Mt Tasman, North Shoulder

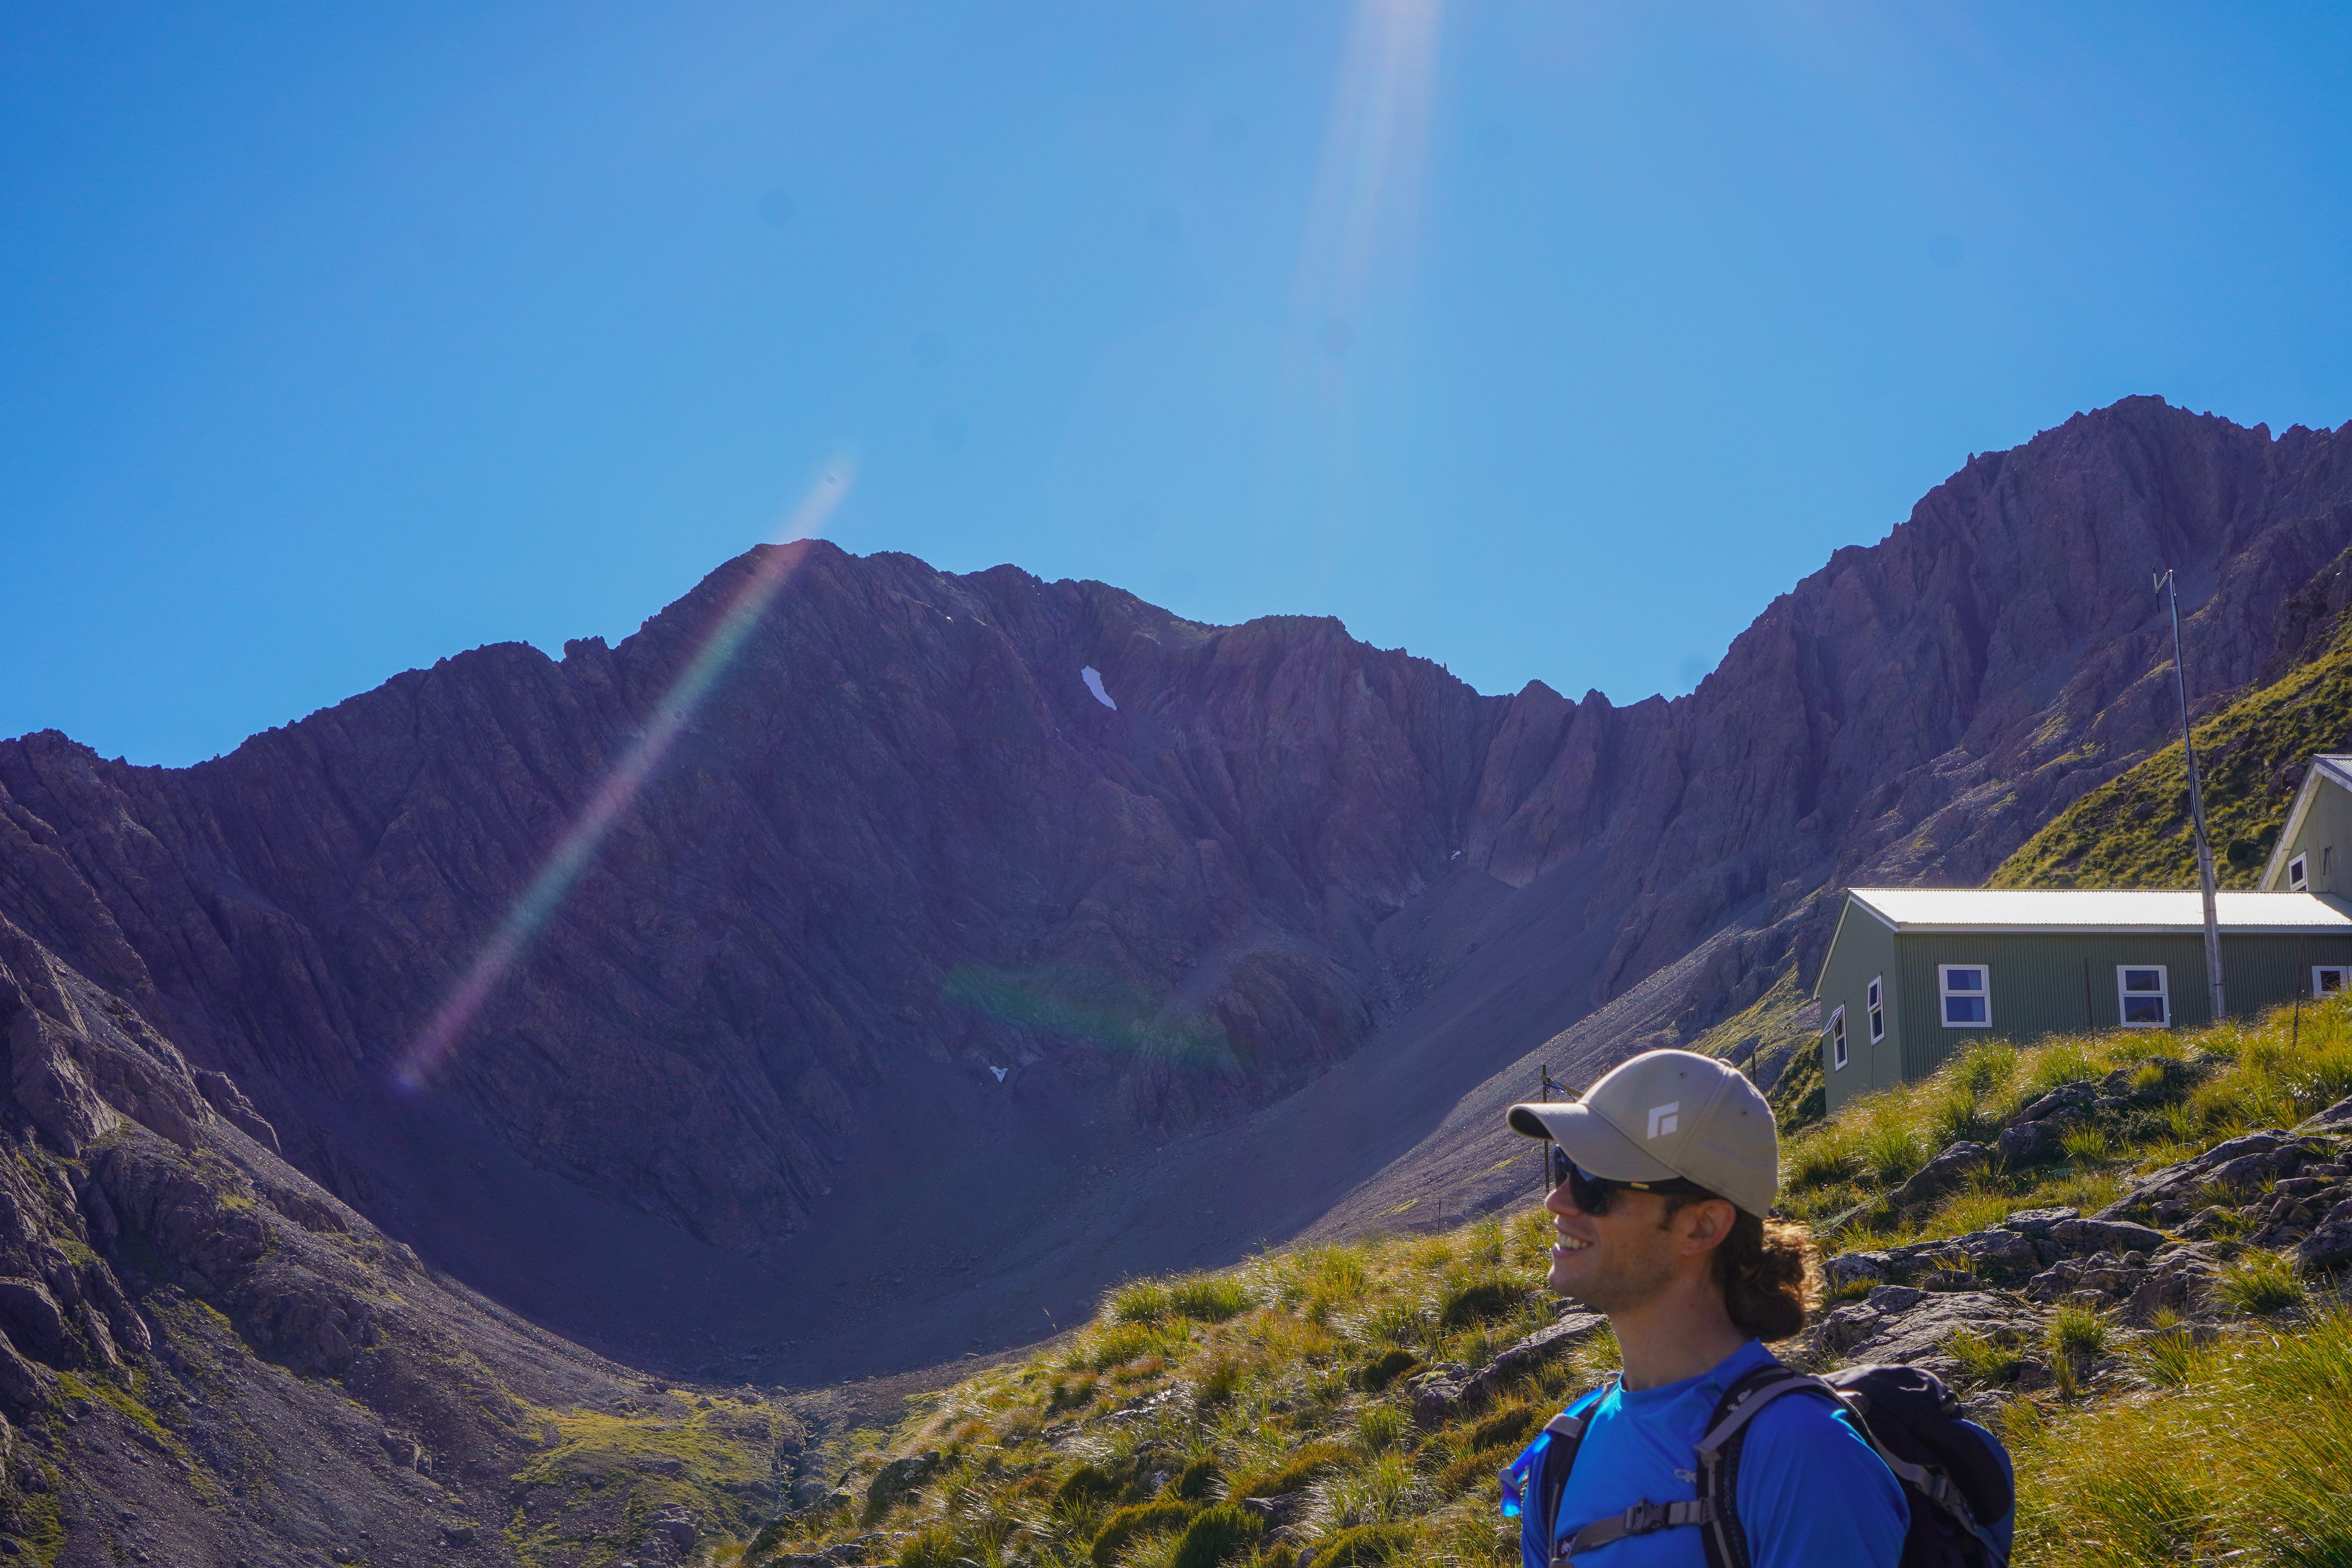
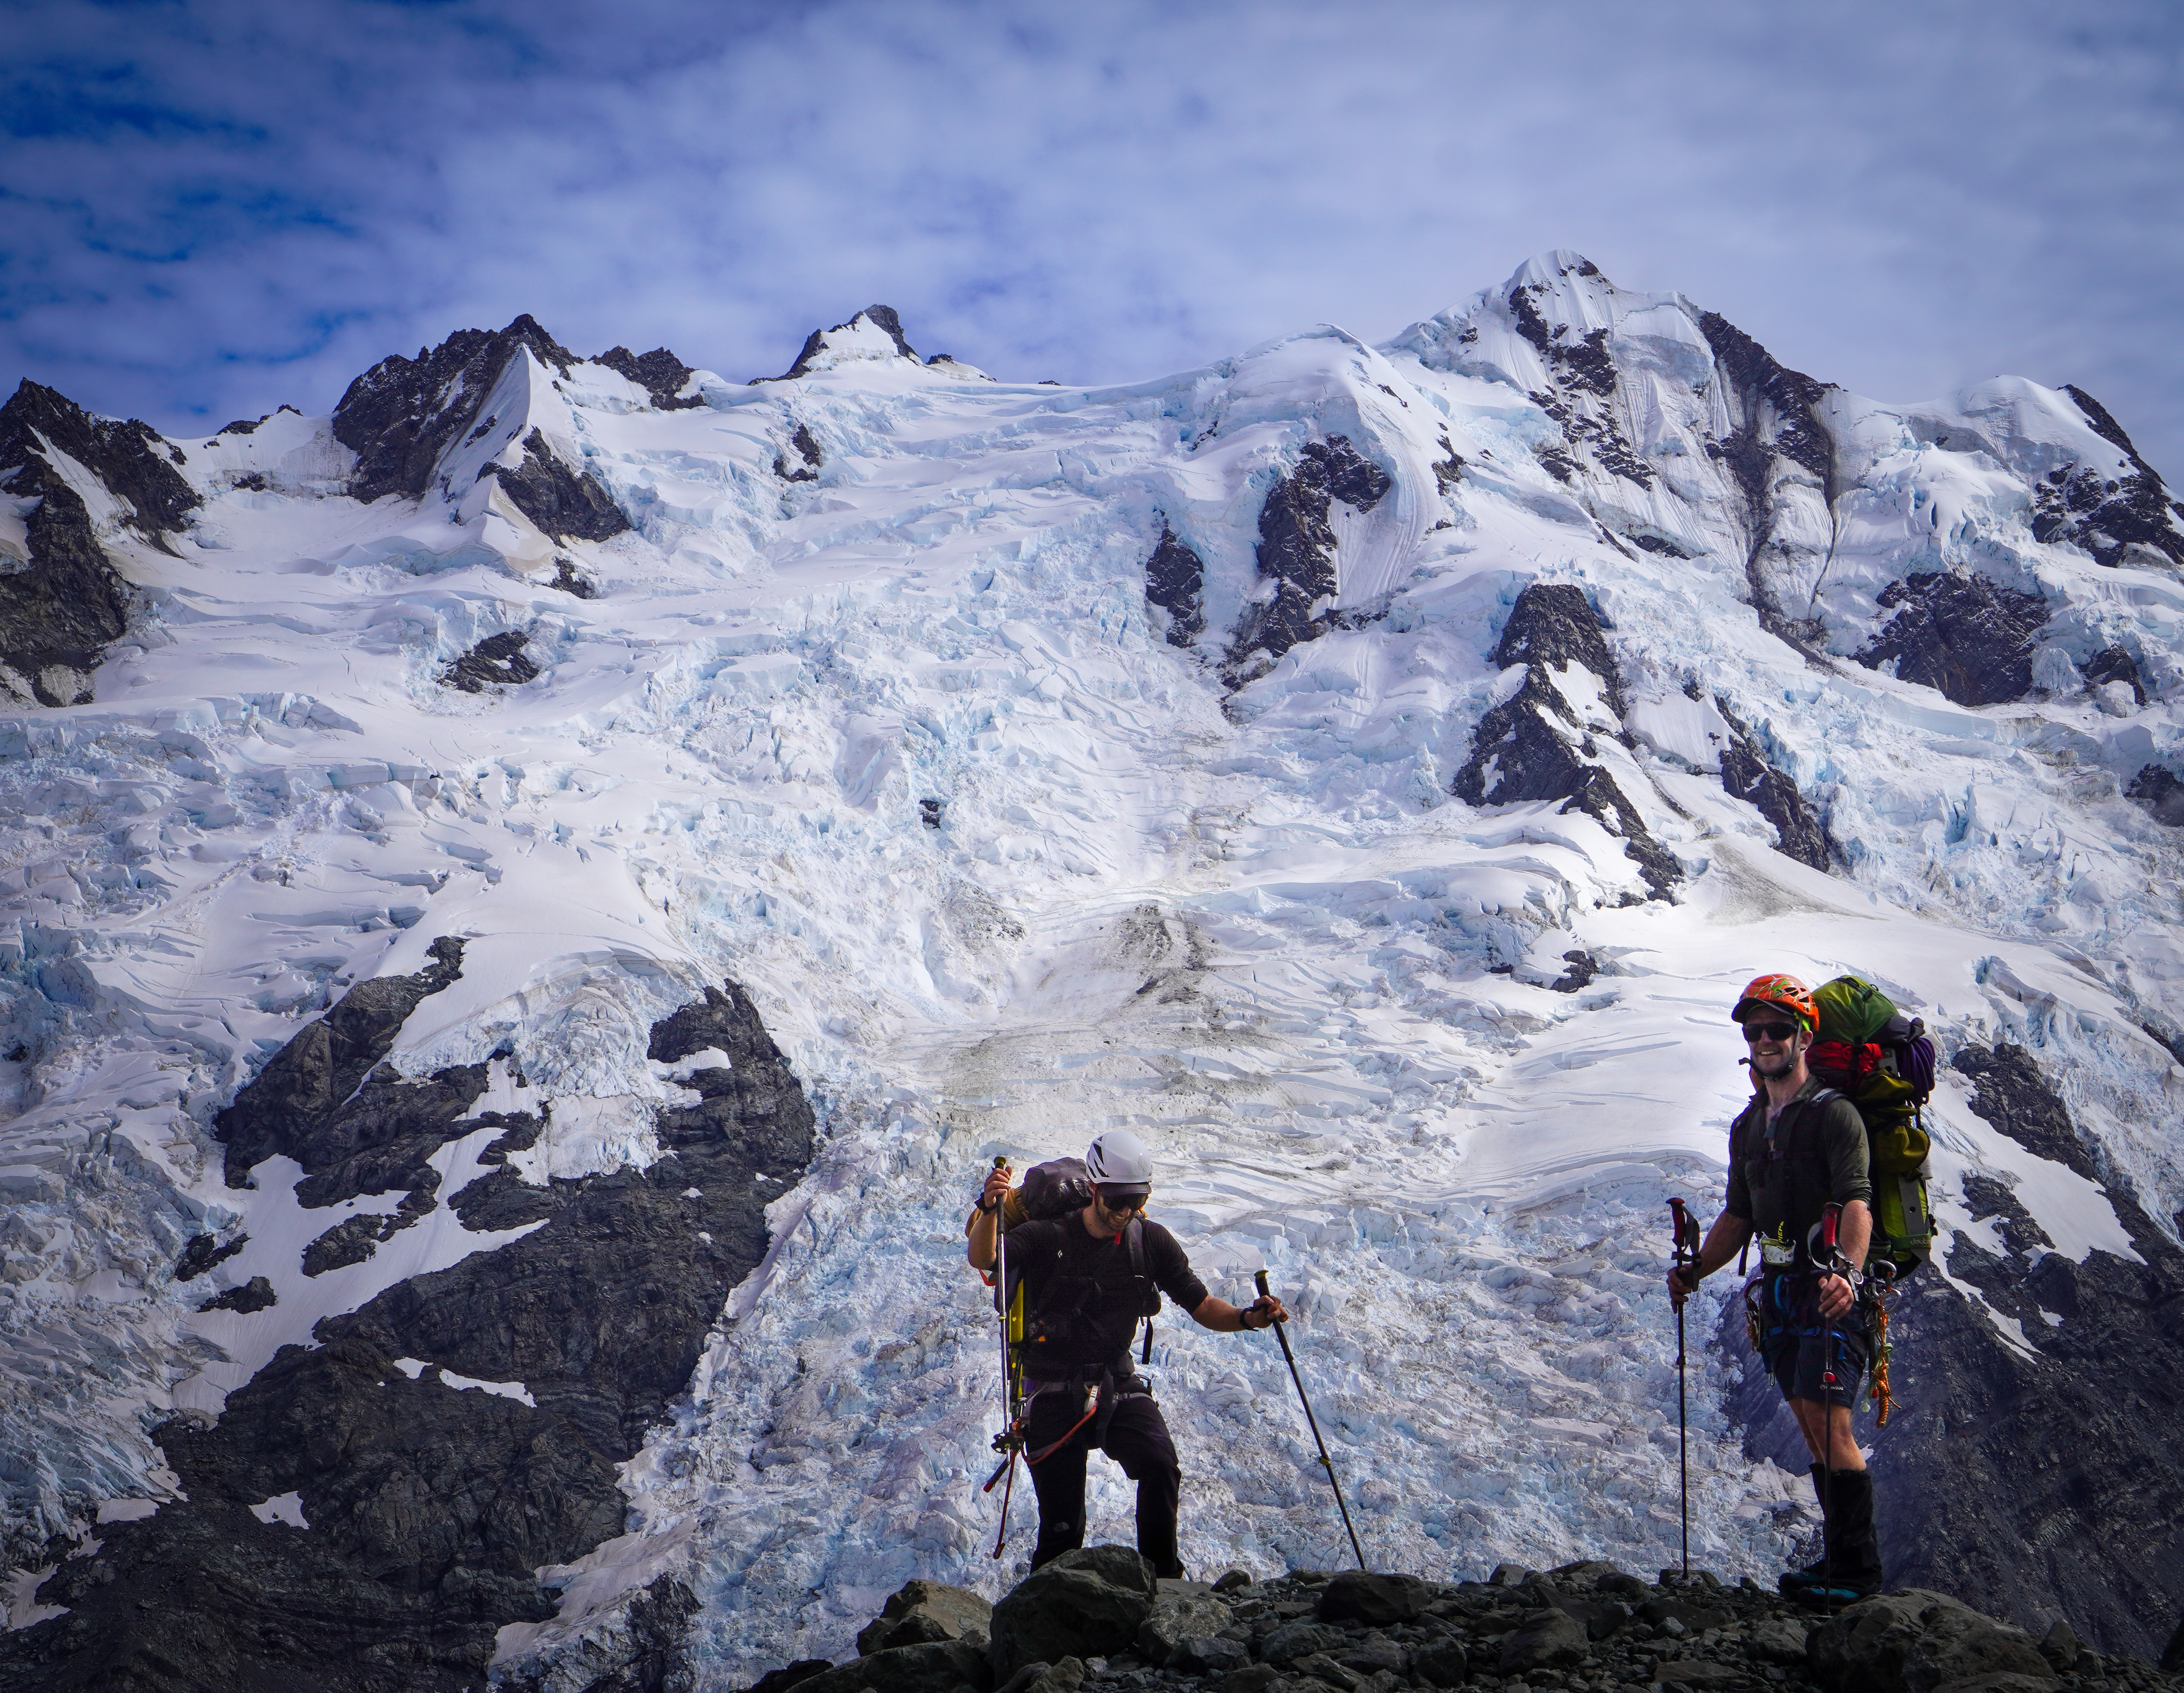
A very special day out amongst the mighty maunga of the Southern Alps. Having just summited Mt Douglas 2 days prior, our bodies were still recovering and we still had some outstanding sleep debt. We had one more good day of weather before a storm was due to come in. If we attempted Mt Tasman, we would have to return early enough to catch a heli out or commit to being stuck in the hut for a few days to sit out the storm.

It wasn’t too hard a decision – we weren’t sure if we’d get a chance to come back this season so we settled in for another early night and early start to give it a go.

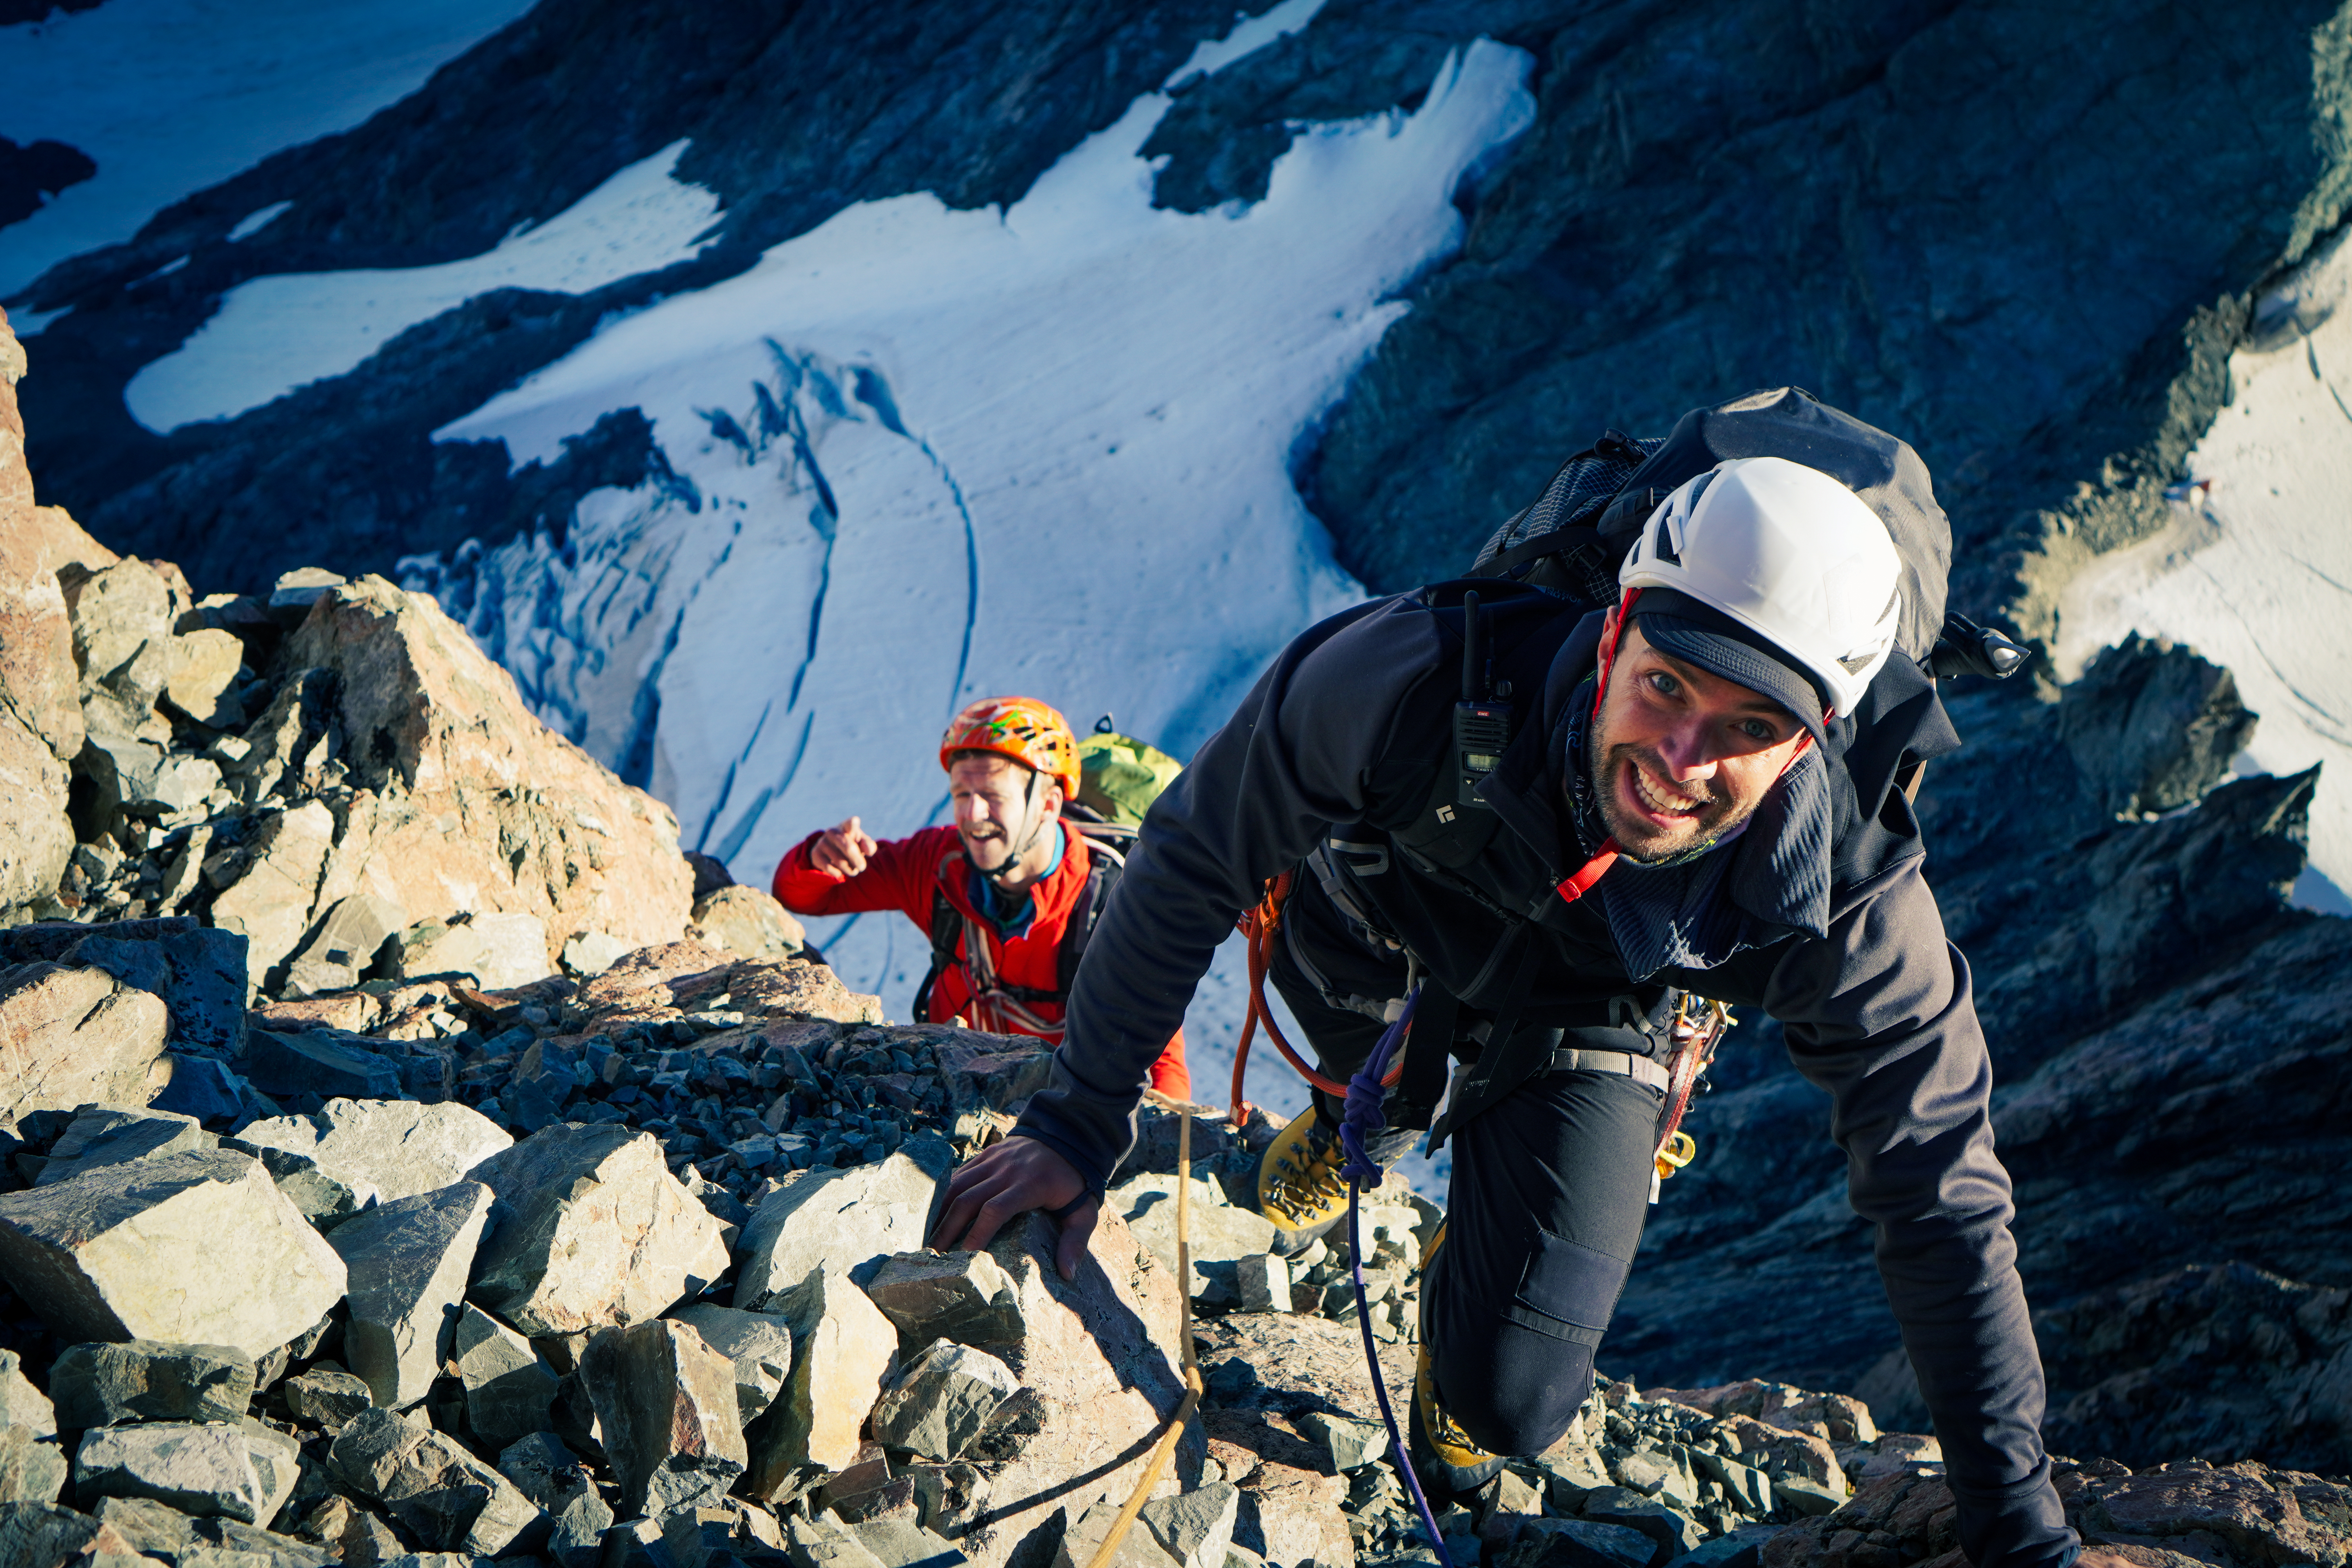
Initially, we wanted to go via the Stevenson-Dick couloir and down via the N shoulder which would make for a nice loop. We had recce’d the access a few days earlier, as theres a schrund at the base of the couloir that can cut the route off, but it looked negotiable. This route was going to be more committing however, as reversing the rockfall prone NE facing gully after the sun was up didnt sound particularly enticing if we needed to bail for whatever reason, and in the interest of getting a flight out before the storm we opted to try the N shoulder via Lendenfeld.


  • Grade : IV, 3+
  • Equipment : 1x 60m rope, 10 screws with long runners, 2 x snow stakes. Tat.
  • Time : 12.5h return (from turn around point) ; 1340m elevation gain, 12.6km
  • Season : Late spring/early summer – late summer may see access cut off
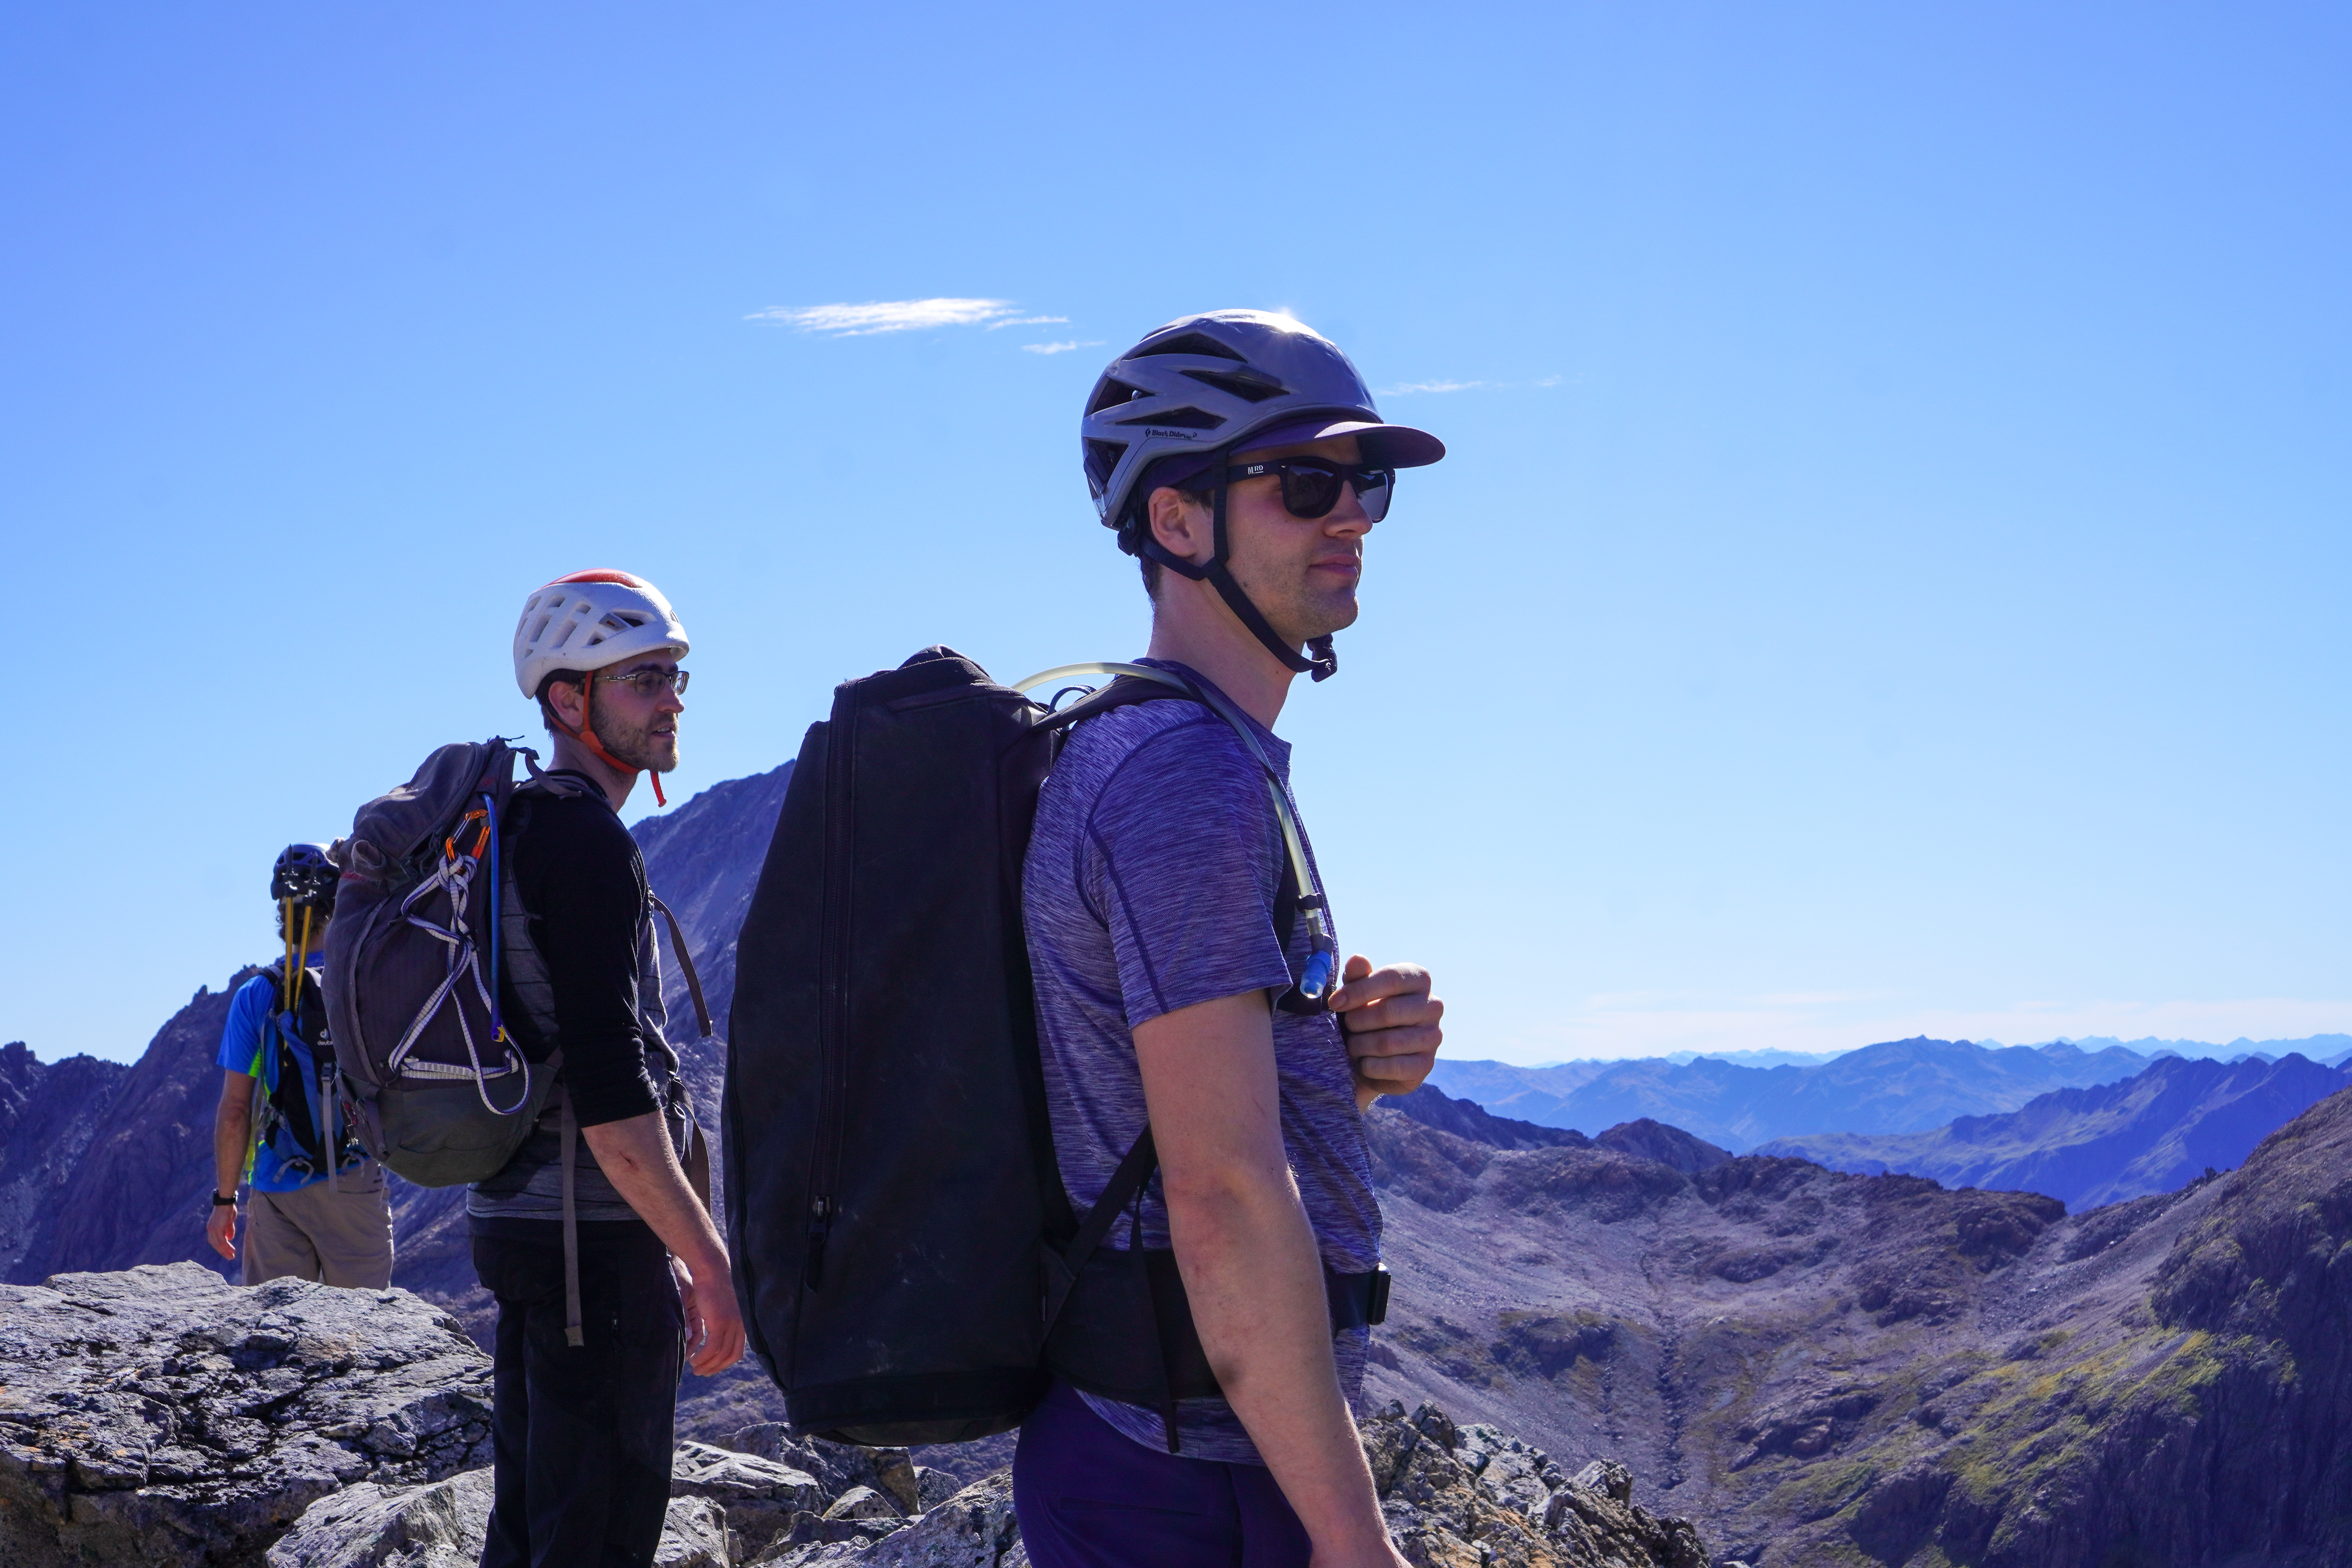
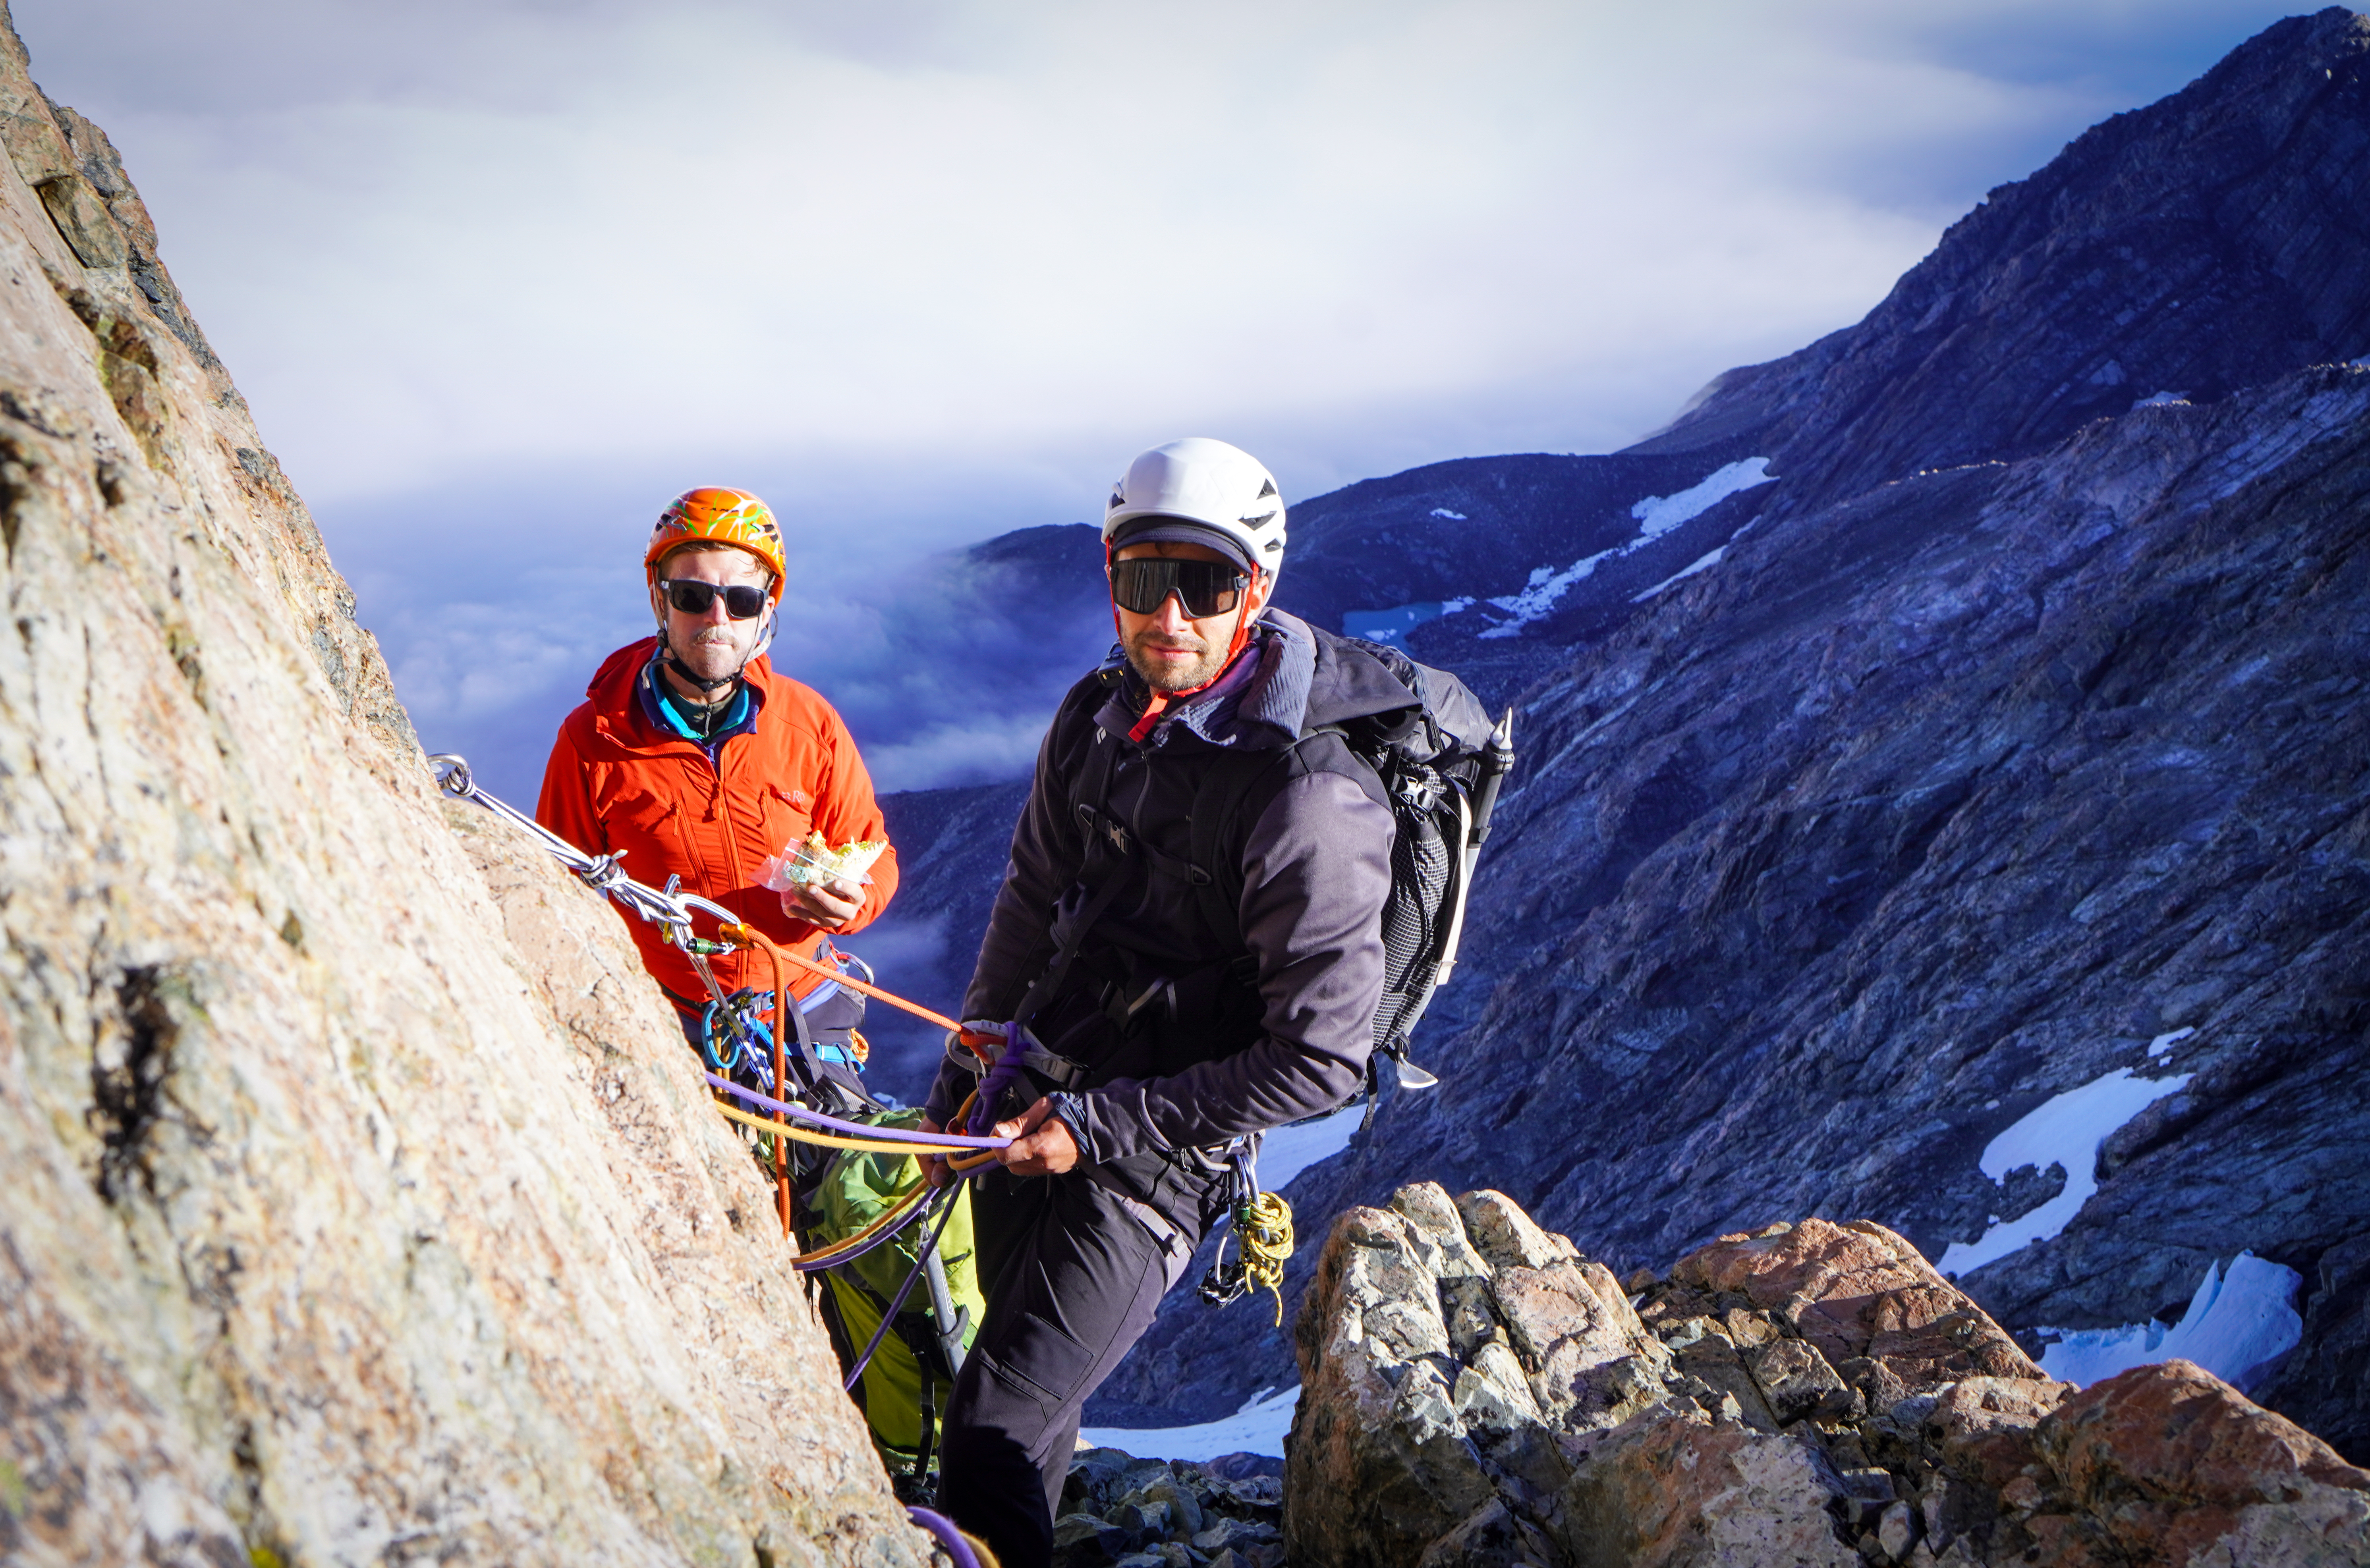
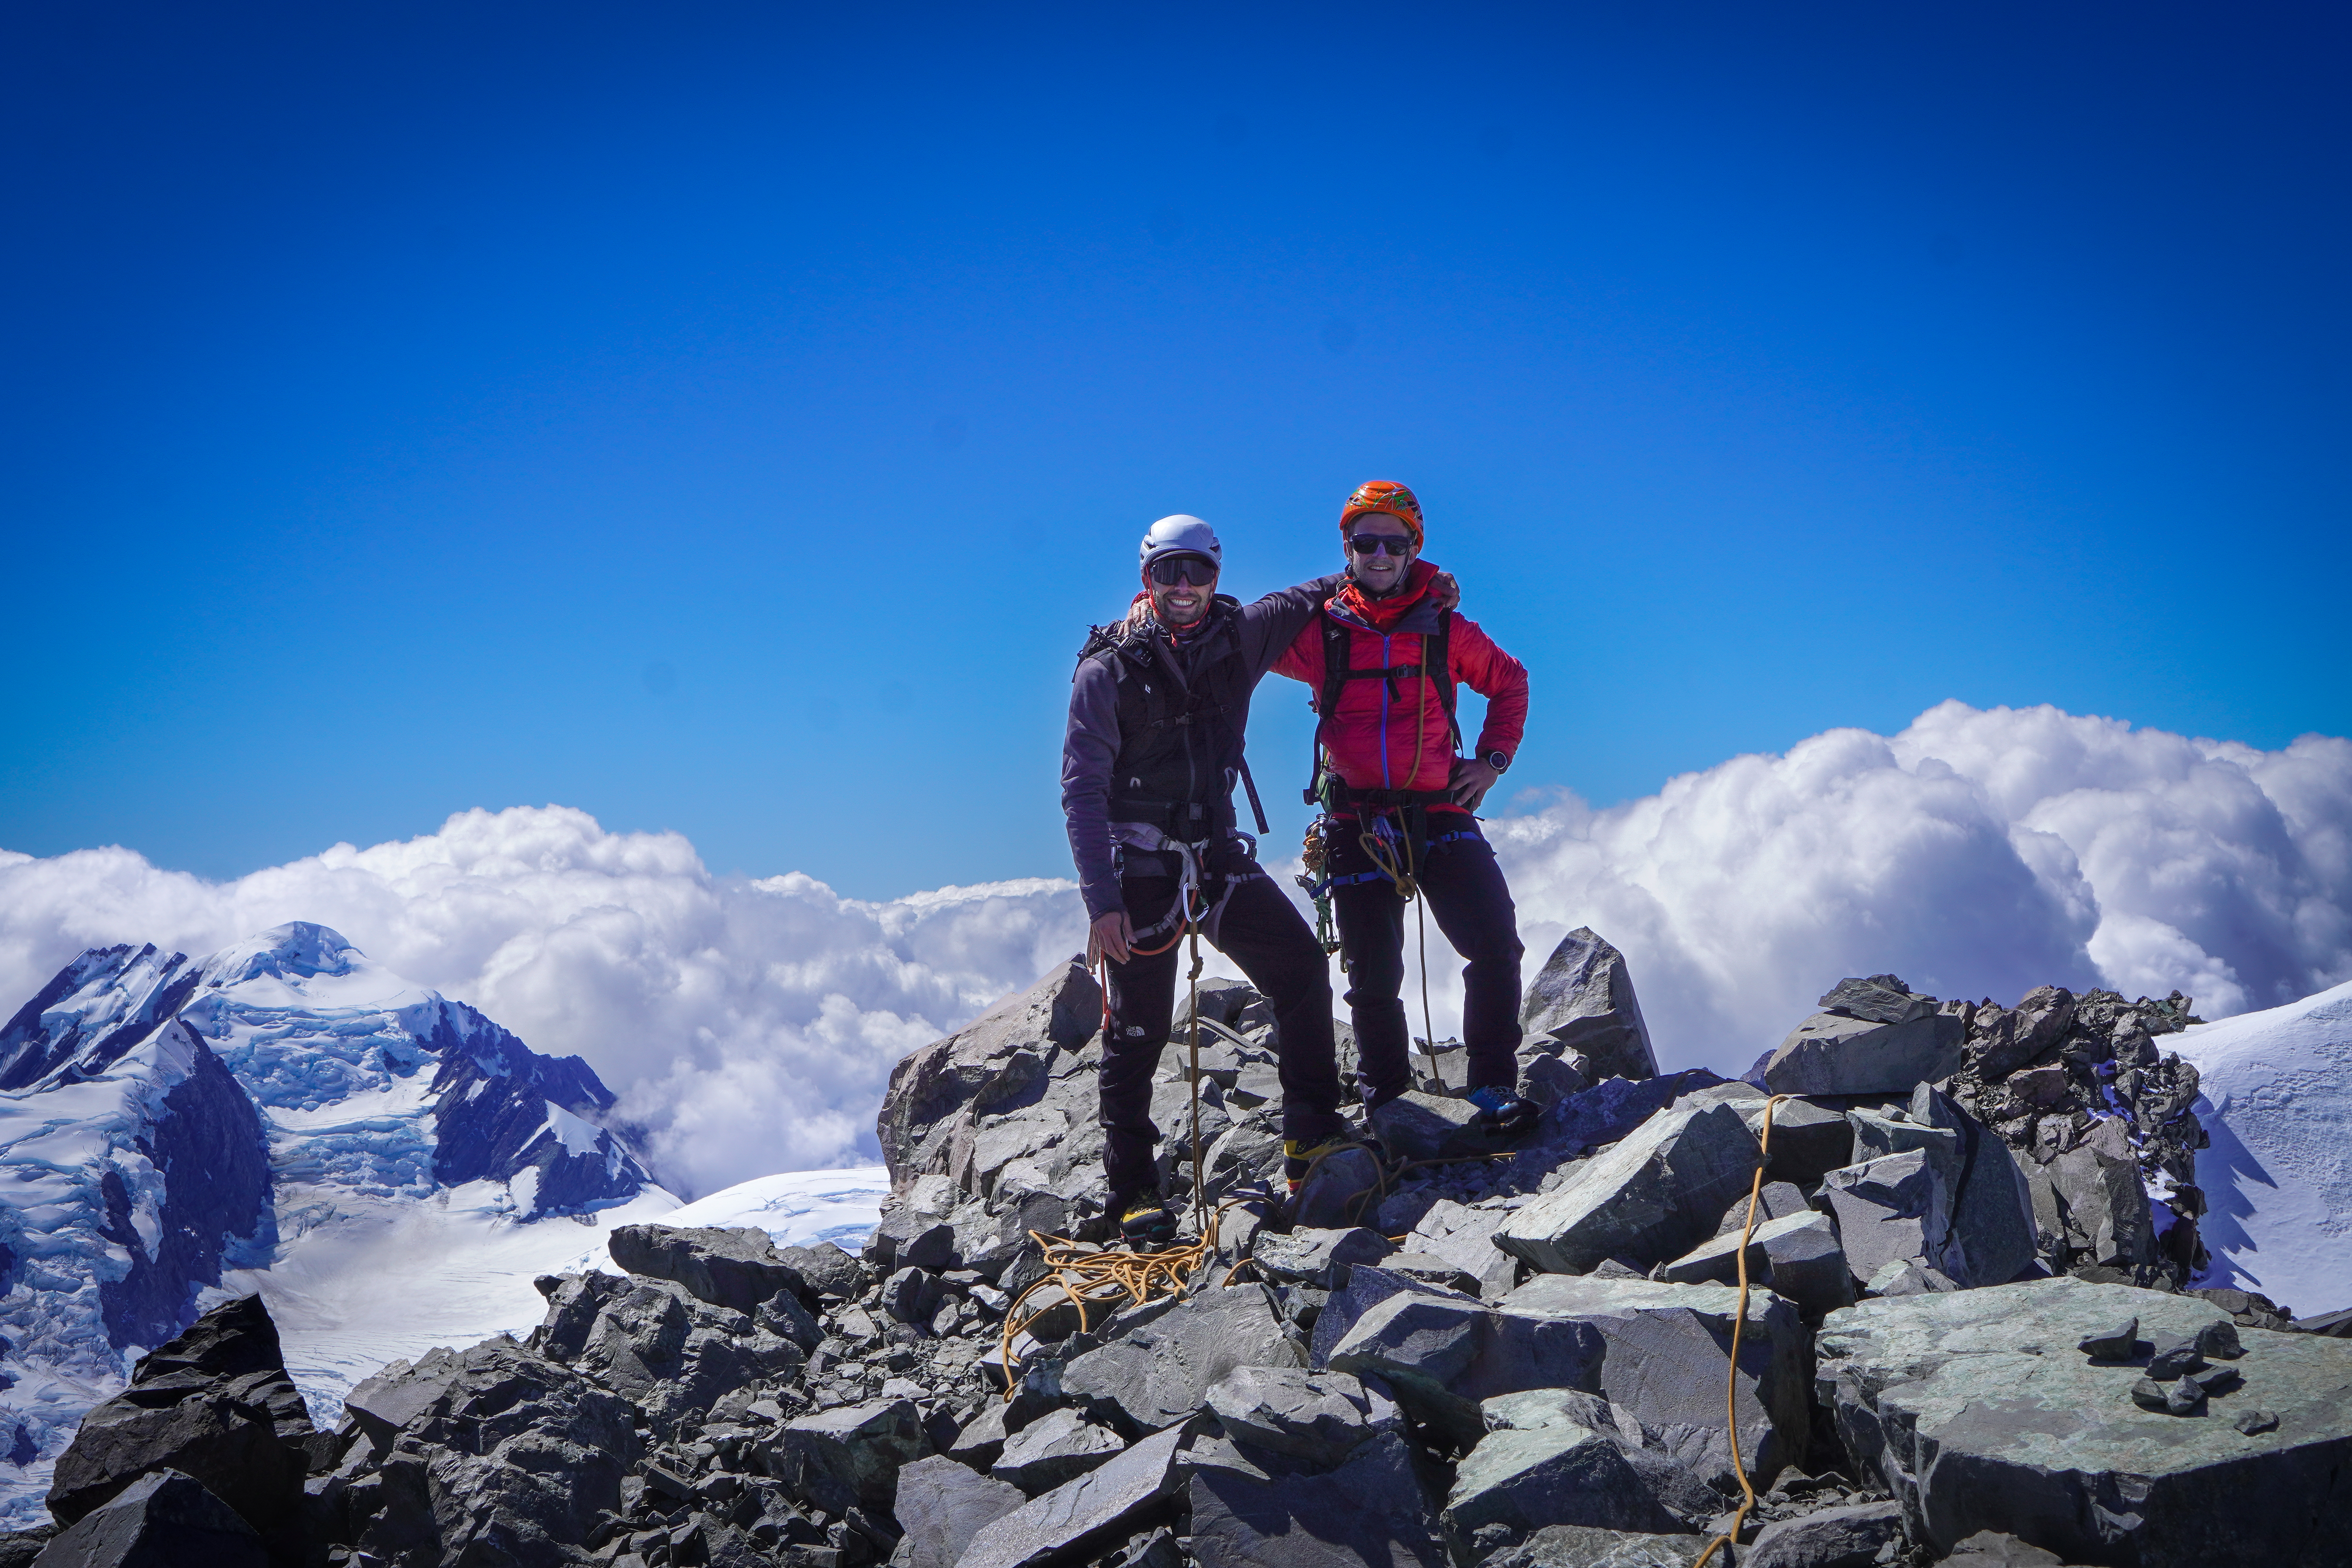
  • Team : Joe and Maria, 21/11/2023

approach

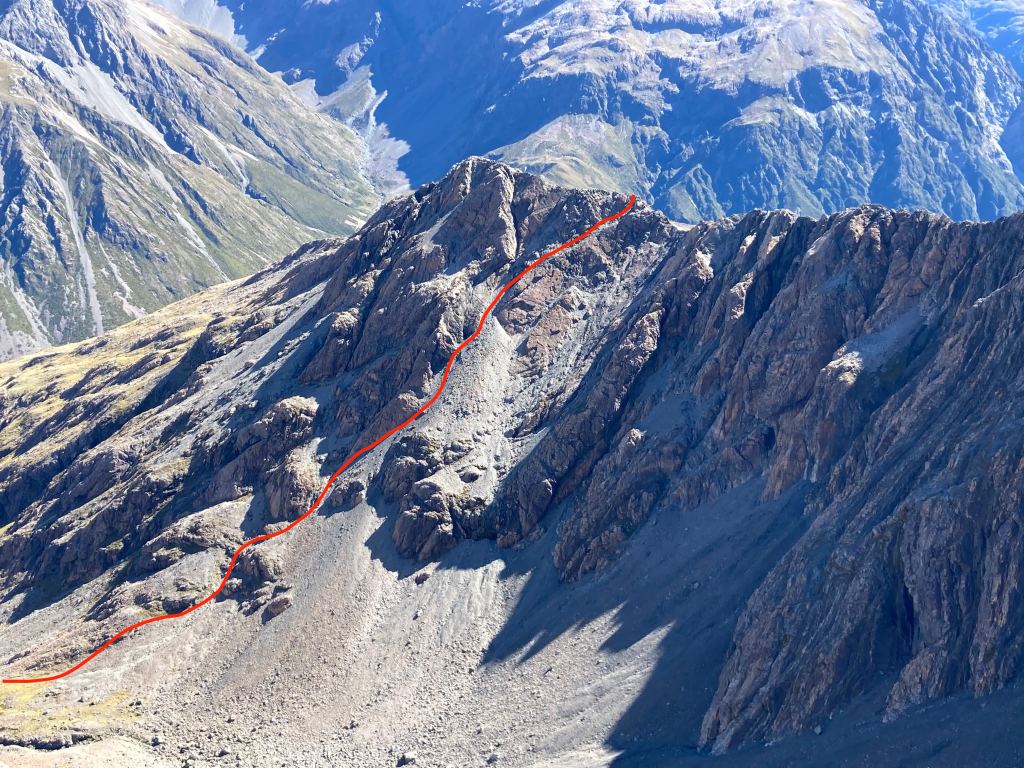
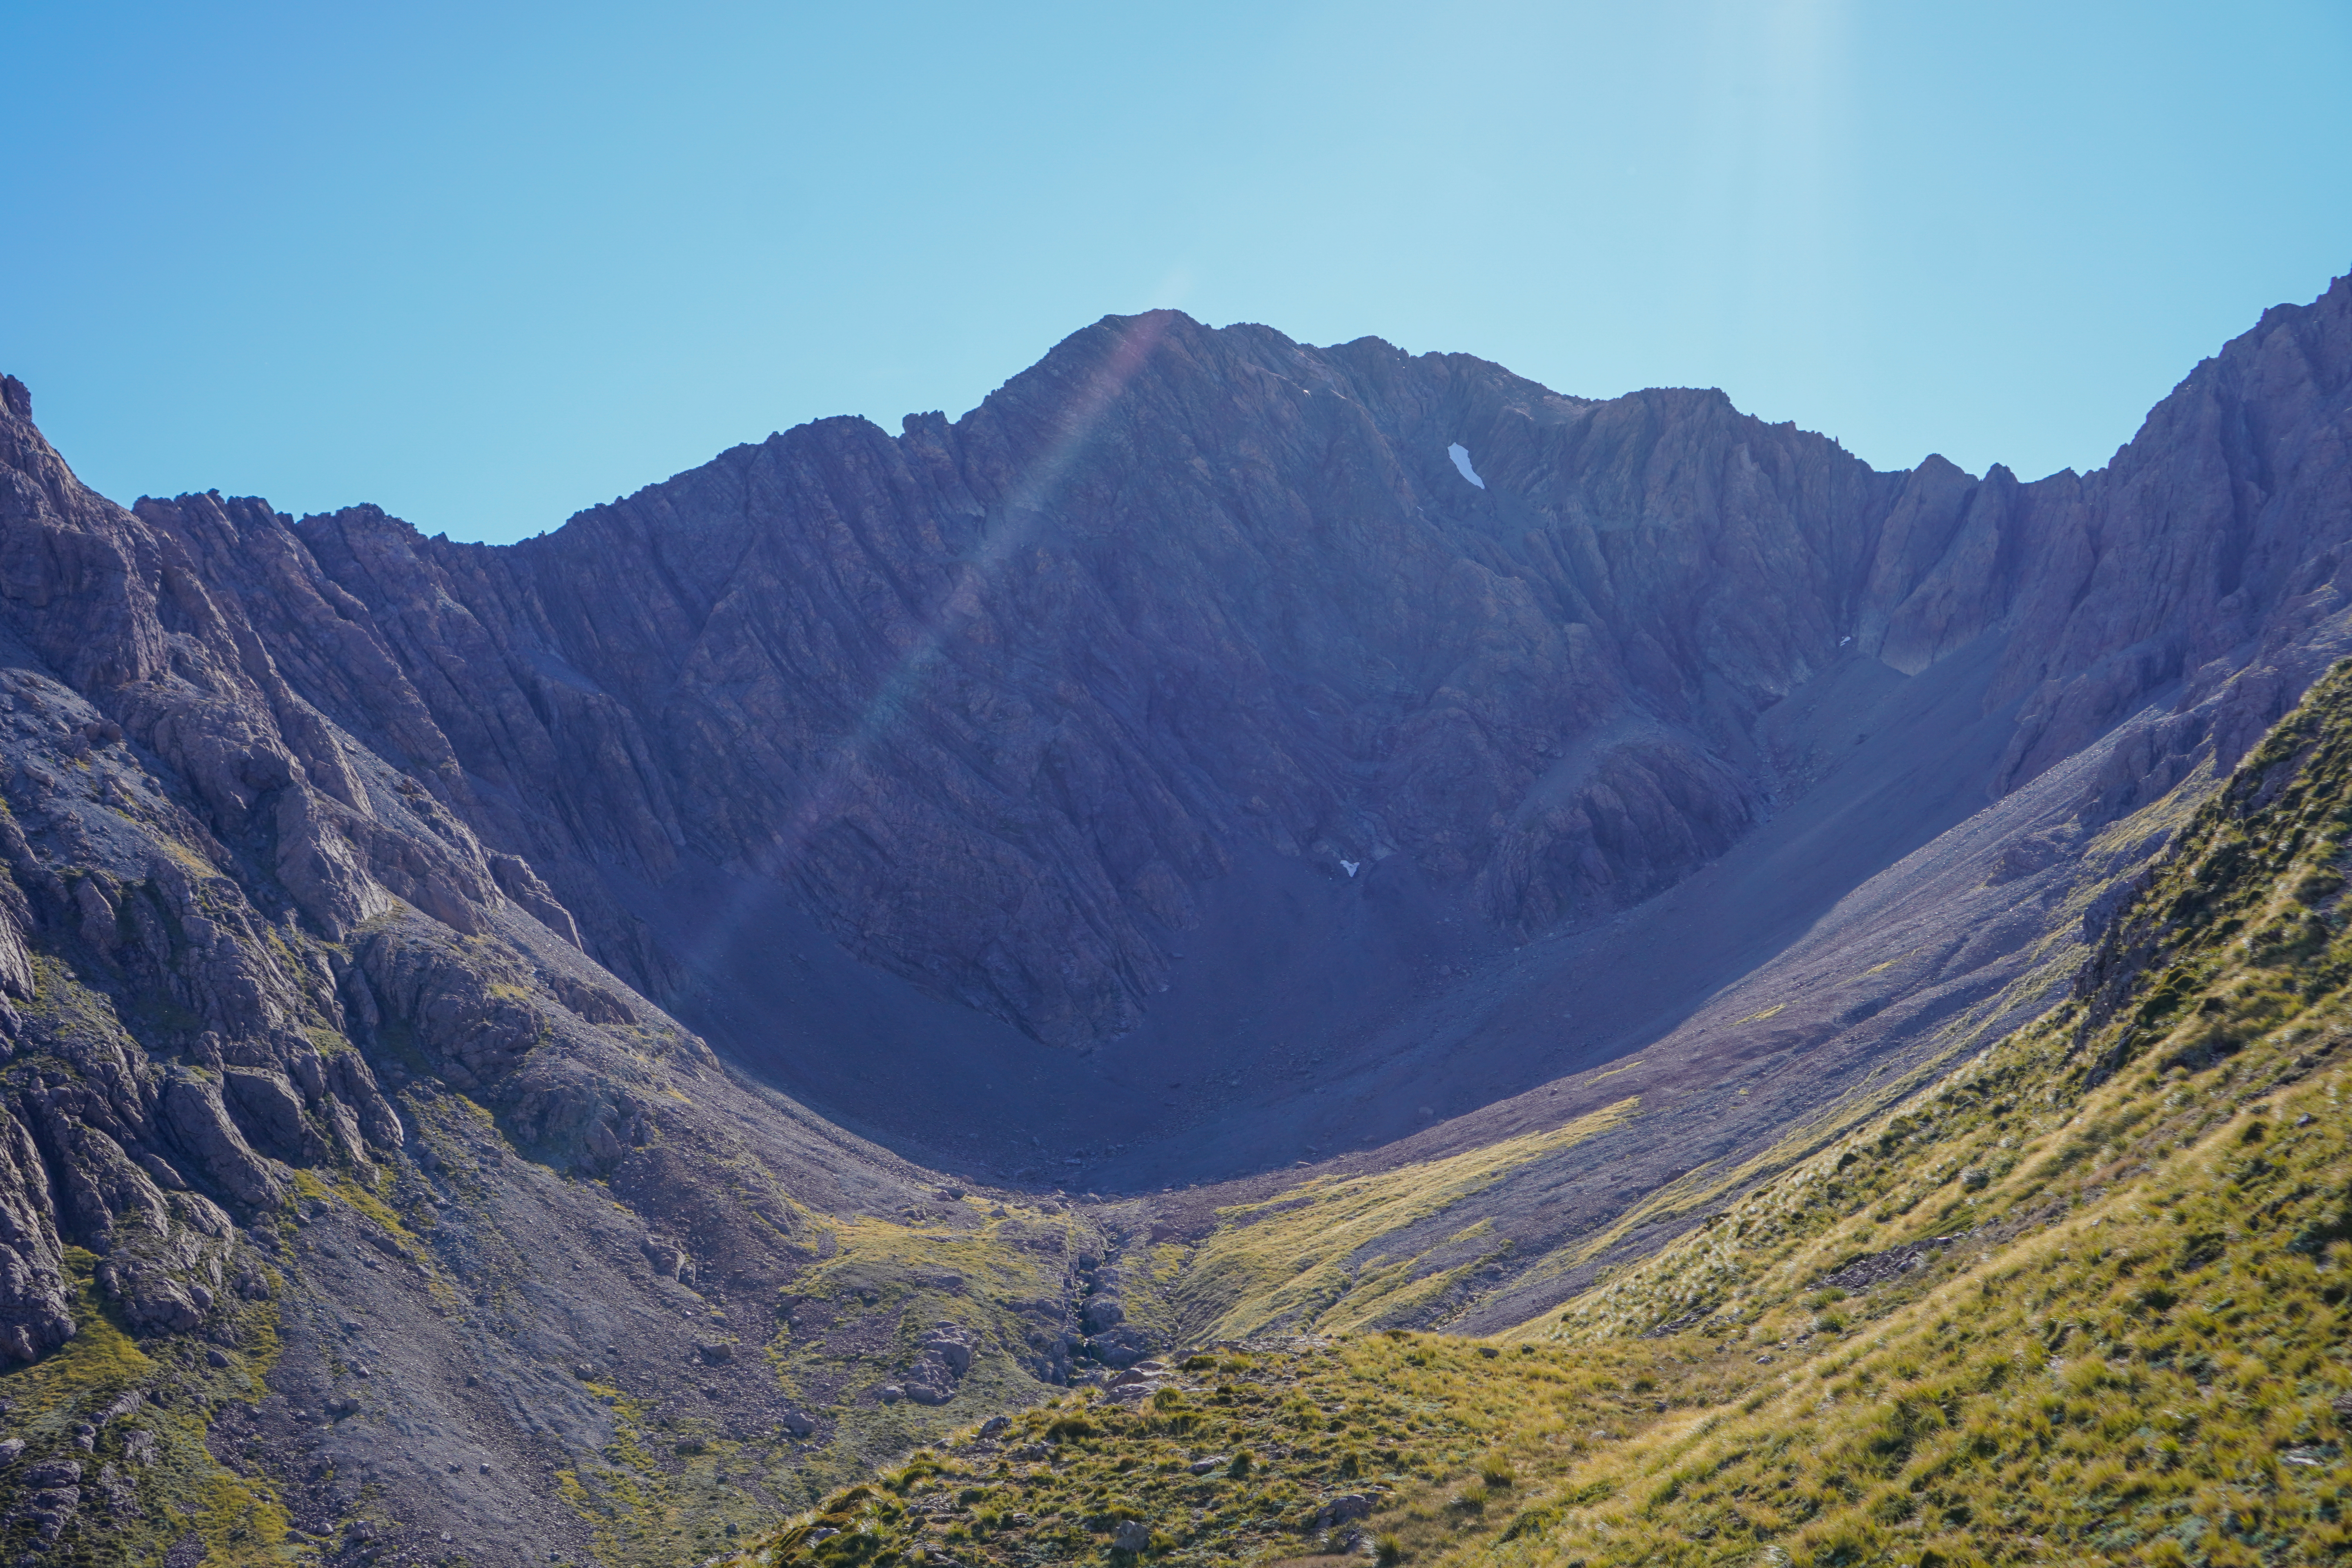
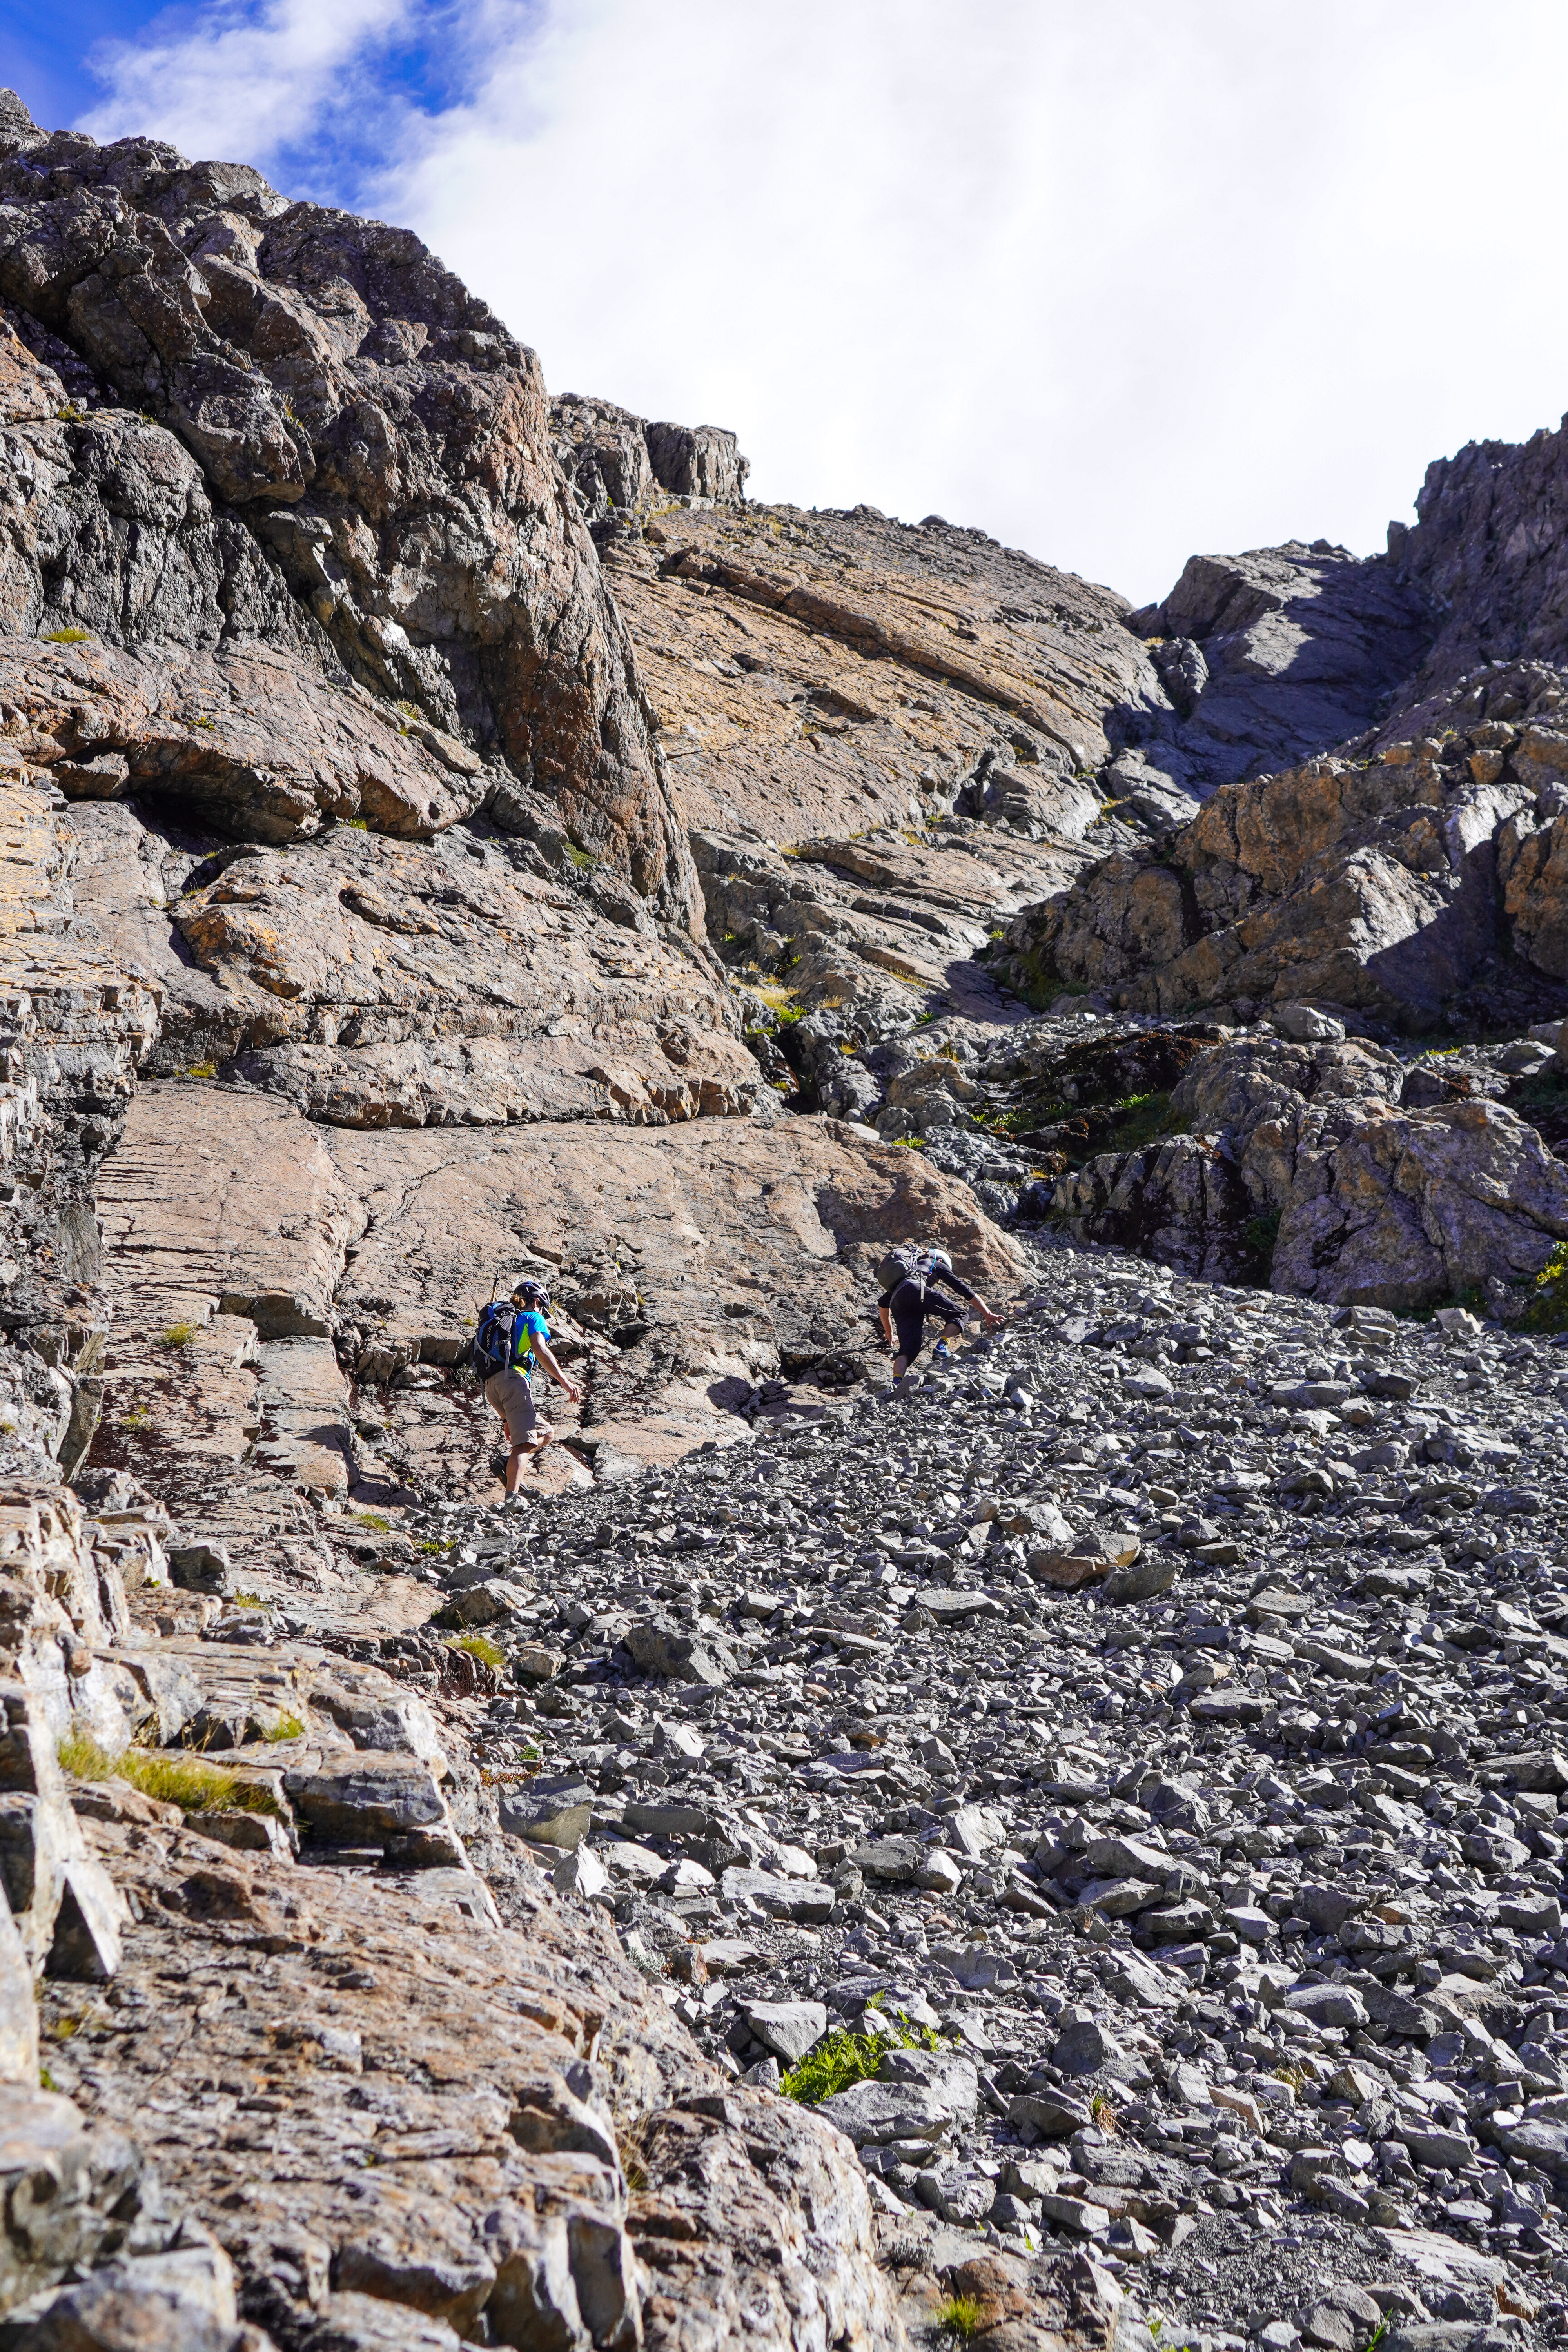
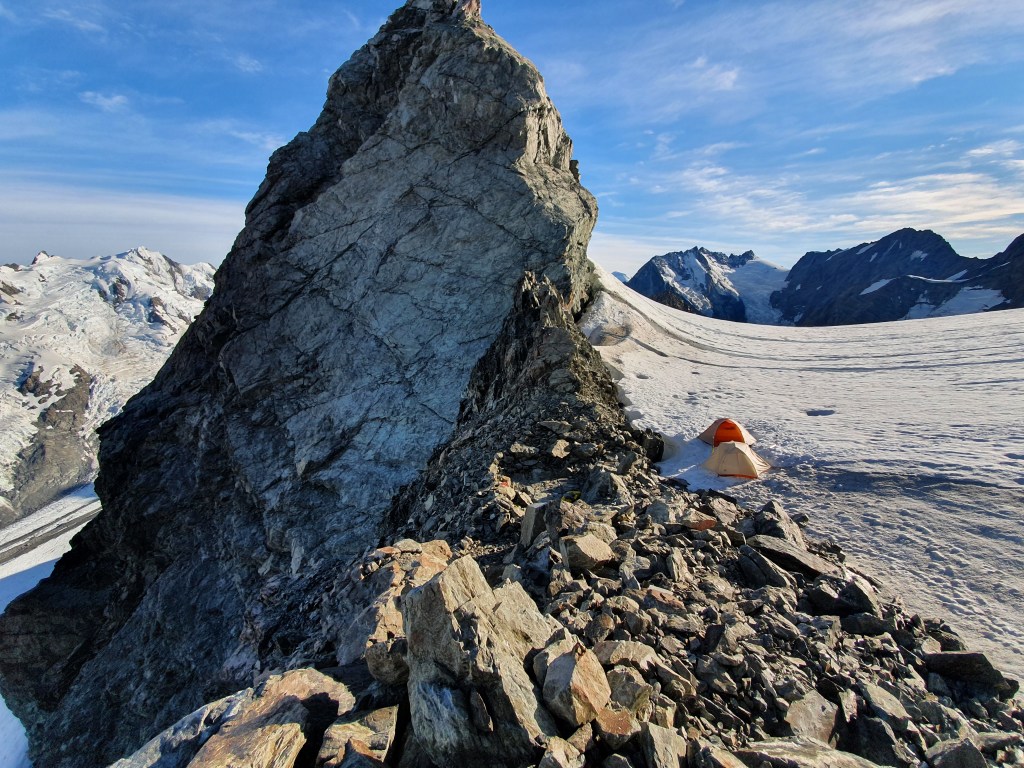
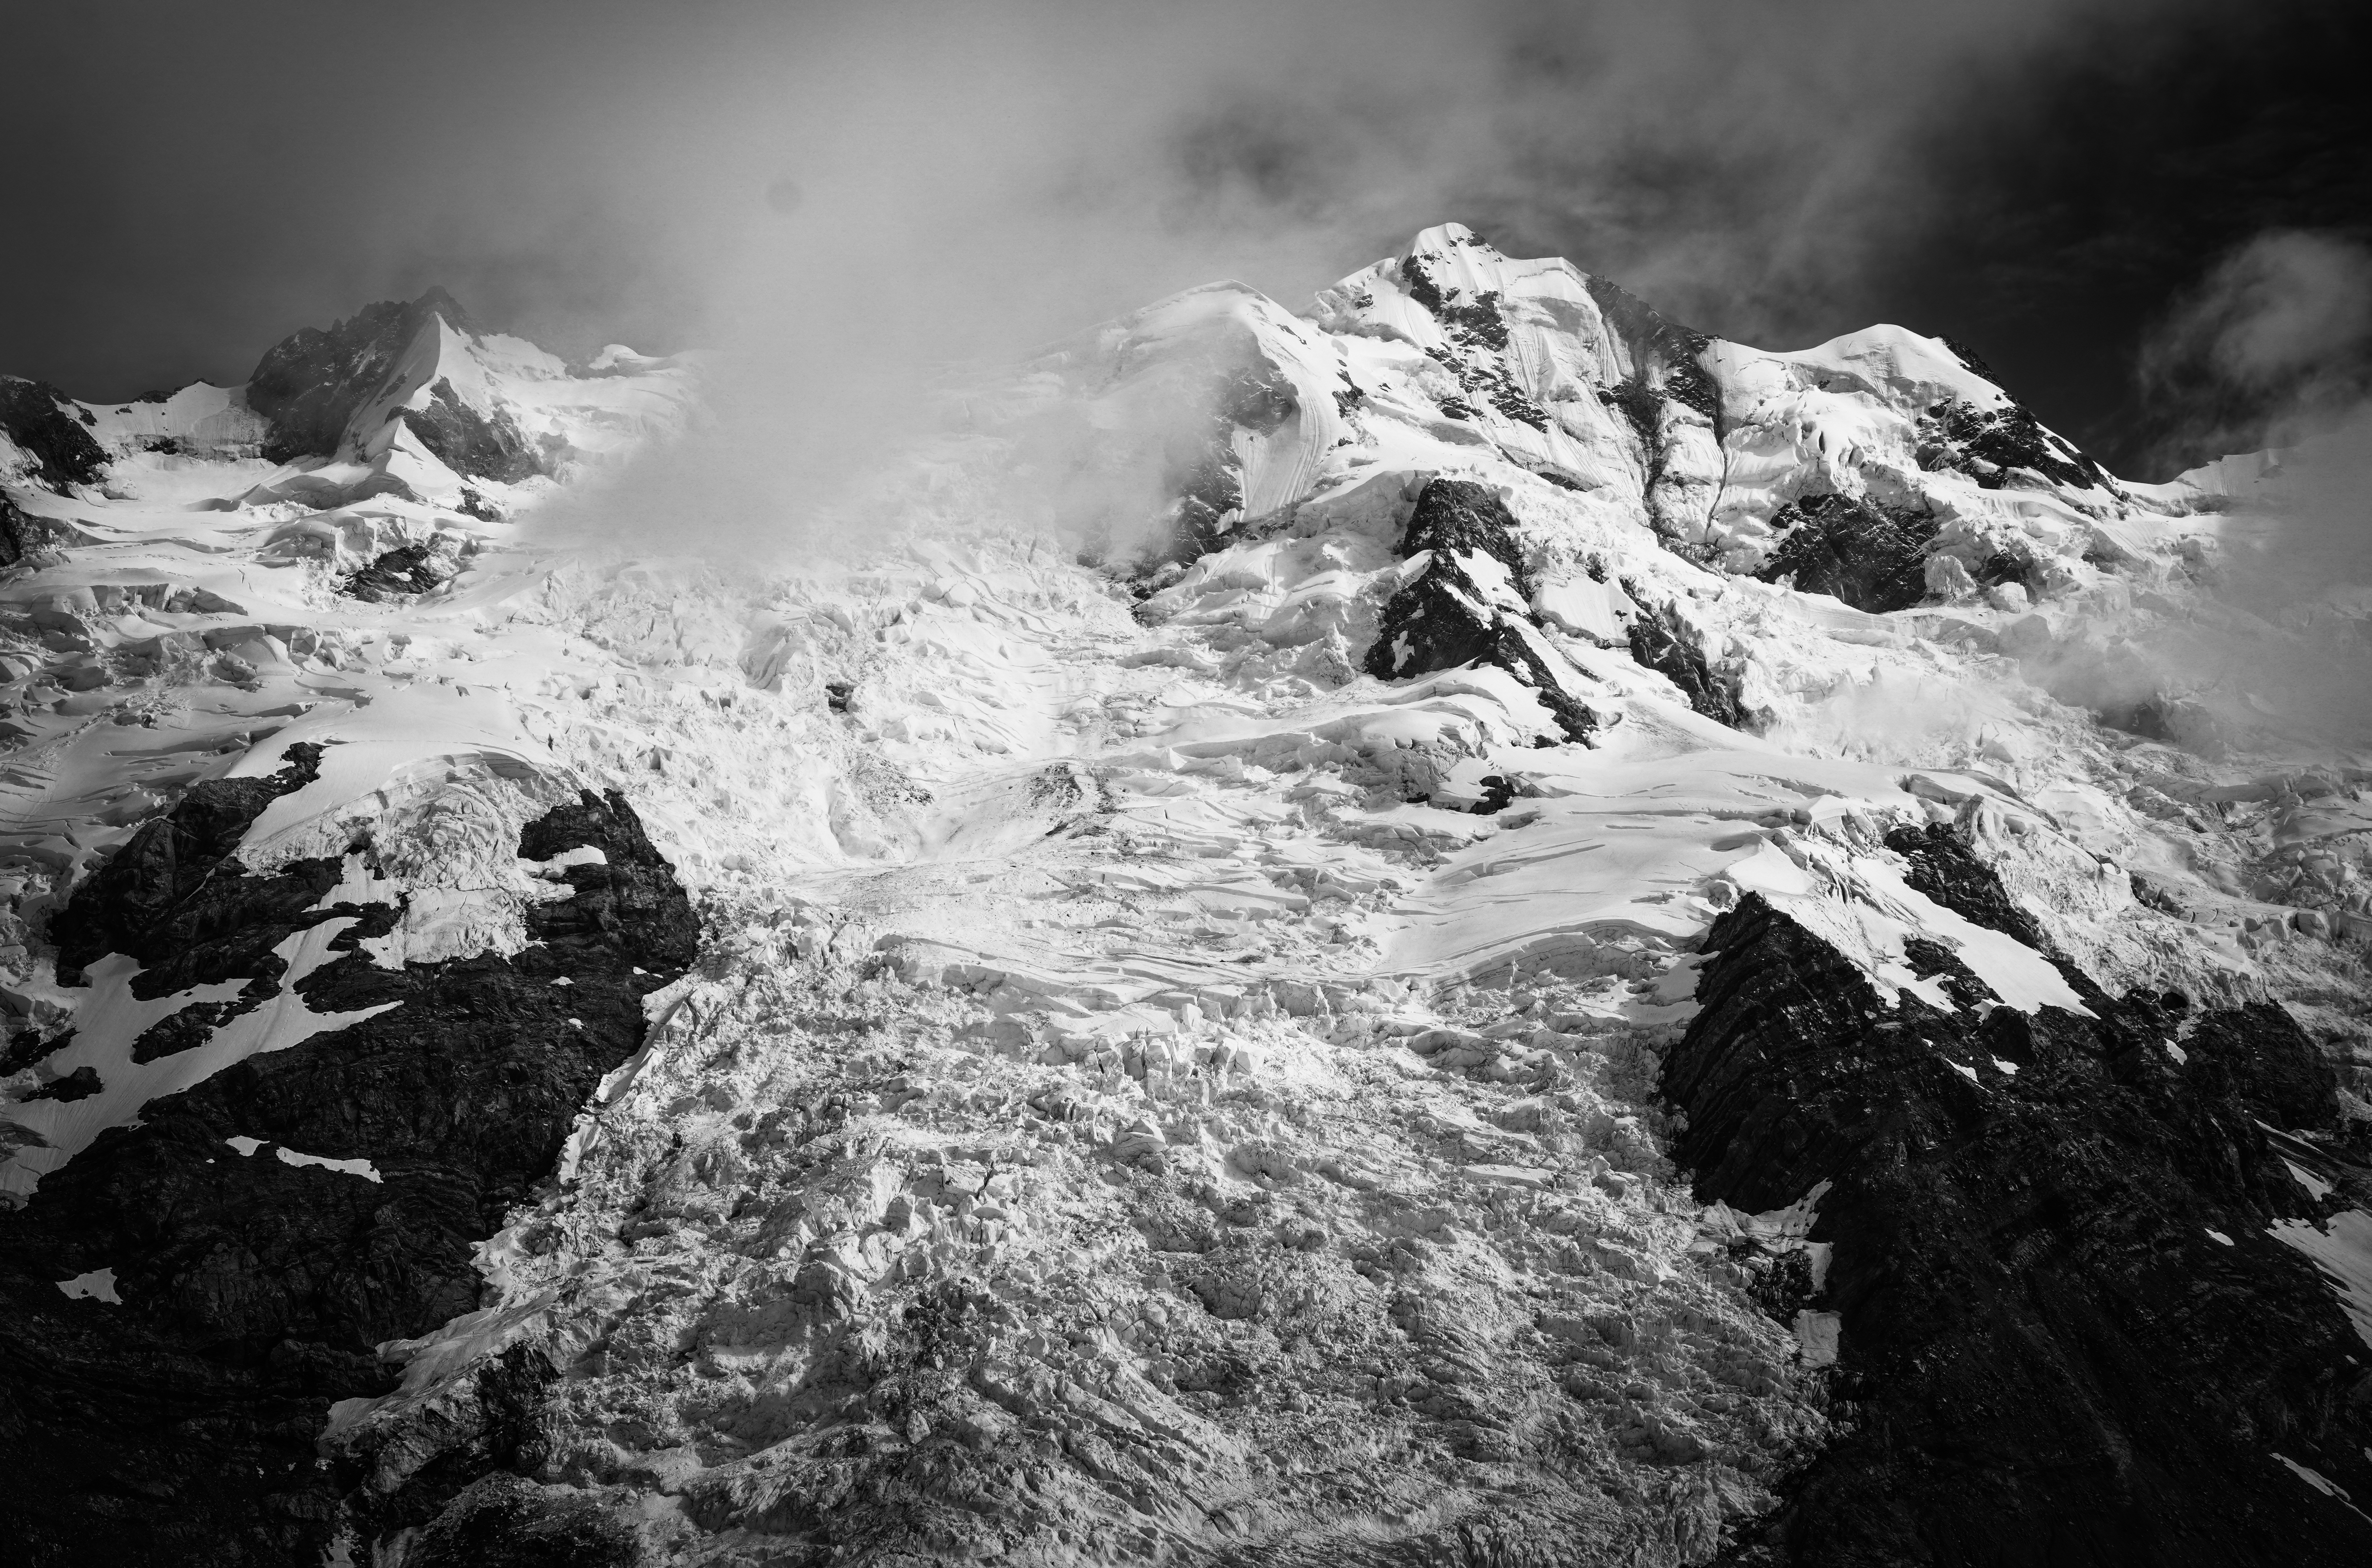
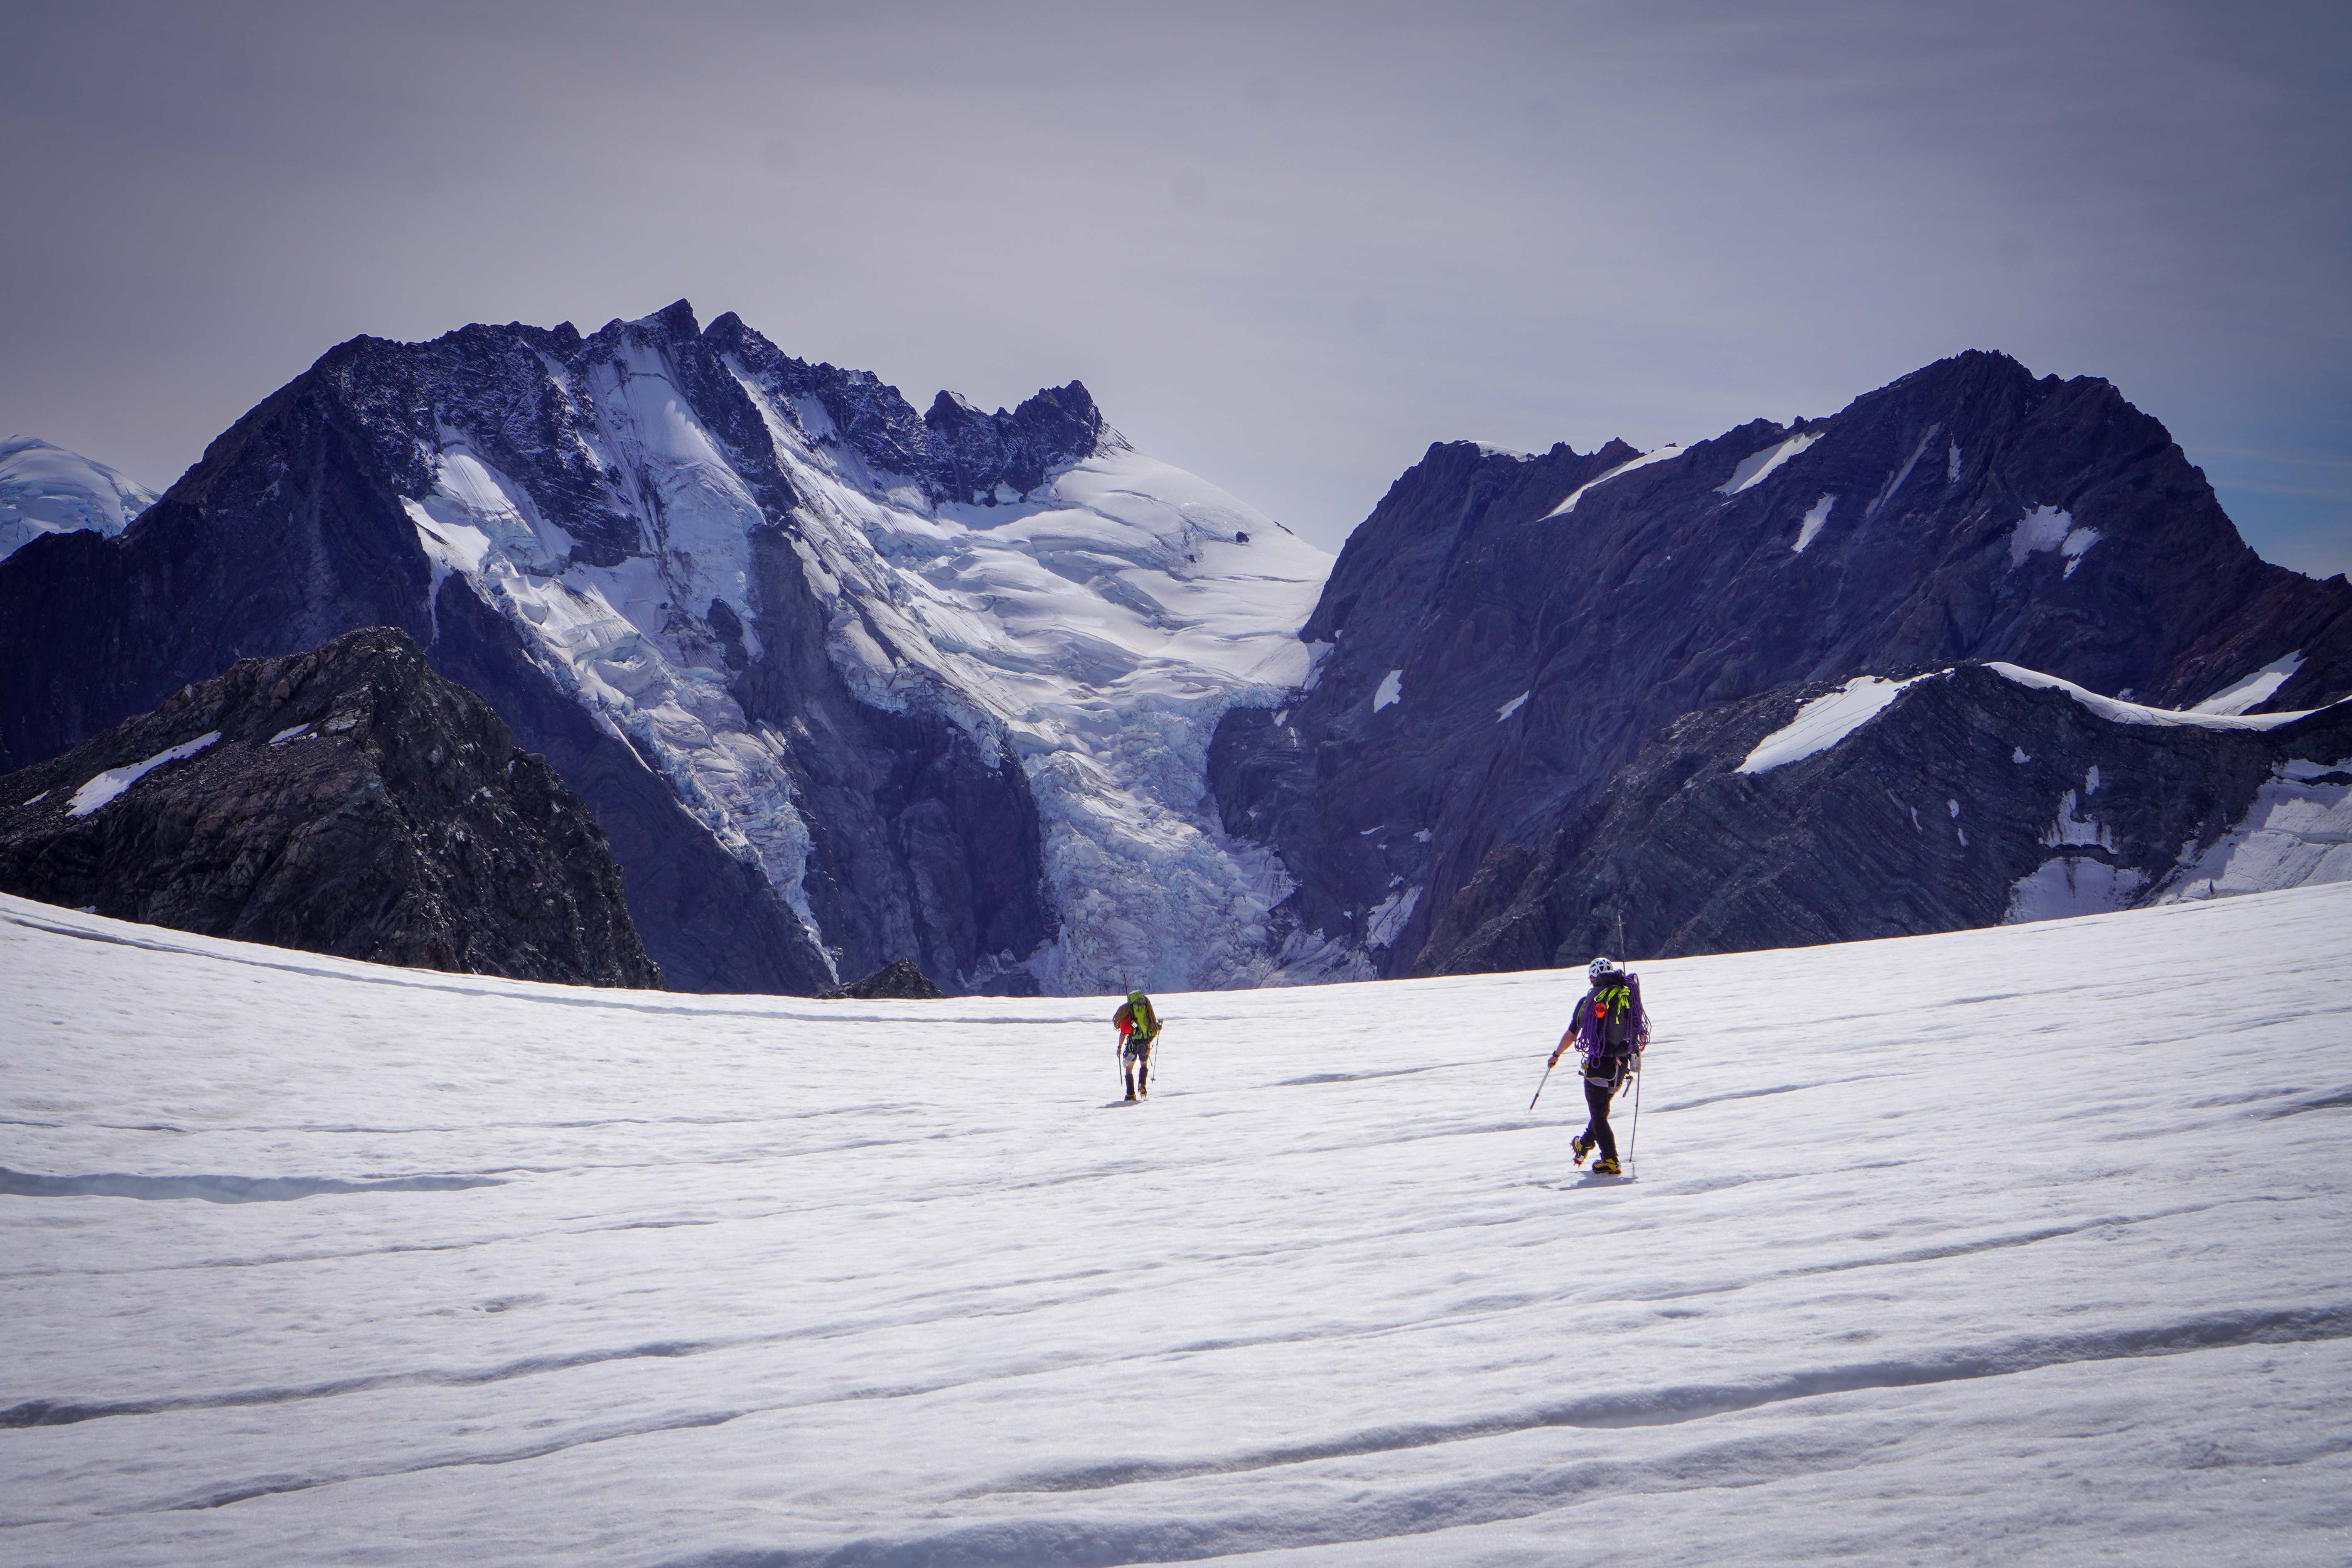
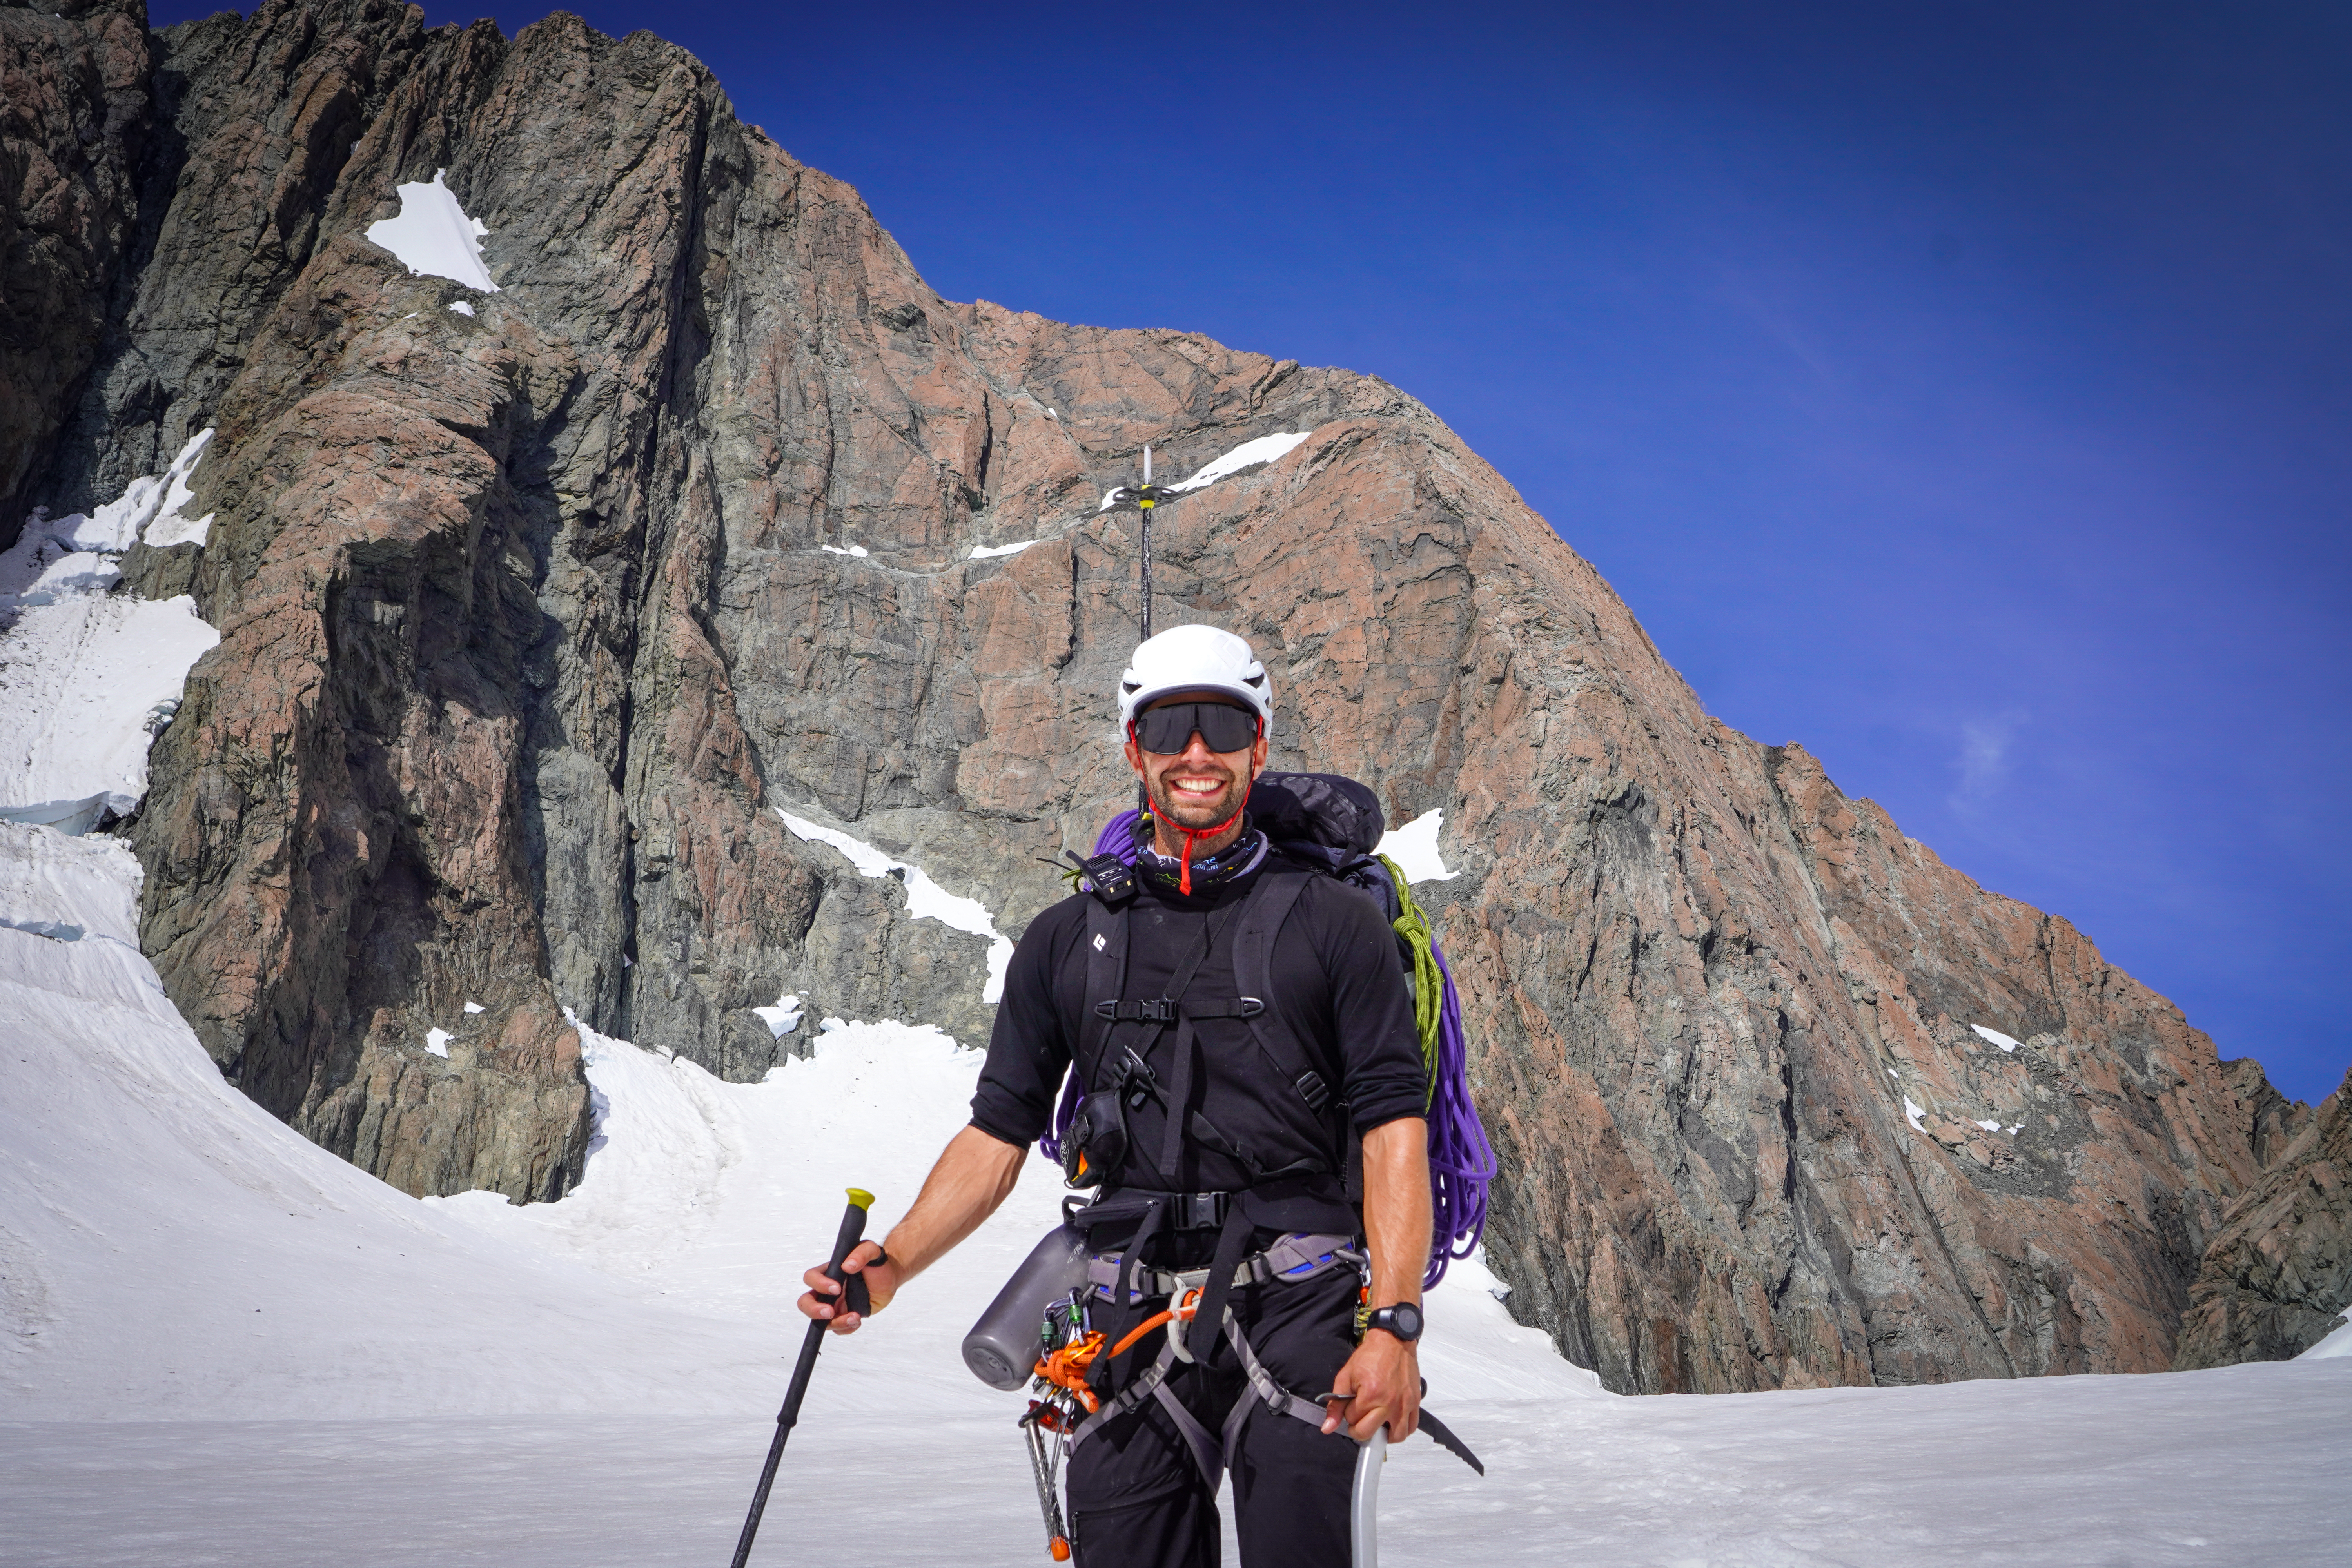
Leaving the hut around 2am, we found a decent freeze overnight made the walk across the Albert glacier cruisey. Towards Marcel col, you need to navigate a bit of a maze of crevasses and seracs – worth taking a photo of from the heli in as figuring this out in the dark would be hard. Luckily for us a party had climbed Lendenfeld the day before so we could just follow their tracks.

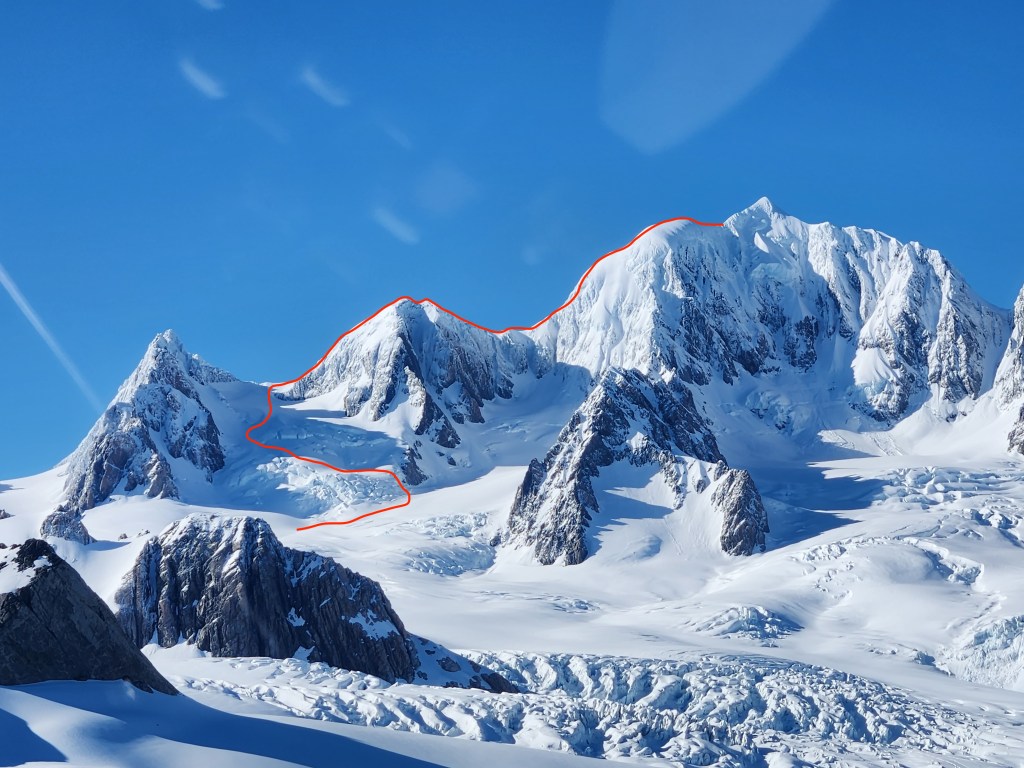
Easy ground on supportive neve made fast progress to Marcel col, which steepens to around 40-45 degrees to the summit of Lendenfeld.โ€‚It took 2.5 hours from the hut to the summit.โ€‚Heading up to Lendenfeld, we were treated with a gorgeous alpine sunrise, illuminating the entirety of the southern alps and the ocean on the horizon too, with Plateau hut a tiny dot 1000 vertical meters below you to the south.

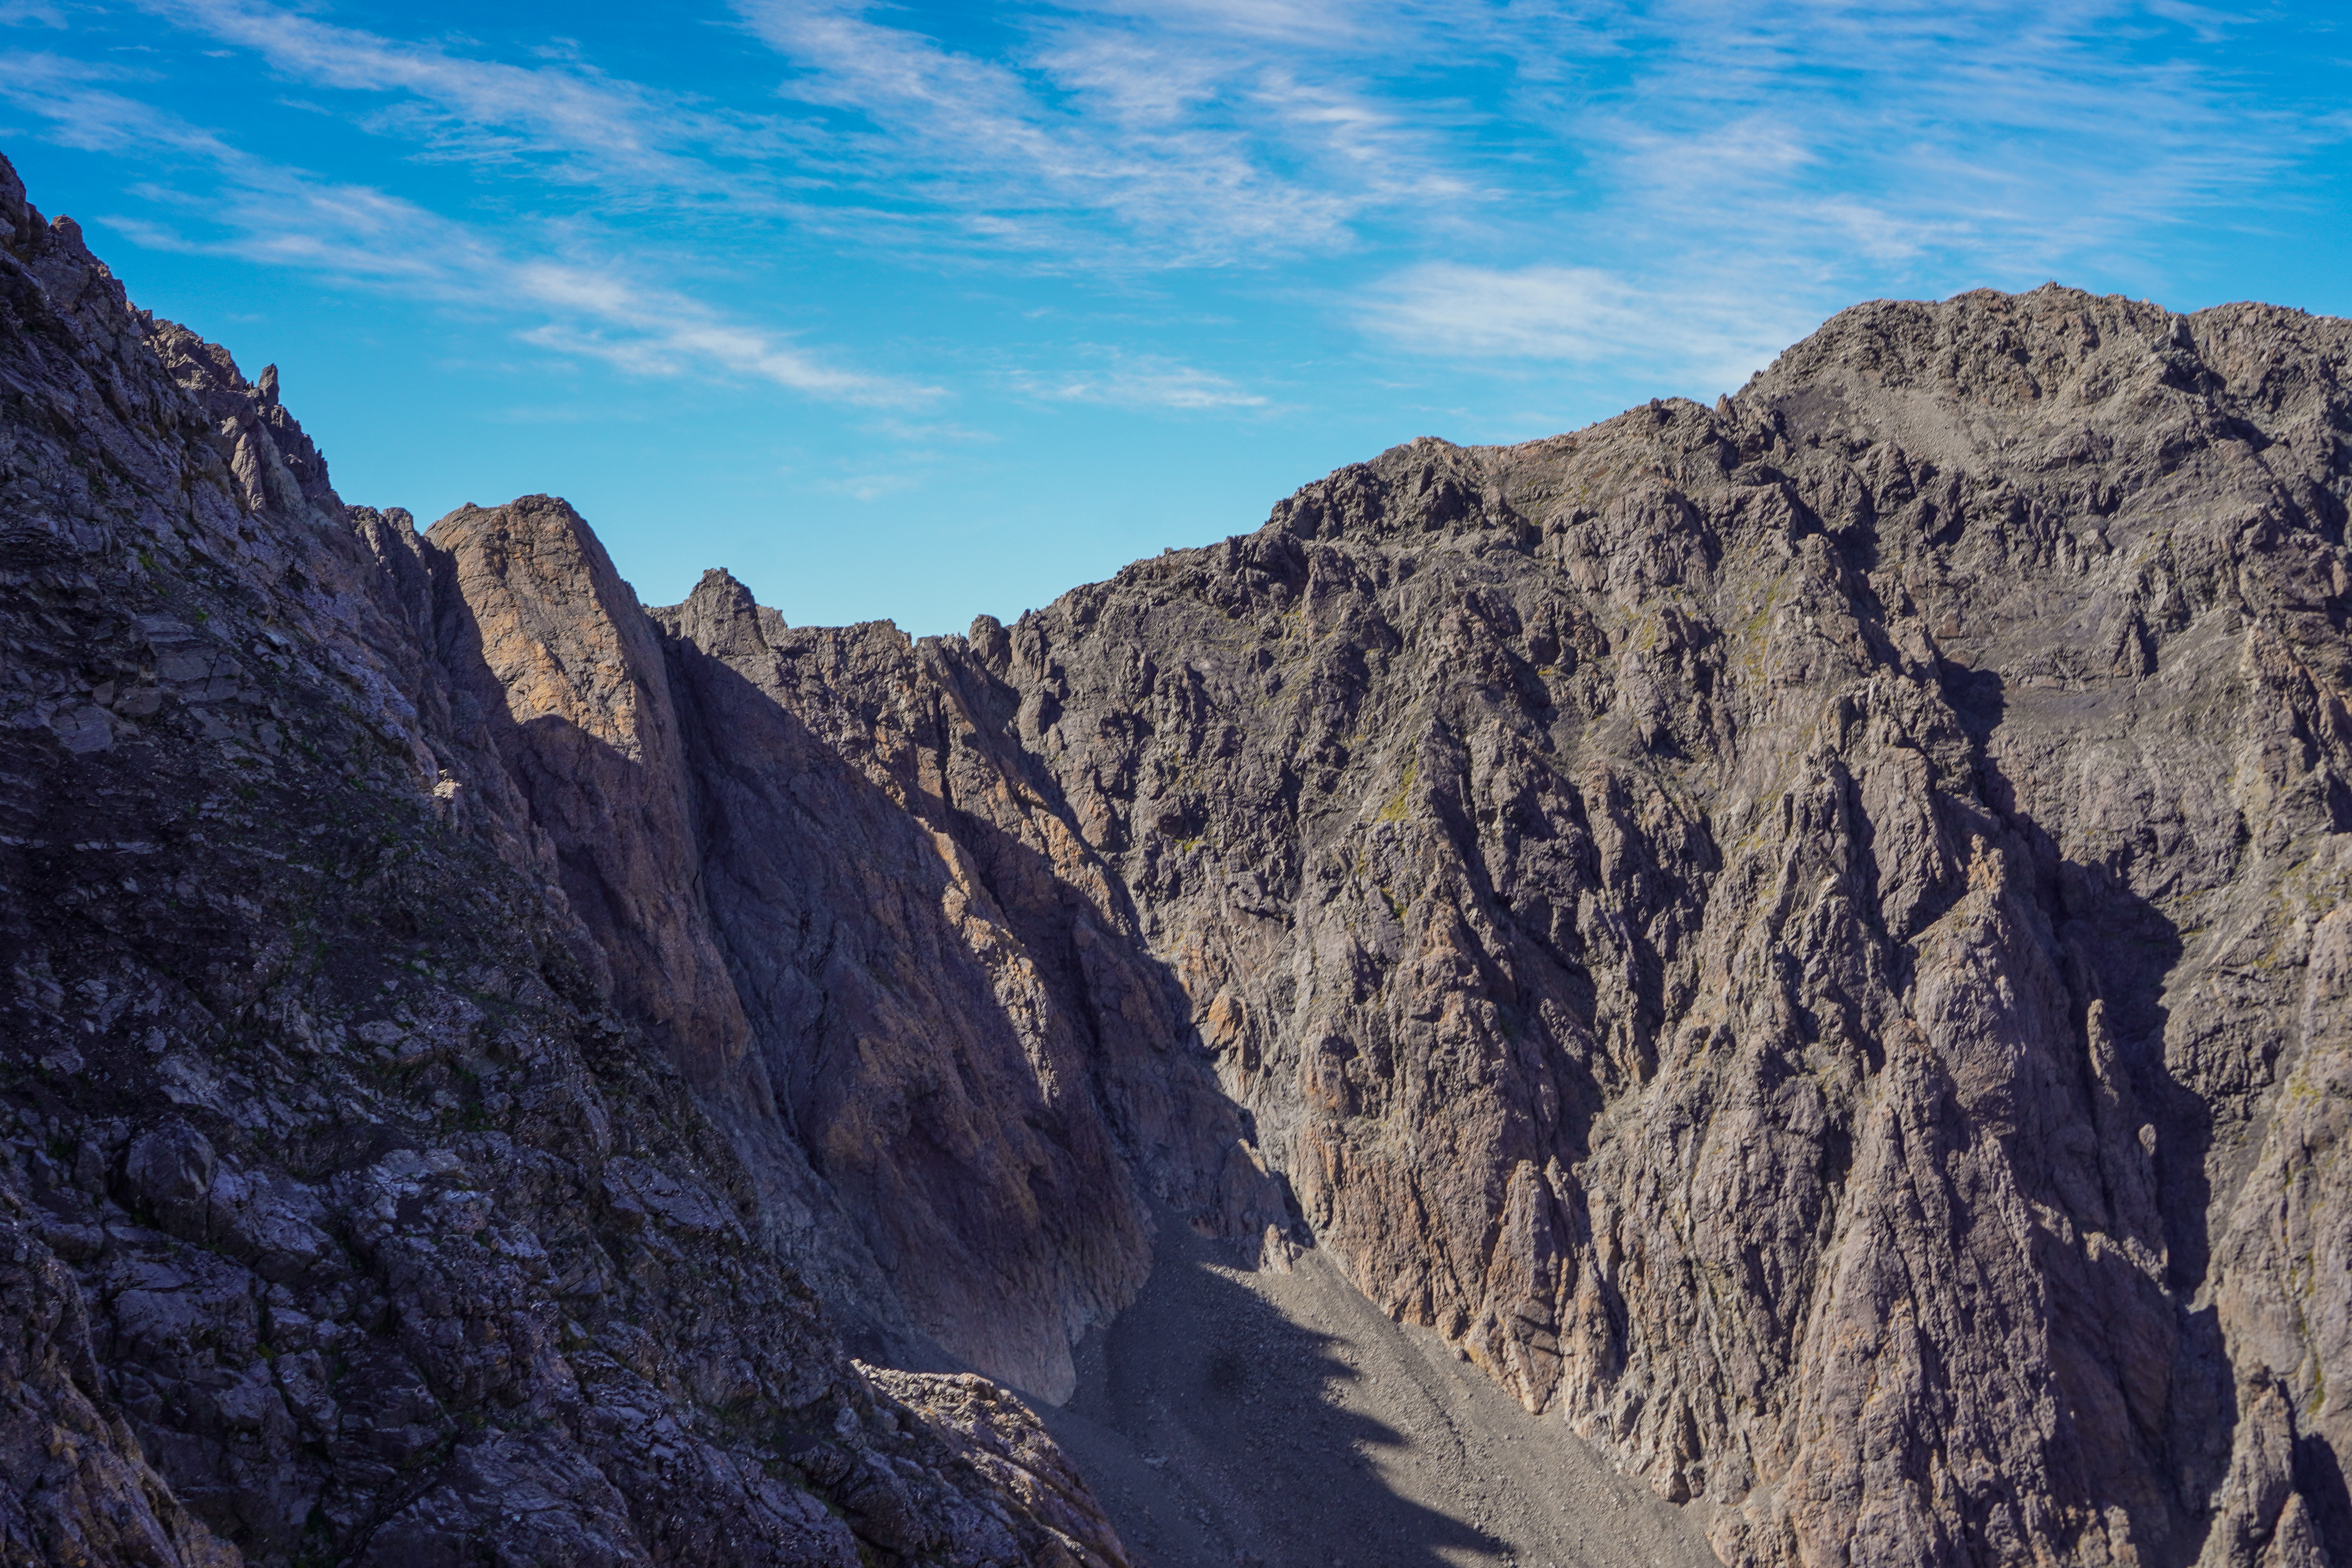
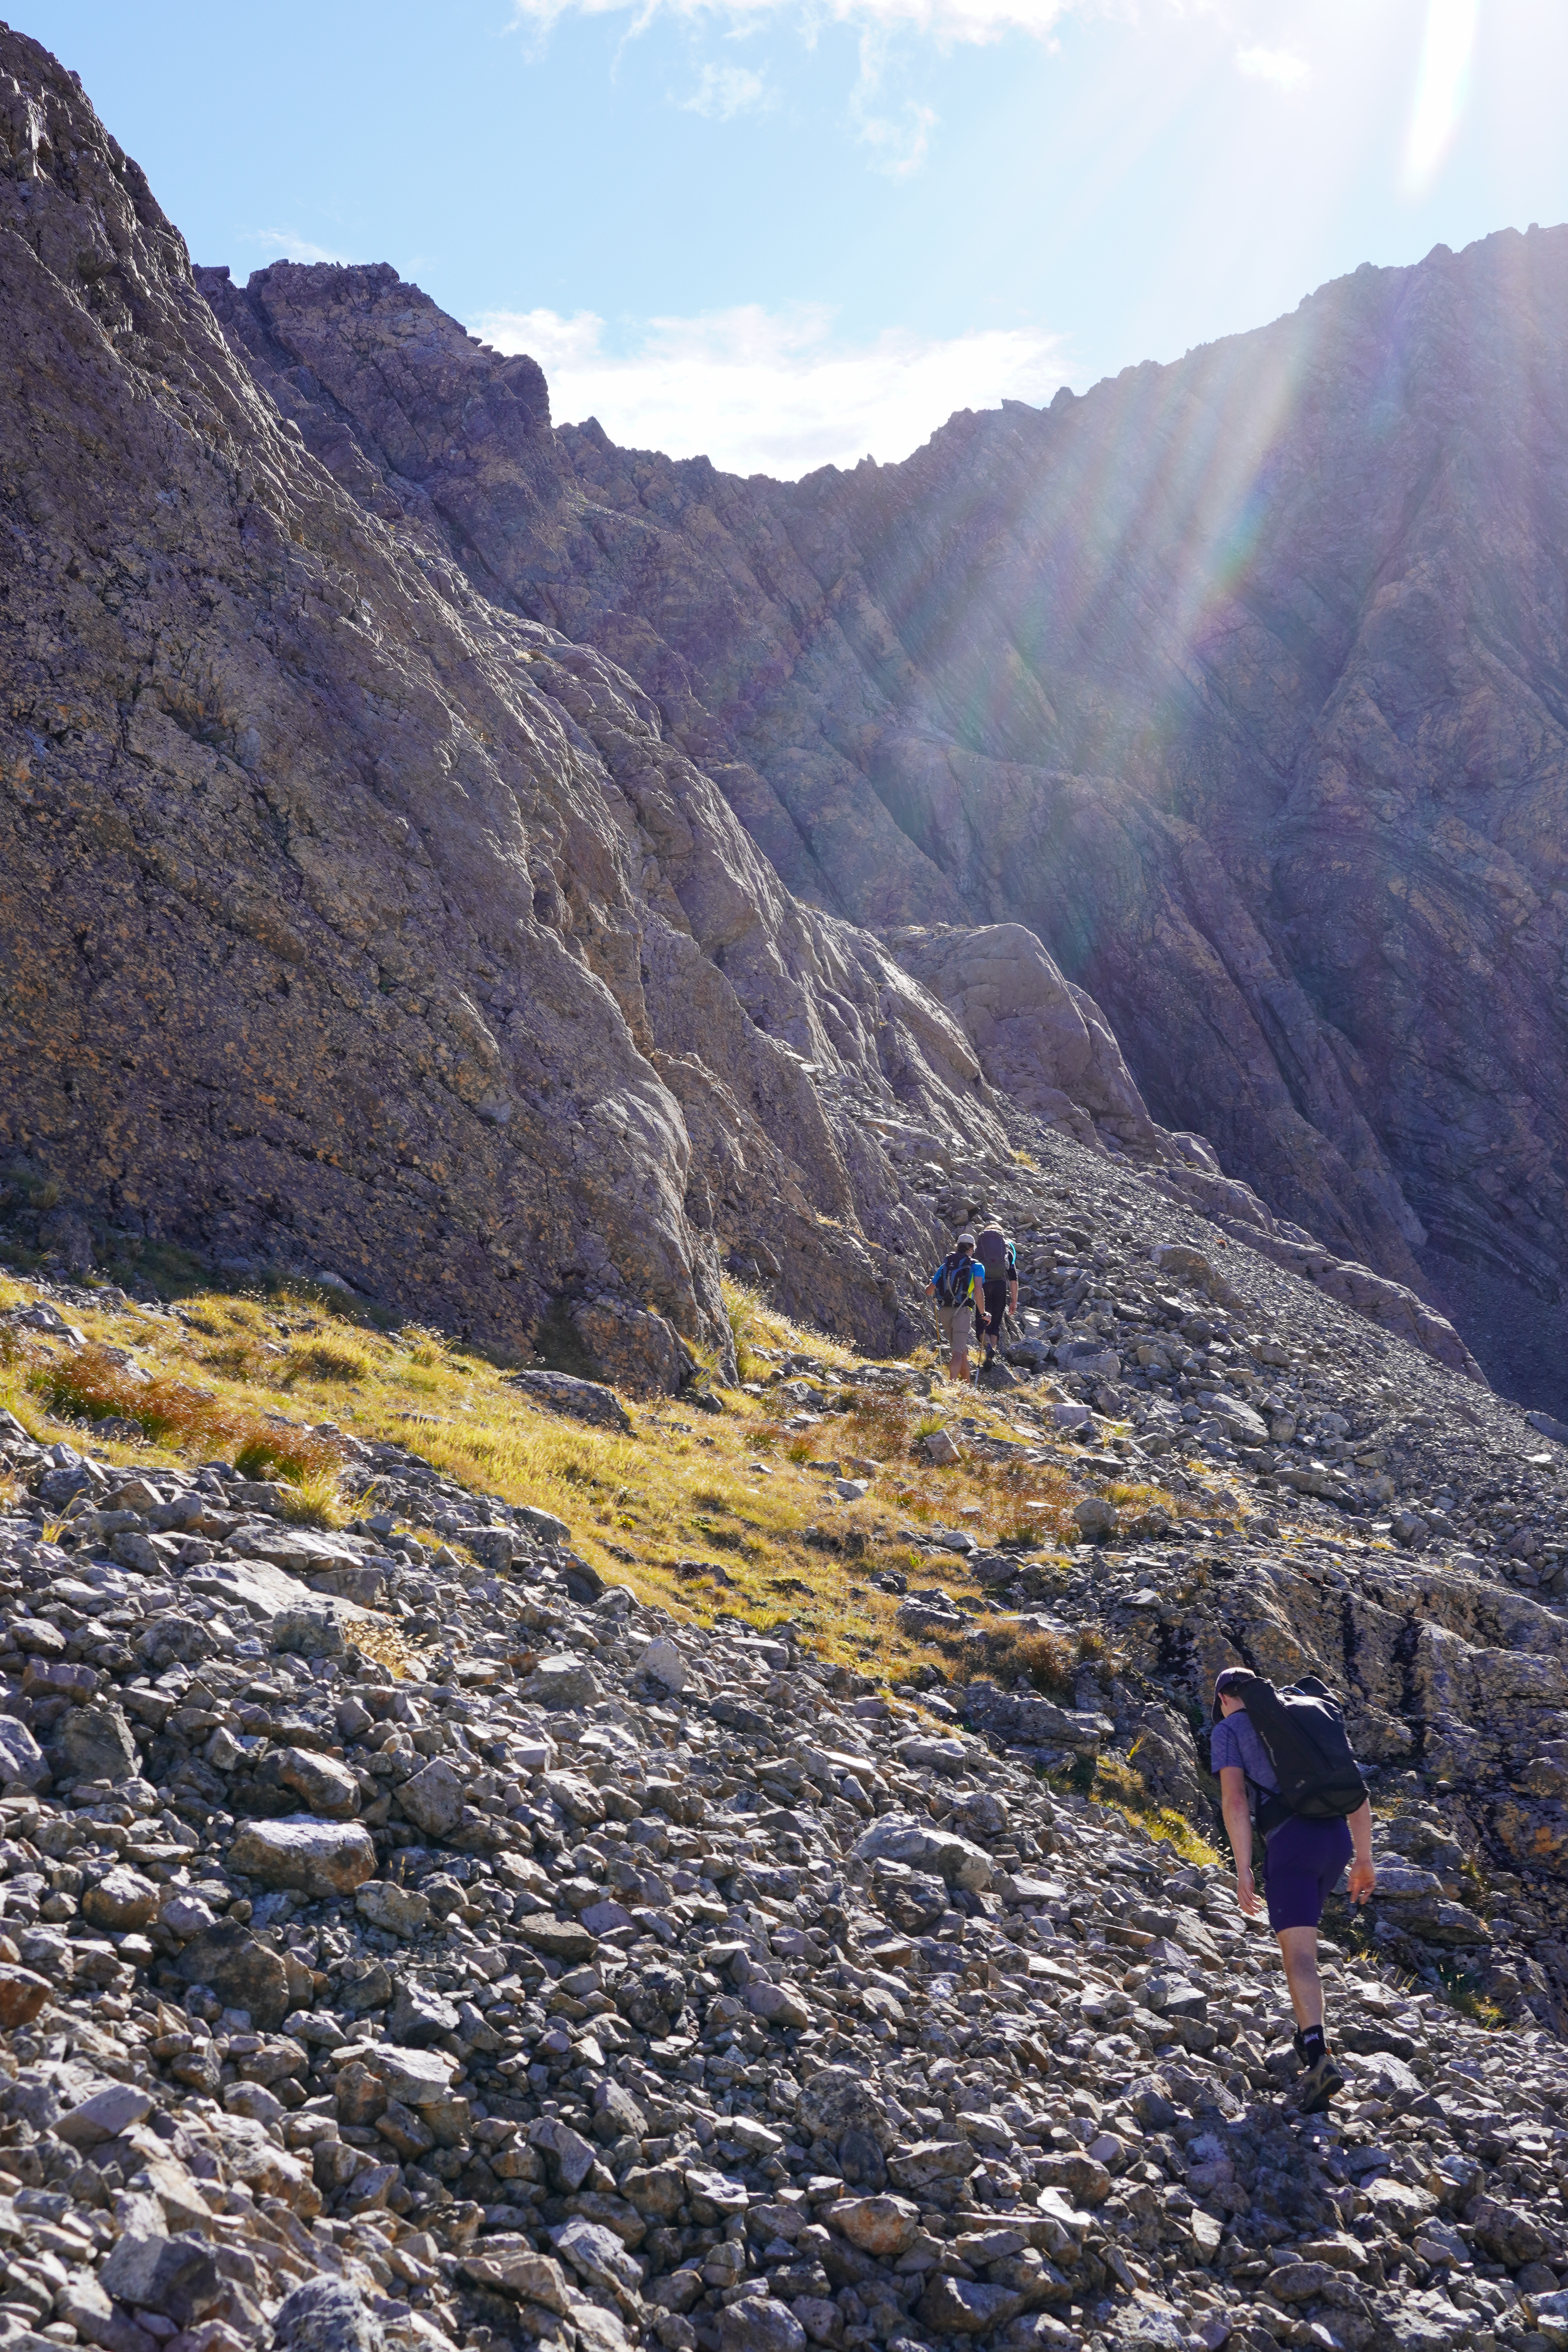
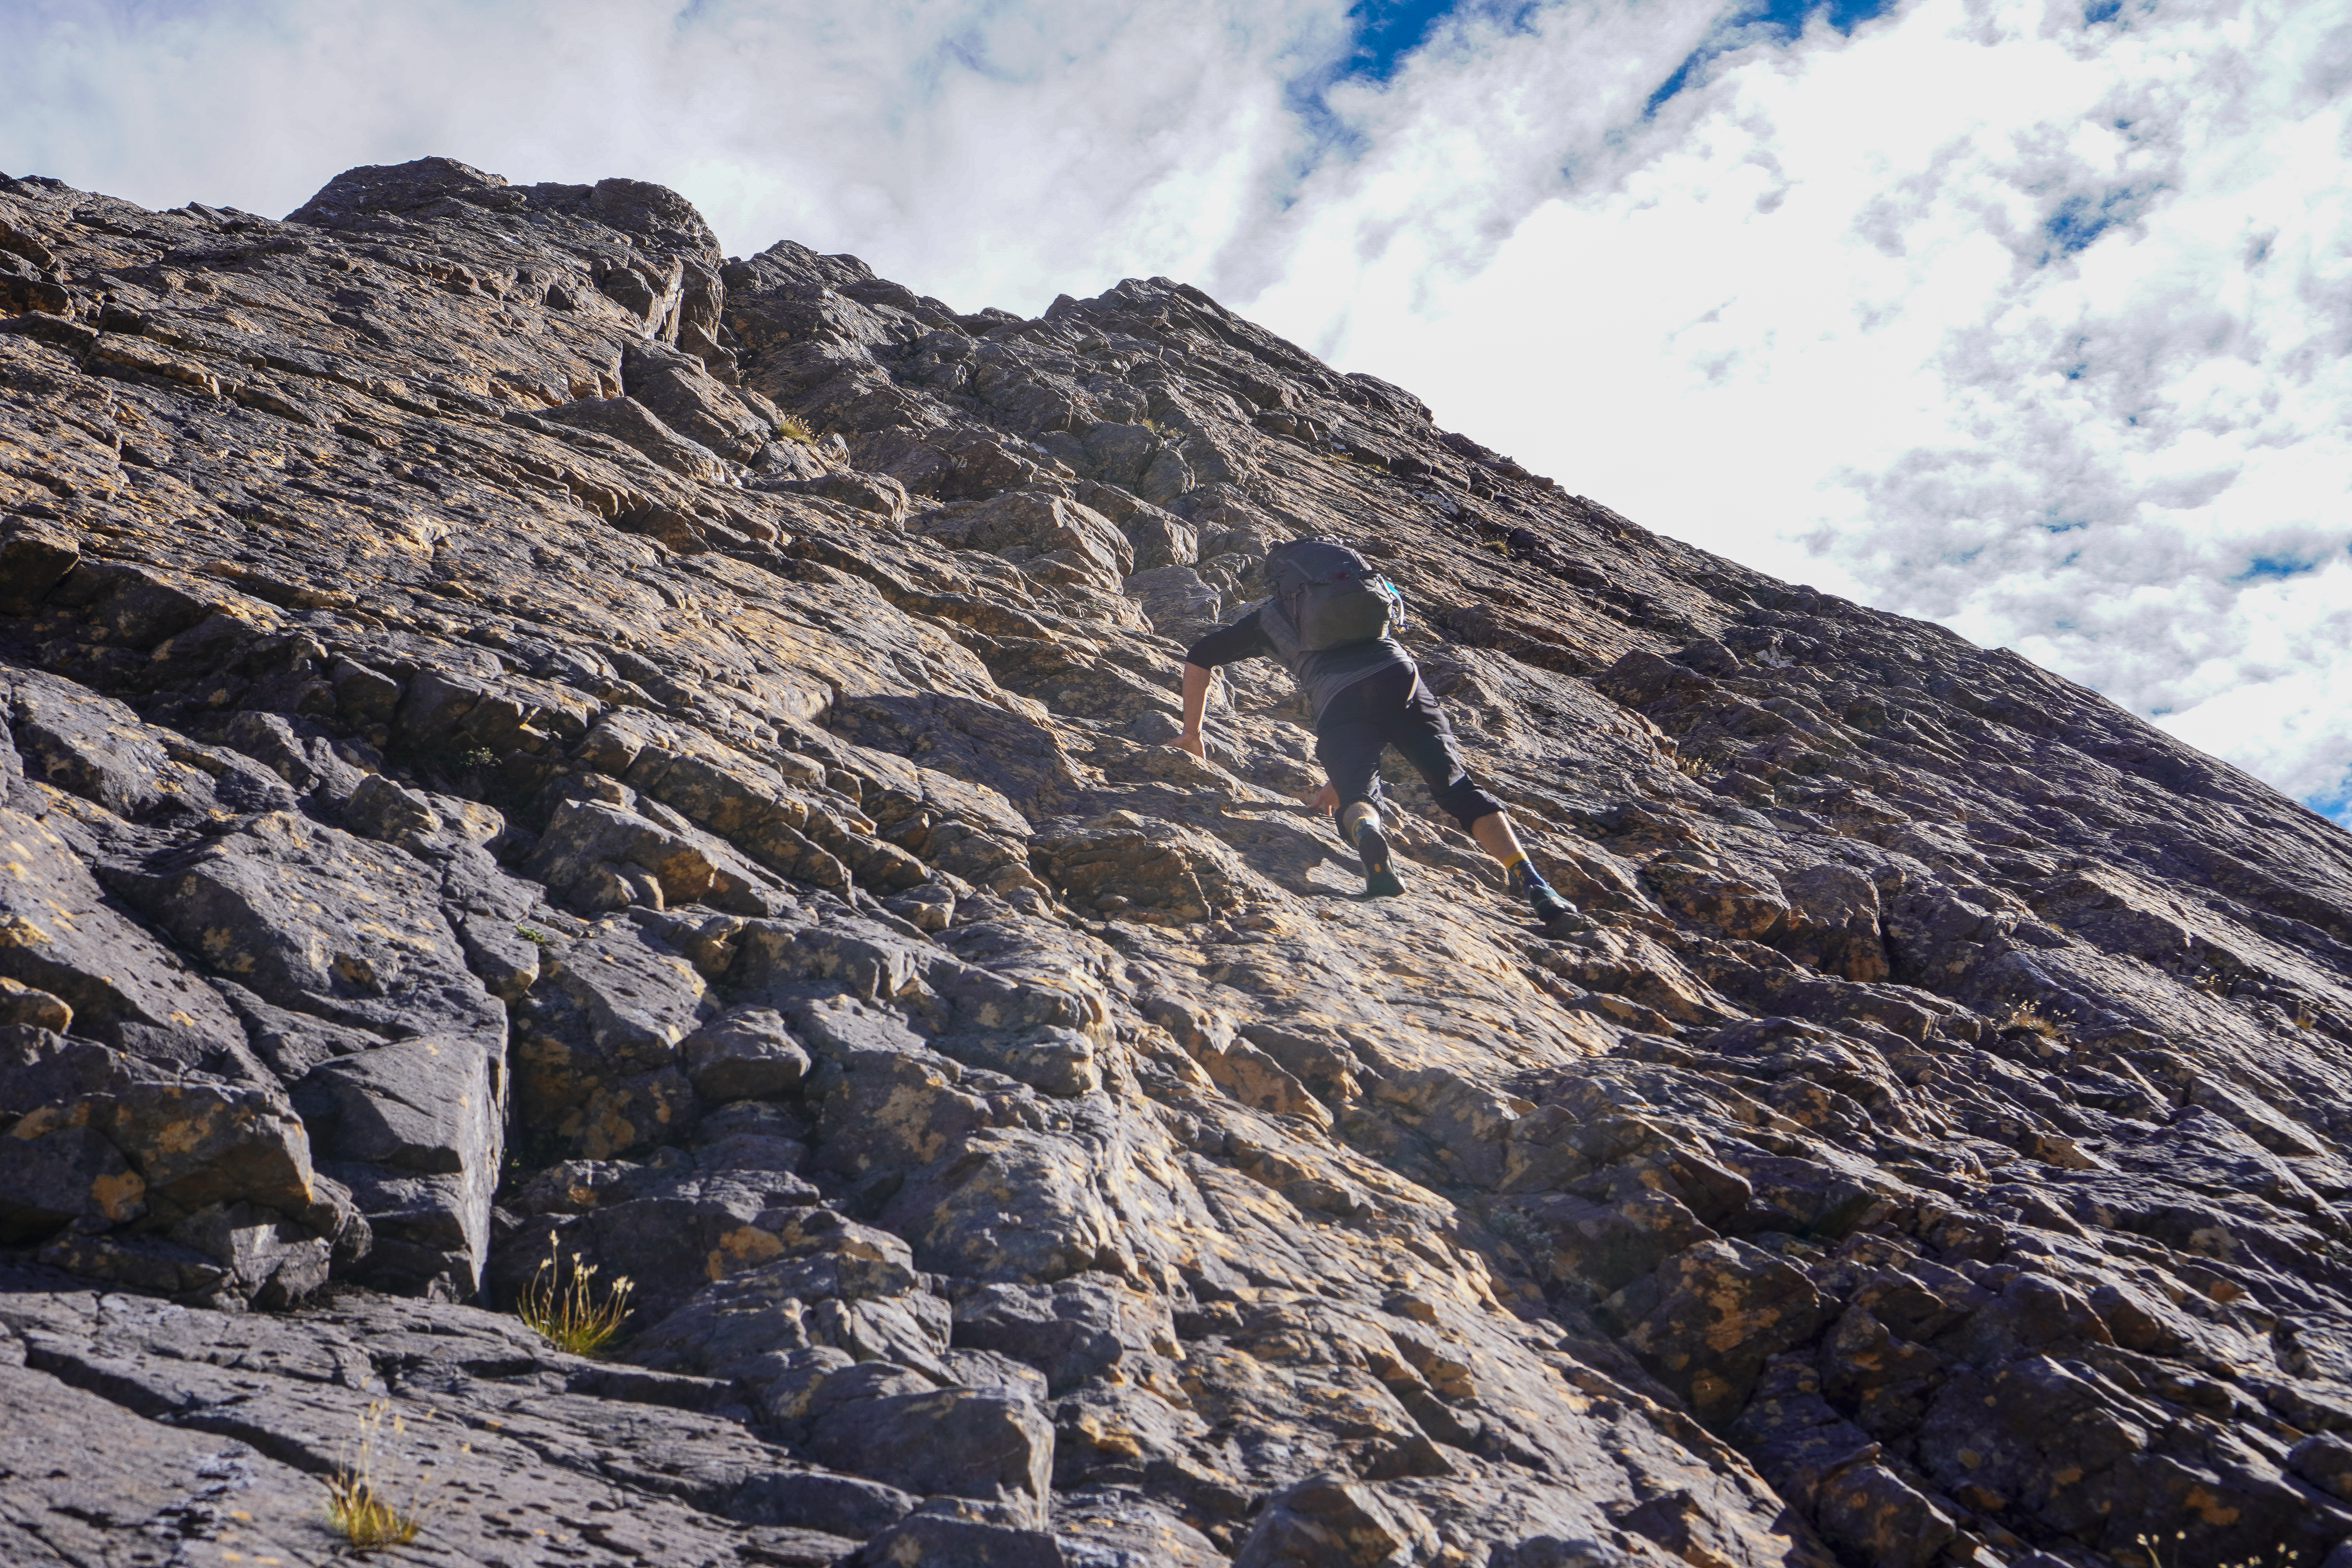
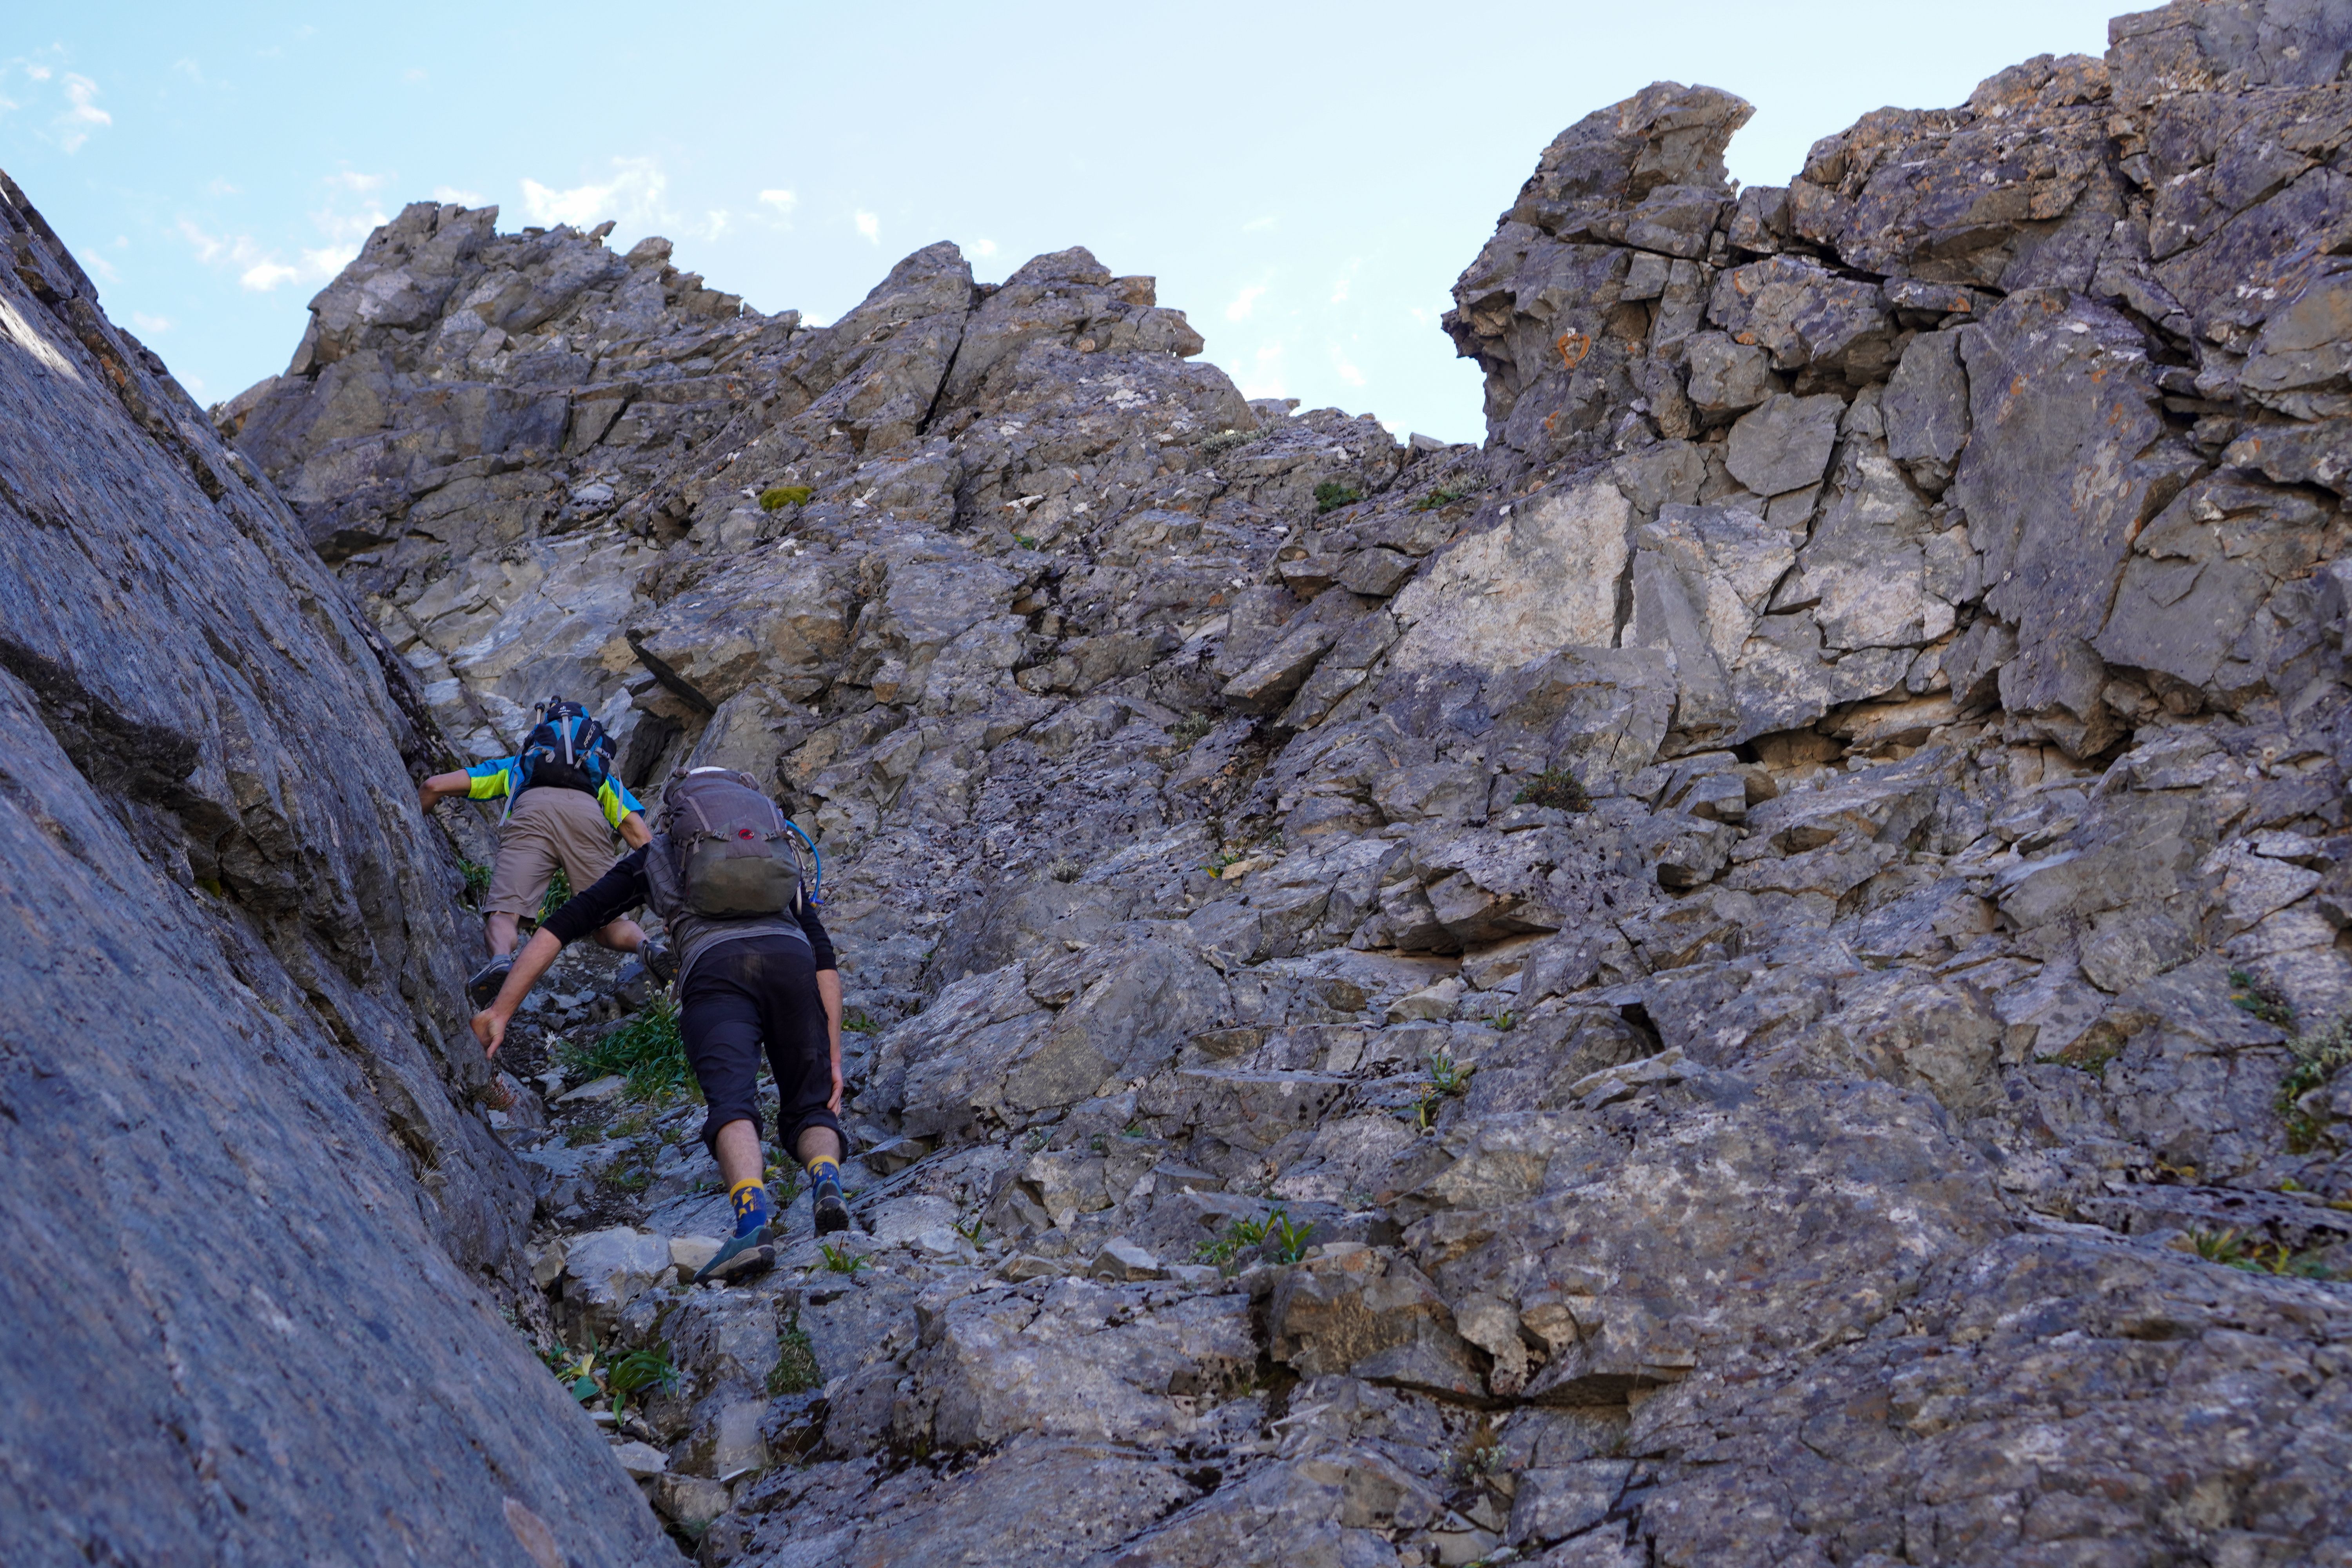
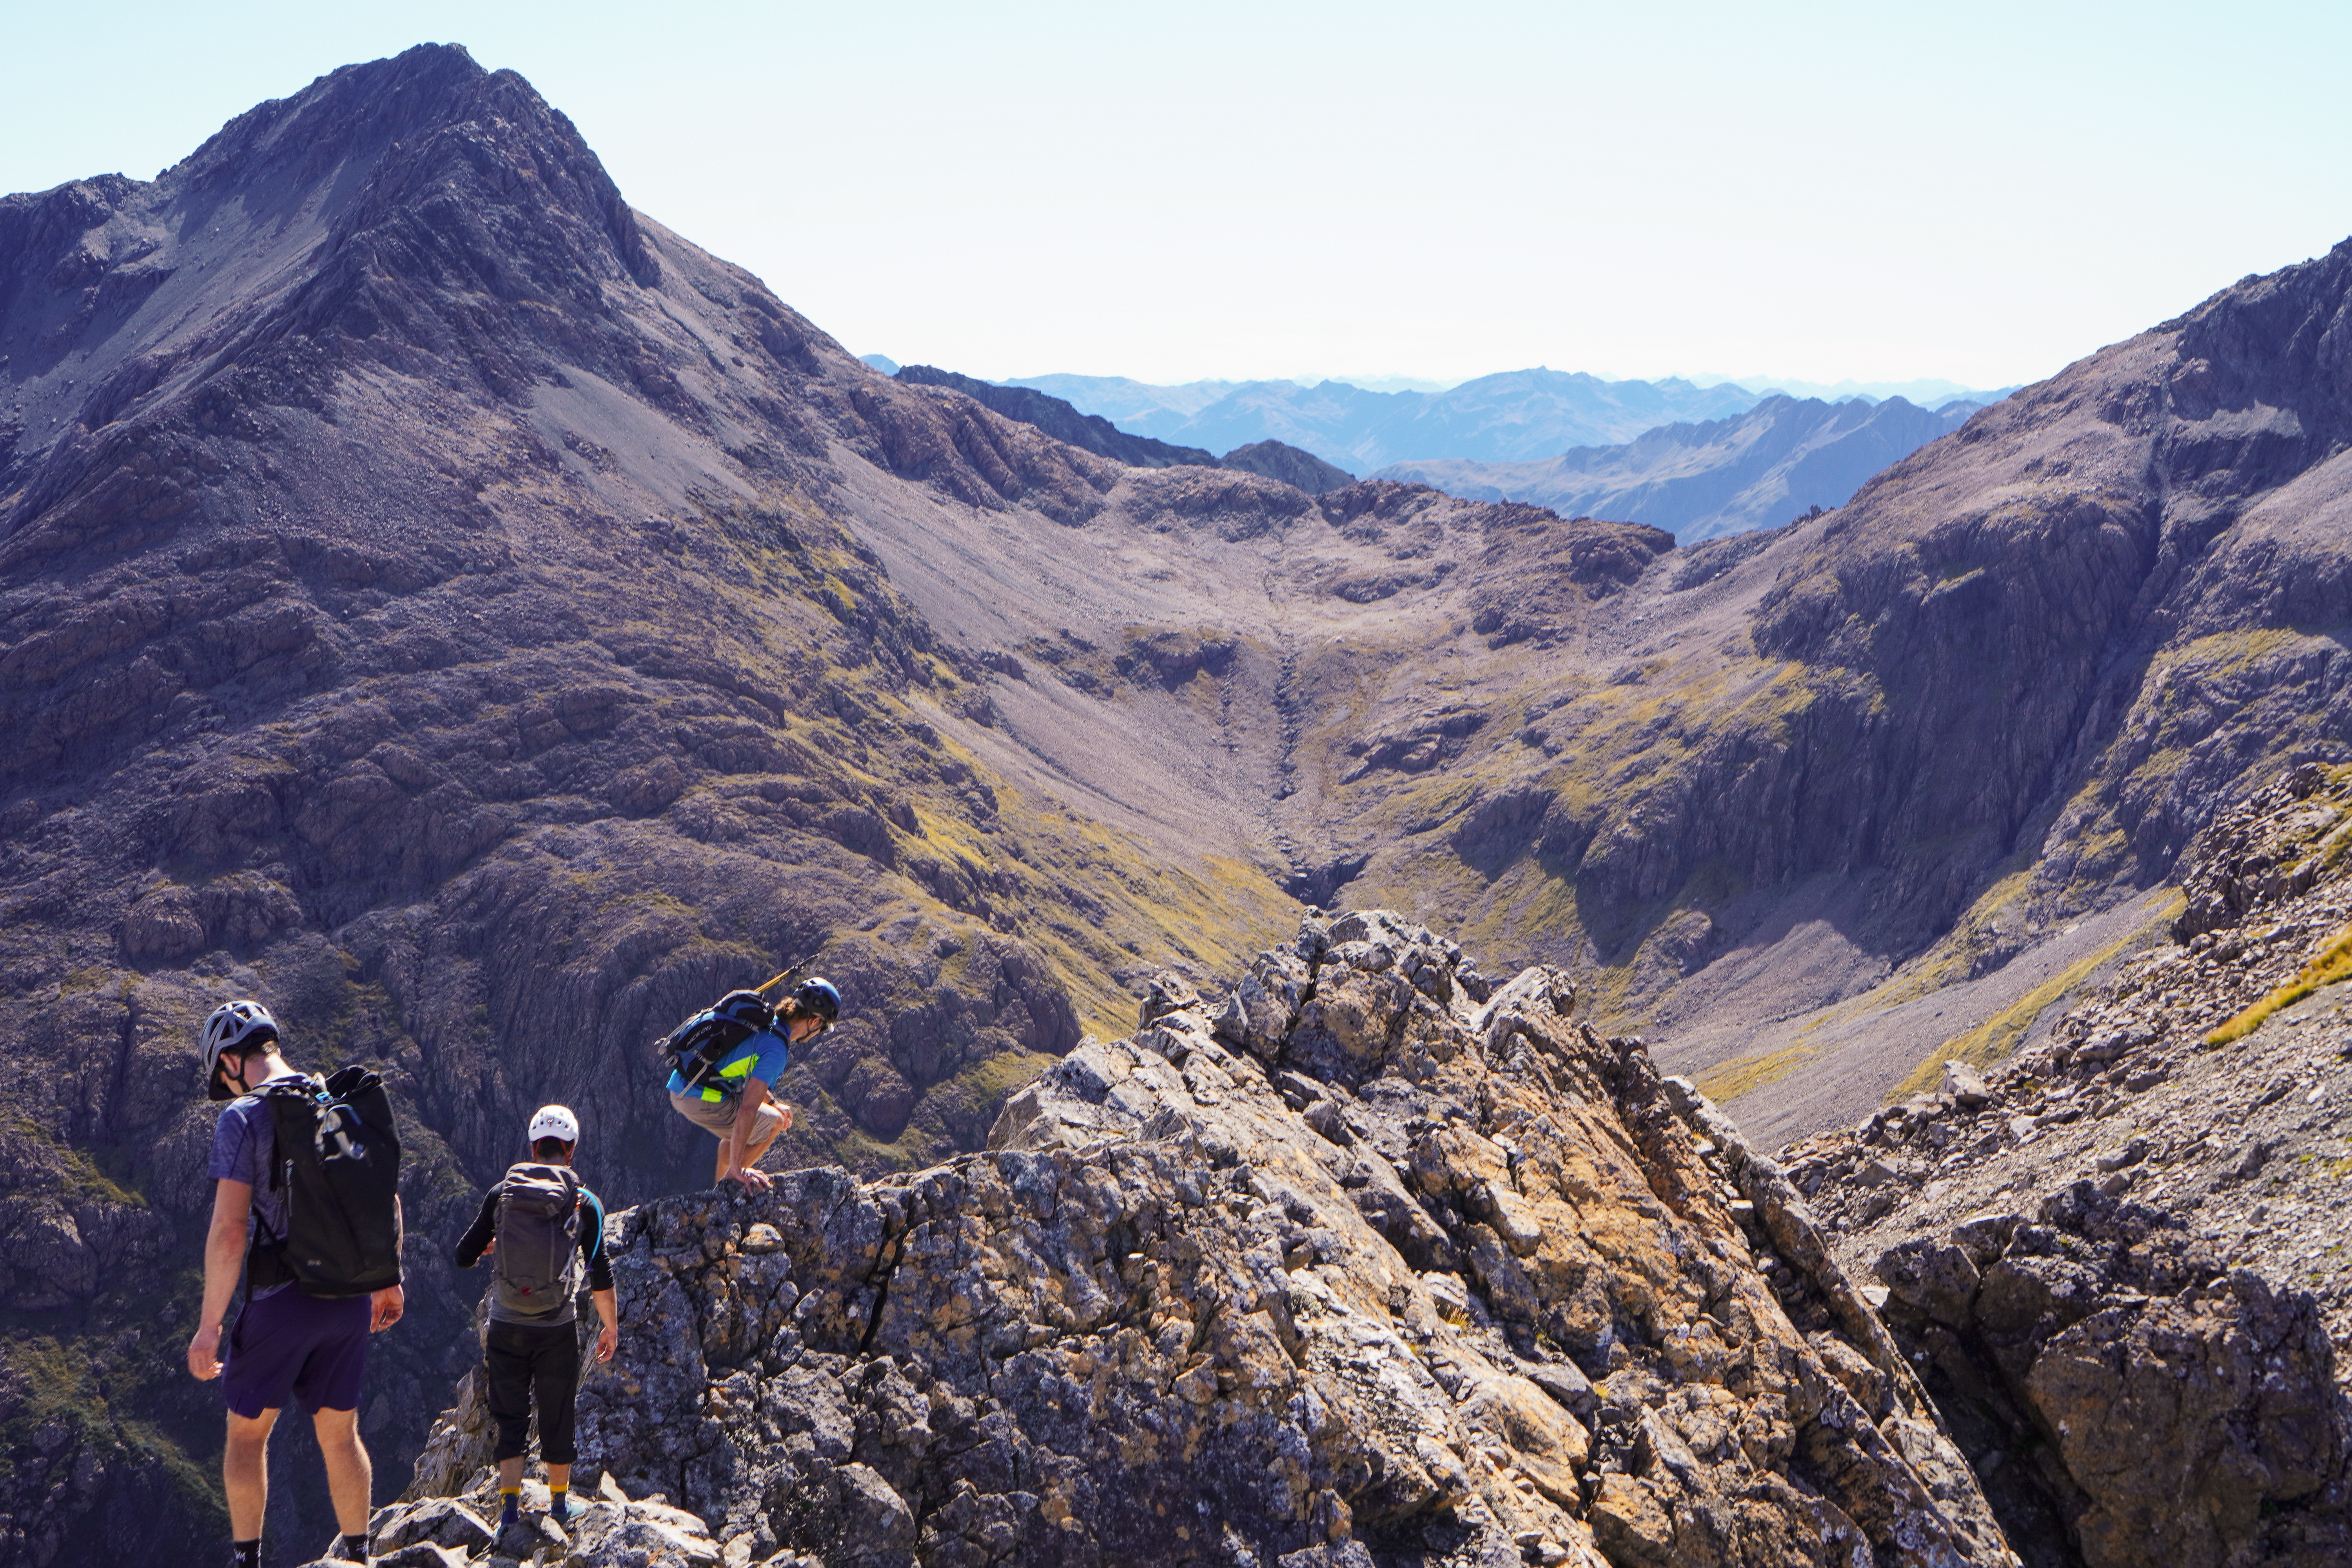
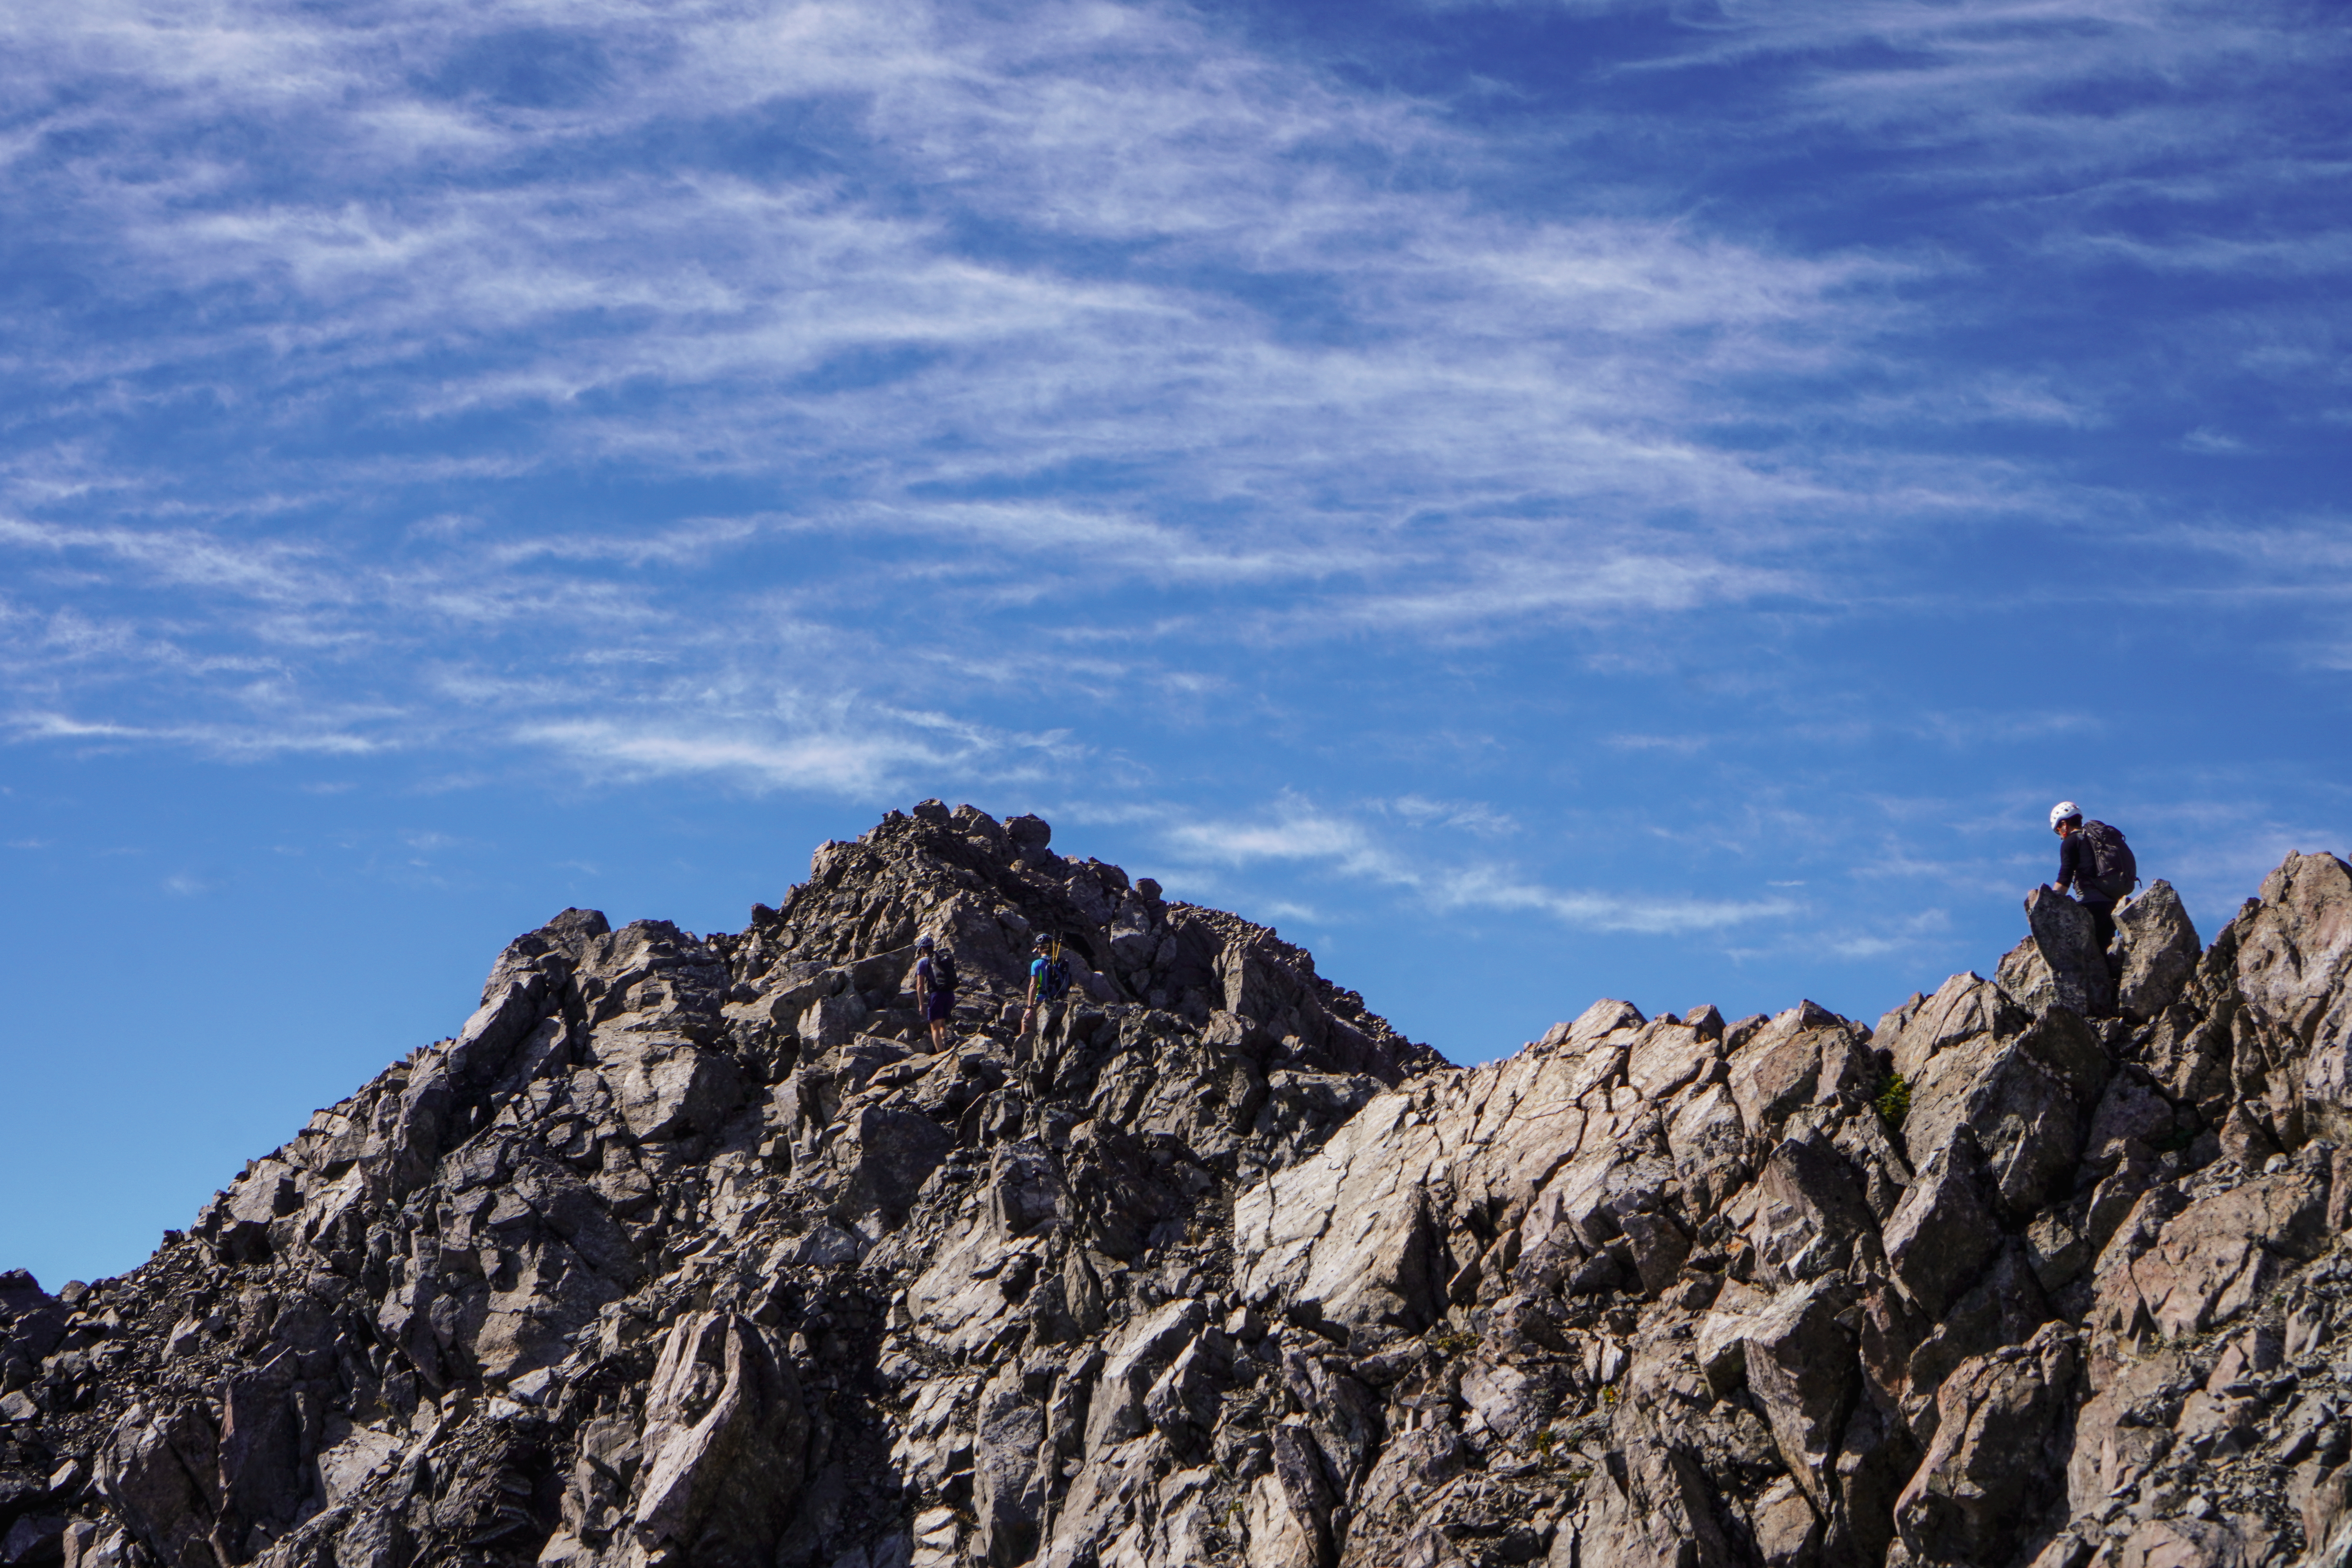
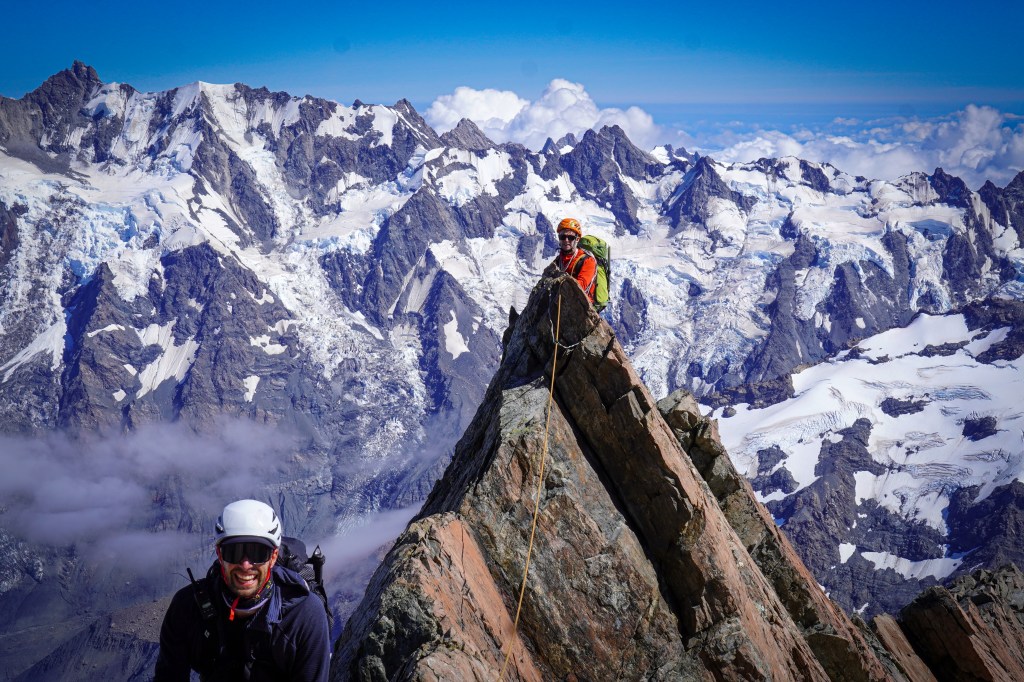
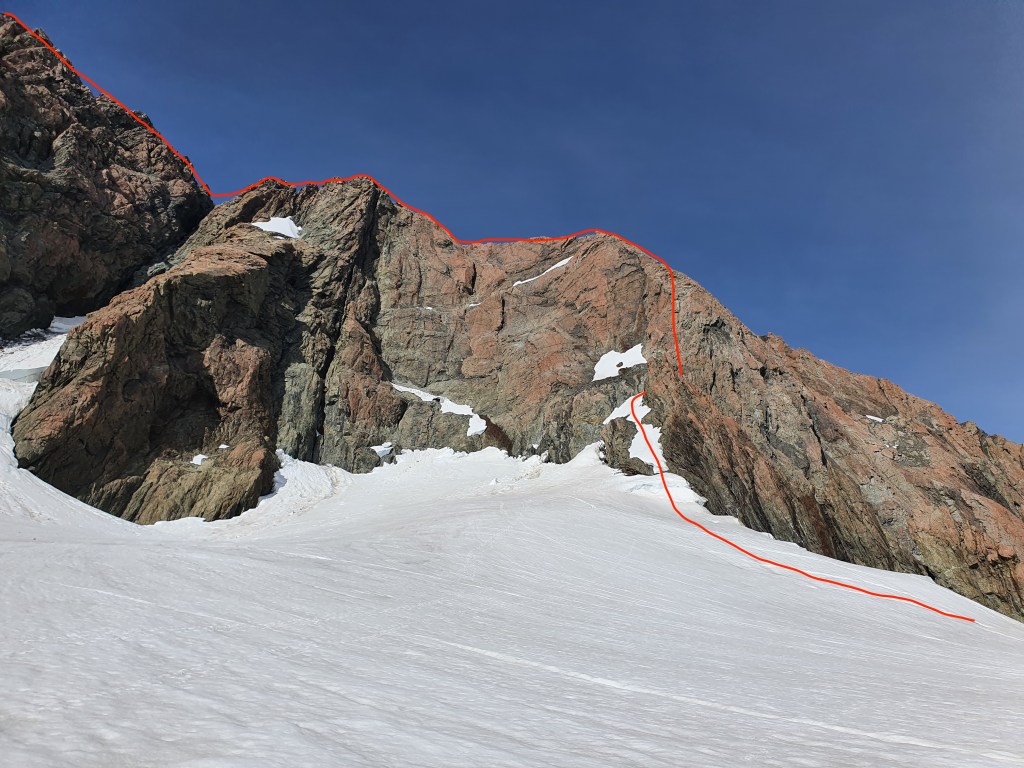
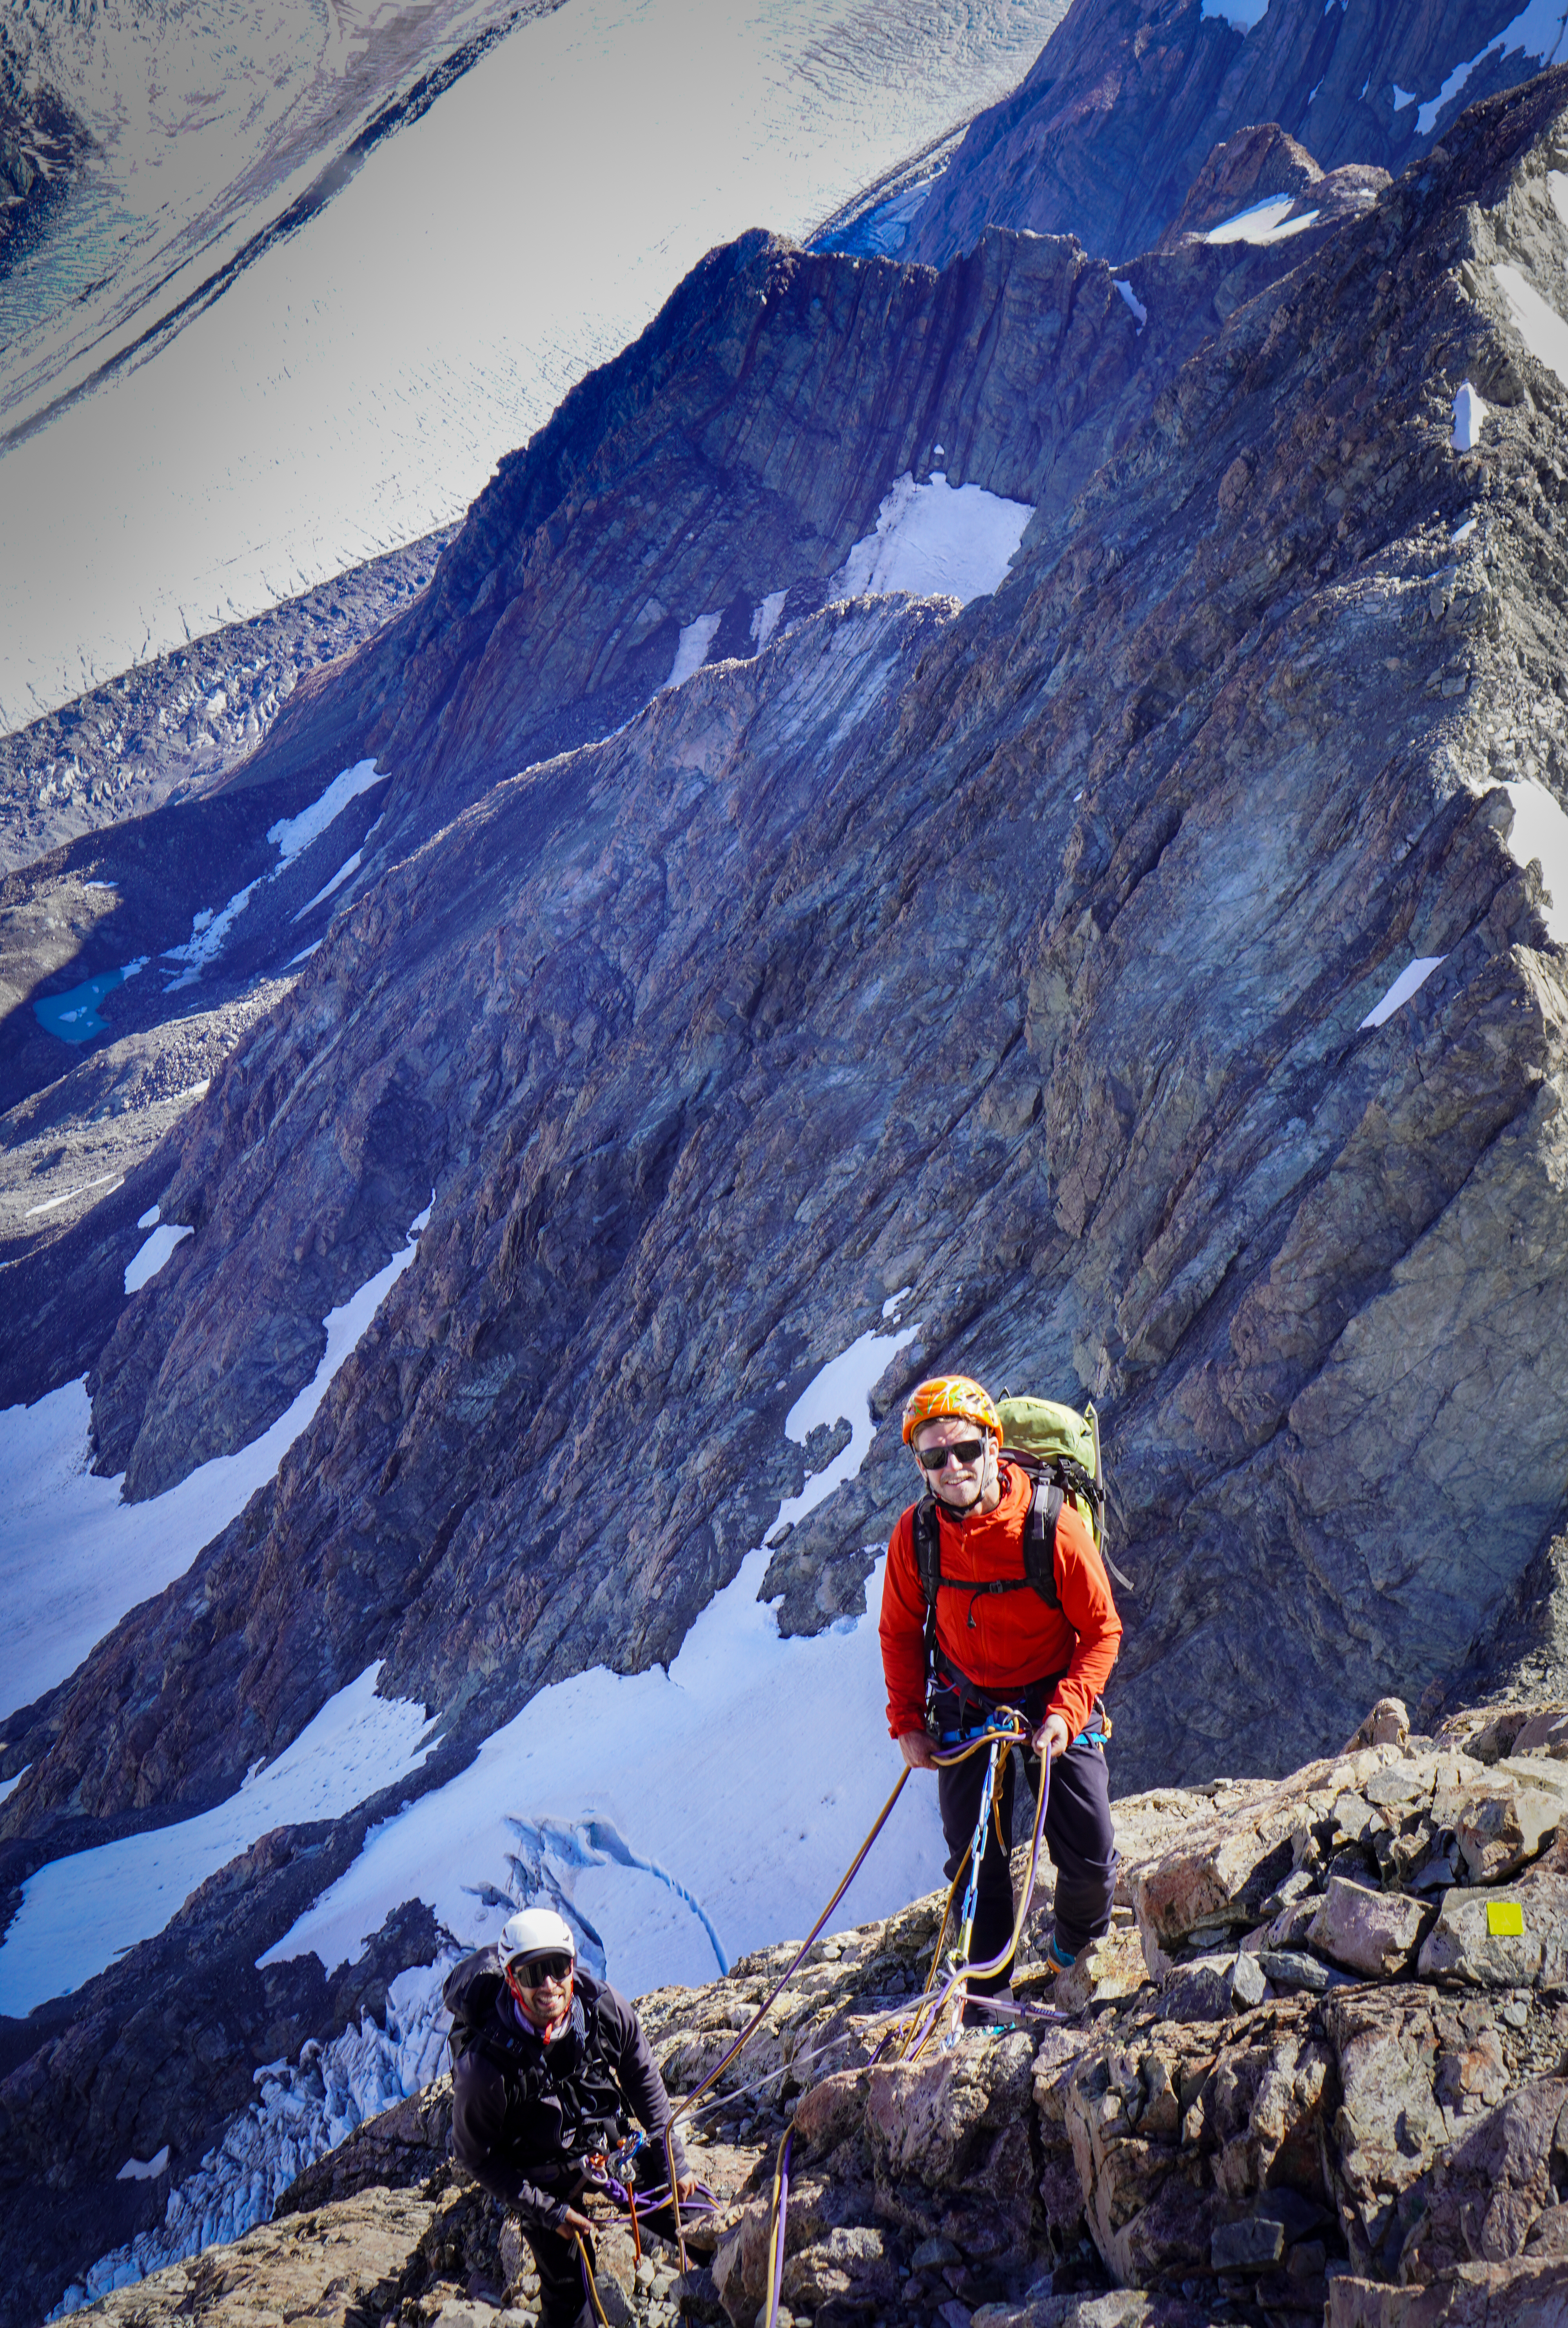
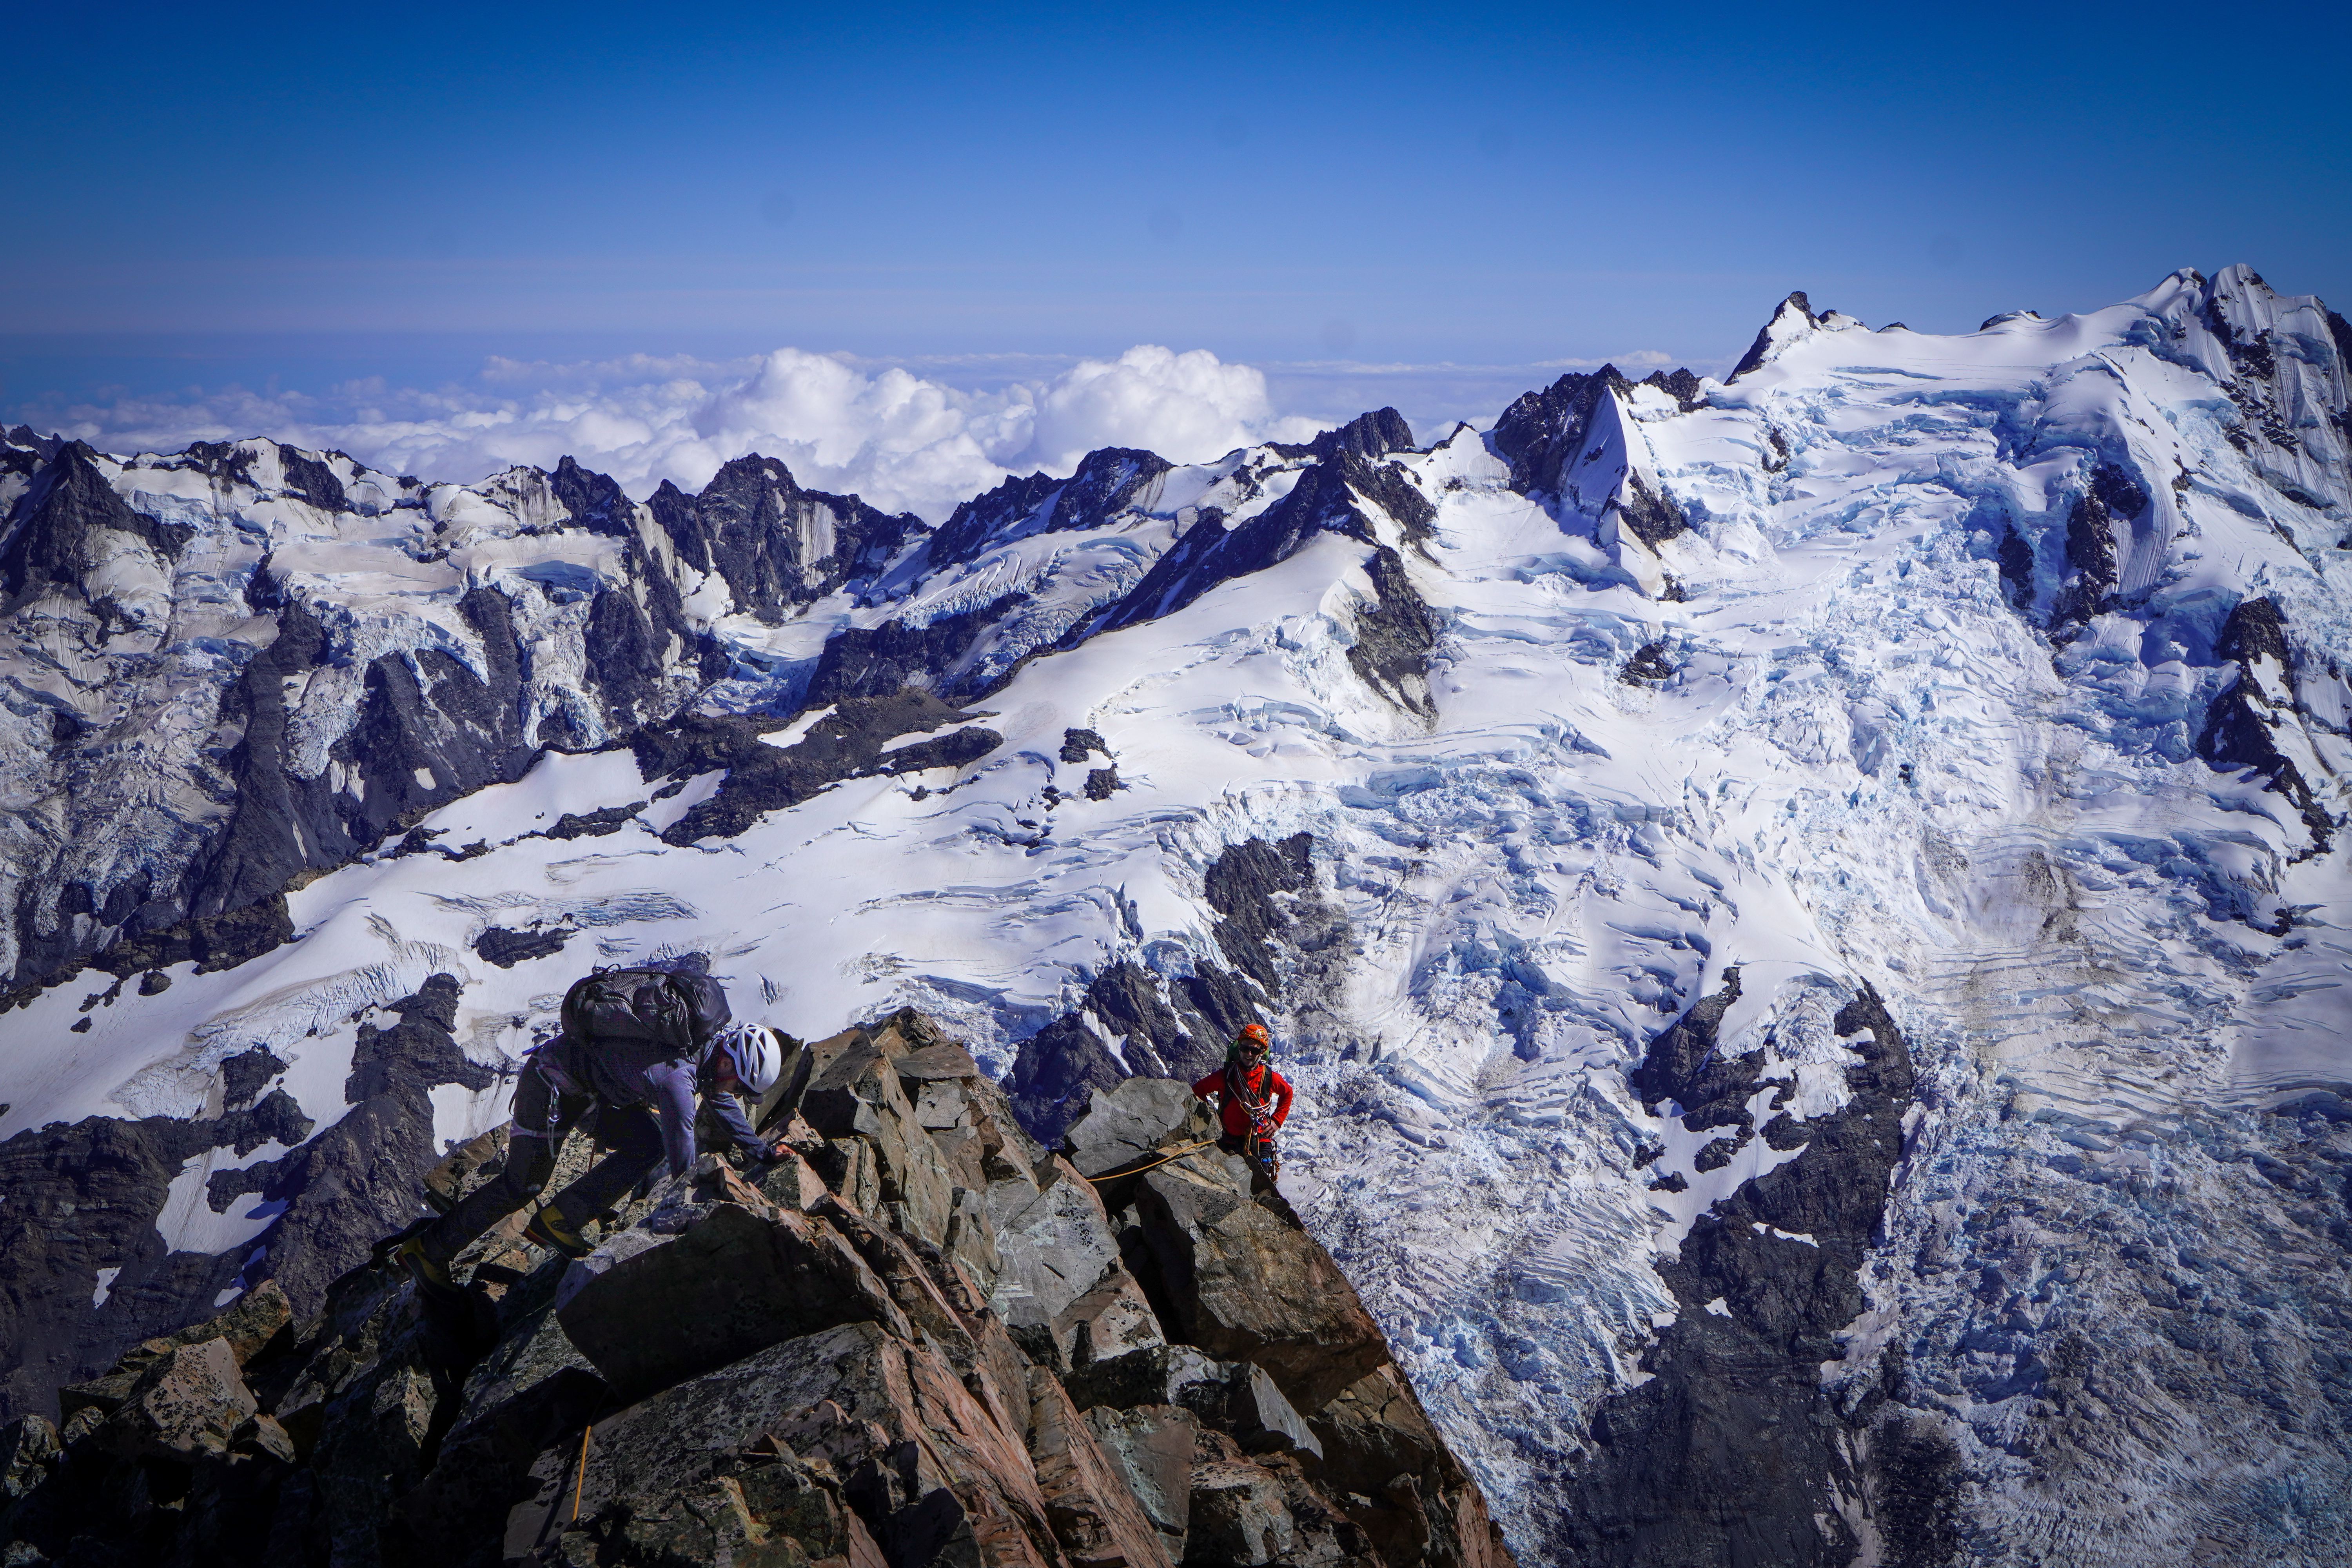
On leaving Lendenfeld the climbing gets considerably more technical and progress slowed down. You’re onto the kind of ridge travel that is typical for this area – big undercut cornices hanging over the south faces and wind stripped ice on the north. The ice makes for solid tool placements, and the angle is not very steep, but you are constantly above serious exposure so full focus is required for the traversing the downclimb to Engineer col.โ€‚We ran a running belay between us for this section – the ice was taking bomber screws and we crossed in 2x blocks.โ€‚If you’re planning on using a rope for this section, I personally think bringing a full rack of screws is well worth the small extra weight in your pack to allow extra long simul pitches.

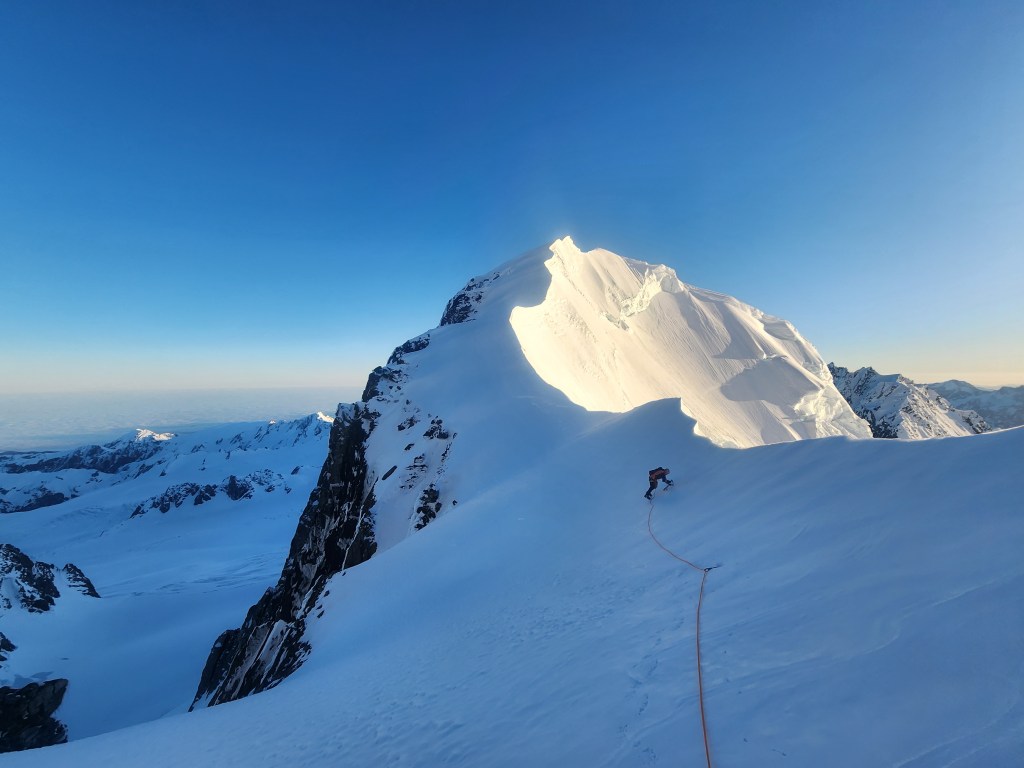
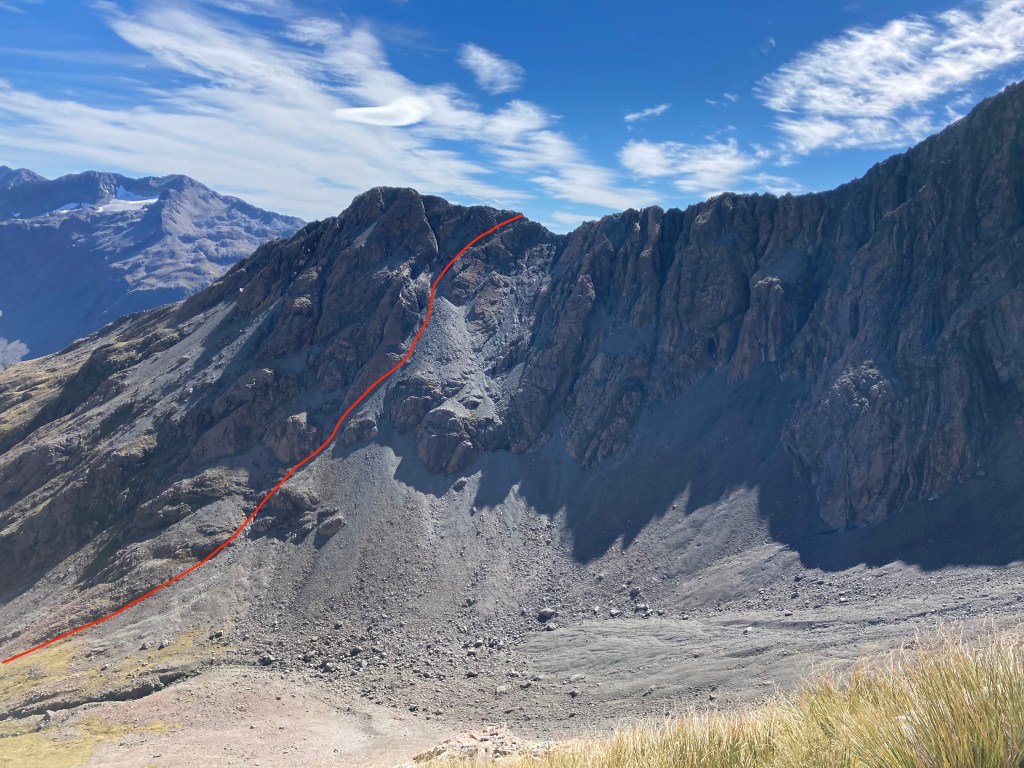
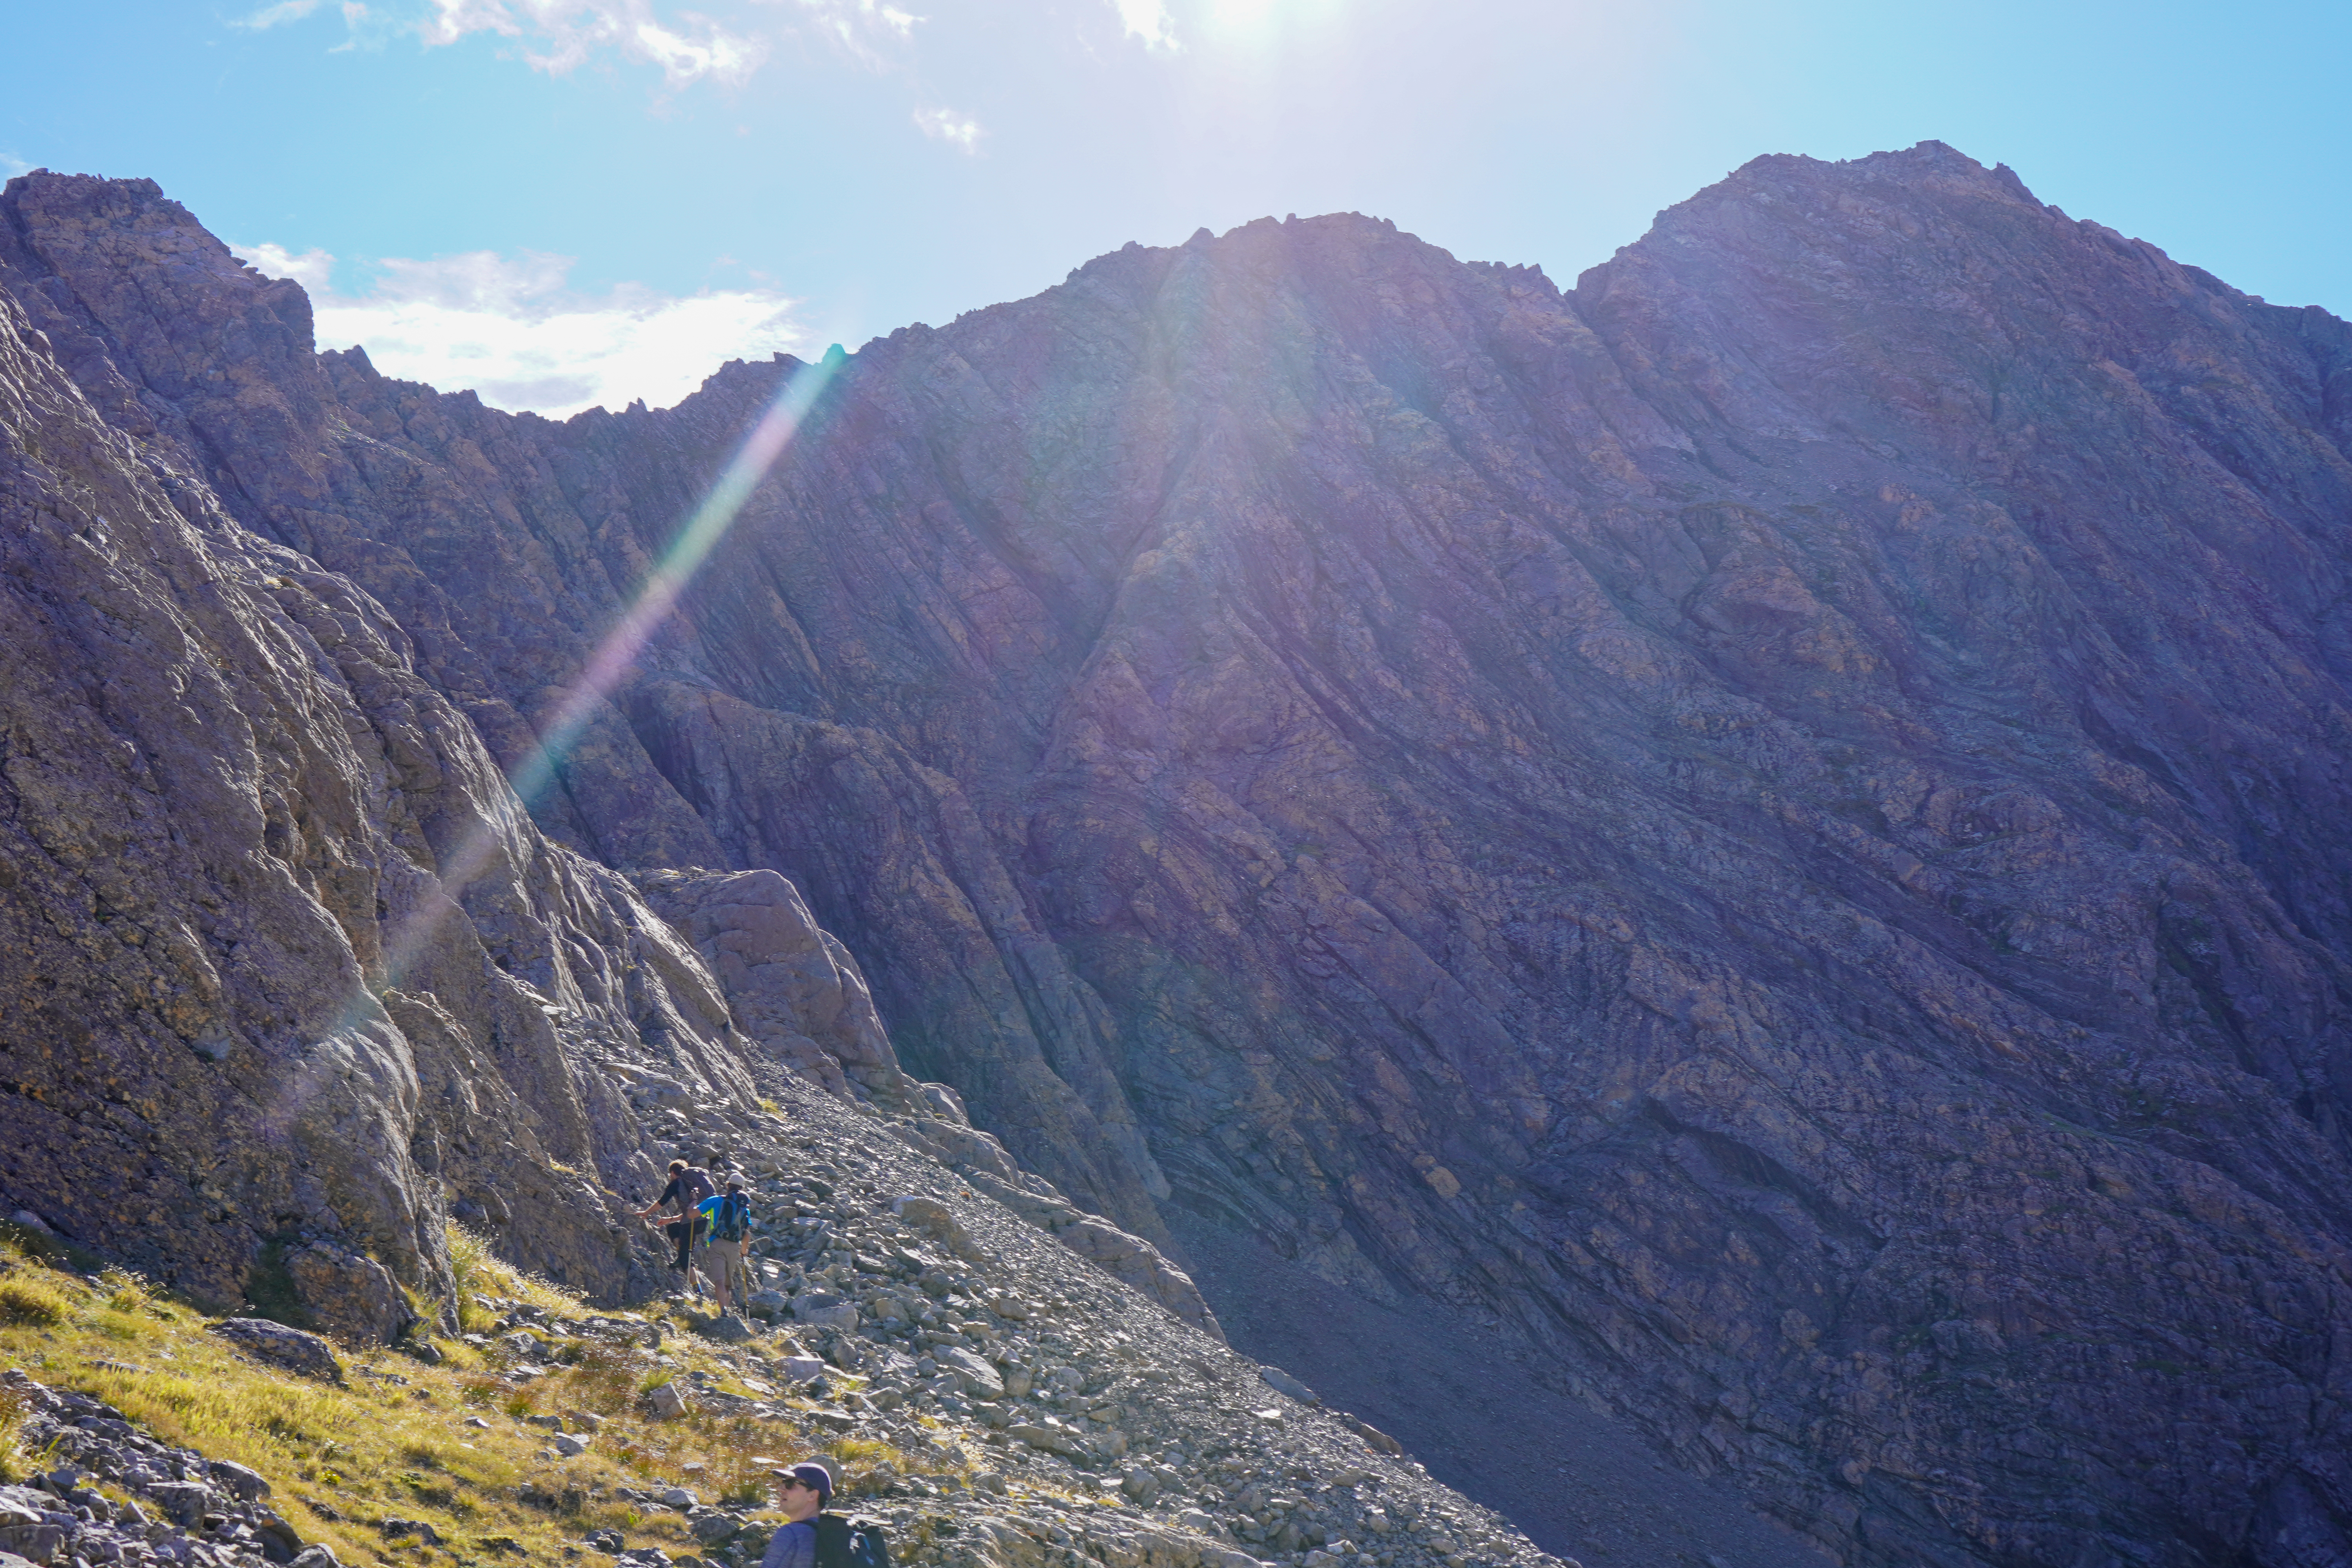
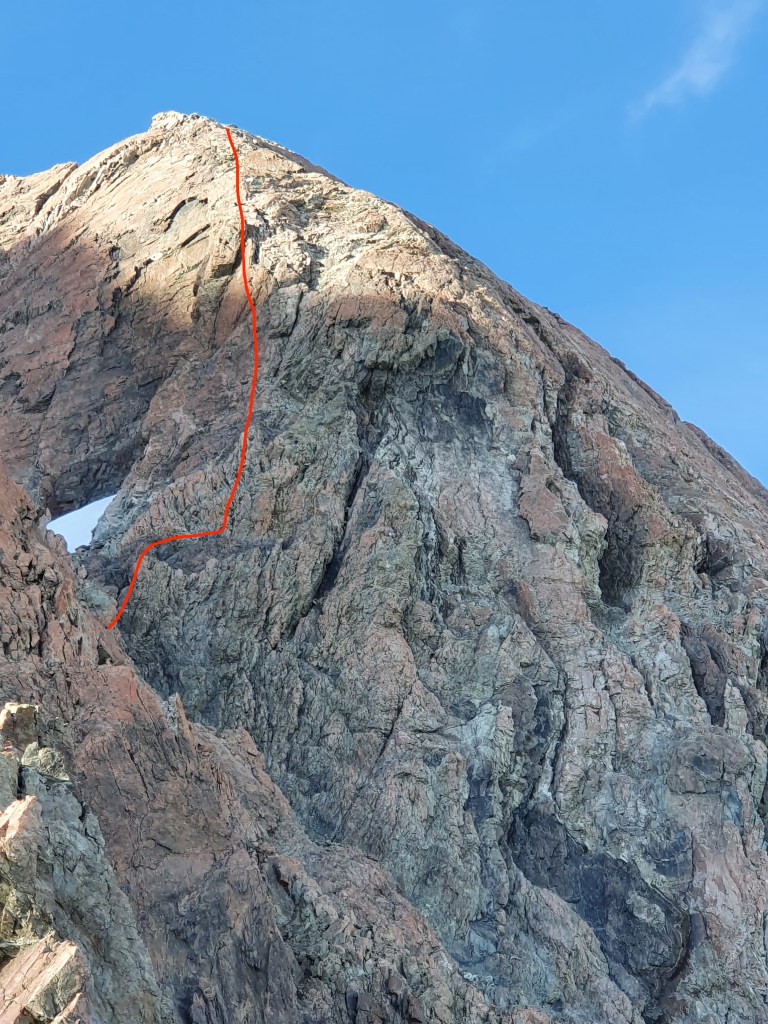
The section from Engineer col is often the crux of the route as it can be cut off by a large schrund, requiring some shenanigans to traverse onto the East face of Tasman to gain Syme ridge.โ€‚Luckily we found it completely filled in and we could stick to the North side of the ridge which connects the col to the top of Syme ridge.โ€‚Easy but exposed 45ish degree climbing, we simulclimbed with good screws and a couple of microtraxions taking around 90 minutes to get to point 3300m, the flat spot just below the summit.โ€‚If pitching this whole section it would have taken significantly longer.โ€‚โ€‚โ€‚

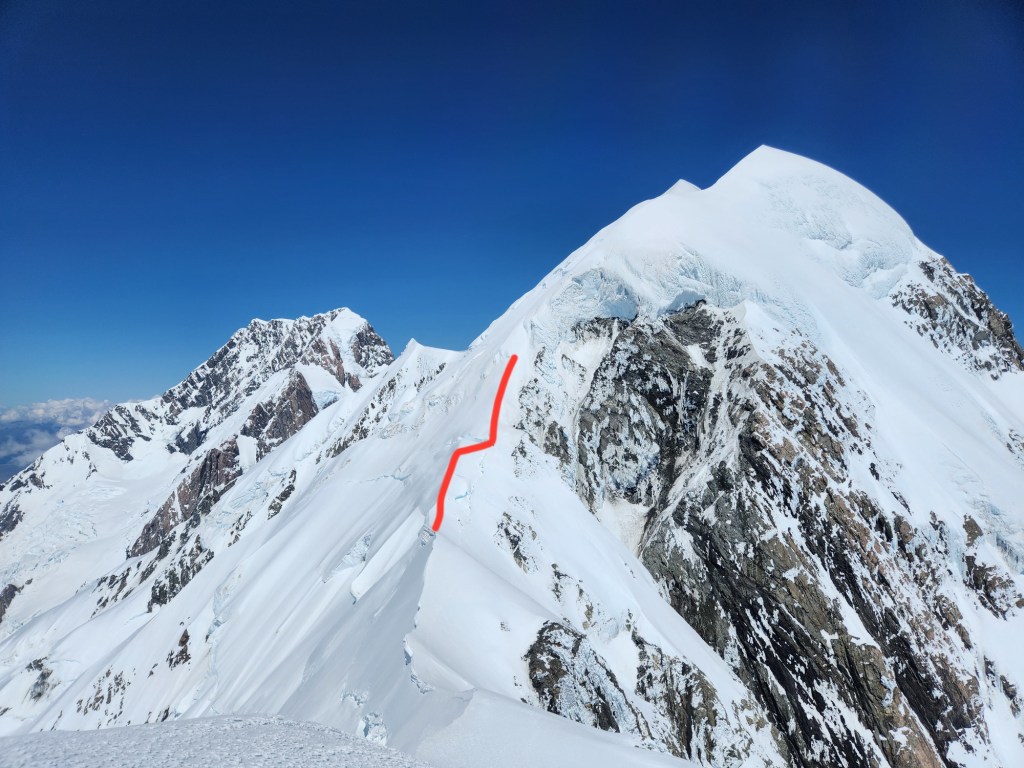
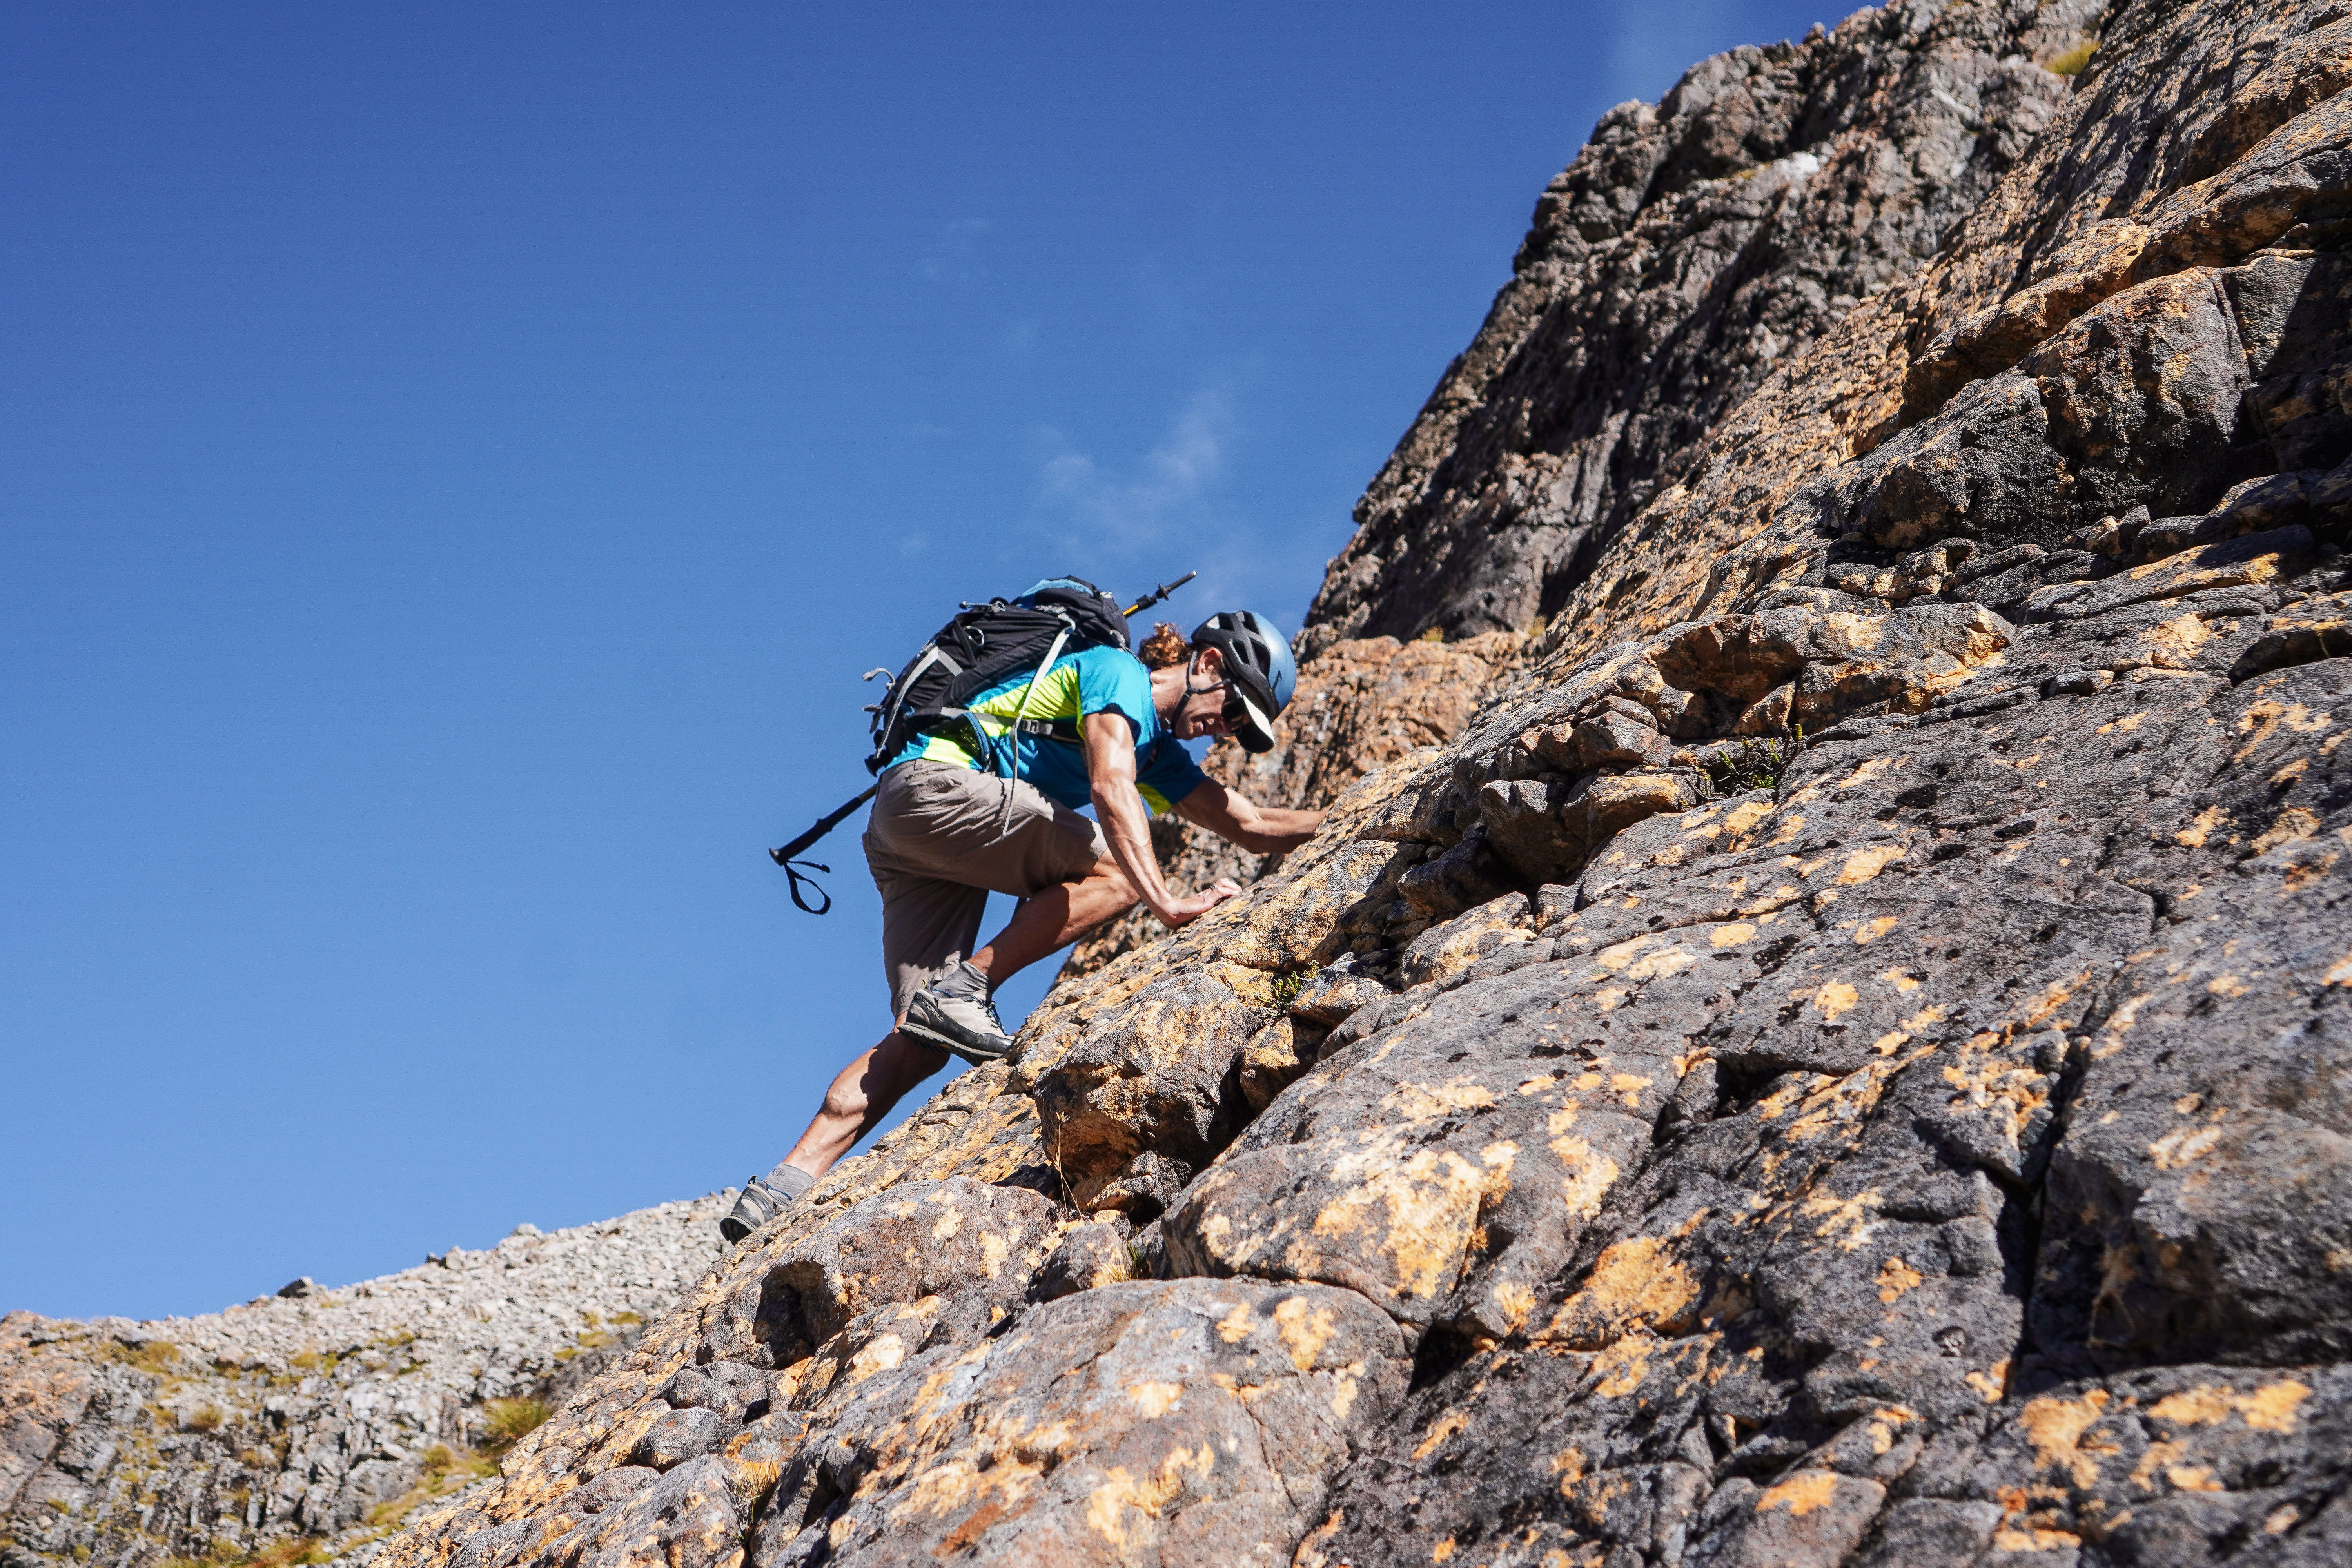
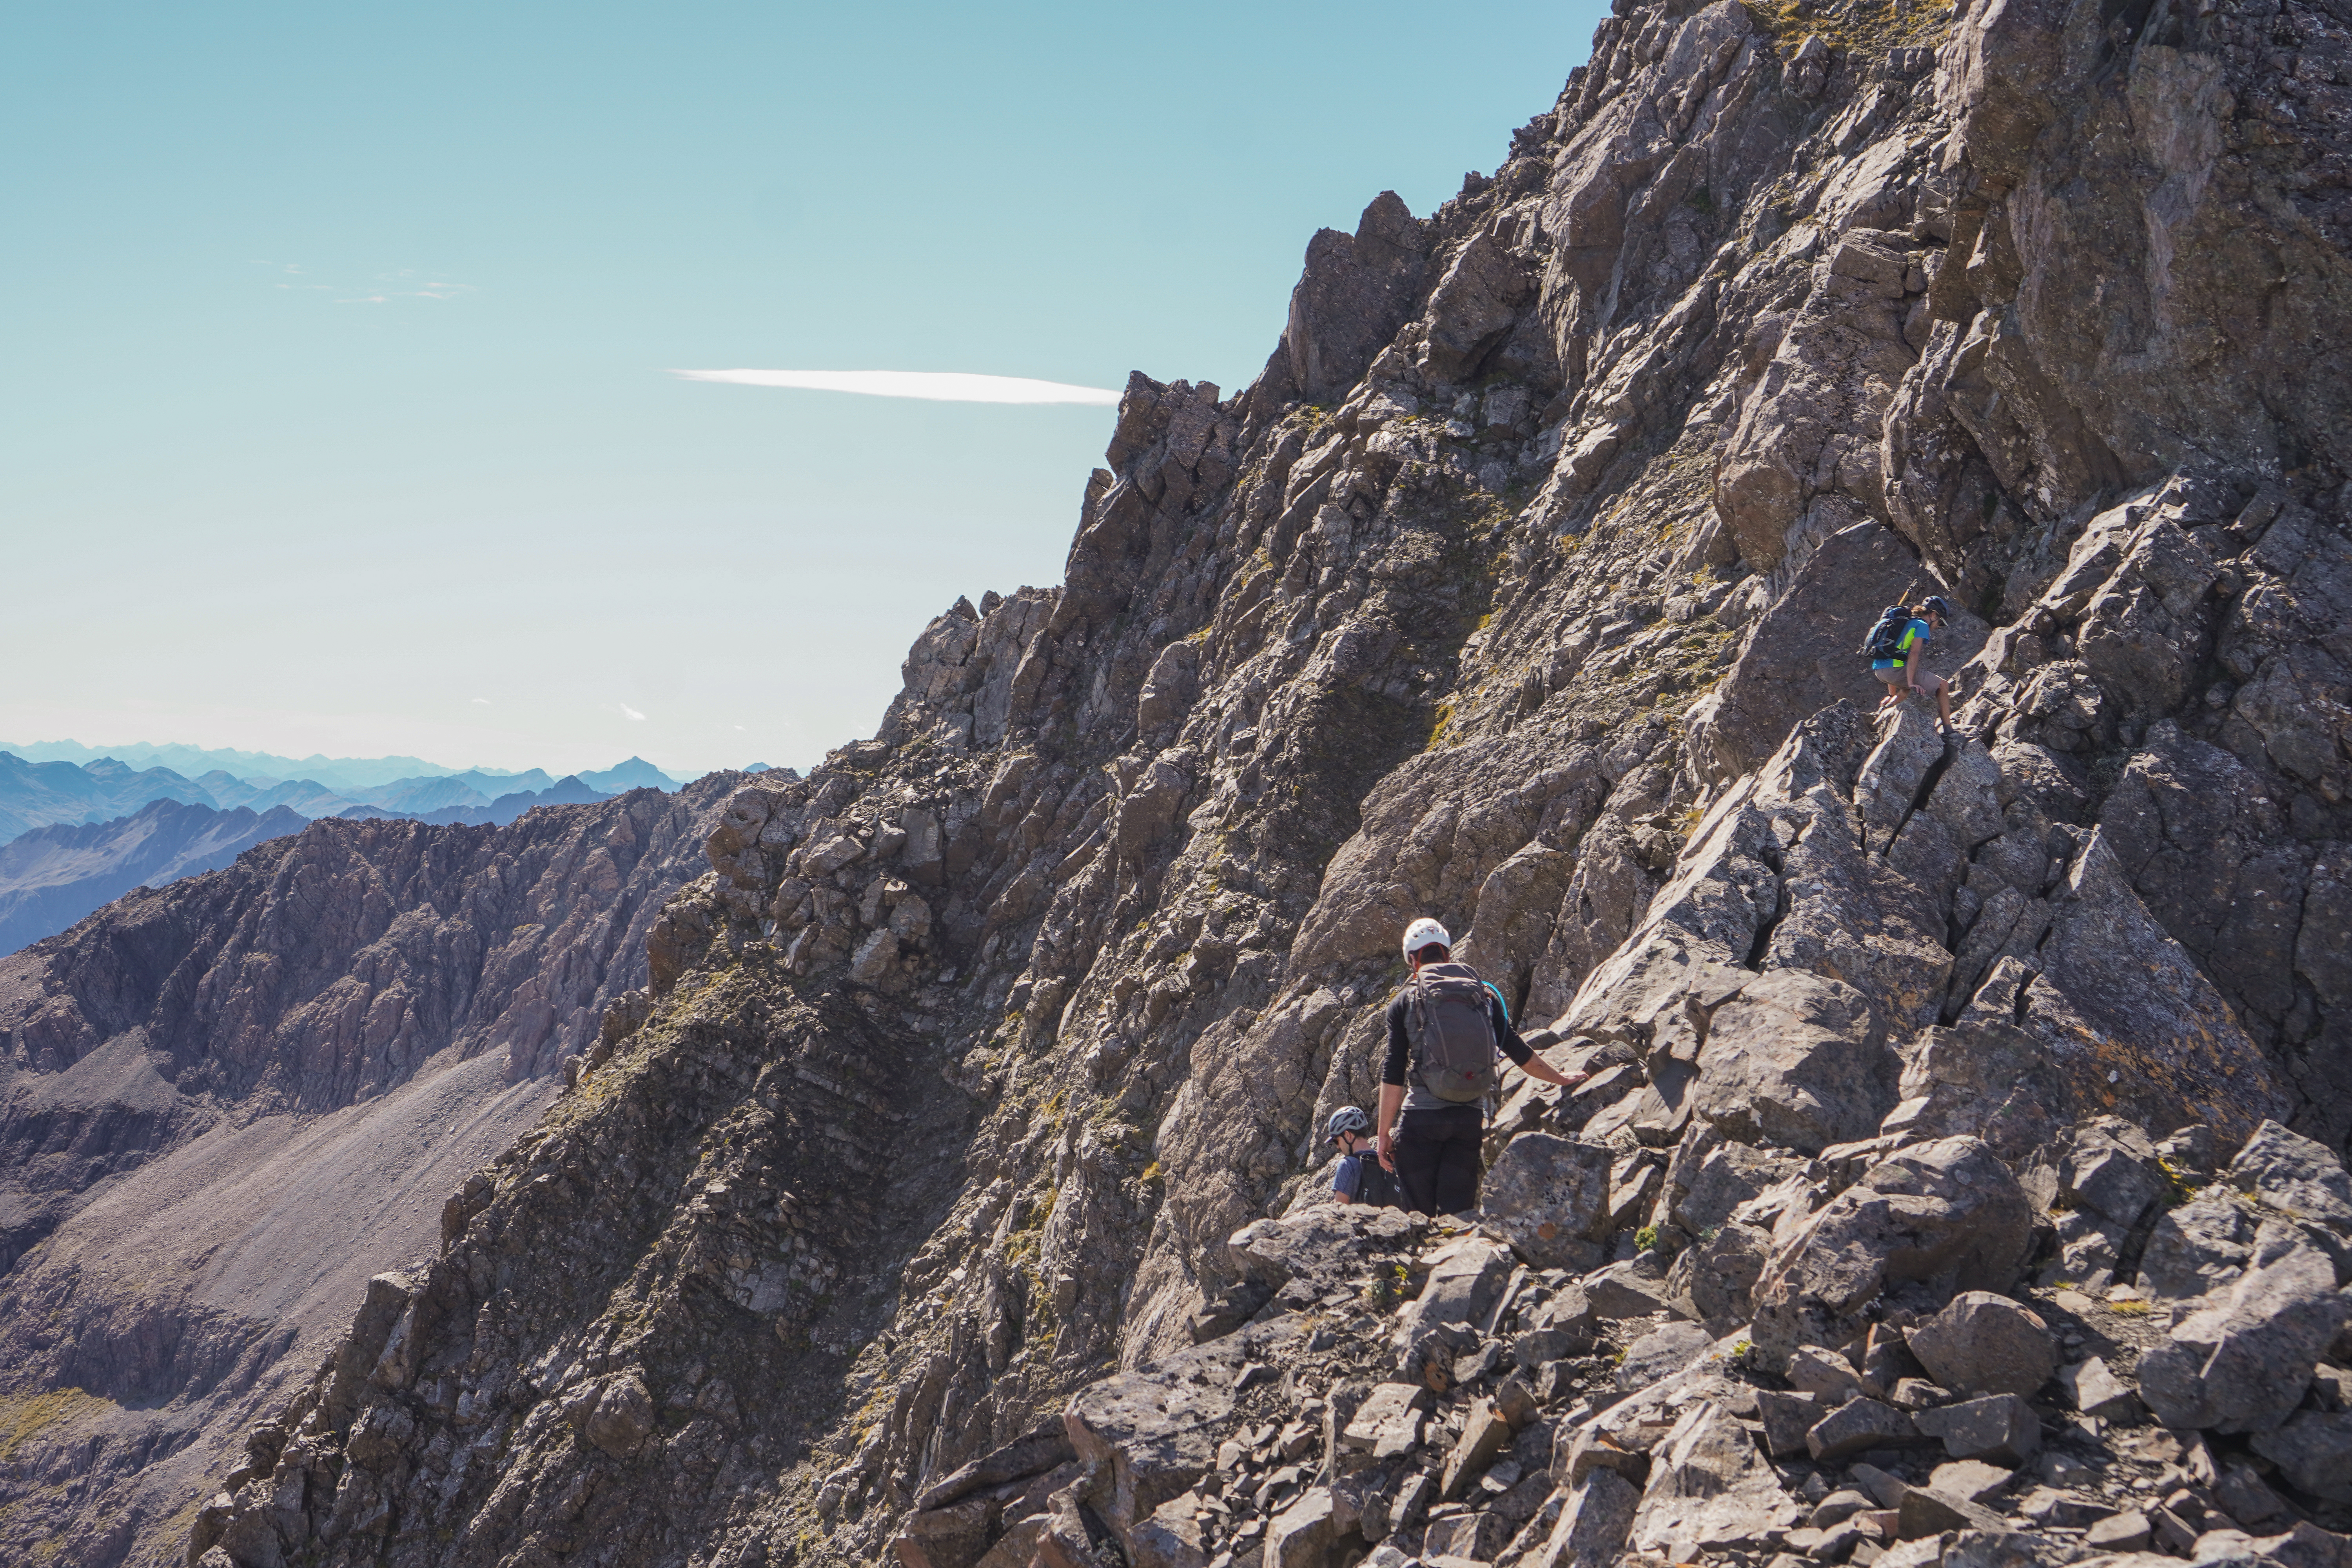
Joining Syme ridge however gave us our first taste of the conditions on the East face: 5 days earlier there had been 25cm new snow that was well into a melt freeze cycle, and the E face was still plastered.โ€‚While there had been a solid freeze overnight, the sun was absolutely blasting and by 7am when we were leaving Engineer col it was already starting to soften.โ€‚Along the ridge itself where the wind had stripped everything back, there was a strip of good ice so we could avoid touching it all the way to the 3300m flat spot.โ€‚

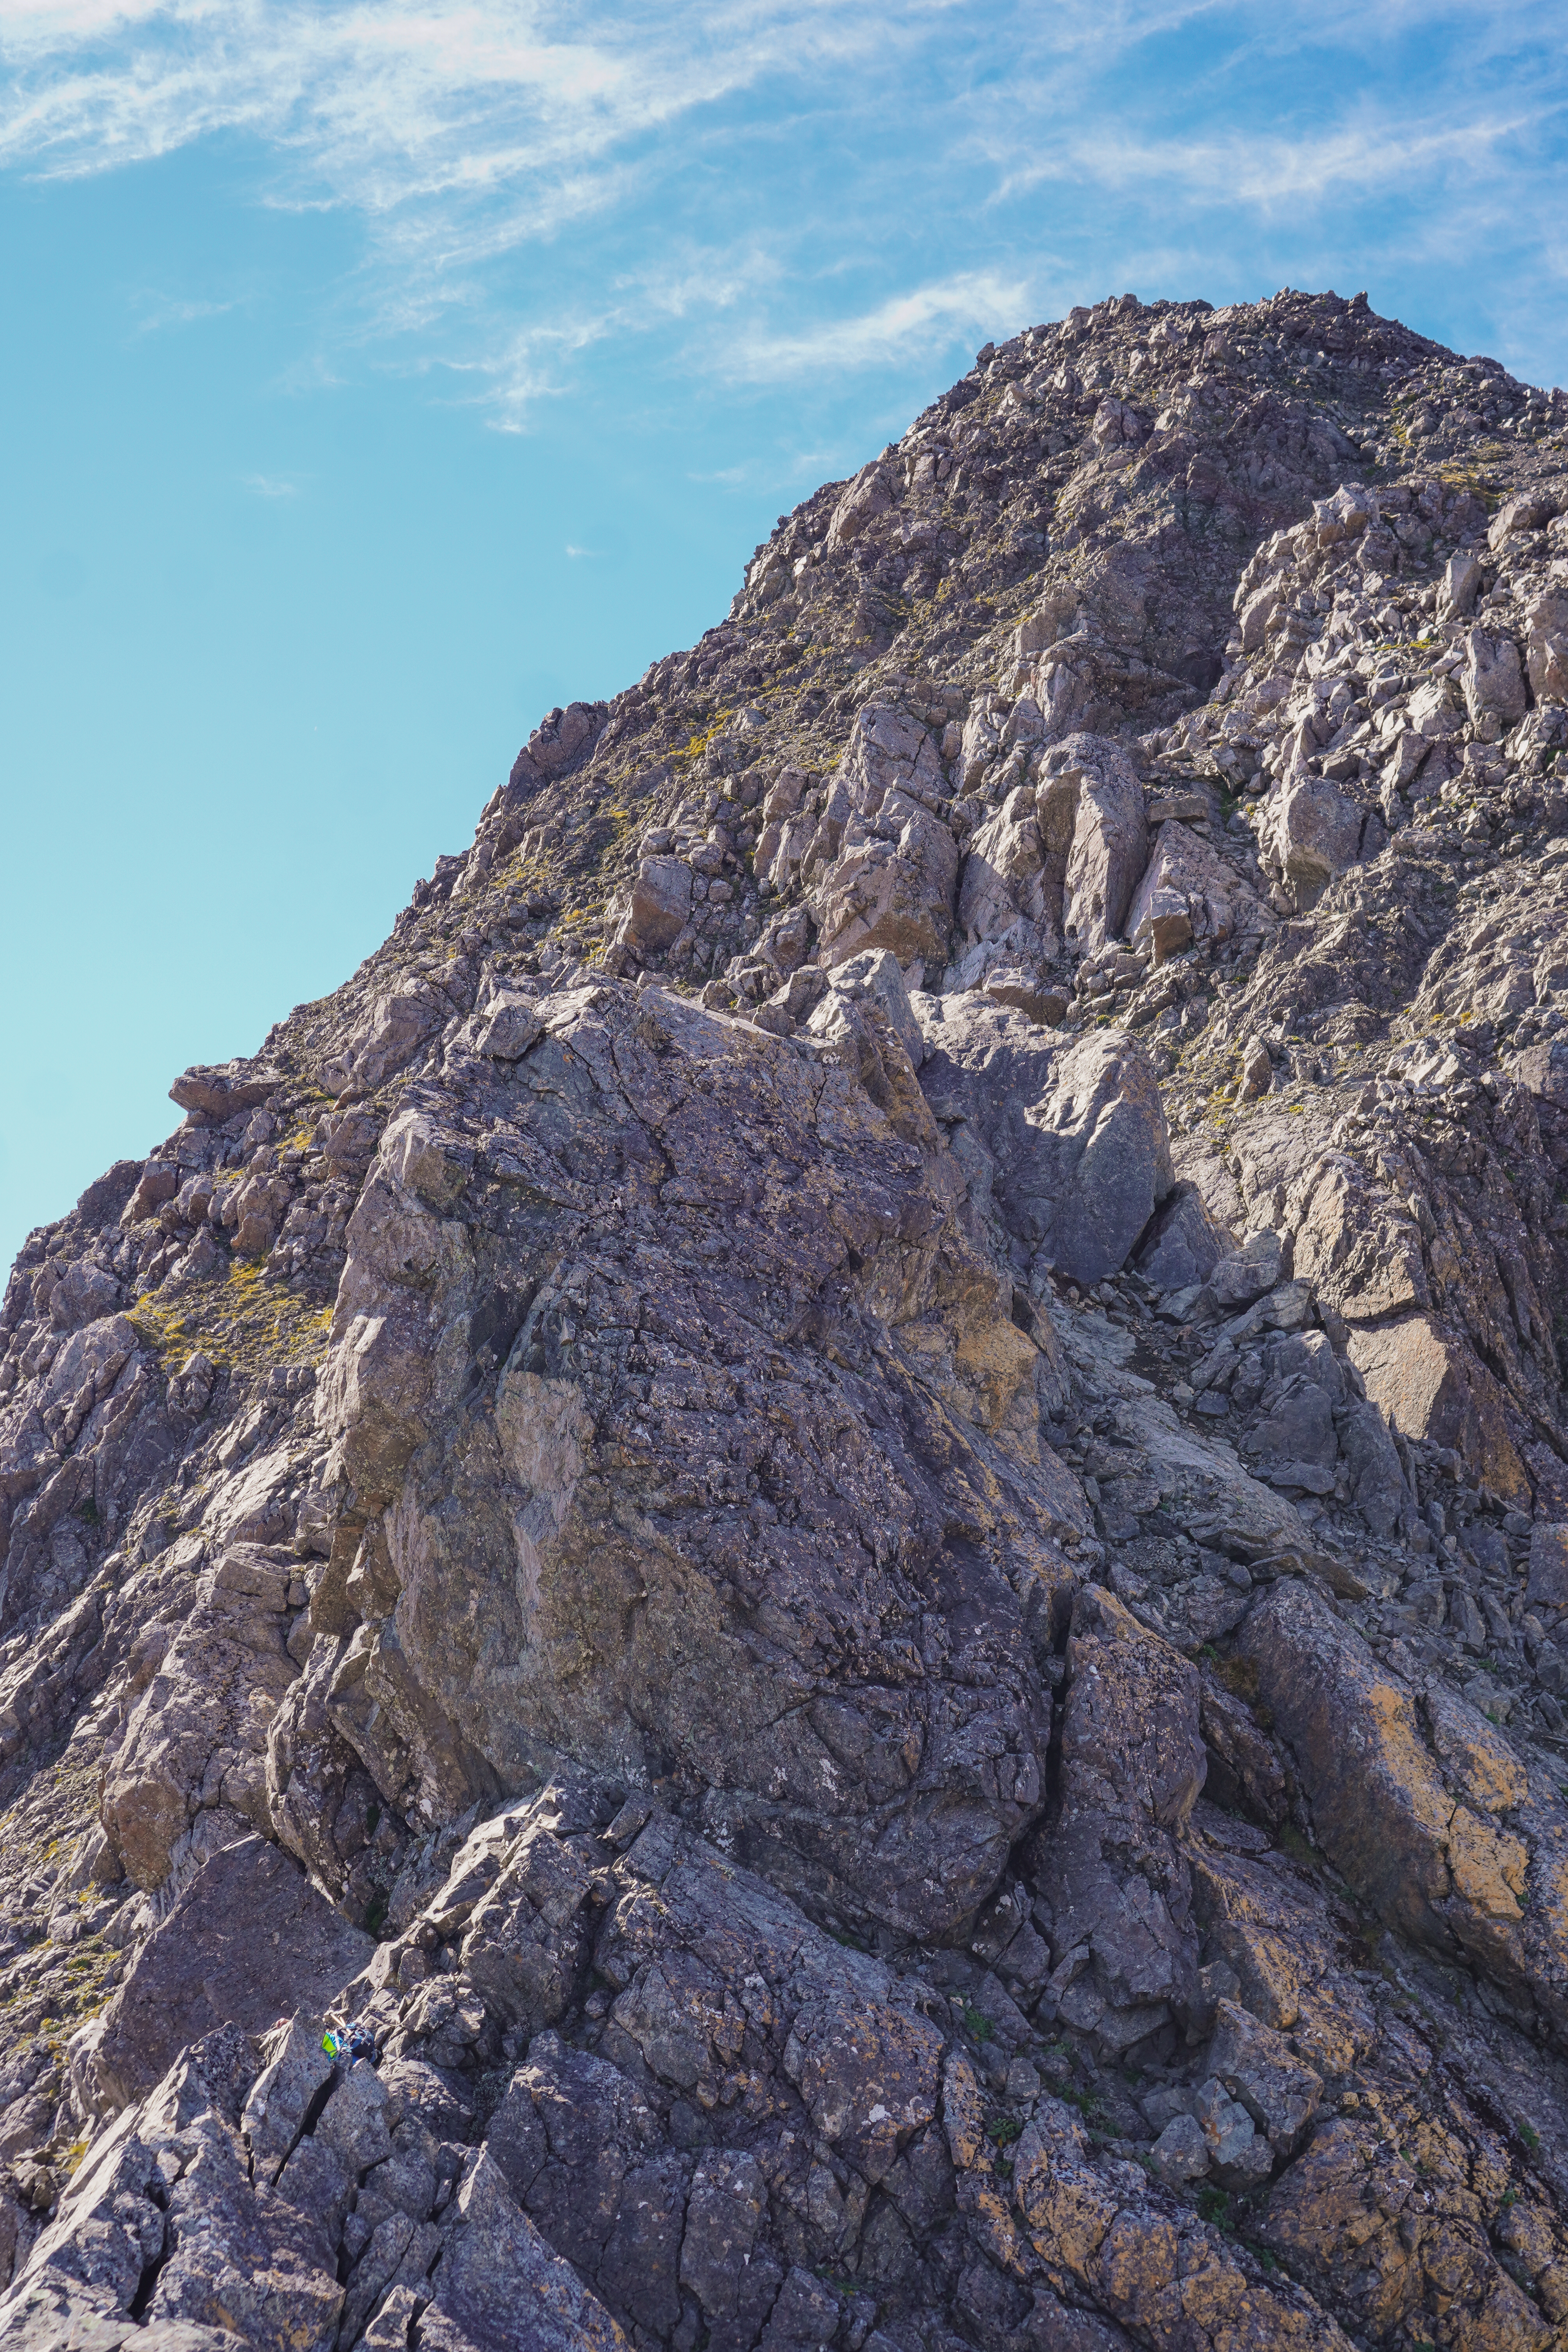
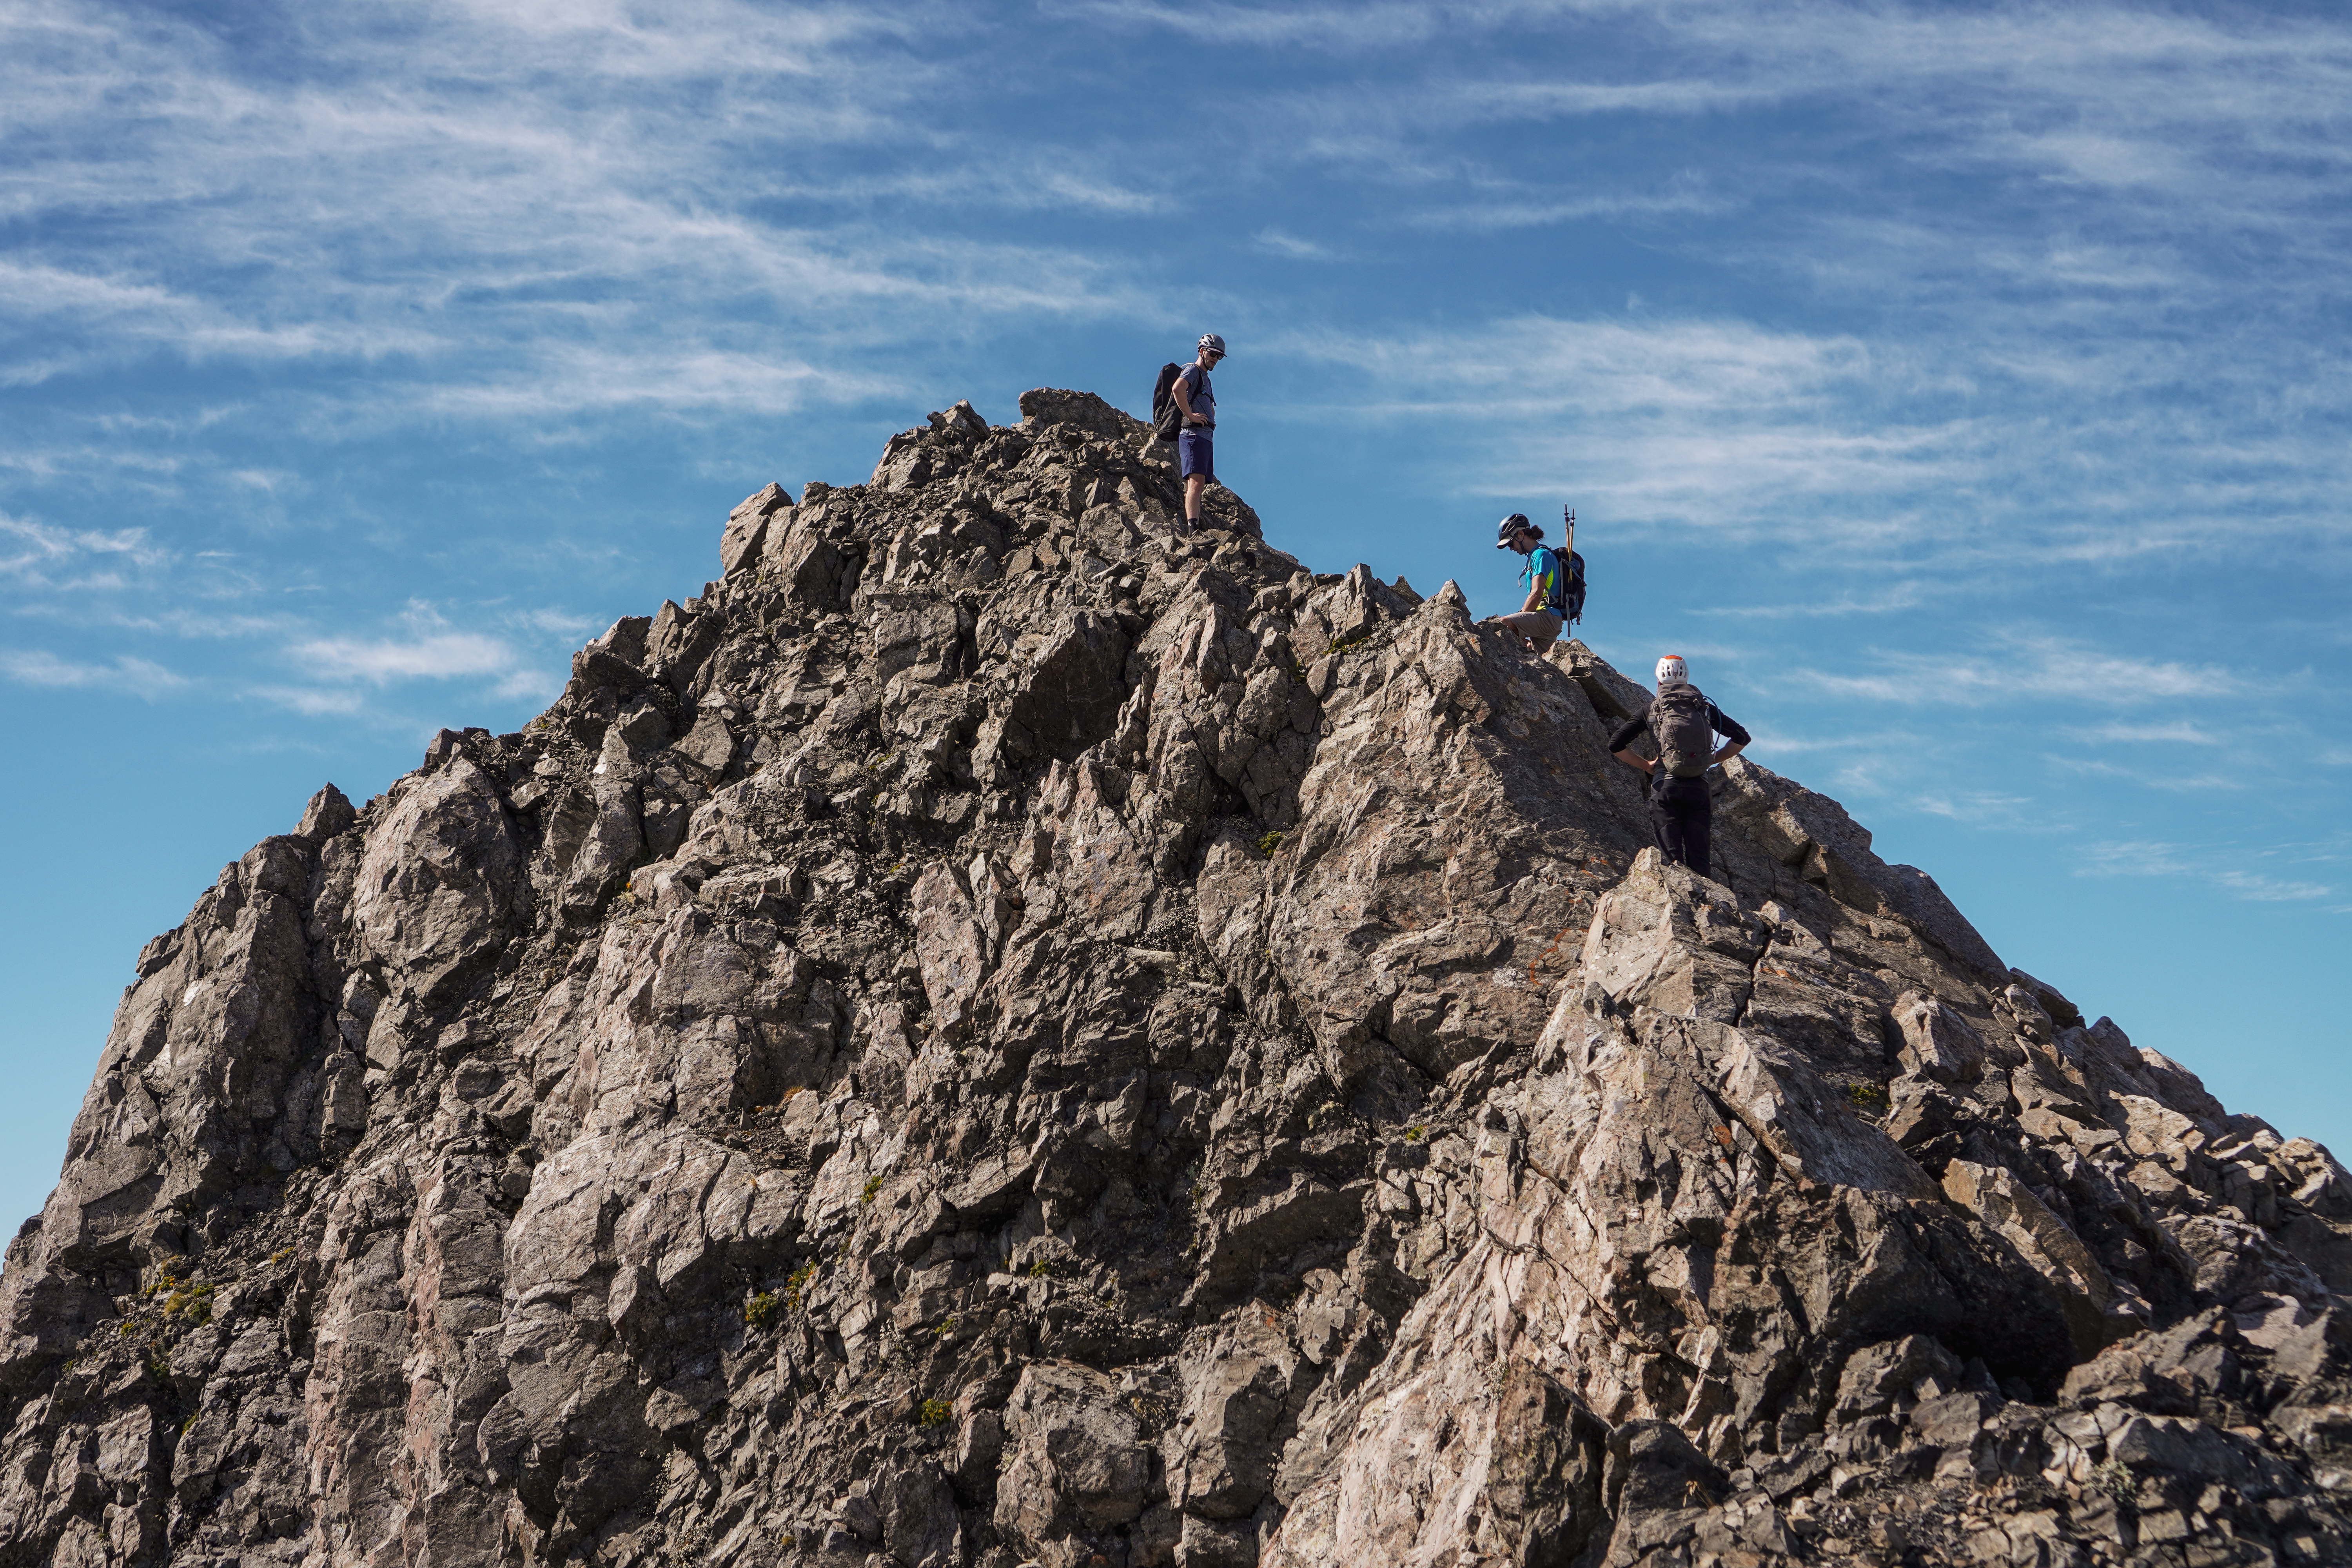
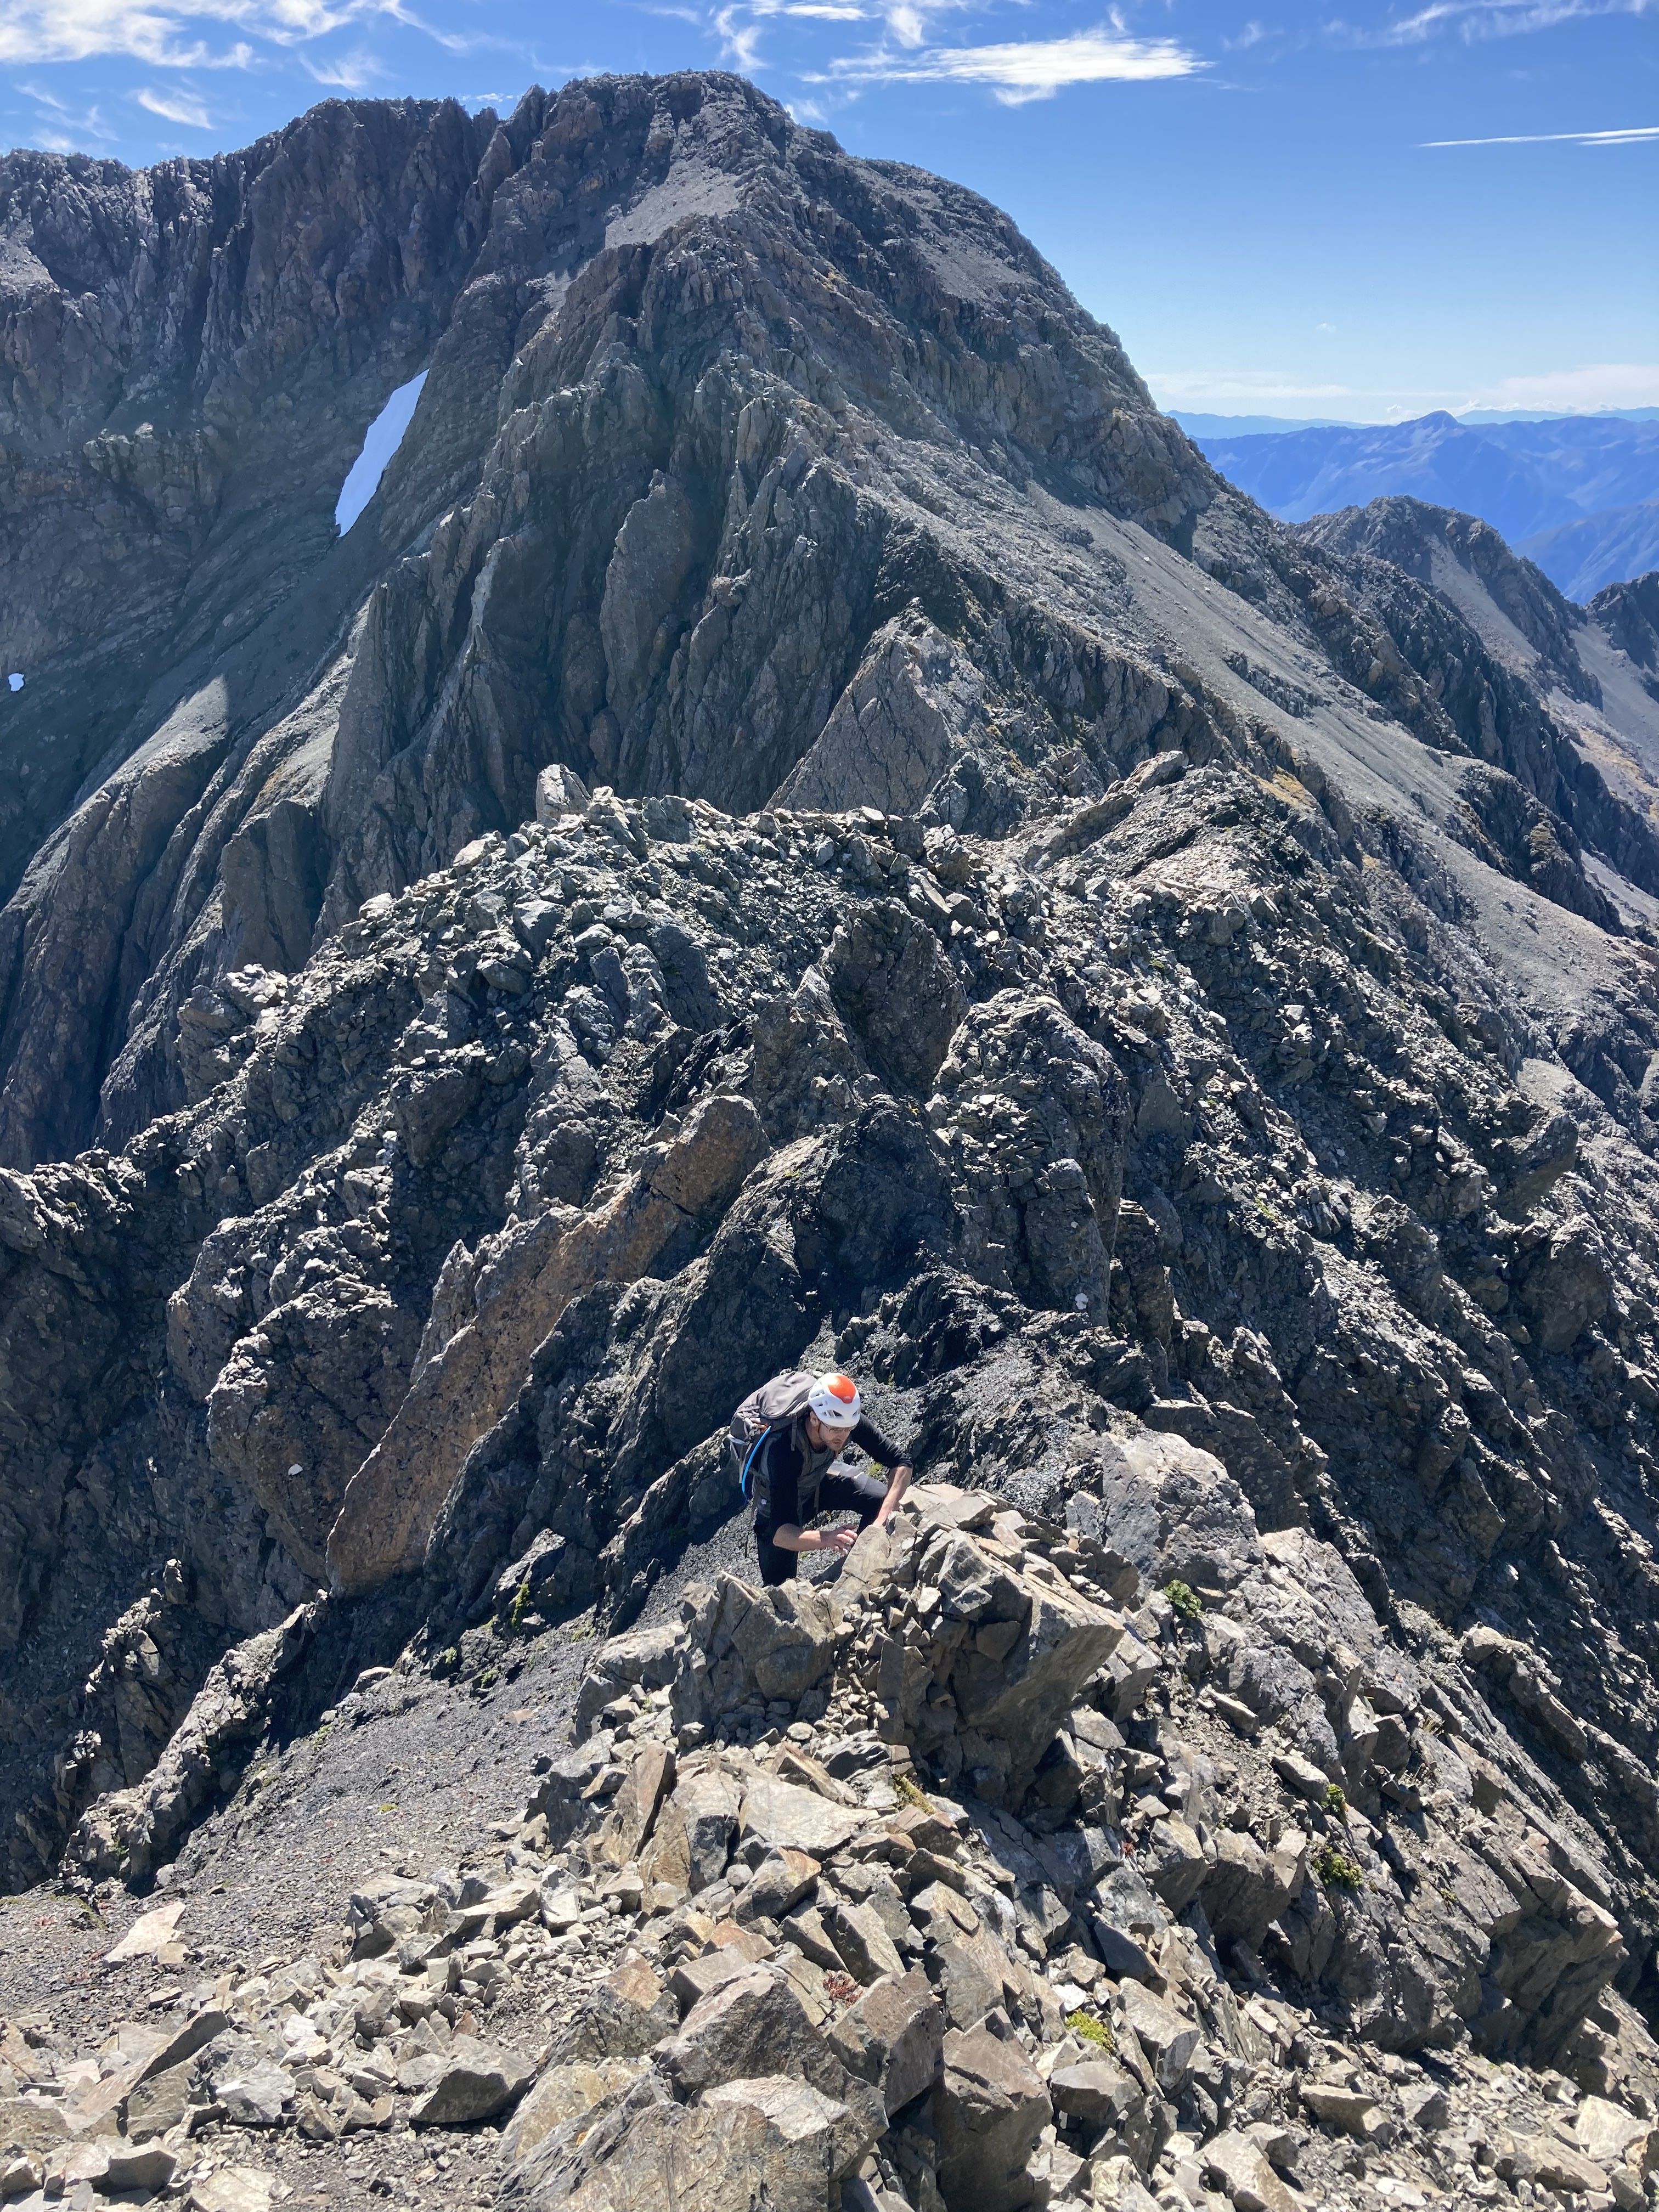
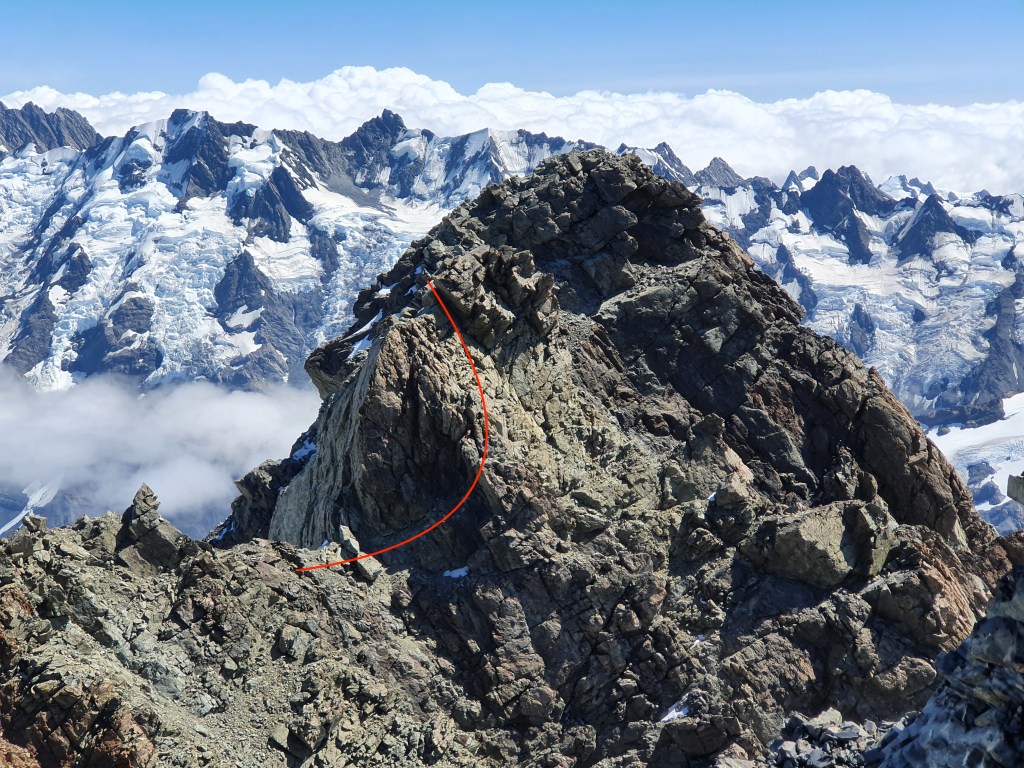
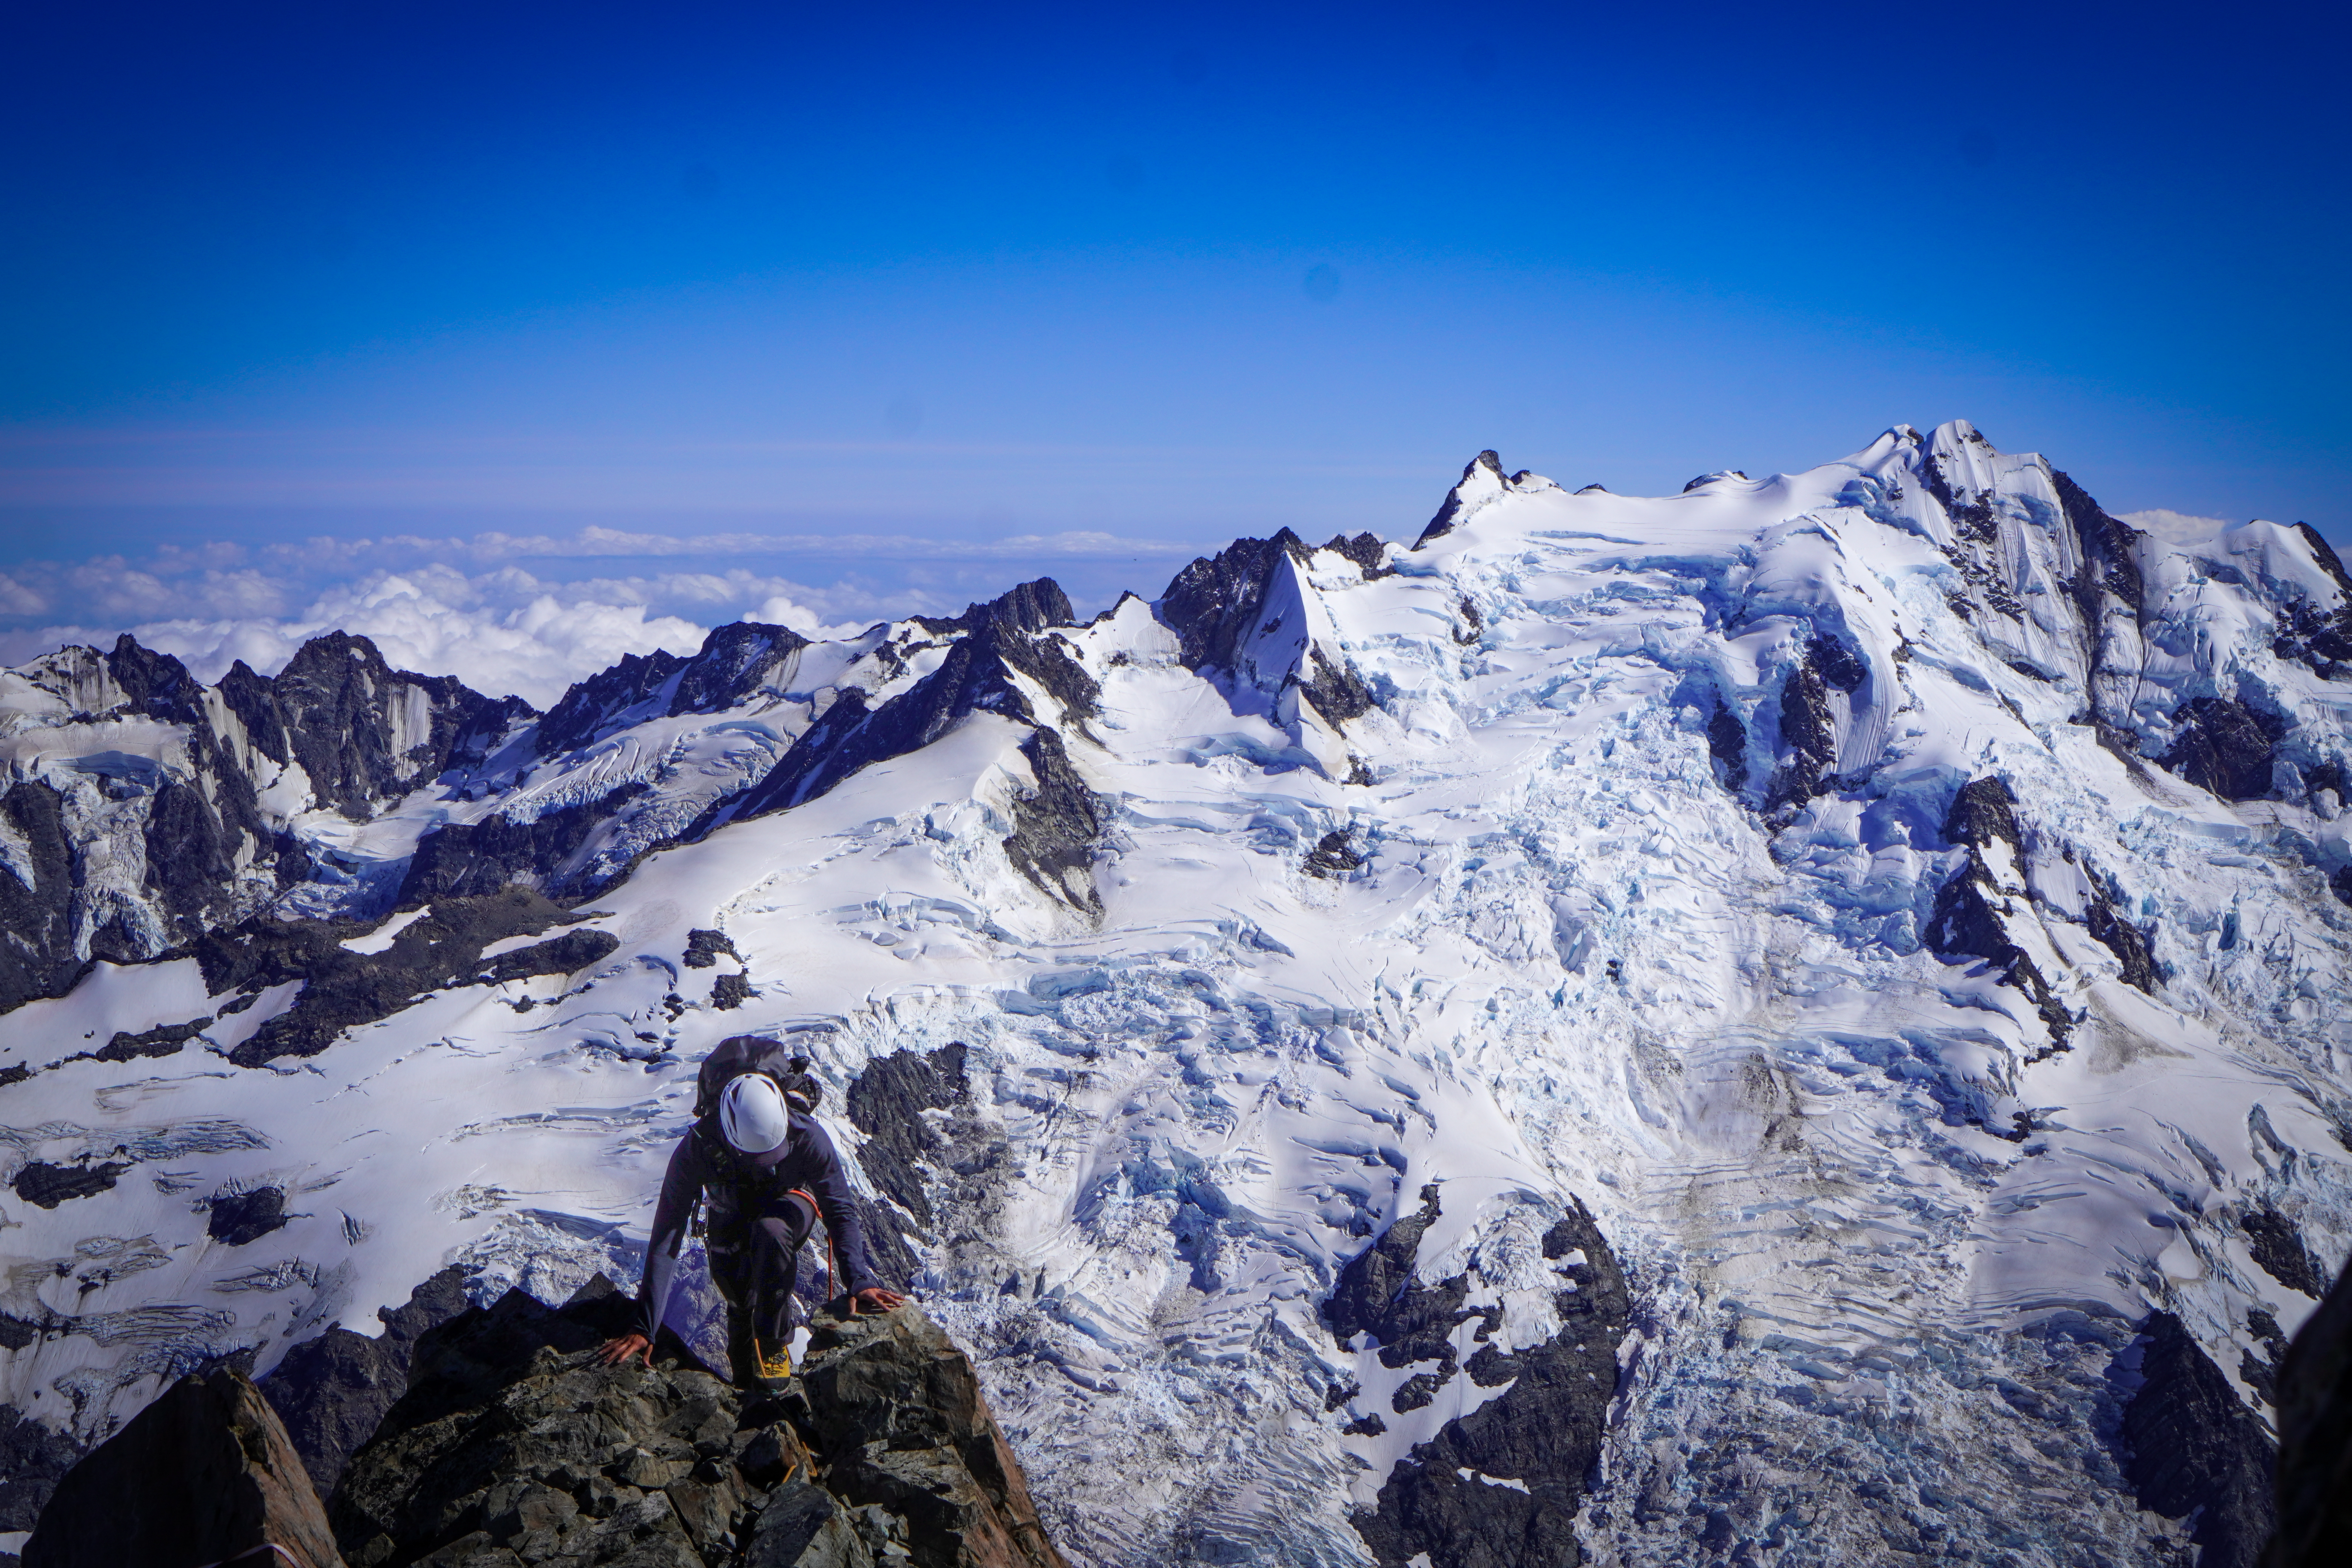
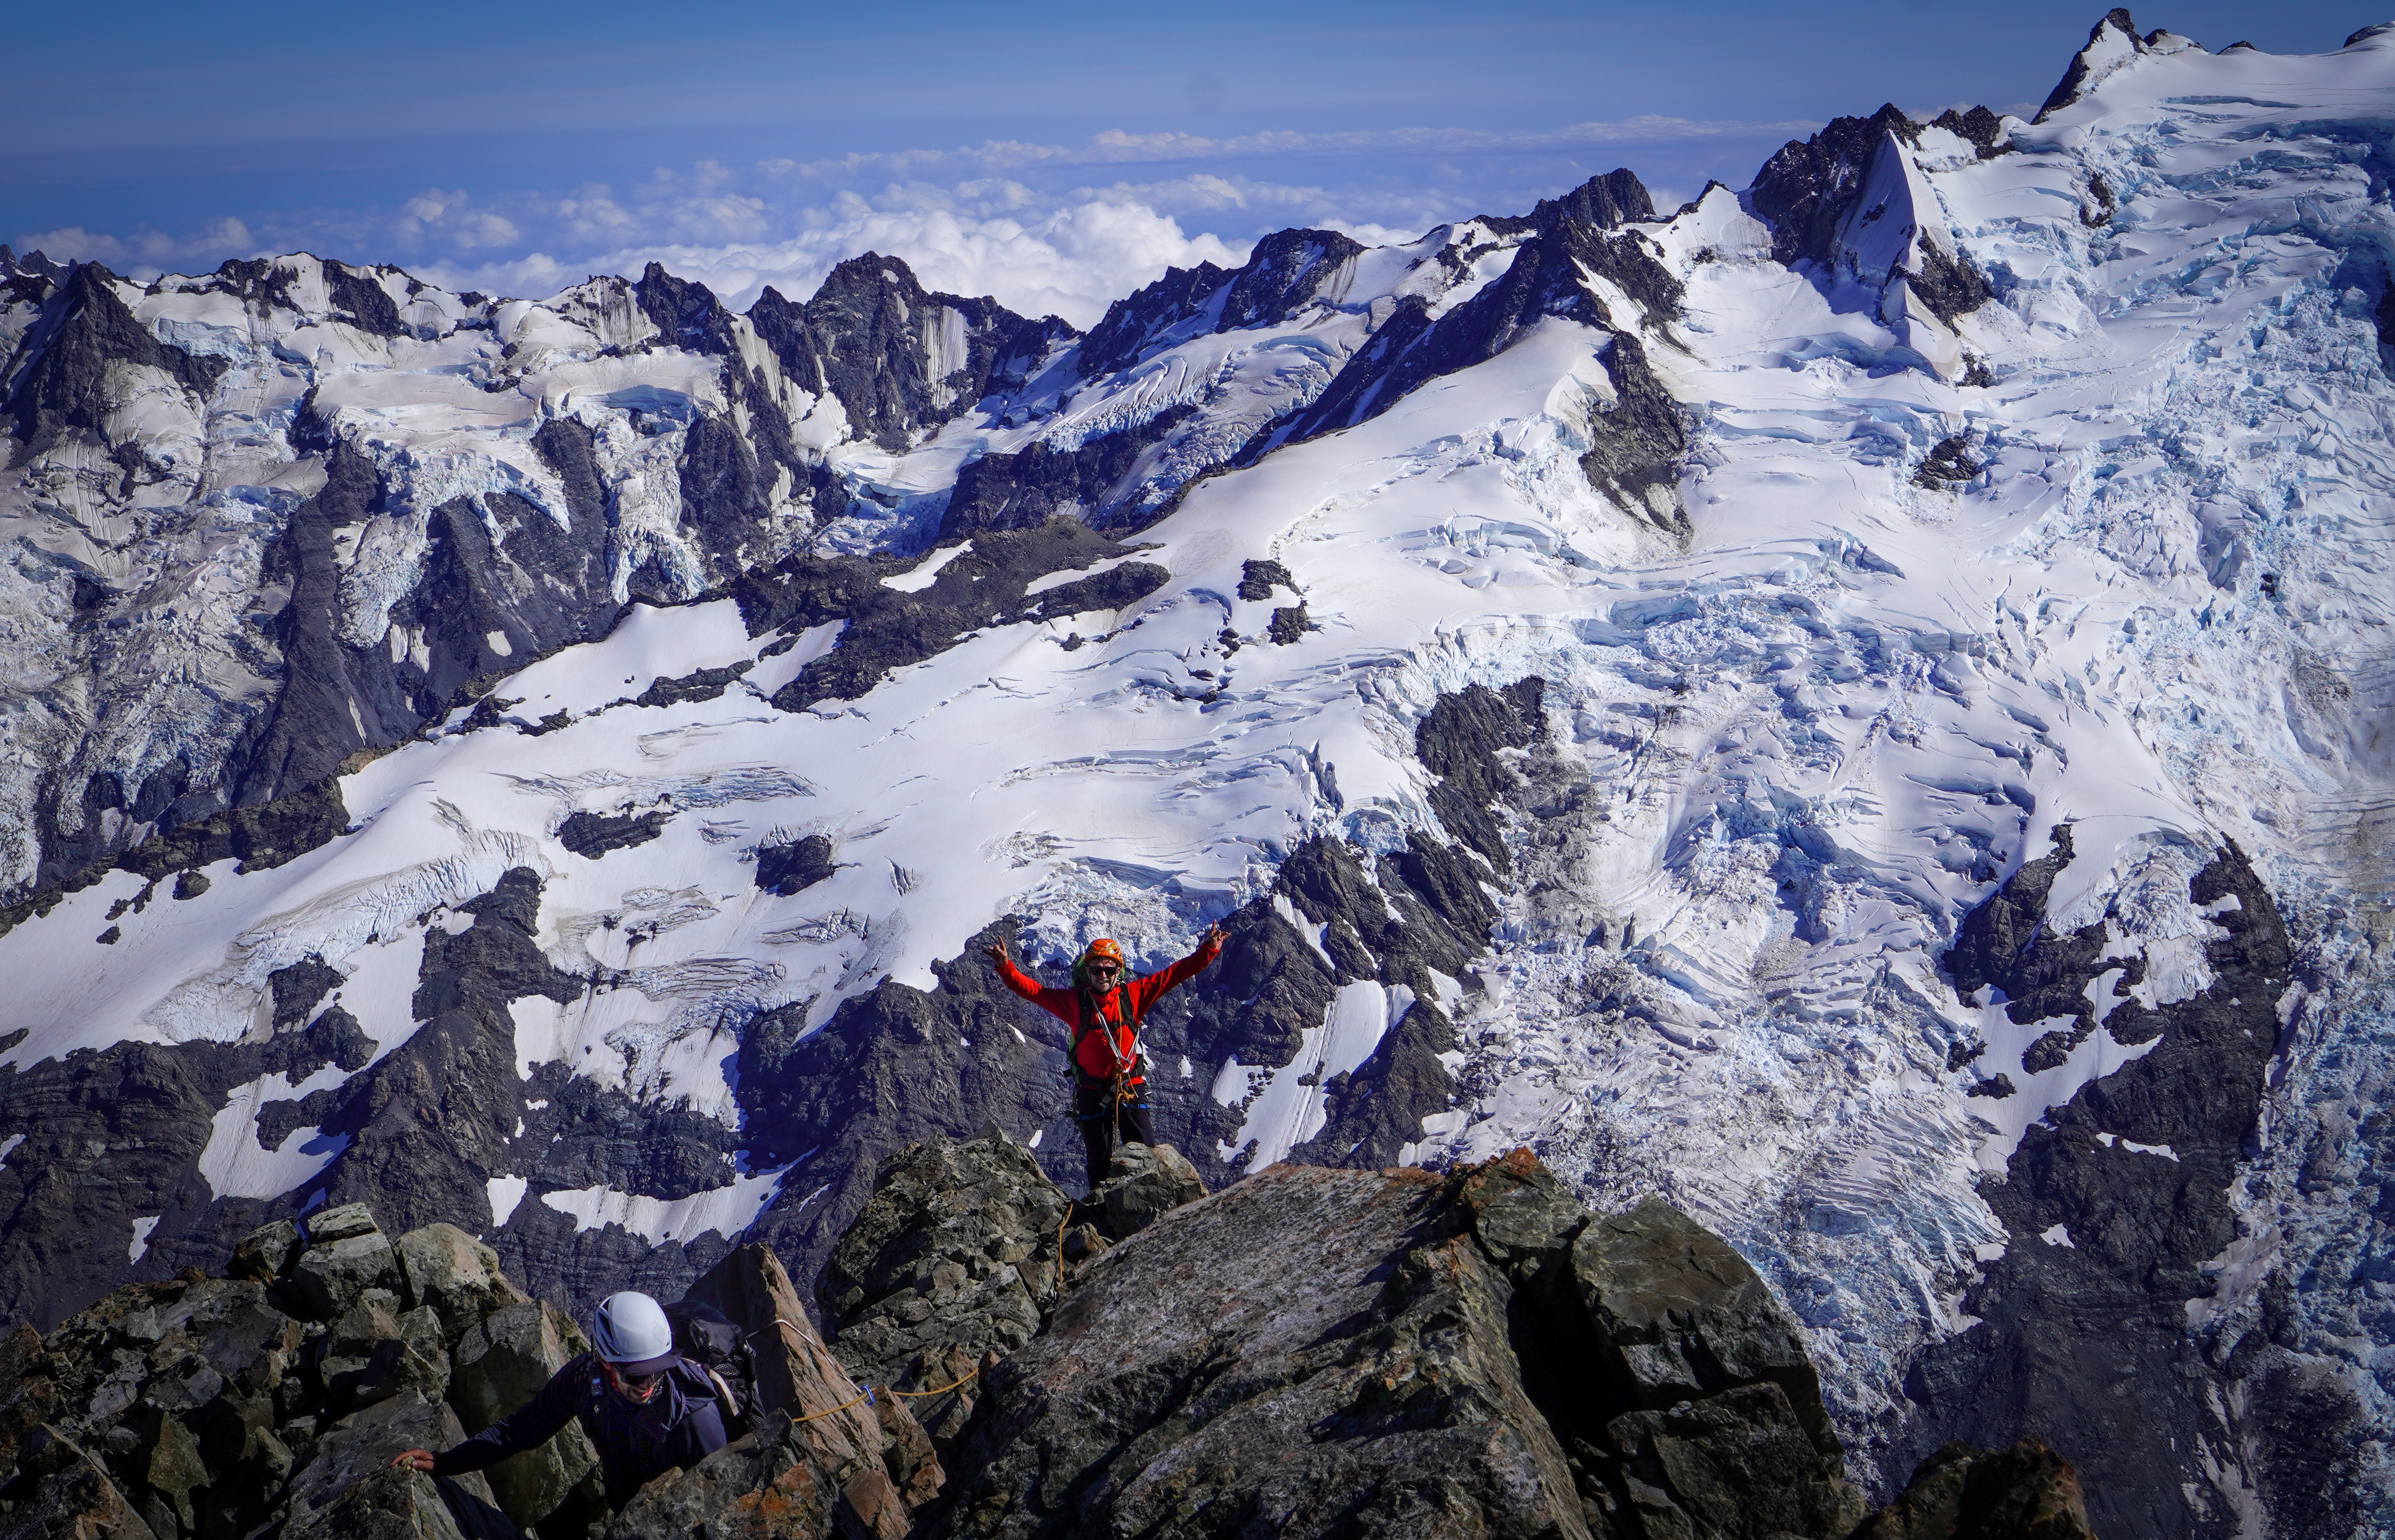
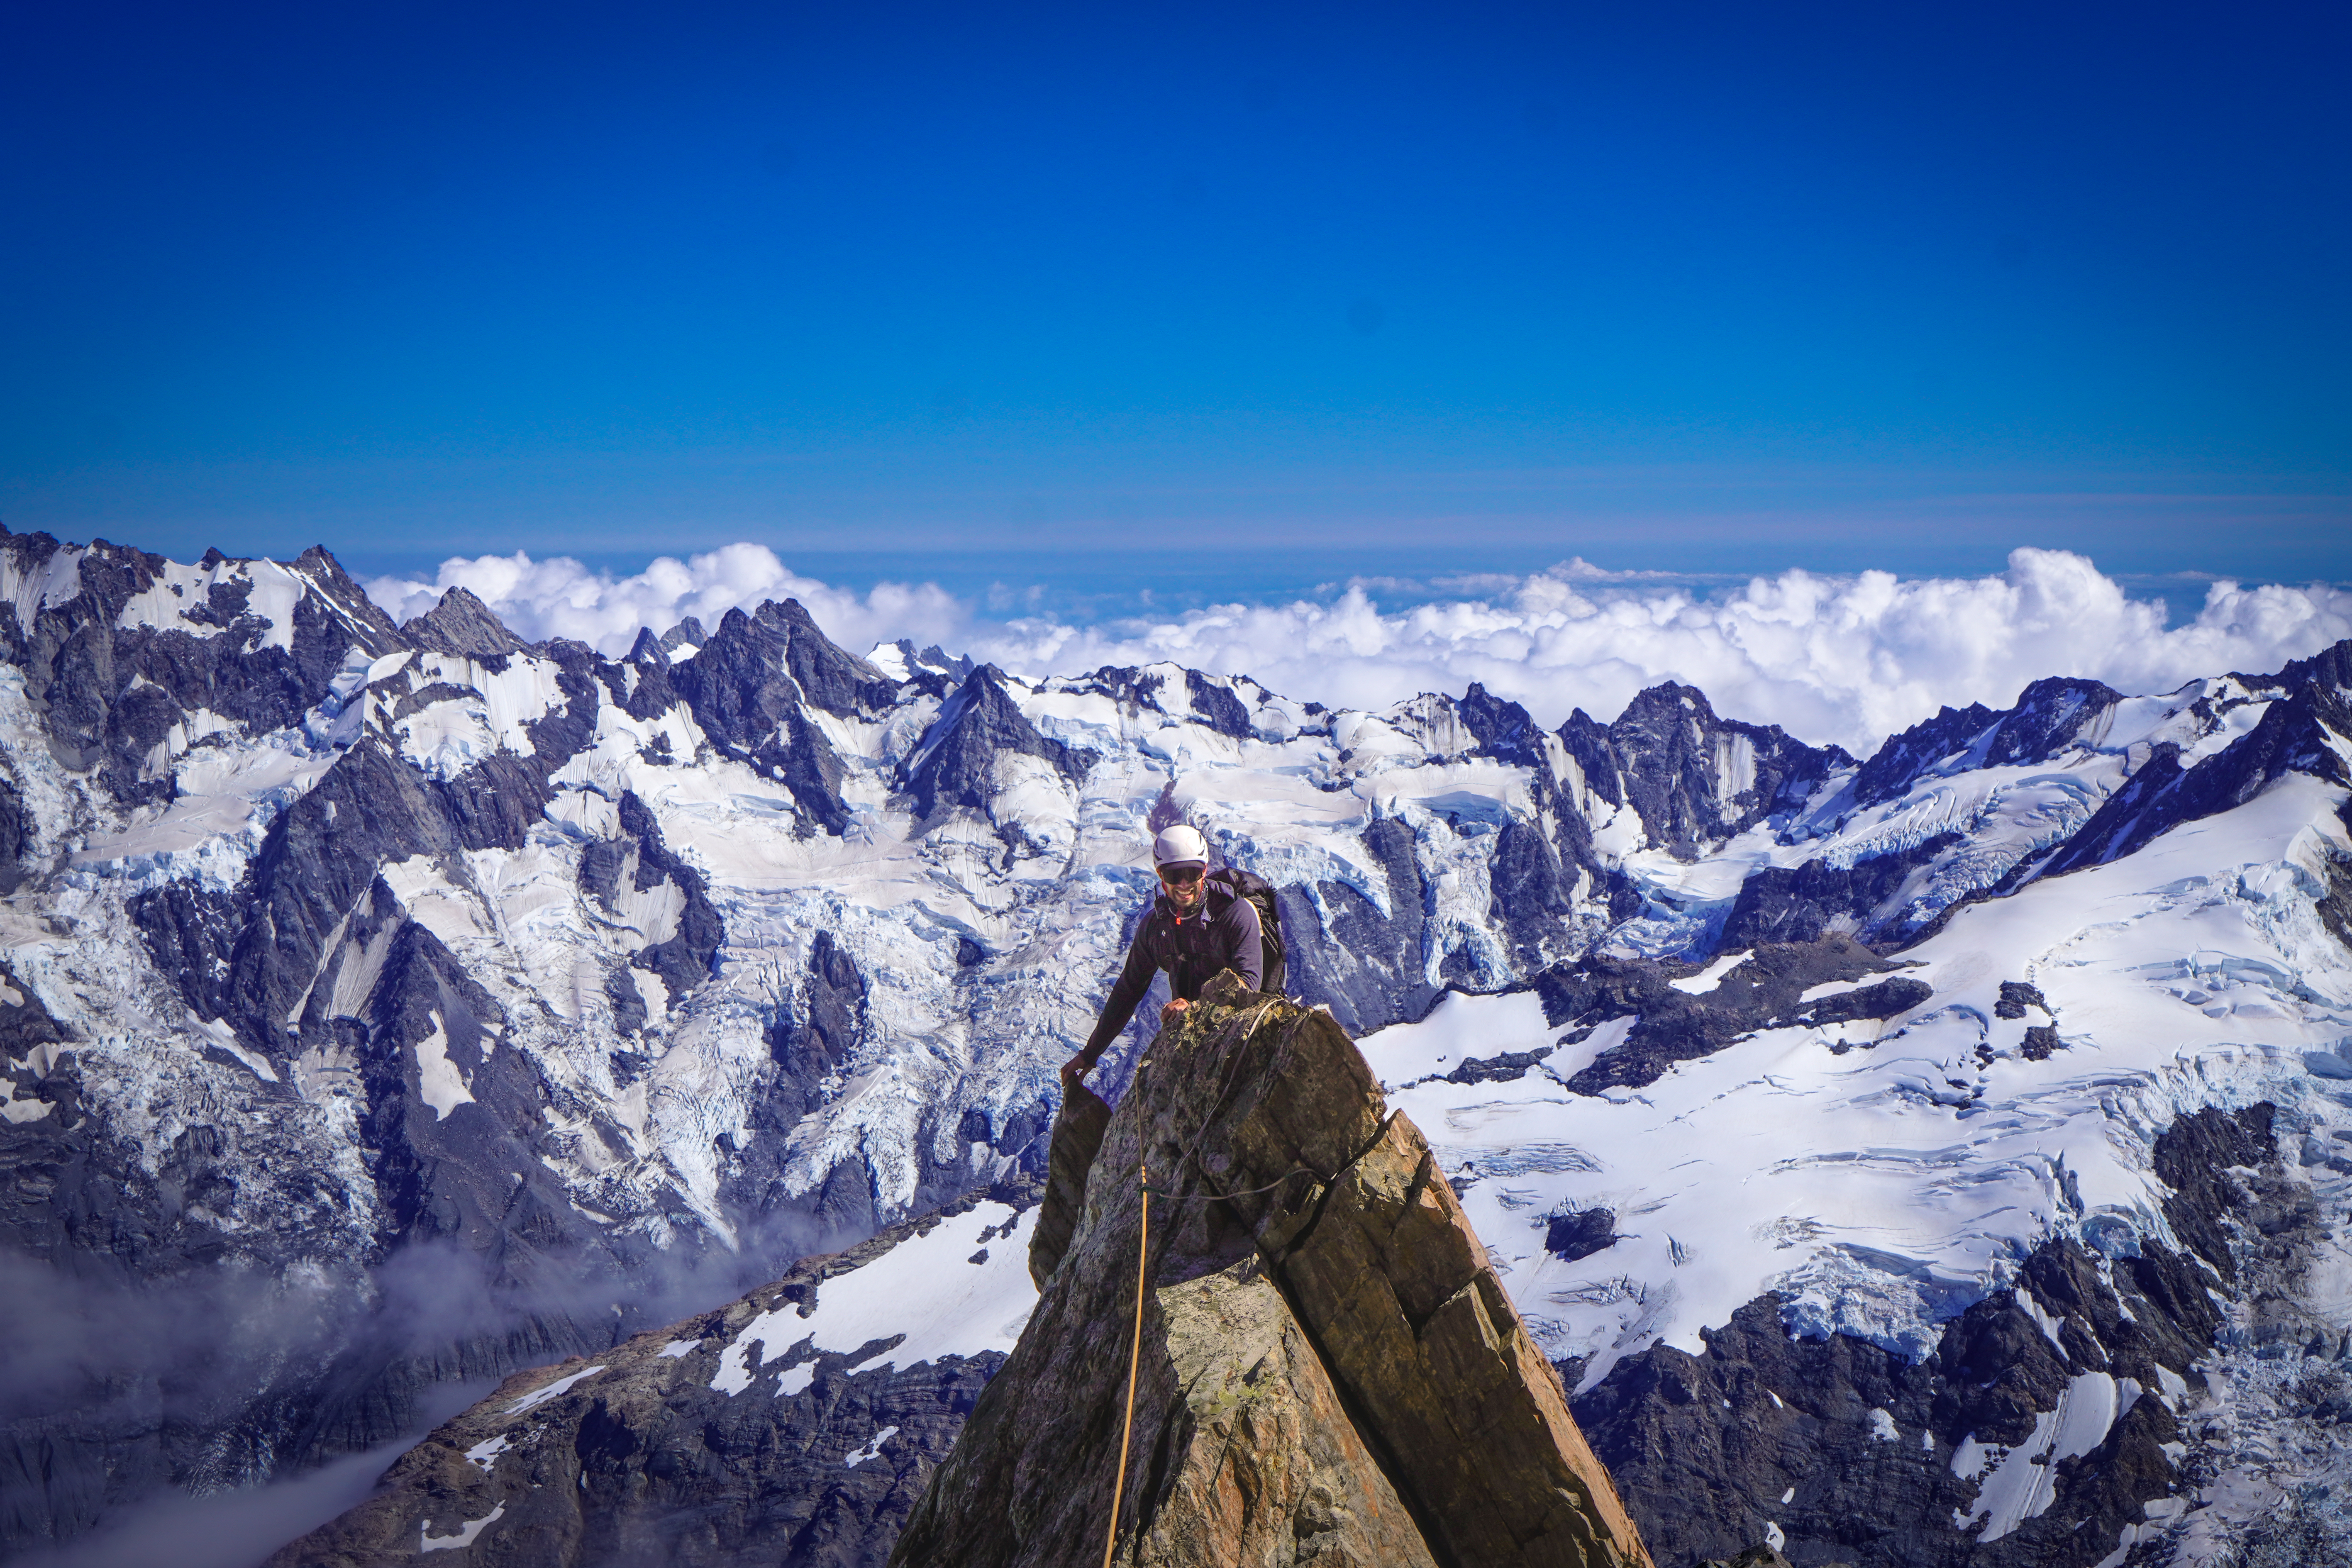
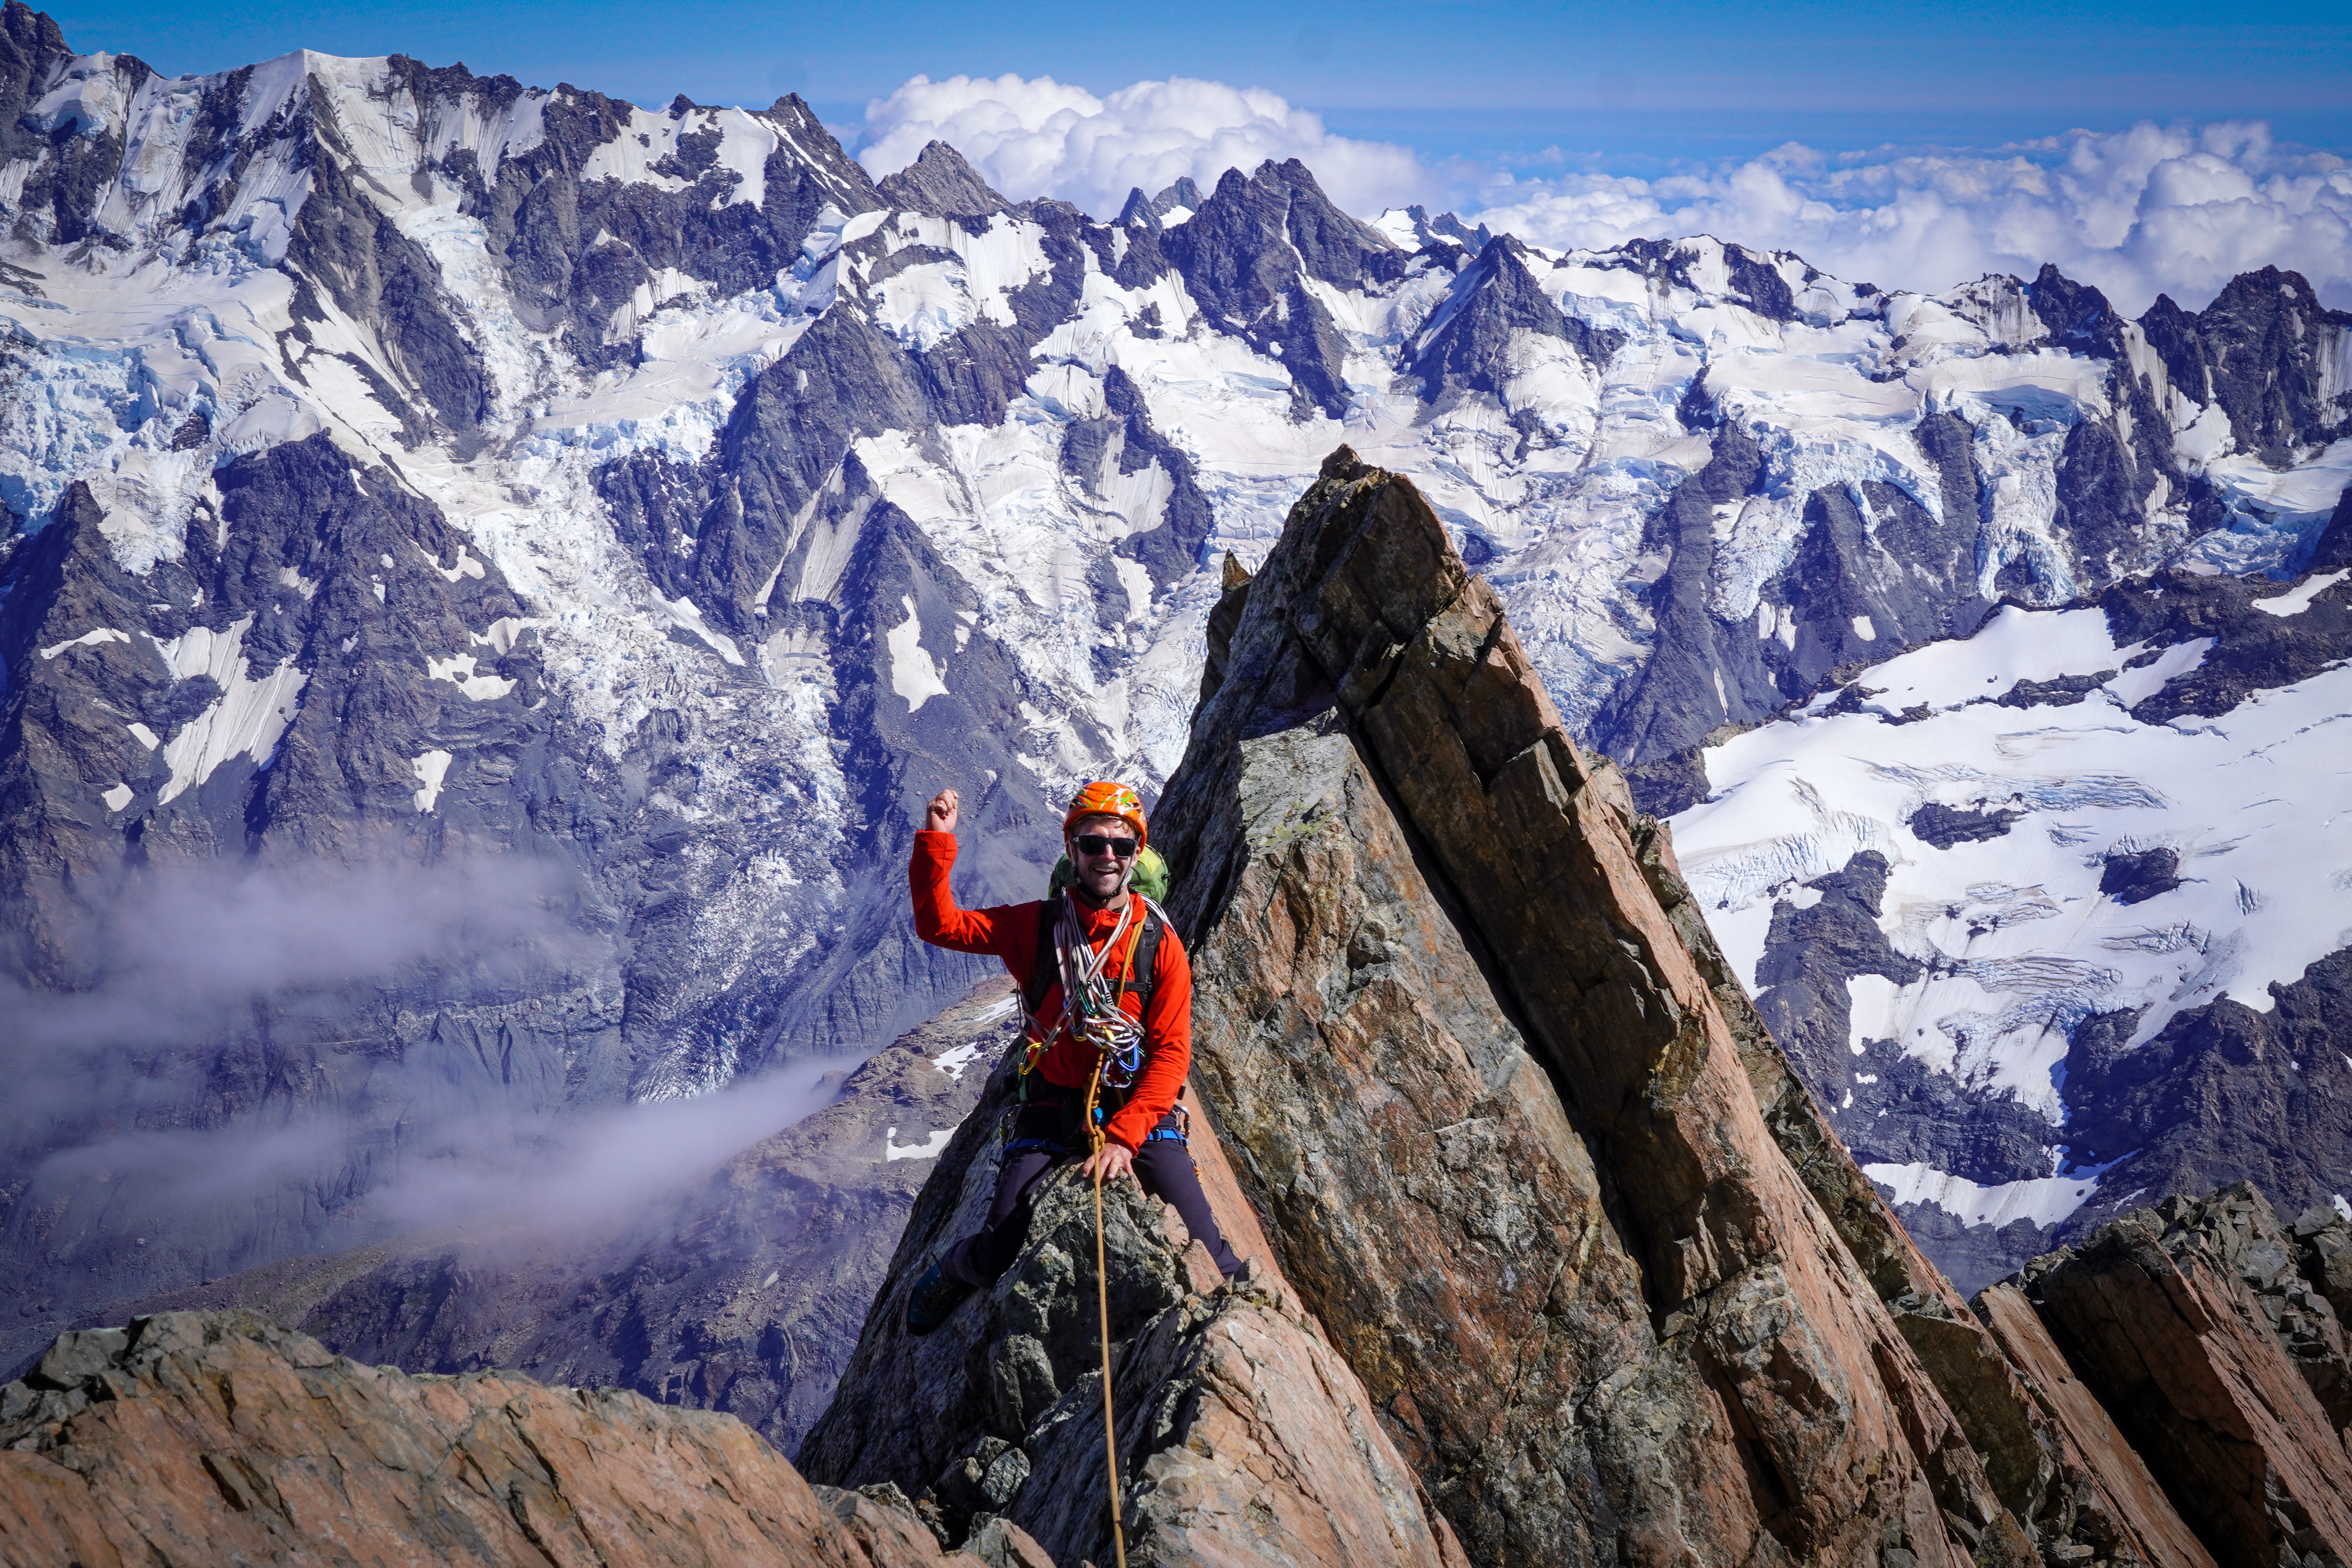
From here, there is another short (roughly 200m) traverse to the final snow ridge to the summit.โ€‚More classic Aoraki ridge travel – hard ice on the north side with 1000m of air under your feet down to the Janszoon glacier.โ€‚Except this time covered in large, fragile lumps of sastrugi and rime ice.โ€‚We started simul climbing again, but the sastrugi made this impossible with the rope constantly getting snagged and tugging at the leader doing more harm than good, so the rope went away and we soloed to the the final snow slope. This was slow going and mentally taxing, and we got to the base of the final ridge at 0900.โ€‚From here the north side of the ridge is plastered with with monstrous rime blobs and so the standard approach is to traverse onto the east face for the final section to the summit. If conditions are good this is an exposed but fairly straightforward section of the route to the summit.โ€‚Reaching over the icy safety of the ridge and punching into the snow on the east face it was clear this wasn’t happening – even by 9am it was totally cooked, with my arm disappearing almost to the elbow.โ€‚Setting off any size of loose wet from the summit of the east face of Tasman would definitely be the end of you, so the decision to turn around was easy – even though we were only 100m or so from the top.โ€‚

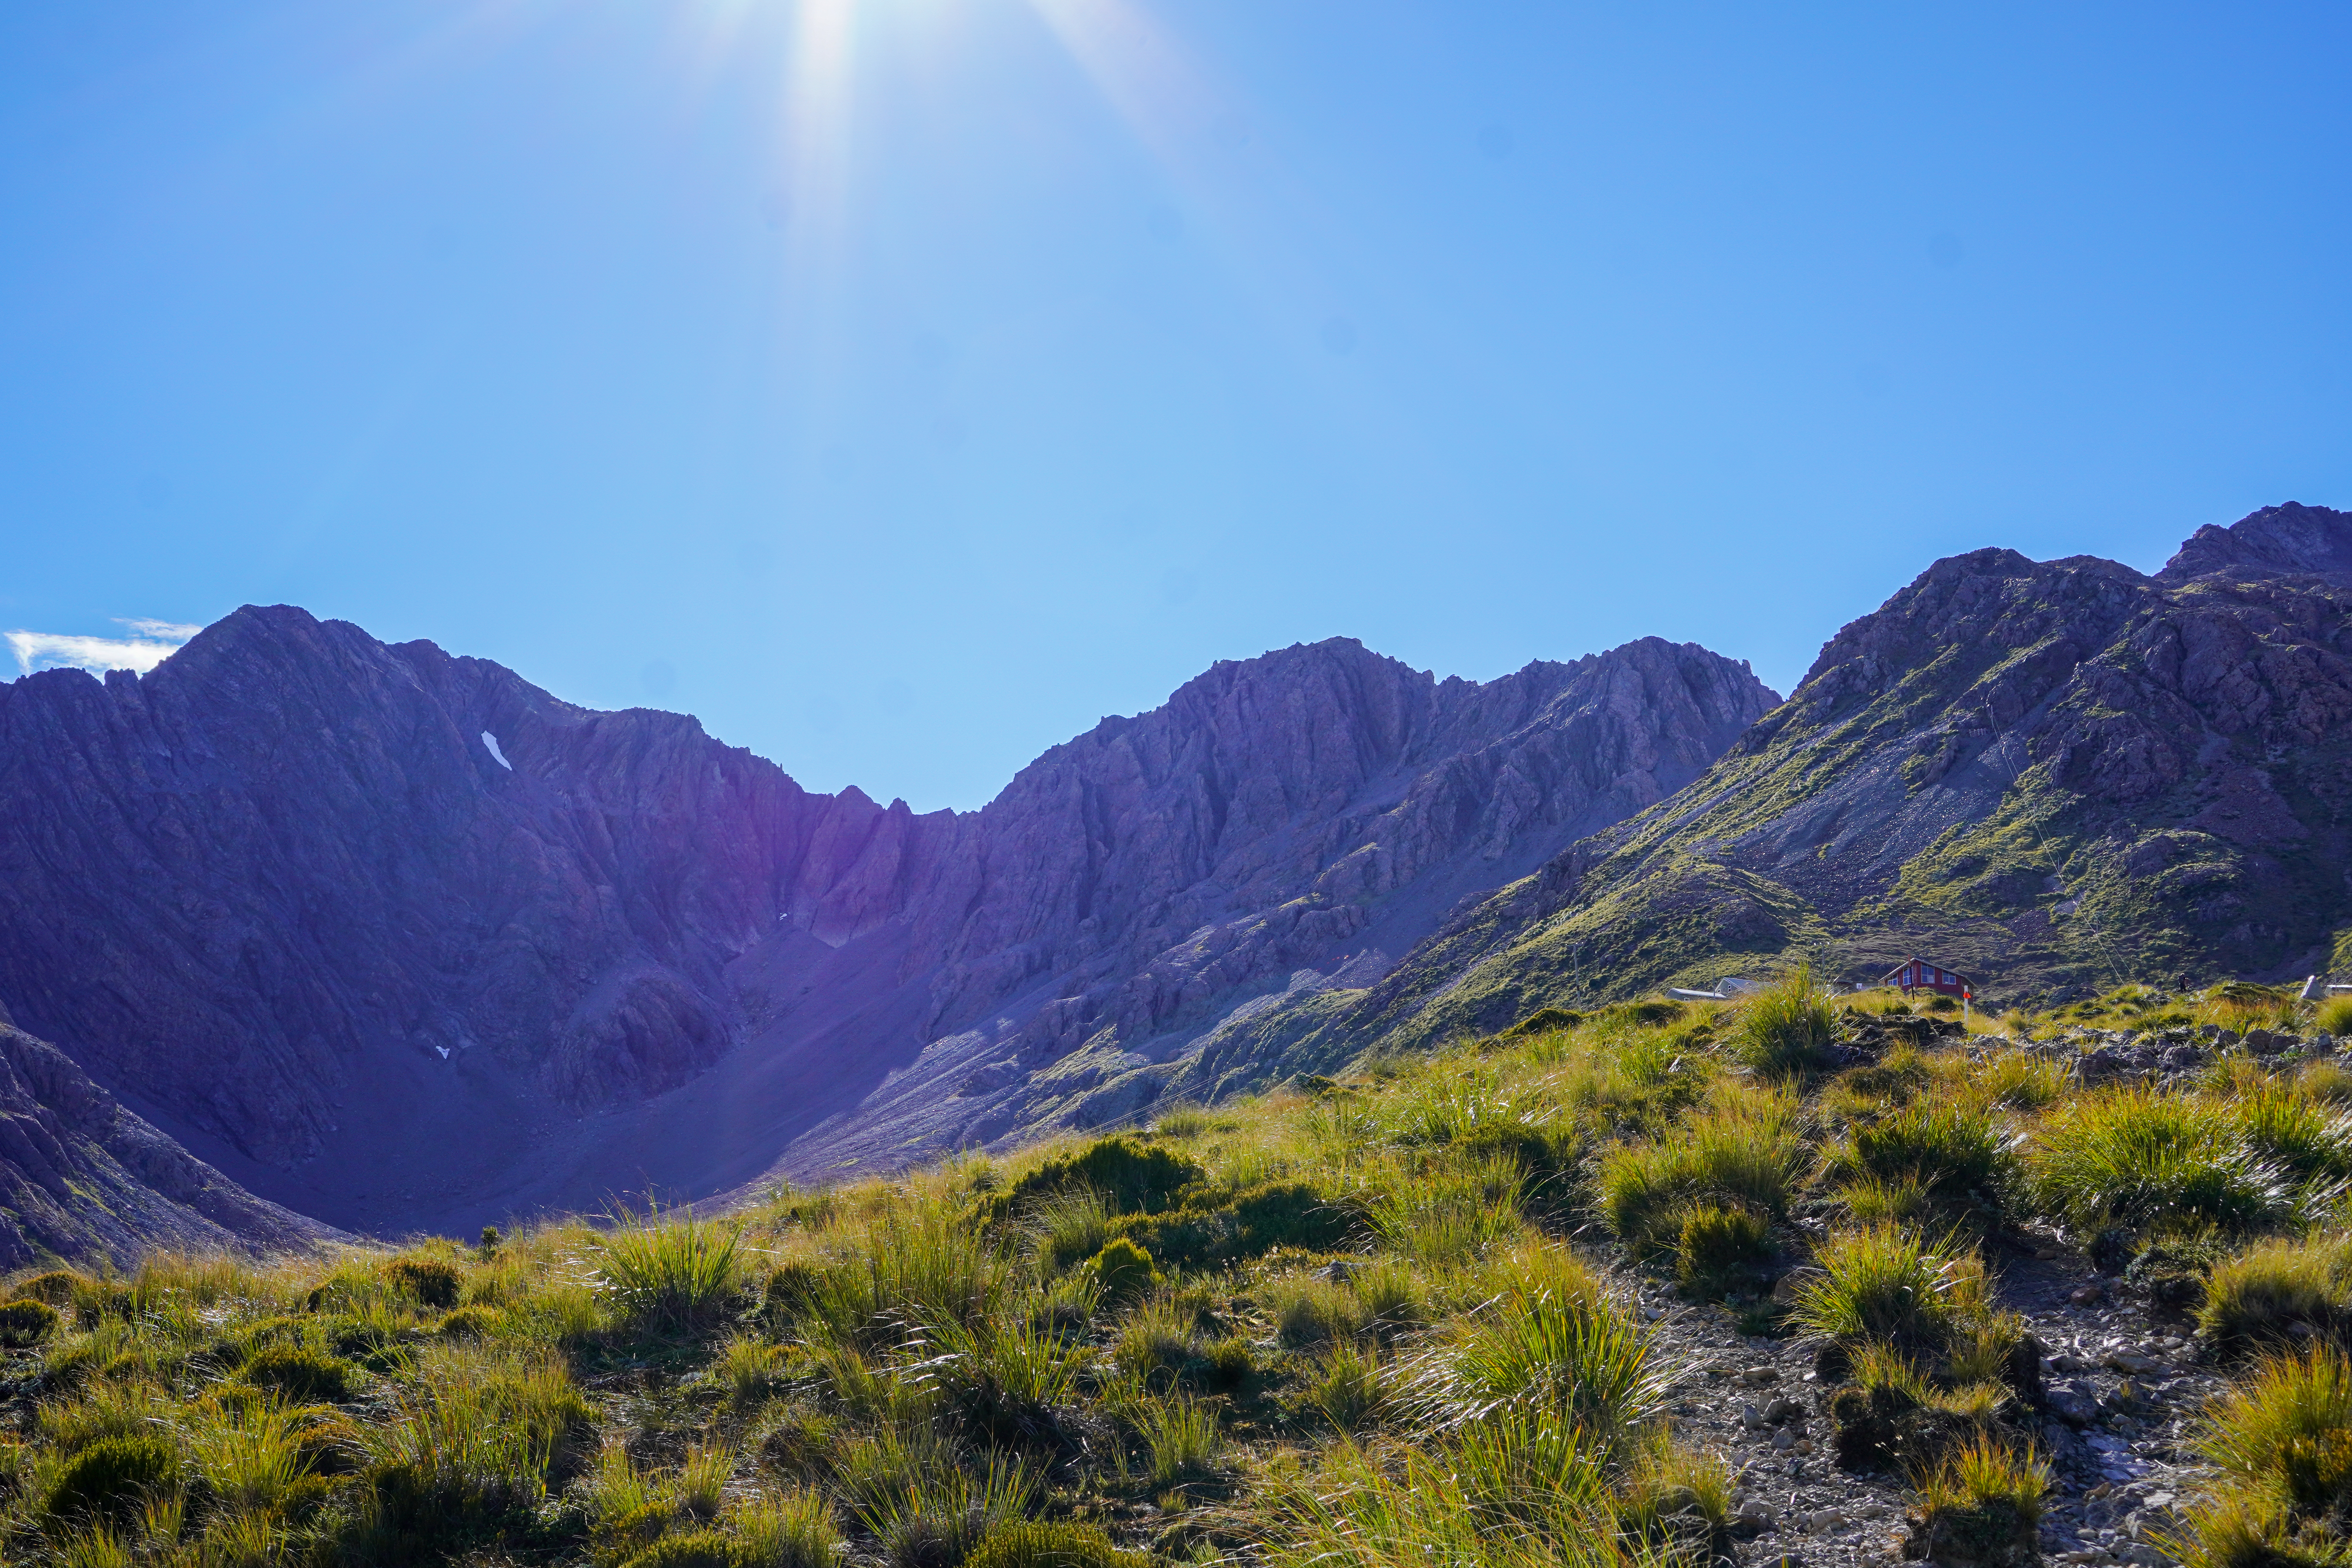
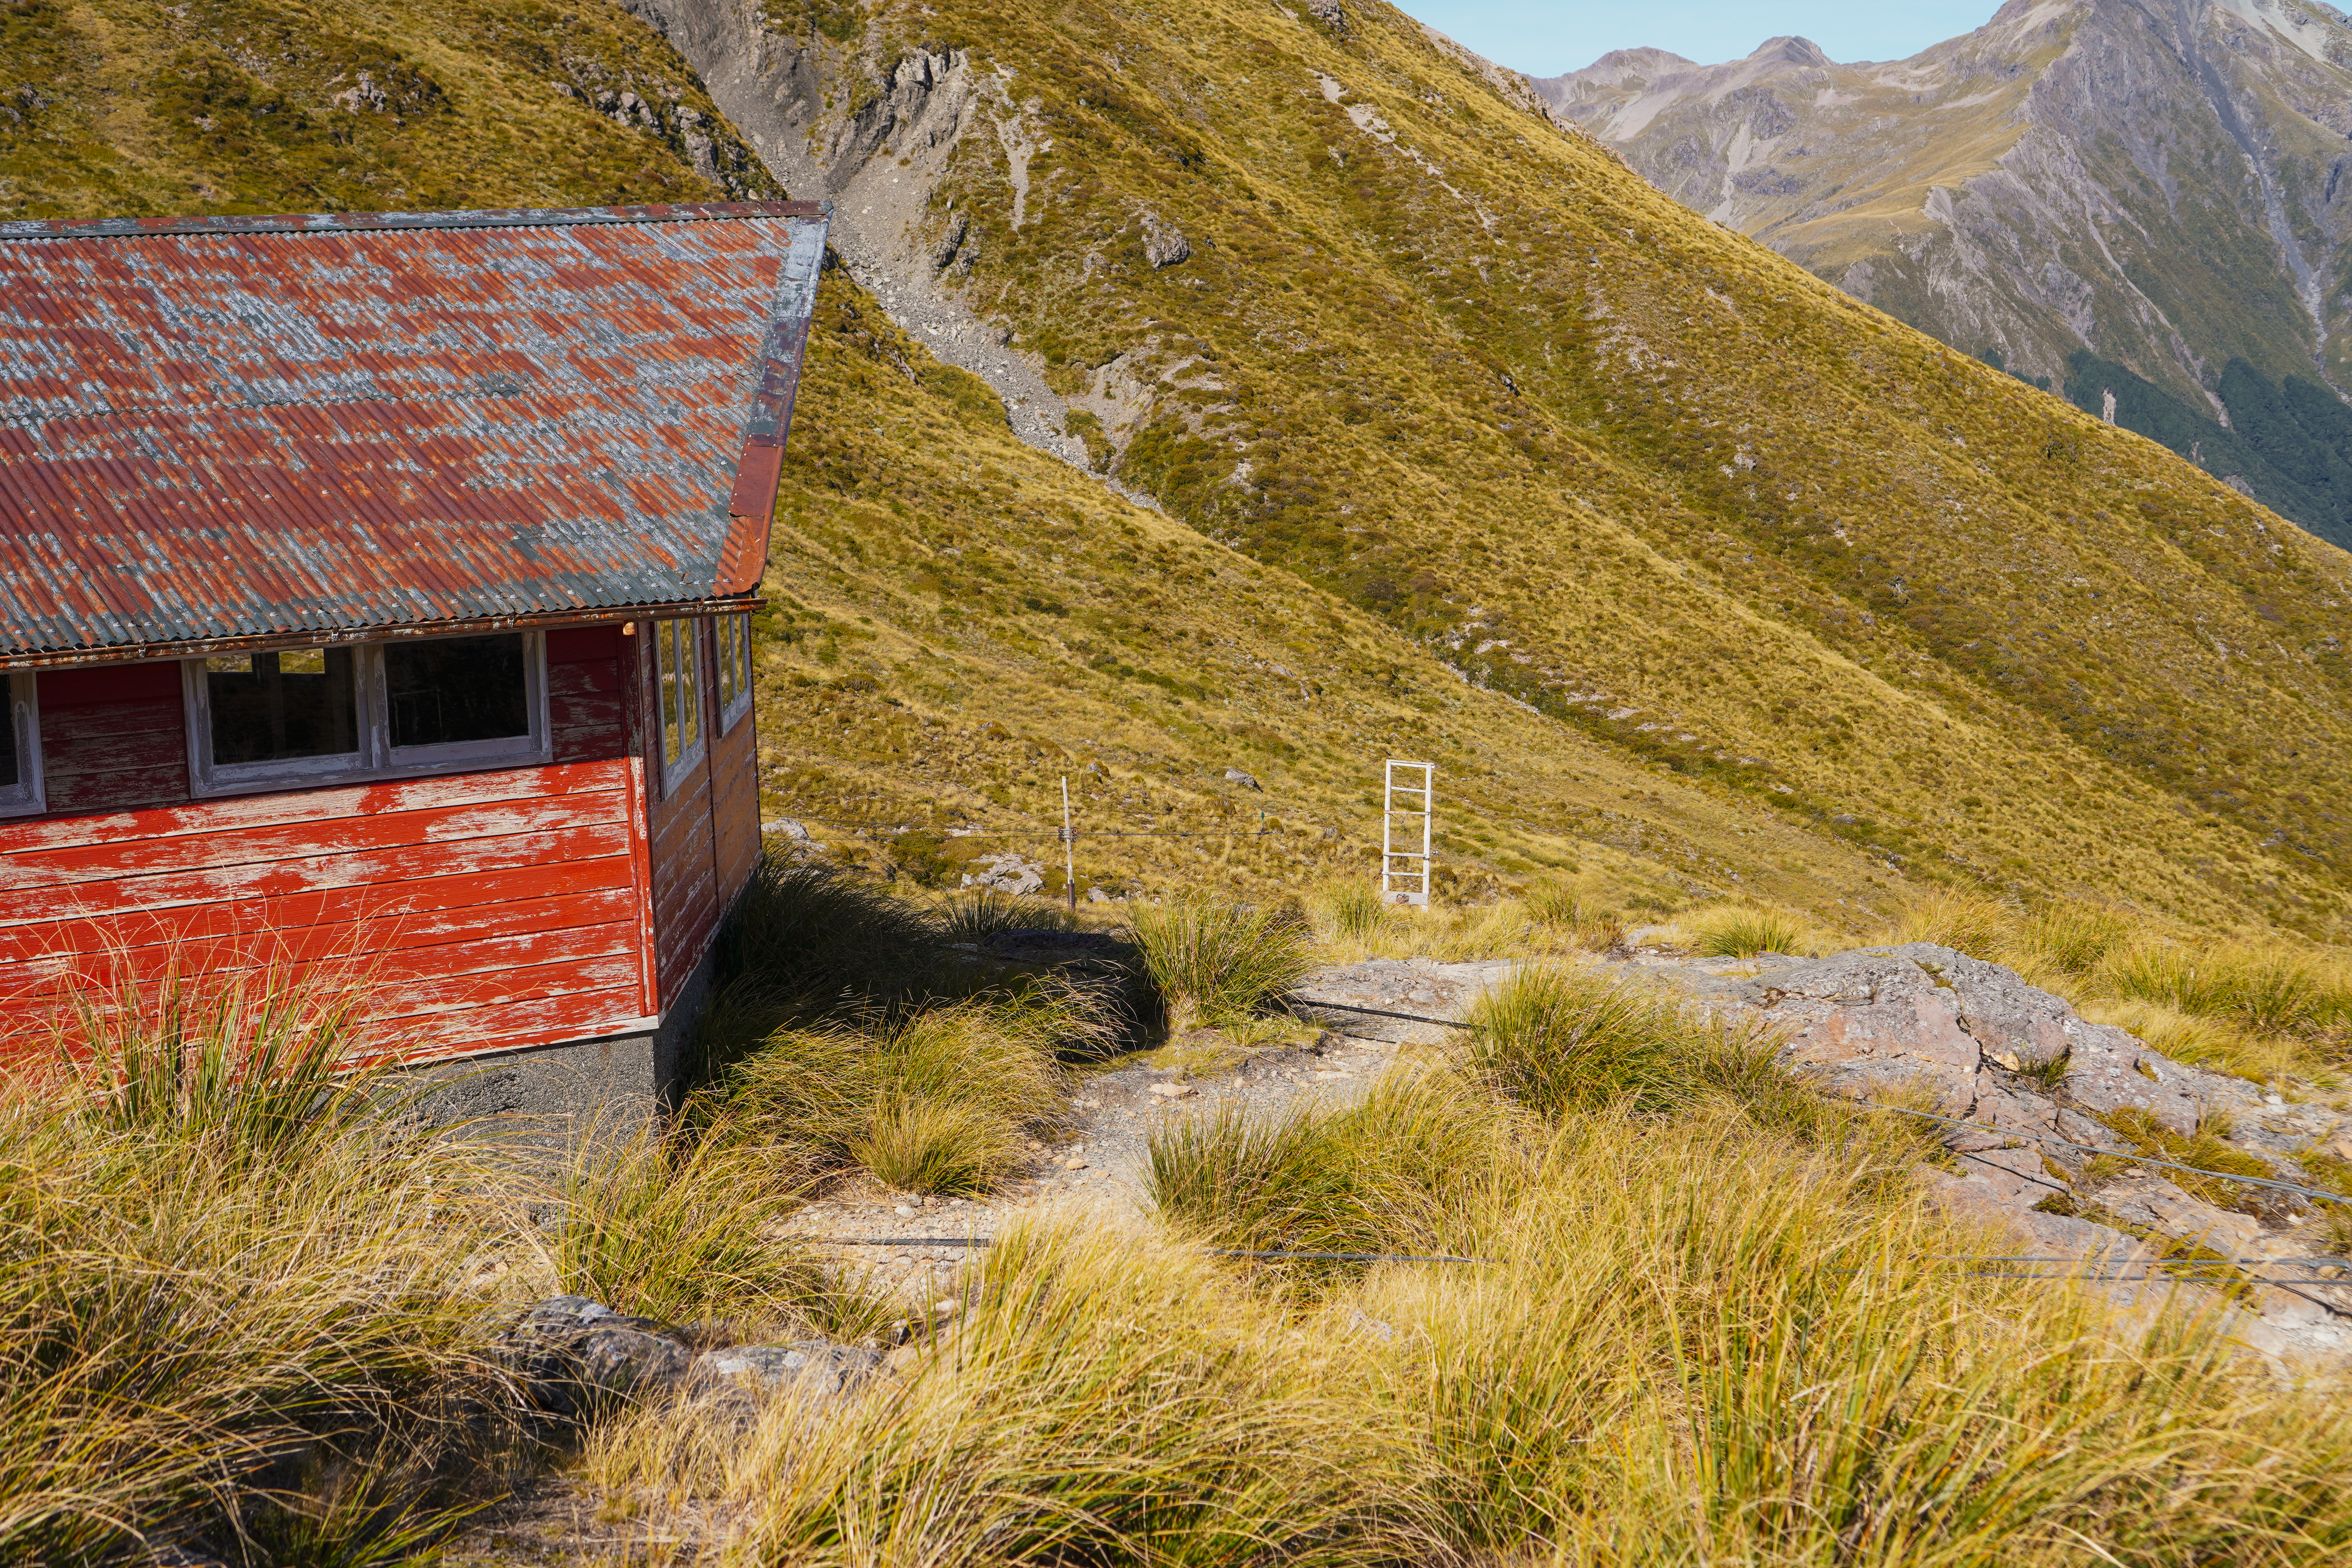
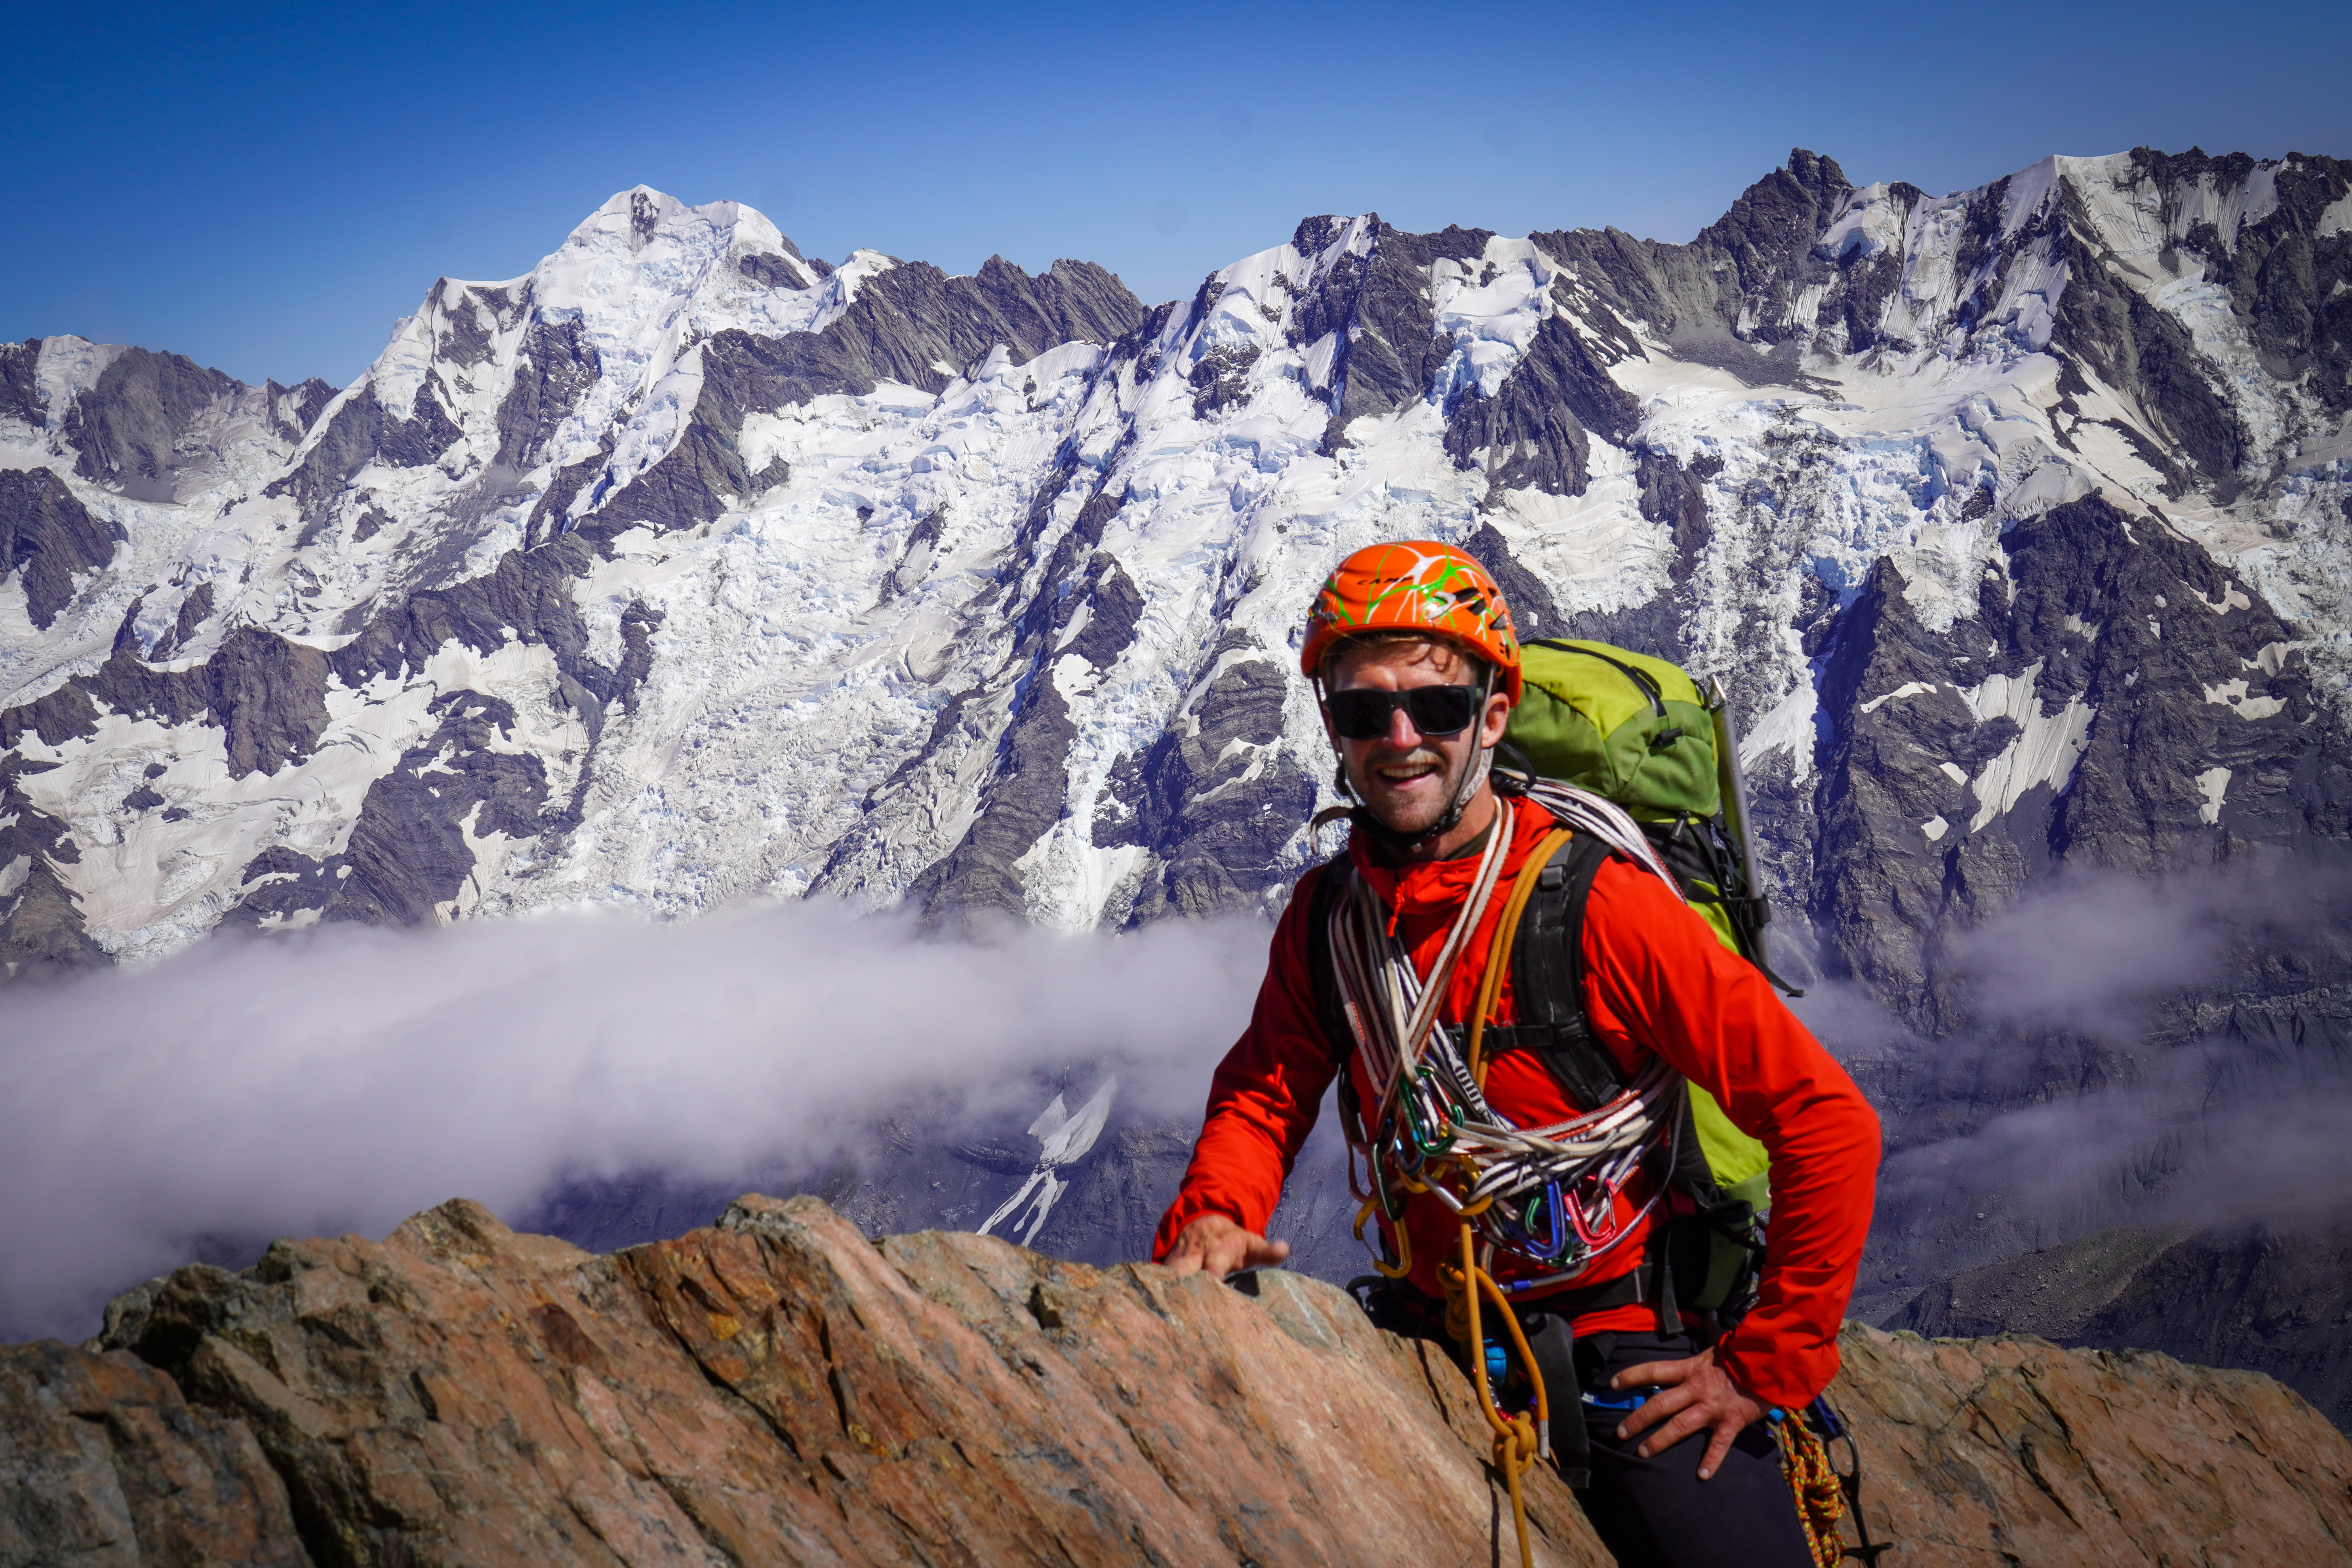
We retraced our steps, following the strip of ice down Syme ridge to avoid the increasingly scary looking snow.โ€‚We had originally planned to make threads and rap this section above Engineer col, but even this ice was starting to soften by the time we got there just after 1030, so we downclimbed the whole thing.โ€‚Once past Lendenfeld the progress was really fast and we got back to the hut by 1430.โ€‚It was hotter than forecast, and the heat crossing the Albert glacier back to the hut was hard to handle – we got back and immediately downed a litre of water each.โ€‚We got back to the hut in time for one of the last heli flights of the day – with only 20 minutes notice, this was the fastest turn around we’ve achieved for packing up!

Reflecting on this day, we were caught out by higher temps than expected.โ€‚We had 9.30/10am in our heads as a turnaround / summit time, on a forecast of 3000m FAFL in mid November with a solid overnight freeze, but we were a few hours late.โ€‚It was also the first time we had done one of these ridge routes together, with sections of easy but unprotectable (due to the amount of rime) terrain with terminal consequences for any small mistake.โ€‚We talked a lot about whether the risk to enjoyment ratio is worth it, especially compared to a route like S face Douglas which we had done a few days earlier and while technically much harder, is well protected the entire way, especially for the second.โ€‚Ultimately, the summit is not everything and being able to bail even when you’re just half an hour away if it’s not safe is the key to avoiding accidents in the mountains.

Phipps Temple Traverse

Canterbury’s answer to the Remarkables Grand Traverse they say! Located on the Main Divide of the Southern Alps, this traverse is spicier than a hike, but not as committing as a full climb. A great day tickling the spine of the South Island.


  • Grade: II, 2+
  • Time: 5h 40mins (moving time 5h)
  • Equipment: can be done in trail runners/approach shoes (although I wore boots due to my gammy ankle). We didn’t take a rope/rack, helmets only. If you’re used to exposure and can confidently climb grades 15+ you should be ok (nothing harder than a grade 8). Some parties have used a running belay along the ridge.
  • Season: we didn’t come across any snow on the route doing this in late summer, just a small patch on the S face of Phipps. In the shoulder seasons would take crampons/ice axe. Can be done as a winter route also.
  • Team: Maria, Andy, Rich, David 26/03/22

access

Park at temple basin ski field carpark and head up the 4WD track that turns into a well maintained walking track to the lodges. From the red building (CMC’s Lockwood shelter) at around 1380m cut across the basin NE. There is a faint trail. We aimed for a spot in the basin that would put you underneath the lowest col visible on the west ridge of Phipps (see route below). Many variations to this route possible.

climb

From the basin there some slabs to scramble up and over. Then stick to the margin of the scree along one of the buttresses heading diagonally right. This leads you to a thin narrow gully 15m shy of the ridge – rock was a bit loose here so watch for rockfall, was better slightly to the left of the gully staying high on the buttress. We were on the ridge within 2h.

Our route up to Phipps, seen from Mt Temple
Our route up to Phipps, as seen from Temple Basin

The ridge travel definitely takes a little time and focus as the rock quality is average. There are a few gendarmes forcing you to dip down low from the ridge, usually to the left but not very often and 95% of the time the easiest route was staying on top of the ridge.

From Phipps peak (1965) its a gentle declining ridge to Temple (1913). It looks pretty hectic when you initially look at it but travelling on it was pretty fast and we got across in 40 minutes.

descent

Just beyond the cairn on Mt Temple there is a steep gully – initially the ground is pretty compact and slippy but further down turns into 10/10 quality shingle/scree! We were down to Page shelter within 15 minutes. From there you can see a trail cut out heading down to Lockwood shelter. From there retrace your steps back to the car.

We took 5h 40 with a couple of leisurely stops, but speedier parties have done it in 4!

Malte Brun, Bonney Rib

A New Zealand Southern alps classic route! Got a brief weather window in late Feb 2022 to sneak up this route. Popular with good reason – easy grade 10-12 scrambling on solid (by NZ standards) rock up to the west ridge, then a spectacular ridge traverse to the summit over the famous cheval.

Highly recommended. Would be especially good for a first foray into this kind of mountaineering – the Bonney rib is fully equipped with high vis rap stations with 2 rings every 30m, so a retreat is very easy, lowering the level of commitment.


  • Difficulty: Grade 3 Rock crux 12
  • Equipment: 3-season mountain boots. 1x set cams up to blue, small set nuts. 8-10x runners, plenty of 120cm slings. Microtraxion if simulclimbing. Tat for raps on the top section (before the bolts).
  • Approach time: time was short so we opted to fly in and out to Darwin corner. A back flight between 3 people was only $150 each – maybe less than the damage to your equipment from walking over the Moraine?
  • Climb time: we took 12 hours tent to tent, but pitched all of the route to the cheval. Much faster if simulclimbed.
  • Season: late summer. You want all the snow to be off the route, and even at the end of a long dry summer in 2022 no issues crossing the glacier.
  • Team: Joe Collinson, Alex Bewick, Tom Brown 28/2/2022

Riding the cheval – Tom (front) and Alex (back)

Access

Access from Darwin corner to the Turnbull. Steeper / sketchier the further right you go

From Darwin corner, access the Turnbull glacier by first ascending the moraine wall. Probably the most dangerous part of the trip (especially the descent). Steep and loose with lots of large unstable blocks to knock down onto yourself or your partner. As of March 2022 the moraine wall is less steep the further lookers left you go, with the area to the right divided into a series of steep and scary looking gullies. We ascended almost directly under Mt Turnbull and then traversed to lookers right across the scree slope above.

Lake at point 1906 with Turnbull glacier above left, Mt Turnbull on far left, pt 2350 of Rumdoodle in centre and Malte W ridge on the right

You pass a lake near point 1906 and then there is some boulder hopping onto the Turnbull. The Turnbull glacier has receded significantly and gave us no problems, although at around 35-40 deg, be careful of avalanche risk especially when getting warm. Where the Turnbull joins the Bonney there are a few crevasses to negotiate but even at the end of Feb 2022 which was especially hot and dry there was no issue crossing these to get to the campsite.

Turnbull glacier. Snow slope the whole way (tucks in behind the rock band)

Don’t be tempted to go up the Malte Brun glacier – the moraine access at the bottom looks pretty terrible and the glacier is much more broken. Also the final bit up to the Bonney is a steep pile of horrible cross. Took us 4 hours from Darwin corner to campsite.

Camp

On the rock rib at the top of the Malte Brun glacier there is a good bivvy spot. Two flat areas in the rock have been cleared out which are about the size of a 2 man tent each.

Campsite at top of Malte brun glacier. You can see the two small rock areas cleared on the ridge. The glacier is more airbed friendly

We opted to sleep on the snow just next to the ridge as we thought our inflatable airbeds wouldn’t stand up to the sharp rock. There was no water near the campsite so don’t forget the jetboil (like I did… The risk of packing straight after a night shift!). We were able to find running water across the schrund at the point marked in the photo, which saved the trip but it was a real faff and took forever. Another option would be to camp down by the lake if you don’t want to melt all your water – allow an extra 1-2 hours to get up to the start of the route.

The Route

We took the classic Bonney rib but many variations are possible!
From the campsite, follow the snowfield up staying just to the left of the large gendarmes. Cross a schrund and climb a 40 deg snow slope up to a small gully with a boulder wedged in the top of it. The climbing starts from here.

This route doesn’t follow the DBAs – they step out to the lookers right after the second DBA

The first DBA is 60m above the boulder and then every 30m to the ridge. The first 2 are in a fairly straight line, but then after that they step out to climber’s right significantly and then meander round a fair bit. The most simple and least committing option would be to follow the DBAs all the way up, but the climbing is more interesting and on more solid rock if you follow a more direct line up the face. The DBAs can also be pretty difficult to spot from below, but there are high vis reflector strips drilled into the rock above each station so finding them on the descent even in the dark / bad weather is super easy. 5x 60m pitches to the ridge. Climbing is around grade 12-14 but obviously varies depending on which exact route you take. We pitched the whole thing as some members of the group hadn’t spent much time on rock, but could save some time simulclimbing in a confident party

Once you gain the ridge, it took us about an hour to traverse to the end of the cheval. Exposed ridge travel , but with plenty of options for pro (especially loads of spikes – bring plenty of 120cm slings) for simulclimbing. Send the camera out front for the obligatory cheval shot! Theres an old rusty piton next to a good platform at the end of the cheval.

It gets easier from here up to the summit but took a surprisingly long time as we took the rope on and off a few times and needed to make 1x rap: it took us nearly 2 hours from the cheval to the summit. The route finding wasn’t super obvious at one point on the way up passing one final gendarme – we made an unnecessary rap down the south face and then climbed back up a snow field. When viewed from above you can easily turn the gendarme on the north side (see pic below!).

Obvious from above but not so obvious on the way up. The final false summit before the top, turn this gendarme on the N side and save yourself a time consuming rap onto the S face
Approximate rap line with 10x DBAs. Watch out for the big traverse between the 2nd and 3rd DBA

To descend, there are multiple spikes to rap from to get you back to the cheval, which is likely a faster option depending on how confident your down climbing is. Once you’re back across the cheval, 10x 30m raps on DBAs gets you back to where you started. Lots of loose blocks around so be careful of rockfall. Would advise against 60m raps, high chance of getting the rope stuck.


We were moving pretty slowly and were around 12 hours camp to camp but with a bit of simulclimbing, you could expect that to be a fair bit faster. But don’t underestimate how long the final ridge can take, more than one group has spent a night on the route!