Philistine-Rolleston Traverse

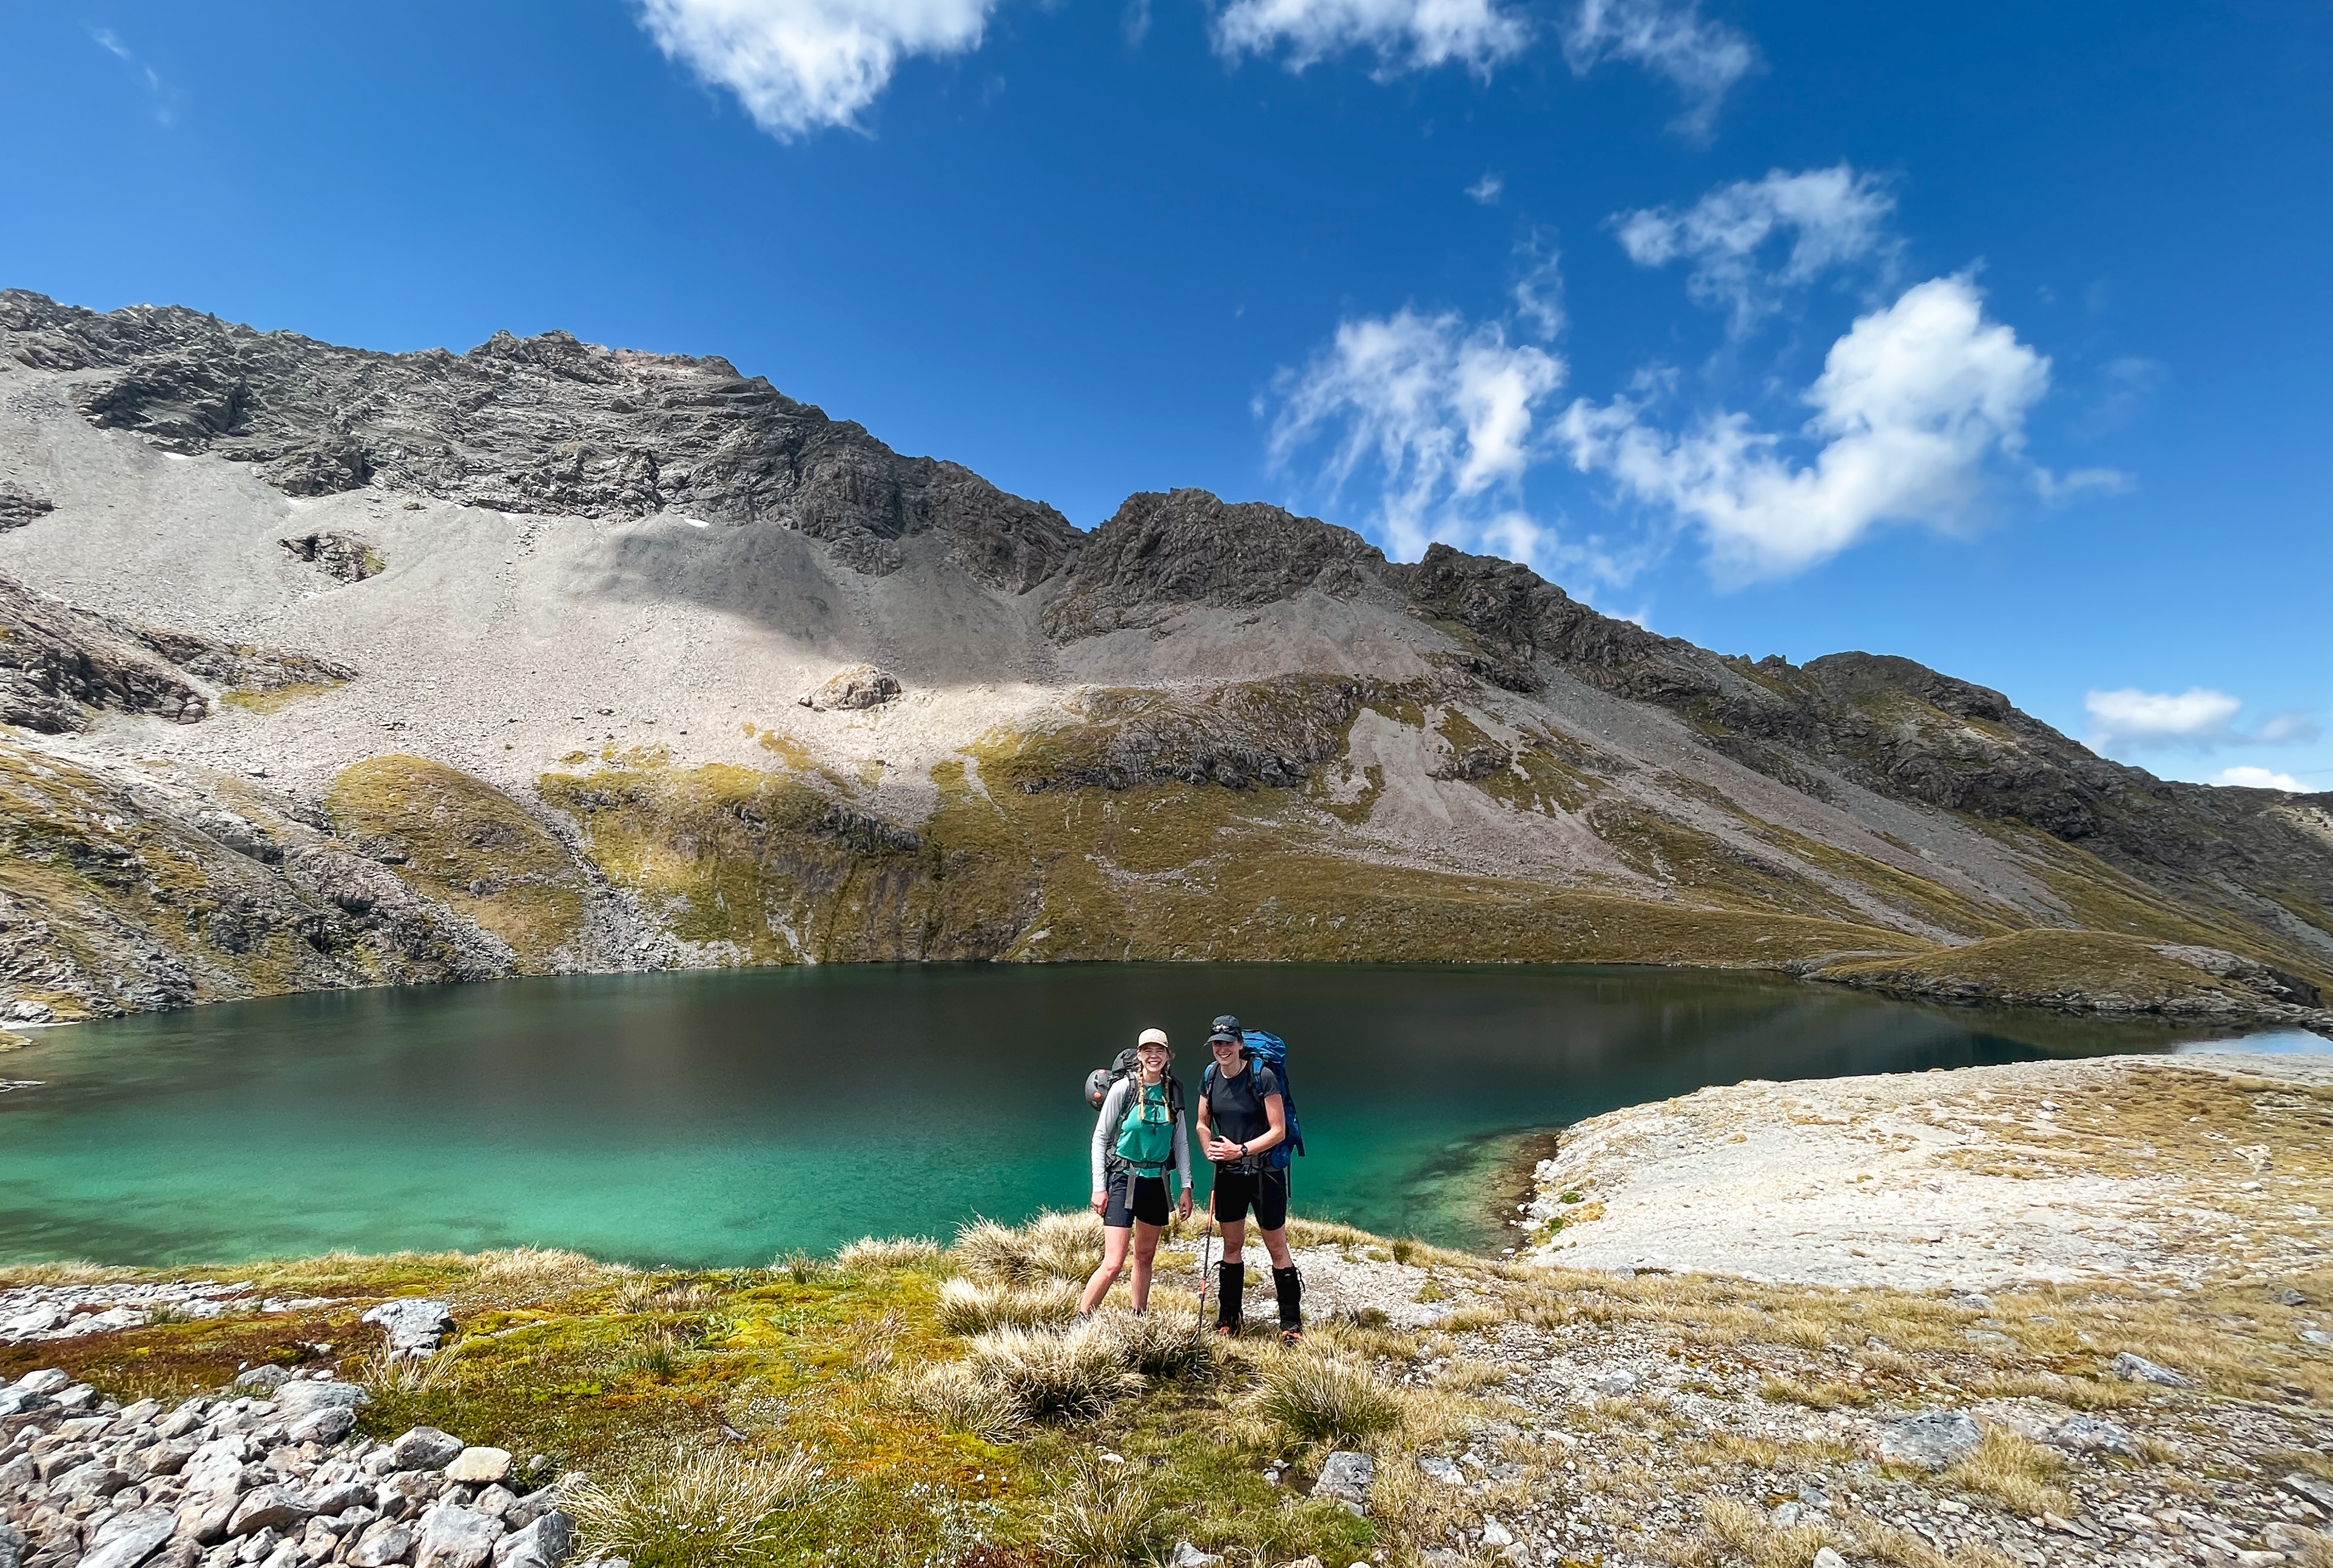
An awesome day on the ridge between two stunning peaks in Arthur’s Pass. I can see why it is so popular! Easily do-able in a day trip from Christchurch. We did this in Autumn, but I think it would make for a great winter day out as well – perhaps even better given you would avoid travelling on loose rock. As Marije said “we’ve given it a good go trying to kill each other today”…


  • Grade: II, 3+ (grade probably comes from doing it in winter)
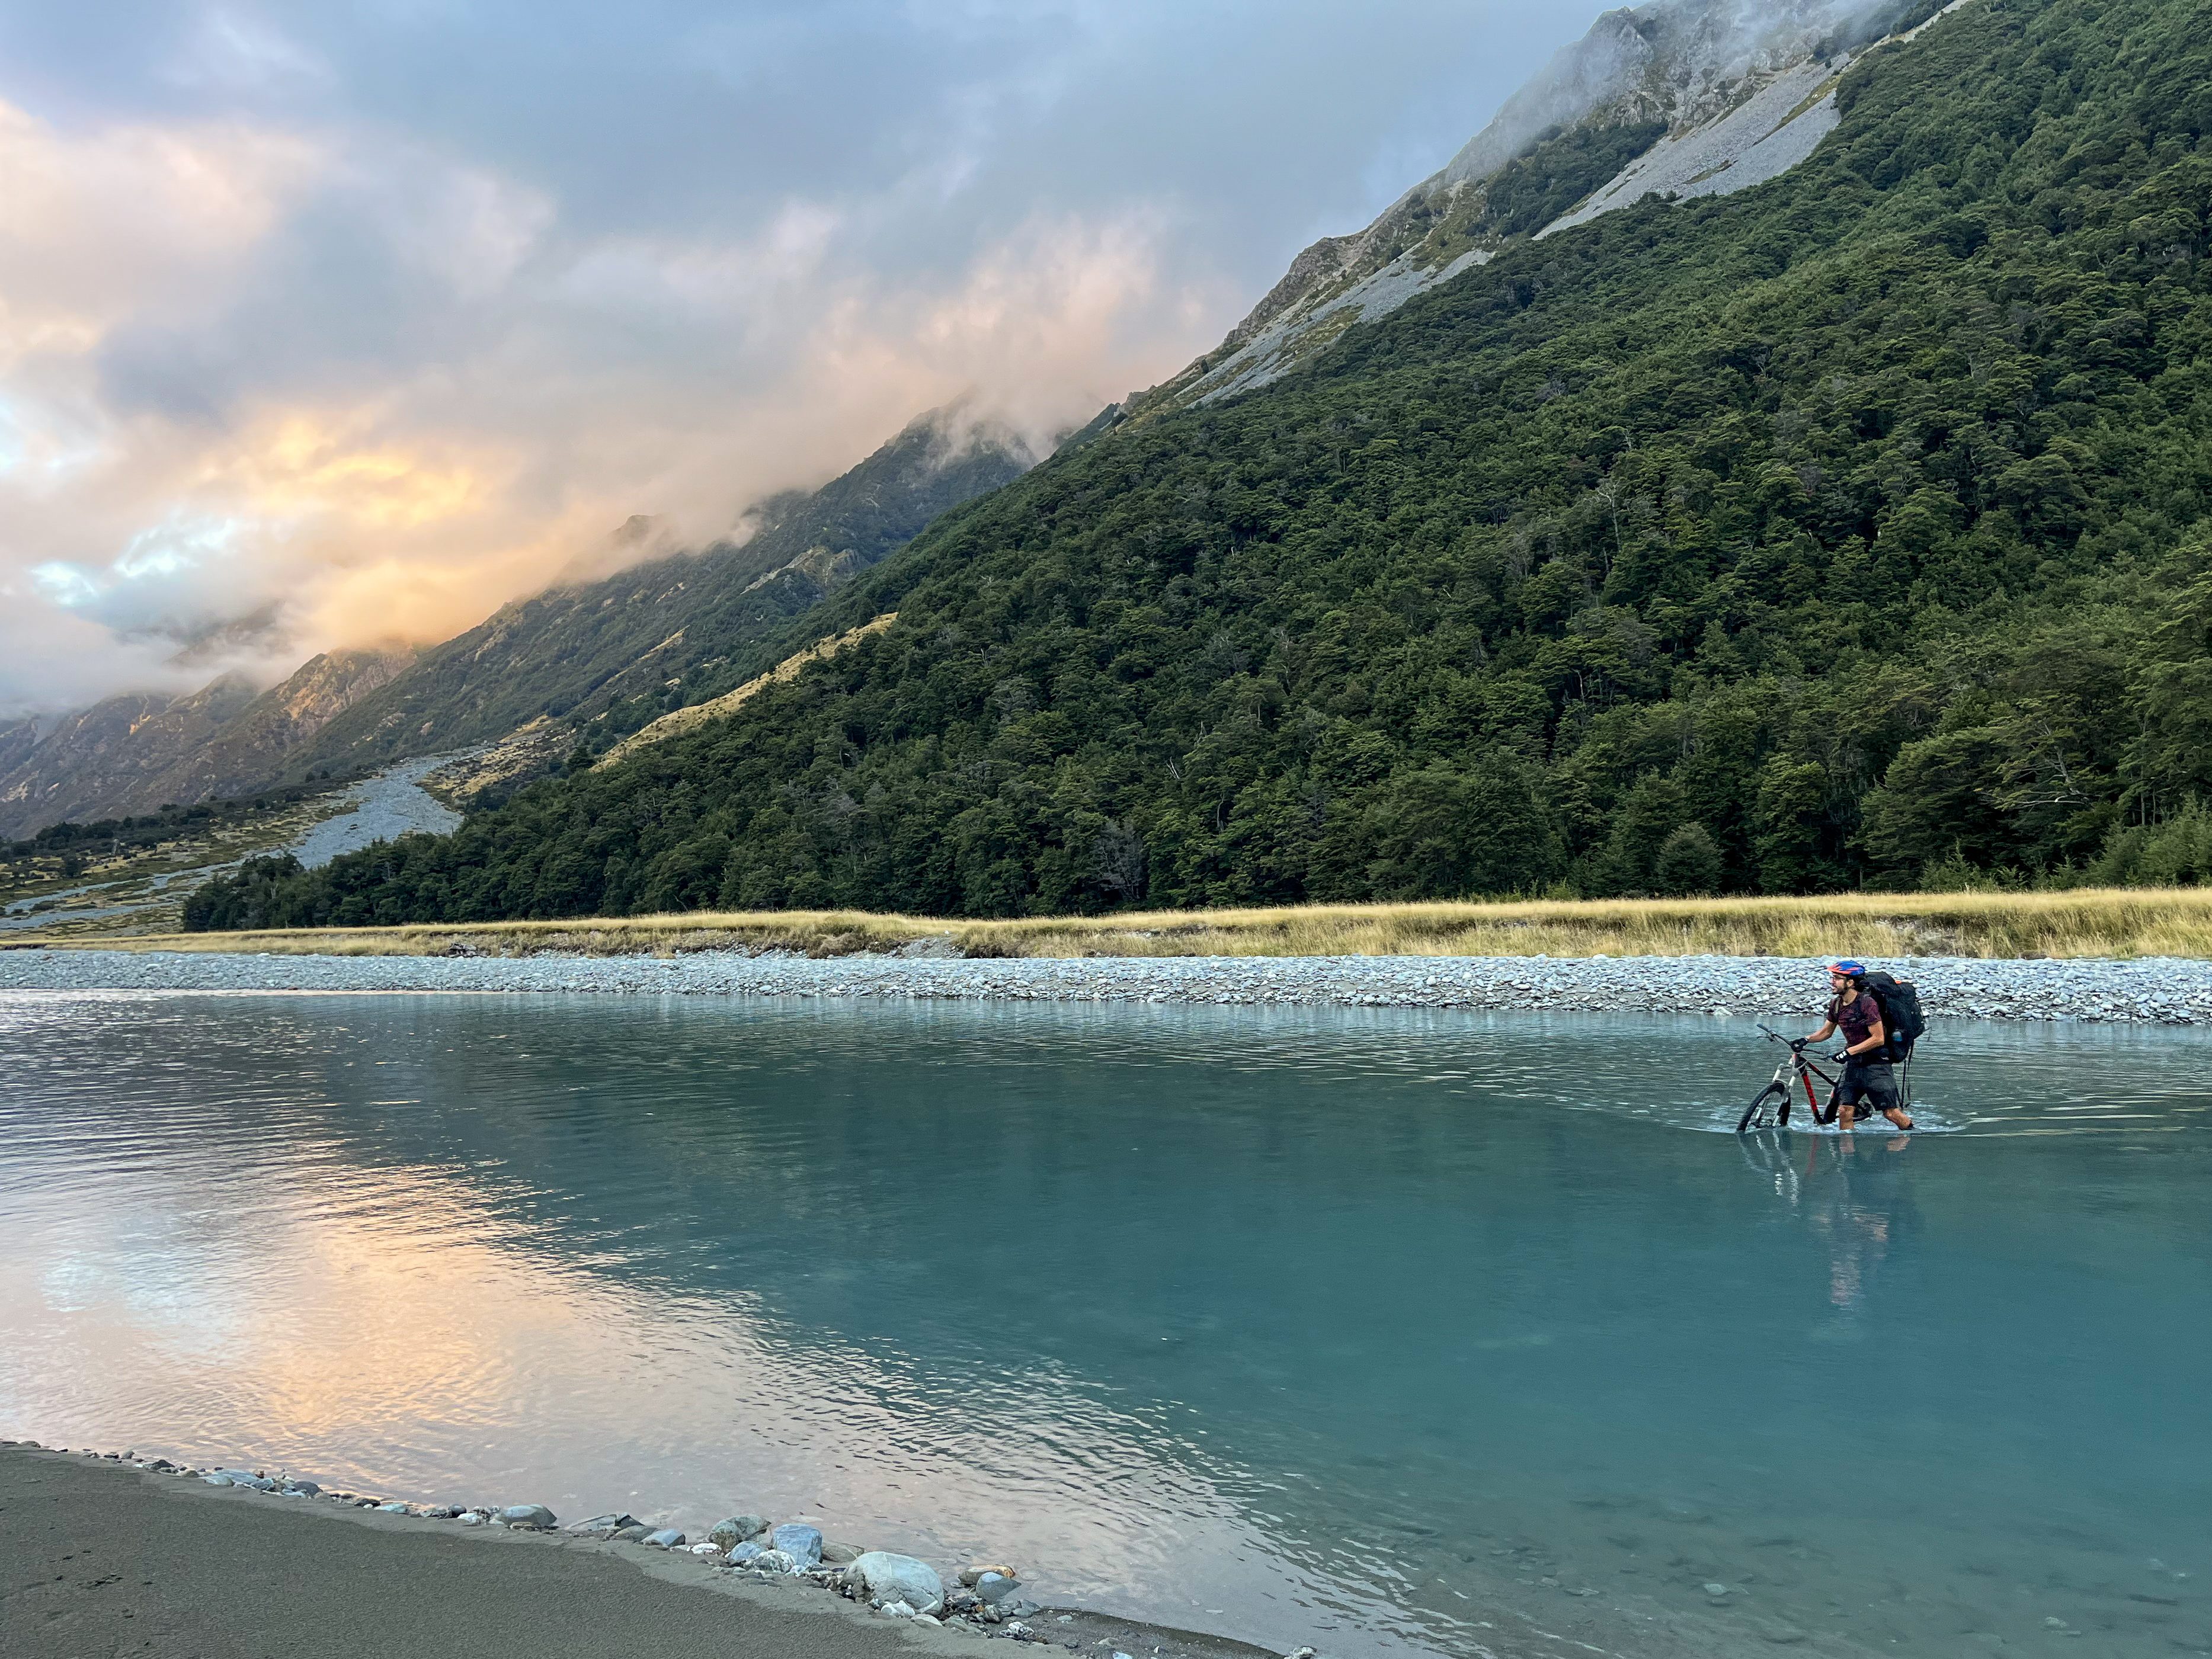
  • Time: 11h total (including breaks and a quick swim in the Otira River secondary to peer pressure)
  • Equipment: can be done in trail runners/approach shoes. We took a 60m rad line for 1x 25m rap. Tat and a few nuts – didnโ€™t end up using. Lightweight crampons – didnโ€™t use as there was no snow on the route. 
  • Season: summer/early autumn; also a popular winter route but more objective risk. 
  • Team: MJ, MK 22/04/2023

access

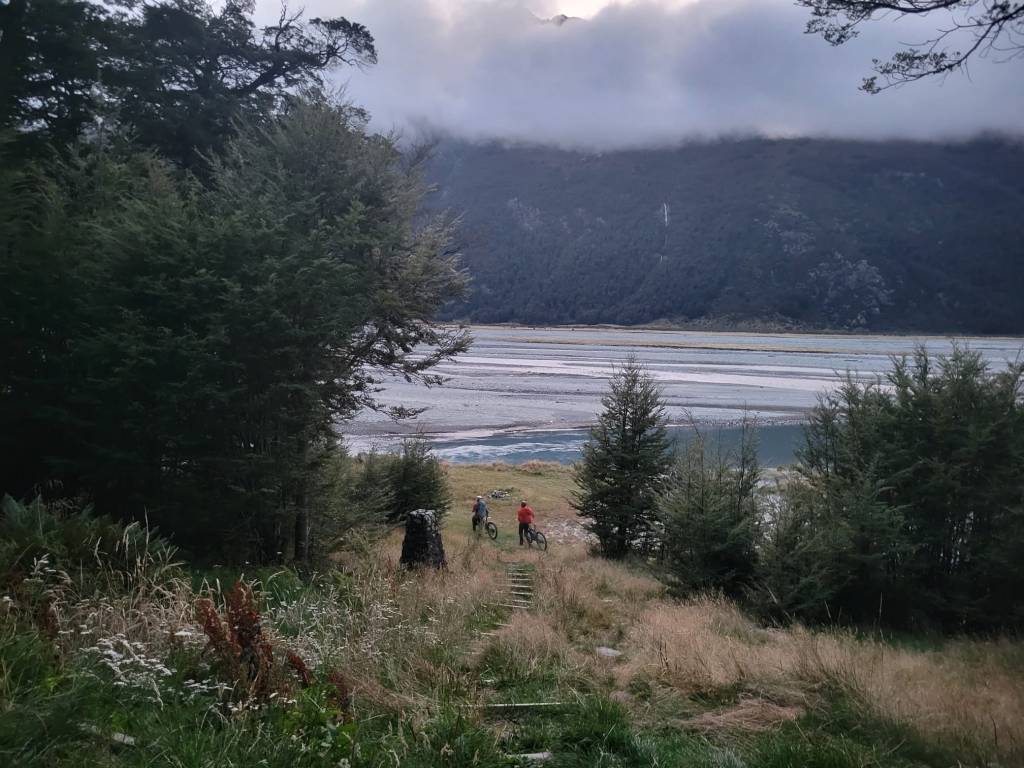
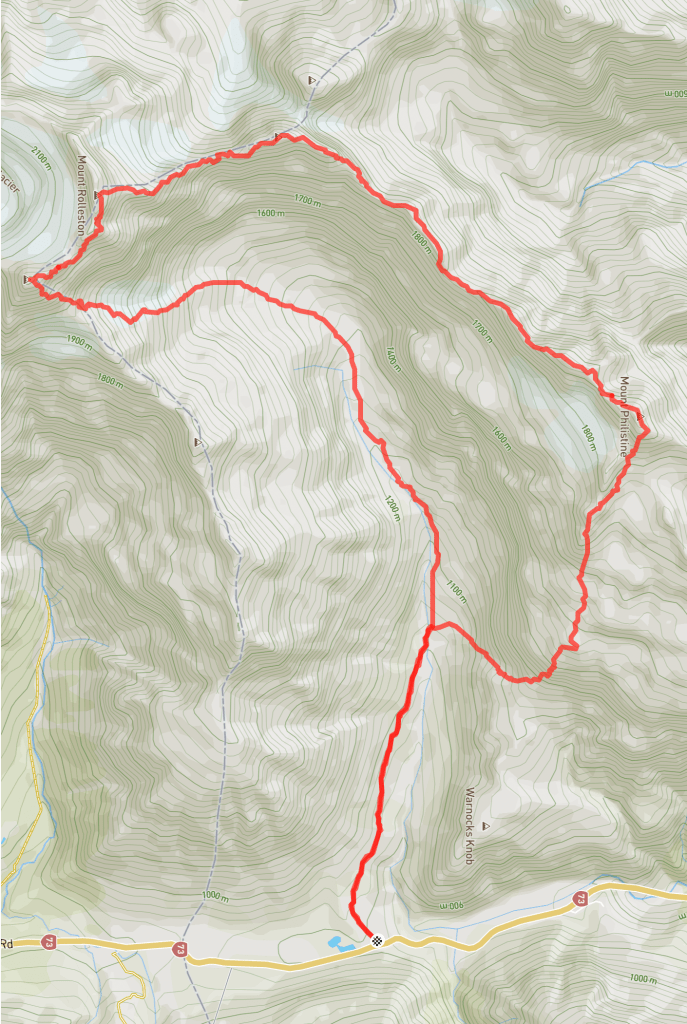
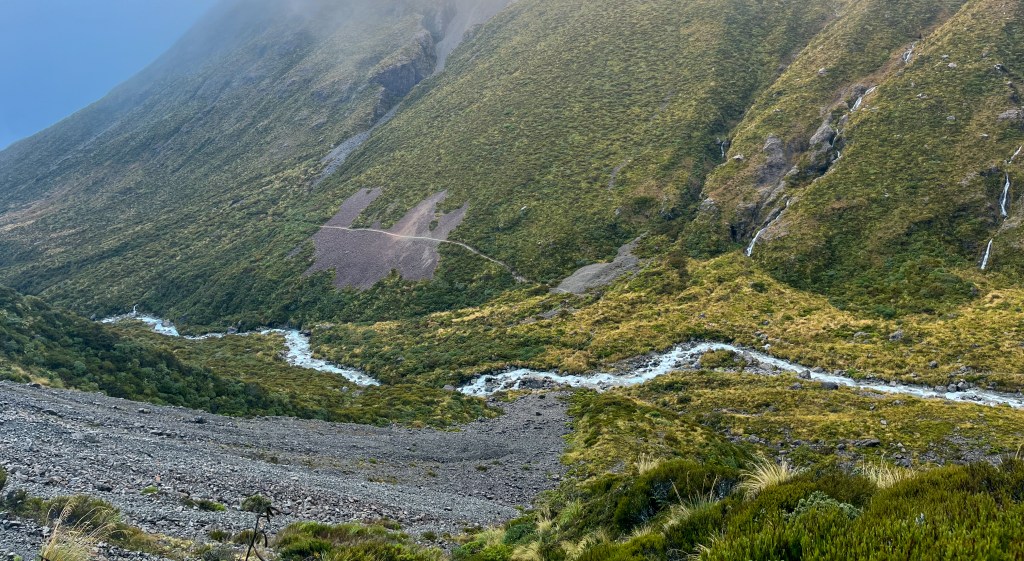
Park at the small carpark at the start of the Otira Valley Track. We stayed in MJ’s van the night before, allowing for a lie-in… 6am alarm.

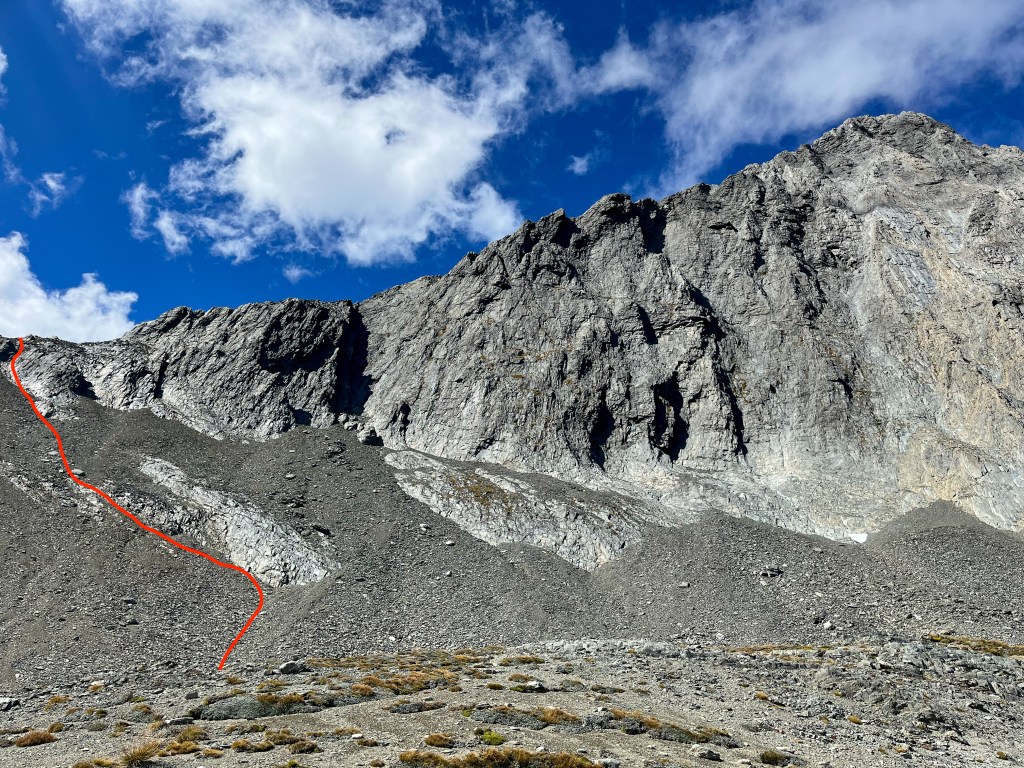
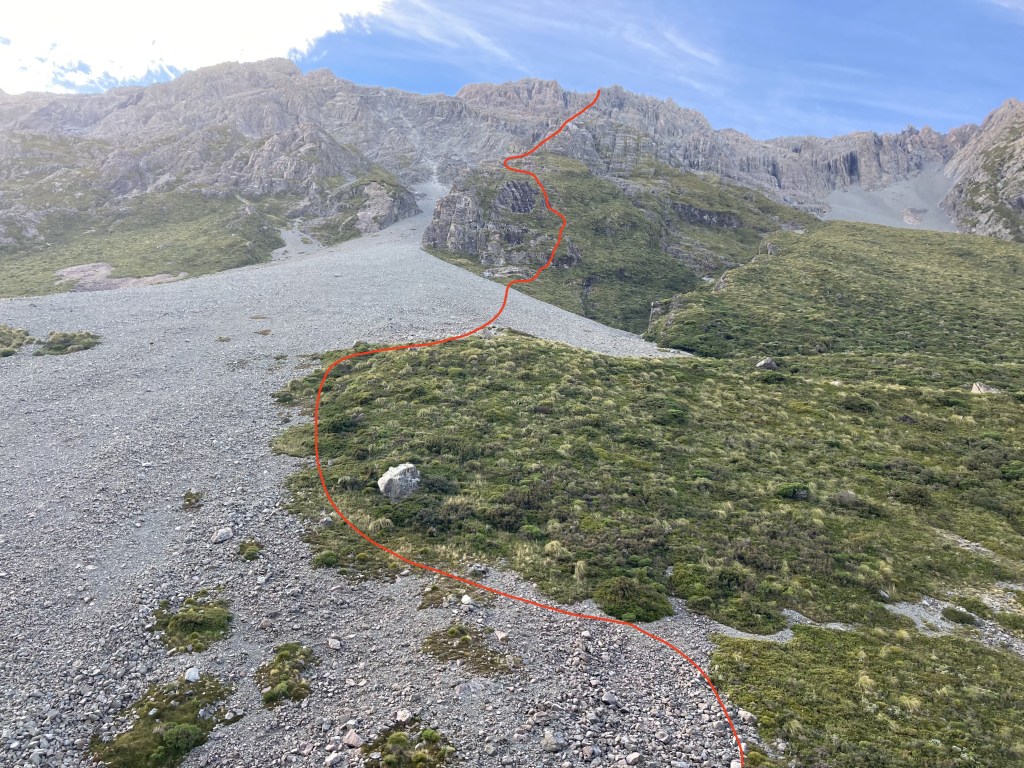
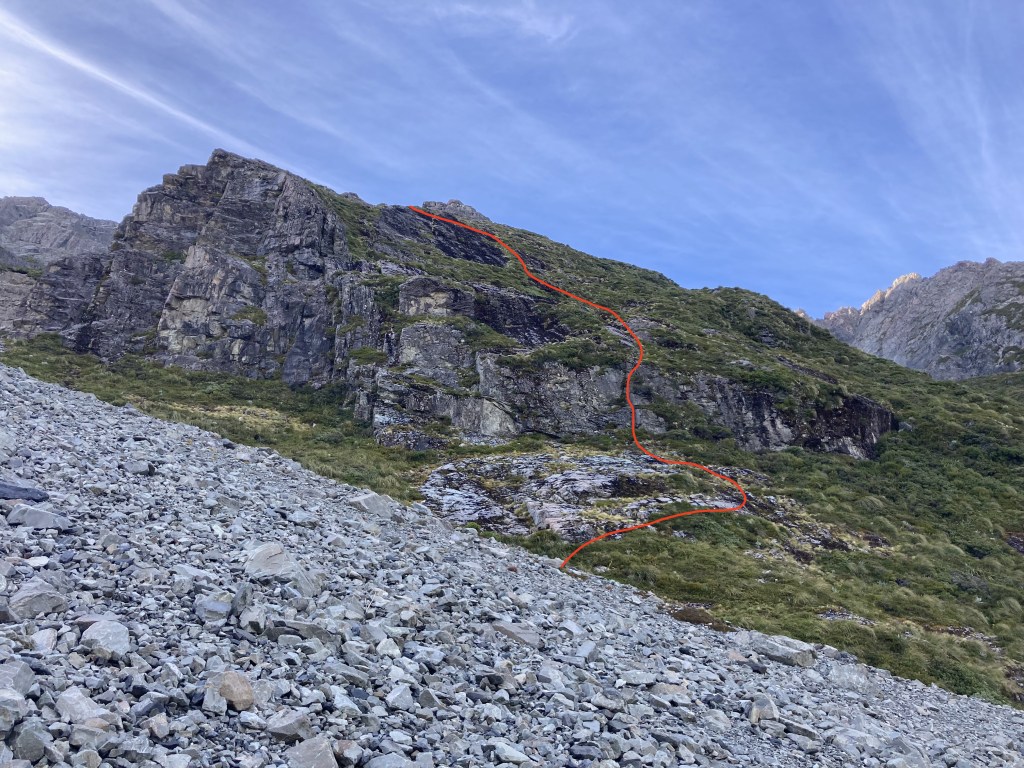
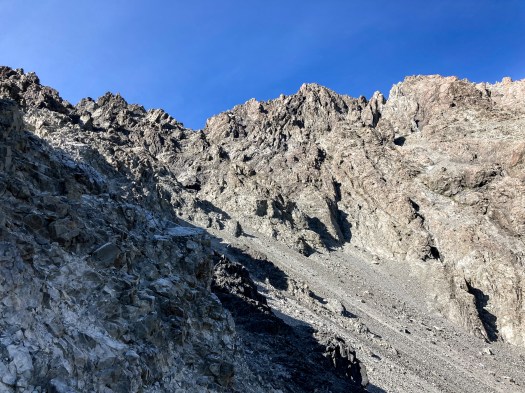
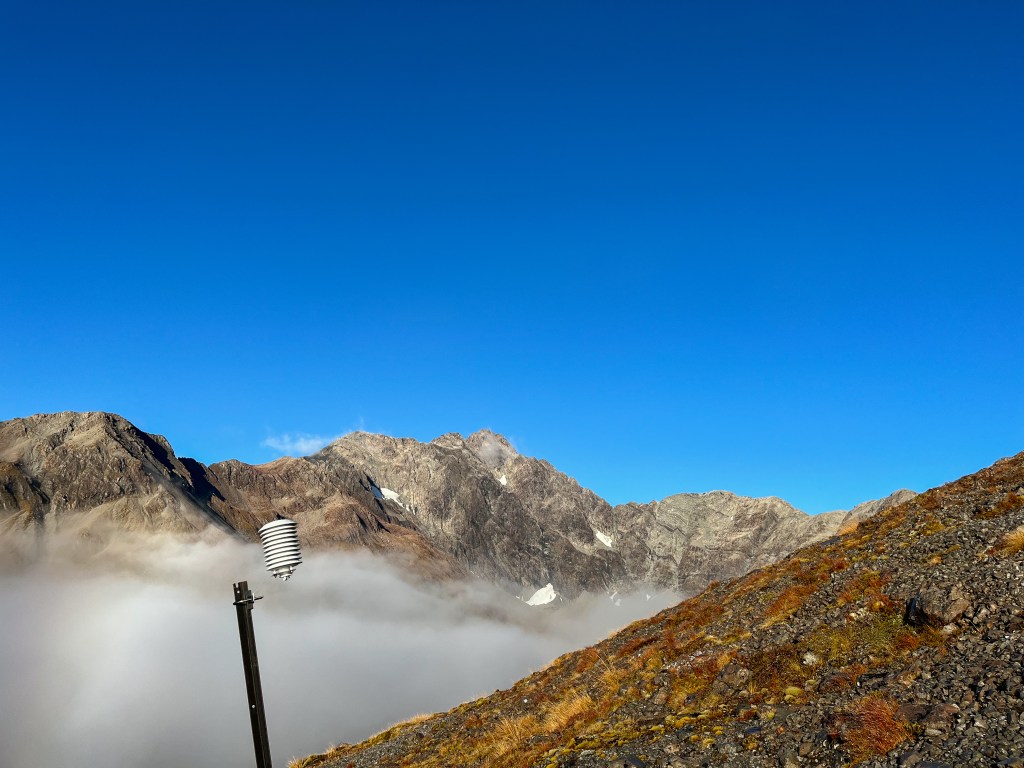
Follow an easy marked trail along the river for about 2km – this took us 30 minutes. Cross the bridge and boost up around 1000m elevation up to Philistine. This took around 2h – thereโ€™s a dug in trail through the moraine then head up left through Warnock’s bluffs, passing a marker/pole (see below pic – ?karaoke mic).

climb

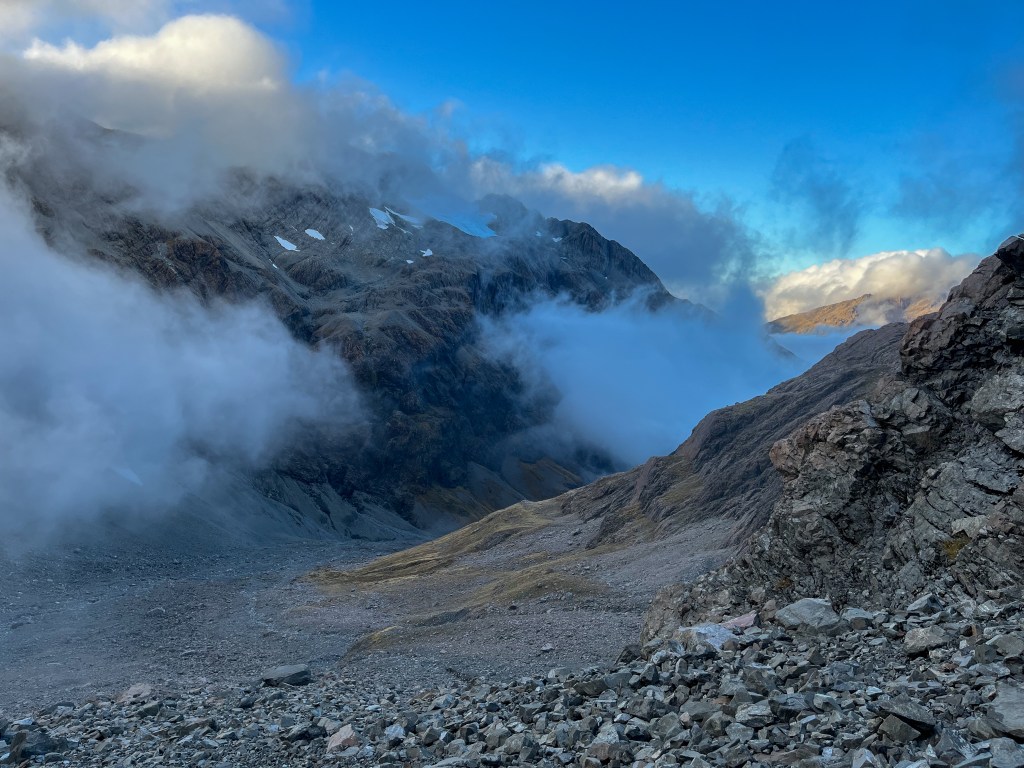
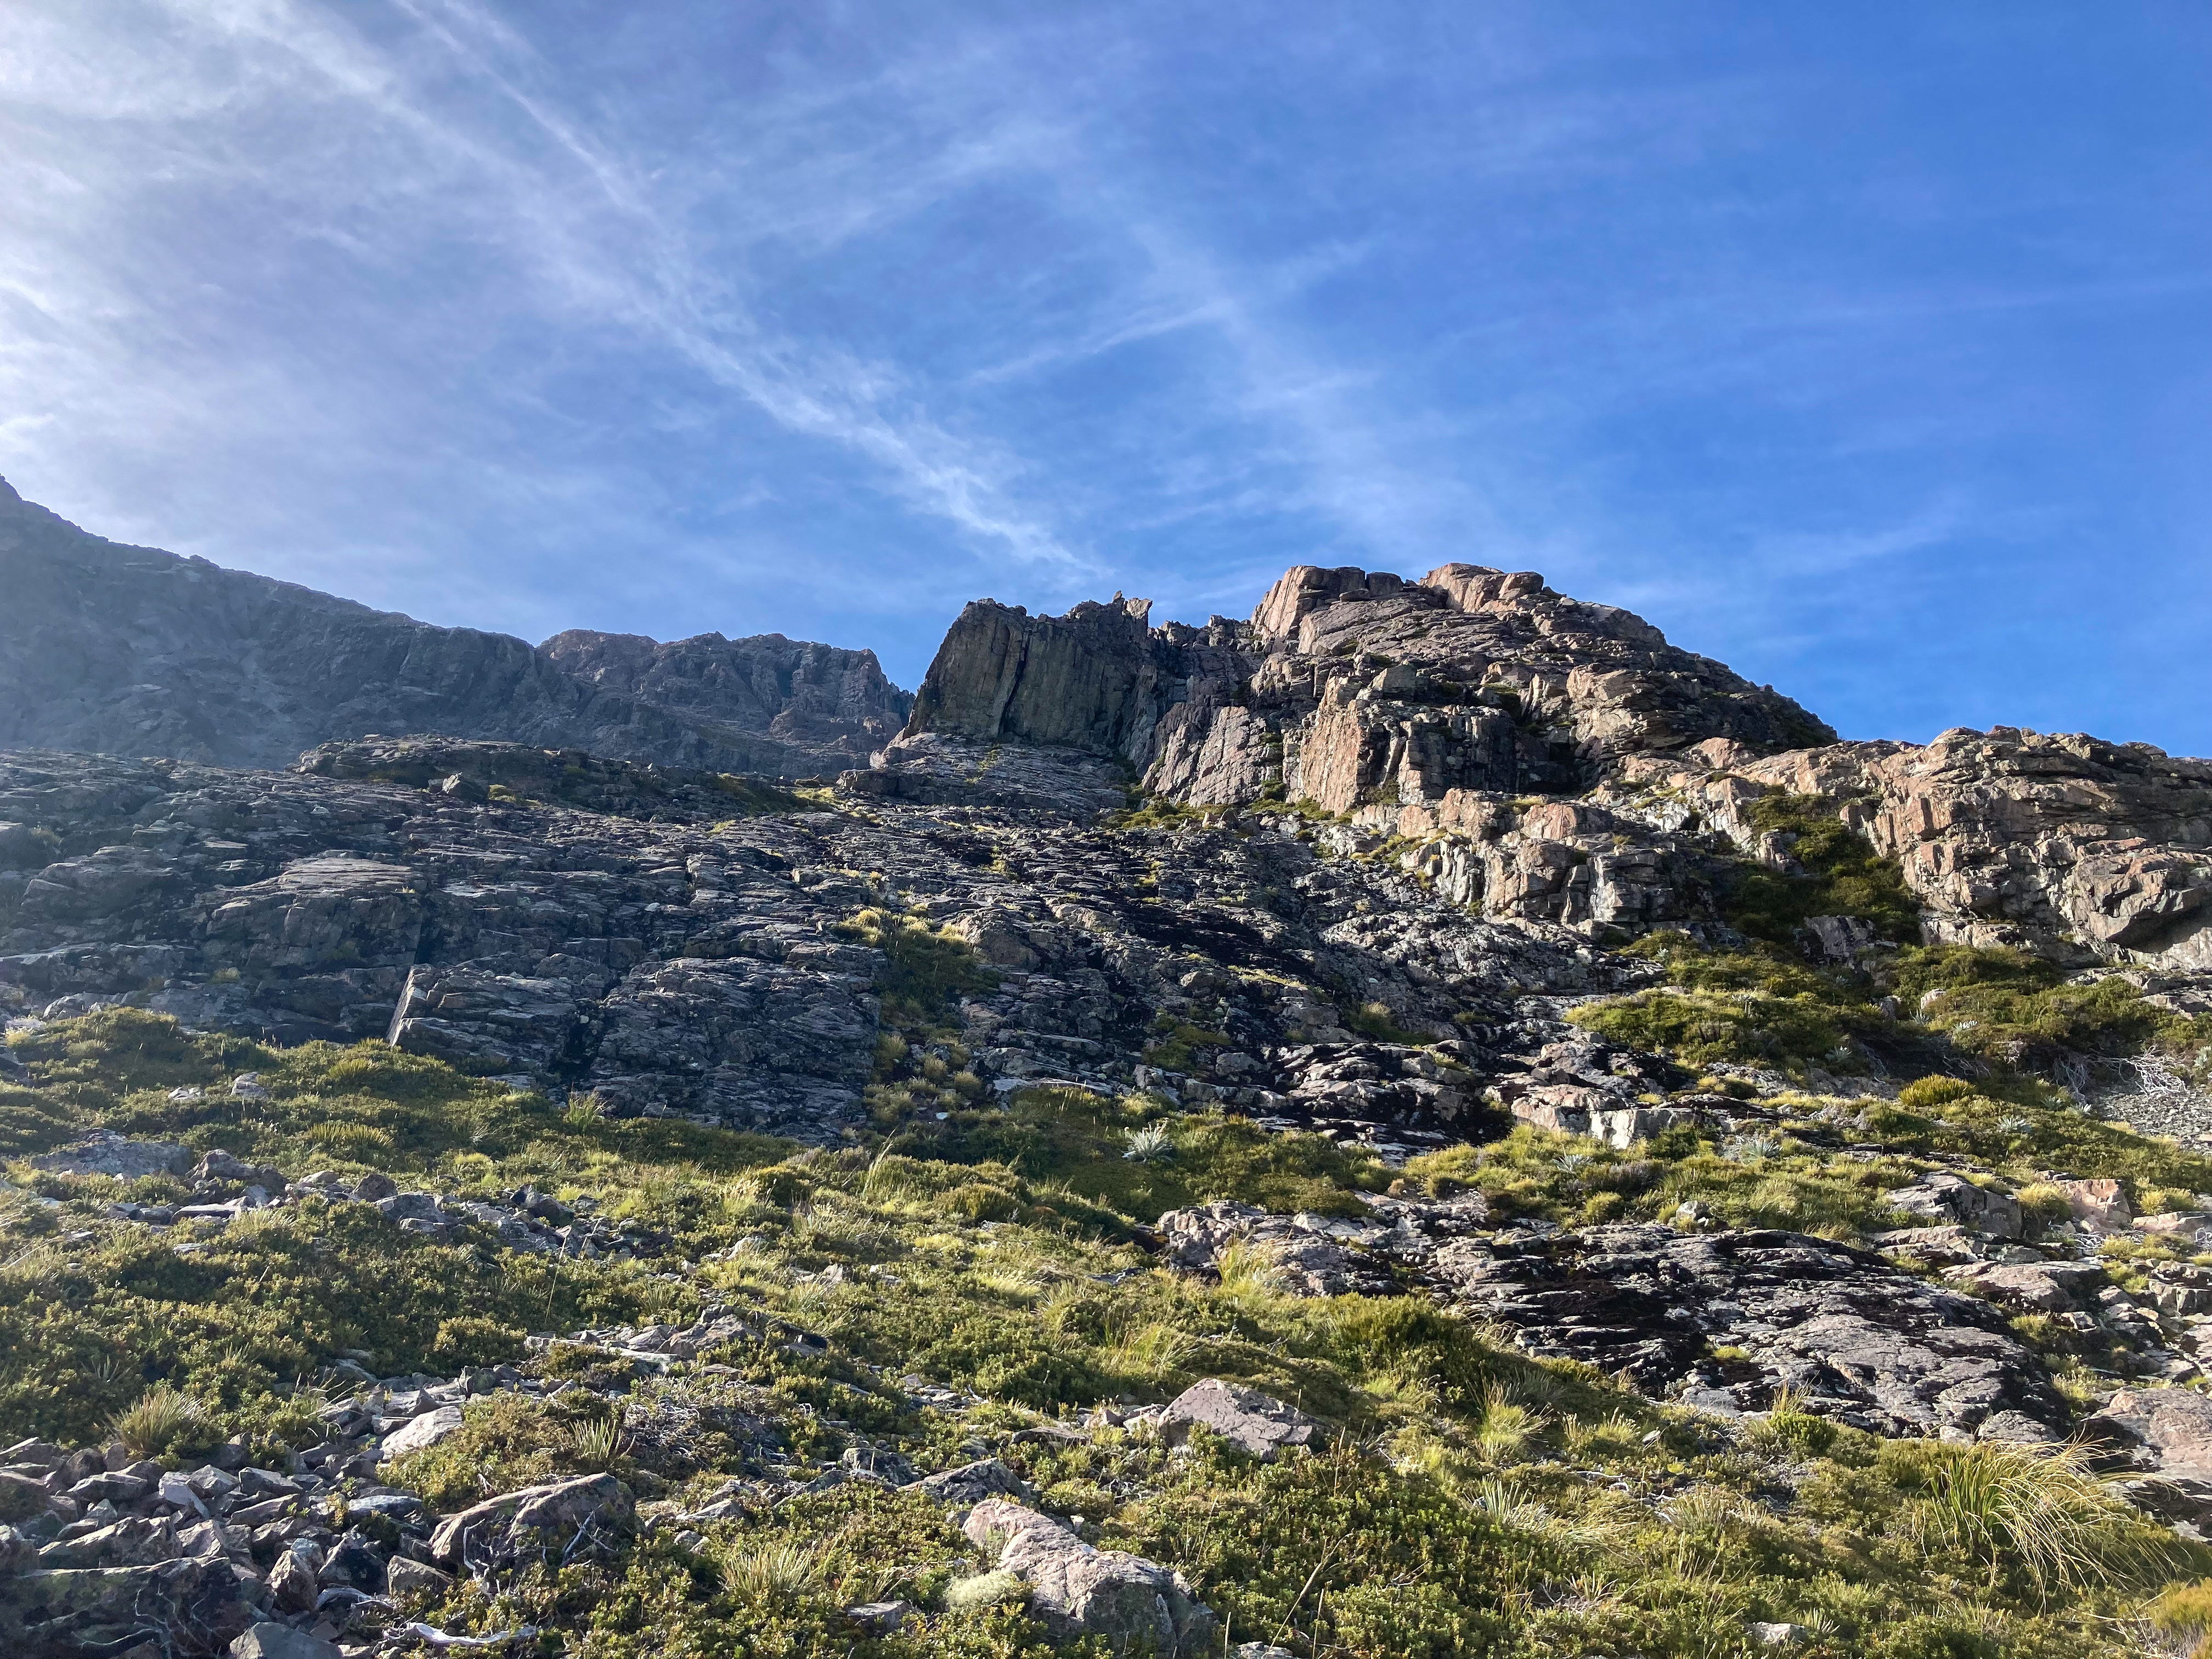
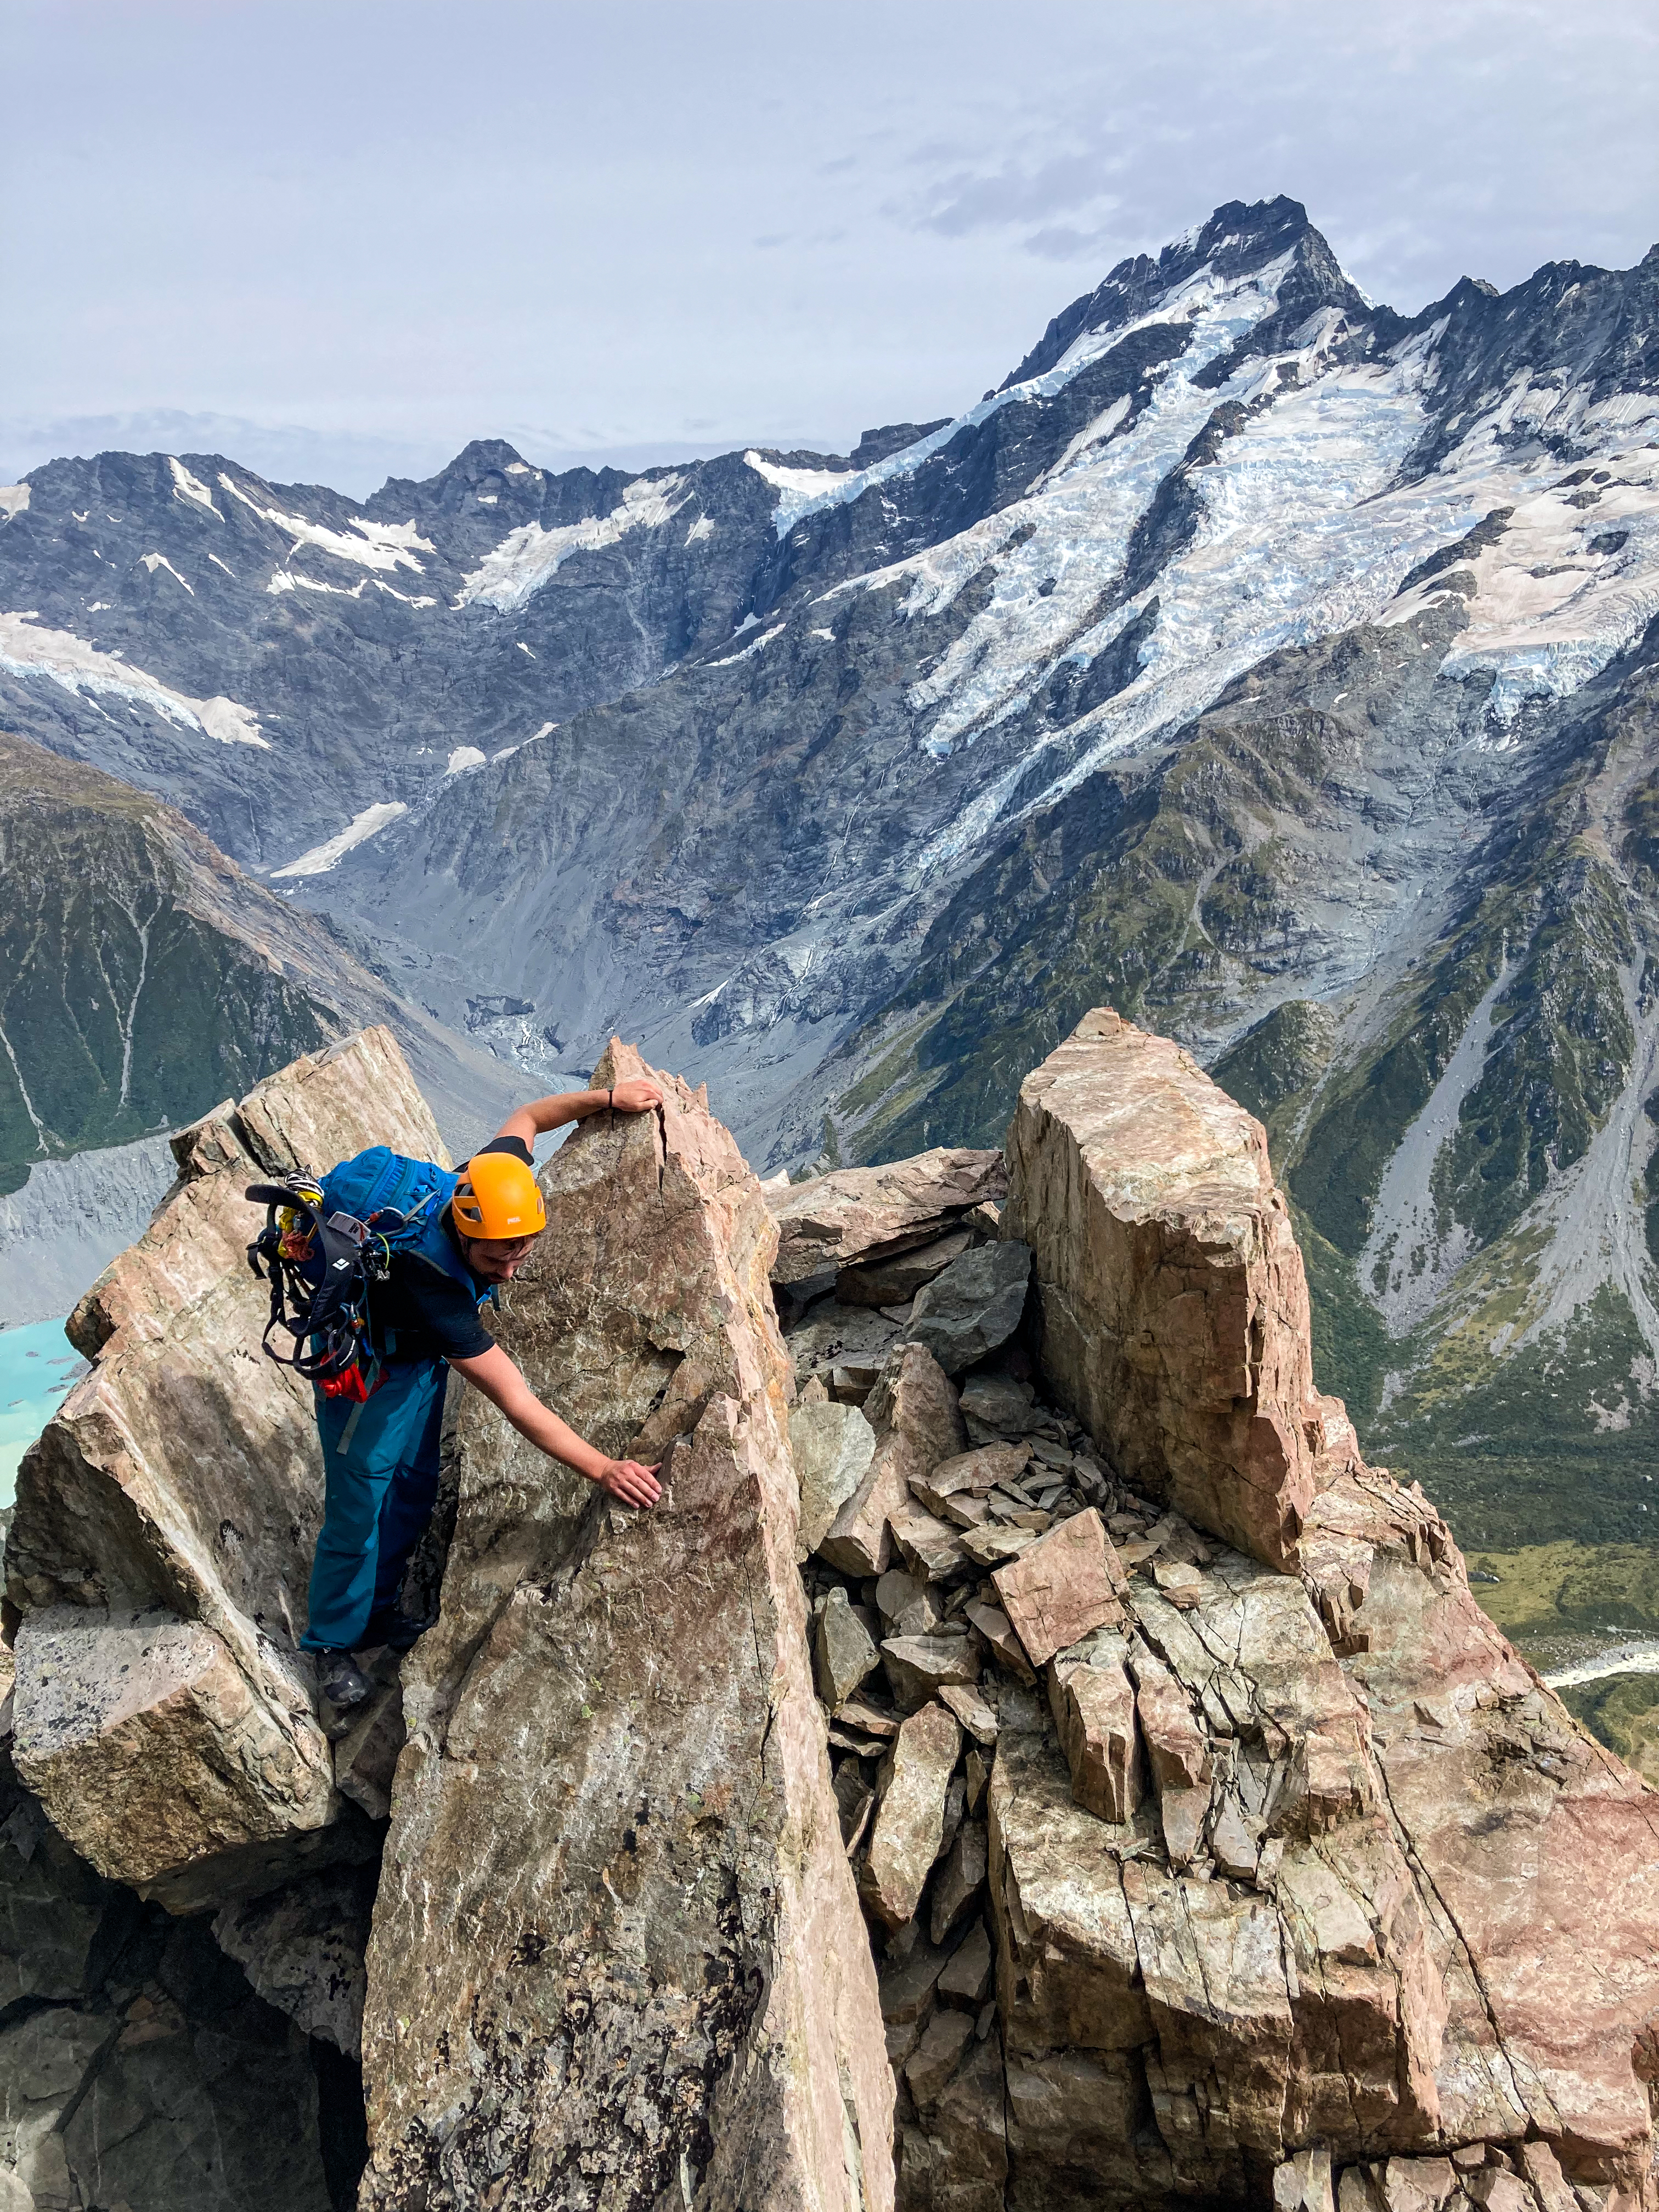
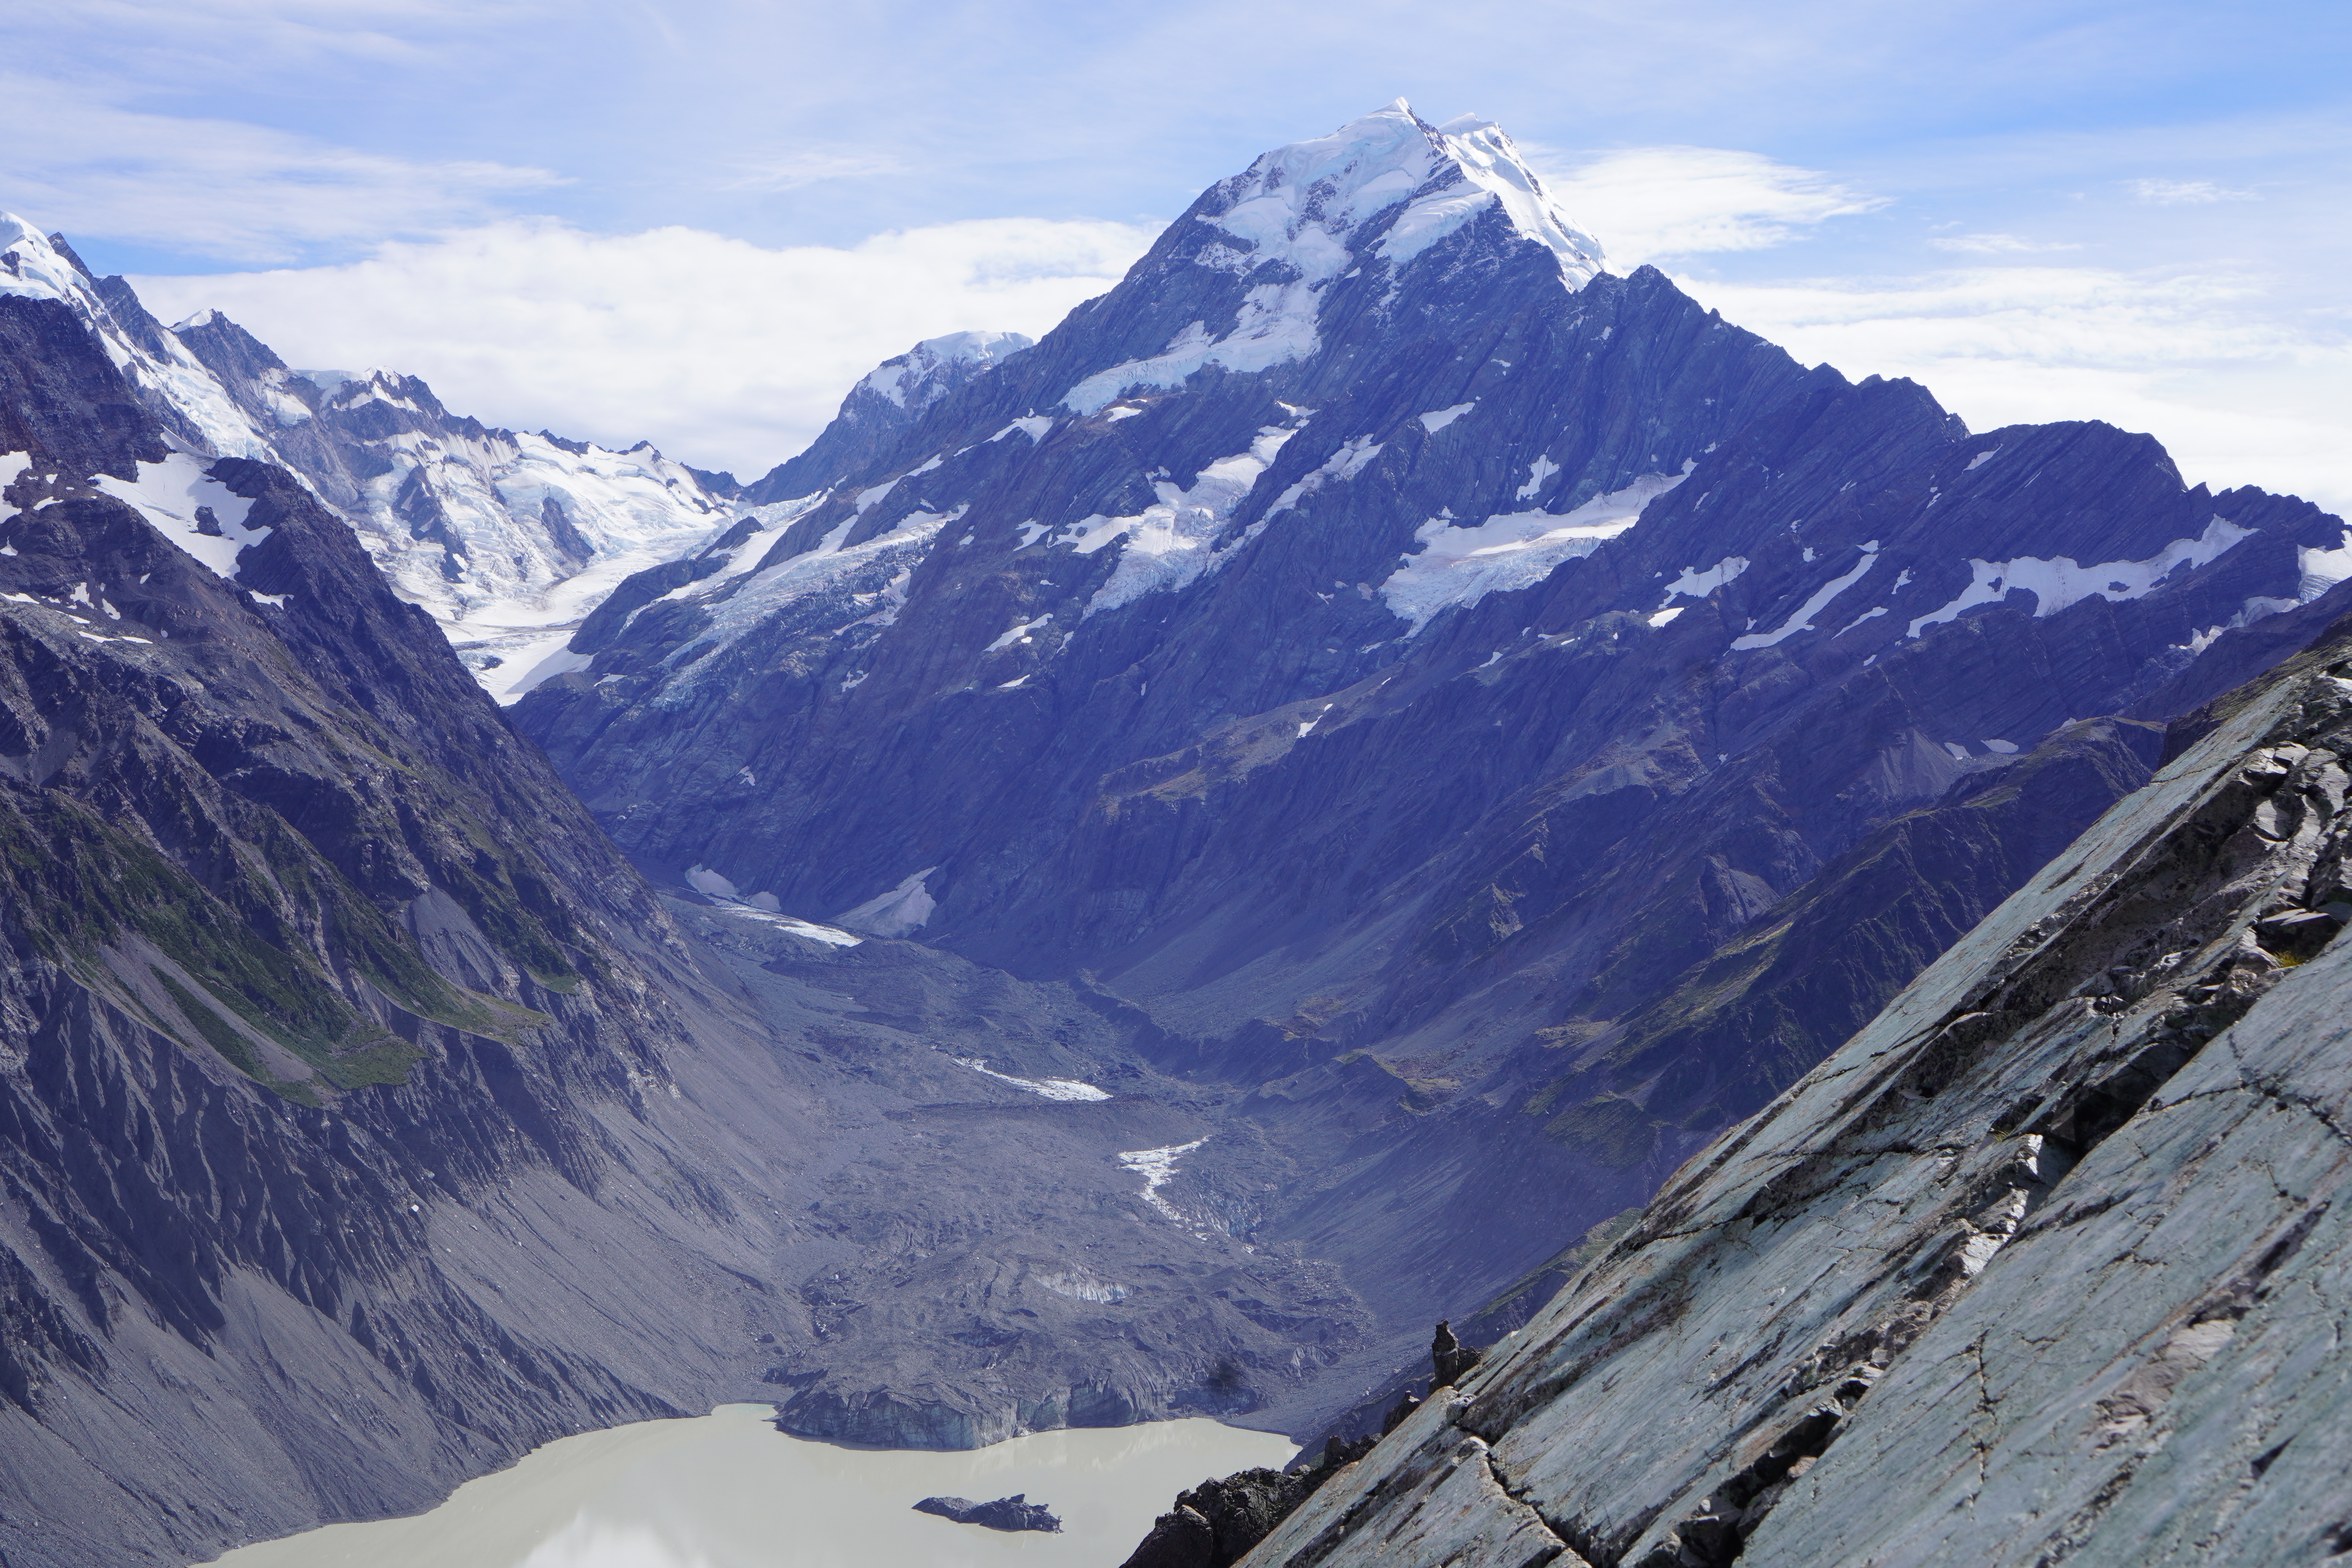
From Mt Philistine you get stunning panorama views of the national park and the southern alps. Here the ridge travel begins!

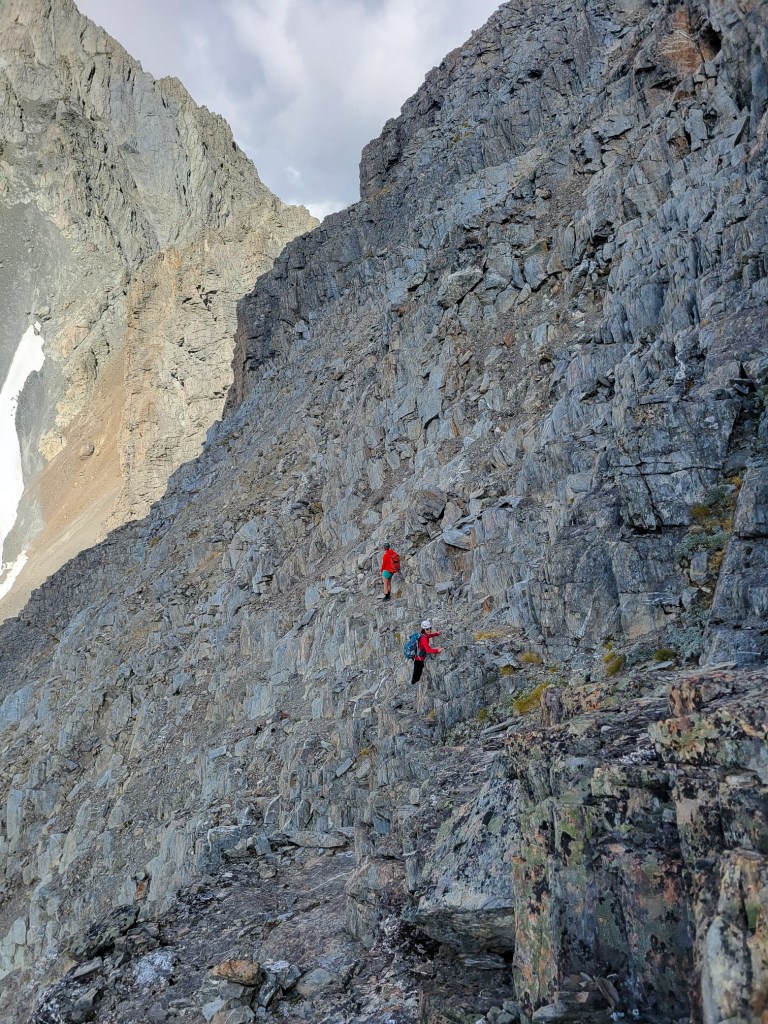
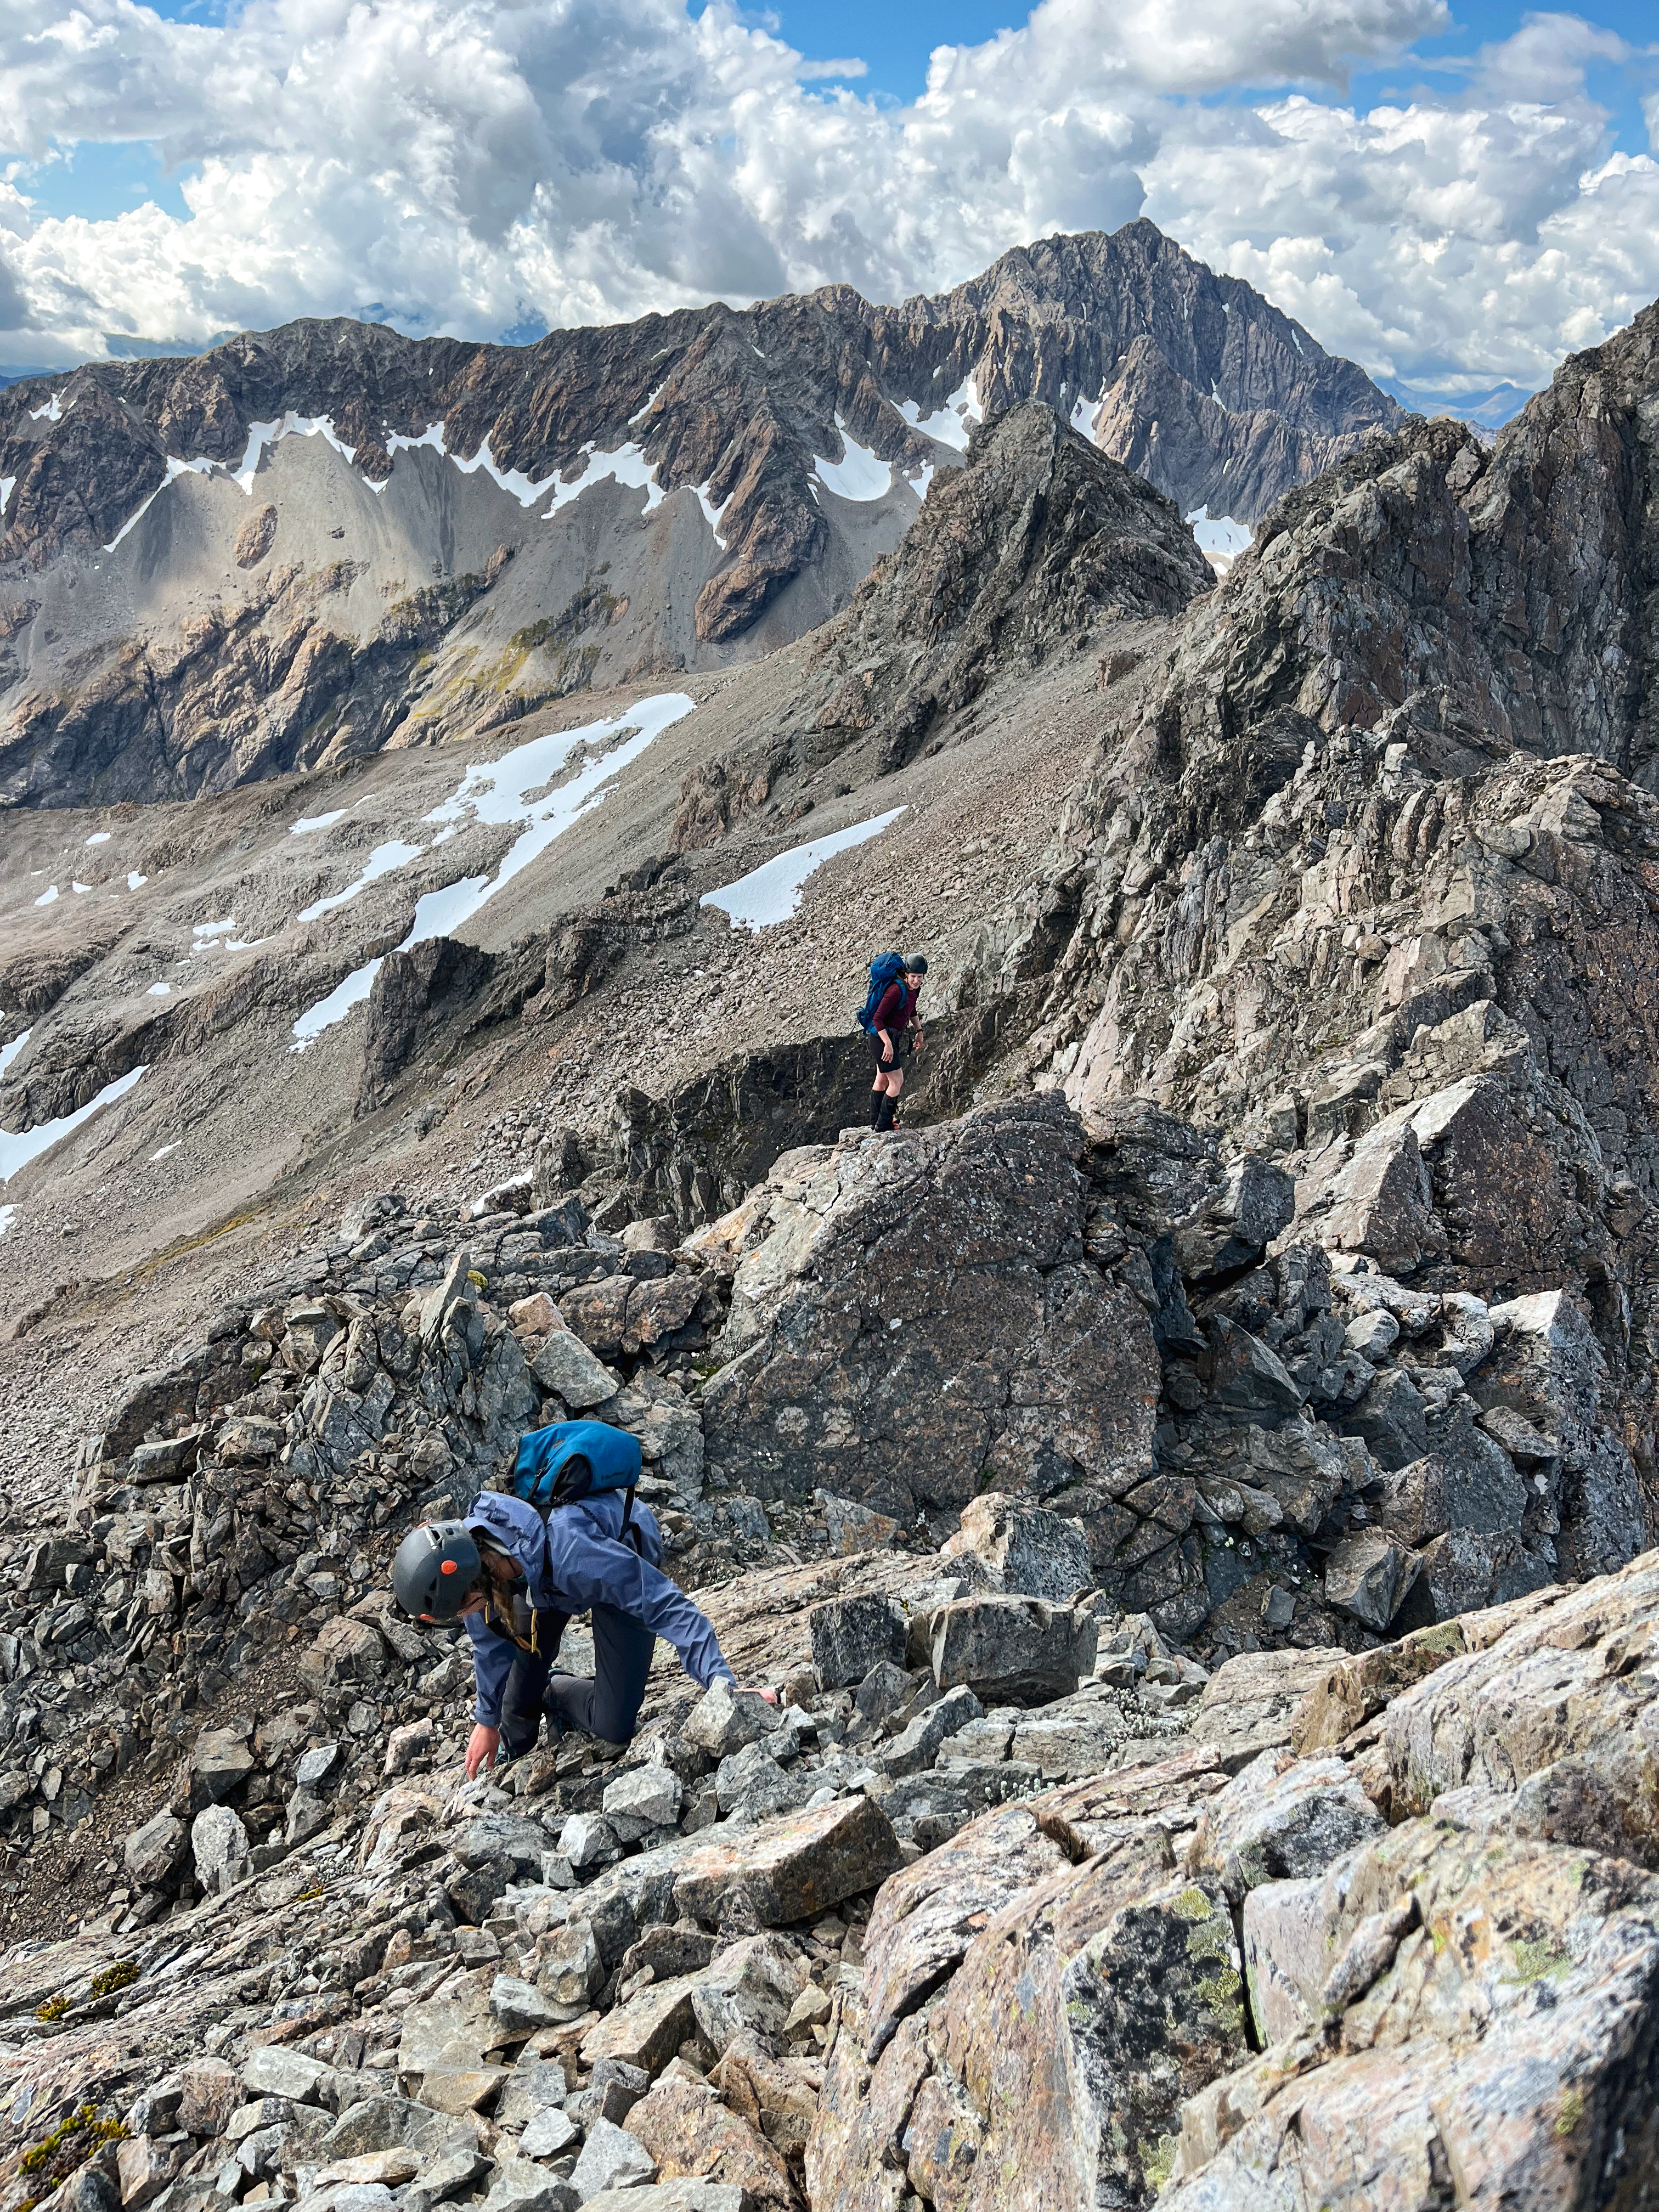
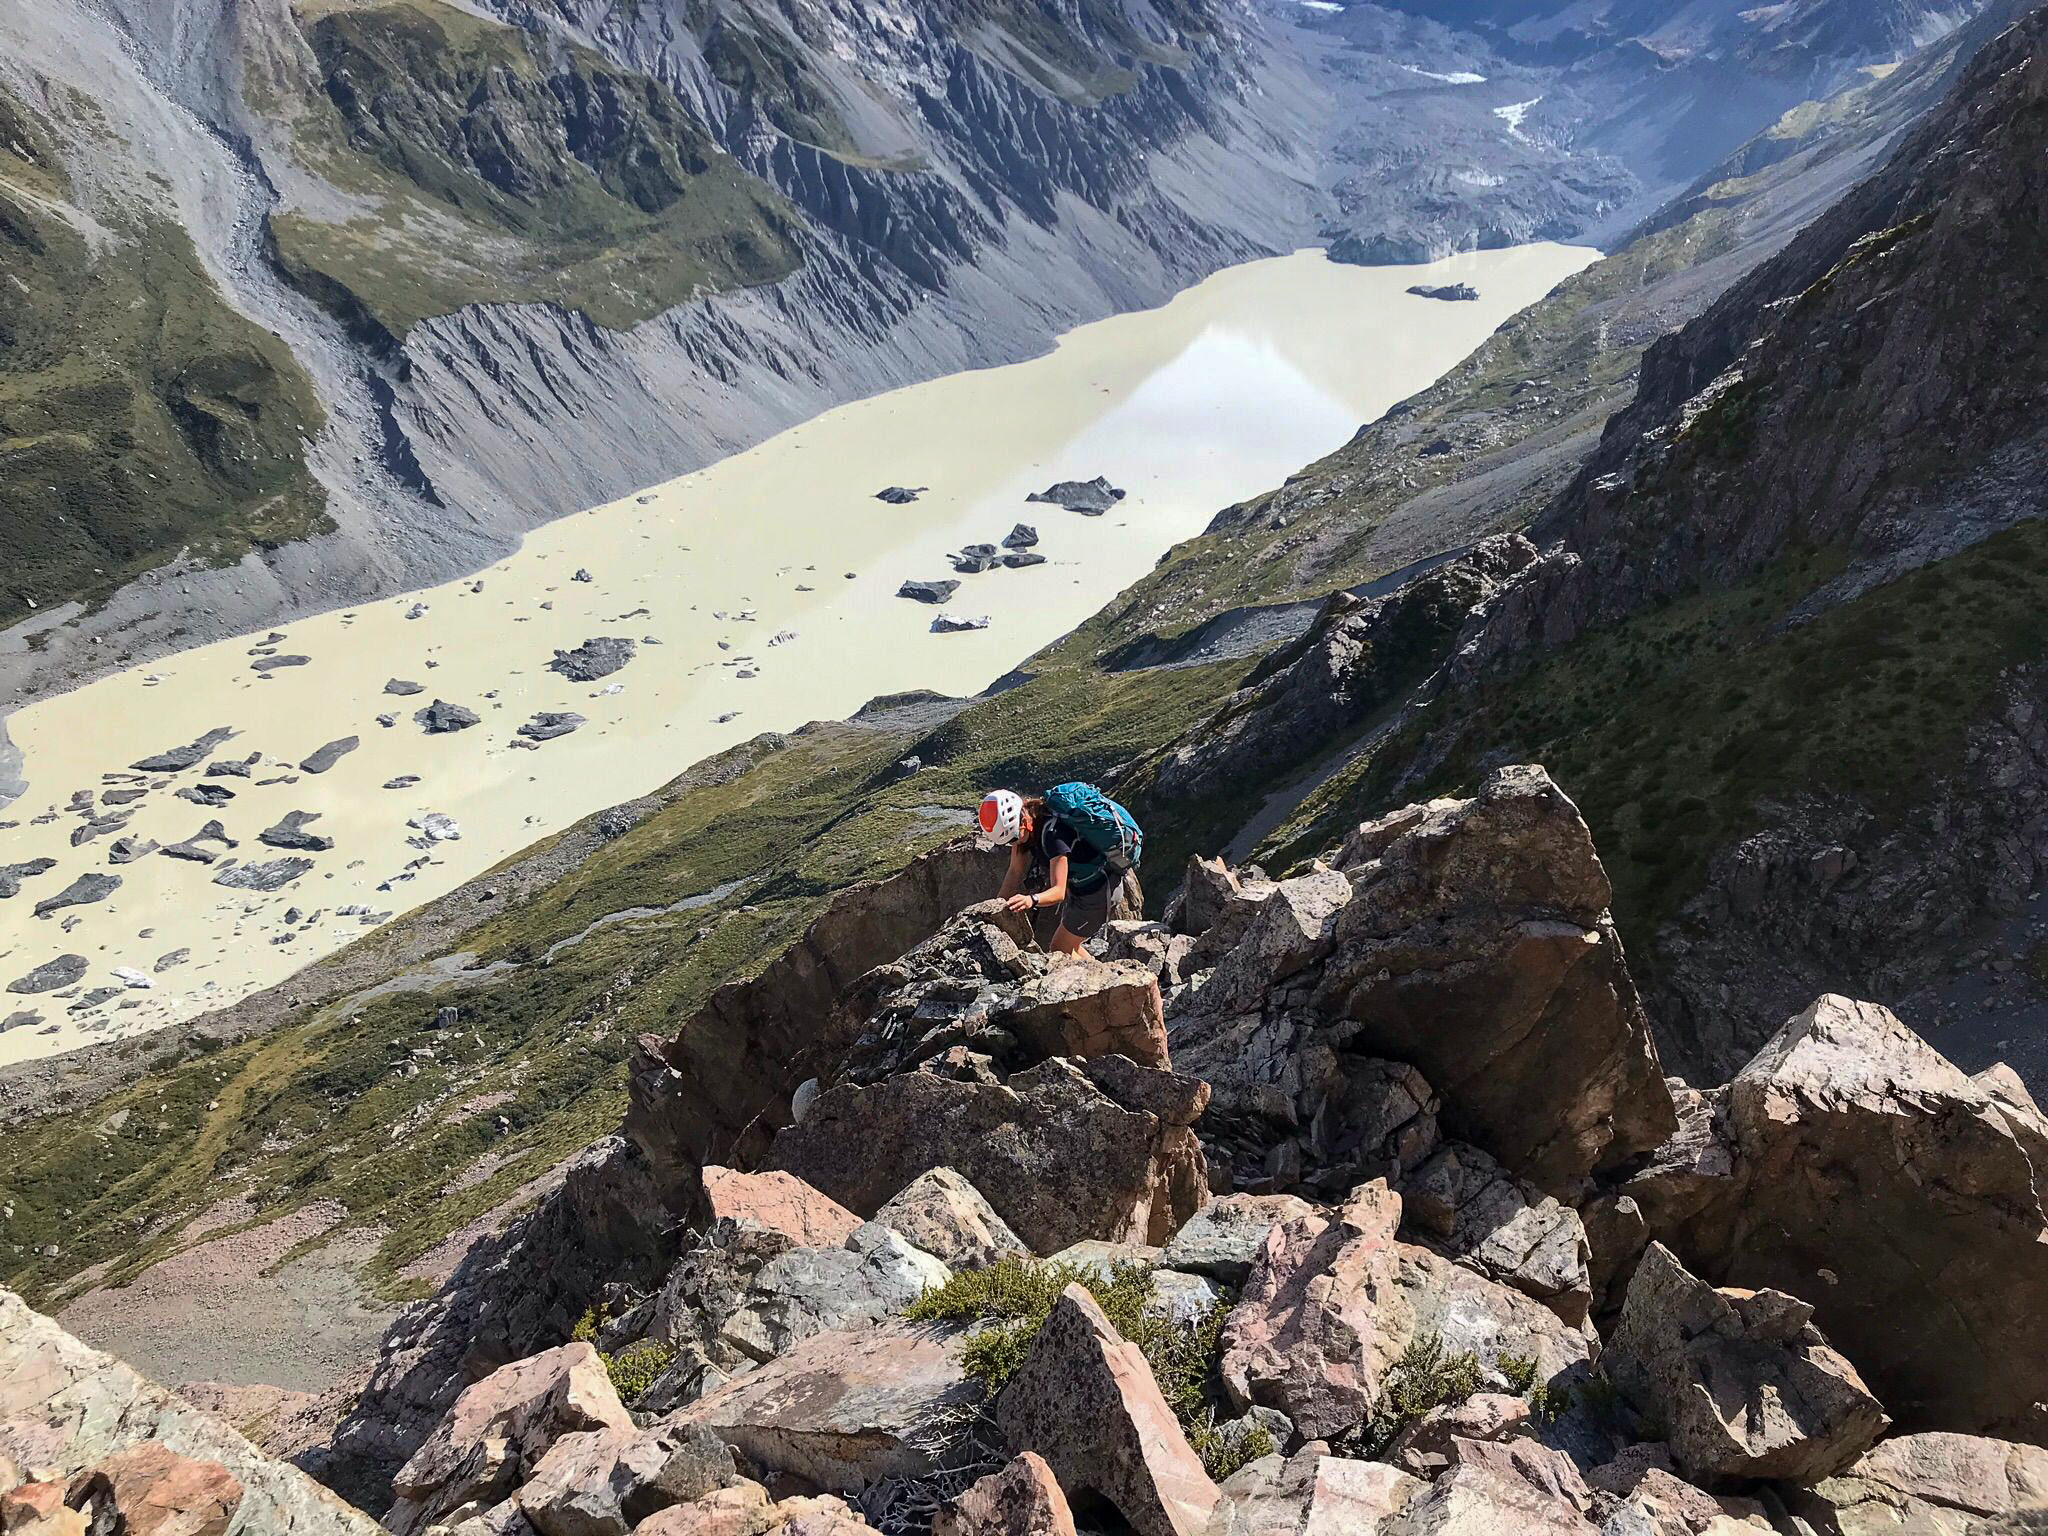
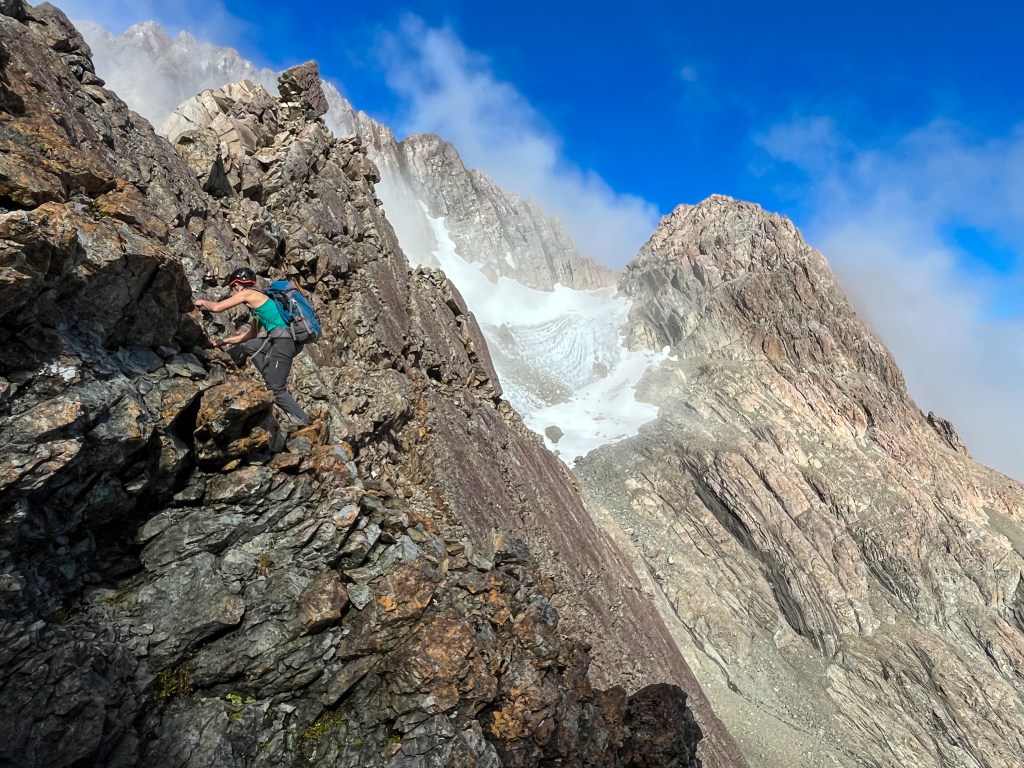
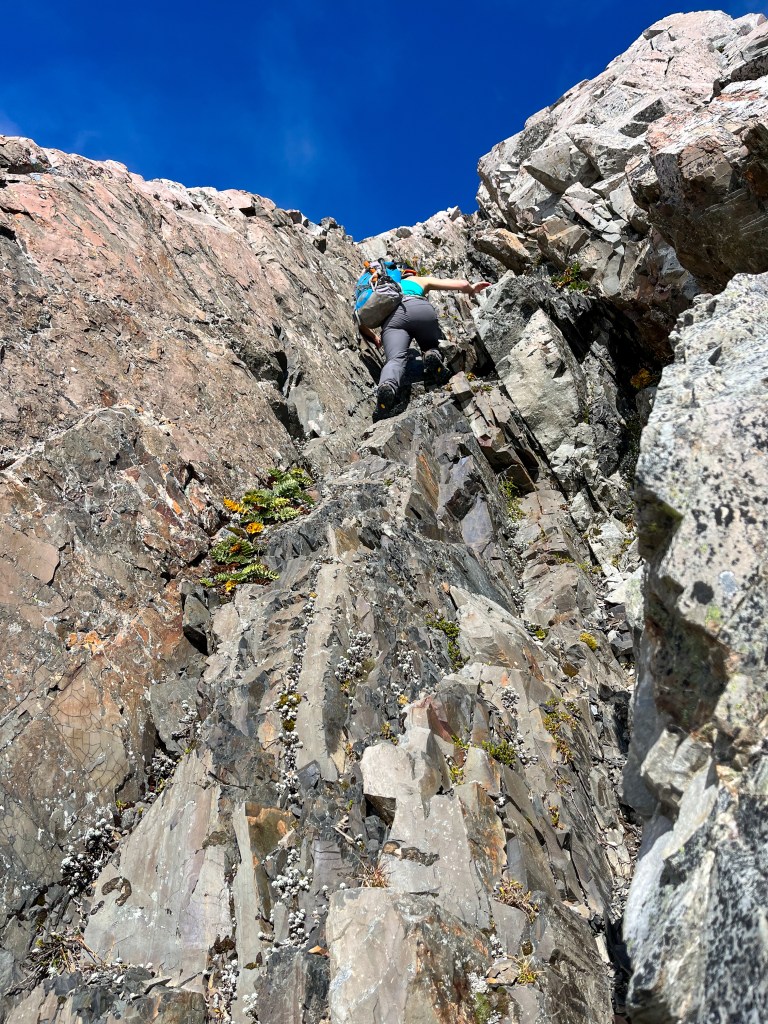
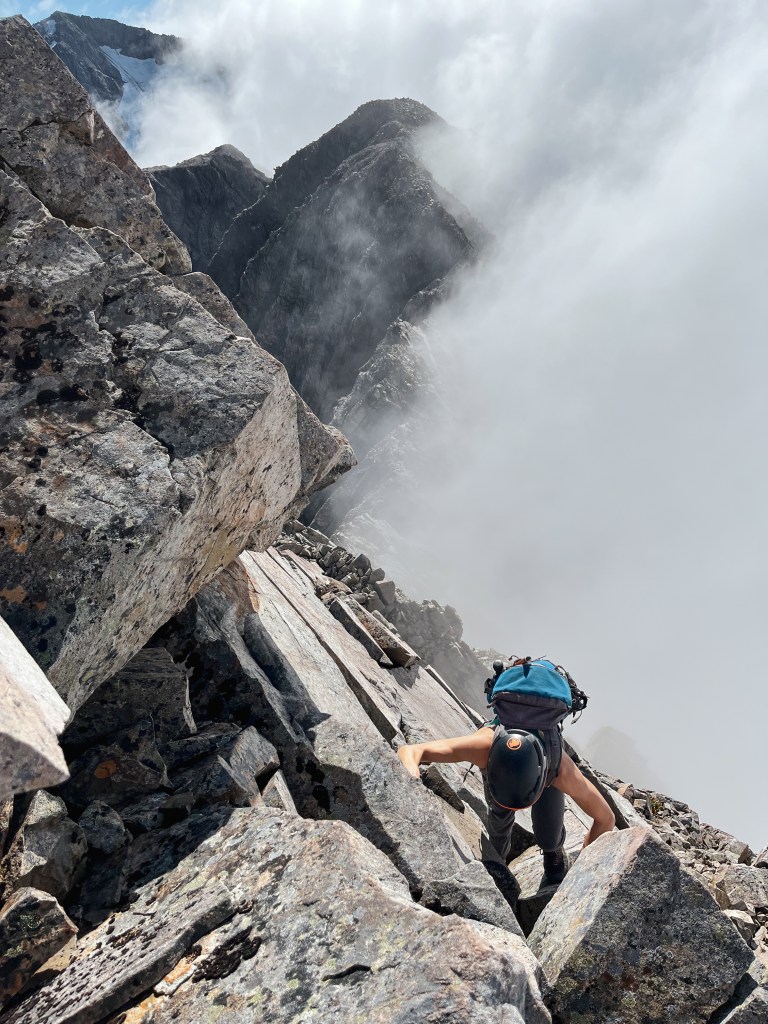
Sidling left, sidling right we navigated the gendarmes – it is pretty intuitive most of the time, but with the heavy clag that came in, we couldnโ€™t see what the best way ahead was so made a couple of errors making for trickier climbing. Some of the rock was slick from the previous nights rainfall which also added to the spice. I found it a harder/more exposed than the Phipps-Temple traverse but still felt happy enough without a rope. 

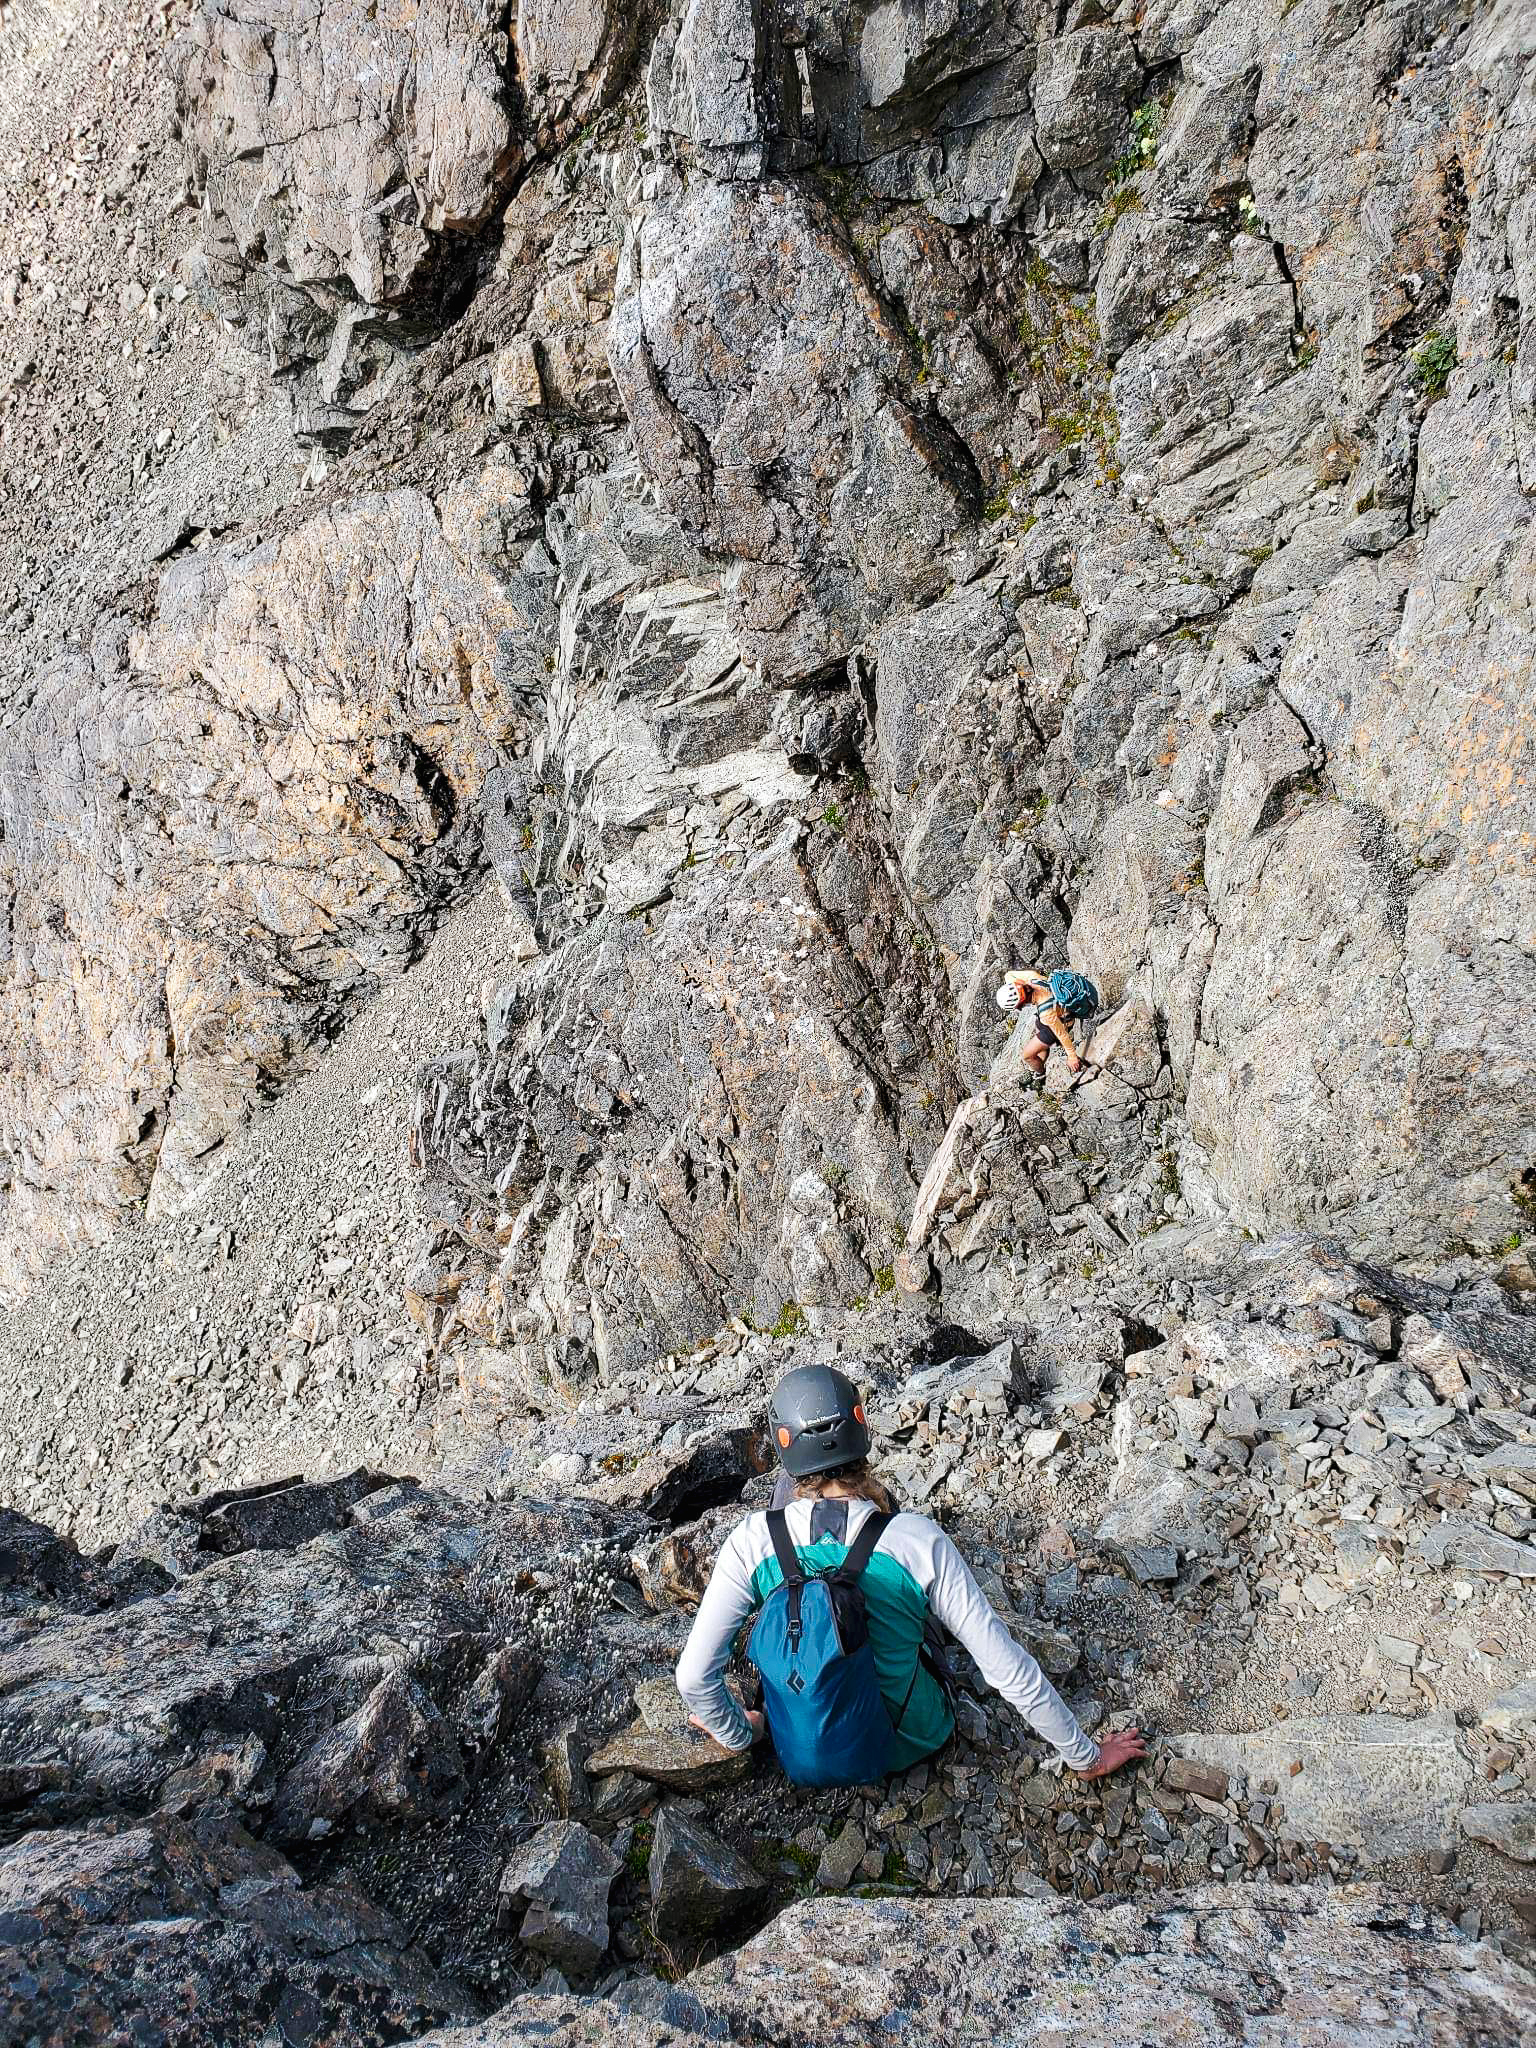
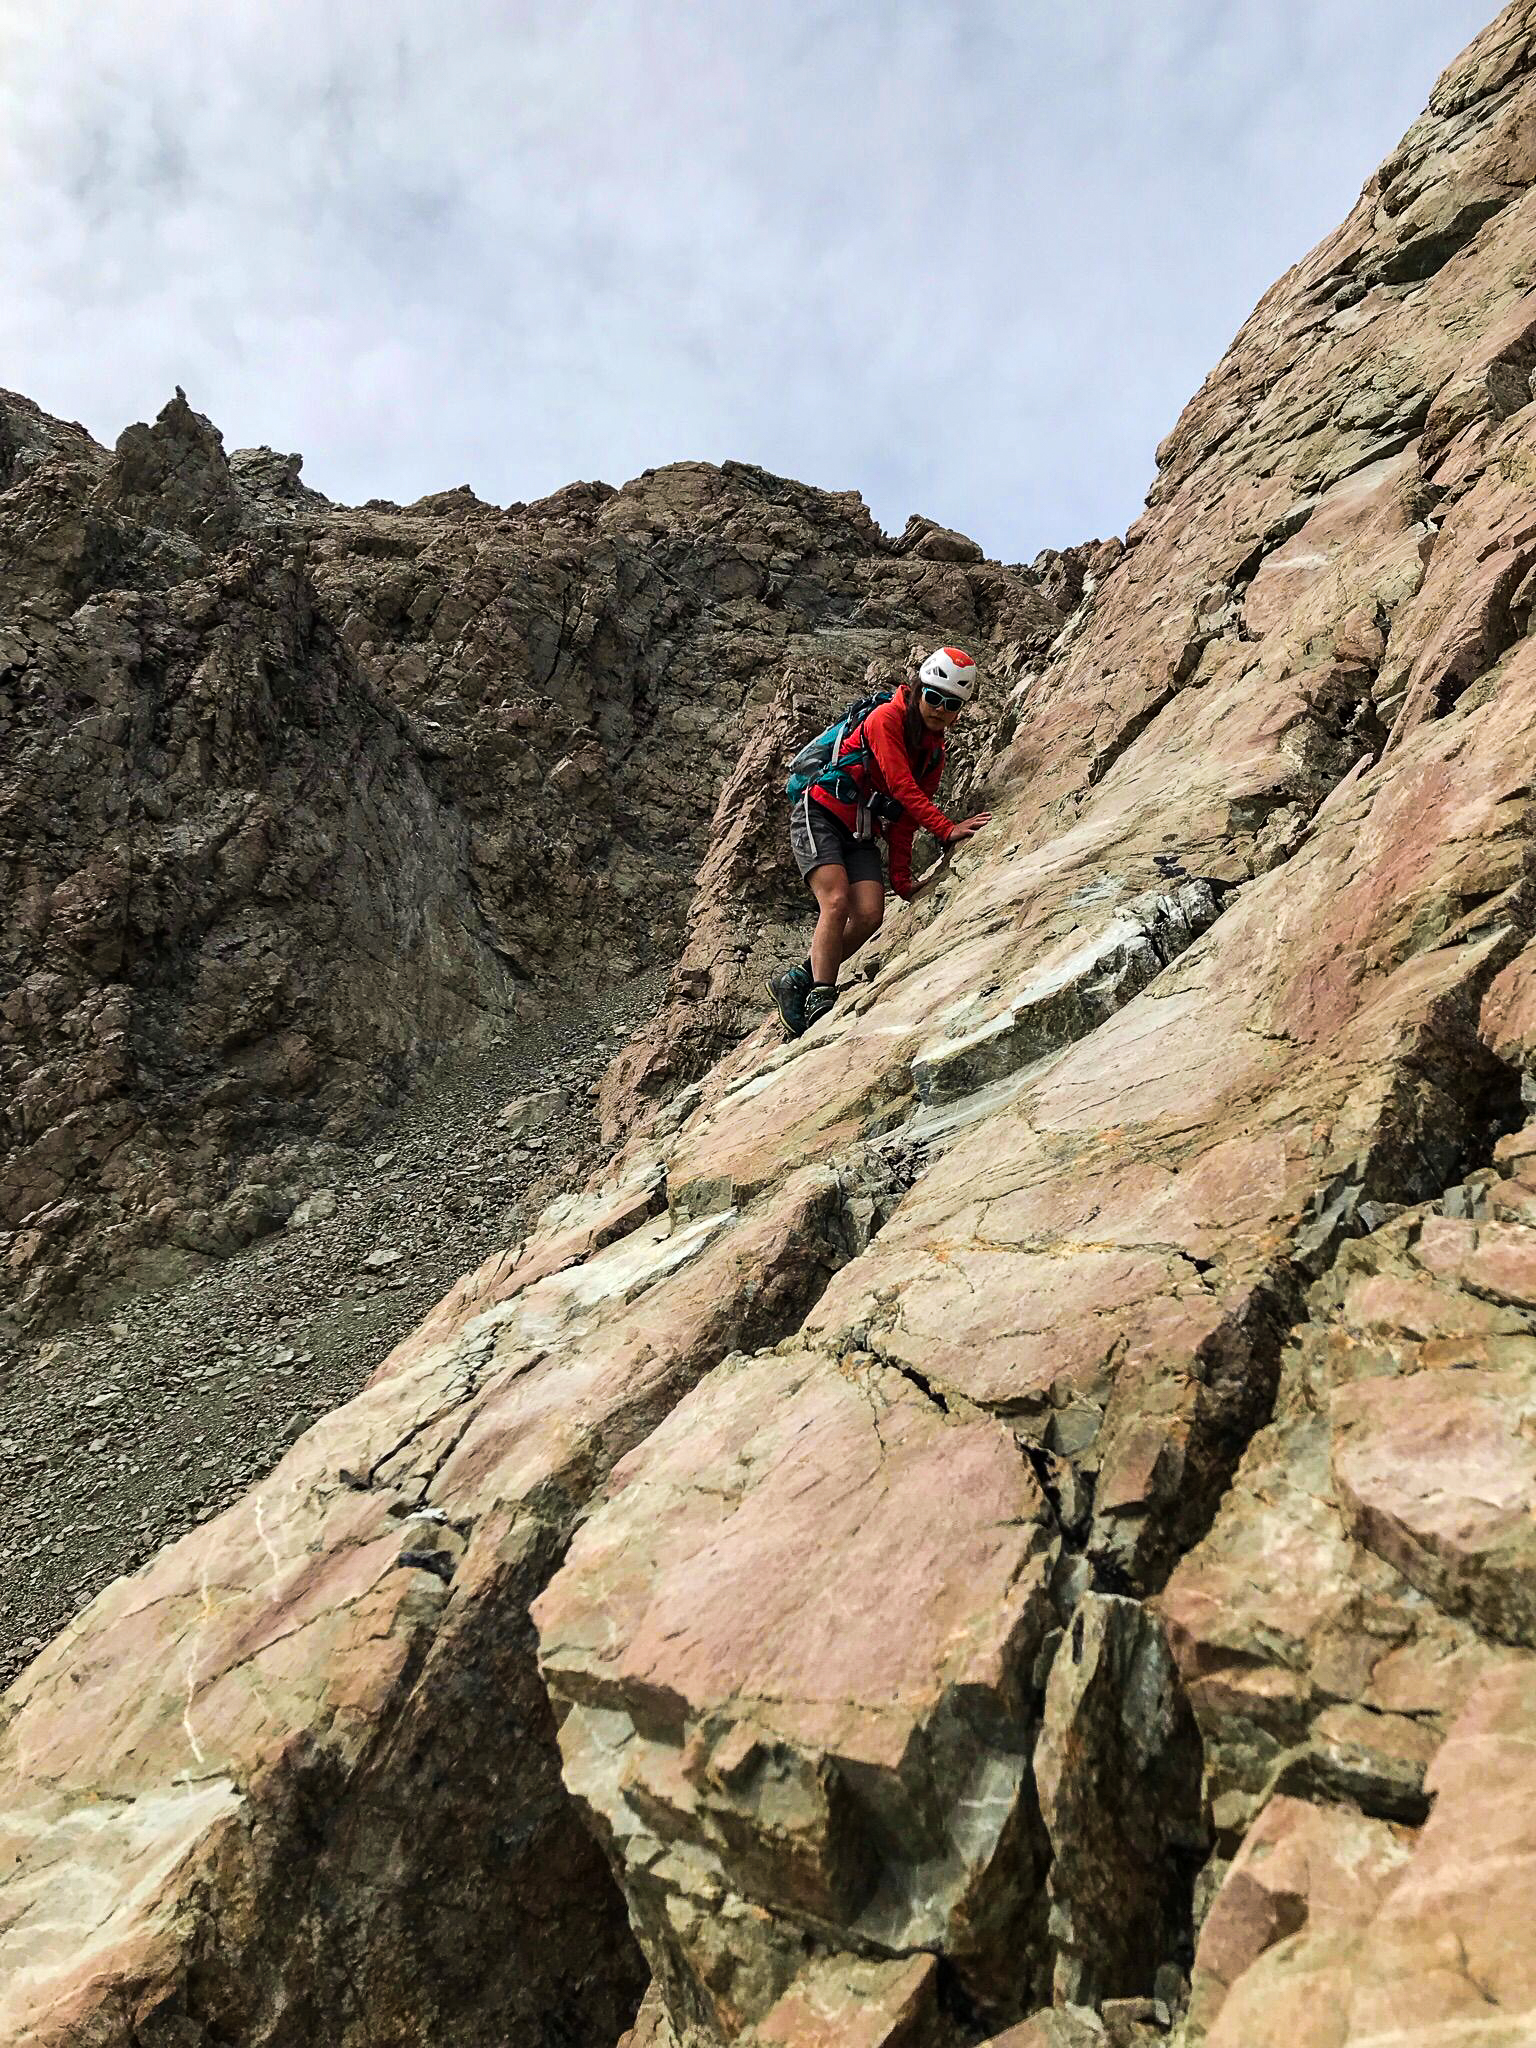
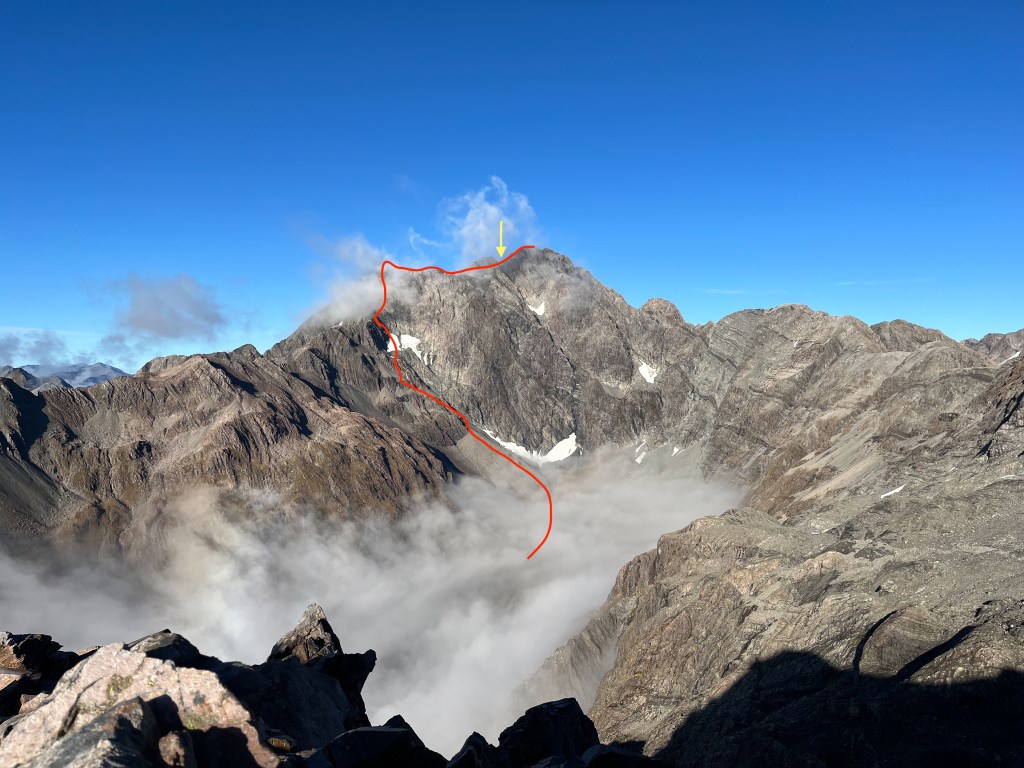
As you approach the high peak of Mt Rolleston there is an obvious gully straight ahead and then some orangey/red slabs to the left. Both ways looked okay but the latter more exposed so we chose the gully – it was loose so we went 1 by 1 but was fine otherwise.

Overall from Philistine to Rolleston the ridge took us around 4.5-5h.

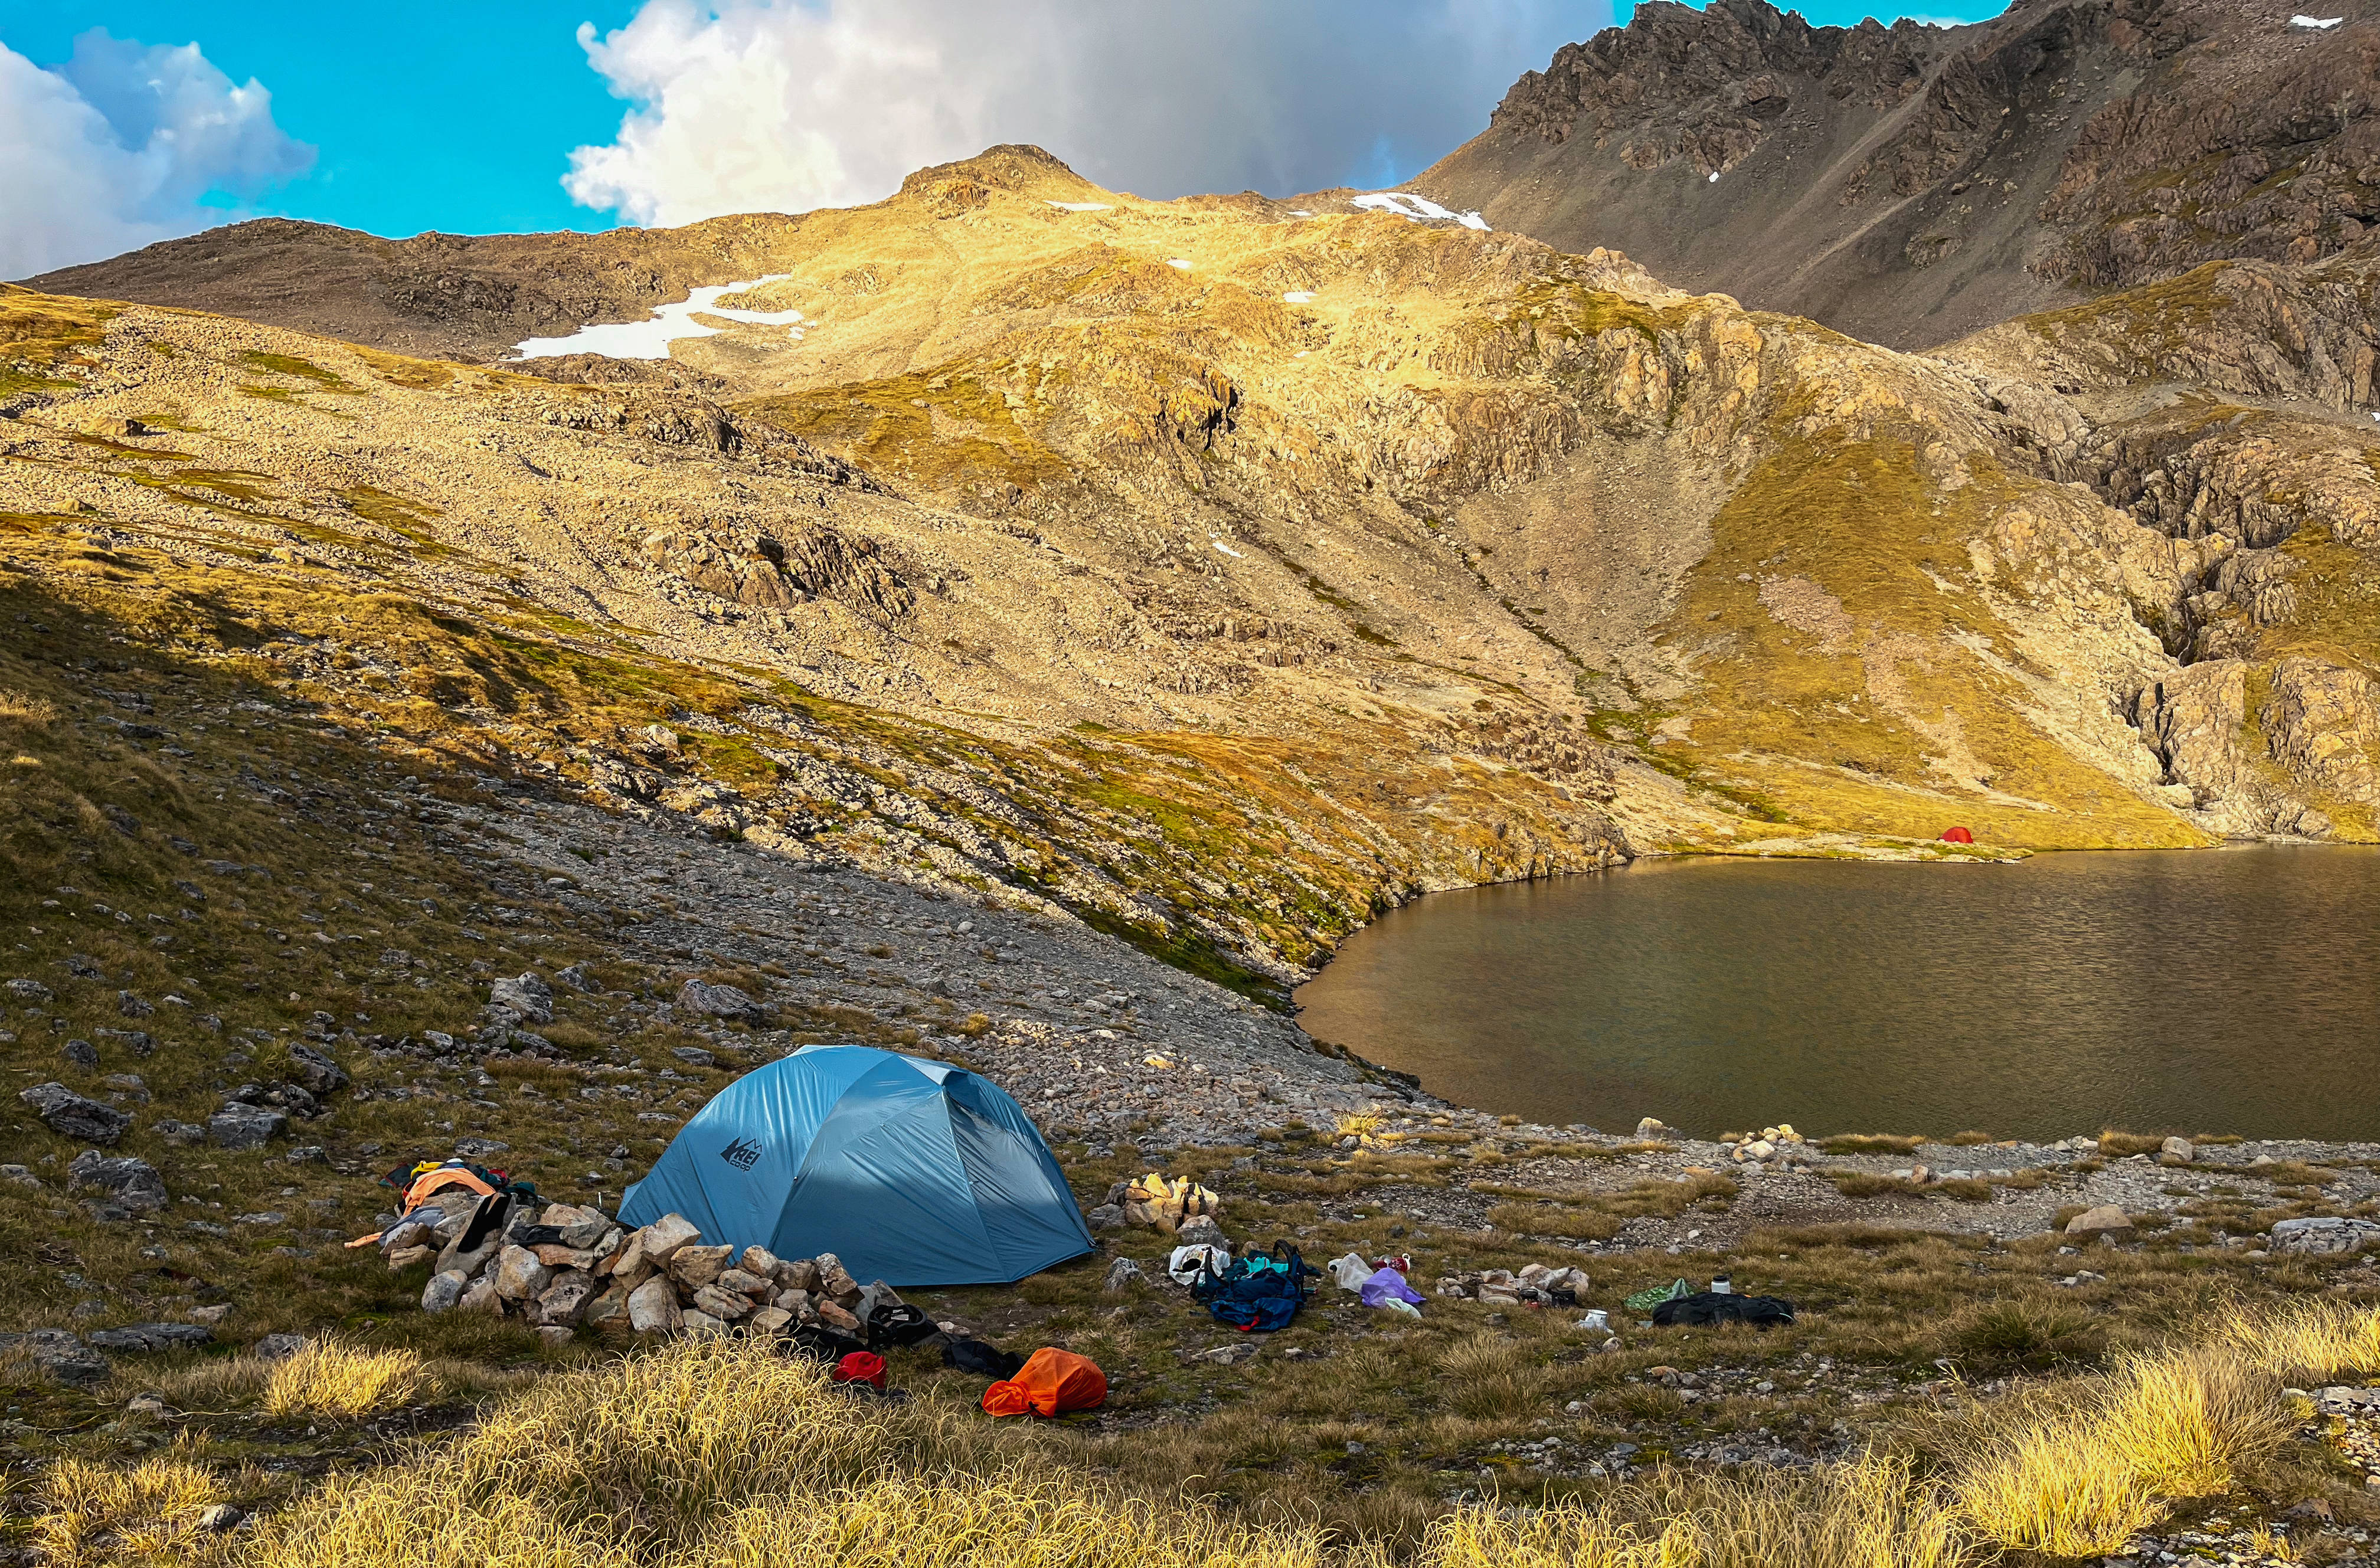
From high peak walk 50m East to a rap station – lots of tat and a mallion. It was around 25m long and drops you into a gully. From here sidle left following the vague trail/cairns. This puts you on low peak (2212). There’s a good biv spot here but no water.

descent

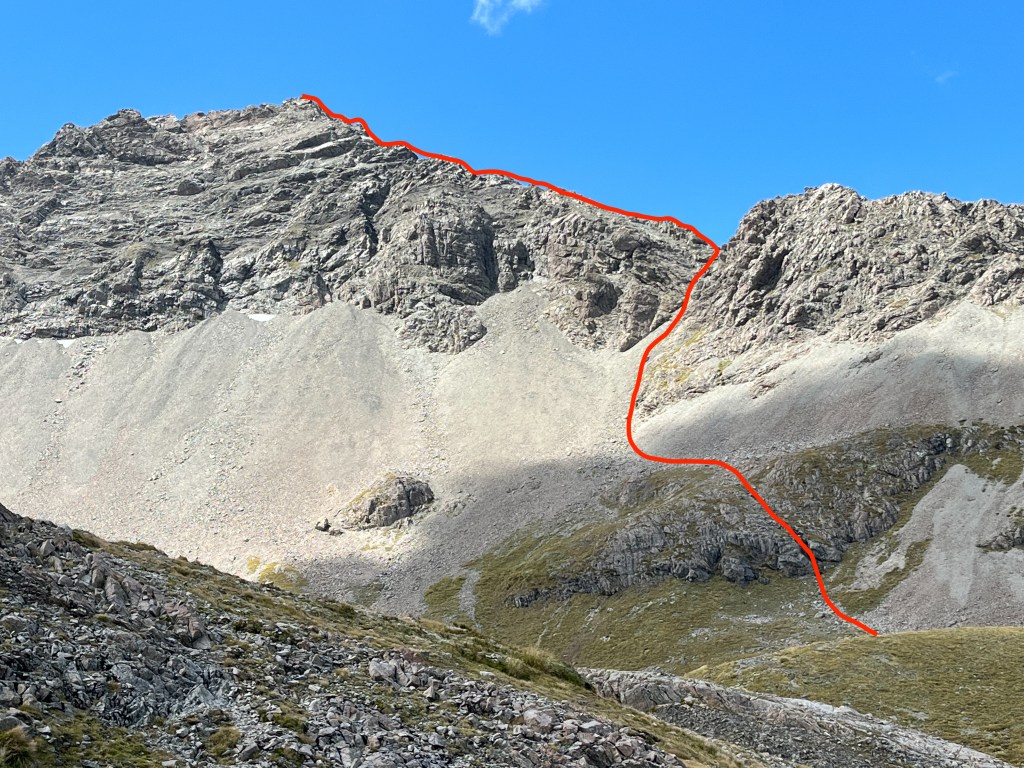
Initially follow the ridge for 250m of descent then veer left onto the Otira slide. Variable quality scree but mostly good. We followed some cairns but there were multiple options to pick your way down.

At around 1950m we used a steep gully to descend but this was avoidable in retrospect if you stay left. We found a bit of snow to glacade down which was a brief but welcome respite from the scree! 

From here just follow the cairns into the valley floor. Stay left of the river and youโ€™ll meet the trail. Boost back out the way you came – optional swim in the river for bonus points!

Dasler Pinnacles, North Ridge

I had my doubts about this trip. Much uncertainty regarding the access, timing and weather. It turned out to be the perfect weekend away, and my first taster of a “multi-sport” adventure. With bikes to speed things up, we achieved our objective and made it door-to-door within 48h. Message for the gpx file as can’t upload to the website.


  • Grade: II, 1+
  • Time: 20-30min bike to Monument Hut (around 5km, depending on how far your car can take you along the 4WD track). 45 min bike to Red Hut (5.5km). 30 min bike to trail head of Dasler Pinnacles trail (4.5km). 7-8h from trail head to summit and back; time on ridge was around 2h.
  • Equipment: can be done in trail runners/approach shoes. We took a rope, helmets and tat only. No rack. We took lightweight crampons just in case as there had been an unseasonable dump of snow in the weeks prior but there was no snow on the route and minimal in the surrounds.
  • Season: Summer/early Autumn to ensure rock is dry. Best to go when dry since significant rainfall in the days prior will have increased the river level, making your crossings spicier.
  • Team: Maria, Shona, Younes 3-5/03/2023

Access

The Hopkins Valley is very popular with 4WD-ers and hunters alike, so there is a decent 4WD track along the valley floor. If you have a 4WD – or a high clearance vehicle you can drive to Monument Hut. If you’re happy fording then you could drive the whole way to the start of the Dasler Pinnacles trail. We parked 2km from the road end and biked around 5km along easy road to Monument Hut.

From Monument Hut, don’t follow the trail into the forest – it is possible to bike but the track makes you gain elevation unnecessarily. Instead cross the river immediately in front of the hut (1st of many crossings so don’t be precious about your feet). There are a few 4WD tracks – one that takes you up the river’s true right then cuts across to Red Hut; the other goes diagonally across towards Red Hut on the river’s true left. The track up the river’s true right was better formed and easier to ride.

Great in-situ chain for a steep section on the Dasler Pinnacles trail – was happy to yard on it.

From Red Hut (great place to stash any sleeping gear etc. that you won’t need for the rest of the day), we biked along an easy 4WD track, stashed the bikes and hiked up to Dasler Biv. Trail is well marked and easy to follow. Follow the trail to the left of the Biv; soon you’ll break out of the beech forest into scrub. Navigate the bluffs, aiming for the base of the N ridge. There is a decent camp spot with water at the point 1840; the views would be glorious and we wished we were staying the night up high. Scramble up the scree, hugging the rock face, up to the base of the N ridge. We stashed some more things under rocks to make our climb even more light & fast.

climb

Fun scramble to the summit; none of it felt committing – if ever there is a steeper section then there are options to sidle around. The rock (?Greywacke) was pretty decent, peaking interest in the other routes on the NW face. Down climb the same way. 2-3h return.

We boosted down, quick cuppa at the Biv, then some respite for the feet as we biked into Red Hut for the night. We just missed the heavy rain, and woke up to snowy mountain tops the next morning. Drove home in time for dinner – a very achievable weekend trip from Christchurch!

Mt Oates, West Ridge via Lake Mavis

I do love an open body of water. And this one is a goody. A beautiful camping (and skinny dipping) location – albeit not as remote as you might hope as we had the company of 5 other tents, a raft and a glider! Mt Oates also provides an opportunity for some spicy scrambling. The walk up the Mingha takes you along the running segment of the coast to coast race so we bumped into lots of people training for it – so much lycra!


  • Grade: II, 2
  • Time: 5h to Lake Mavis (4h to Goat’s Pass then 1h to the lake); 1.5h to low peak of Mt Oates, 3.5h along the N ridge / back to the lake.
  • Equipment: can be done in trail runners/approach shoes. We didnโ€™t take a rope/rack, only helmets. Easy scrambling to low peak but between low and high peak we wanted a rope; instead we decided to go along the N ridge which was mostly fine.
  • Season: Lake Mavis would be snow-free in spring/summer; you would want to do Mt Oates in summer to ensure the rock is dry
  • Team: Laudi, Abbey, Maria 14-15/01/23

Access

Park at Greyney’s Shelter. We stayed at Kennedy Lodge the night before allowing for a bit more of a lie-in! From the Doc sign at the N side of the carpark cross the road and go through a tunnel which puts you on a doc trail. Follow the orange markers. The Waimakariri river level varies significantly, so worth checking this before going as you need to make a few river crossings. It’s just over 11km to the point where you want to take a right up towards Lake Mavis. Don’t be tempted to turn off early – from the stream draining from Lake Mavis continue another 500m on the track. The turn off is marked with cairns. Head up the sparse scrub/scree, following the cairns up to Lake Mavis.

climb

Cross the outlet of the lake then head up the scree gully just left of the buttress that extends the lowest on the scree. Don your helmets! The climbing is easy but the rock is a little crumbly. It was great fun scrambling up to low peak but on traversing the summit to have a look over to high peak, we weren’t too inspired. There is a drop of around 20m then quite a steep climb, which looked pretty gross to down climb.

From Lake Mavis looking up to Mt Oates, low peak. Our route along the West ridge.

Instead, we opted to go along the N ridge towards point 1978. There are multiple opportunities to drop down from the ridge onto scree, but we were enjoying the scrambling so continued so far as we felt comfortable then dipped down. Towards the end we were increasingly sketched out by the level of choss so were relieved to be on safer ground – “oh blessed scree”. From here it was a quick/easy descent down to camp. Even found a 50m stretch of snow to glacade down! The next day we went out the same way due to time (and food constraints) – but another option would be to go over the ridge N of Oates, descend to Taruahuna Pass then to Edwards Hut and out (approx 9h). Great weekend trip, completed with ice-cream!

Mt Wakefield, Guideless Buttress

I first heard about this route from my guide on a mountaineering course; he had recommended it as a classic ‘must-do’ for the region.
That was 2 years ago, but I finally got round to it in March 2022. A really great day trip from Cook village. Easy access, long route (800m), non committal. And the rock quality was pretty good! She says, surprised.

Very solo-able. Some parties may want to take a rope but expect a long day if that is the case; it is an 800m route! As a frame of reference, it was more exposed than the Phipps Temple Traverse, but similar in parts to the access to Moir’s mate.


  • Grade: III 3, crux 8
  • Equipment: we took a 30m rope and a minimal rack just in case
  • Approach: 2h up the Hooker Valley track from White Horse Hill Campground
  • Climb time: 4h to top ridge then further 1.5h scrambling up to Mt Wakefield
  • Season: best in summer/early autumn when dry rock is guaranteed
  • Team: Jack, Maria 5/3/22

approach

Woke up at the very reasonable time of 7 after driving down from Christchurch the night before to stay at the NZAC’s Unwin Lodge – email ahead to book a spot and bring cash for fees.

Easy walk along the marked Hooker Valley track. Cross all 3 suspension bridges. Just nearing the end of the track, turn off the path right towards the scree field. There are two large scree fields, it is the one closest to the Hooker lake. Fatmap has a really handy route overlay.

From here scramble up to looker’s right of the scree field. The direct start (18/19) is on the left sticking to the arete. We started further right. Initially a bit vegetated (I was in head high bush briefly), but the route comes into its own the higher up you go. Soon you’re scrambling over decent rock with stunning views of Aoraki the whole way up. Route finding was pretty straight forward; generally we stuck pretty close to the arete.

Guideless route; direct start (18/19) follows the arete just left of our line
Our route closer up

The route pops you out at around 1960m on to a very Mars-esque plateau. Walk left and scramble up to Mt Wakefield. Soak in the 360 panorama before taking care going down -there was more loose rock on this section than on the actual route.

Ridge South of Mt Wakefield

We initially thought we’d walk south along the ridge until we met the Tasman Valley Road, and had dropped a car off there in the morning, but the ridge looked quite involved (see photo on left) and it was already mid afternoon so we dropped down into the scree field west of 1566m. Scree quality was average but this saved us a good few hours. At the bottom head right and within a km you’ll hit the Hooker Valley Track again.

Type 1 fun all the way. Would climb again, next time via the direct start or via the other Wakefield gullies!