Bruce Peak, Butterfly Buttress

Come on a trad multi-pitch climb, she said. It’ll be fun, she said… This was Jack’s first trad/alpine climbing experience and the first on which I lead by myself. The climbing was easy with a crux of 14, and the rock was decent, however a leisurely pace meant we were near-benighted as we struggled to find the walk-off in the dark. Route finding in pitch black and 60kph winds… Not advisable!

Moral(s) of the story – need to work on simul-climbing, bring a lighter rack, a single rope would have been fine, 1 bag of car chips to come back to is not enough


  • Grade: 5 IV 500m. Crux grade 14 (Largely sub 14, 10-14). All trad including anchors. Good belay ledges.
  • Equipment: Full trad rack, singles up to #2, full set of nuts. No need for RP/micronuts. 2x 240 slings for anchors. 5-6 alpine draws sufficient including some 120s if confident at the grade – I was only placing 4-5 bits of gear on most pitches. We used 2x 60m half ropes but with long slings a 60m single rope would be fine. We walked off but did come across tat from another party’s rap descent – always a good idea to have some spare tat.
  • Approach time: 4-5h via the North Temple track/Gunsight Pass
  • Climbing time: 12h (we took it v slow, a fast party could climb it in half the time)
  • Season: Best in Summer, for those long days and warm rock. Being on the SW aspect we were largely in shade so layers were appreciated.
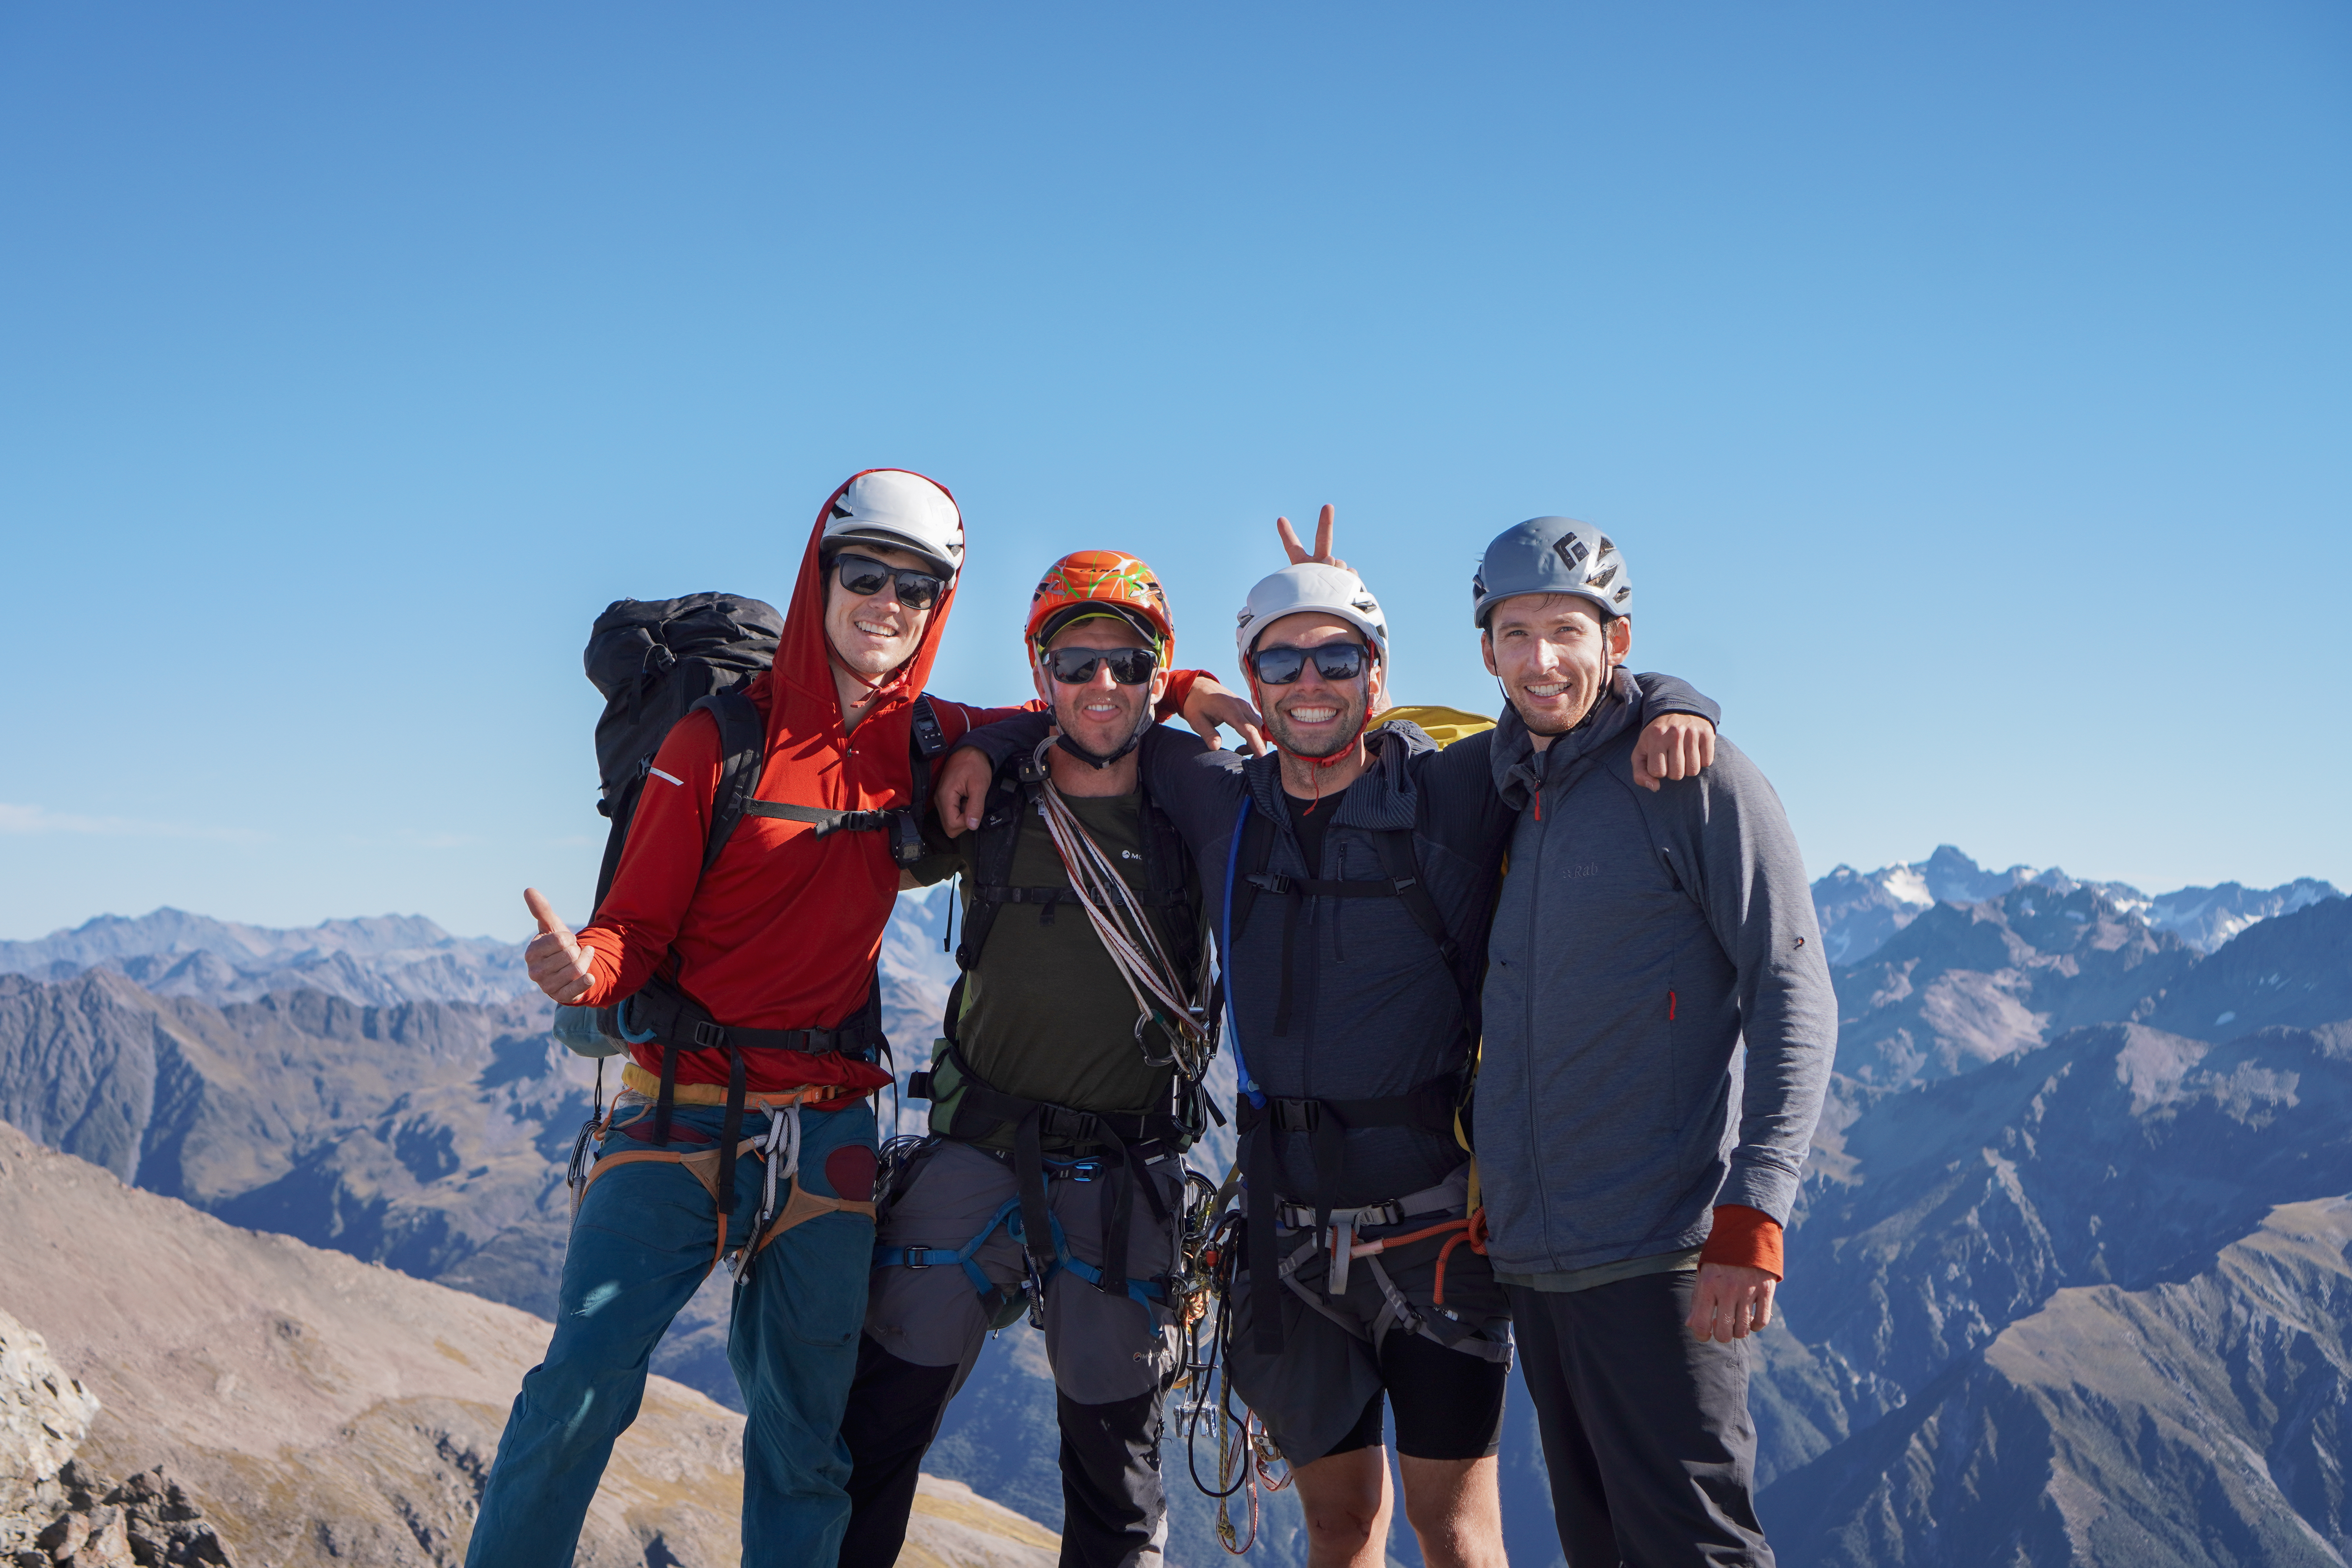
  • Team: Maria, Jack 29/12/2022

Approach

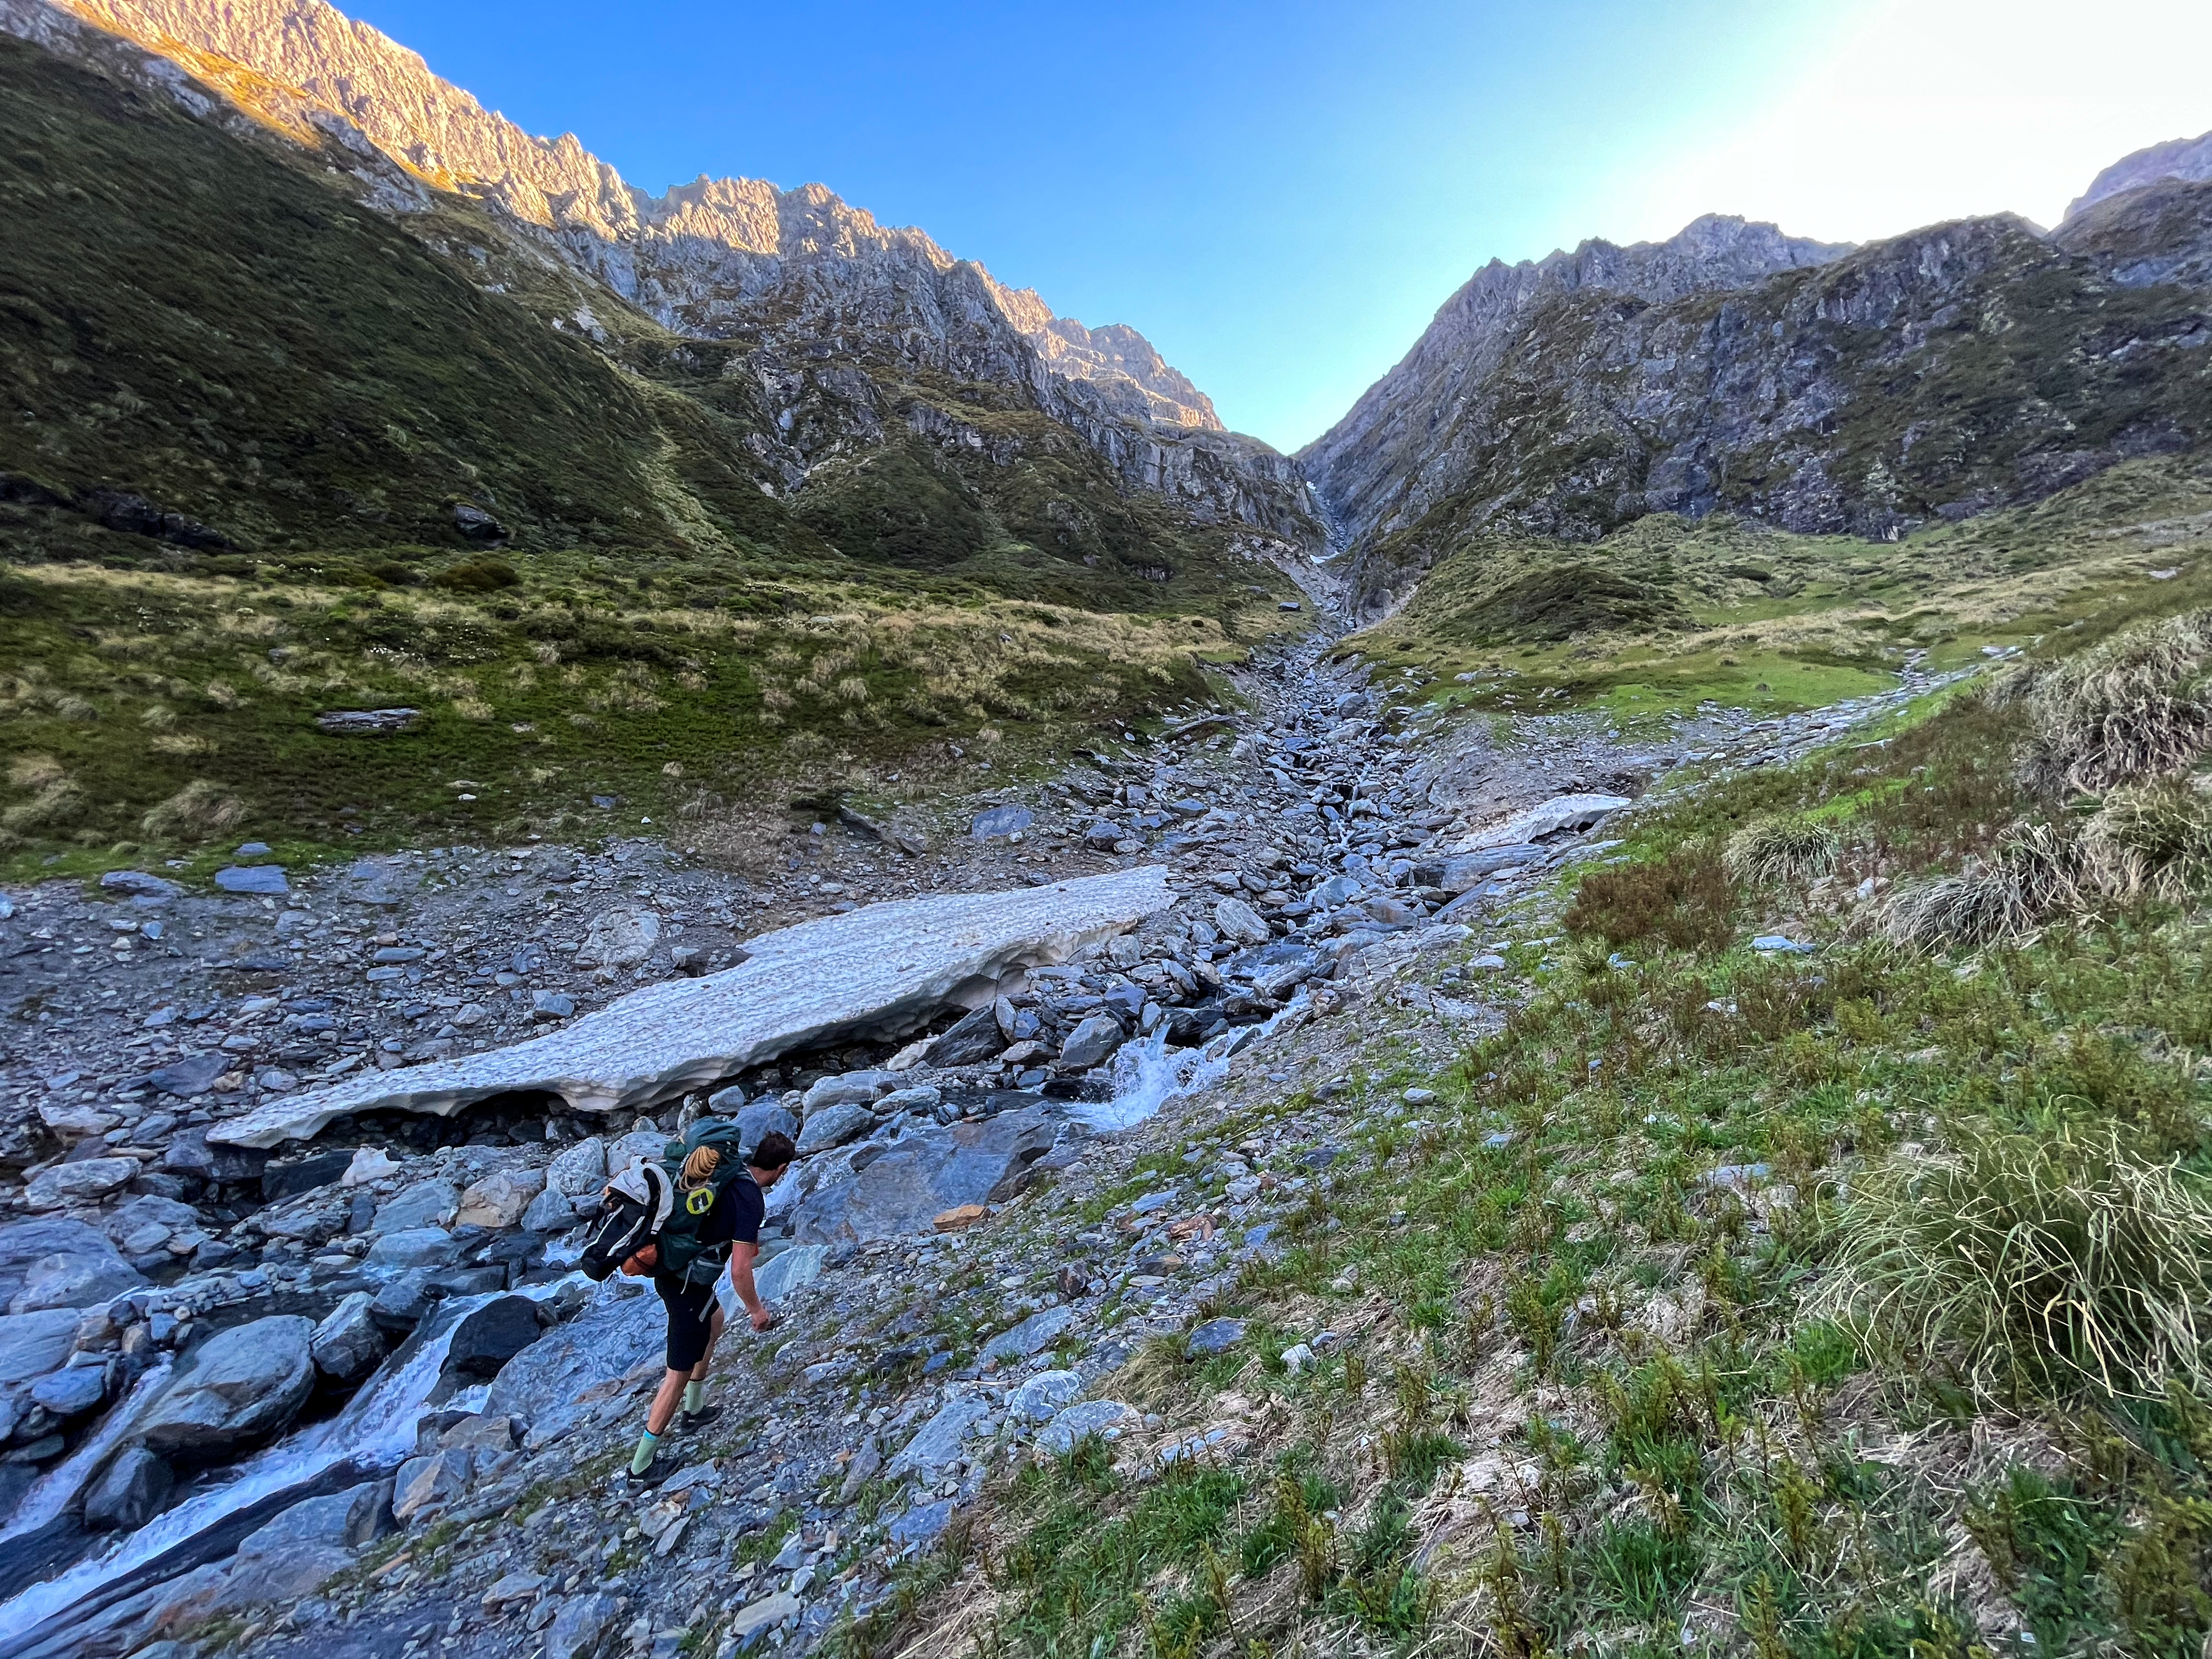
Park at Temple Campsite.

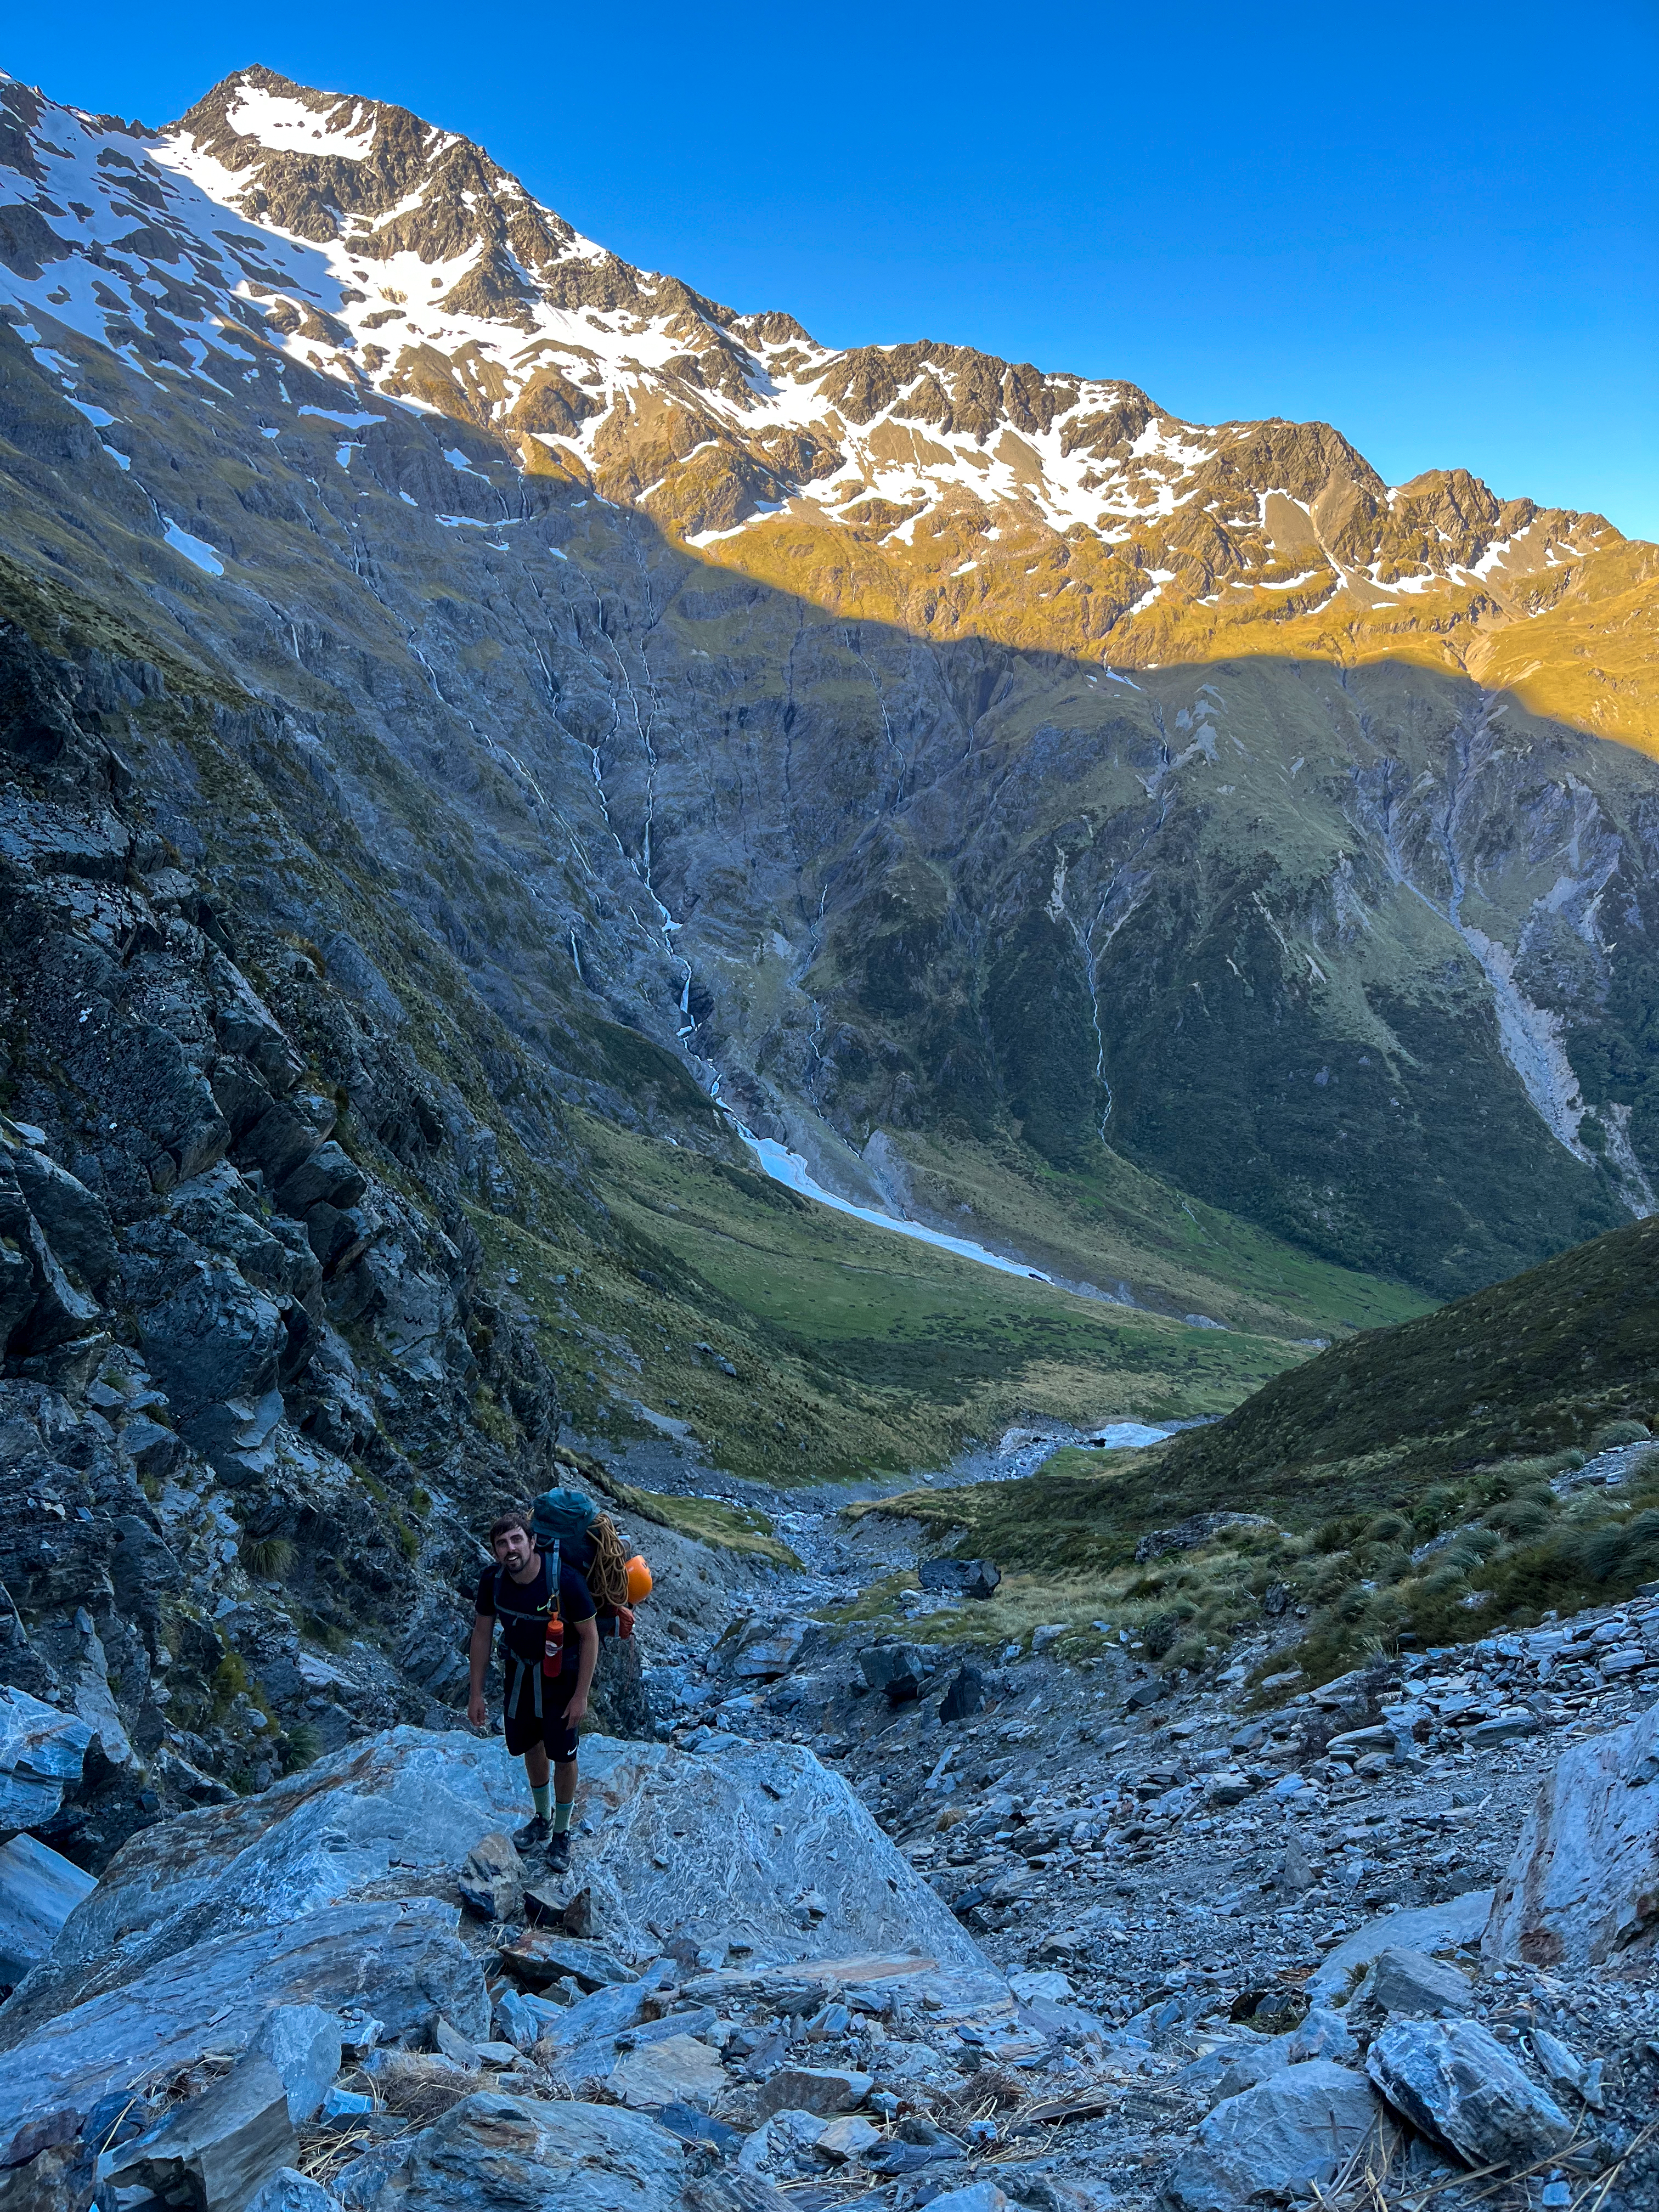
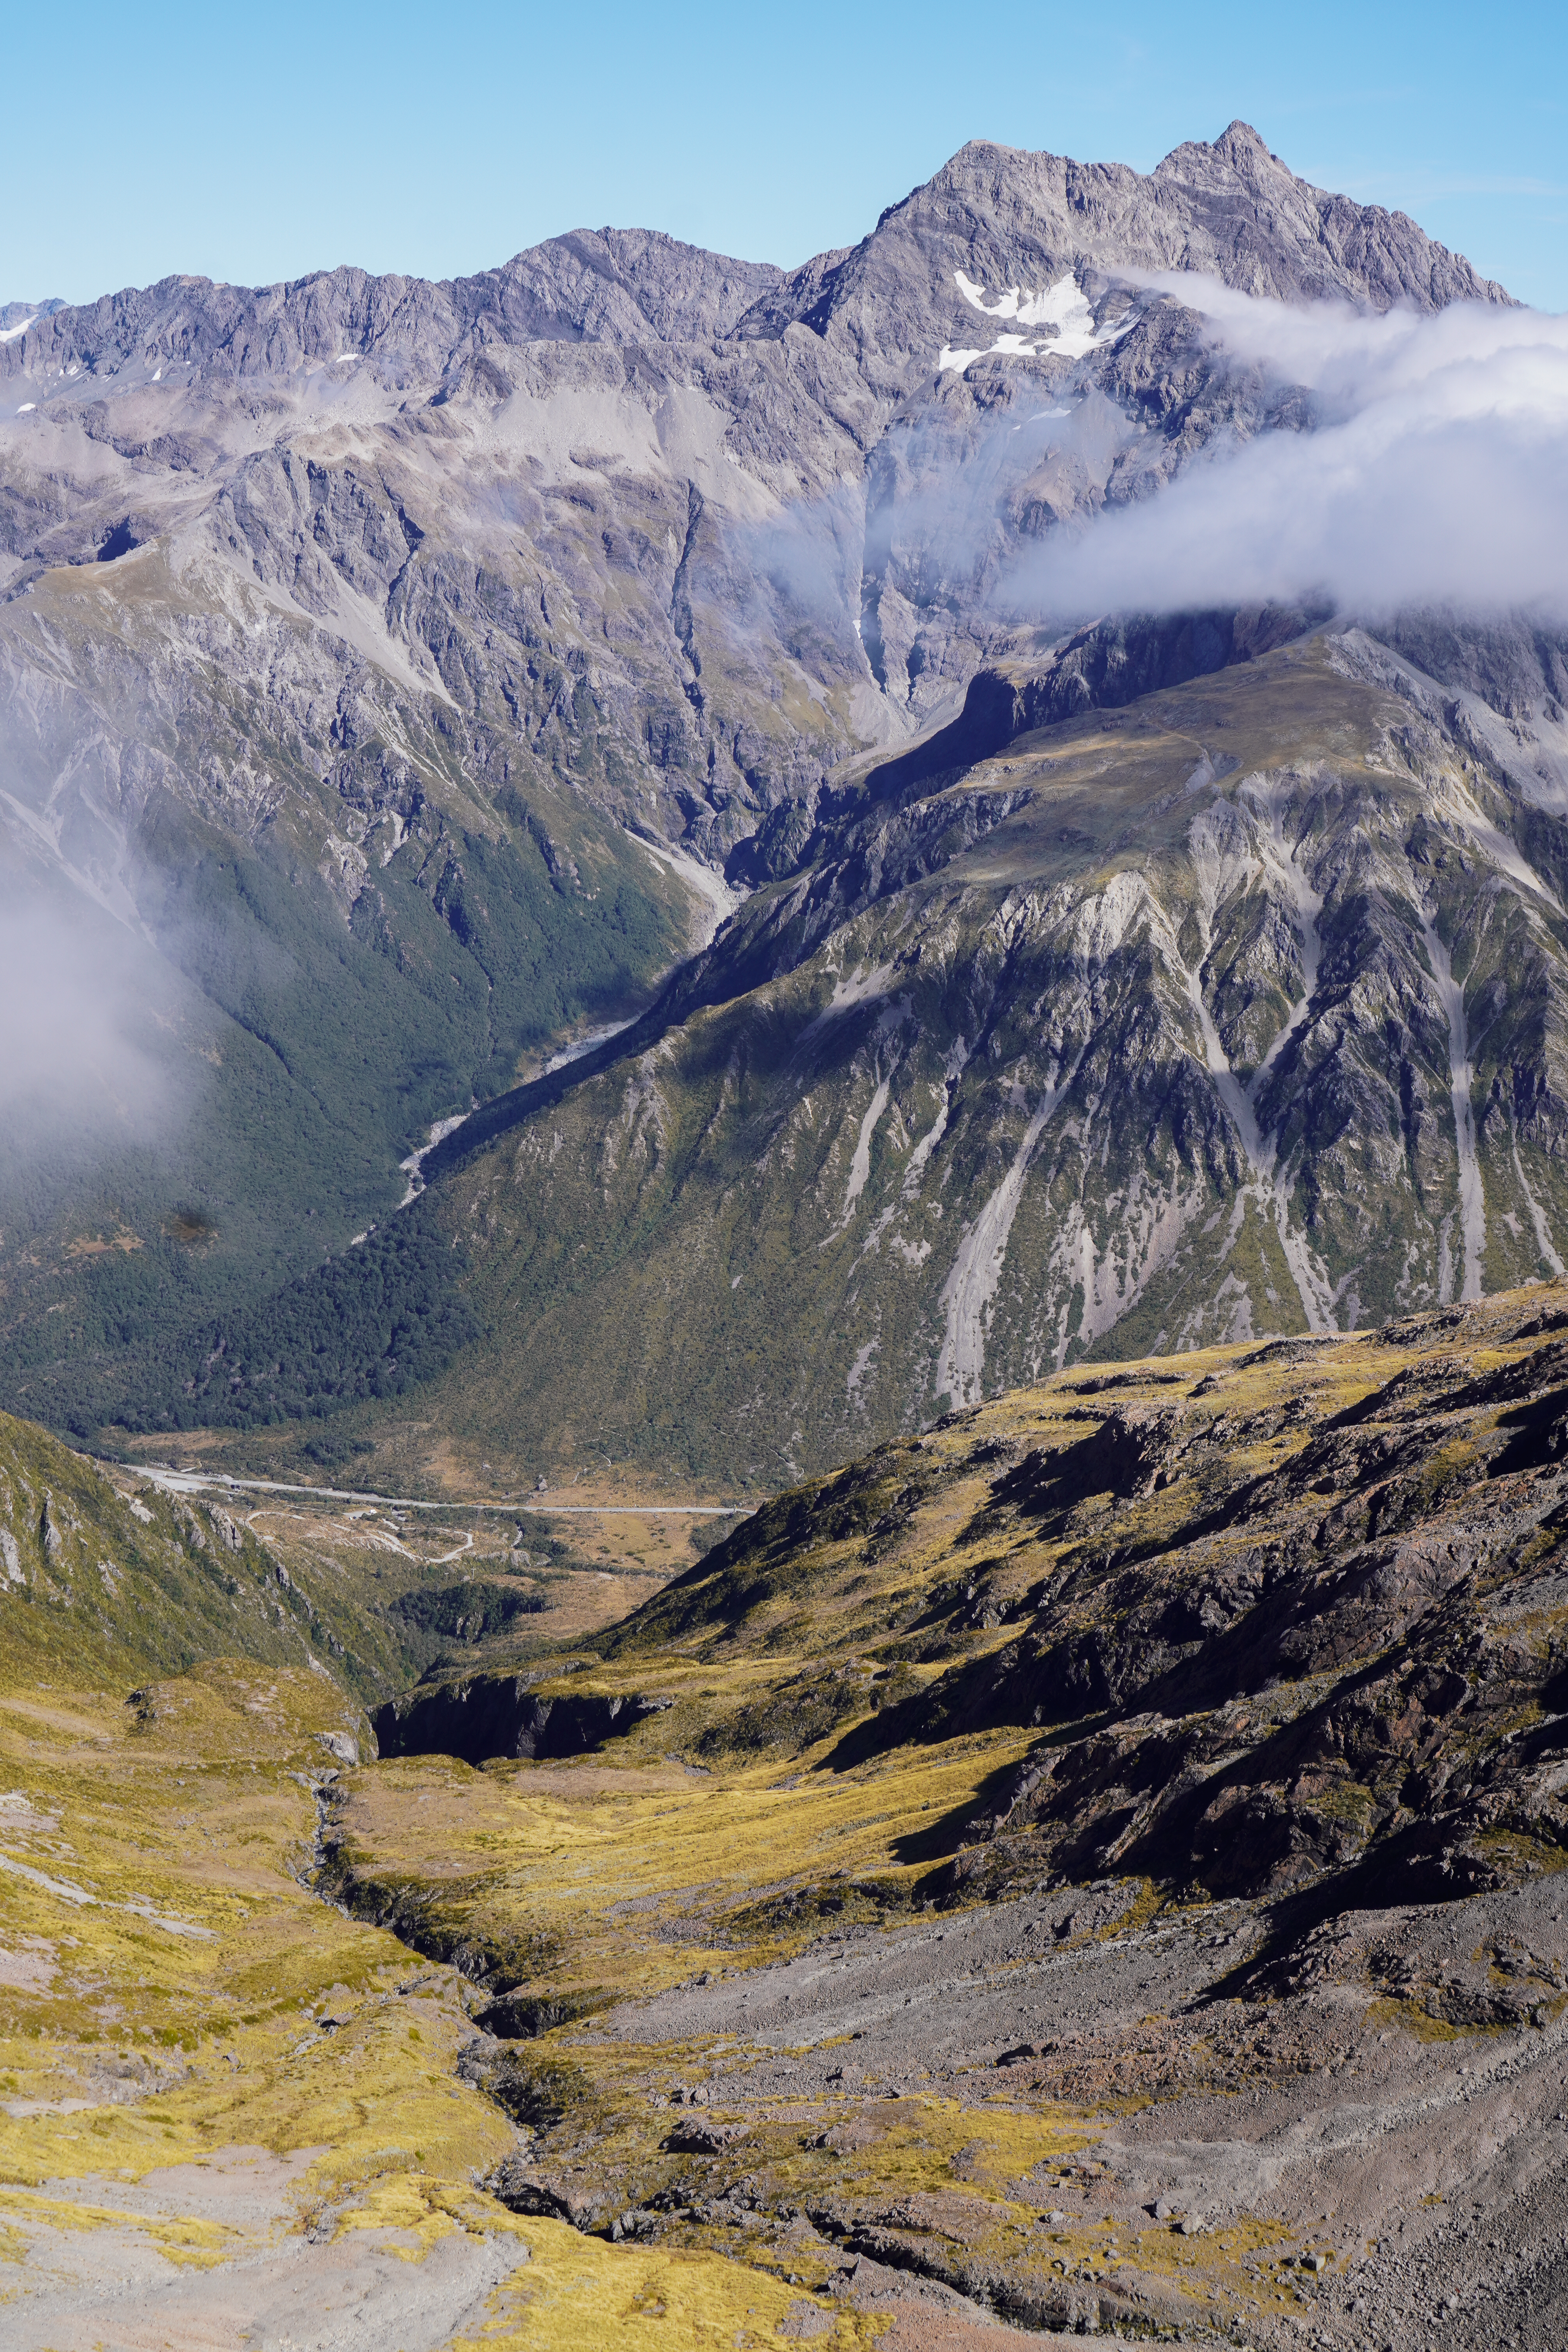
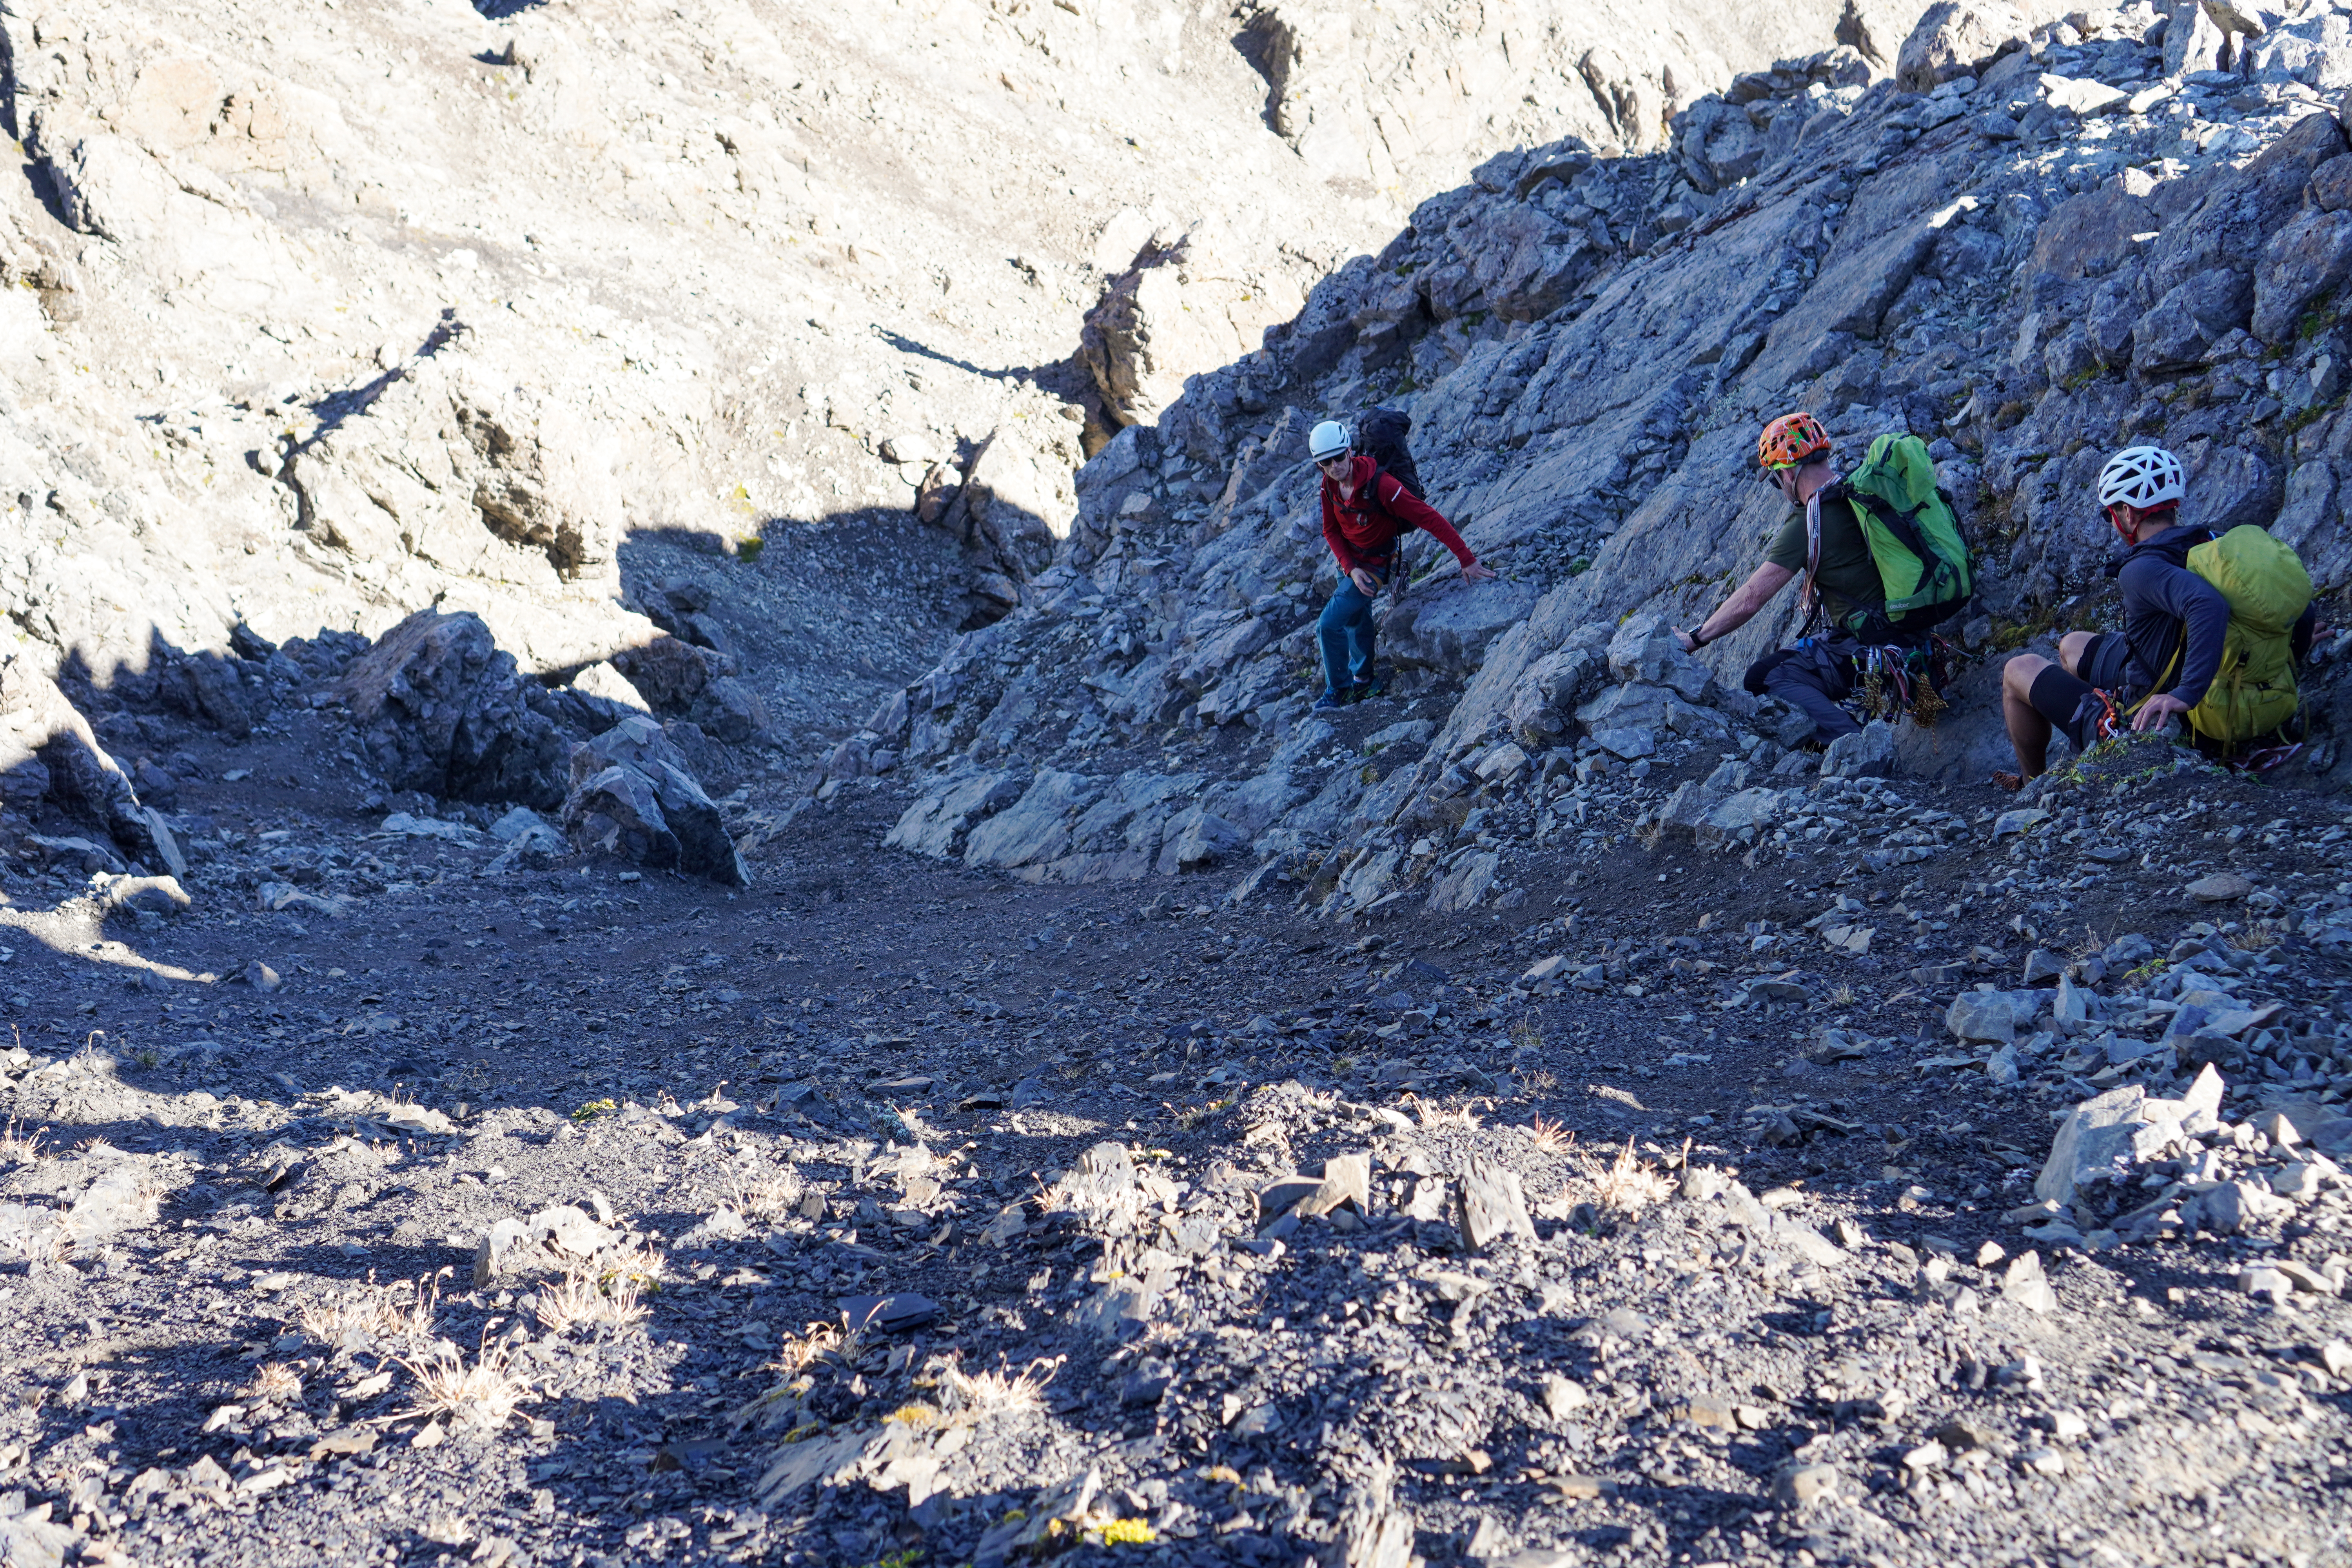
Option 1: Walk in/out via N Temple Track. 1.5h along a doc trail – a few landslides along the way make for navigating some fallen trees. Getting up and over Gunsight Pass to the biv spot took 4-5h. I would not want to descend this chossfest, so would not recommend this as a way out.

Option 2: Walk in via N Temple and out via S Temple (9km, 5-6h in and 16km, 6-7h out). This was the route we opted for. Walk out from the biv to the S Temple track required multiple river crossings. Once you hit the doc trail follow the cairns (there are no regular orange markers until you hit S Temple Hut).

Option 3: As per the guidebook/climbNZ, start on N Temple Track then turn off at BZ14 433 141 and head straight up through scrub towards Bruce-Steeple col. Looking up at the dense beech forest, we thought this might be slow going but I’d be open to trying it next time.

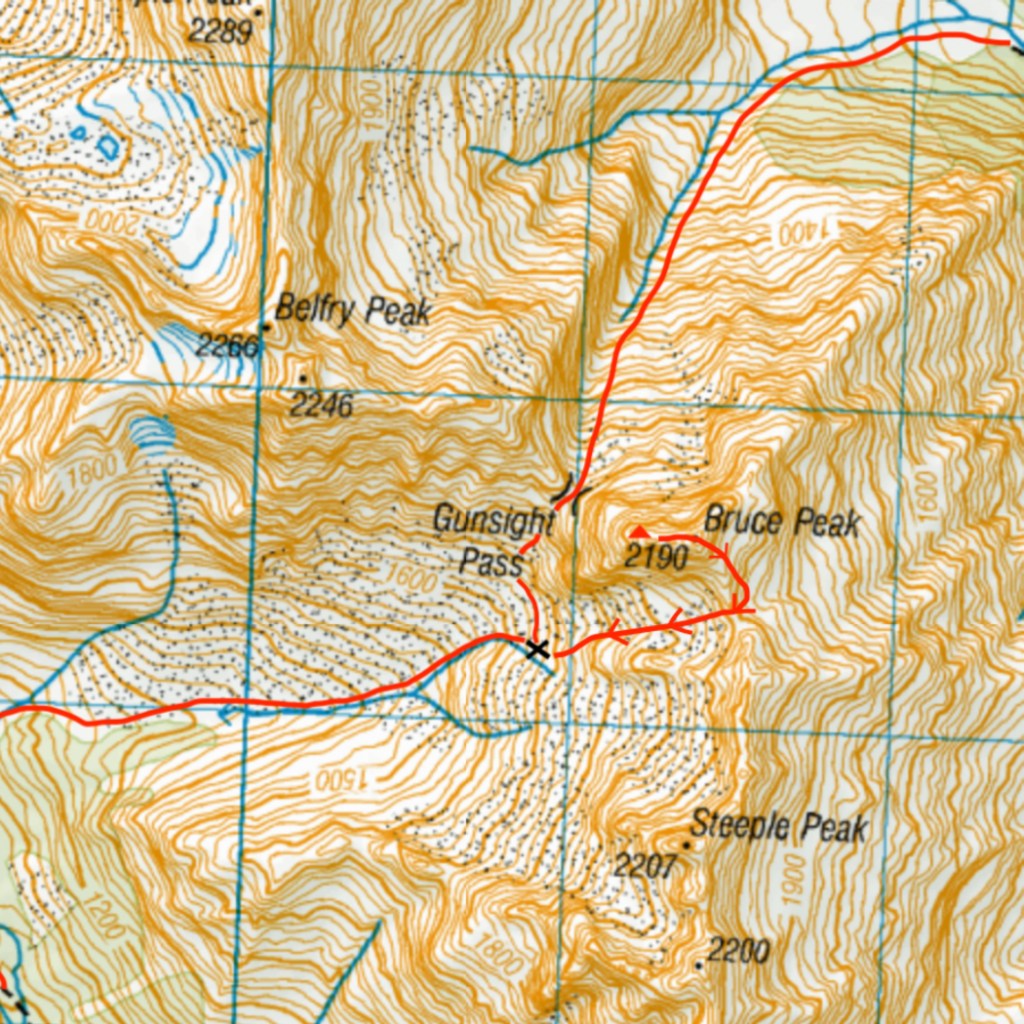
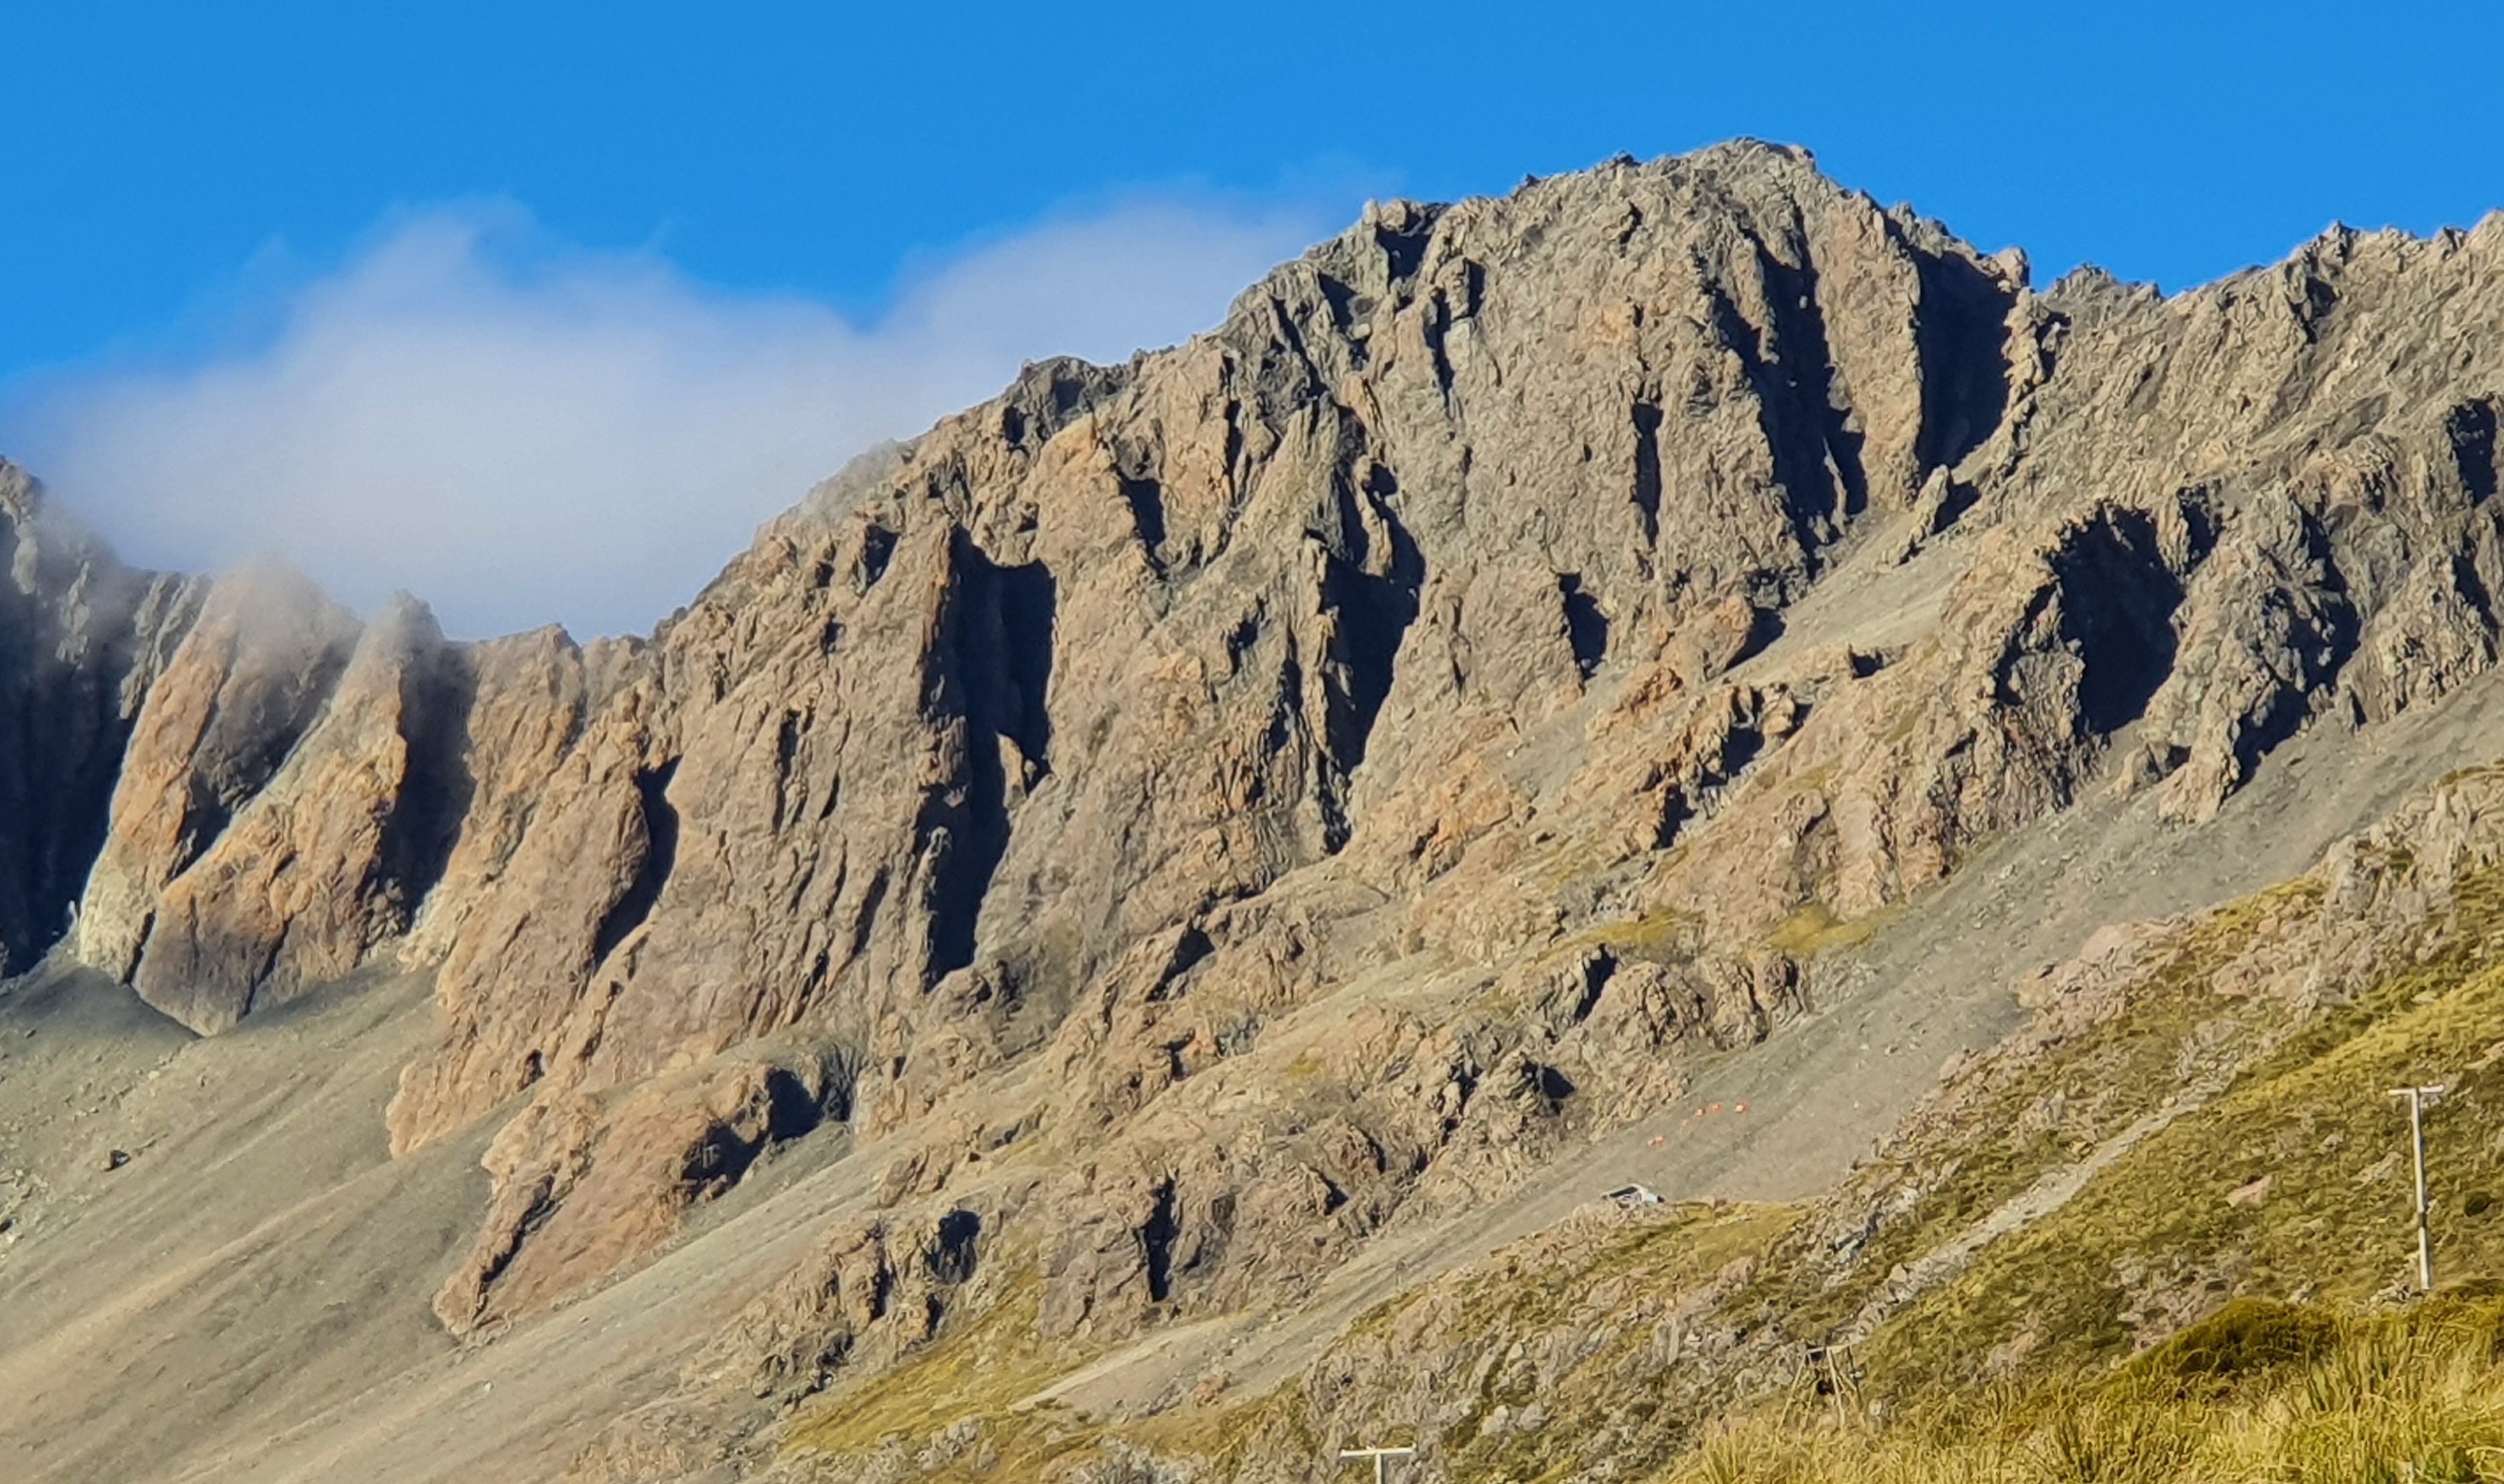
We camped on a strip of tussock amongst the scree marked by X at around 1650m. There’s running water right beside it.

X marks the biv spot; Triangle marks route top out. From the triangle marks our descent route. Climb route not shown, see below.

Photo credits to ClimbNZ (https://climbnz.org.nz/nz/si/otago/barrier-range/bruce-pk).
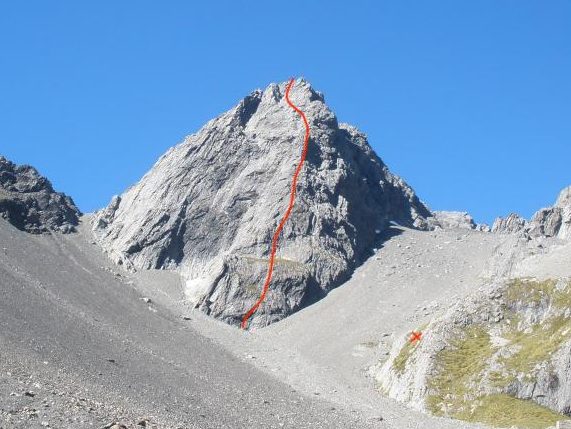
Our route in red, X = biv spot.
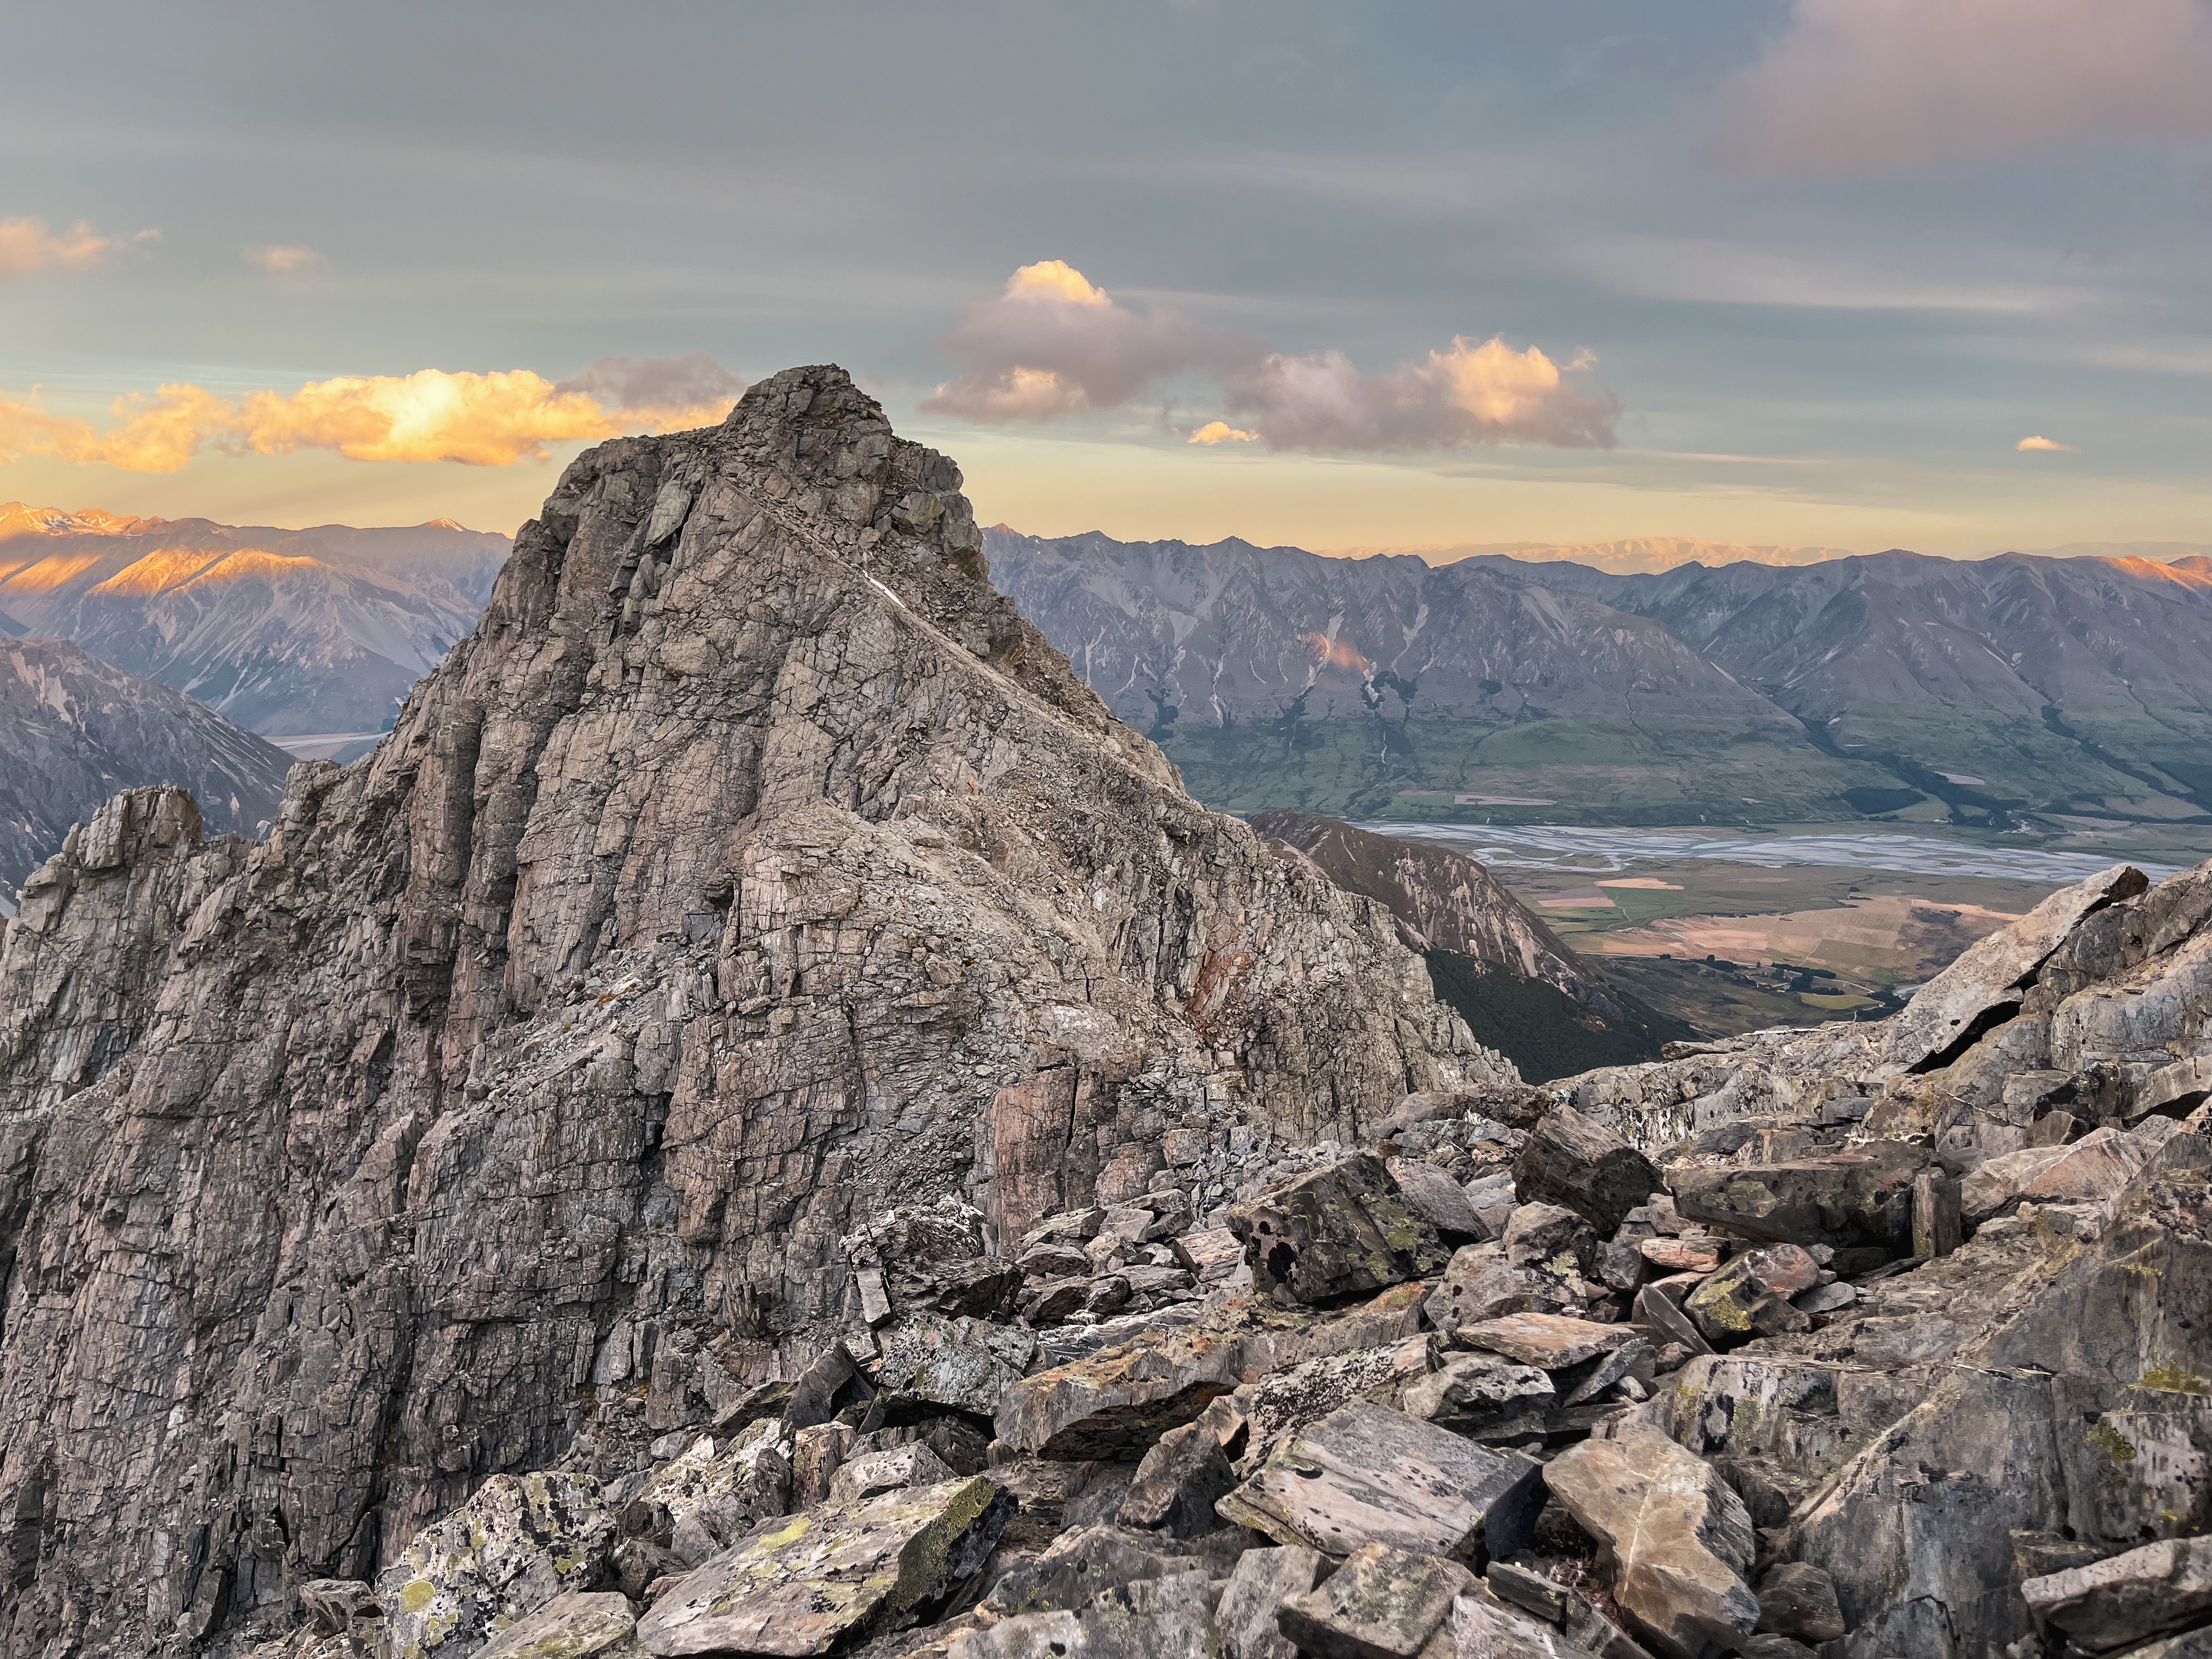
The Route

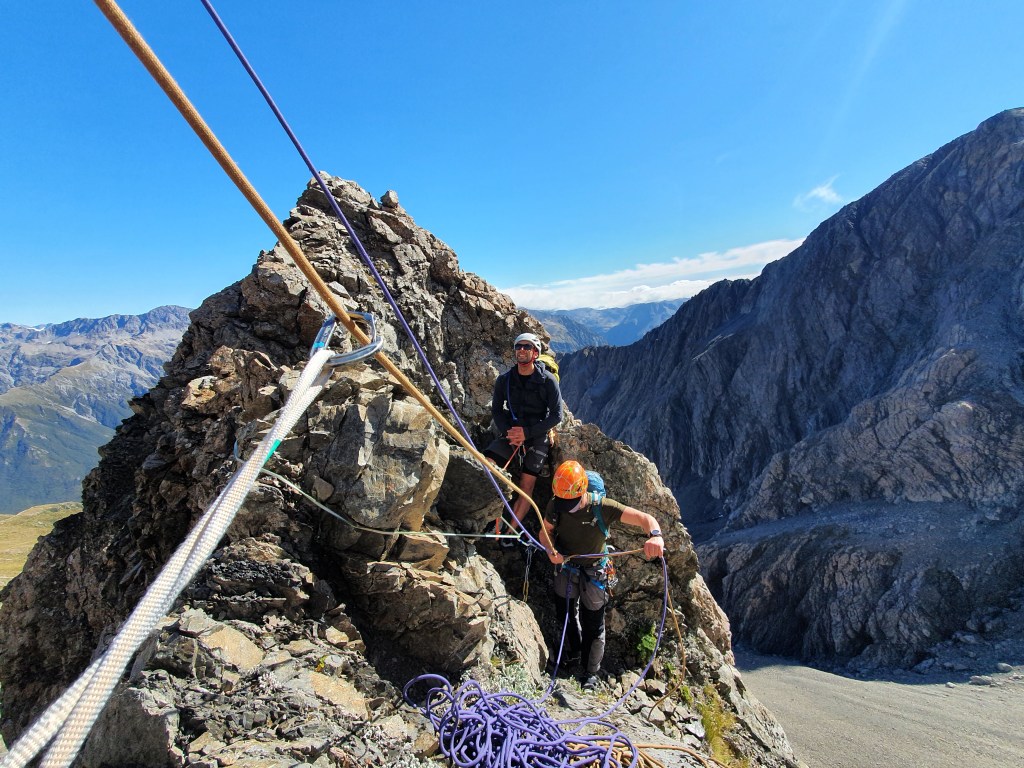
To get to the base of the route, sidle 200m North of the biv spot along the same contour towards Bruce Peak. The climbing starts at the lowest point of the buttress.

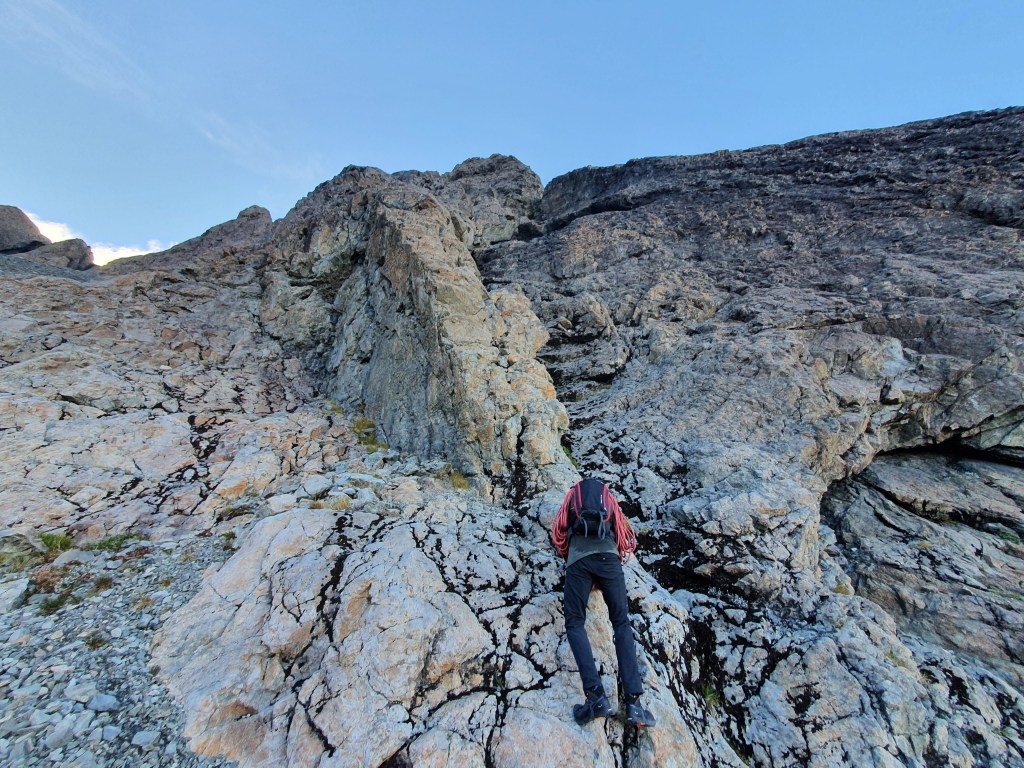
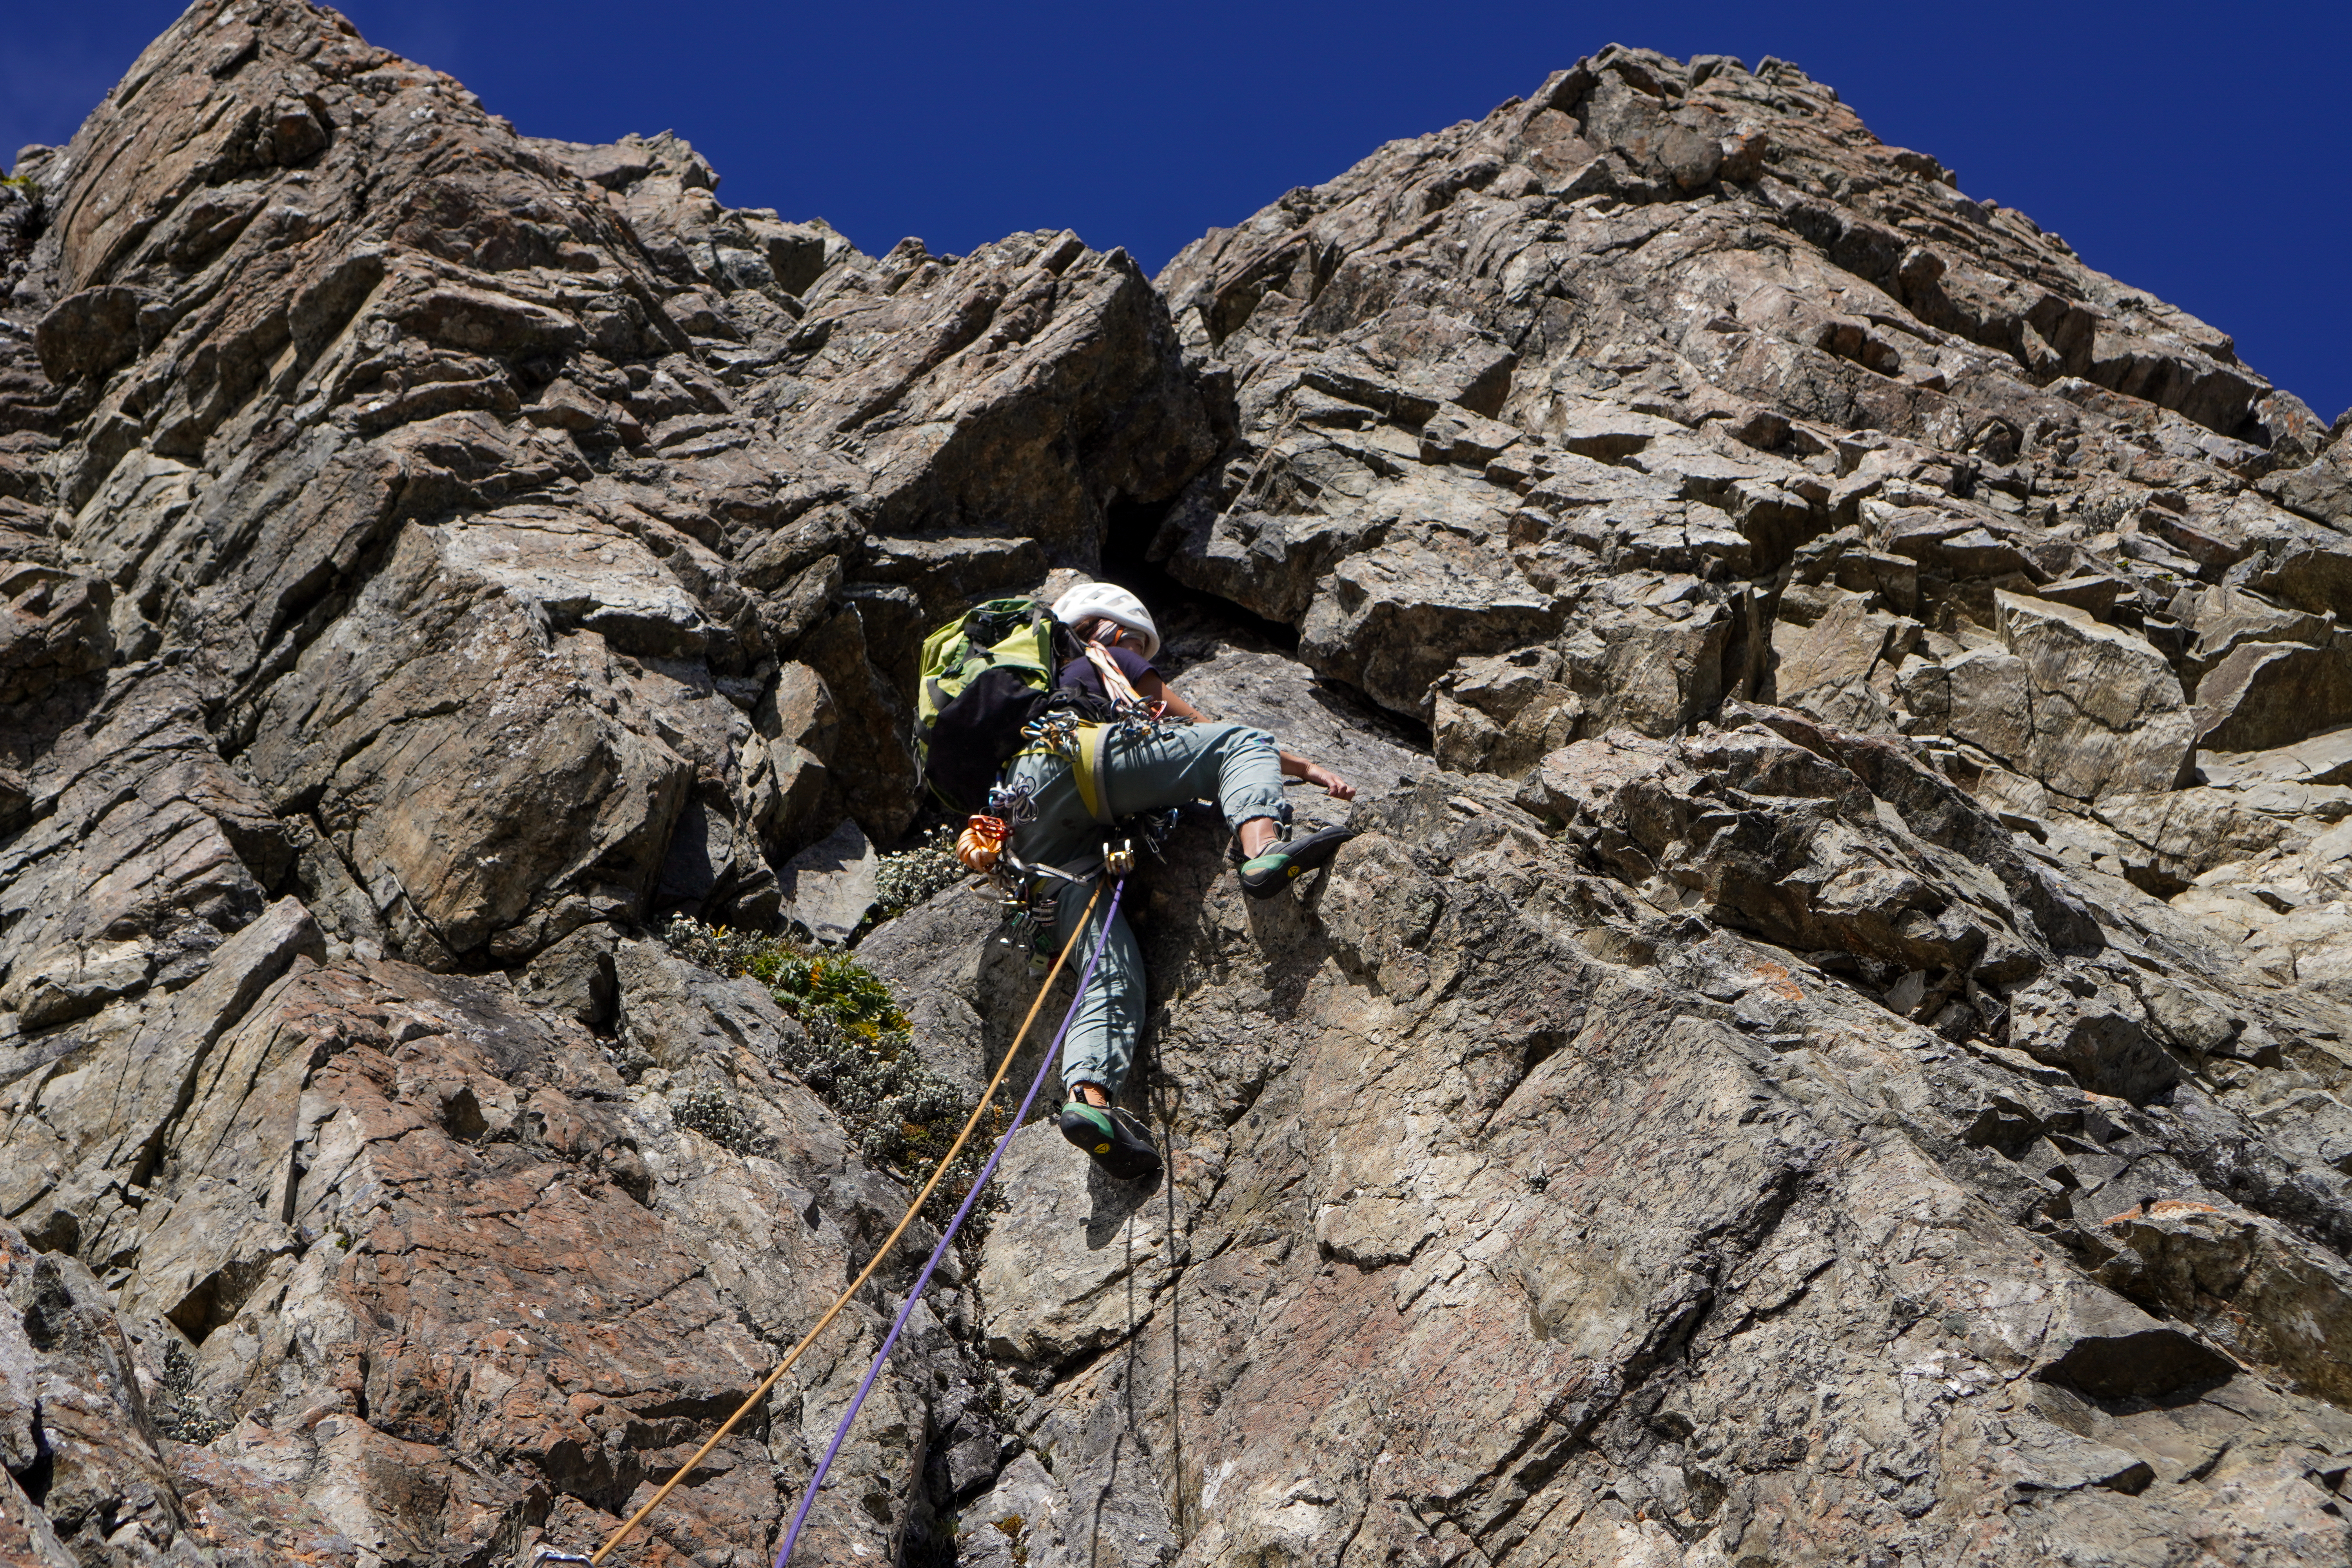
P1: (14, 60m) Poor gear. Climbing no harder than a 14 but felt harder as was difficult to protect.

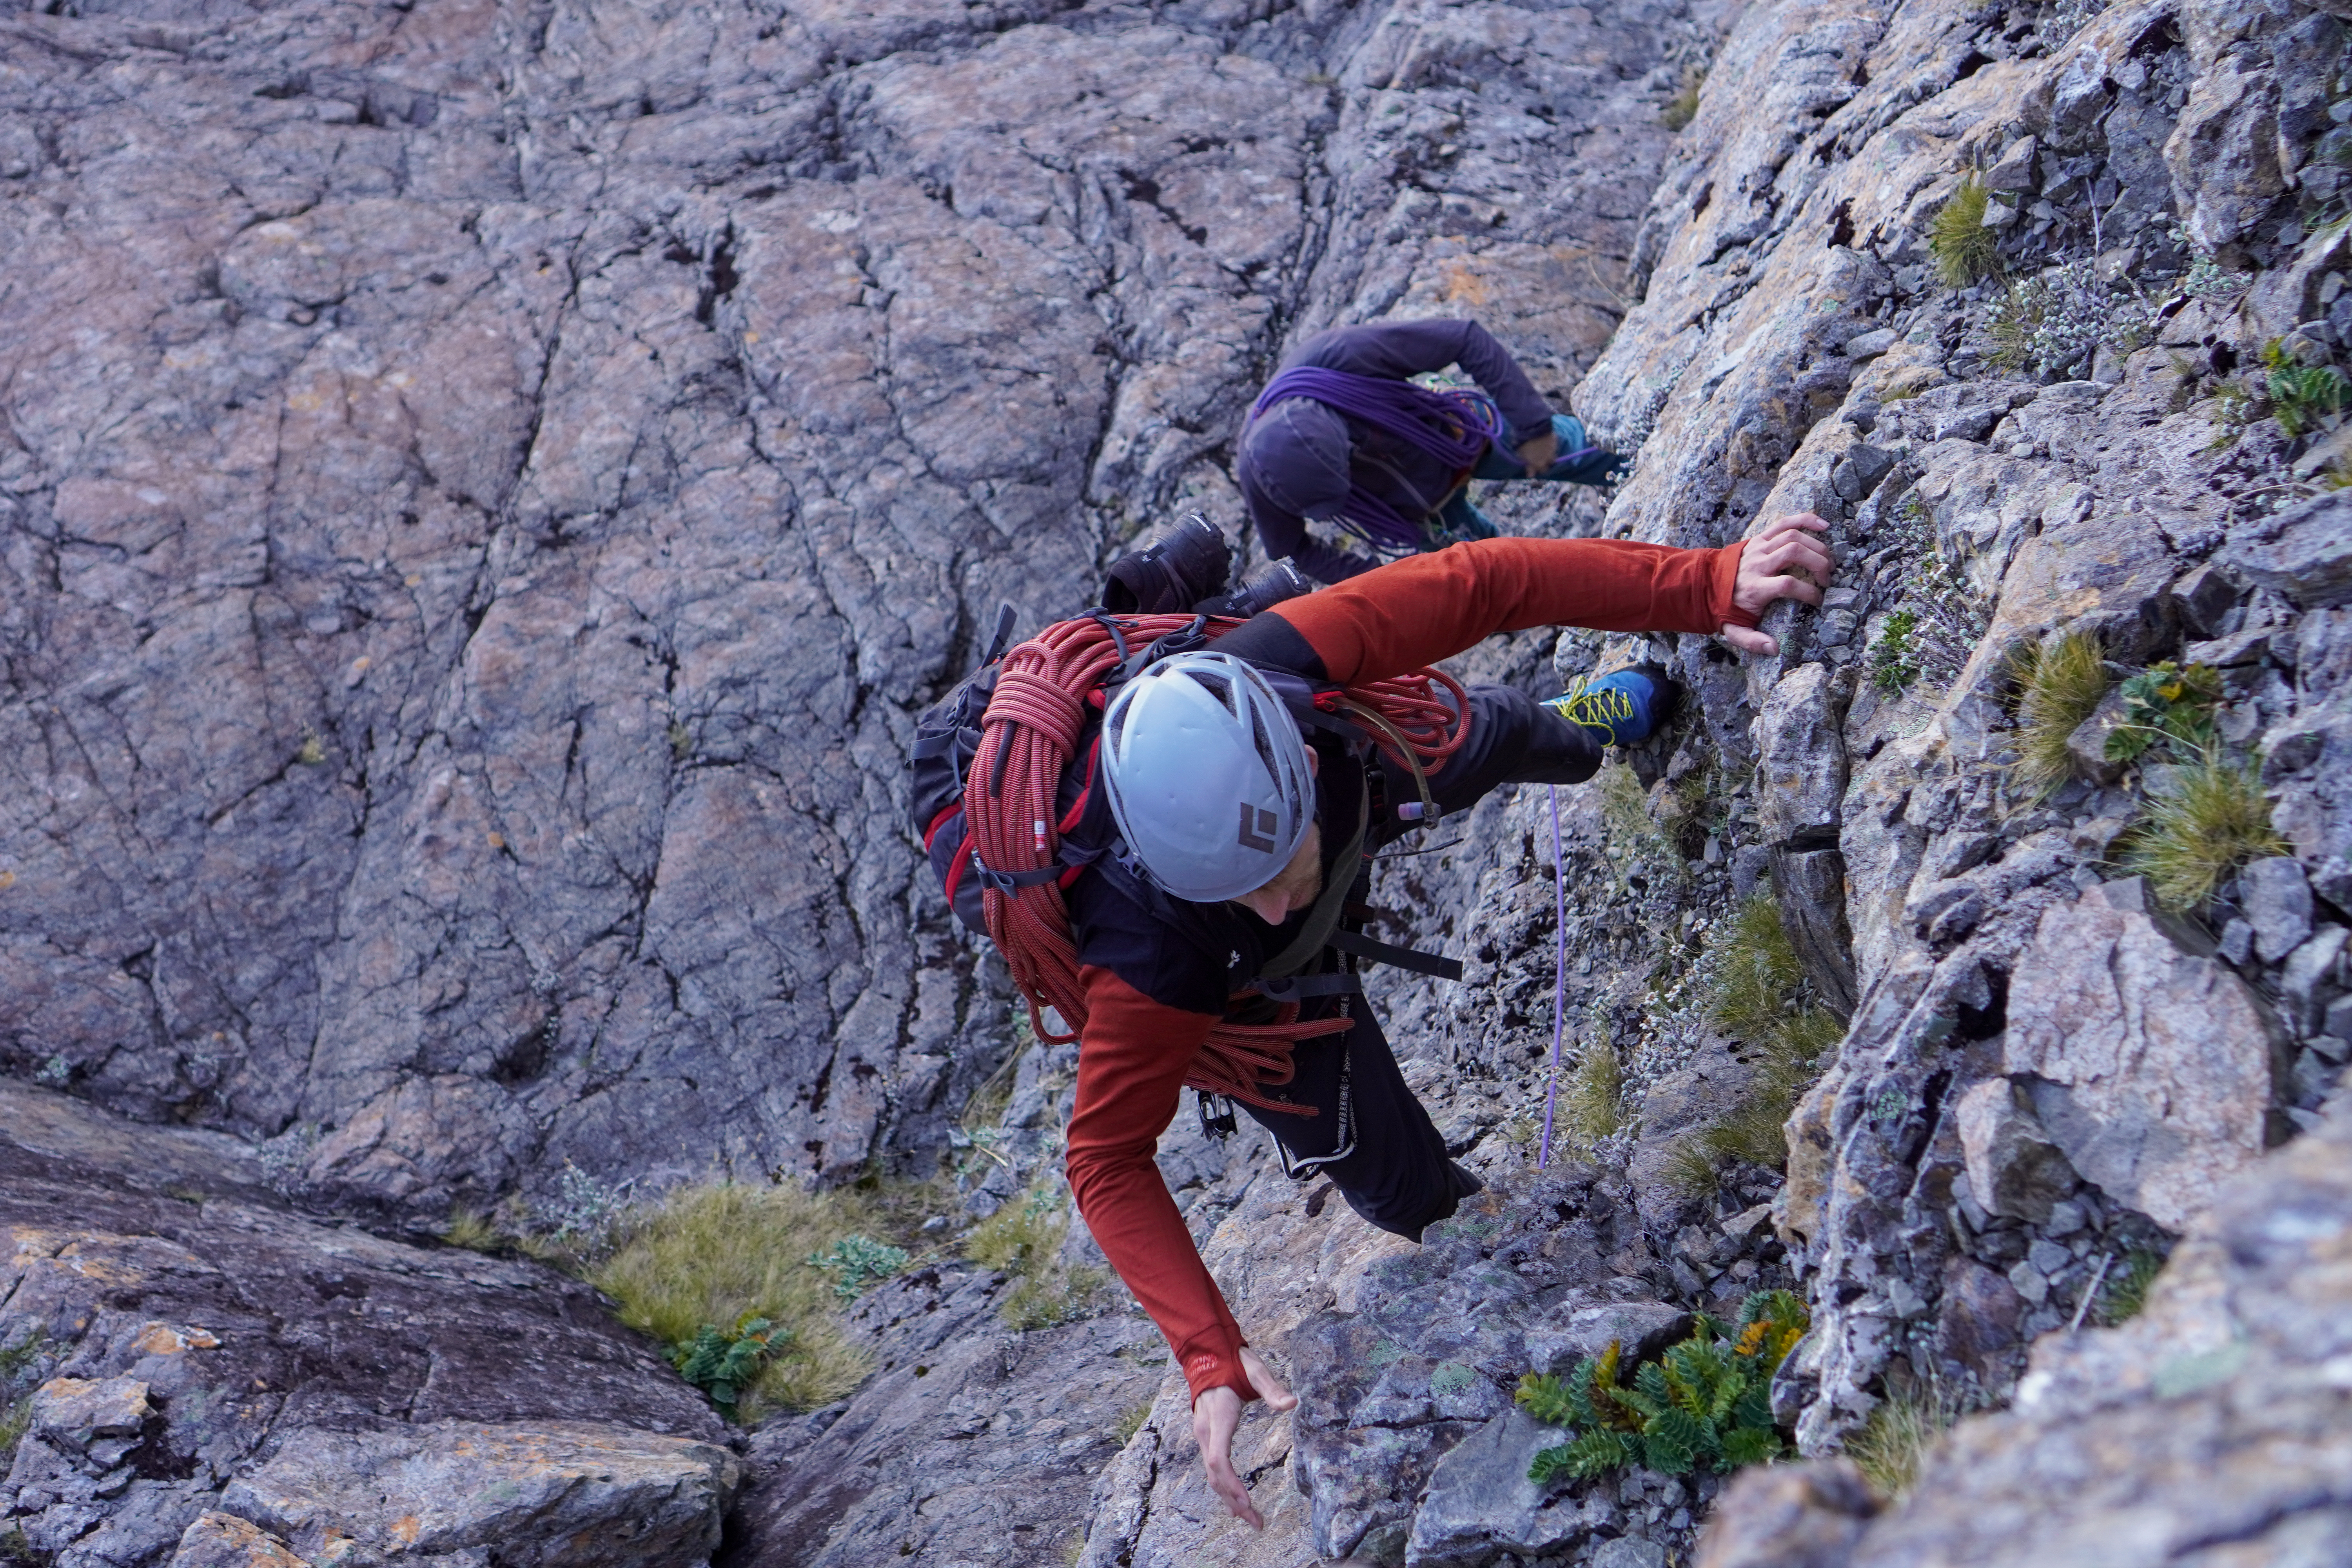
P2: (10, 60m) Very easy scrambling, can be simu-climbed for confident parties. Minimal gear was placed with much better protection than in the first pitch. Finishes over a wide grassy ledge.

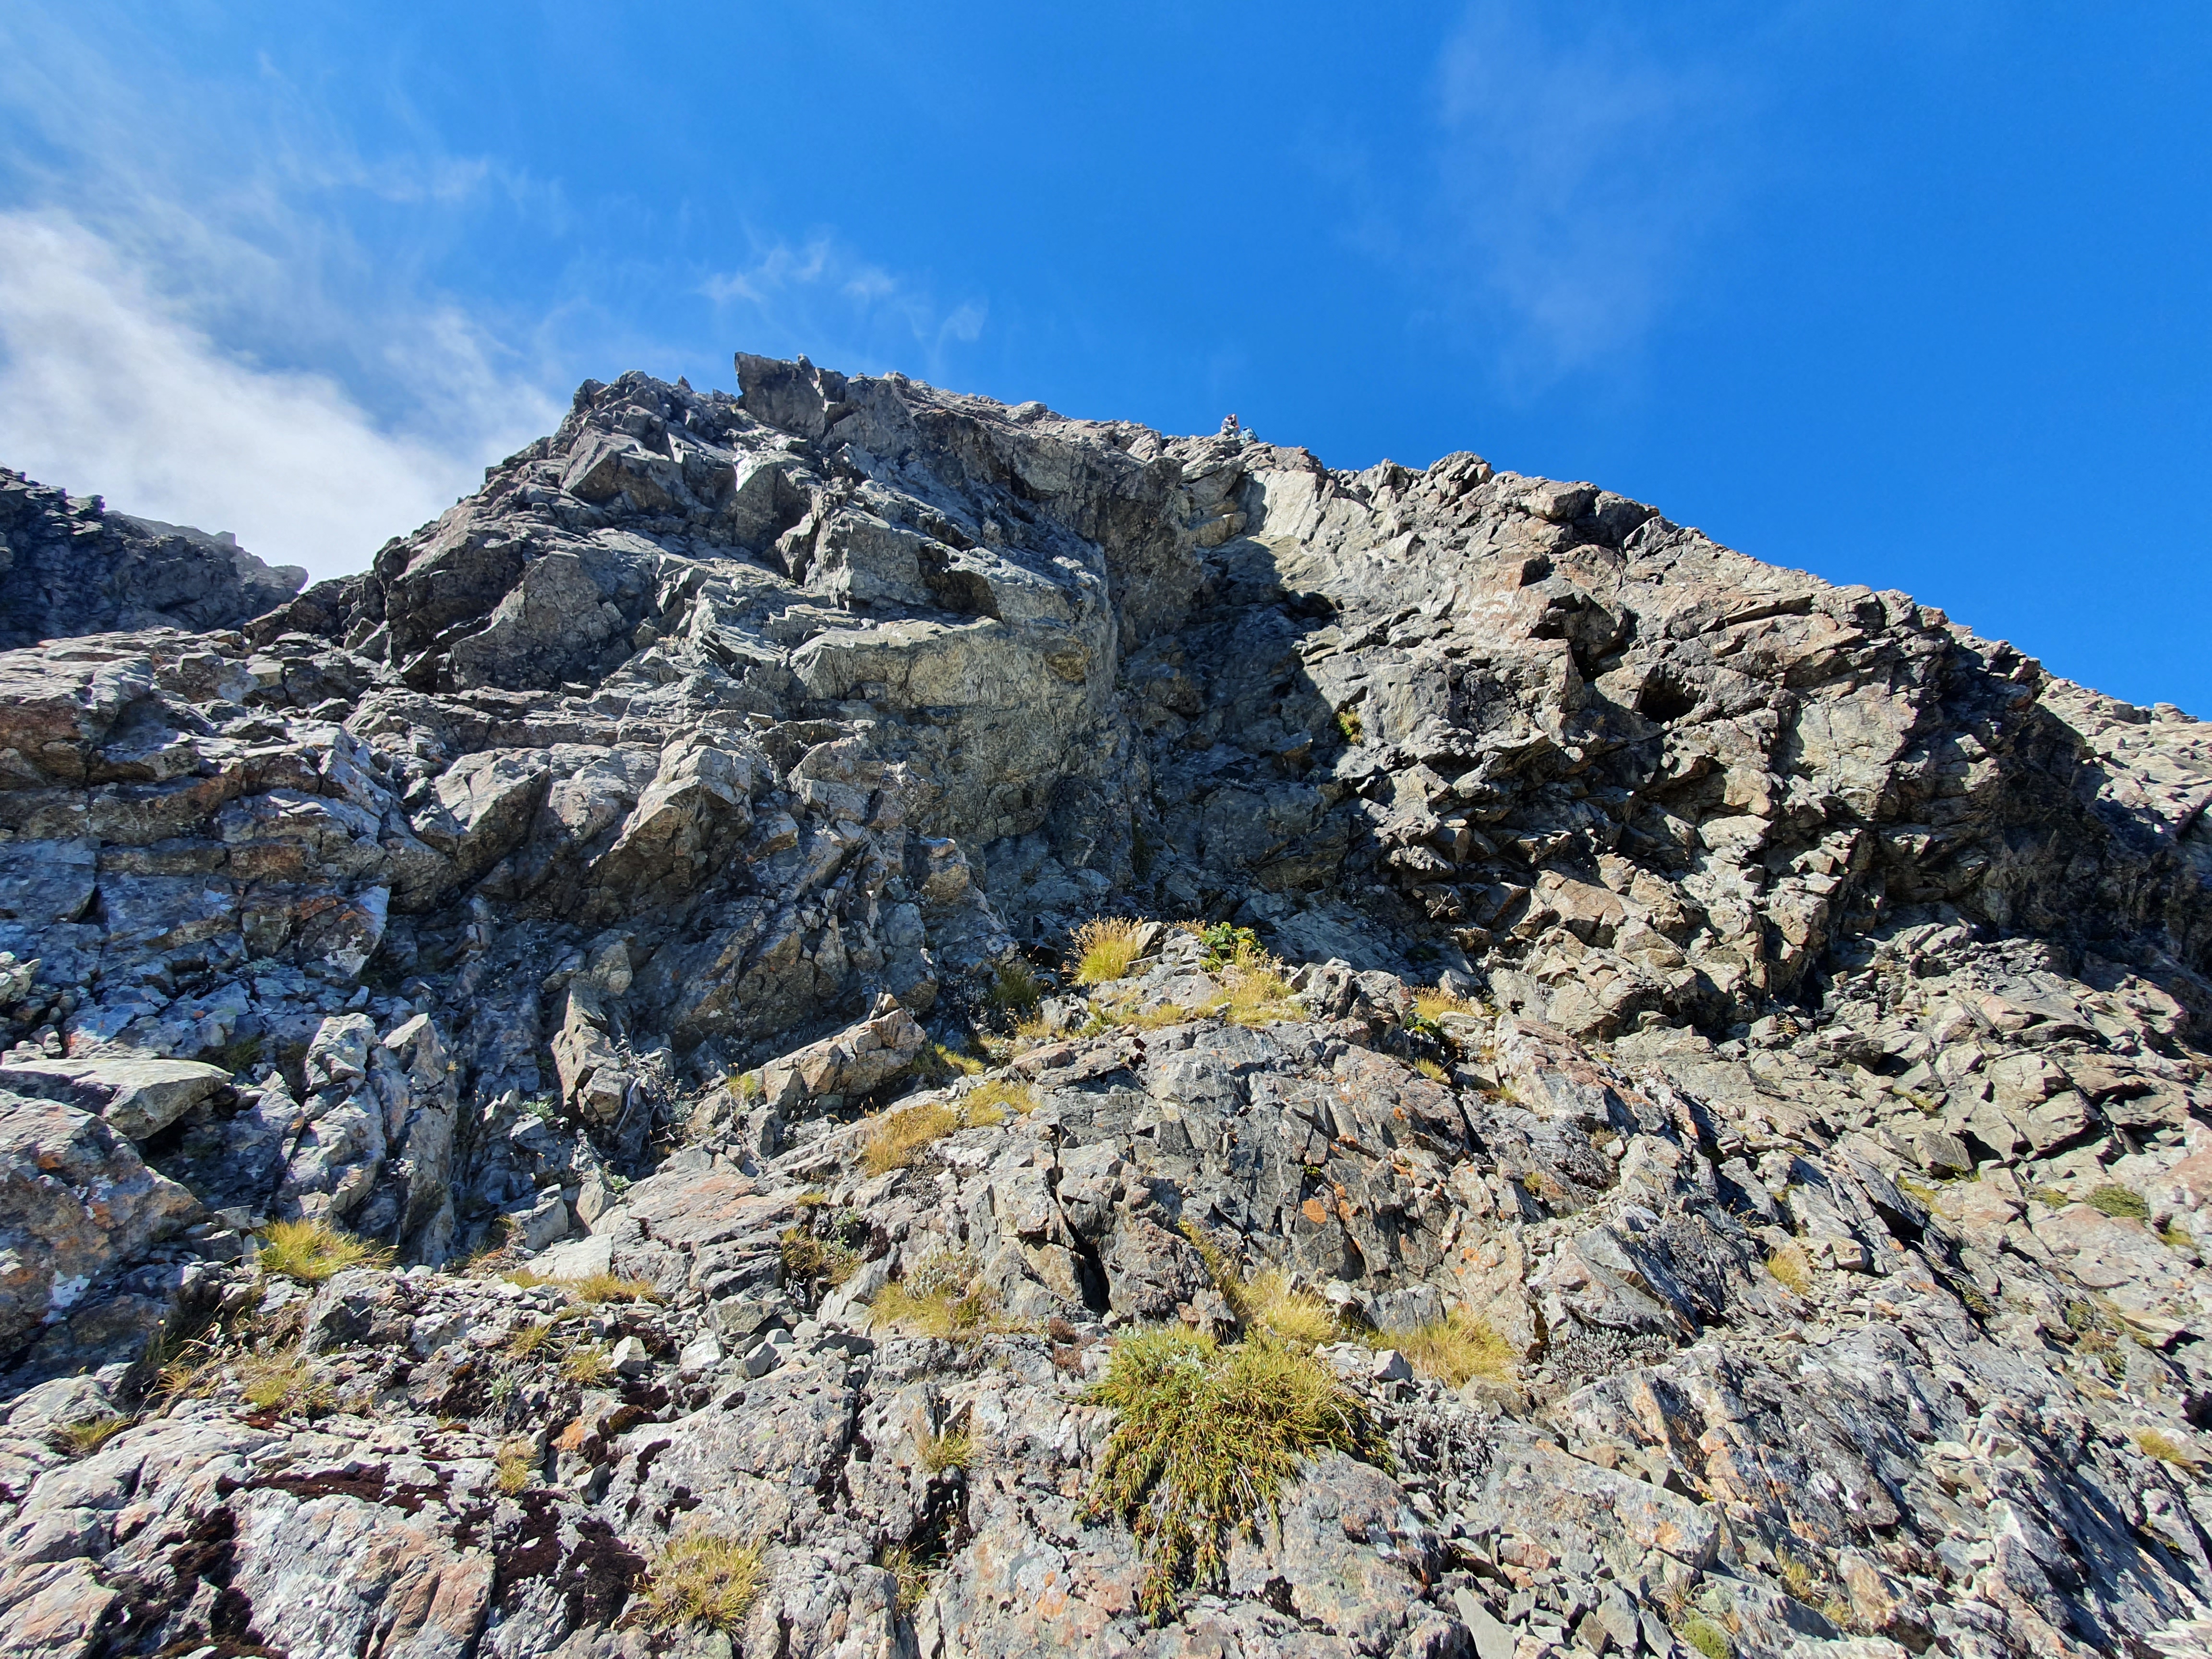
P3: (11, 60m) Similar to above. Follow the arete.

P4: (14, 60m) Probably the hardest pitch yet, grade 14 interspersed with easy grassy ledges. Decent gear. Some steeper areas directly up, however can avoid by sidling right.

P5 (13, 60m) Some staunch moves in between easy climbing.

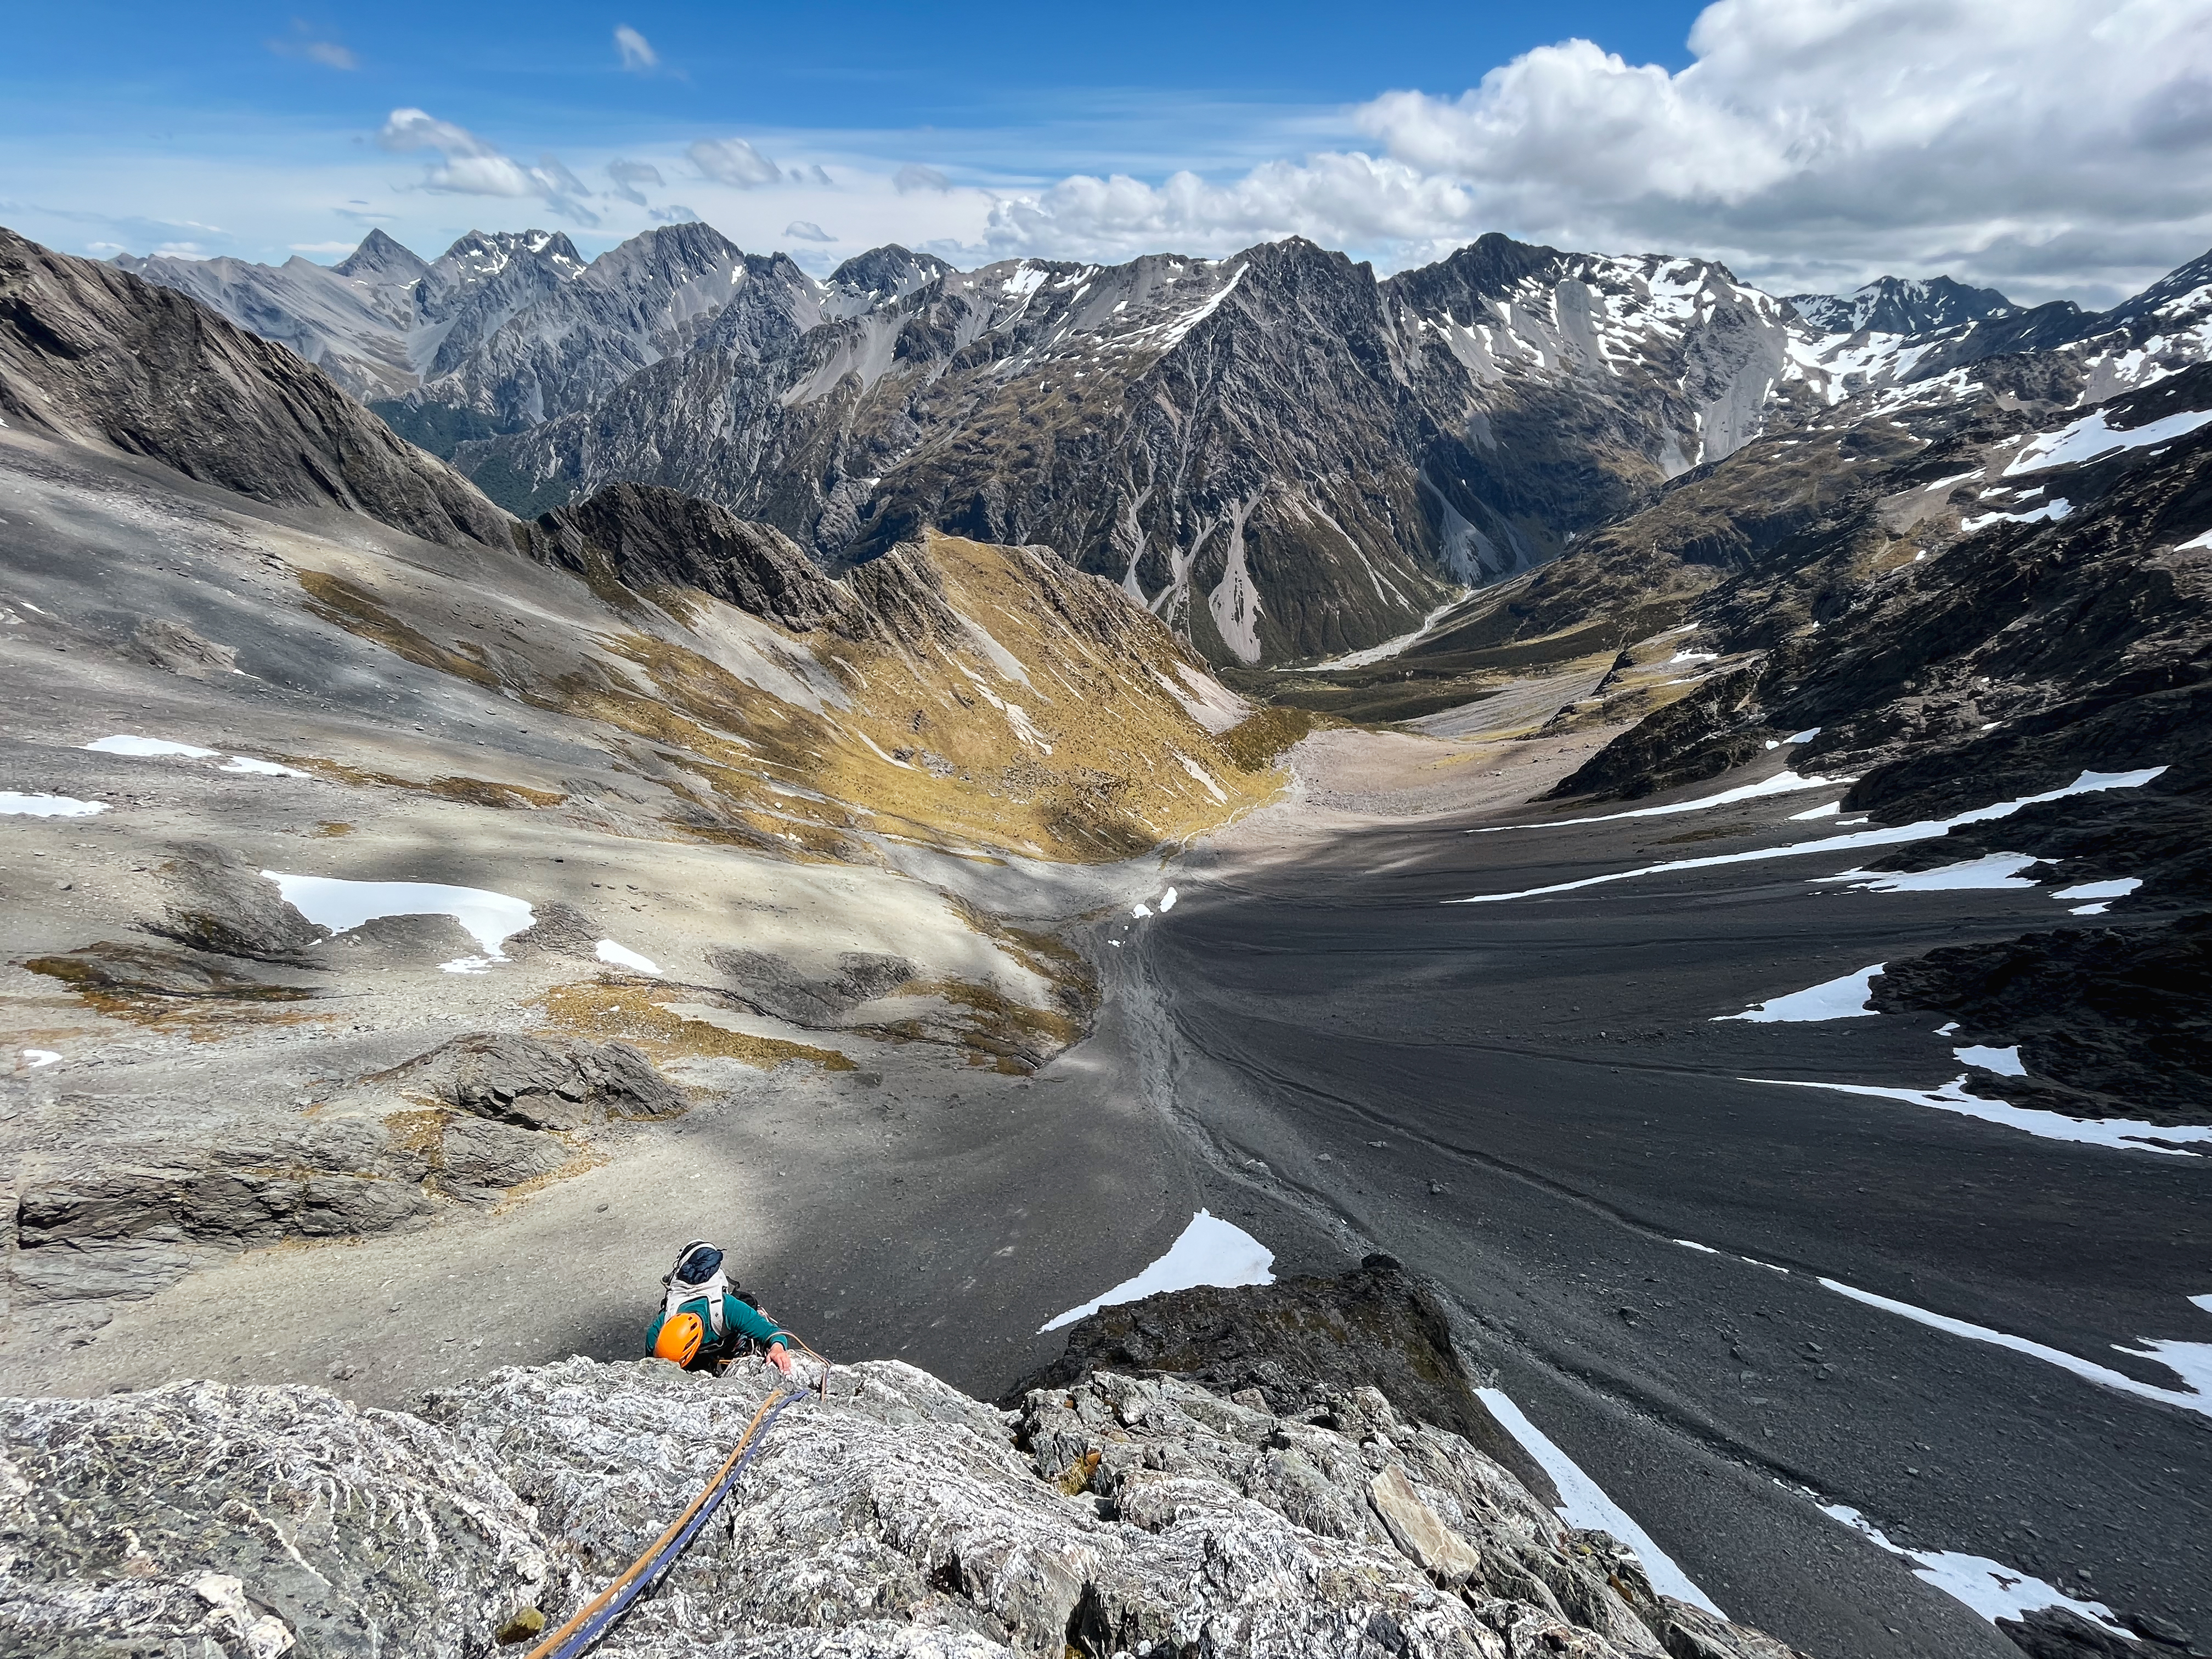
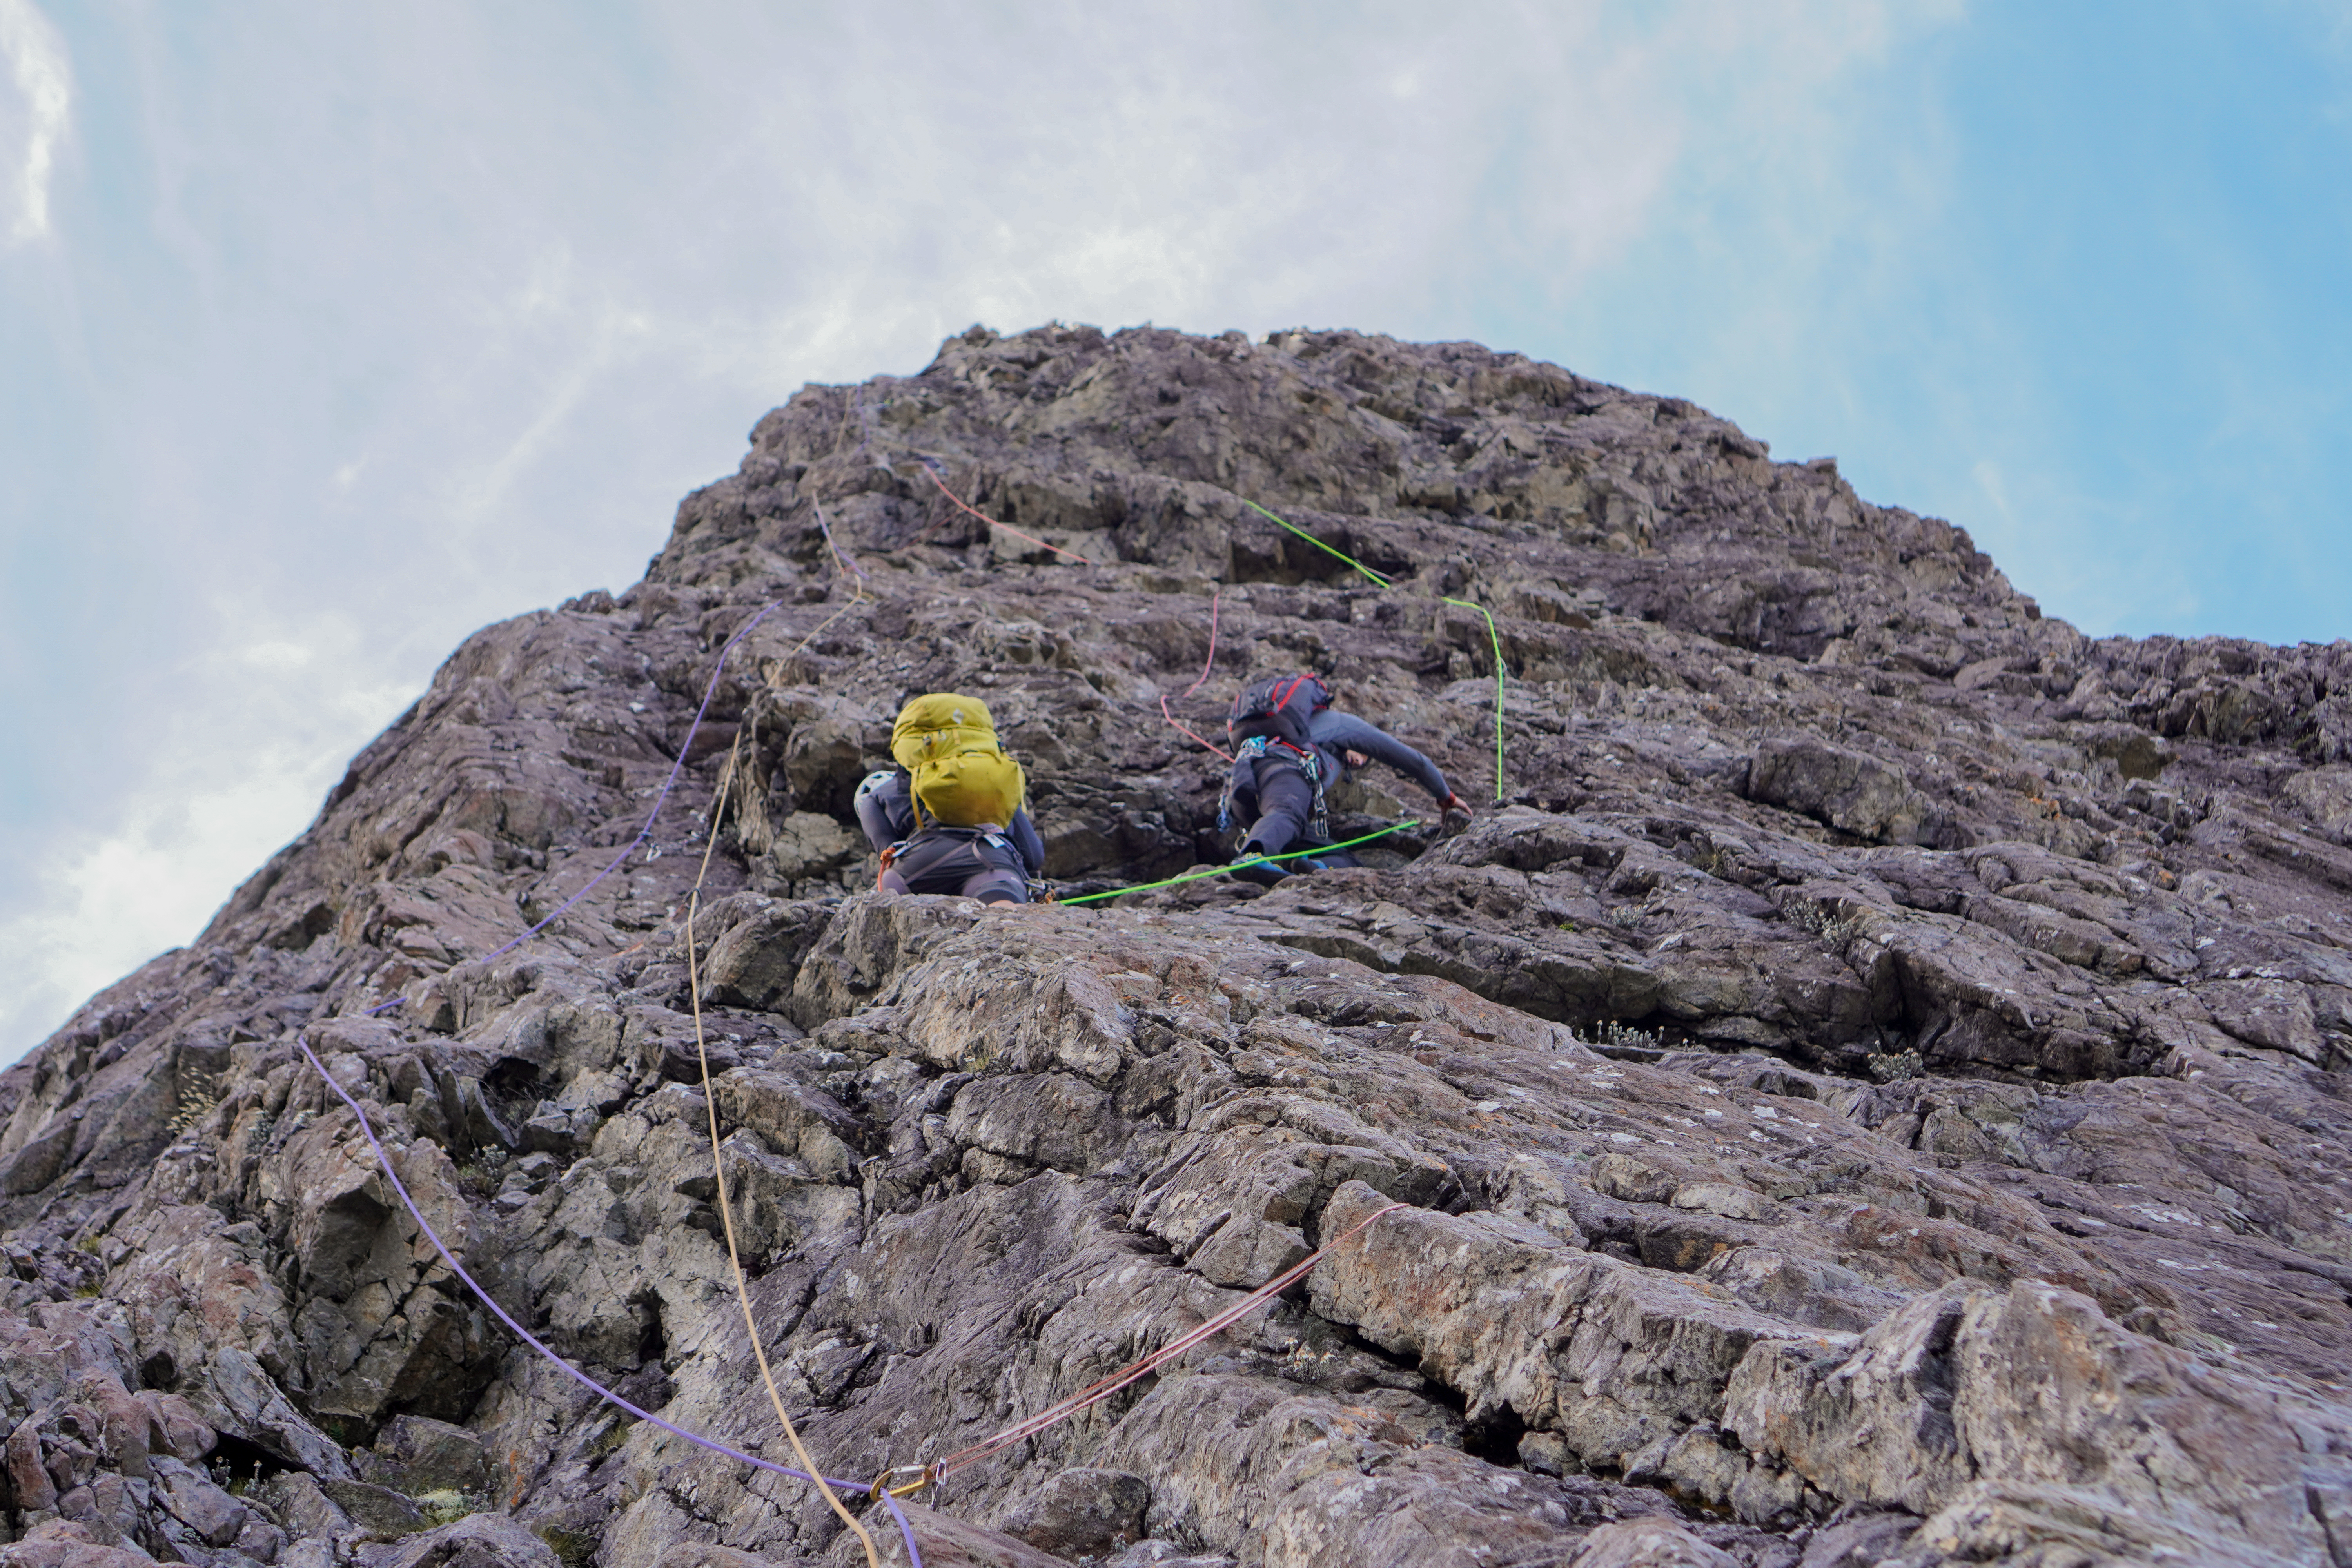
P6-8: (11-13, 60m each) Can stick to the arete but we chose the path of least resistance, going diagonally left which leads you to a rocky platform.

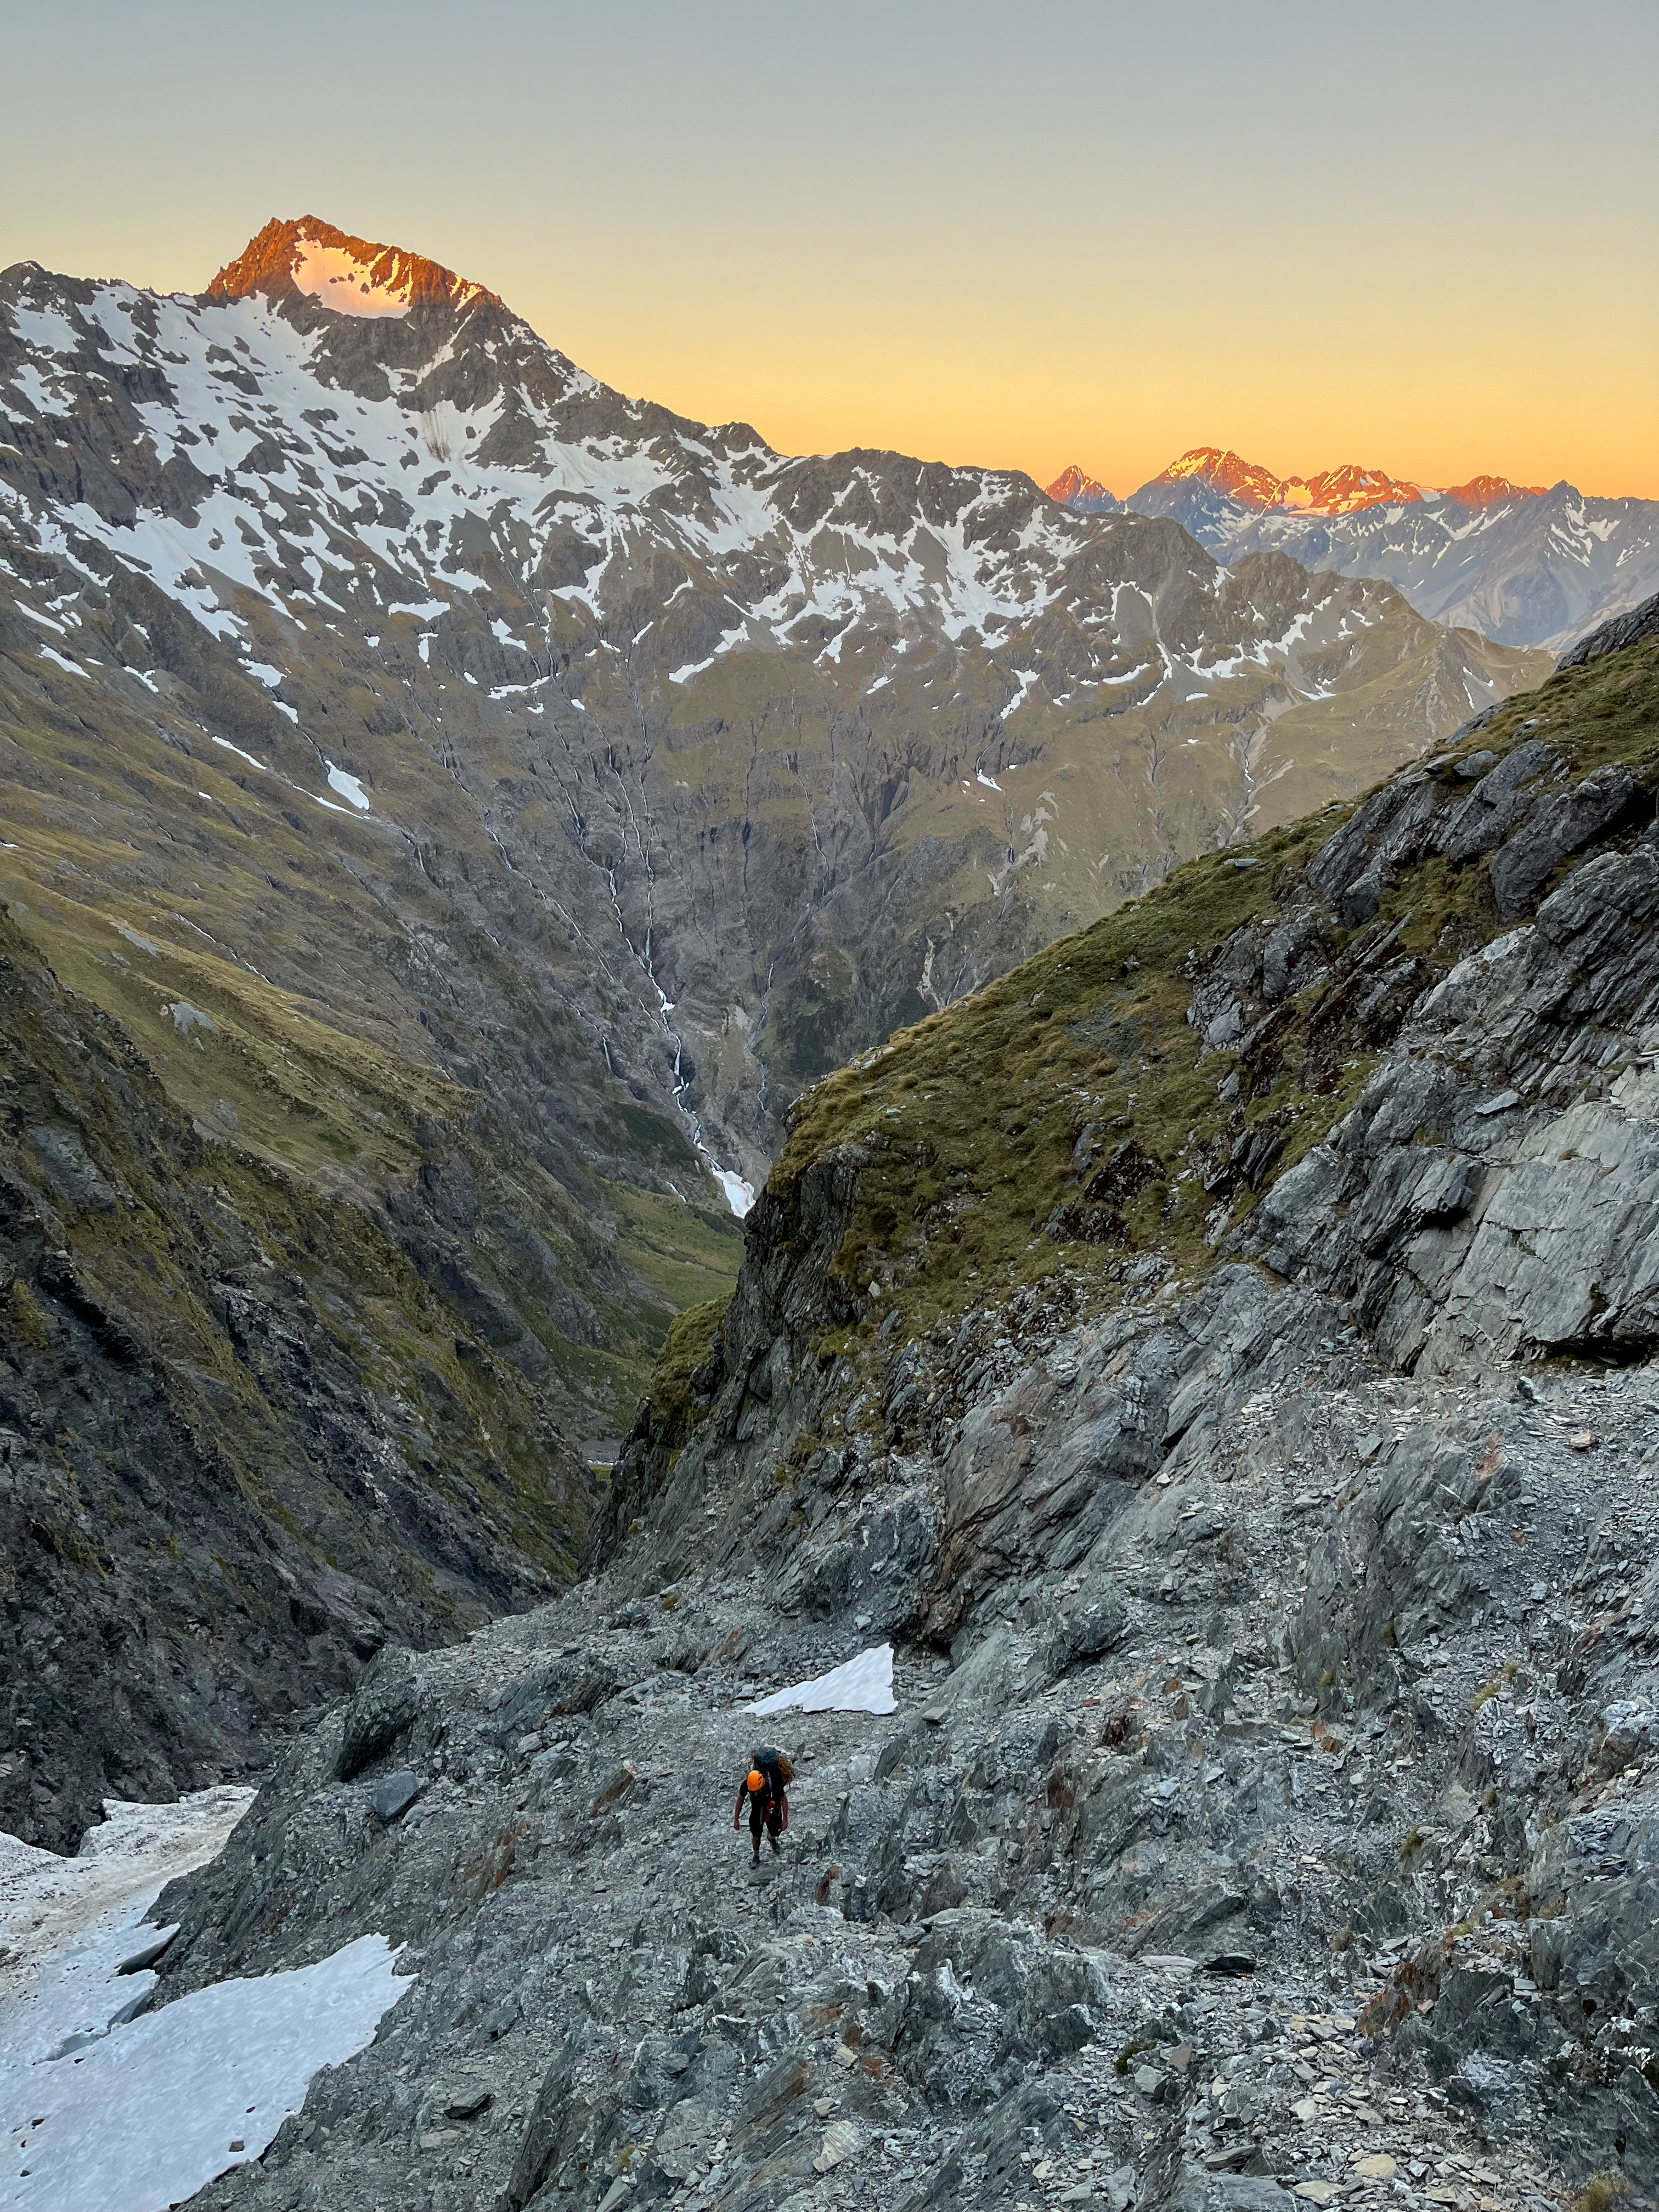
From here we took the rope off and scrambled the last 50m or so up to the top via an easy gully. The true summit lies 100m East of where you top out. It’s easy ground heading to the true summit then you have to navigate ledges down to Bruce-Steeple col. Would have been much easier in the light but doing it with head torch illumination alone resulted in a lot of back/forth. We ended up actually going down the NE face then coming back up the N side of the col. Came across a block that a party had rapped off down the S face – perhaps in the dark as well? Basically, I’d leave plenty of daylight to figure out the descent. Would expect it would take 1-2h to get back to camp.

All in all a great 3 day trip, and awesome to be able to share in a friend’s first trad climb. A little dose of suffering is good for the character anyway…

Addit: struggling to upload the gpx file at the moment. Just comment if you want it and can send through directly.

Mt Temple, Central Buttress

A fun day out that’s easily accessible as a long day trip or cruisey overnighter from Christchurch. We made a weekend of it staying at CMC’s Kennedy Lodge the night before, then staying on for canyoning down Agility Creek the next day (what was supposed to be our ‘rest day’ but turned into a borderline quest – but that’s another story).

Generally low easy scrambling (grade 12 ish) but with 2 well defined overhanging cruxes that I reckon are more like 16 than the topo 14. You can avoid these if you want to. Rock is loose in places but generally decent and the gear is spaced but not as run out as I was expecting from the climb nz description. Crucially the anchors are bomber, with big spike belays for 240cm slings on all 4 pitches. Easy scree descent.


  • Grade: III, 4+, crux 14 according to topo; I think this is a bit of a sandbag, the overhanging crux is more like 16 but is short. All trad, no bolts including anchors.
  • Equipment: full trad rack – singles of cams up to #3, full set of nuts (RPs were very handy), tat, 2x 70m half ropes
  • Approach time: 1.5-2h
  • Climb time: 4.5h
  • Season: Summer into autumn. West facing so gets the afternoon sun.
  • Team: Joe, Tom, Alex, Dave, Maria 02/04/22

approach

Park at Temple Basin ski field carpark and head up the 4WD track that turns into a well maintained walking track to the lodges. Central buttress is flanked by a left and right buttress. It extends into the scree further than the Left/Right buttresses do making it easy to spot.

The route

It isn’t really obvious from the Climb NZ topo that this route is actually a series of pinnacles, and so you need to make 2 short raps during the climb to link them together. Multiple variations to the route exist – the Climb NZ topo shows 3 alternative starts, coming together towards the top. We chose the line on looker’s left of the buttress. Other routes start further right.

Note the 2 raps required mid-route
Scramble the first 40m

Pitch 1: (10 40m) Scramble up the detached stand alone block in front of the buttress to get to the scree platform at the base of the buttress. We went up just to the right of the obvious deep crack. We soloed up this section in approach shoes, pretty limited options for gear if you want to pitch it. Is easy to just walk around this section to the base of the main buttress if you want to avoid it.

Pitch 2: (12 50m) We chose to climb the arete on the far lookers left of the buttress which starts from a small grassy patch. Either stay left in the groove for easier climbing but looser /mossier ground, or right on the face for better rock but more difficult and run out climbing. About halfway up is a small overhang which is easier to get through on the left. Some pretty loose rock on the overhang so watch out. After almost a full rope length you get to a large grassy platform about 5m wide with a big boulder you can sling as a belay.

Pitch 3: (16 50m) We climbed up the right hand side through the small overhang (see pic) which has some cool stemming moves. There was some loose rock and average gear just on the crux move which made this a bit stressful. If you stay left sticking to the ridge you could avoid this section. Once over this is you scramble up grade 10 blocks to a ledge on top of the first pinnacle and make an anchor with a sling over the very top of the pinnacle. There were a few slings and a maillon left there when we were there. From here you need to make a short rap (5m or so) onto a small ridge and walk along this above steep gullies to the start of the next pitch. Very loose rock on the ridge so take care.

The crux

Pitch 4: (12 30m) There’s a small area you can tuck into at the base of the next buttress to belay from. Head up the groove on the right hand ride of the buttress. The angle then eases off up to a spike belay at the top of the second pinnacle. Another sling/maillon was insitu here. Make another short rap to the start of the final pitch.

Pitch 5: (15 30m) Generally easy climbing but with a well defined crux half way up. Step right into the overhang. Great gear (#2 cam just below the crux) and huge jugs to haul on to get you through. Then scramble up to the top where you can make another good sling anchor around a boulder.

From here we took the ropes off and scrambled through the shingle to the cairn on the summit.

Descent

From the summit, head South along the ridge towards temple col then drop down into one of many scree gullies back down to Temple Basin ski field. We cut off halfway between the summit and the col down a scree couloir, and then trended left picking our way through the bluffs to get down to the ski field base building in around 1.5 hours. The scree is pretty hard work and Maria stacked it losing a phone and cracking her camera so watch out!