Aoraki / Mt Cook NW Couloir – Ski Descent

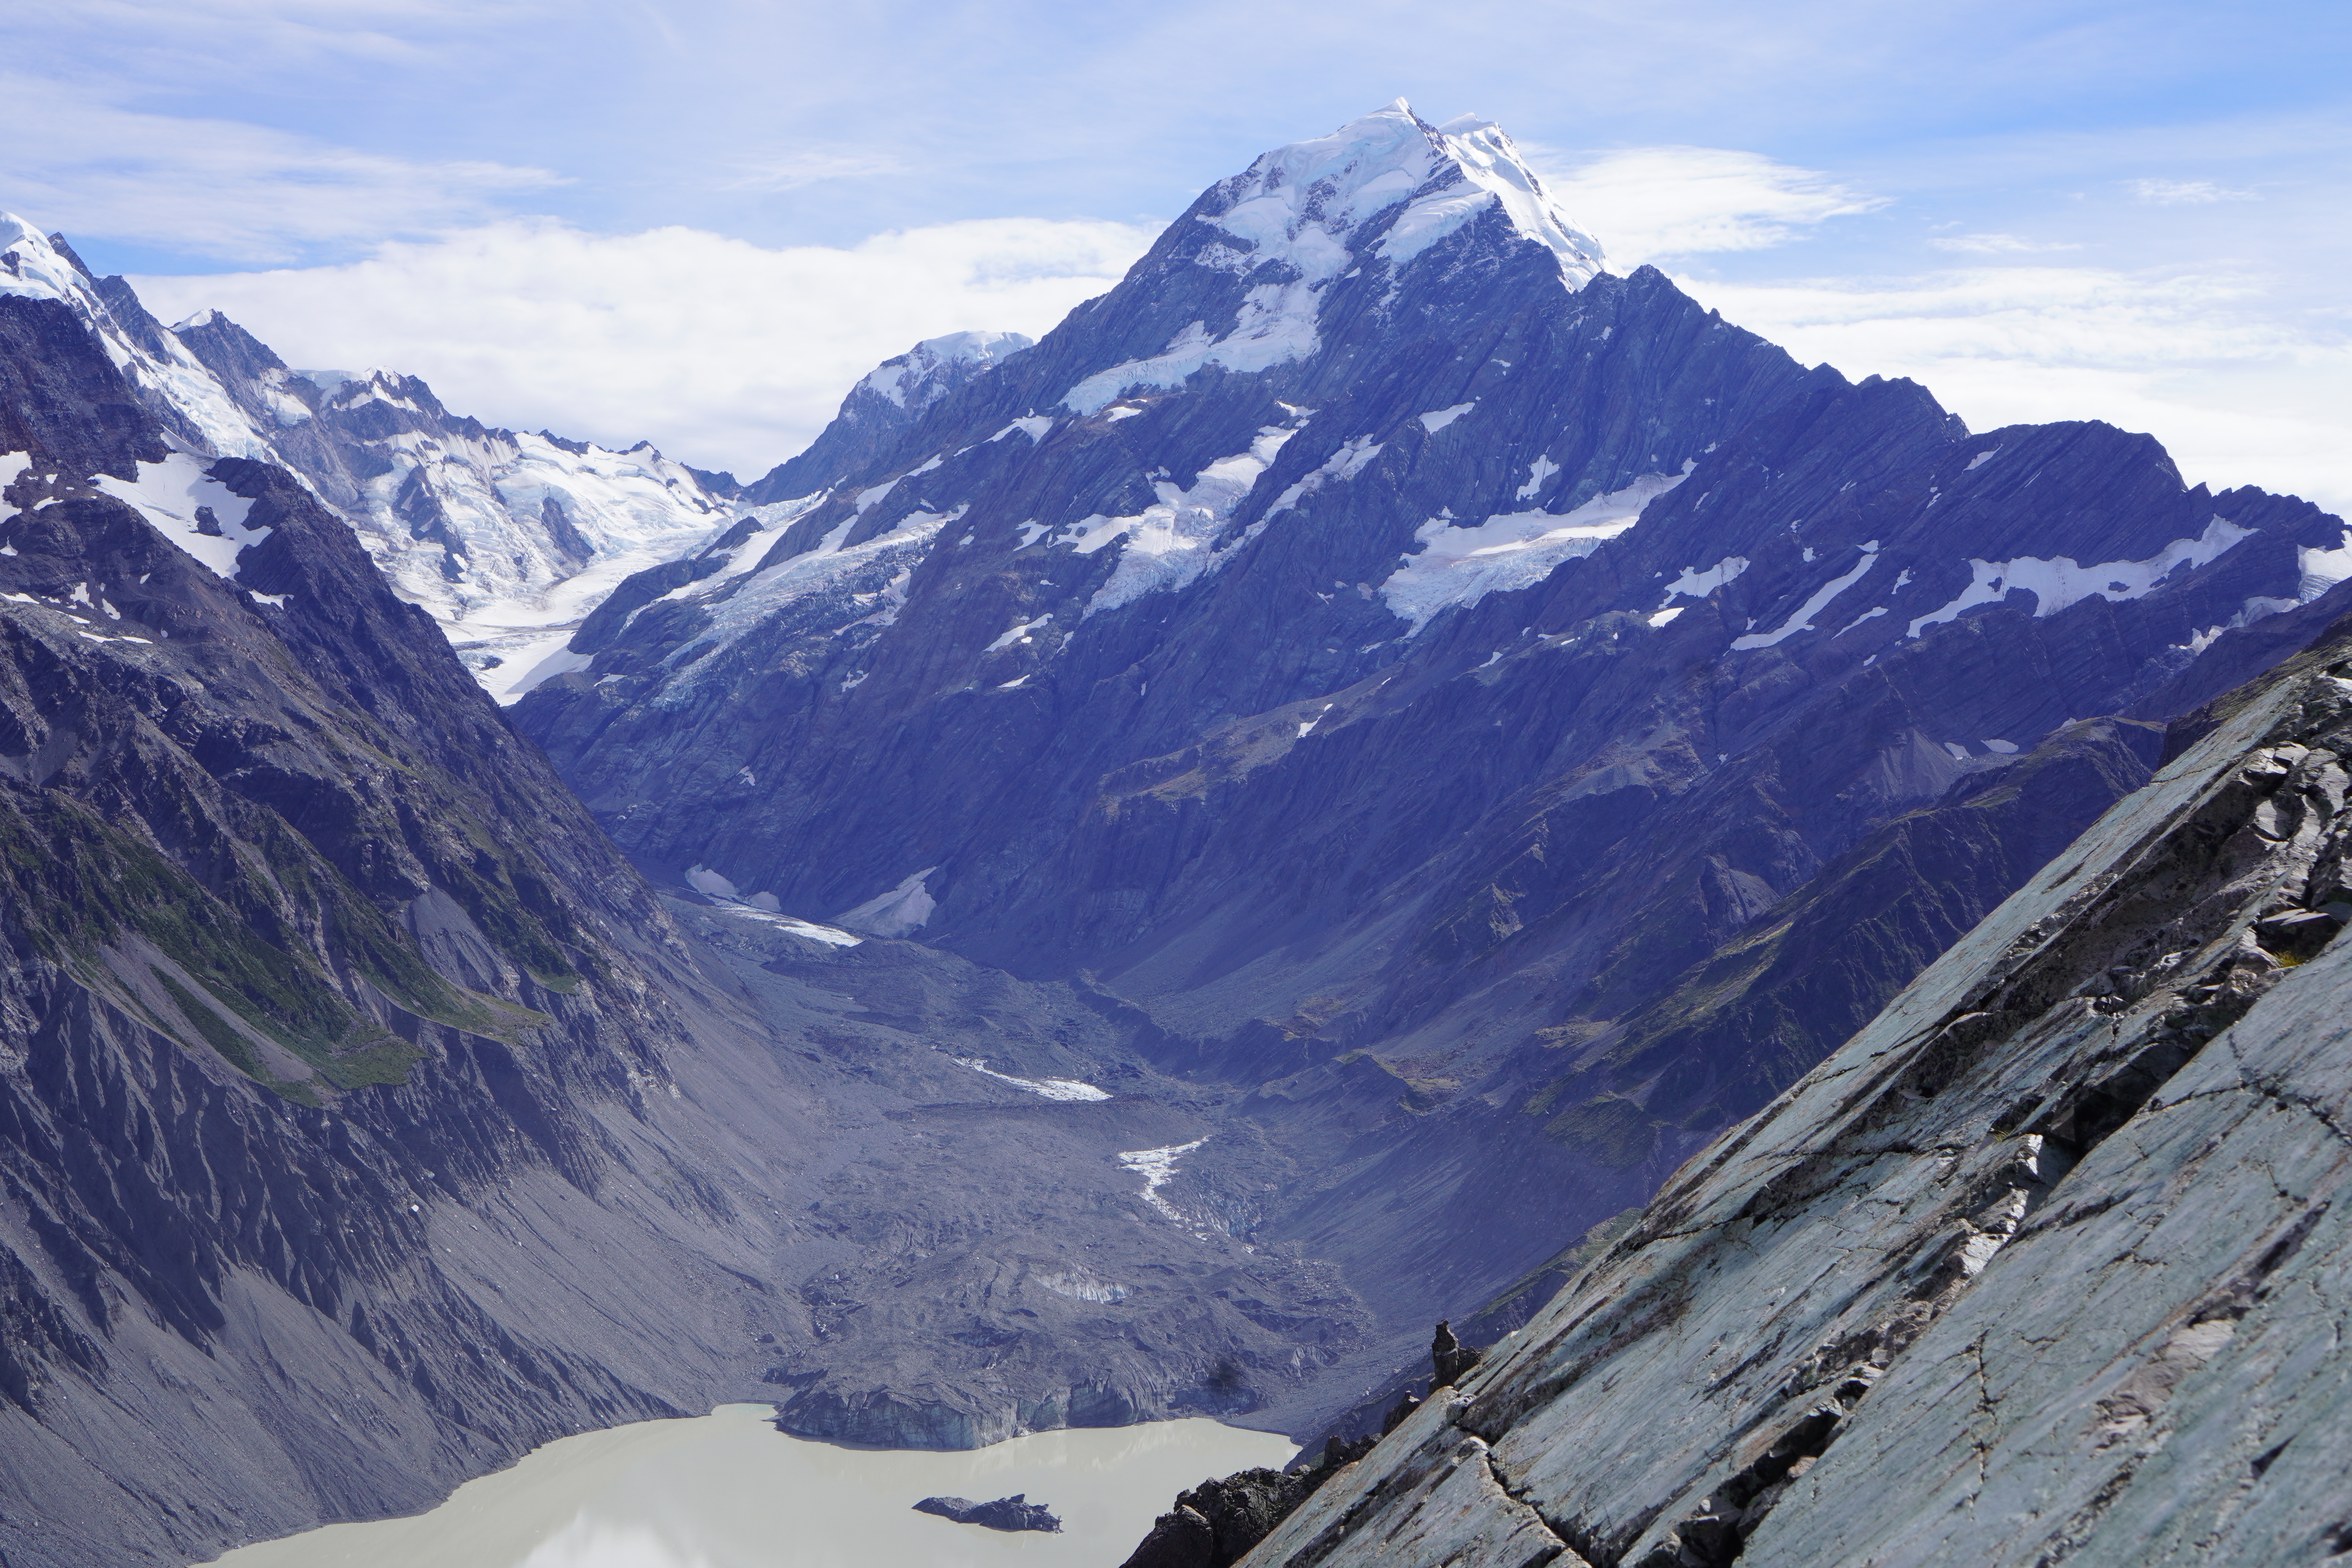
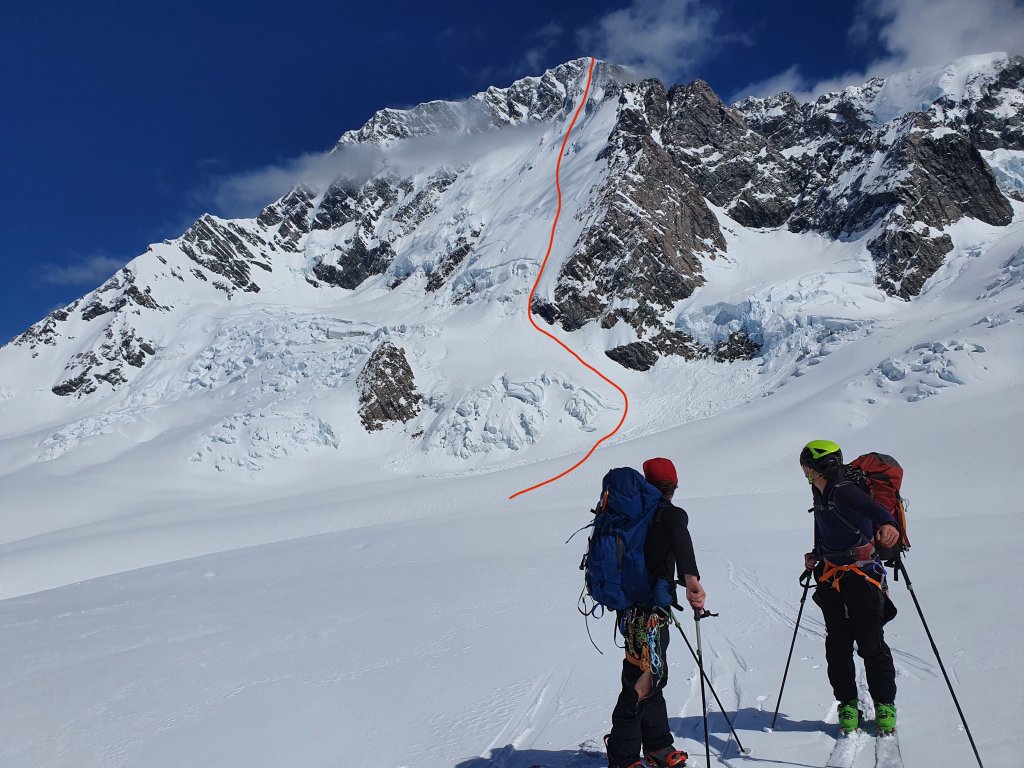
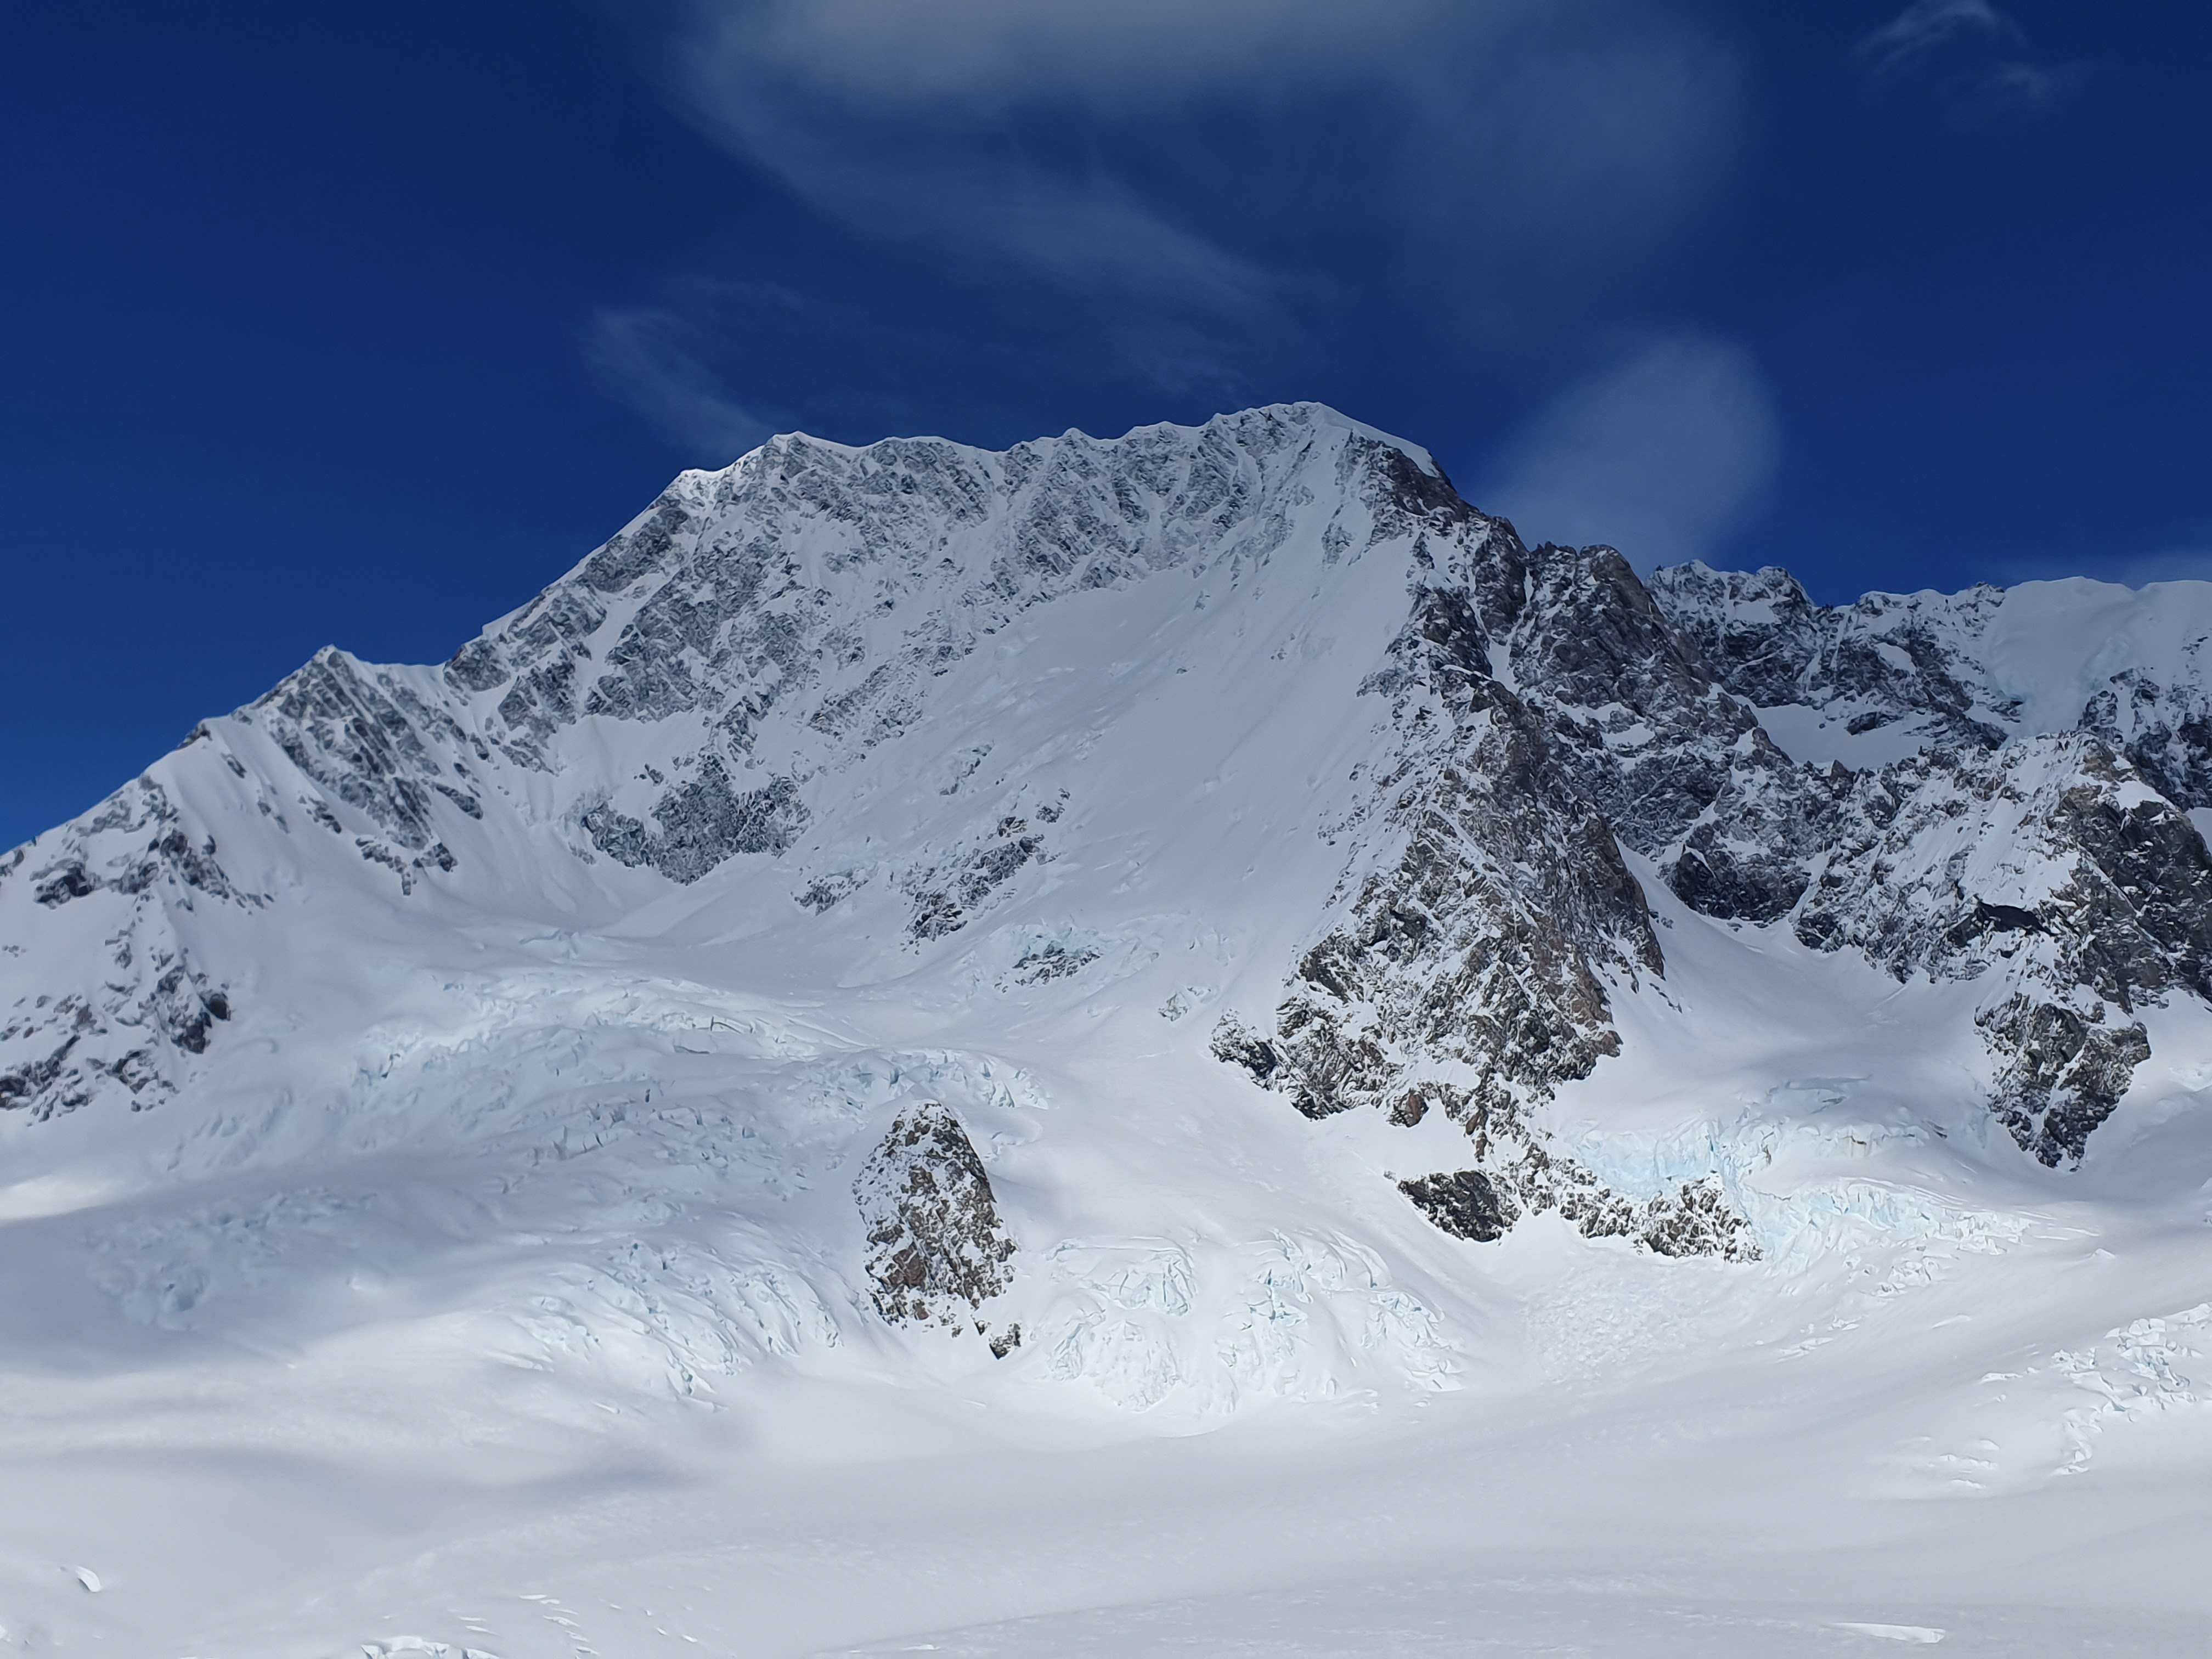
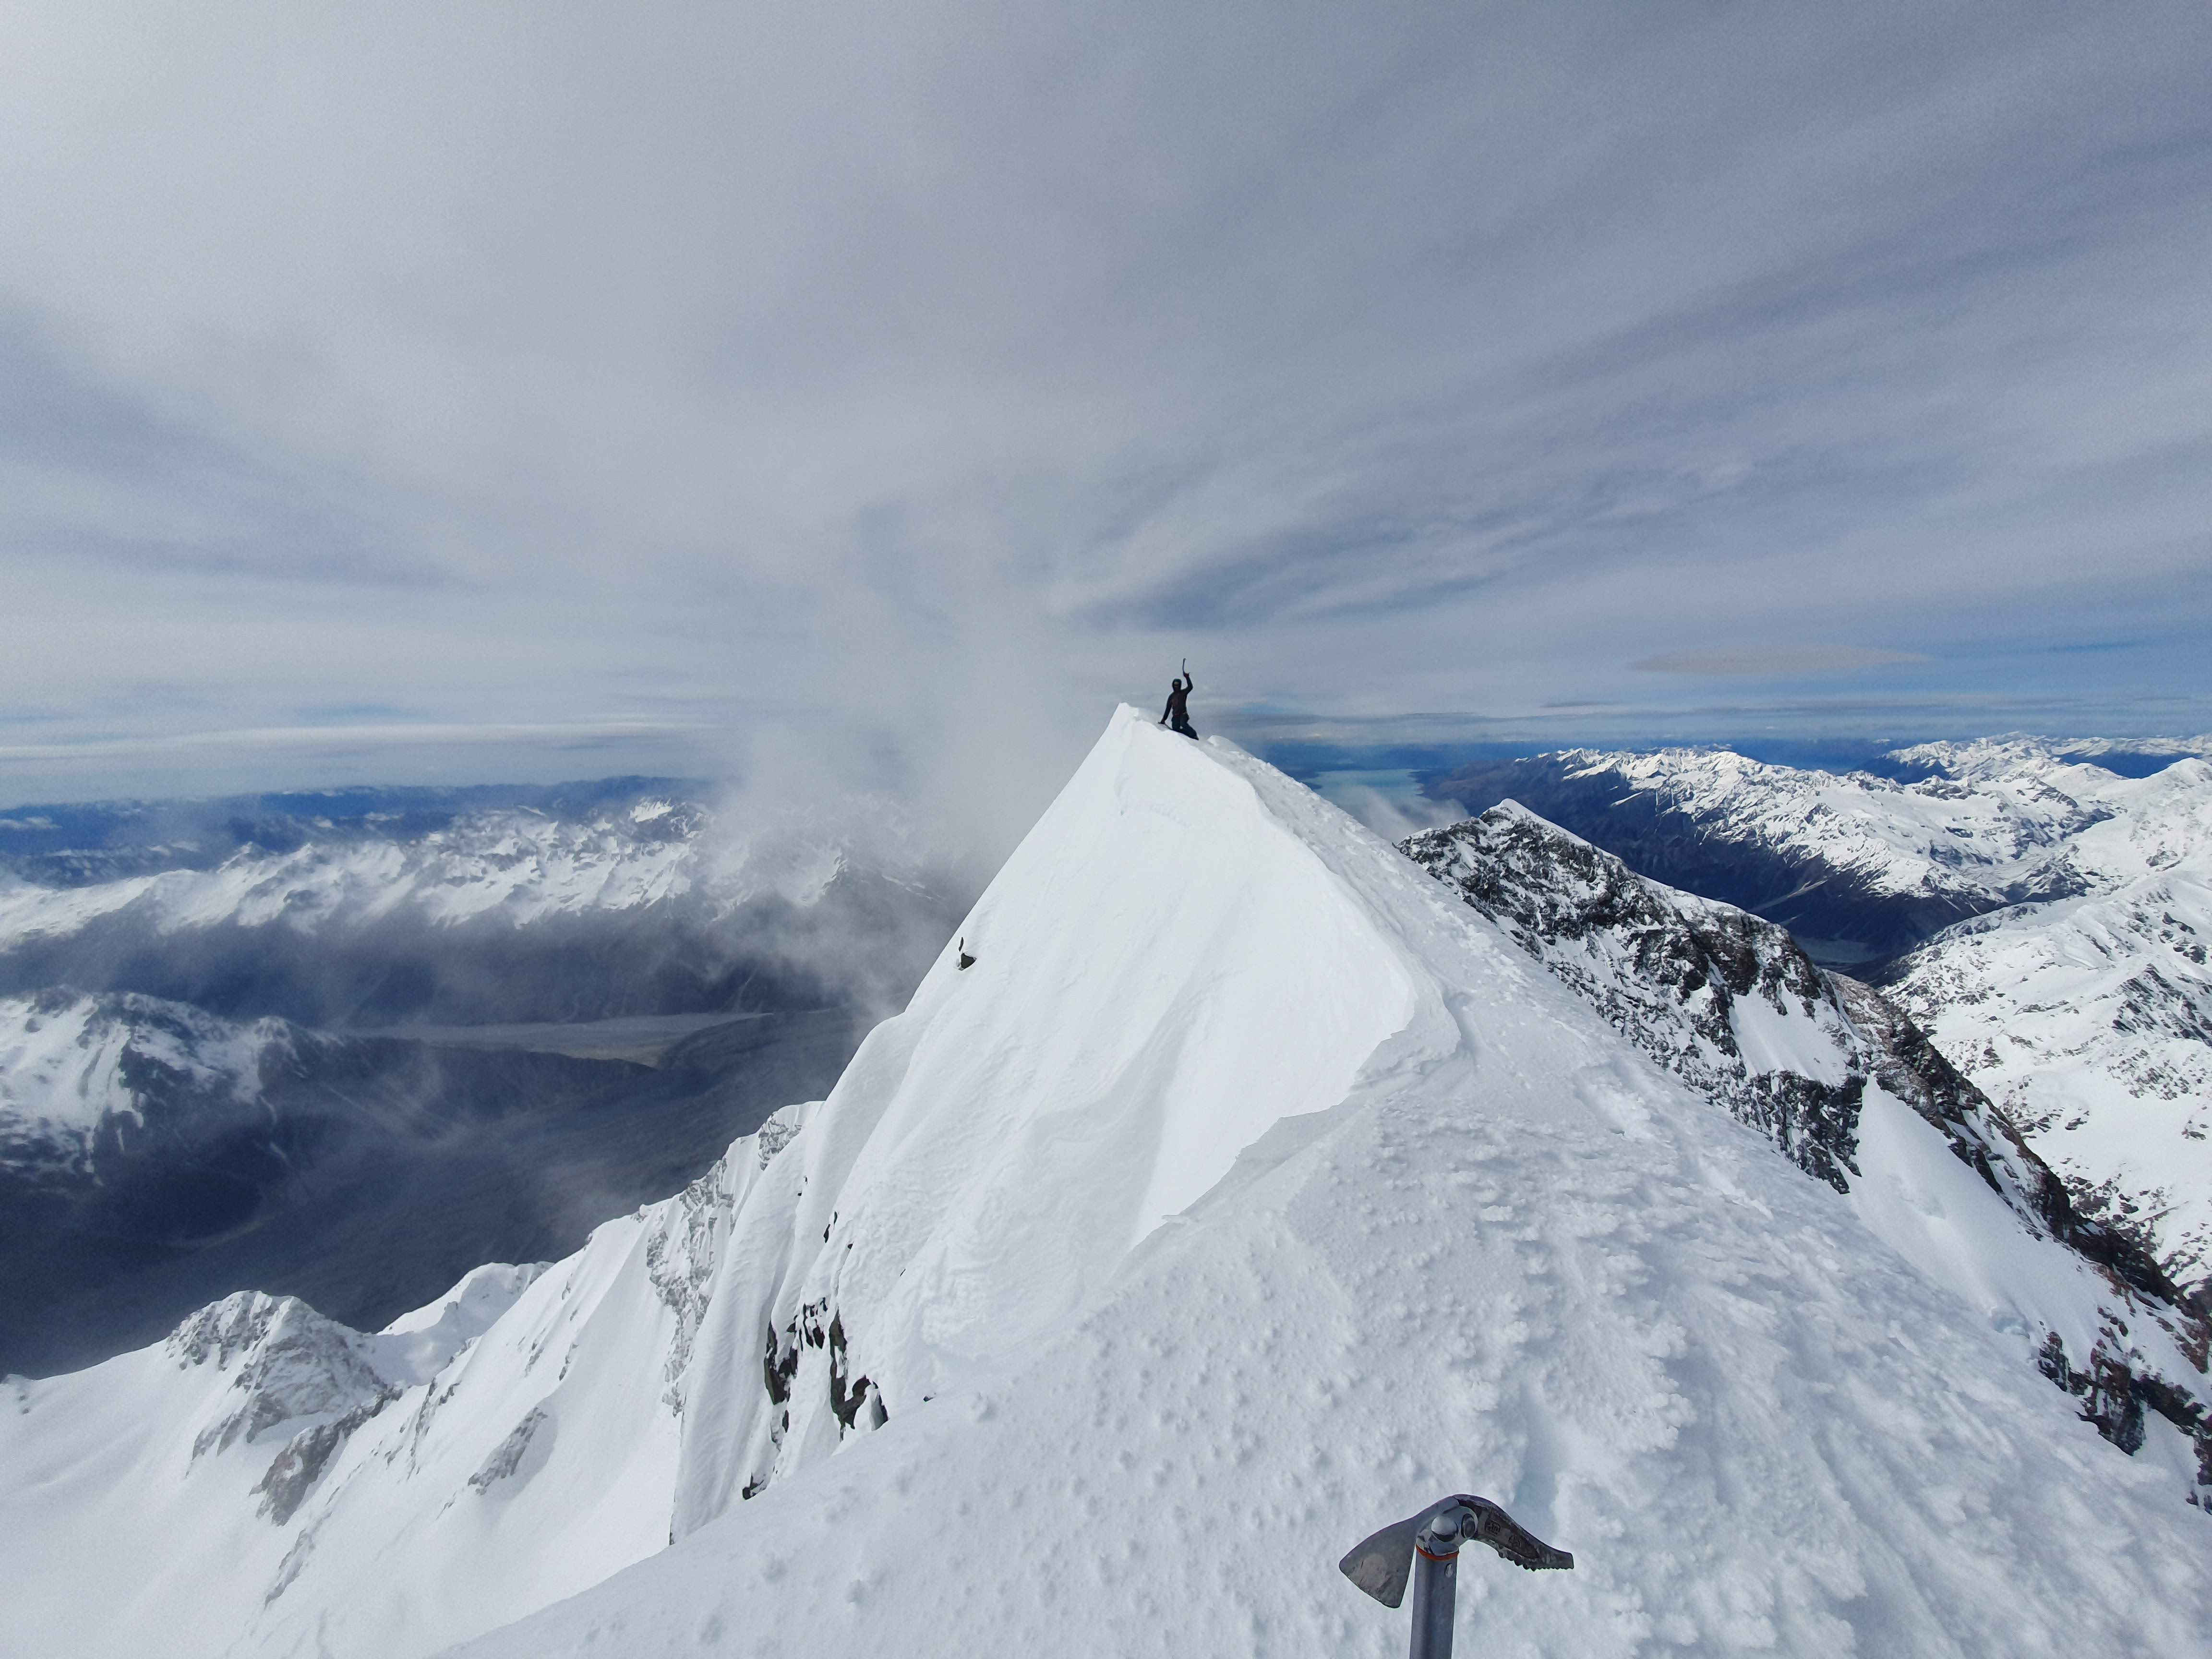
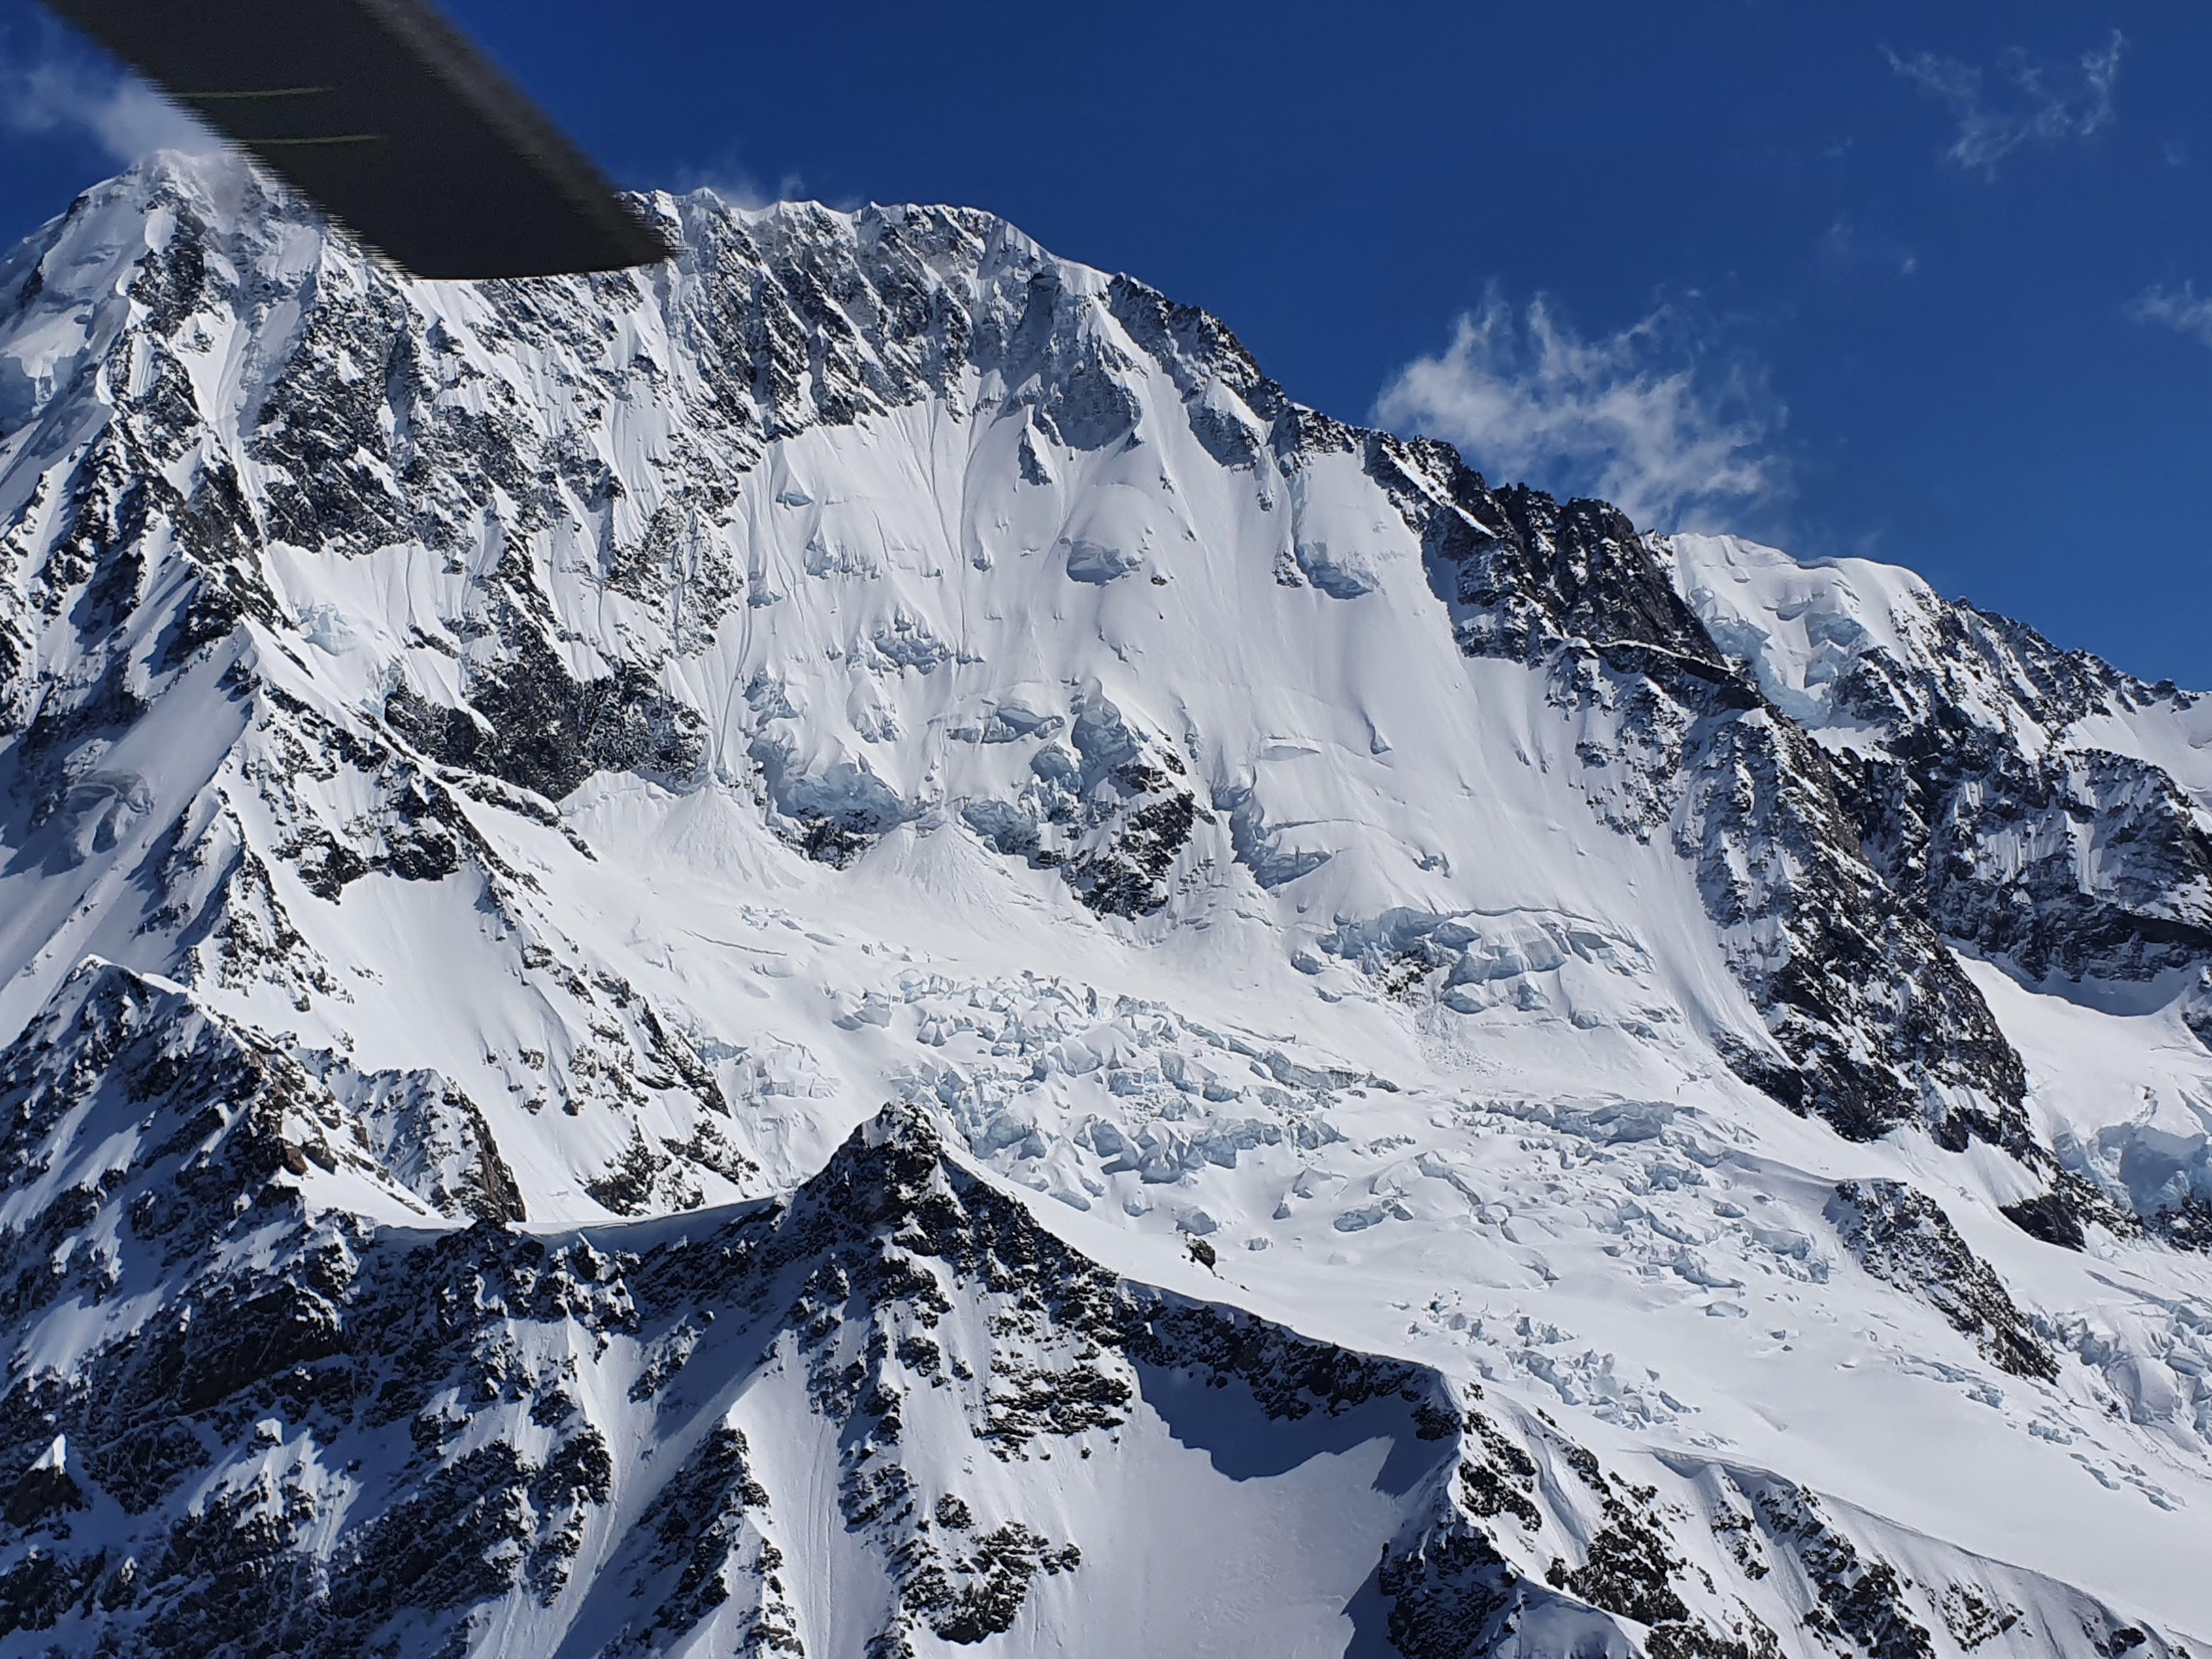
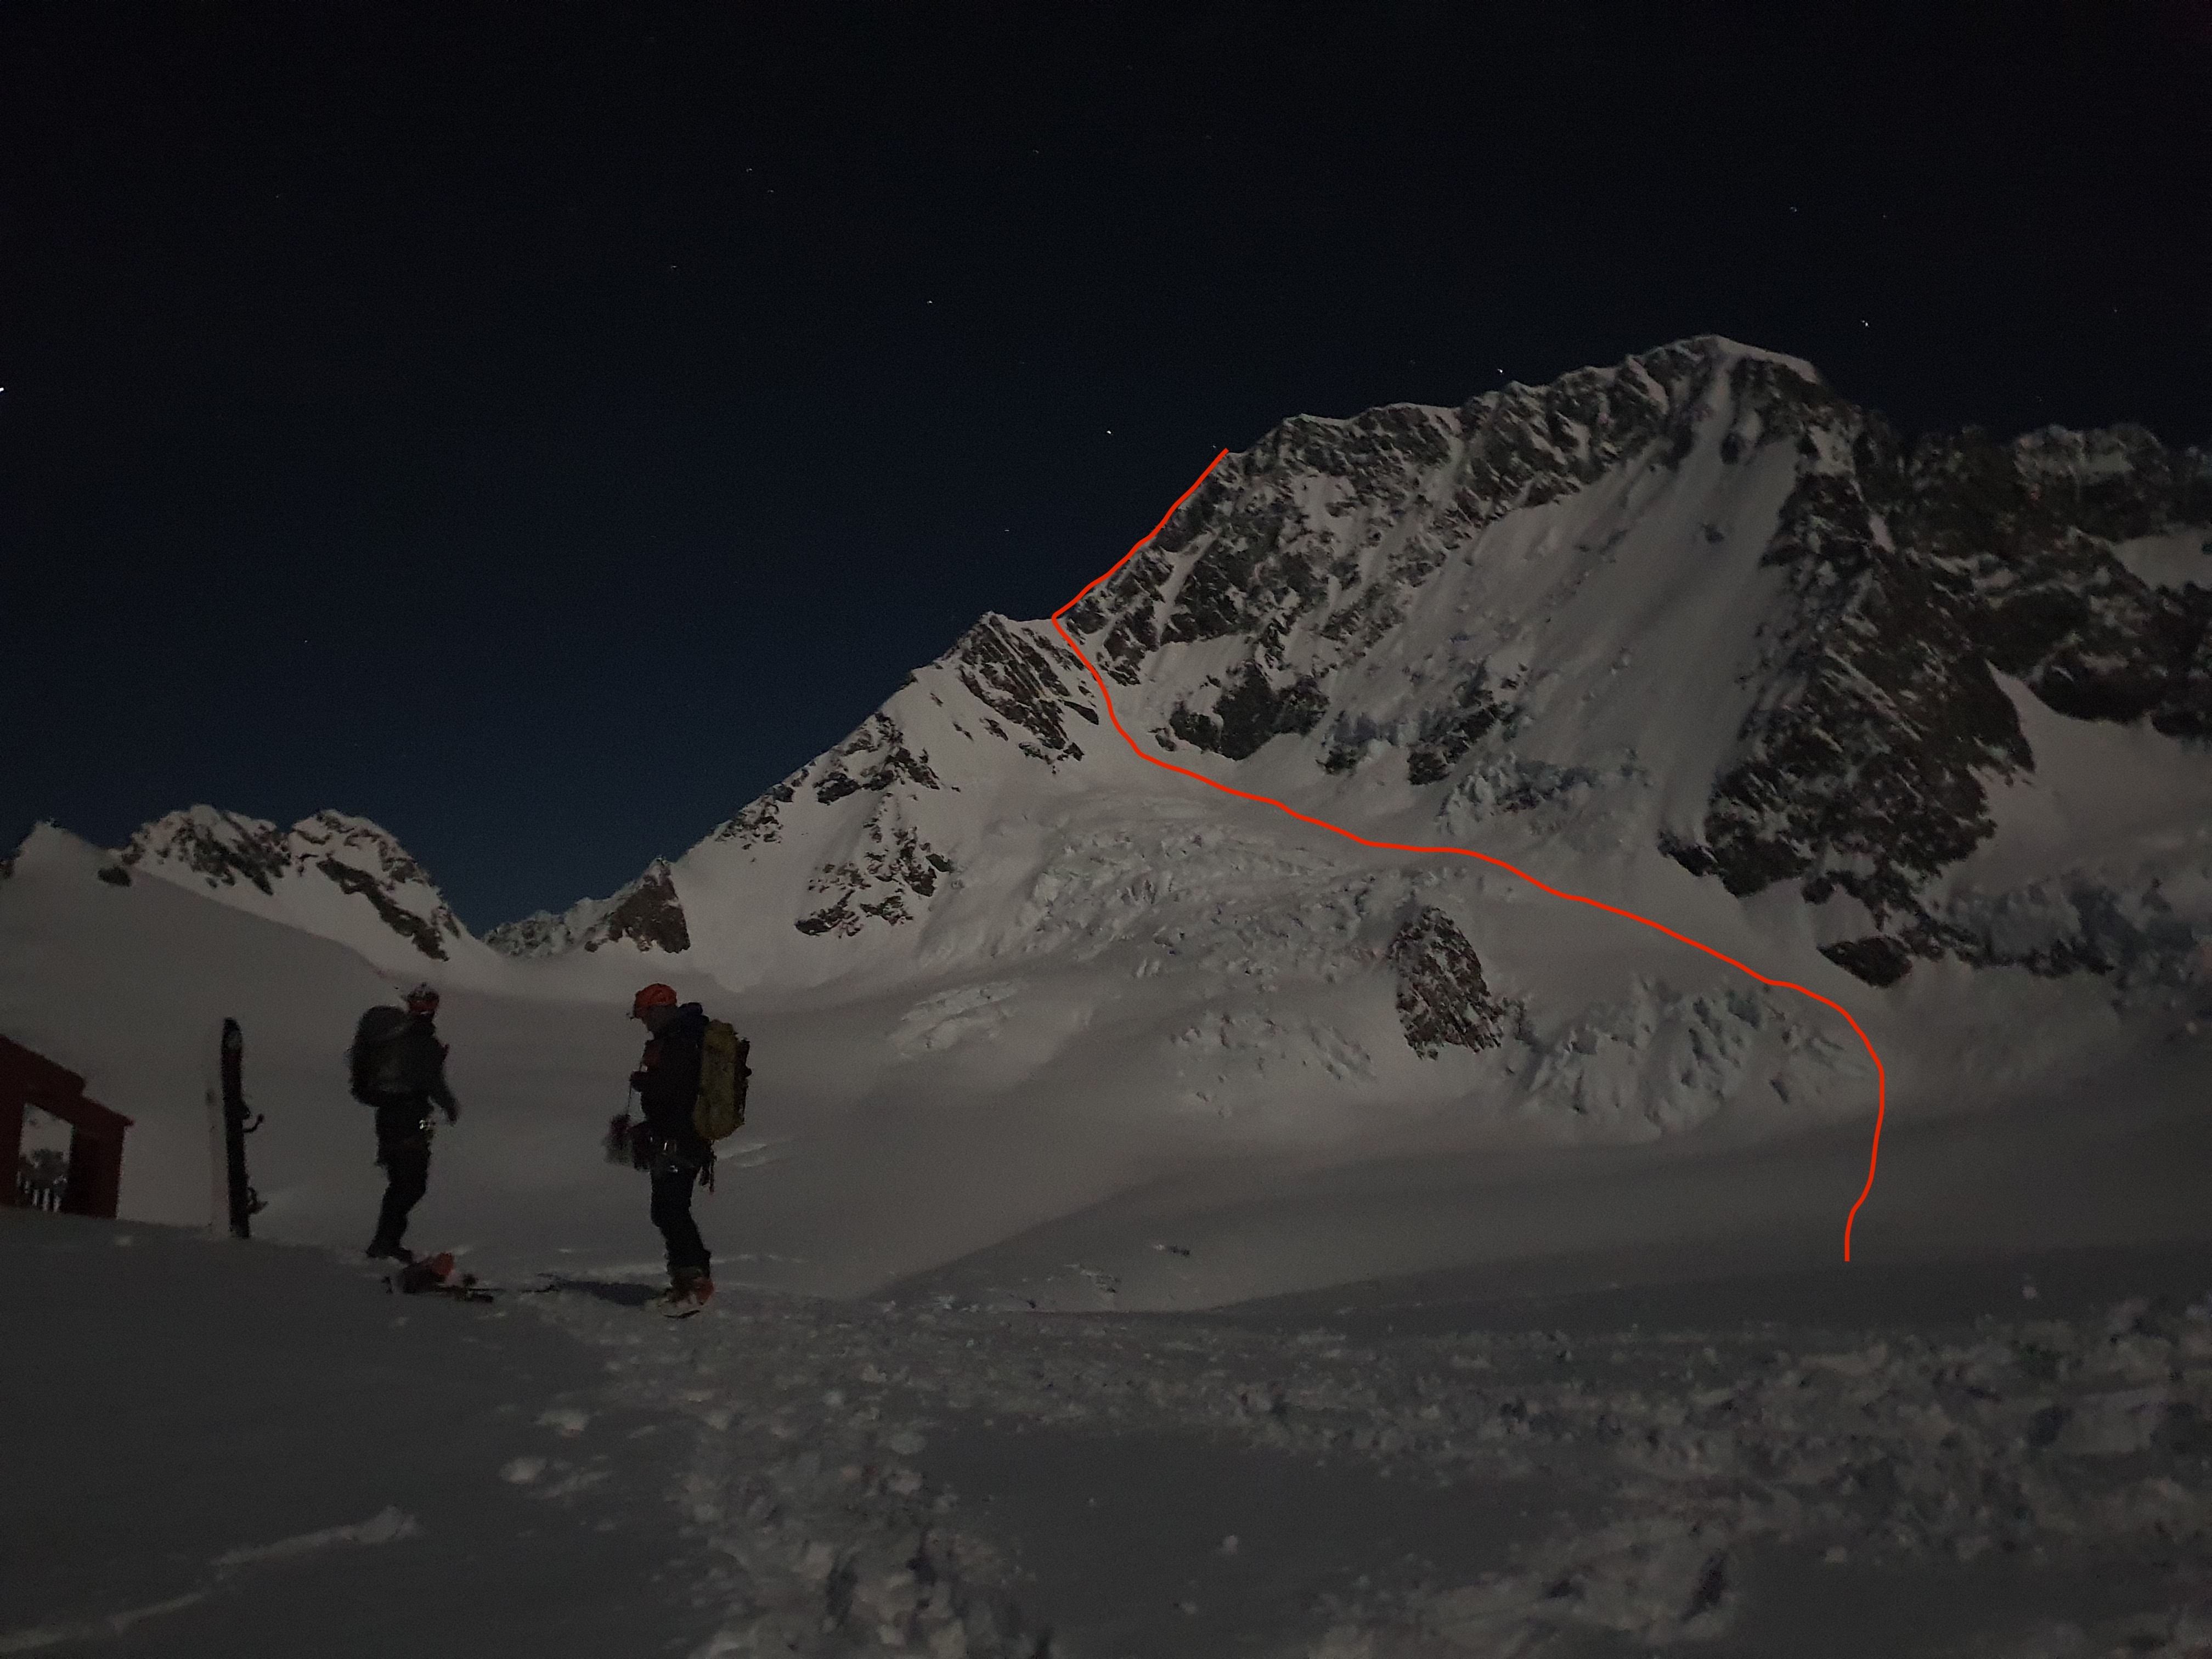
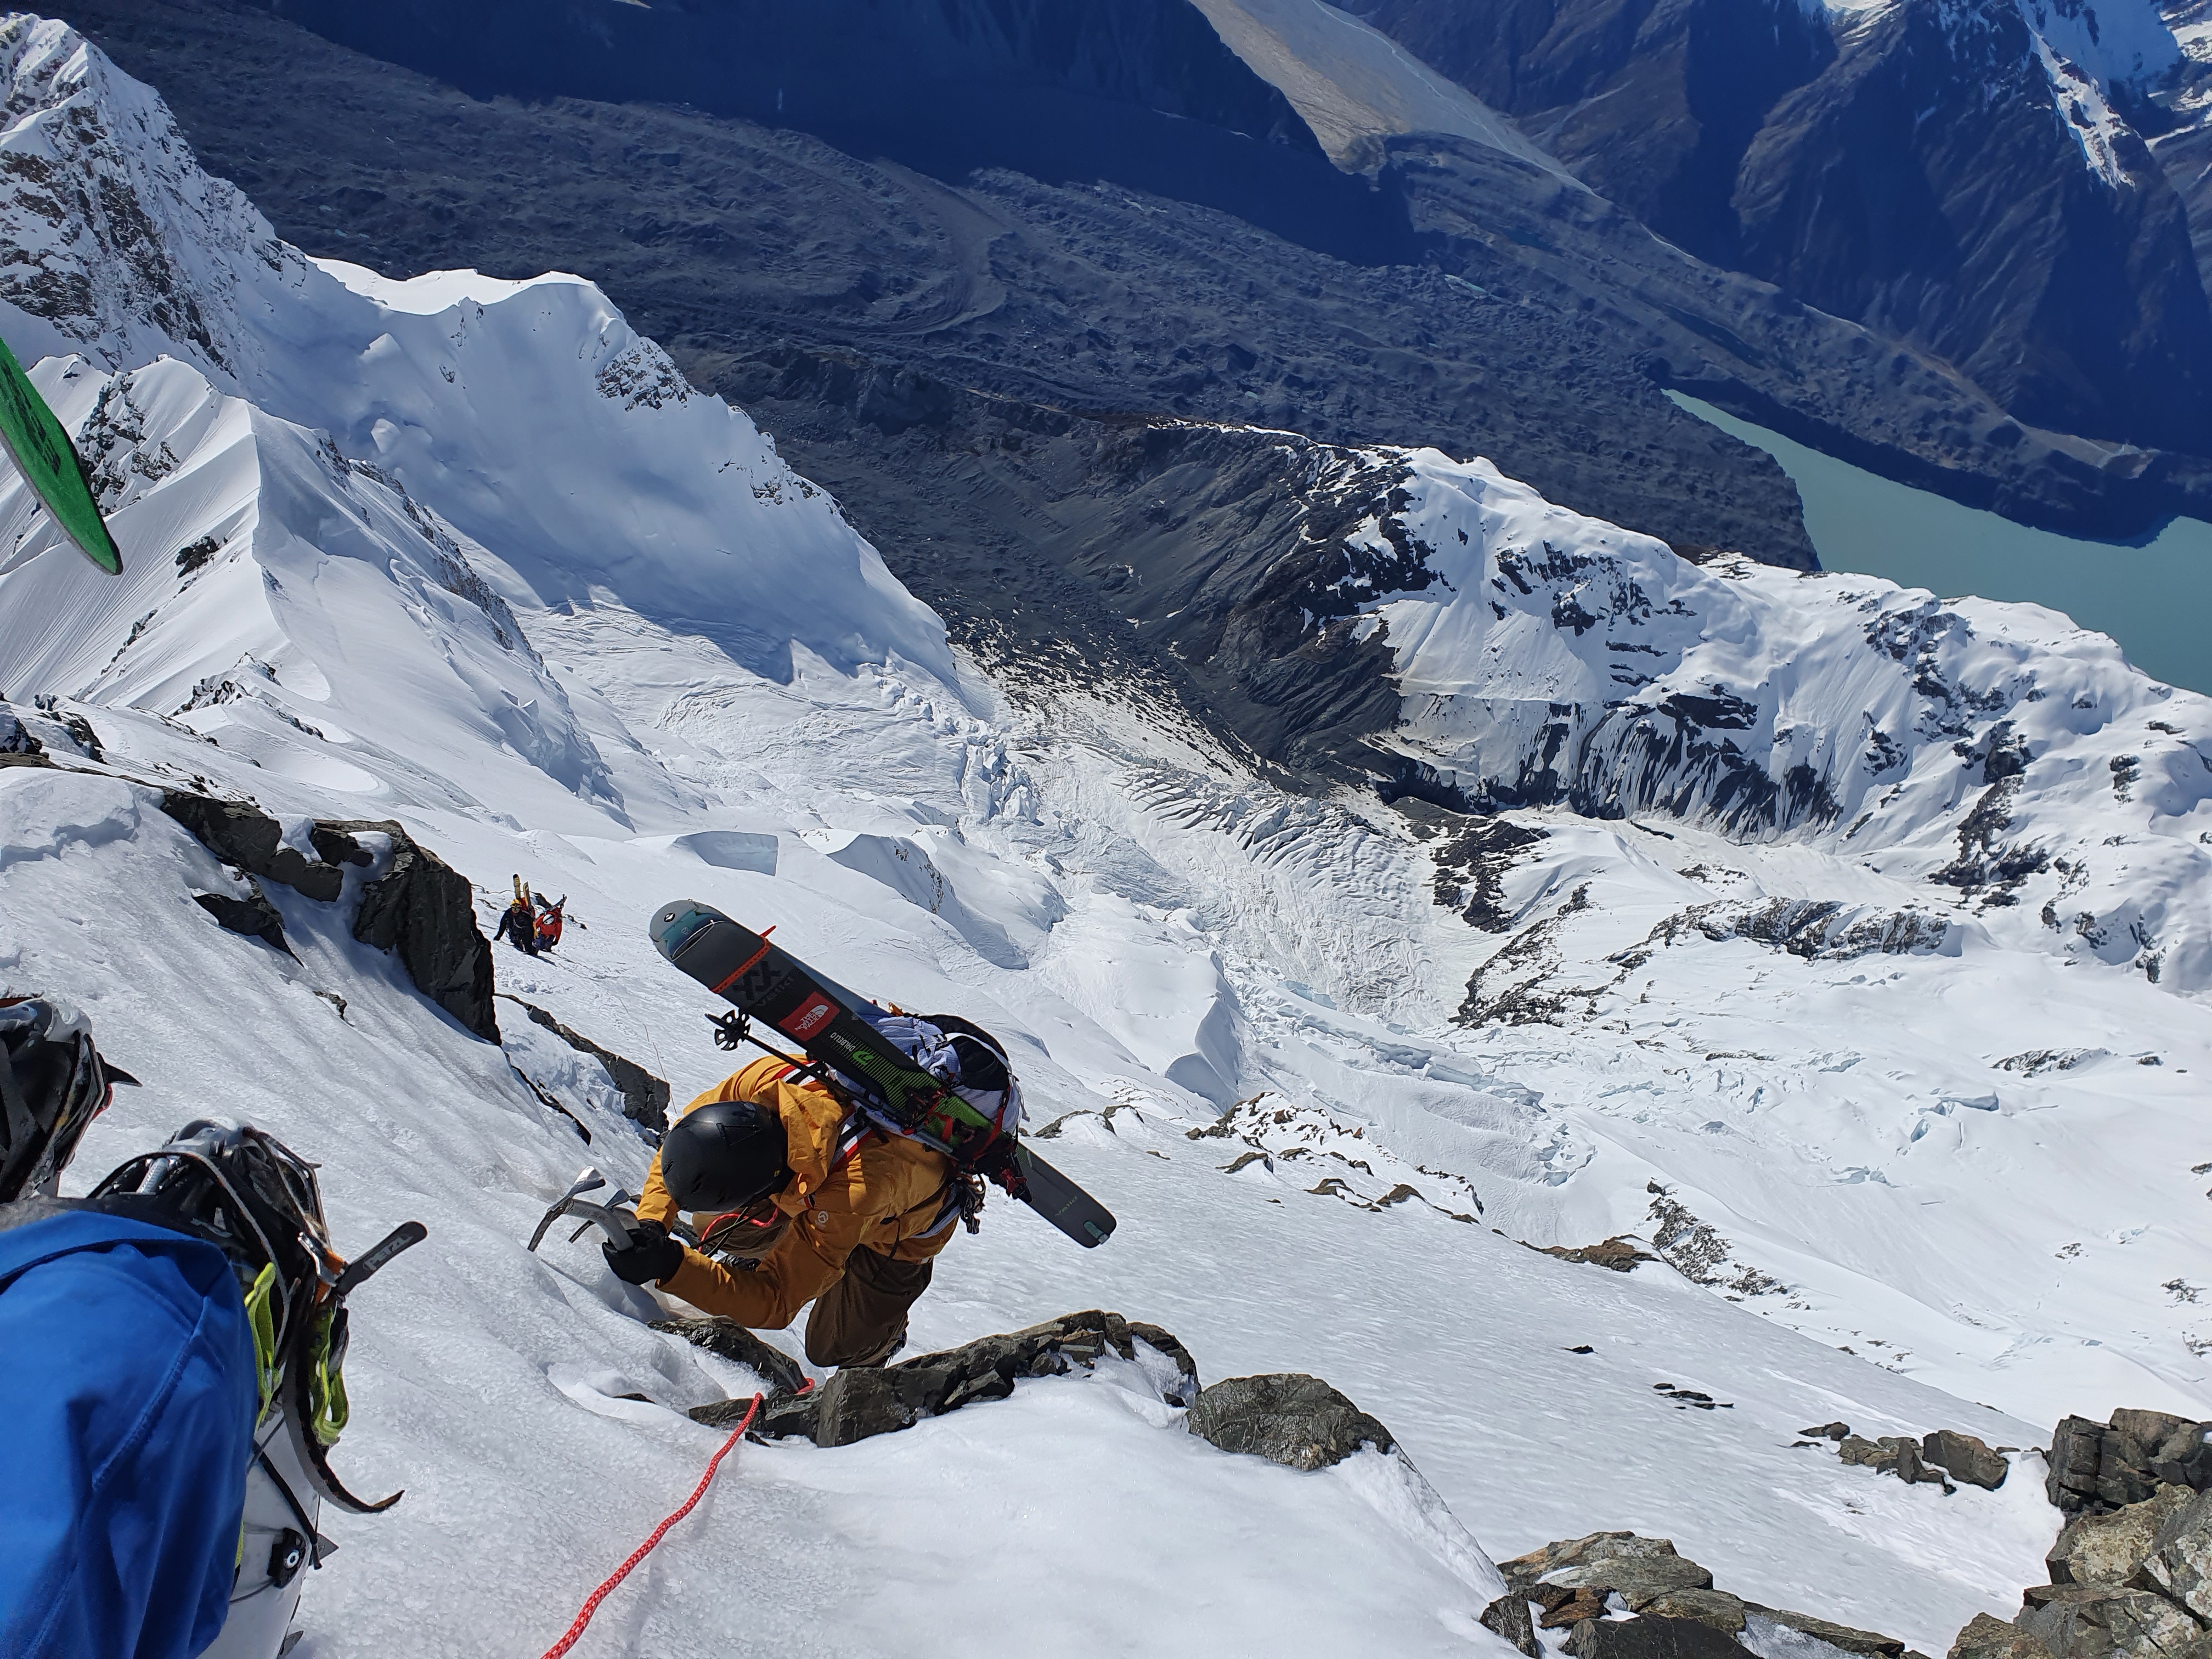
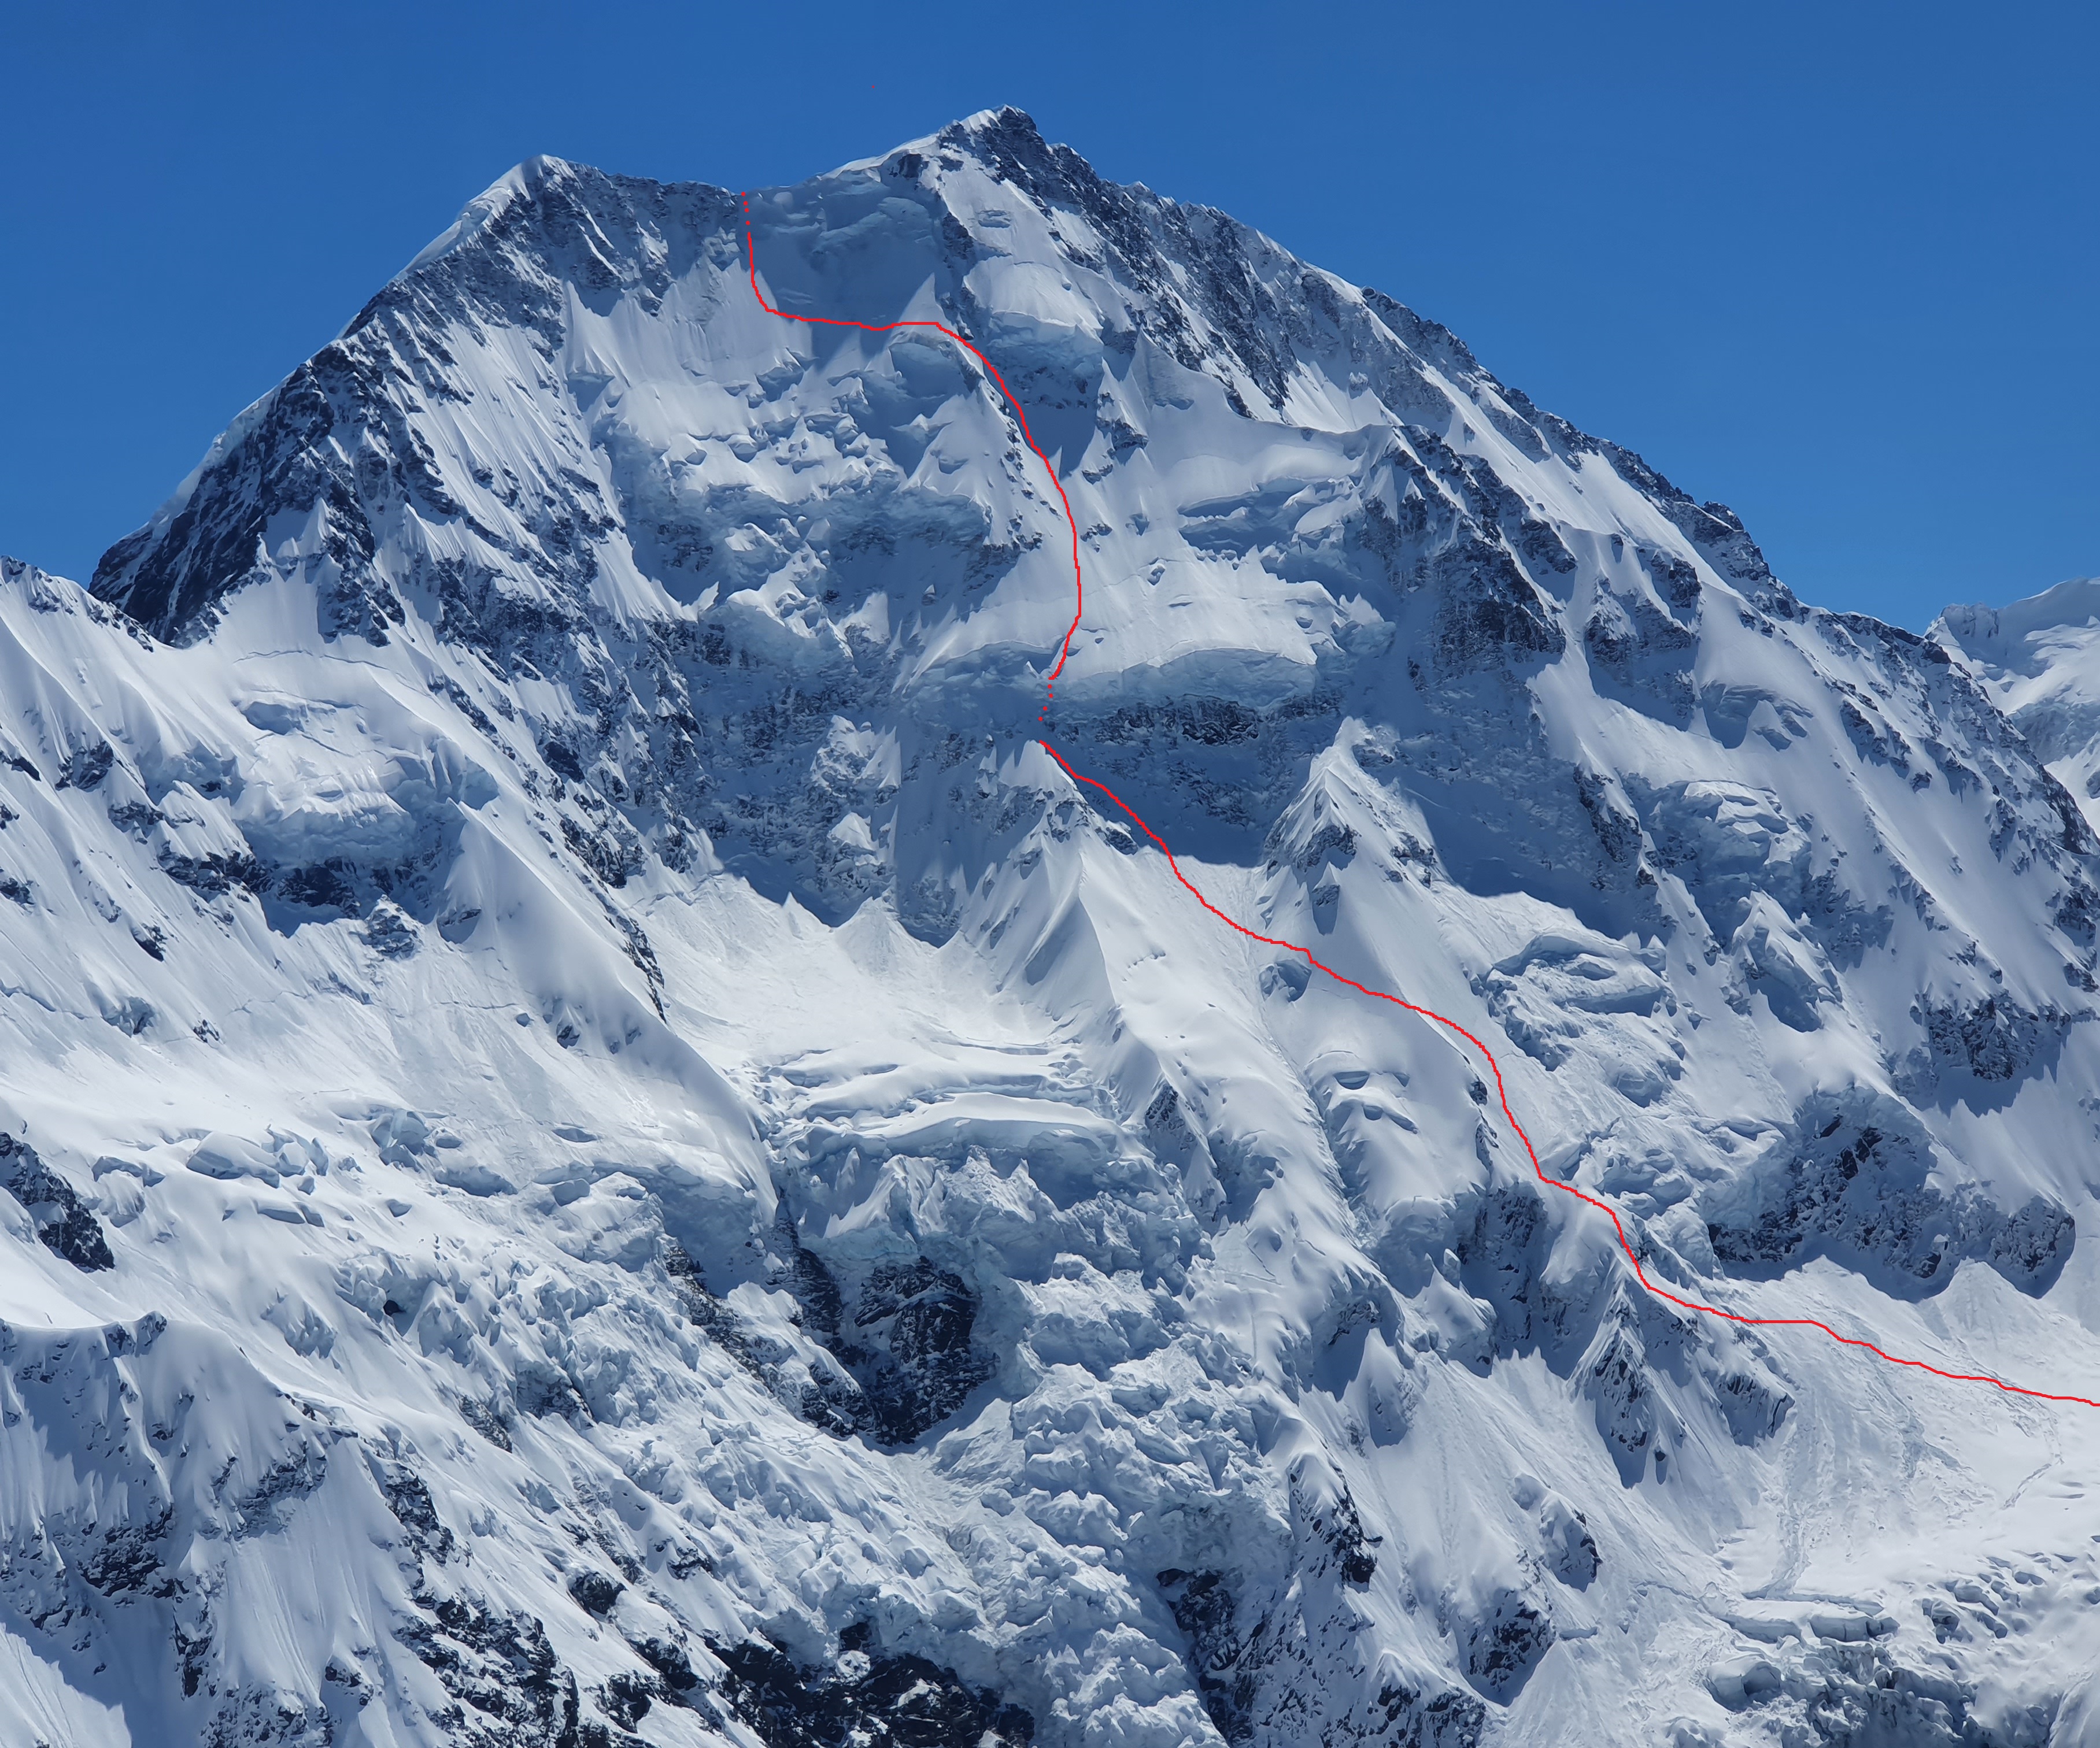
The wild side of Aoraki! A long and serious approach with no heli access gives the Hooker a wild and remote feel. This was my first trip to Aoraki back in 2018 and it was definitely jumping in at the deep end. While not too much steeper than the East face the NW couloirs is winding, technical and exposed nature make it a much more serious undertaking, and as such it is sees far fewer descents. Youโ€™ll be rewarded with an incredible ski line and a feeling of isolation that is definitely missing on the Plateau side. We climbed to the top of the skiiable line and turned round, but some easy mixed climbing would take you to Low Peak a couple of hundred metres higher. You would then need to make a couple of raps to get back to the line.

The line we skiied in red – we stopped at the rock just below the summit. Empress hut at the X. Alternate descent in blue from the base of the couloir to save you a trip back to the hut – wasnt in condition when we were there.
  • Length โ€“ From Empress Hut (2500m) to Low peak (3593m) is just over 1000m. Then around another 1700m down to the car park at 880m. When we were there the couloir was skiable from around 3300m
  • Steepness โ€“ Crux at the top of the couloir. 50-55 deg for 100-200m. Remainder of couloir 45 deg. Once on the Empress glacier eases to 35-40 deg
  • Exposure โ€“ Very exposed at the top, as the couloir winds over some big cliffs. Once you reach the Empress shelf this improves. Couloir prone to significant rock fall once it warms up, particularly late in the season. Very large crevasses and active ice cliffs on both sides of the Hooker.
  • Aspect โ€“ NW. Good corn skiing late season, but significant loose wet and rockfall risk late in the day
  • Extras โ€“ย We needed to make 1x 15m rap right at the bottom of the couloir to cross a small rock band
  • Difficulty โ€“ย  Climb 3. Ski 5.3 E3
  • Equipment โ€“ Glacier equipment. 30m half rope. Tat and snow stake for raps. Screws x2 each and V thread equipment.

Approach

Looking back down towards the Hooker lake from the Hooker glacier

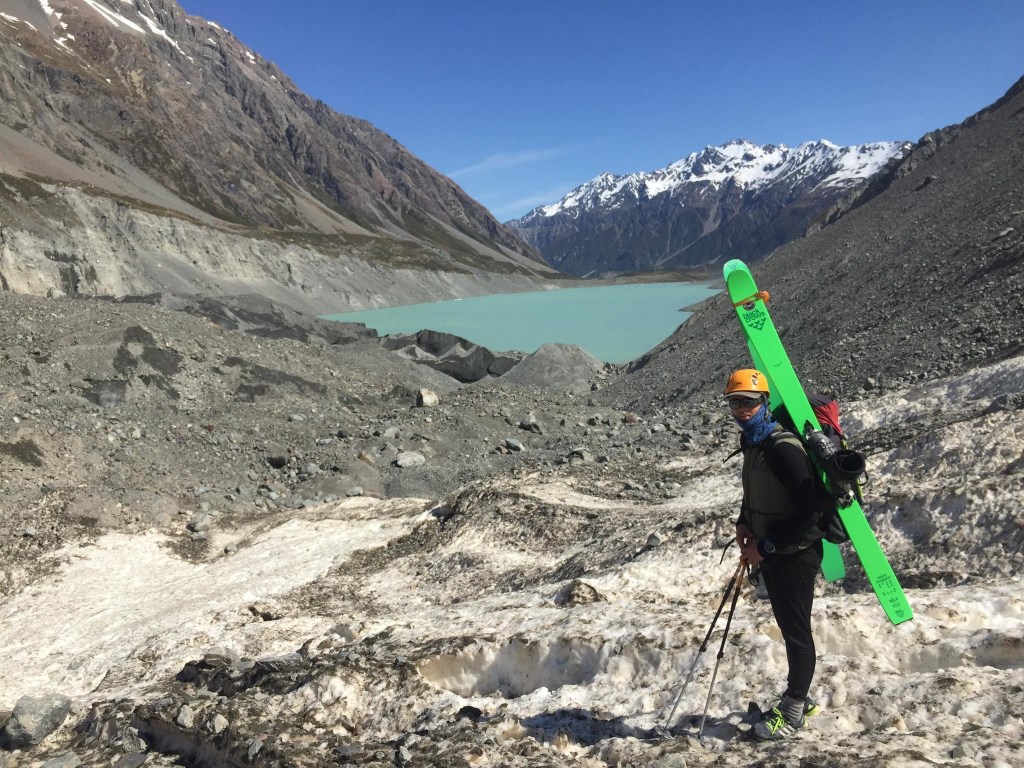
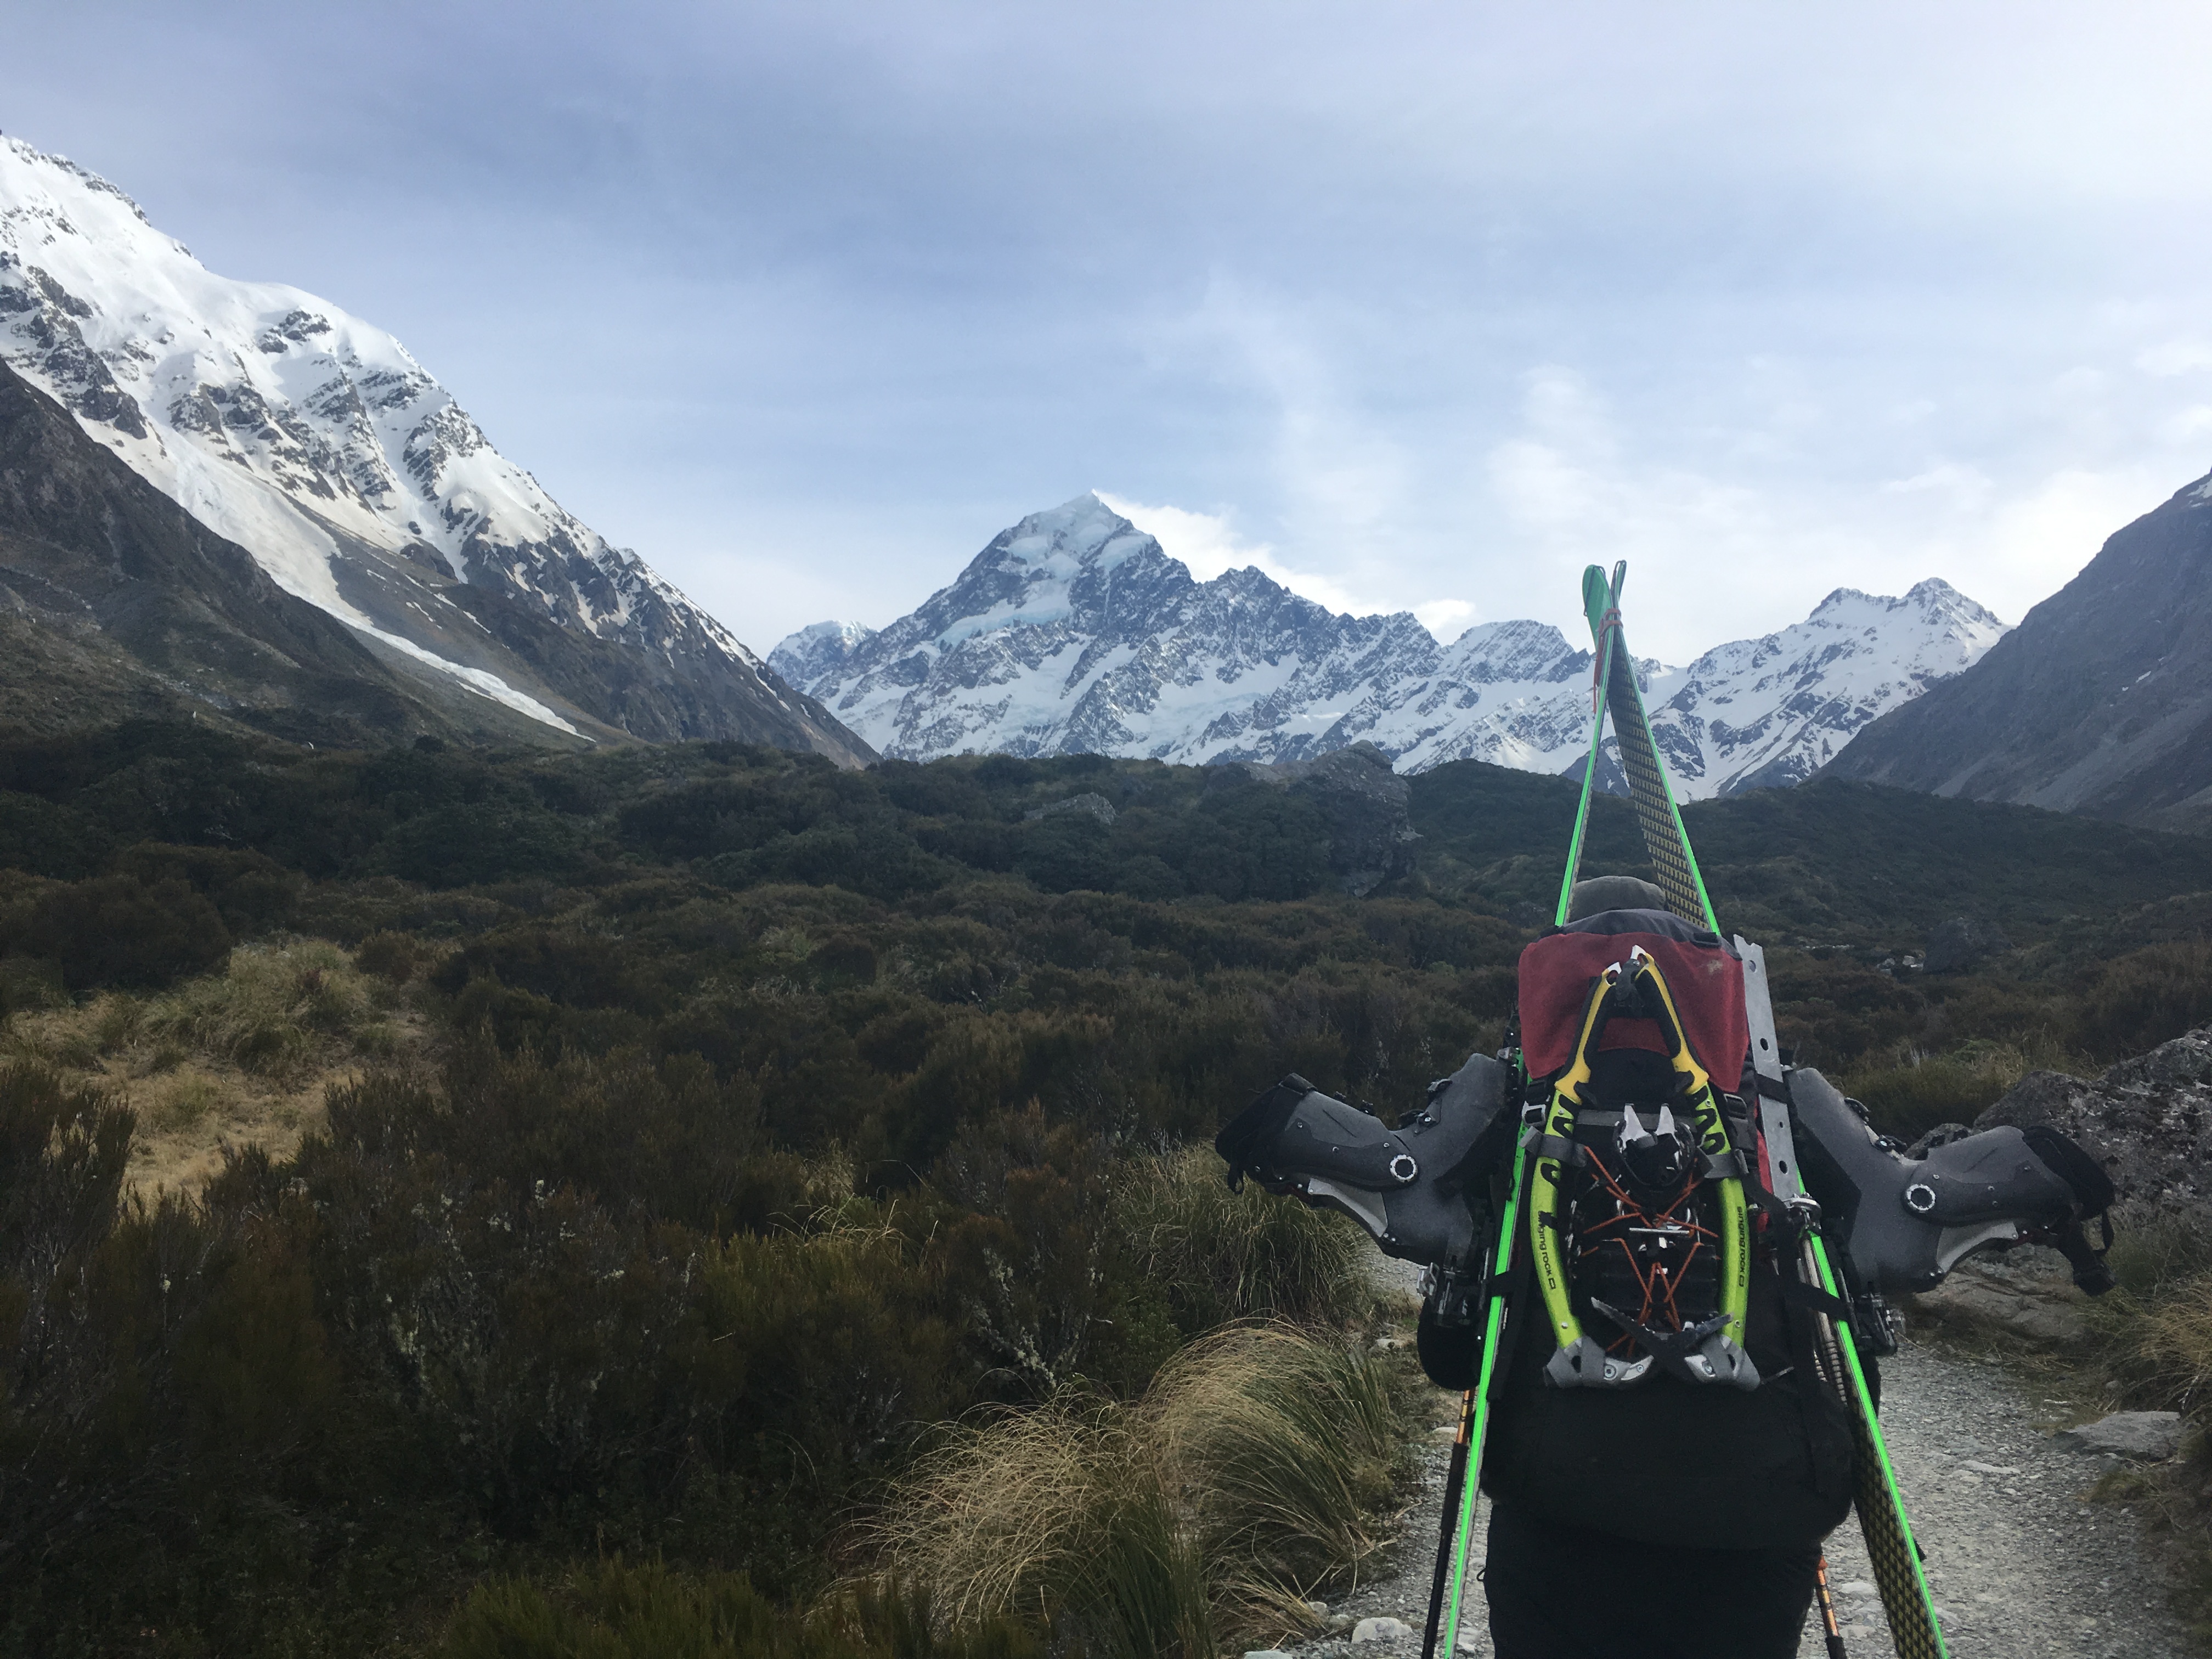
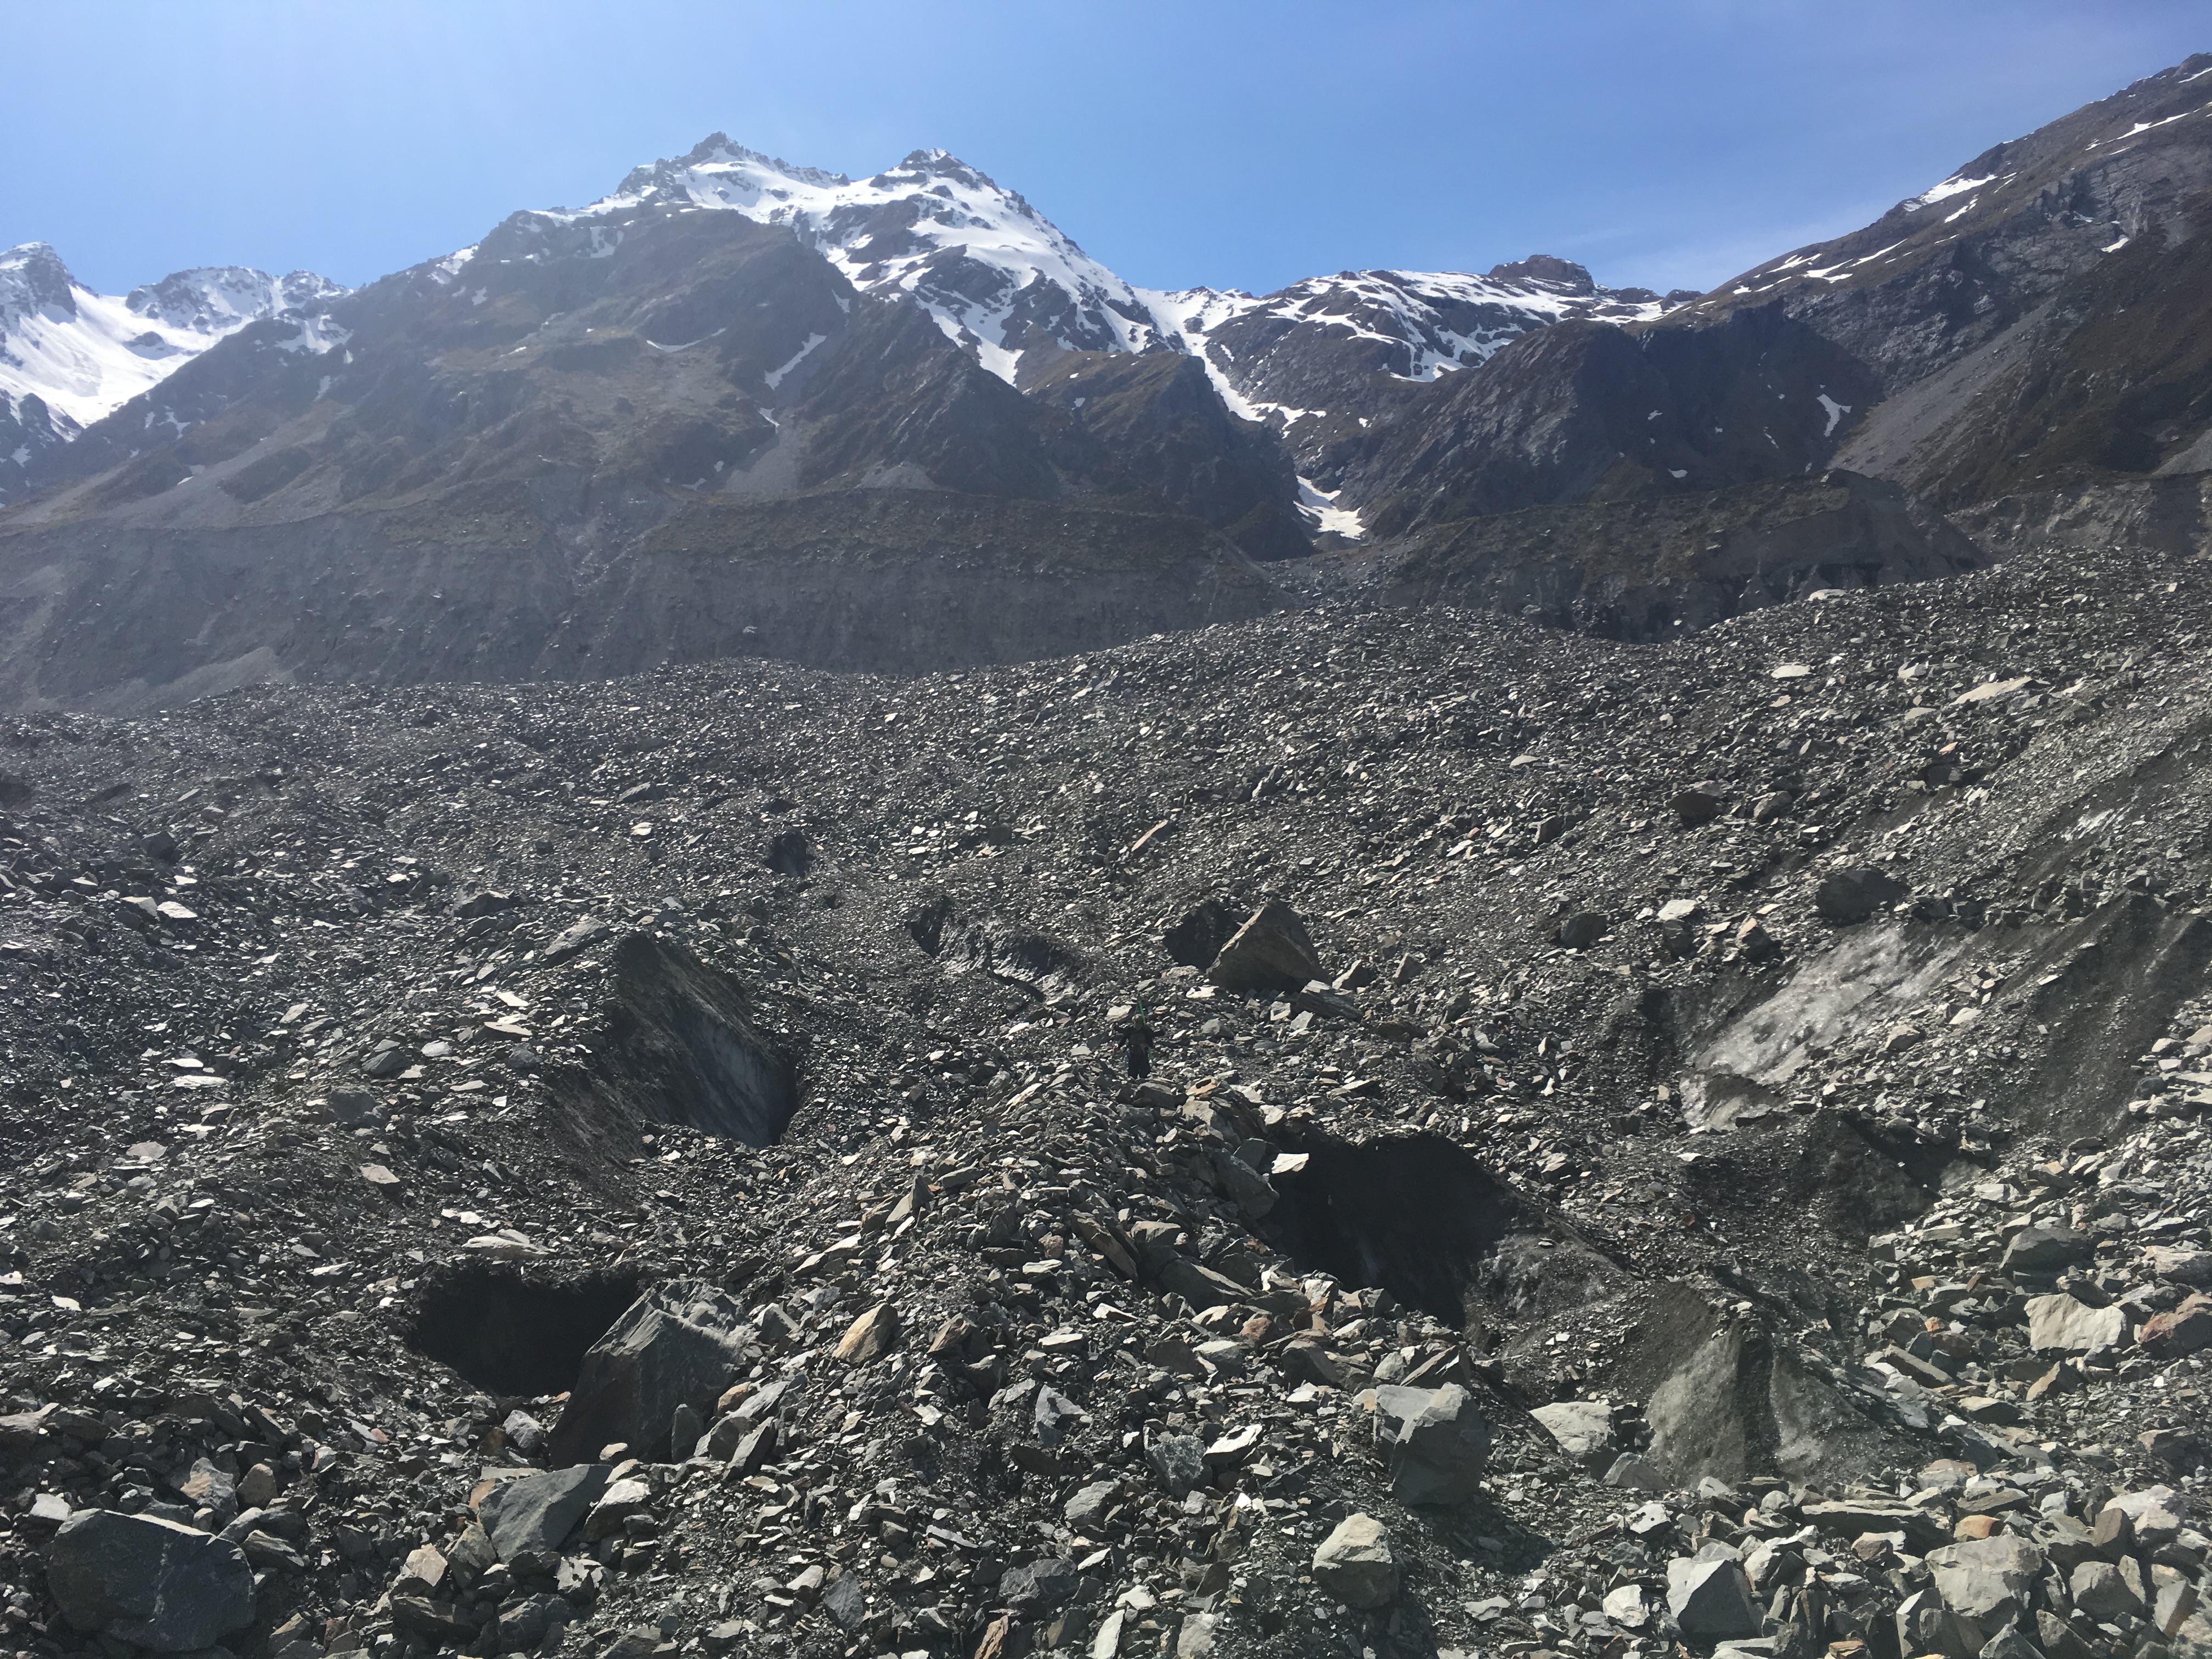
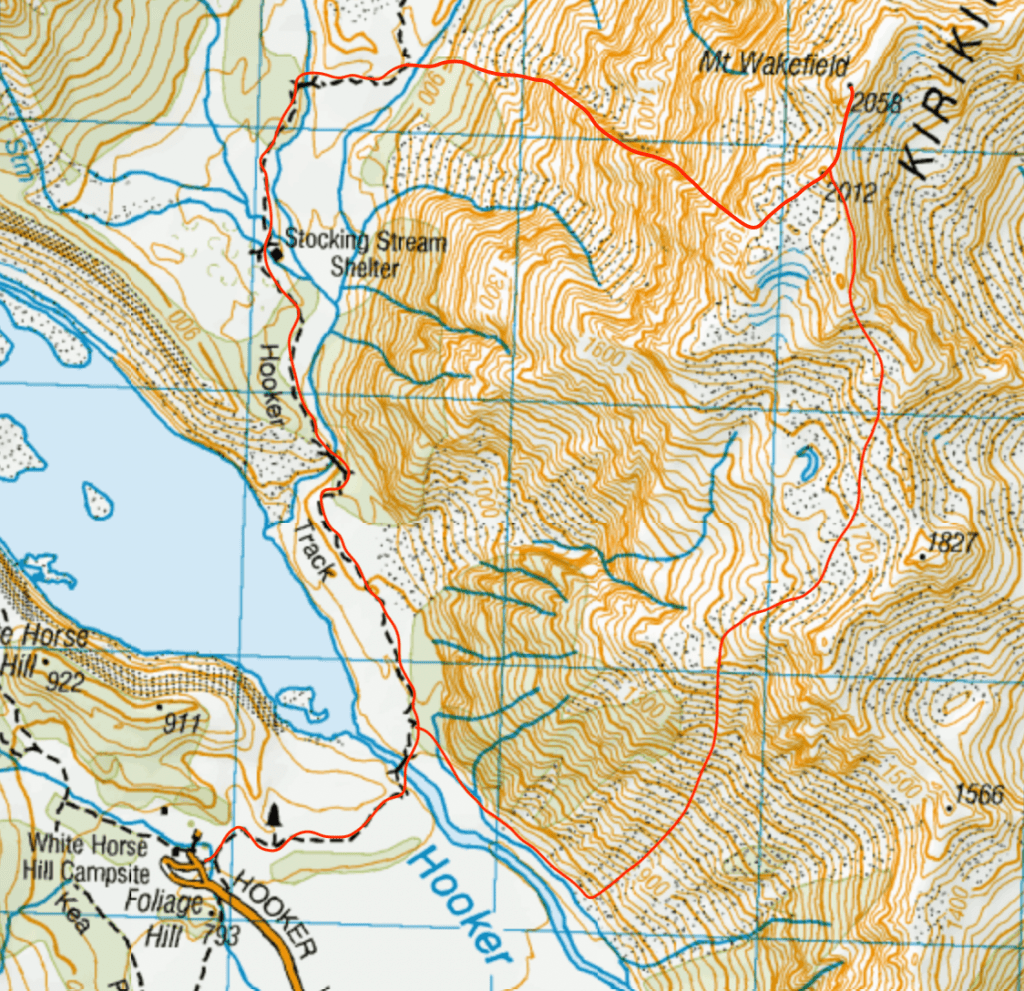
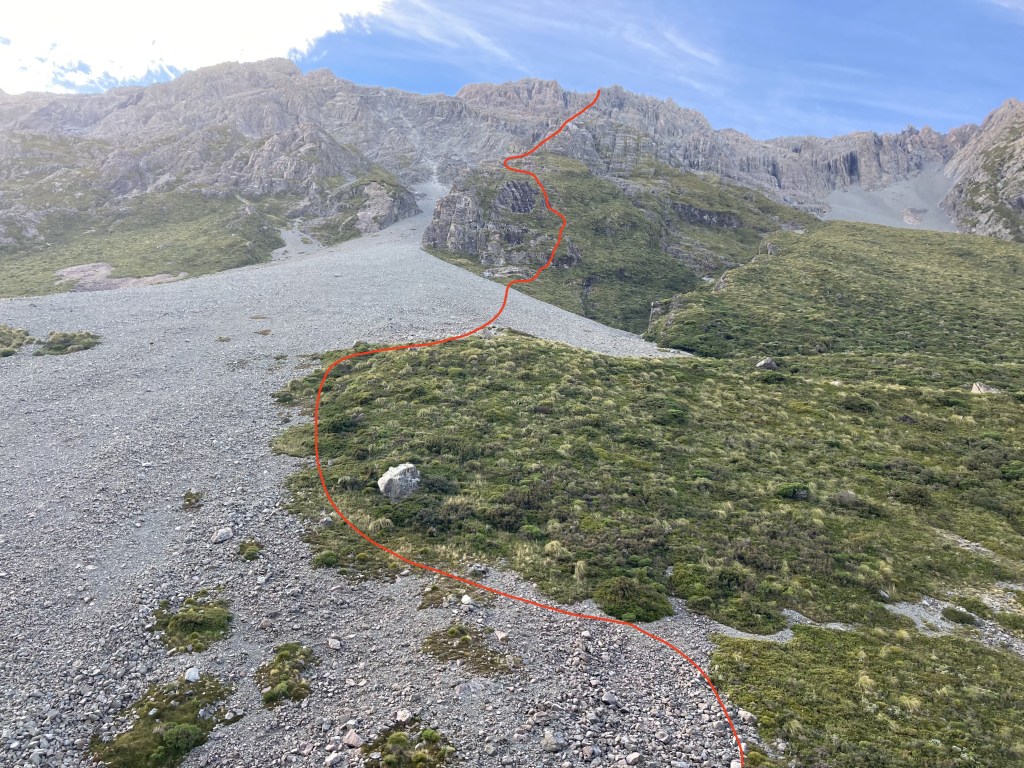
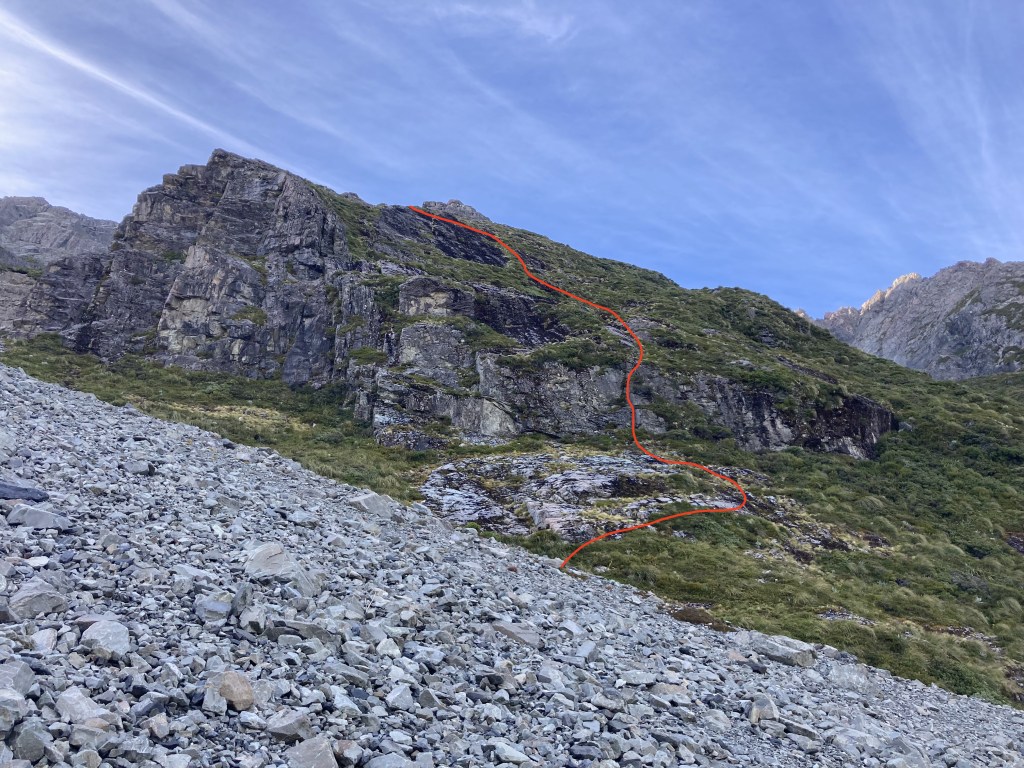
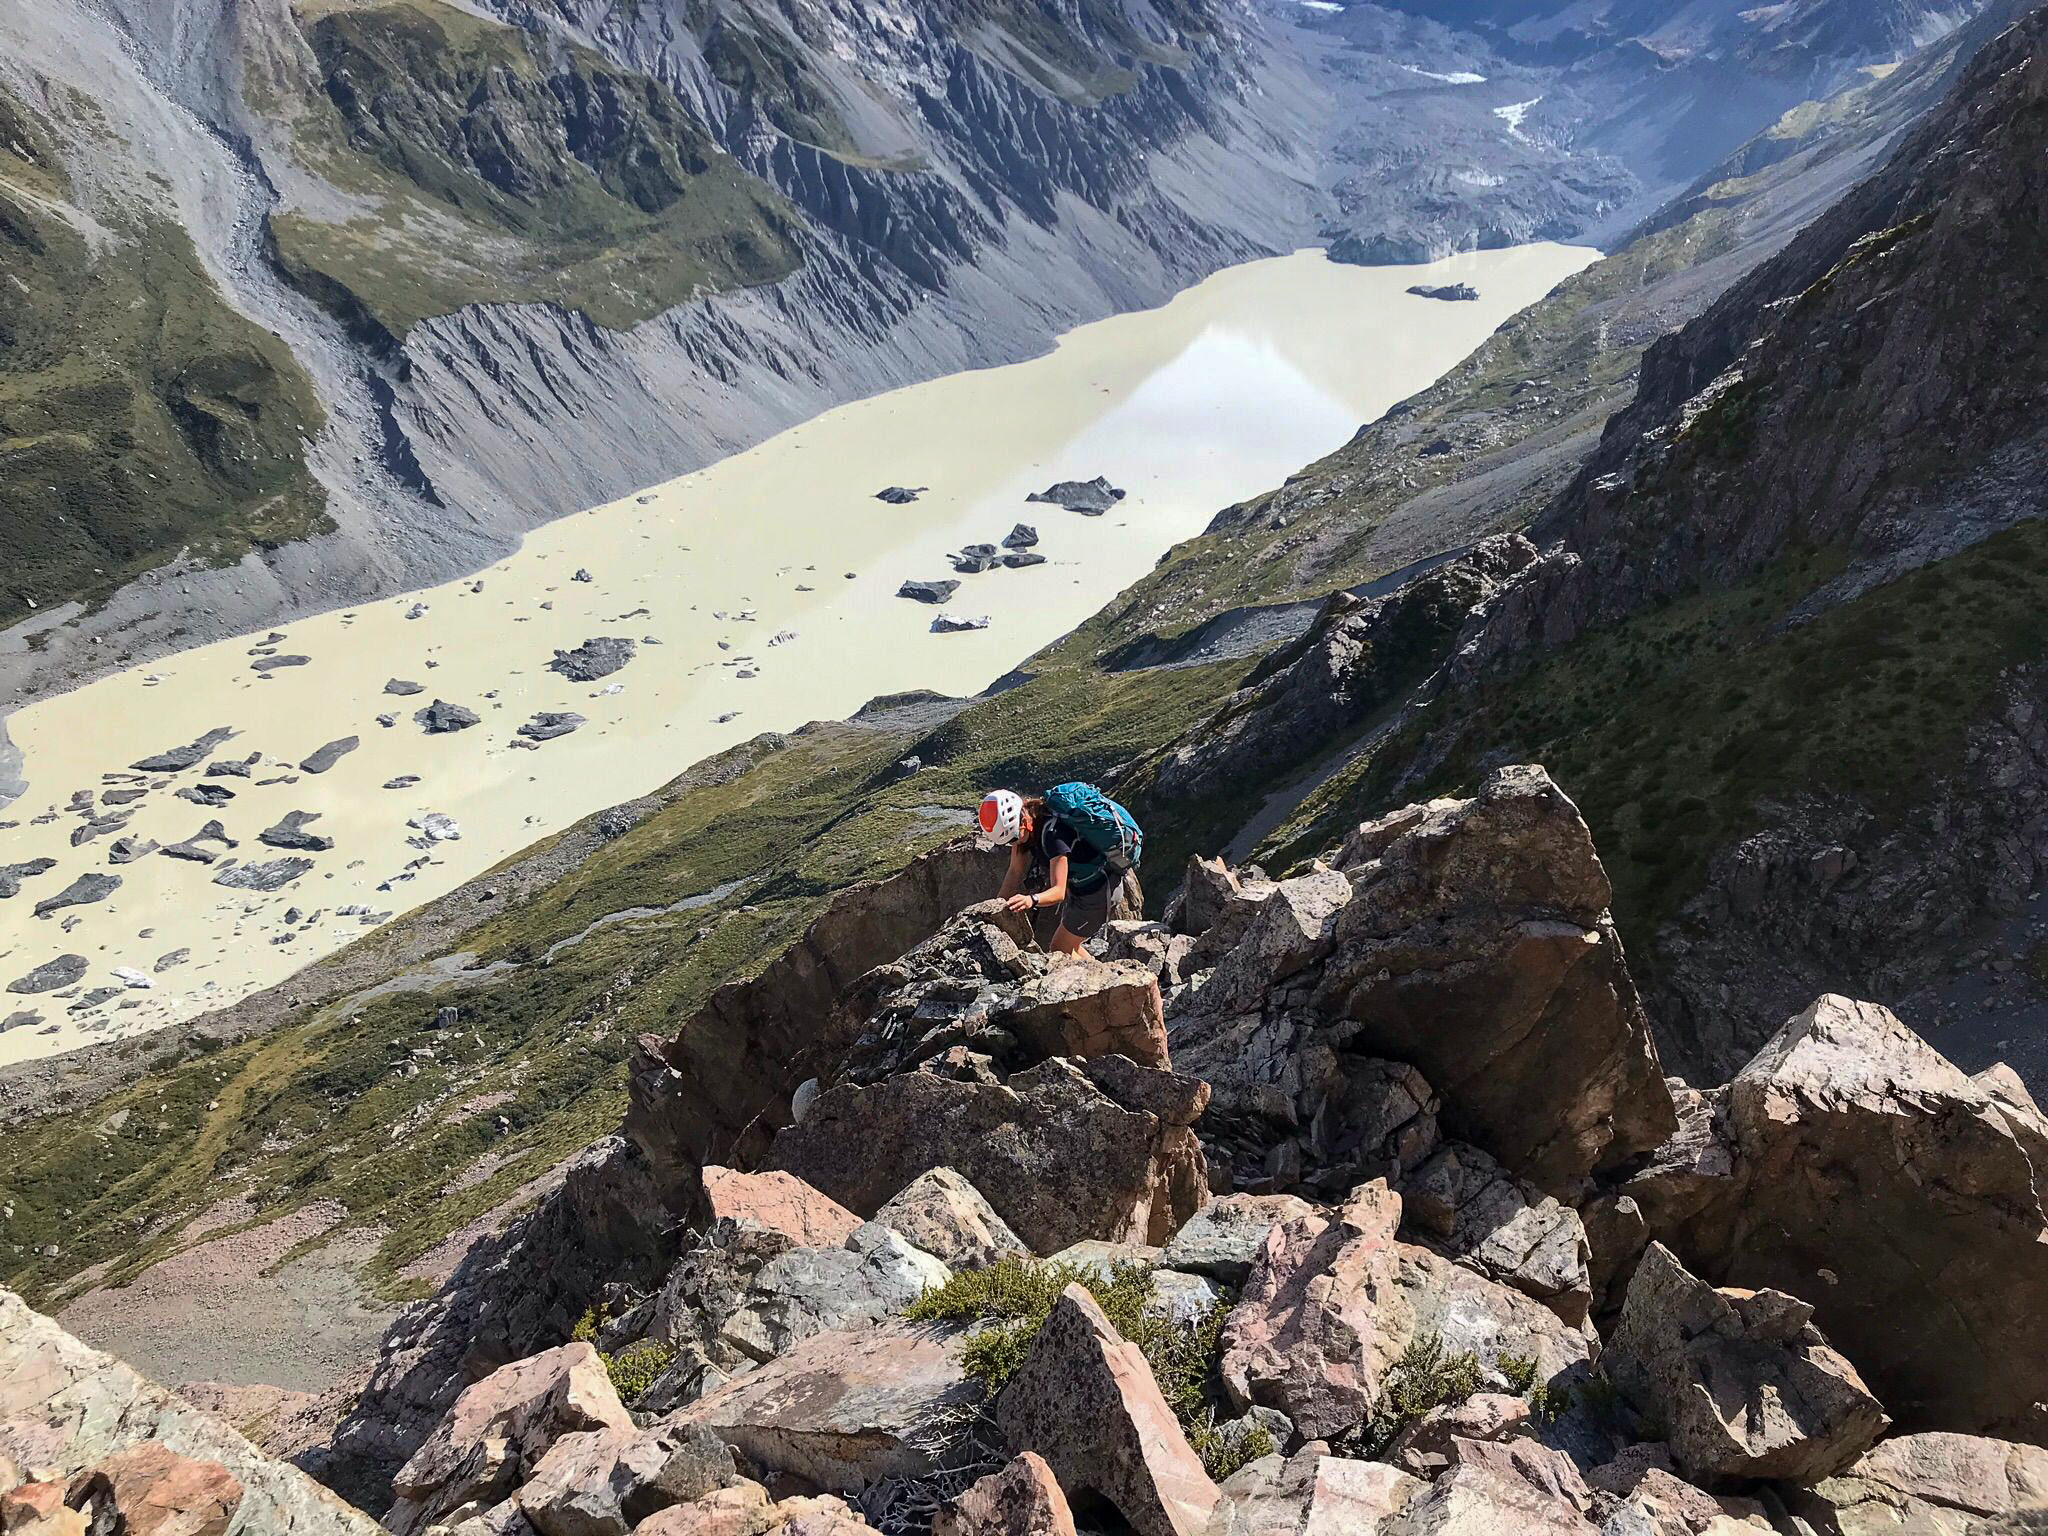
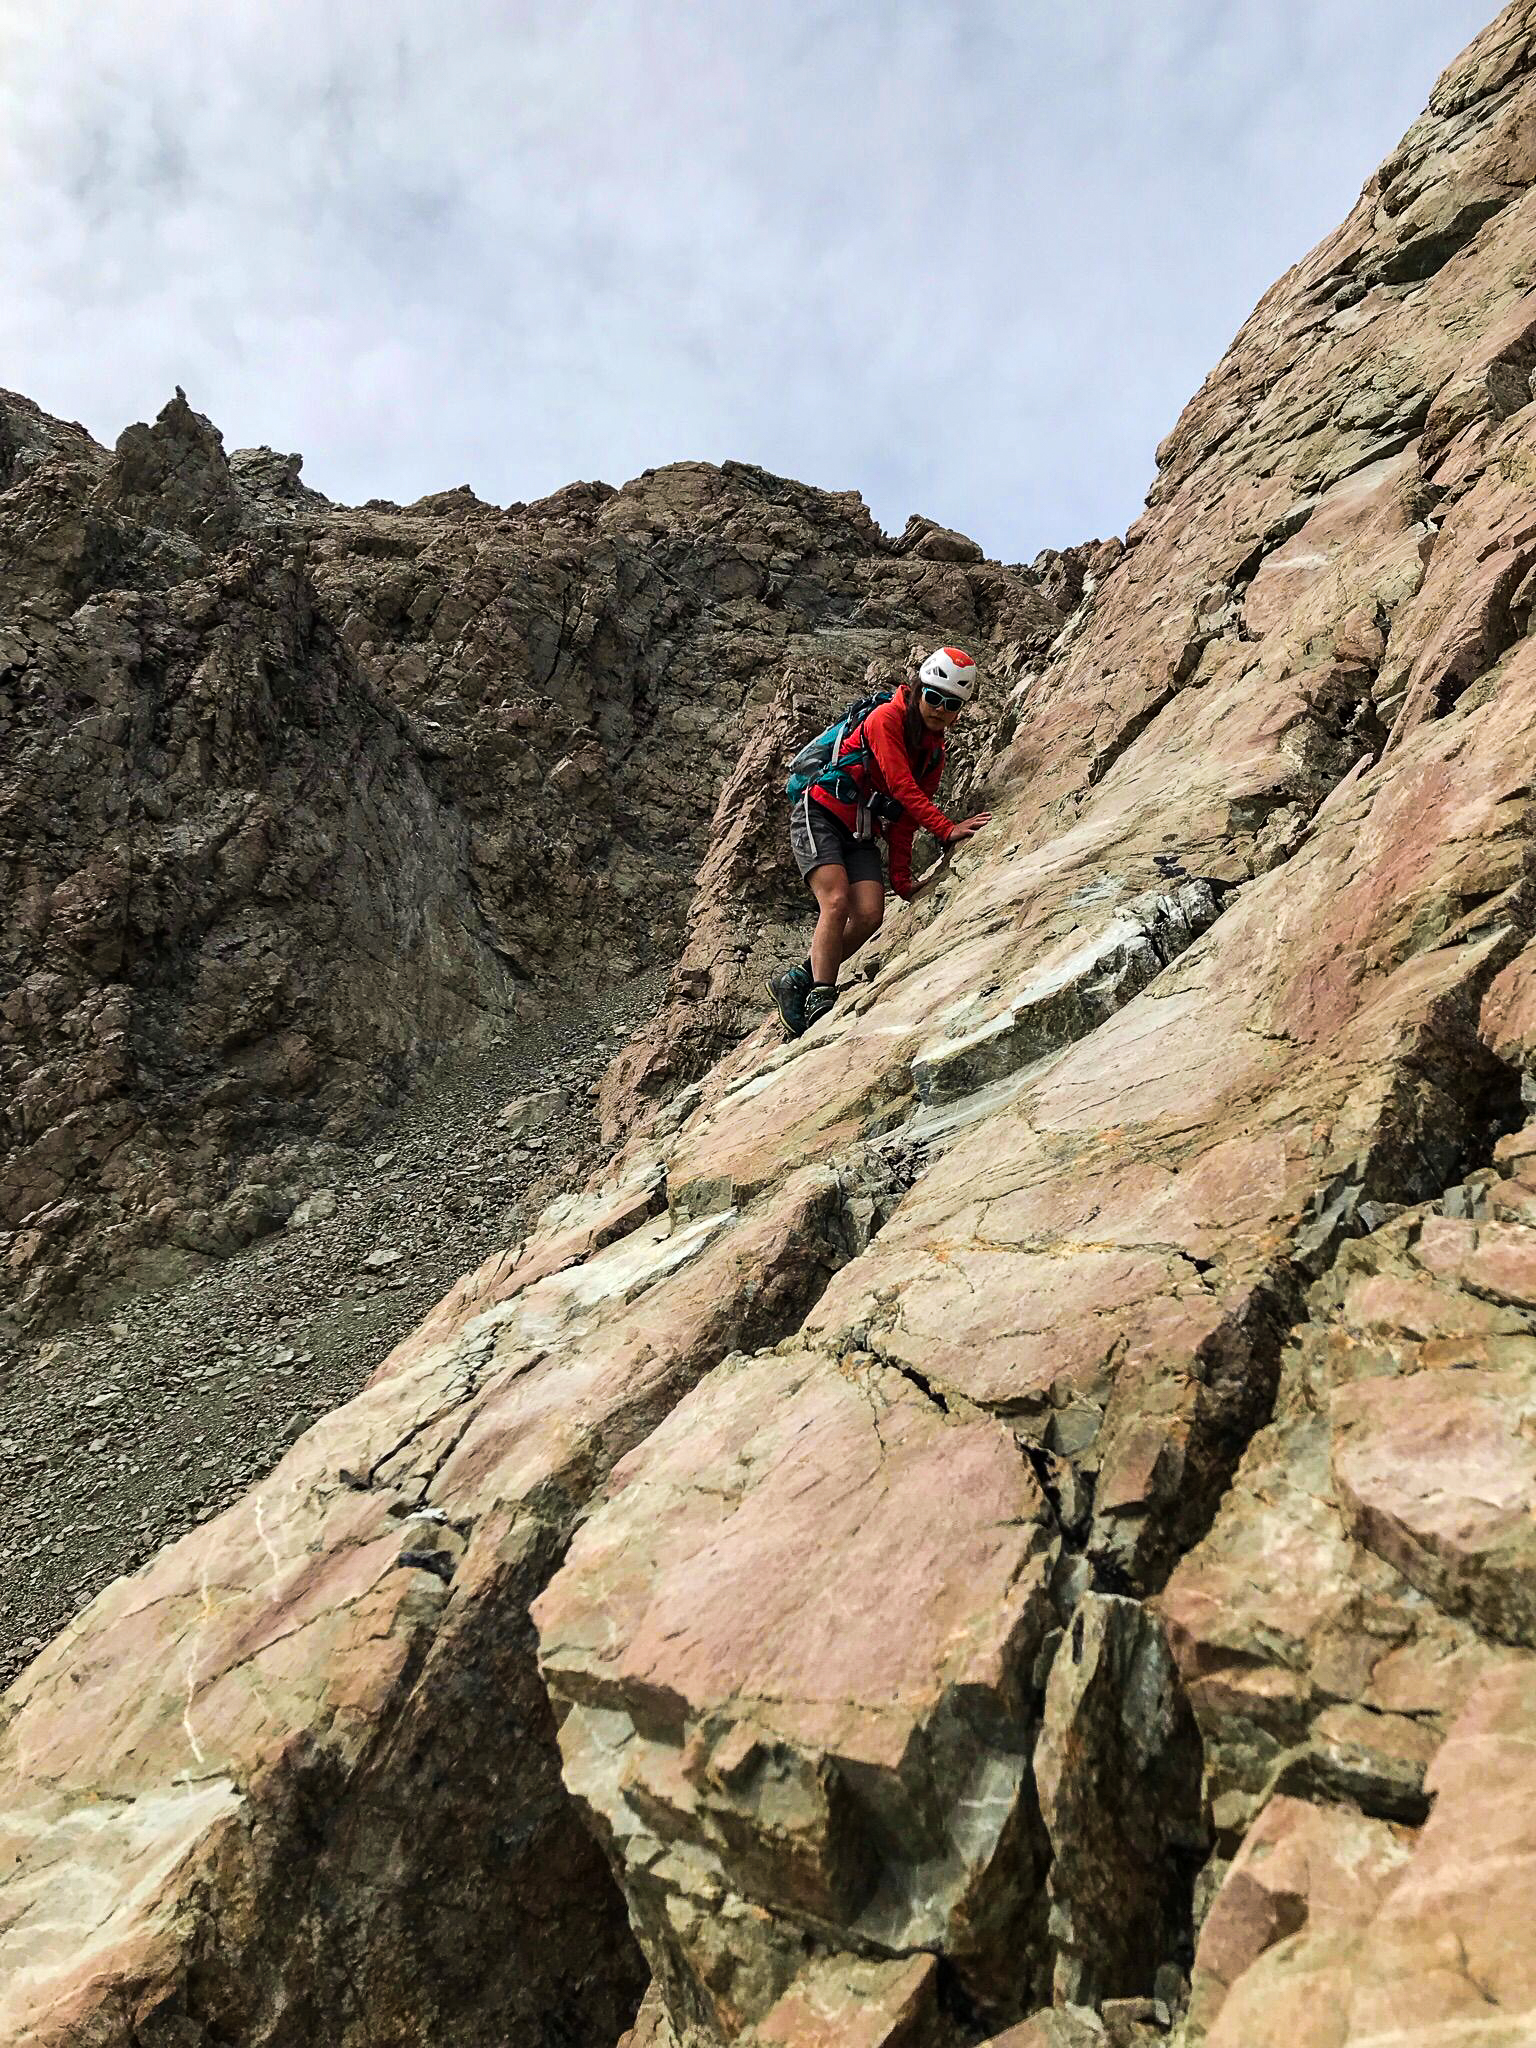
It took us just under 12 hours in total to get from the car to Empress hut. Head up the Hooker track to the Hooker lake. We then rock hopped at the shore line most of the way up the west side of the lake. Just before after Stewart stream the moraine got too steep due to a washout and we had to climb vertically up the moraine wall to around 1200m before traversing along flatter ground and then dropping back down to the main Hooker glacier. This section was really difficult especially with heavy packs. The morraine was incredibly loose and you constantly had to be looking above you for spontaneous rockfall coming down to the lake. Taking a step into the loose morraine would cause everything to shift and would cause rocks 30m above you to start moving and coming down. It would also be easy to slip and fall all the way down into the lake which would be suboptimal while strapped into a heavy pack. Overall we felt this was the most dangerous part of the trip and we were super stoked when it was over.

Easy rock hopping up the side of the Hooker lake, before the moraine walls got steep and sketchy
Towards the top of the lake you get into this terrain – steep and loose moraine wall which is pretty sketchy. Stay a long way away from you partner and the inevitable stream of rocks they knock down

Much easier ground on the flat moraine between the lake and the Hooker glacier. South face of Mt Cook ahead

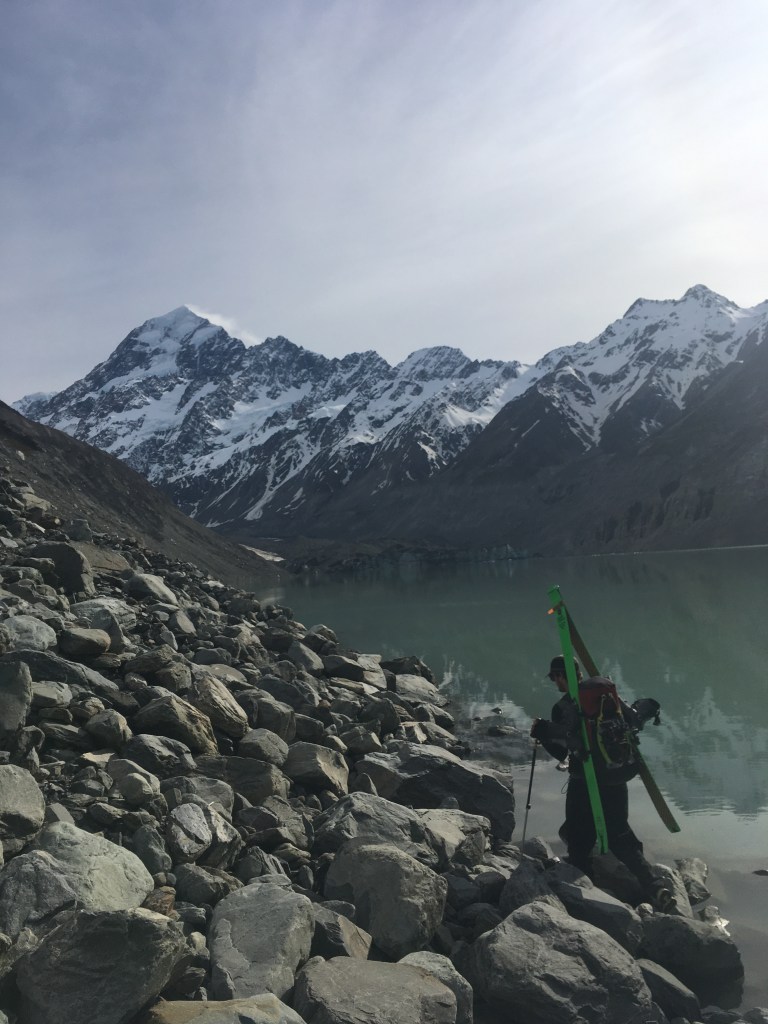
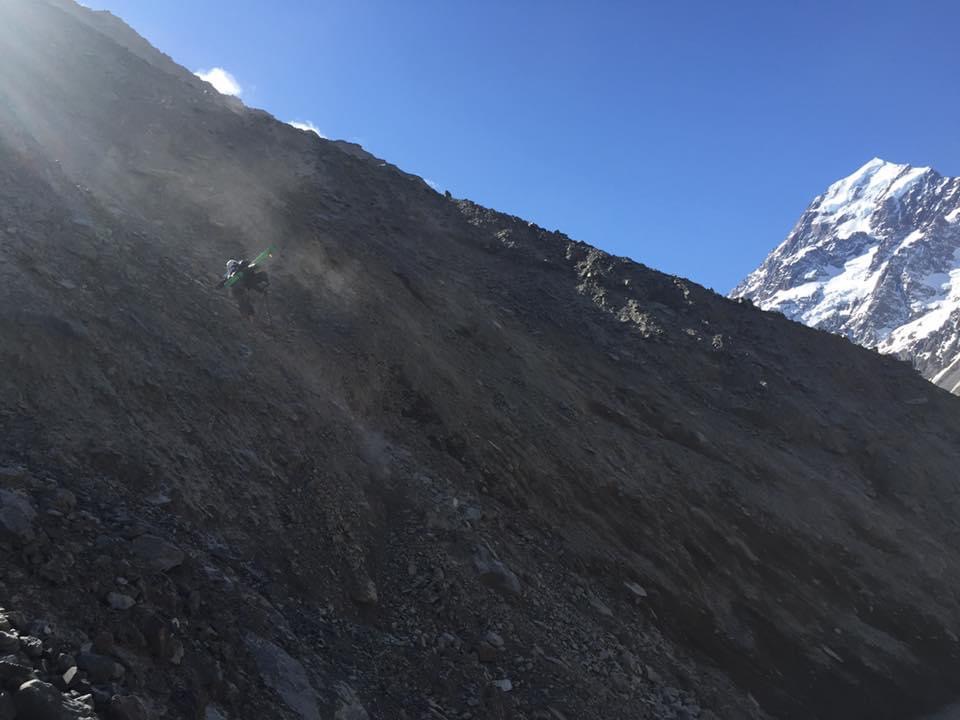
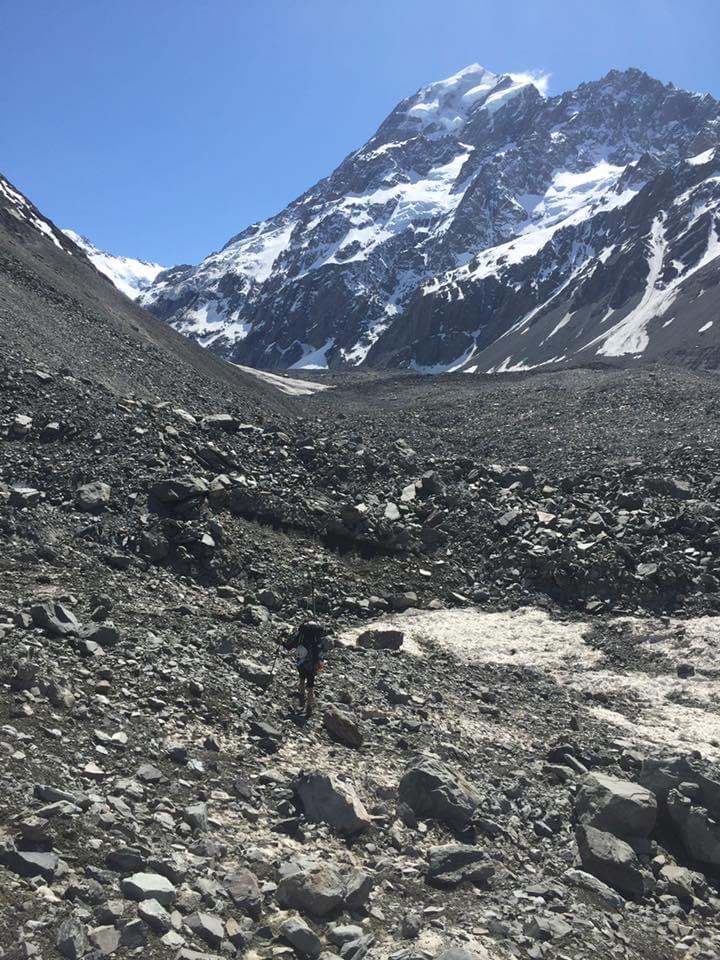
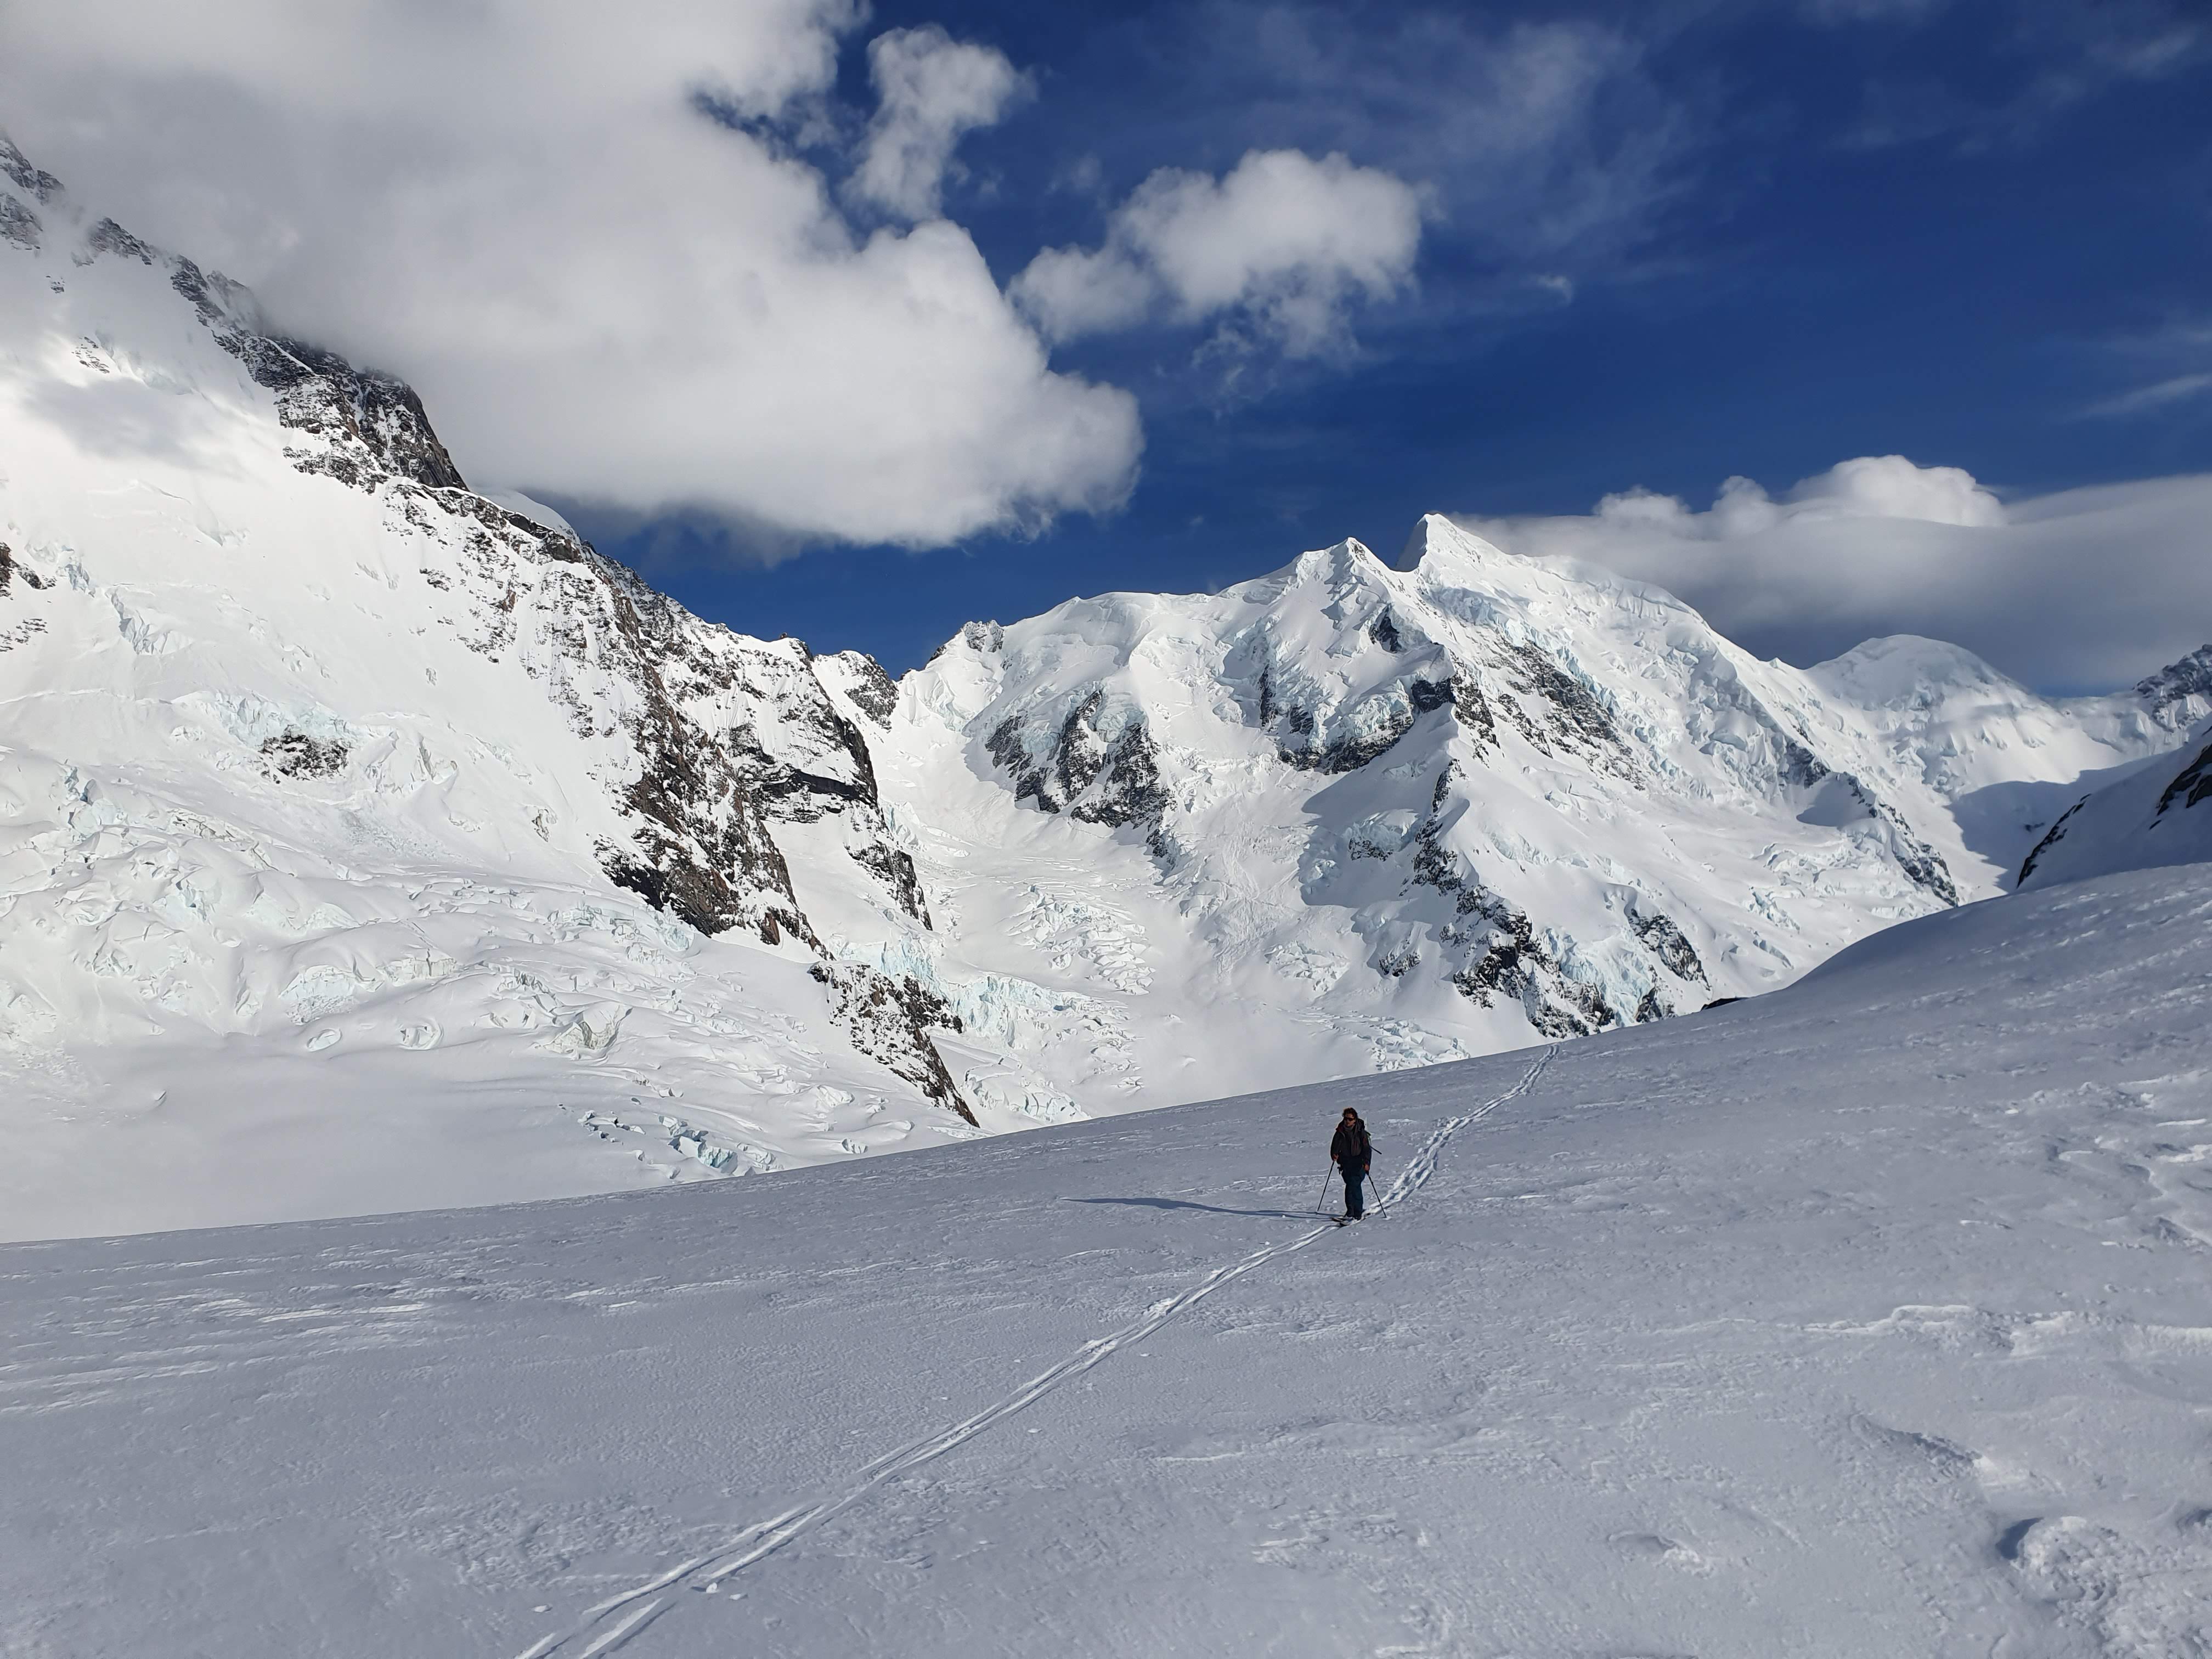
From the top of the lake we headed north staying pretty much in the middle of the glacier until we reached snow. This was the same loose moraine but on flatter ground. Tiring but safe. After a few hours of this it was a relief to be finally able to put the skis and boots on and start skinning.

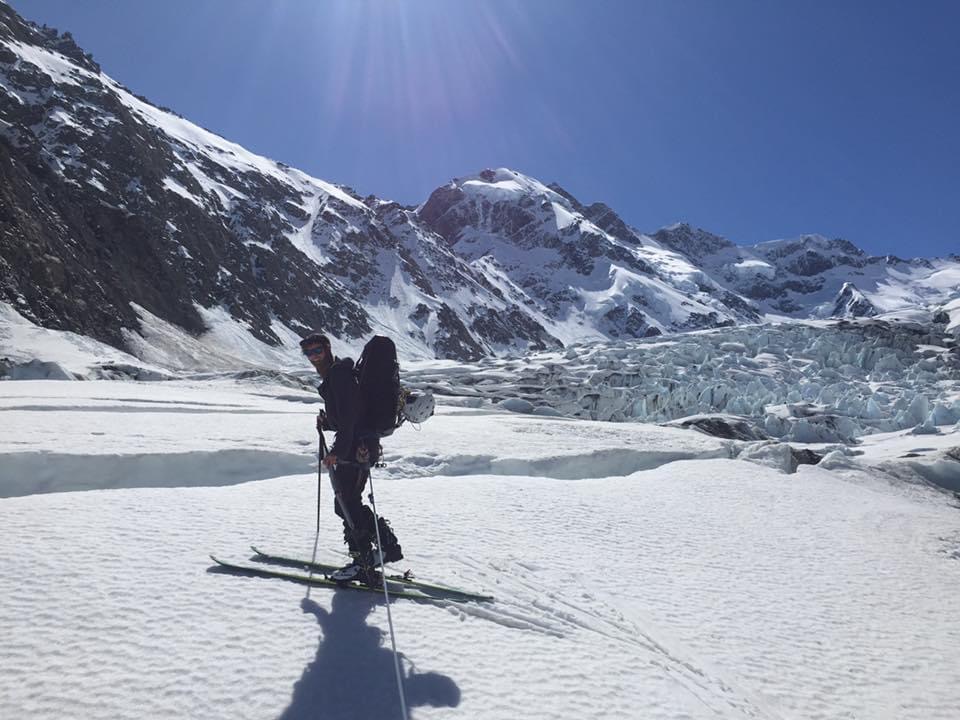
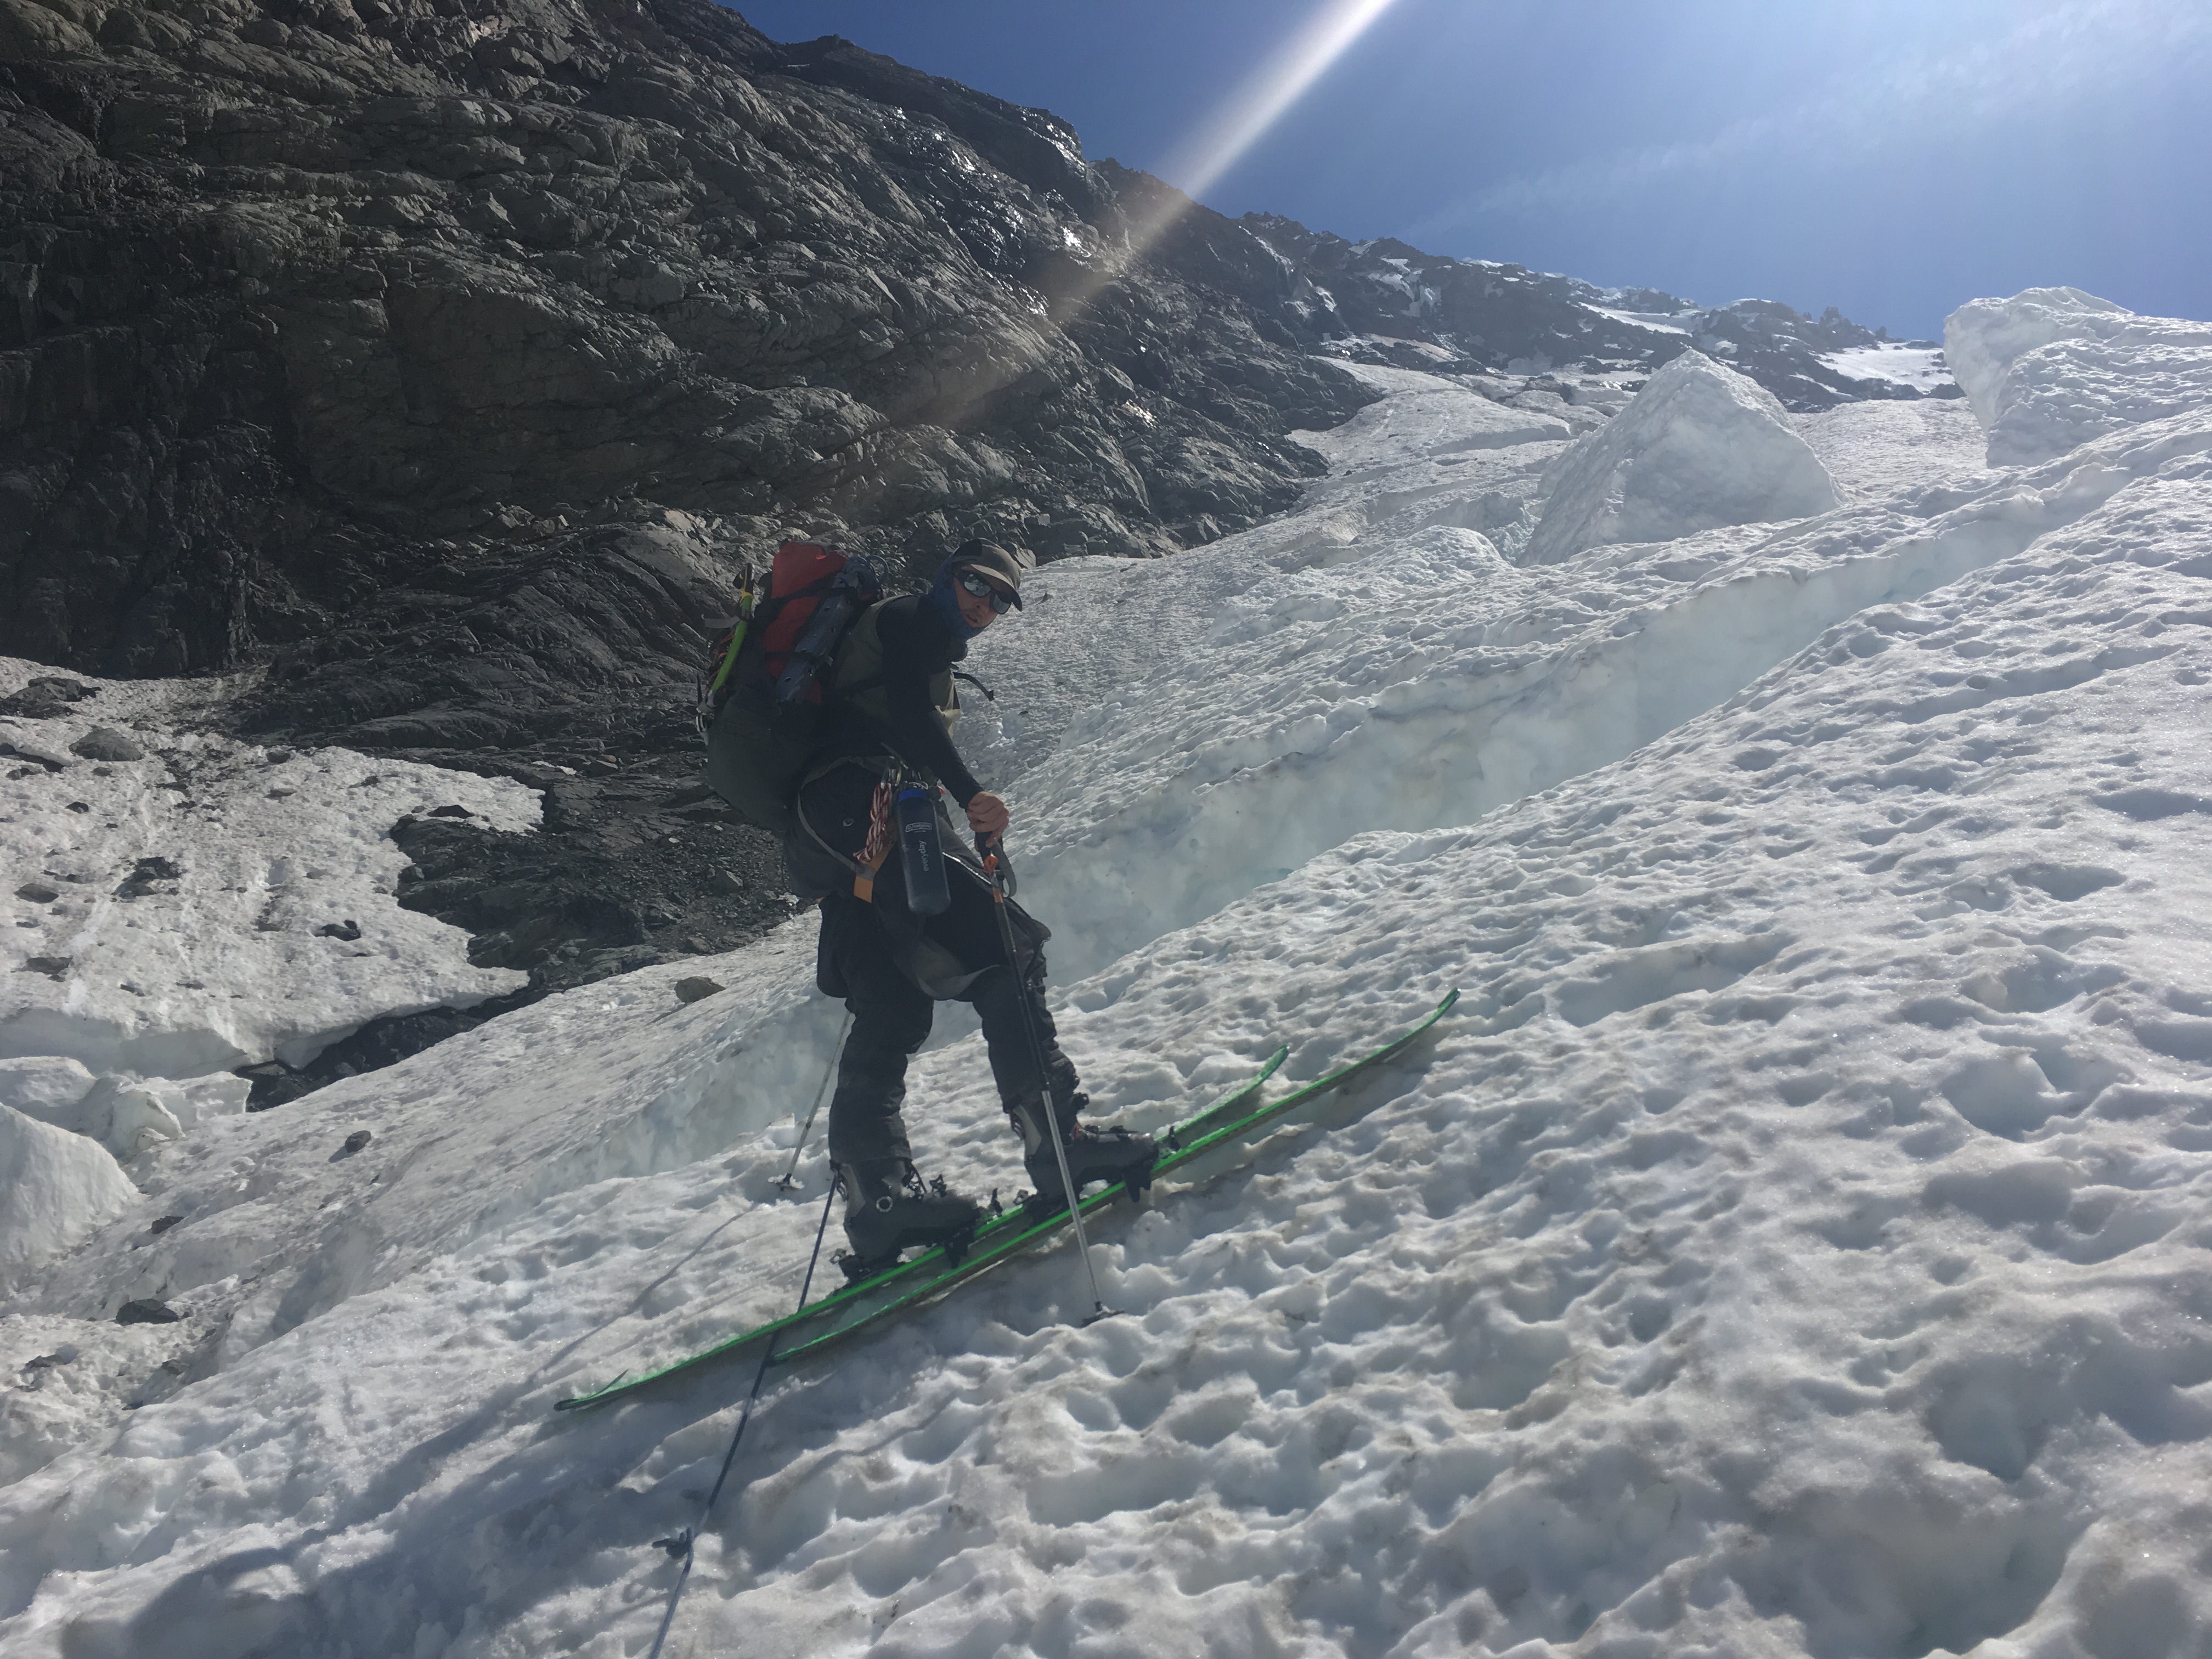
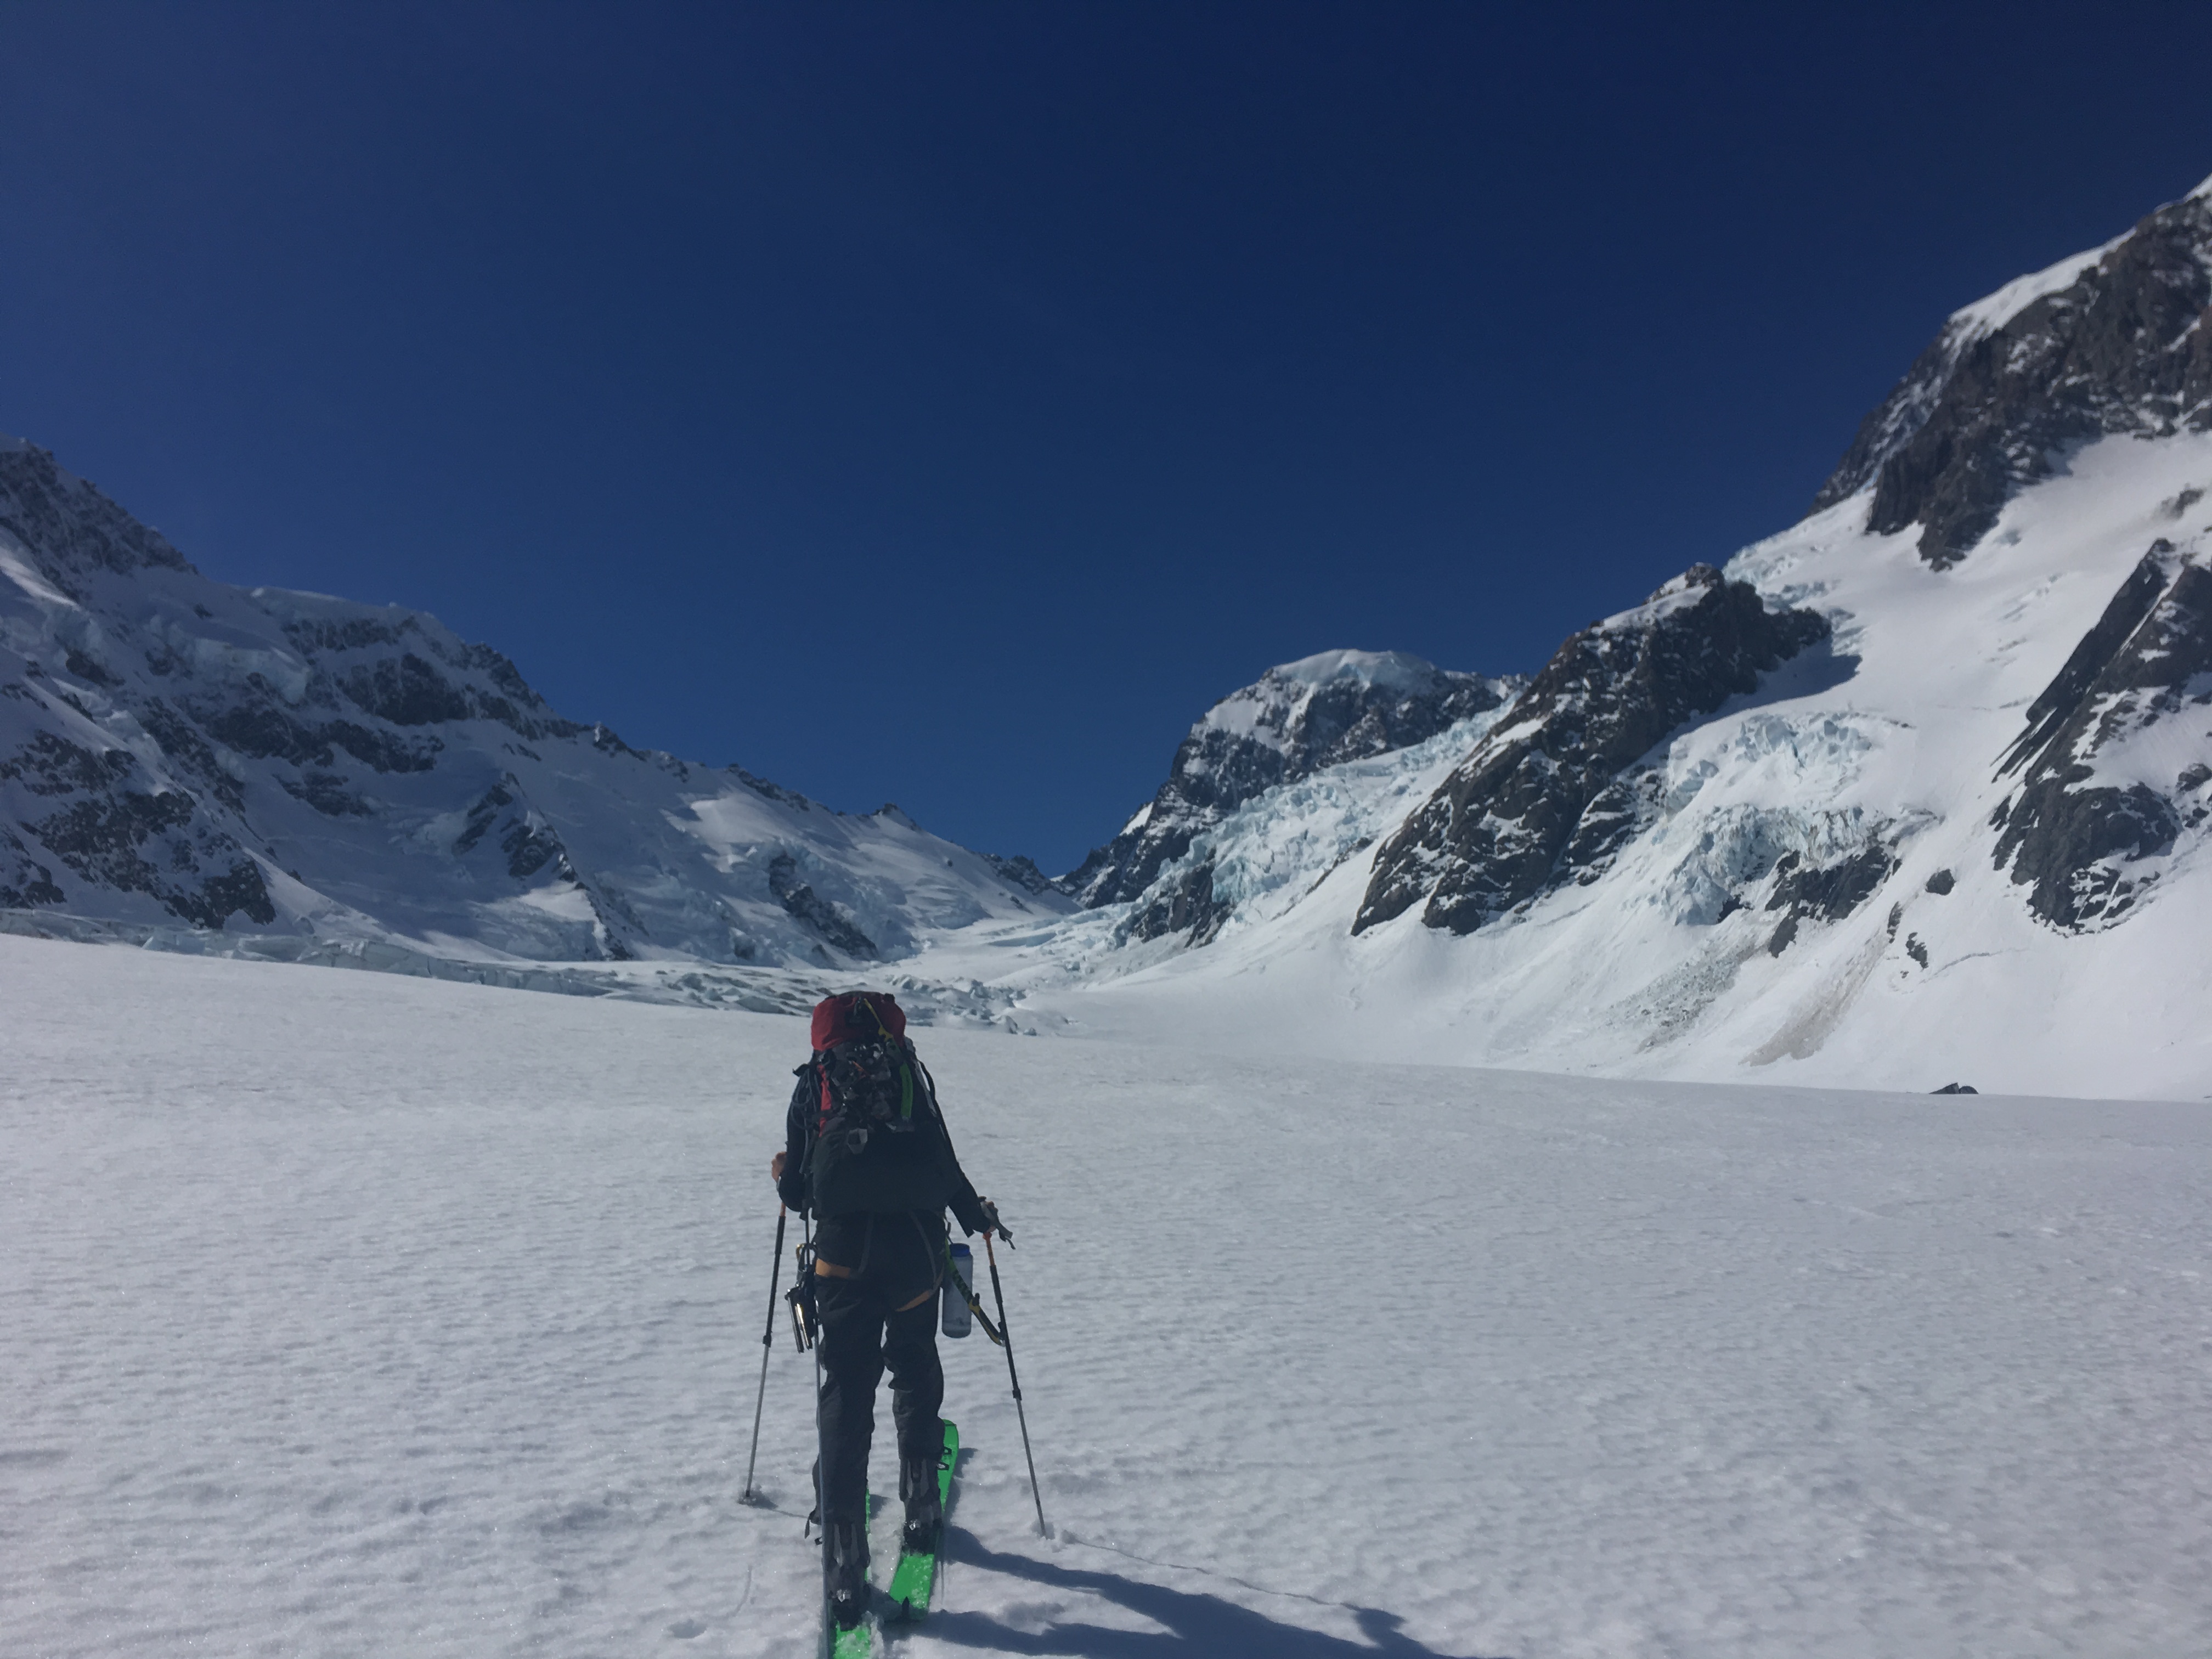
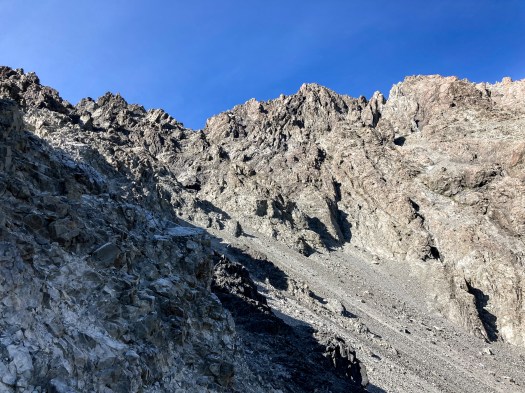
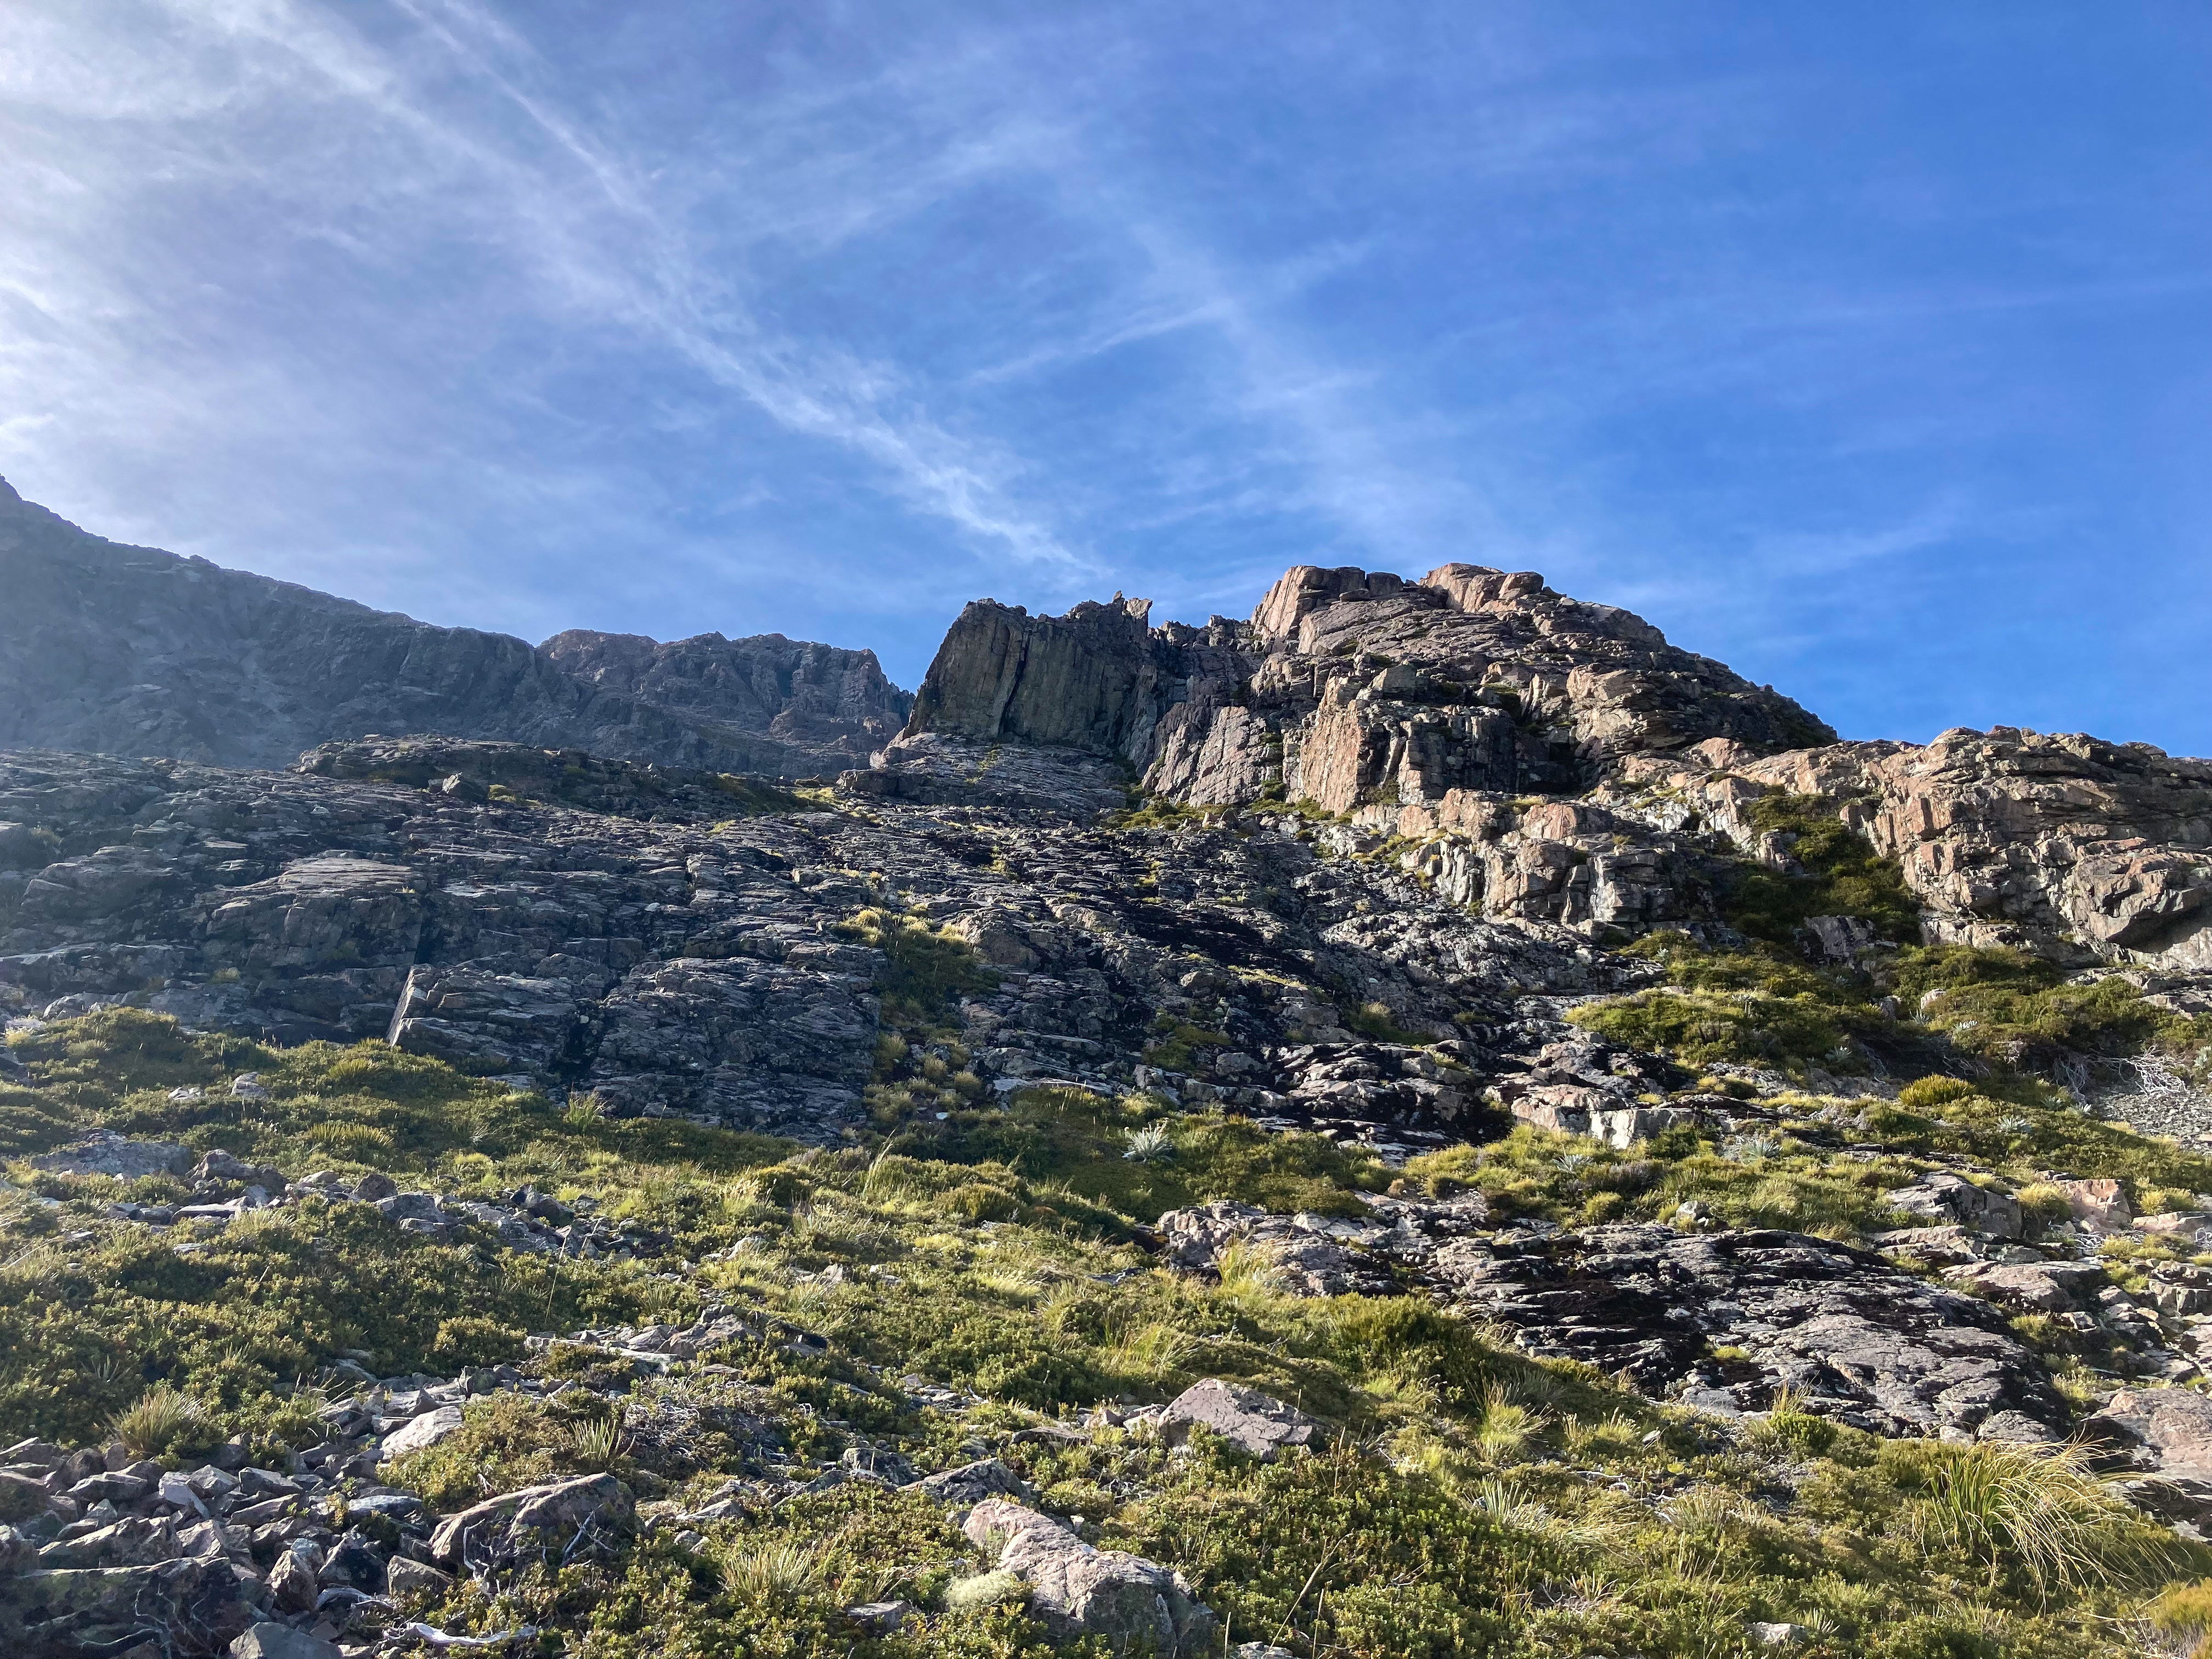
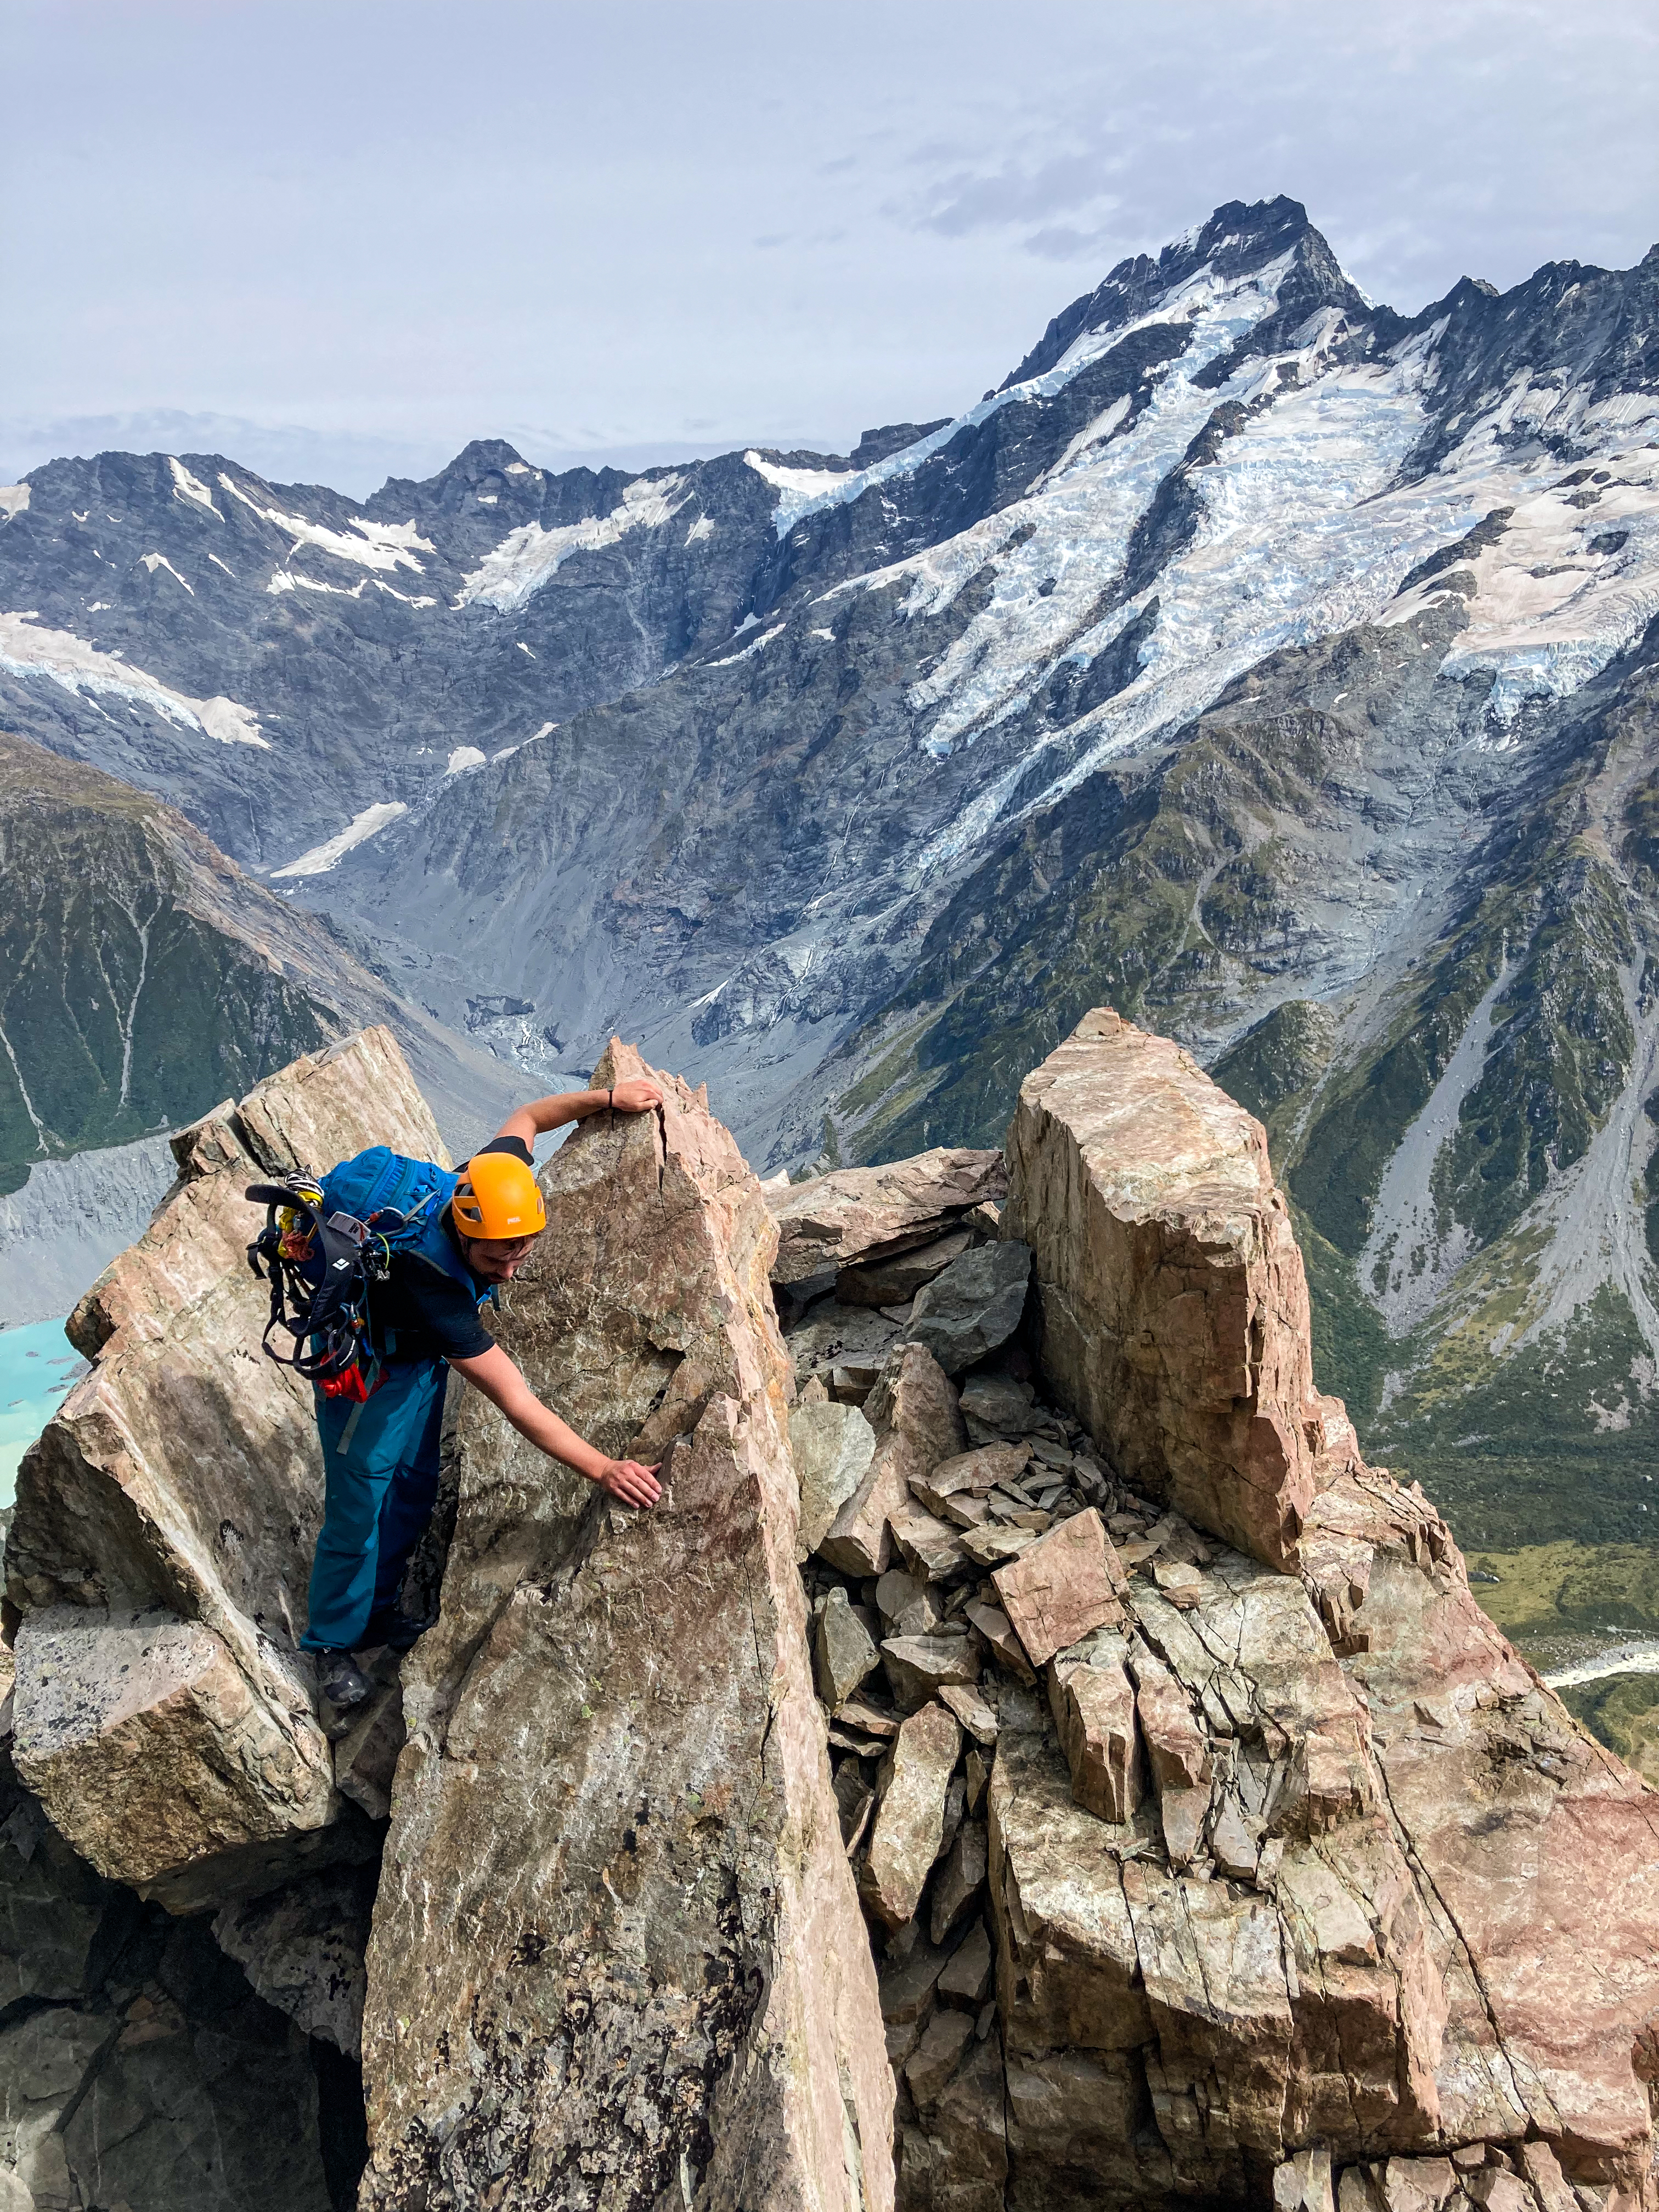
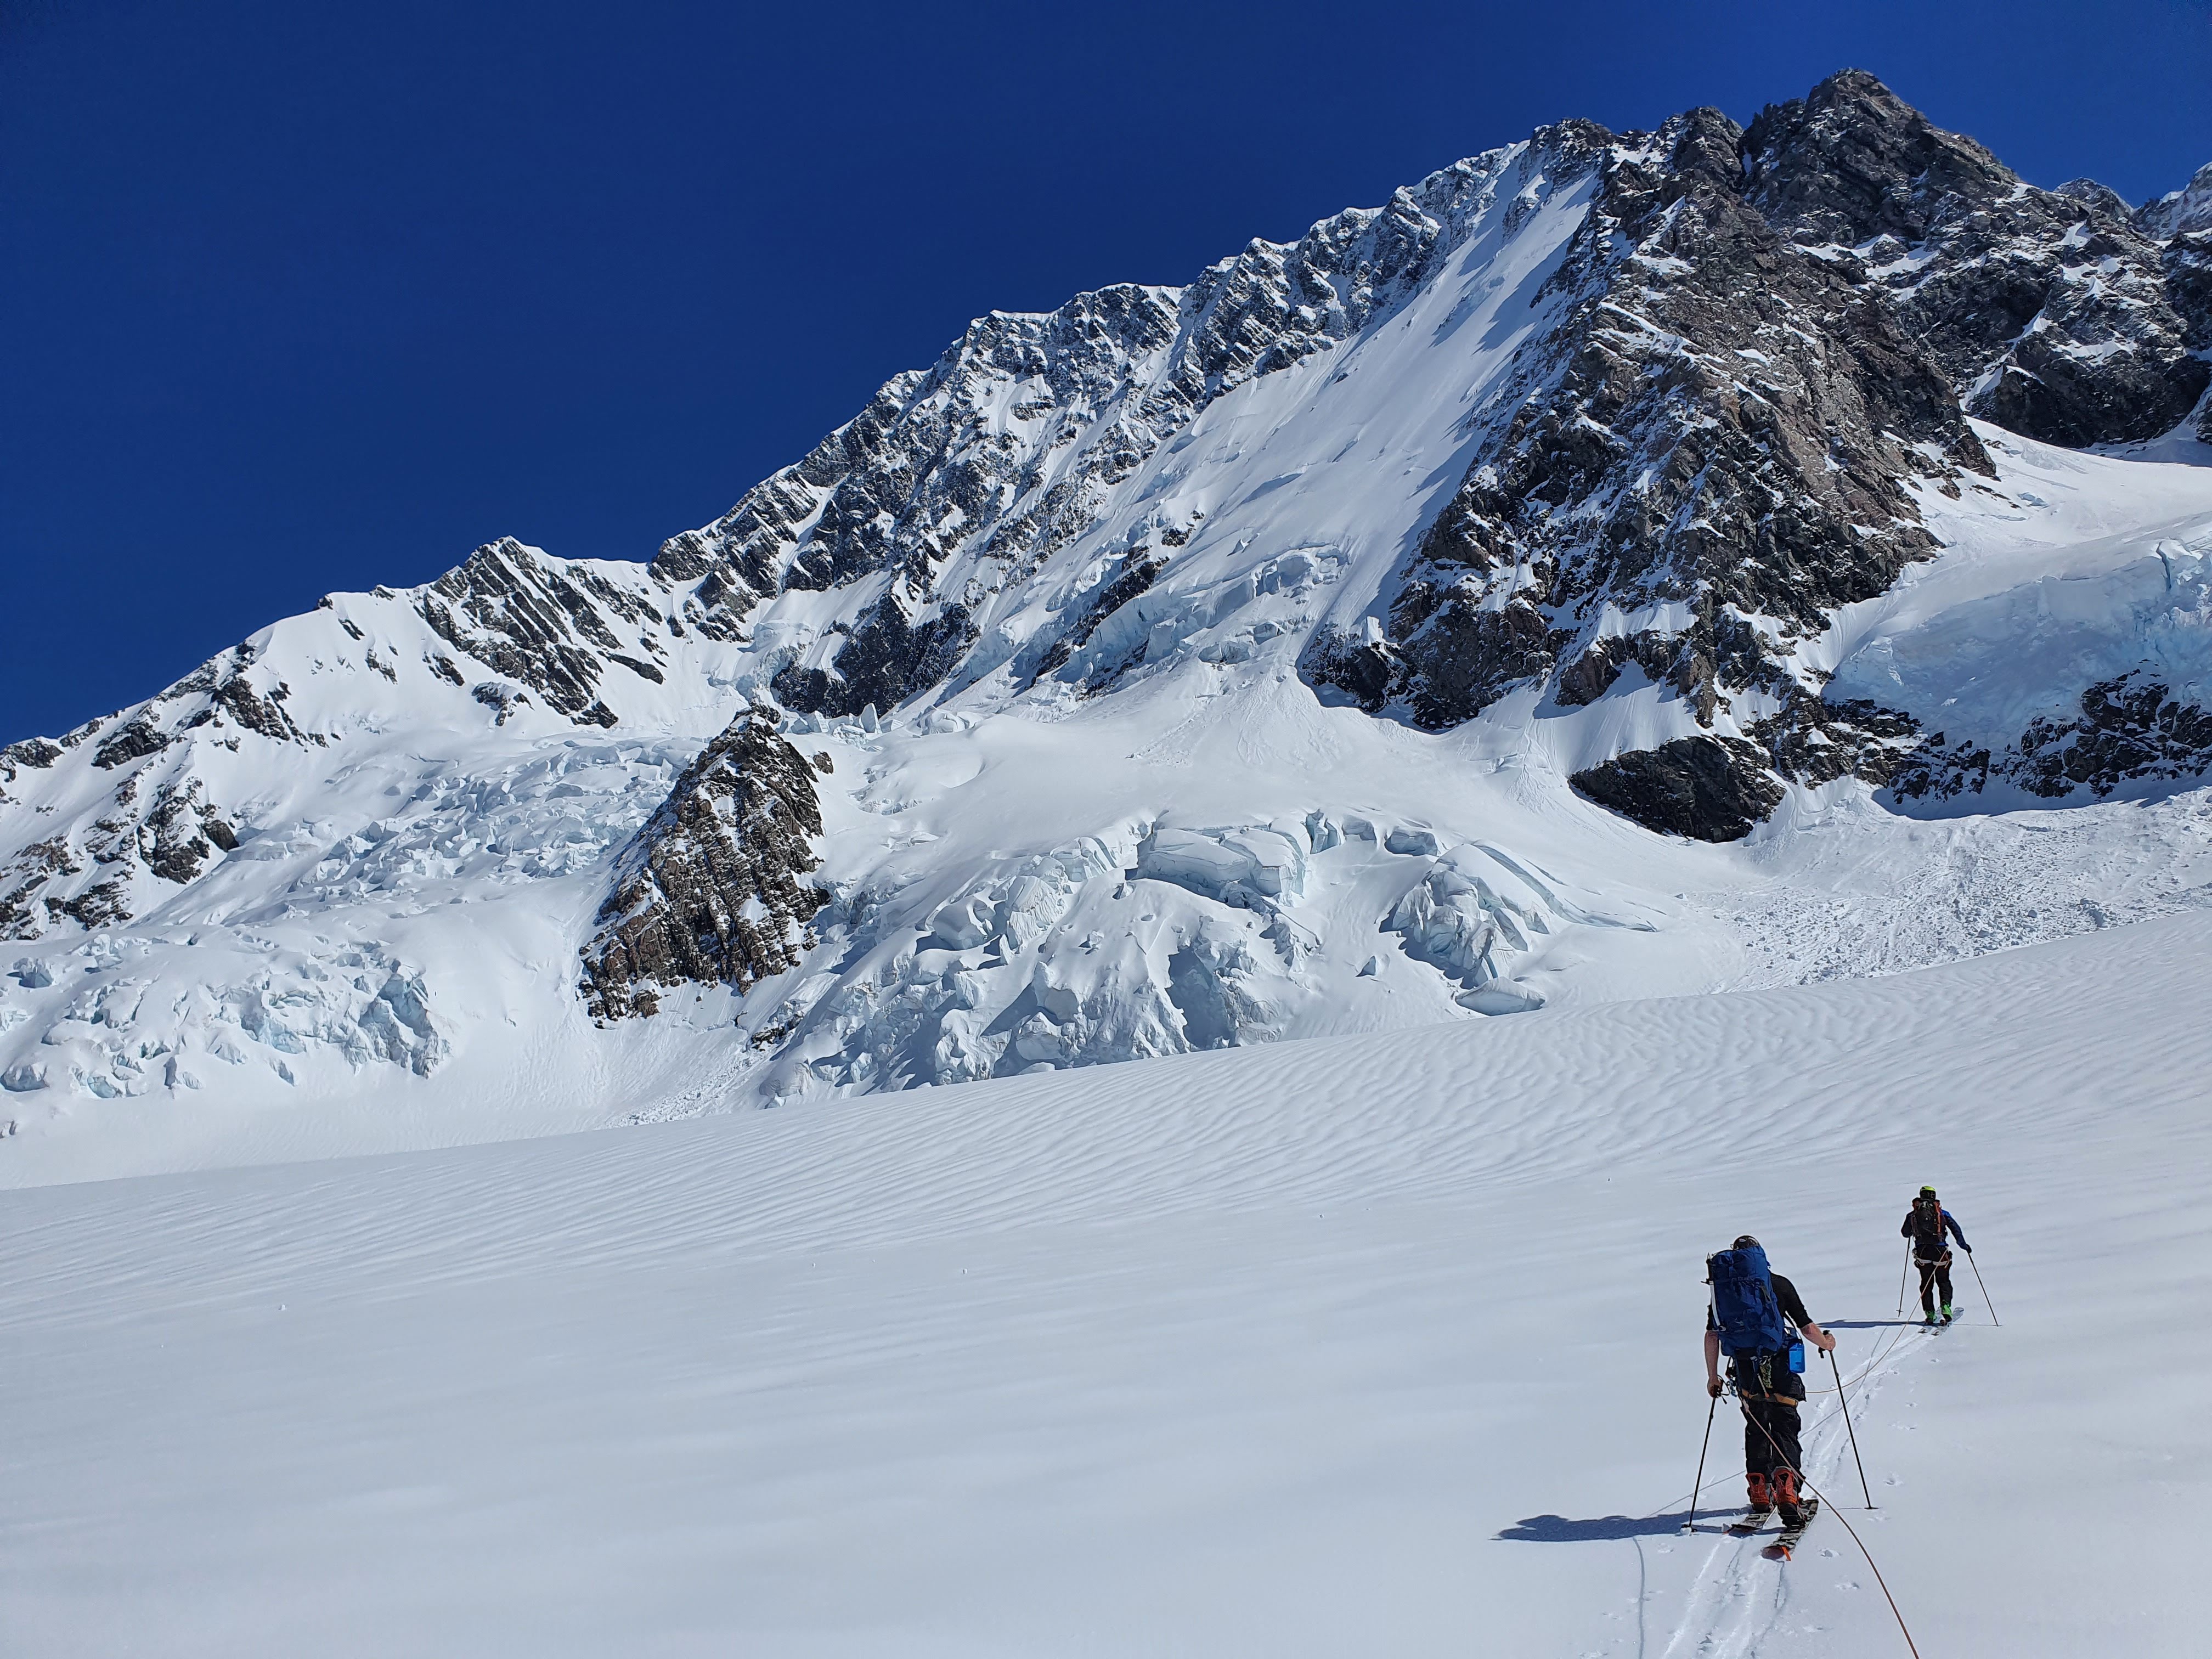
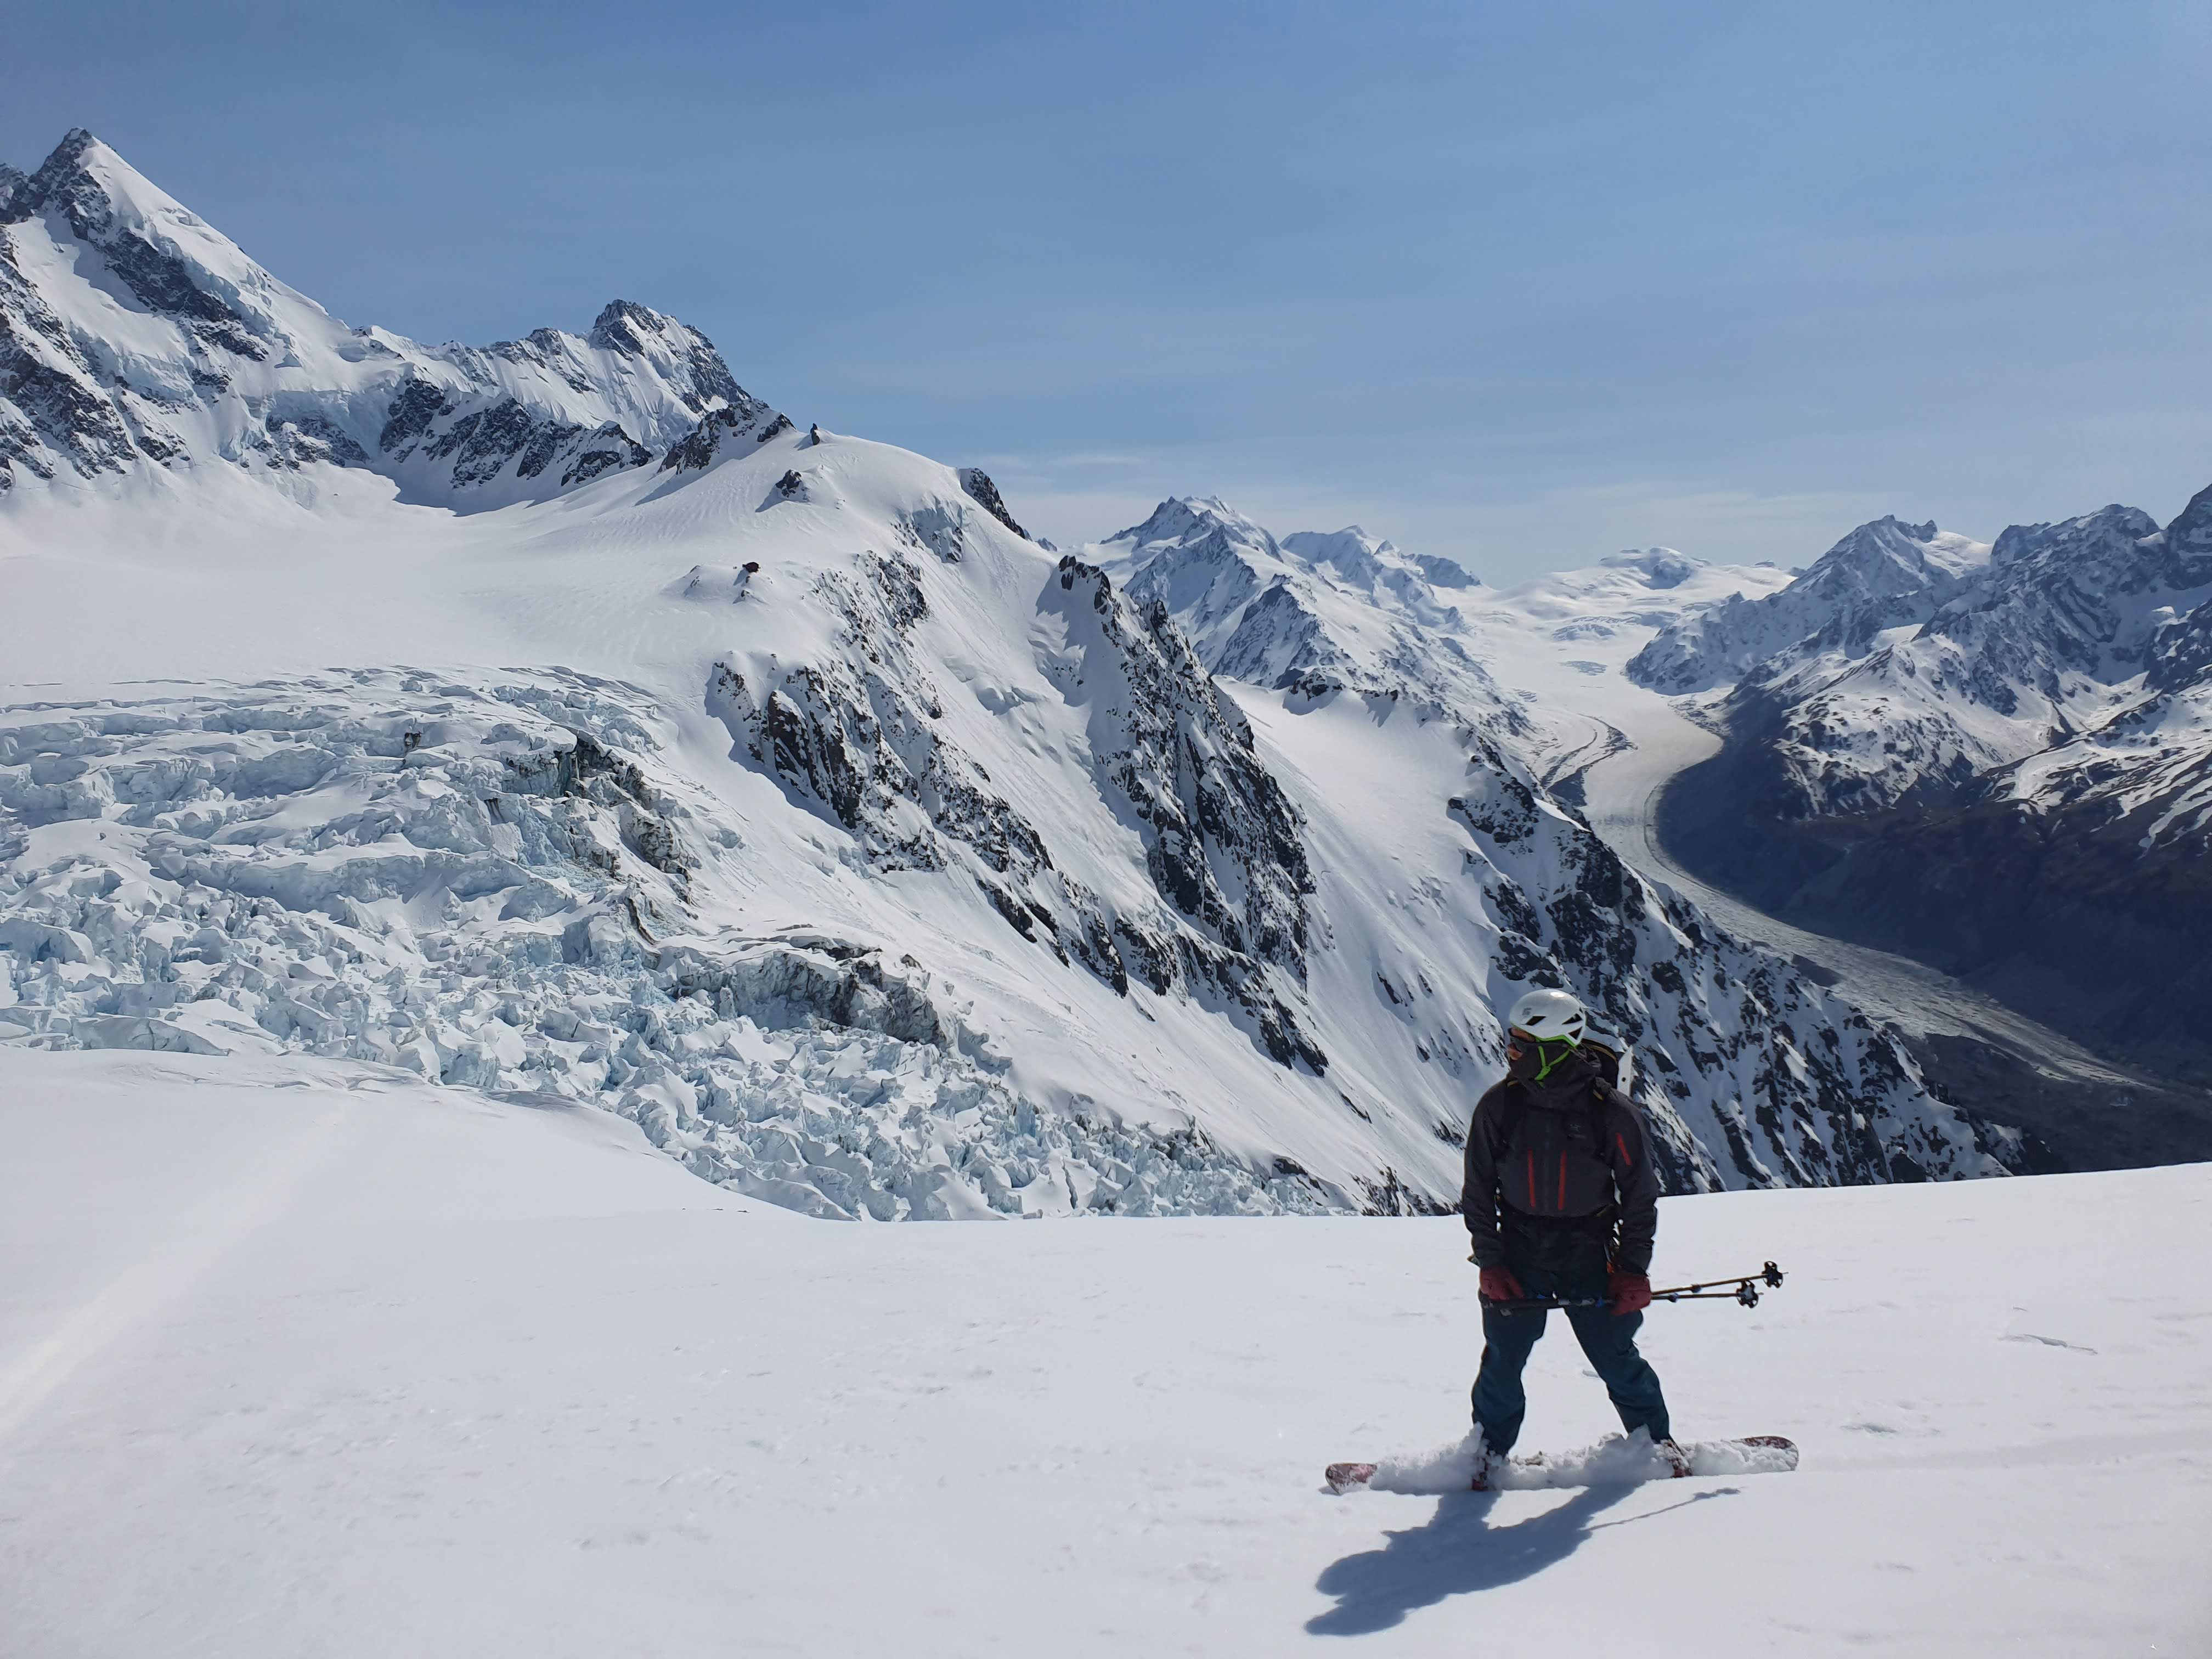
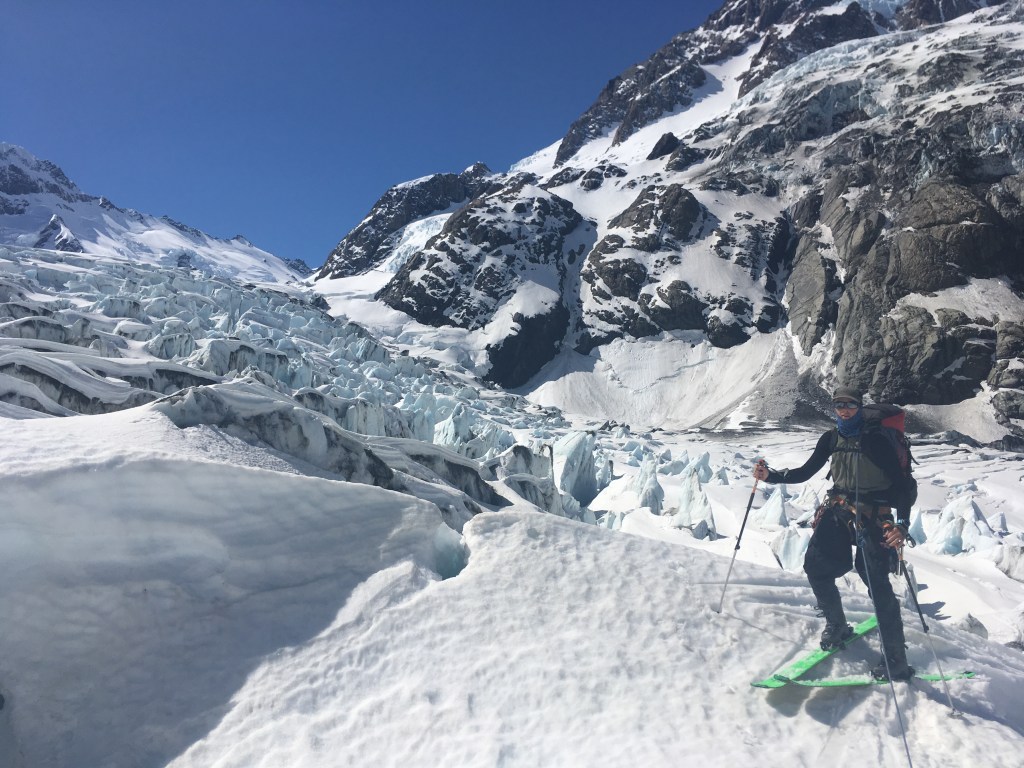
The way you pass the lower ice fall on the Hooker is very condition dependent. When we were there the true left (Pudding Rock) was completely cut off and so the only option was the true right. We were tucked right into the far west of the glacier and skinned up under Dilema peak, the end of the Straunchon glacier and finally under La Perouse. Everything was very open here and we were picking our way through the crevasses over winding and narrow snow bridges (check out the end of the video below to get an idea). Complex route finding but relatively safe as what you see is what you get. From around the 2000m contour things open up and we were back to skinning straight up the glacier for the remainder to the hut.

Looking up the Hooker. The way you get past the major icefall will depend on the state of the glacier. We stuck to the far left of the picture but when its more filled in you can stick to the far right (Pudding rock)

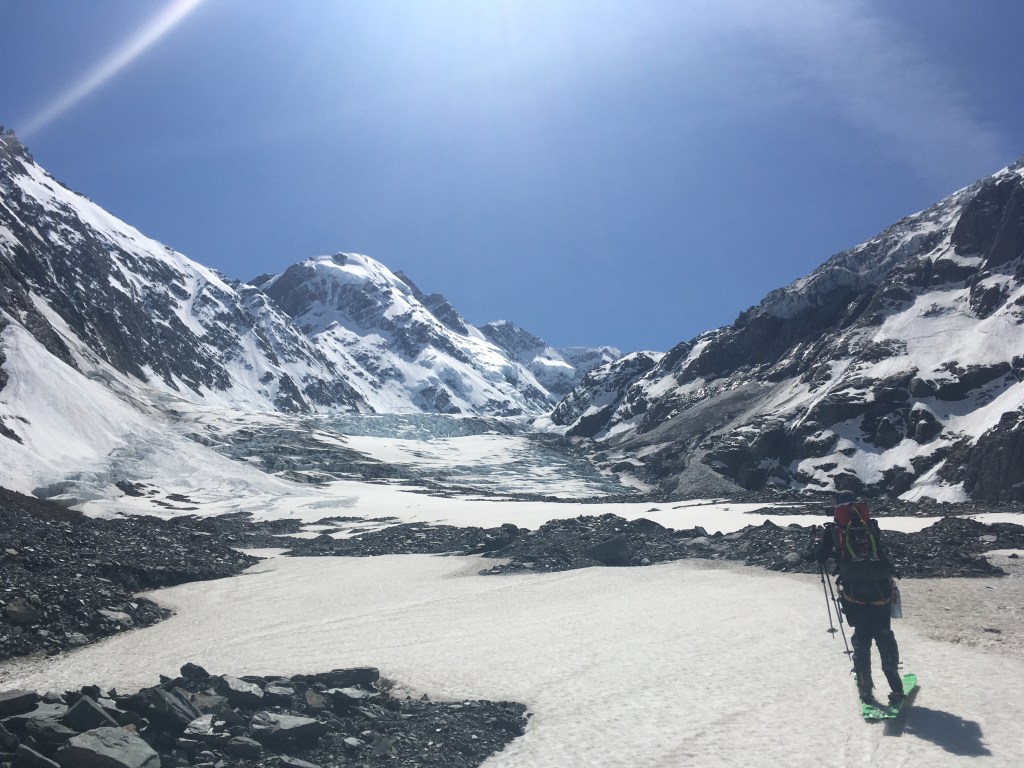
The crevasses here are humongous – we would regularly cross 20cm wide cracks in the snow, and only when directly on top of the crack get to look straight down to see that in fact we were on a snowbridge spanning a gaping monster that disappeared down into the depths of the earth. Several times the 10m of rope between us was barely enough to keep us from both being on the same bridge at the same time. In addition the ice cliff on the east of the glacier at 2200m (just below the words Empress Glacier on the map) was highly active, regularly throwing off car sized chunks. We were thankfully able to stay far enough west to be out of the firing line. However the east faces of Dilemma and La Perouse had regular rockfall once the morning sun started warming them up and there was no way to stay clear of both and get through the crevasse maze, so we had to move fast and keep our fingers crossed.

Skinning up through the maze of crevasses on the Hooker icefall

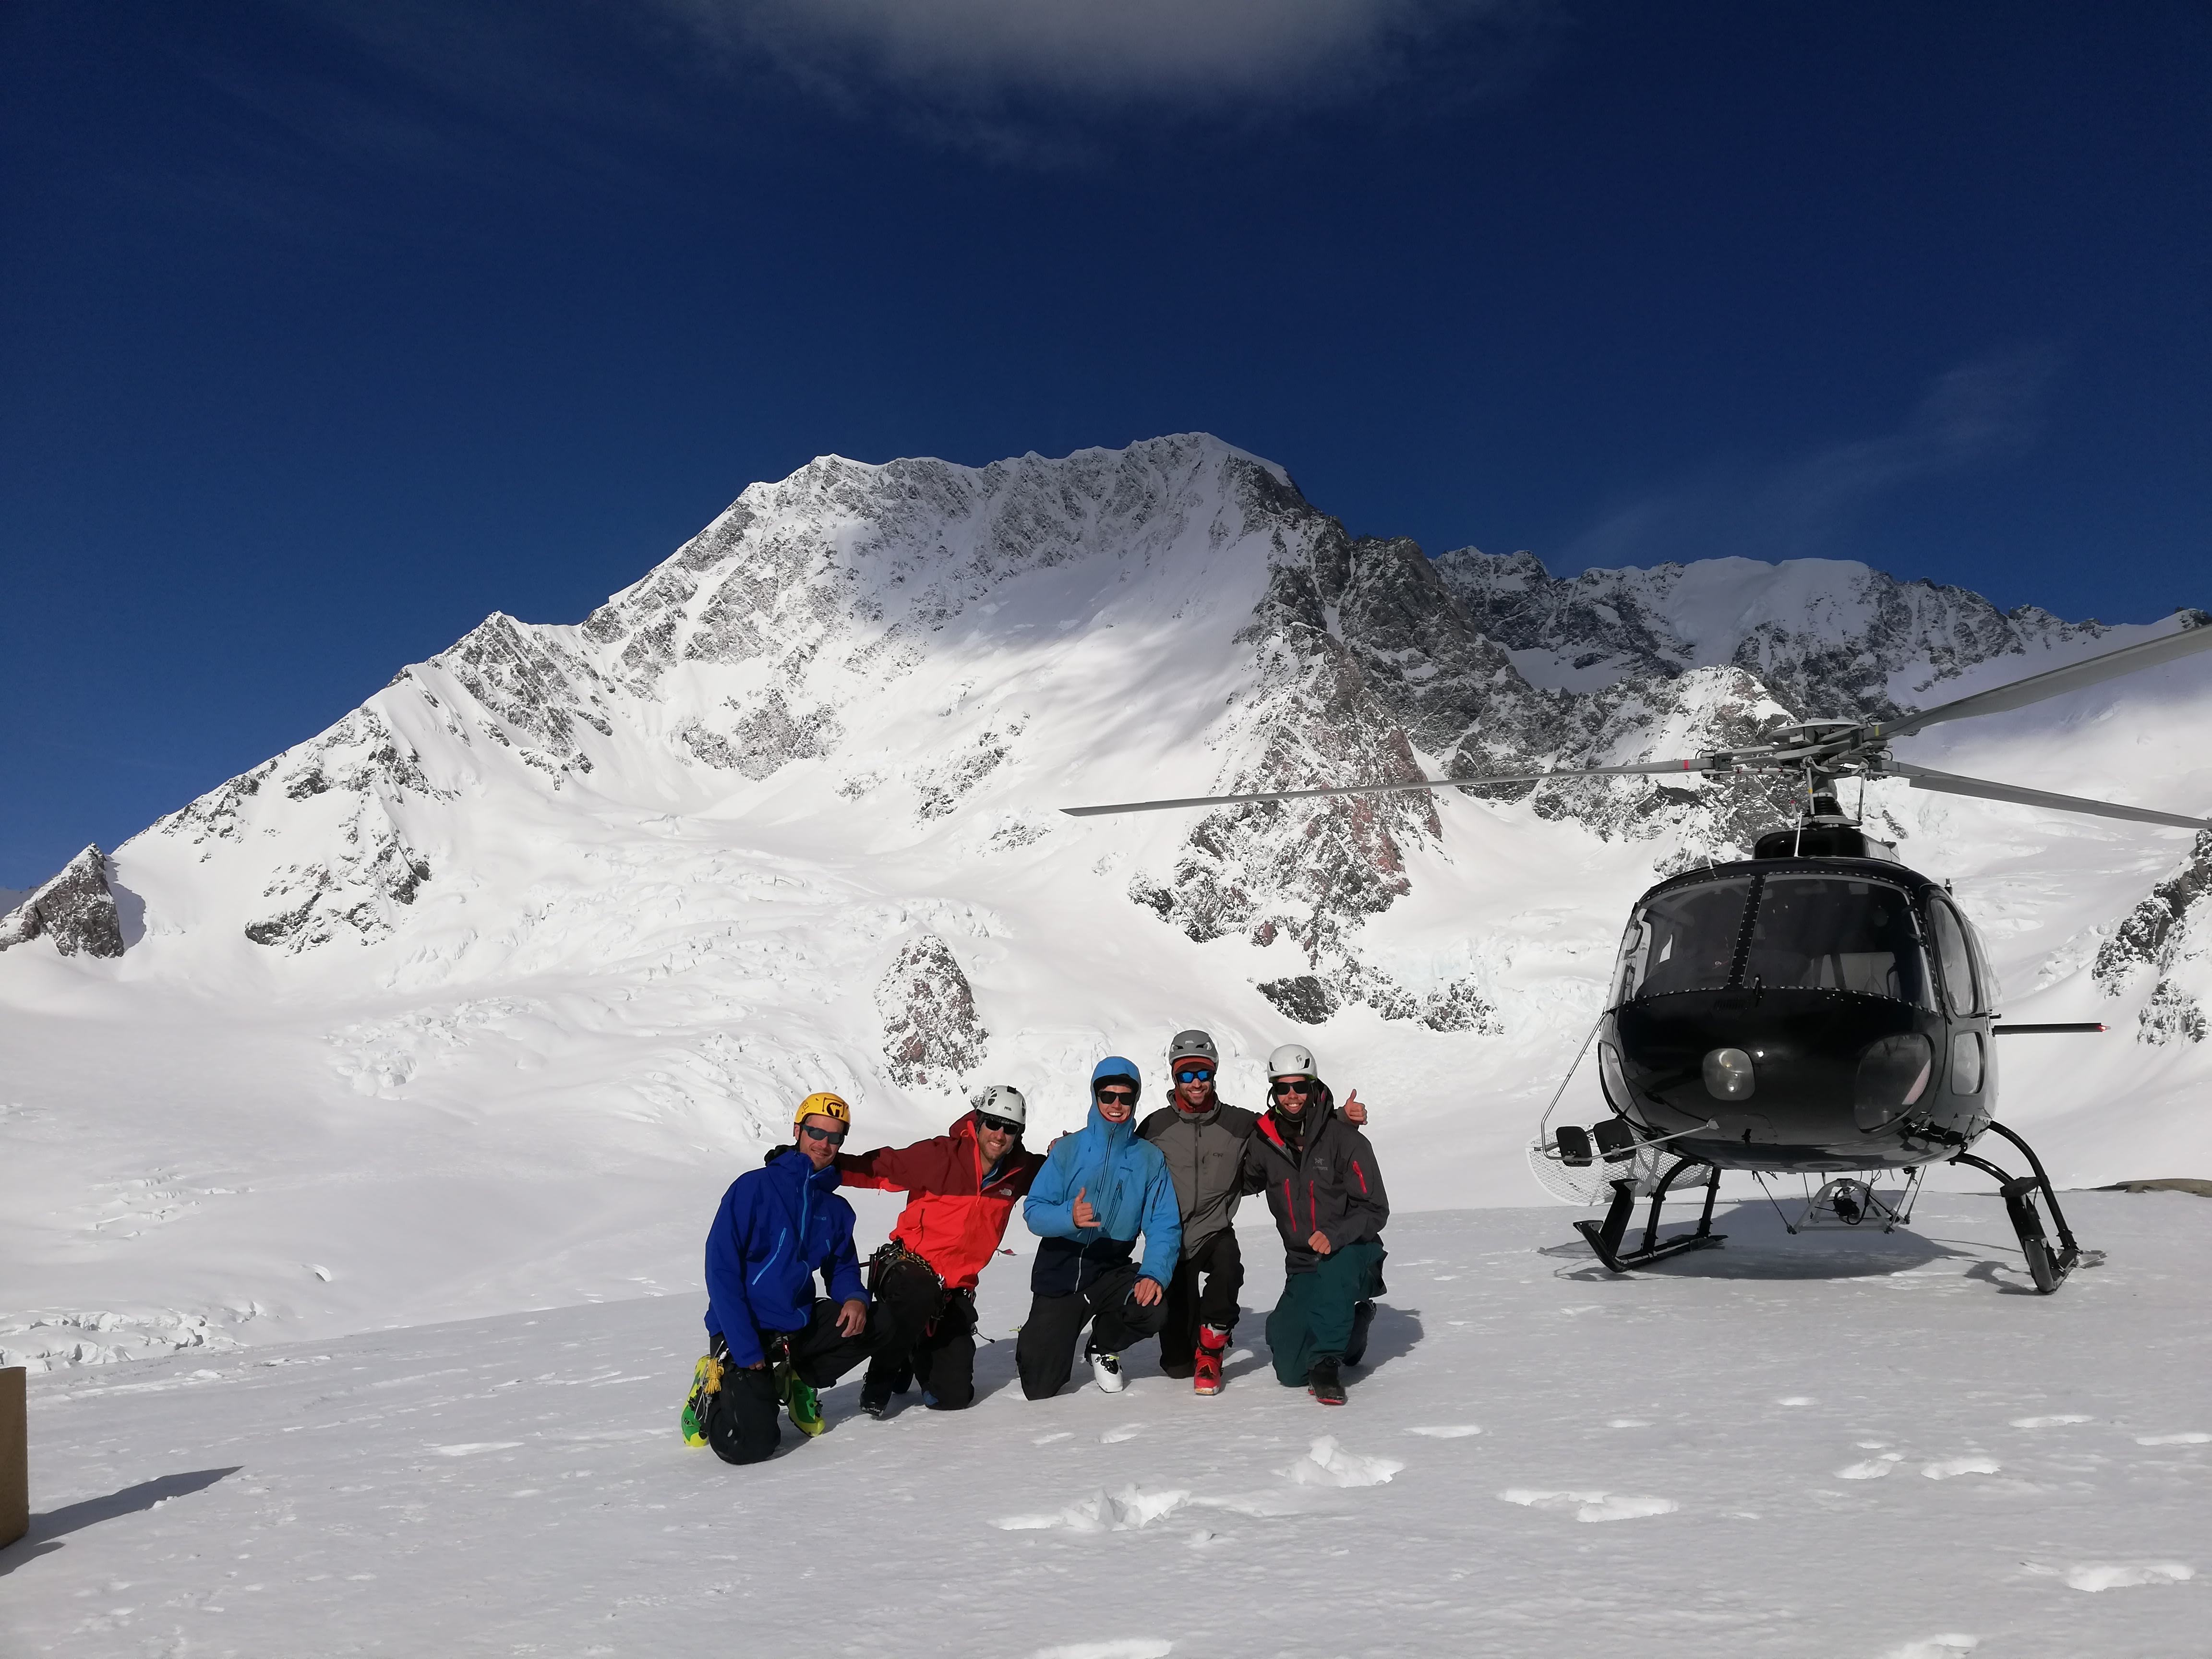
All in all this was a pretty hectic experience and I got to the hut feeling like I never wanted to come up the Hooker again. From speaking to friends who have been up to Empress I think it was especially scary when we were there and this isnโ€™t a typical experience – later in the year and everything would be more open with no hidden surprises, earlier everything would be more filled in. Either way it put me firmly into the โ€™we should open the Hooker to heli accessโ€™ camp, especially as the whole way in we could hear the buzz of scenic flights overhead in anycase. Maybe not a popular opinion with the purists, but Im sure would increase the number of people who would enjoy the epic terrain above the Empress hut.

View out from Empress hut, La Perouse on the right

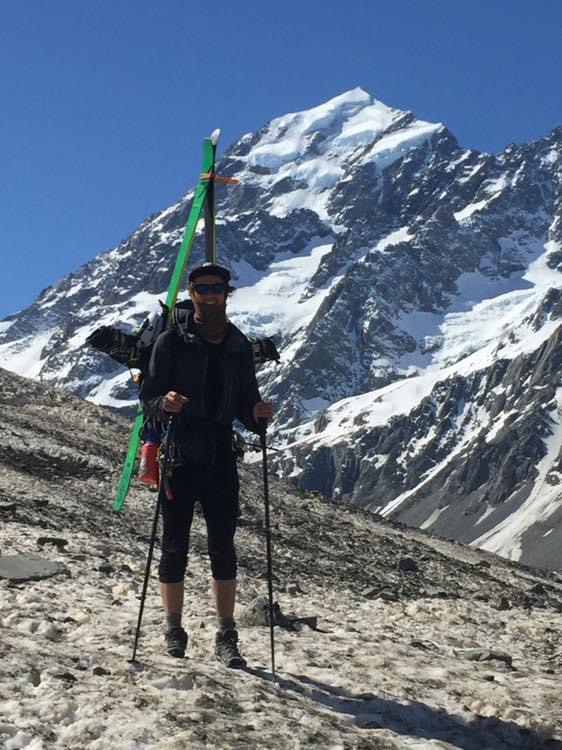
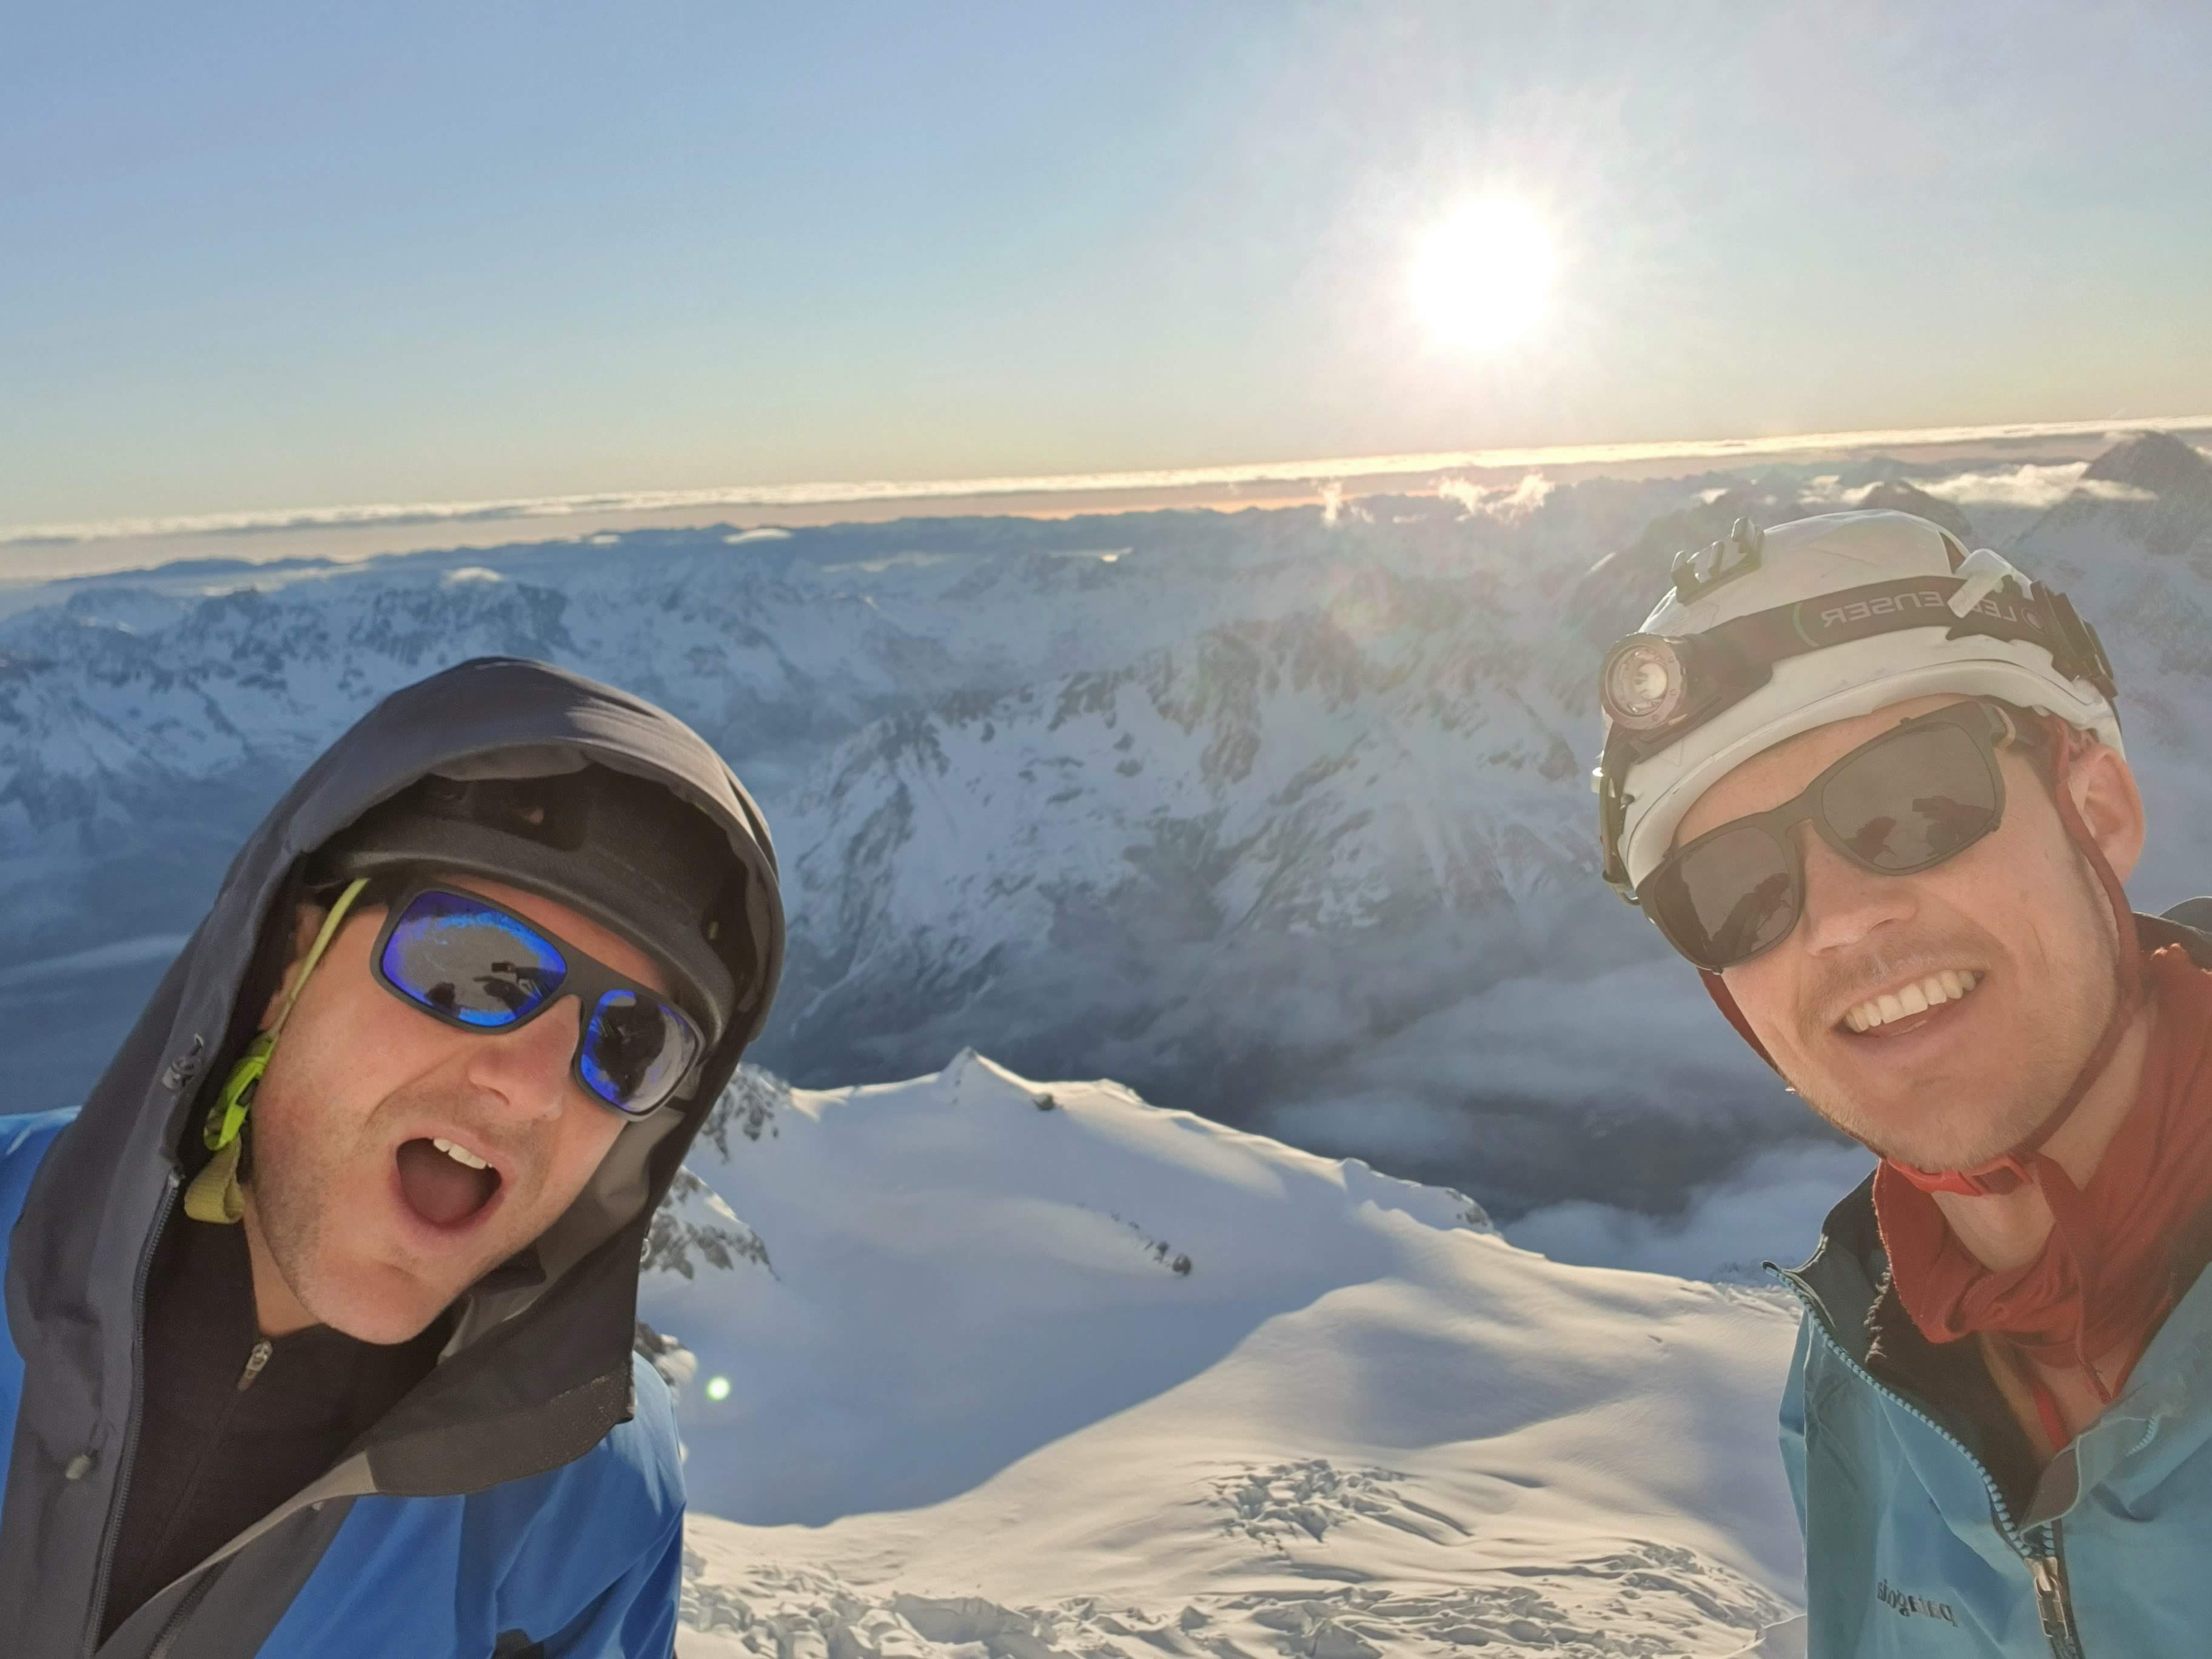
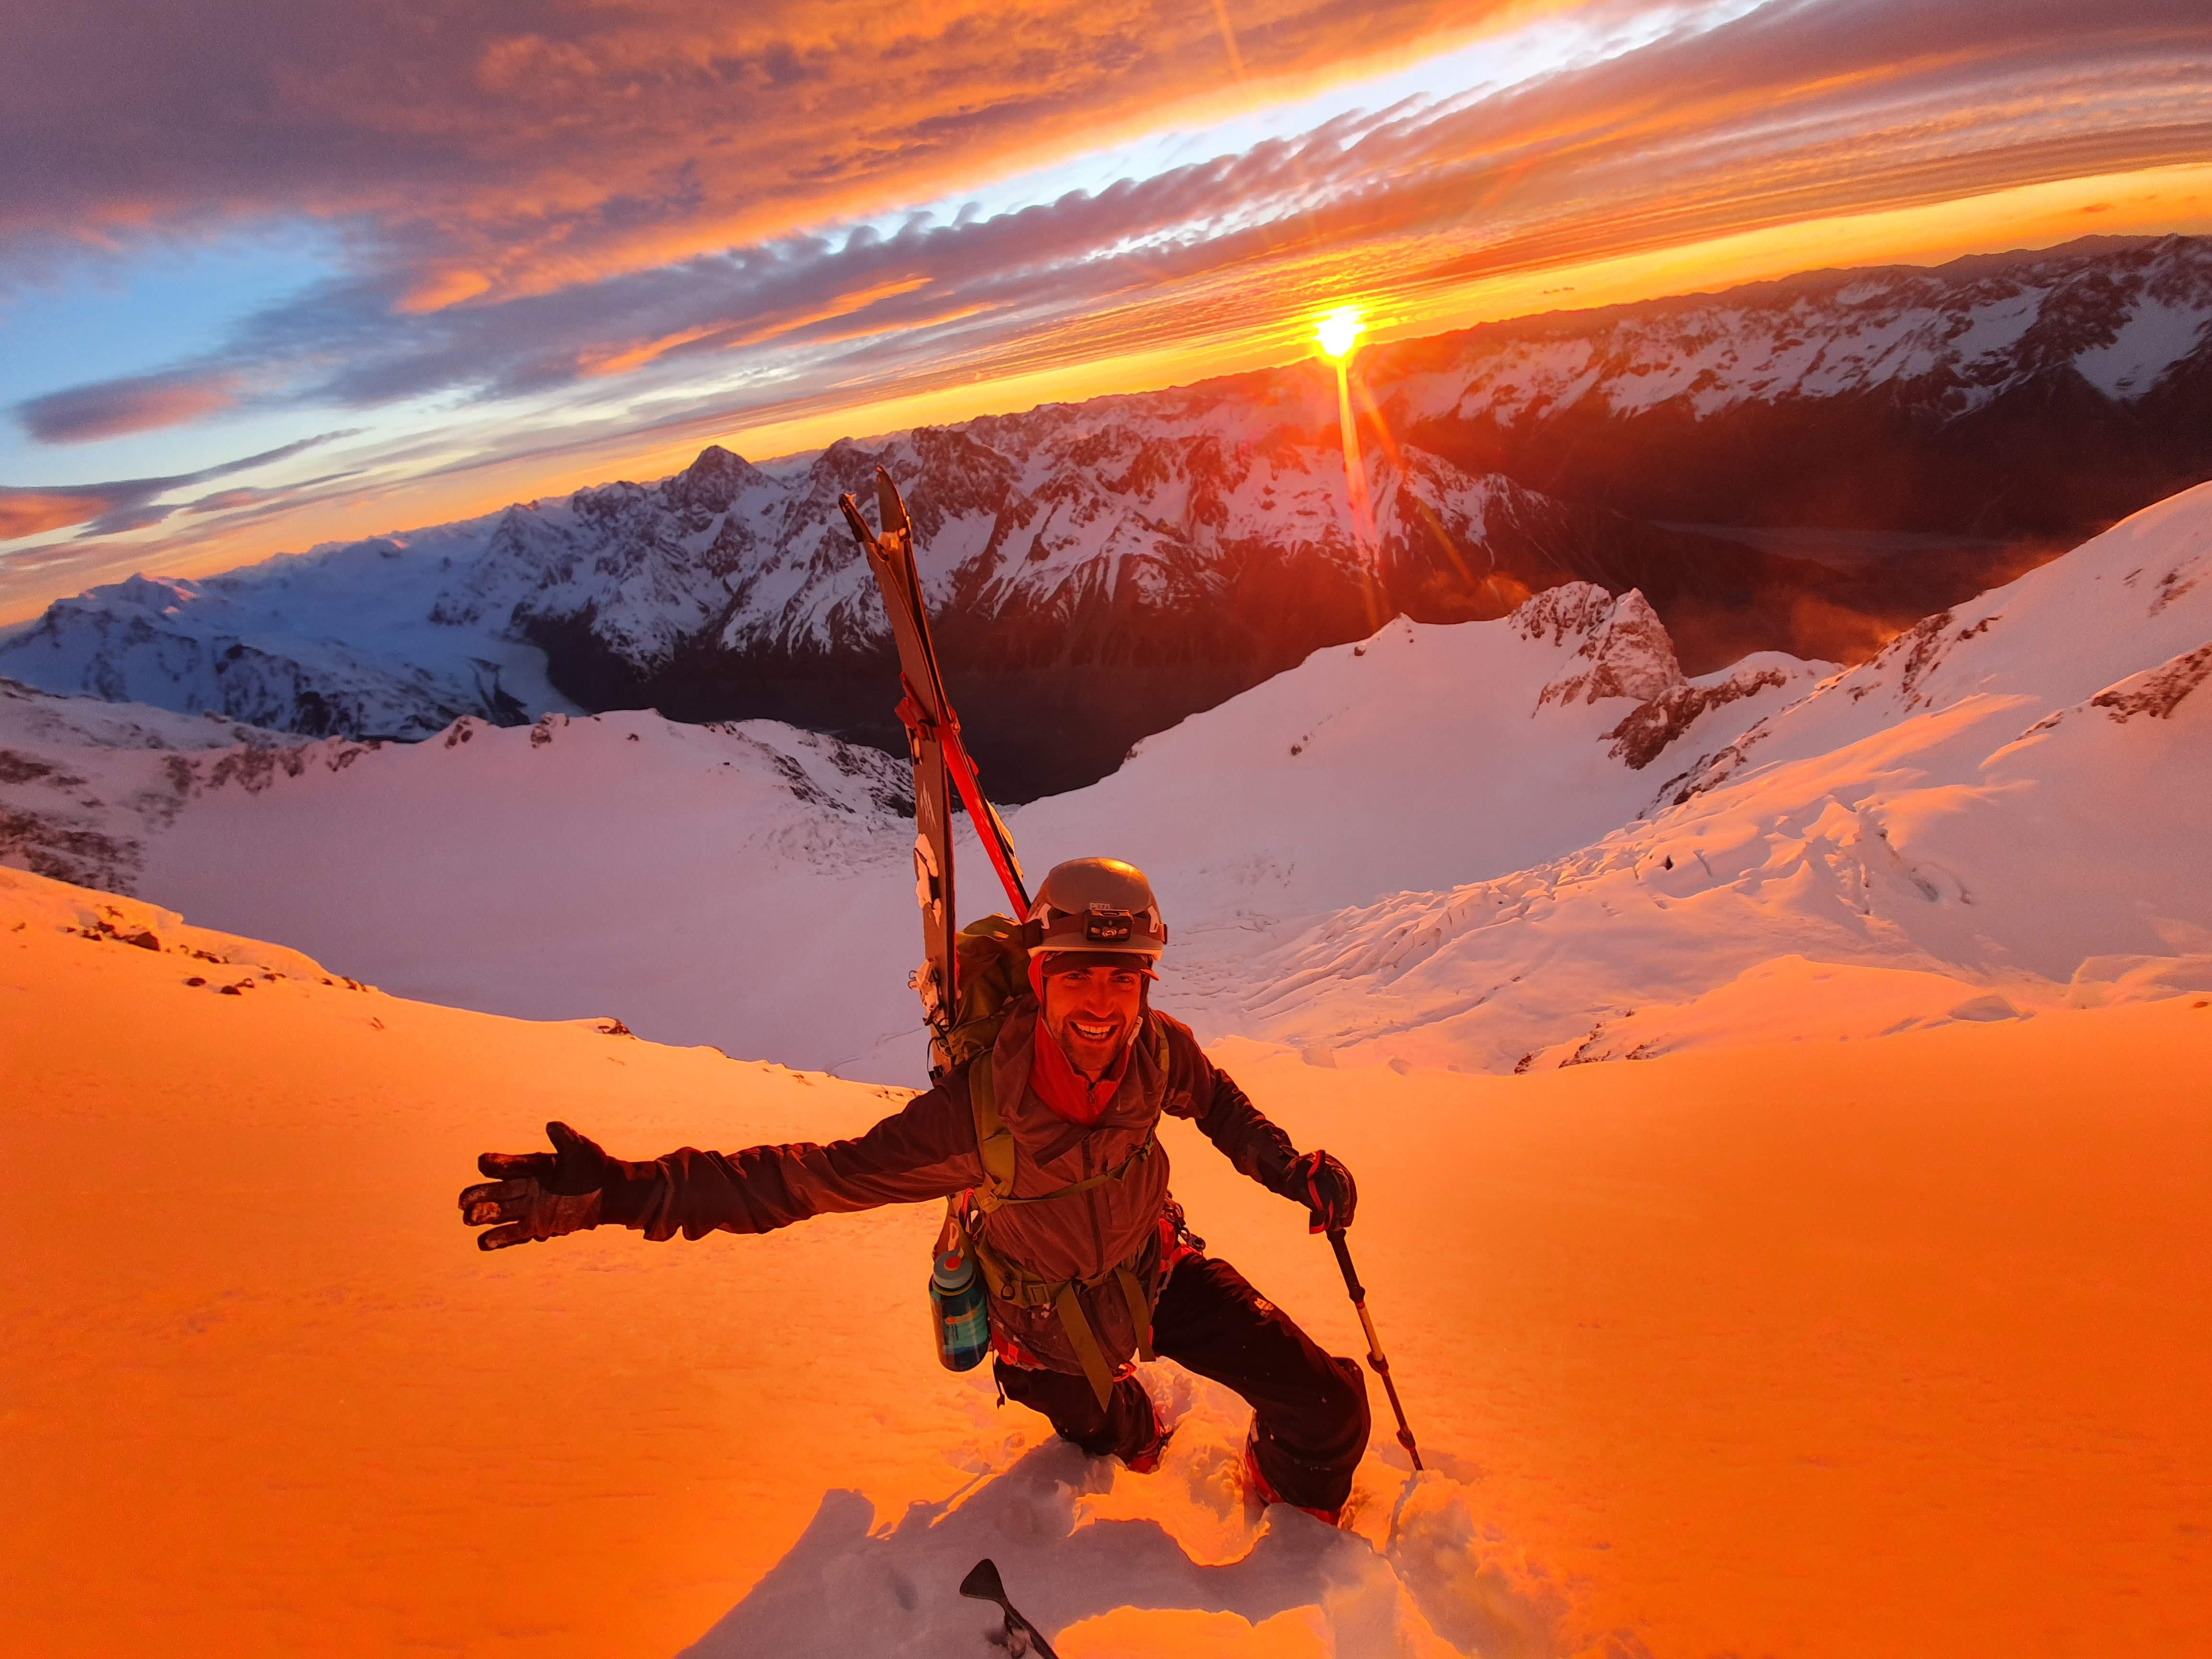
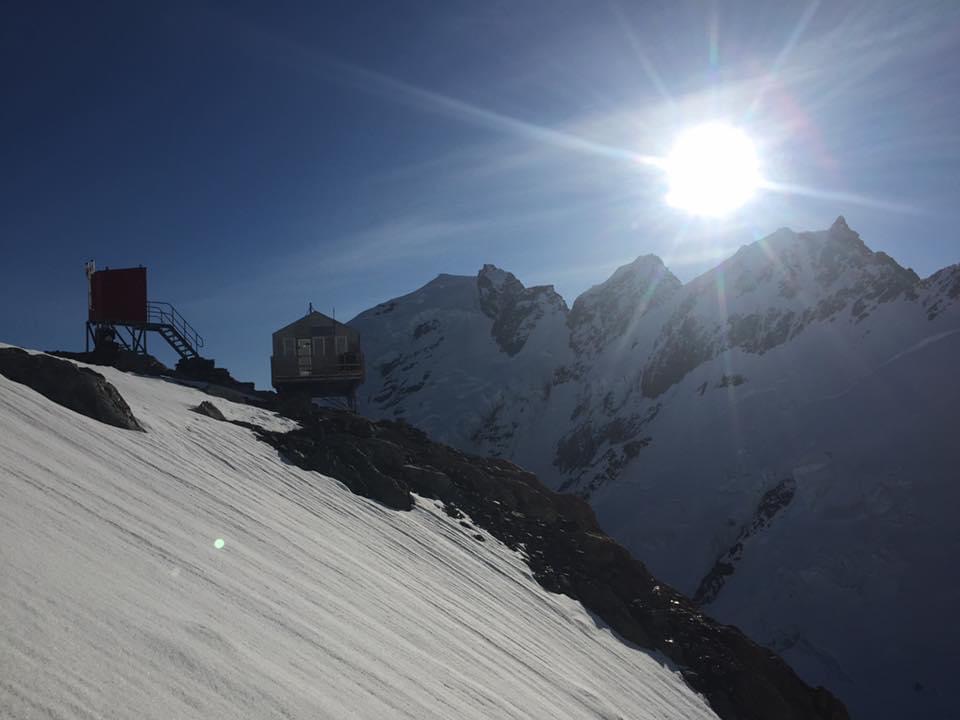
Empress Hut is a pretty special place – the difficult access means it not many people make it up there and so you can flick through decades of entries in the hut book and soak up the history of the area.

Empress hut

Climb

Will booting up the lower section of the couloir. This part is wide and straight and is the easiest skiing meaning yo ucan open it up a bit

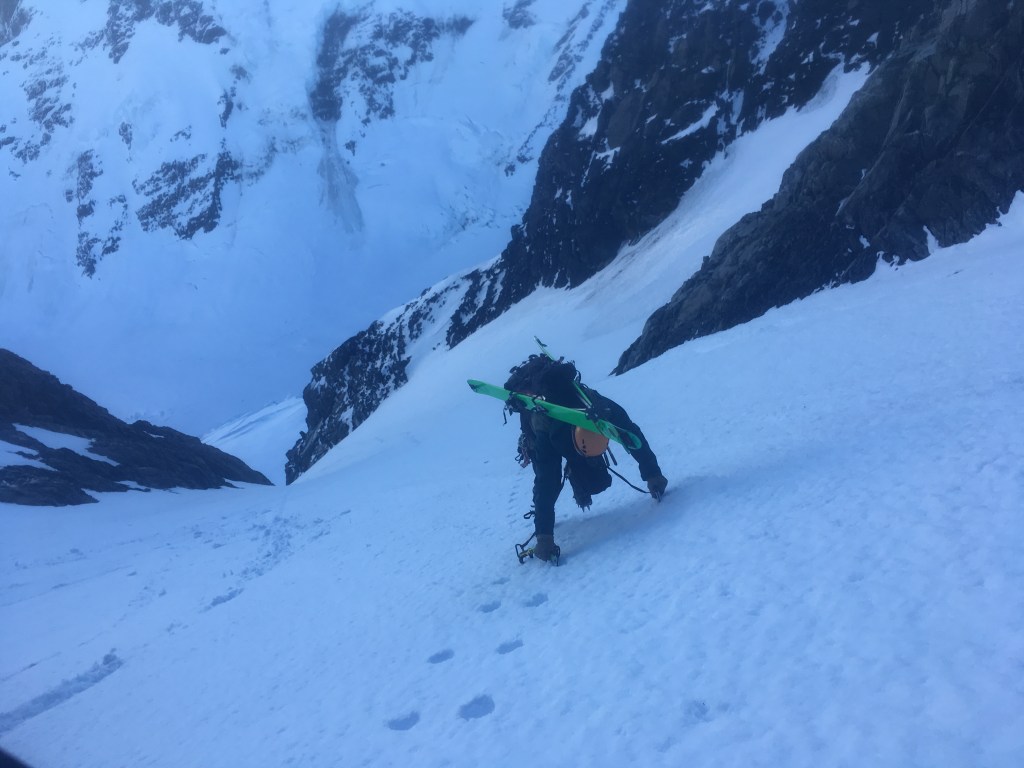
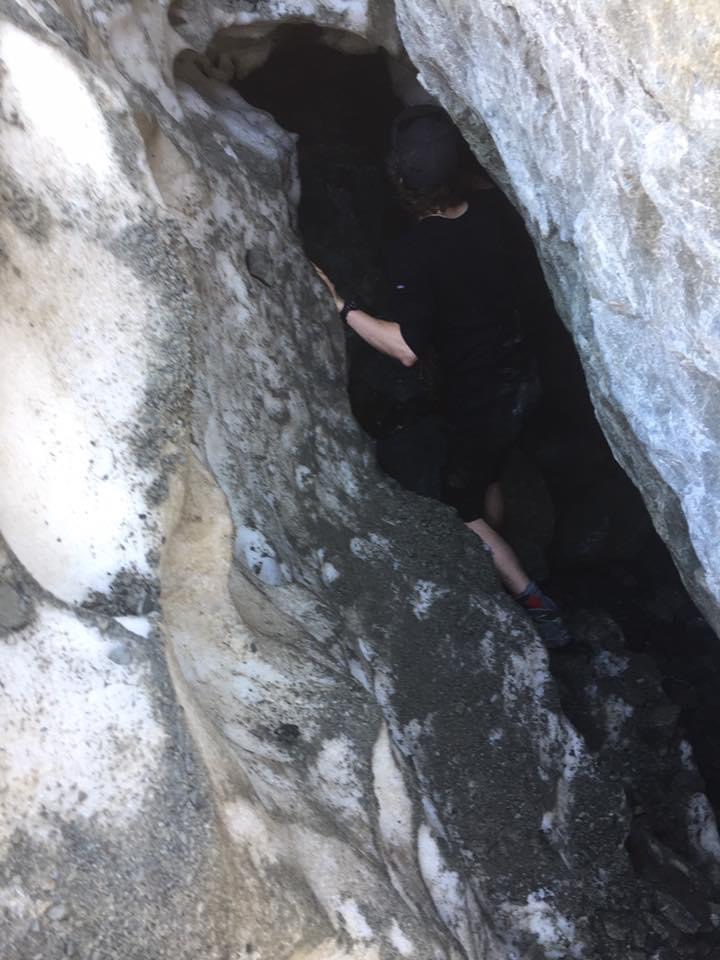
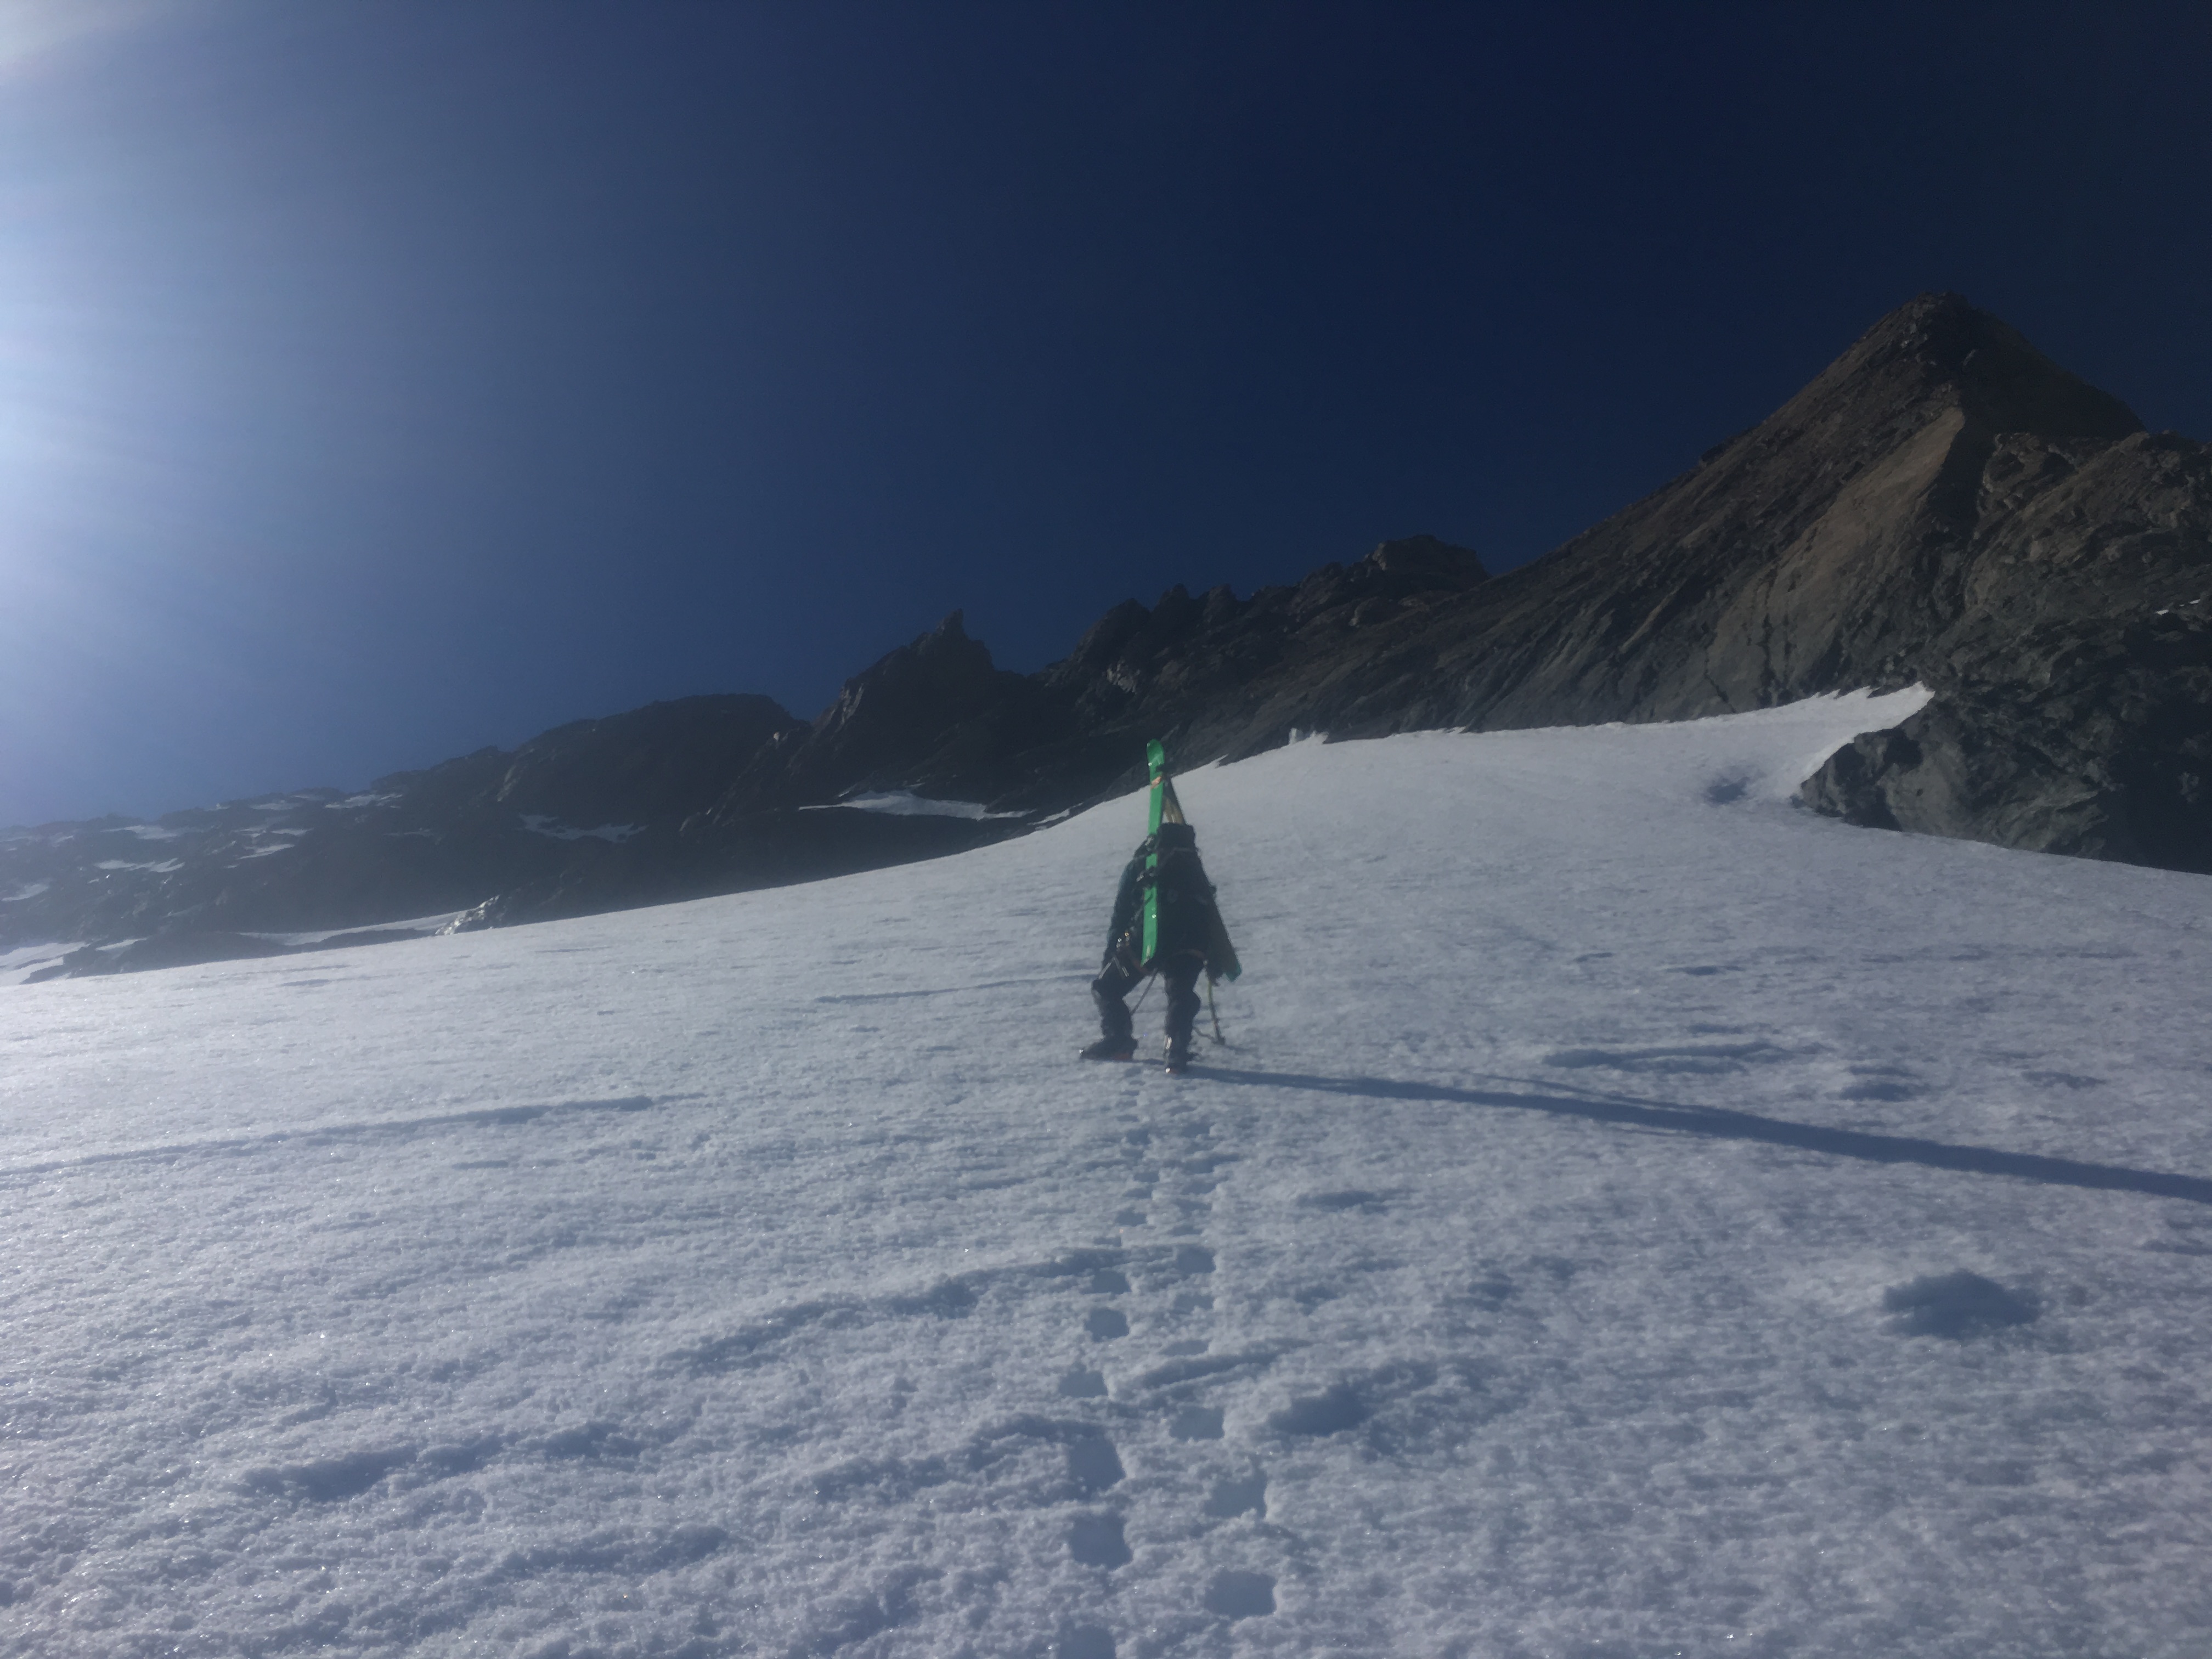
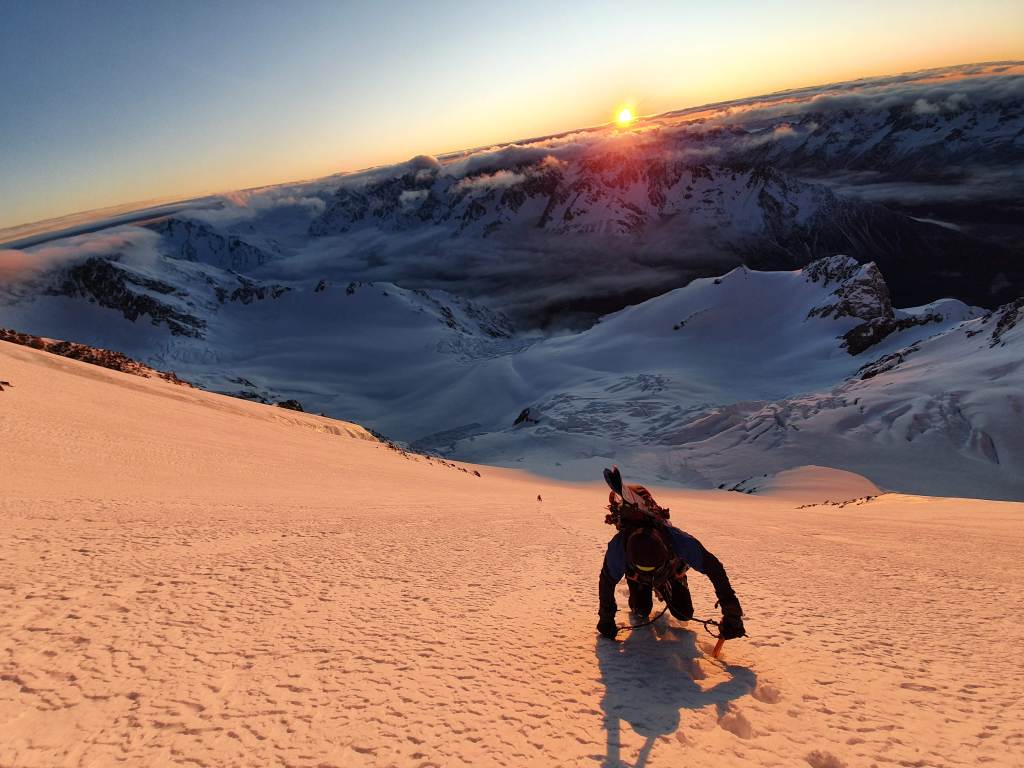
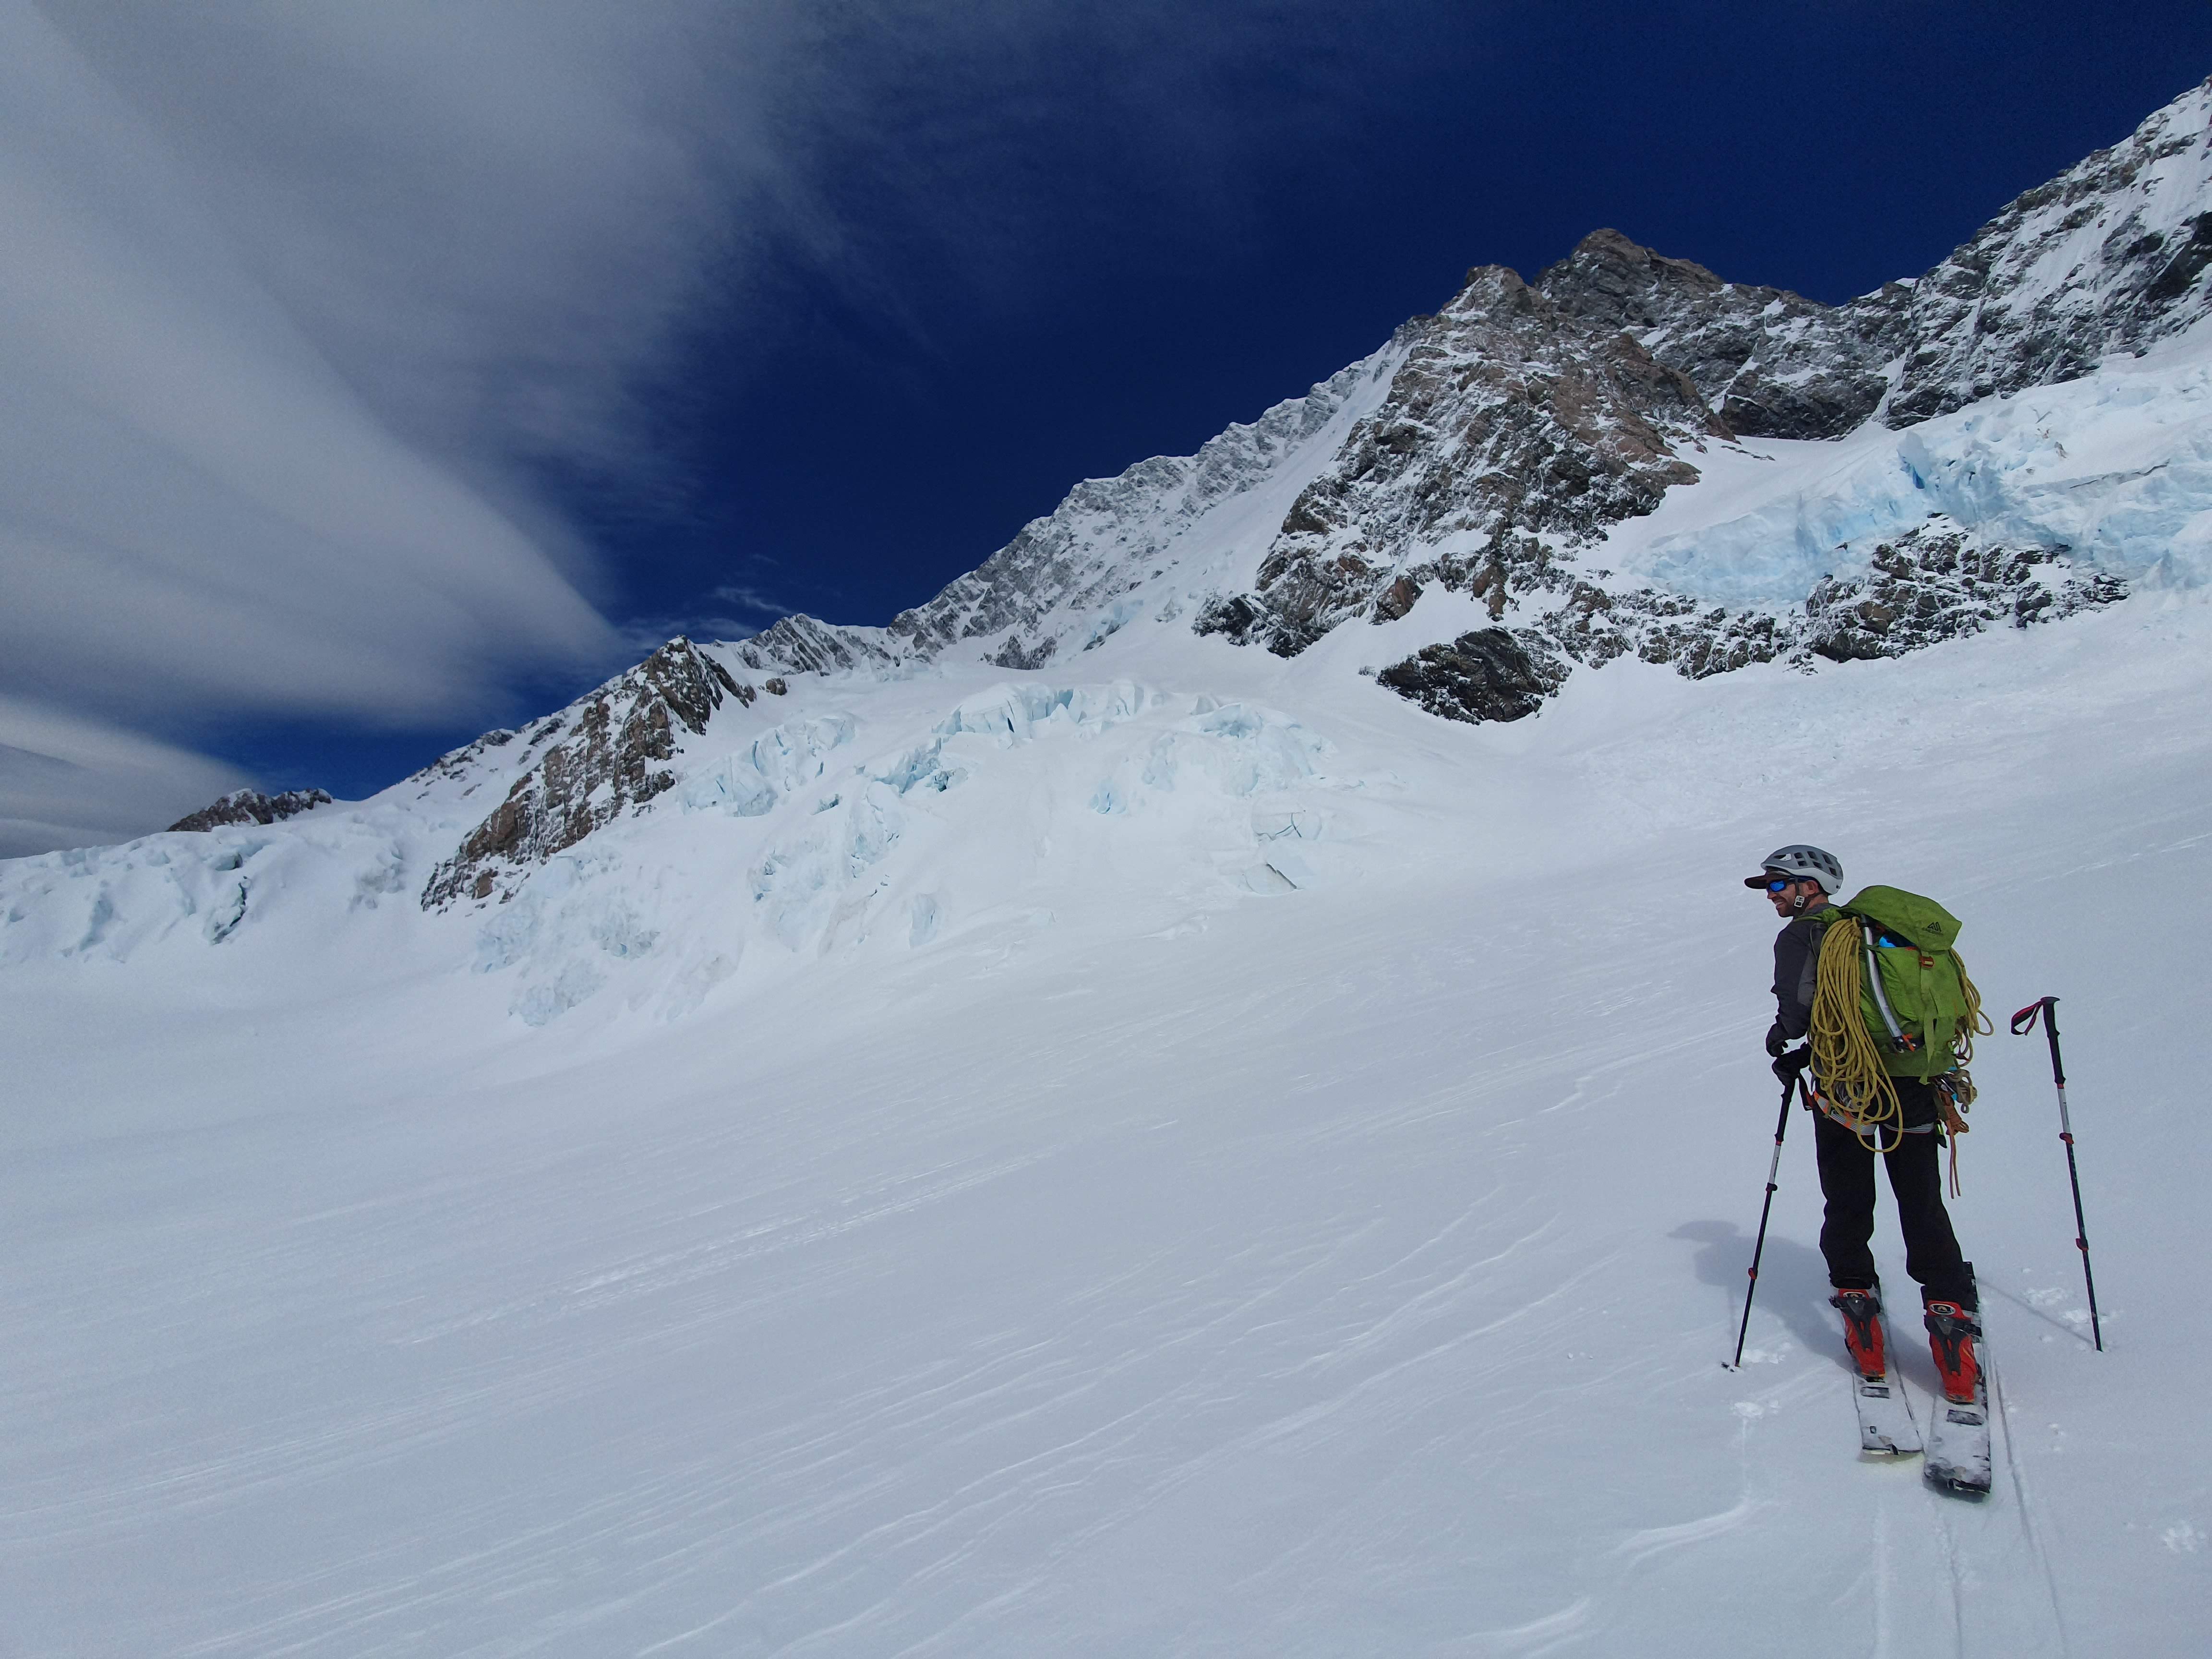
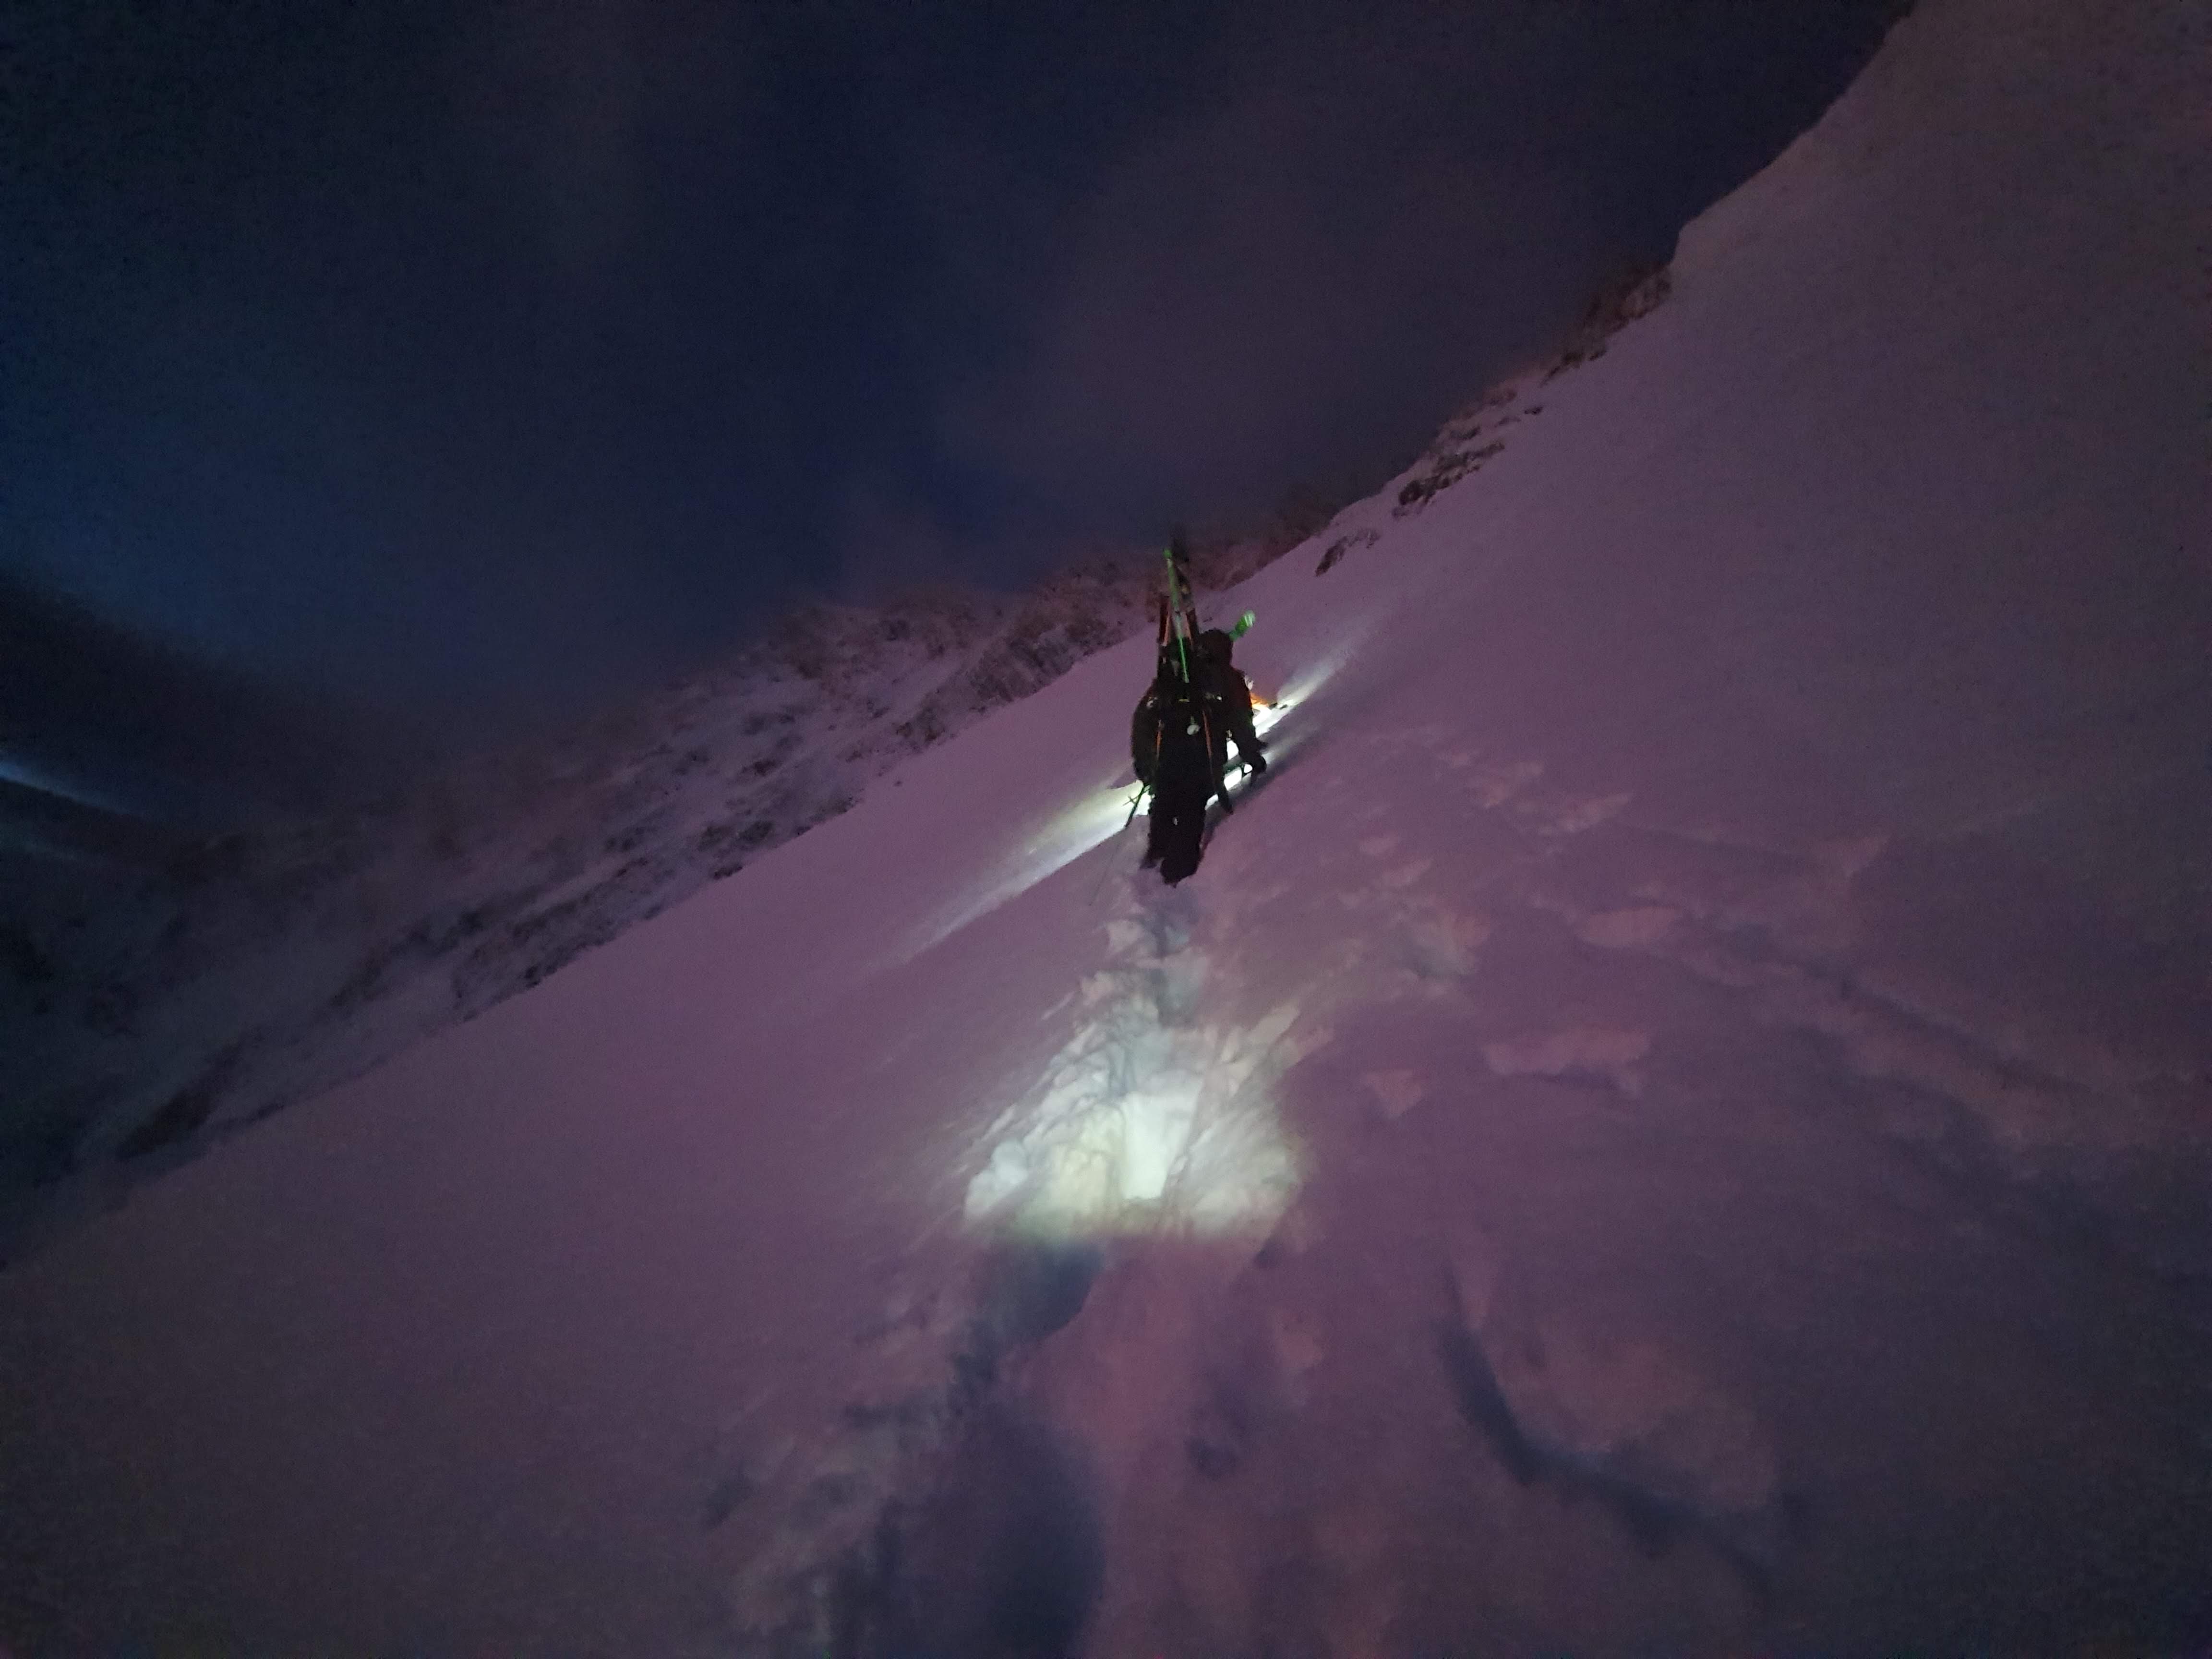
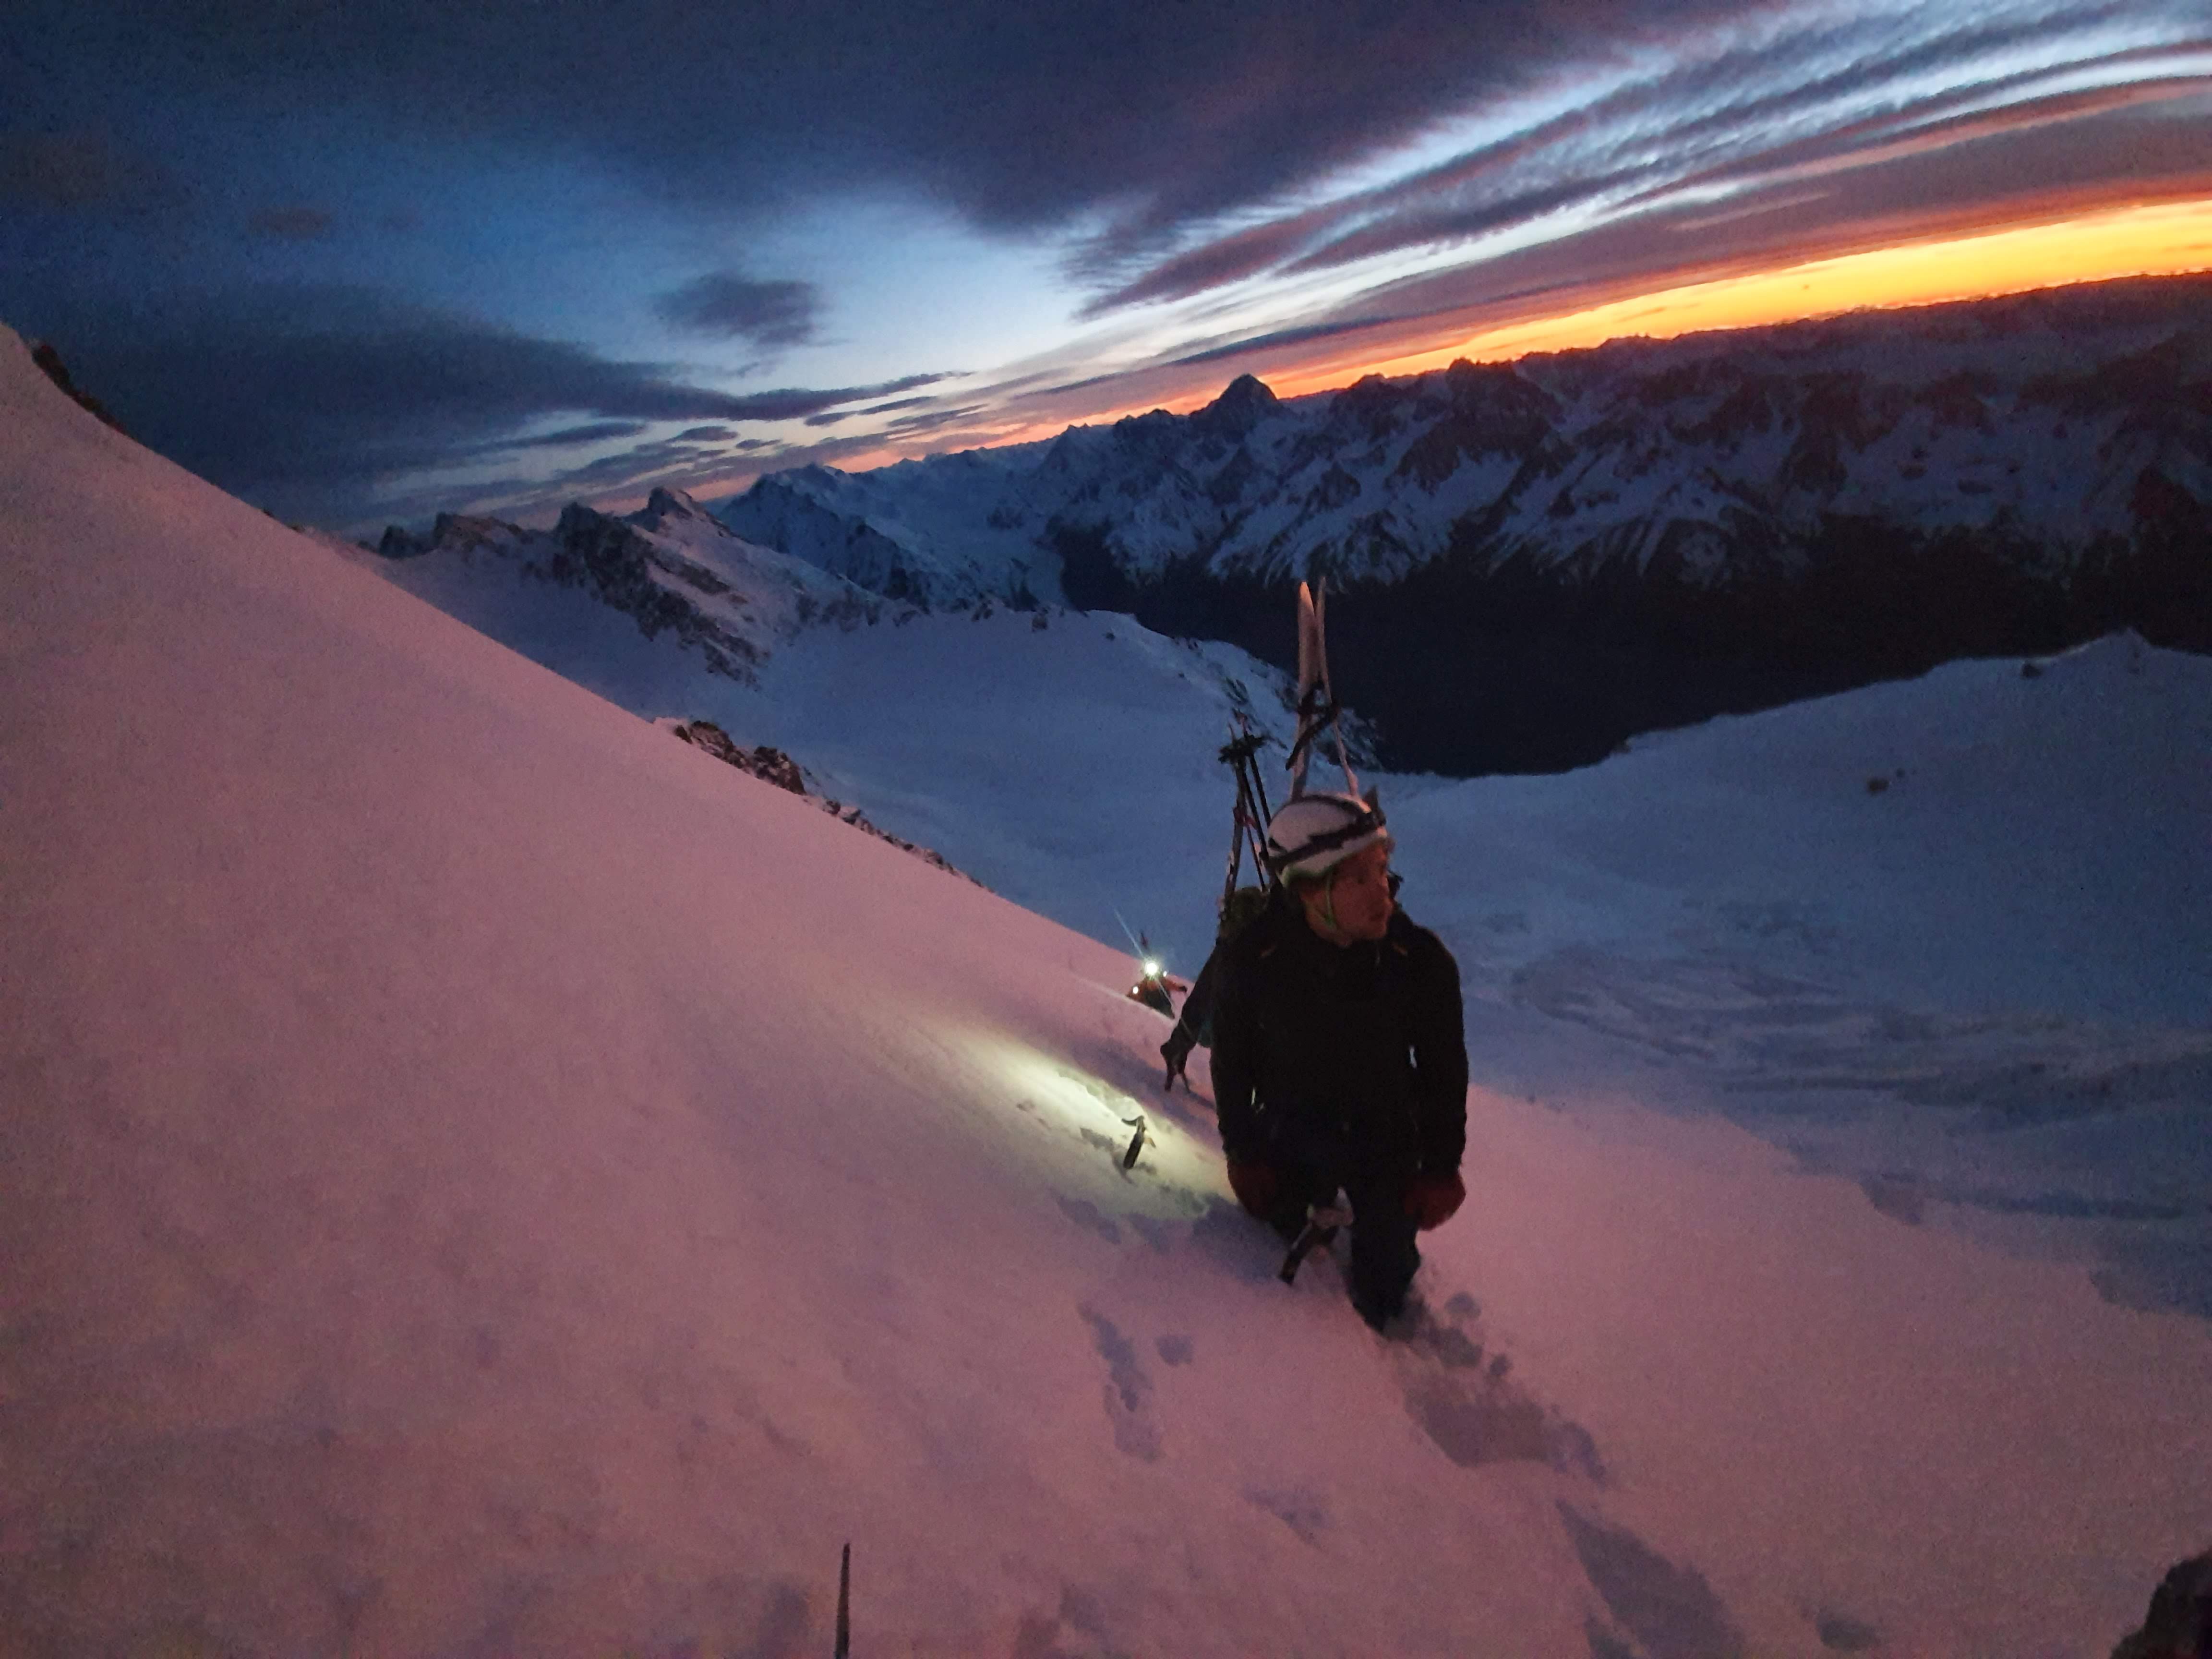
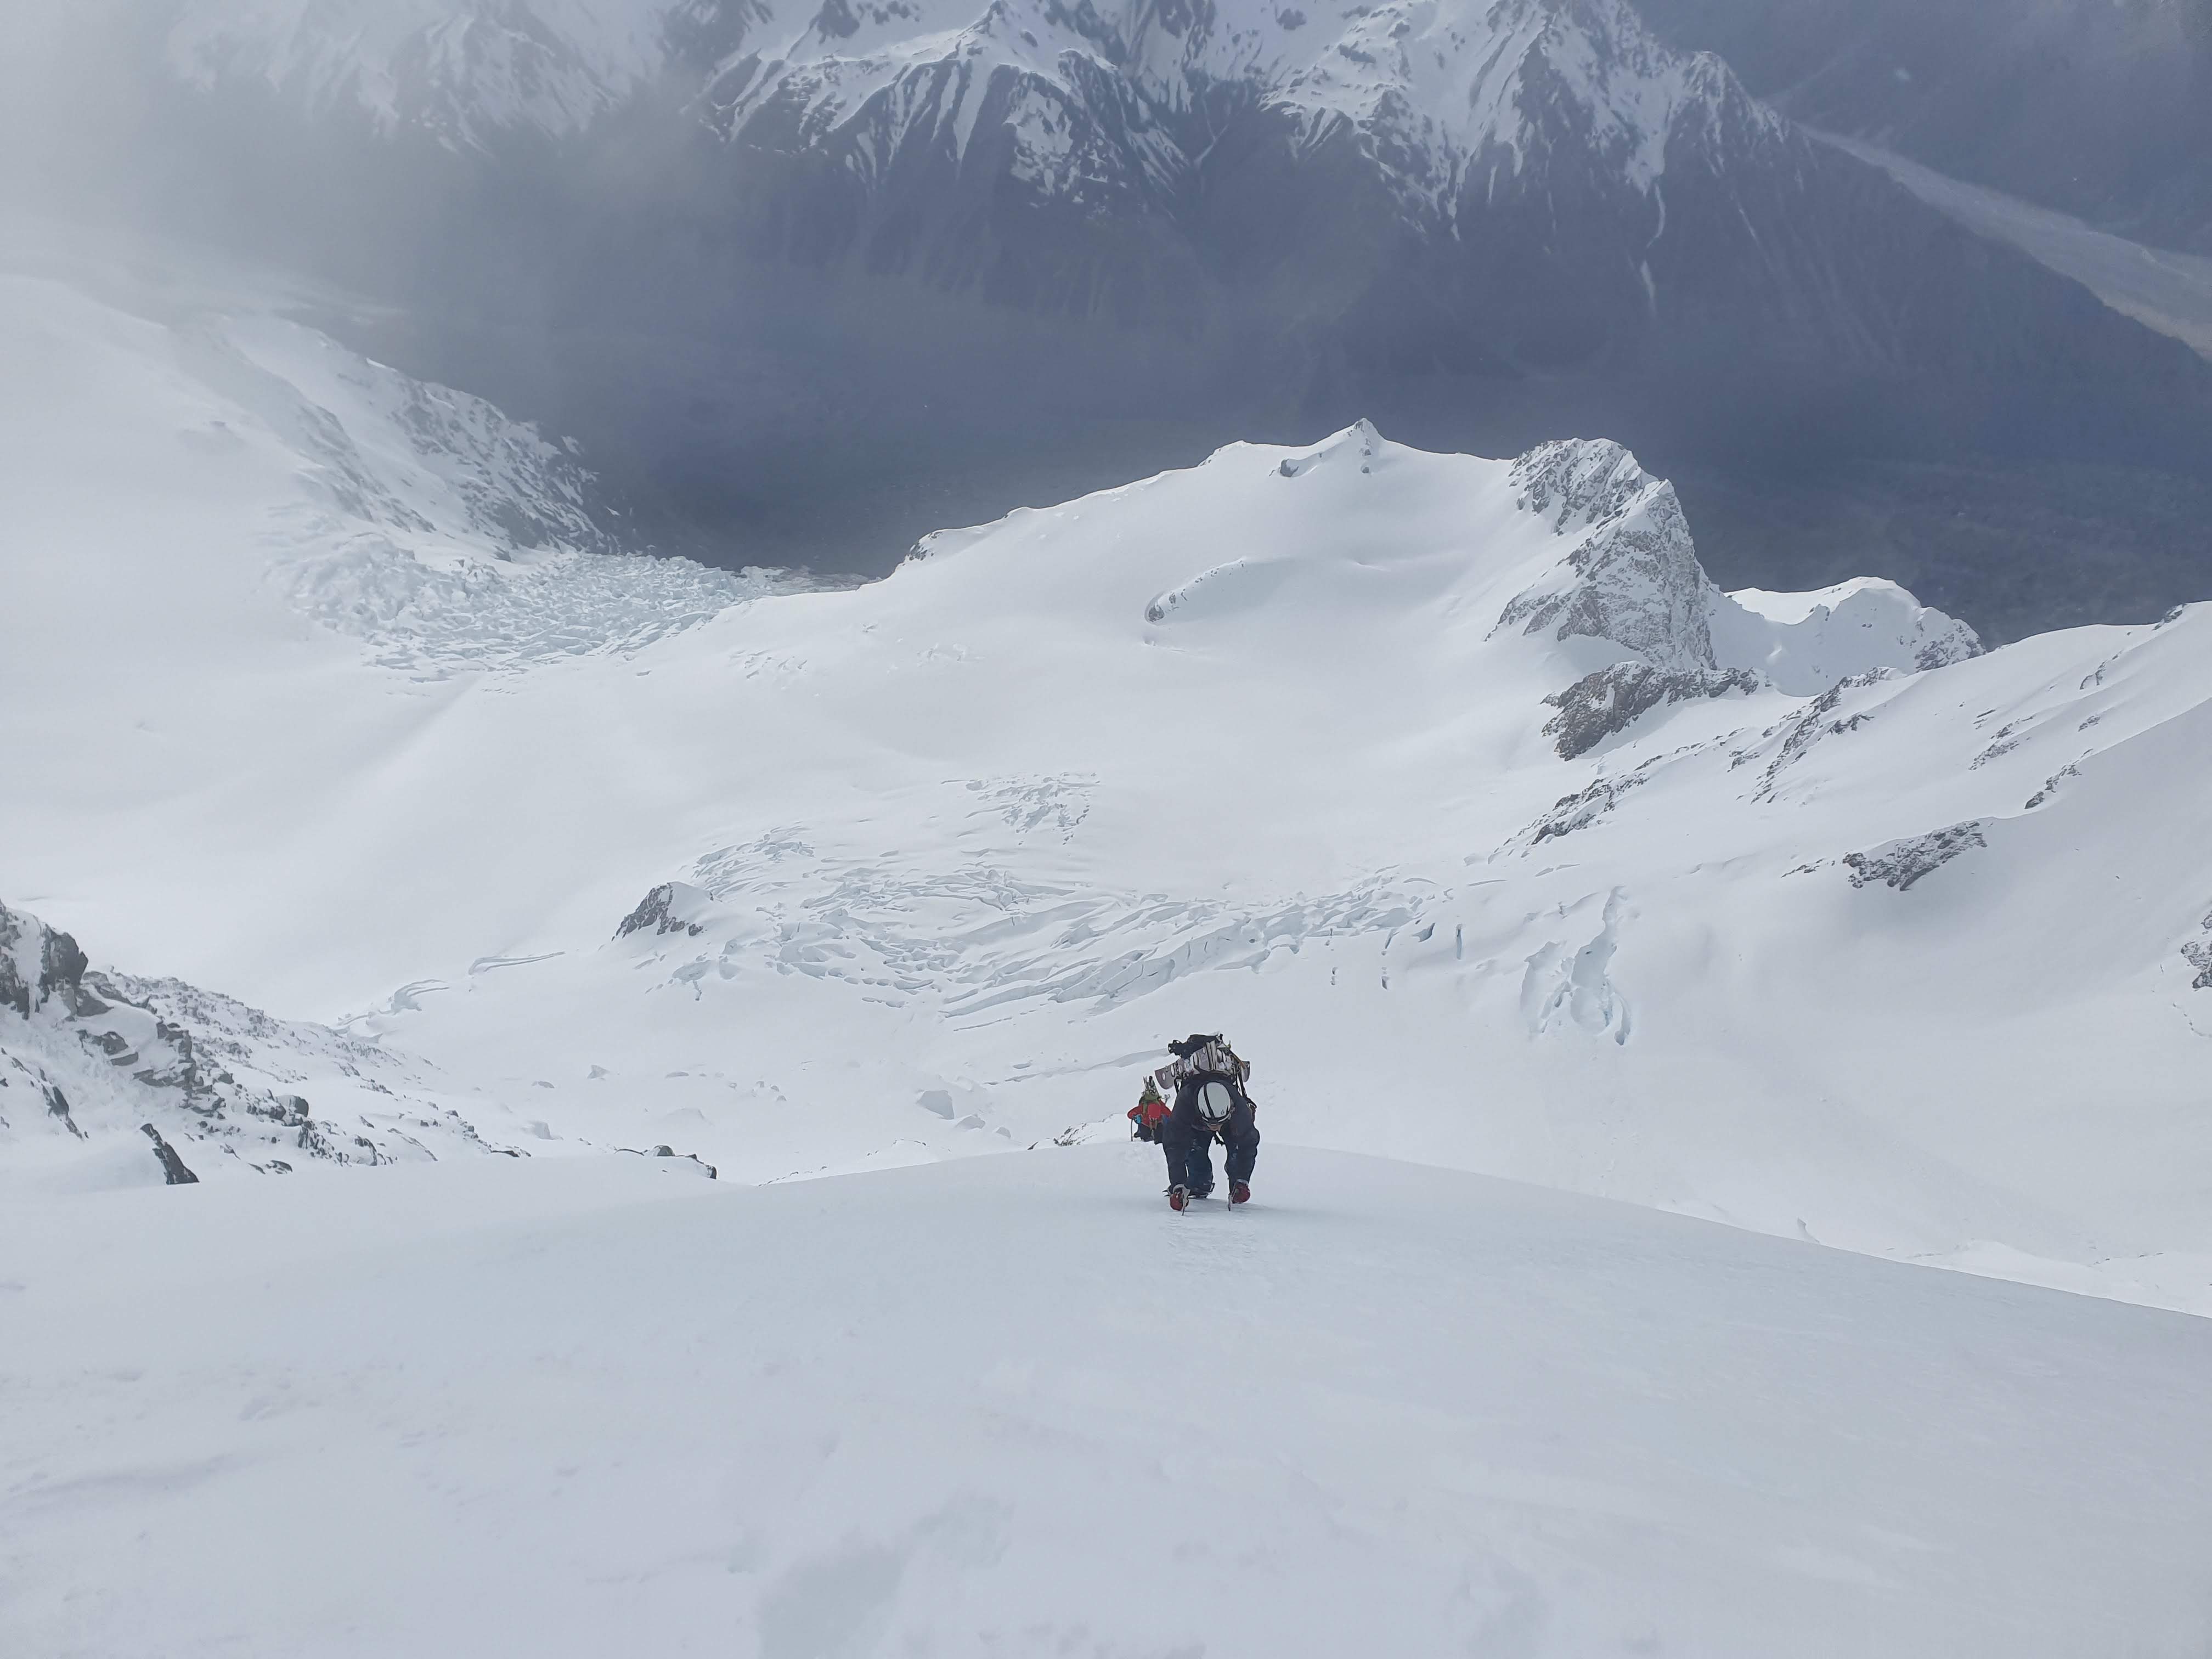
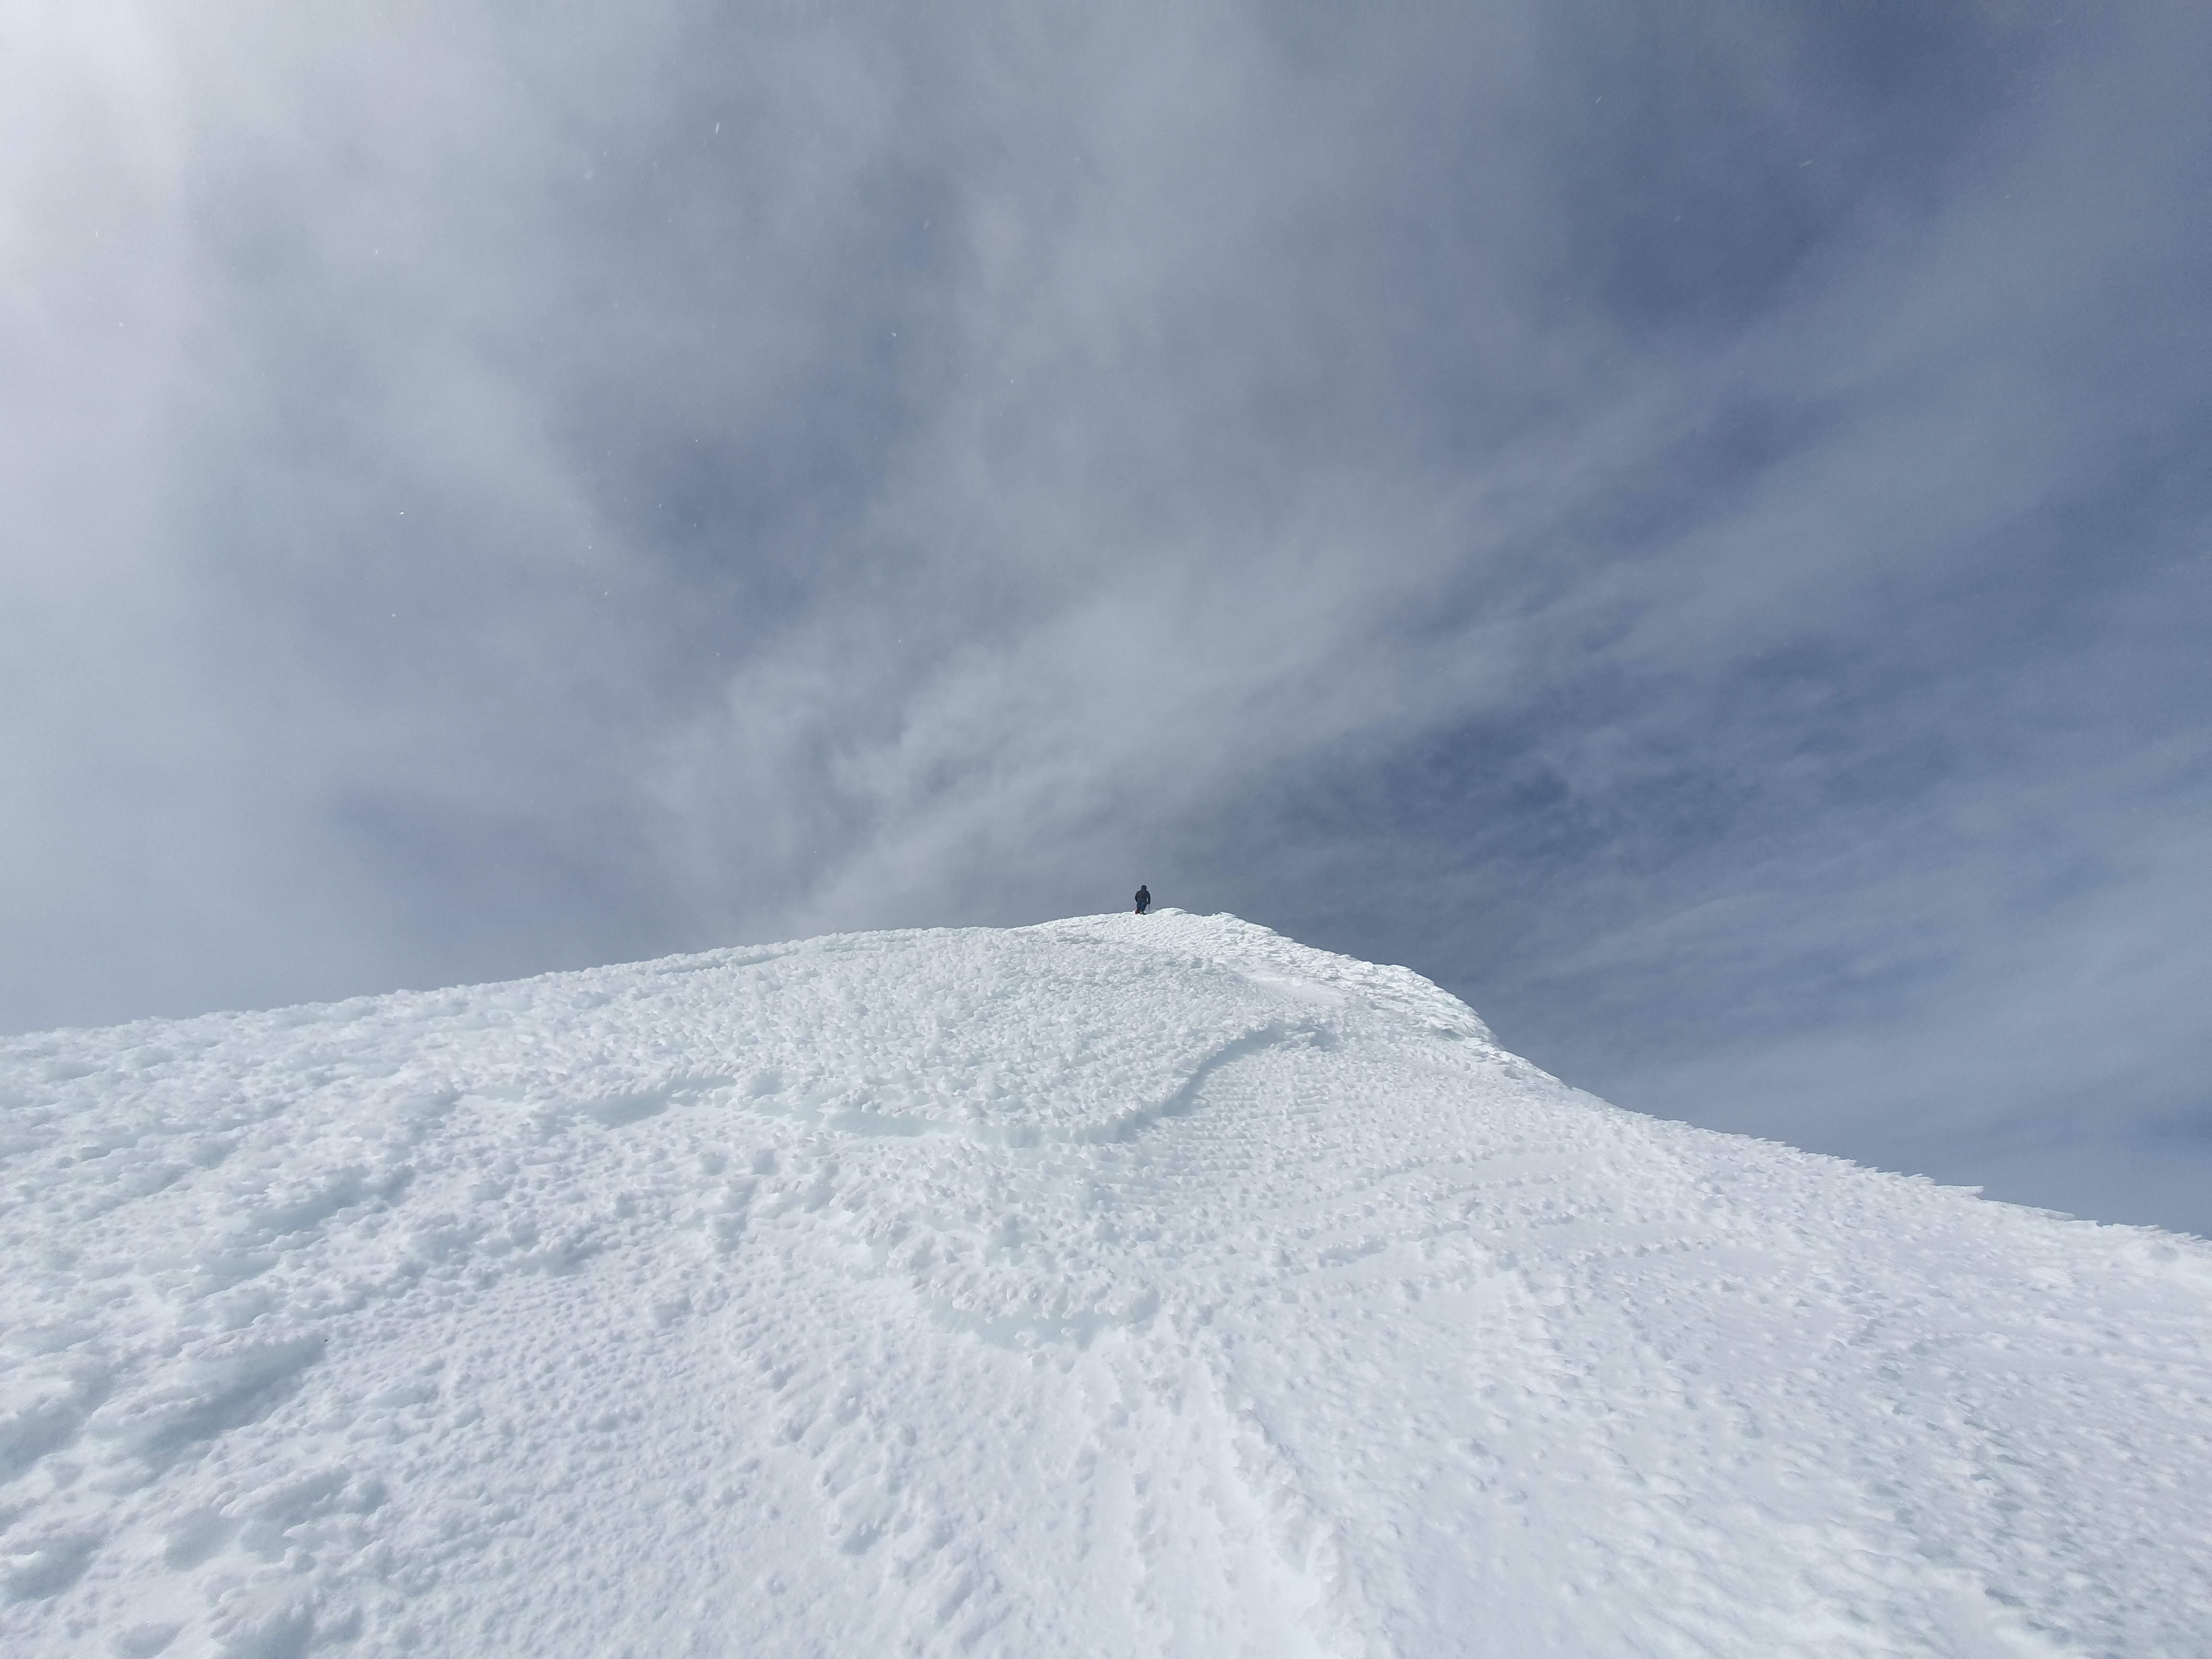
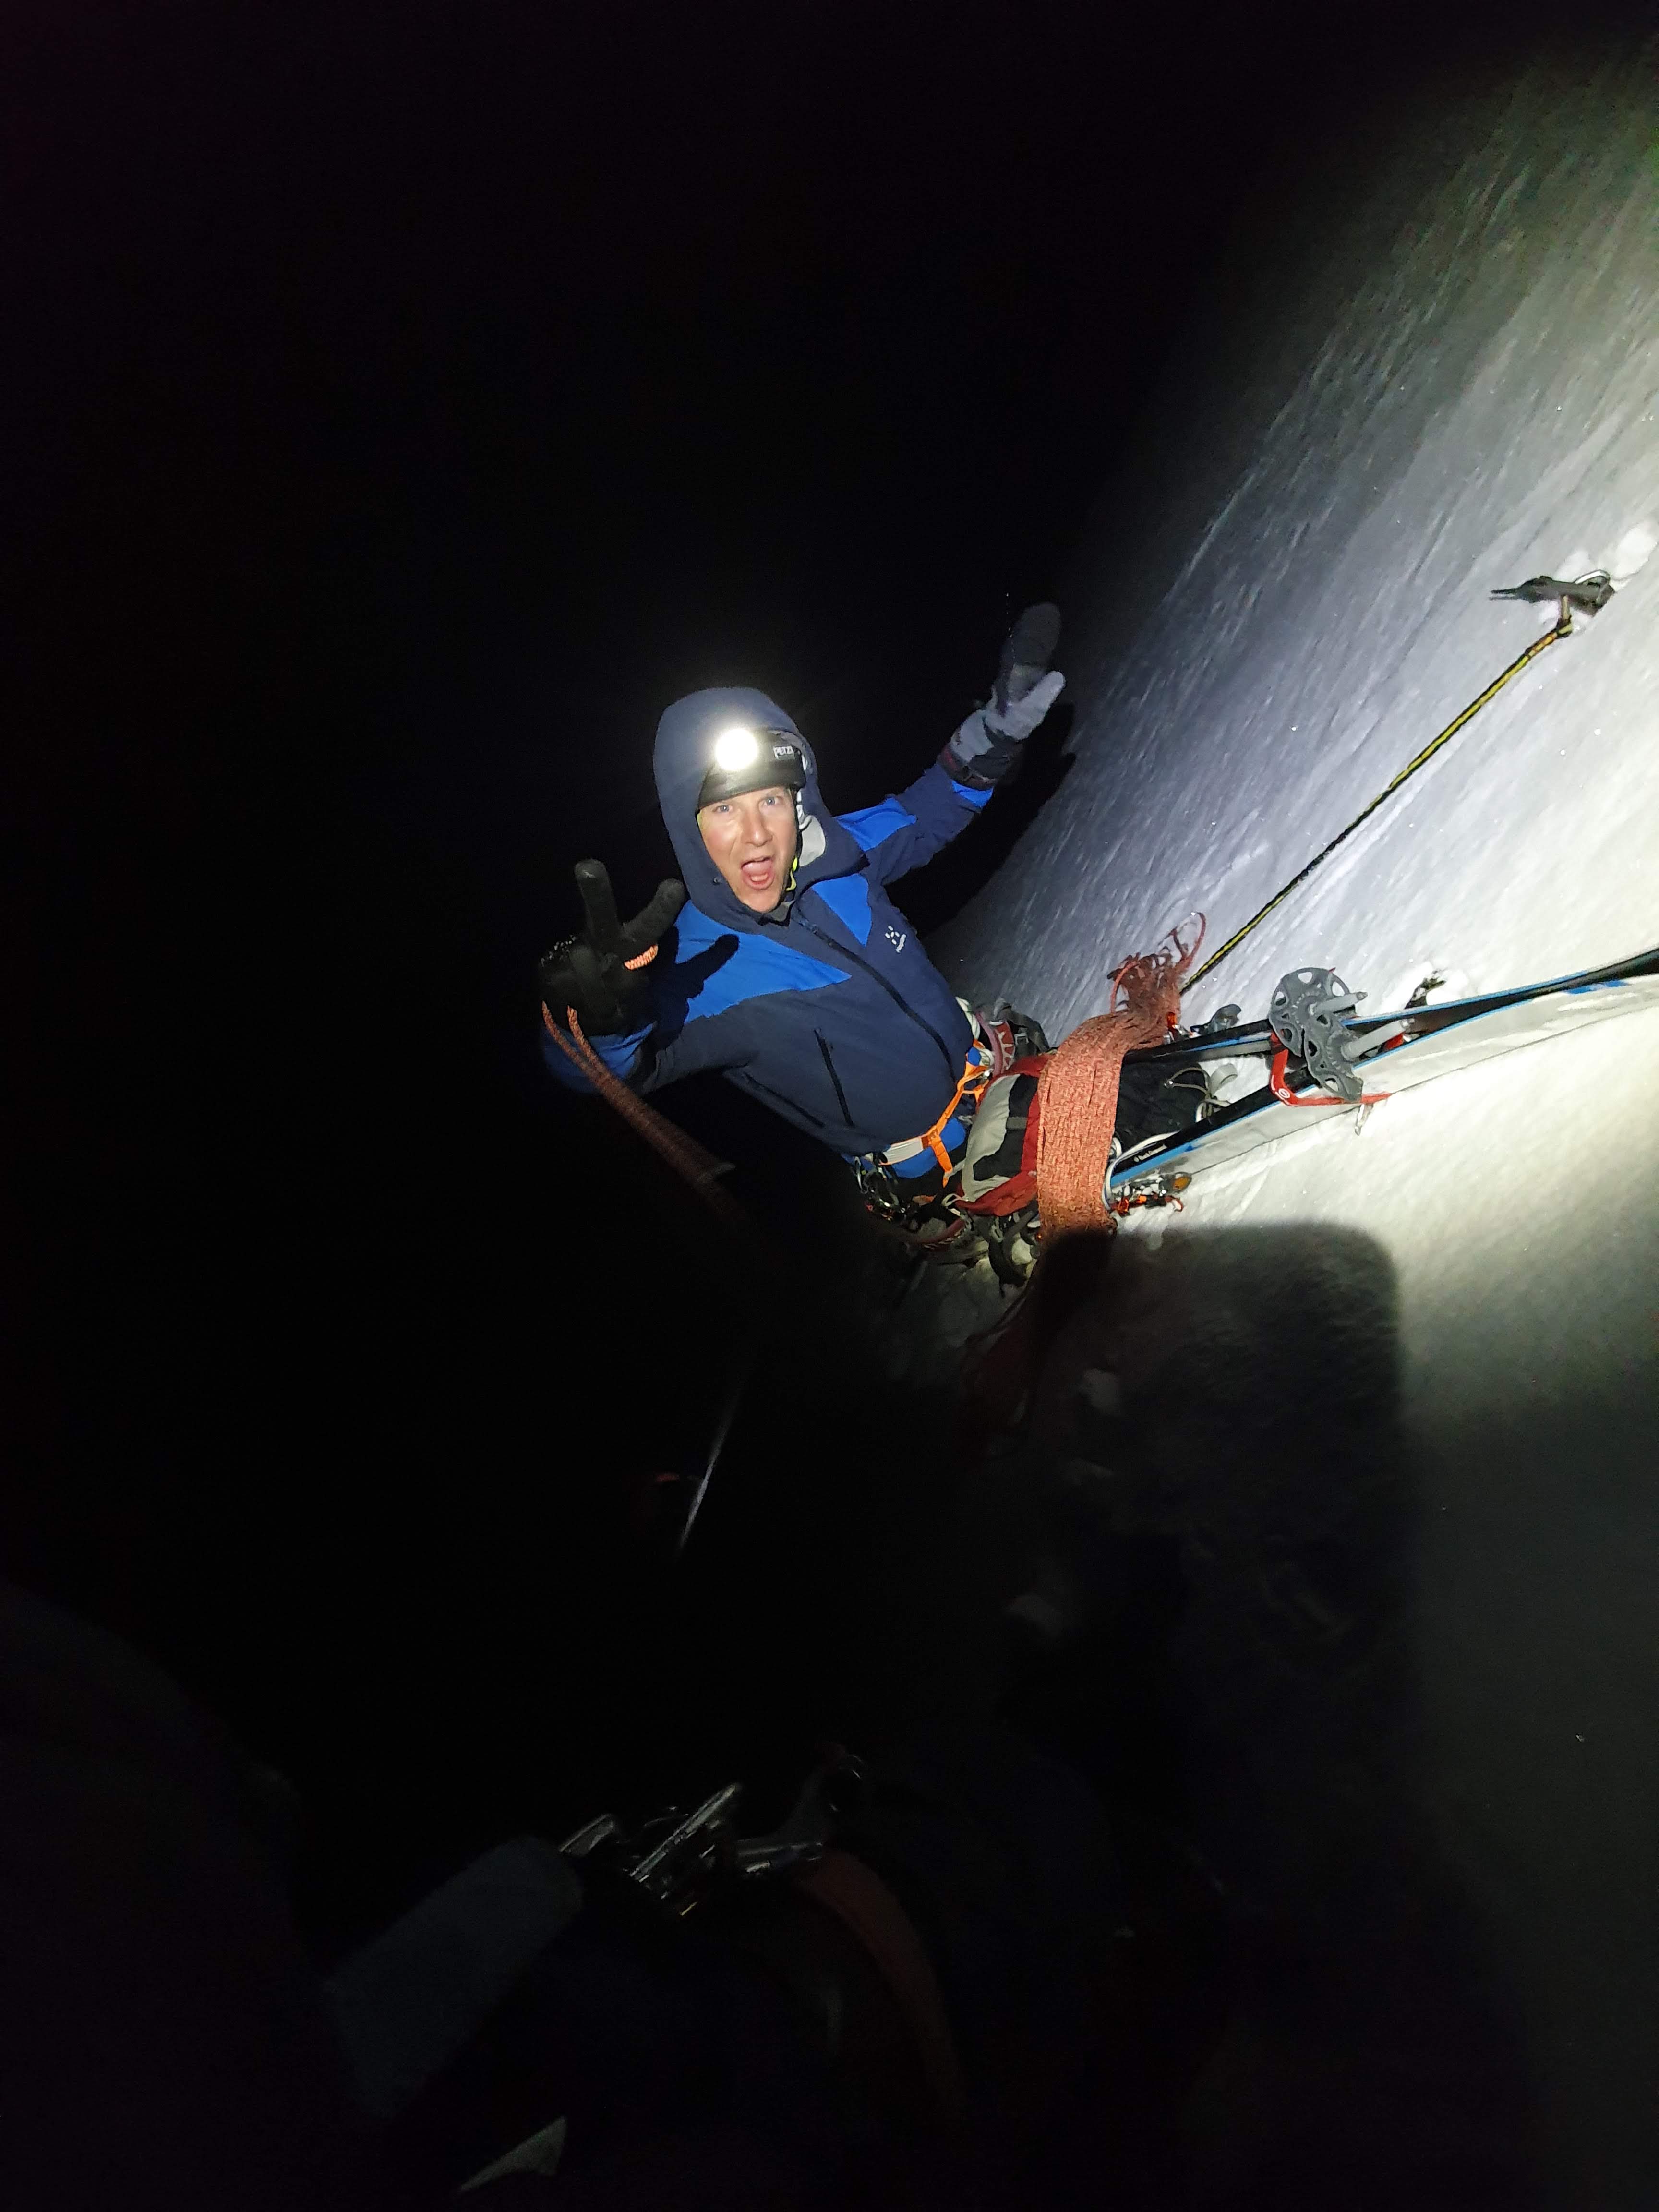
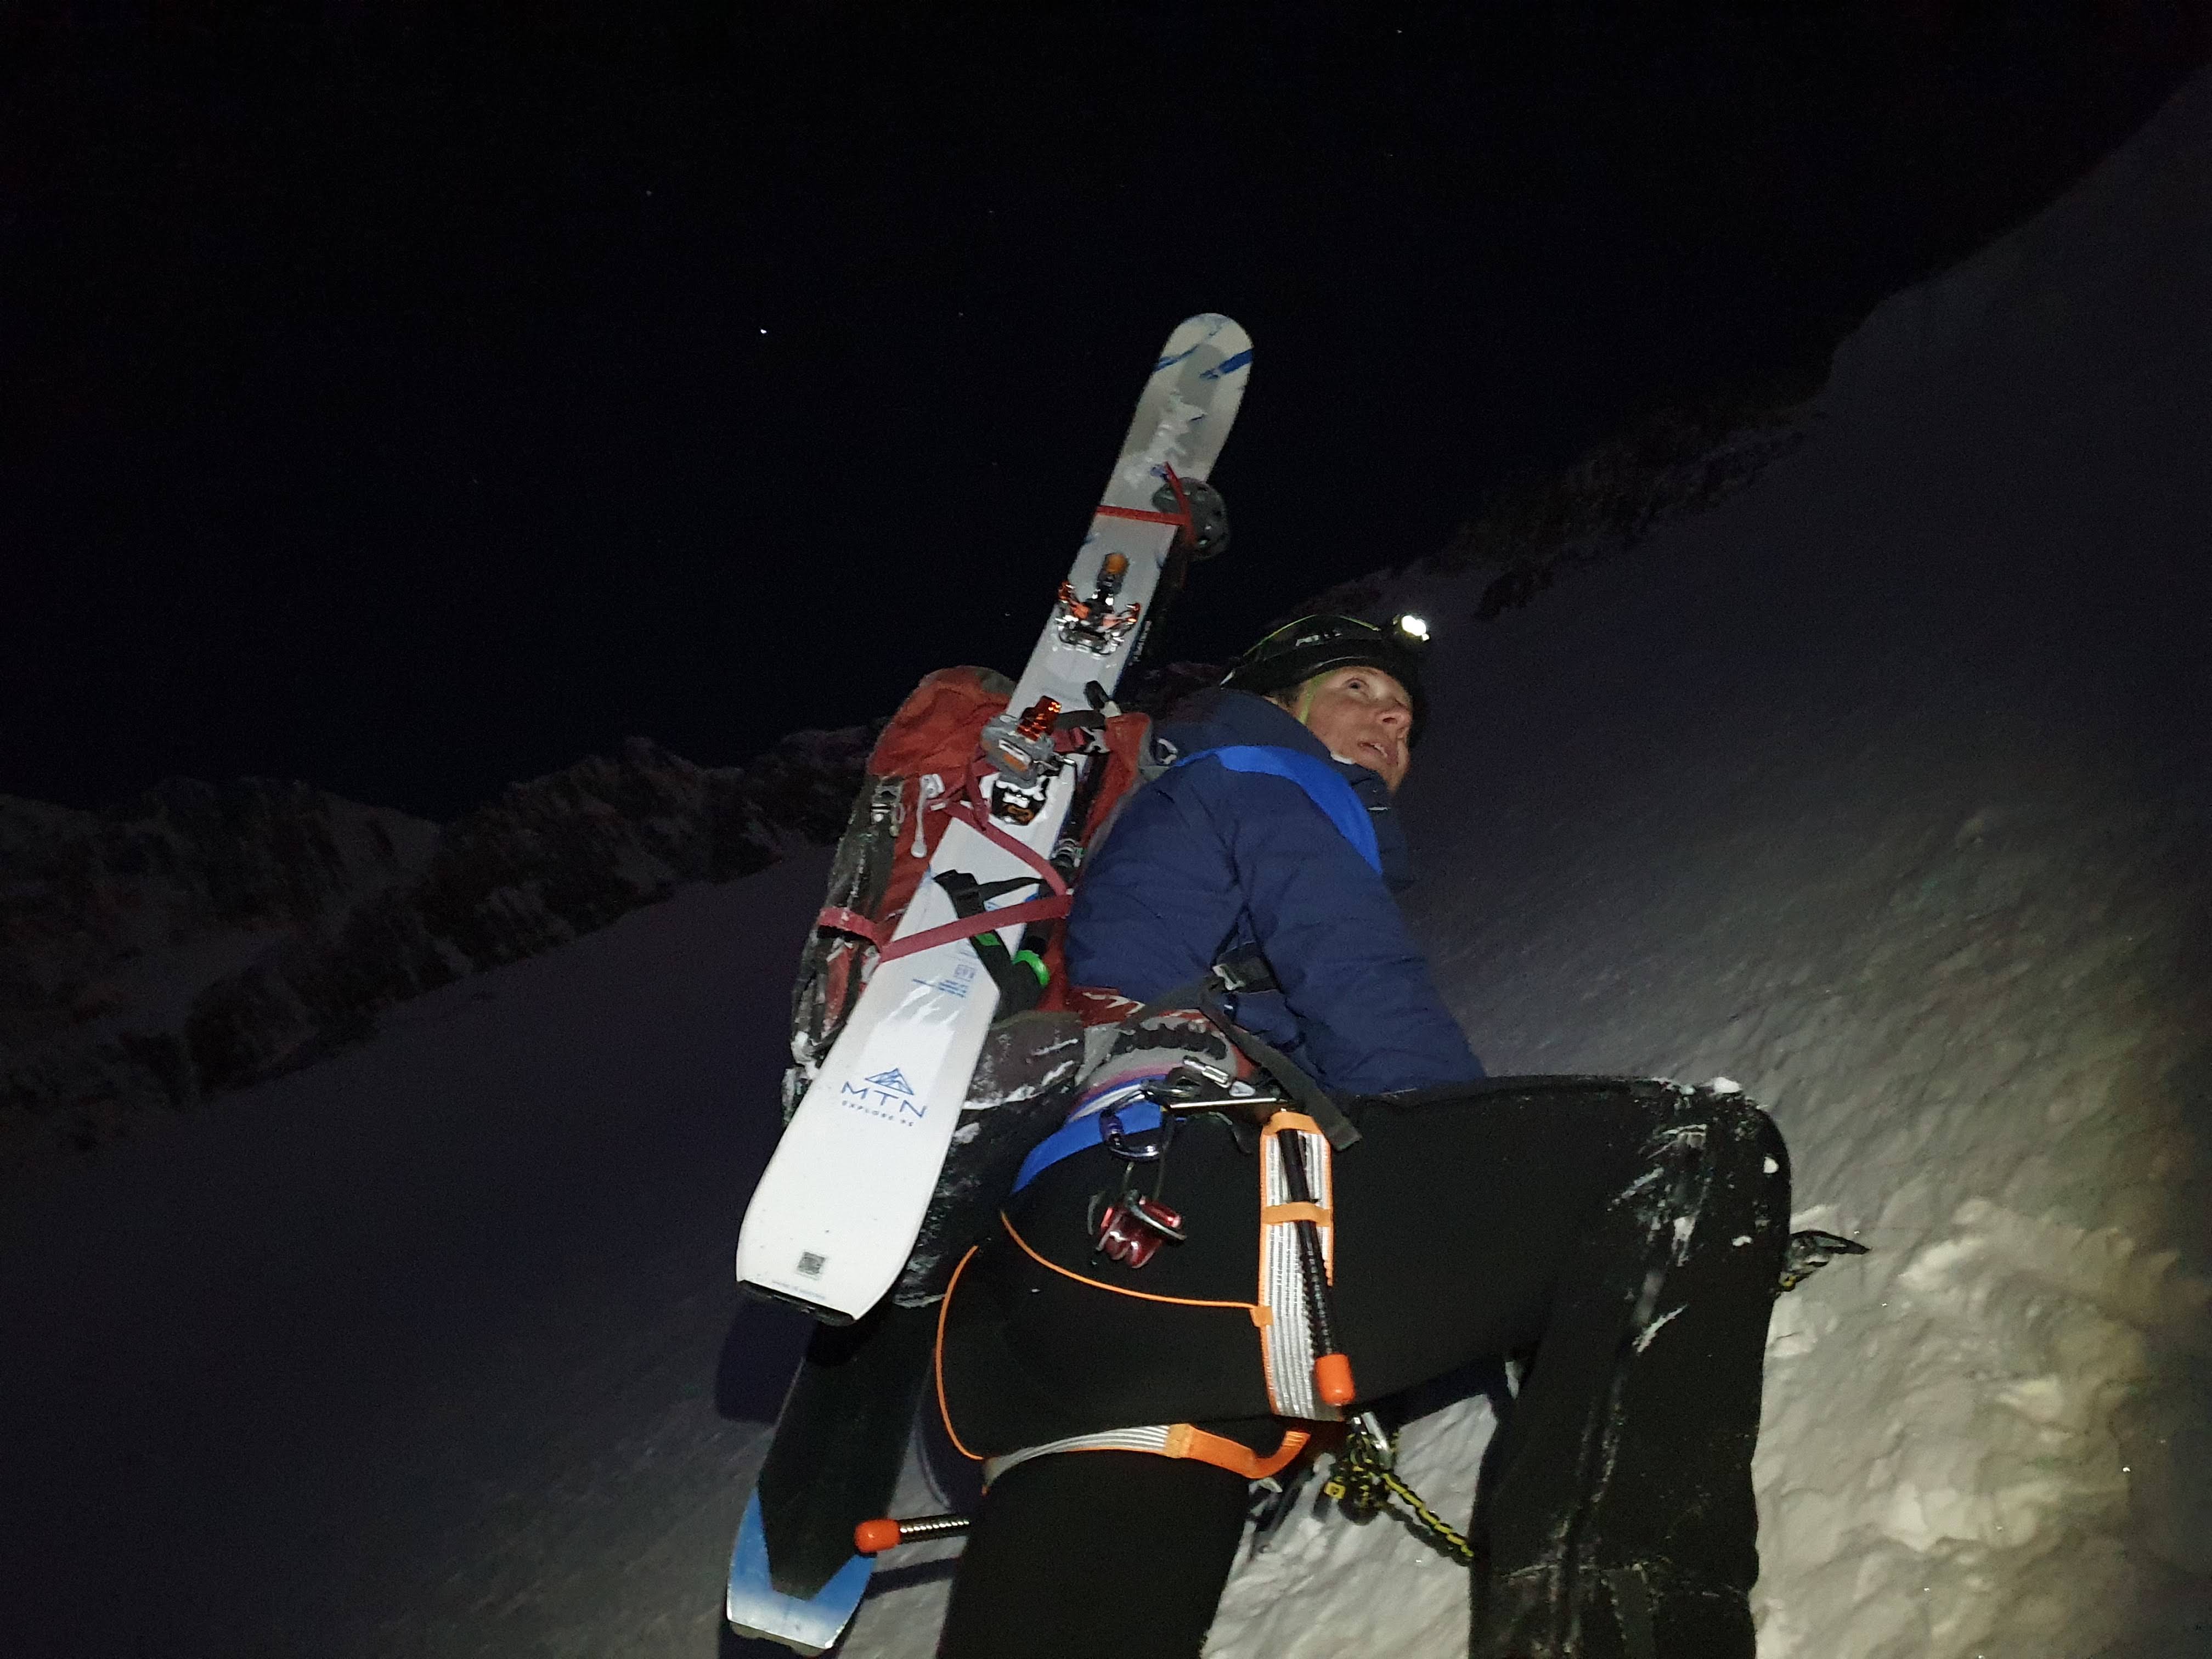
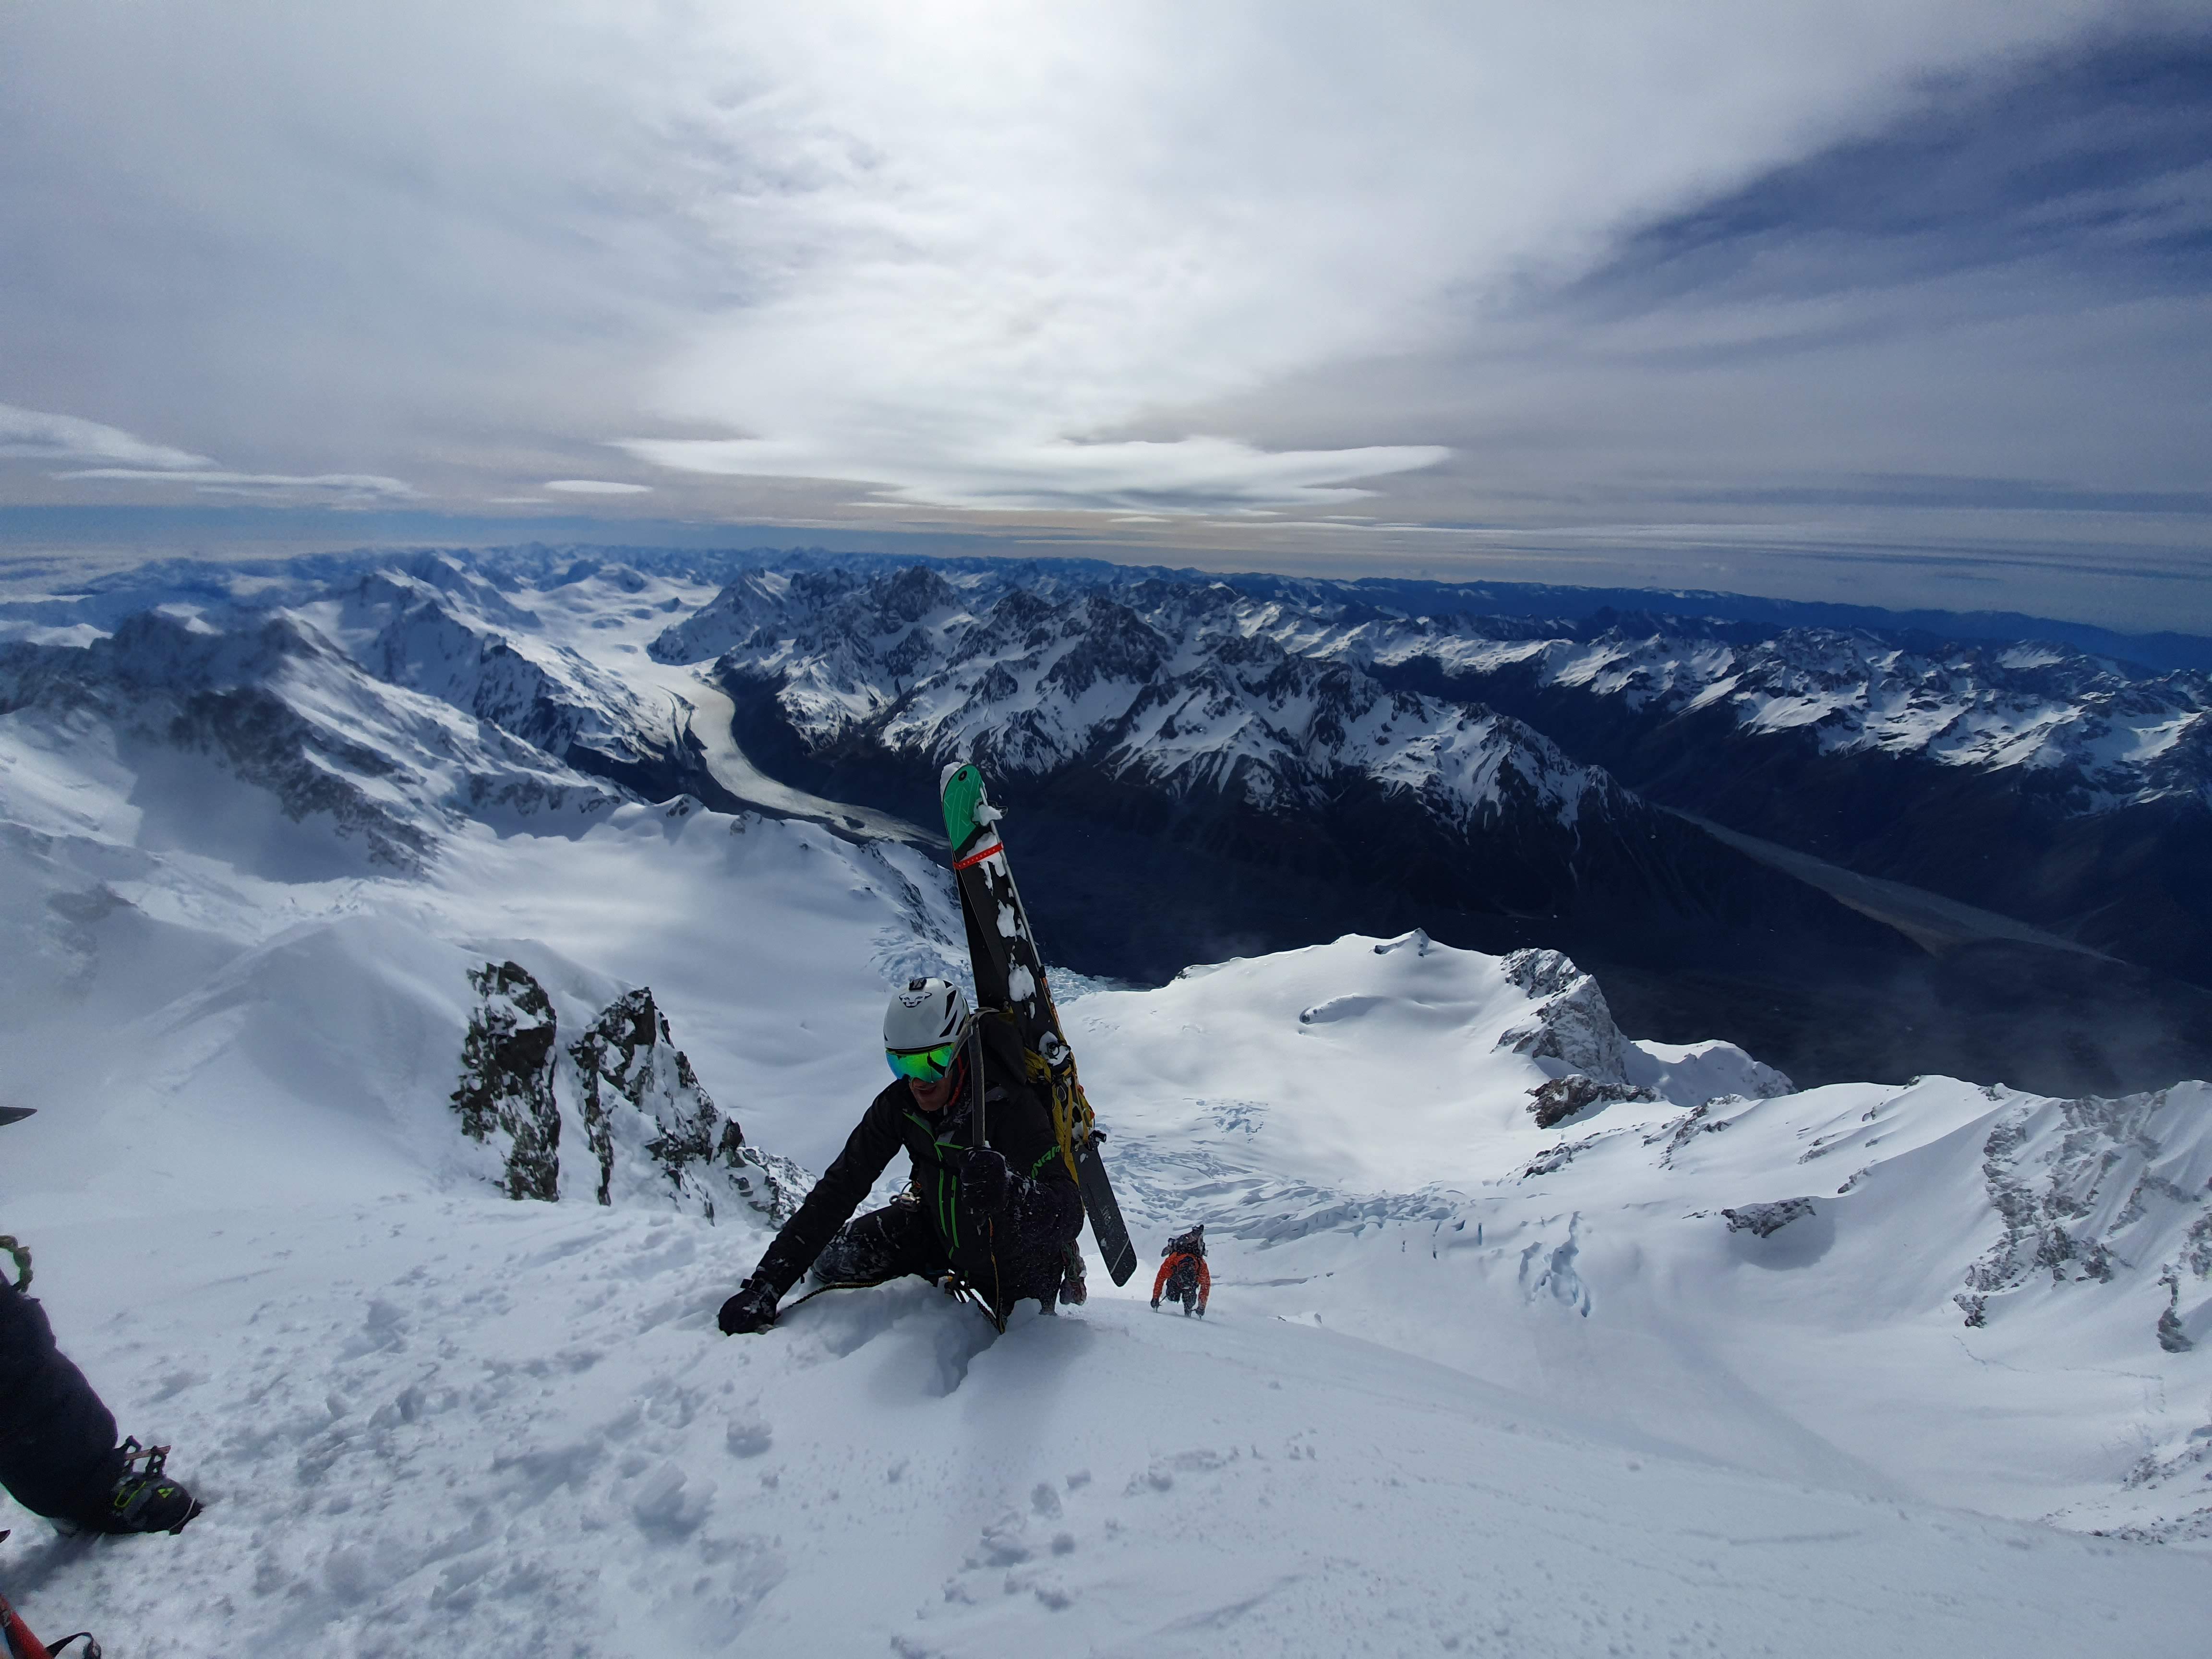
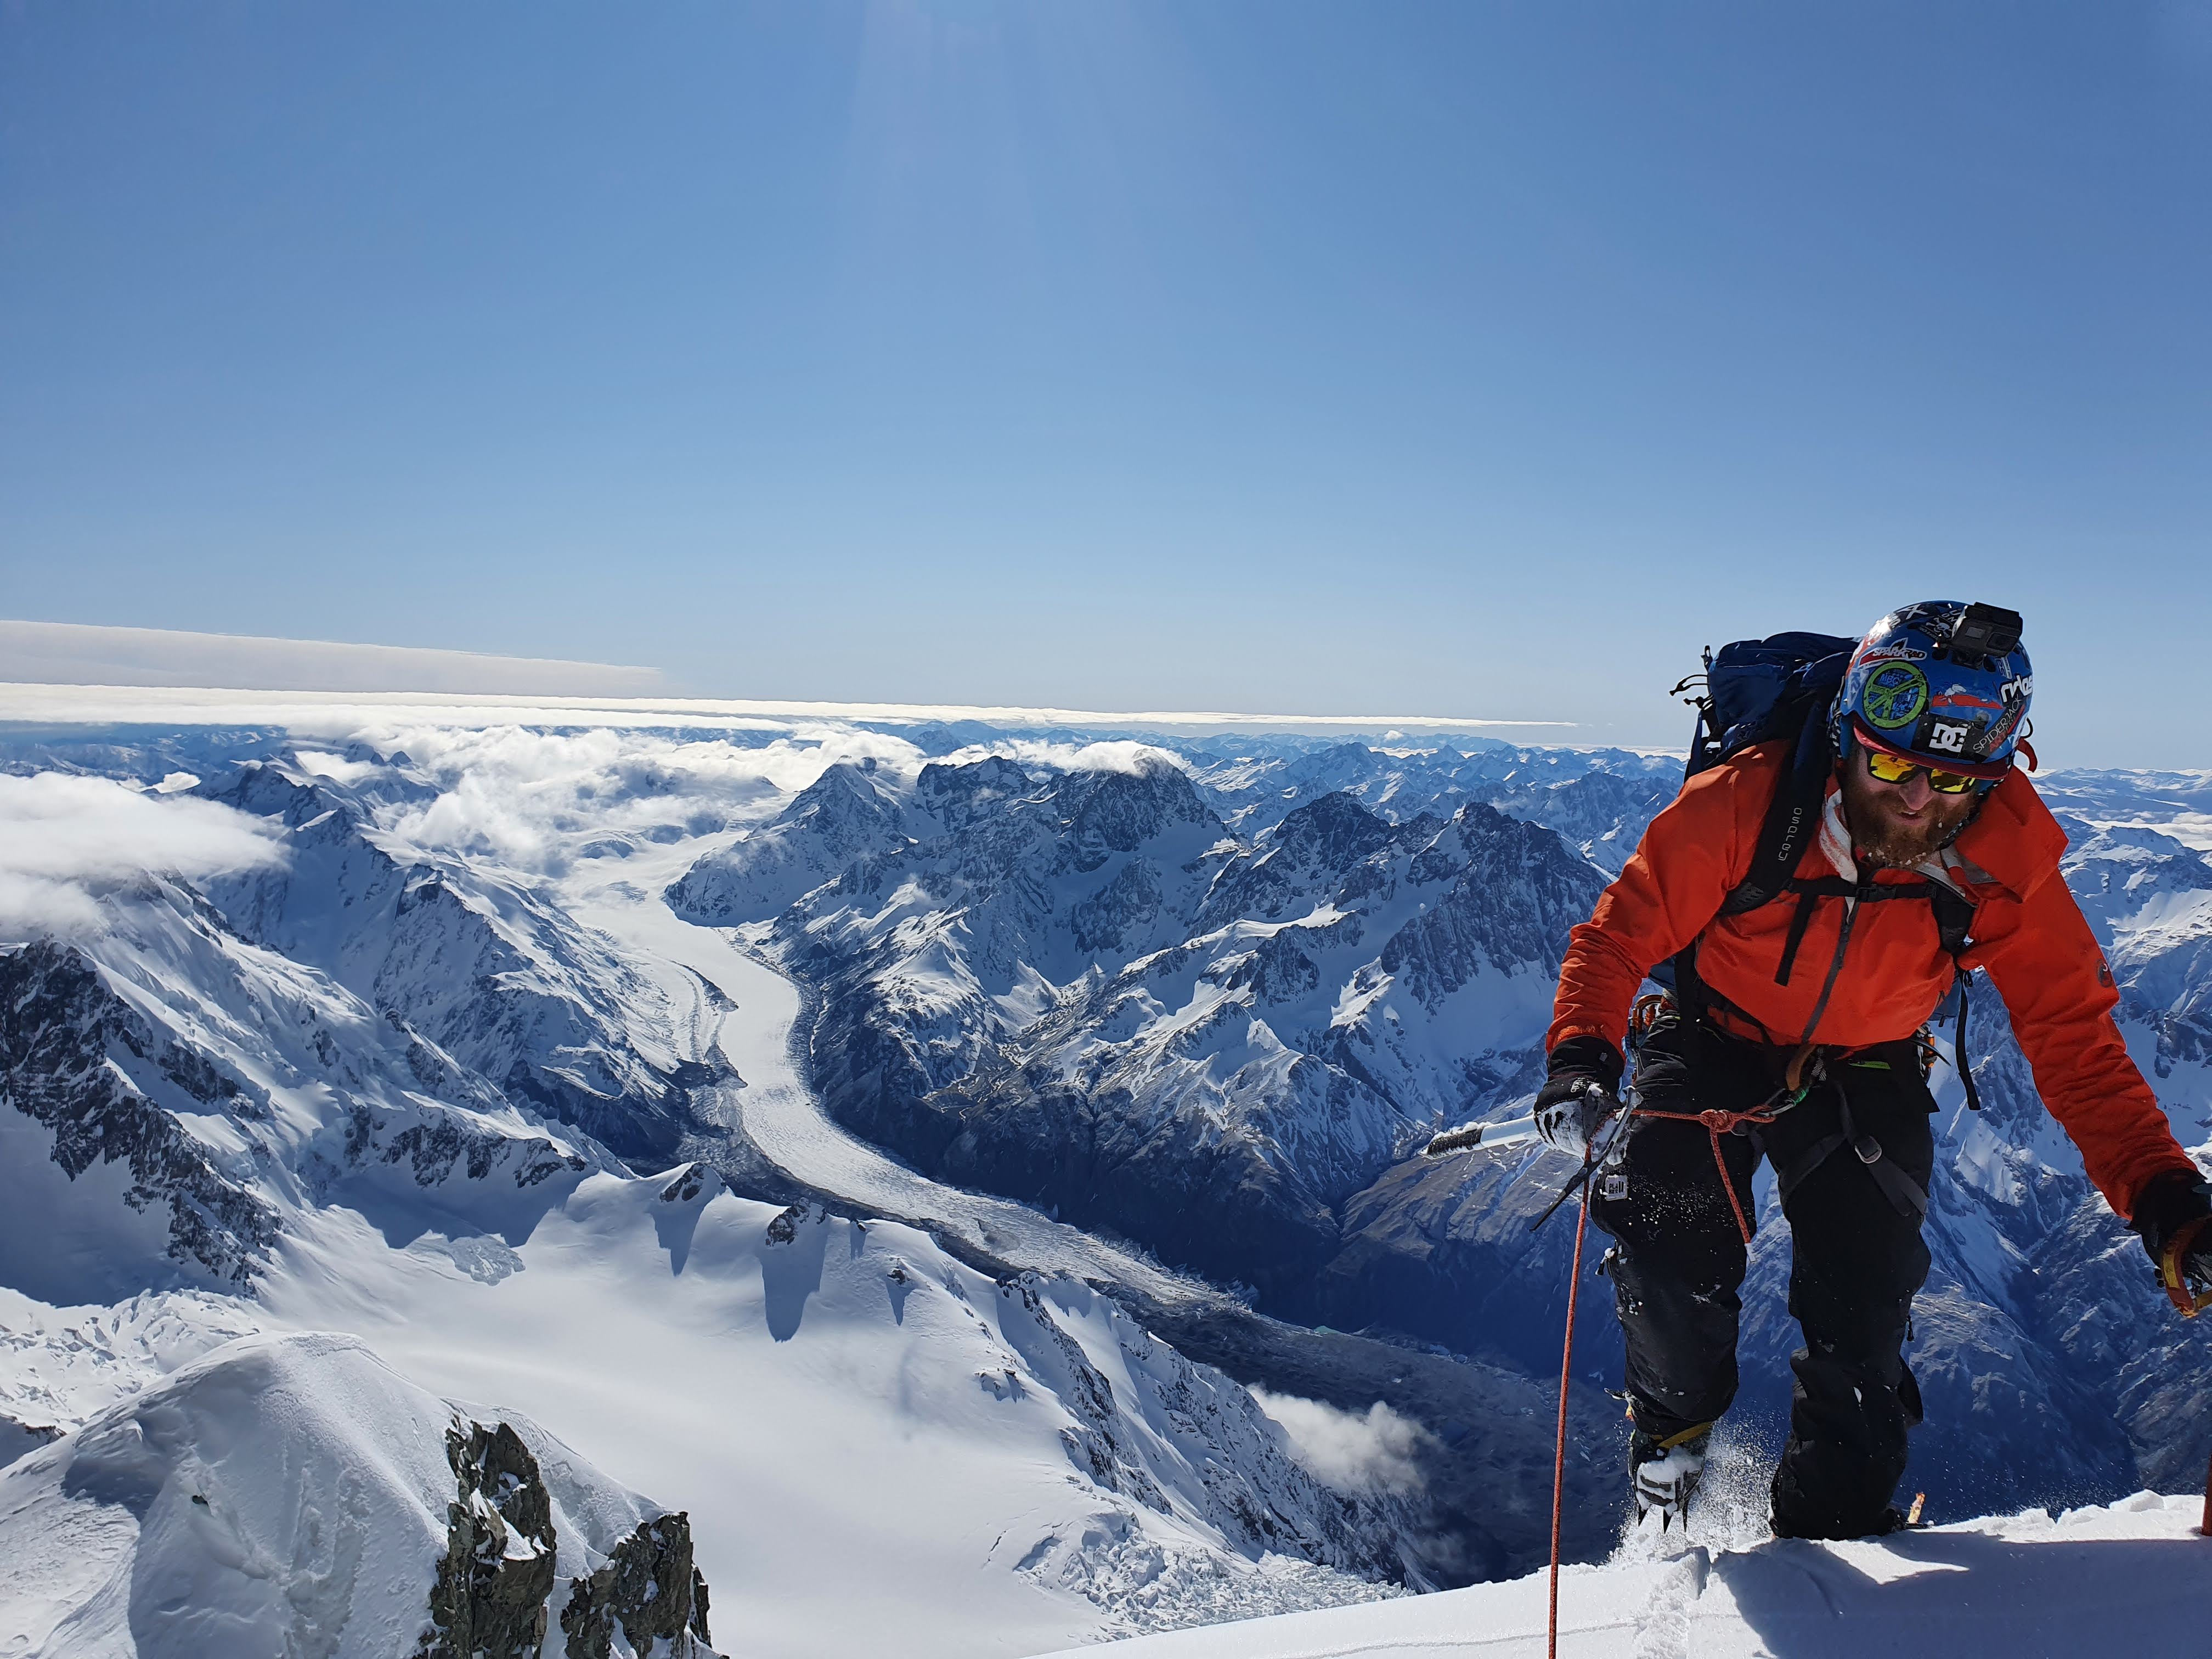
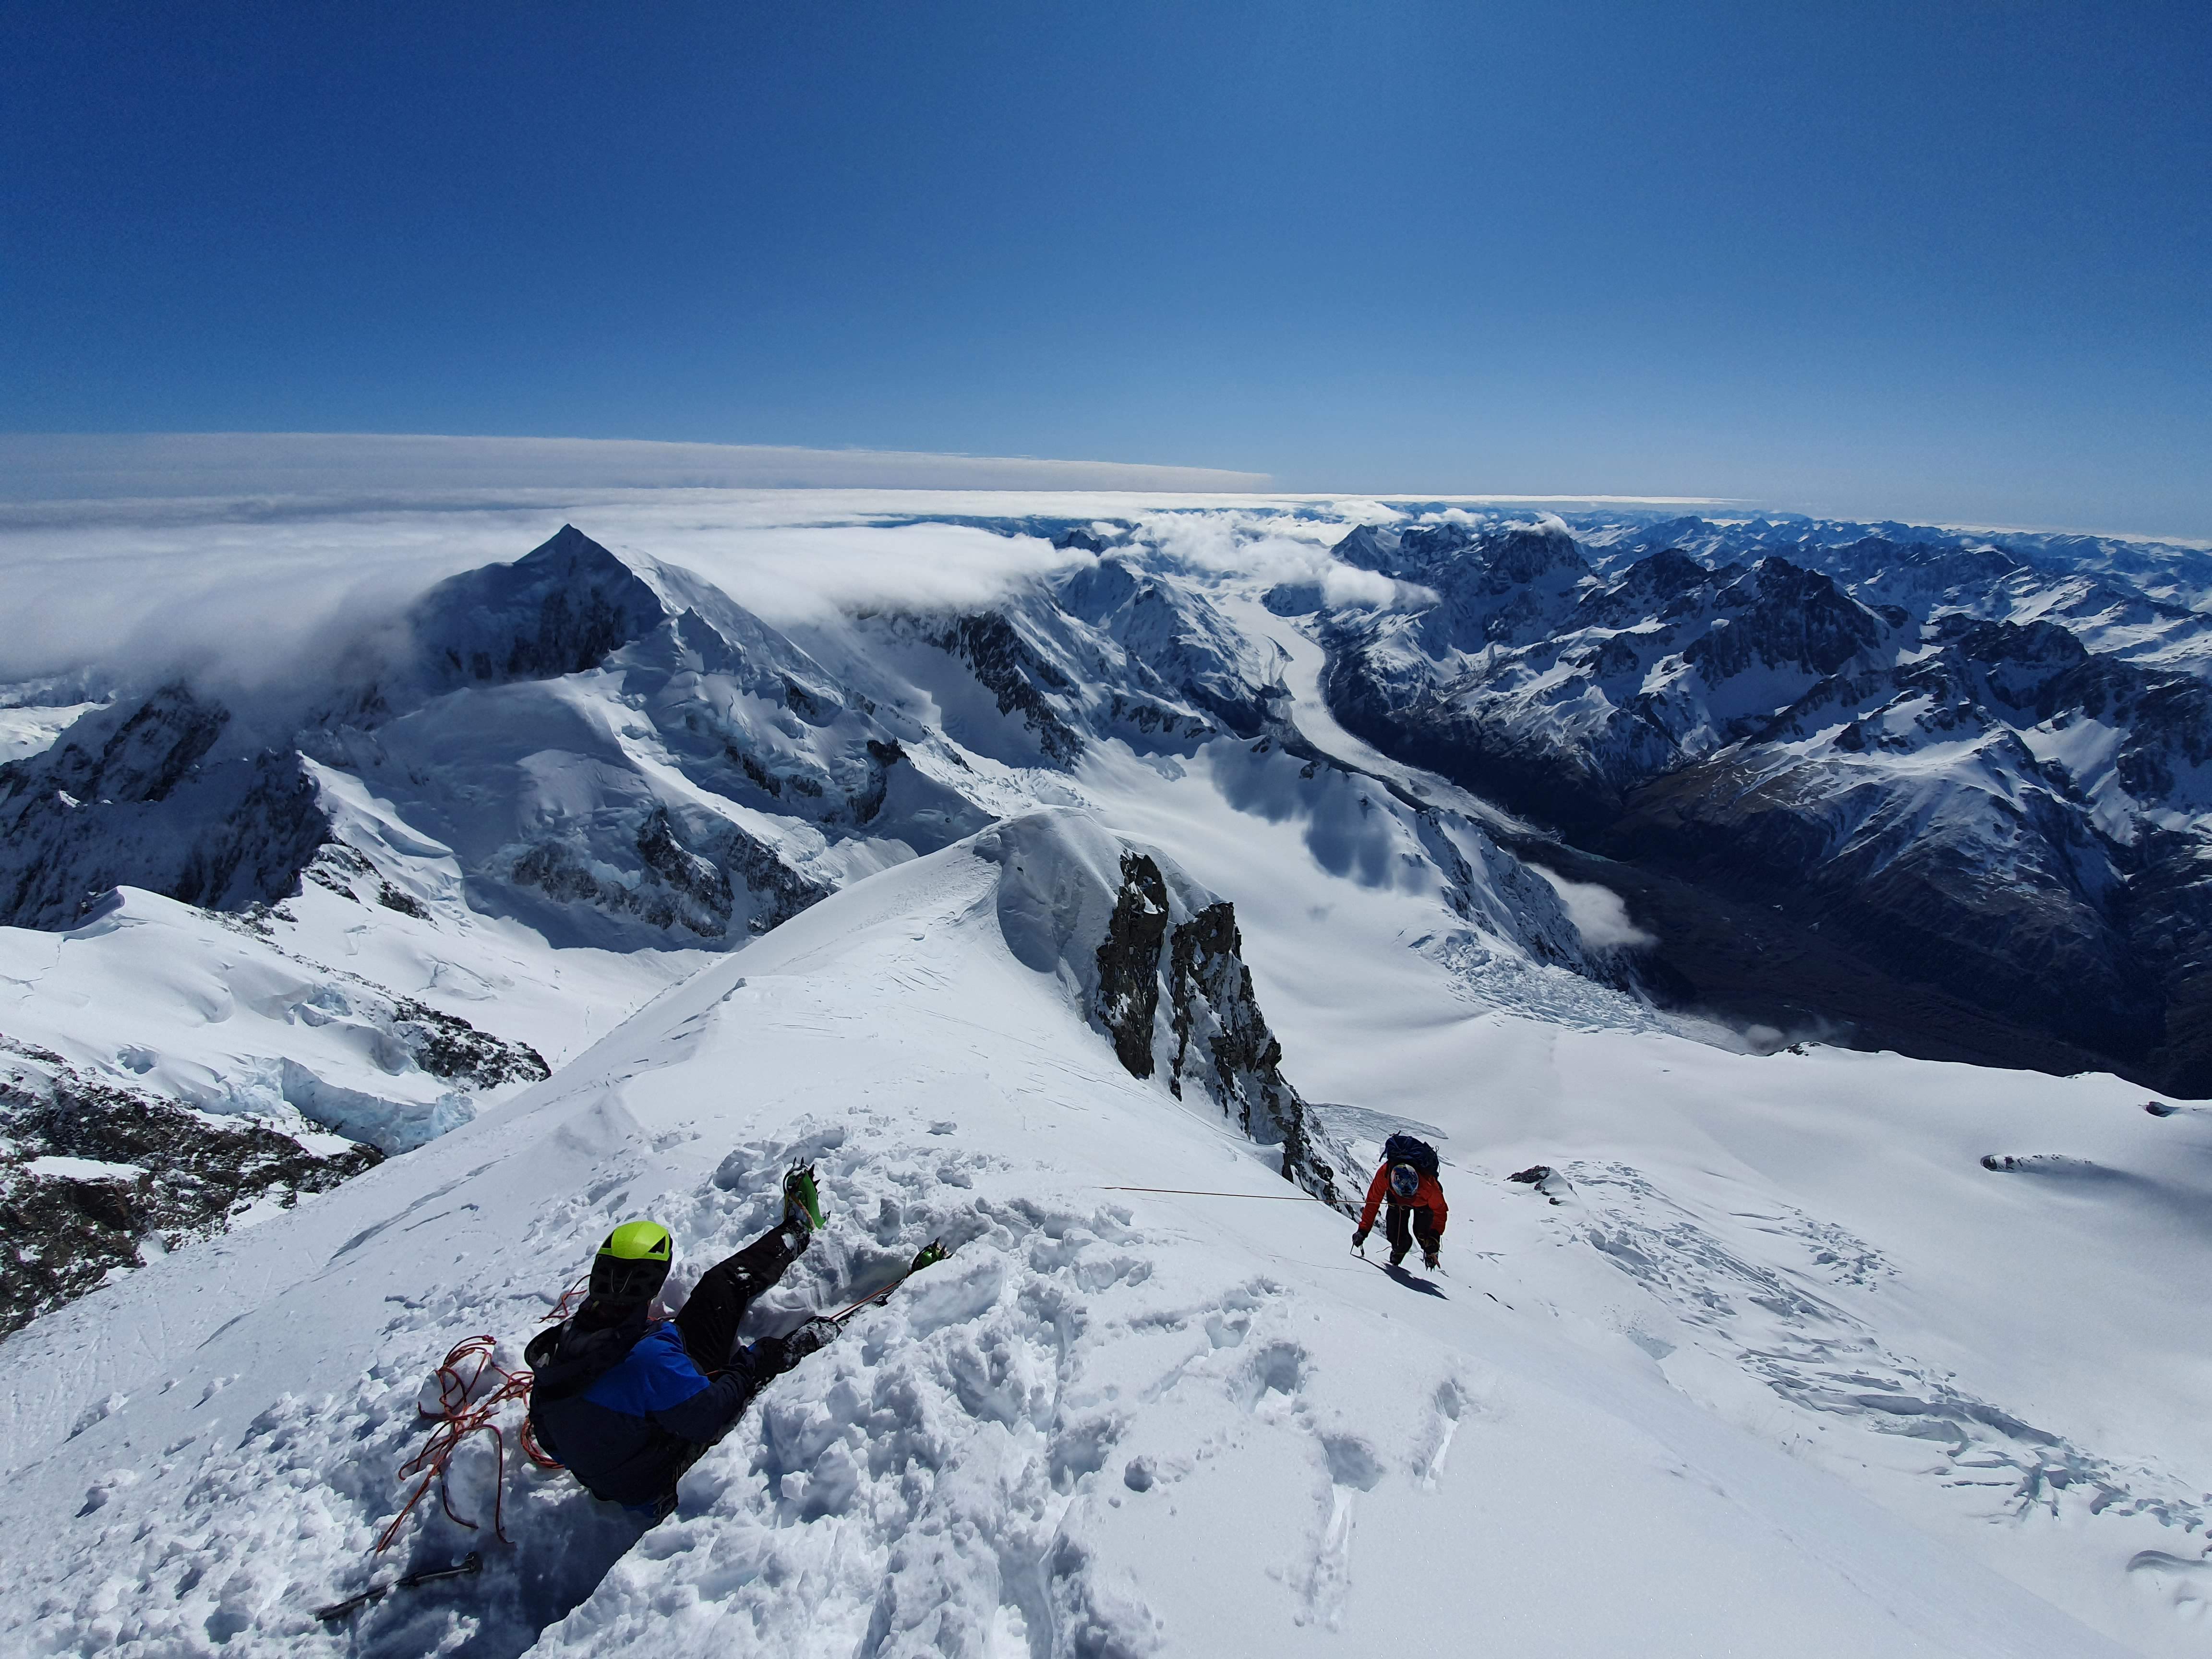
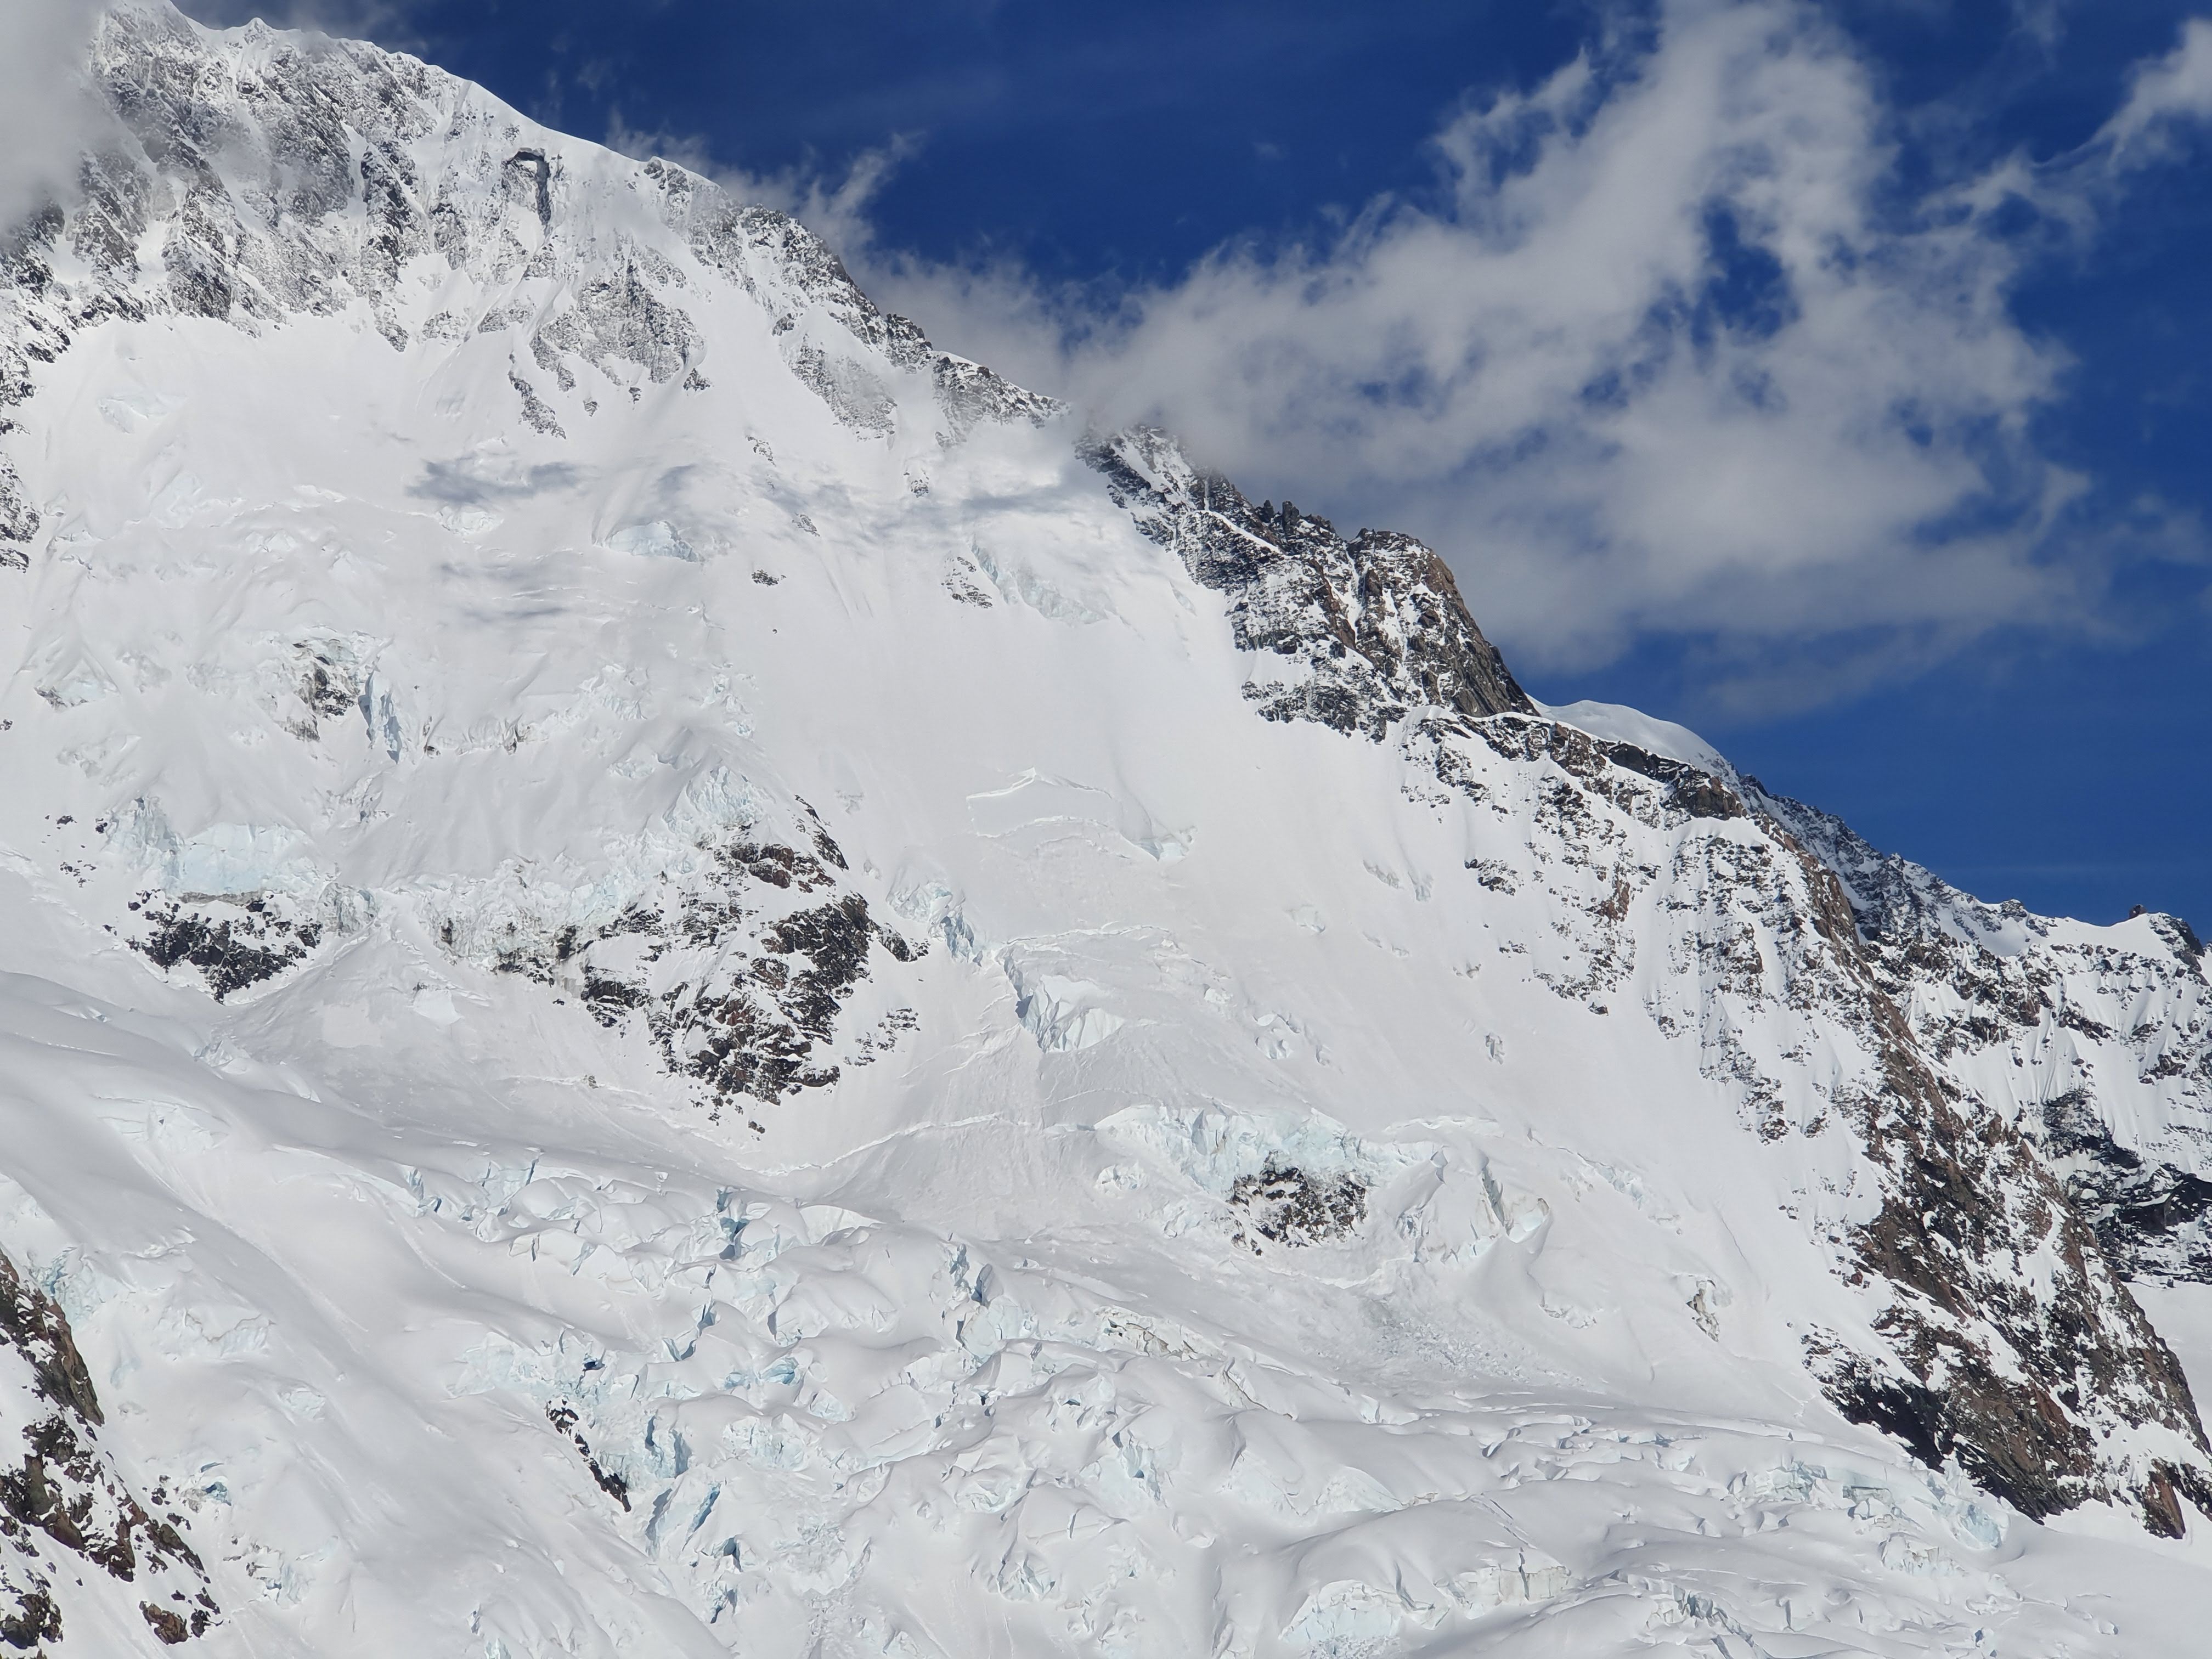
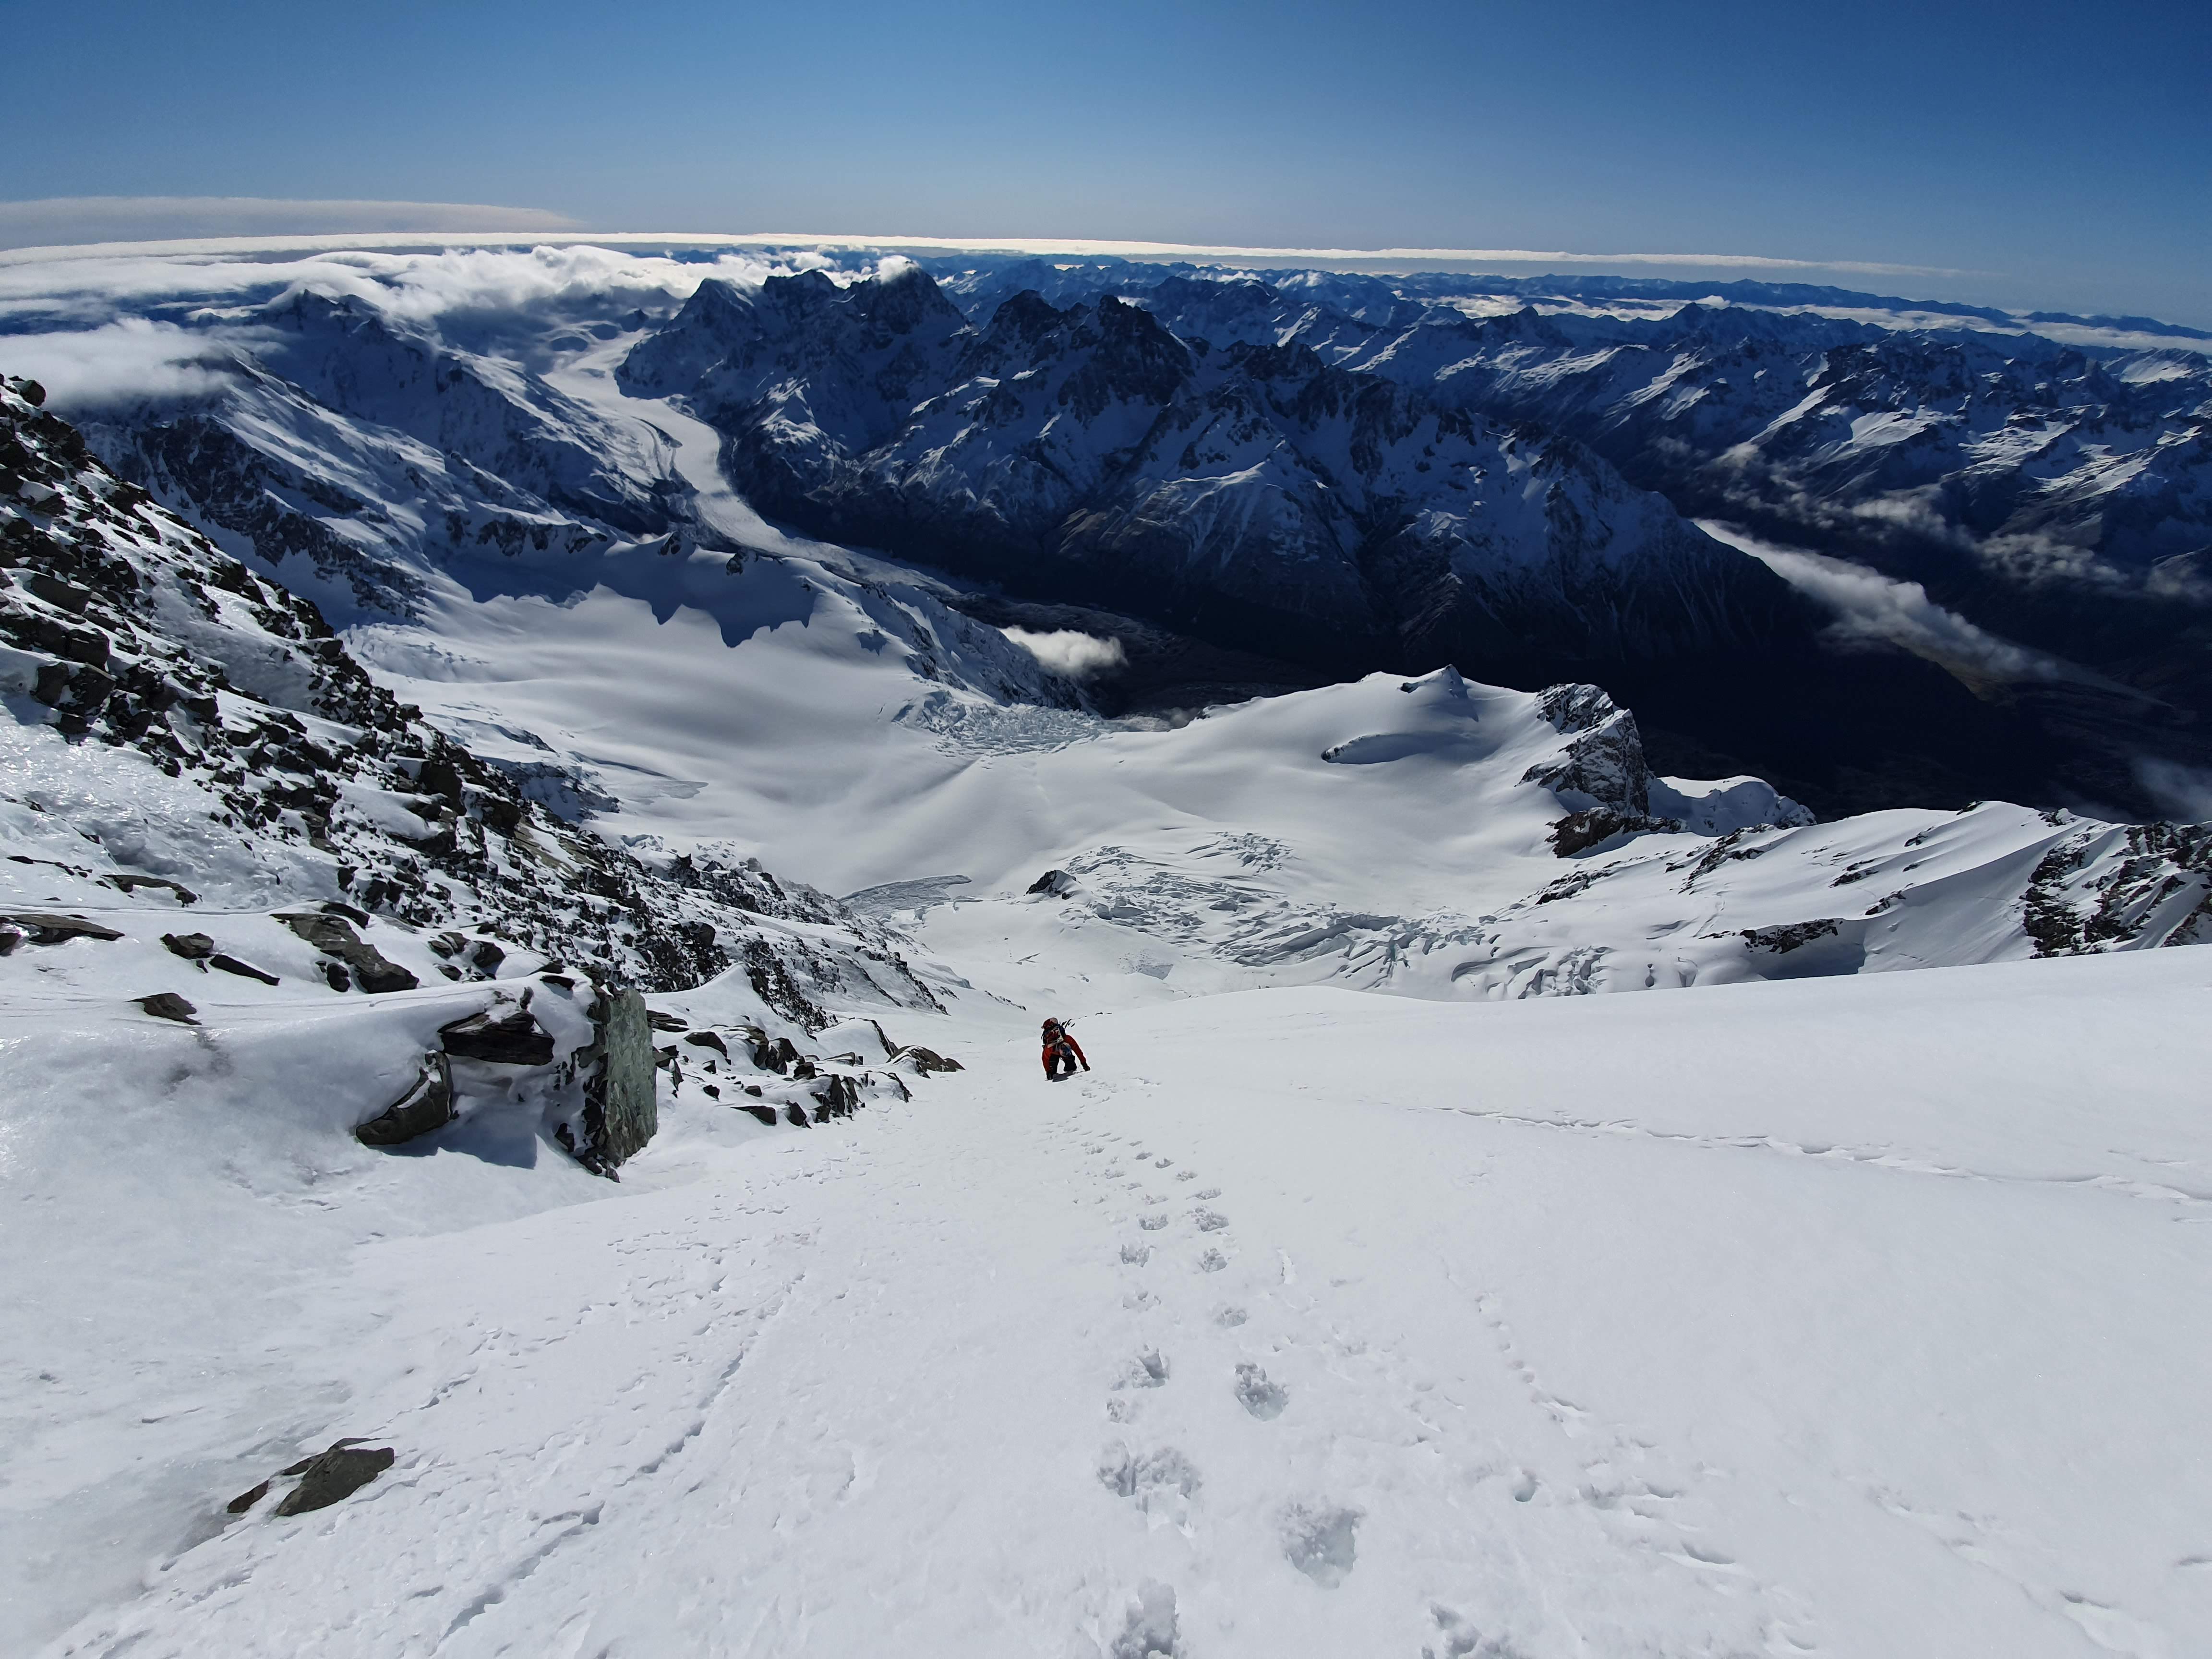
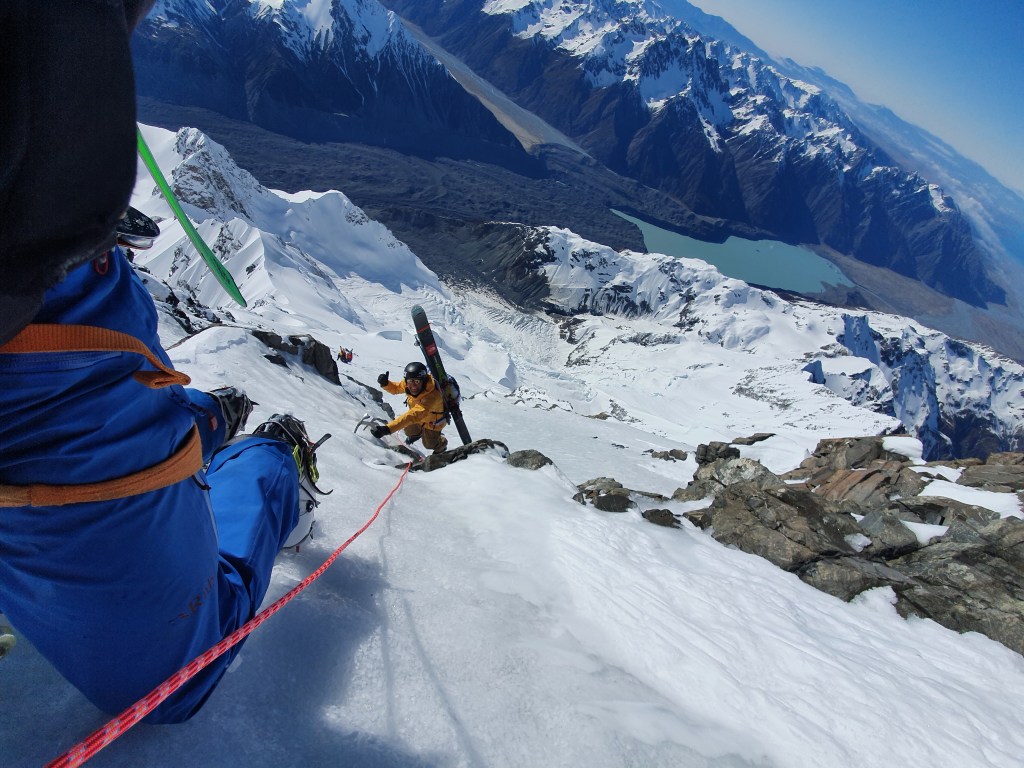
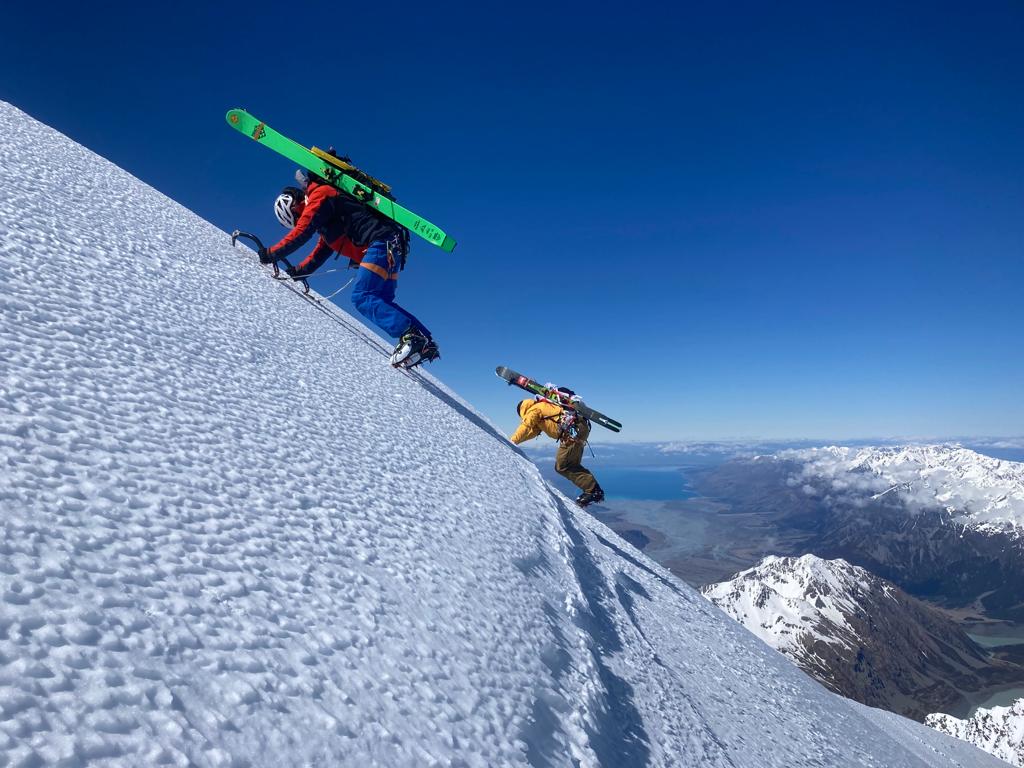
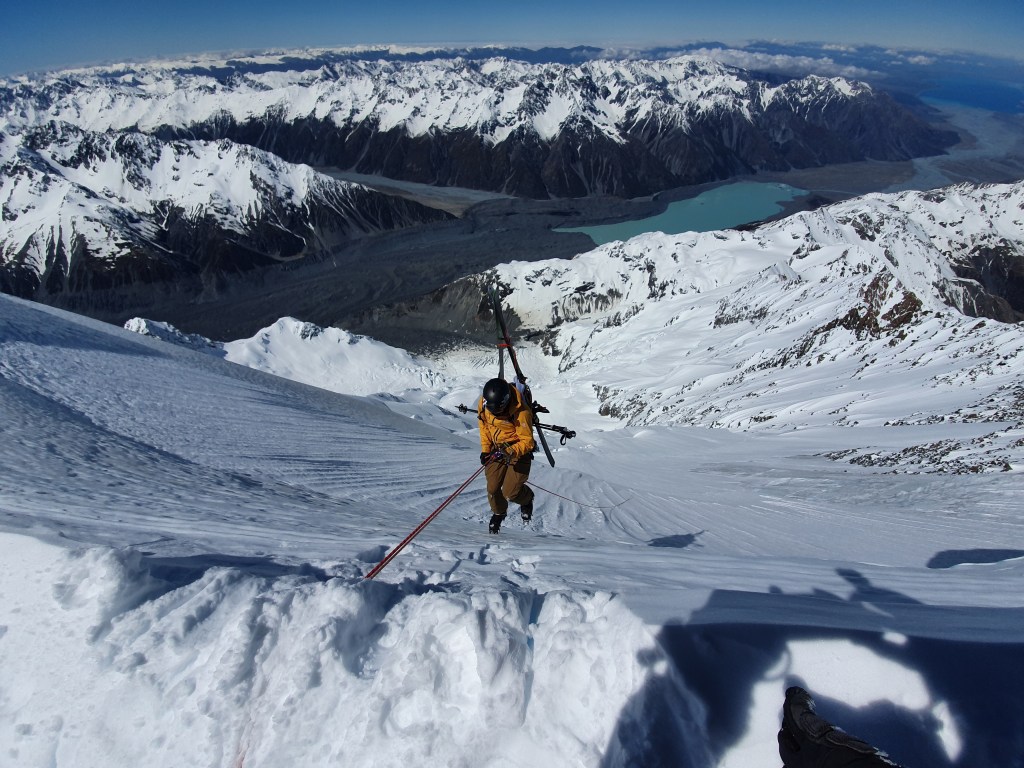
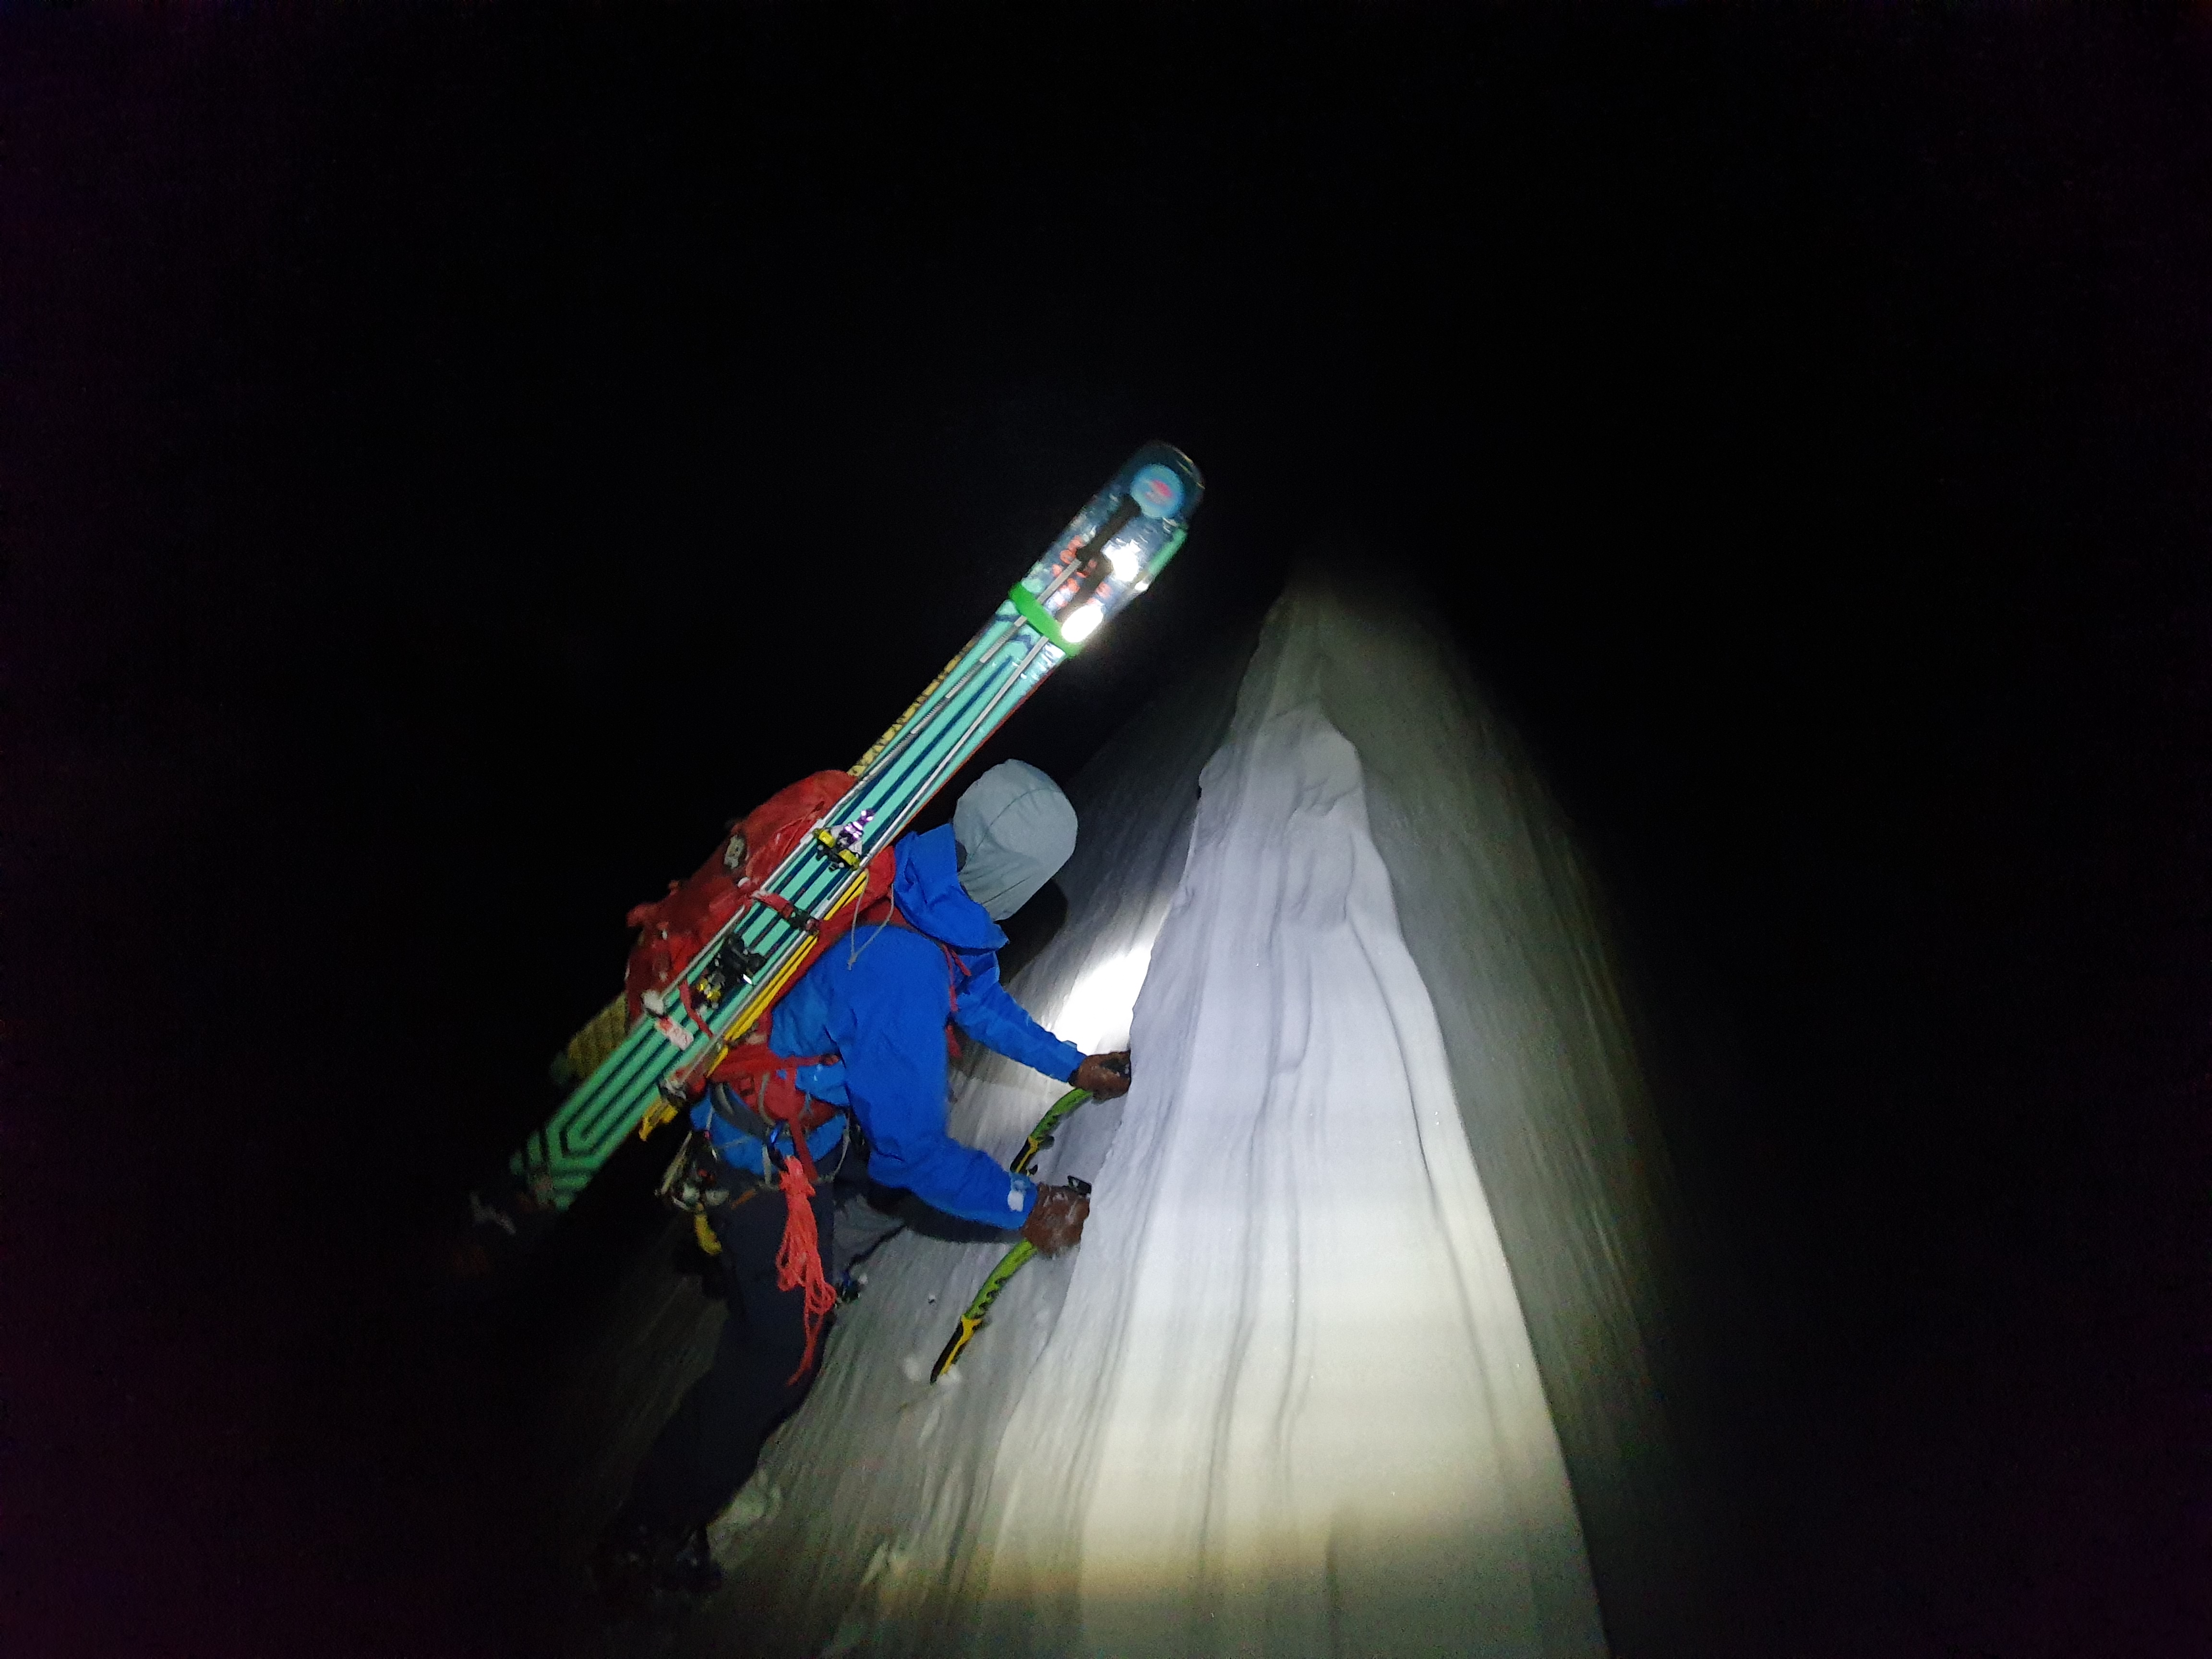
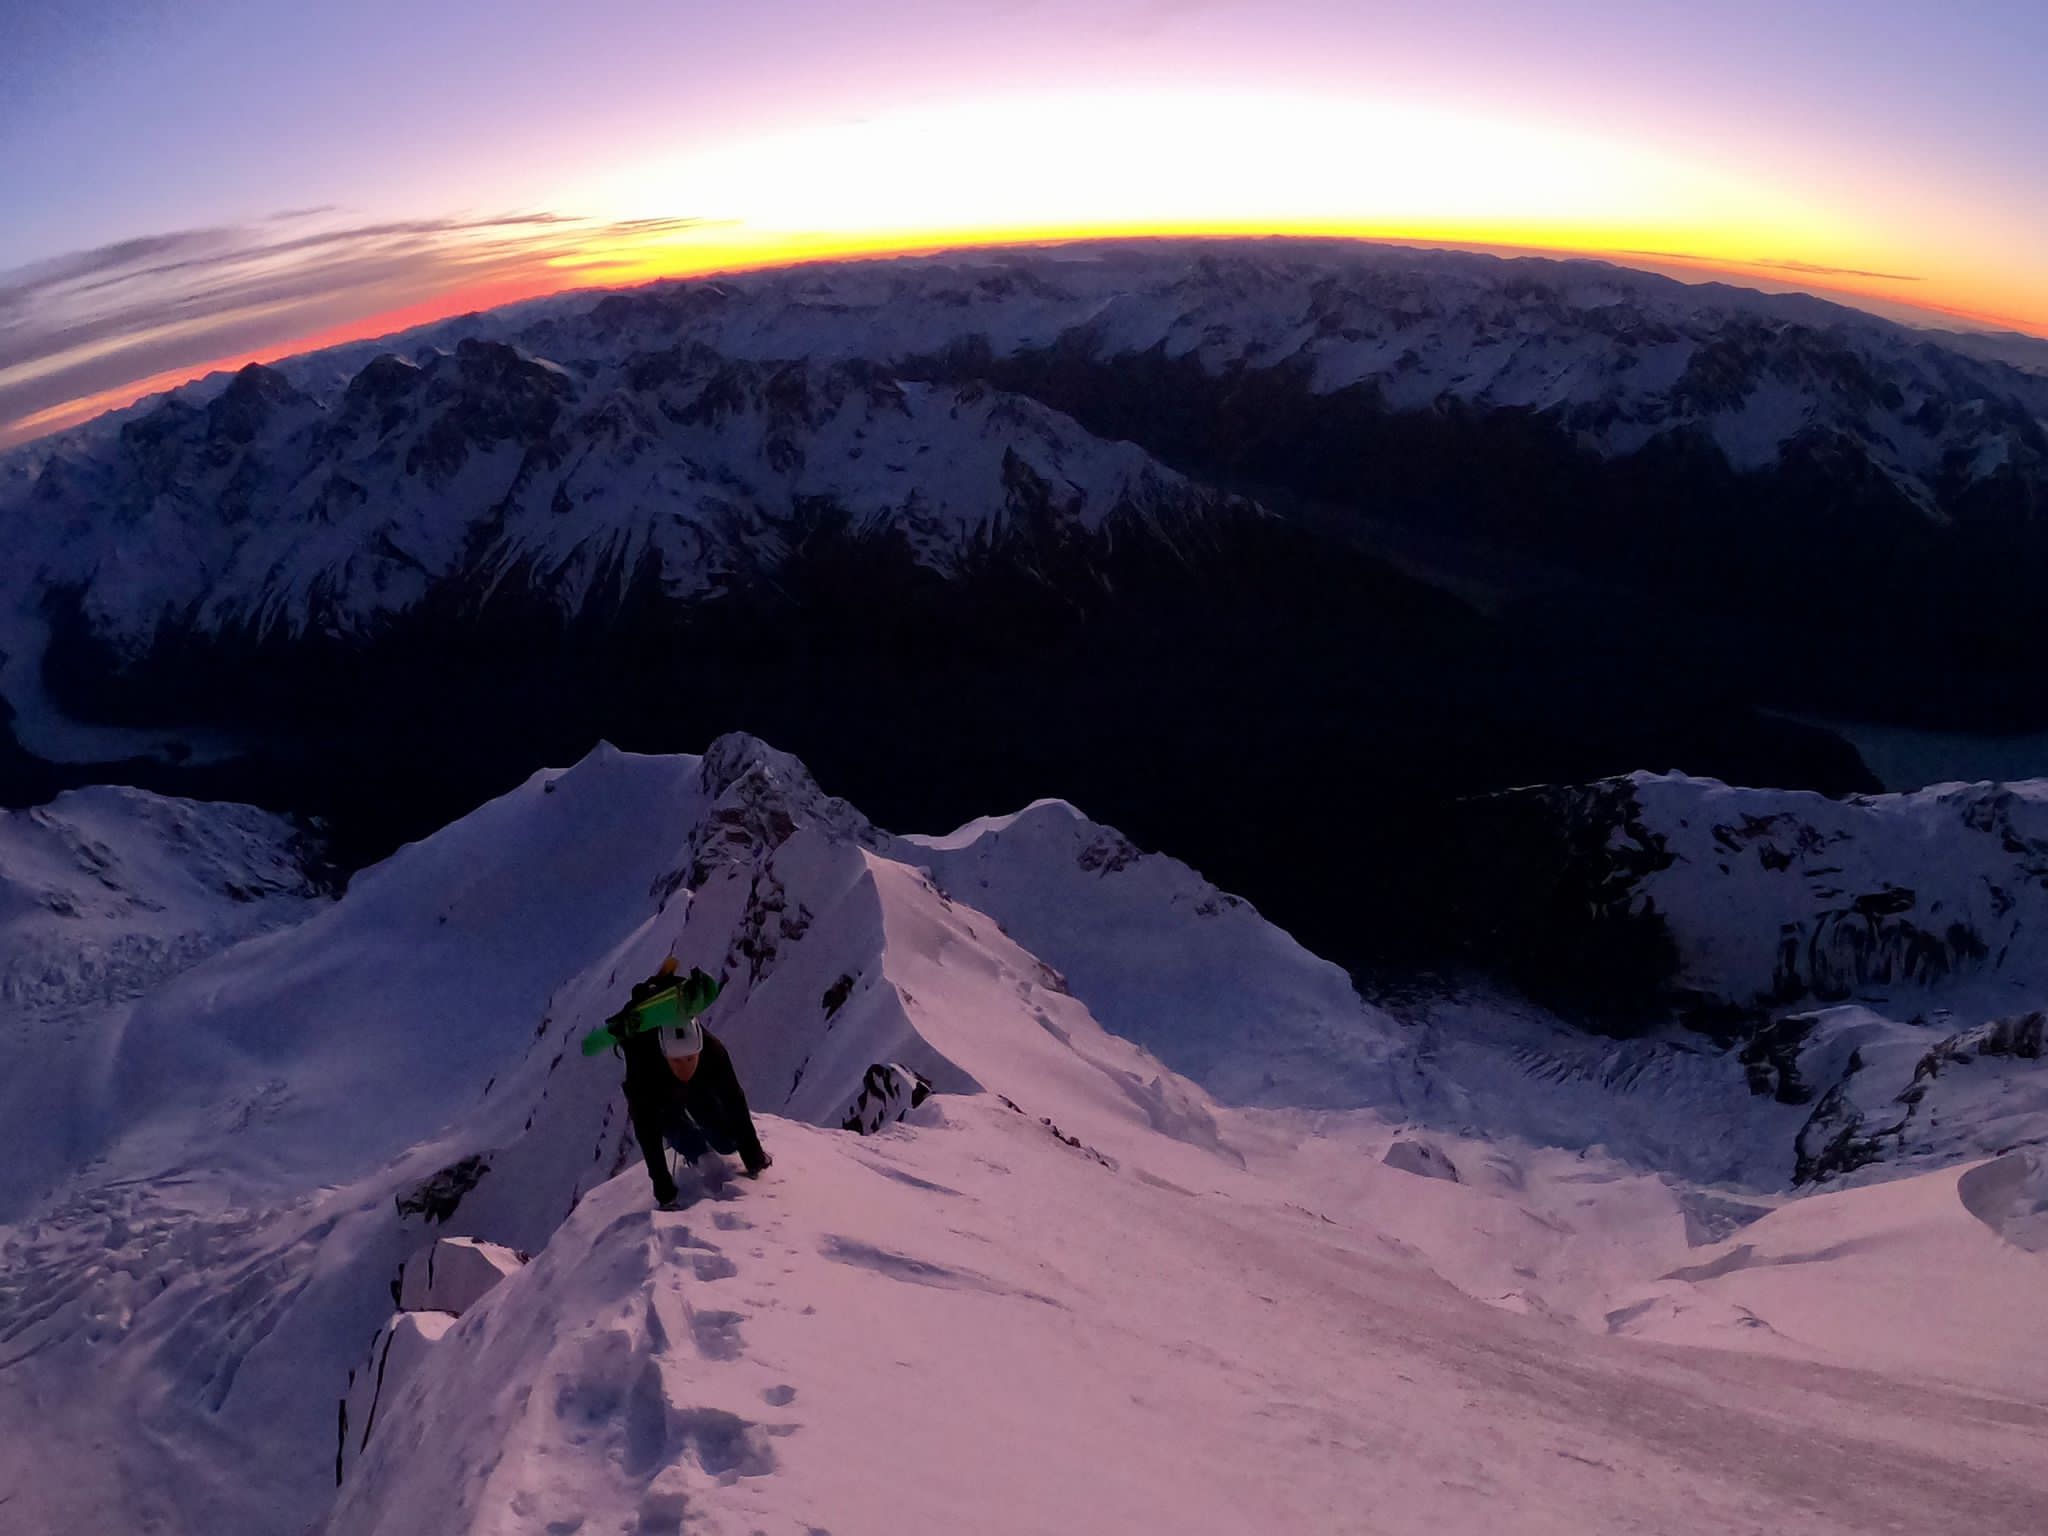
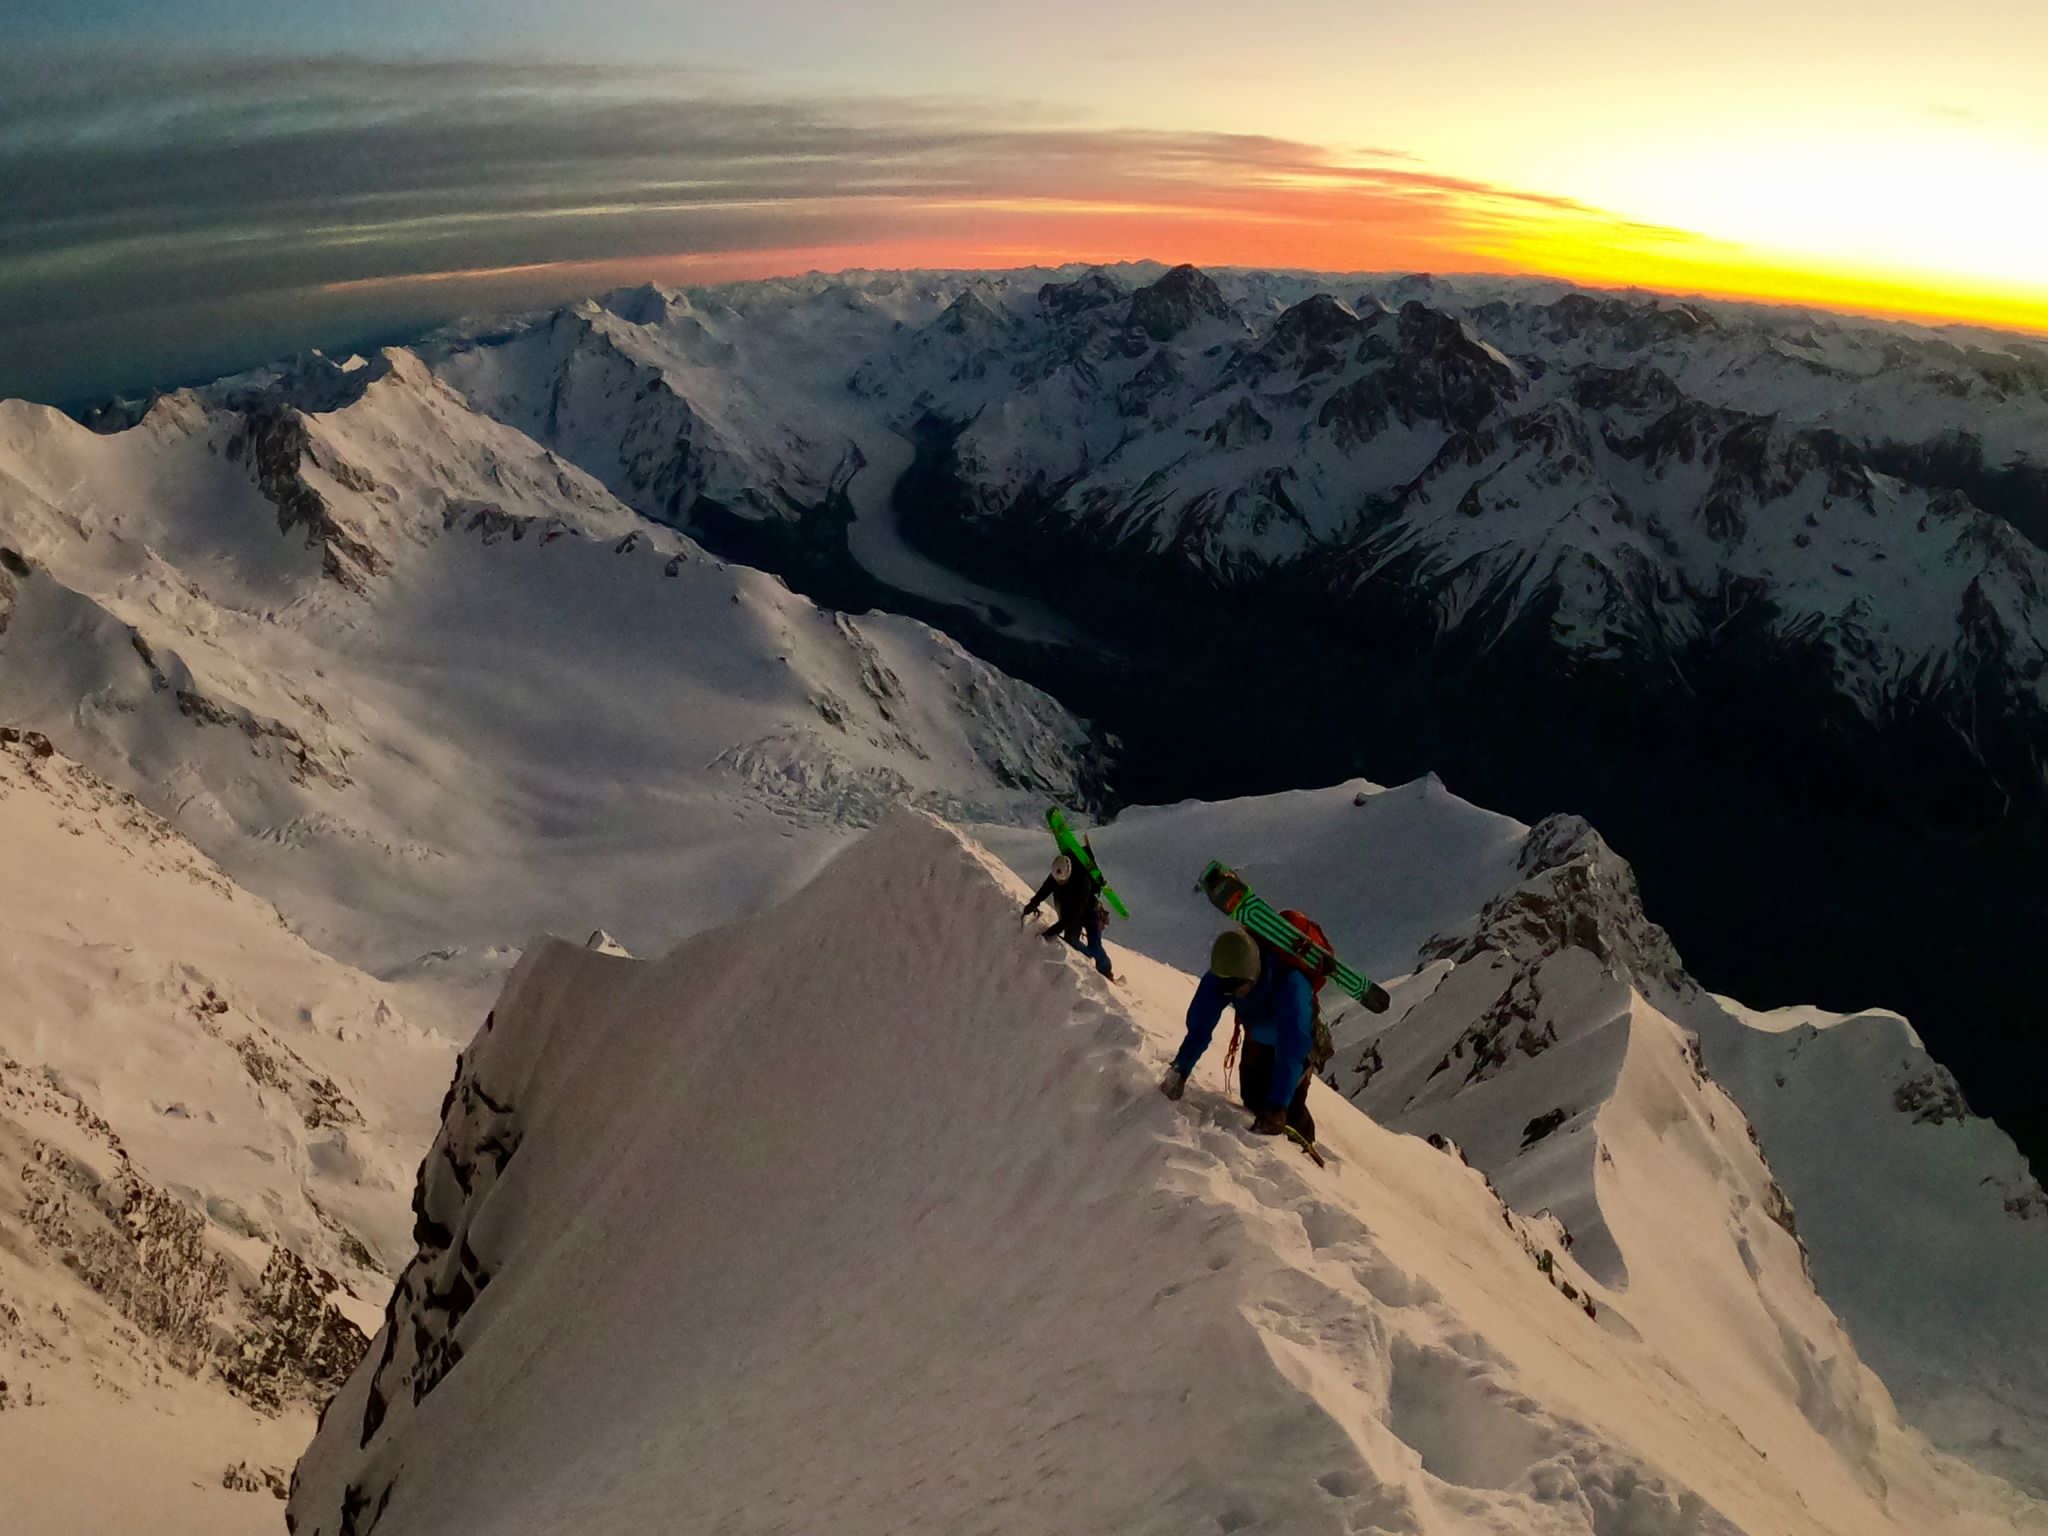
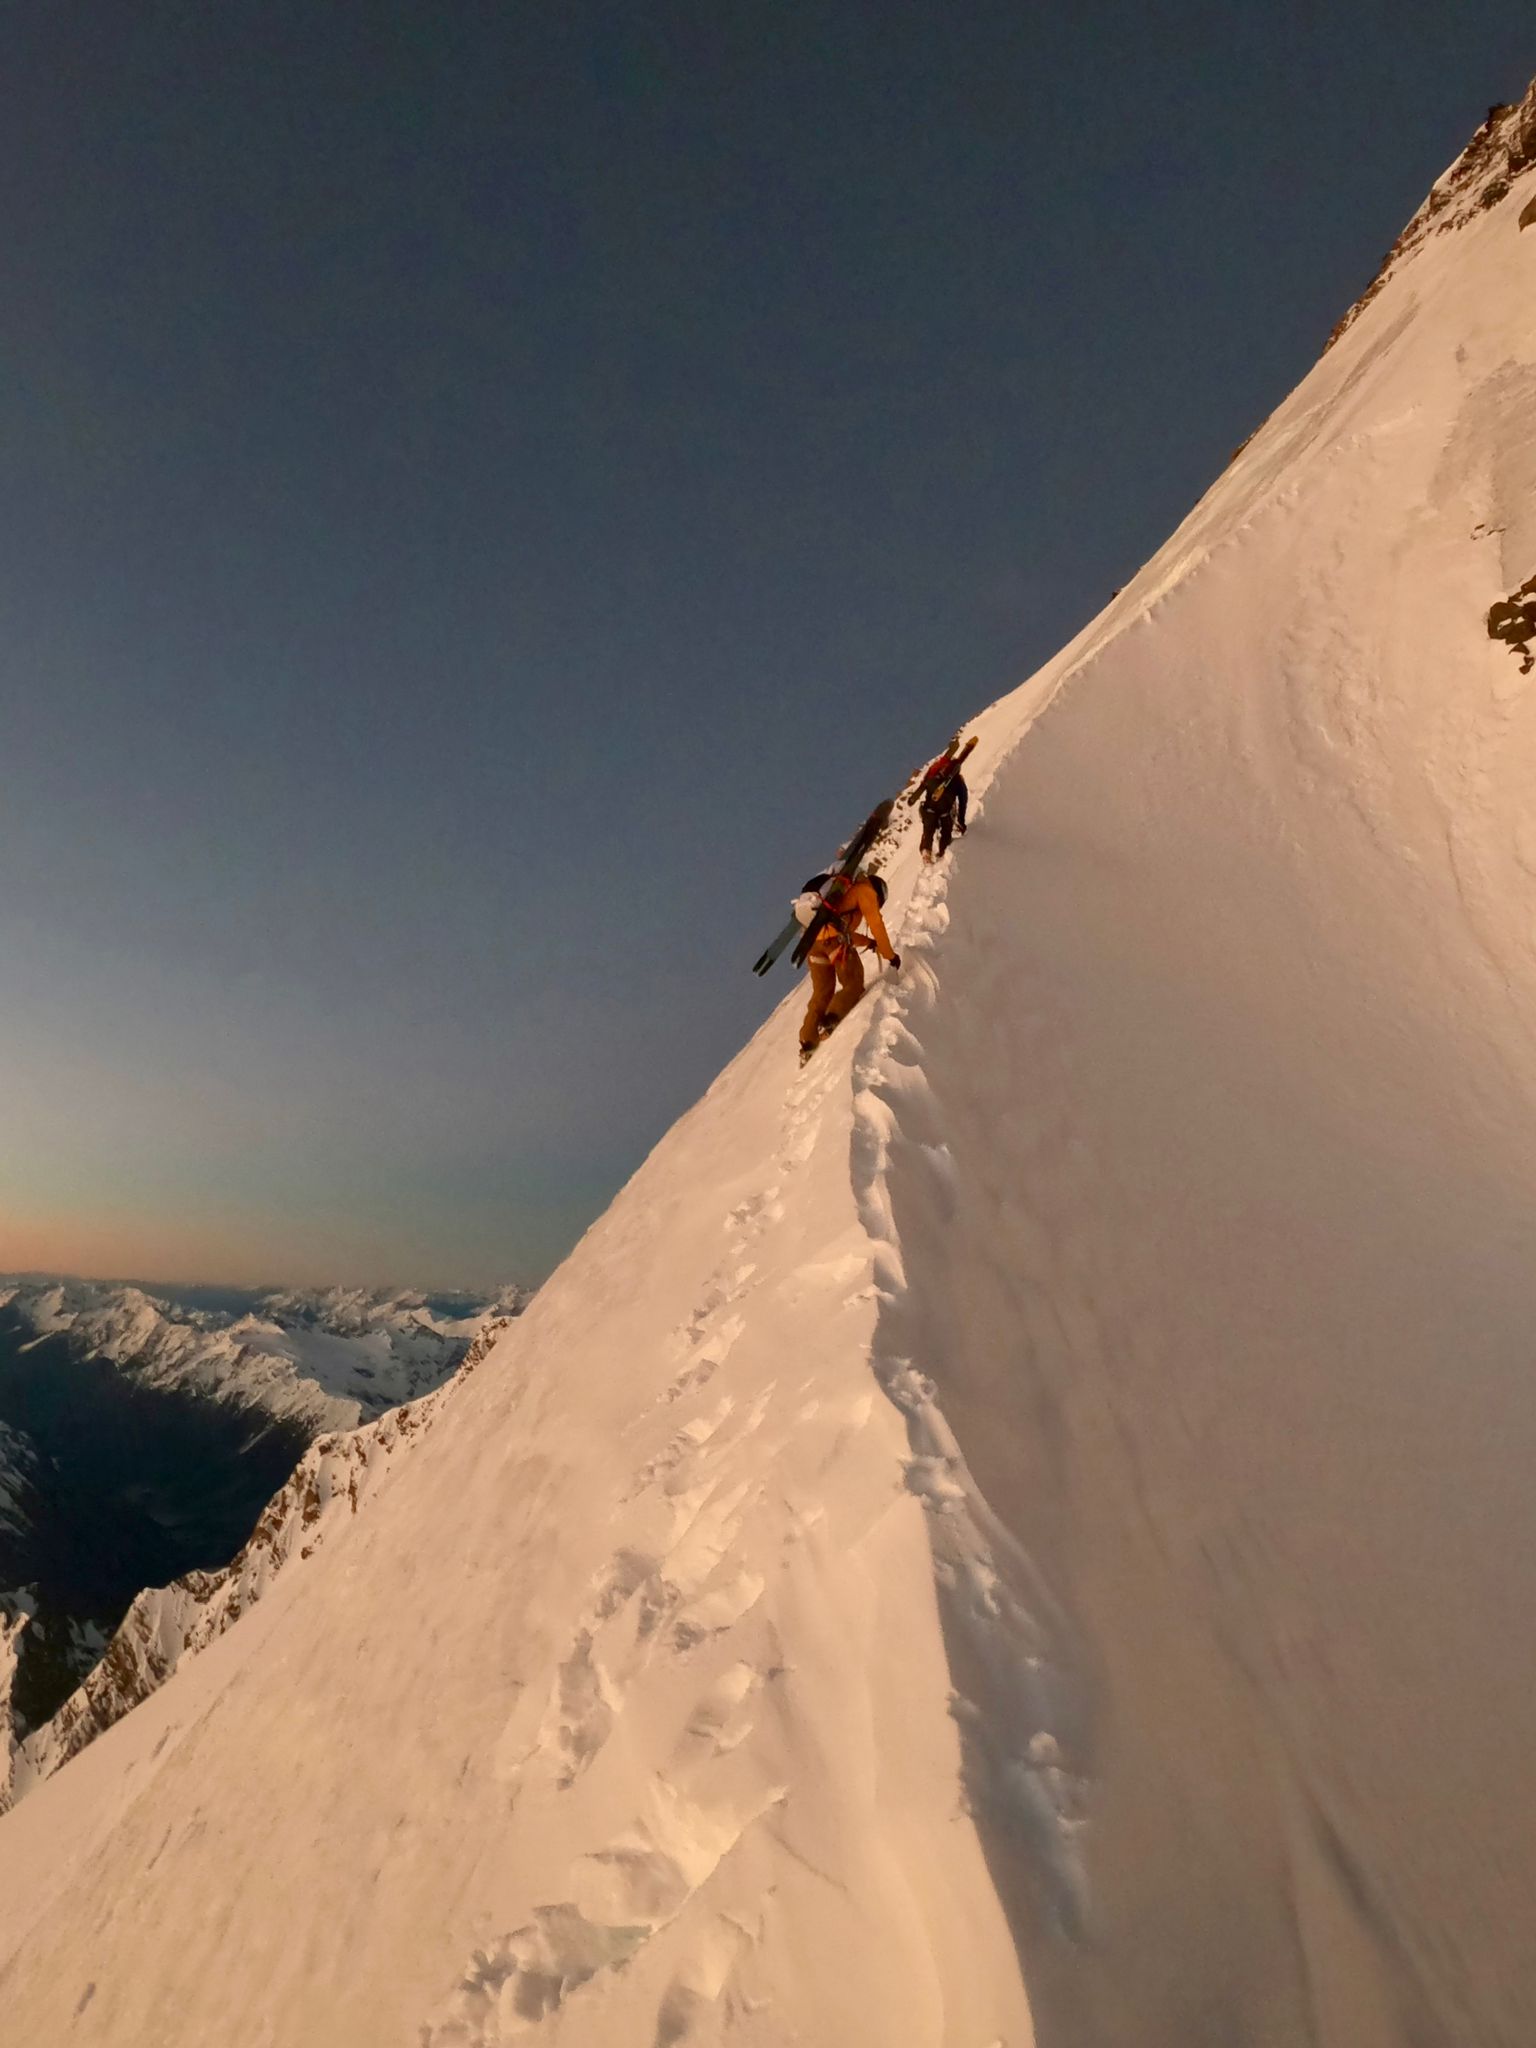
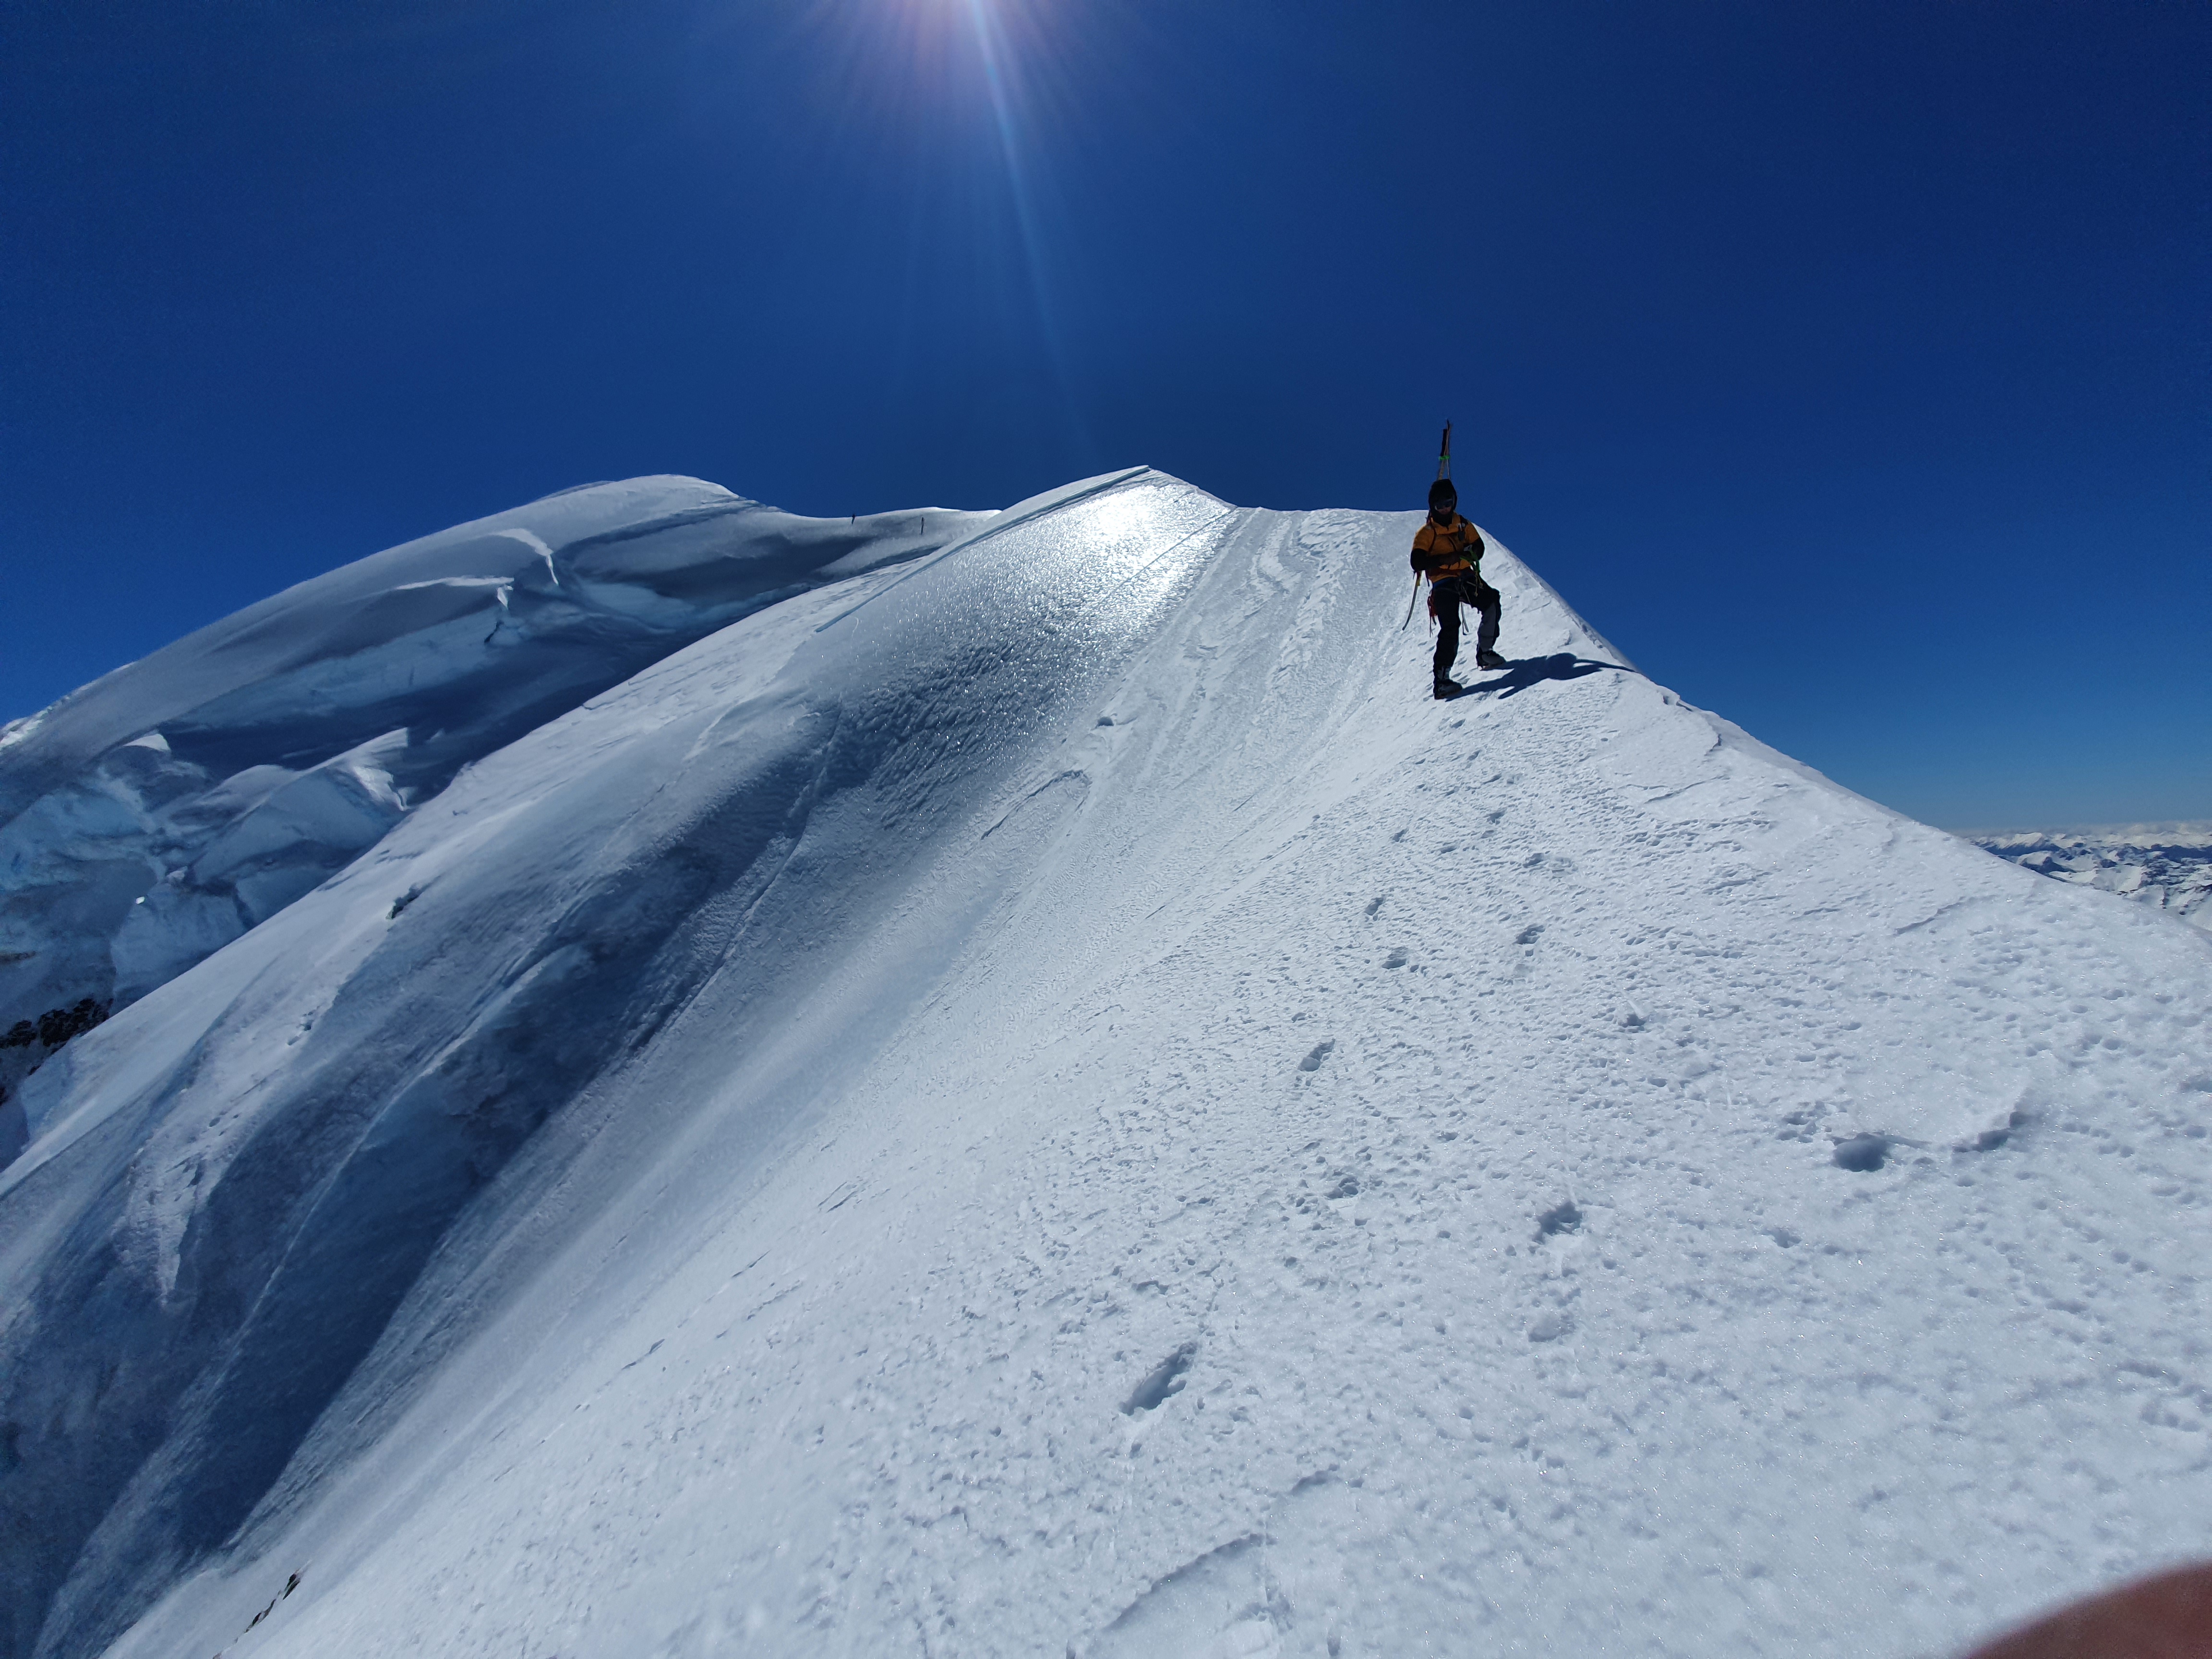
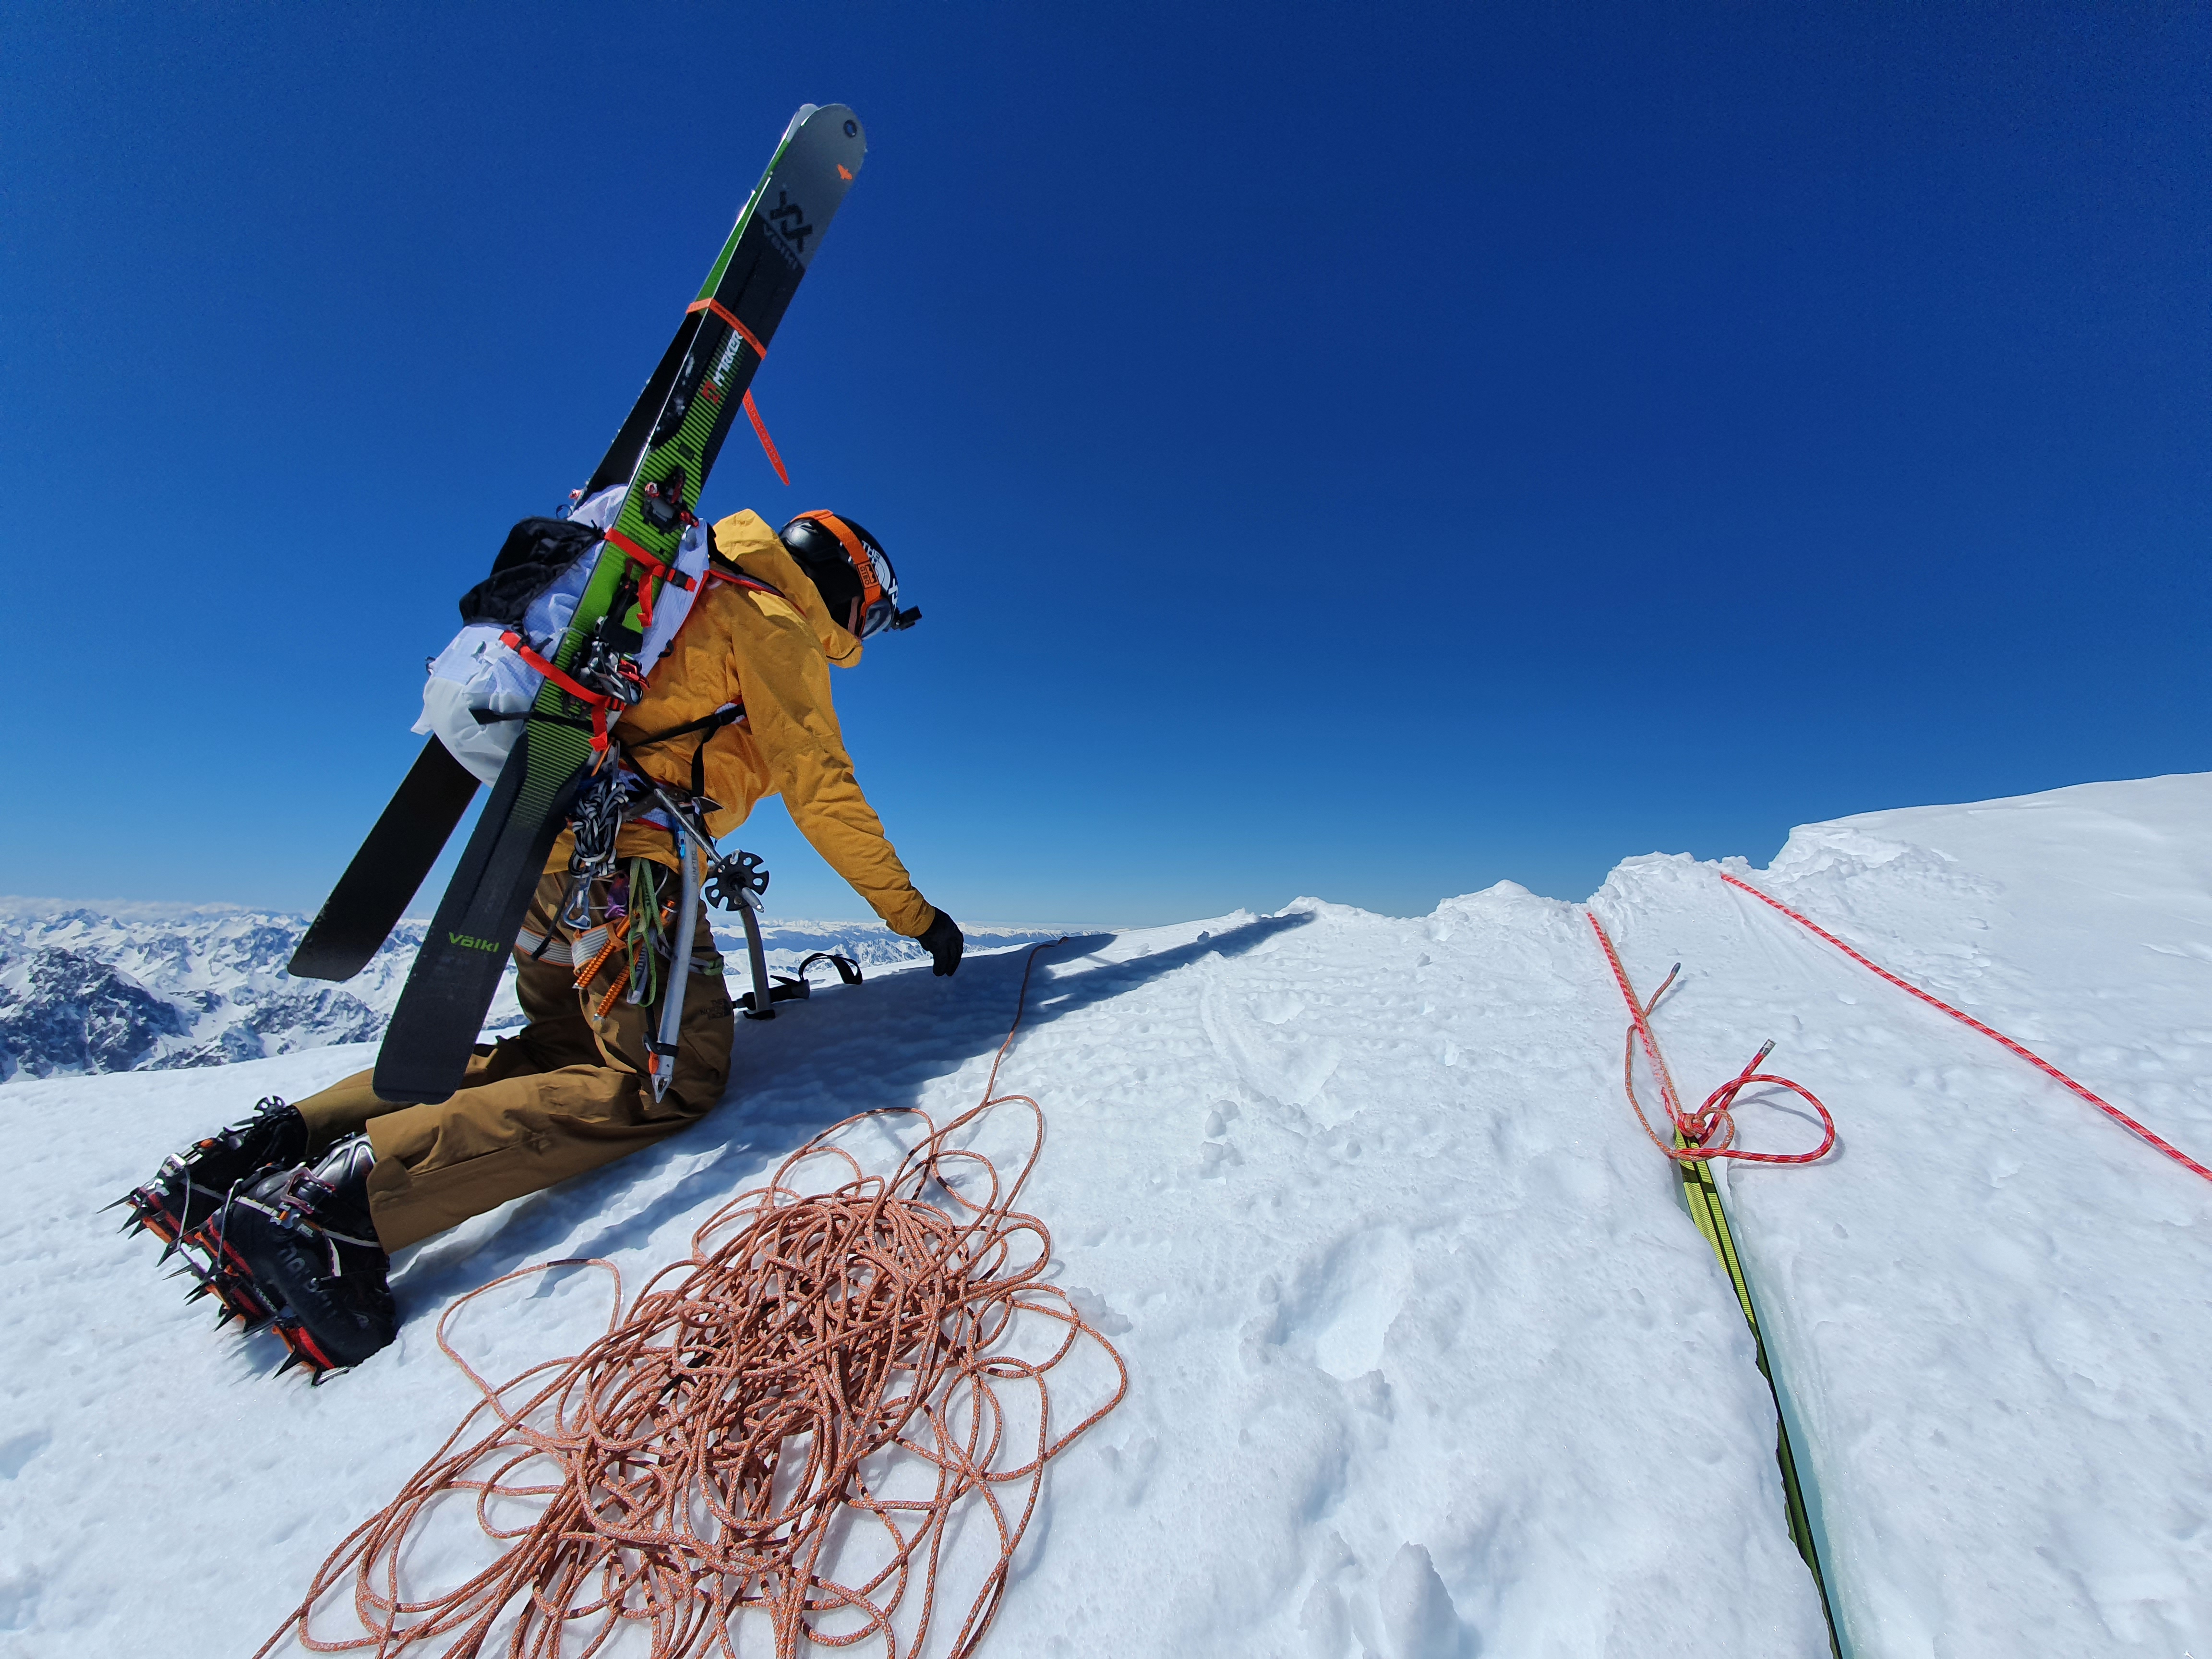
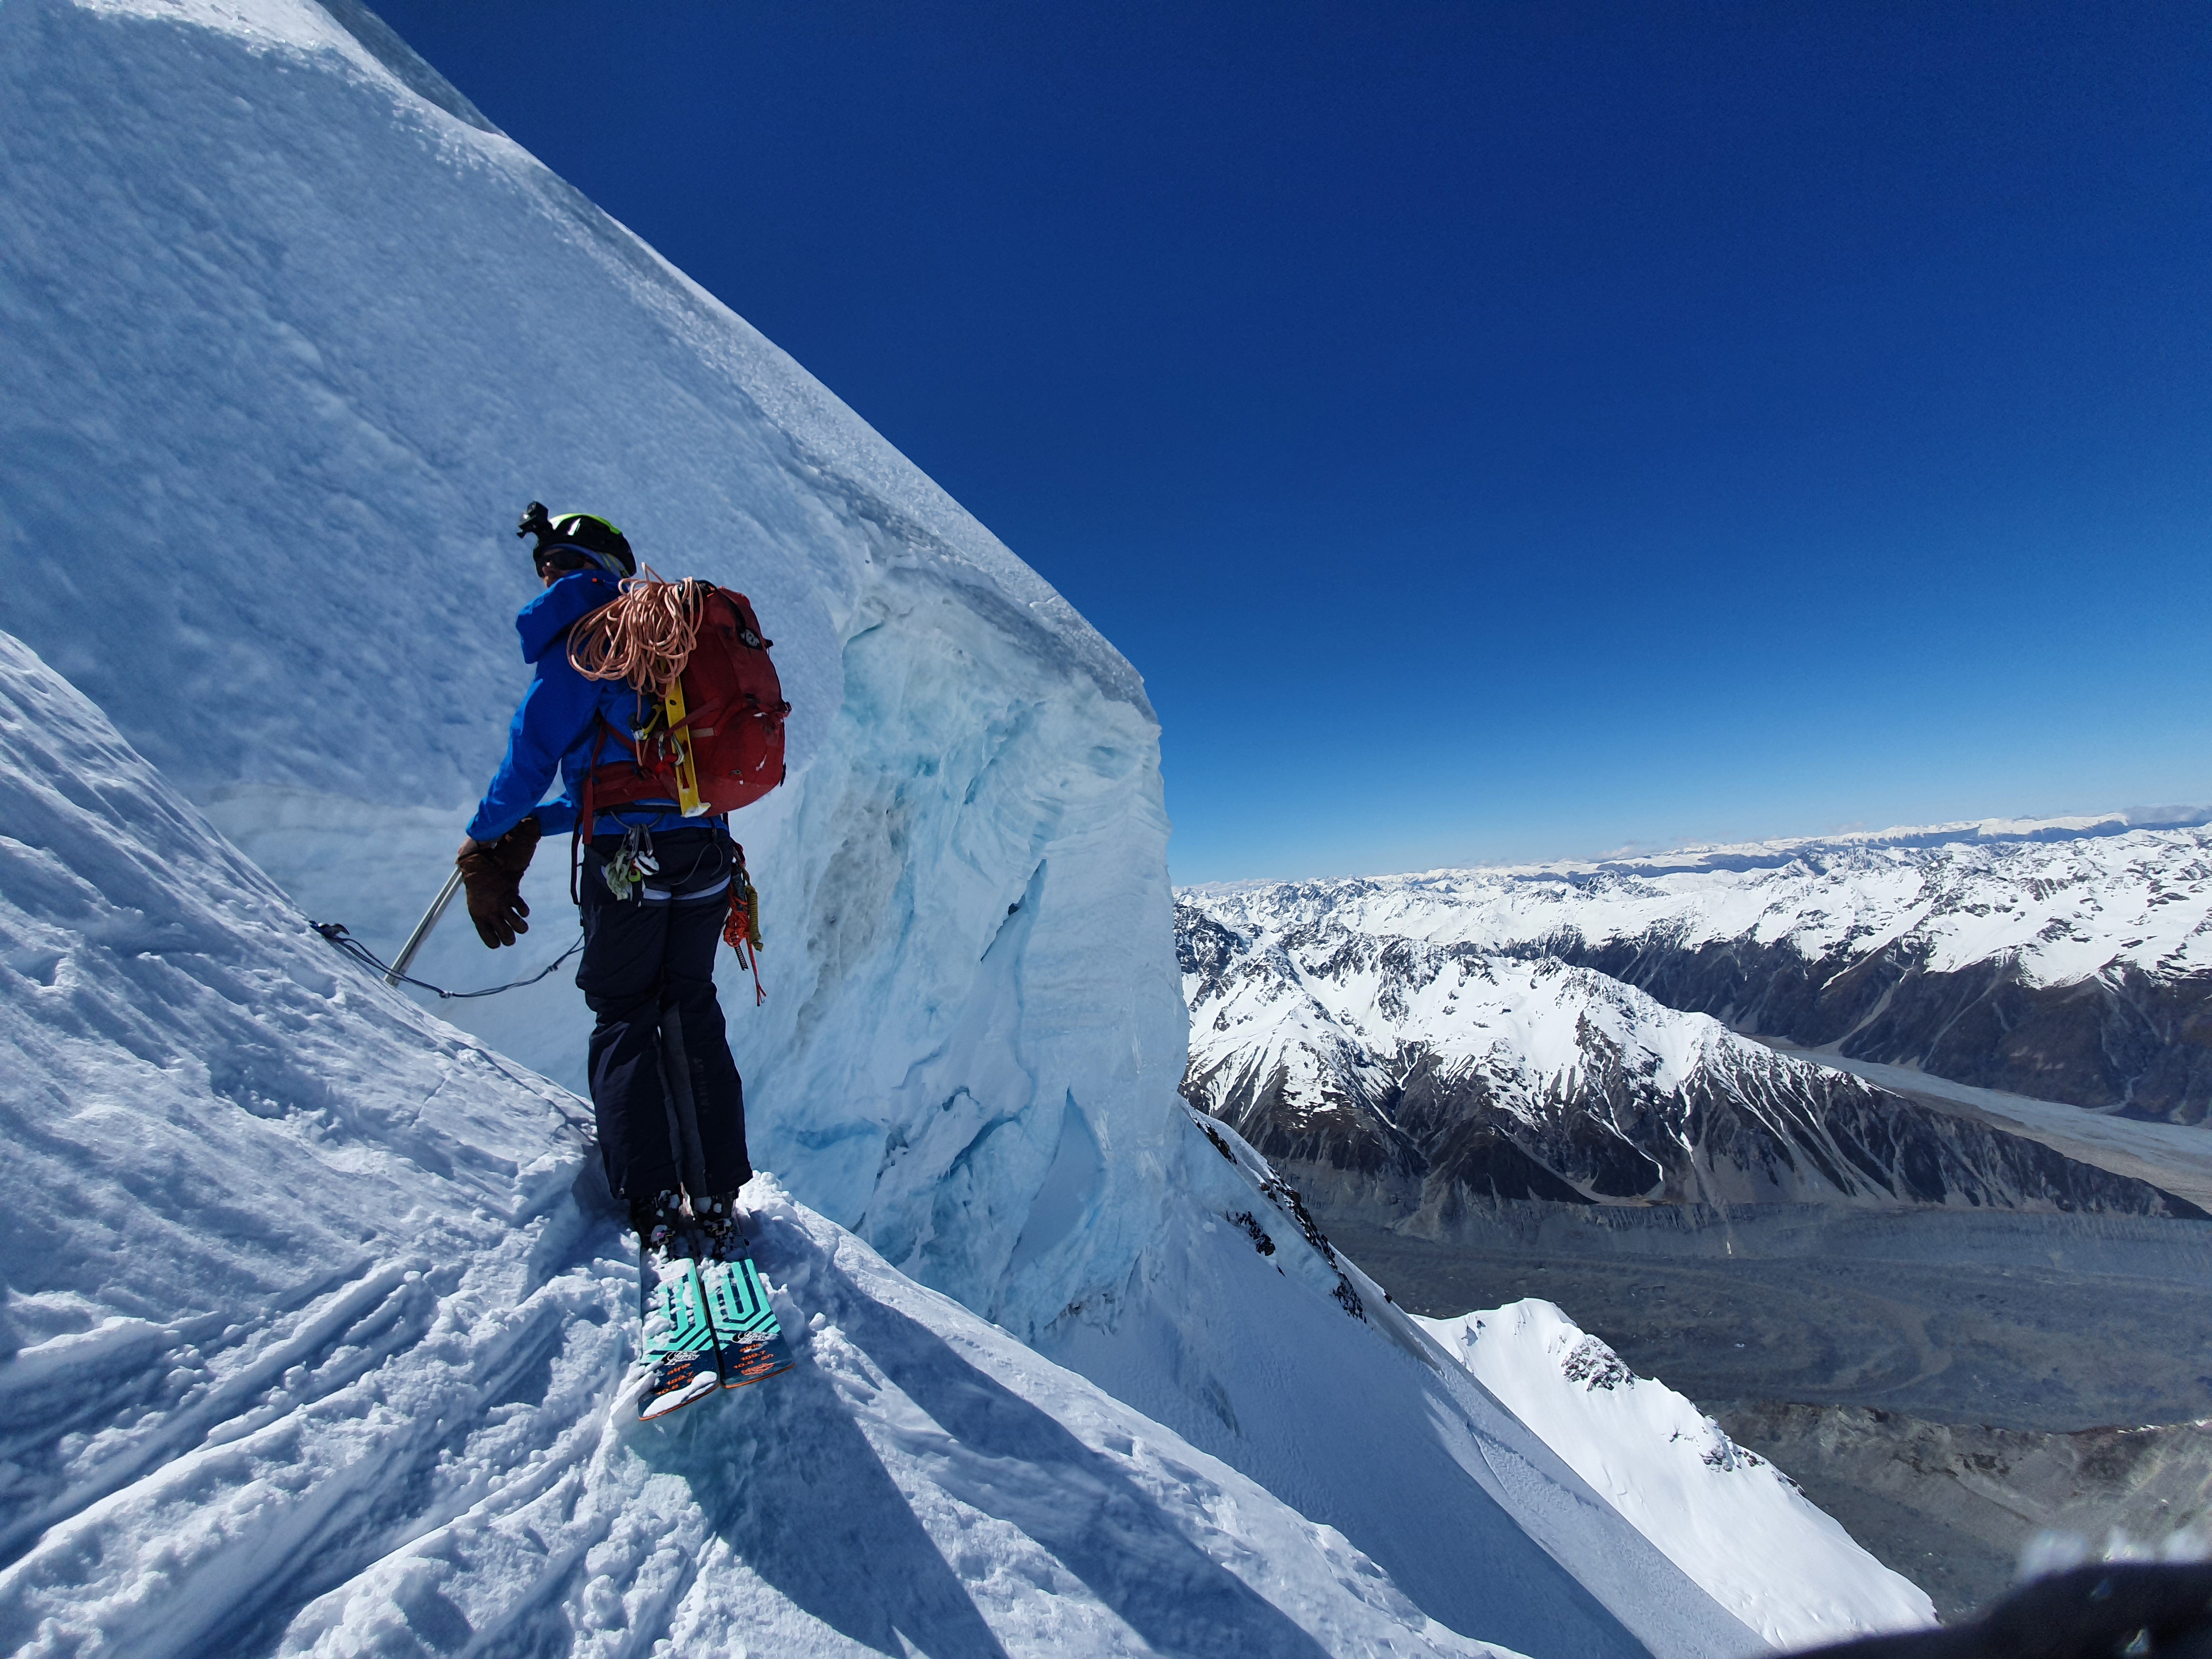
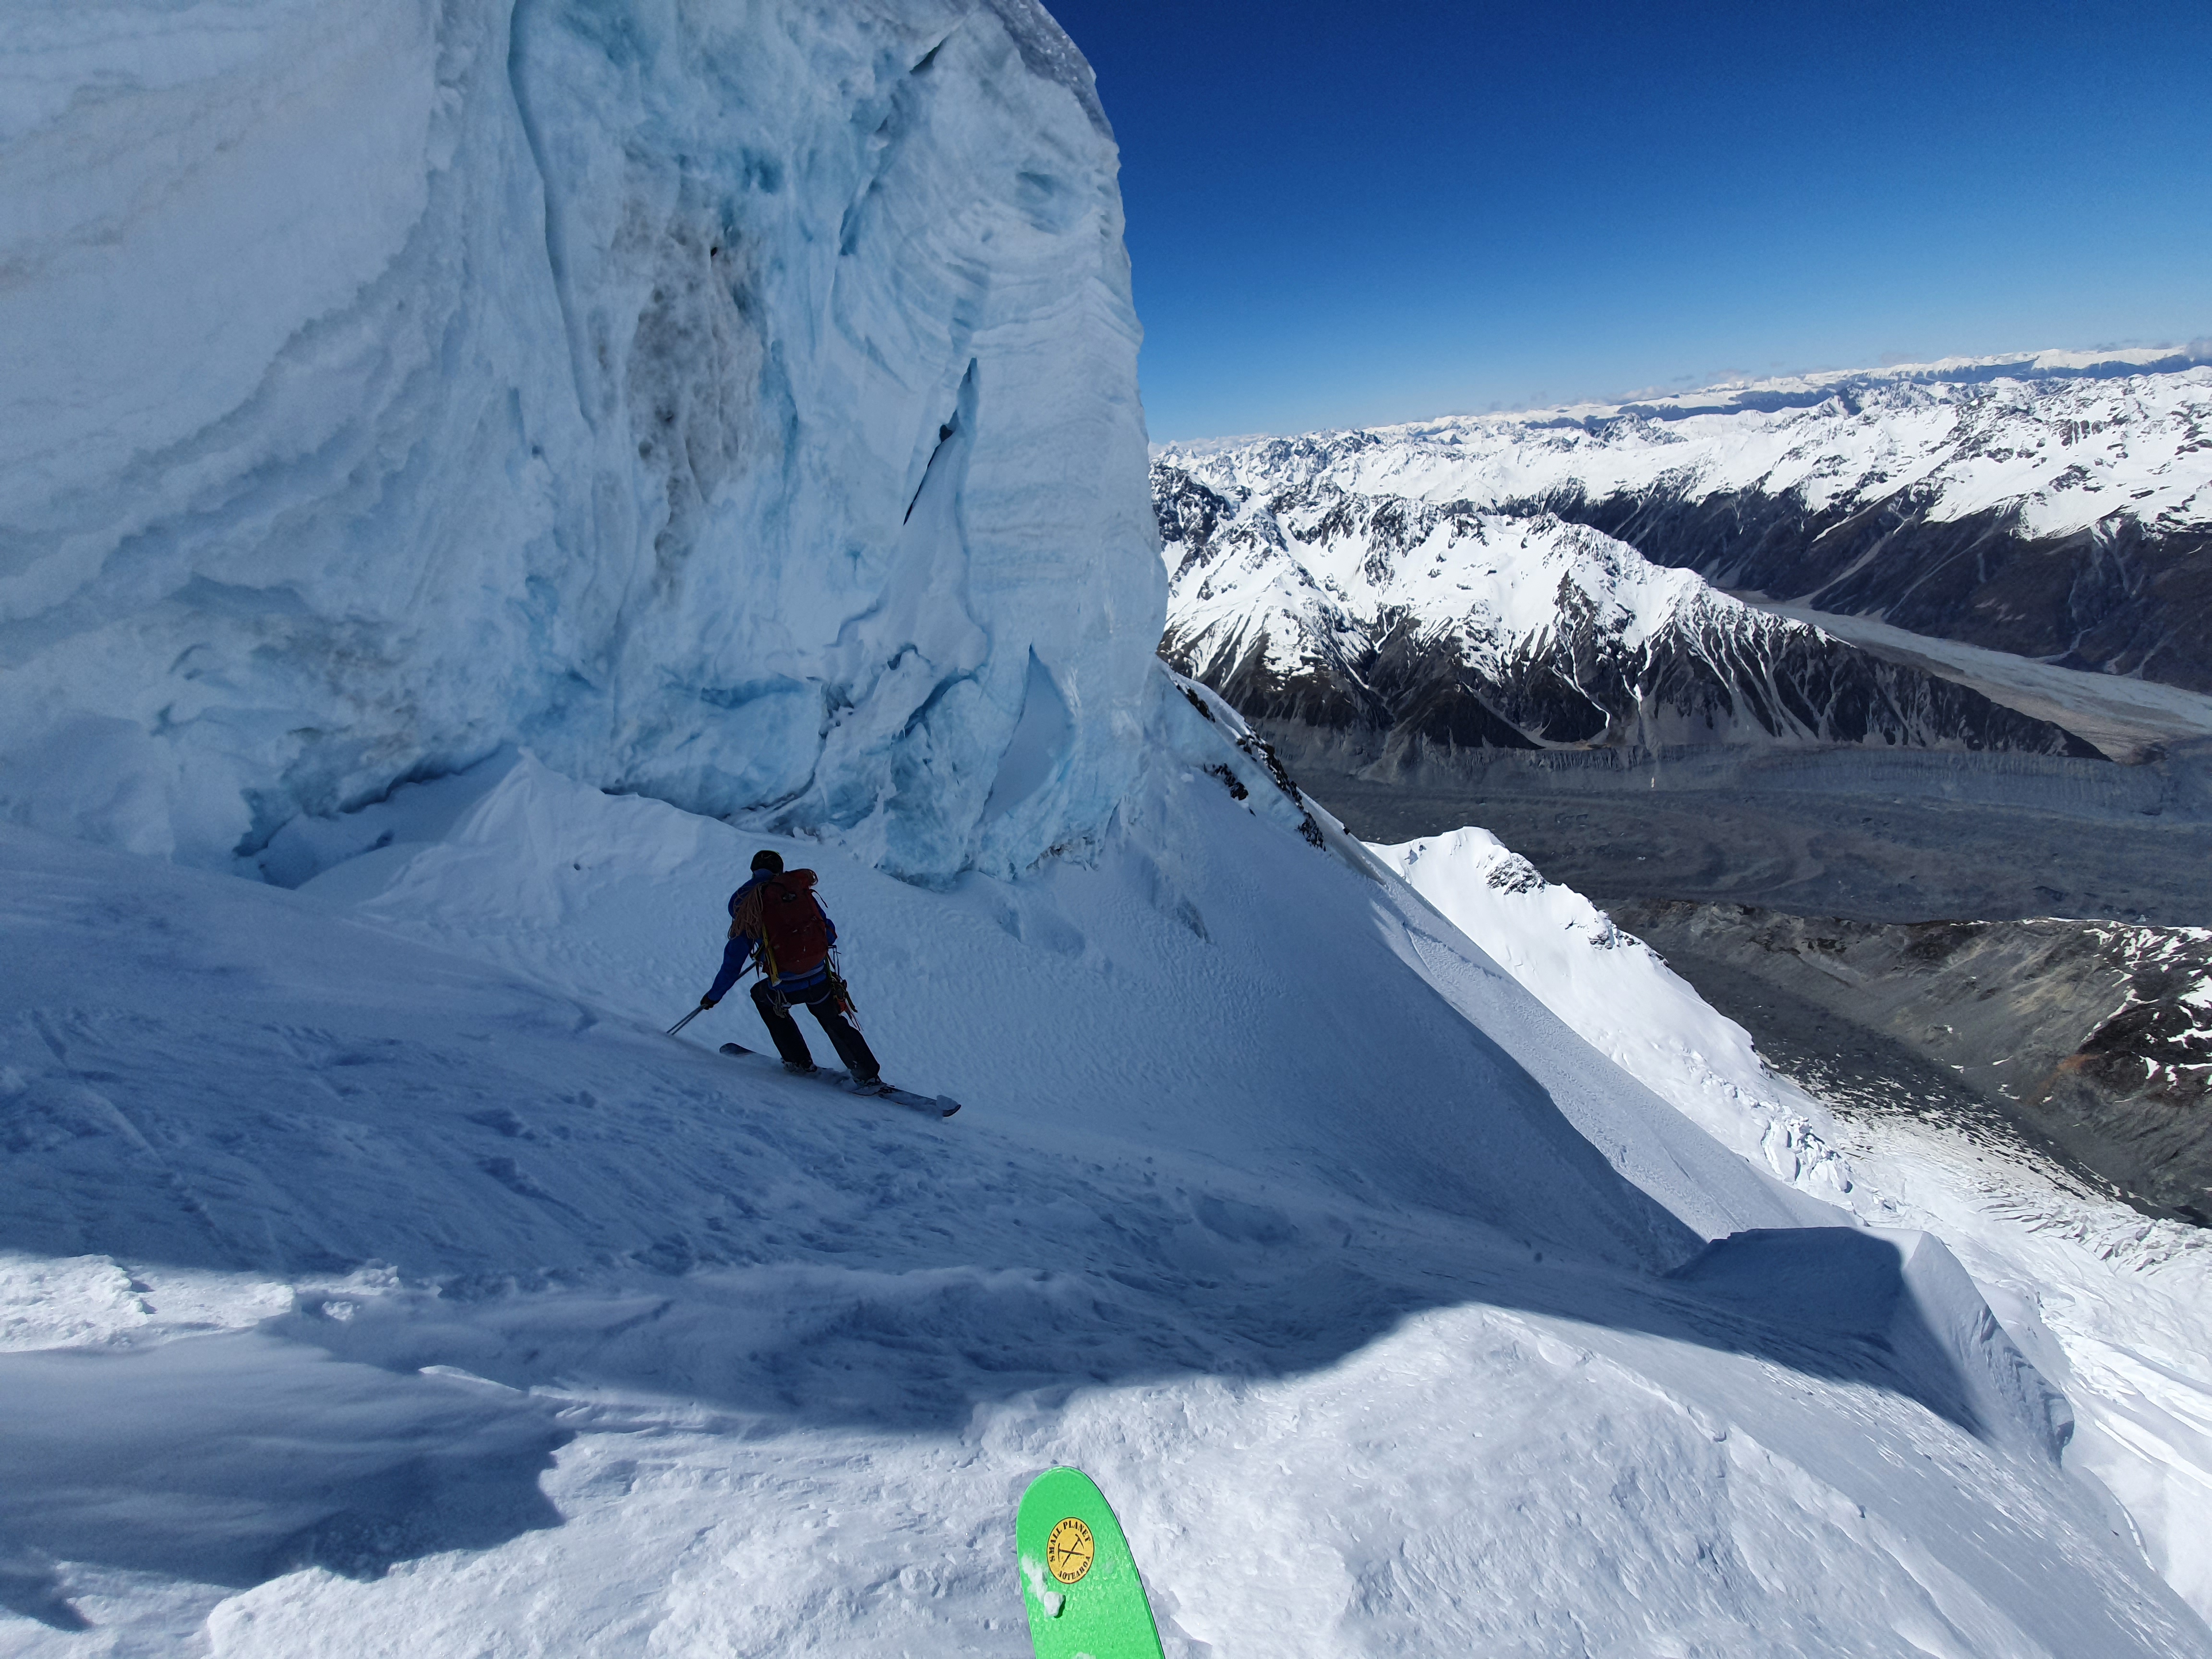
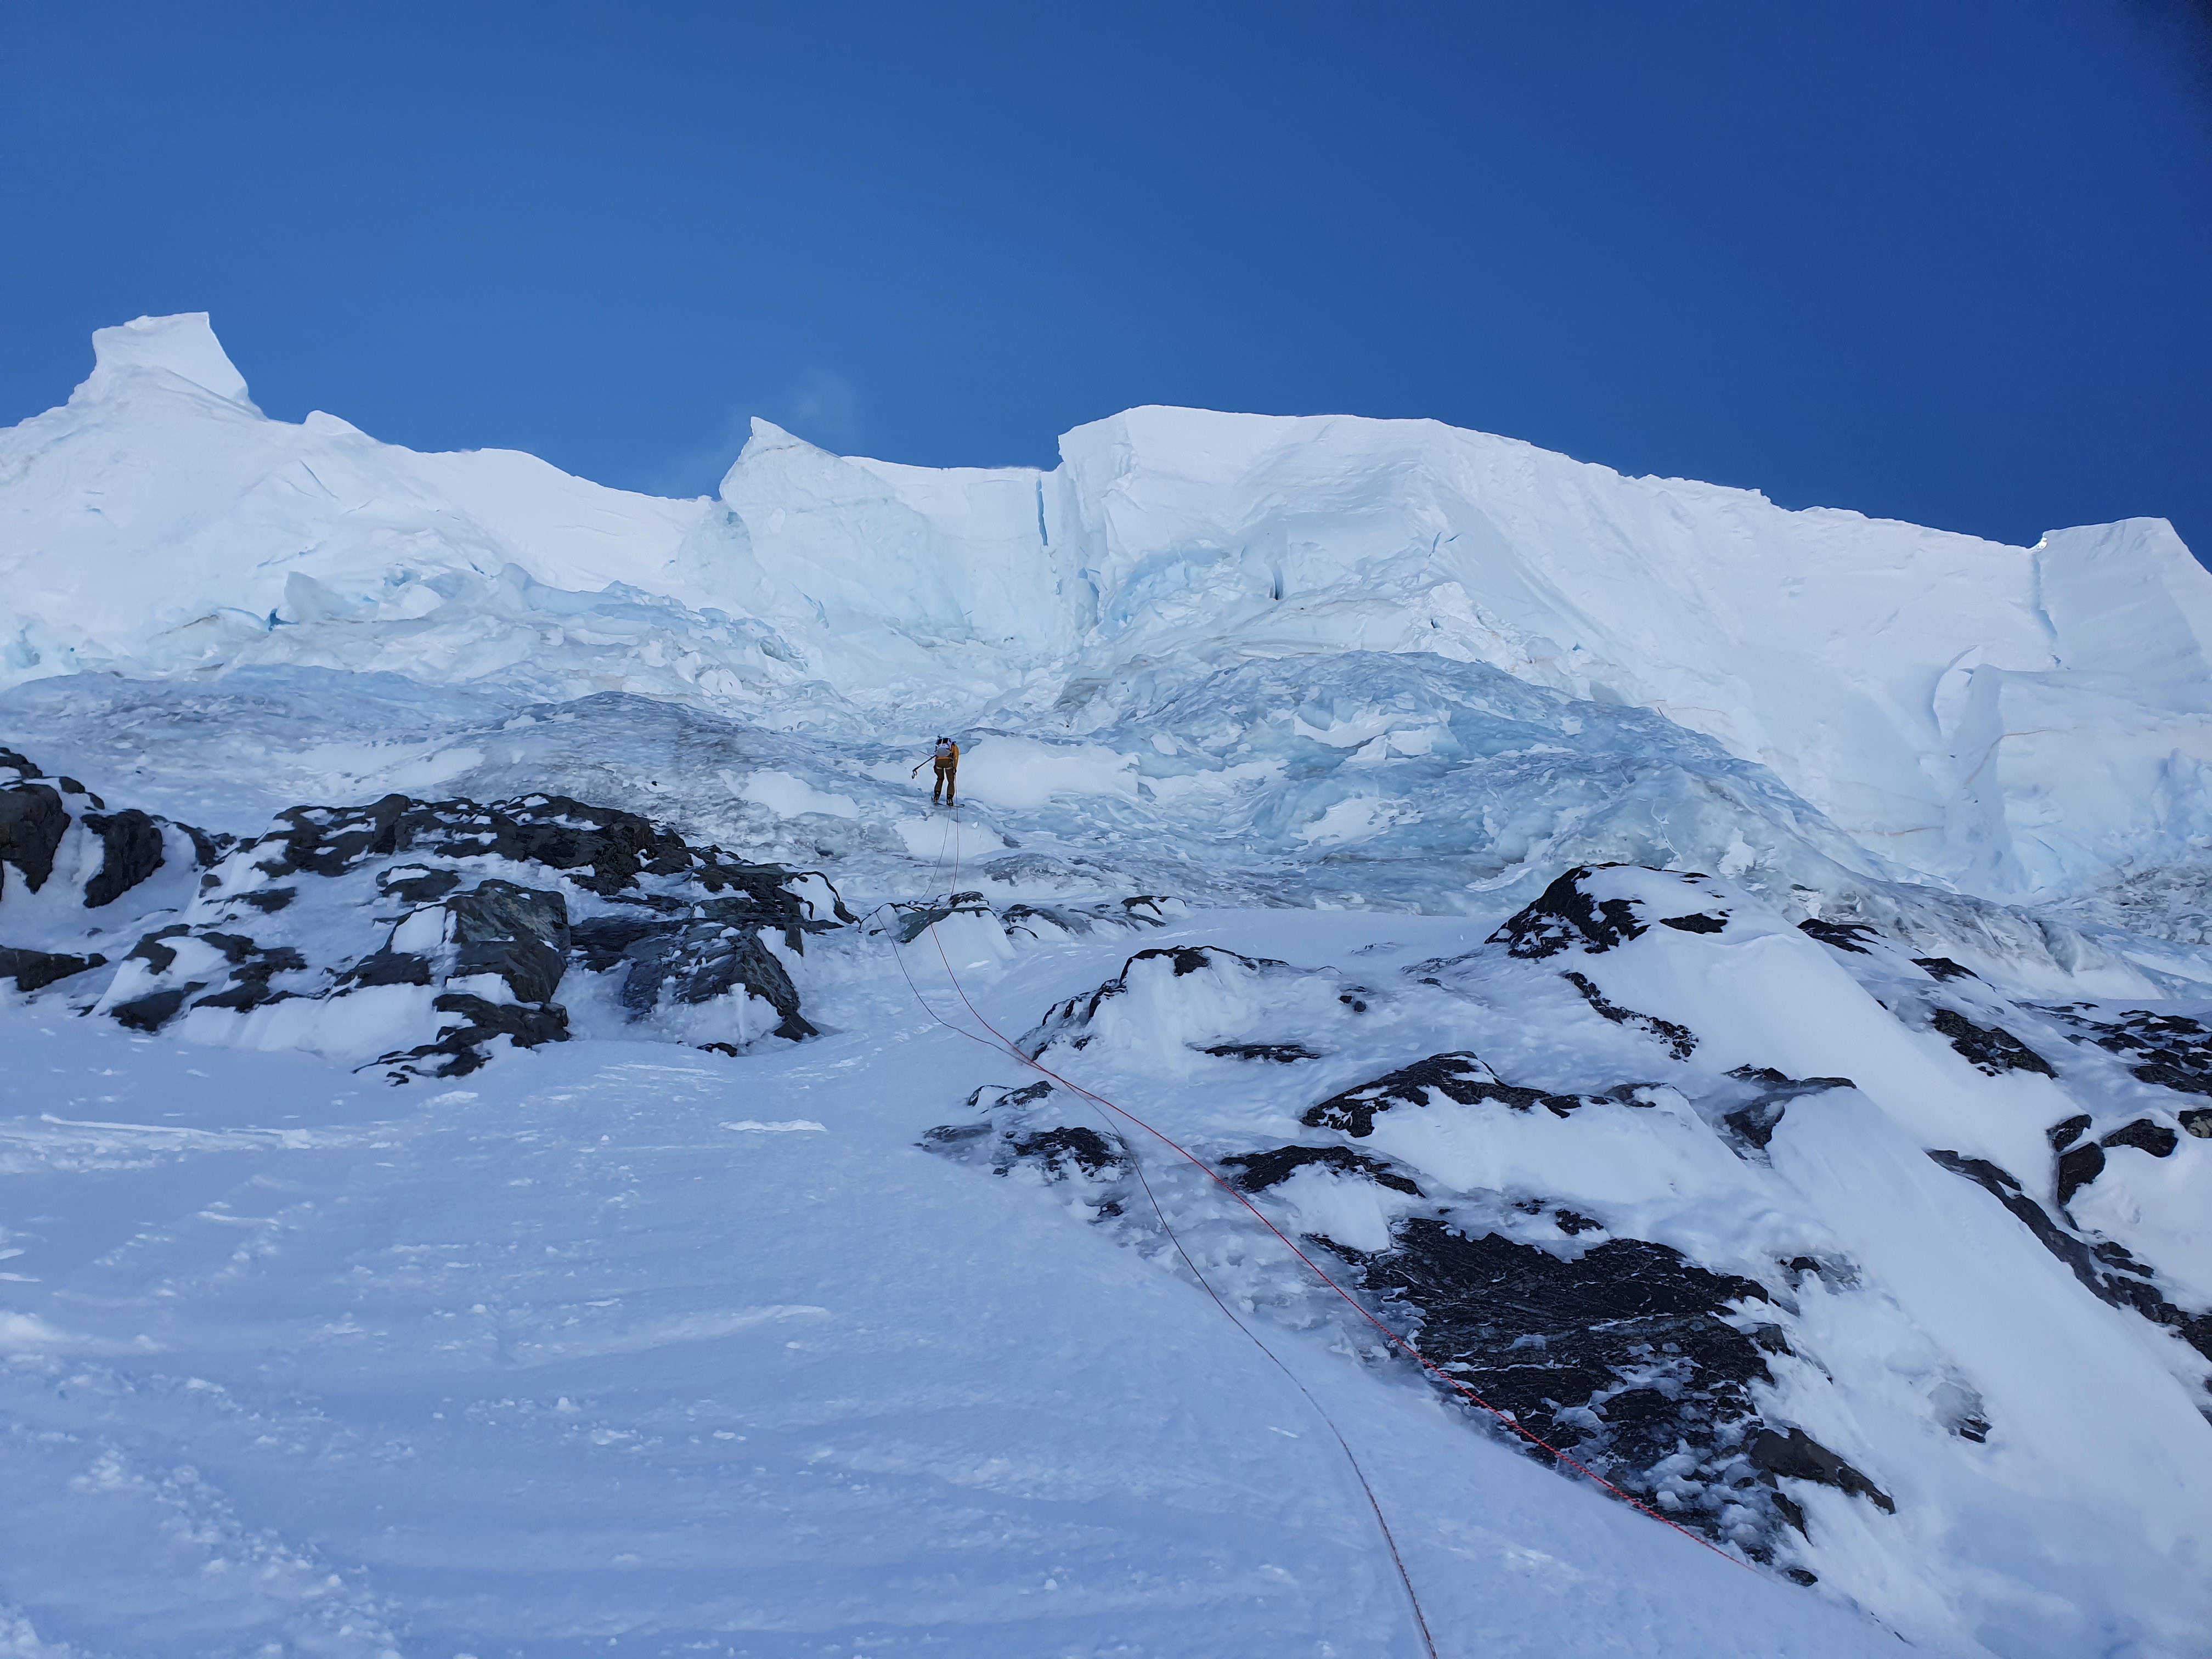
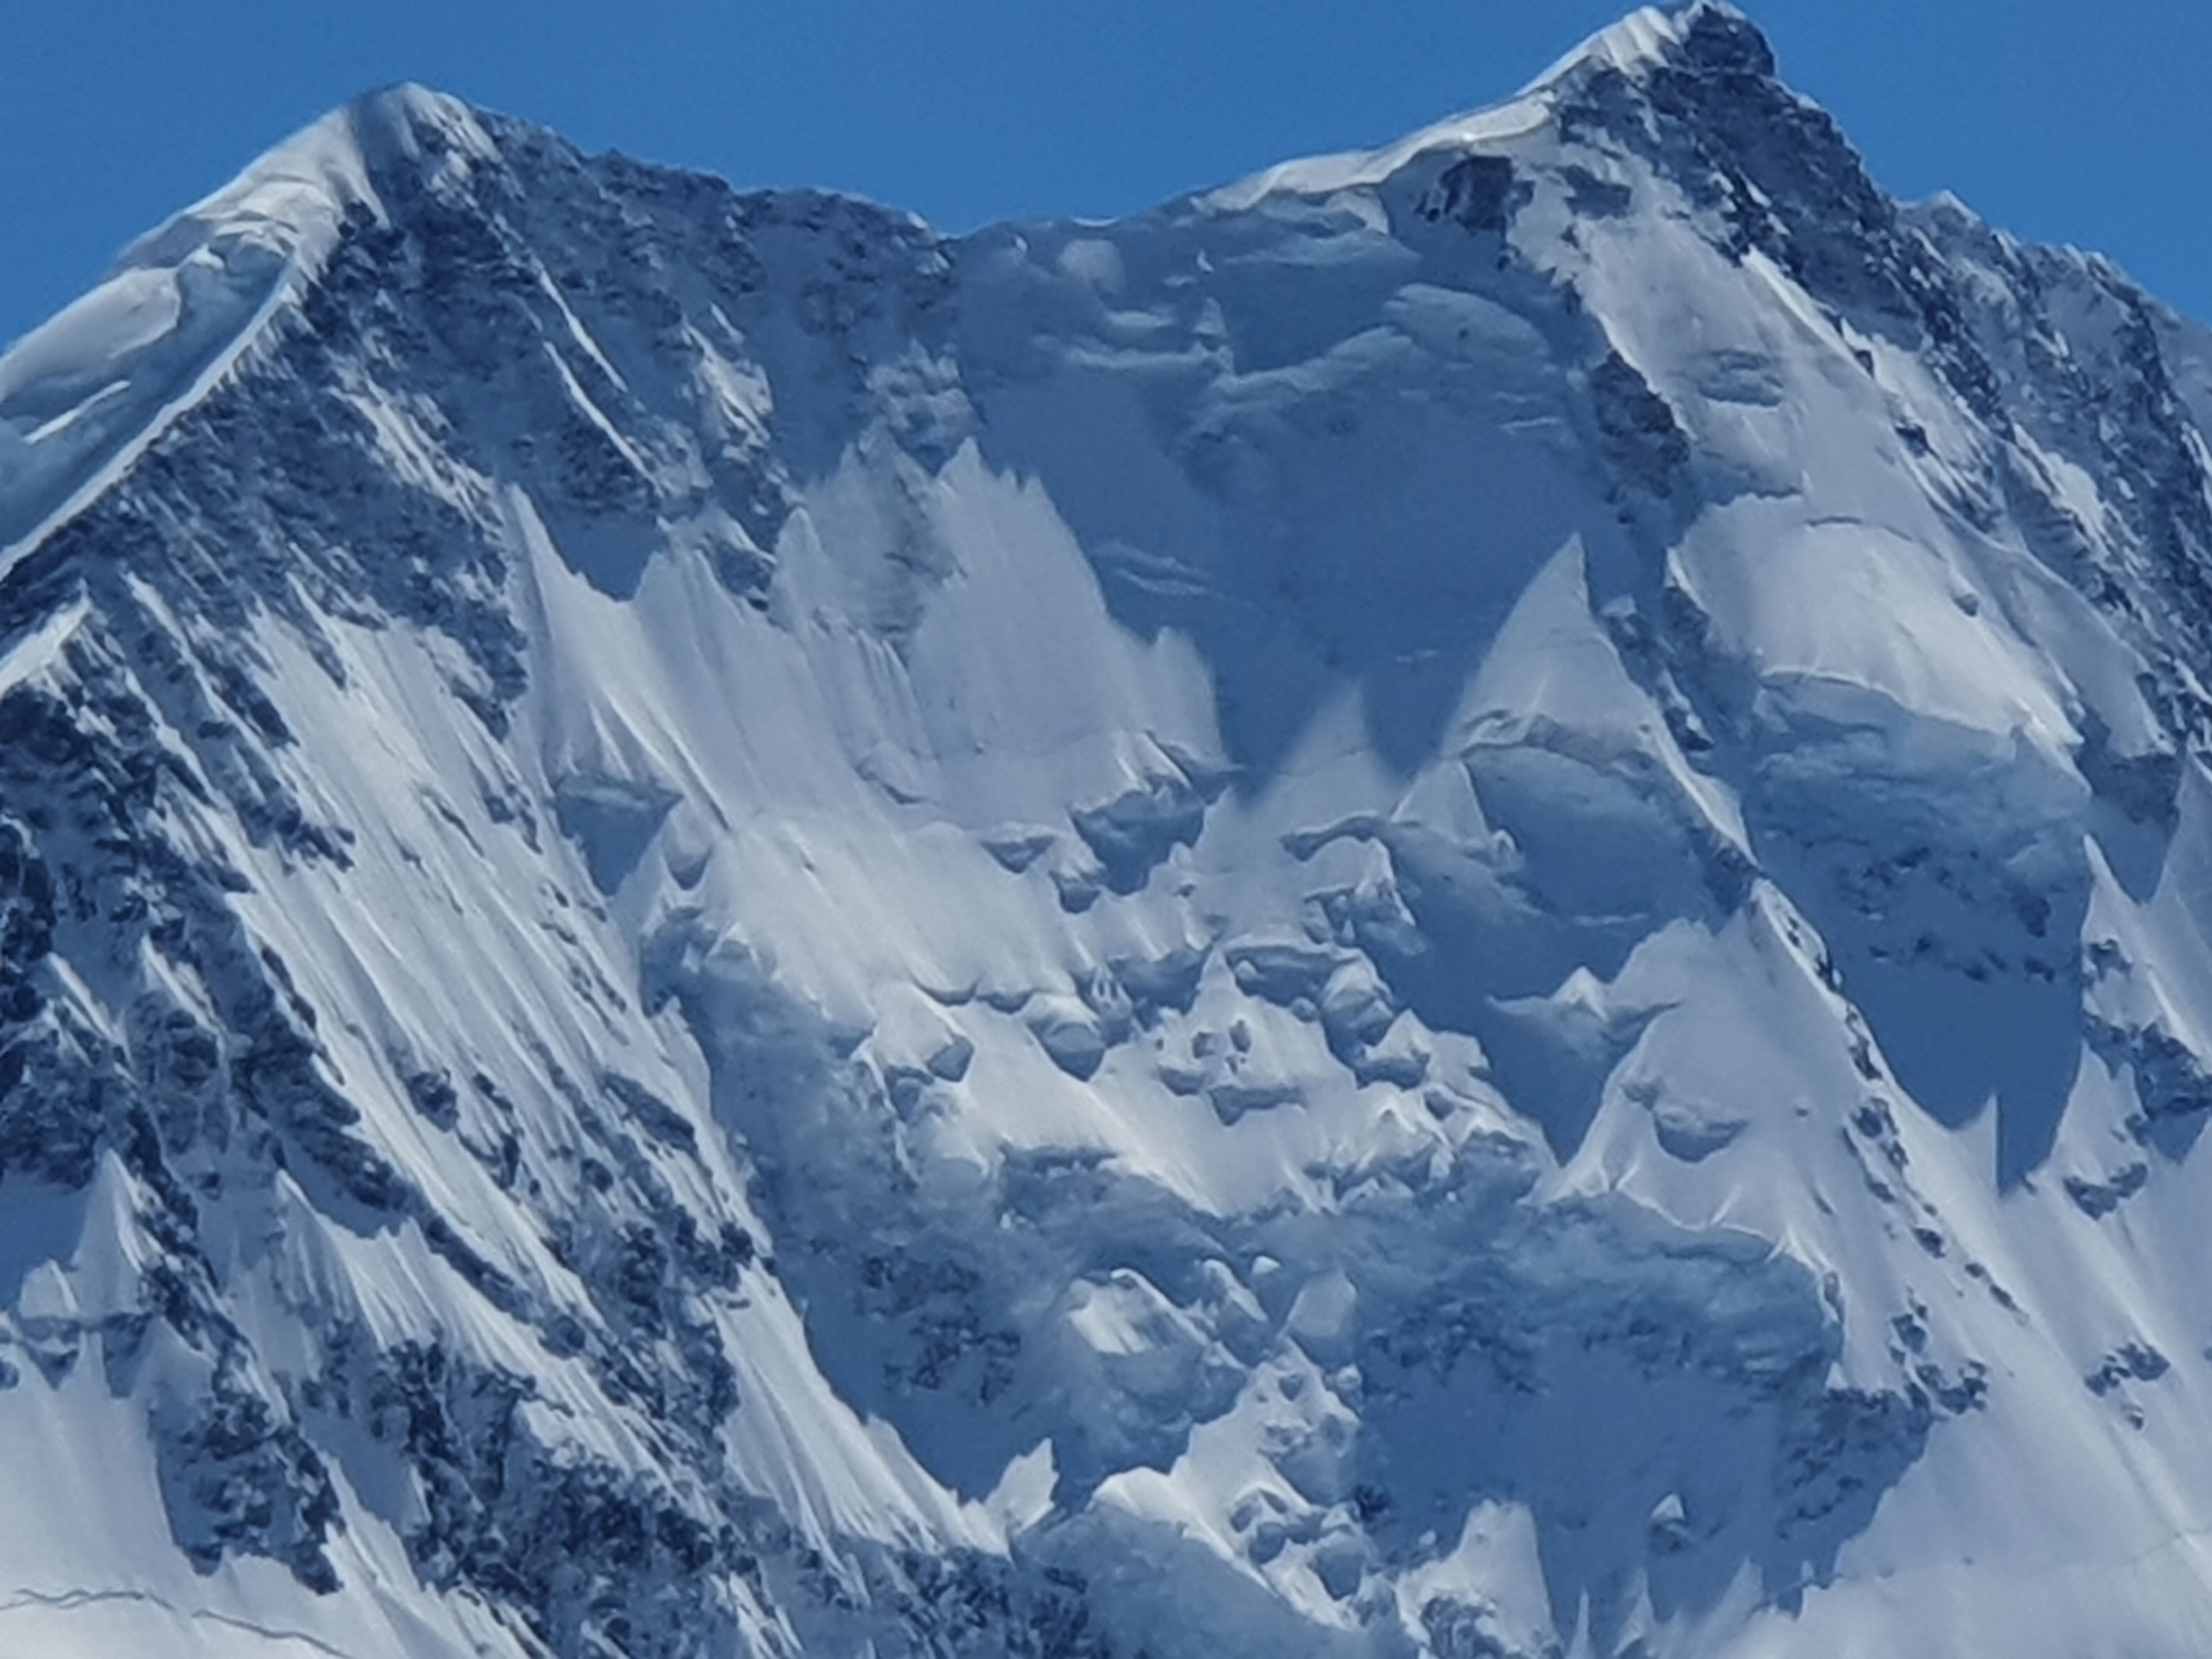
Pretty straightforward when the conditions are good. We had a good overnight freeze and so fast efficient cramponing conditions. We skinned (ski crampons were essential) south from the hut to the base of the couloir just south of the NW ridge. From here we transitioned to crampons and booted up the route. We used the rope to cross the shrund at the base but otherwise we soloed the whole way making fast progress. The couloir fans out into a couple of possible exits at the top – if you continue directly up fall line it turns into some M2 mixed climbing up to the West ridge and Low Peak. We wanted to just maximise the amount of skiing and so didnt bring equipment for mixed climbing or raps, and headed to climbers left up a narrow couloir onto an open snow fan at around 3300m. Another option from here would be traversing north to Porter Col if you wanted the summit without any mixed climbing. For us that would have been bare ice on this section, so once the snow ran out we transitioned to skis. This was a technical transition, on very steep exposed and firm snow, and any equipment (or people) dropped at this point would end up on the Empress shelf 1000m below. We protected it with a snow stake belay.

It took us around 3 hours from the hut to climb the route. We had perfect conditions and soloed the whole route so it may take longer than this

Ski Descent

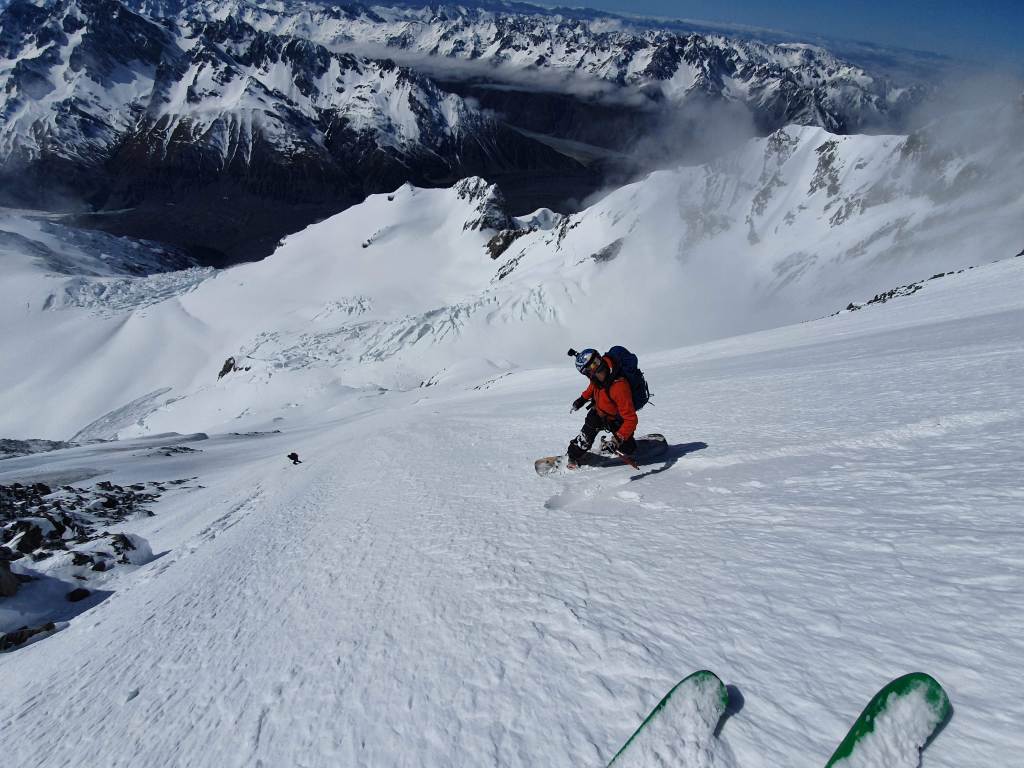
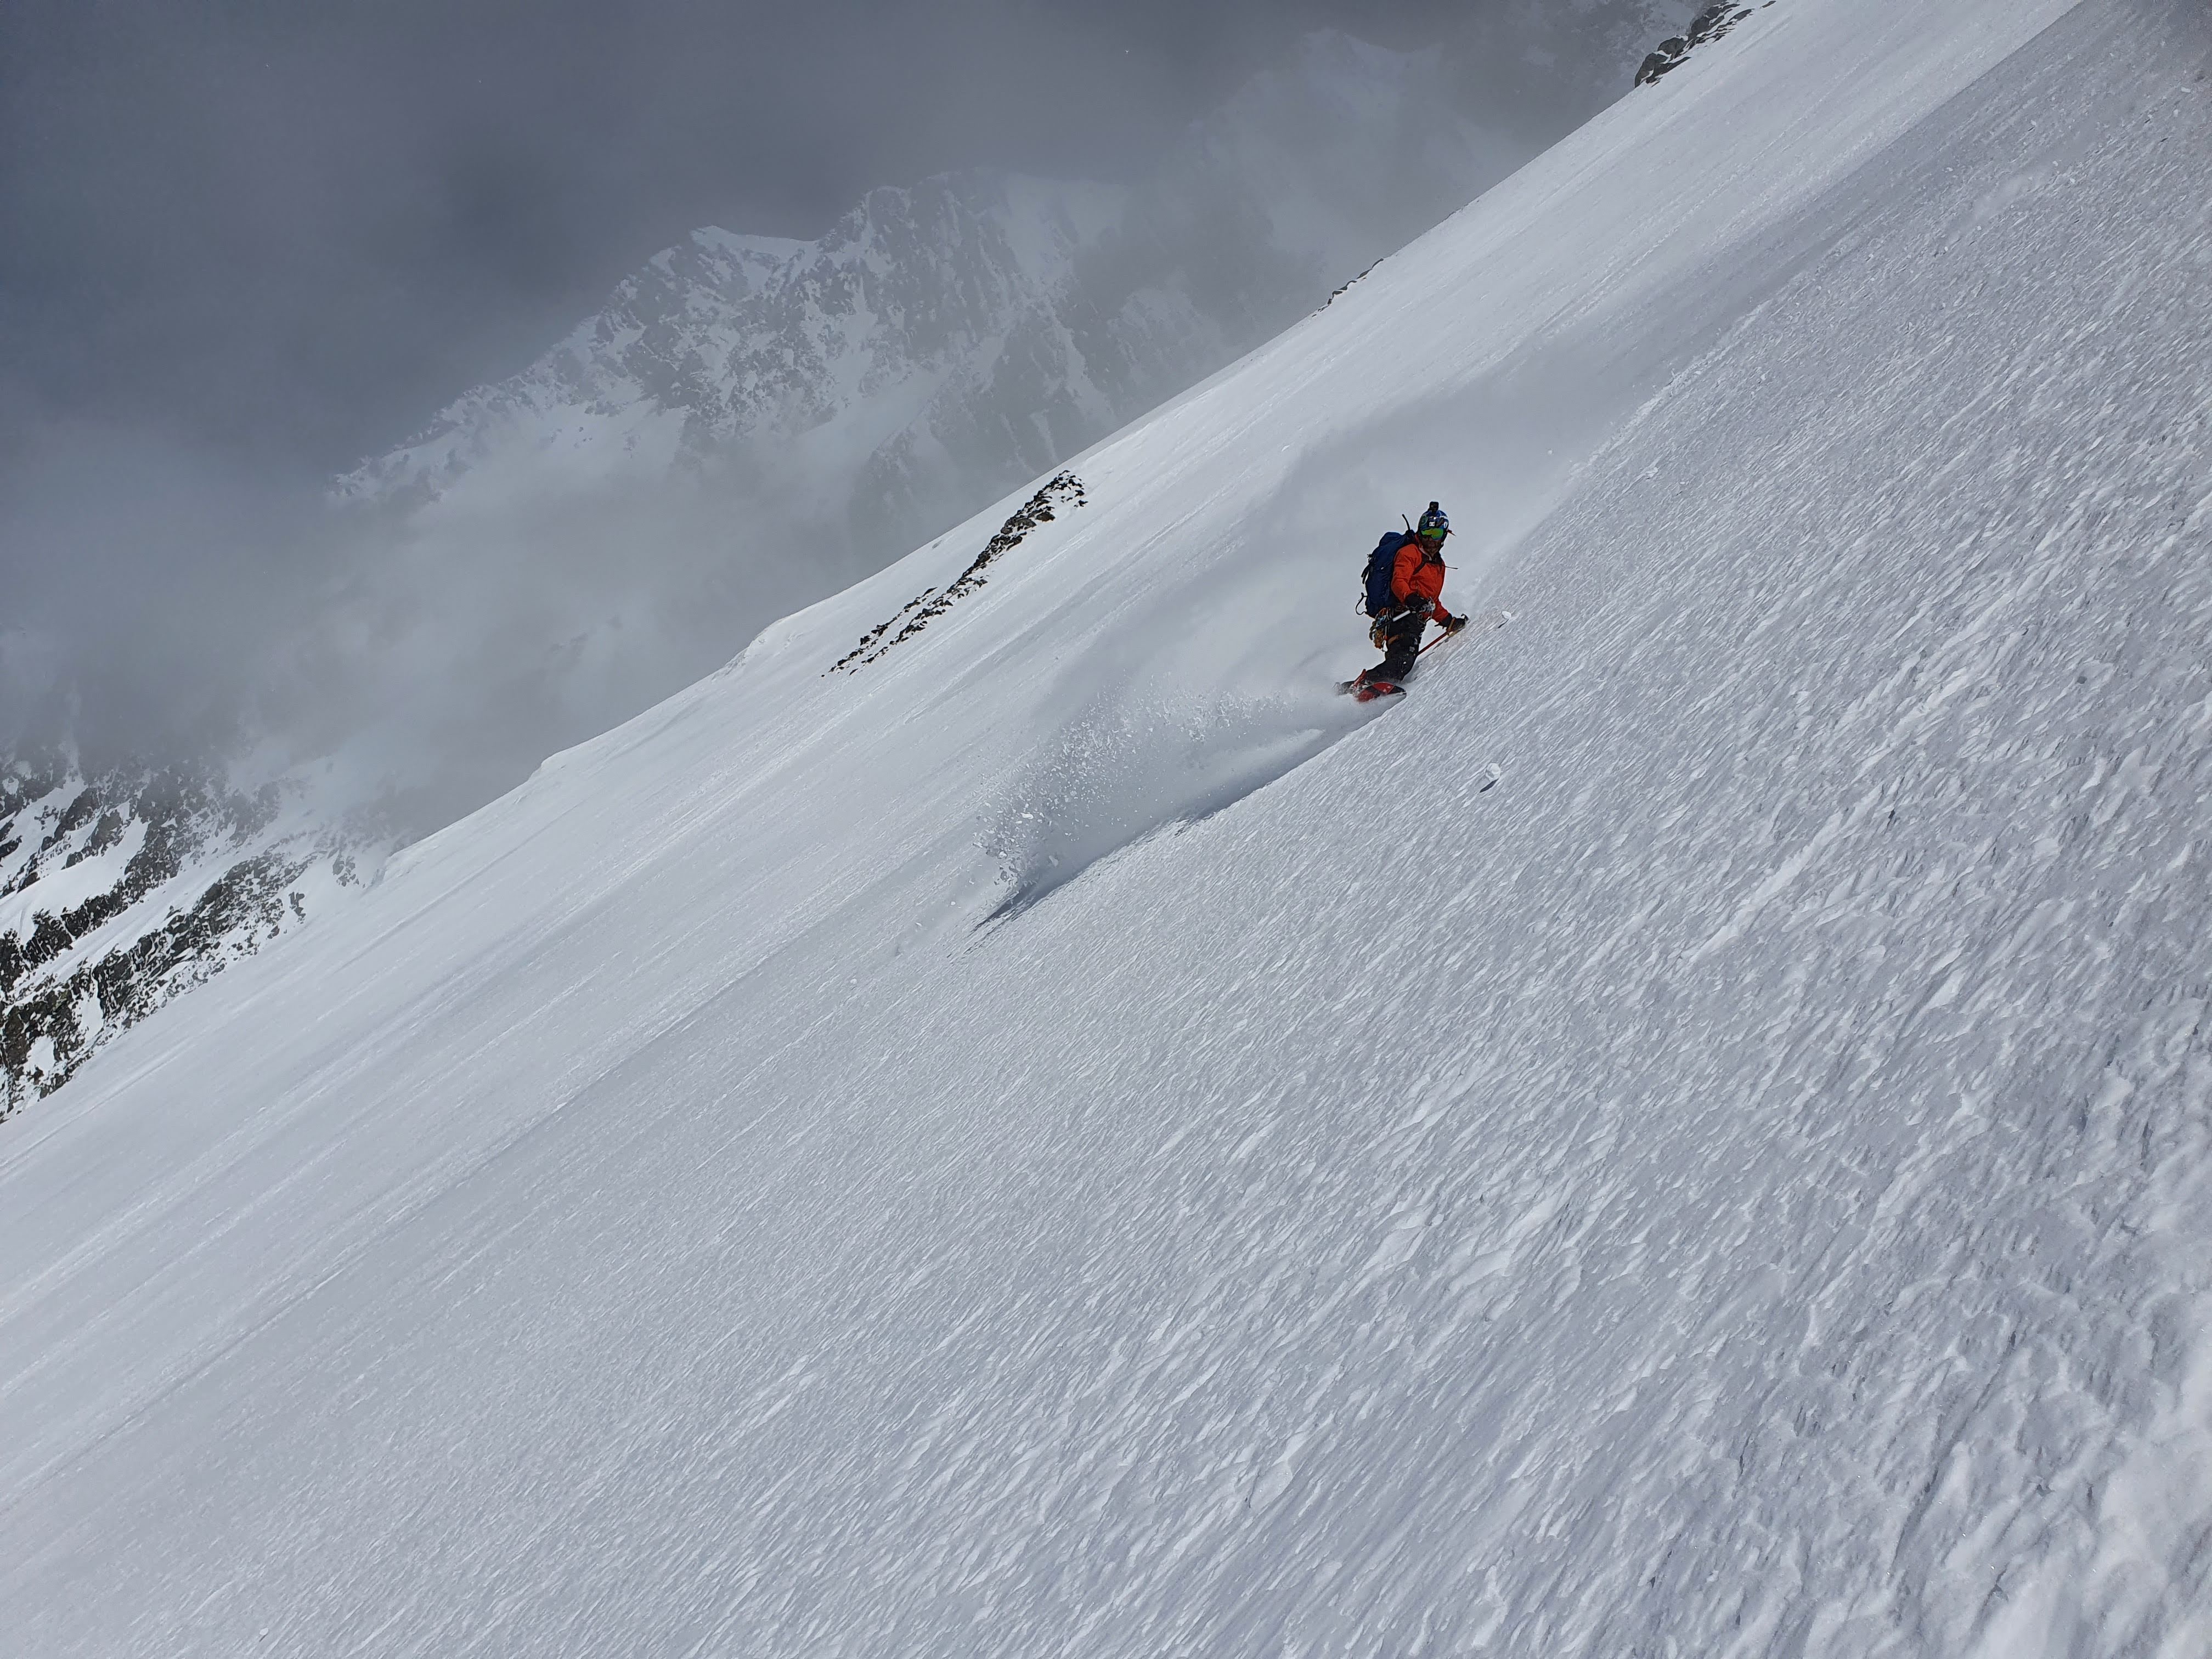
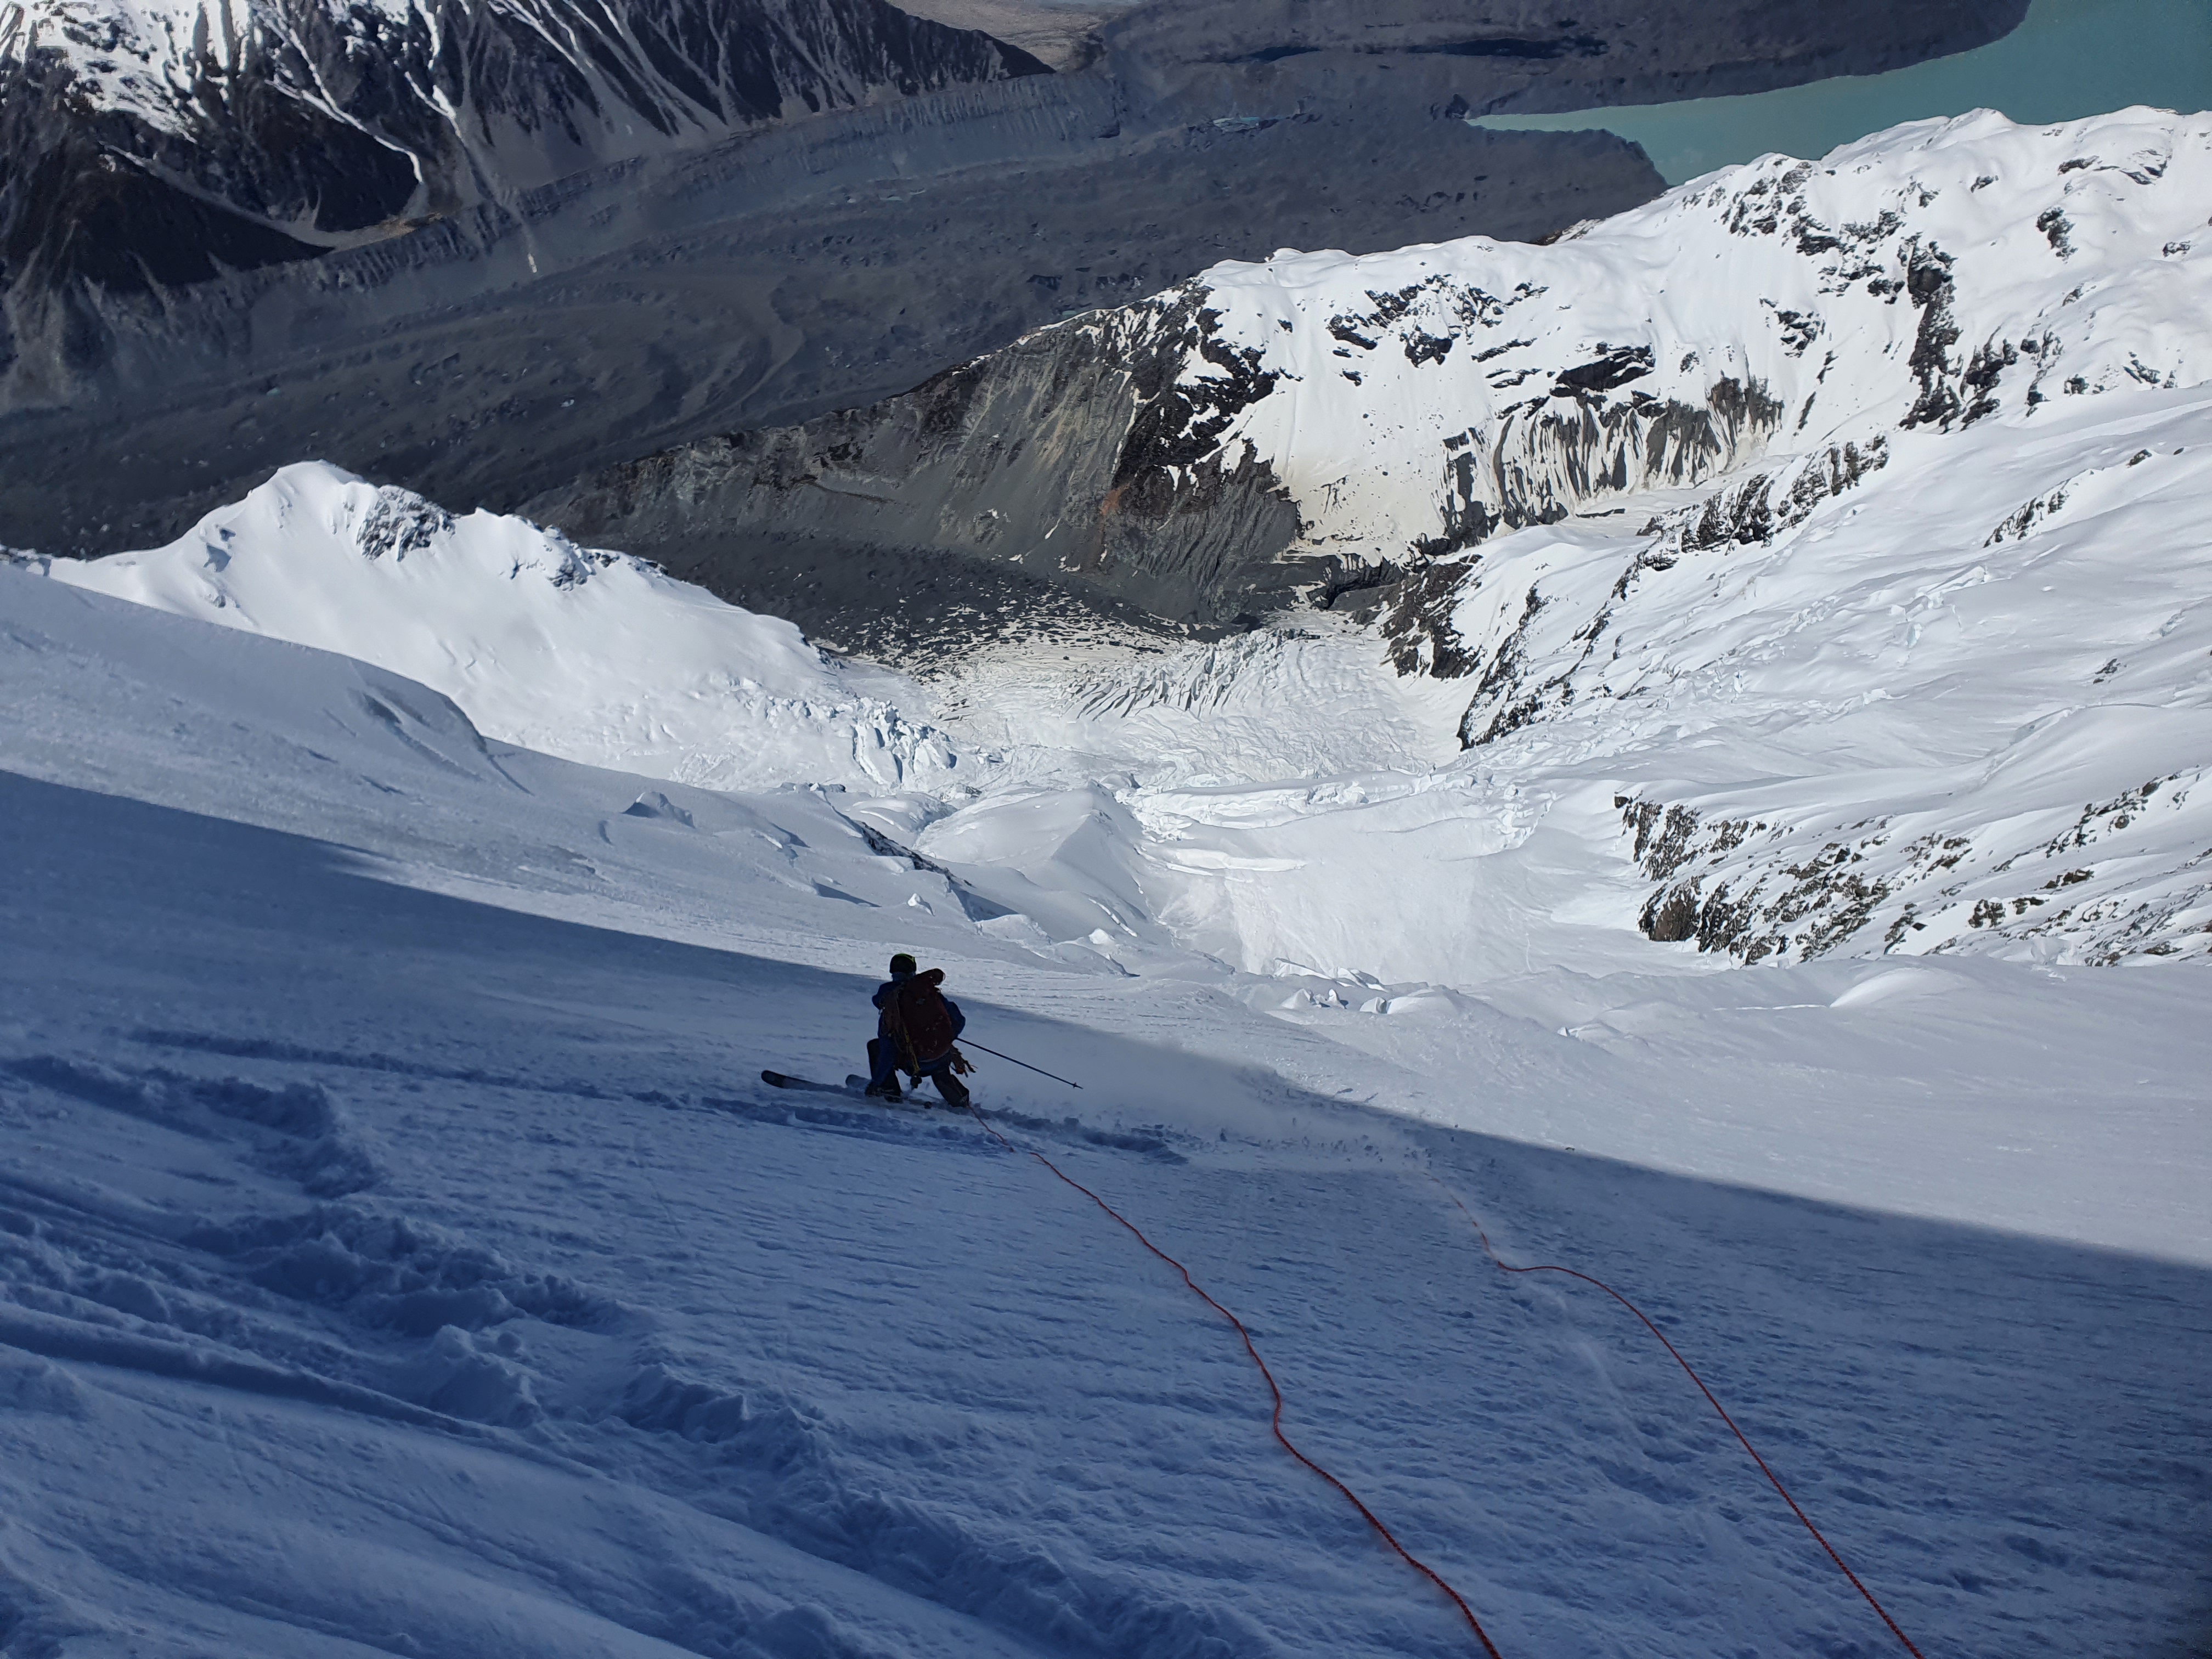
We started skiing at 9am. This was too early and the snow was still pretty firm, which given the exposure made things pretty spicy. We had to be back in the village that evening though and didnt want to be coming back down over those snowbridges too late in the day. Time to put the edges through their paces!

Joe making turns on the lower part of the couloir

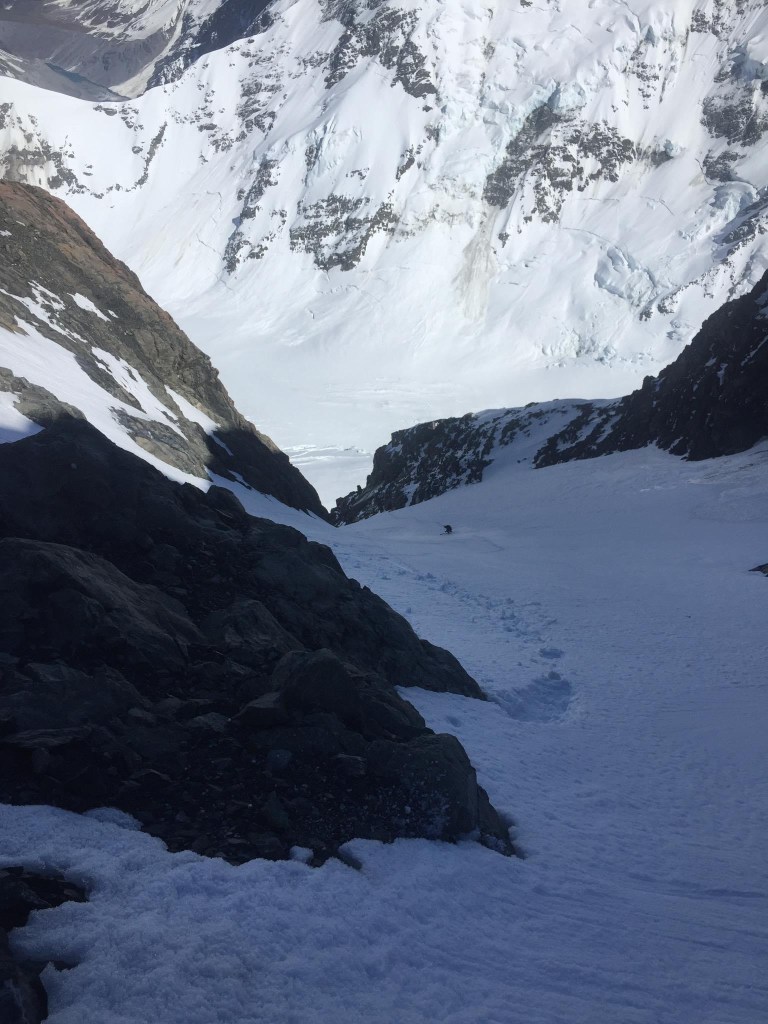
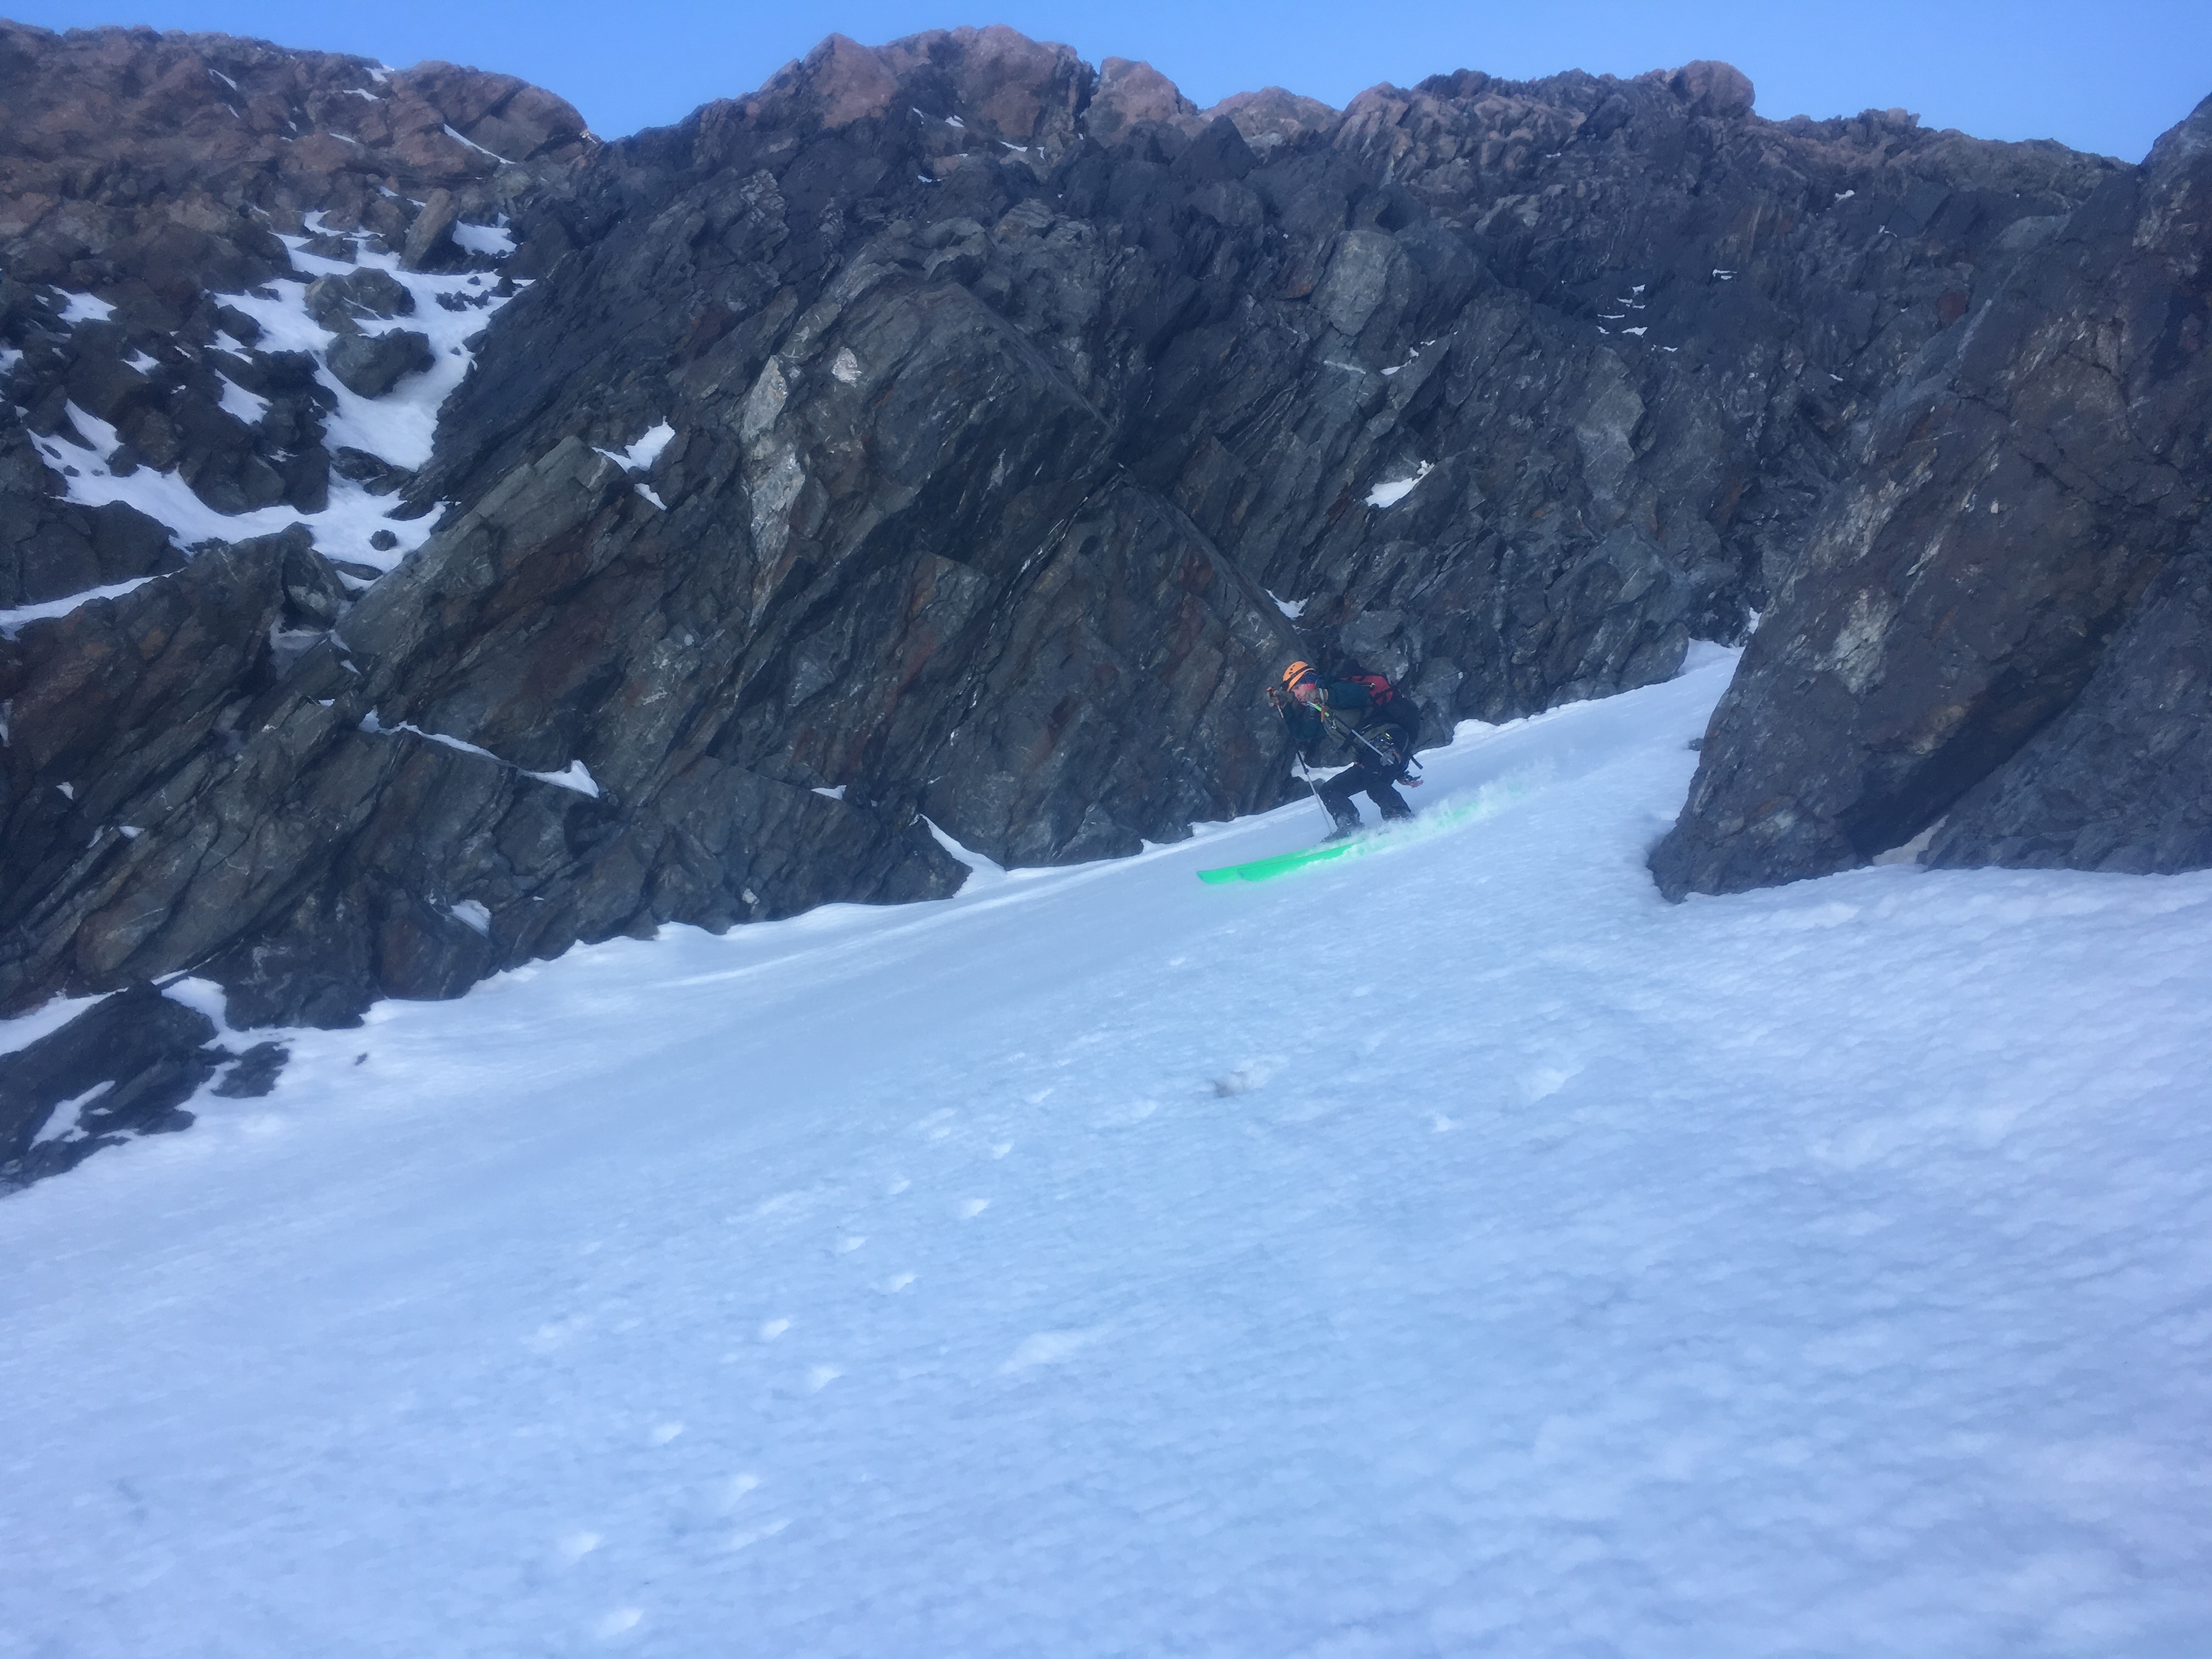
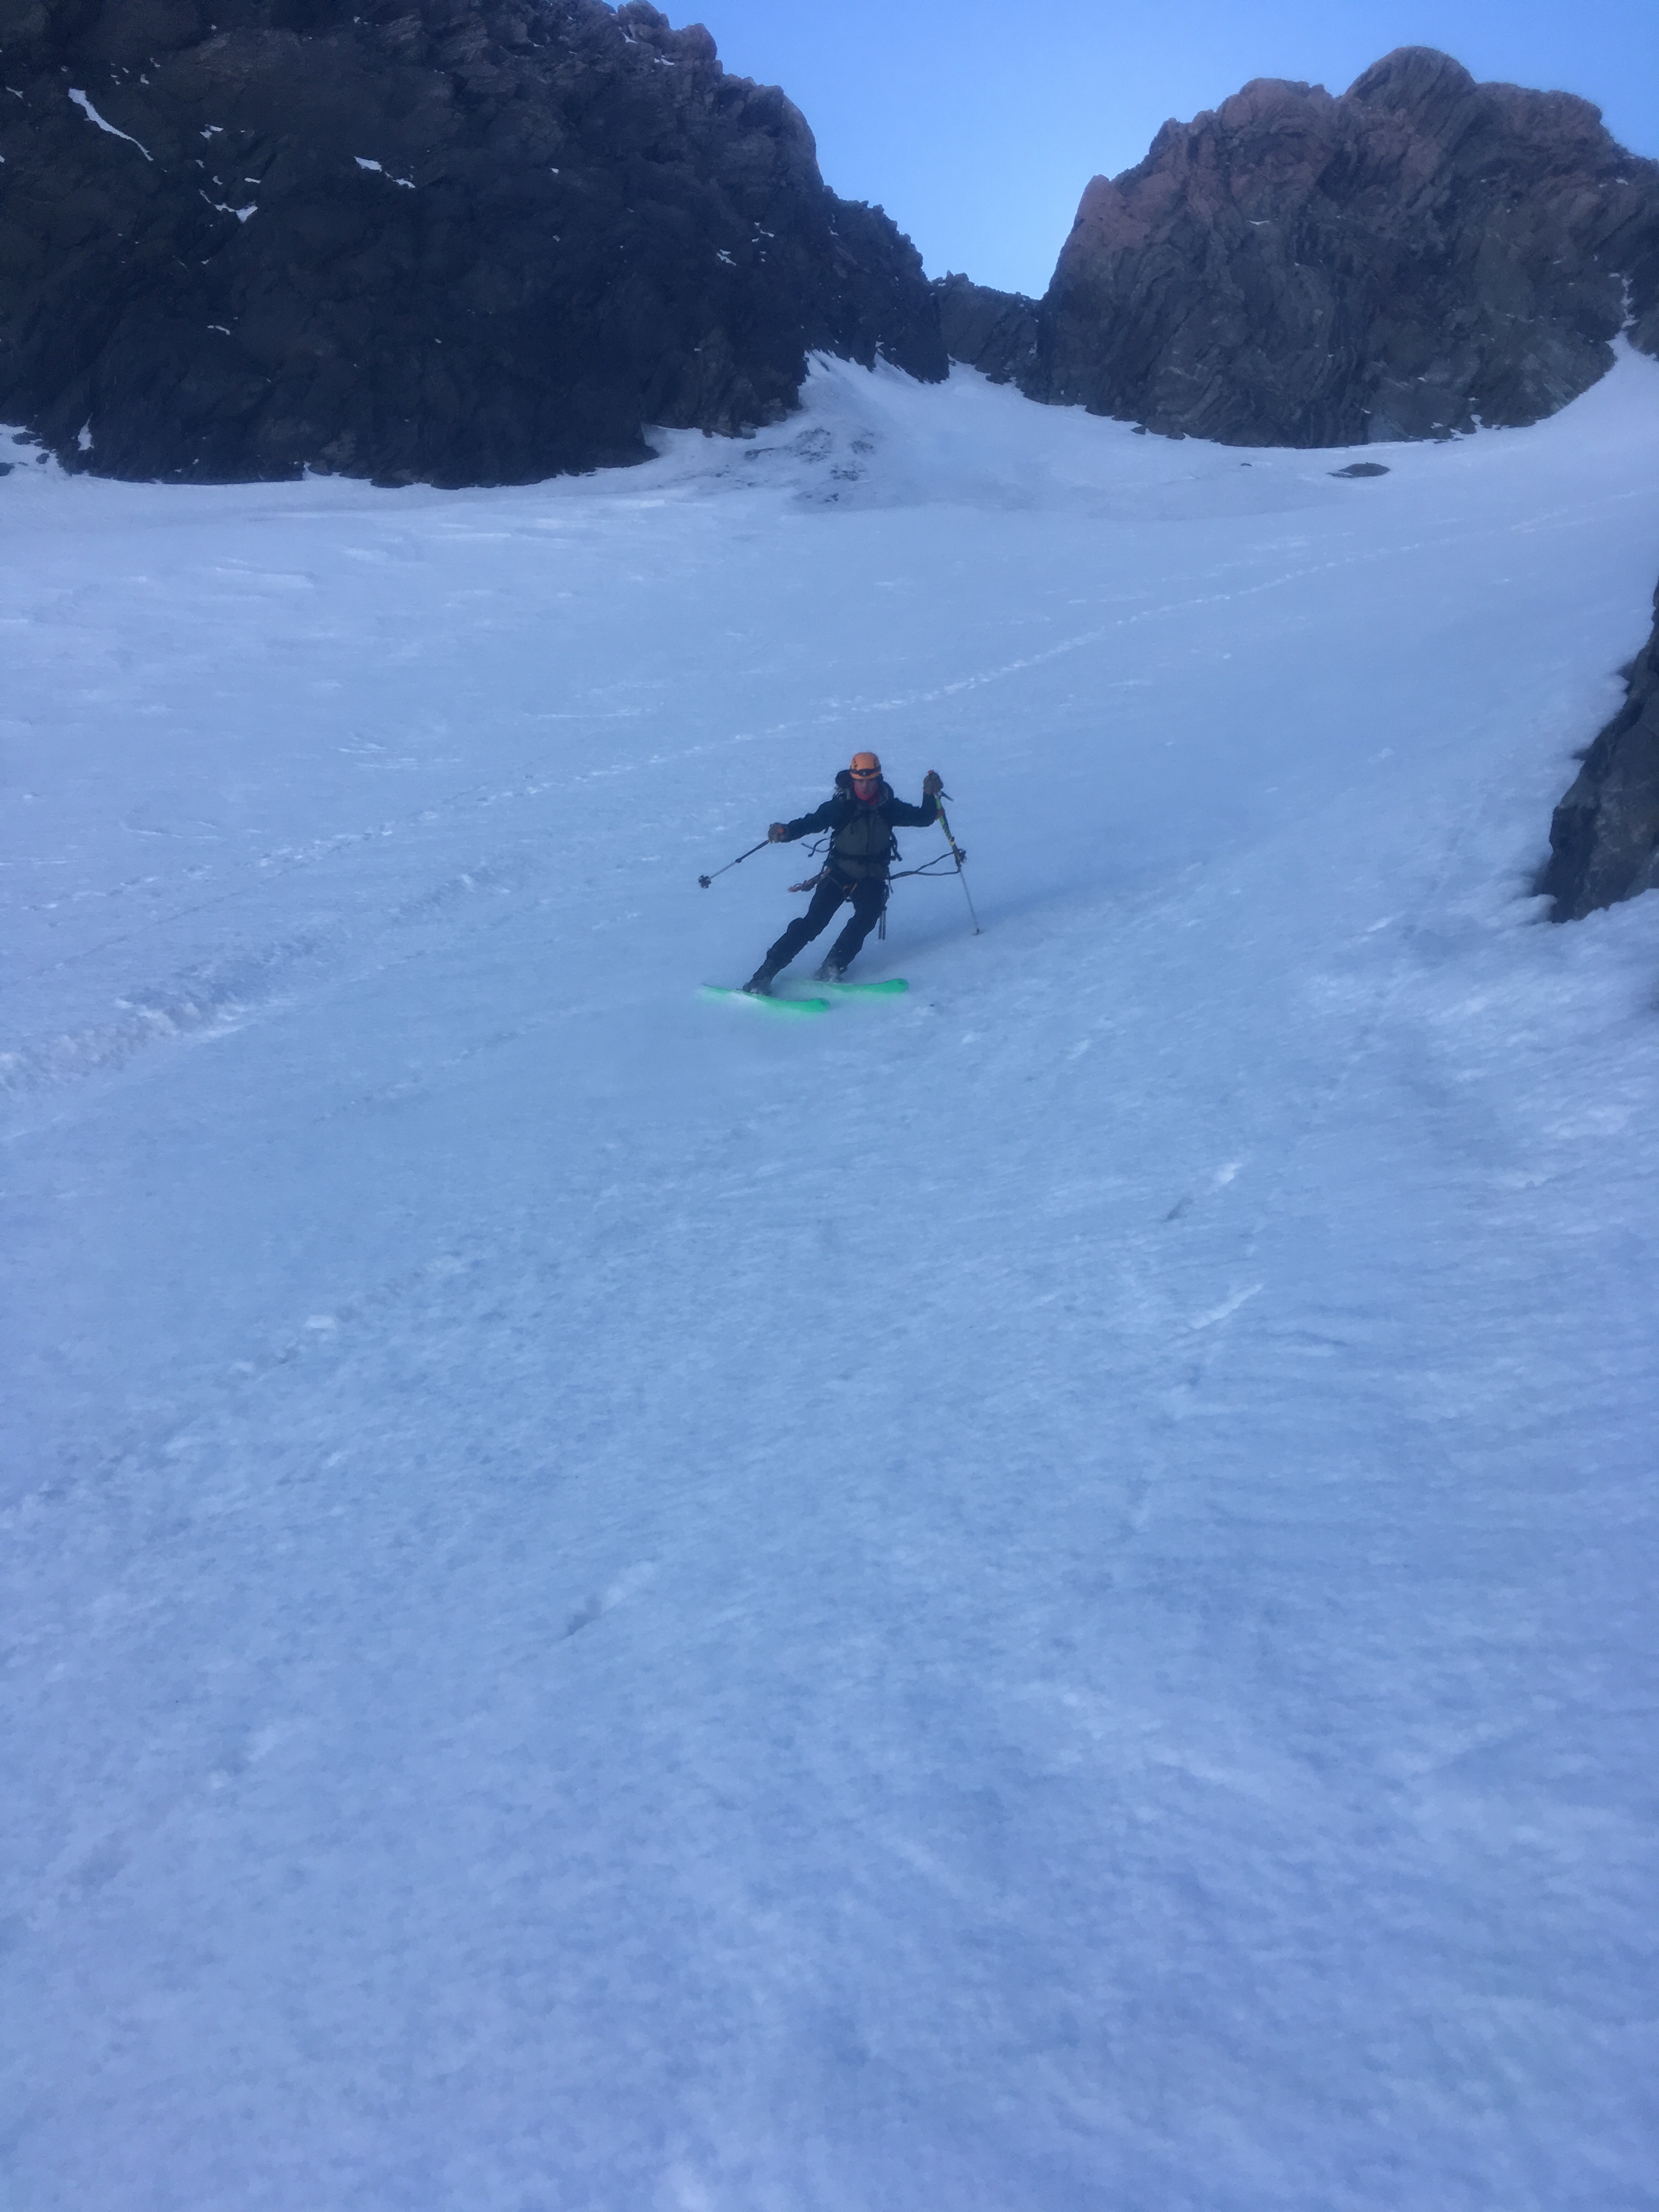
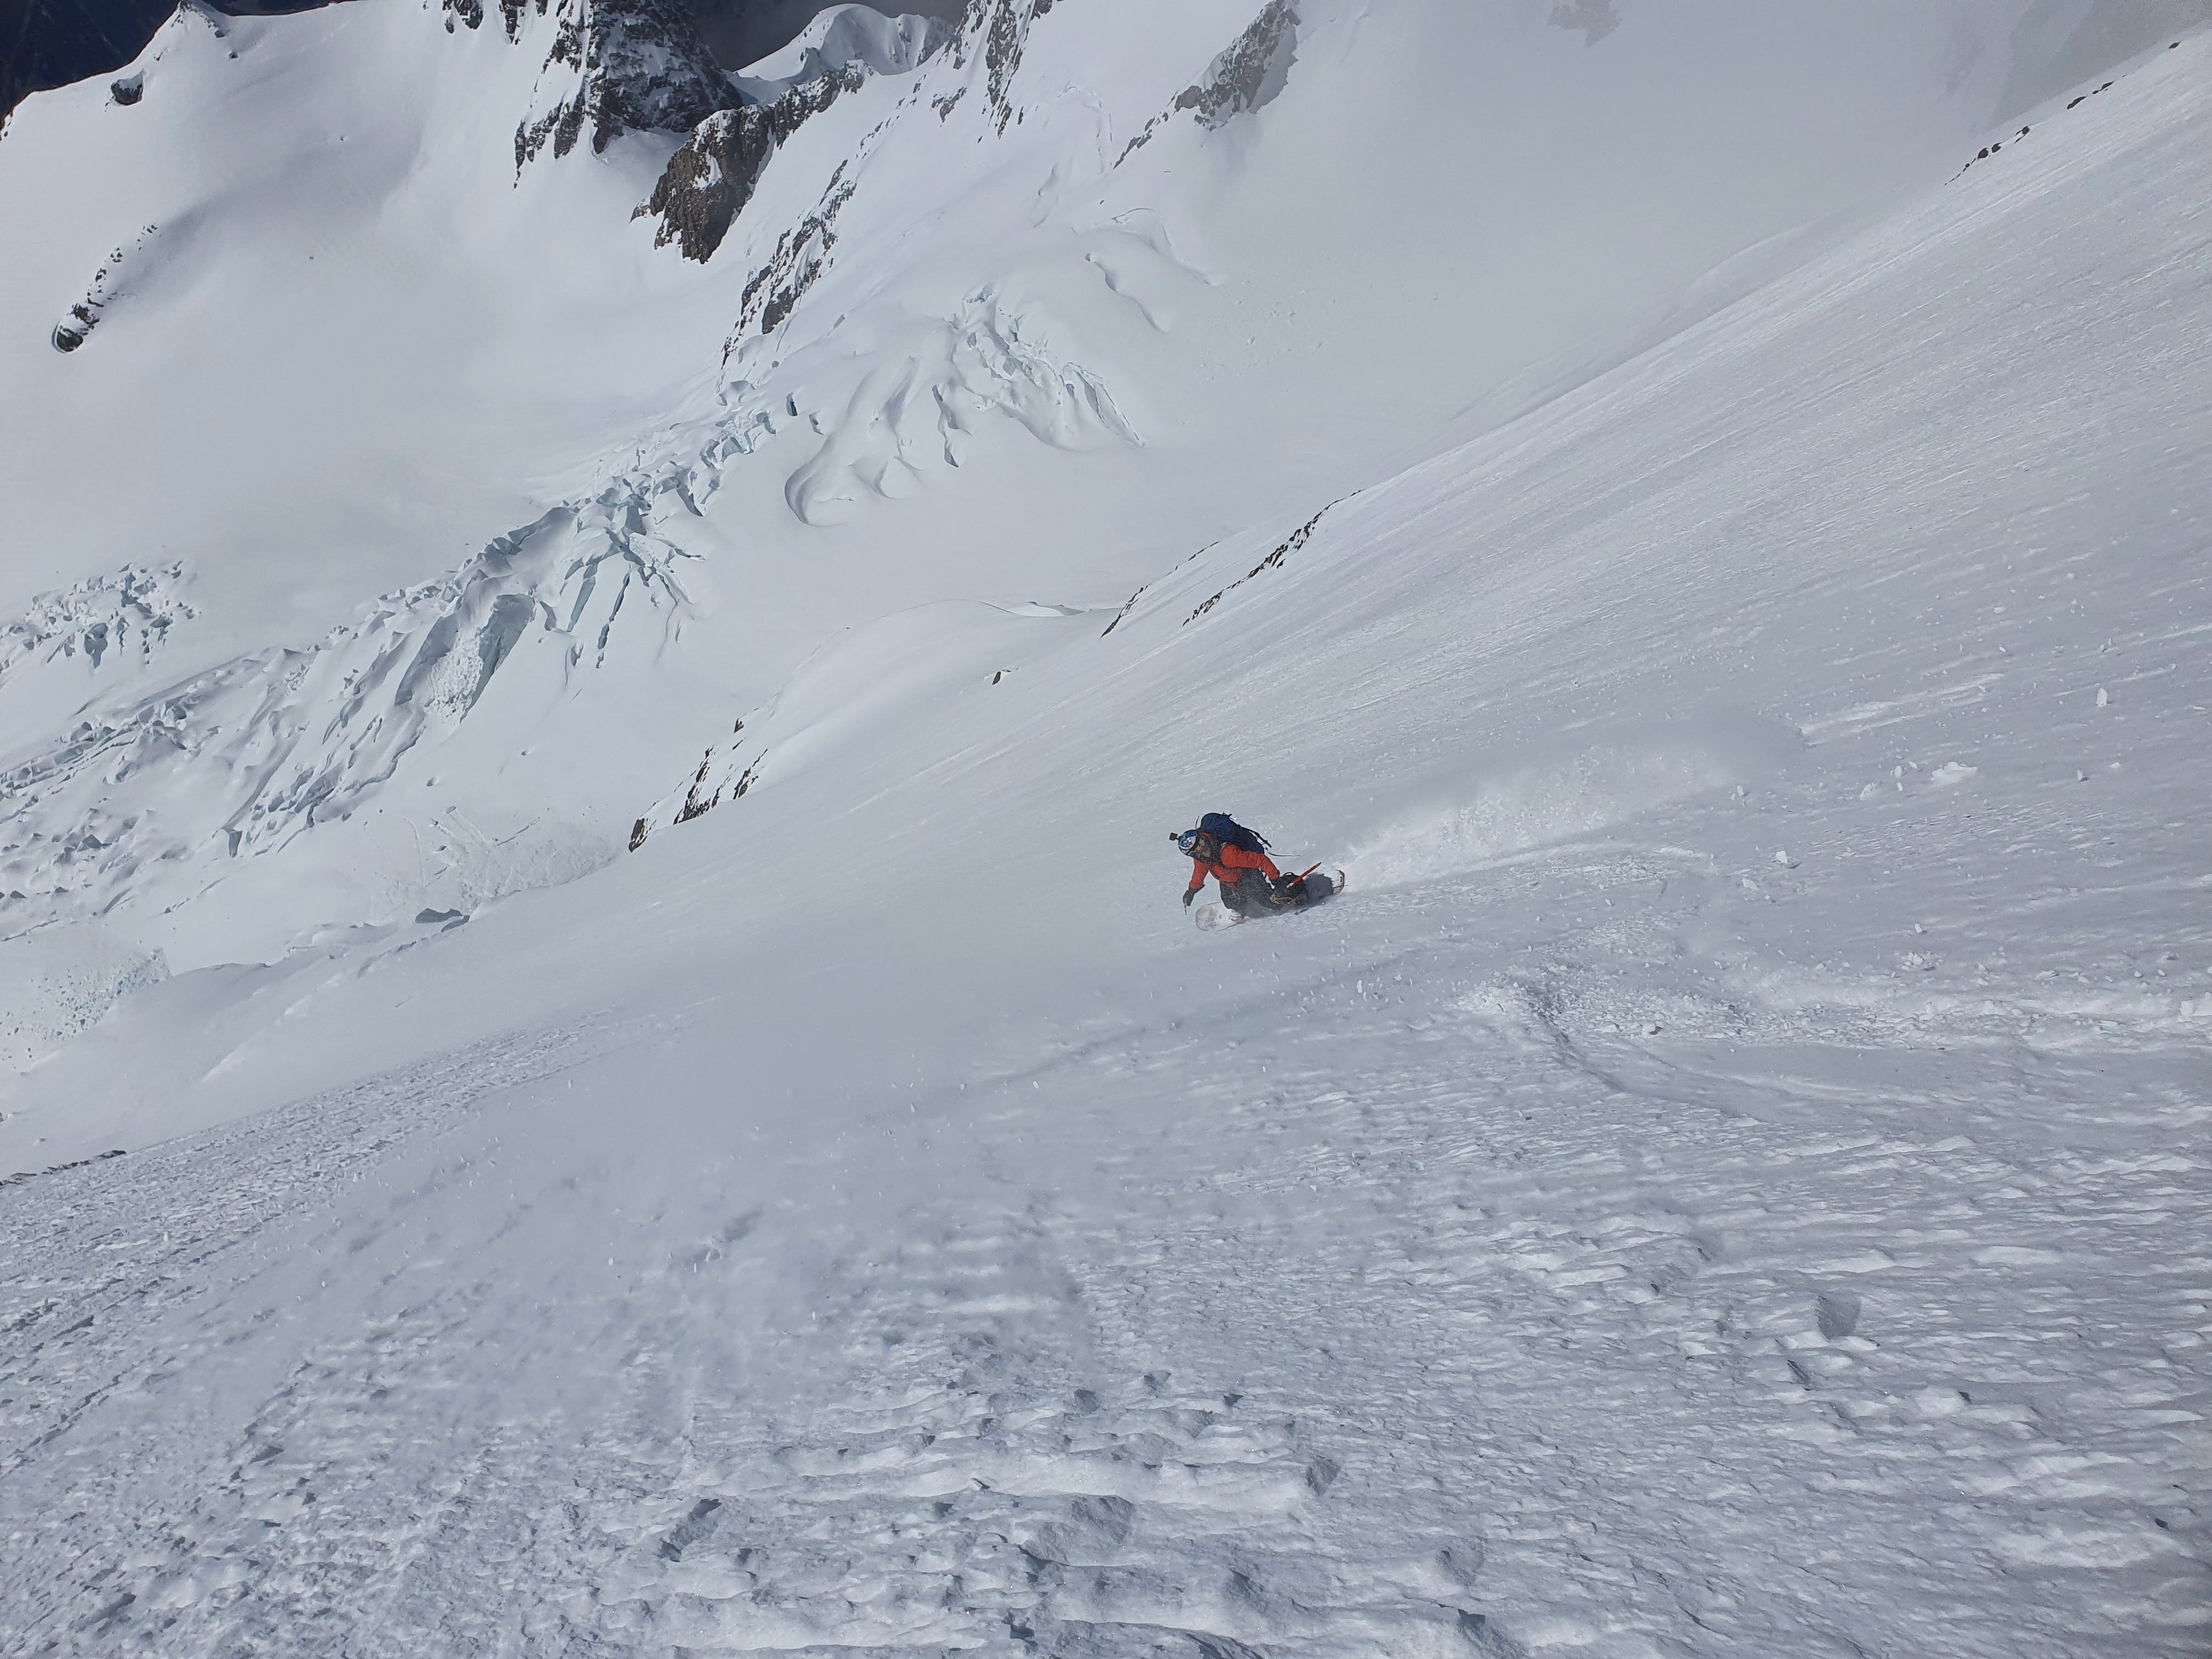
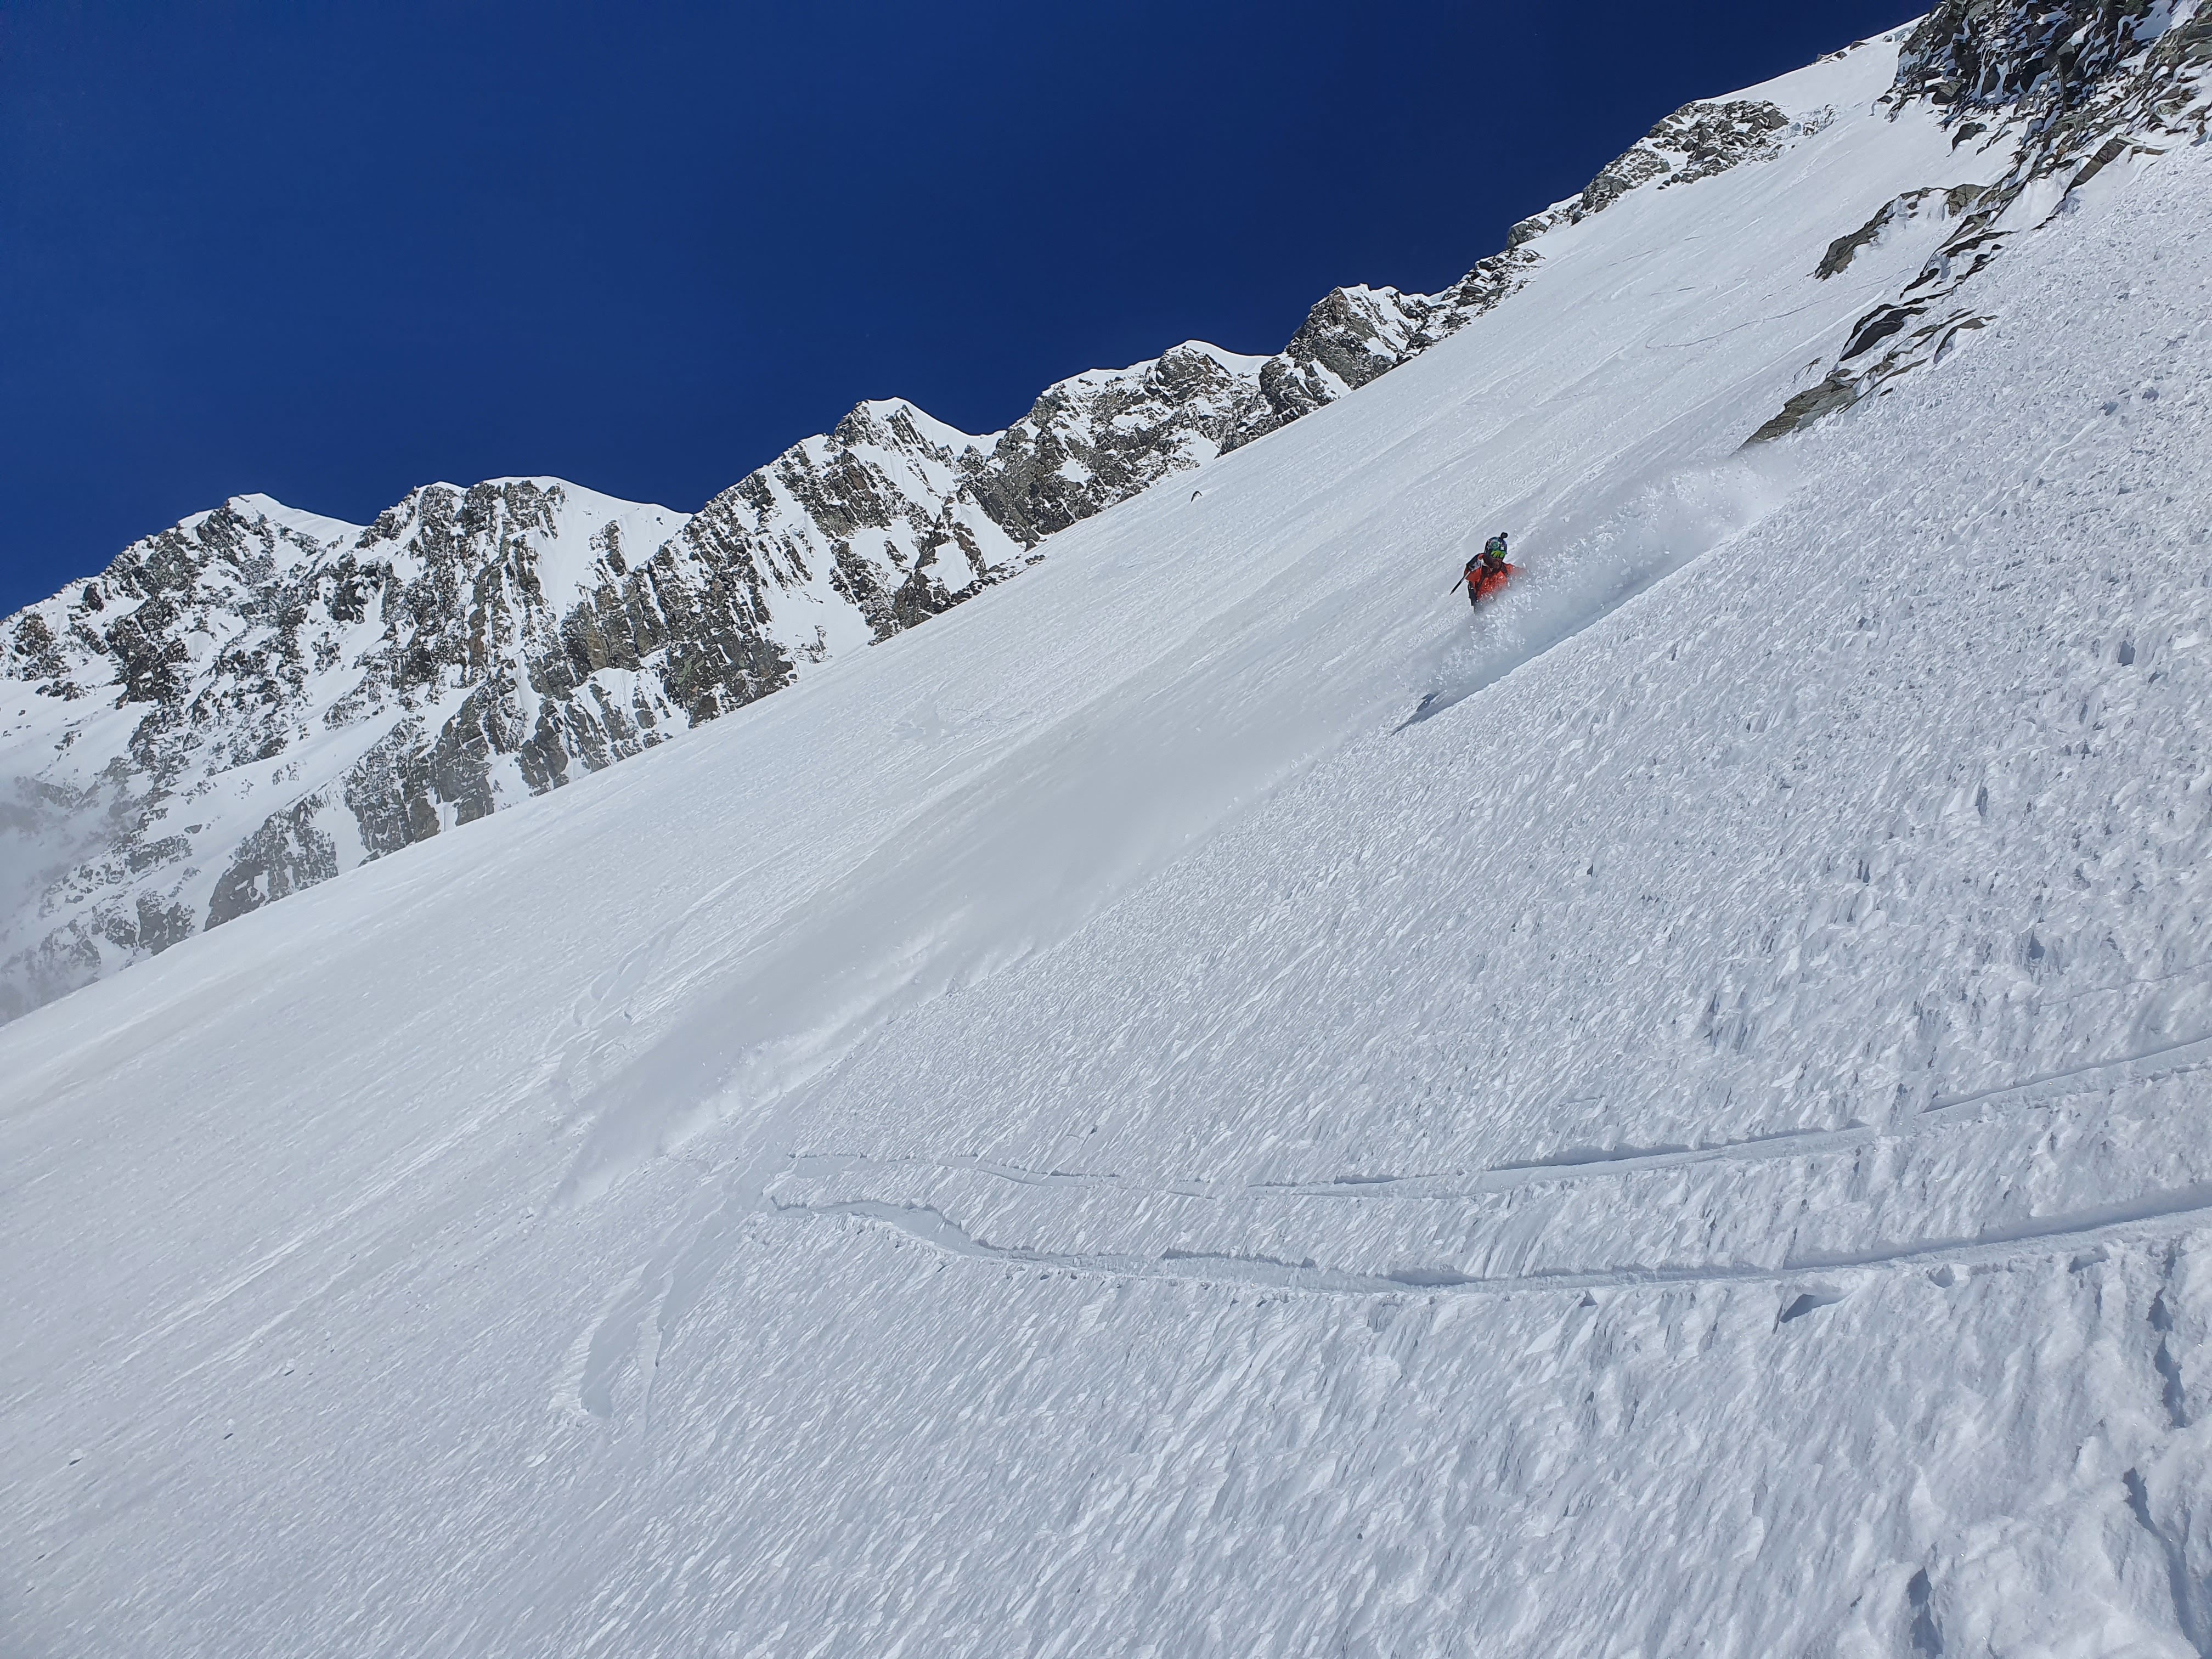
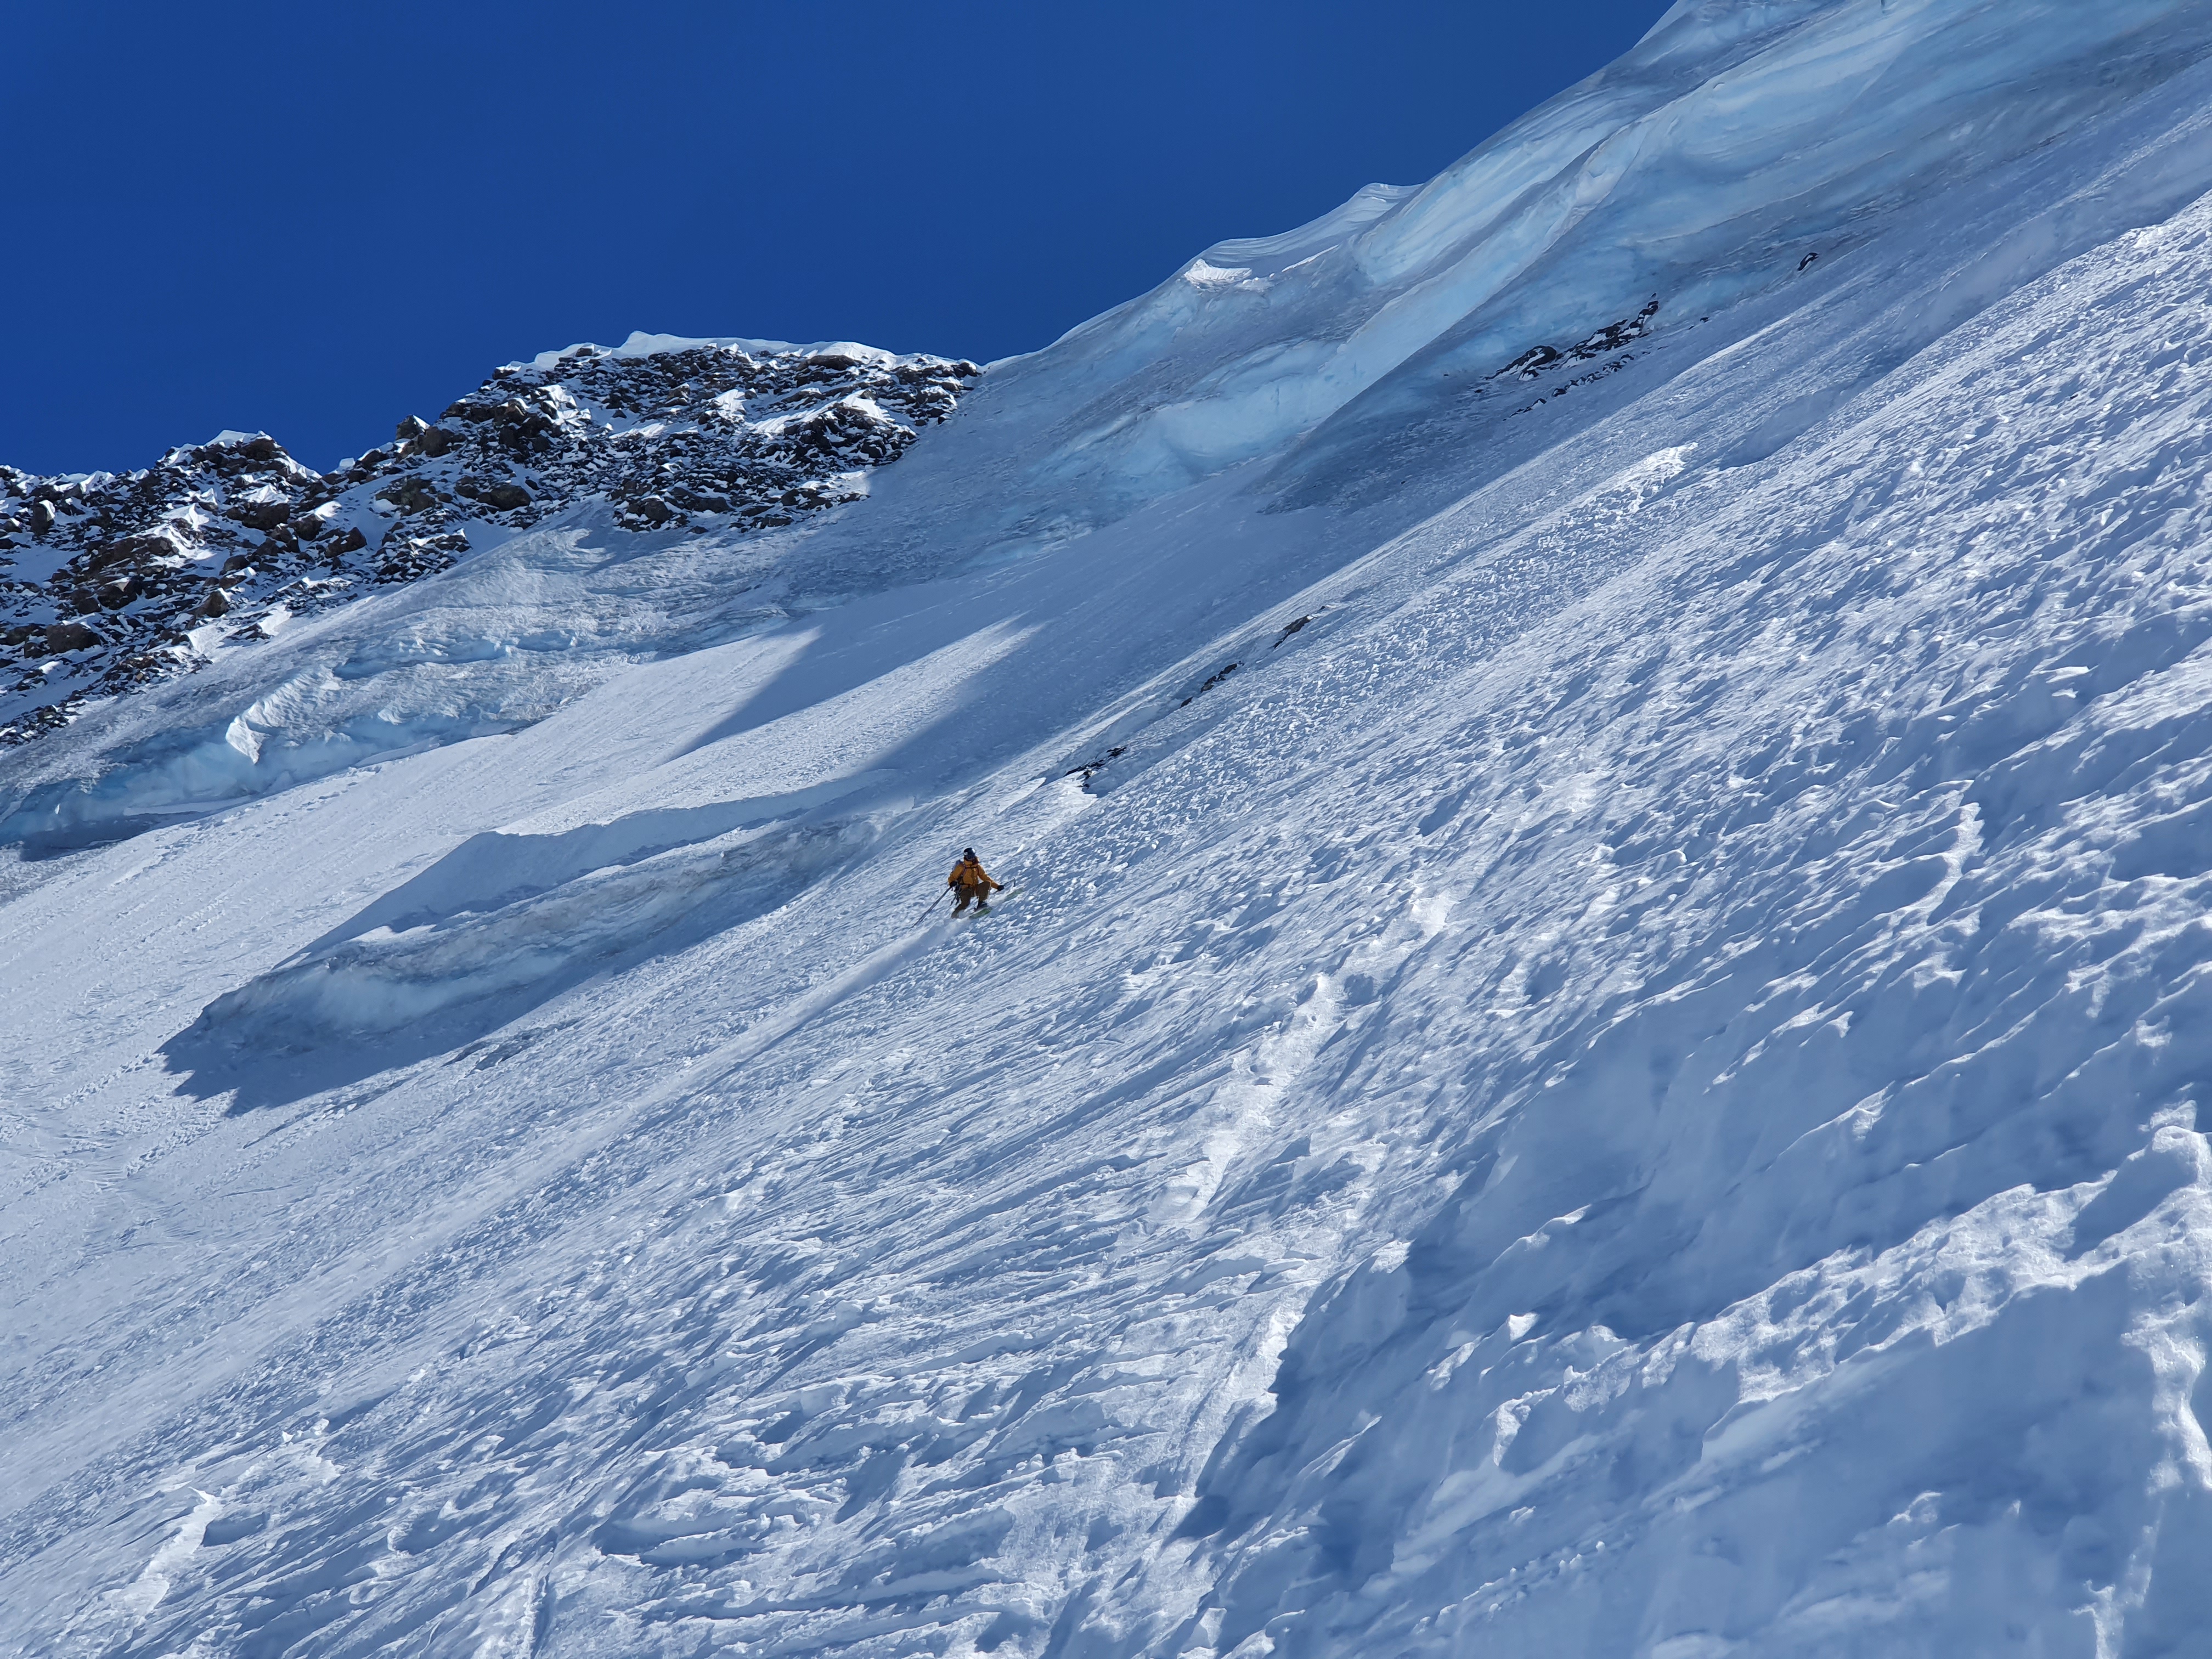
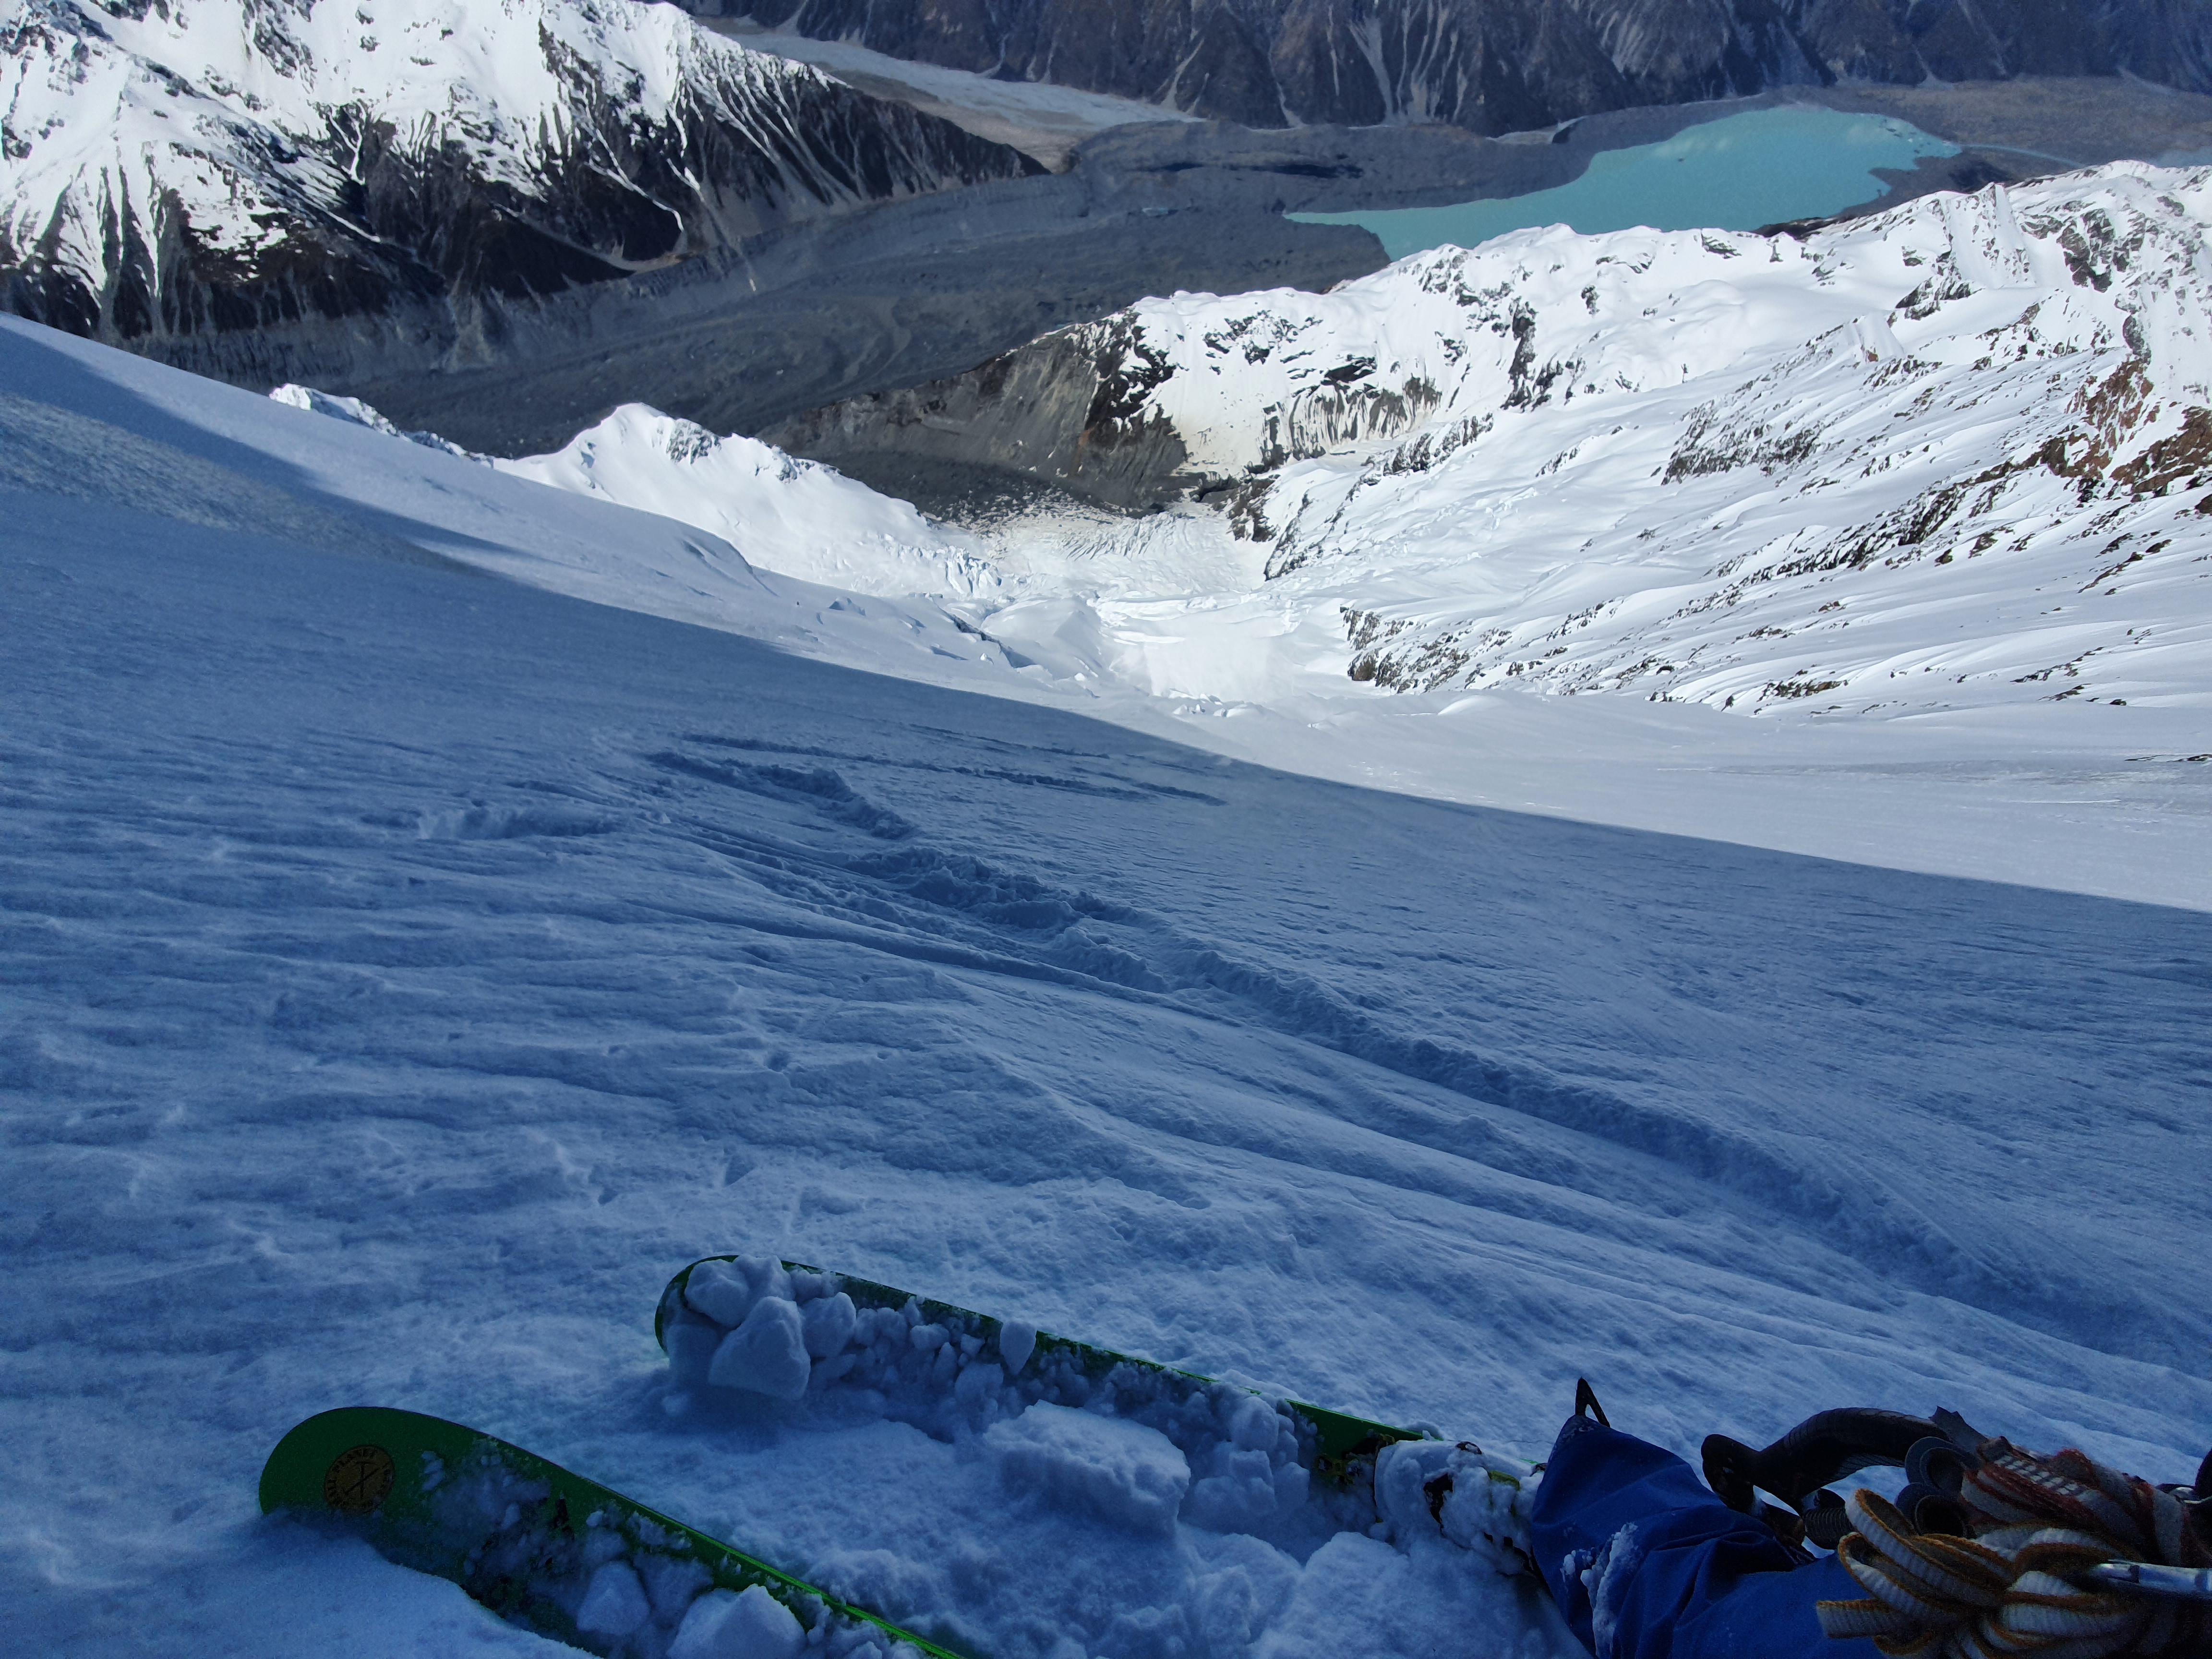
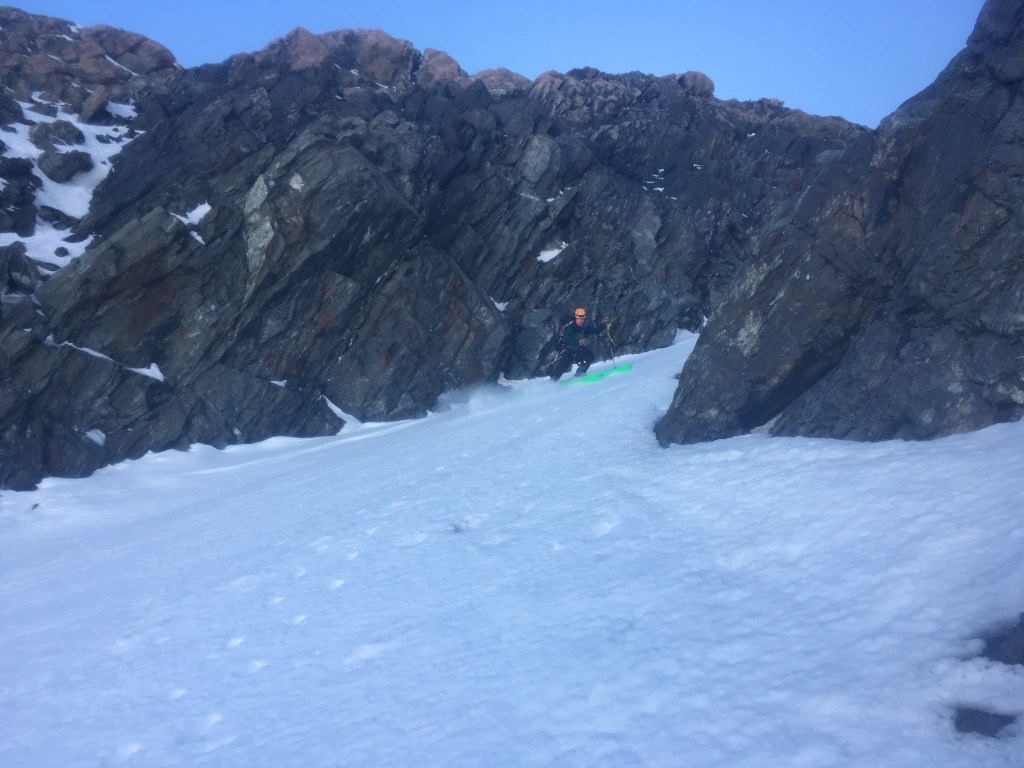
The initial snow fan was a touch under 50 degrees, and wide and open (but with serious exposure to the right). Once we hit the couloir the steepness ramped up to over 50 deg, and initially only just wider than a ski length. Cue cautious high pressure jump turns. This steep technical skiing lasted around 100-200m before the couloir gets much wider and the angle eases slightly and we opened it up a little bit more. Your still pretty exposed in this section as there is a dog leg and small cliff right at the bottom of the couloir to negotiate.

Will coming out through the crux, the choke at the top of the couloir.

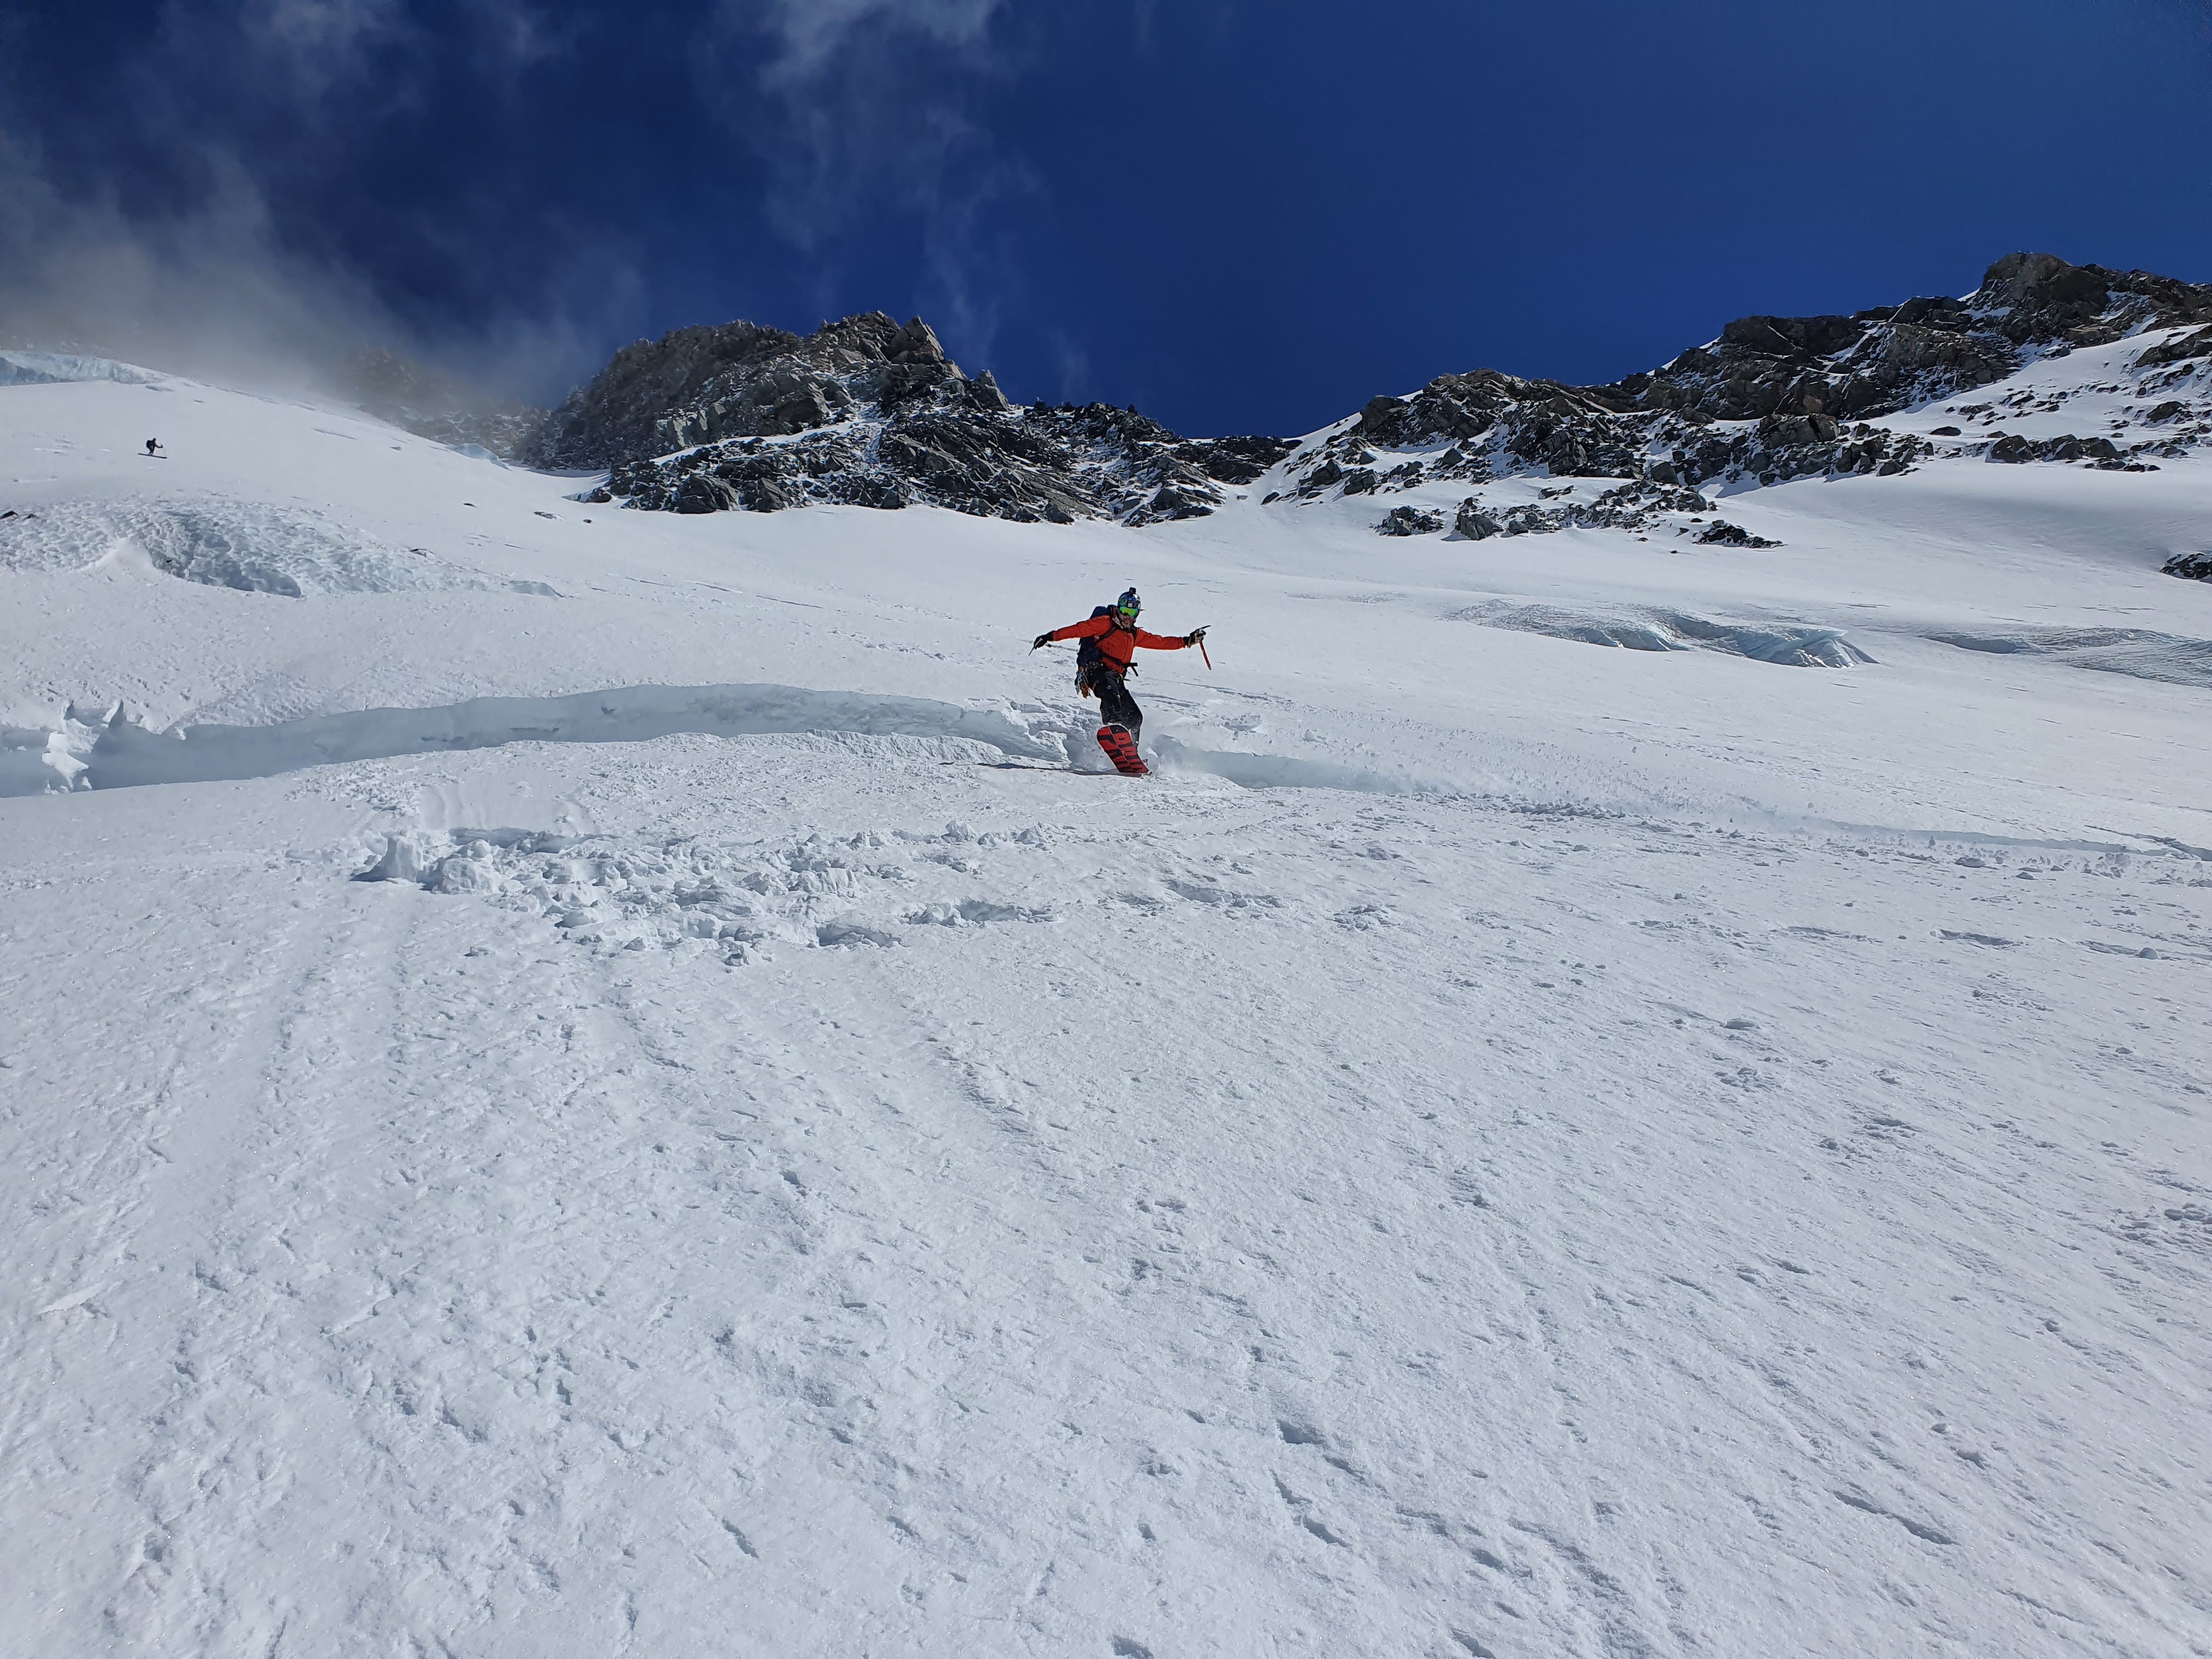
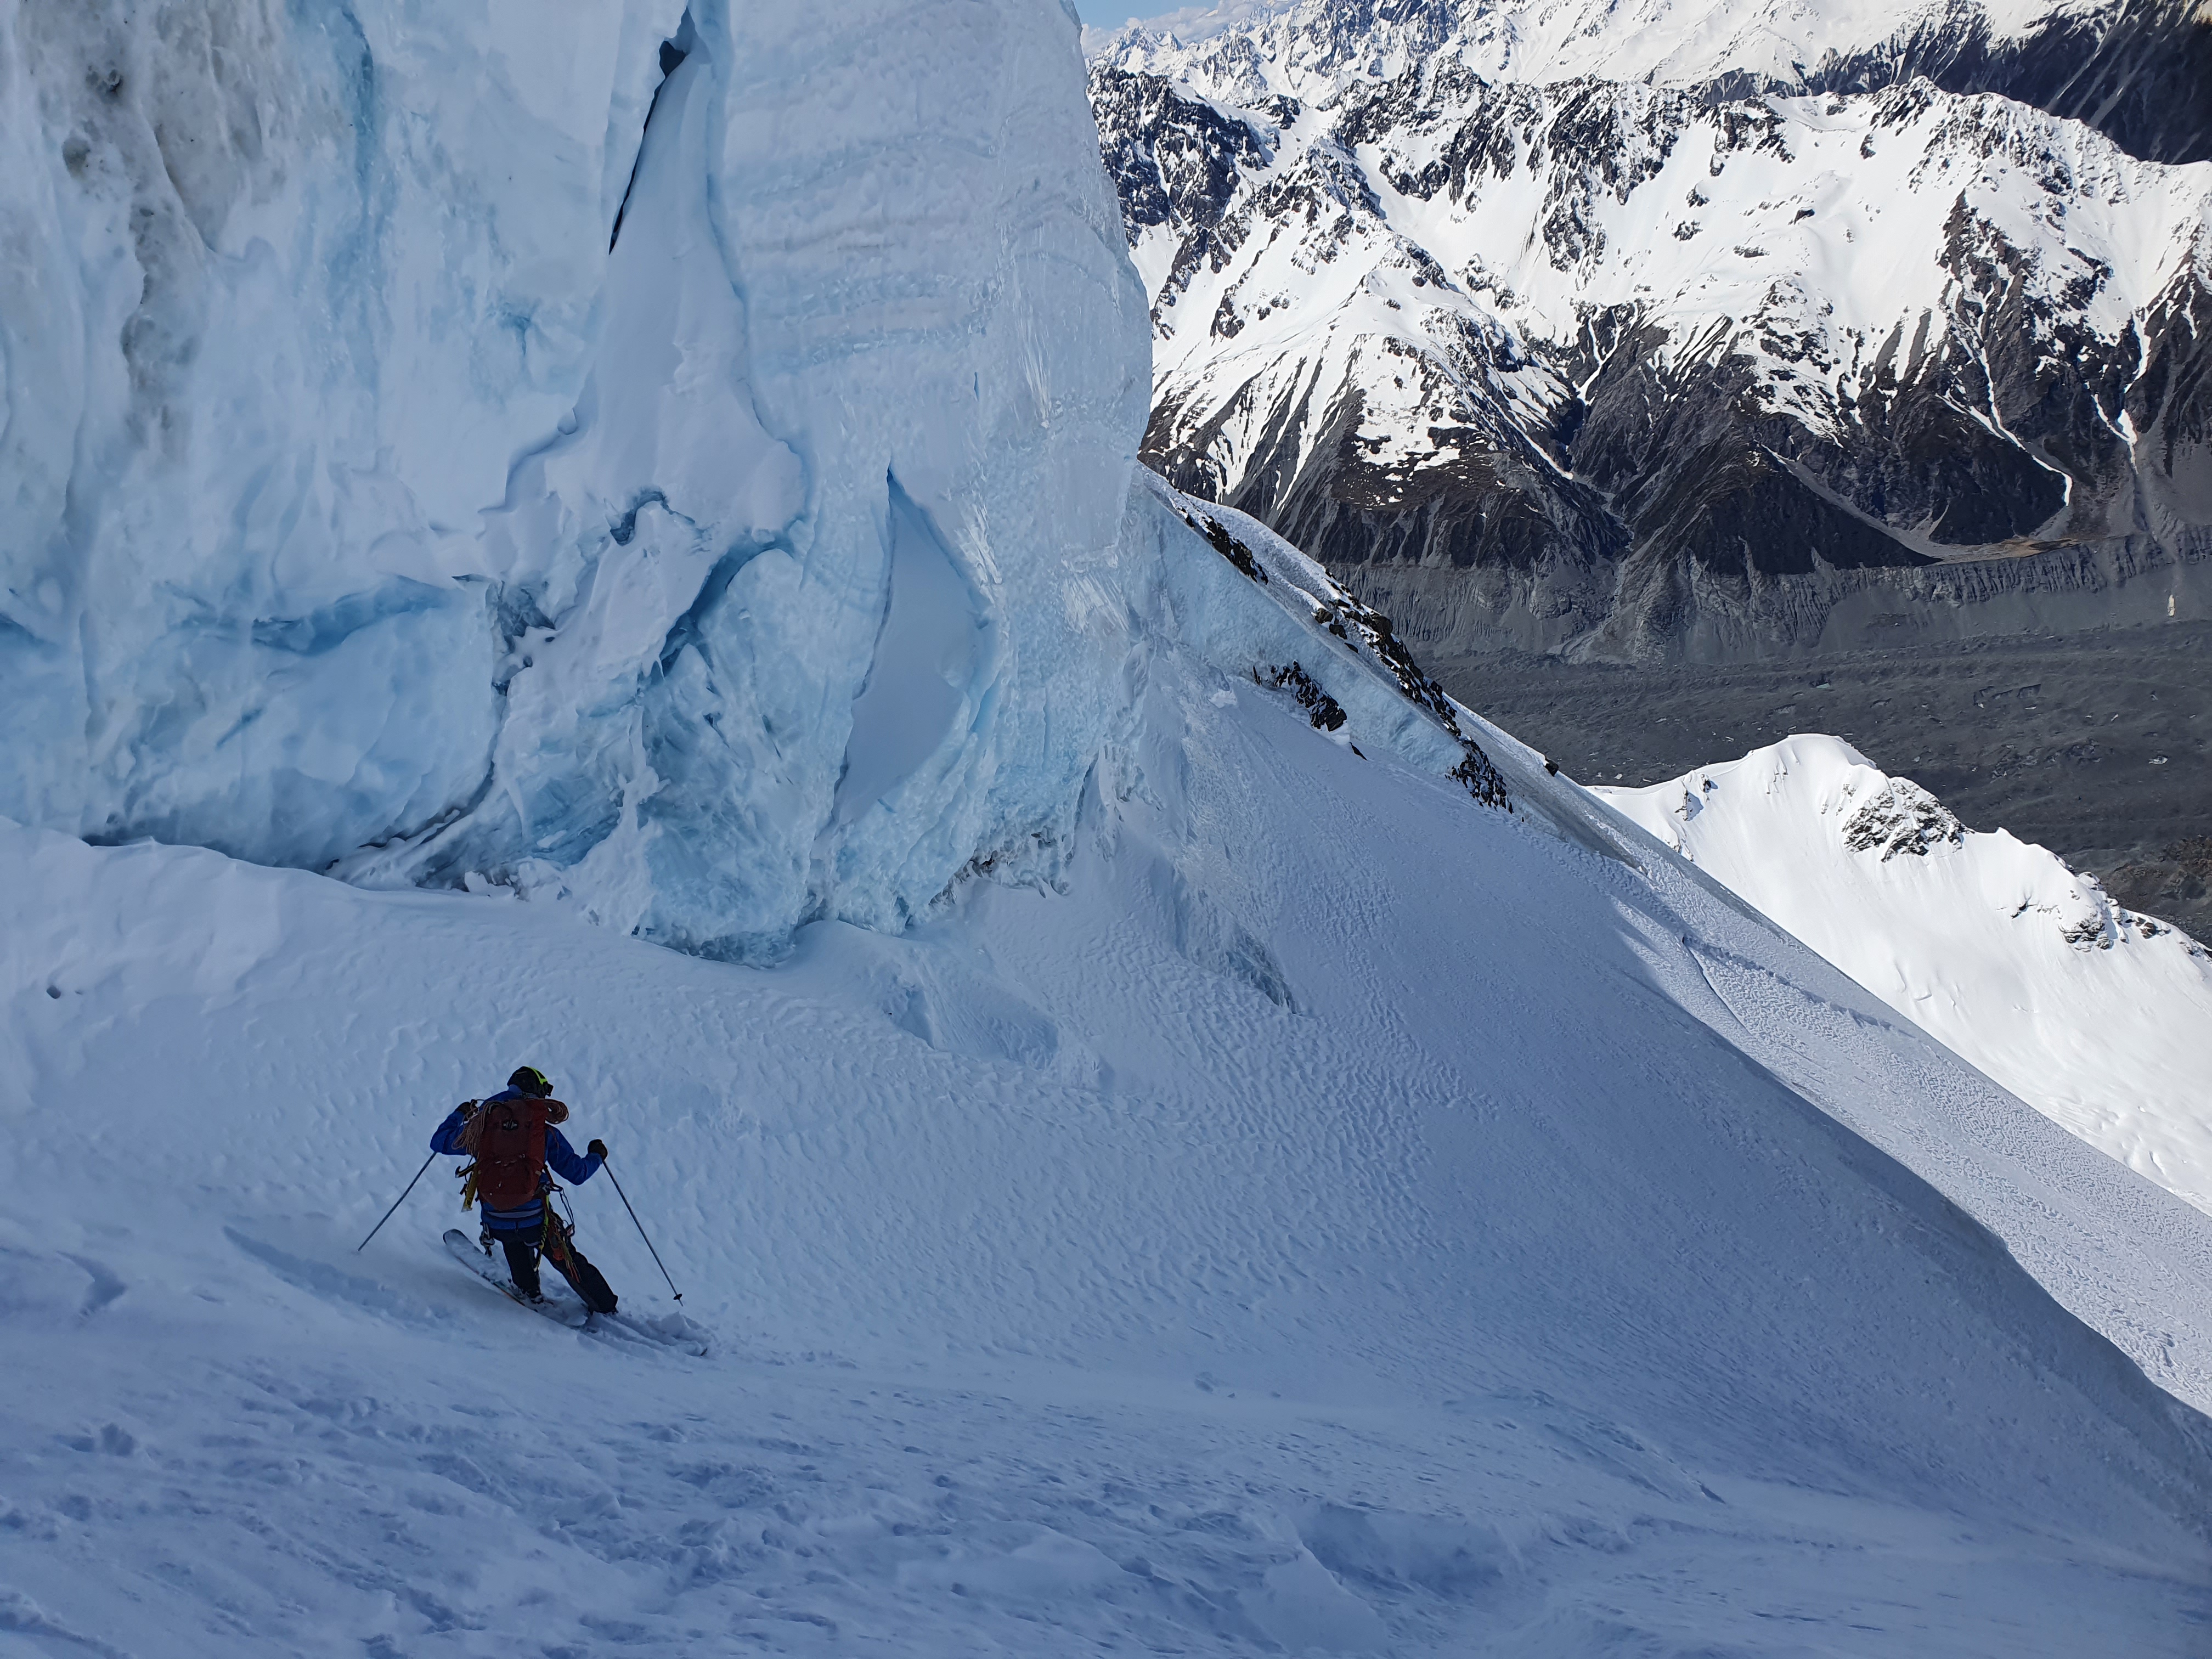
Right at the bottom we made a 15m rap to get through the dog bone, putting us just above the shrund. There was a good spike to leave tat around for the rap. From here we just had to make the obligatory shrund send to get into the sun and beautiful corn on mellow 35 degree slopes. Sometimes a route might go from here south crossing the Noeline Glacier to drop you at the bottom of the Hooker (passing just to the left of the W of West ridge on the map) but we had scoped this on the way in and it was a no go. So we skiied back to the hut, grabbed the rest of our kit and headed down the same way we came.

The dog bone at the bottom of the route. We made a short rap here

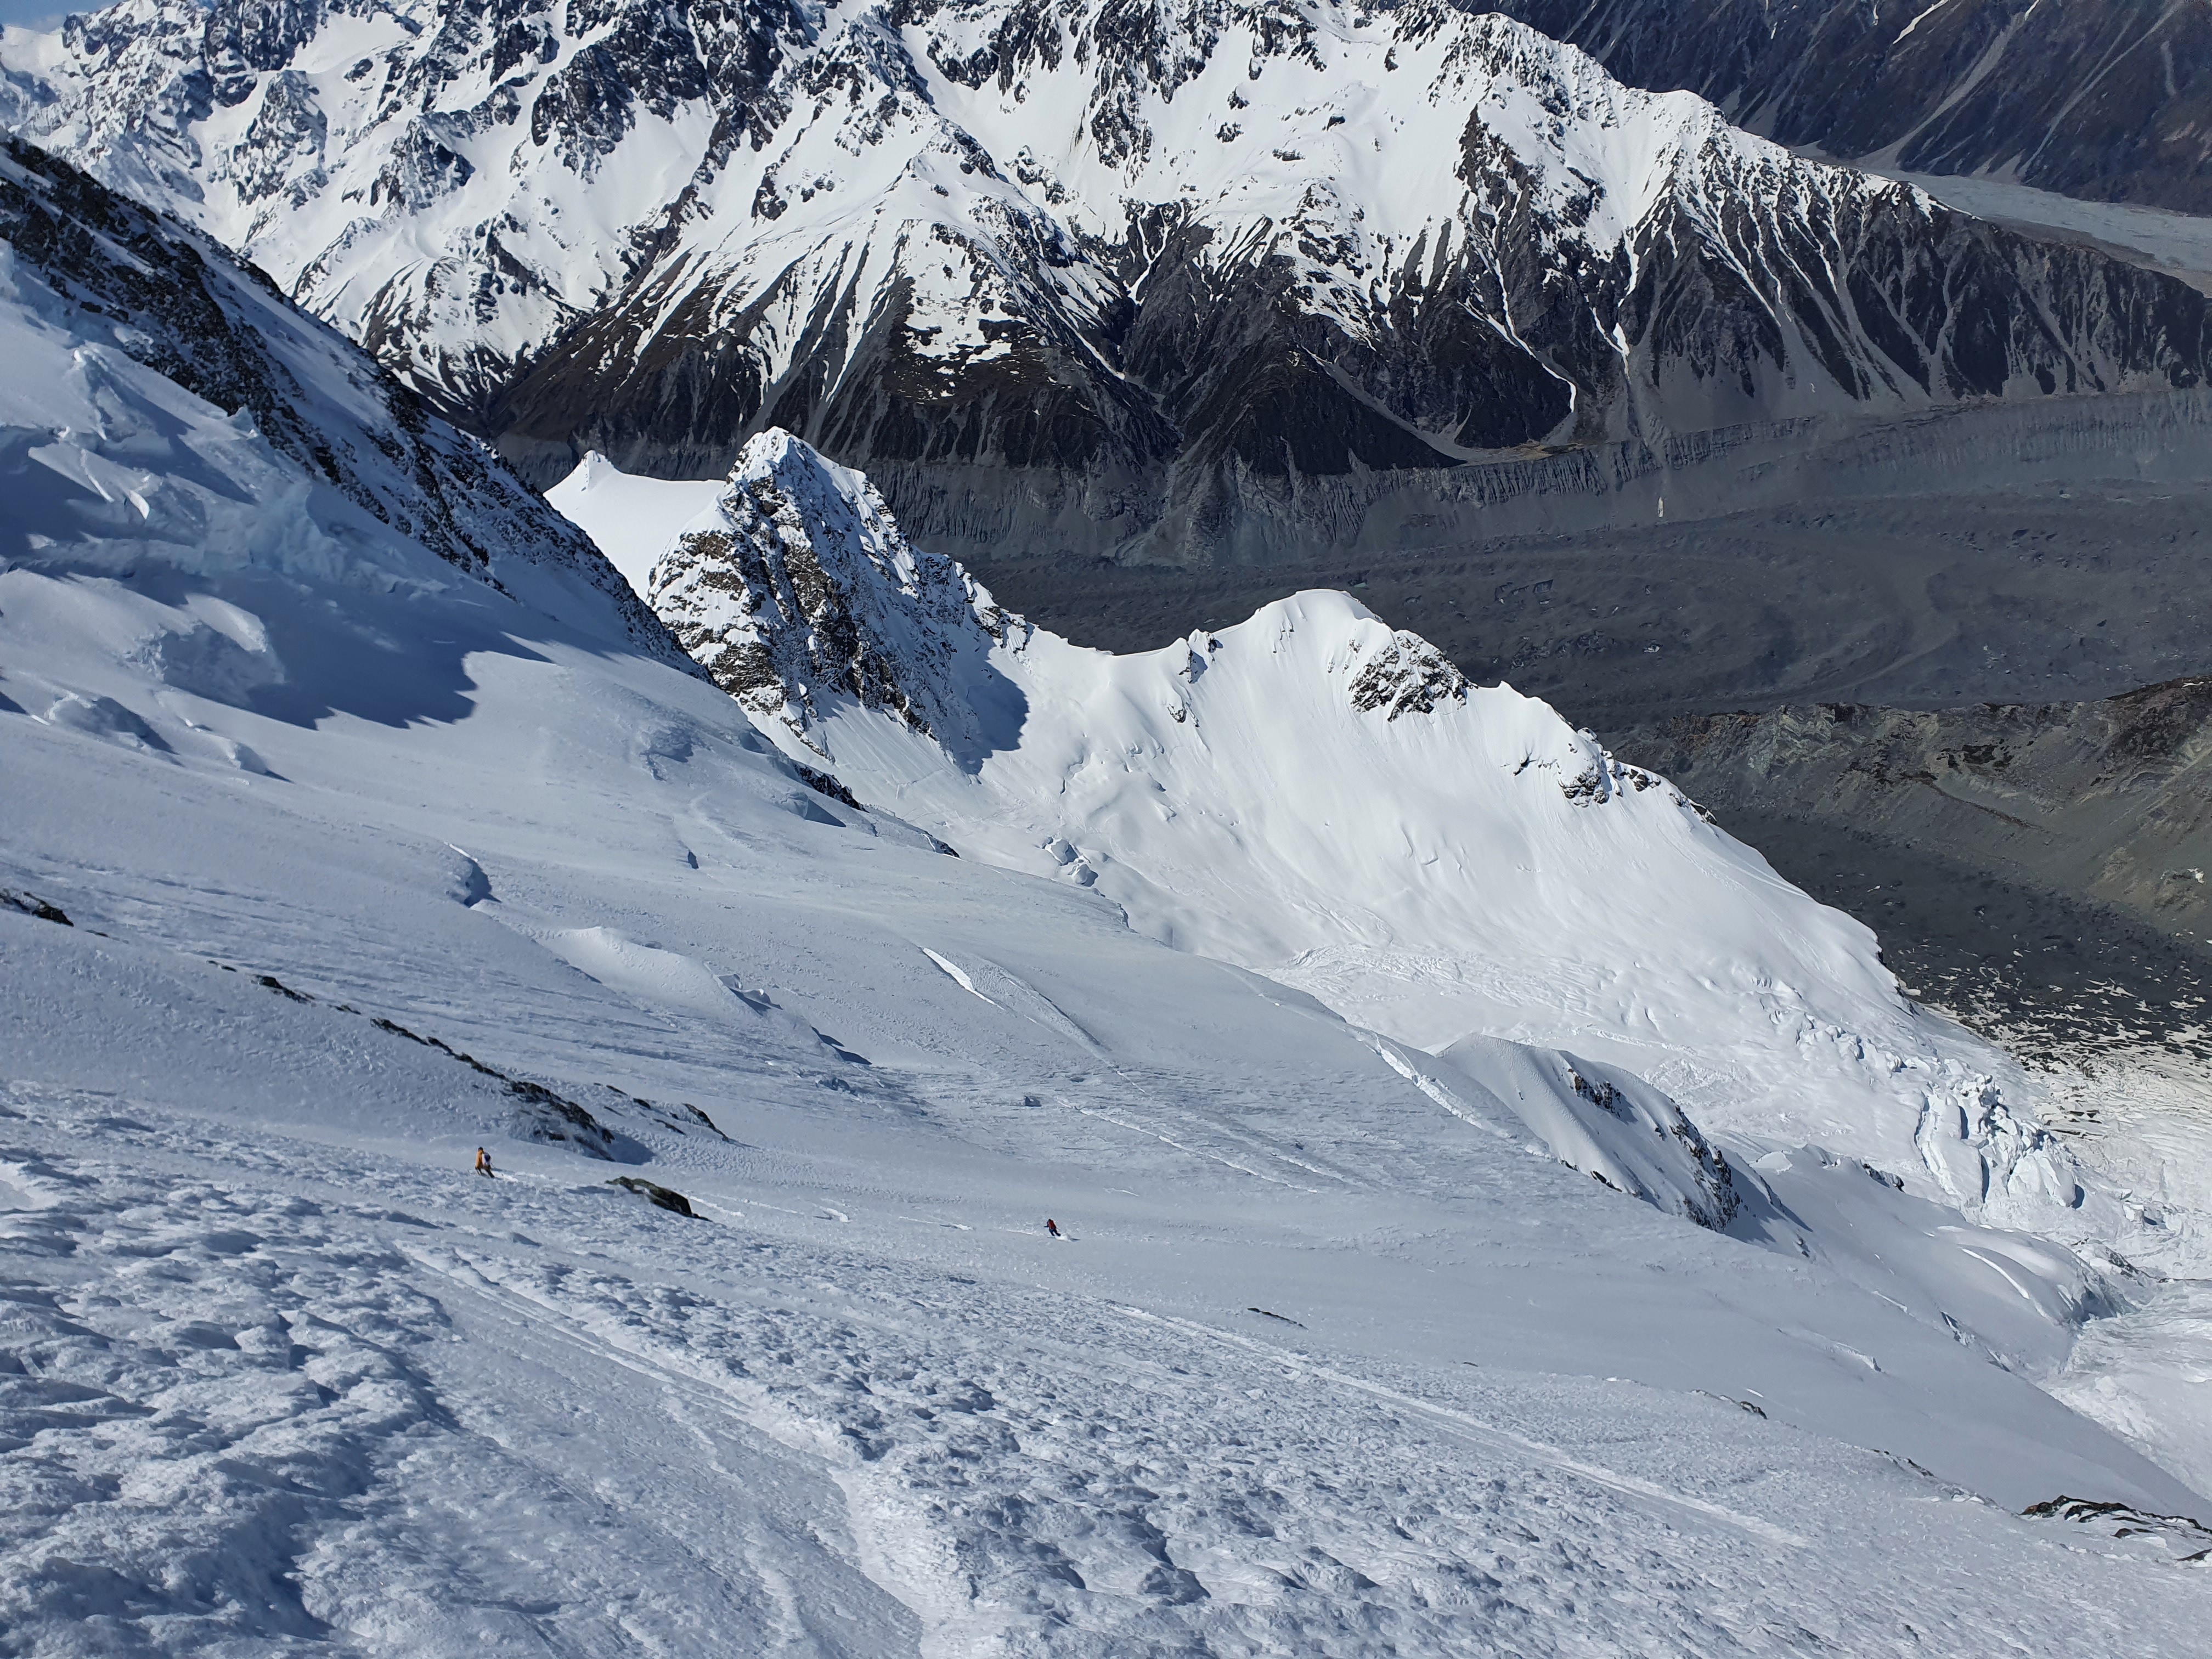
We blasted it down the top section of the glacier until reaching the ice fall under Baker saddle. Given how open this section is we decided to ski down through it while roped together. This is pretty difficult and theres a real risk of it causing more harm than good – if you dont have perfect timing and very clear communication as you cross the gaps you risk just pinging your partner off balance and throwing them into the crevasse. We had our system dialled and were moving slowly carefully and precisely through the crevasses – until a rock fall released from the Baker Saddle area 200m directly above us. Caution had to go out the window and we started straight lining it through the maze of narrow snowbridges to a safe spot out of the firing line. Probably one of the scarier experiences Ive had in the mountains!

Picking our way through the lower ice fall

Once through this it was a case of reversing the Moraine slog. It was pretty scorching by this point, but there are a couple of hidden water sources on the morraine to get us through. We made it back down in time for a feed and post mission beer in Twizel before hitting the road back to Chch

Mt Wakefield, Guideless Buttress

I first heard about this route from my guide on a mountaineering course; he had recommended it as a classic ‘must-do’ for the region.
That was 2 years ago, but I finally got round to it in March 2022. A really great day trip from Cook village. Easy access, long route (800m), non committal. And the rock quality was pretty good! She says, surprised.

Very solo-able. Some parties may want to take a rope but expect a long day if that is the case; it is an 800m route! As a frame of reference, it was more exposed than the Phipps Temple Traverse, but similar in parts to the access to Moir’s mate.


  • Grade: III 3, crux 8
  • Equipment: we took a 30m rope and a minimal rack just in case
  • Approach: 2h up the Hooker Valley track from White Horse Hill Campground
  • Climb time: 4h to top ridge then further 1.5h scrambling up to Mt Wakefield
  • Season: best in summer/early autumn when dry rock is guaranteed
  • Team: Jack, Maria 5/3/22

approach

Woke up at the very reasonable time of 7 after driving down from Christchurch the night before to stay at the NZAC’s Unwin Lodge – email ahead to book a spot and bring cash for fees.

Easy walk along the marked Hooker Valley track. Cross all 3 suspension bridges. Just nearing the end of the track, turn off the path right towards the scree field. There are two large scree fields, it is the one closest to the Hooker lake. Fatmap has a really handy route overlay.

From here scramble up to looker’s right of the scree field. The direct start (18/19) is on the left sticking to the arete. We started further right. Initially a bit vegetated (I was in head high bush briefly), but the route comes into its own the higher up you go. Soon you’re scrambling over decent rock with stunning views of Aoraki the whole way up. Route finding was pretty straight forward; generally we stuck pretty close to the arete.

Guideless route; direct start (18/19) follows the arete just left of our line
Our route closer up

The route pops you out at around 1960m on to a very Mars-esque plateau. Walk left and scramble up to Mt Wakefield. Soak in the 360 panorama before taking care going down -there was more loose rock on this section than on the actual route.

Ridge South of Mt Wakefield

We initially thought we’d walk south along the ridge until we met the Tasman Valley Road, and had dropped a car off there in the morning, but the ridge looked quite involved (see photo on left) and it was already mid afternoon so we dropped down into the scree field west of 1566m. Scree quality was average but this saved us a good few hours. At the bottom head right and within a km you’ll hit the Hooker Valley Track again.

Type 1 fun all the way. Would climb again, next time via the direct start or via the other Wakefield gullies!

Aoraki/Mt Cook, East Face

What a line! A huge alpine face, with 1200m of continuous 45 degree skiing that regularly holds good snow just half an hour from Plateau Hut. It’s really a testament to how New Zealand ski mountaineering has developed over the last decade that this line, which only saw its first descent in 2011 and at the time was viewed as the domain of only the top skiers in the world, now sees multiple descents per year and is a classic right of passage. The first time I skied it there were 14 people in total on the face! It felt more like being in Chamonix than in the Southern Alps. But don’t underestimate this line – it is serious alpine terrain and deserves to be taken seriously.

Pretty straightforward route finding. Note the ice cliff on the right at the bottom – this is very active and you want to stay out from under this as much as possible

I’veย skiedย thisย lineย twice,ย firstย onย 3rdย Novemberย 2019ย withย Samย McGrathย andย Zackย Wentz,ย andย againย onย 11thย Octoberย 2020ย withย Peteย Deytrickย andย Grahamย Dawson.ย It seemsย likeย aย wasteย ofย aย weatherย windowย inย someย waysย toย skiย theย exactย sameย lineย twice,ย butย it’sย suchย aย funย lineย whenย it’sย inย conditionย Iย wouldย happilyย skiย itย aย thirdย time (plusย meย andย Peteย hadย beenย talkingย aboutย skiingย thisย lineย togetherย forย years…ย Heย couldn’tย makeย theย 2019ย tripย soย Iย owedย itย toย himย toย goย upย again!).ย Thisย isย definitelyย the timeย ofย yearย toย goย forย yourย bestย chanceย ofย goodย stabilityย andย goodย coverage.ย Bothย timesย Iย skiedย theย faceย inย powder,ย whichย isย superย funย butย meansย you’veย gotย toย be especiallyย carefulย withย stability.

Approach
Taking the easy way in to Plateau

I’ve always gone for the fly in option – a flight from Cook airport takes about 15 min and there are almost always other climbers or skiers around willing to split the flight to keep the costs down (and a ski plane is cheaper again). If you can get a back flight so customers both coming in and out its even cheaper, you can get it as low as 100ish bucks per person. The hike in is getting progressively more difficult due to the moraine washing out and collapsing along the ball shelter track.

Once you’re past the ball hut, you have to descend to the confluence of the Tasman and ball glaciers and then climb up to boys glacier to Cinerama col. Rock fall and wet slides are common on the boys so don’t be there too late in the day.

Plateau hut is incredible – 33 bunks in 4 different room, with plumbed in gas and cookers in the kitchen plus all the pots / pans / cutlery you could need. The heli drops you about 20m from the hut so bringing food in a big cardboard box or bin bags is a good option. If you take the ski plane it lands about an 45 min skin from the hut so you have to pack properly.

Zack catching some wild sunrise rays half way up the East face
Climb

The East face gets hot fast as soon as the sun hits so you need to be out early. We got up at midnight and out of the hut at 0100. It’s worth skiing over to the base of the route the day before to figure out the best way through the shrund at the bottom because it can be a bit confusing in the dark.

From the hut it’s a quick ski to the flat part at the base of Zurbriggens Ridge. There is a big active ice cliff at the base of the ridge – don’t linger under here and get up to the base of the East face out of the firing line ASAP.

Graham and Peet heading up the East face

We roped up to cross the bottom schrund, quick stability check and then the rope went away and we soloed the majority of the face. It’s a bit of a slog, plugging steps for 1000m, but you’re rewarded with the most epic sunrise you’ll ever see as the first light hits the face. You need to trend left while you’re climbing – a bit more than you might expect. Once you get to the final couloir to the summit ridge, the snow quality generally deteriorates.

While this section was skiable on my first trip, on my second time it was bare ice so we made 1x rappel

When I was there in 2019 it was firm breakable crust overlying ice, just about skiable – we soloed up and we able to ski back down to make a full descent of the E face. But in 2020 it was bare glacier ice, we put the rope on for the final climb (55 deg) and rapped back down to where the snow quality got better. From the top of the E ridge it took us 45 min to the summit. It’s low angle and relatively mellow compared to what you’ve just been climbing, but was wind scoured sastrugi the whole way and we left our skis and the top of the E ridge to get the summit and walked back down.

Descent
Looking down the top section of the face with the plateau 1000m below

From the ridge the top couloir is fairly full on, 50-55 degrees on a narrow spine which is very exposed and often has wind affected snow / ice. Luckily you’re coming up this way and can make a full assessment of whether or not you’re going to ski this part or not. We made cautious jump turns down this top section. About 50m or so down from the summit the line tucks round to skiers left under an ice bulge and the snow generally improves here and you can start opening it up and tearing up the face!. The first few turns here are steep at around 50 degrees, but after another 100m or so it mellows out to 45 degrees and then stays like this all the way down to the plateau.

Sam got this sweet shot of me getting deep
Peet getting into the white room

The snow was unbelievably good for us on both trips, and we made big fast slashes and slarves getting face shots the whole 1200m down to the plateau. You trend left the whole way down the descent which is useful for dodging your stuff. Drop the schrund at the bottom and cruise back to plateau hut for the celebration beer!

If you’re skiing the face in powder be especially careful of the sun warming up the face – on the 2019 trip we had 24 hours of cold still weather after the storm for settlement and then another cold 24 hours to ski the line. The next day the temps went up to a FAFL of 3000m and we sat at the hut watching big avalanches ripping out on the face all day exactly where our tracks had been.

Edit from my trip with Sam and Zach (and 11 other people on the face that day!)
Edit from my trip with Peet and Graham

Aoraki/Mt Cook, the Caroline face

An iconic line in New Zealand mountaineering history – described as ‘the last great problem of New Zealand mountaineering’ when first climbed, it took another 40 years for its first ski descent in 2017.

This 2000m monster of a face is not to be undertaken lightly. Fickle conditions, complex route finding, objective hazard and sustained 45-50 degree skiing above serious exposure combined with a serious mountaineering route just to get to the starting gates, means you need to bring your A game for this line. For the majority of the line, a fall is likely to be fatal.

It took several years of planning, preparation and patient waiting for myself, Will and Sam to get the second descent in 2021. Without a doubt one of the most incredible lines I have ever skied, and the euphoric feeling stayed with me for a long time afterwards. But I don’t think I would ever skin the line again; the objective hazard from the constant serac threat is on the wrong side of that line separating acceptable and unacceptable risk. Even moving as fast and efficiently as possible, 2 hours spent under those ice cliffs is a roll of the dice and balancing the reward against that risk is a very personal decision.

Conditions

Really this is the crux of the route, and can be broken down into the condition of the ice cliffs and the condition of the snow.

Ice cliffs – the state of the face changes significantly year on year, and also throughout the year. While the basic line that Ben Briggs and co took in 2017 is the same as our line, we crossed the 2 main serac bands in different places, and the next descent is likely to cross somewhere else again. Regularly following the state of the face through the year is key, and thankfully climbers and skiers are constantly flying past the face generating a beta stream. Once it looks like it’s in, the pilots will give you a really good fly by on the way to plateau. Multiple photos from multiple angles is crucial to get the line dialled, choose rap spots and make an assessment of coverage. We spent an hour or so zooming in on different spots on the face trying to find tell tale grey / blue shine that might suggest bare ice.

Snow – we wanted to ski the face in powder. Corn is the other option, but your time window between the top section softening, which is steep and super exposed, and the bottom section becoming dangerous is going to be pretty narrow given the complexity and length of the route. The biggest concerns here are avalanche risk, and hitting a section of hidden ice just beneath the surface which would knock you off your feet and you’d be gone. For a line like this I would normally climb the ski line and get a good look at conditions and identify any ice patches on the way up. Given the serac threat this isn’t an option of the Caroline so you have to ski the line top down, and back yourself that you’ve assessed correctly and can deal with the conditions you encounter. Our approach was to wait until late spring and generally stable conditions, and then wait for a system that was going to bring in warm precip turning cold during the storm, hopefully providing well bonded right way up snow sticking to the underlying ice. We wanted at least 24-36 hours of cold still weather for settlement and then another day of the same to ski the line. This is not common in New Zealand but in November 2021 everything seemed to be lining up so we flew in to take a look.

Approach

Plateau hut is incredible – the majority of New Zealand 3000m peaks within a 30 minute skin. The best approach to the Caroline is to head towards the East face and traverse high, climbing the snow gullies to reach the East ridge. This means you miss the first 400m or so of the East ridge, significantly speeding the climb. Once on the ridge, the soft confidence inspiring snow meant we made pretty fast progress by soloing the majority of the route. It also gives the opportunity to sidle onto the Caroline and assess the stability for the first time.

With everything looking good we continued up the East ridge. Once we hit the last couple of hundred metres it turned from soft to bare glacier ice so we put in 4 pitches up to middle peak. The climbing was super fun, easy WI2 , mostly 50ish degree ice with short steps up to WI3 over outrageous exposure. Halfway up the climb we saw a massive 500m wide avalanche rip down the face to our left reaching all the way down to the Ball Glacier. From the ridge you don’t get a full view of the face and it was impossible to see exactly where this had started – if it was on our line then either it was a slab avalanche and we had totally misjudged the avalanche risk, or if a serac collapse (the most likely thing) it would have cleared all the snow off the line leaving bare ice. Either way not good. We decided to carry on to the top of the east ridge and asses and discuss – if we were not happy then the bail out options from there would be the Grand Traverse and down the Linda, or down the NW couloir to Empress.

From the top of the East ridge, Porter Col is just a short distance South West. We took particular care here – the ice was totally bulletproof and a slip would mean a fall all the way down to the Empress Shelf. This was the spot that Magnus Kastengren tragically died in 2013 attempting this line, and that thought was in the forefront of our minds while crossing this section. From Porter Col for the first time we got a full view of the top section of the line – it was clear the avalanche we had witnessed earlier had come from serac collapse on the far lookers left side of the face, and had not affected any part of our line. The snow looked incredible from the top and after a long final discussion we decided to rap in and commit to the line.

The Line

Routefinding is key – have photos of the face on standby on your phone to reference, and have a mental image of the major landmarks on the face. Climbing back up under those seracs is not a position you want to be in!

Rap entry – I can’t imagine there would ever be a time when this top section would be skiable. A stretch of blue ice just below the ridge where it has been blasted by high winds, leading to the snow. We rapped around 80m in 2 raps, leaving a snow steak on the summit and a V thread half way down.

This is fairly committing – be ready for some WI4 ice to reverse this if the snow isn’t what you expected when getting to the face. Once at the snow we built another anchor for another stability assessment – while everything looked perfect we decided the first person down would ski 50m on the rope as a final assessment. Will took one for the team and dropped in first – a test of belaying skill to let slack out fast enough! With everything looking primo the rope went away and it was on.

The first pitch is the steepest, around 55 degrees for a couple 100 metres. We then cut hard left for a long traverse to the feature we called ‘The Nose’. The traverse is pretty critical – from the photos we had some concern about ice on this section. A tool in each hand and screws ready to go to make an anchor and switch back to crampons if needed. The traverse takes you to the top of the nose.

This section wasn’t how it looked from the photos – was a lot wider and less sketchy than we were worried it might be, and the angle eases off to be similar to there E face at around 45 degrees. But it does mark the start of the serious overhead hazard which just gets worse from here on down. There are also a couple of bail out options here. If you can’t get through the nose, you can climb back up and right towards middle peak following the top part of the Clit Route. Or if you get through the nose but its looking bad underneath that, you can cut hard skiers left and could traverse back to the East ridge.

The skiing from the nose to the middle serac band was really incredible – shin to knee deepcold powder on consistent 45 degree slopes. Be sure to cut right at the bottom – finding the correct spot to rap the middle serac band is critical. Too for to skiers left and the cliff is 100s of meters of overhanging ice, too far right and you under the much more active and dangerous seracs.

2 V thread raps from here got us down to the lower snowfield. Speed is really of the essence from here on in, as you’re now under the maximum serac exposure. We managed to get our rope stuck on the final rap – knowing this was the last rap we just left one of our ropes behind in the interest of reducing time spent under the seracs. A momento left on the face and a good talking point for the scenic flights for the next few weeks! The last section involves cutting left to the major rib and then cutting down through the final cliff band. There are a few options to get through this and is another point to ID before starting down the line. Then straight-line down through the debris field across the Caroline Glacier and out of the firing line! It took us 2 hours from the summit to the bottom, and then a cruisey skin back up to ANZAC col and across to Plateau Hut, and some celebration beers.