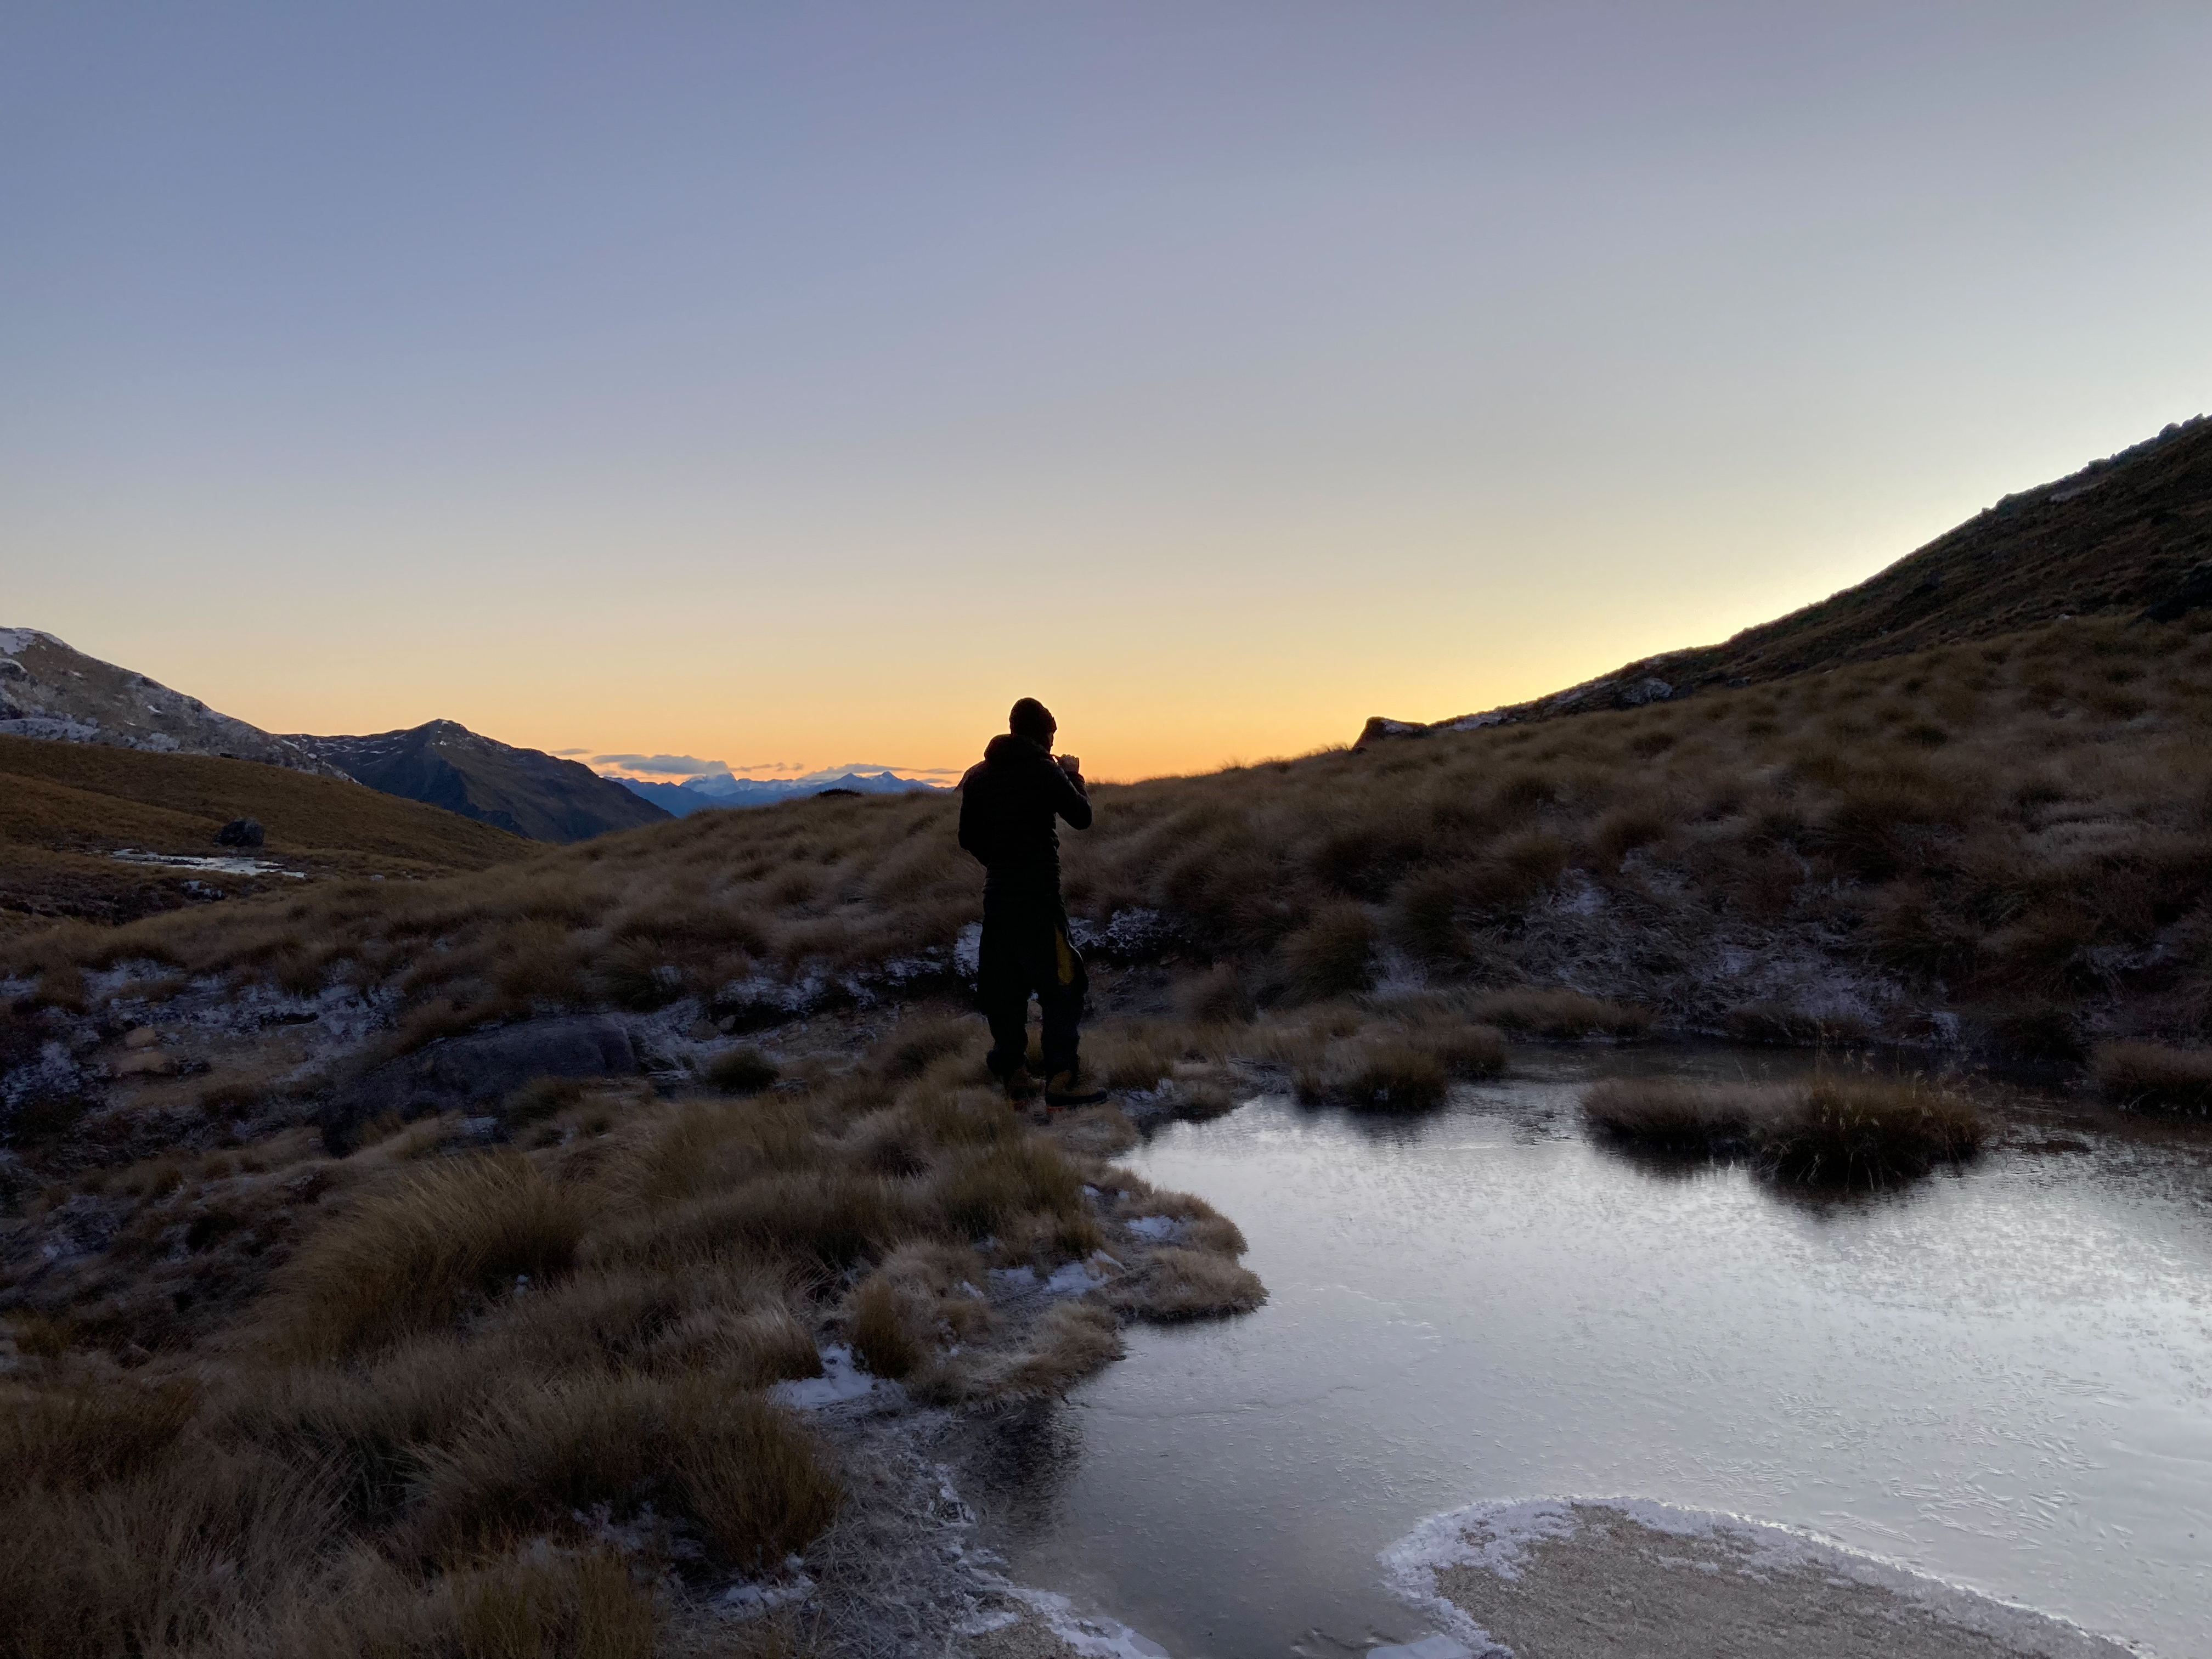
Memories of this trip – being oh-so-cold. Beautiful hike, felt like we were on the moon due to Titiroa’s distinctive white granite. Highs: the forecast was stellar and we were treated to an ocean of stars in the evening (forget Tekapo!) Lows: airbed popped and I spent the night in the foetal position Overall: a must do in Southland
Time: 10h from jetty to biv; 6.5h biv to car (17km)
Season: you want a good forecast as it’s pretty exposed at the top for bivvying; also mid-late winter you would have to take crampons
Team: Joe, Maria 19/06/21
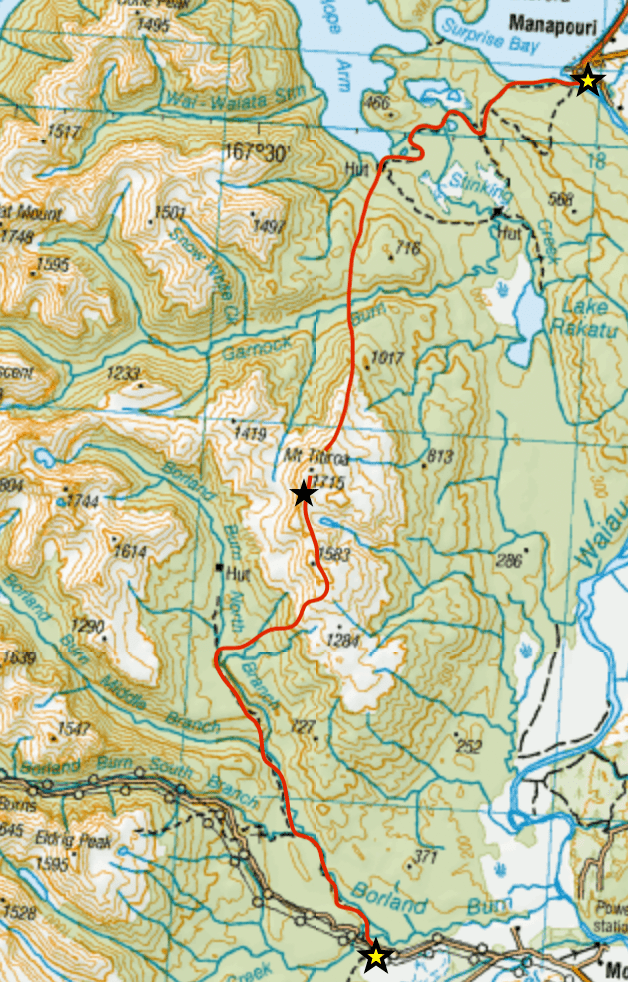
Titiroa is part of the Hunter Mountain range on Lake Manapouri. You can access it as an out and back, or do what we did as a loop track.
Black star denotes where we camped
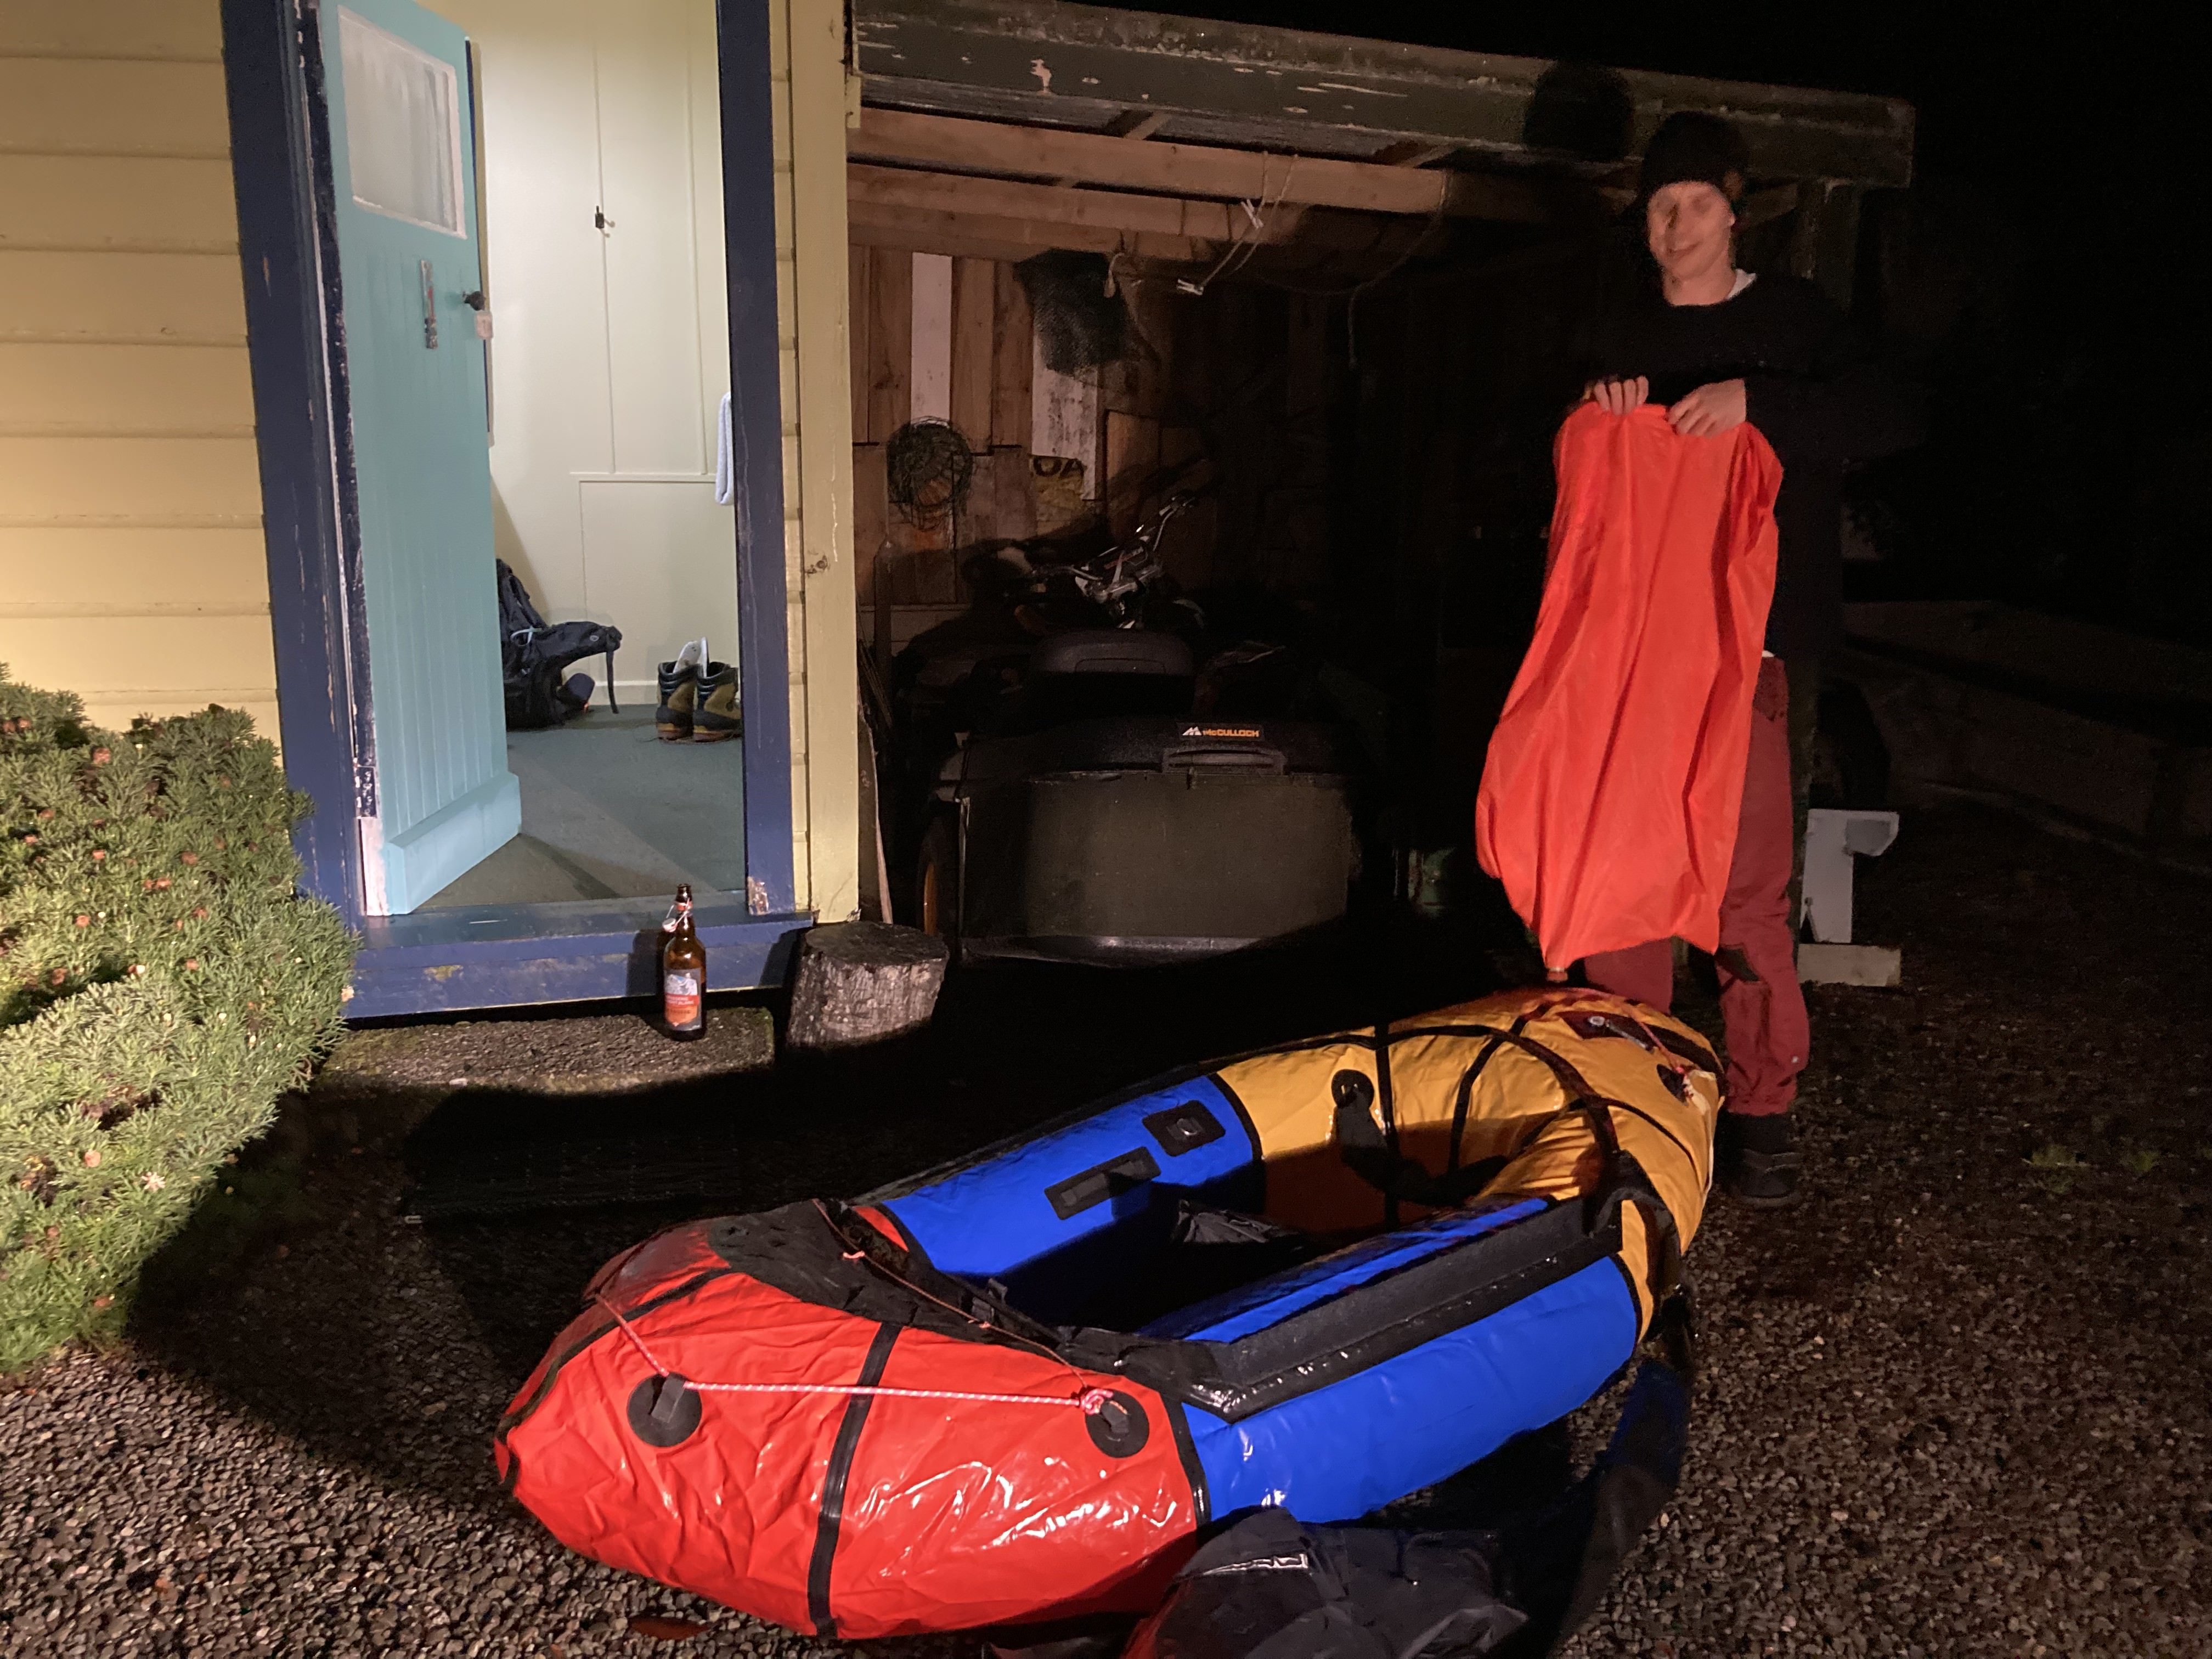
We left one car just up to road from Borland lodge. Then we drove round to Manapouri and stayed at Possum Lodge the night before – a stone’s throw away from the jetty where you start. You need to cross Waiau river to get onto the walking track. There are water taxis in the summer season but it was June and besides, it is only about 50m wide – easily doable with a packraft! Harder when there’s only one between two and heavy packs per person… Joe took one for the team and did the trip once with the bags, and the second time with me. Obviously you can use any other river worthy vessel too, as long as you’re happy to stash it somewhere discretely or just risk losing it. At the end of the trip you’ll have to retrieve whatever you left of course requiring a river swim to finish the hike! Other option is to hike with the packraft but we opted just to swim back over at the end. Just watch for passing boats… We were on the water by 0700.
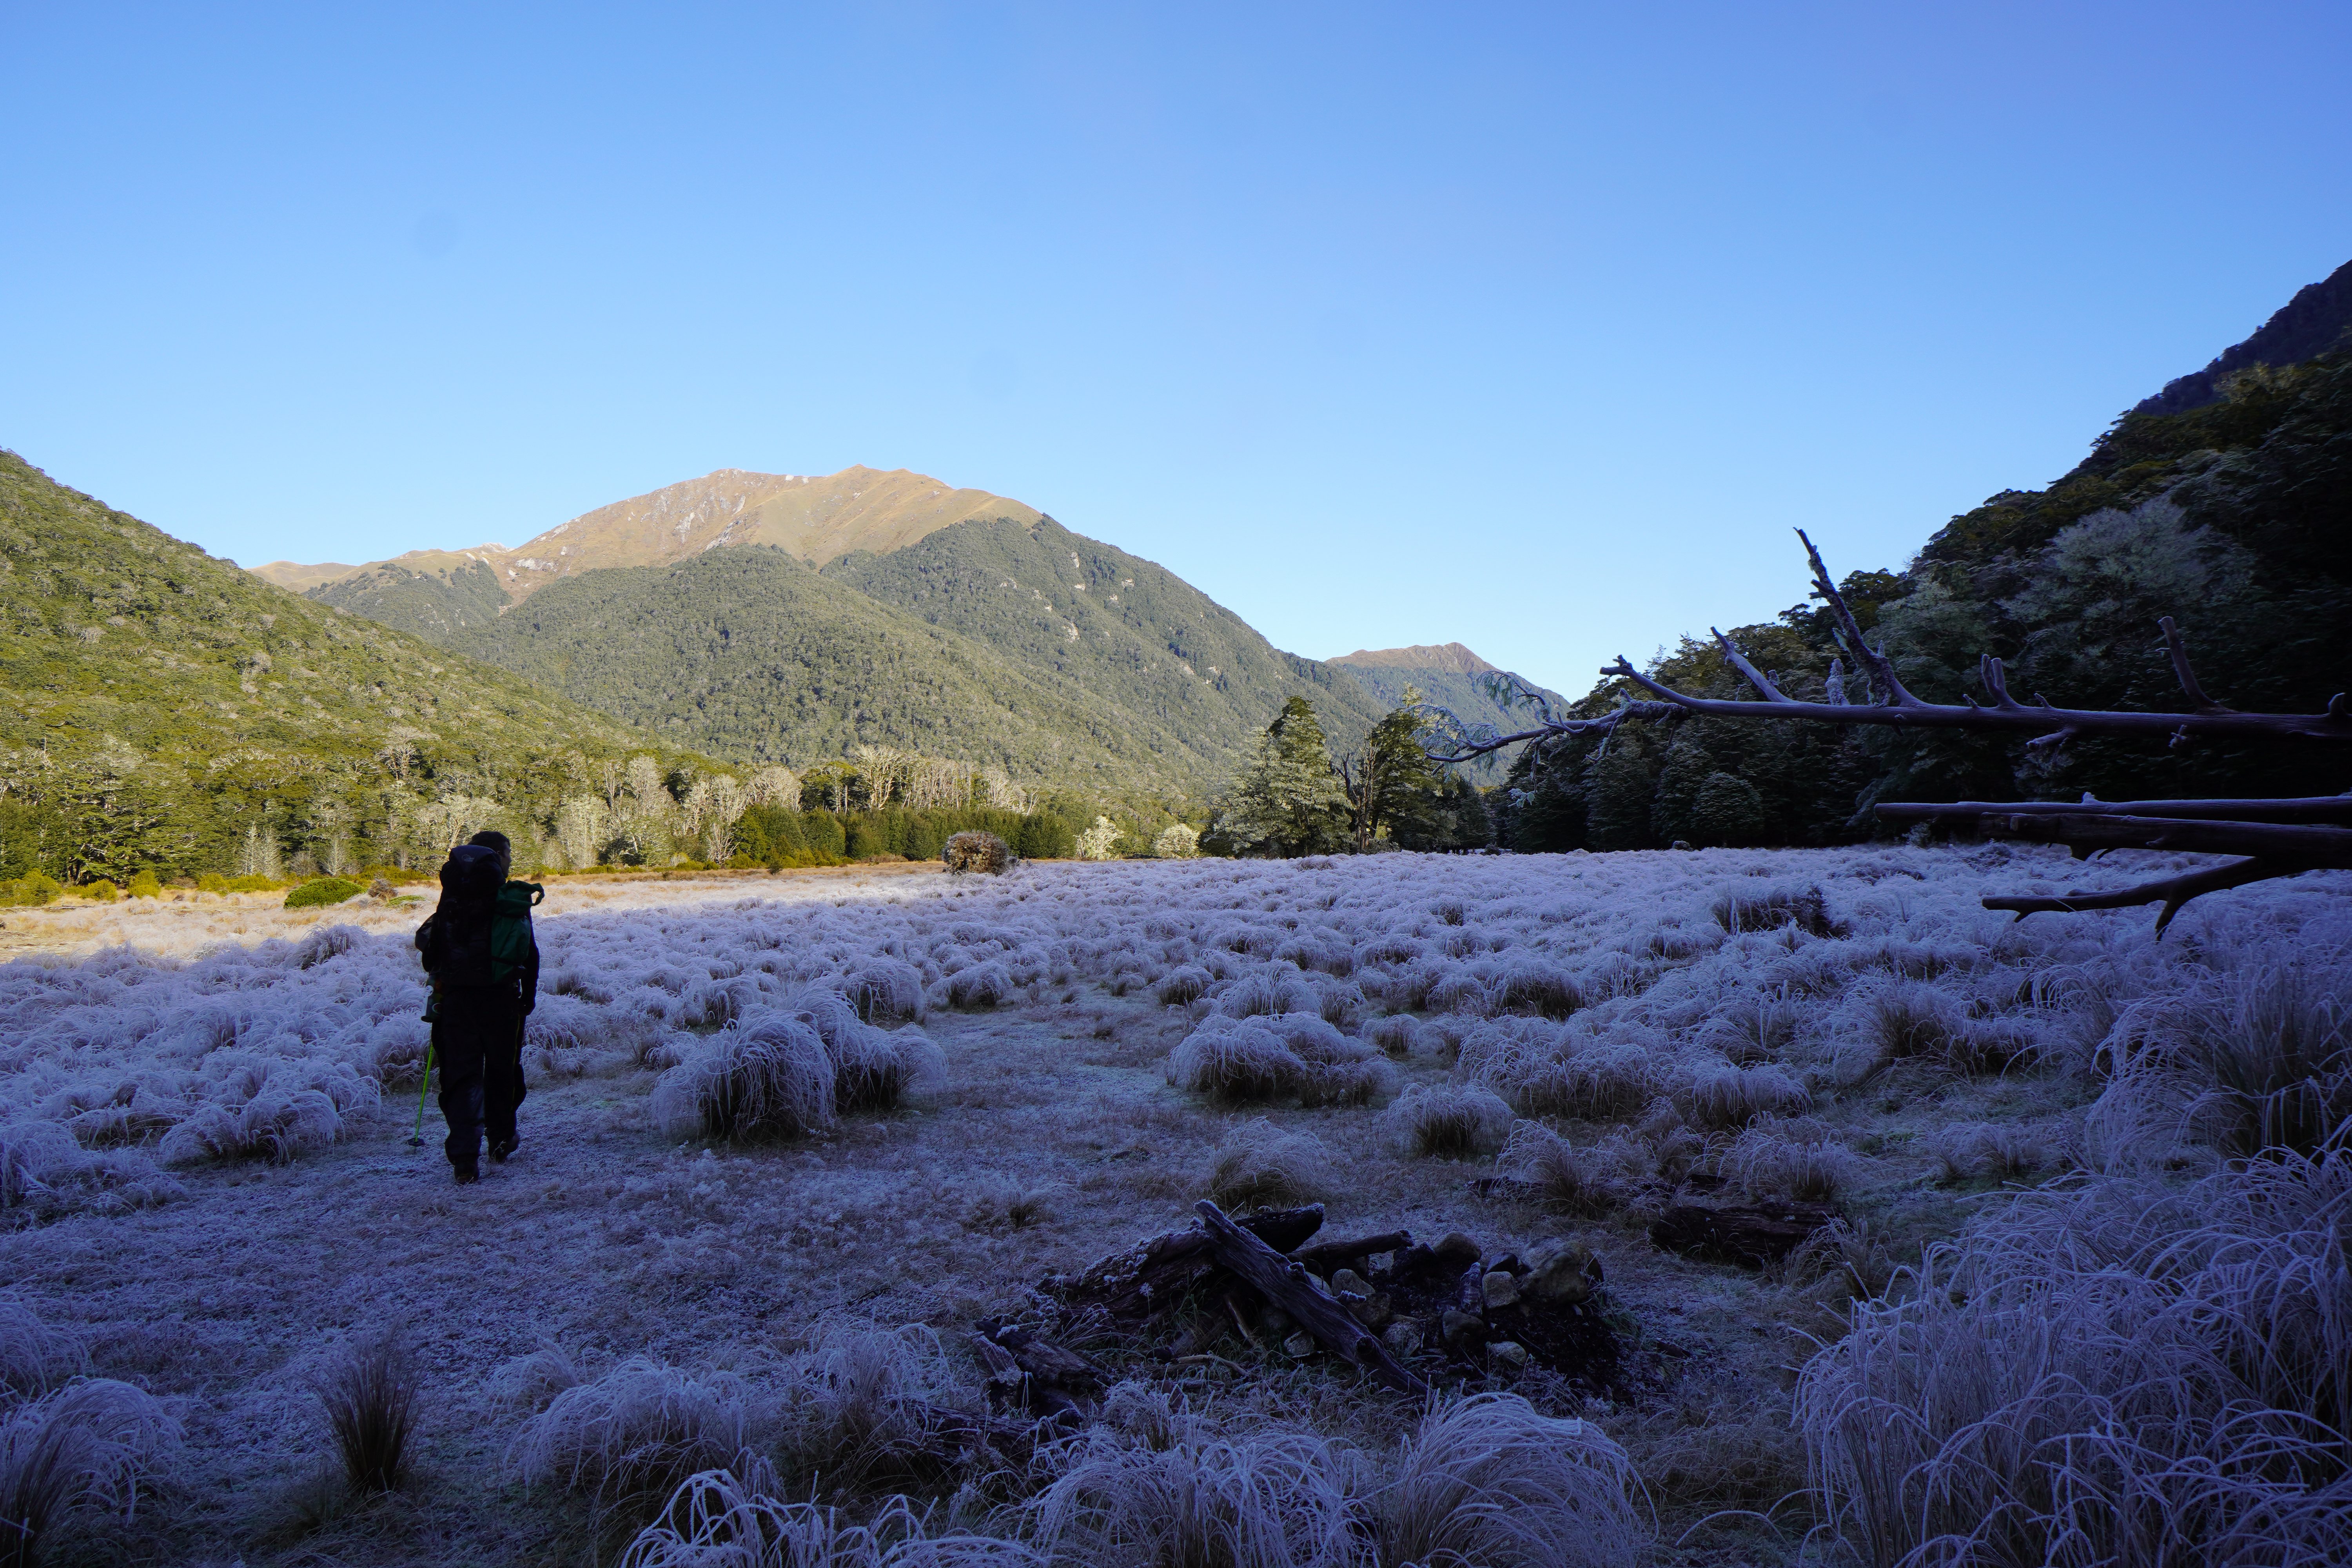
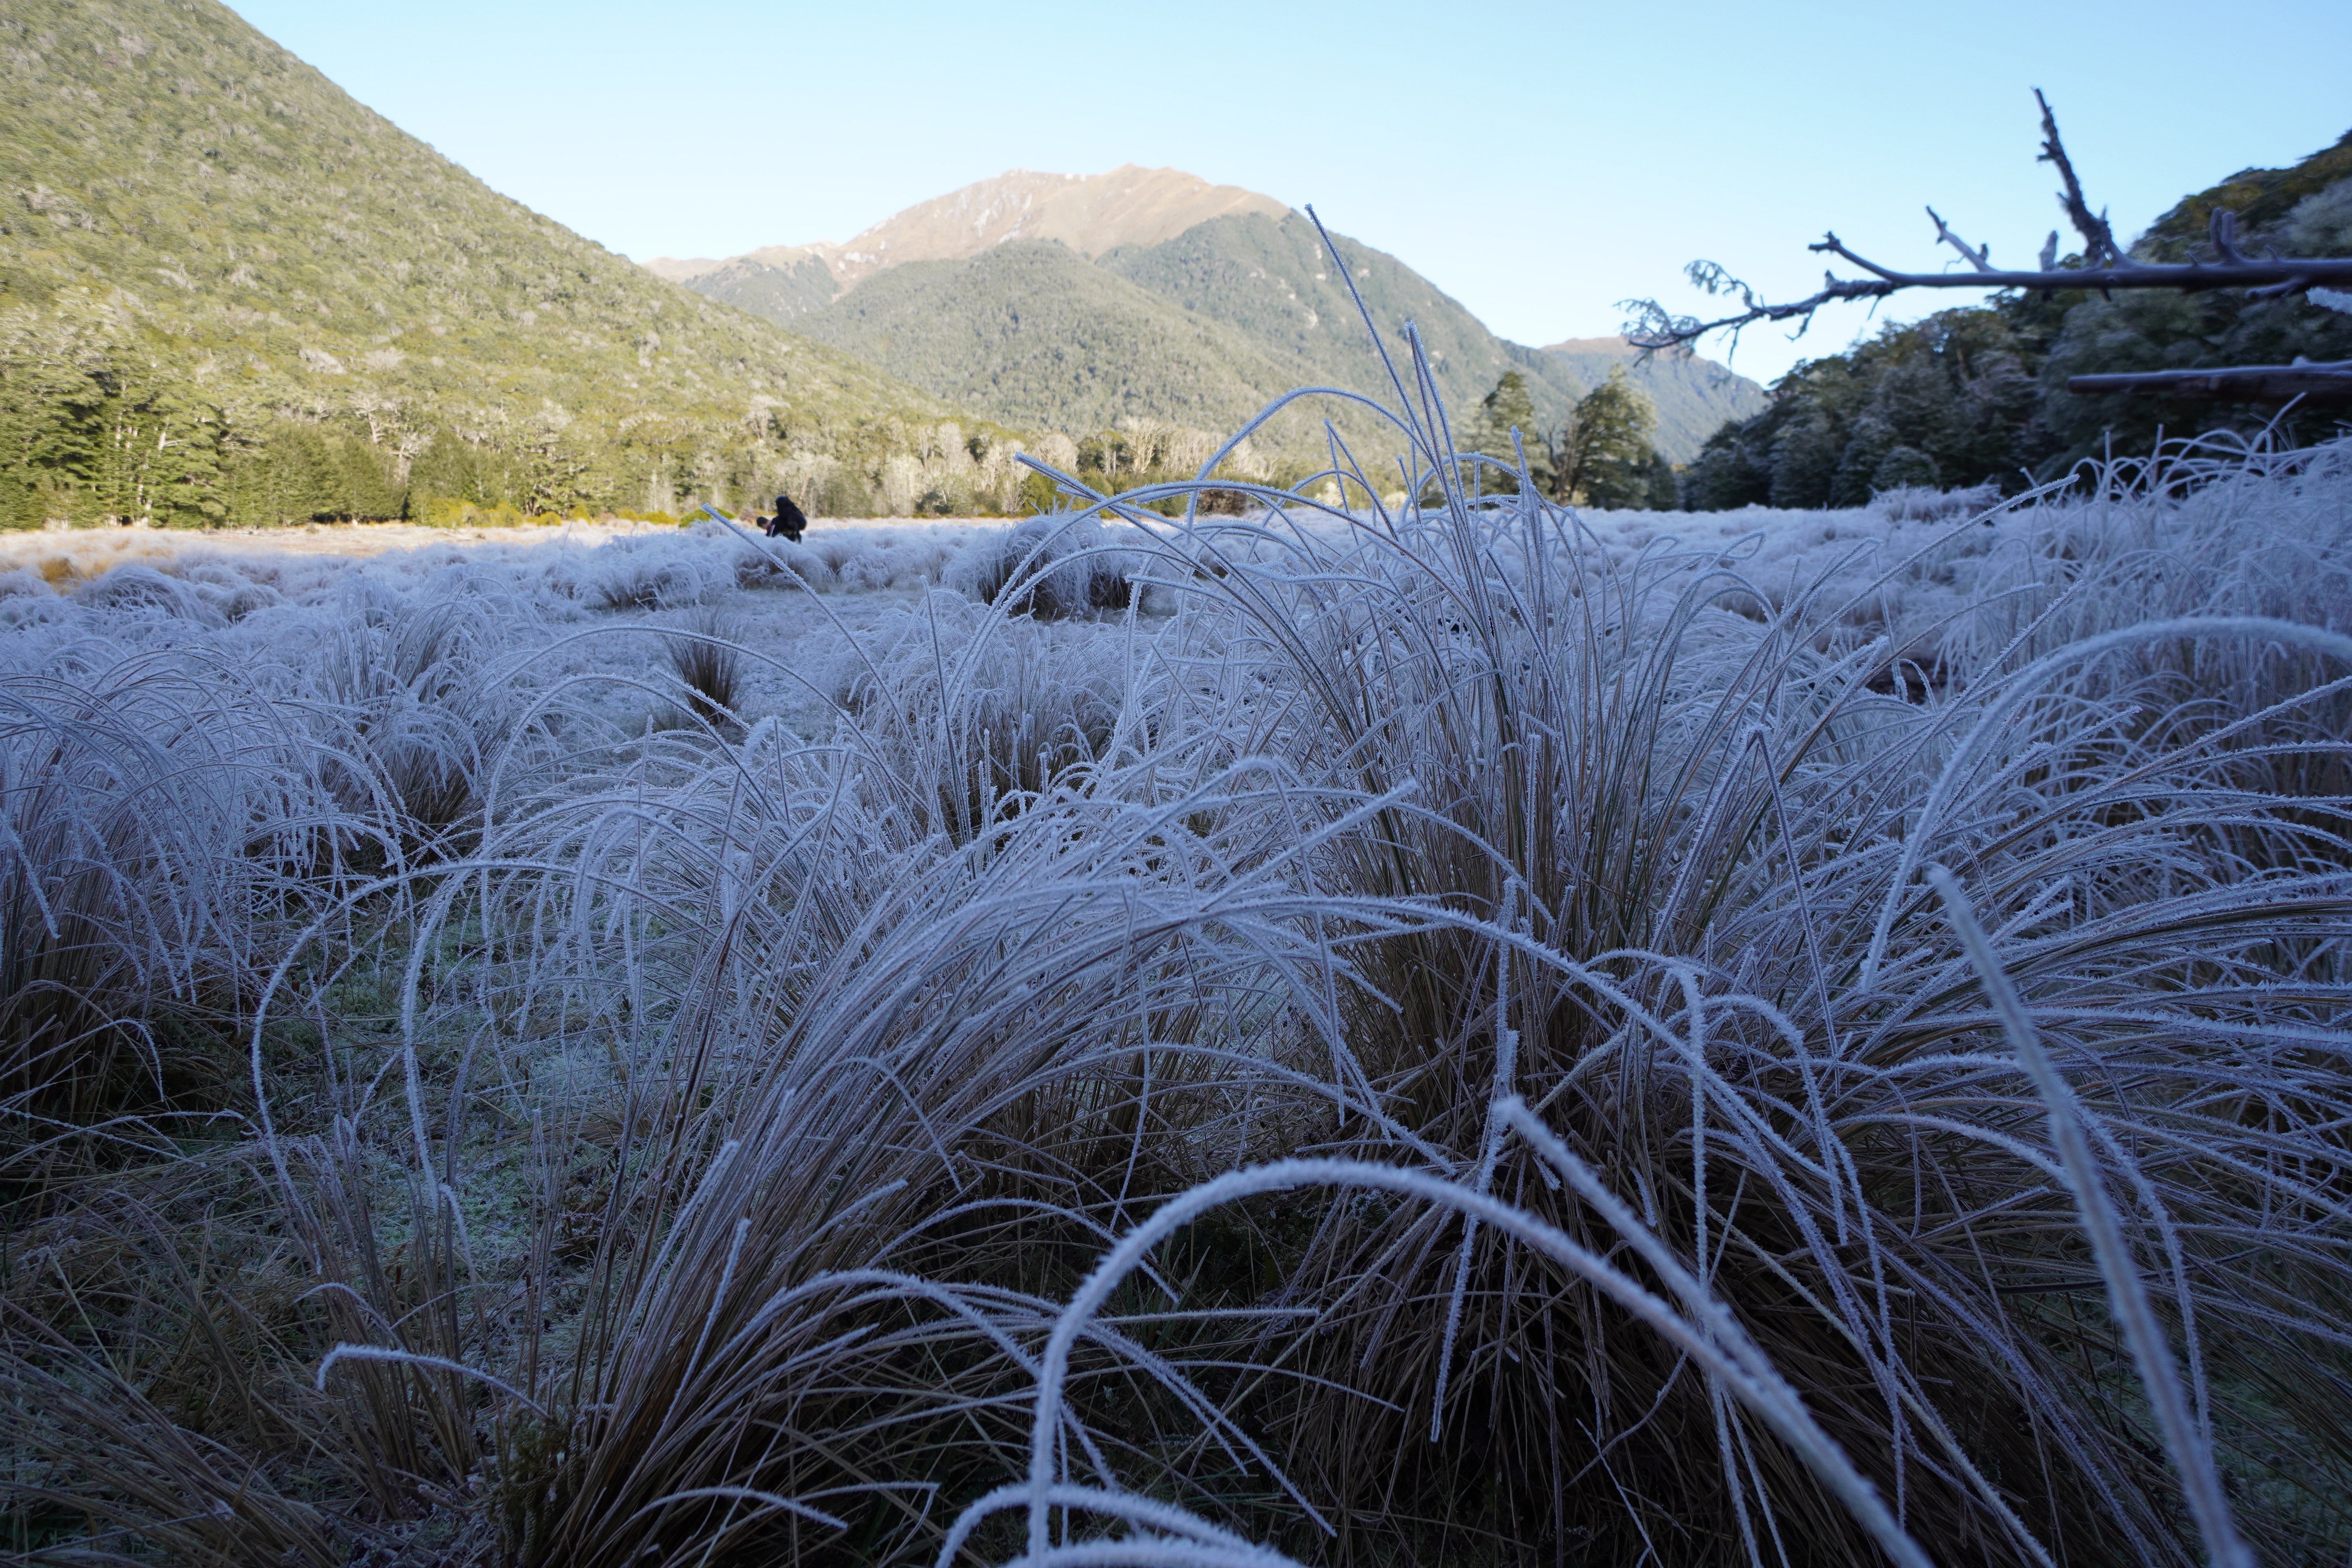
Easy flat Doc track through beech forest. Stick to the trail following the lakeside as the Circle track is a loop track that takes you inland. Around 6km in is the Hope Arm hut. Take a left here heading up Snow White clearing track which takes you to Garnock burn. Ice cold river crossings had me in tears!
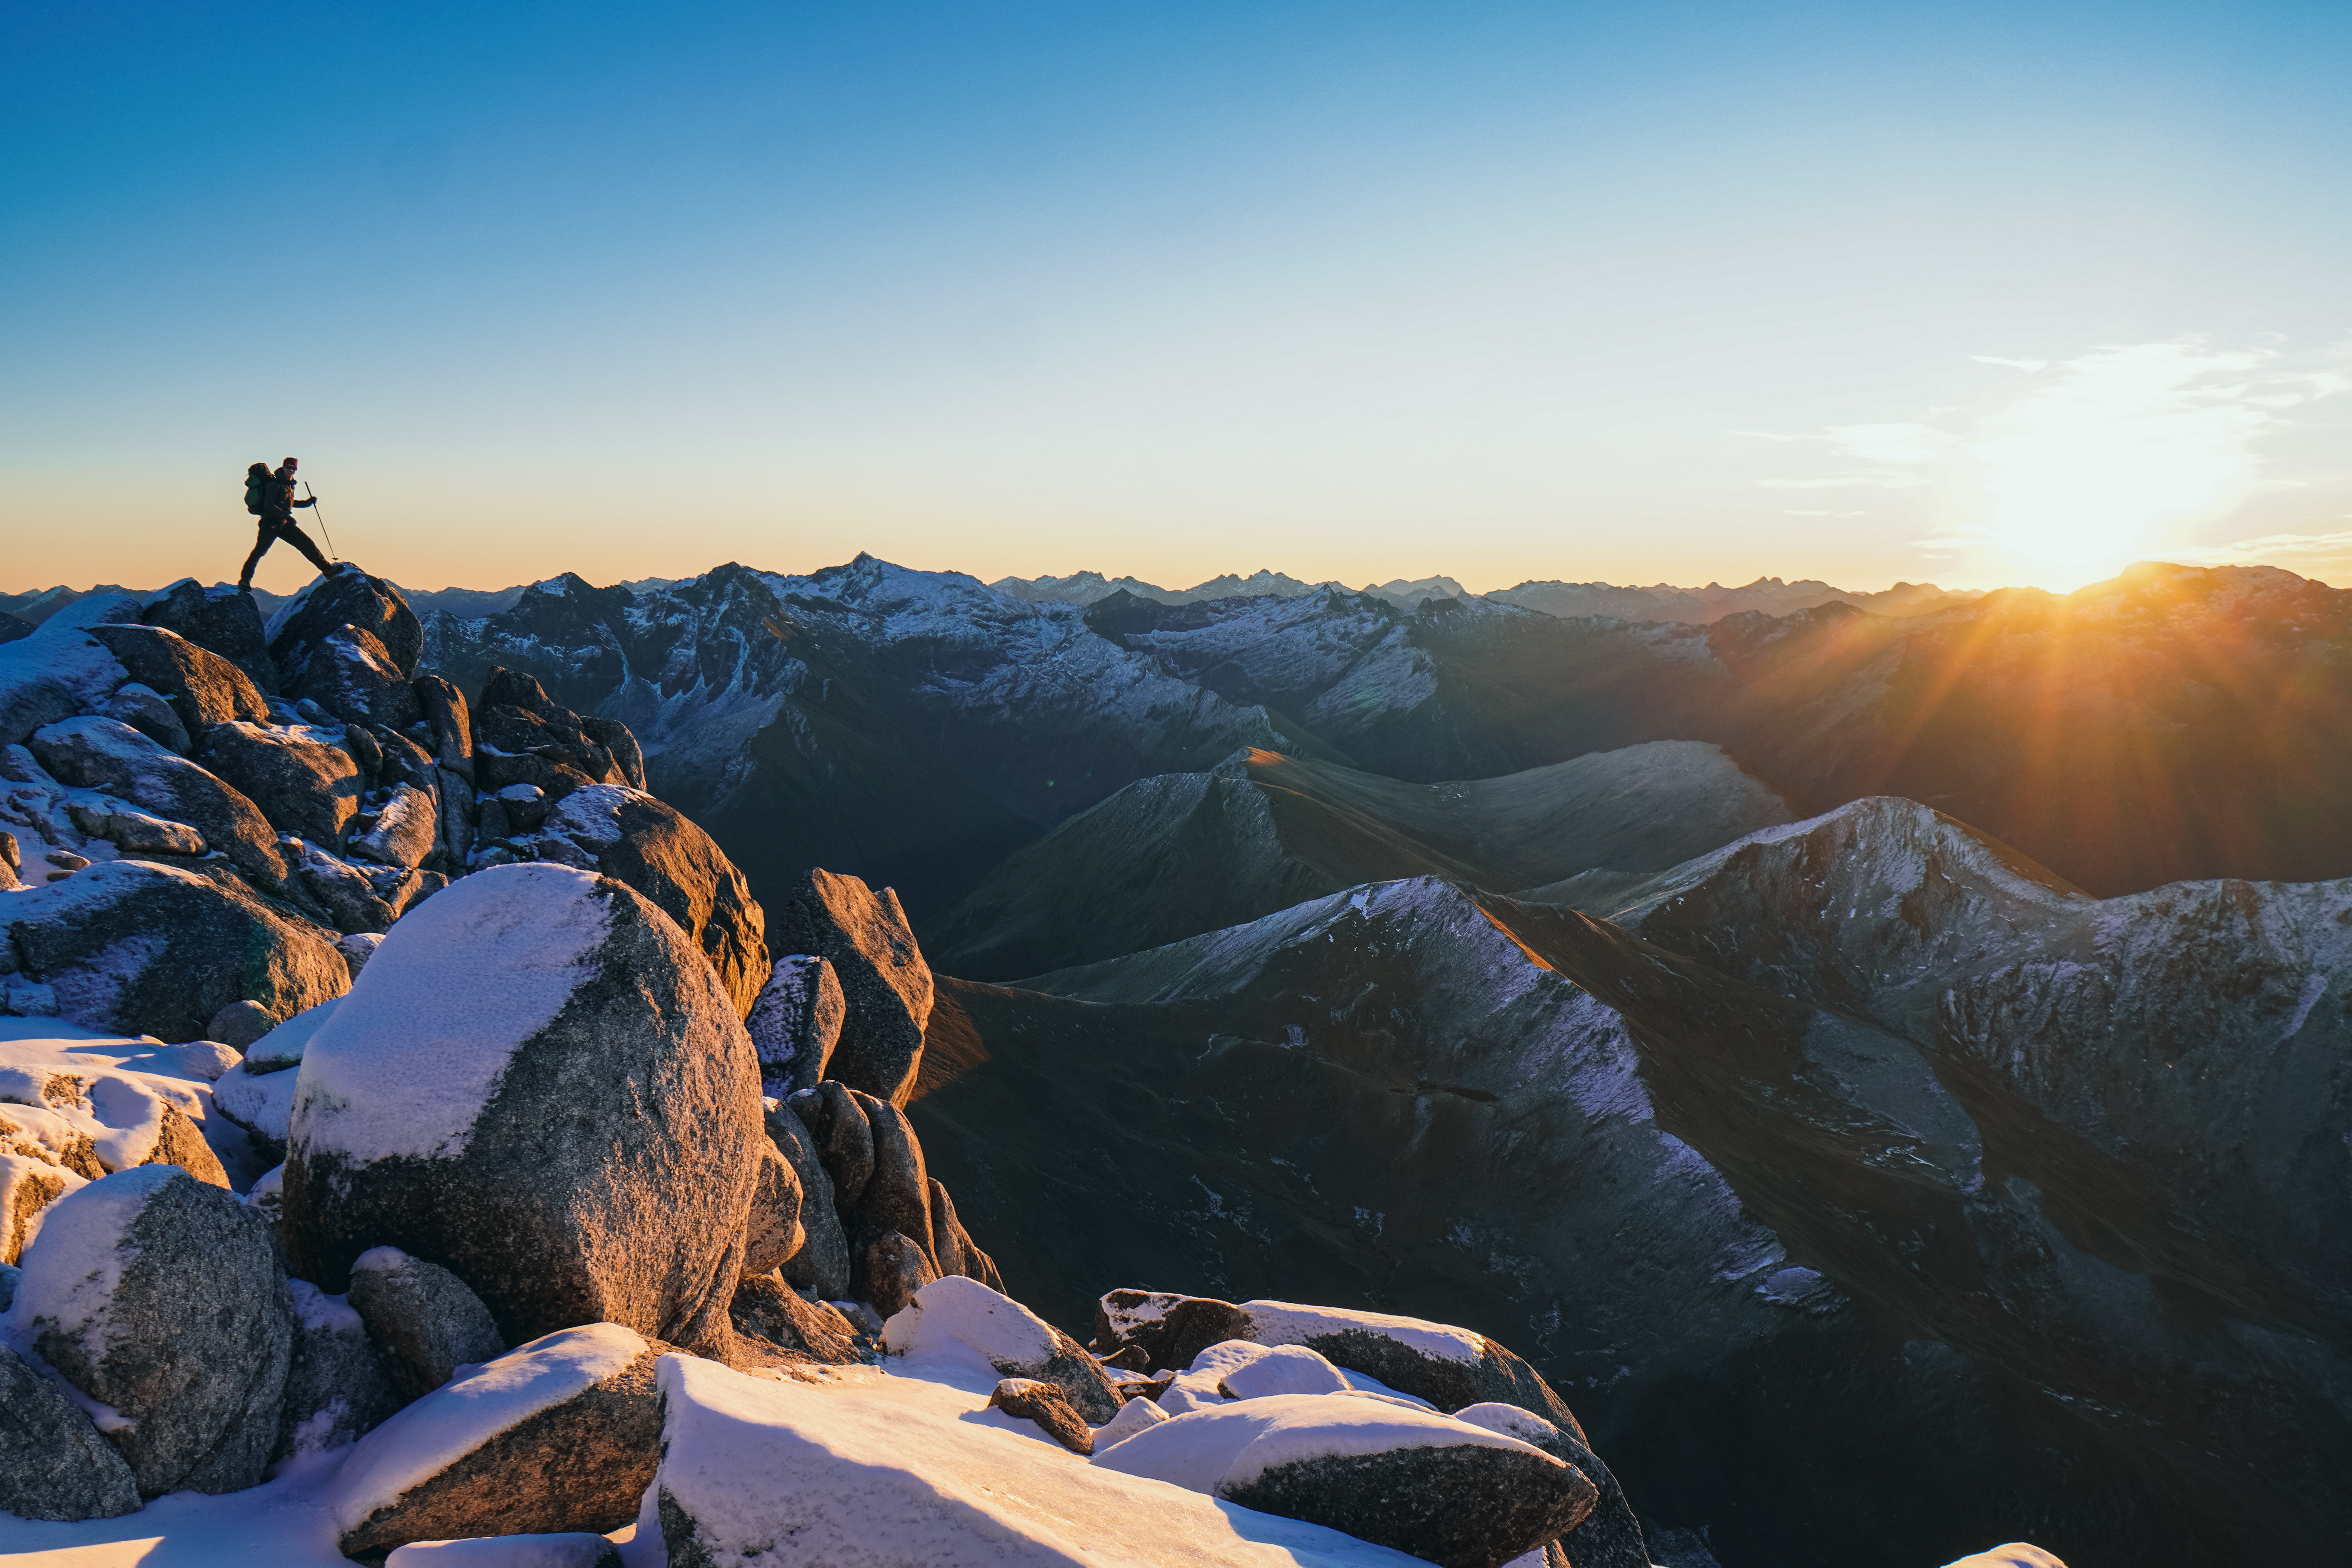
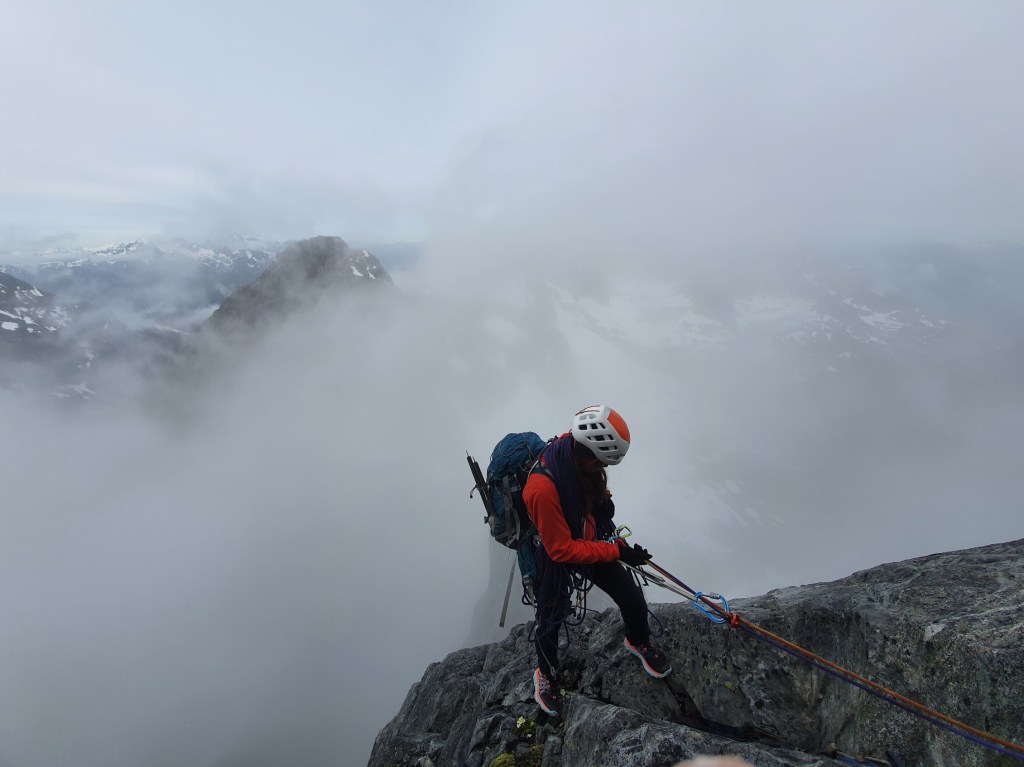
Head directly up through the bushline and stick to the ridge of Titiroa. It’s a good grunt going up to 1715m, but in total we clocked just shy of 2000m elevation in total. From the summit, soak in the panoramic views of the Fiordland surrounds! We summited just after 5pm. Smattering of snow around, lots of very oddly shaped boulders. The sun was just starting to set as we descended to find a biv spot for the night. Always love golden hour!
After a sleepless night thanks to a popped airbed / no repair kit, we set off around 8am. Boosted down to North Borland hut, and along North branch Borland river track. OJ and carrots never tasted so good. Drove back round to Pearl Harbour jetty for a brisk swim (thanks Joe!).
New Years day. Hungover and sleep deprived. What better way than to sweat it all out in a 3-day adventure into the Darrans?
This was a good old NZ epic in the back country. The approach was not merely a way to access Sabre; it felt just as much a part of the trip as the actual climb. I’d steel yourself up against the good slog in and out, and a long day out for the 500m climb up this beast. But the rewards are pretty sweet – with the elegant backdrop of Lake Adelaide, Sabre juts out impressively, true to its name, and has been luring climbers to it since the first ascent in 1959 via the West ridge.
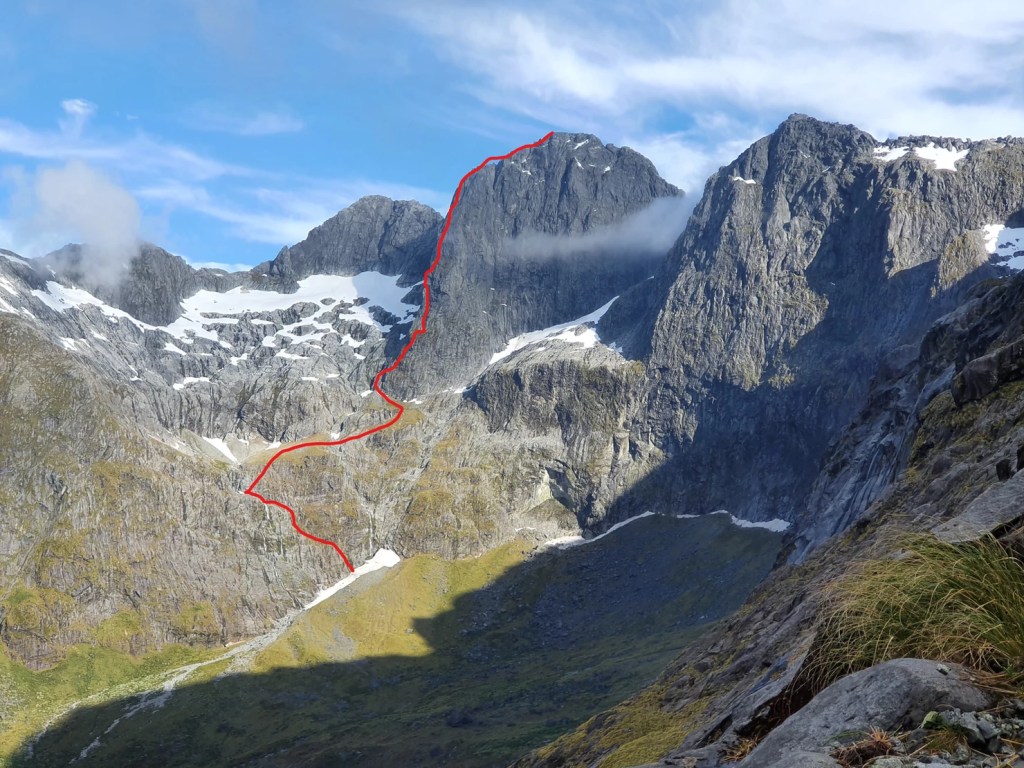
The line we took on Sabre Peak. Marian to the right.
Grade: 17
Equipment: 2x 70m half ropes. Full rack including 1x set of cams, nuts, long slings. Lots of tat to rappel.
Approachtime: 6h to Phil’s Biv
Climb time: ~16h biv to biv
Season: best in summer as minimal snow and dry rock
Team: Joe, Maria 1-3/01/2022
approach
From Homer Hut carpark, take the well signposted track for Gertrude Saddle. It is a popular day walk so plenty of people coming and going. At gertrude saddle (around 1.5h to here), follow the obvious path NE towards Barrier’s Knob. There was a bit of snow for the last hundred metres up to barrier knob, but we were in our light-weight crampons and trail runners and had no issue.
From Barrier knob, head down the ridge to Adelaide saddle (further 1h or so). Route finding to Gifford’s crack/gap is fine here as long as you go all the way down to the saddle. Don’t make the mistake we did and drop down too early, as we had to descend steep moist tussock and make one rap off a dubious spike to reach the valley floor.
Gifford’s crack is steep but in dry conditions could be down climbed carefully. There is a faint hint of a trail to reassure that you are on route. There are a few single bolts you can use to rap down it (unclear to me why someone would go to all the effort to bring a drill, just to drill one not two bolts…). Going up it felt fine, but for less confident parties can be climbed in 2-3 pitches.
Giffords from the bottom. You come in from Barrier Knob on the skyline top left, cross over the rise in the middle by staying west and then drop down into Adelaide saddle. Theres an obvious gully to downclimb with a couple of bolts.
Once down in the basin, soak in the views of Sabre in the distance. It looks really steep and intimidating from a distance – but don’t worry, it feels way more approachable up close!
We made another error here and stayed low in the basin and headed towards Sabre, but the scrub was thick and the travel was slow. Took us 2h but can be faster if you stay high as we did on the way out. There is a definite break in the bush that leads you all the way to Phil’s Biv – aka a 5 star hotel.
There was no vacancy that night at Phil’s Biv, but we had brought a tent just in case, and set up for a dinner and early night. I realised I had forgotten to pack any spoons for Joe or myself. This was a downer but made so much worse by then realising I had also forgotten the coffee! I was not popular…
the route
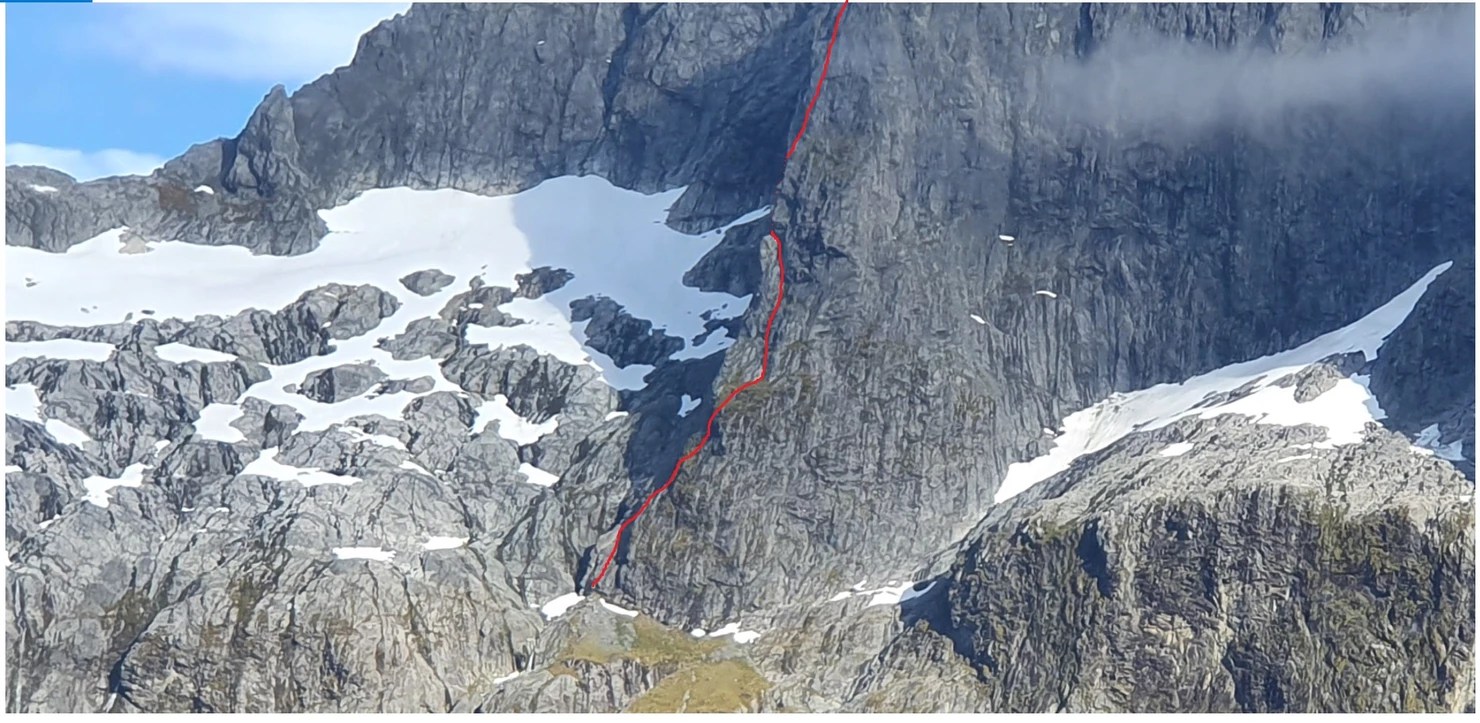
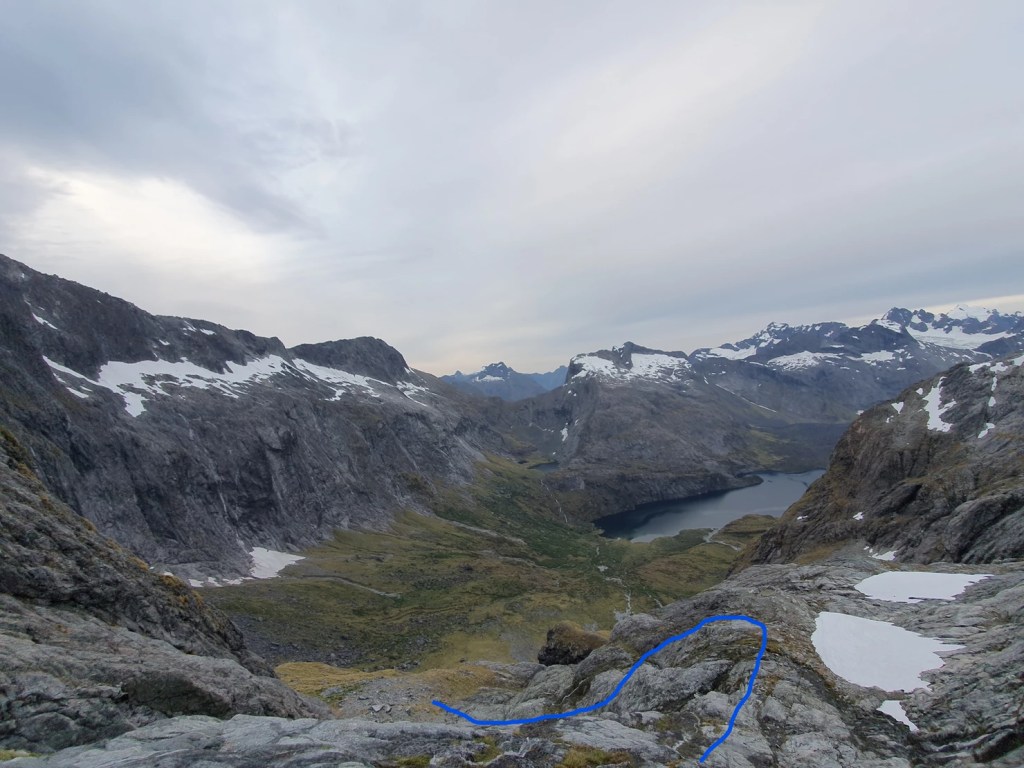
Alarm set for 5am. As we were eating breakfast (quite challenging without spoons) we saw 3 head torches in the distance heading up and we knew we would have company for the day. Getting to the base of the route is a bit tricky so we were grateful for the cairns en route. Head to the the left of the obvious waterfall on the North Buttress – see picture below. There was some snow here when we were there, stretching 50m or so. Gain the tussock ramp on the left, climbing up before reaching another waterfall. Zig zag back right at this point where the ground flattens off.
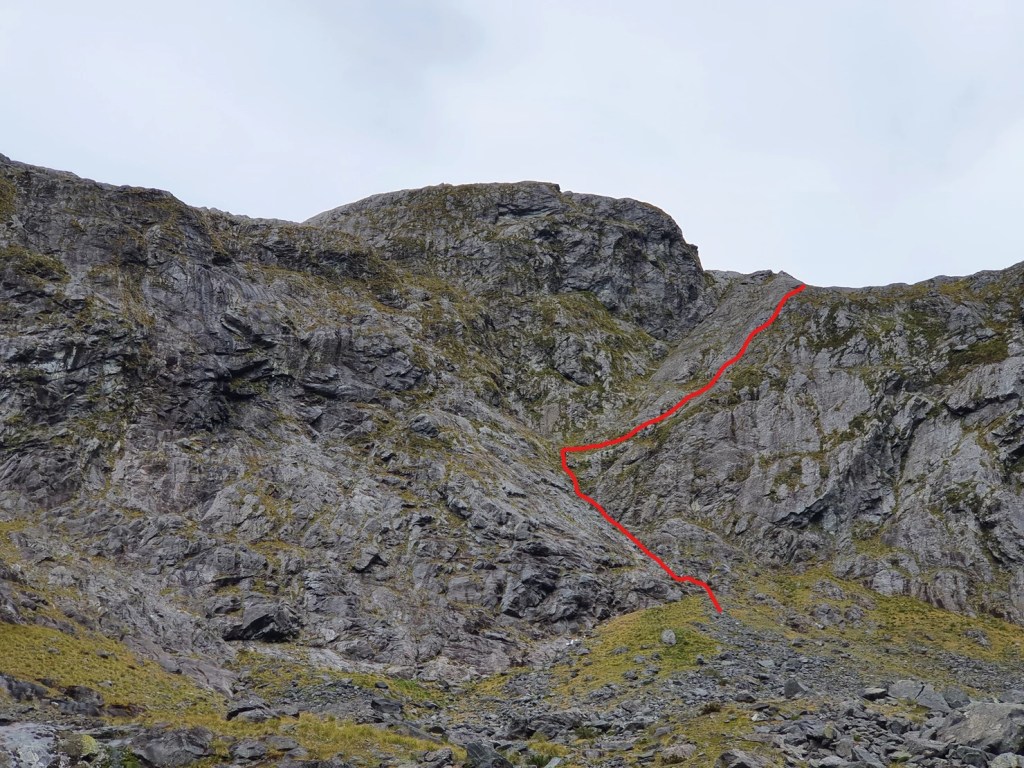
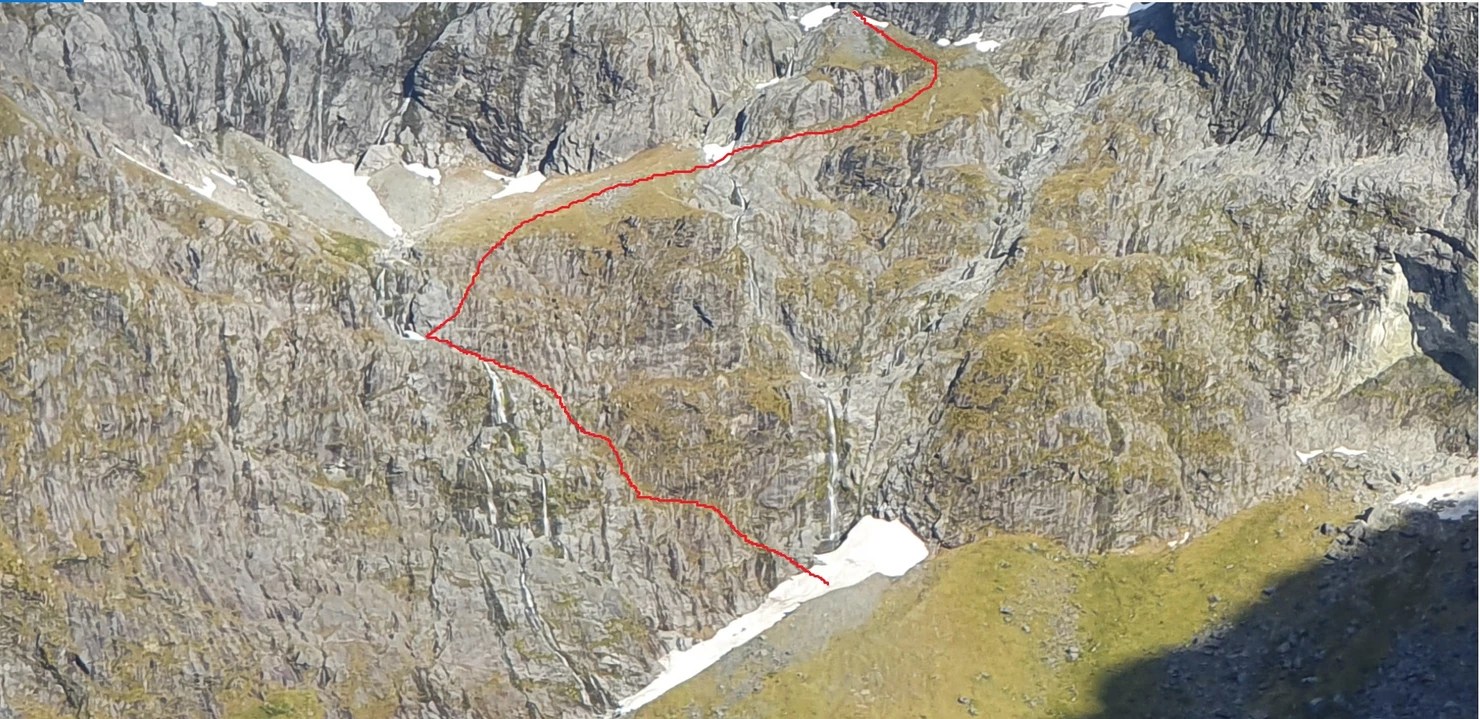
Swipe to see the route we took – it isn’t as bad as it looks from afar. Pretty similar to Giffords crack in steepness. The track is cut into the cliff a bit and as long as its dry never feels too sketchy. The hardest route finding was at the top where it cuts back hard right on itself (the furthest left point of the red line) – just head up the low angle slab towards the tussock.
I would divide the route into 3 distinct sections.
Part 1 Getting to the crux – can be done either through the yak pastures (what we did) or via the direct variant graded 19 (what we wished we had done), and ending at a massive obvious spike belay and ledge right on the ridge of the N butress. Its not obvious from the above photo but once you hit the yak pastures there a deep obvious gully that cuts up diagonally from the right hand edge of the yak pastures towards the ridge. Its going to take a varying number of pitches depending on exactly which way you go and has the potential to be very time consuming. We took 5 in total.
P1: Started up the low angle slabs on the left
P2: head diagonally towards the right which takes you to a spot which you can see the yak pastures from.
P3-4 : Full quest time. Awful, slimy, mossy, run out. We were heading up through the muddy slippy tussock which was pretty unprotectable and not a lot of fun. When you eventually get up to the yak pastures it levels out and you can find a good anchor on the rock band on the right
P5 – Start on the far right of the yak pasture and follow the gully that goes diagonally up and left towards the ridge where the spike belay is and the actual climbing starts! The rock quality and pro is actually decent in this gully, a welcome reprieve from the last few pitches
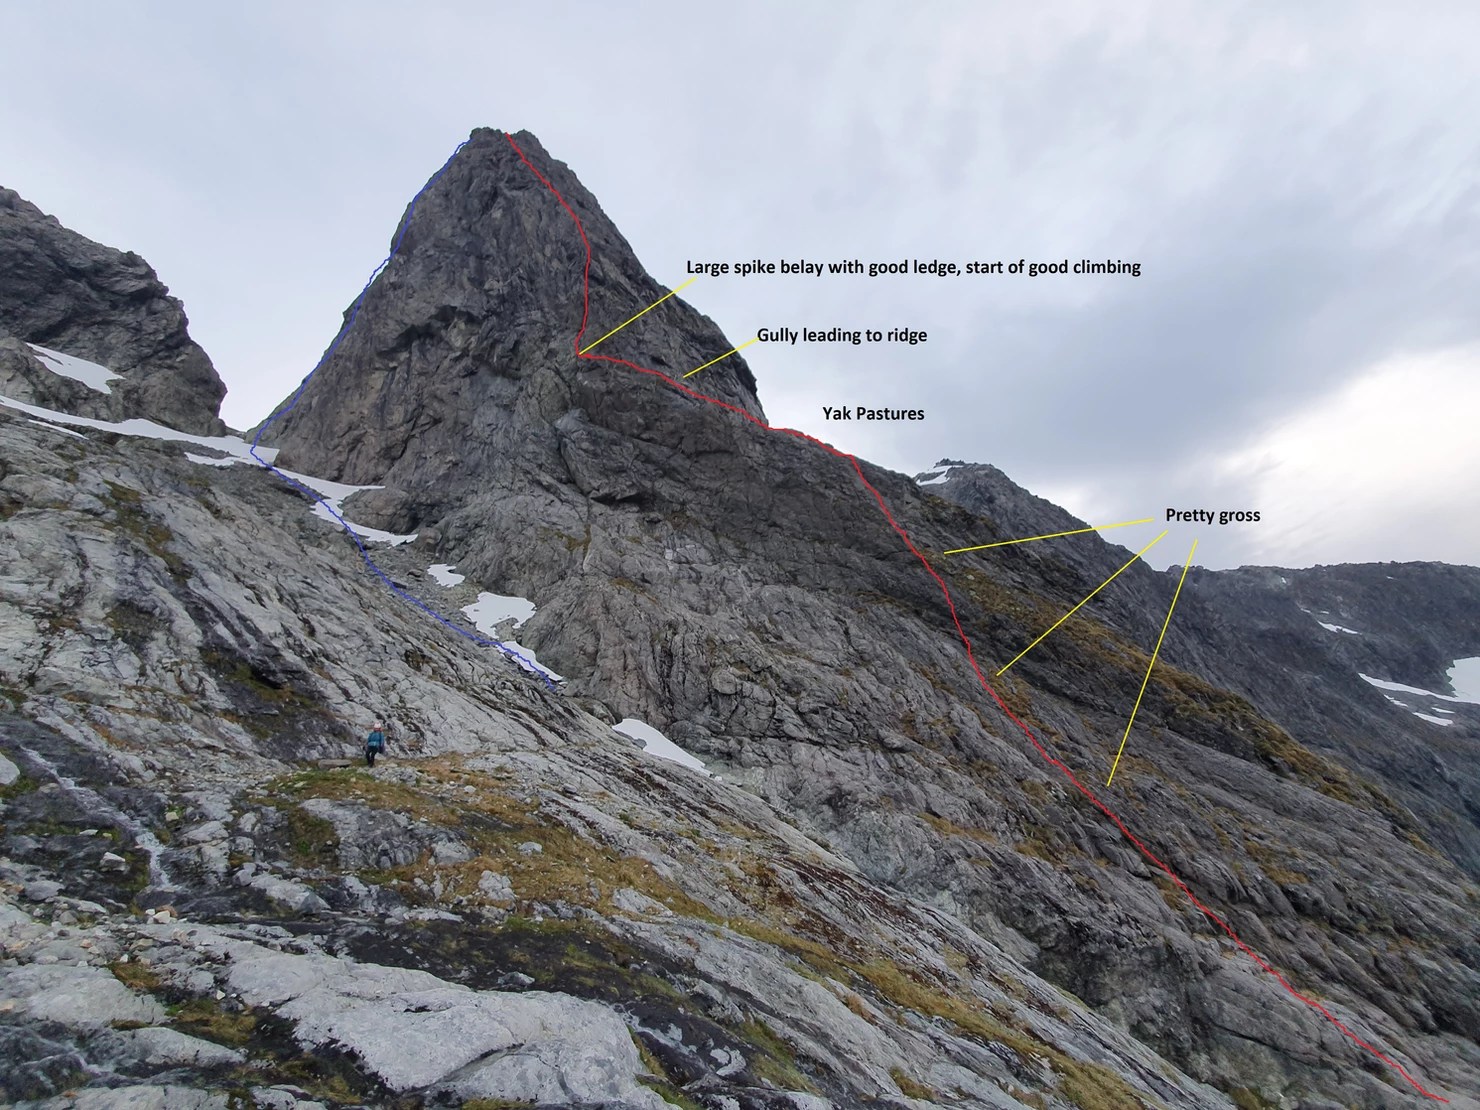
Swipe up for route/annotations. Gettting up to the Yak pastures wasn’t a lot of fun. Mossy, muddy, wet, hard to protect. This is how we went but probably a much better way. The crack straiught down from the spike apparently goes at 19 and looks much nicer! Once your at the Yak Pastures it gets much better.
This angle gives a much better view of the gully from the yak pasture up to the ridge, and the belay ledge that signals the start of the good climbing!
Part 2 The crux aka the good climbing! – 3 pitches of super fun well protected grade 17 climbing – not really the crux because grovelling through the slimy tussock of death below was way scarier and harder. Took us around 4h to get here.
P6: 16, 45m. Very enjoyable, finally nice clean granite just as we were promised! Super fun exposure swinging out left onto a ledge before heading up the obvious crack. Spike belay and ledge here.
P7: 17, 40m. Stem city. Fun moves up the corner straight up, following the obvious line of protection.
P8: 16, 40m. Again straight up.
Part 3 The final pitches to the summit – Lots of different ways you can go, angle mellows out significantly. Choose the path of least resistance, grade 14 or so is possible to the top (although we veered right under an overhang/roof section which was very cool and fun climbing, harder than it needed to be. Probably about 18/19. Worth the detour if you can be bothered.
P9: Traverse right, jugs the whole way but v exposed. Then easy scrambling up. Bit of rope drag here.
P10: Directly up.
P11: Up and towards the right takes you to a tricky overhanging roof, which is difficult to protect. Alternatively stick left for an easier option.
P12: Easy scrambling to the biv spot just shy of the summit.
We got here by around 5.30pm. Tired but great feeling of accomplishment! Quick sandwich before starting the descent.
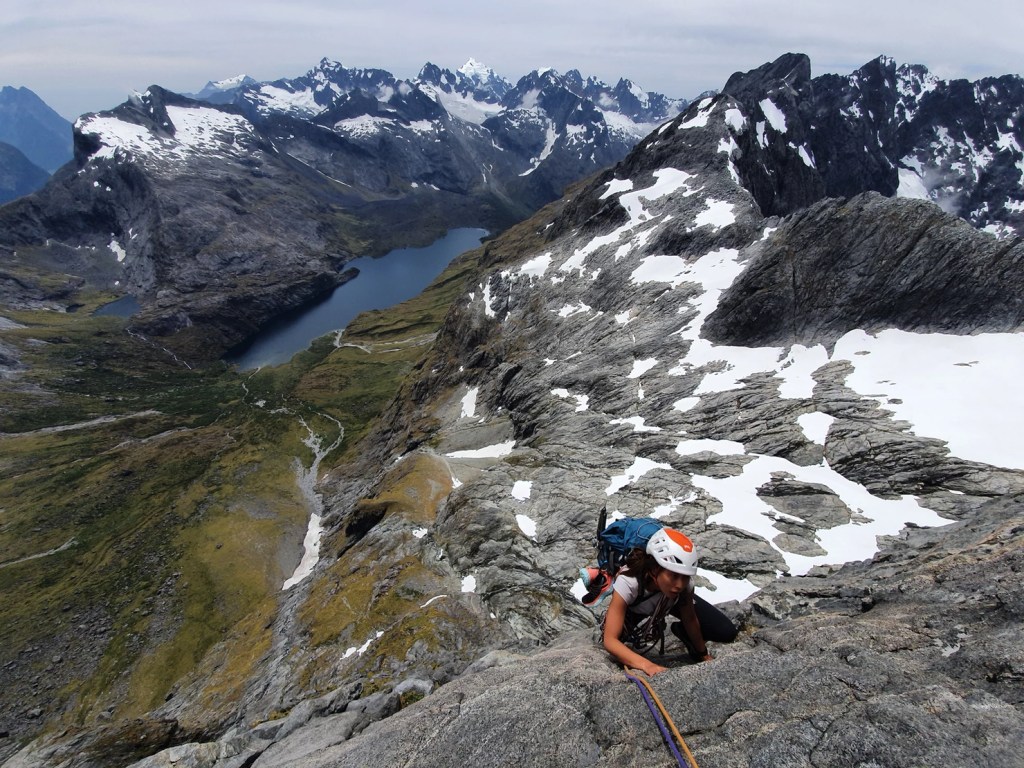
Coming up one of the mellow top pitches with some amazing views
Descent
Scramble south past the multiple biv spots that people have built and towards the summit. To get to the rap station head East around 50m before you reach the summit, aiming towards the East ridge. The stations are pretty obvious with huge bundles of tat from previous groups. Bring enough tat to replace weathered slings and be ready to leave some nuts behind. From the top your aiming for a giant obvious gendarme – the rap line is just to the skiiers left of this. Some people downclimb to the gendarme but that seems pretty sketchy to me, especially with tired brain kicking in.
Cloud coming in at the start of the first rappel
We were down to the Sabre-Adelaide col by 8pm. We had to walk through down some snow and mossy slabs to get to where we started the climb. Took us another 2.5h to get down to camp. Had another spoonless meal and KO’d by 10.30.
Had a much needed lie in the next day then paced it out! Great way to kick off 2022.
Once you’ve walked down from Sabre Adelaide col, you can easily get bluffed out on the wet slabs especially if its dark. This is an easy way down to where the climbing started.
GPX files. GPS went slightly haywire a couple of times on the summit but you get a good picture of the approach and descent routes. The approach file is the correct way through Giffords, not the way that we took on the way in!