Mount Murchison

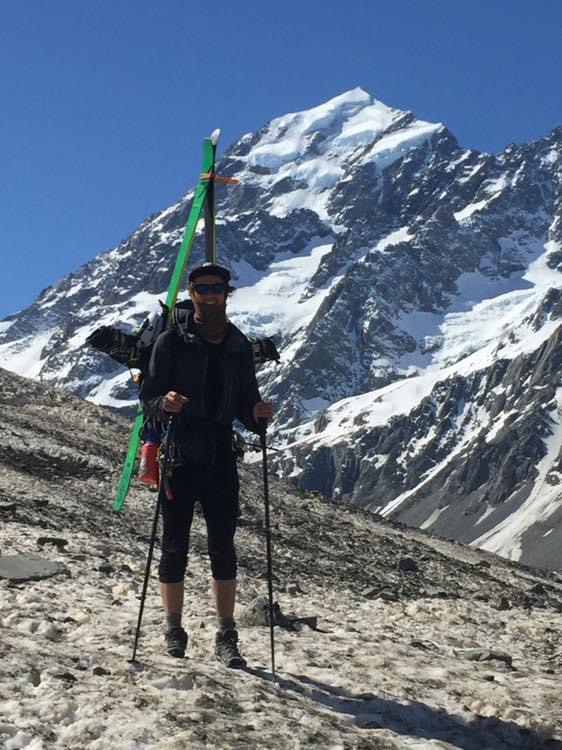
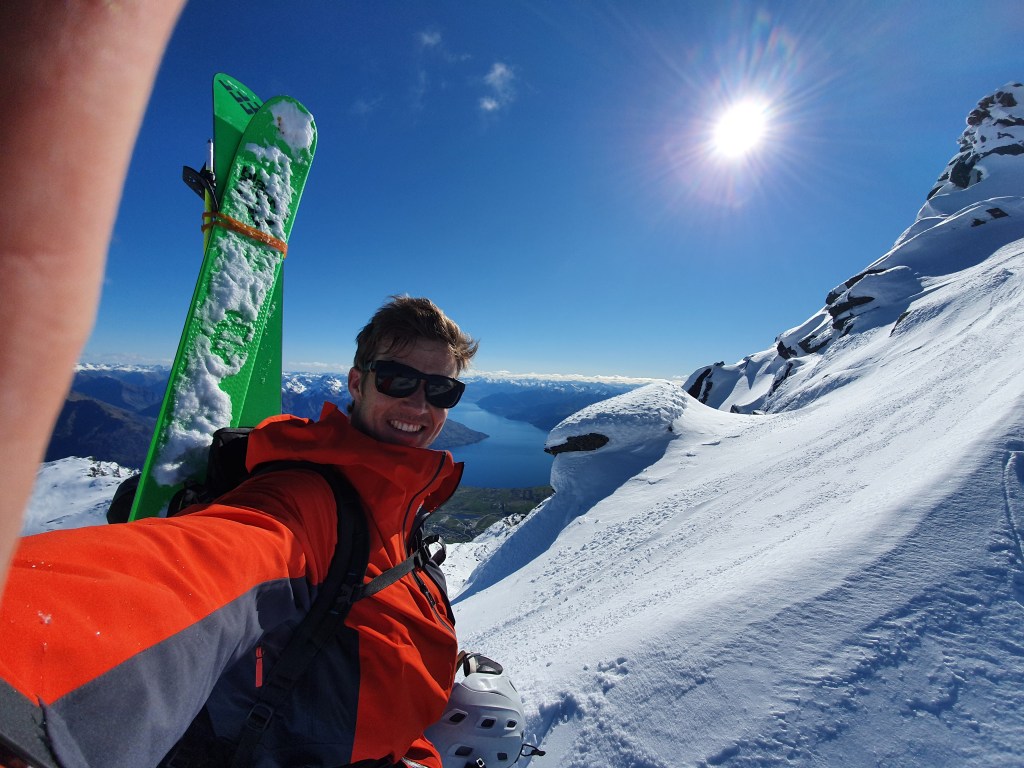
The highest peak in Arthurs Pass. It had taken us 5 years of living in Christchurch to get around to climbing Murchison. It had always been on the cards, but with a long riverbed approach, it was always bumped down the list as a lower priority. But winter 2024 – what a doozy! With no snow and most of the ski fields shut, we decided it would make for a great weekend mission. Of course, Joe wanted to bring his skis and so we set forth as a team of 4 (2 climbers / 2 optimistic skiers).


  • Grade : II, 2 (but condition dependent – crux section felt more like III, 3 )
  • Equipment : 1x 30m rope, lightweight rack (handful of nuts, couple of screws), glacier travel equipment
  • Time :
    • 9h from O’Malleys Track to Barker Hut (1500m elevation gain, 24km)
    • 1.5h from Barker Hut to Mt Murchison (1100m elevation gain, ~6.5km)
  • Season : in mid July, white glacier was already pretty well filled in, although we were cautious as there had been minimal snow so far in the season
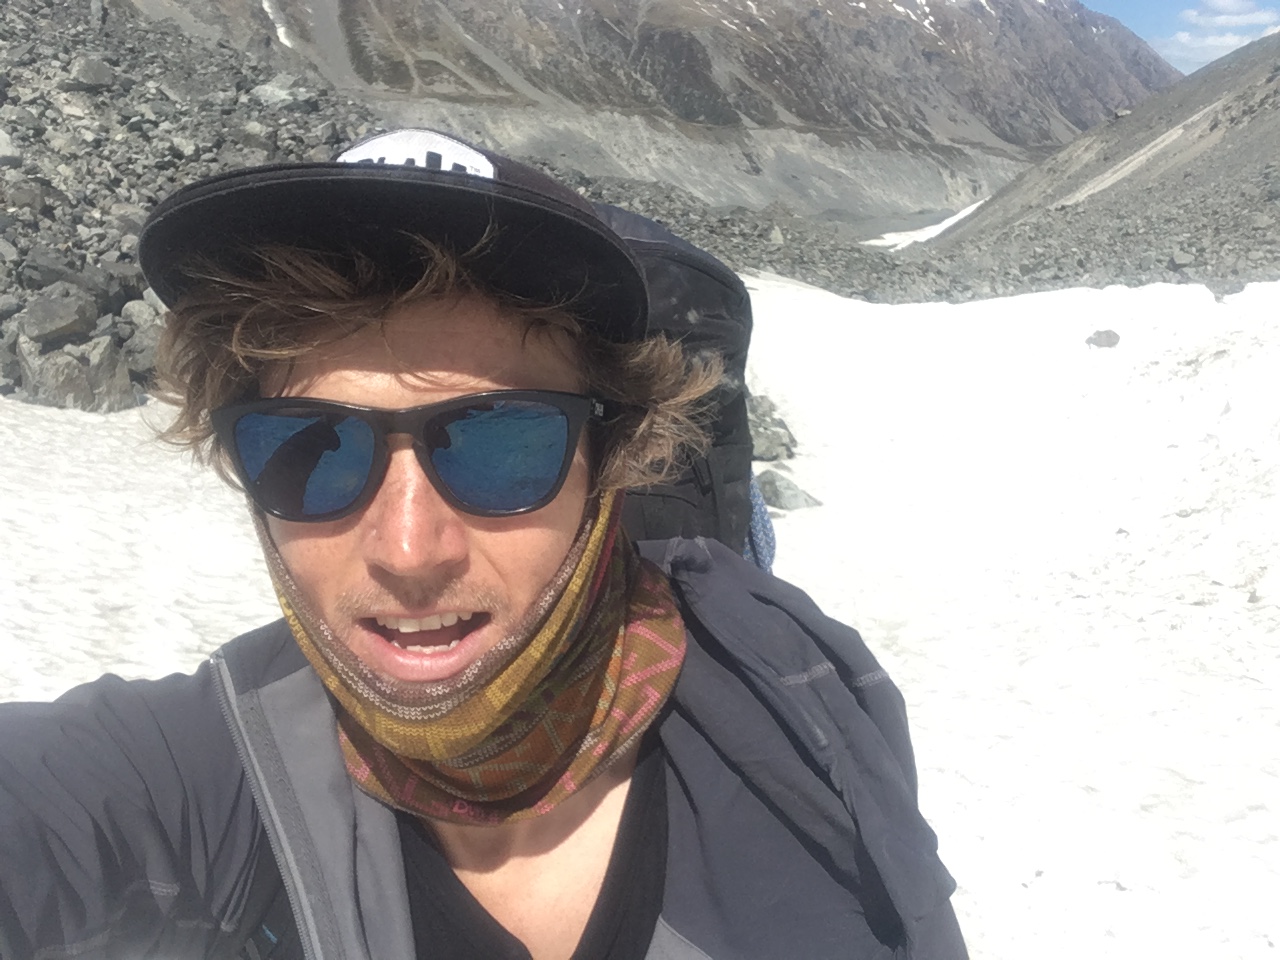
  • Team : Climbers Sean & Maria, Skiers Shona & Joe; 13-15/07/2024
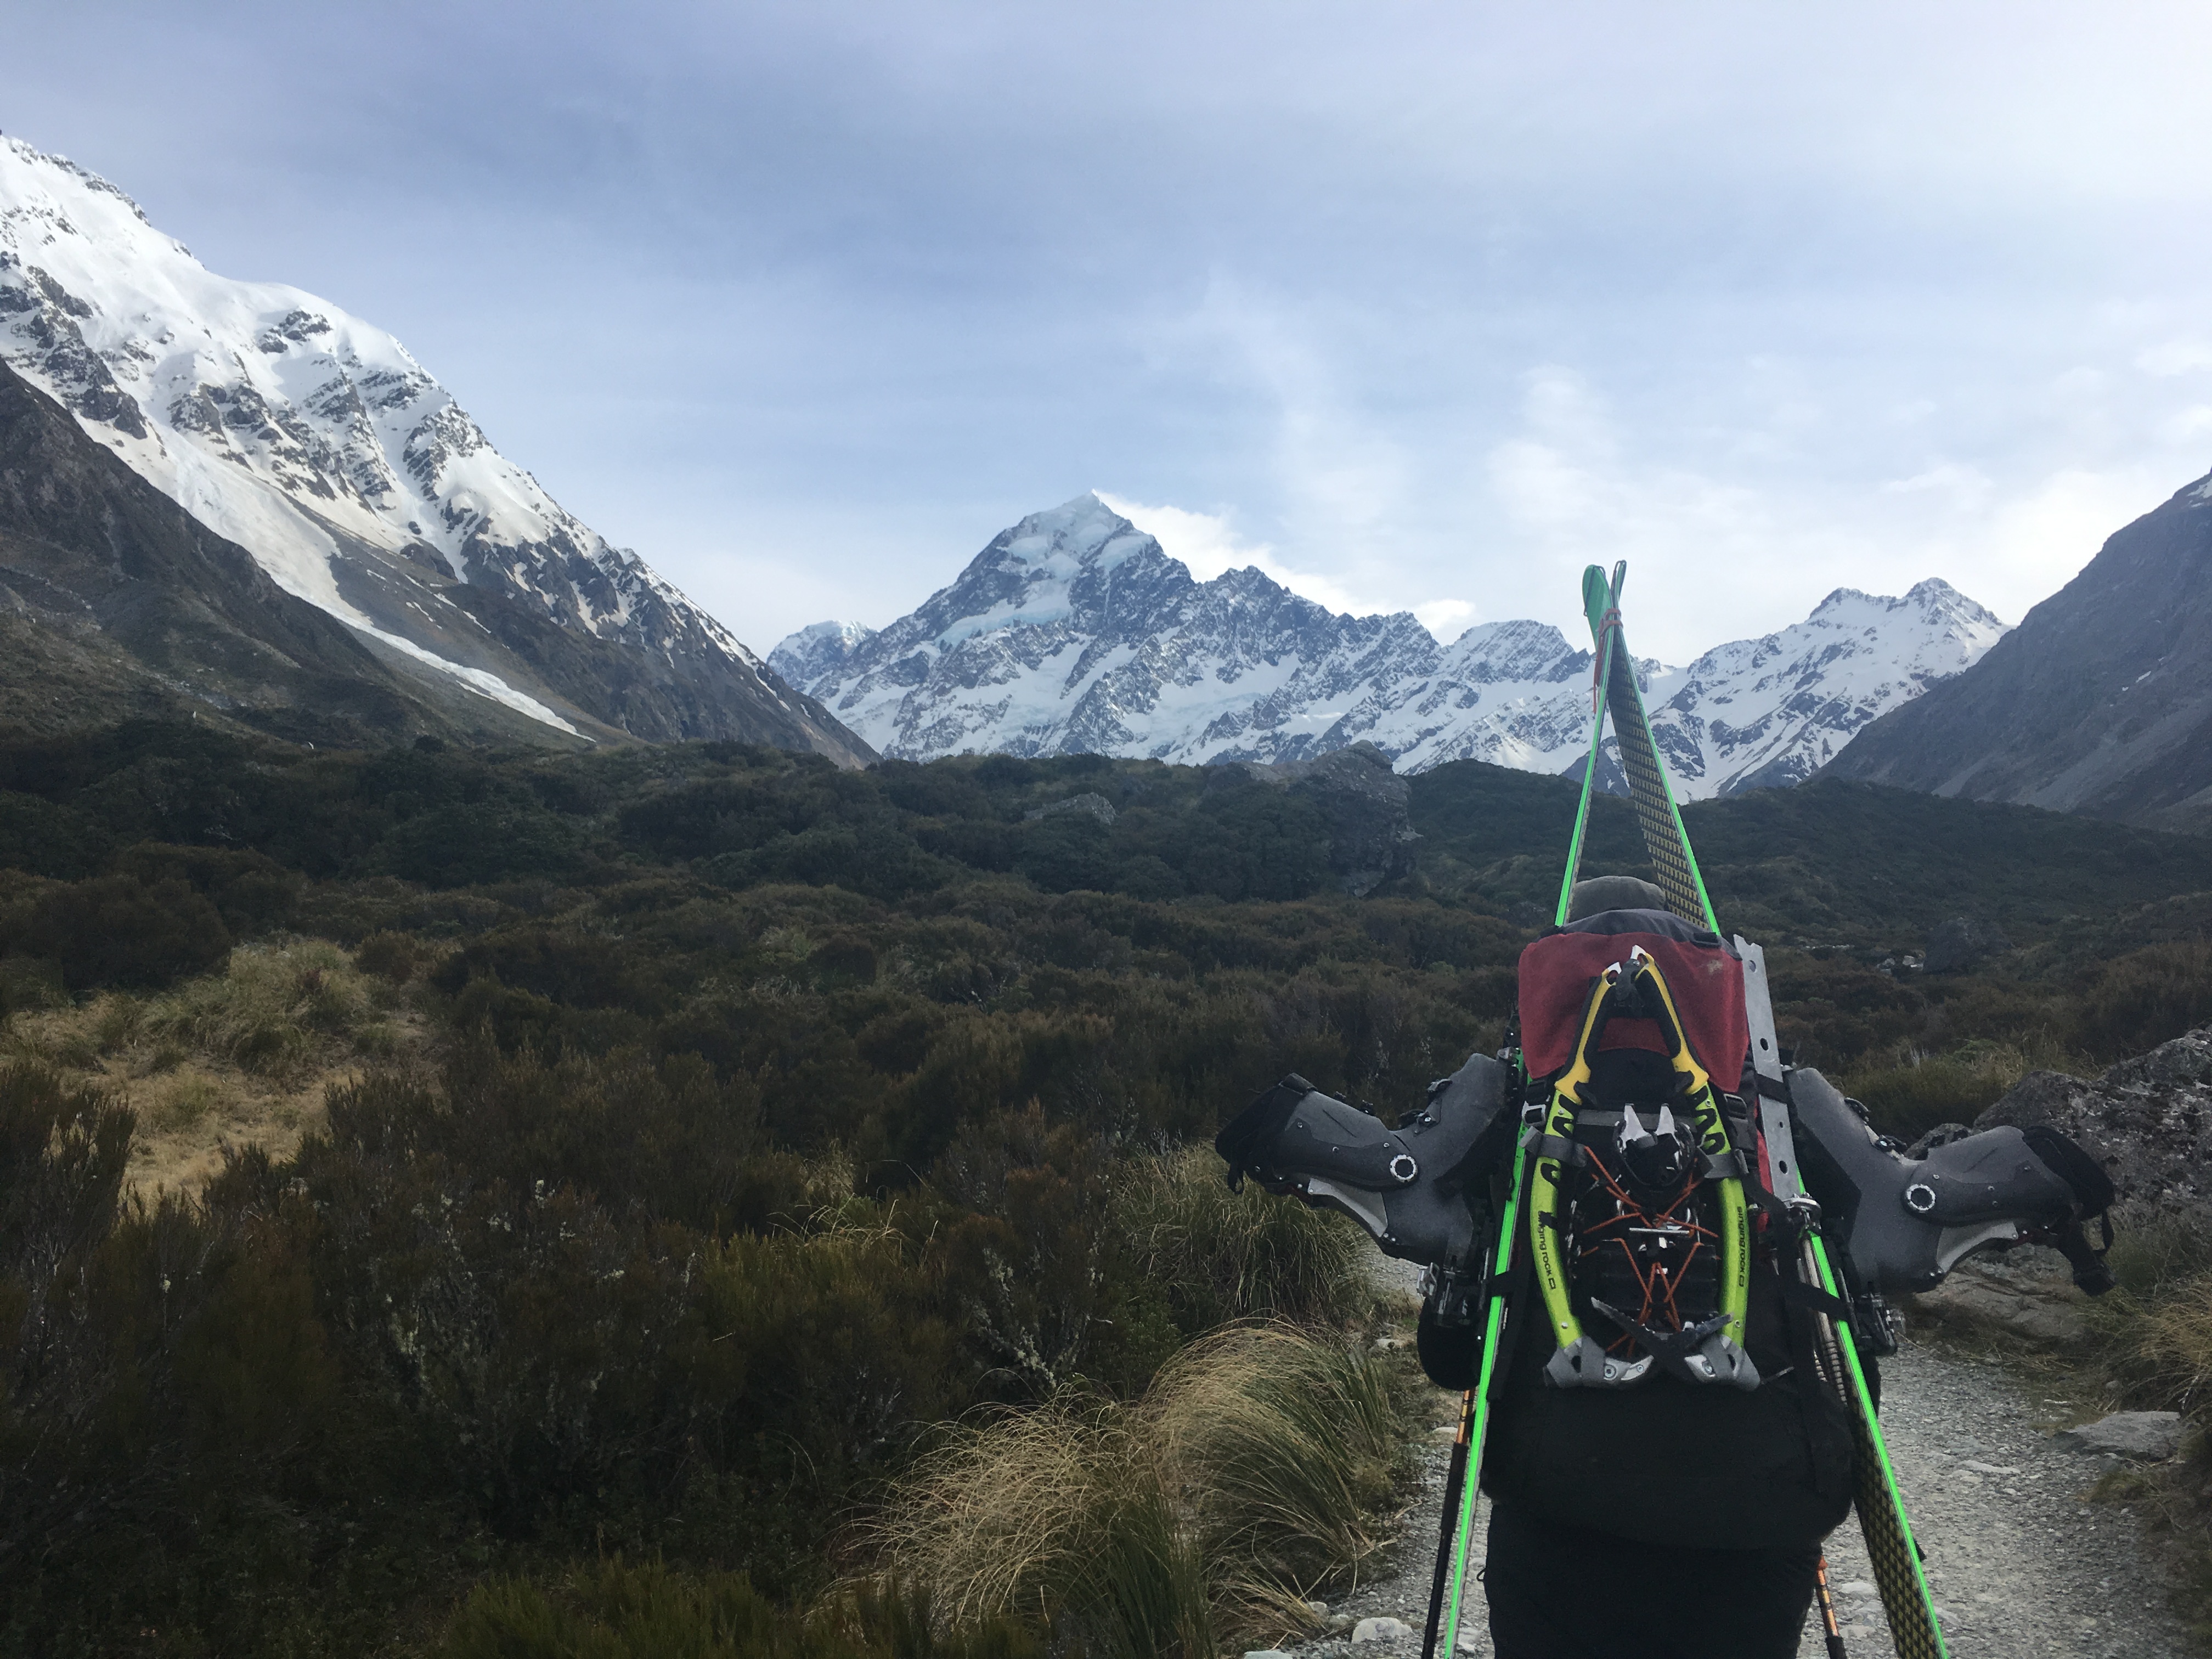
Approach

Straightforward but a slog. Park at trailhead for O’Malleys Track – but this carpark is notorious for break ins; we took a risk but otherwise leaving the cars at Klondyke corner campsite is an option. Alternatively you could ask Bealey Hotel permission as it is much closer.

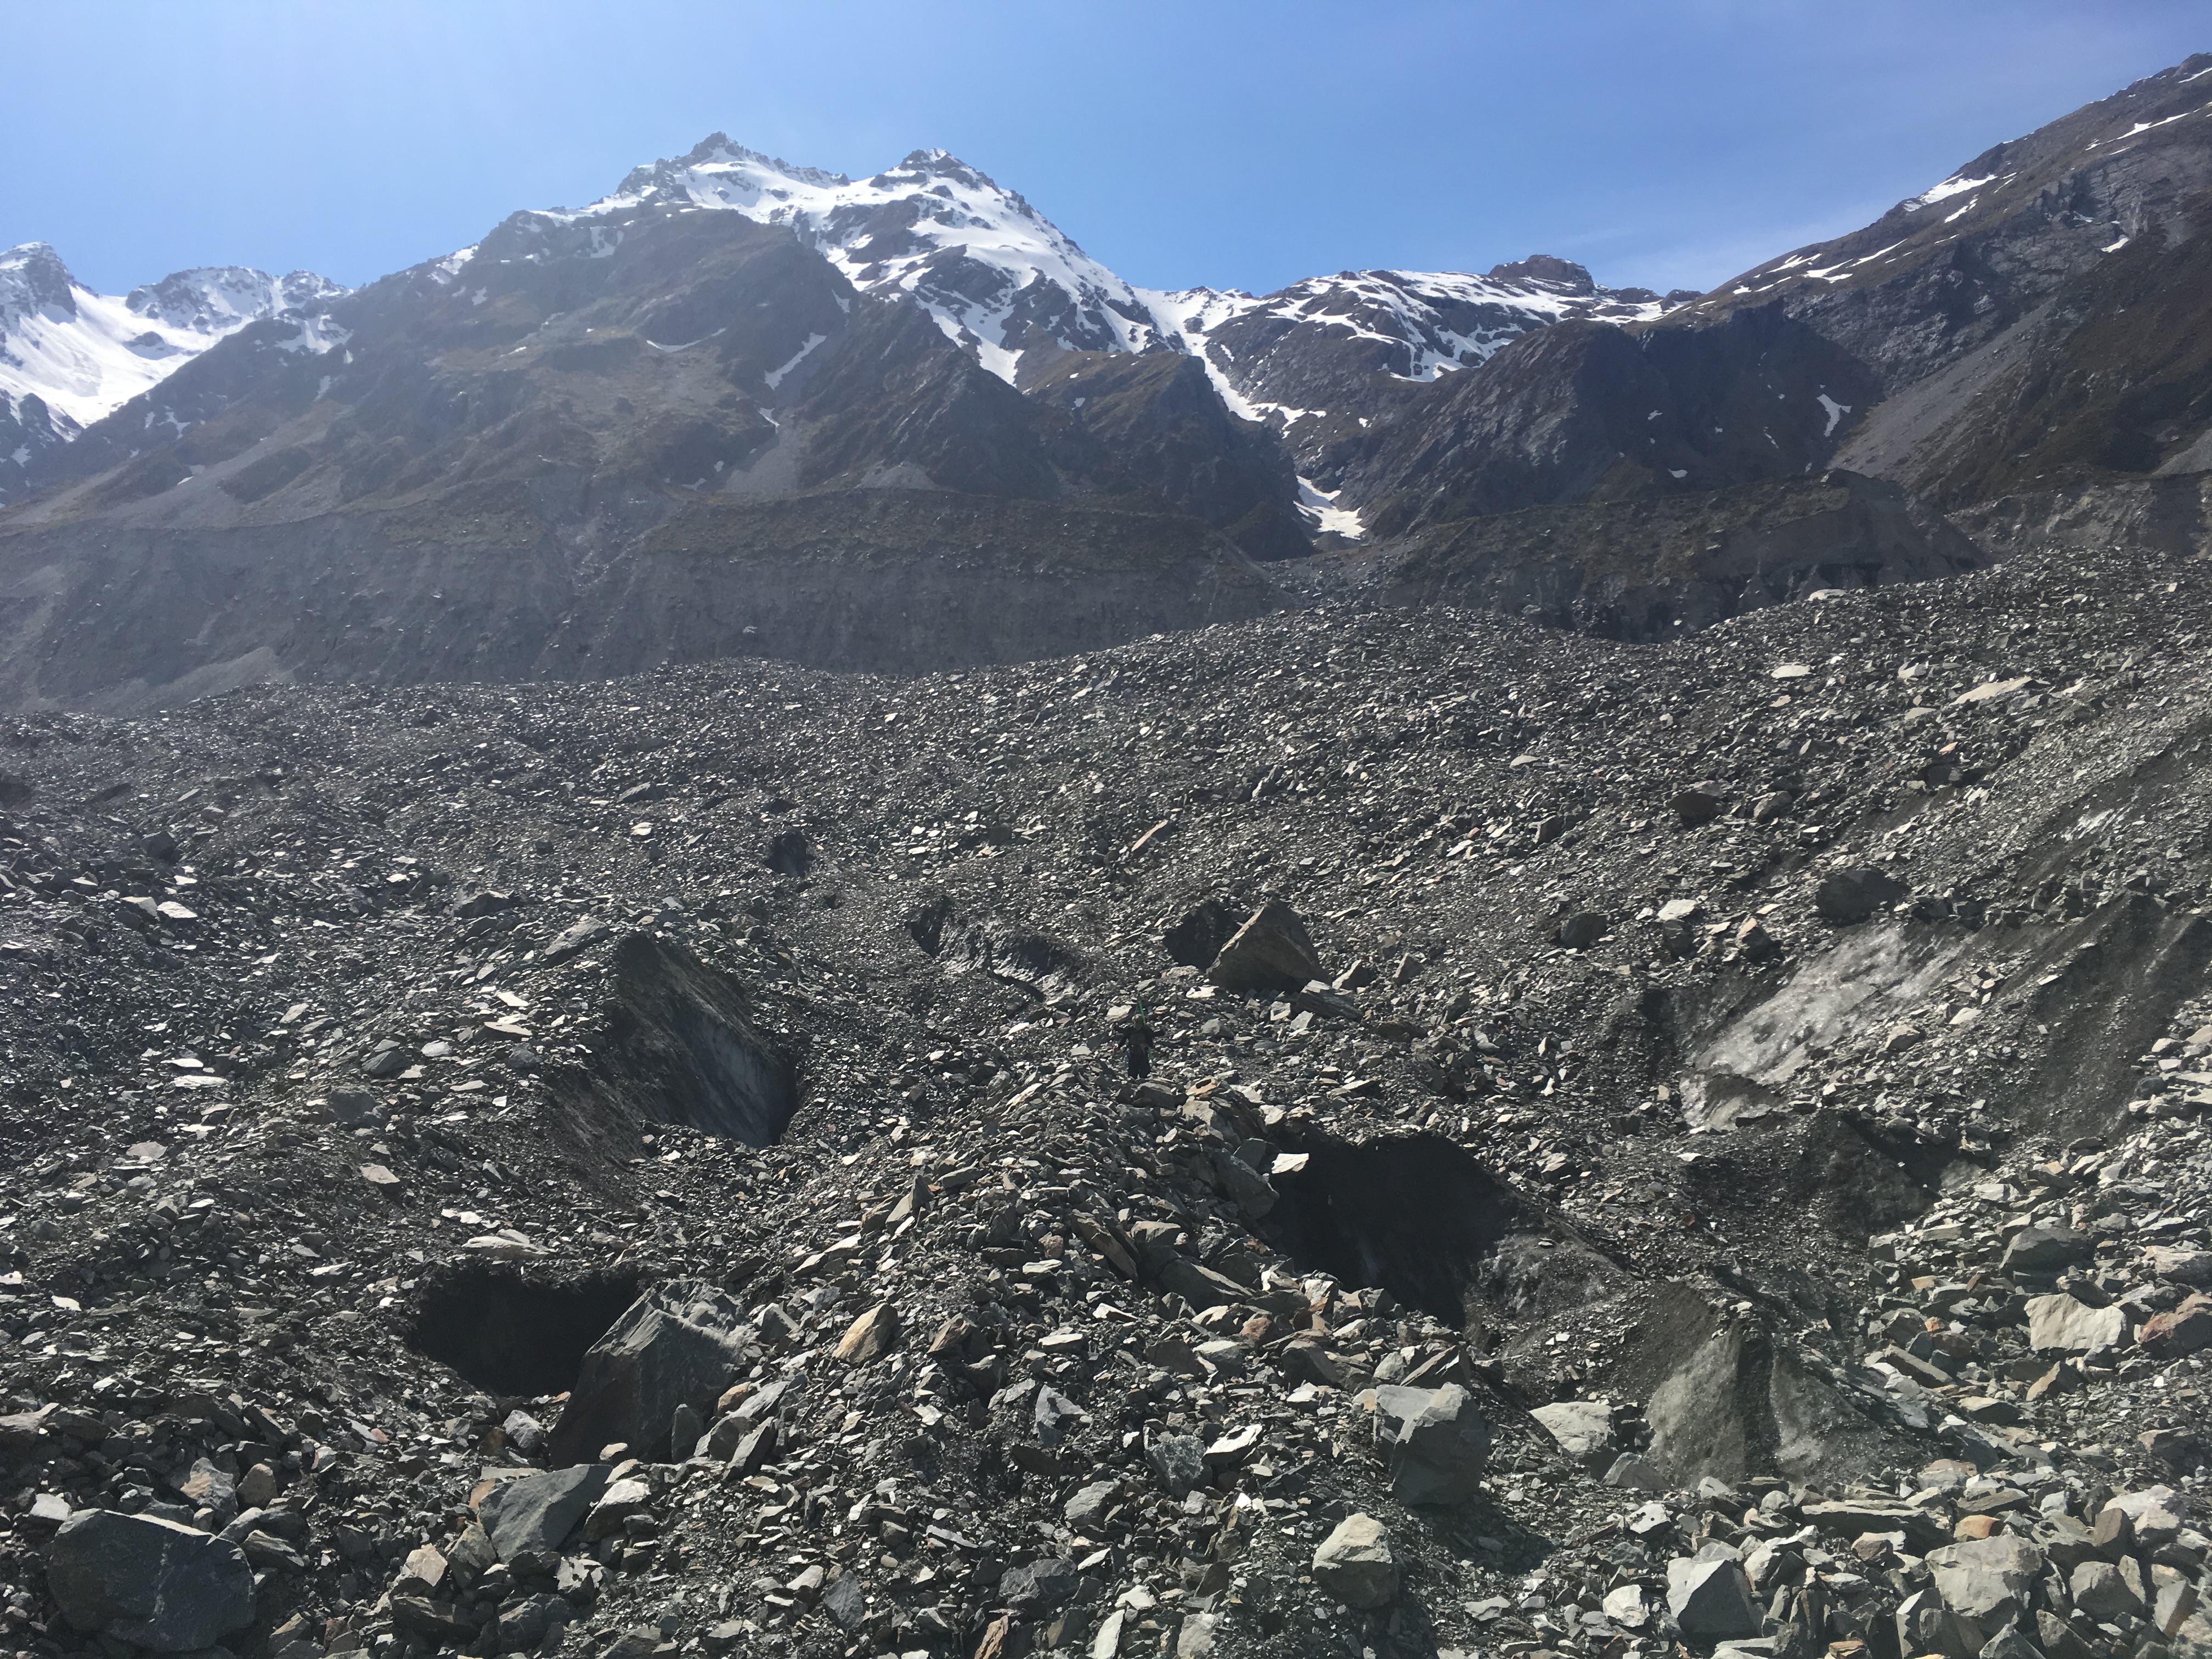
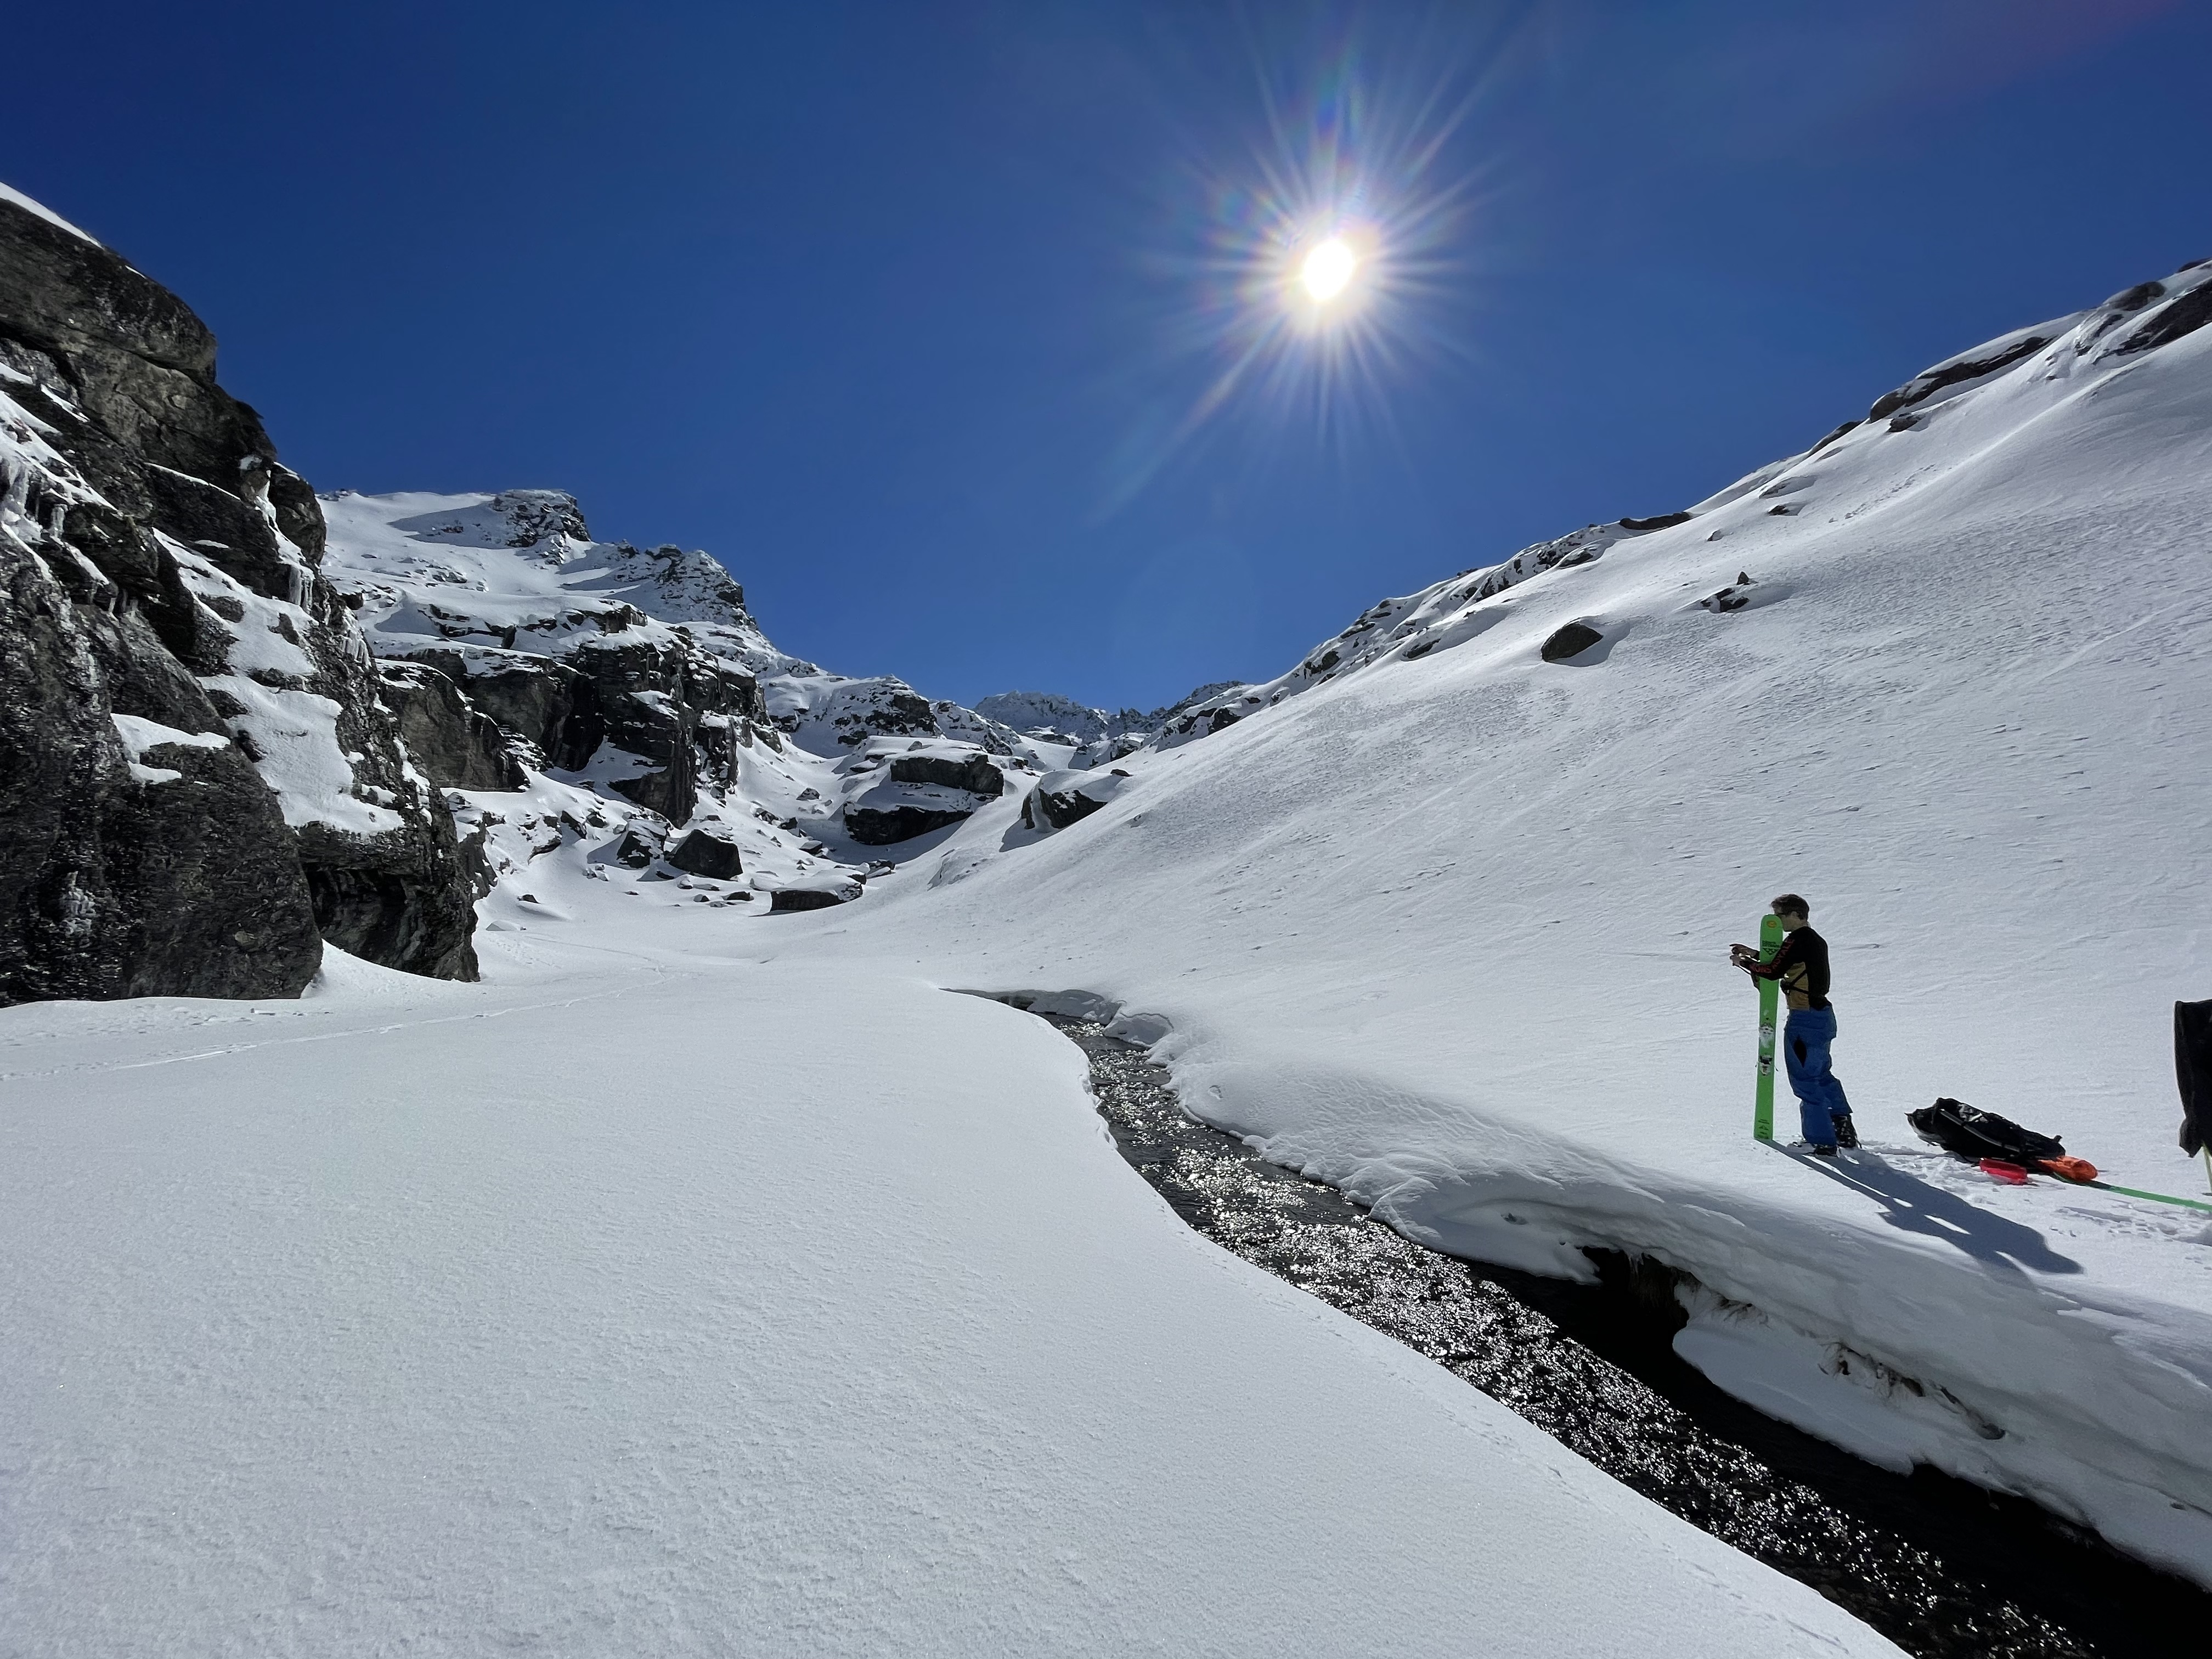
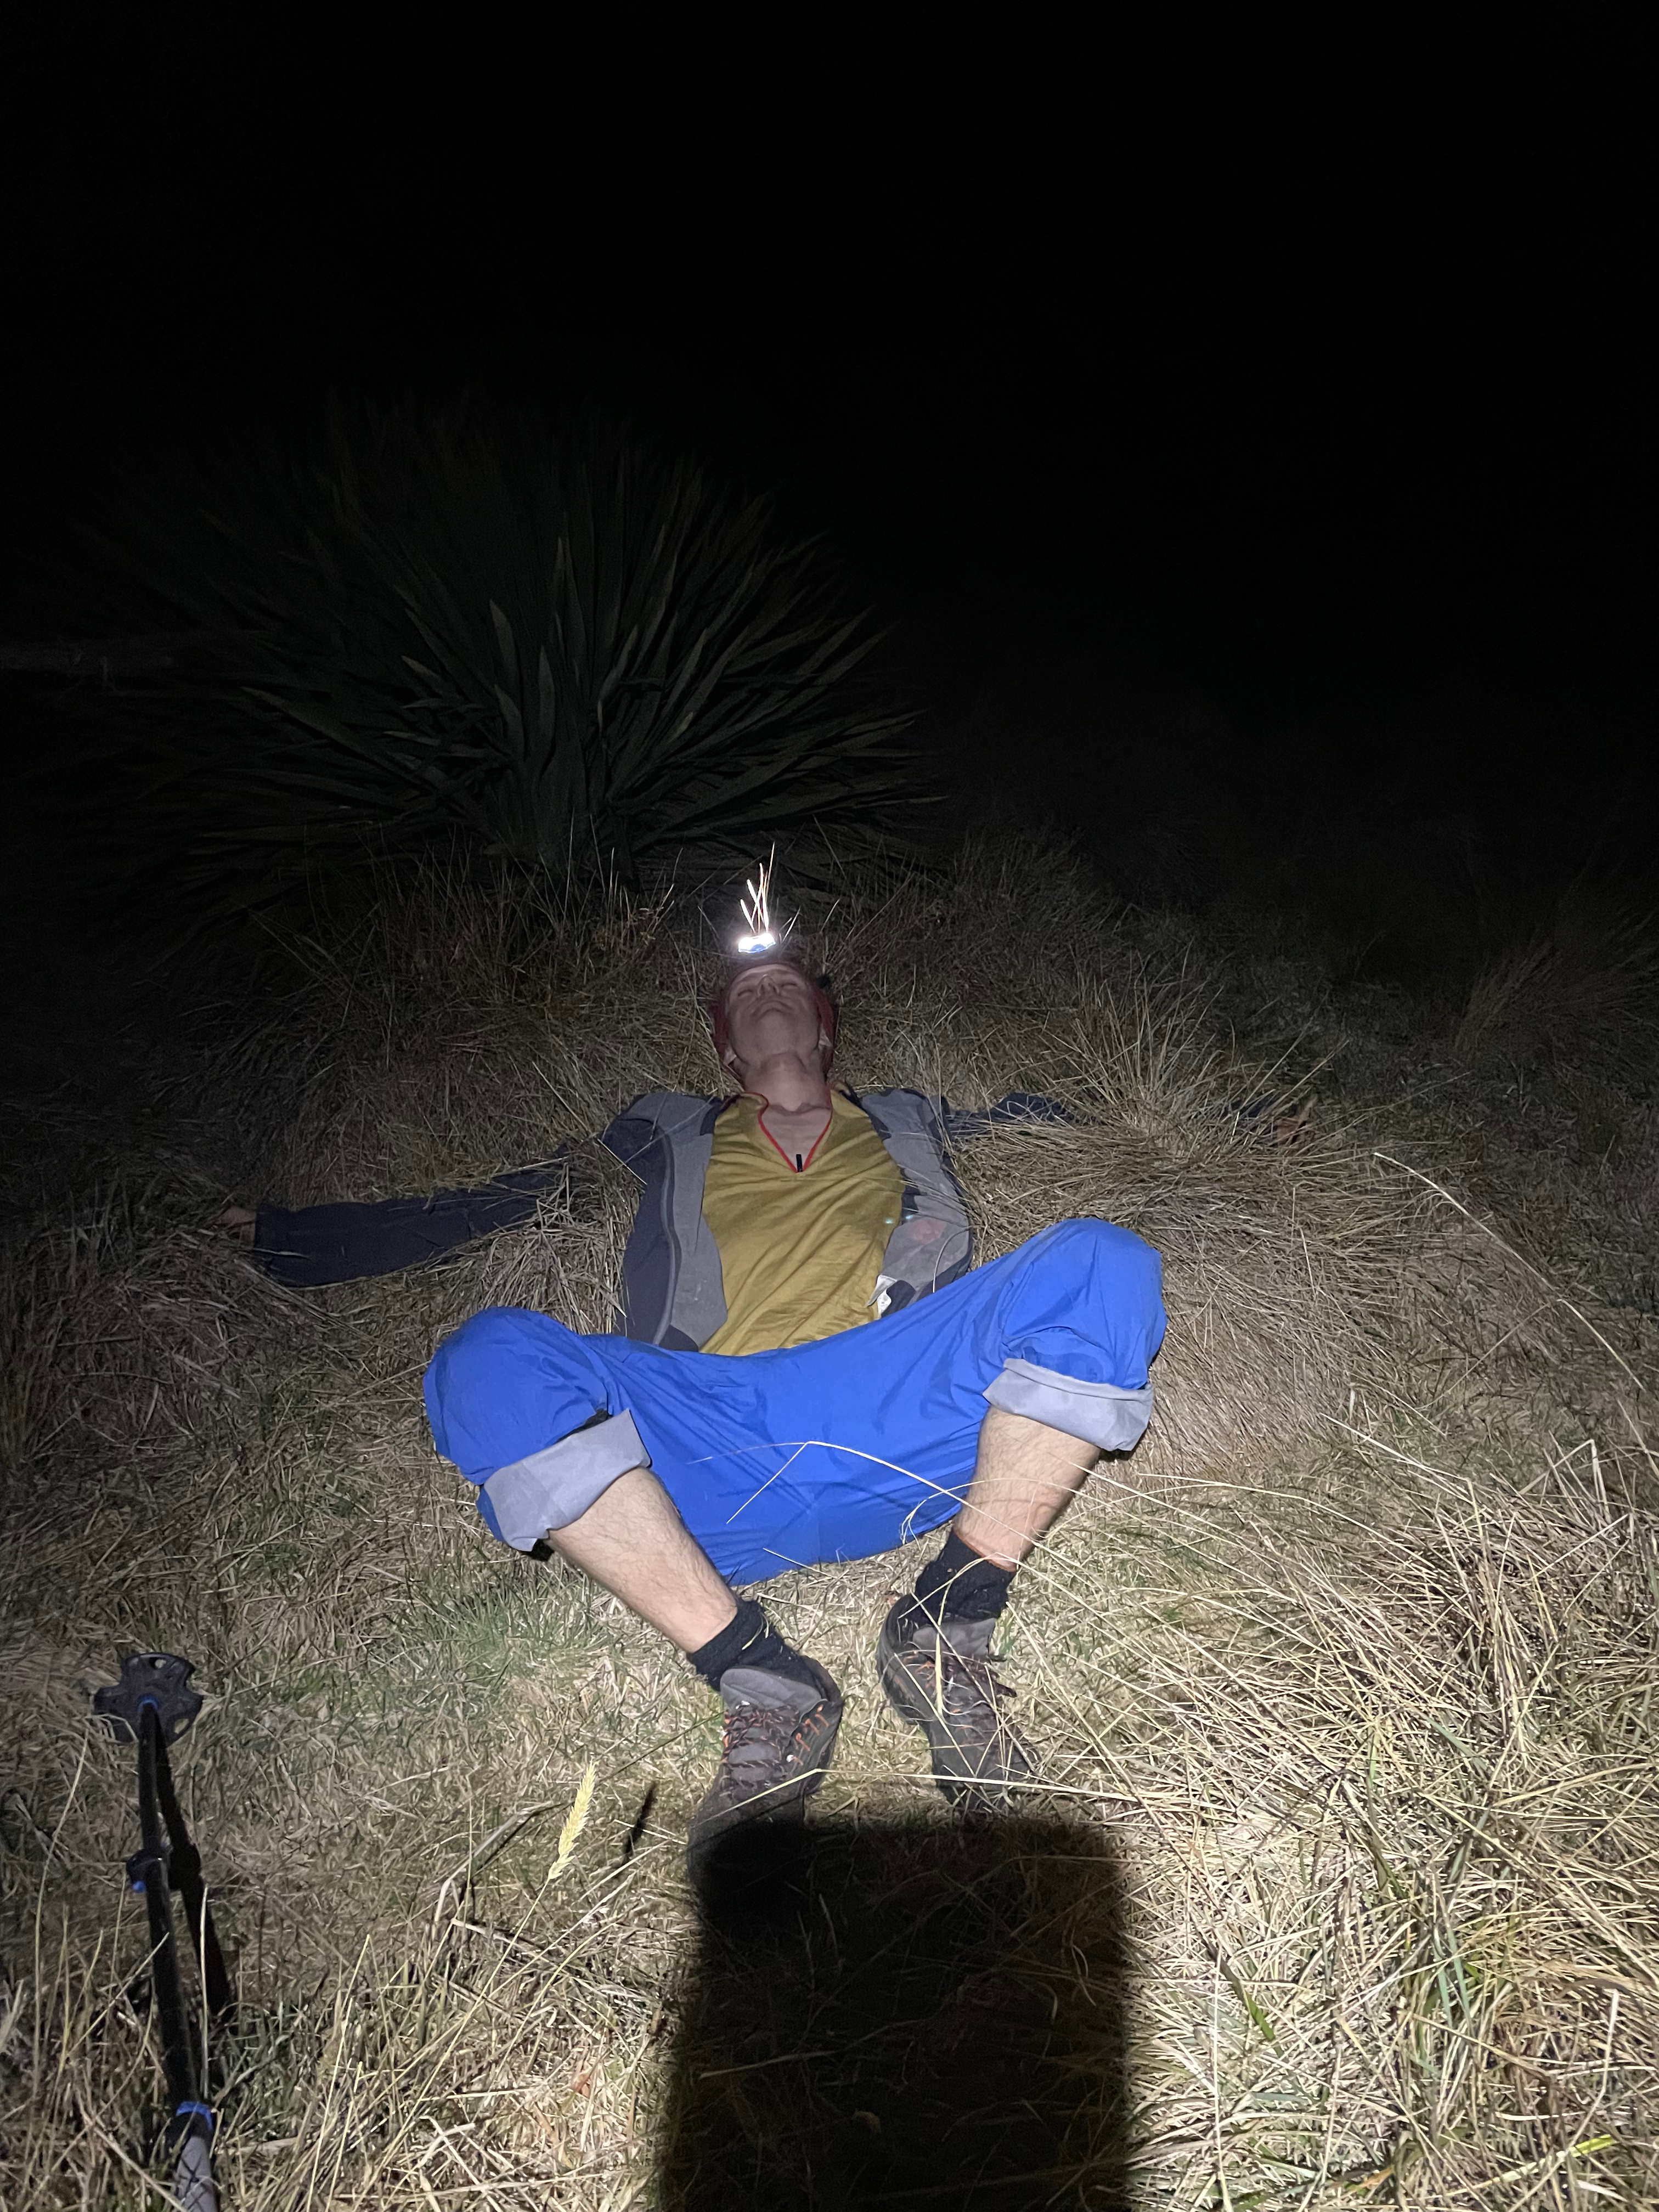
We thought we’d fly across the undulating / largely flat section all the way to Carrington Hut, but heavy packs slowed us and we were about 5h before we got to the hut. The next section involved some slippery boulder hopping due to the thin layer of hoar frost that covered the riverbed (beautiful – but time consuming!). We crossed the river where the cableway once was, and where the White / Taipoiti rivers merge into the Waimak. River levels were super low at the time, (involved just wading up to about knee depth) but worth checking before the trip, as this can become uncrossable.

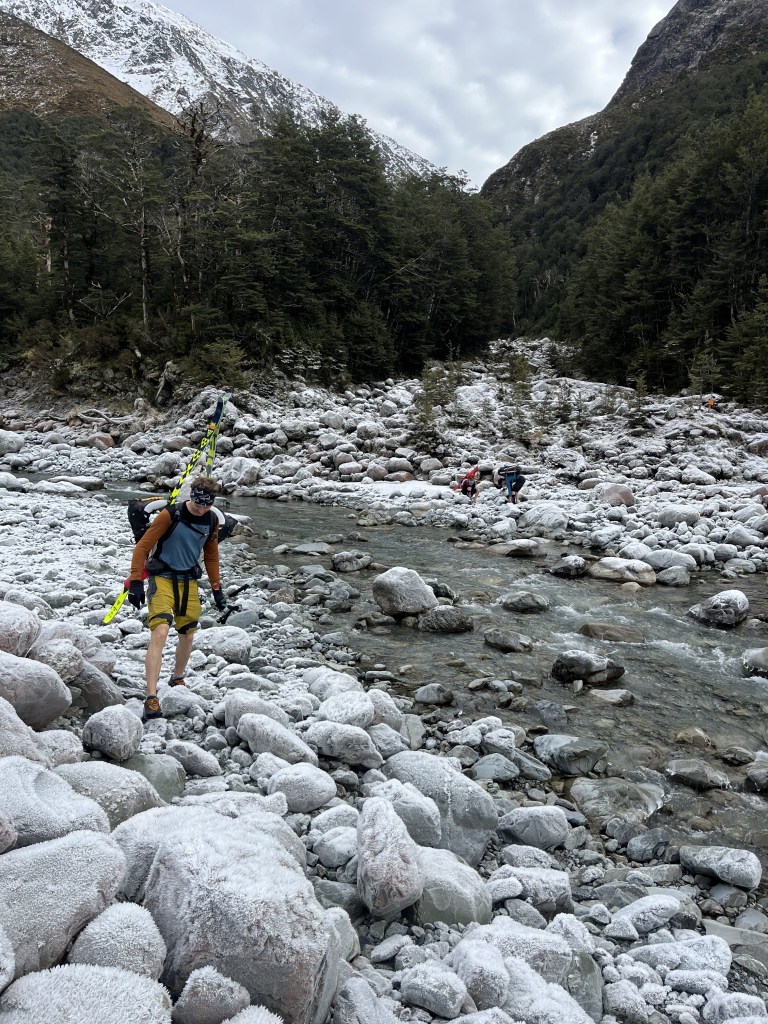
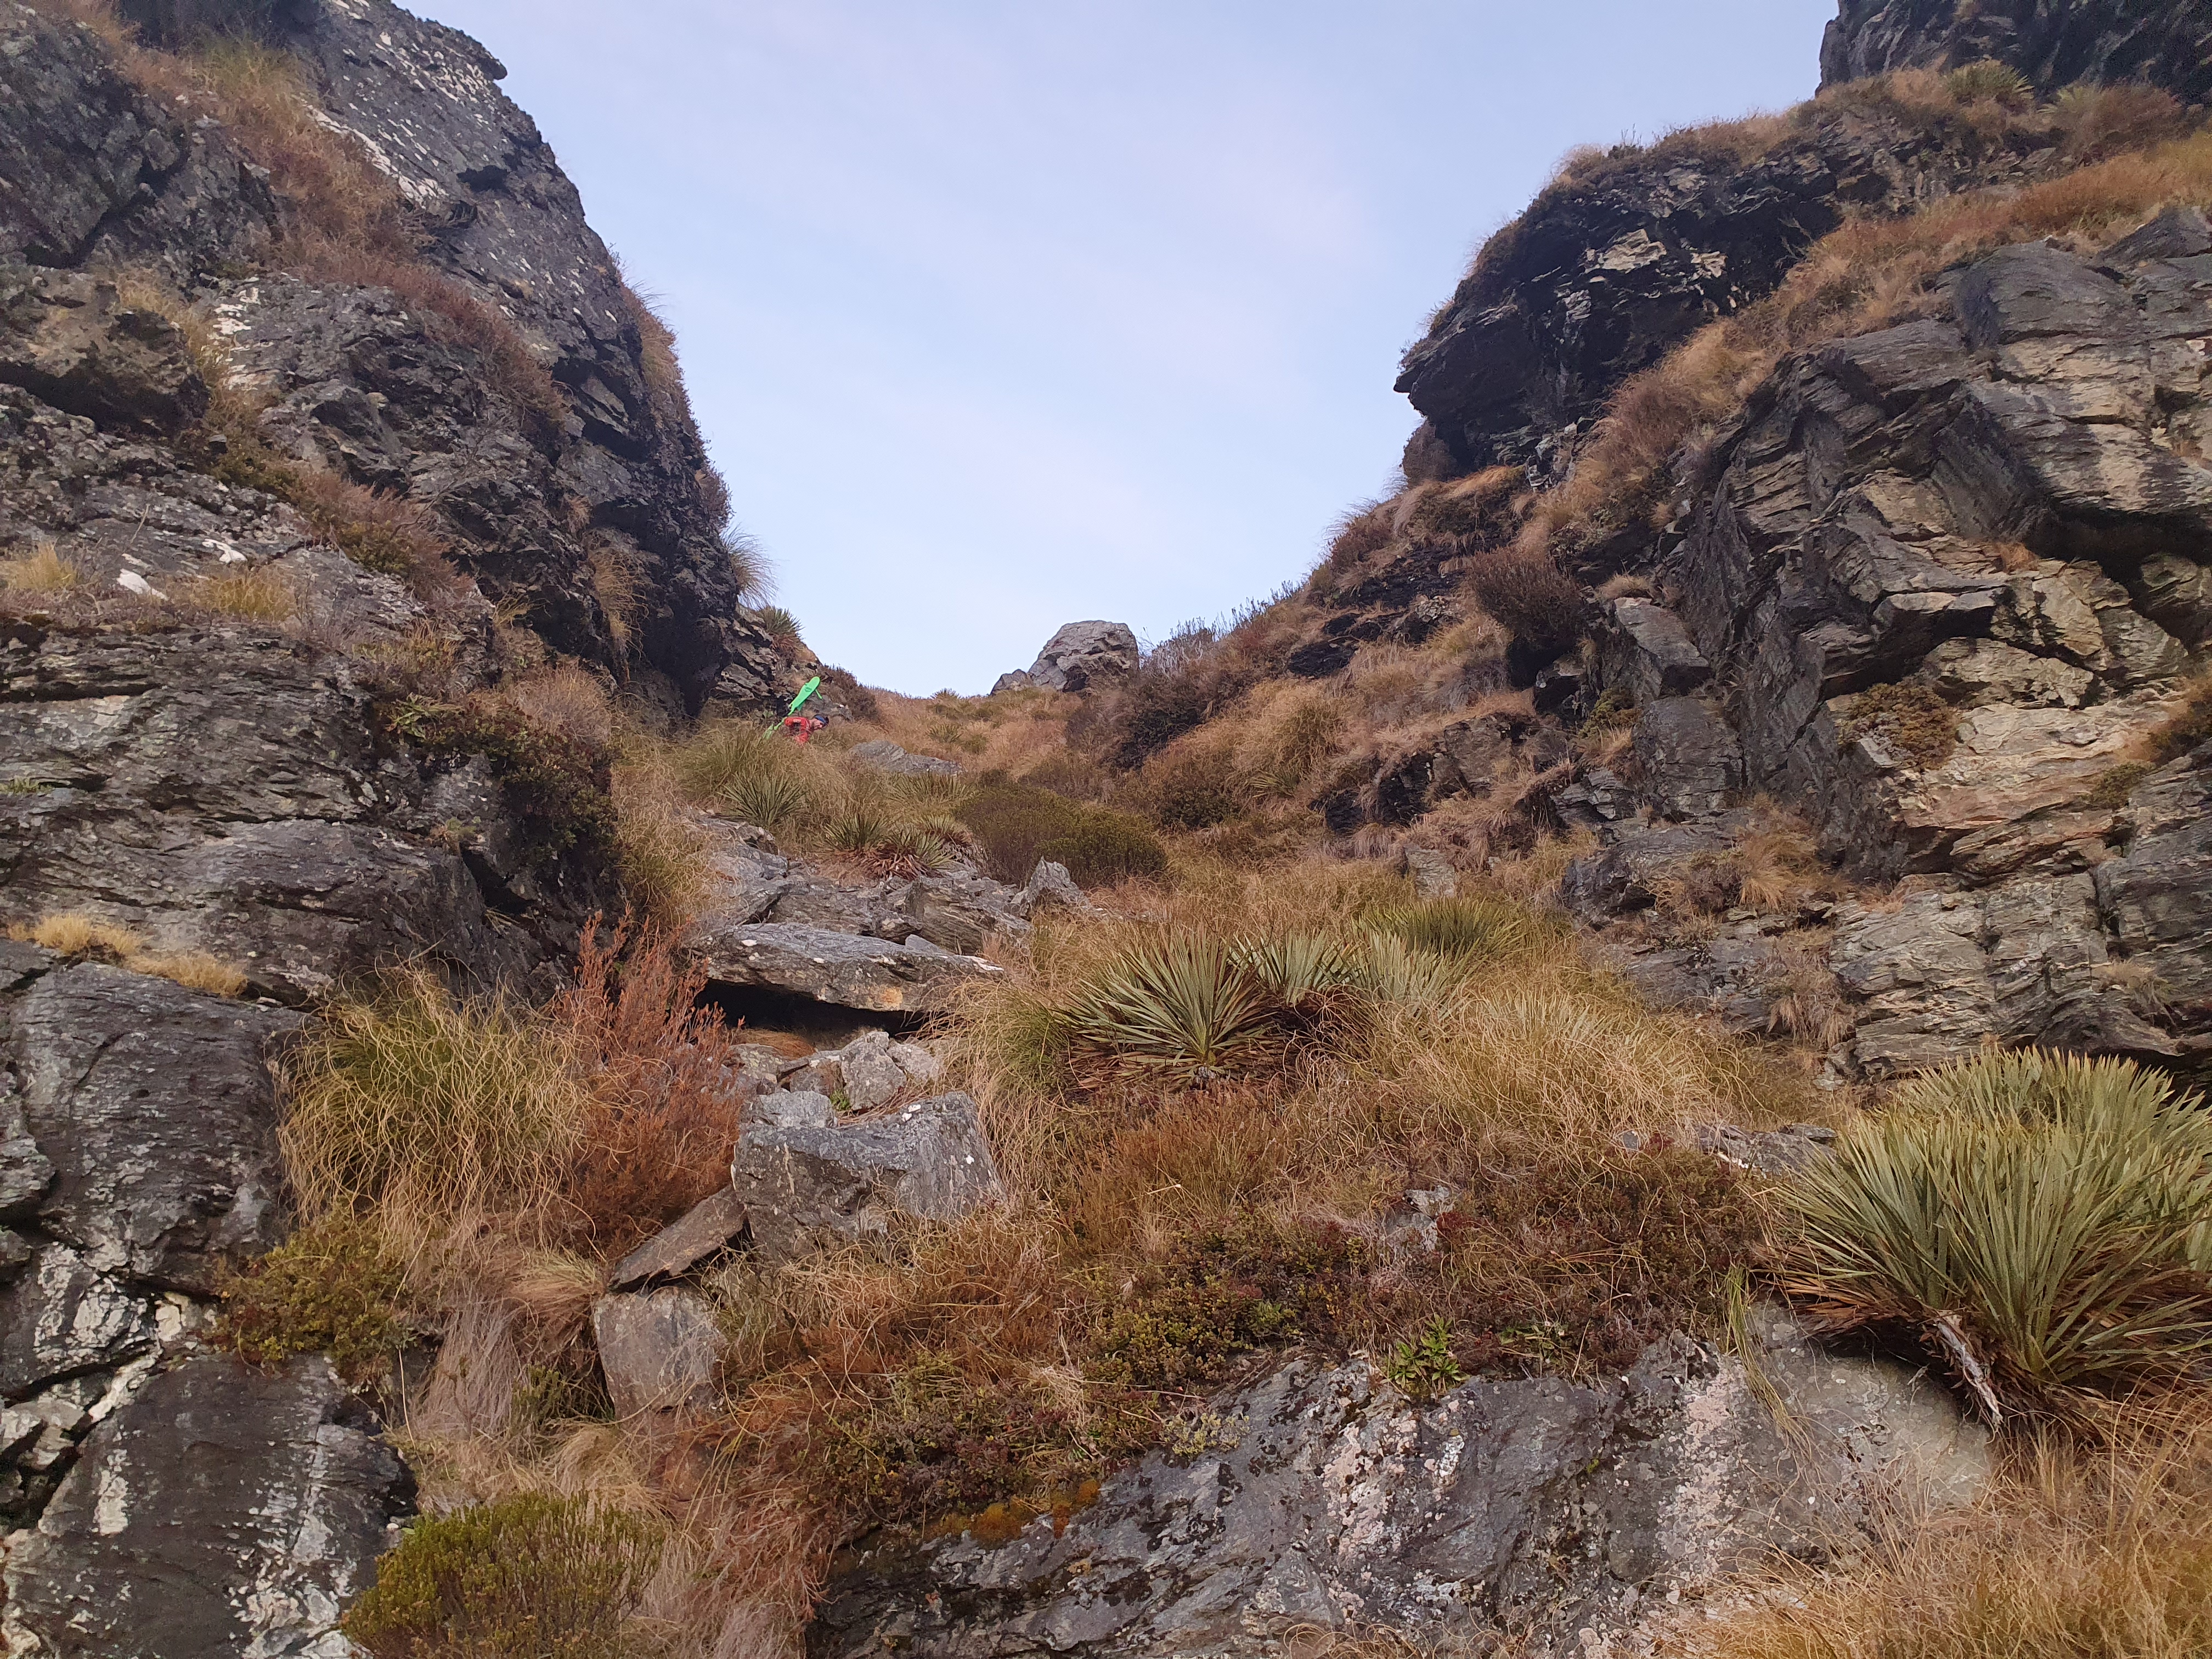
From here pick your way up the path on the river’s true left. We were losing the light at this point and missed the “trail” which is very well trafficked with cairns and even some marker poles en route. The easiest way is to stay in the river bed until you reach the steep walled gorge, then climb up the tussock slope to get past the gorge and then drop back down again into the river bed. We sidled the whole way to the marked trail on topo maps which was pretty slow – on the way out in the light, the lower track was obvious.

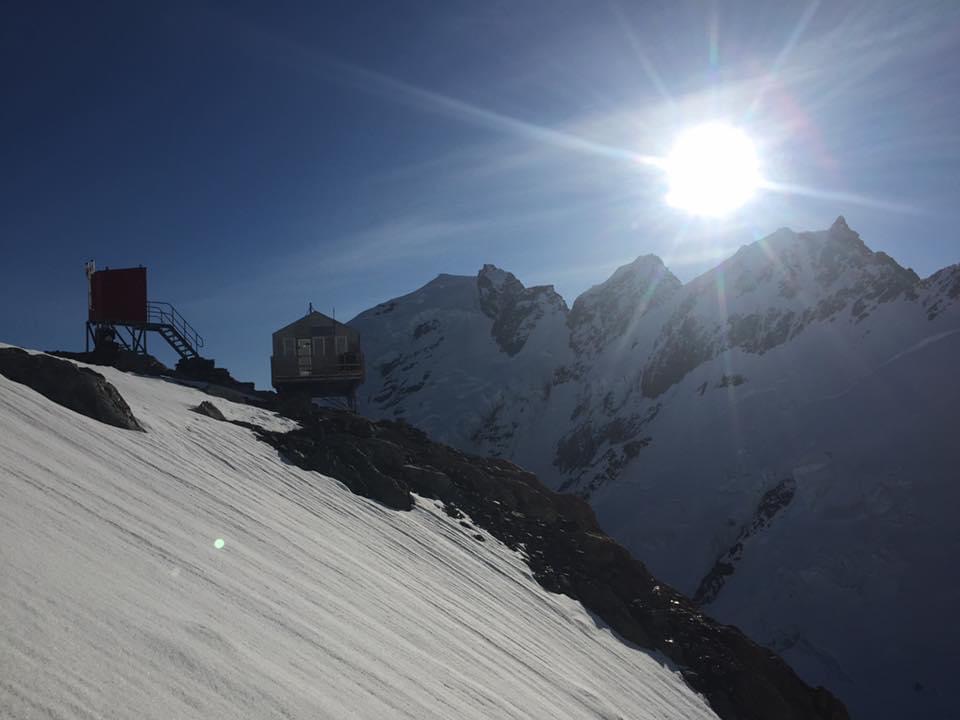
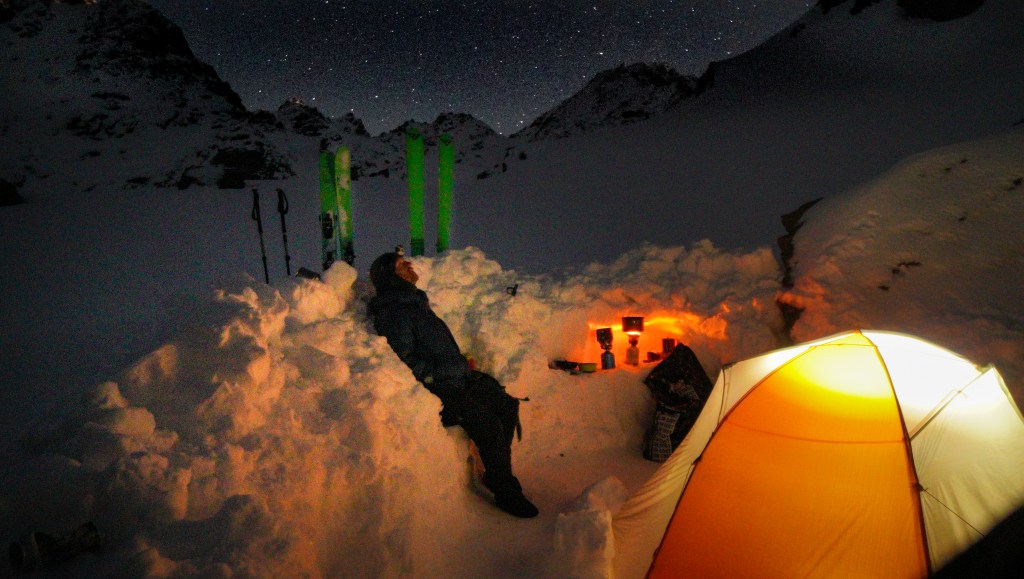
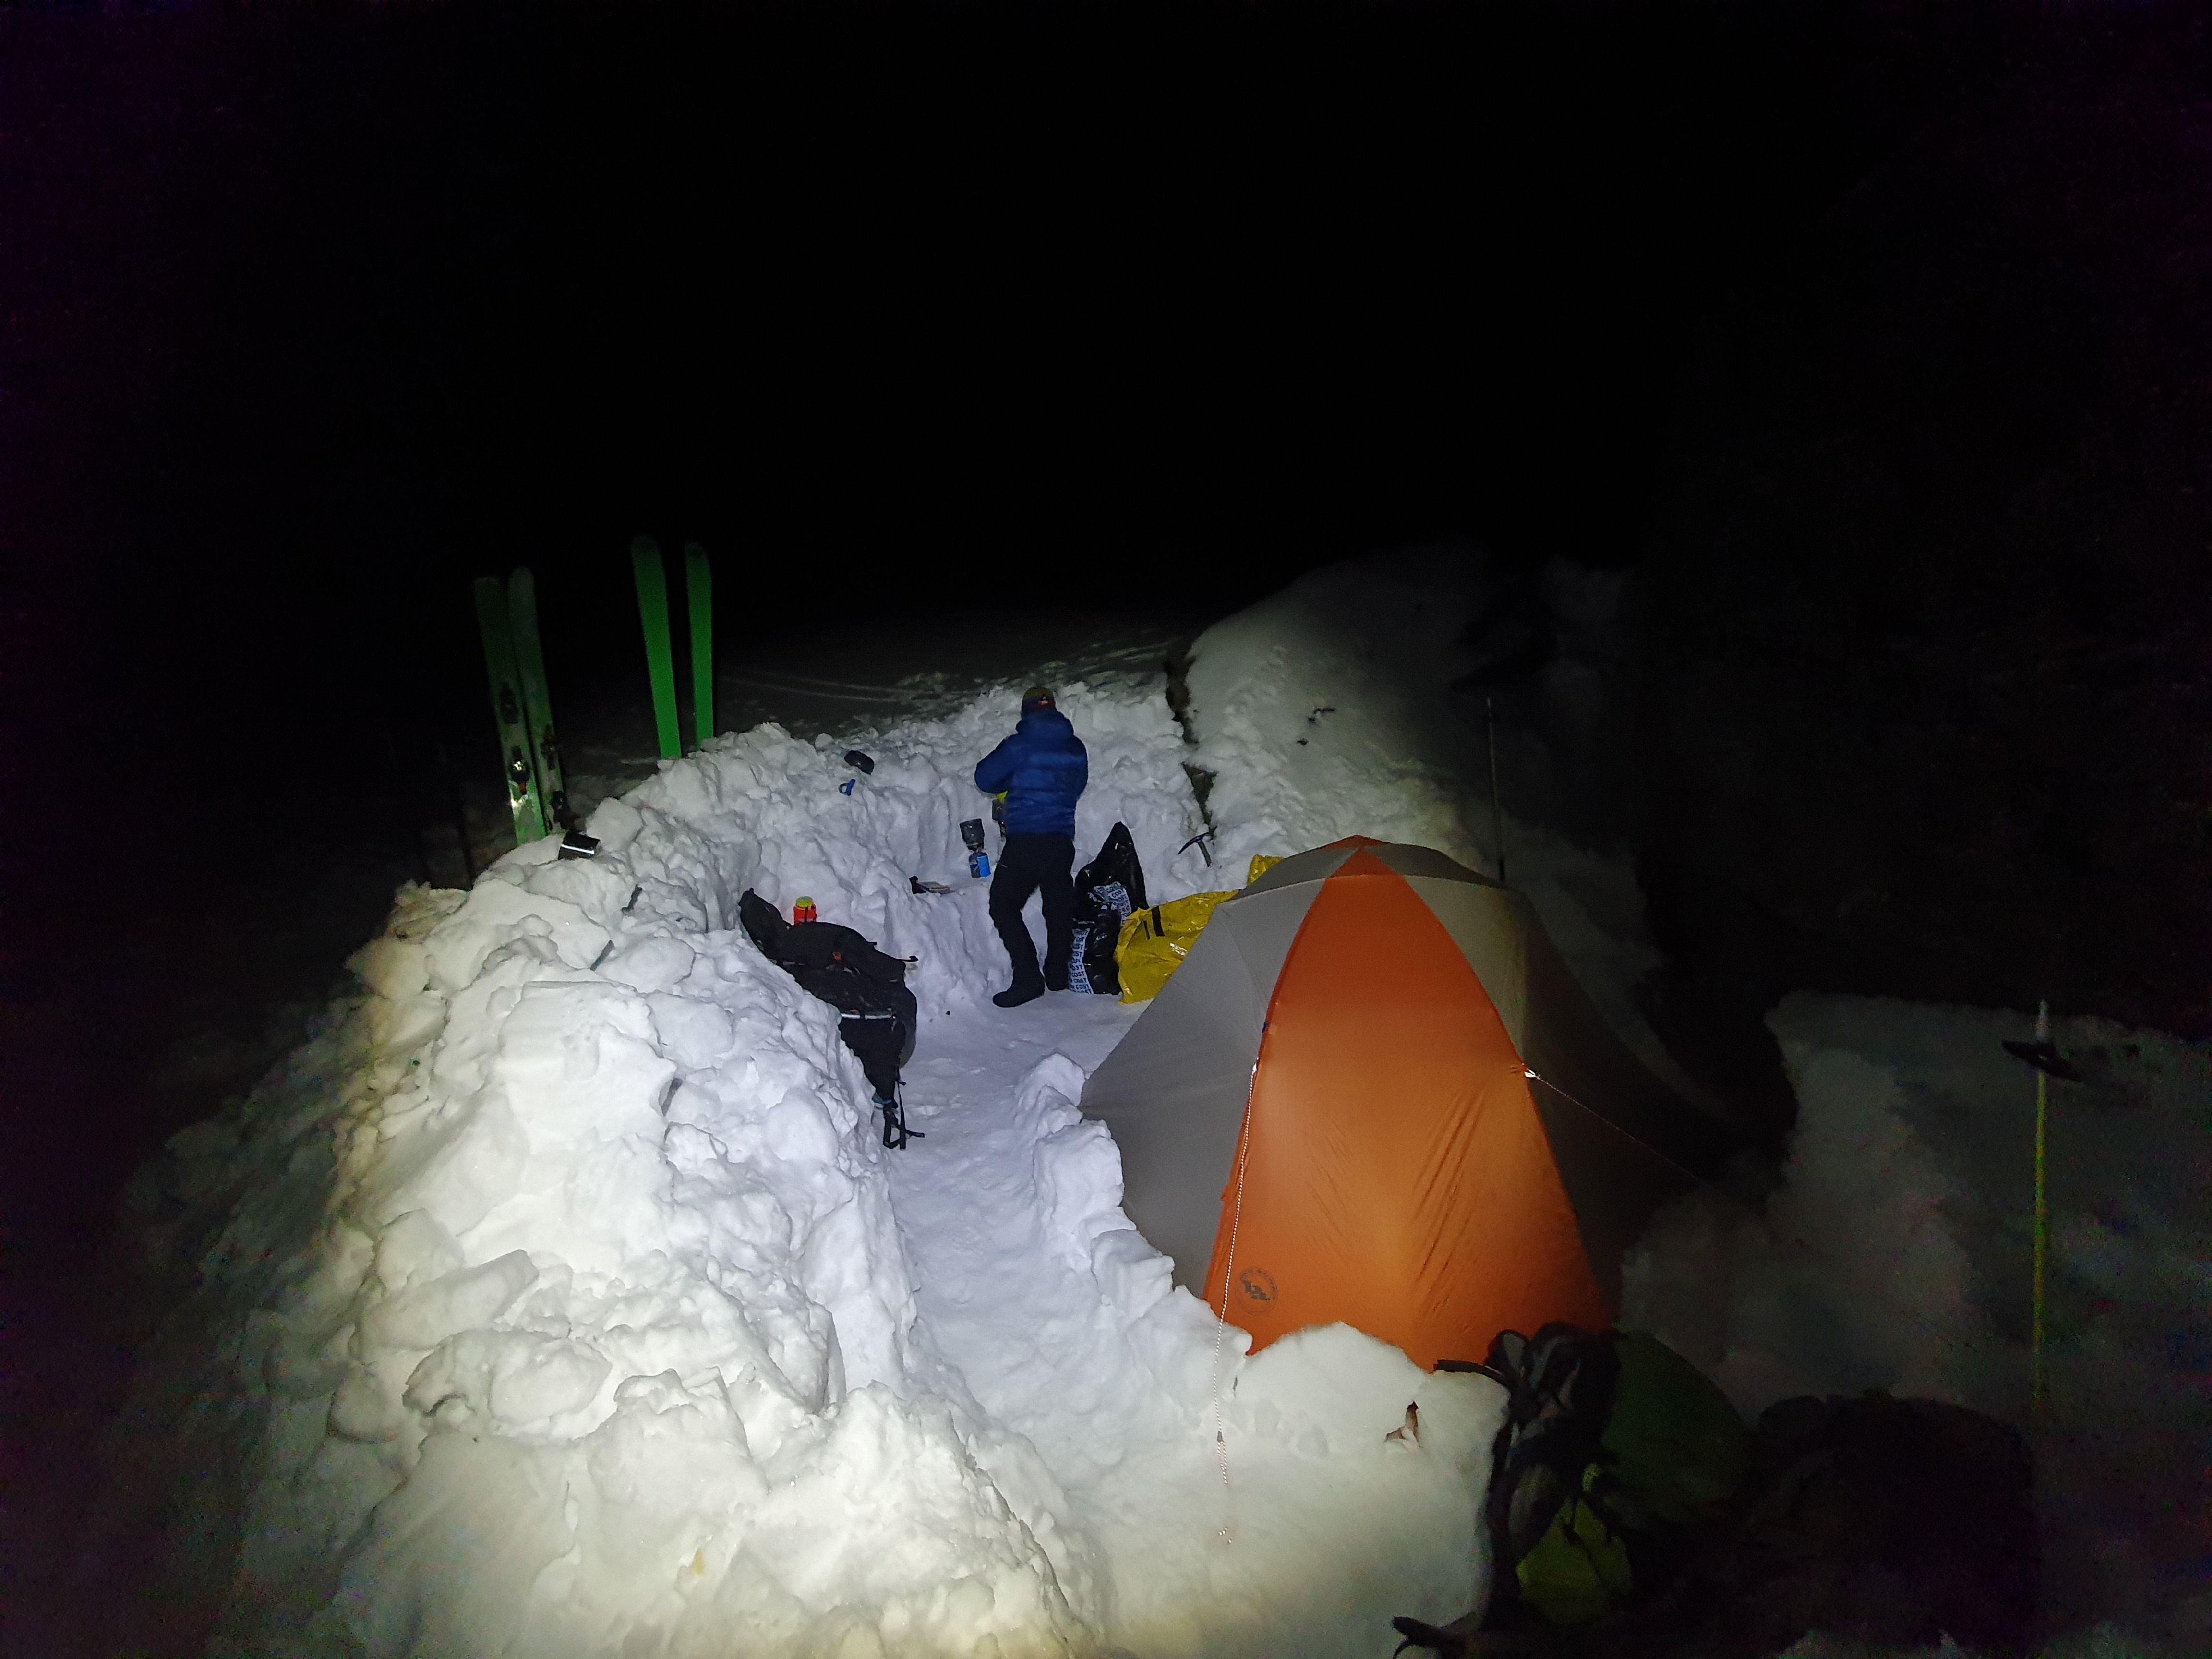
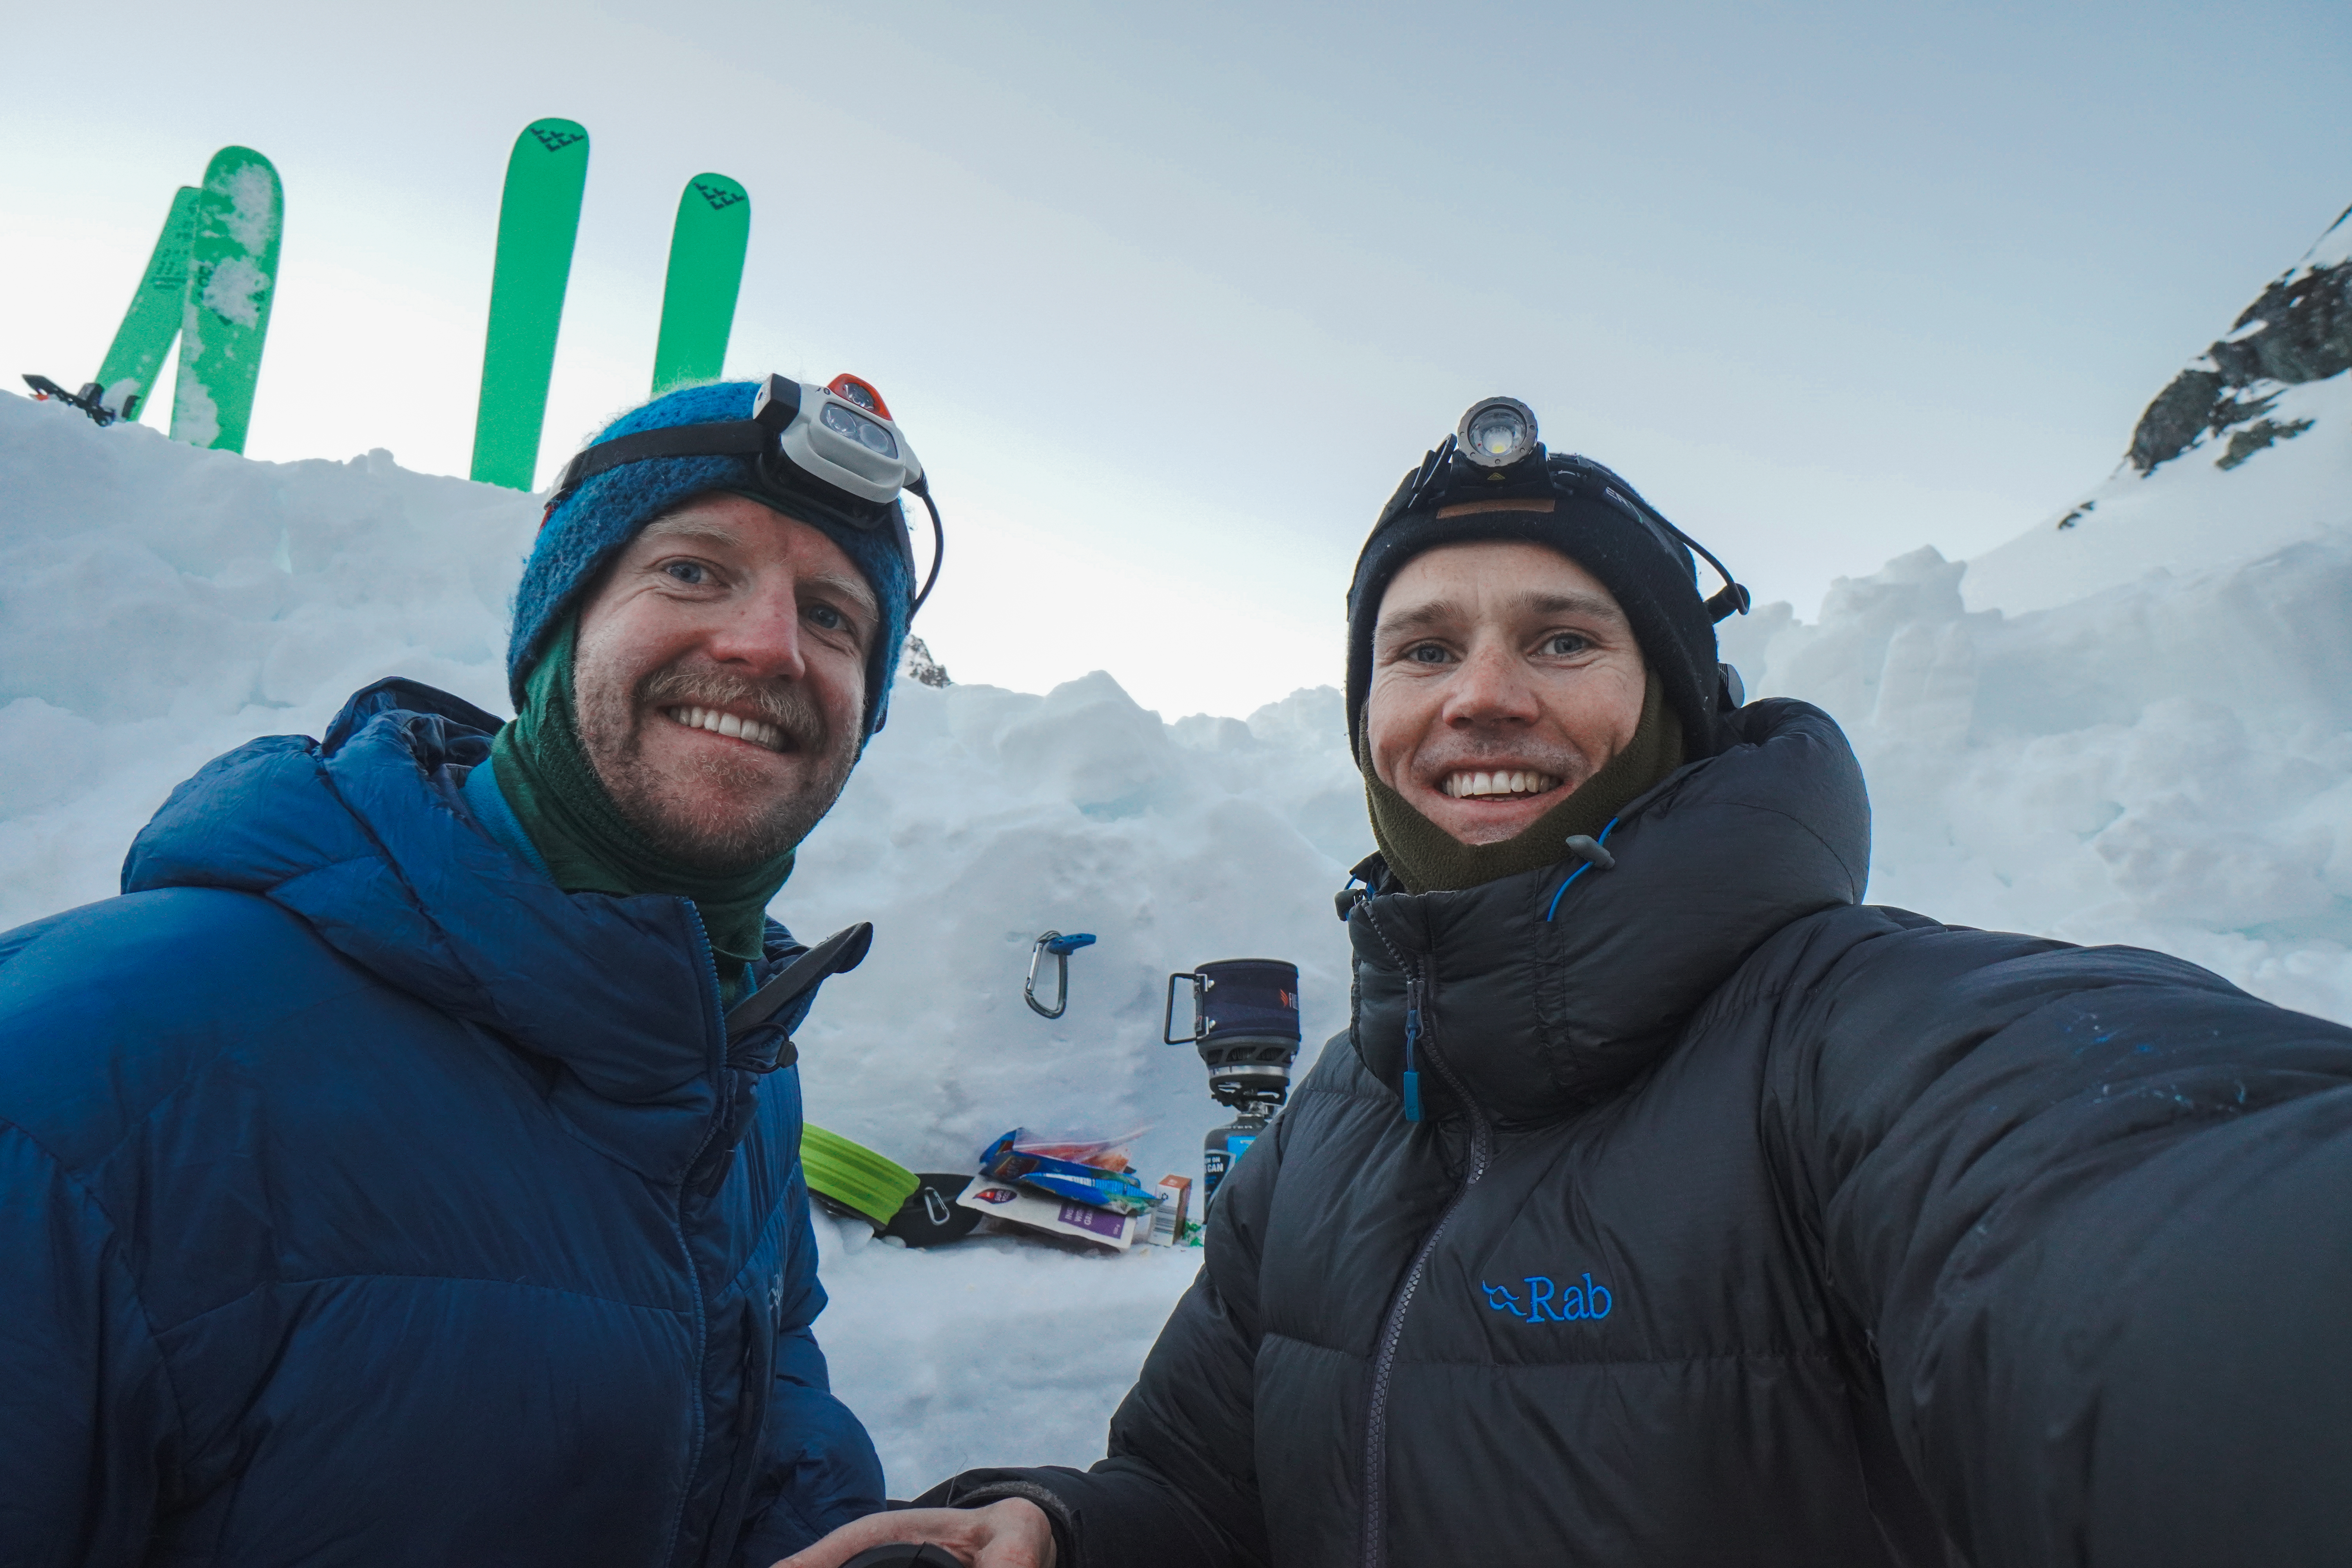
Barker Hut is one of the warmest I’ve stayed in. Well insulated, double-glazing, solar lighting, USB charger (no cable)… A 5* hut! Thanks CMC.

Climb

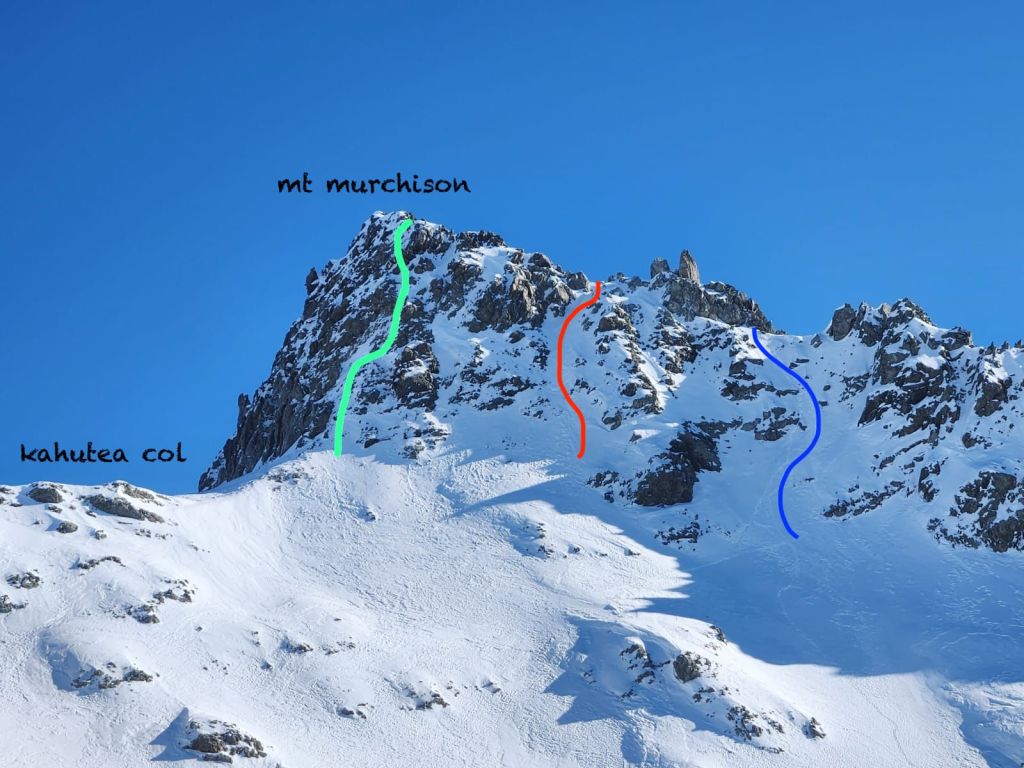
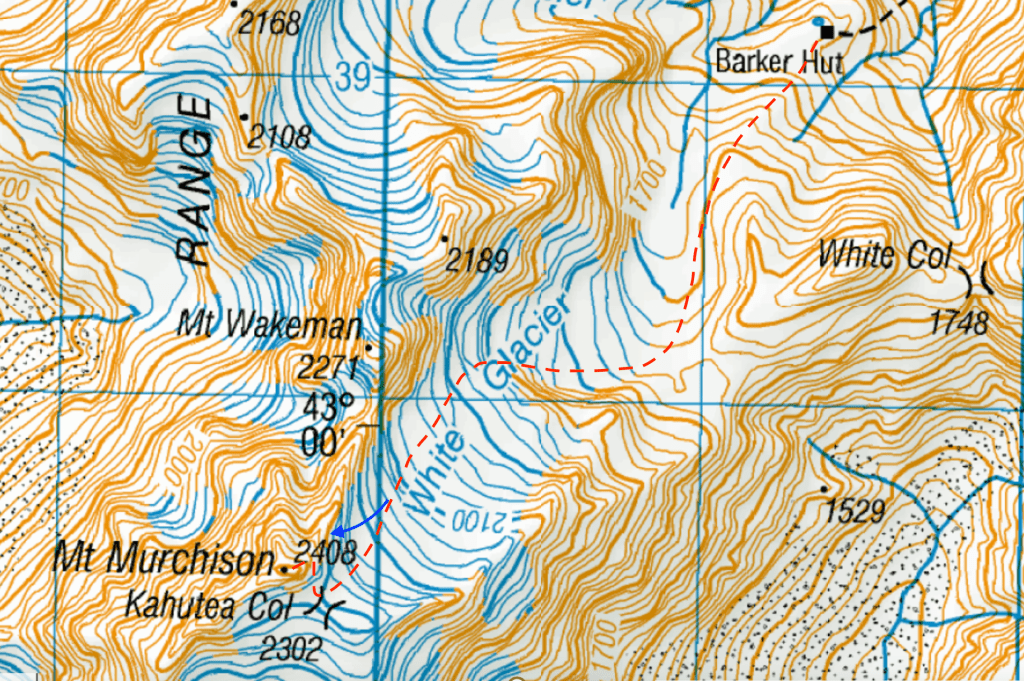
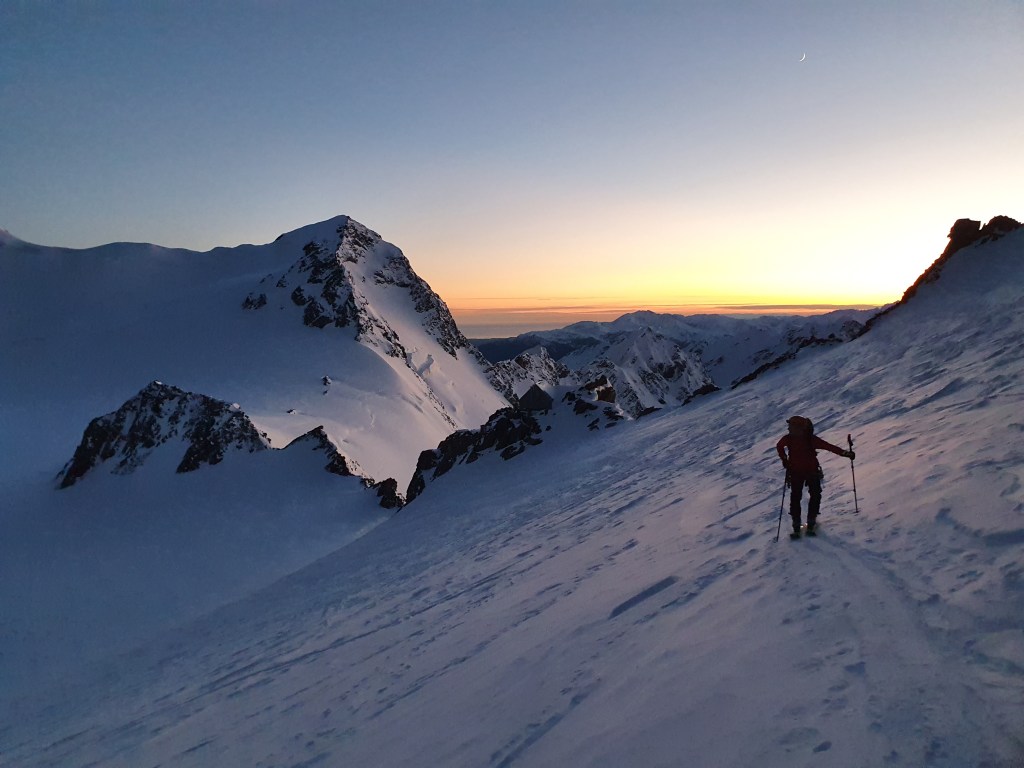
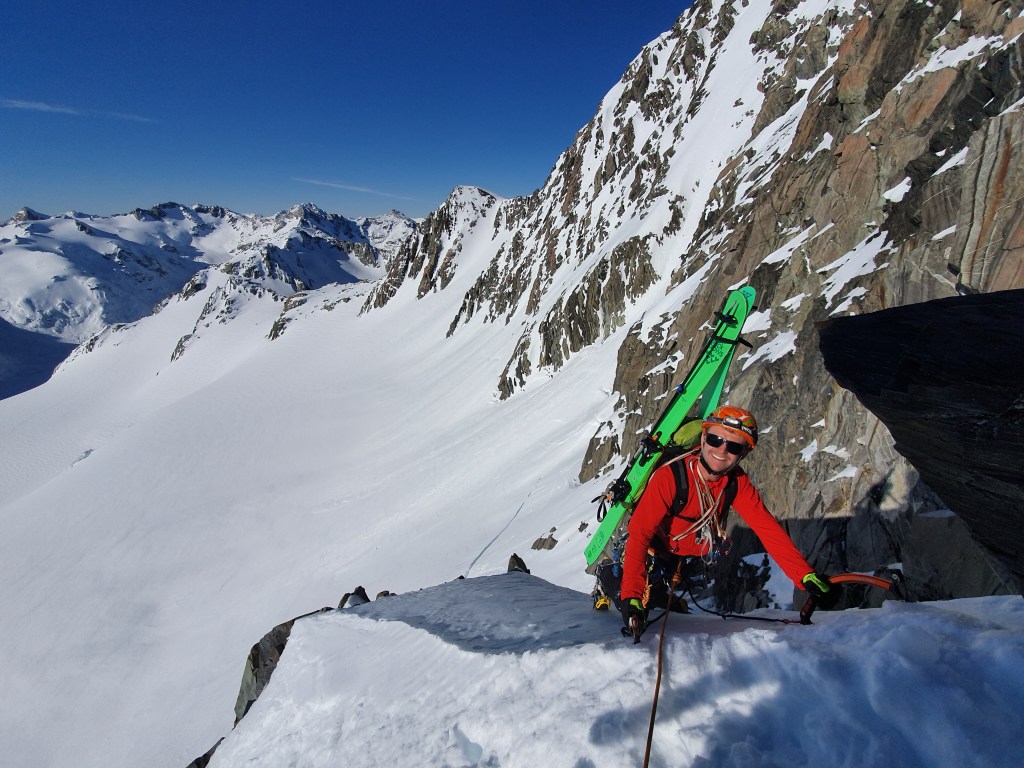
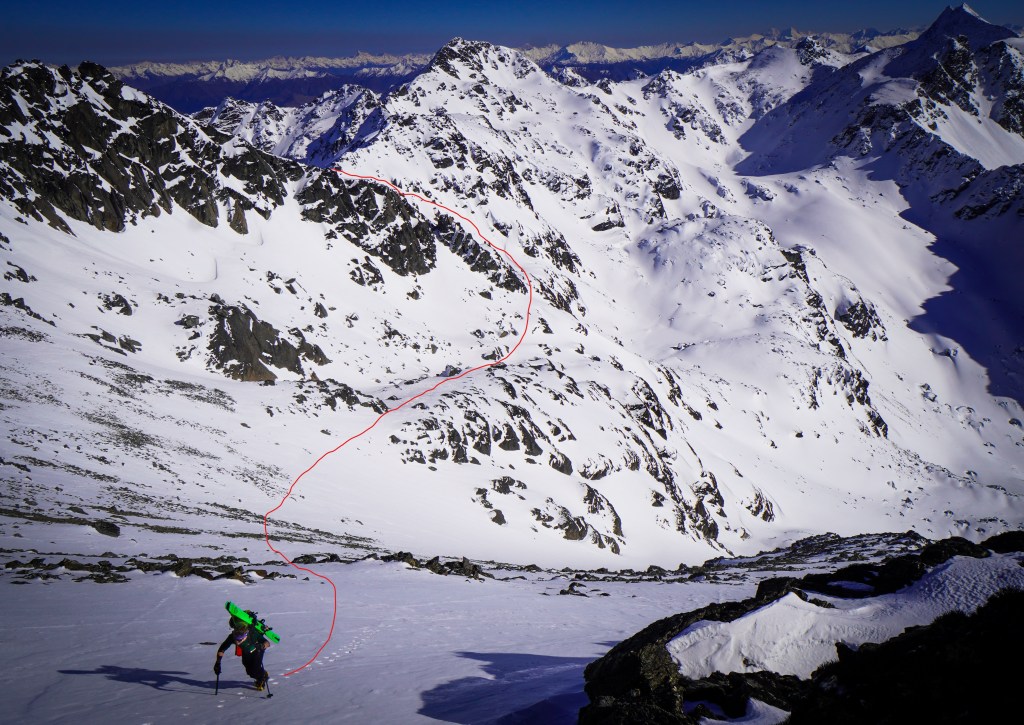
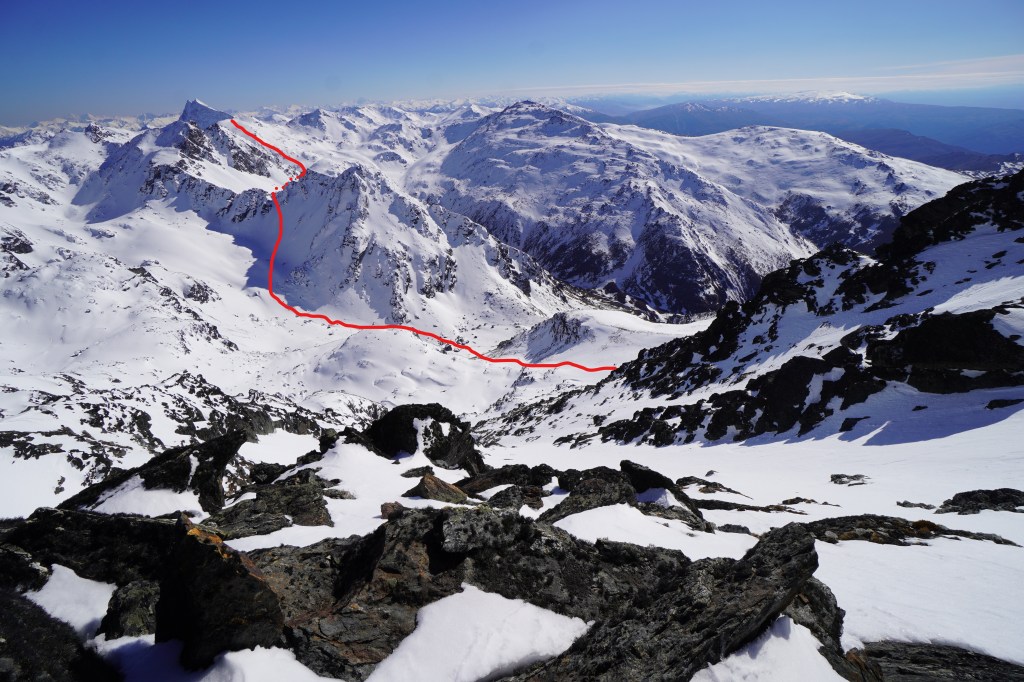
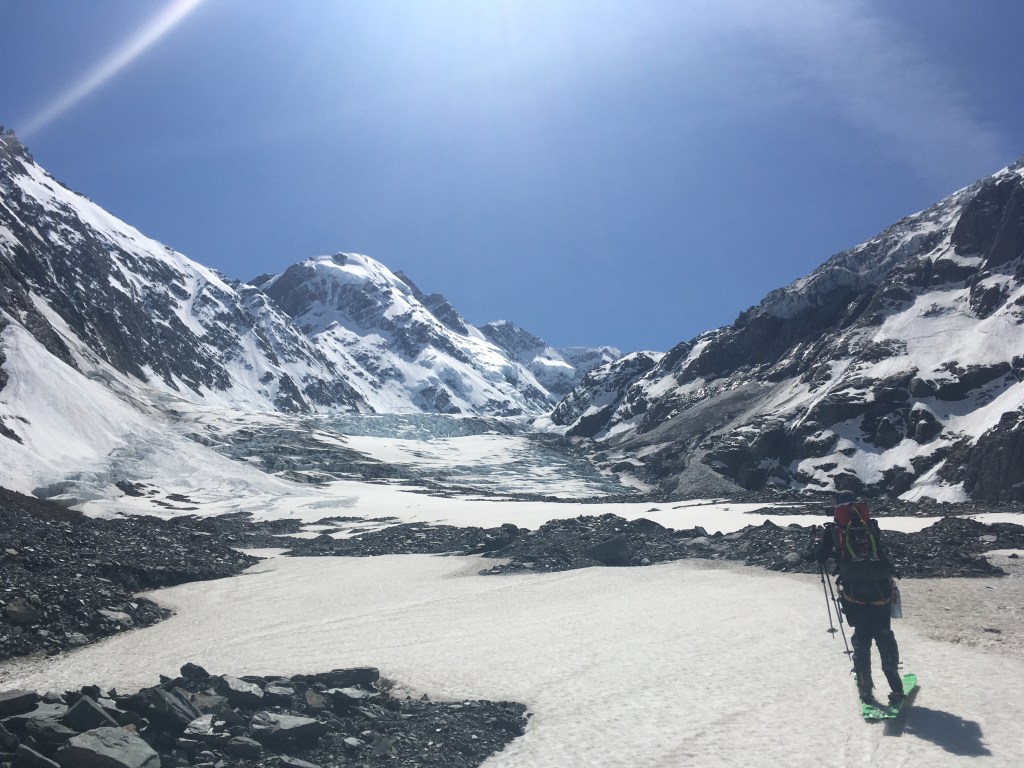
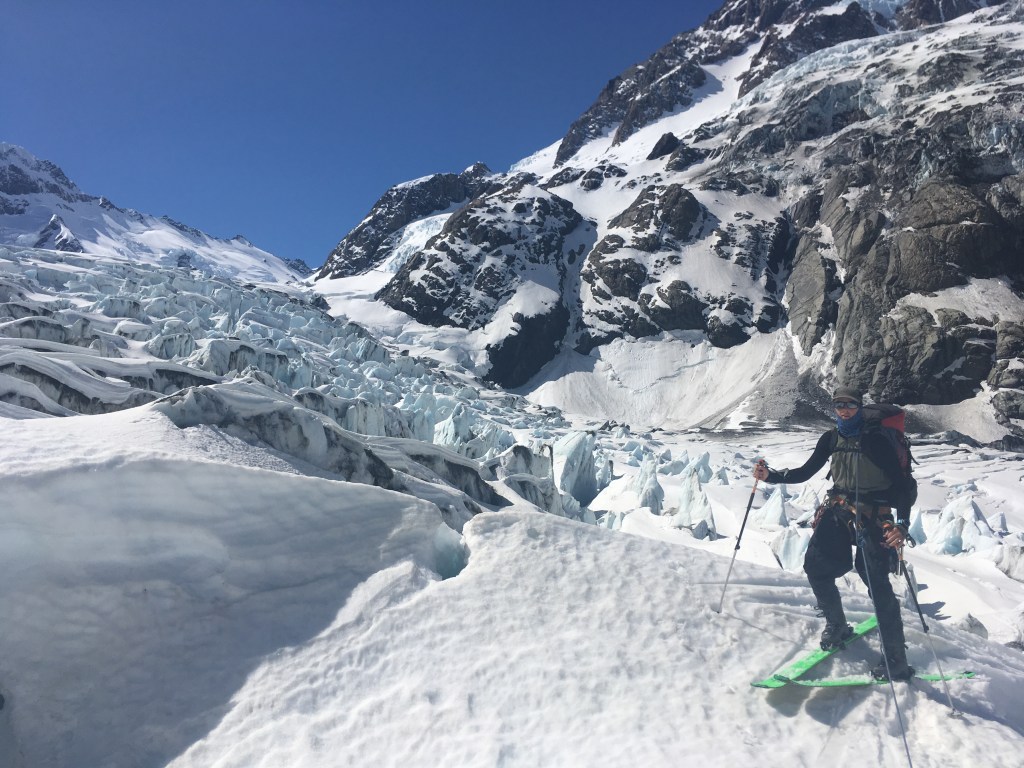
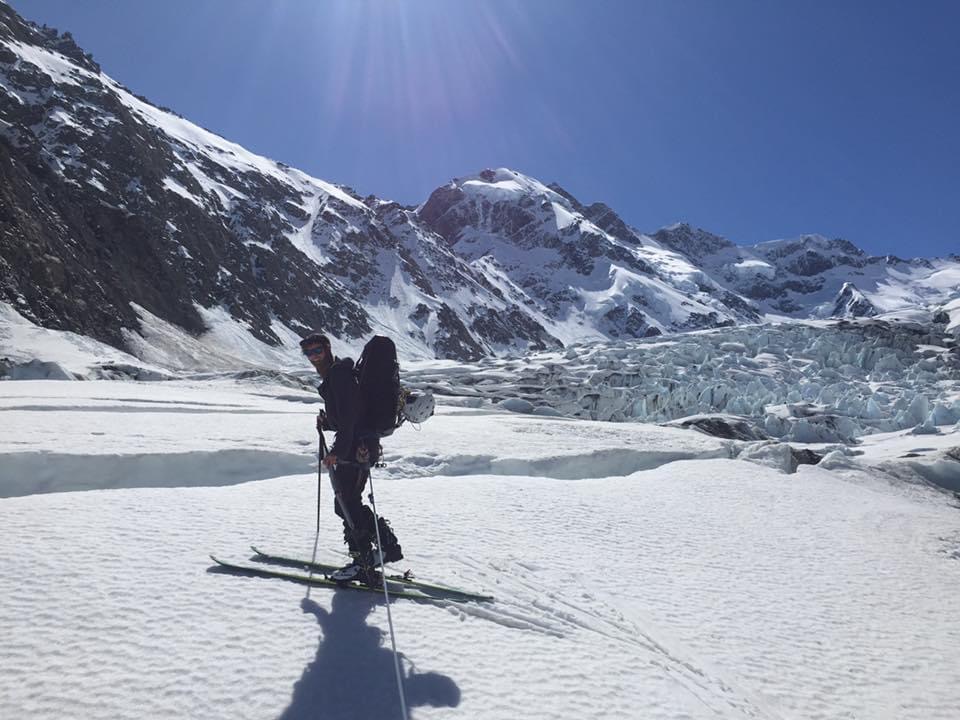
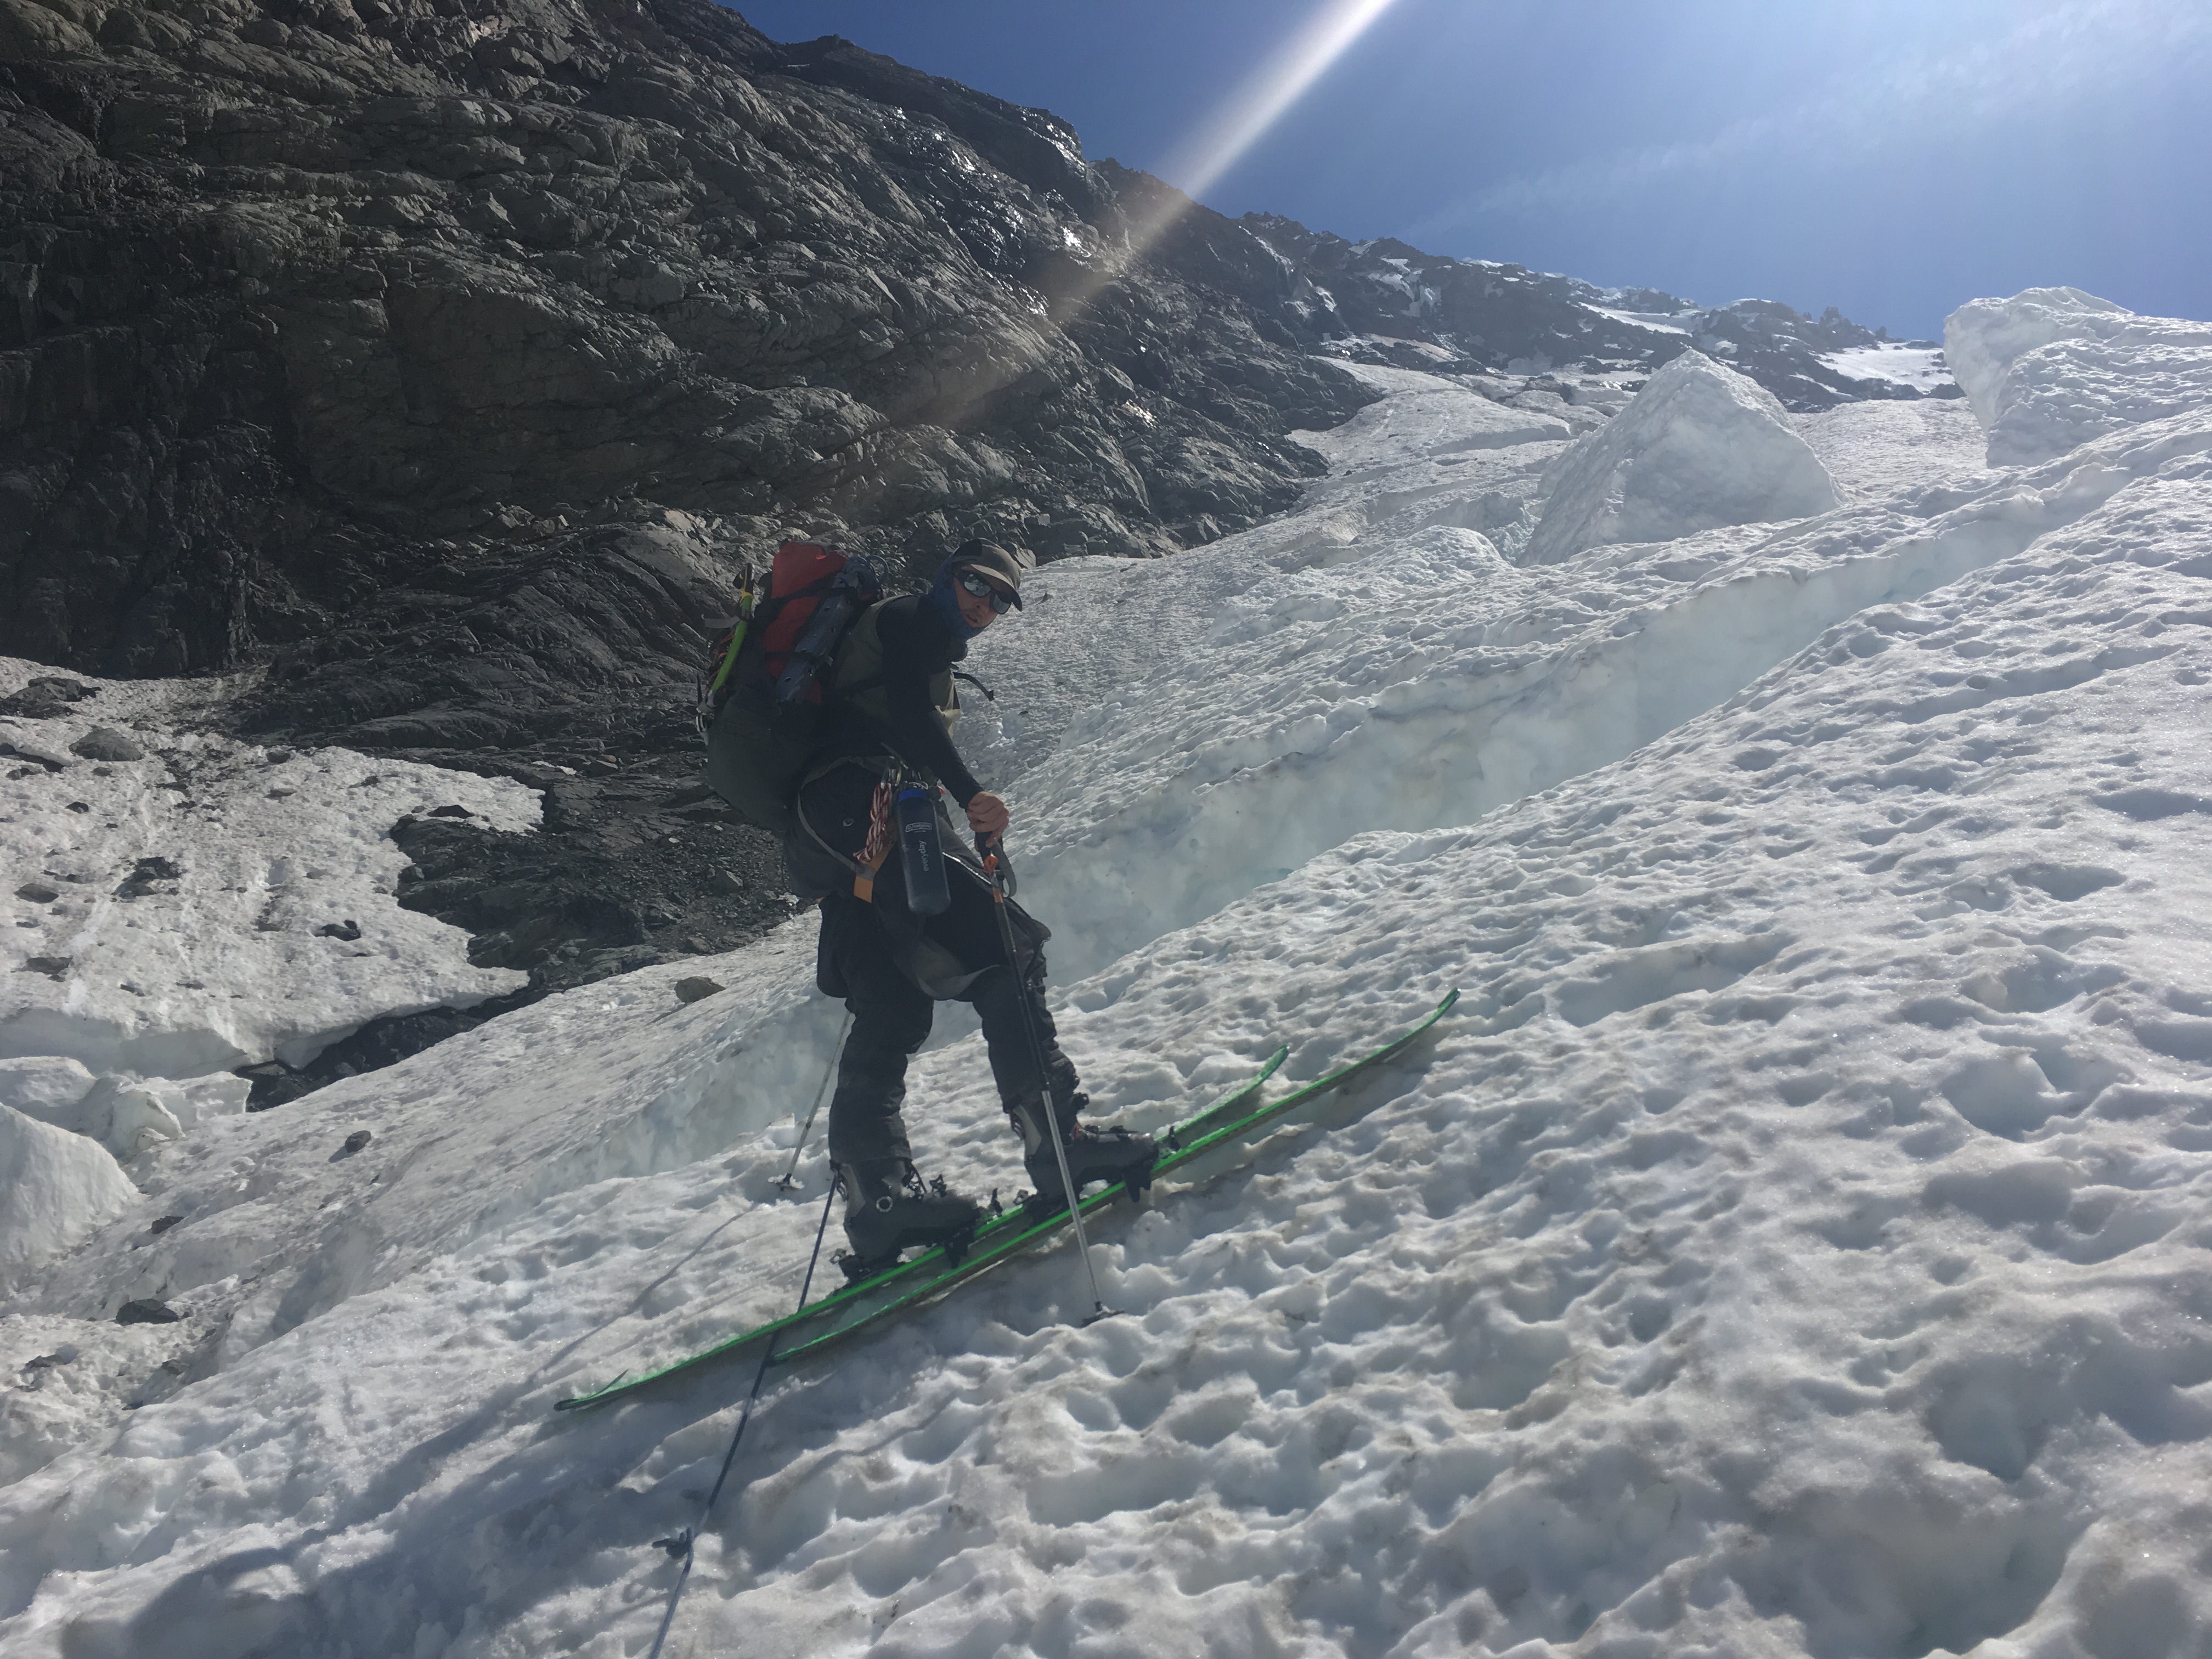
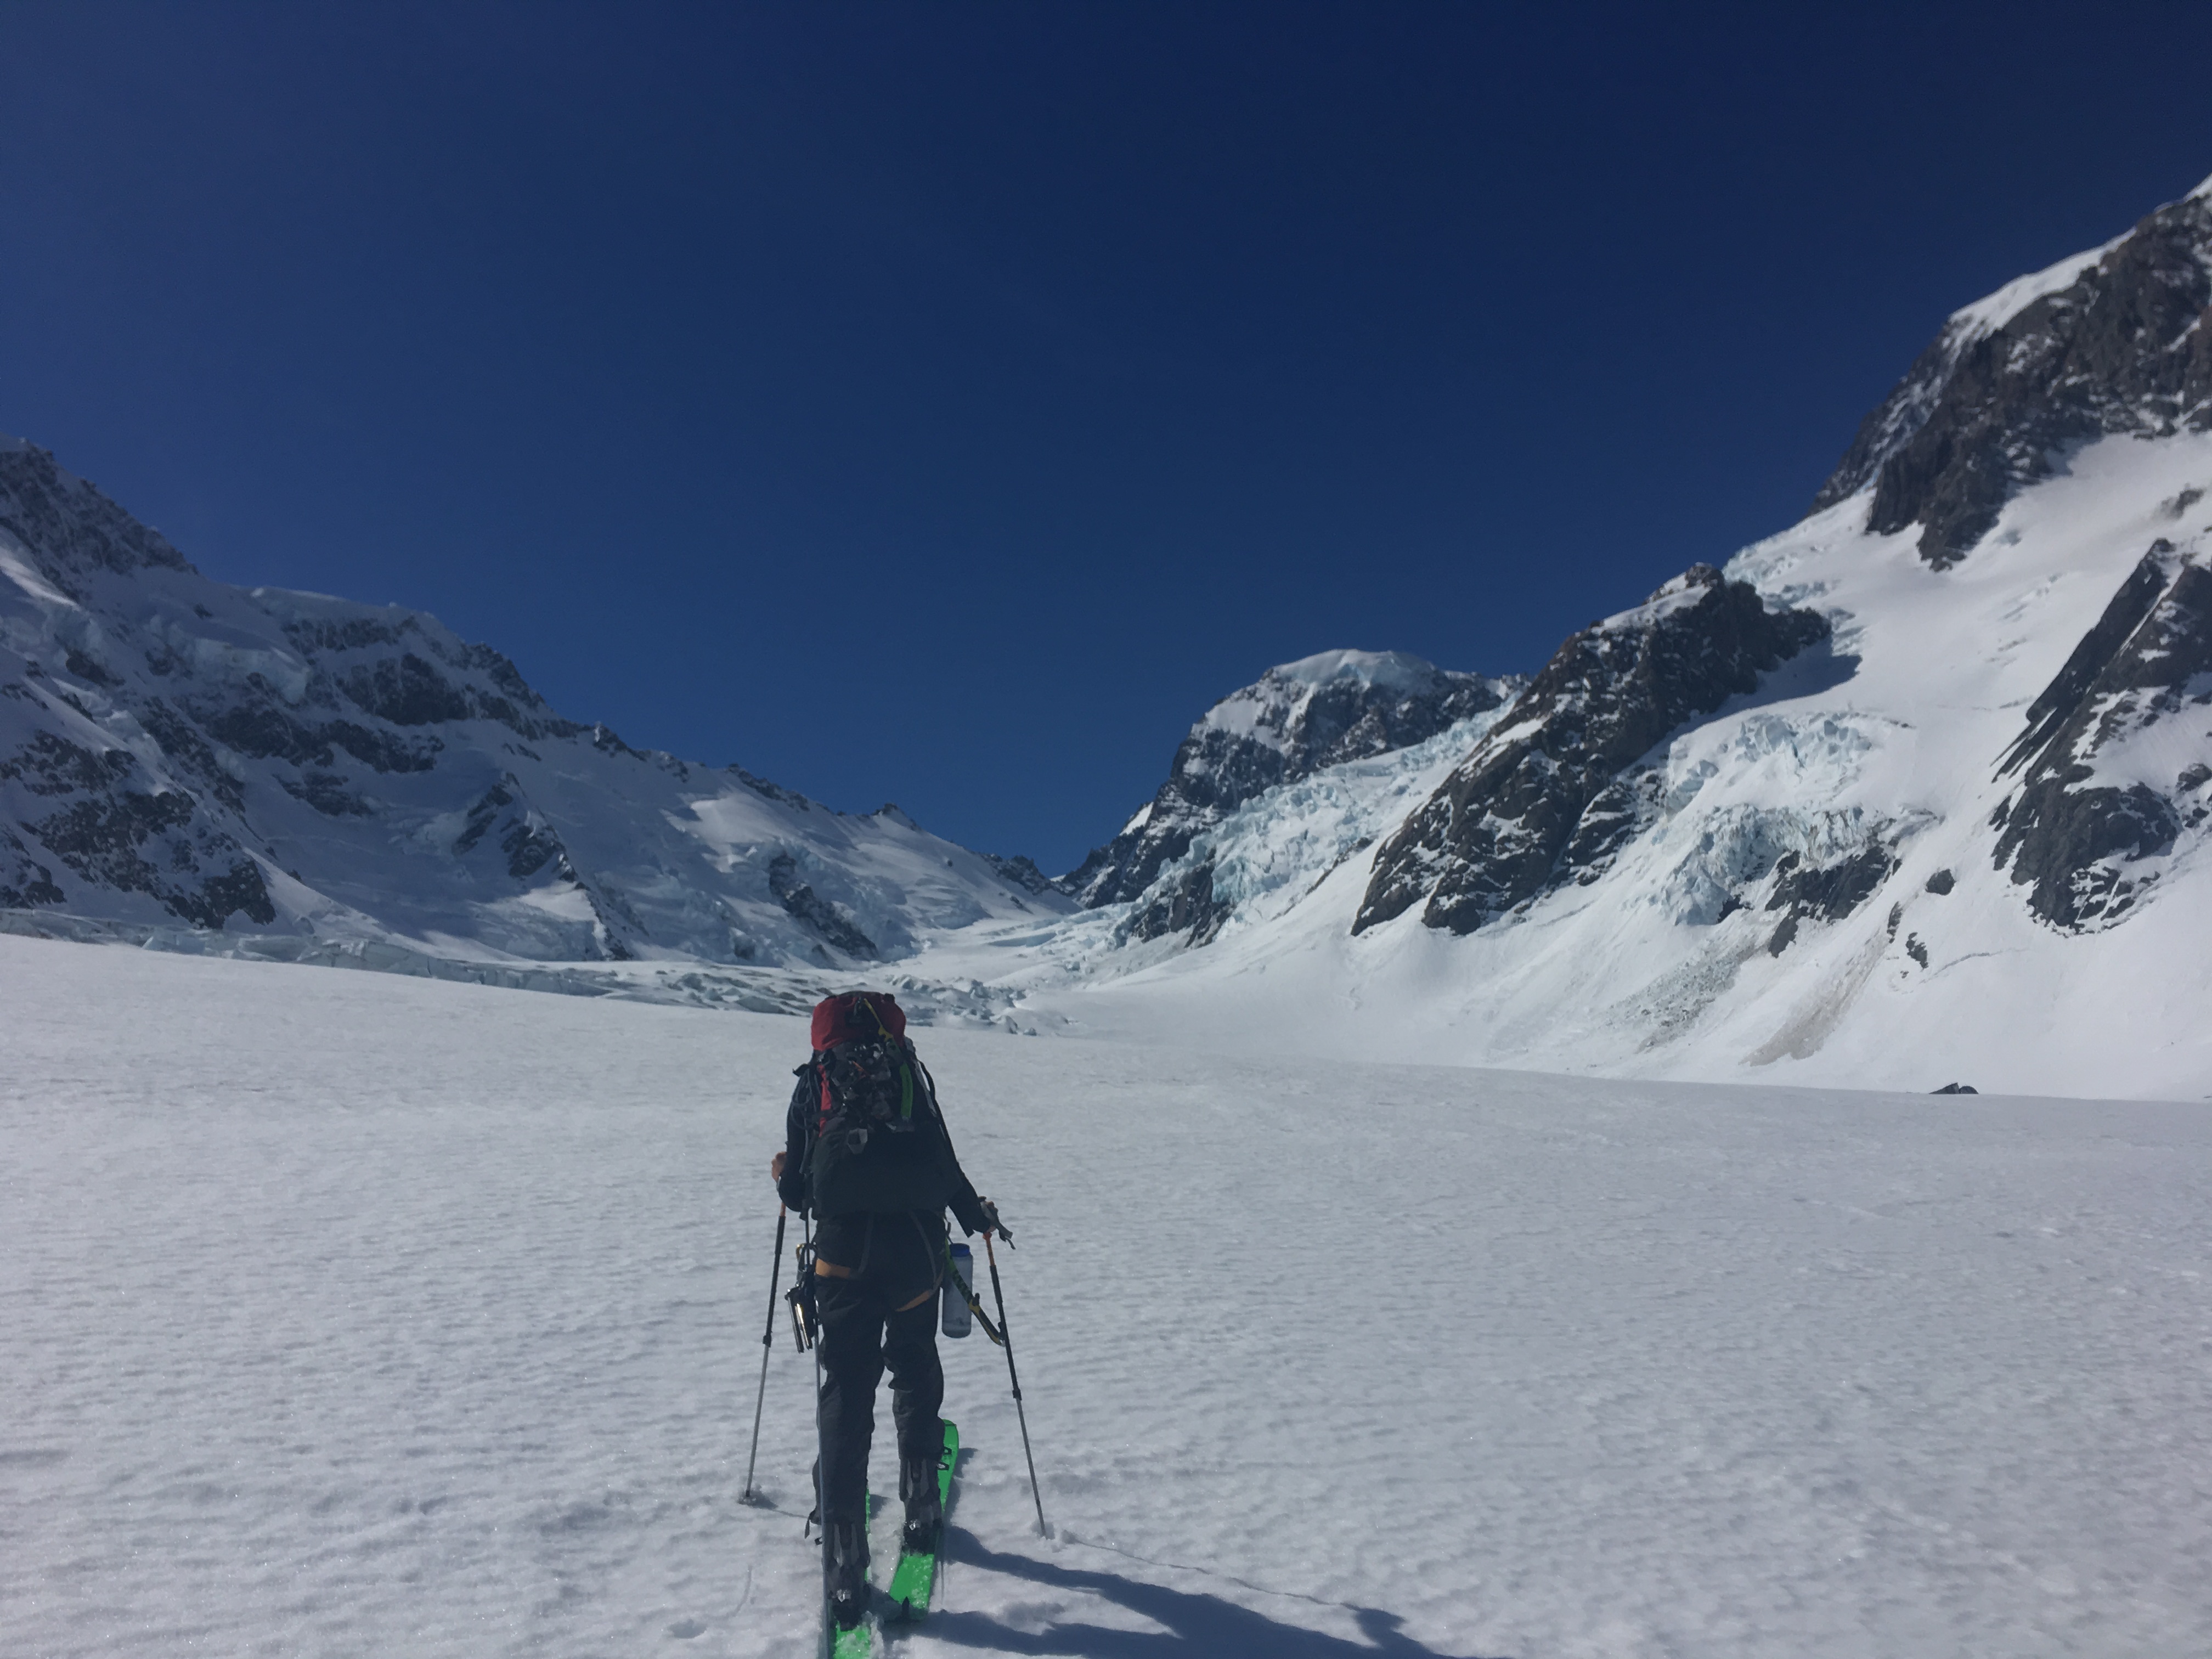
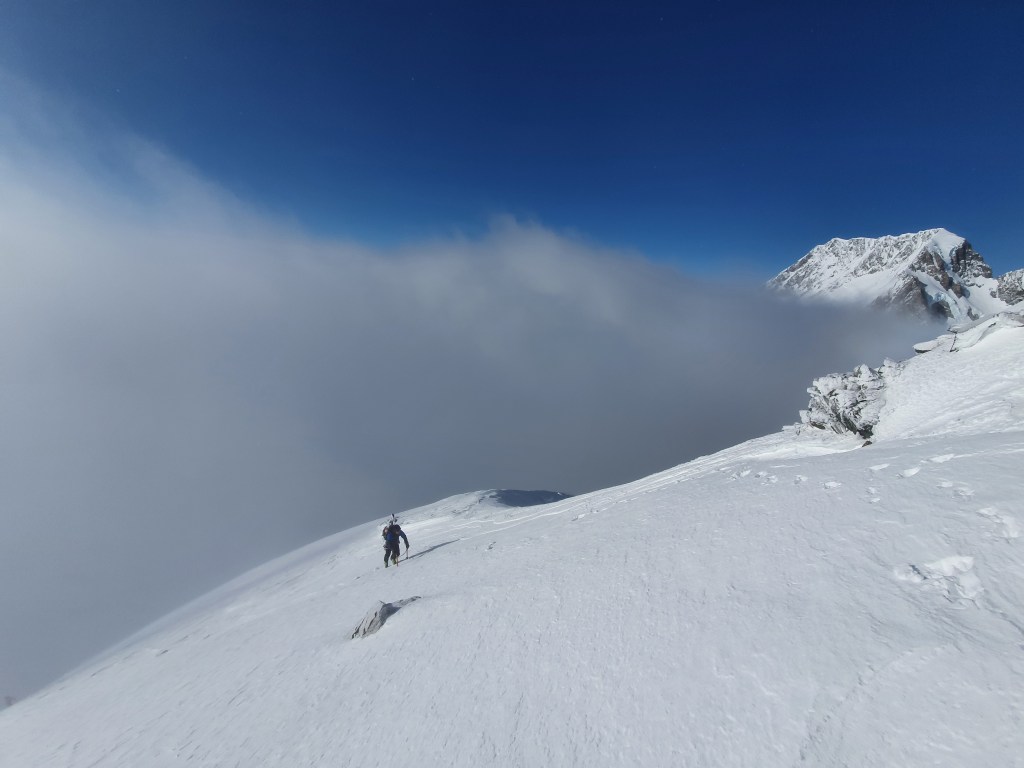
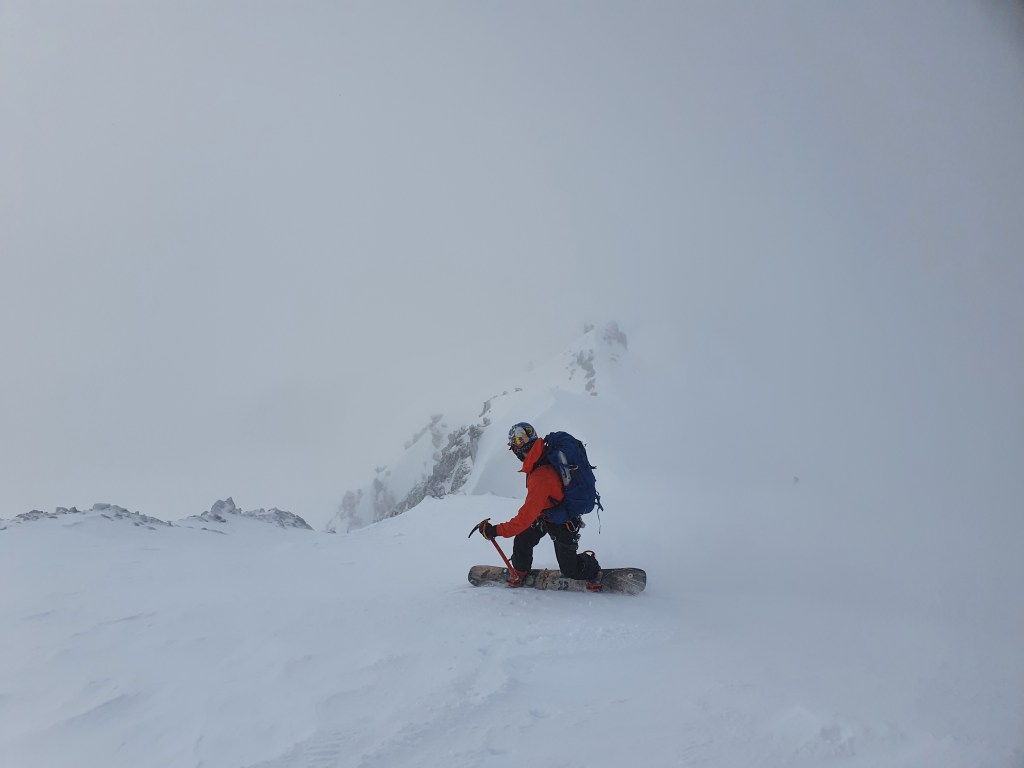
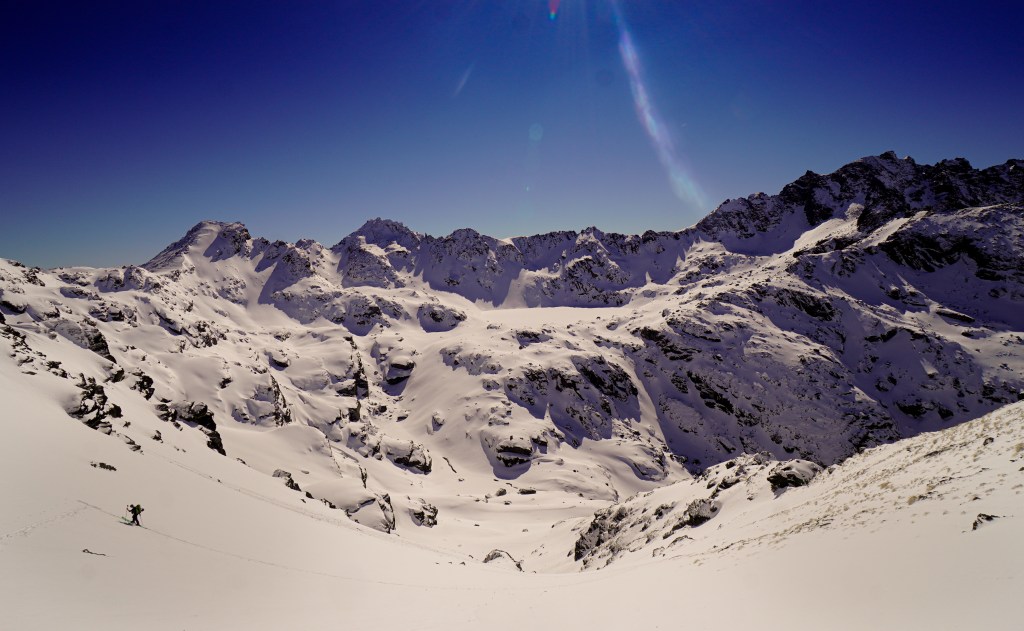
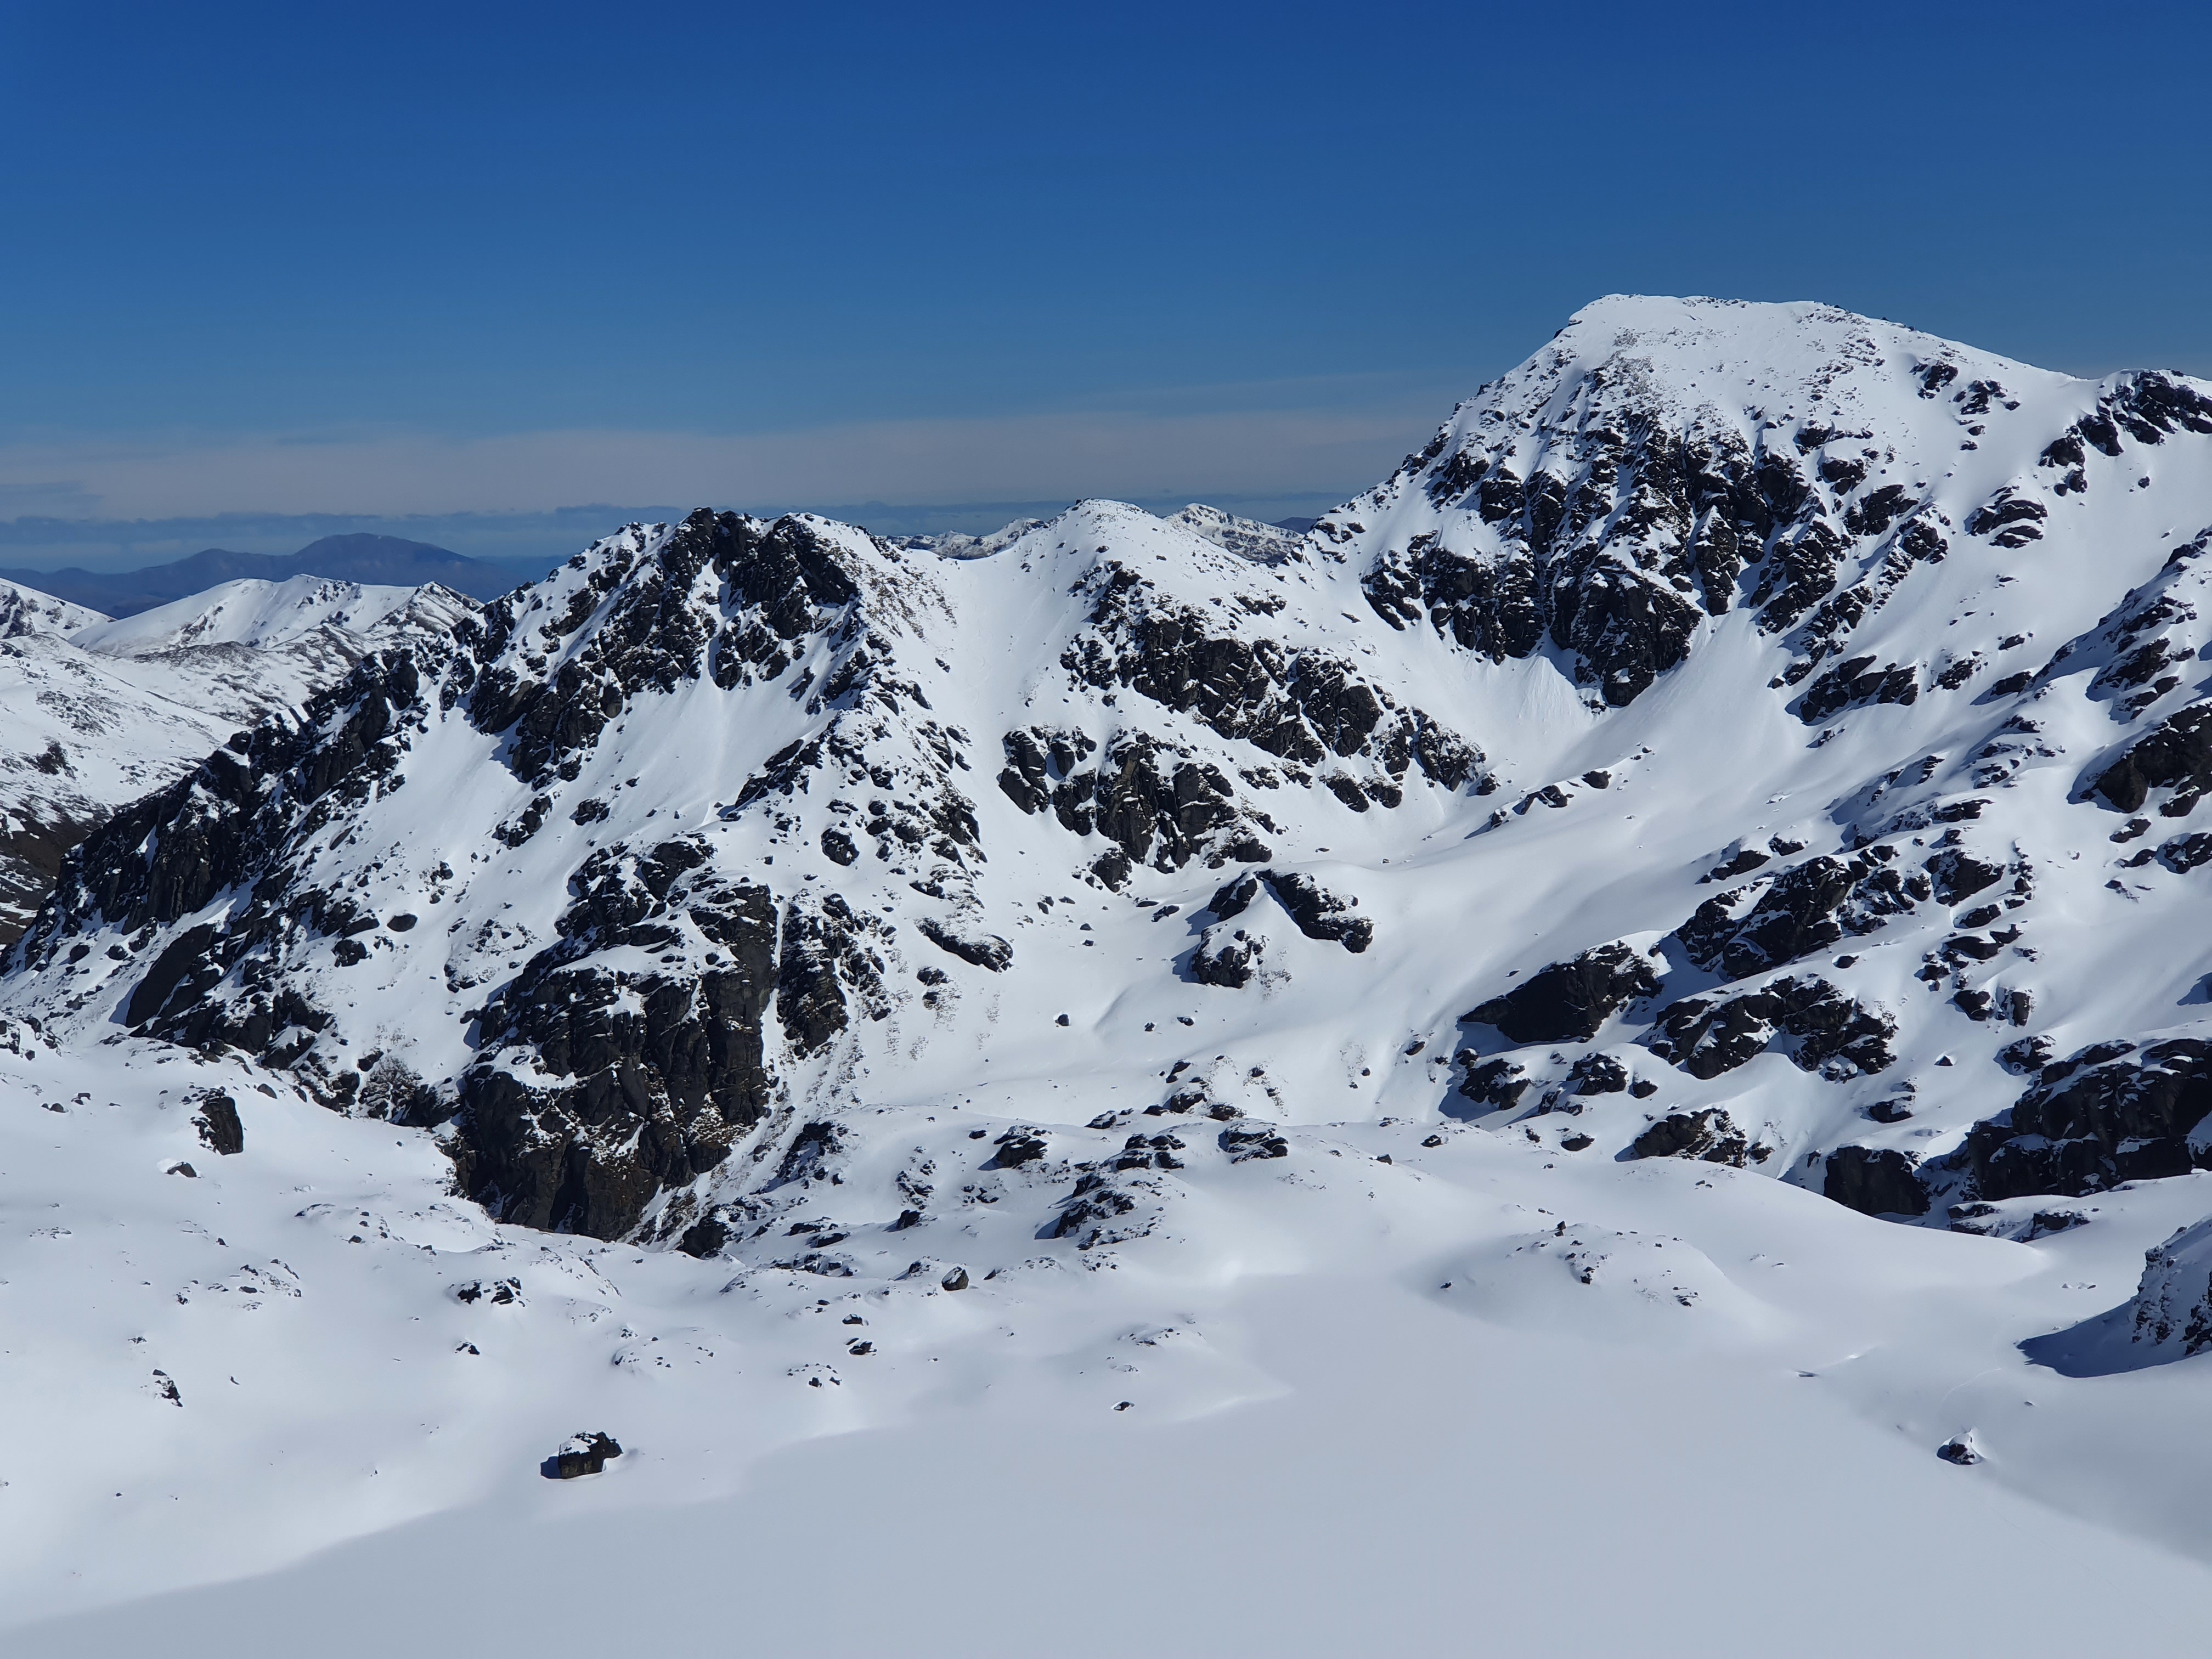
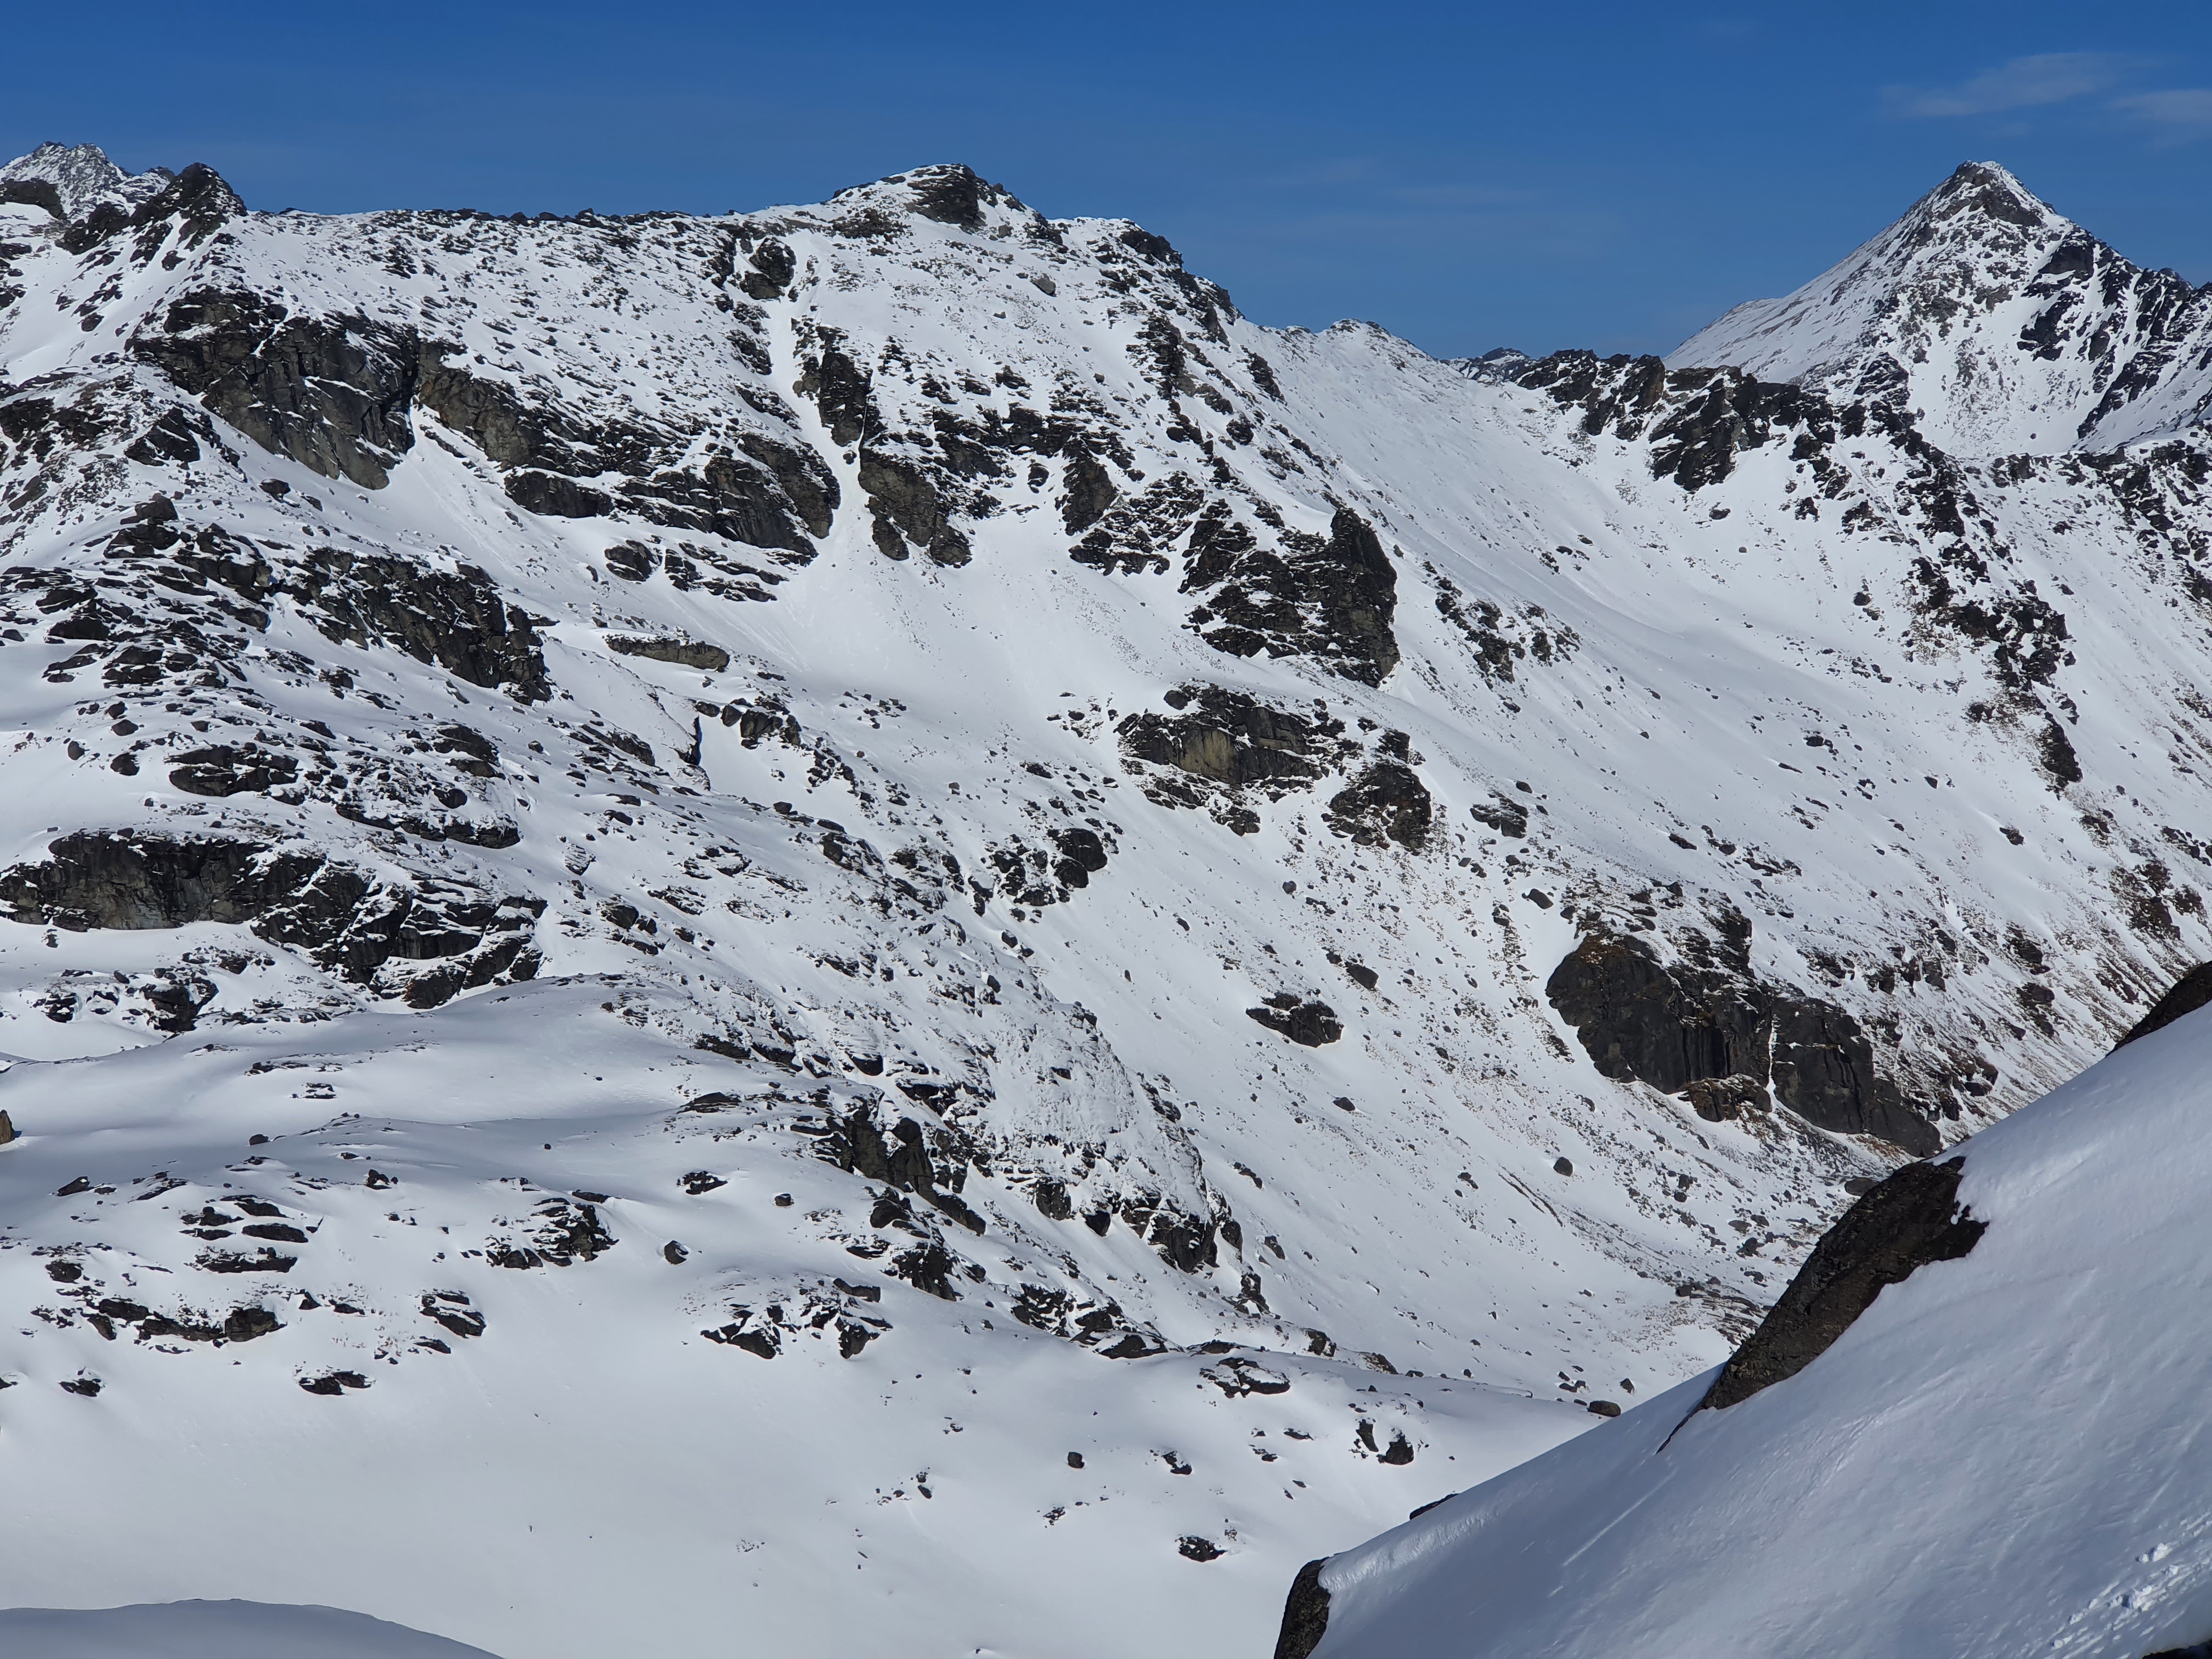
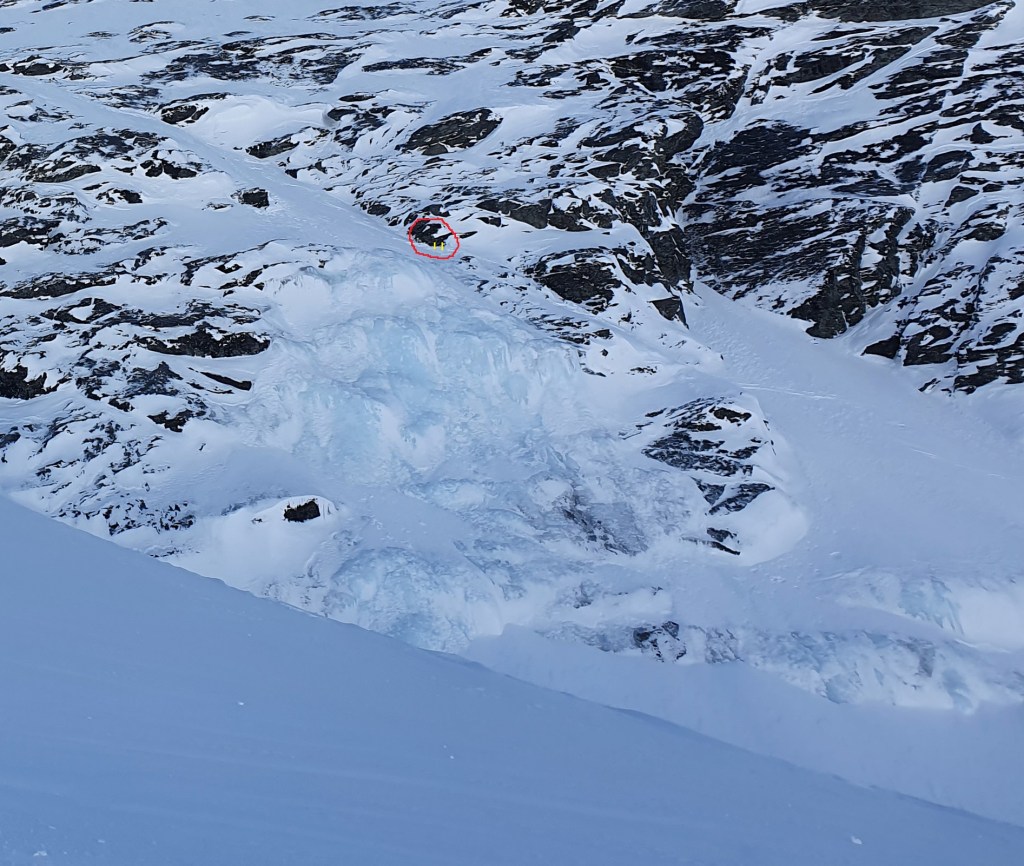
A leisurely 7.30am start. We followed the usual route up the white glacier as per the guidebook – heading up the steeper ramp on lookers right, beneath point 2189 then zig zagging our way to Kahatea col. There were only a few visible crevasses, but we were wary any snow bridges were likely to be thin on the ground and kept our ropes on until the col.

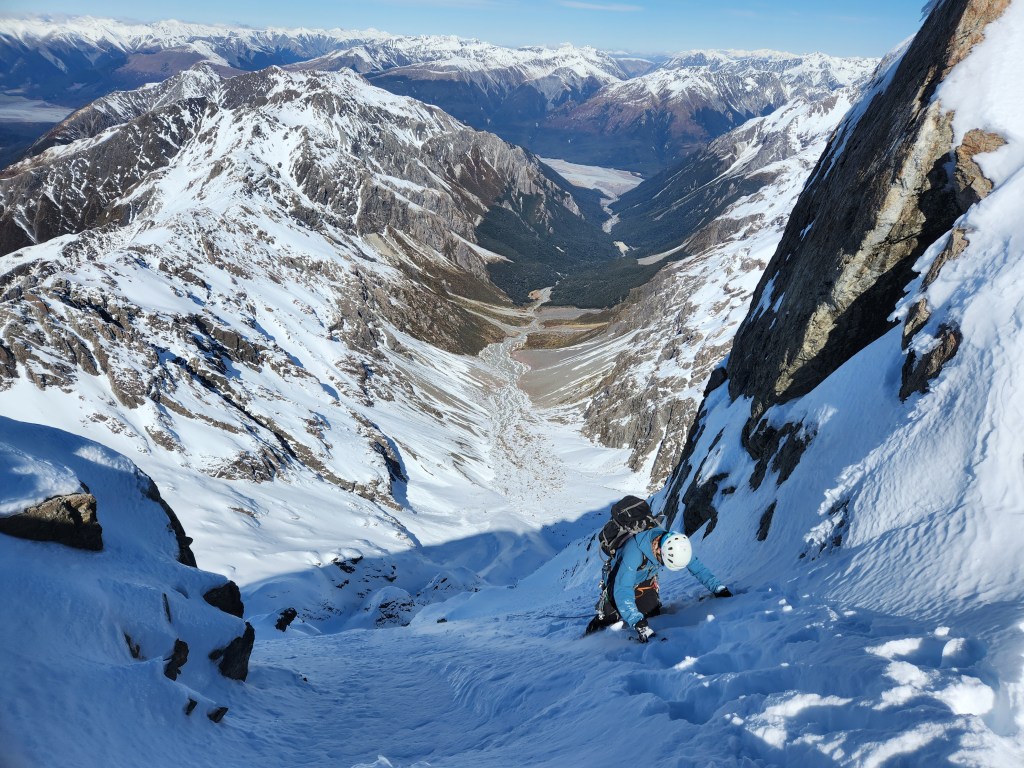
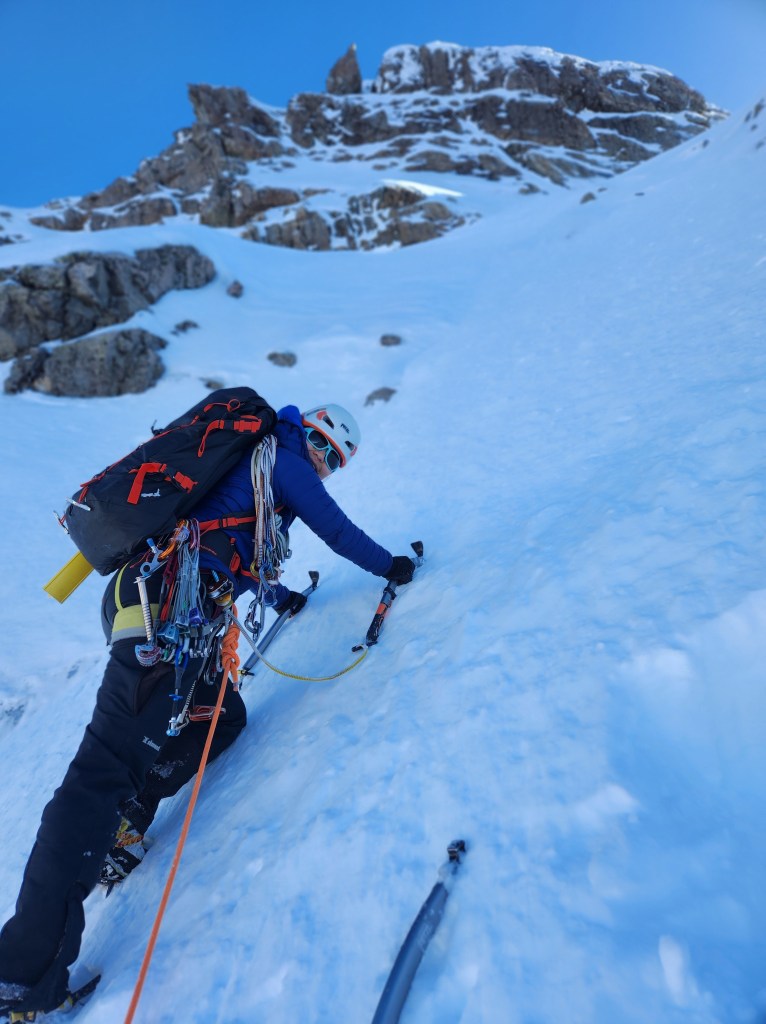
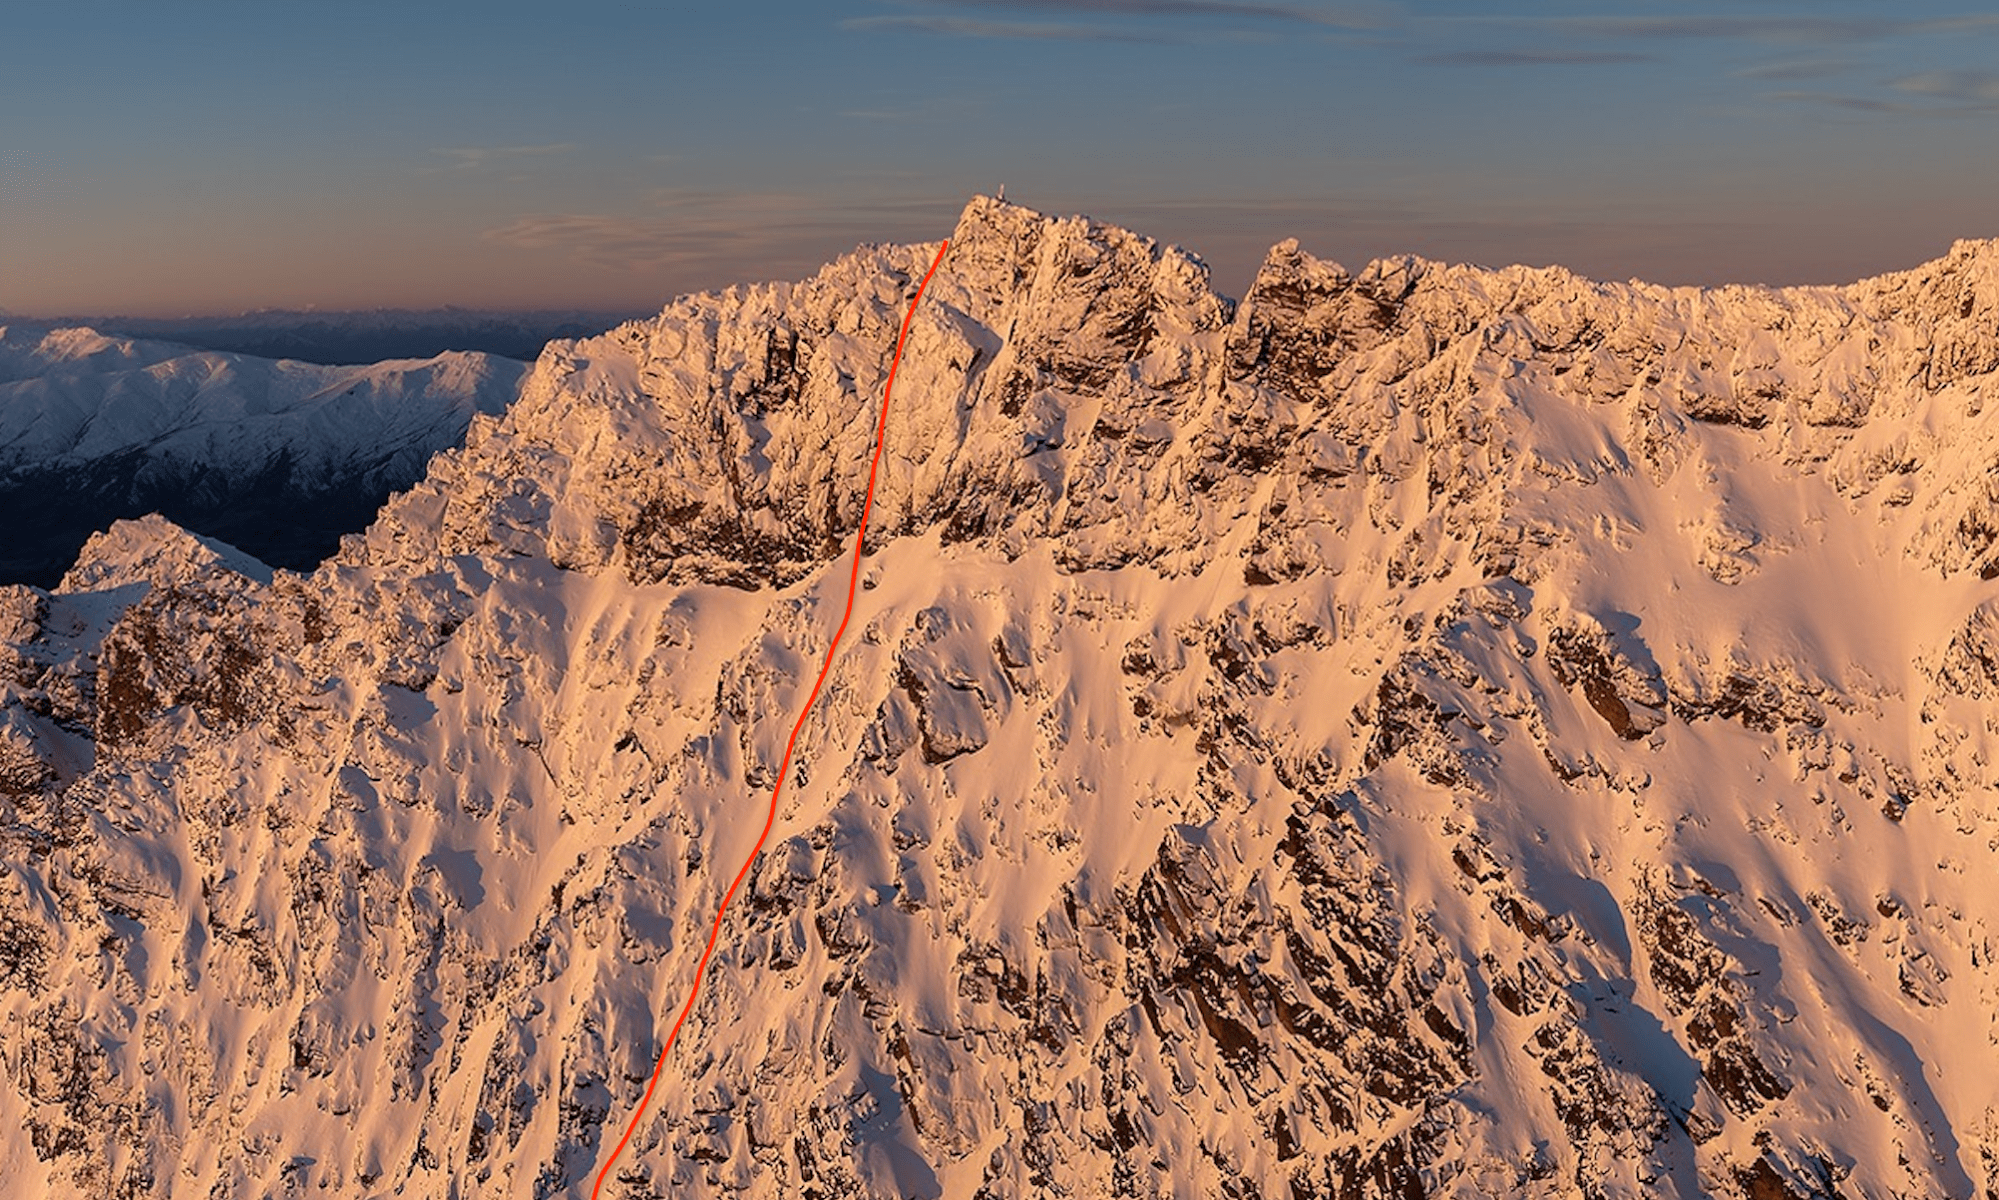
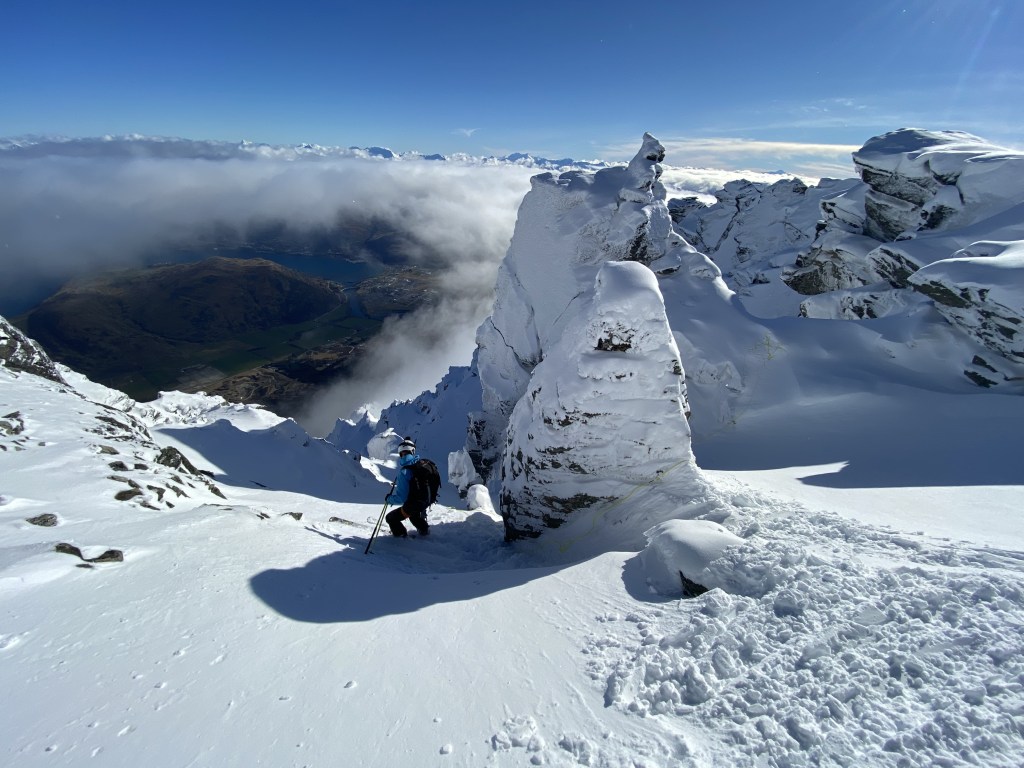
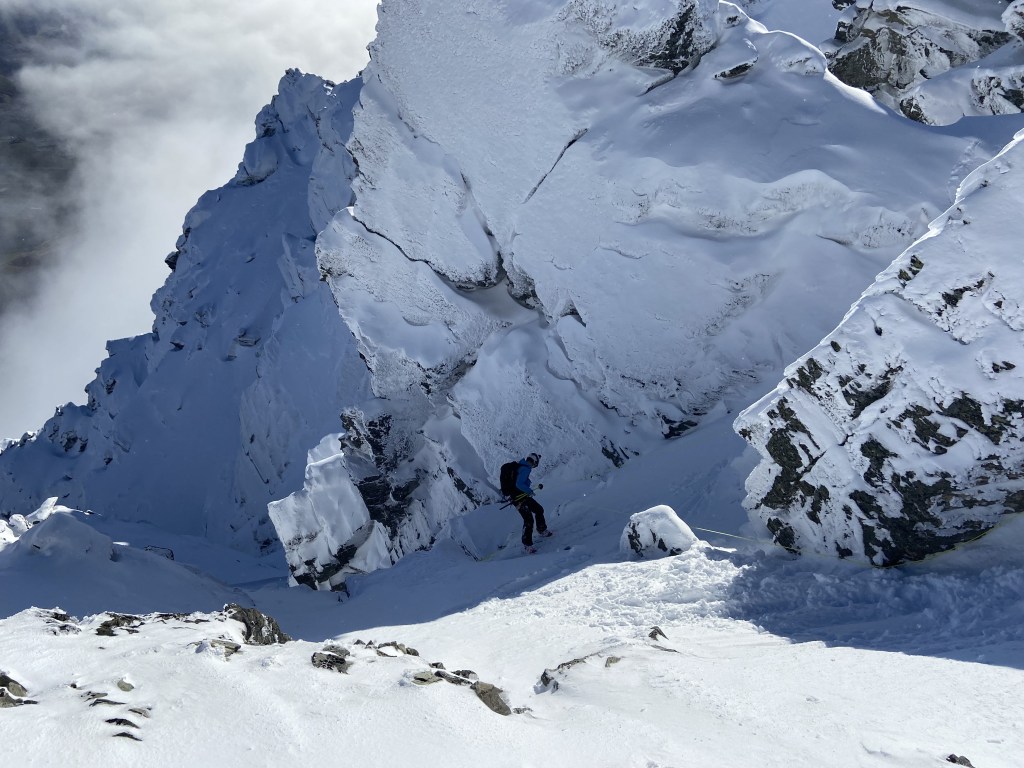
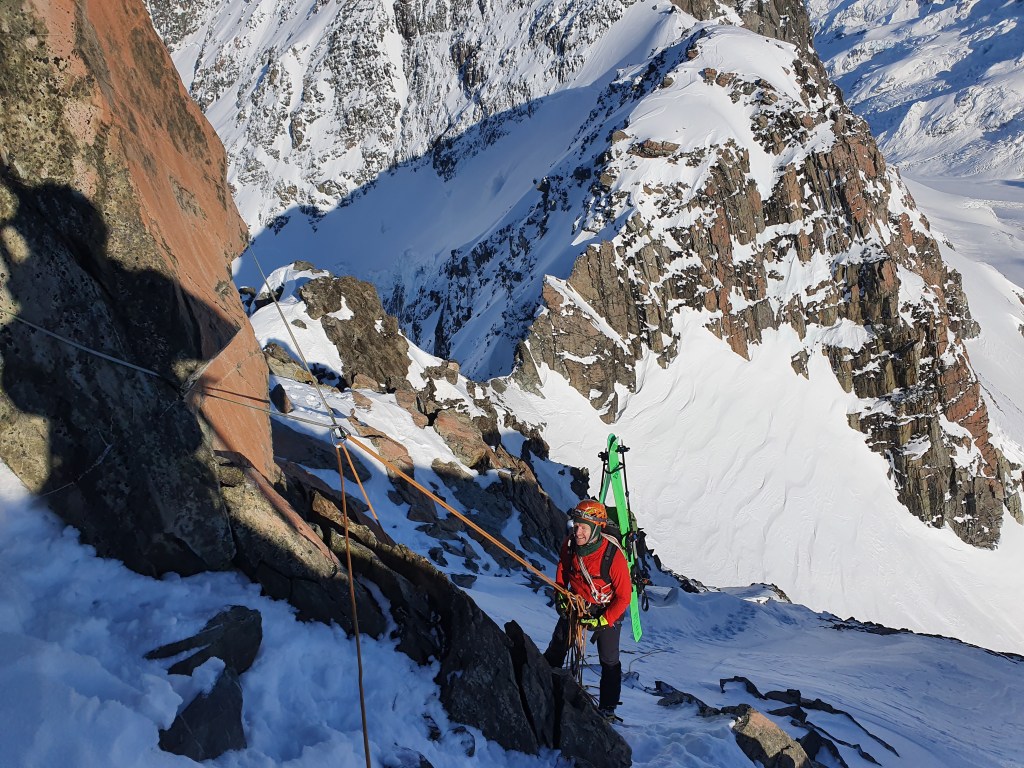
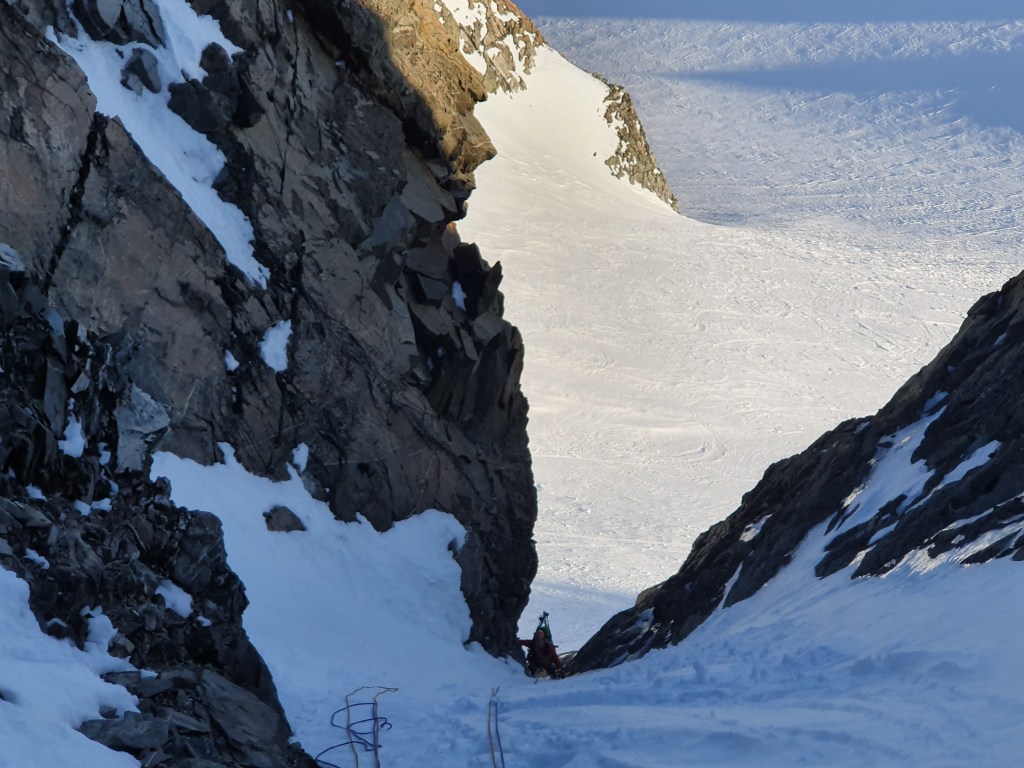
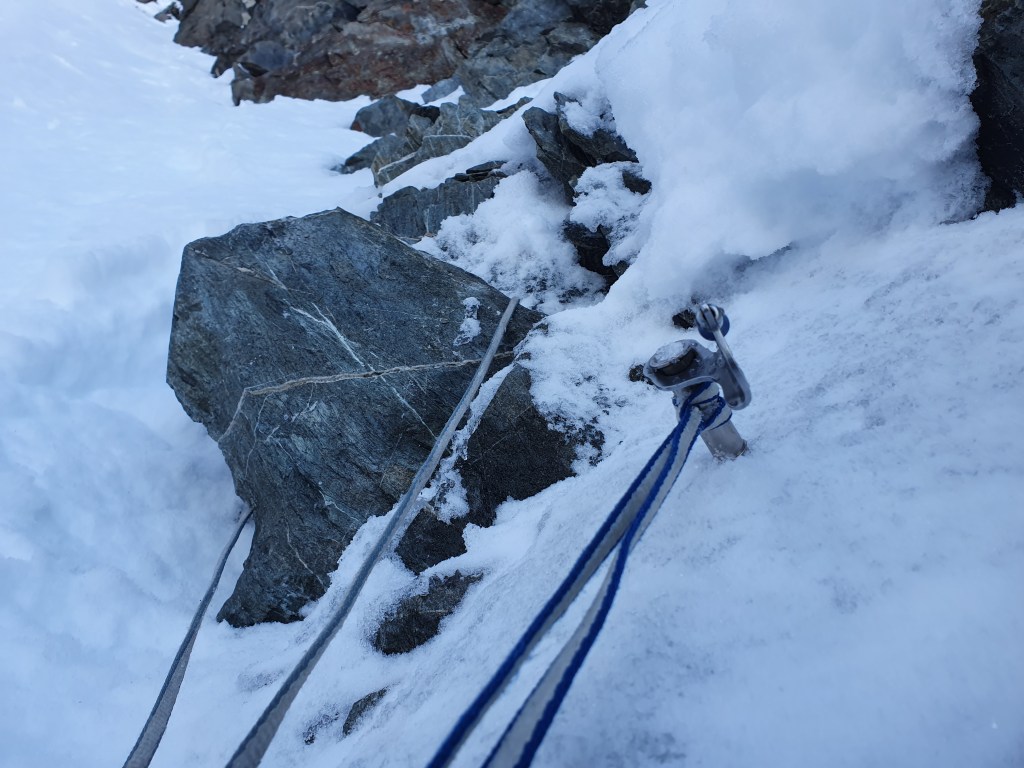
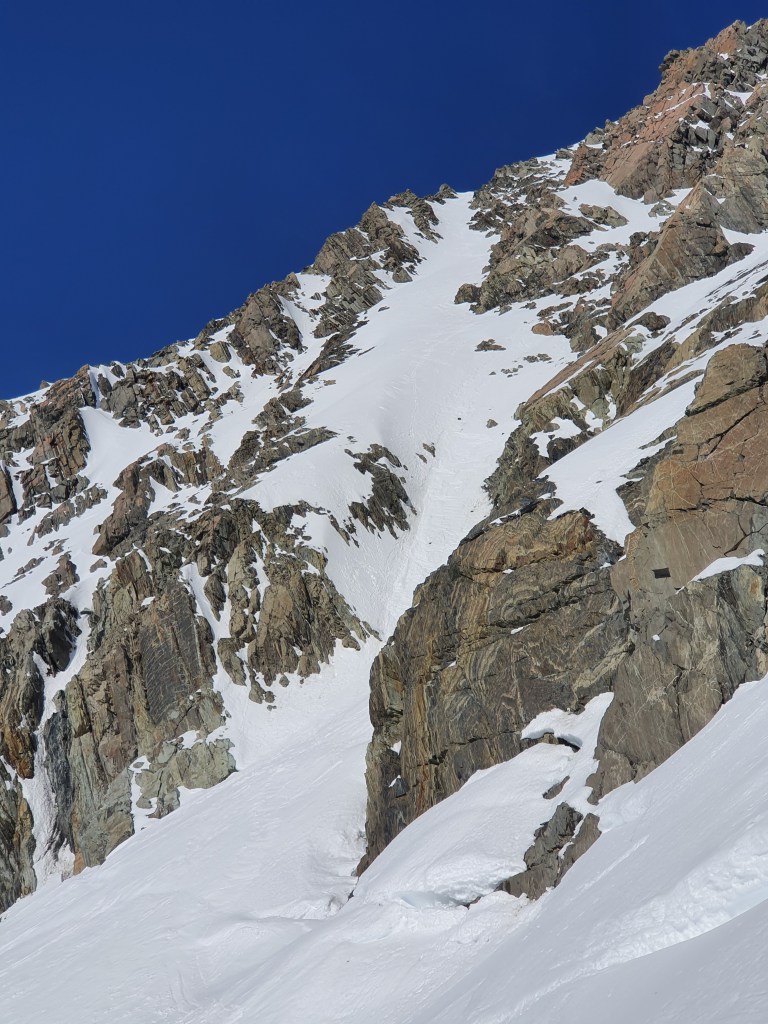
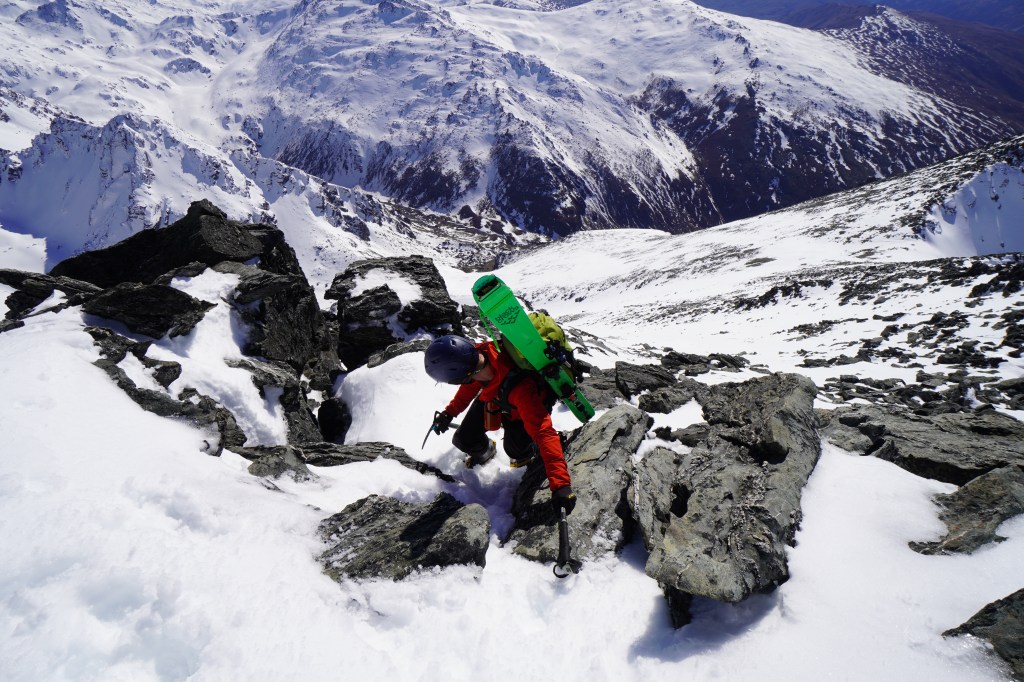
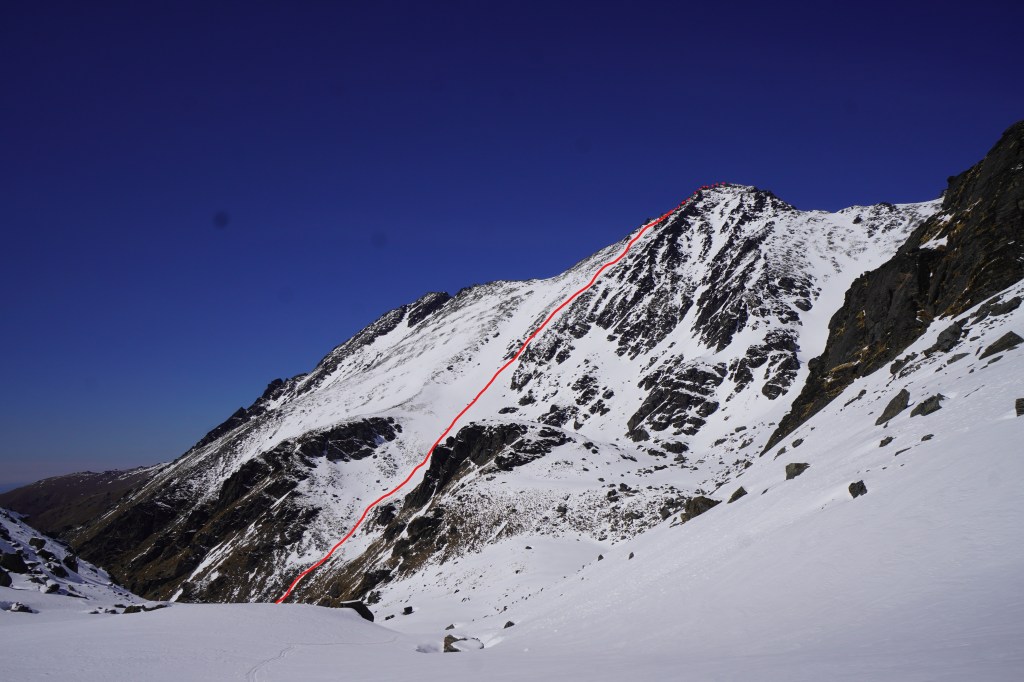
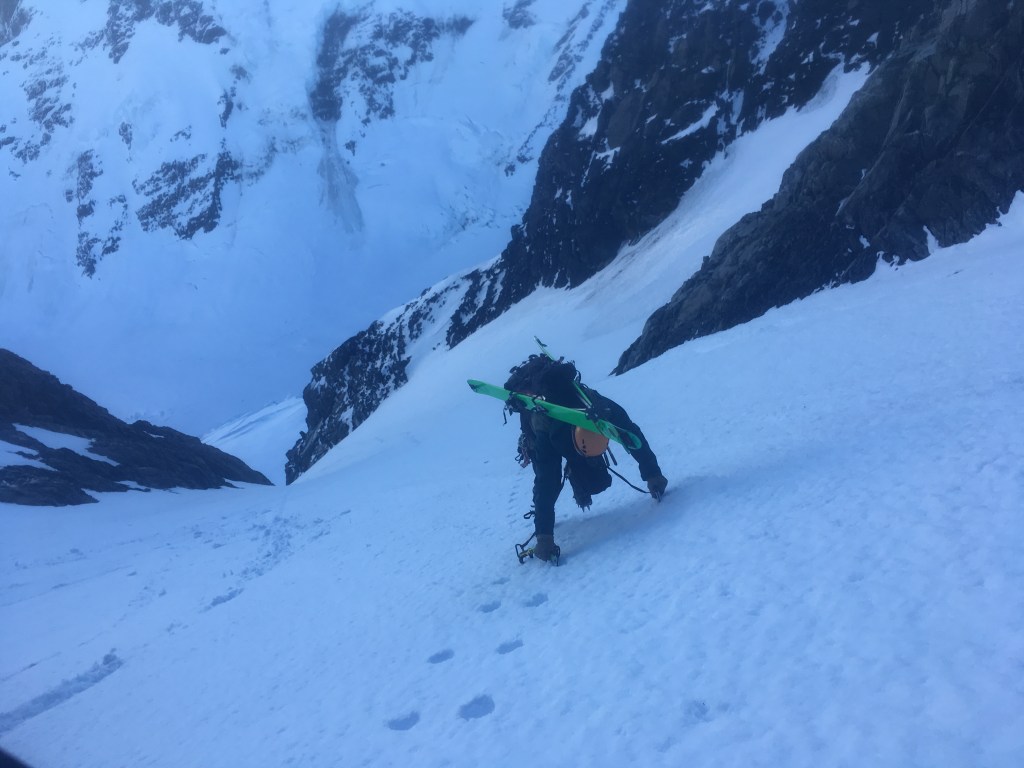
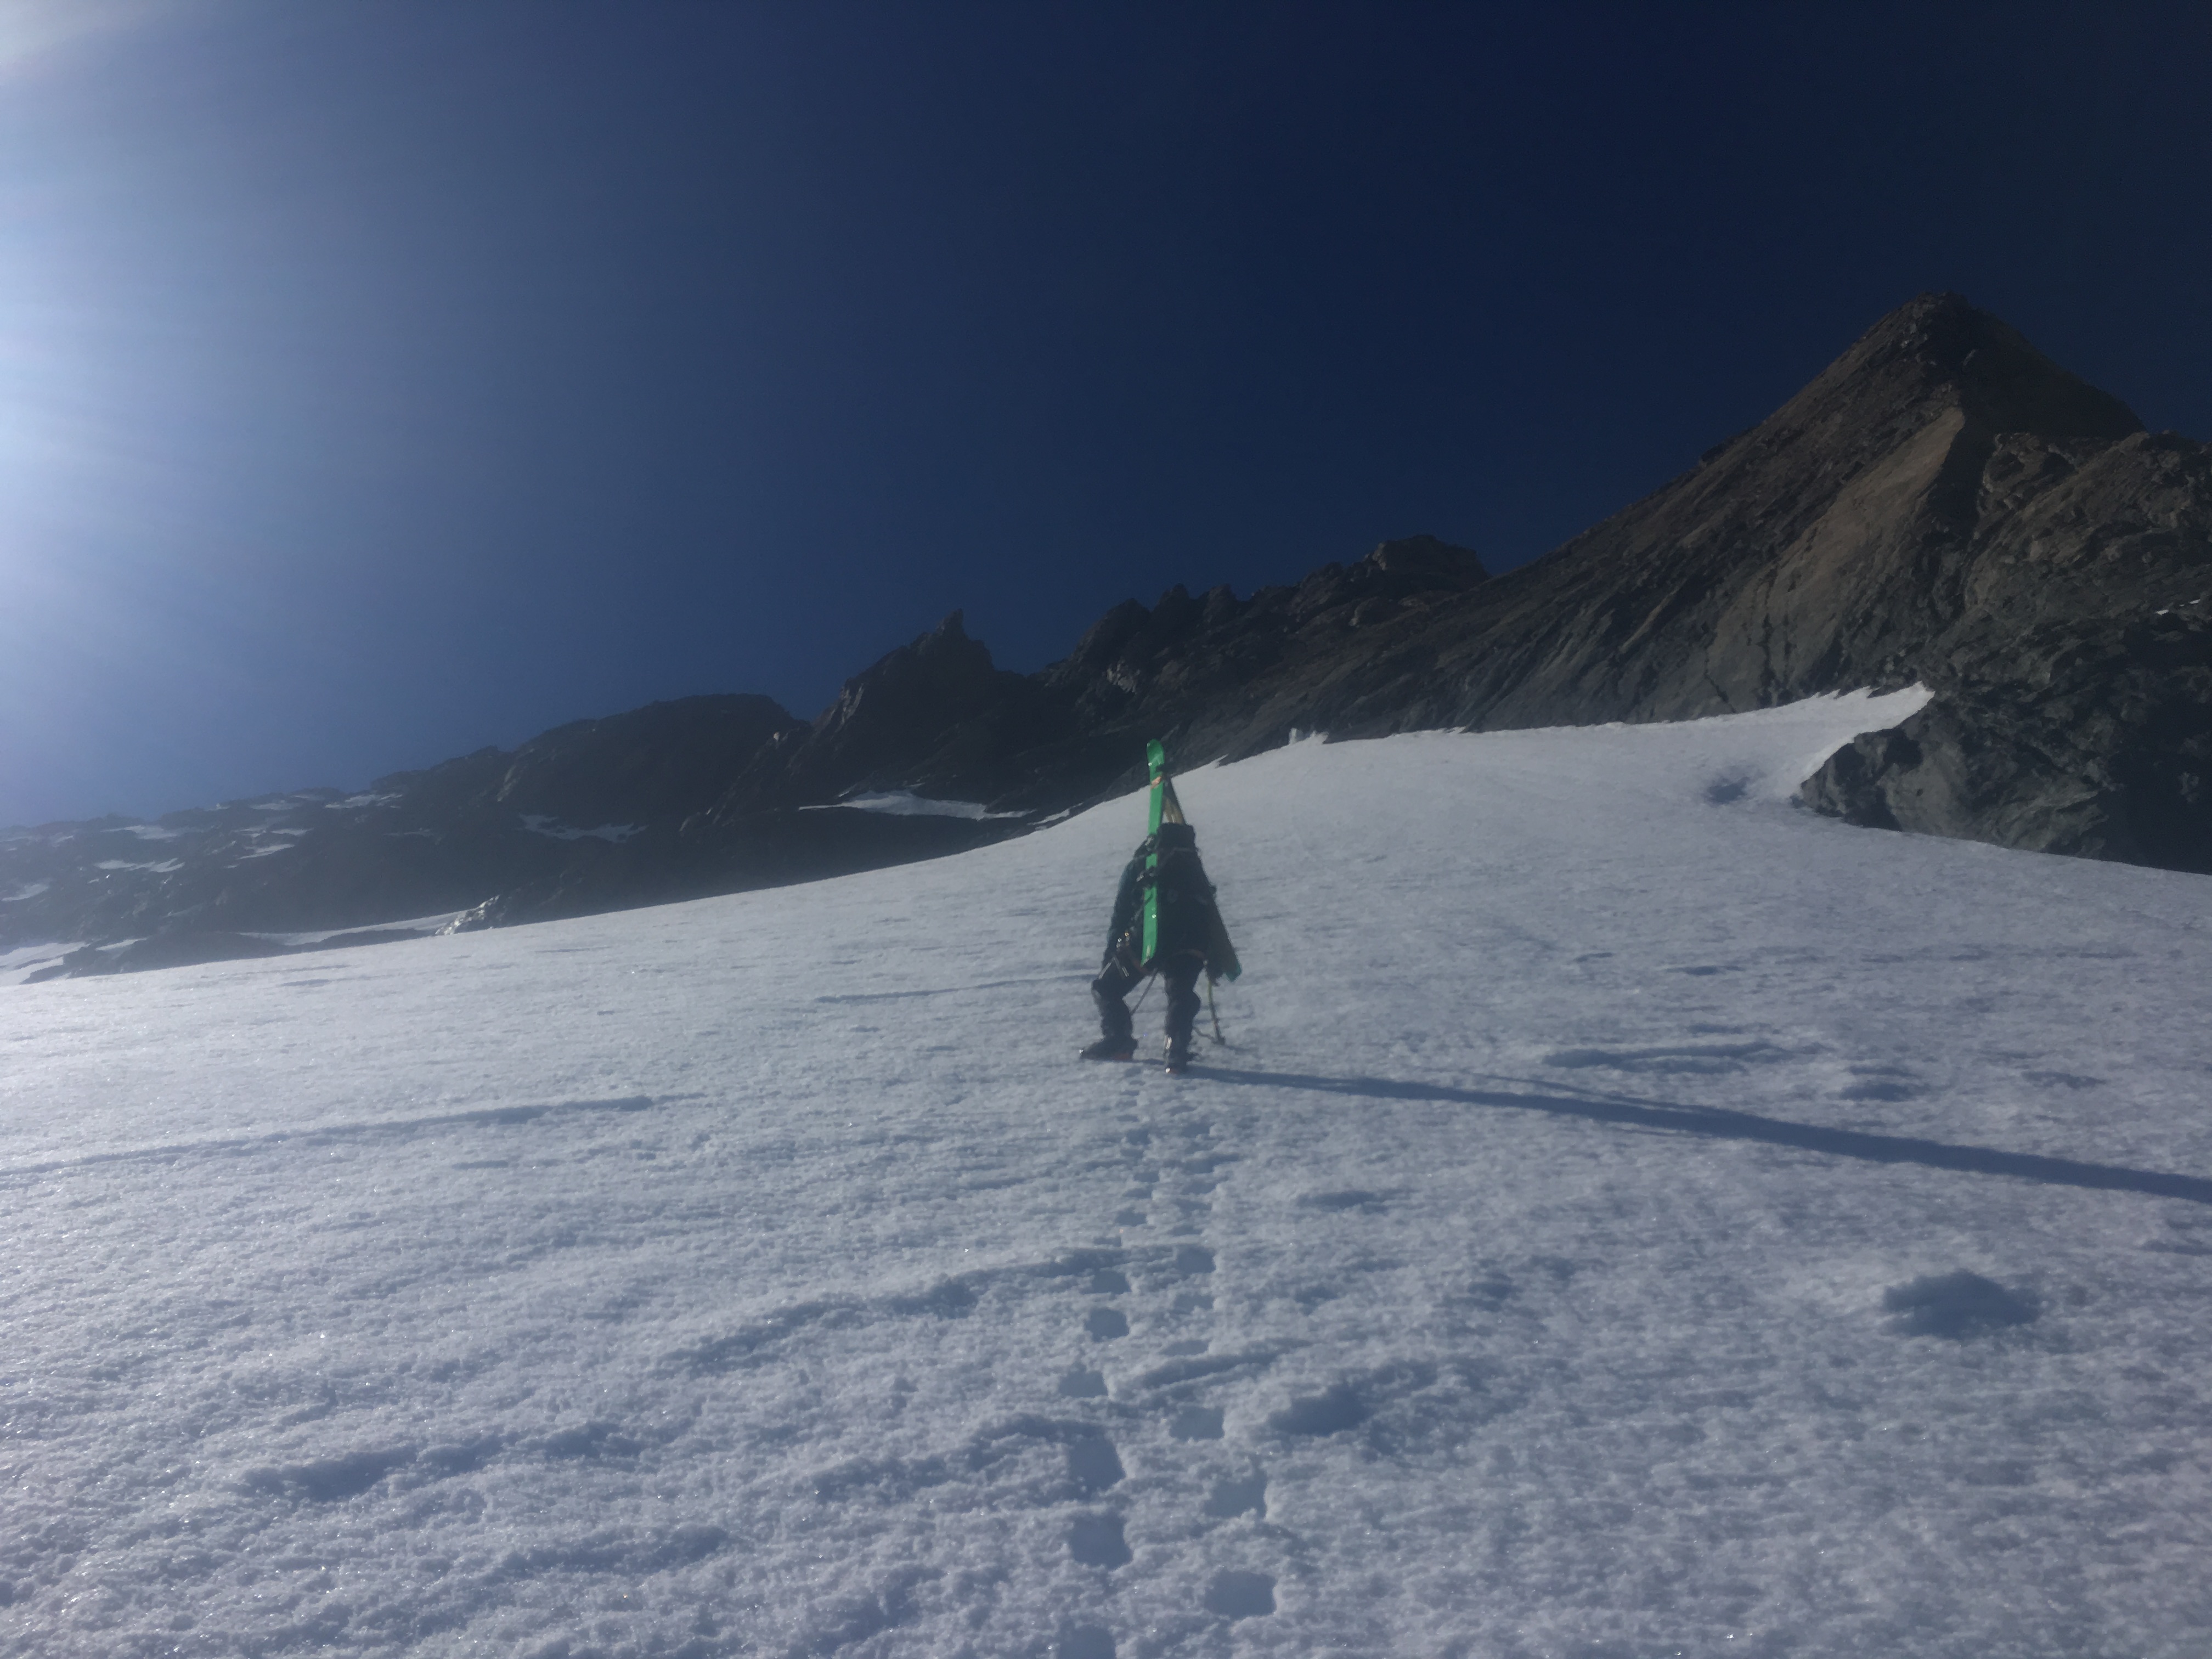
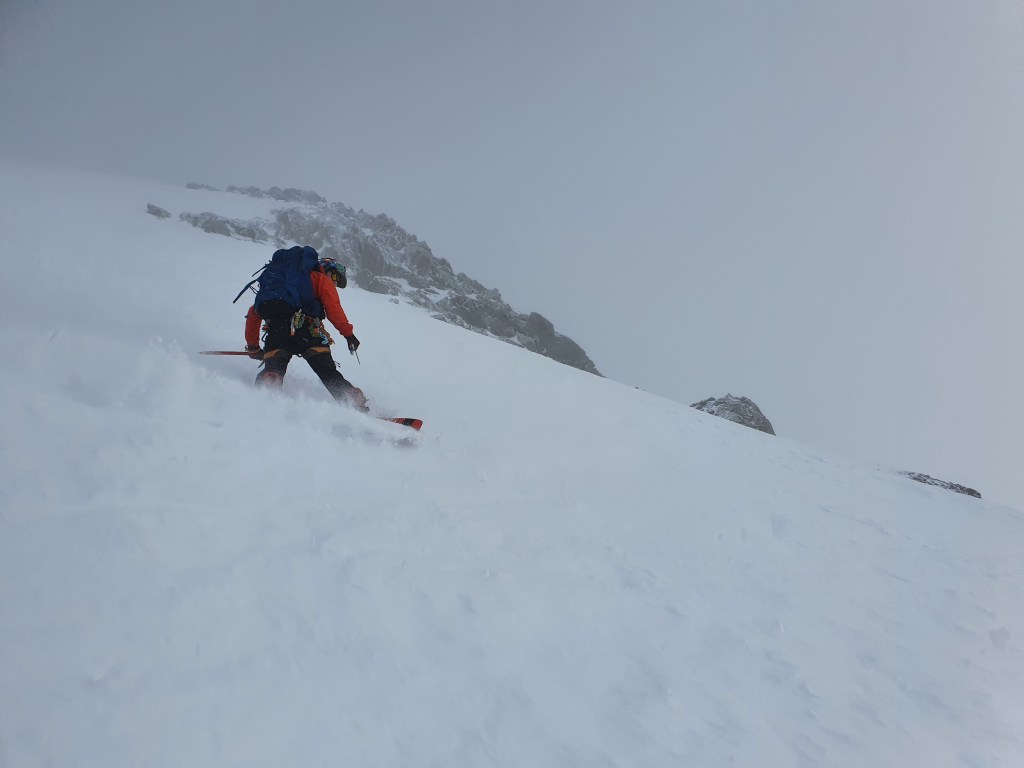
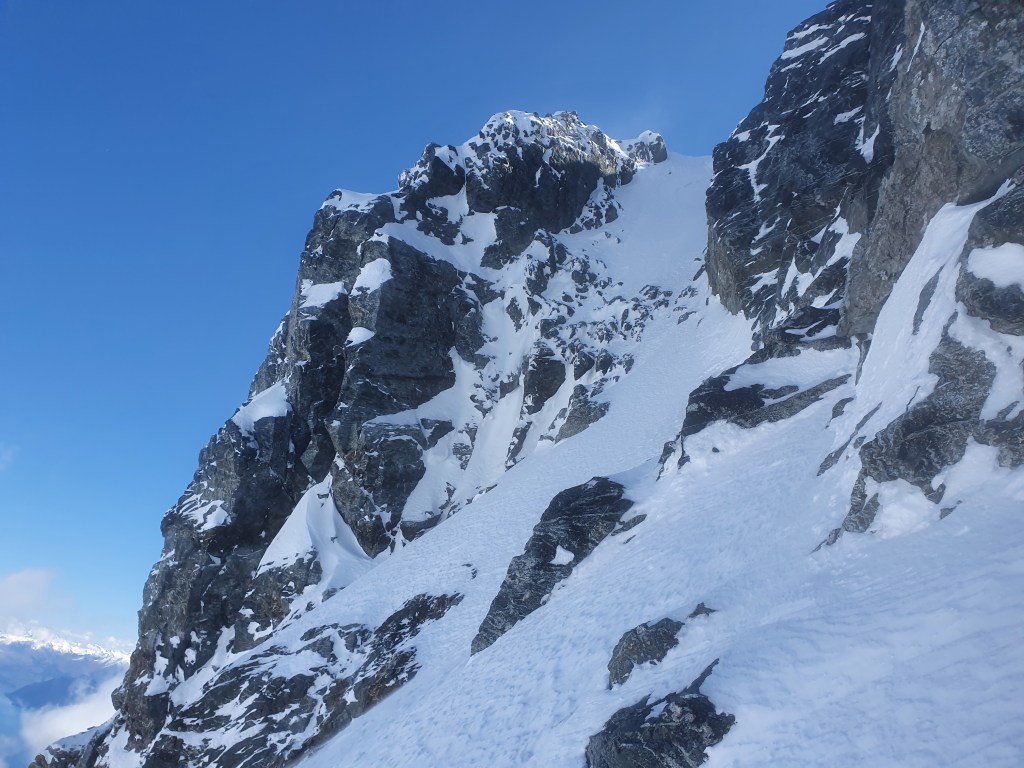
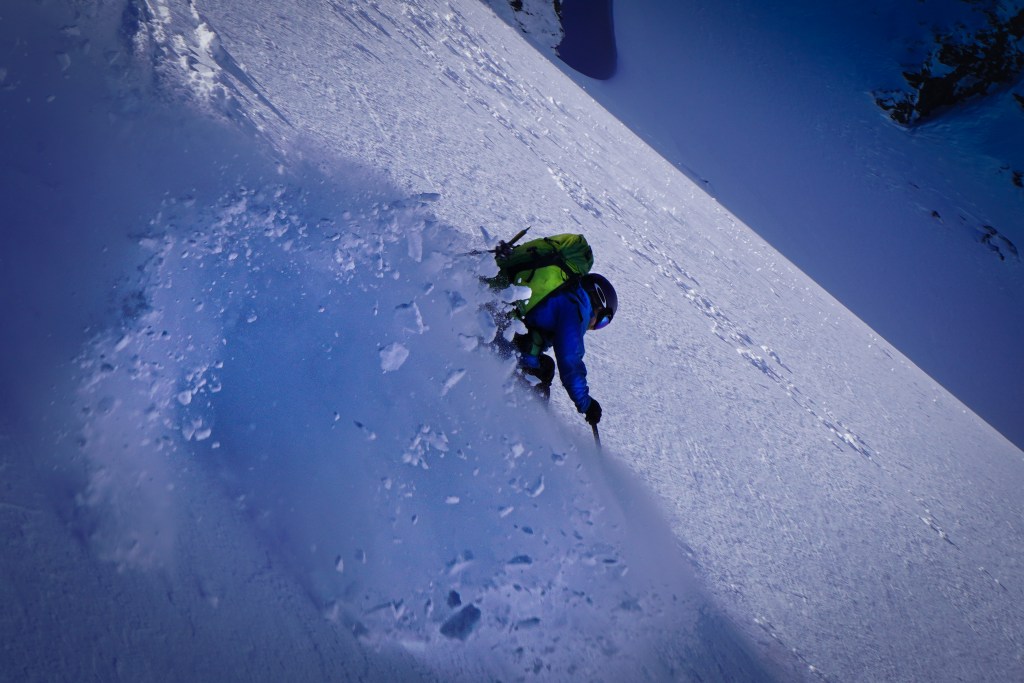
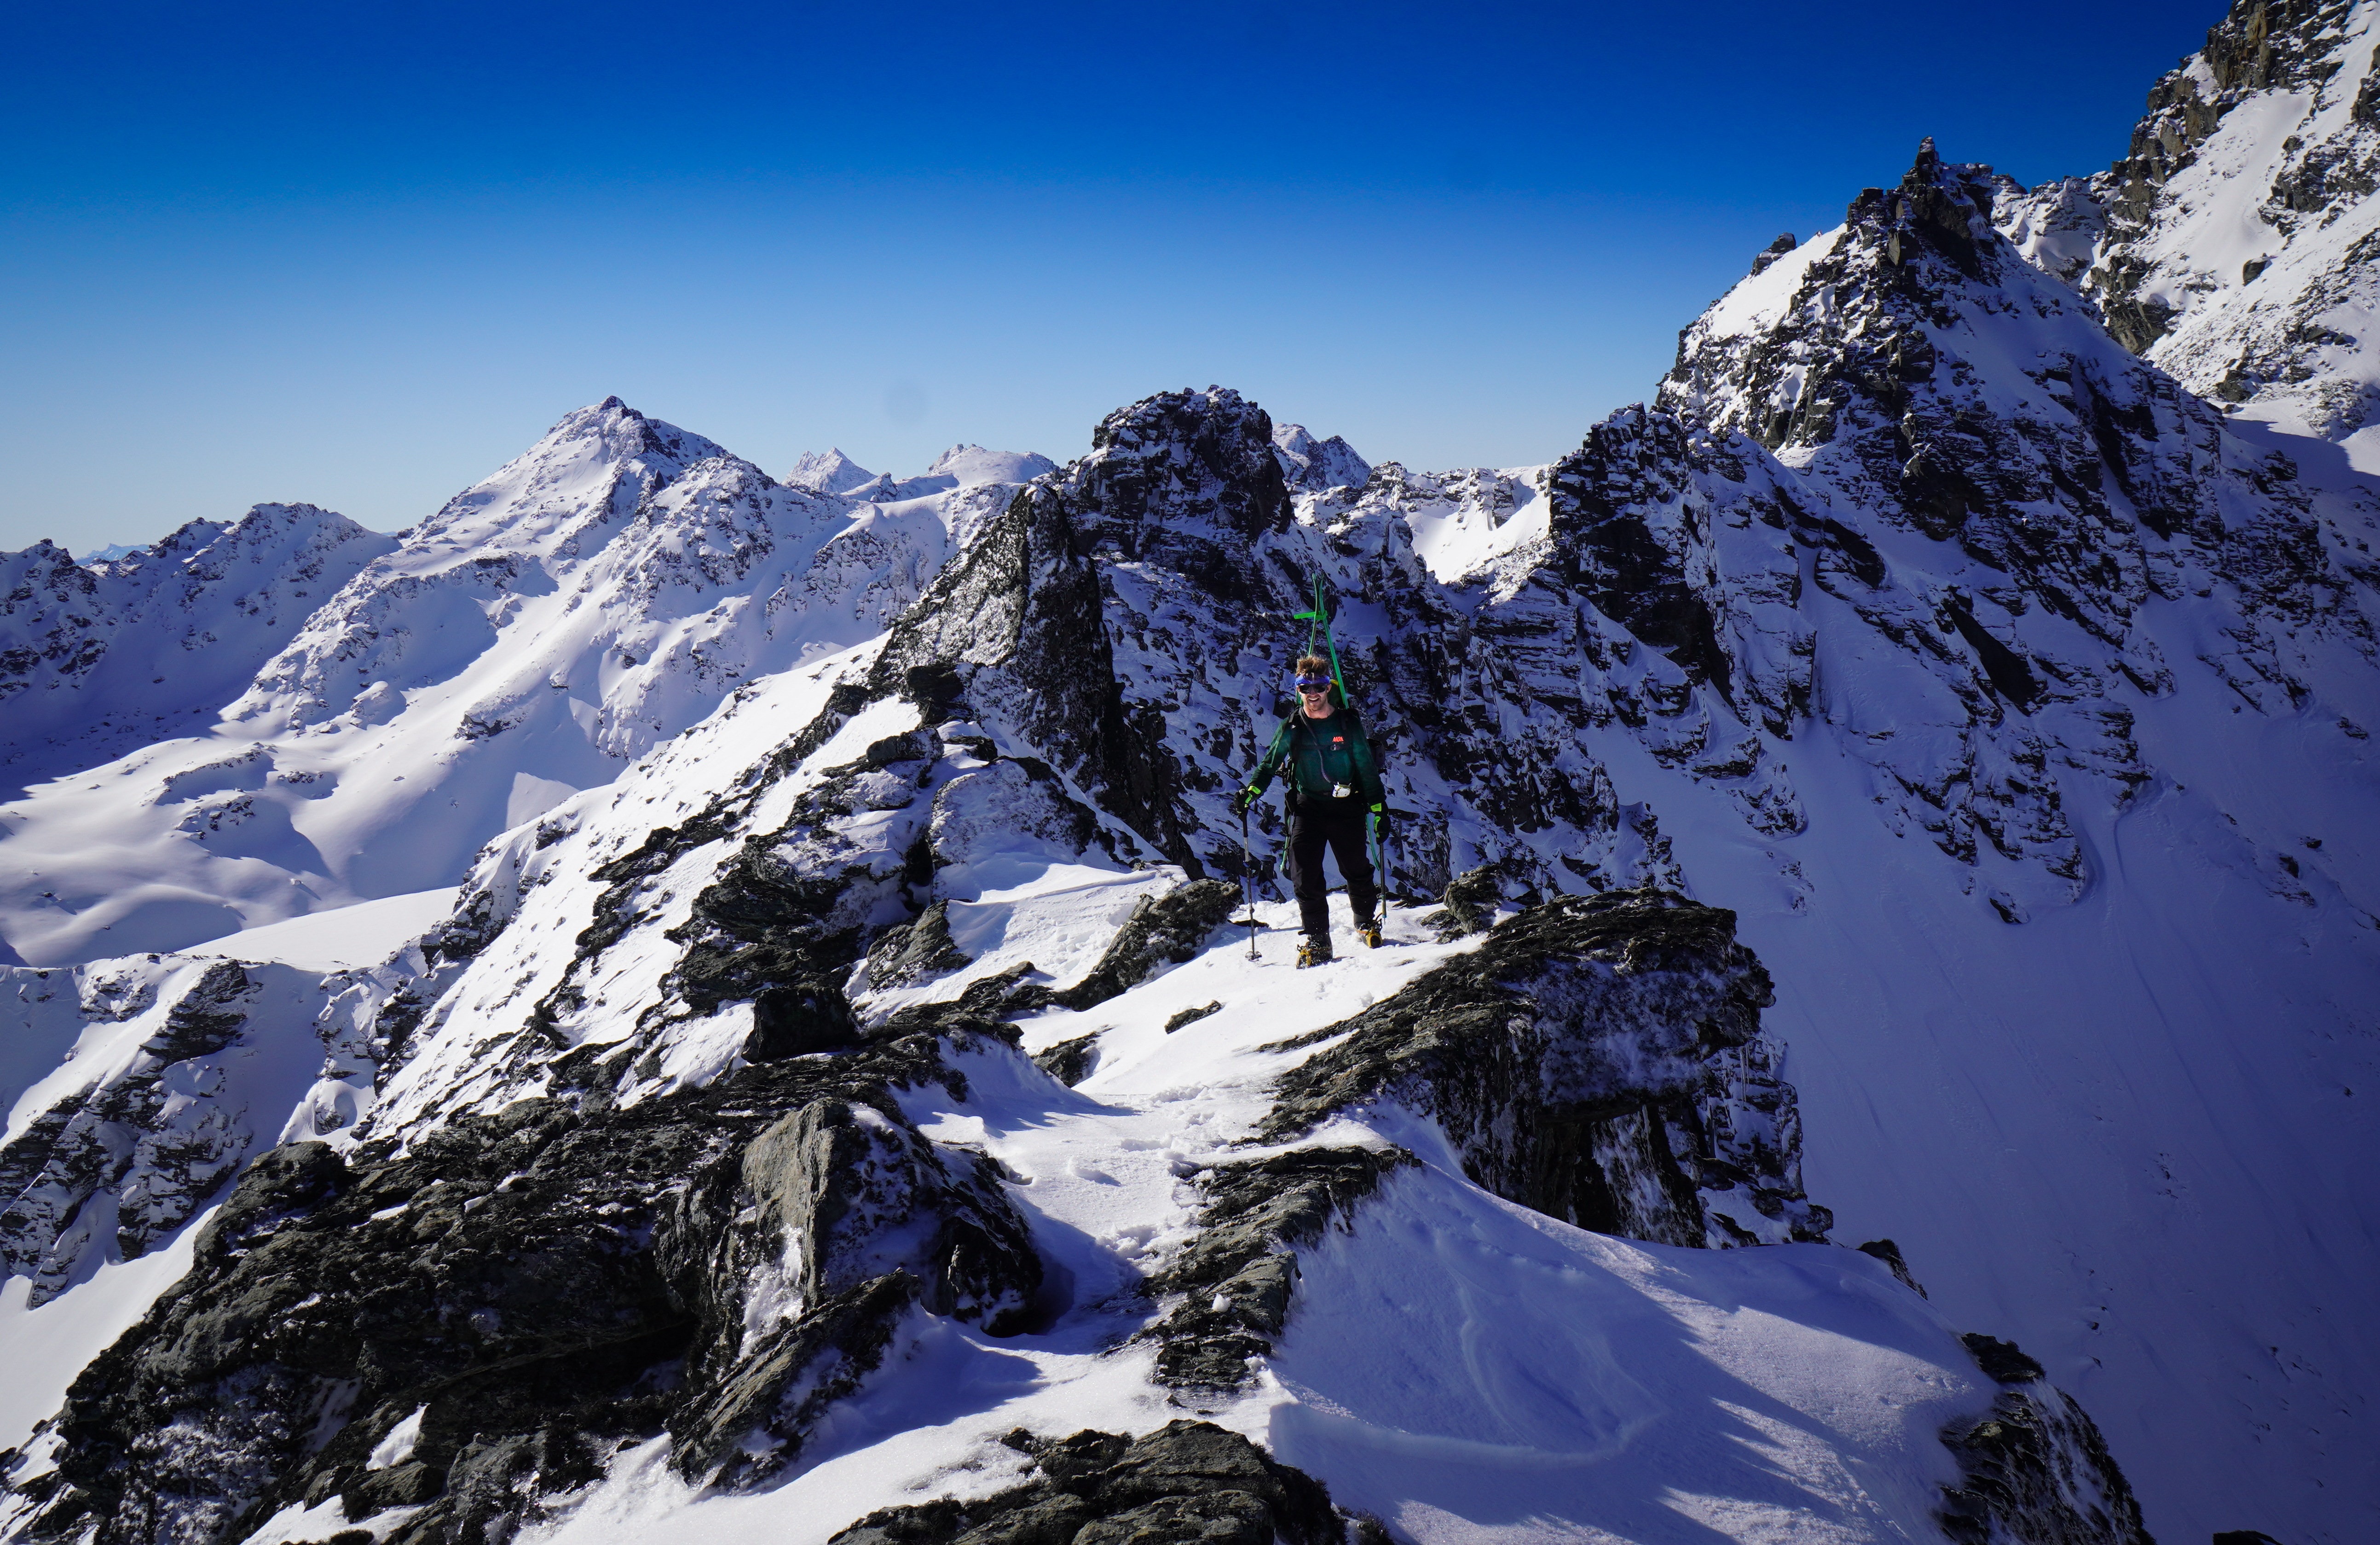
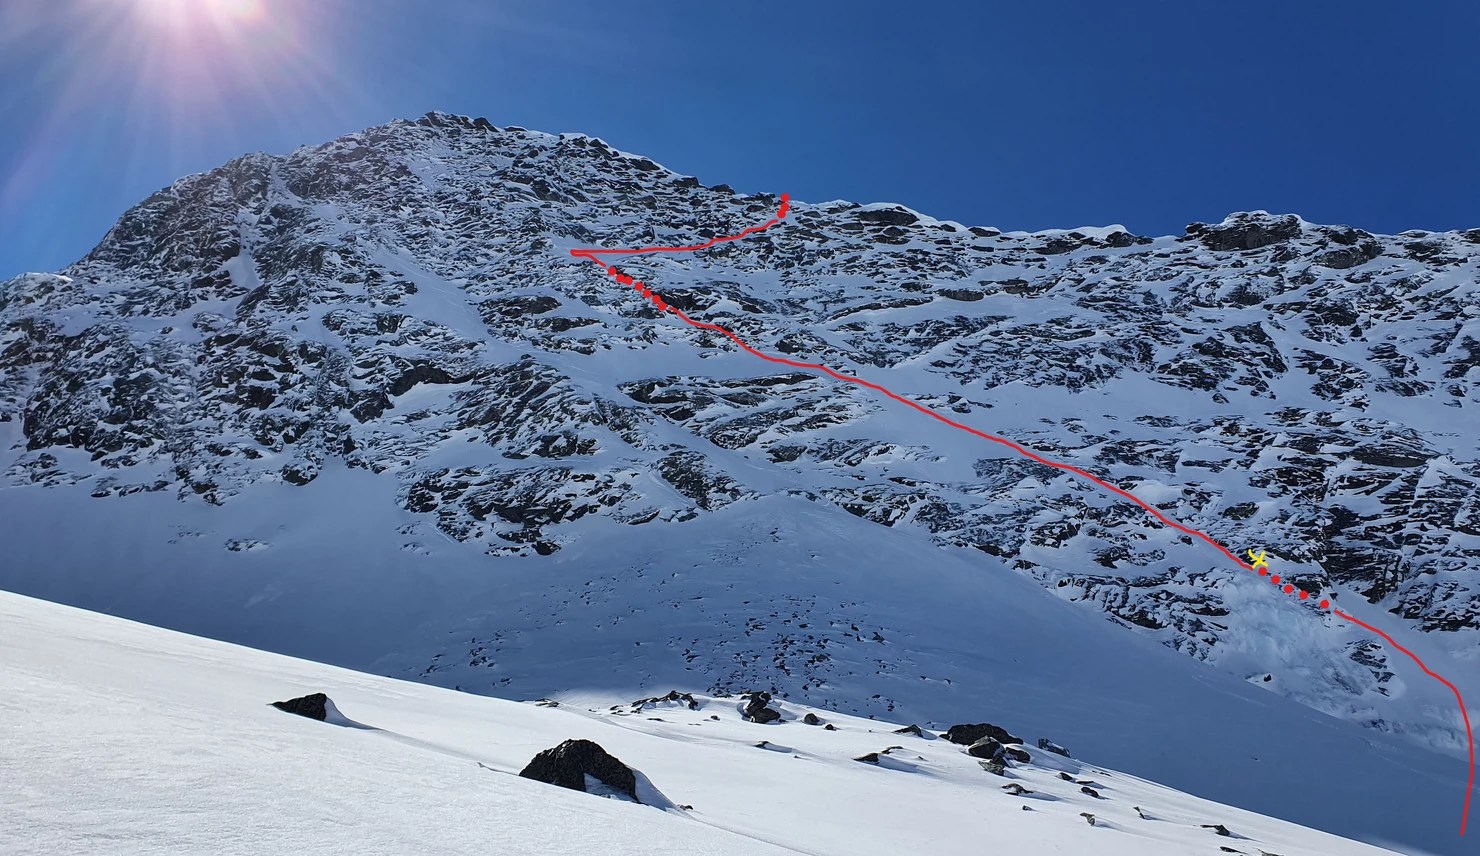
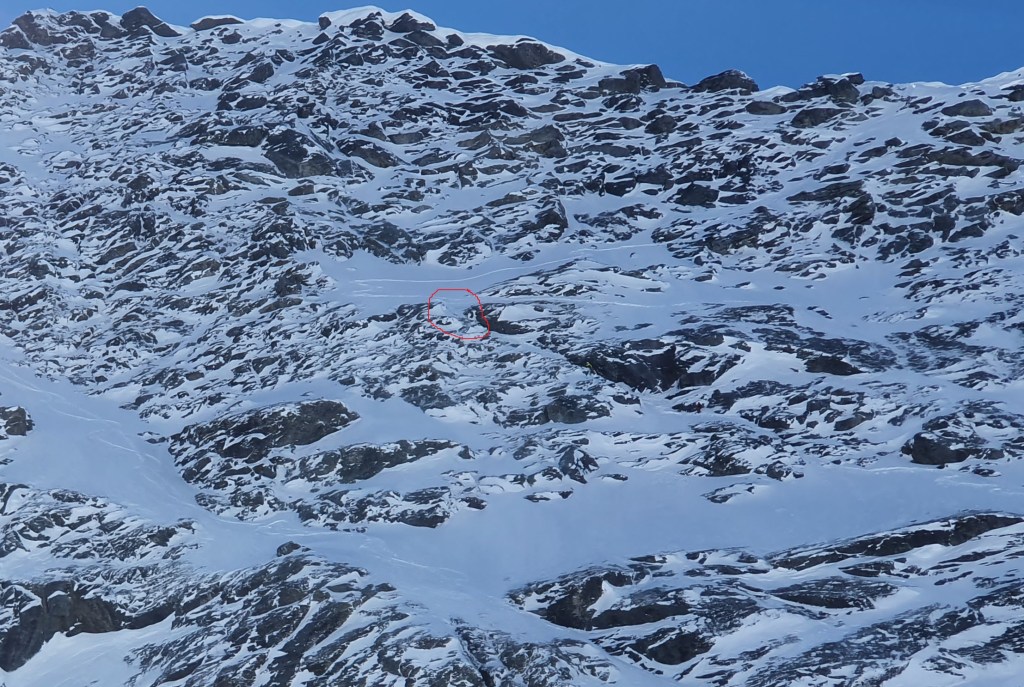
There are a couple of options to the summit – the easiest way is to sidle NE from the col and climb the 45deg ish snow ramps up the E face of Murchison, which lead to a ridge and a short downclimb and then easy snow slopes up the N face to the summit. We chose a more technical looking option up the S face from the col, with some ice and rock steps. We simul-climbed – the gear was sparse but we found a few reasonable nut placements/slings.

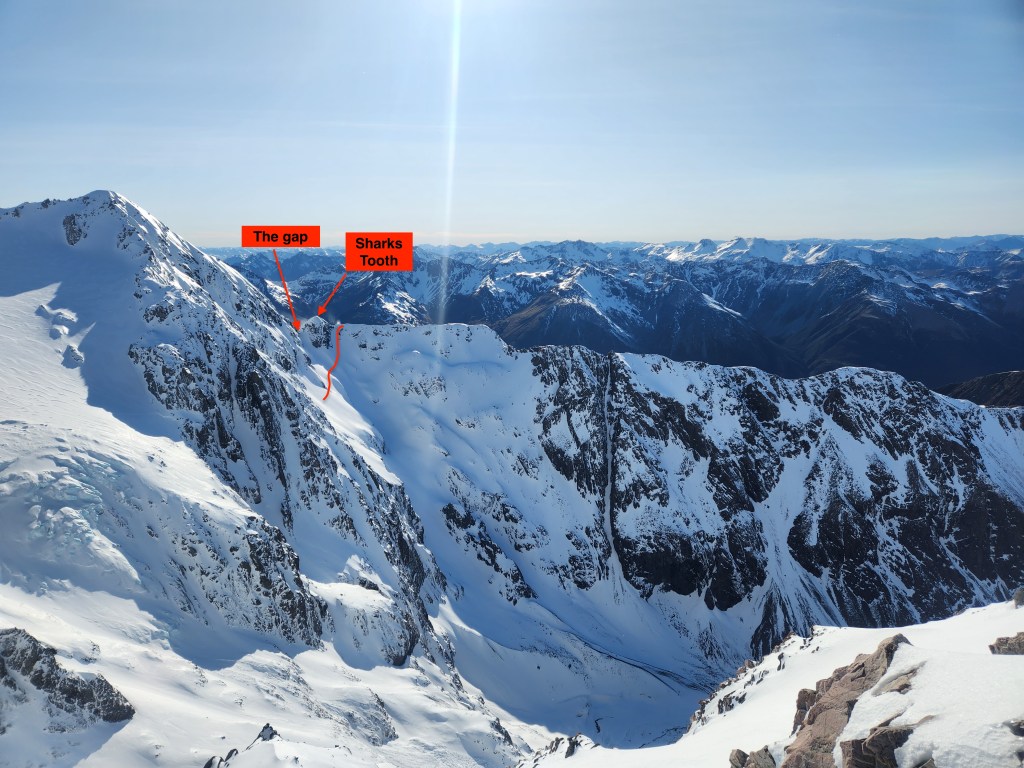
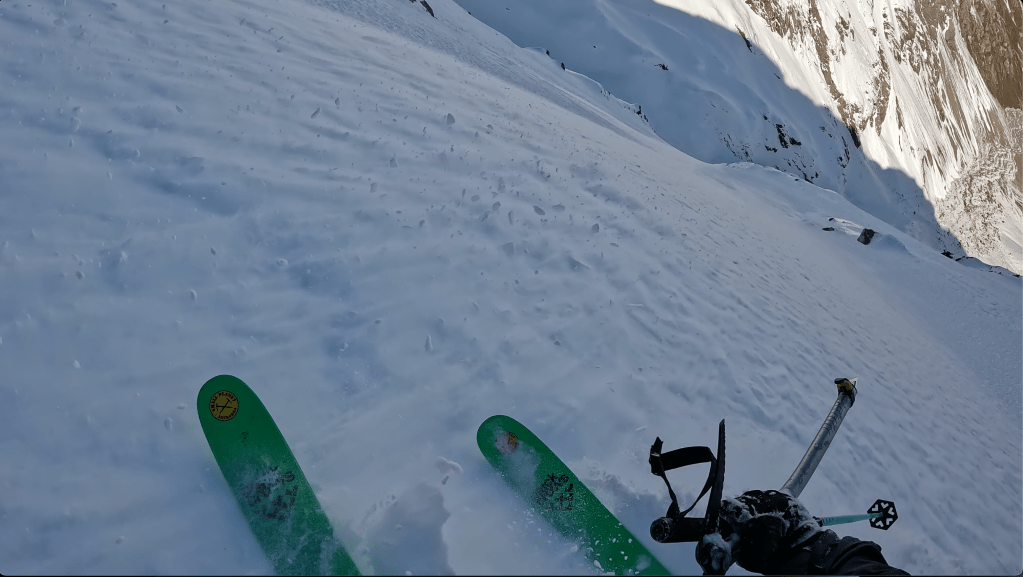
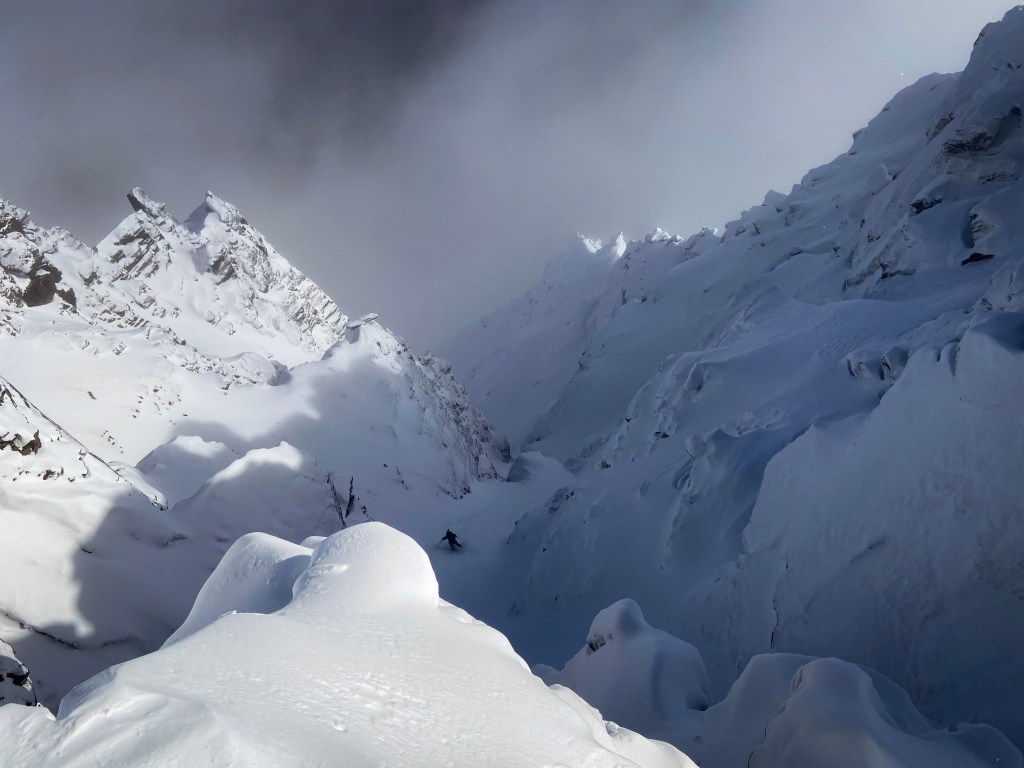
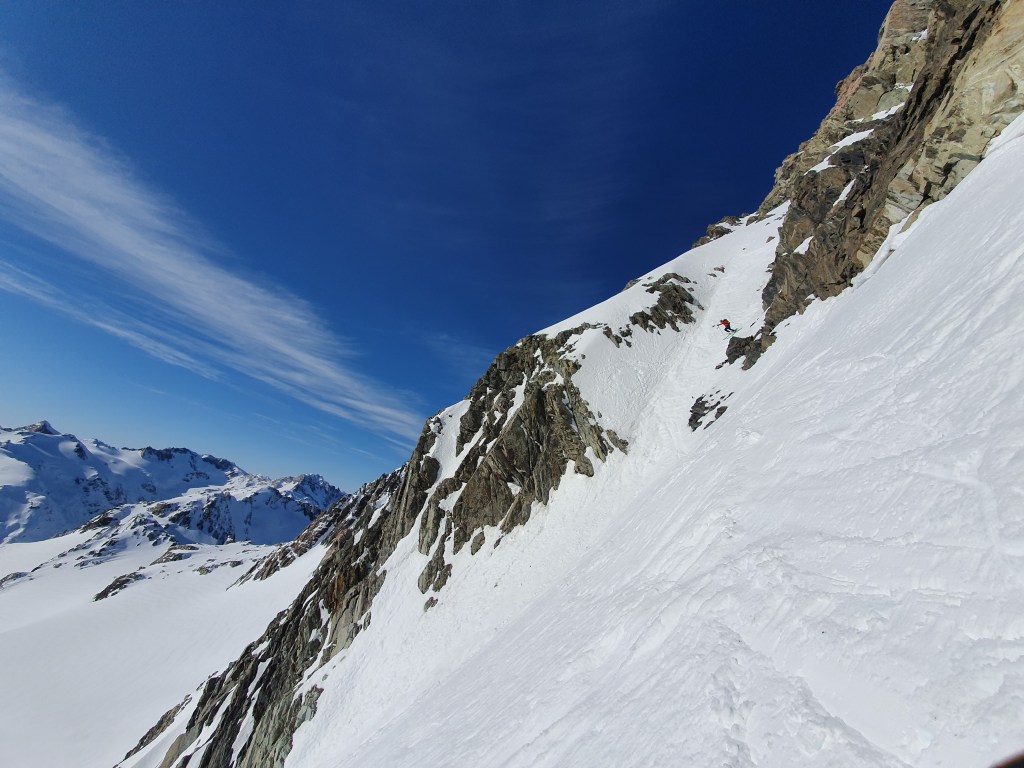
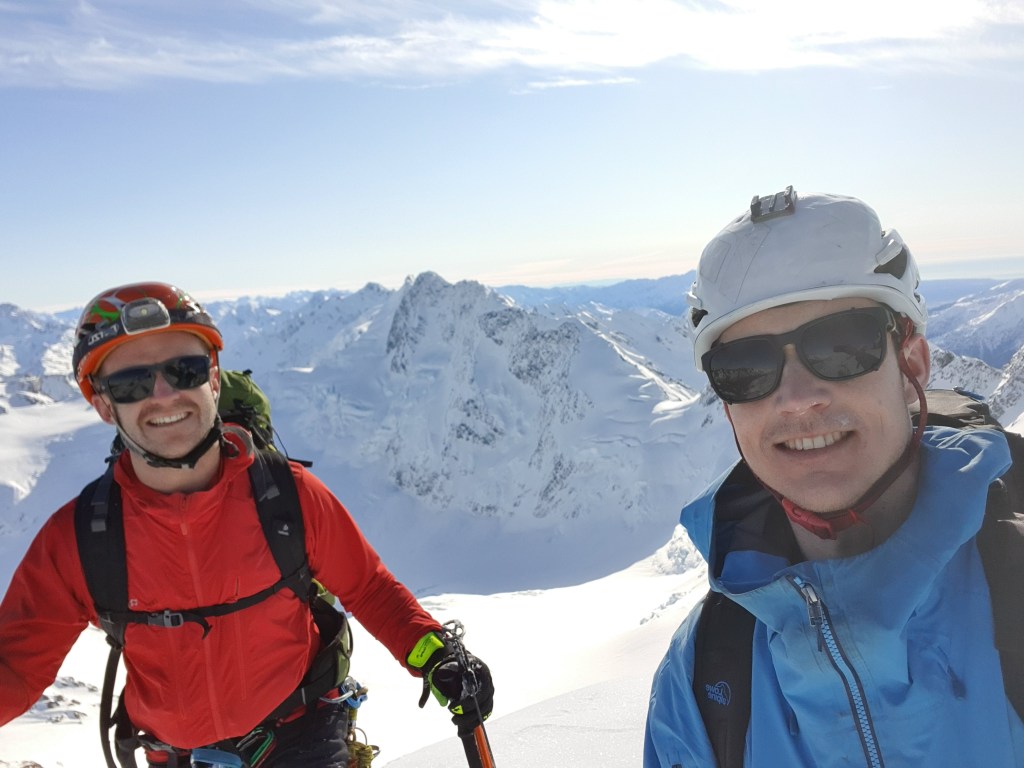
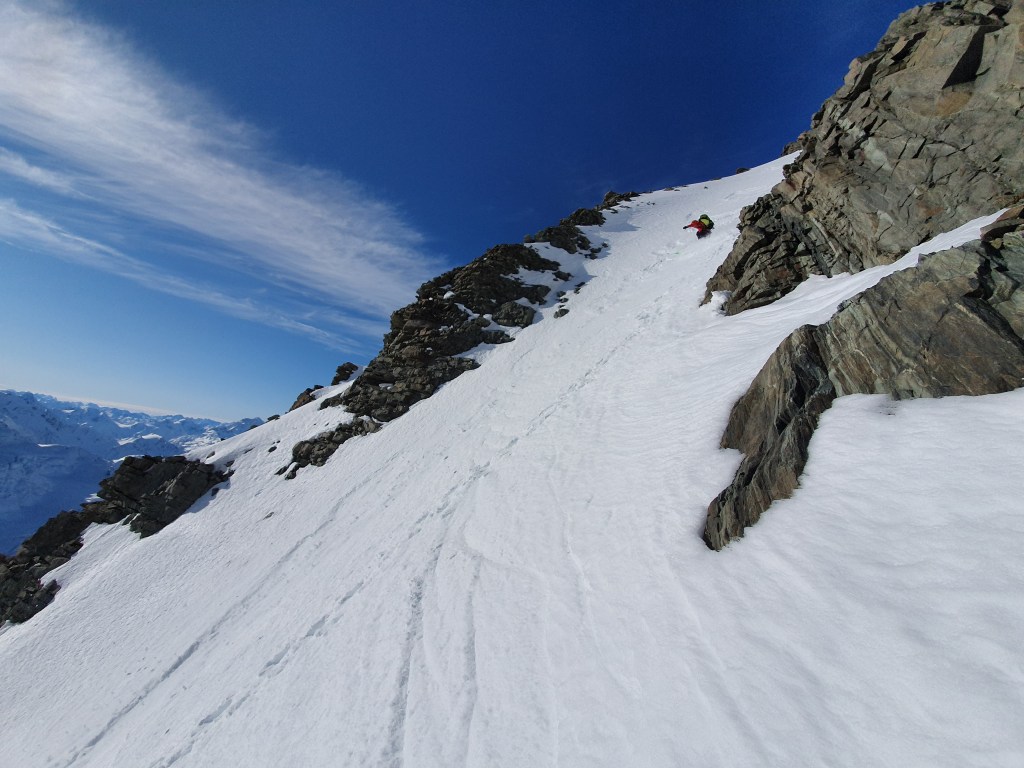
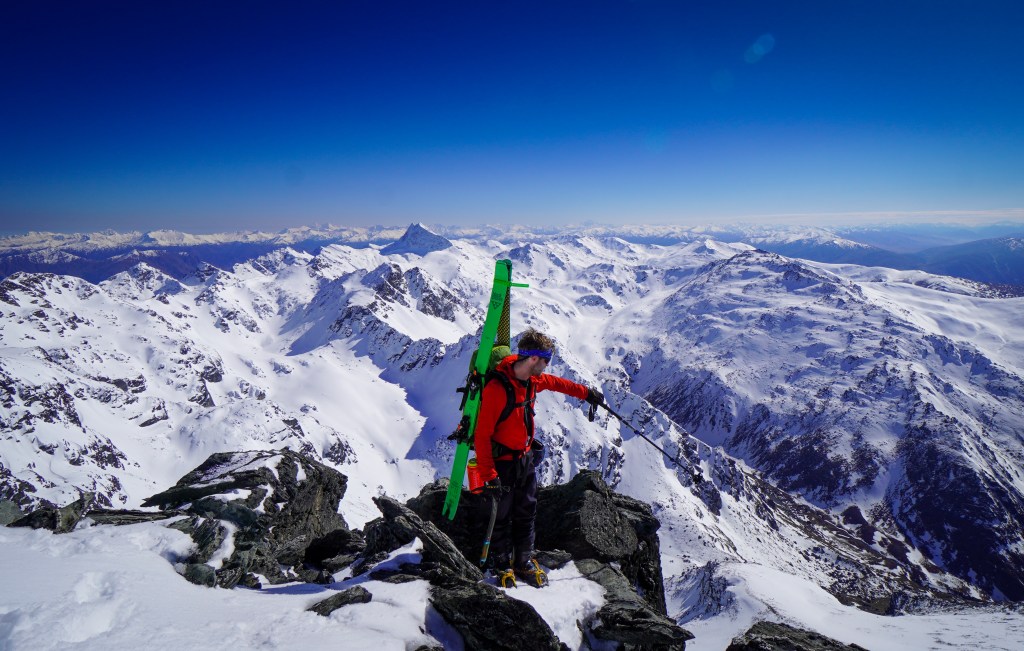
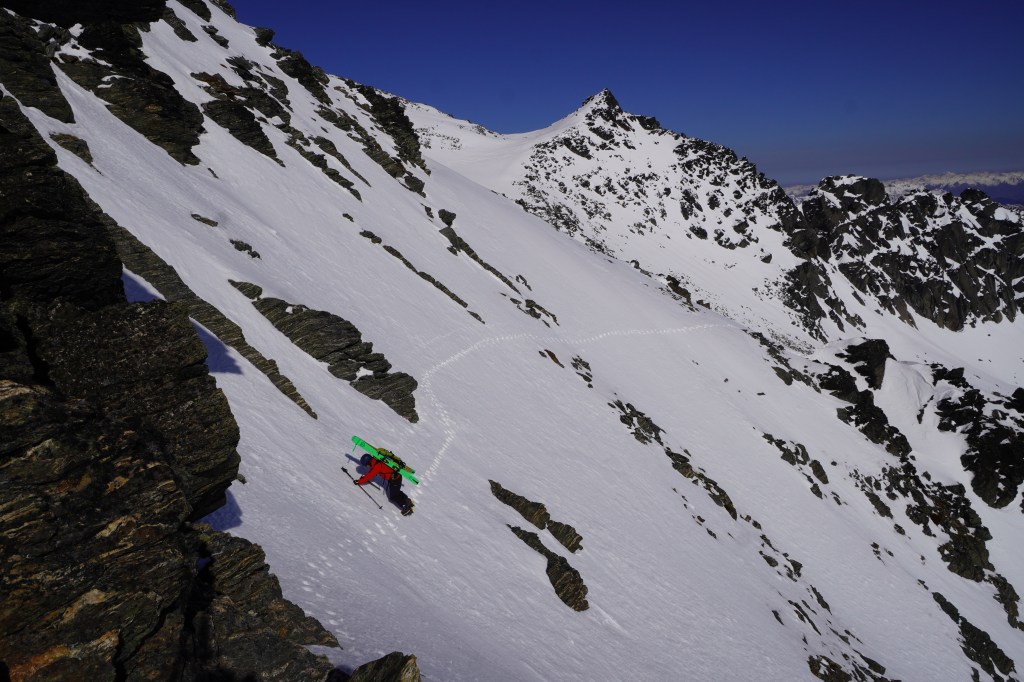
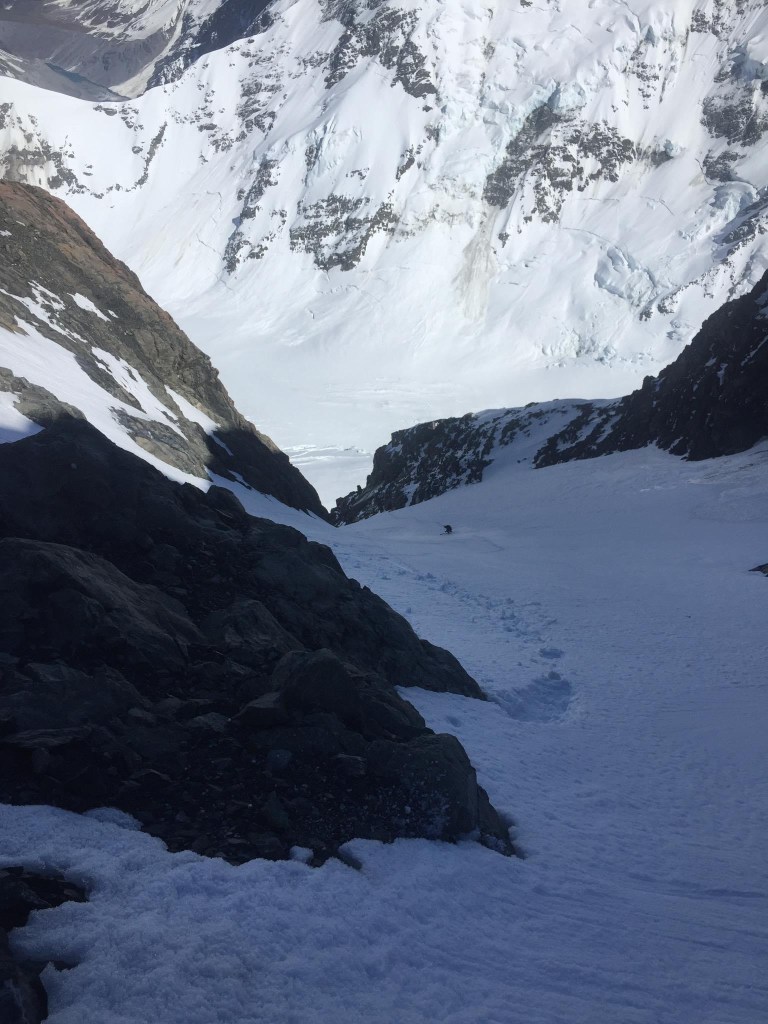
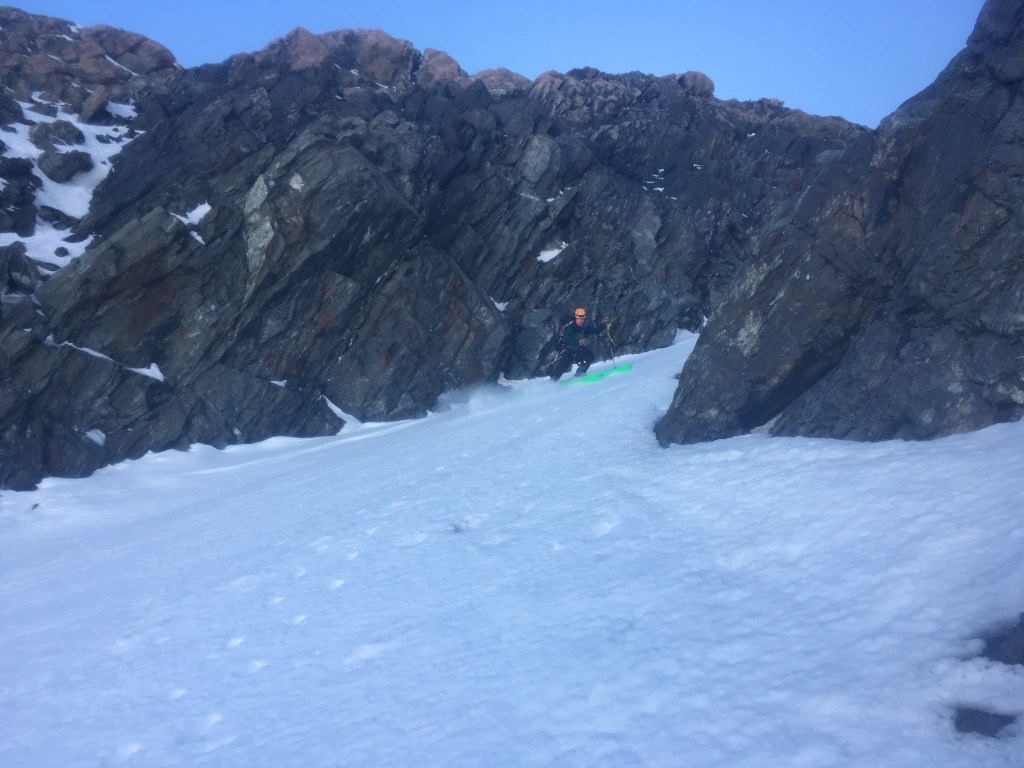
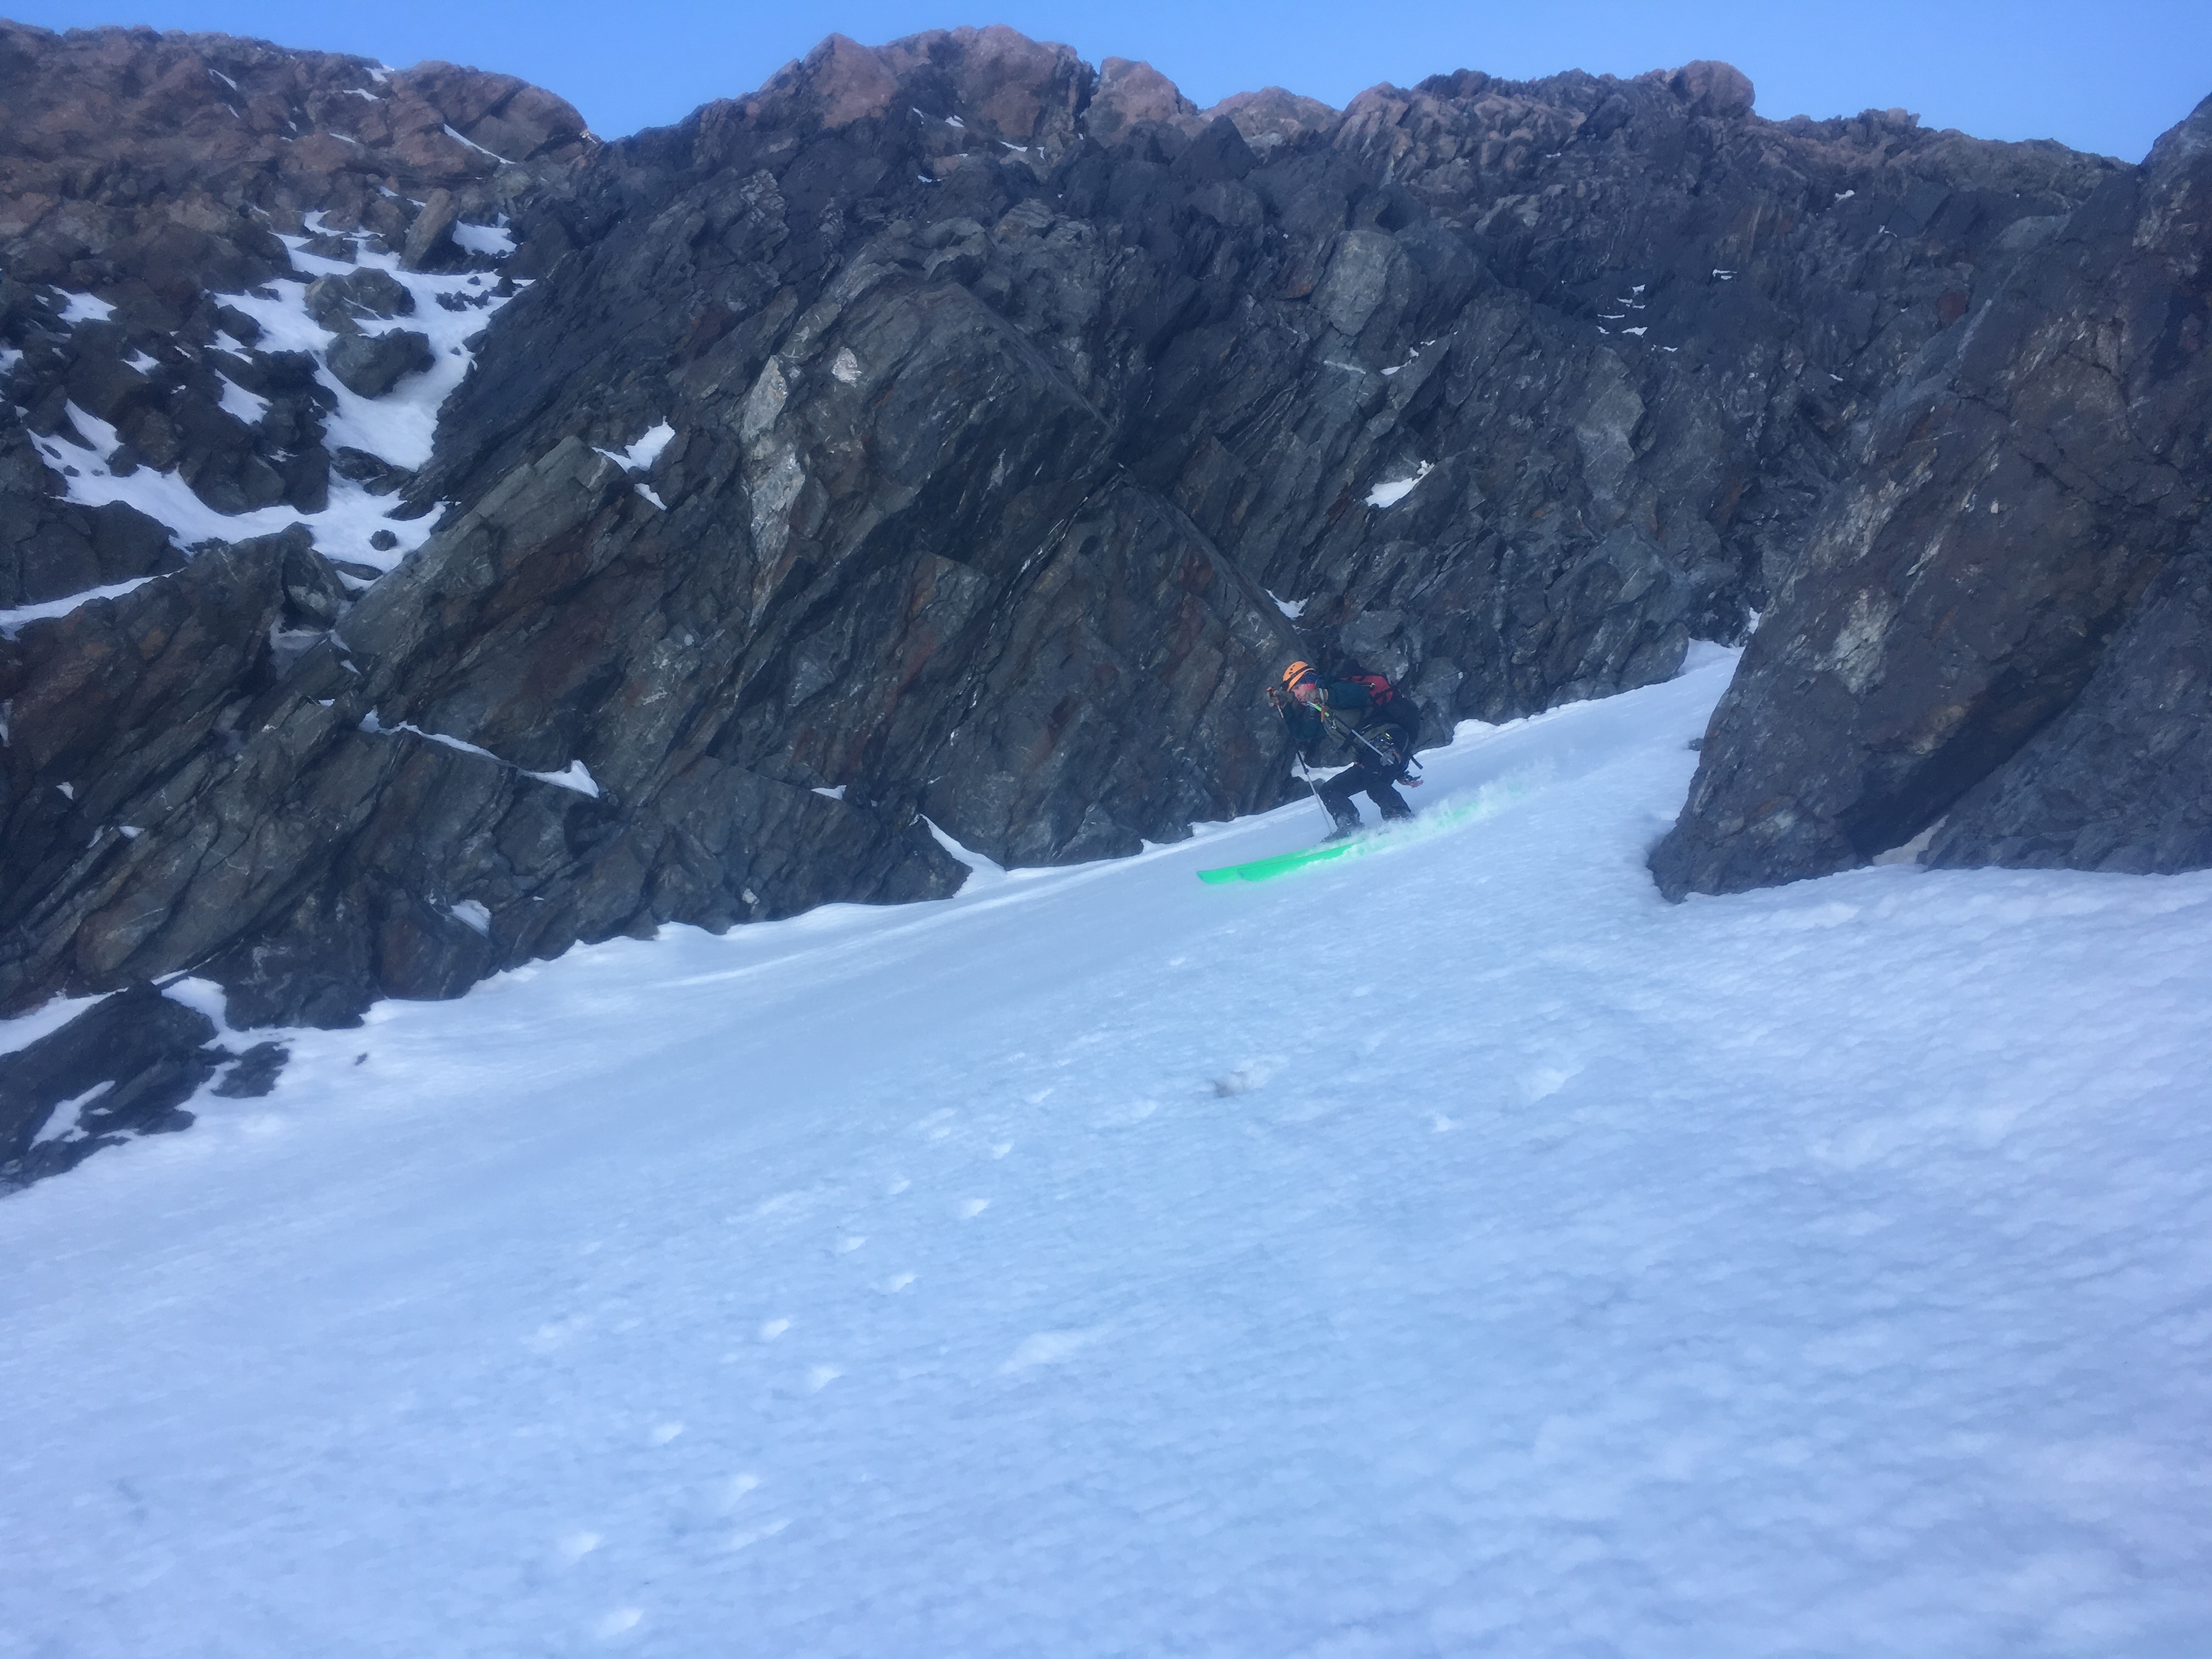
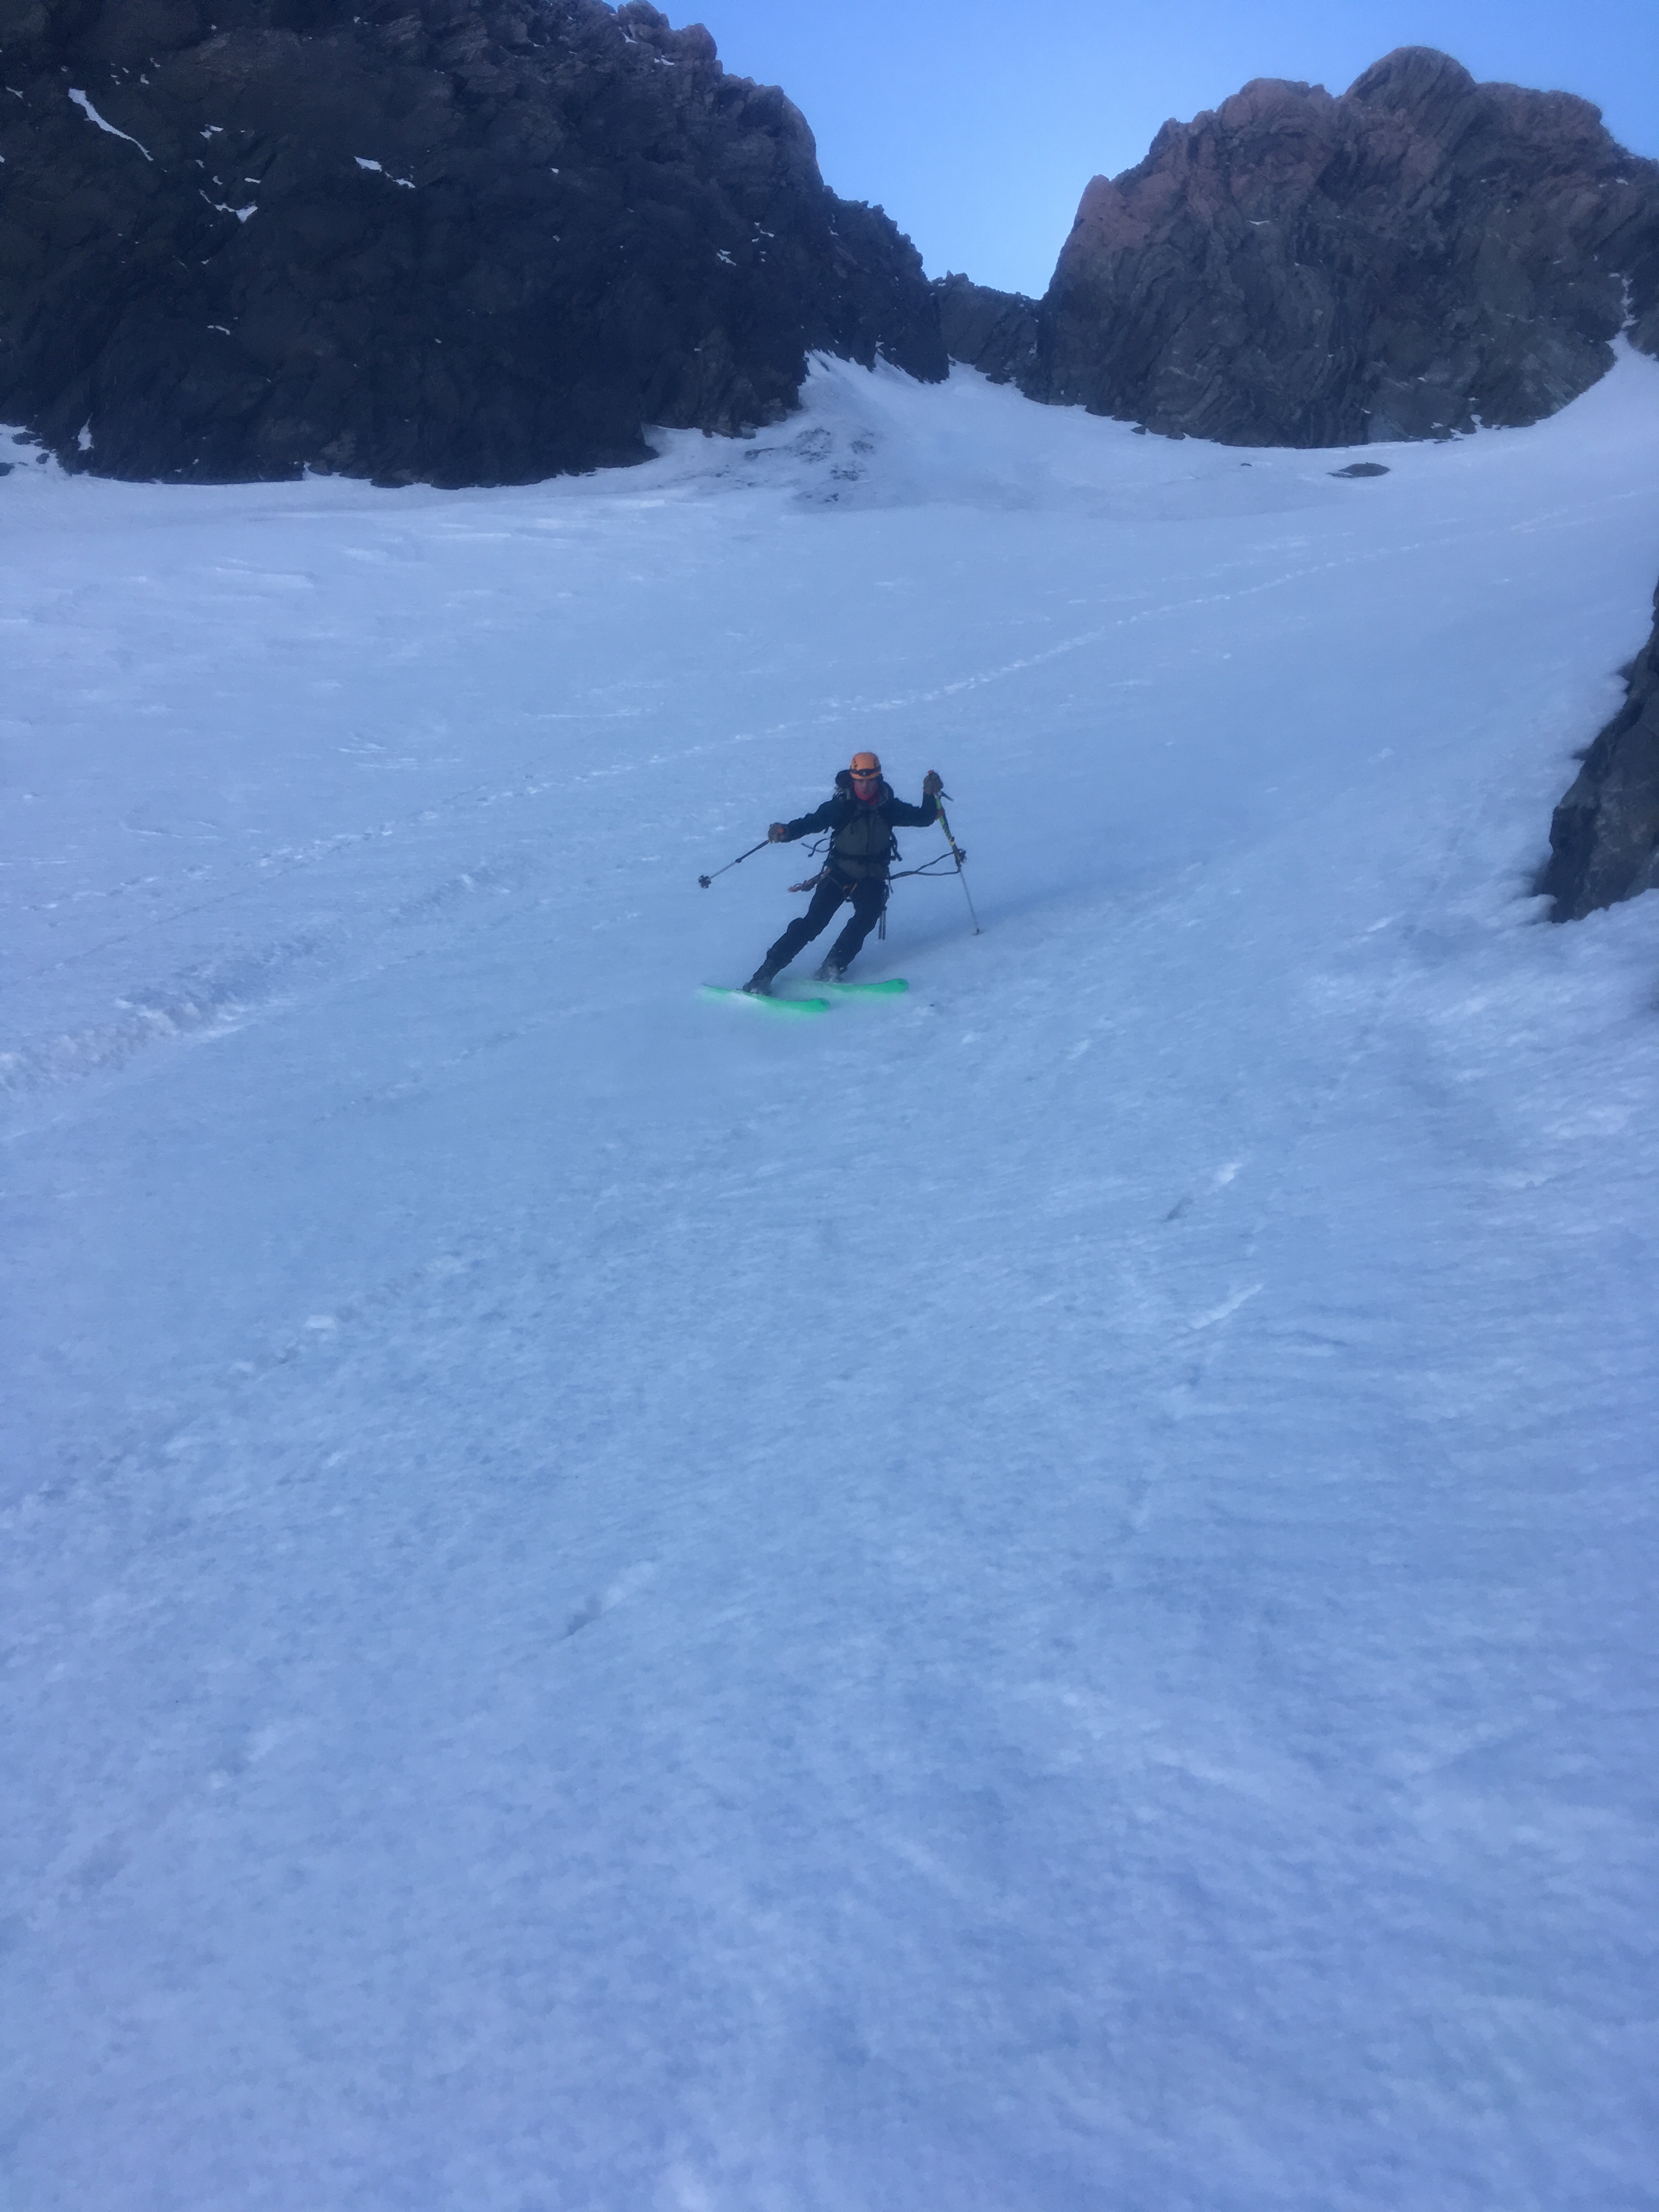
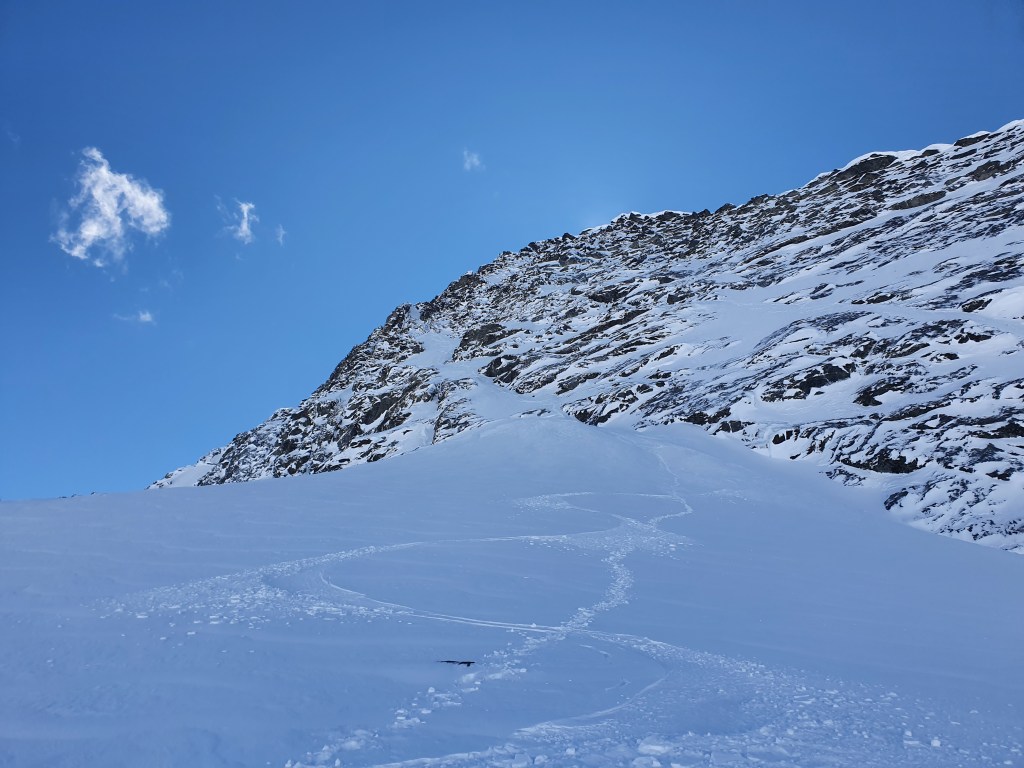
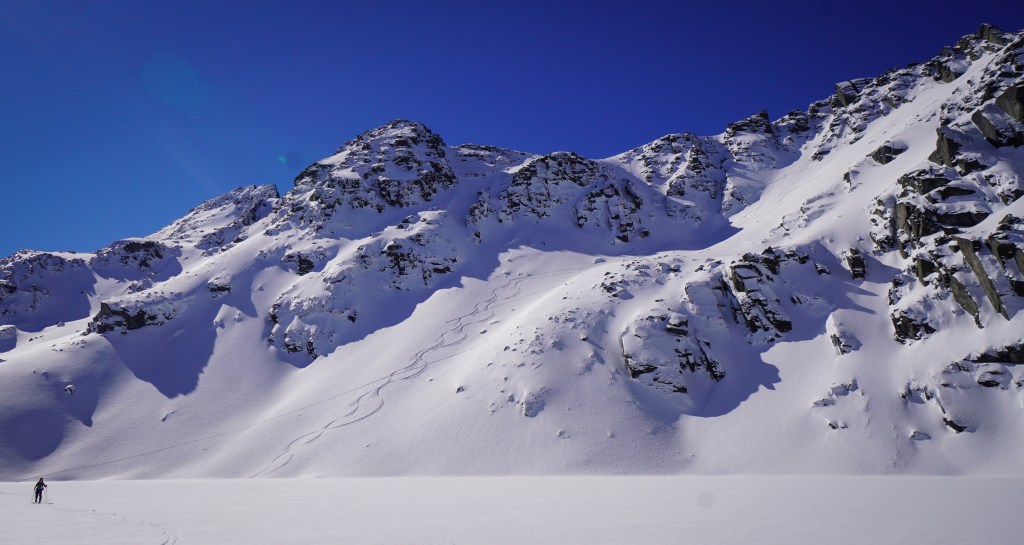
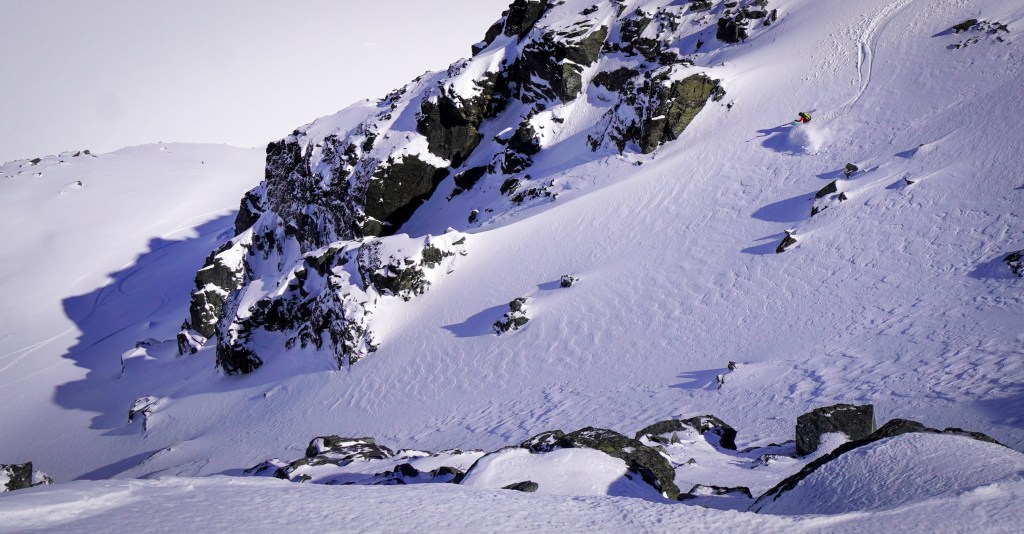
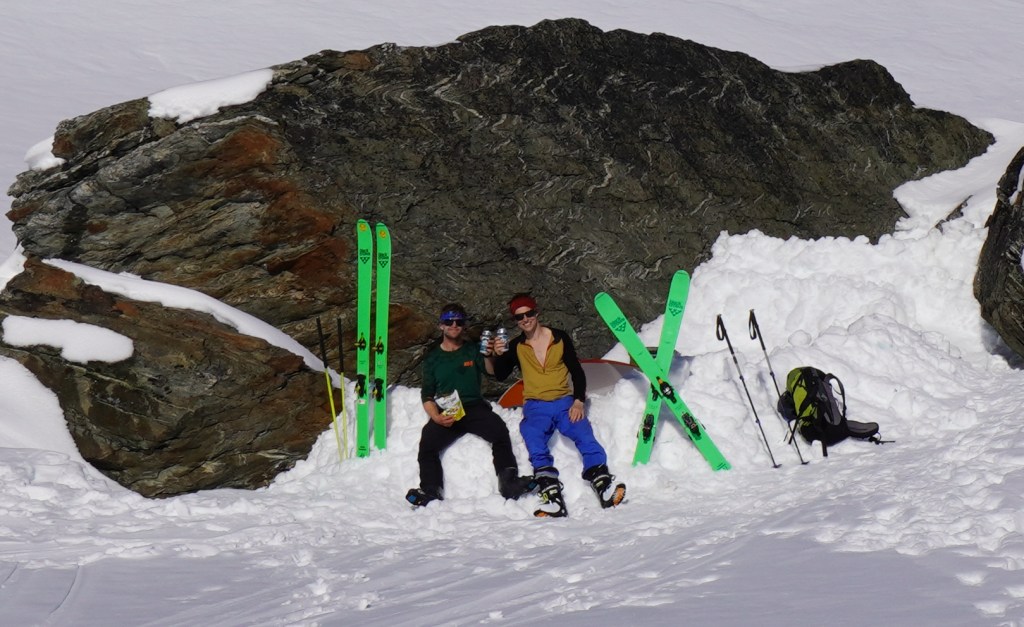
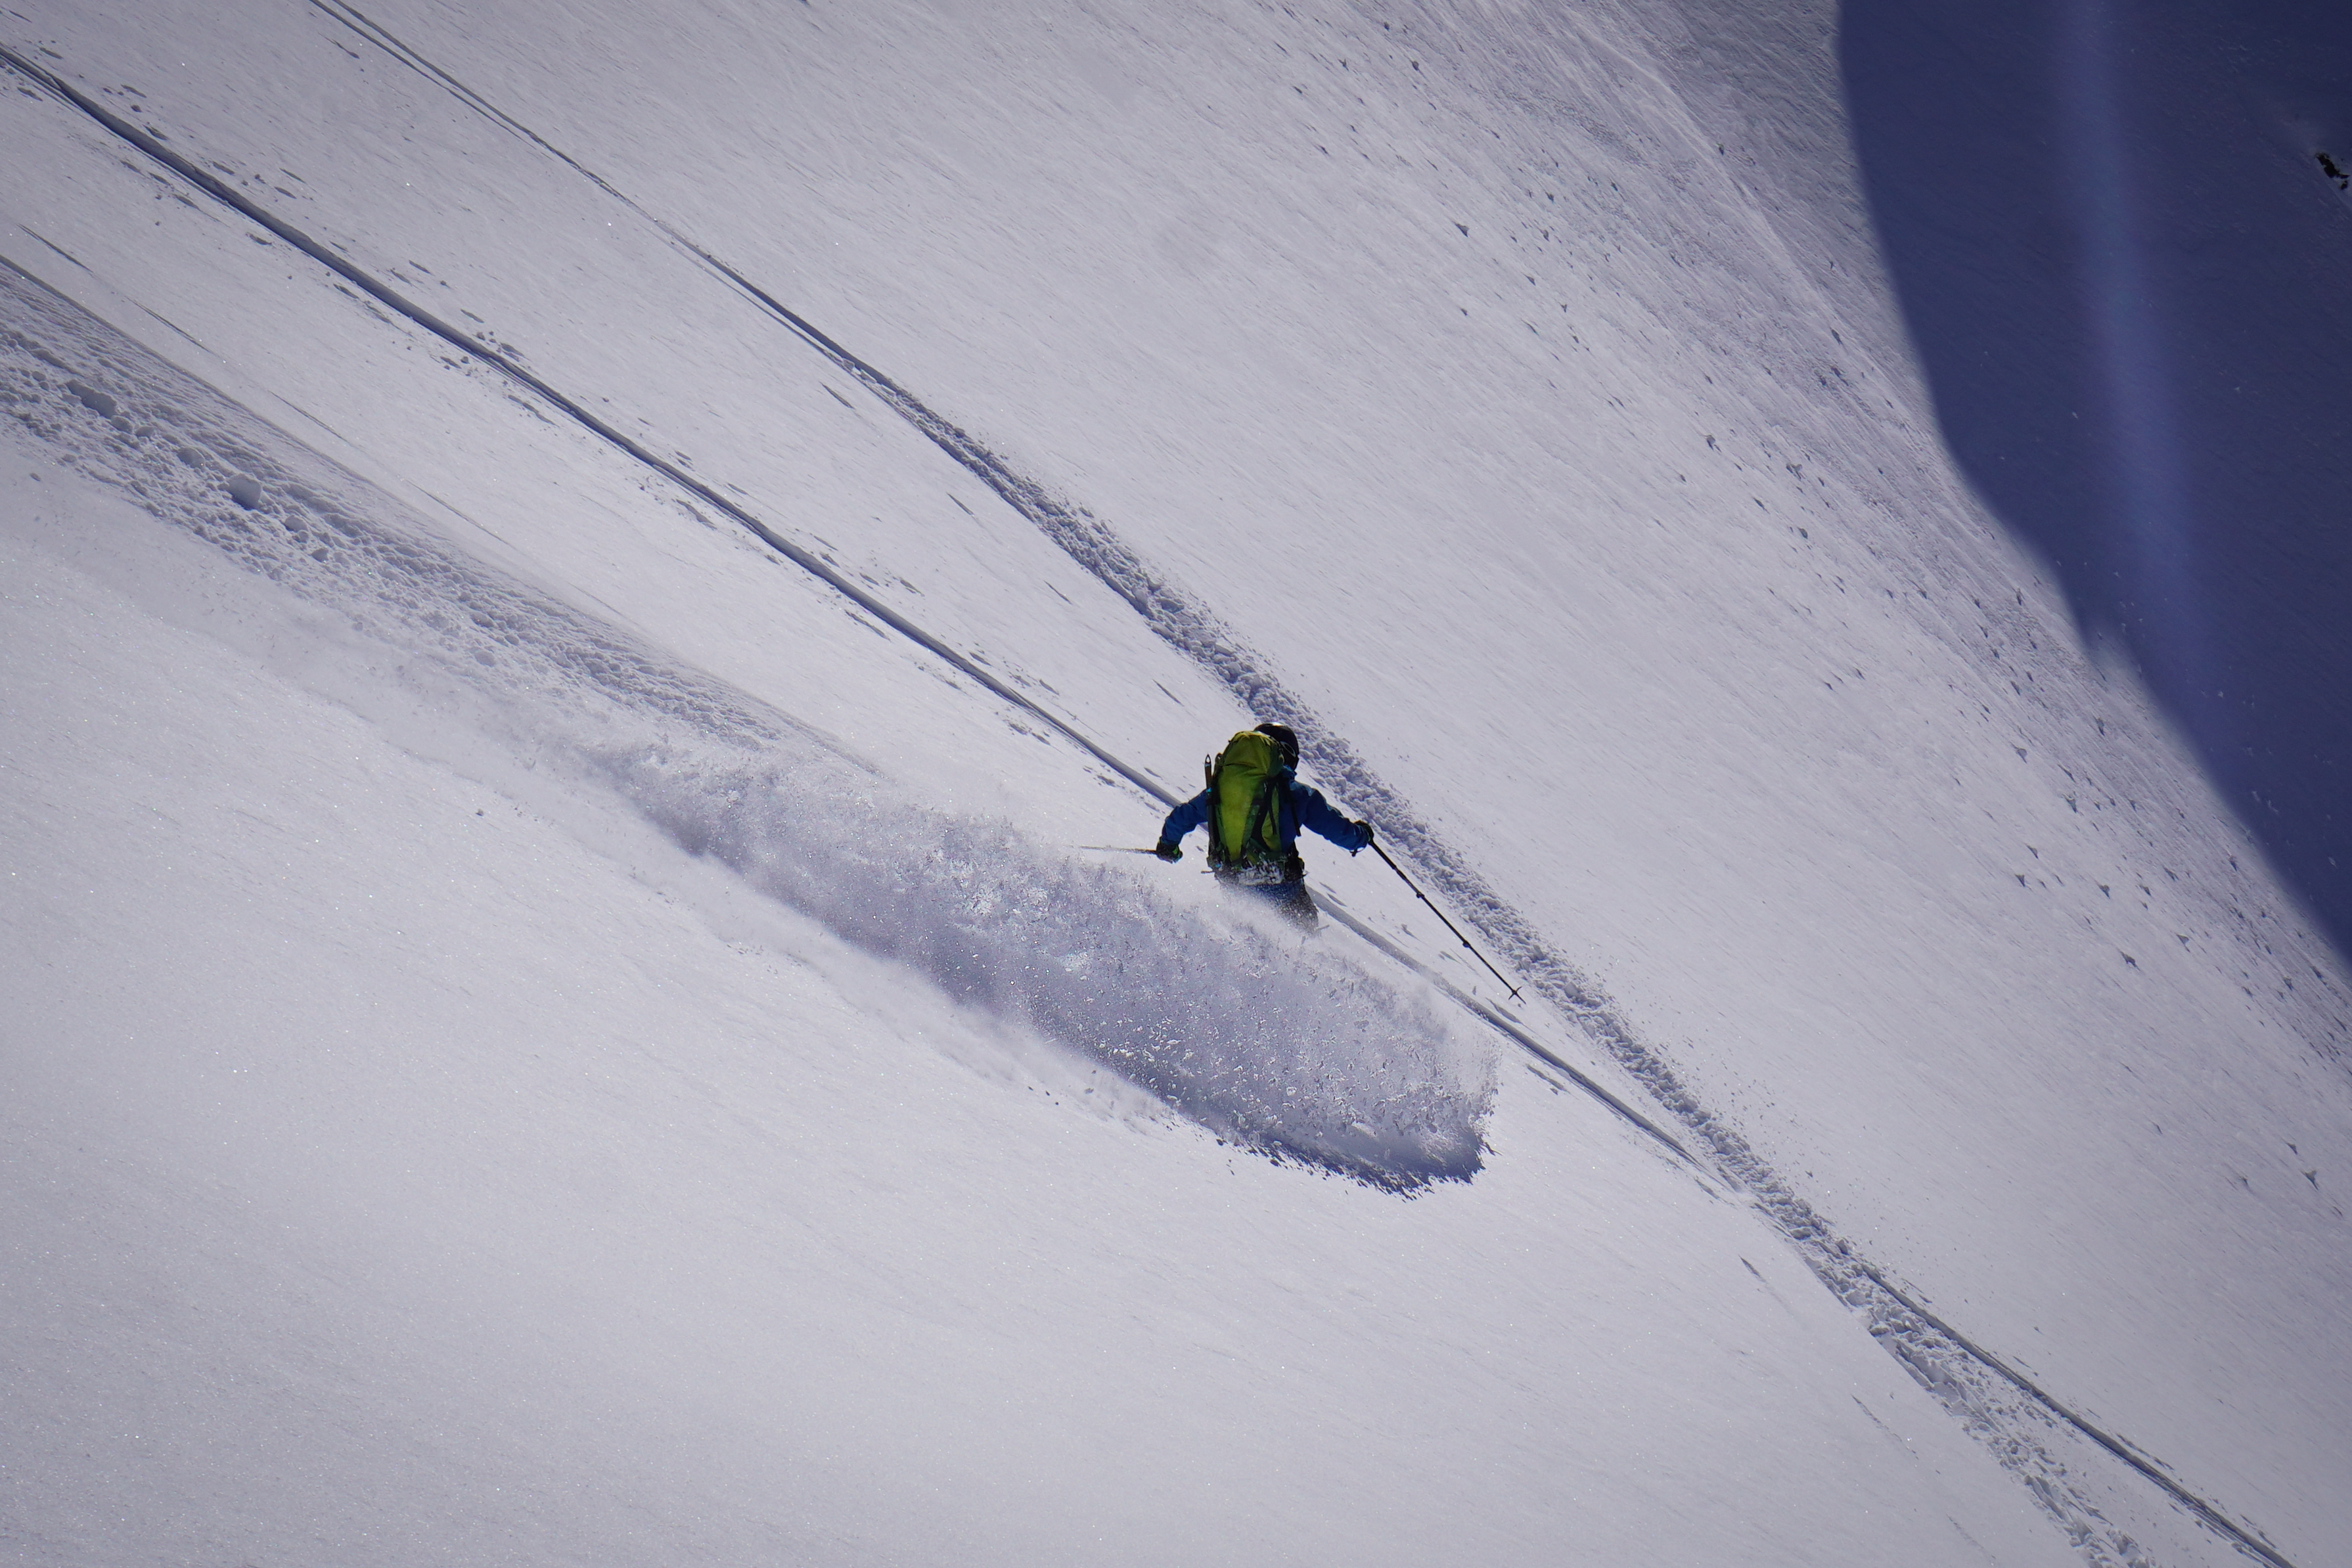
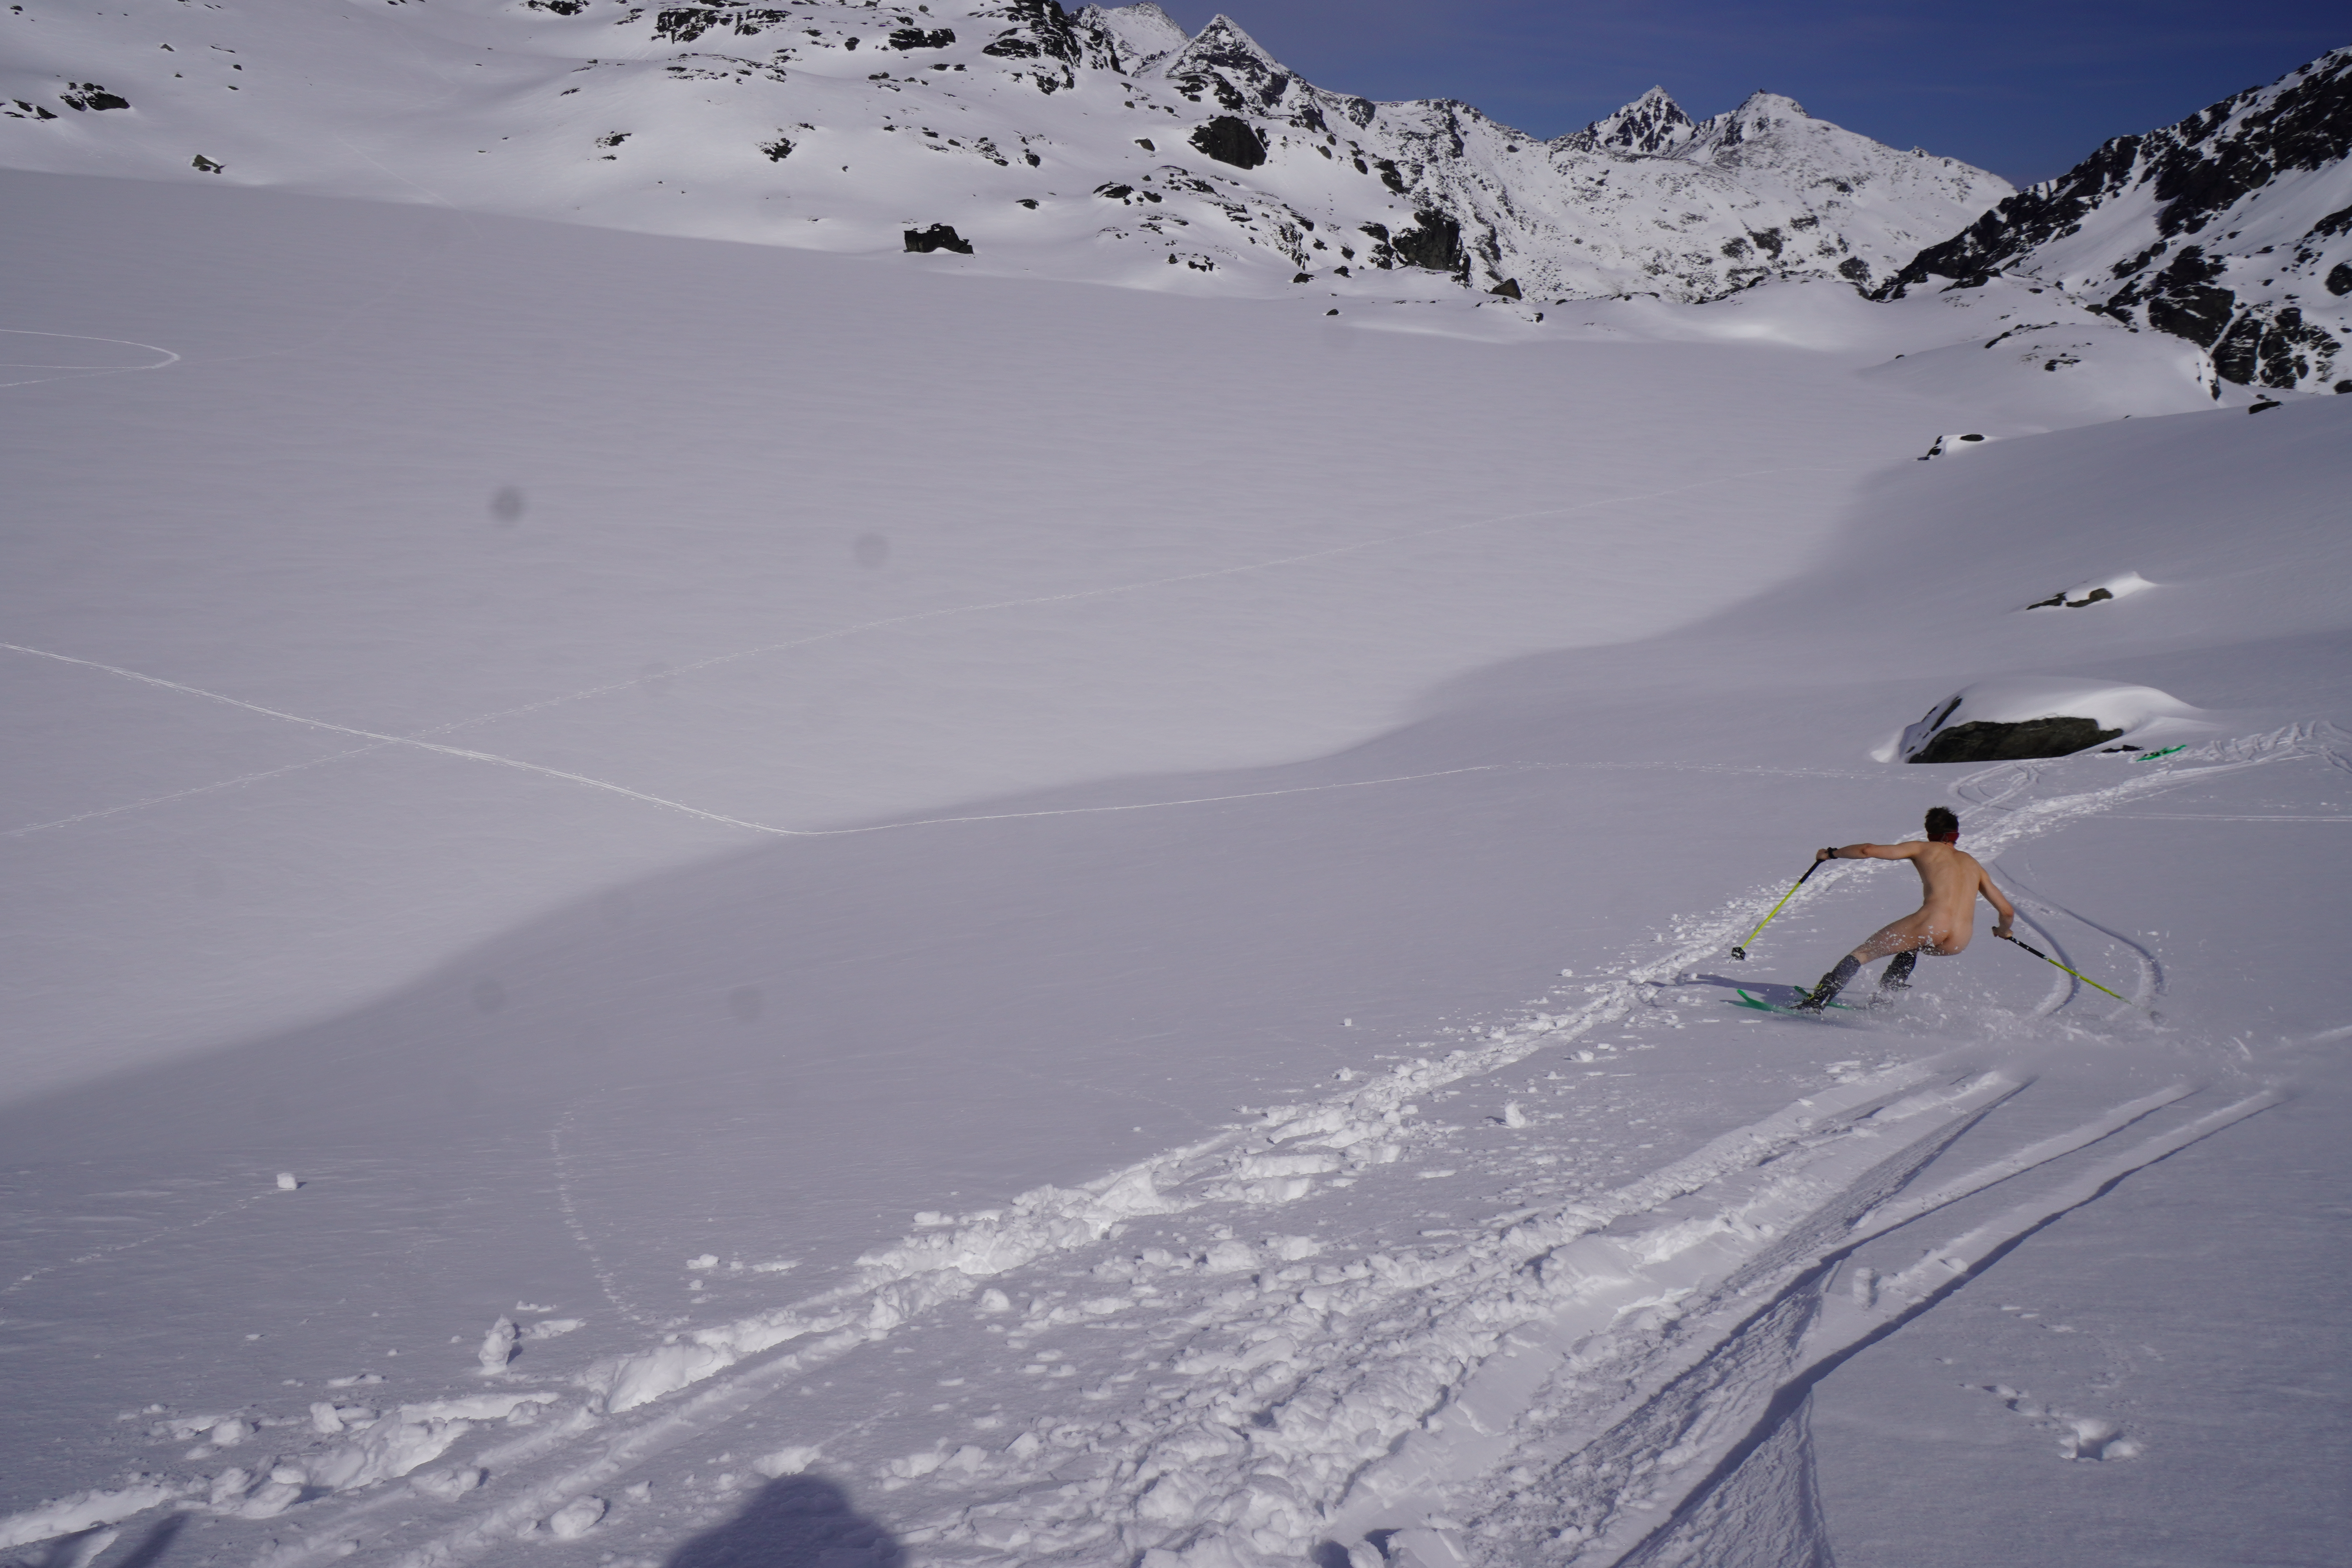
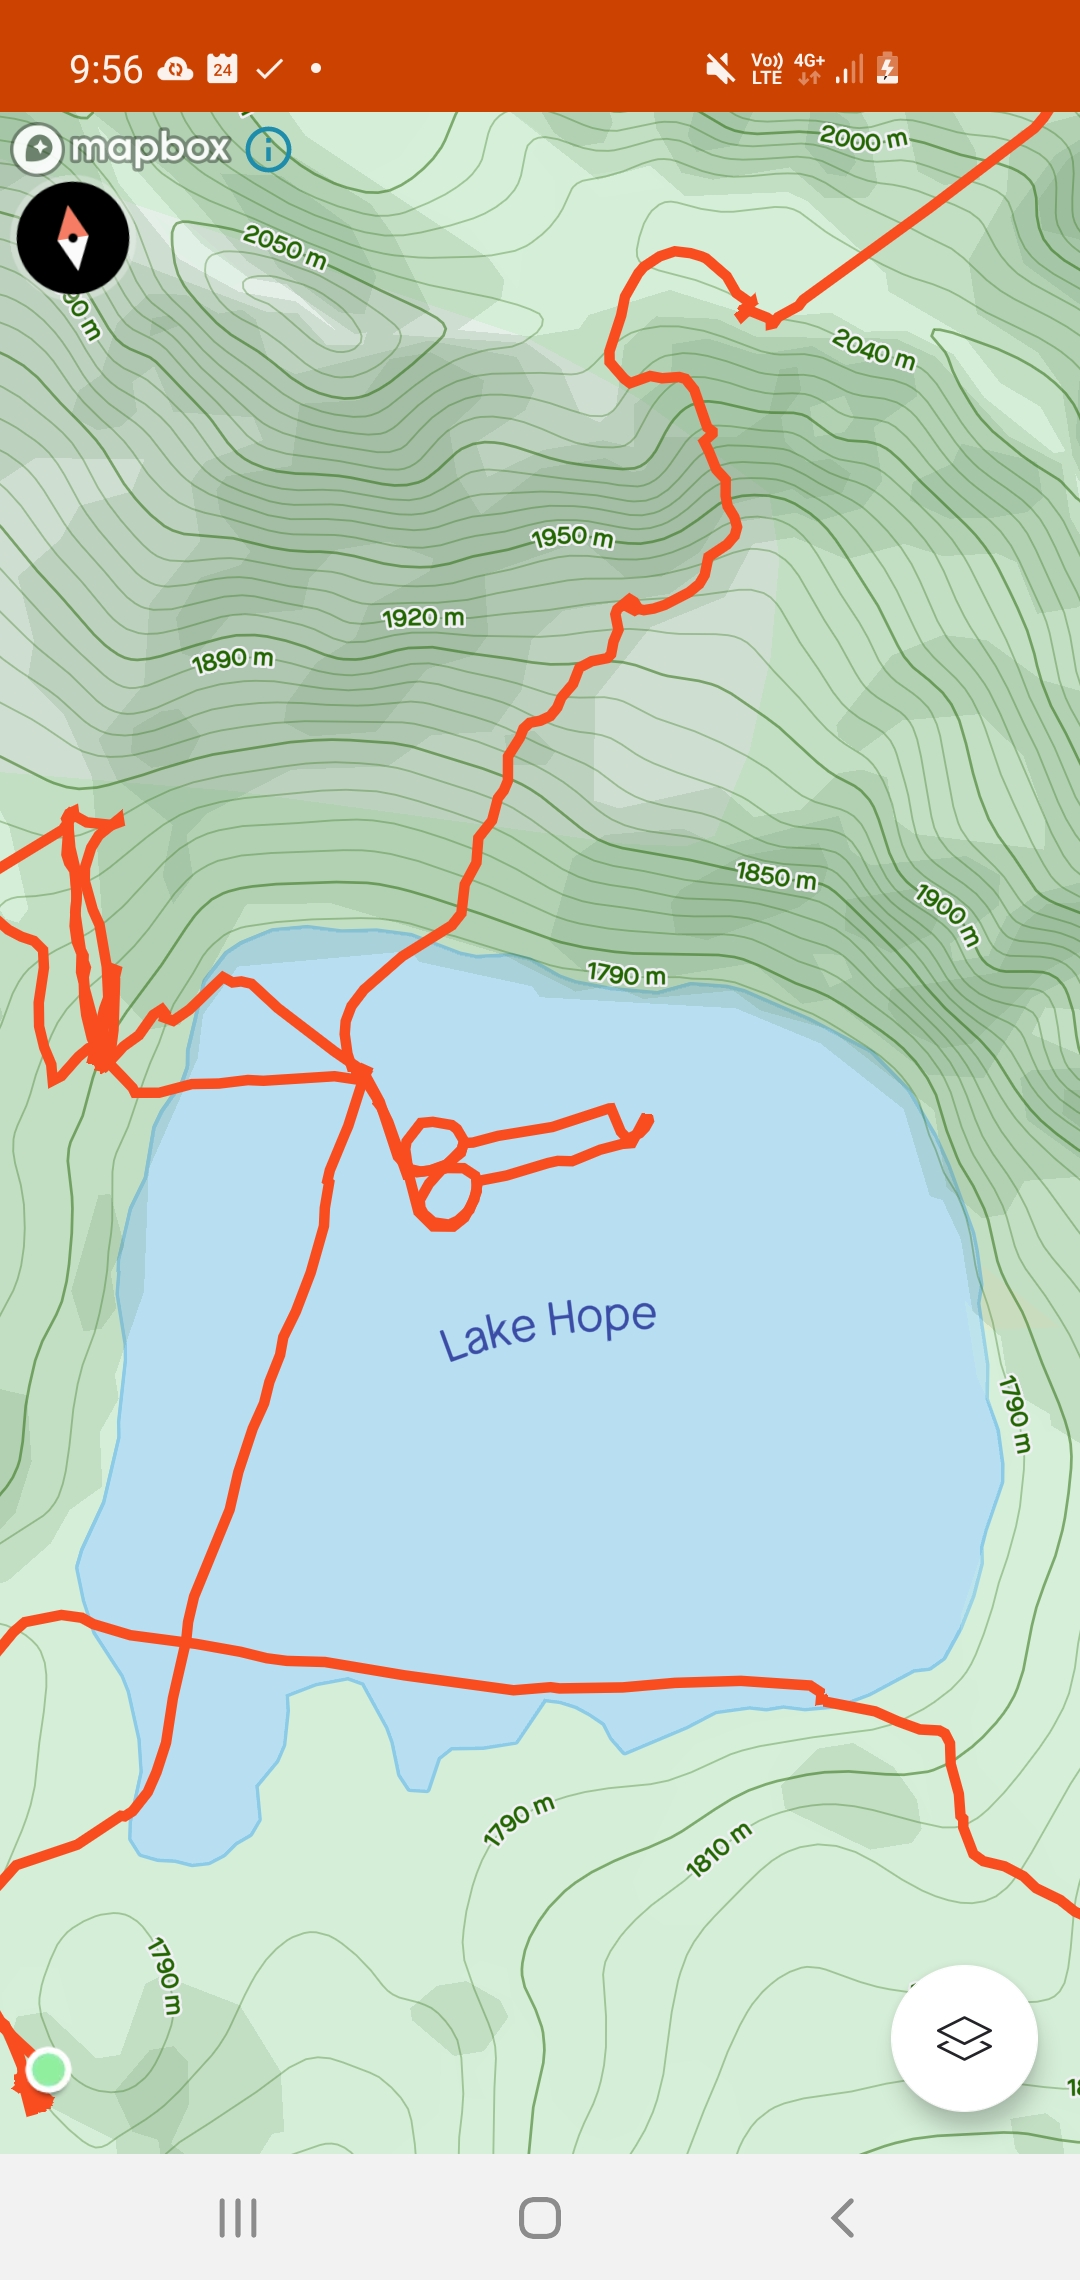
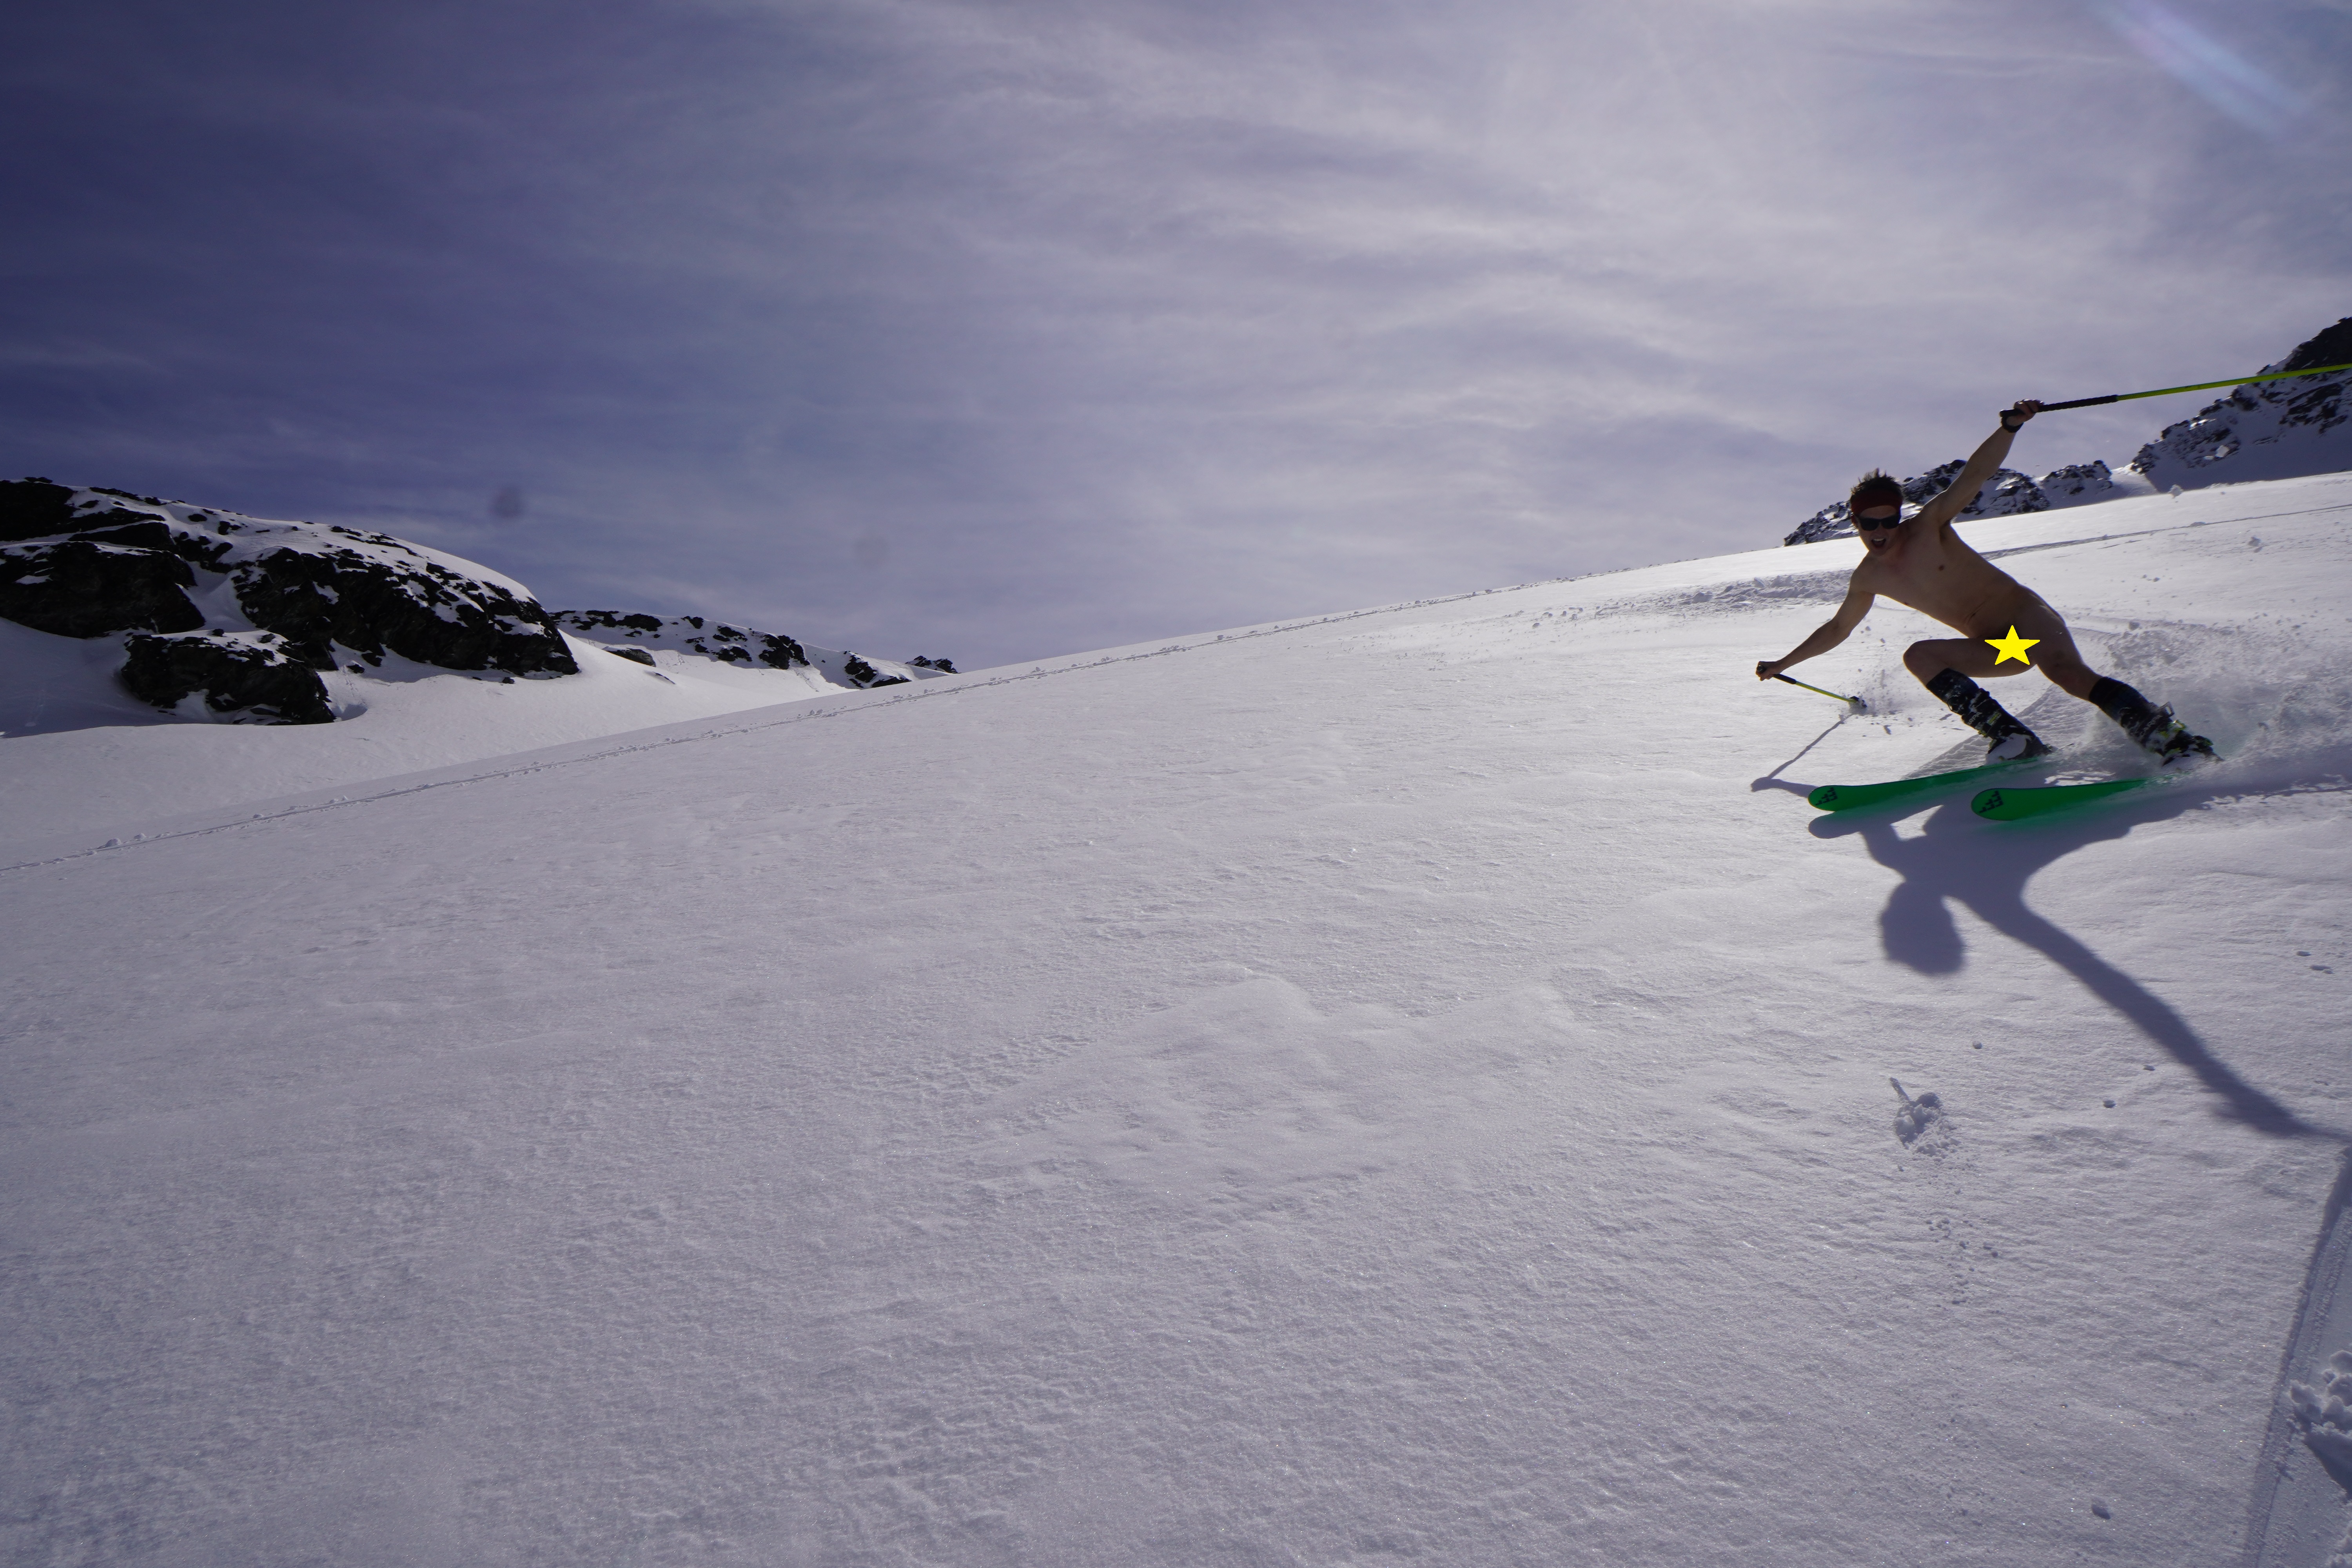
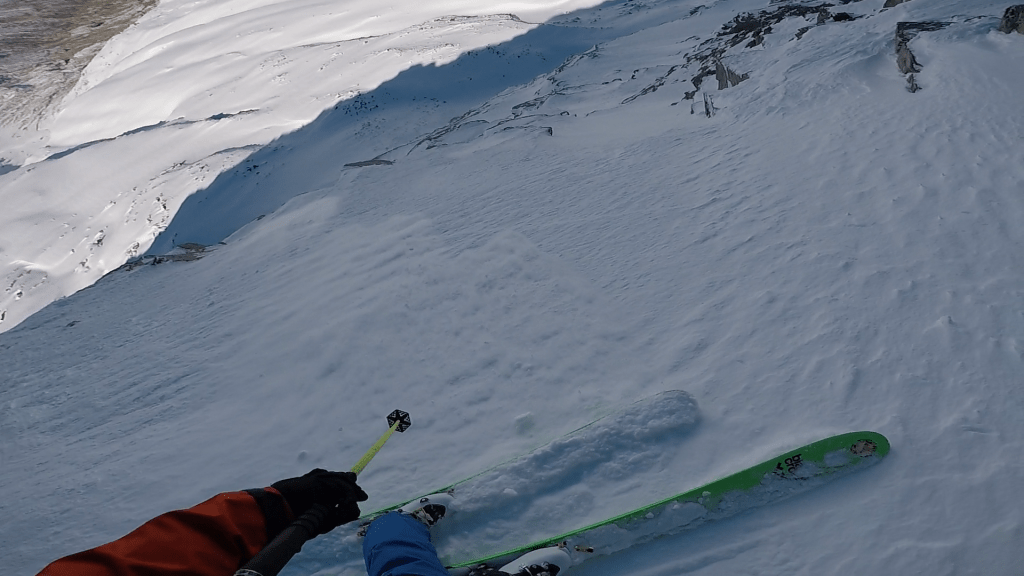
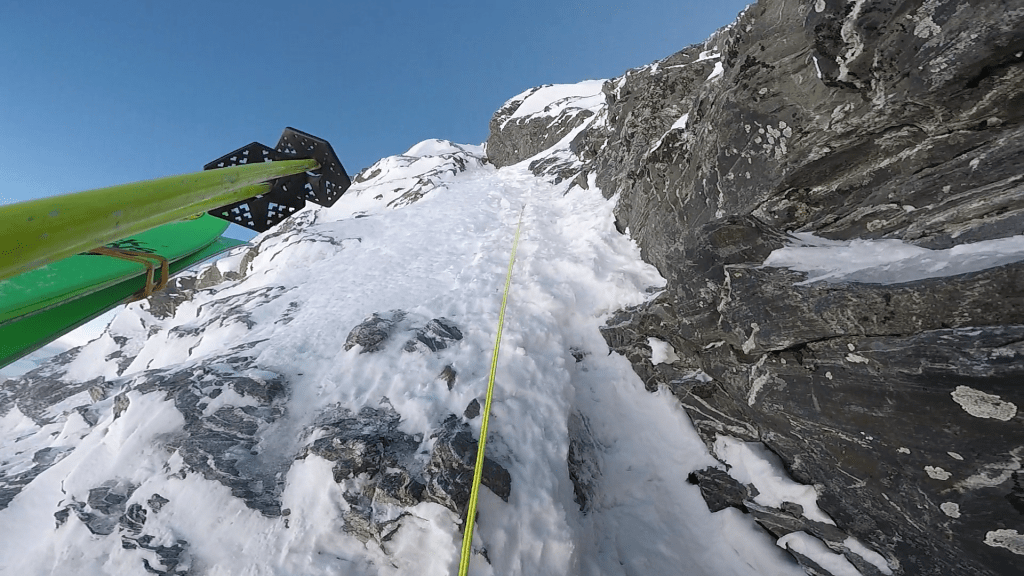
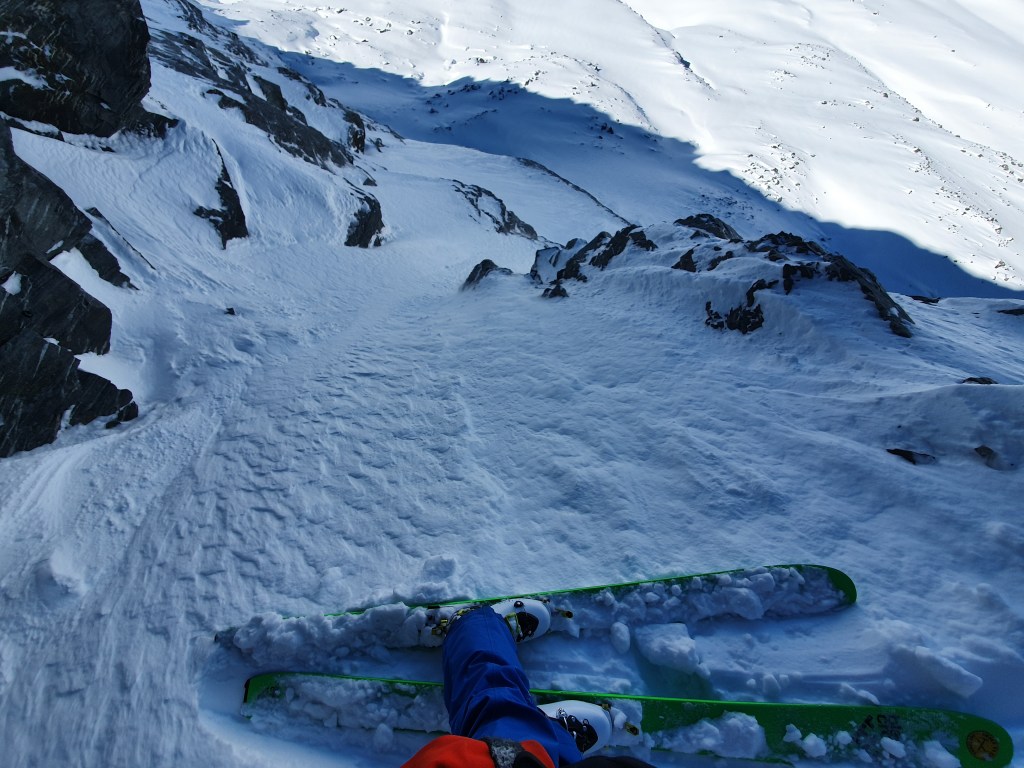
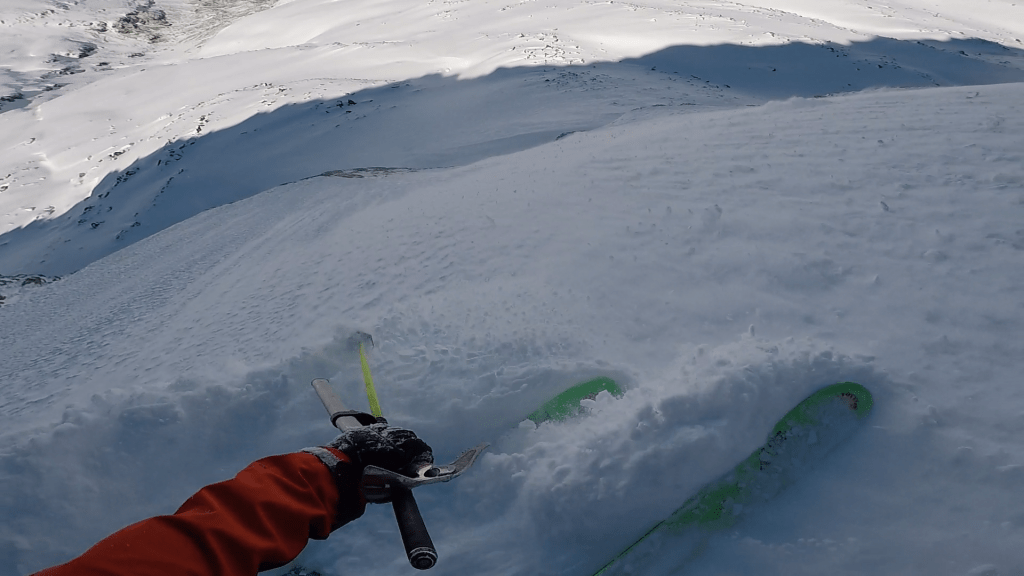
A straightforward 50m west along the ridge led to the summit, where by pure chance we found the skiers (who had taken the easy route!) had beat us to it! After a brief regroup the skiers skied down a chute to the north before rejoining the ridge to ski the east face. Sean and I descended via the same way, although we picked a mellower snow chute on the east face, around 100m north of the col.

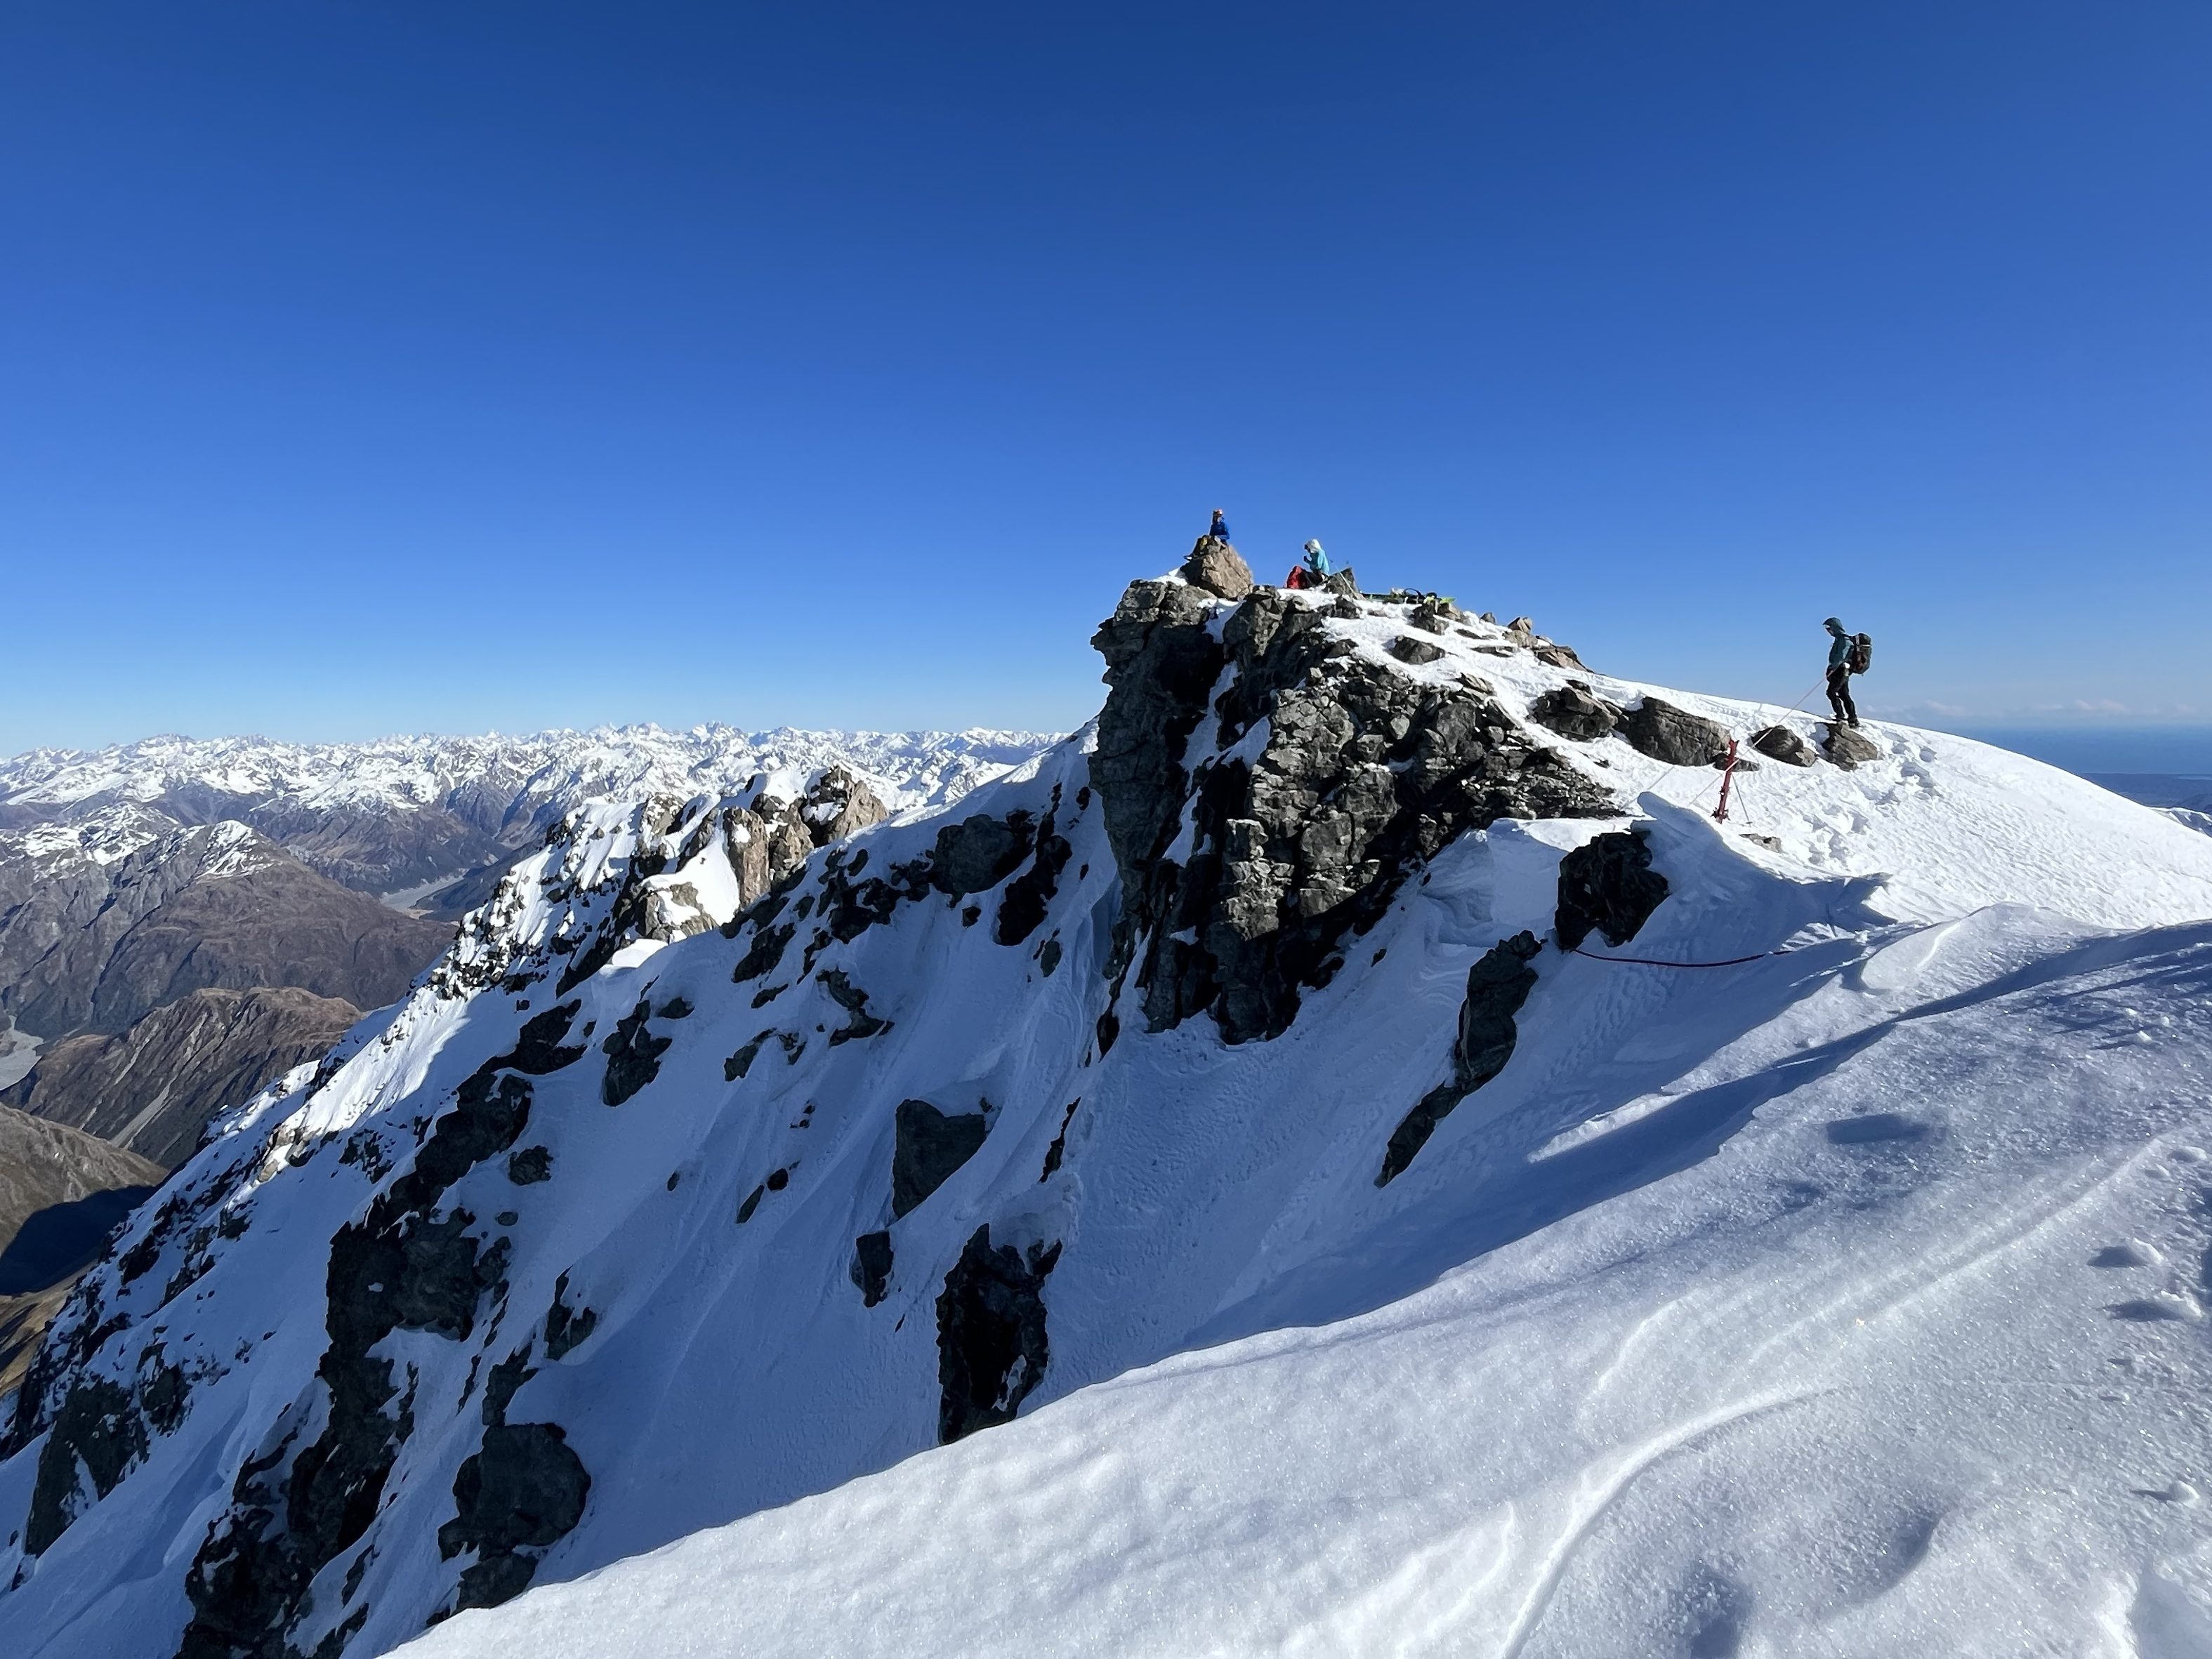
To avoid pitching, head up one of the snow chutes along the west face. Requires dropping down to the other side, sidling round to then gain another snow ramp to the summit ridge. Although a little spicier than what Sean and I had expected “too hot, TOO HOT!” – we were pretty stoked we got to do a bit of technical climbing amidst all the plodding. Besides – it justified carrying all the gear we brought!

Blue arrow roughly shows alt route up on west face

Crow Face, Mt Rolleston

A classic climb on the proudest peak in Arthurs Pass, or a steep and technical ski mountaineering line easliy accessible as a day trip from Christchurch. Up there in terms of the steeper and more sustained lines Ive skiied in New Zealand, and with big exposure the whole way this is a serious ski. I went with Maria, Sean and Marije in early September 2023 to climb the route. I’d been thinking about the possibility of skiing the face for a while, but had no recent beta on conditions and it had been a particuarly thin winter so almost didnt bring my skis, but once we hit Rome Ridge and found cold dry snow on the shady aspects it became apparent it was on! Firm windpressed powder and some breakable crust – not dream conditions, especially on such a steep line, but edgeable enough to make it work. Would be an incredible line to ski in powder!

Length โ€“ย 400m of steep ground with optional further 500m down towards the crow rived
Steepness โ€“ย Very steep and sustained. Opwards of 55deg at the top
Exposure โ€“ย Constant serious exposure the whole way
Aspect โ€“ย S
Extras โ€“ย Picket for rap. Rad line. Screws – 3-4 to protect the climb. Threads may be possible for the descent

Difficulty โ€“  Climb 2. Ski 5.3 E4
Equipment โ€“ Glacier equipment.

Approach

We went up Coral track to Rome Ridge, along Rome Ridge to the Sharks tooth / the gap – the end of the flat section of ridge just before the final ascent to low peak. From here theres an obvious gully that drops you down directly under the Crow face, and continues down into the Crow valley.

Travel along rome ridge when the conditions are good is fast and straightforward, but if coverage is thin and you end up on rock it would become a lot slower.

From the car it took us around 1 hour to the treeline, and 3 hours to the sharks tooth, then another 20 minutes to the base of the route.

From Rome Ridge you get a reasonably good view of the face to pick a line – although its not possible to see the bottom section in its entirety to figure out the best way through the lower rock band.

We chose a line starting on the left side of the face following the most obvious line of weakness to the summit ridge, but multiple variations exist. When we were there the other lines would have involved some scratchy mixed climbing to get establihed on the face

Climb

Will vary massivley year to year, but for us we found mostly pressed powder and breakable crust the whole way up the face which made for fast progress. There was a 30 section of WI2 at the very bottom of the route which we pitched, and took reasonable screws. There was another short rock step to negotiate near the summit, only a couple of metres long and no more than M2. There were plenty of oppurtunities for rock pro along the way if needed, and the pickets were solid.

Apart from those 2 sections we simulclimbed and it took us just under 3 hours to climb the route – expect longer if pitching the whole thing.

We followed the snow ramps to the summit ridge, just below low peak. The final section to the top was hard rime and rocky, but with the right conditions does look like it would go.

The climb is a really fun day out in itself, with a real sense of remoteness and scale despite only being a day trip from Christchurch, and well worth it even without the ski.

Ski

I followed the exact climbing line back down – especially on a face with such fickle conditions this gives a lot of confidence your not going to hit an unexpected chunk of ice and get thrown off the face. Starting at the obvious notch on the ridge, drop into the super steep and narrow right trending gully. This section is really steep and sustained, and the exposure is right in your face so its full focus time. This funnels you into the first rockband – I transitioned to crampons and downclimbed through this to save on loosing a picket. Once through this rockband theres a rightward traverse on a narrow terrace that puts you into the large open snowfield.

Once into this the exposure isnt quite as heinous and the angle eases off and you can open it up a bit more. I then tucked back left for the final section, which funneled me back into another steep and narrow gully ending in the WI2 section. I left a picket here and rapped 30m back to the snow.

From here its all go : mellow angle and no exposure = hoon time! You can go all the way to the snow line in the Crow Valley – an option is to then walk out via the Crow Valley to Klondyke corner (about 3 hours and a bunch of river crossings, but a good way to avoid the late in the day soft snow on Rome Ridge). I was meeting the others back at the village so instead retraced my steps exactly back up to Rome Ridge and the back down Coral Track to Arthurs.

MK Gully, Remarkables West Face

A classic moderate M3 mixed climb on the west face of the Remarks, previously unskiied. Back in July 2021, Maria and I had taken some friends there a few days earlier for an intro to mixed climbing, and as we were wallowing up the route through knee deep powder I got thinking this would be a great ski line. Luckily I was off work the next day so came back with the skis to open the line. Farily hectic line : short but technical and exposed at the top, with a mandatory air into the steepest narrowest part of the gully, just above another cliff band. High pressure stuff! Bumped into Grice who was working patrol and told him my plans and was keen to join me, but sadly couldn’t get out of work duties. But it did mean he was at the top of the line to take these rad photos! Chur!

  • Length – The climbing route to Queens Drive is 150m. But you can keep going beyond there until the snow runs out, I made it about another 300m.
  • Steepness – Initially around 40-45. After the air its steep (around 45-50) and you havent got long to control your speed before the next drop
  • Exposure – Critical in the top section. Gets its M3 grade from several vertical rock steps which are linked by snow ramps. Once your through this your cruising
  • Aspect – West
  • Difficulty – 5.2 E3. Difficulty really all comes in sticking the air and controlling your speed in the narrow and steep mid section before the next cliff. Falling on the landing would cause a really nasty tumble through the next cliff band
  • Equipment – 60m rad line. Crampons and 1x tool. Picket and rap tat

As with all of these climbing lines, its critical to check theres nobody coming up the route before you start skiing it.

Start by going up Shadow chair and head up past the chutes across the top of diangulator all the way up to the ridgeline. The top of MK is just in front of you at a flat section. The climb has several different topouts – the furthest skiiers left is the most skiiable. The large block in the above photo is the best landmark to ID it, and also works well as a rap anchor. I rapped about 5m over the rocks at the top – after getting through it and seeing the snow on the other side, it totally would have gone to just jump the rocks. Maybe next time!

The line is in 2 distinct halves – above and below Queens Drive. Above is the climb – steep, narrow, and tight with several rock steps you have to either air or rap. The very top section from the ridge takes you diagnoally down and right to the main fall line, and the first rock step. Roughly 2-3m high into the steepest and narrowest part of the line, with only about 20m or so after to control your speed before the next cliff. I went off the skiiers left of the block where the drop was smaller but you land in a really narrow part of the gully. A more heroic option would be straight off the end of the block, but you really dont have long to stop before the next cliff, and falling through it would be seriously bad.

If you were going to rap this middle cliff a picket would be the way. Unusal to get good ice just there and scraping around for rock pro would be a pain.

The next cliff is a similar height, but had ice on the landing when I was there so I put the crampons on and downclimbed. But again I reckon it would go late season in a big snow year!

Once the skis are back on the pressure is off and its type 1 fun – blast down through Queens Drive and down the gully until the snow runs out! I then just hiked back up to Queens Drive and out to the ski field. I would definitely NOT recommend carrying on down the West Face – did this on a previous trip down Morning Glory and it turned into the quest of all quests

Youtube link below for the POV

Mt Abel NE Couloir – Ski Descent

Cool line easily accessible for a quick hit from Kelman hut incorporating some easy mixed climbing up pencil dick gully and a pretty spectacular and exposed ridge traverse over to the top of the couloir.ย  The gully is super fun, 300m at 45 degrees, but because it traverses left across the face and cambers towards the cliff its more exposed than it looks!ย  Once at the bottom either skin up the Murchison headwall, or there are a variety of mixed ice lines from the base direct up to Kelman hut. ย We took a line that went at M3/WI3 for 2 pitches

Leaving Kelman hut at dawn

Approach

From Kelman skin up the hill south west and cross over almost as far as the col to the west of Mt Abel.  This puts you at the bottom of pencil dick gully โ€“ the climb varies a lot depending on conditions, but generally the fuller it is the better.  For us there was one defined 5m or so crux of M3 mixed with 20-30m or so of WI2 on each side, and otherwise steep (50ish degree) firm snow.  From the top of the gully, step onto the south side of the ridge and soak up the sudden exposure down to the Mannering, and traverse up to the summit.  The ridge traverse is very cool โ€“ knife edged and exposed.  We put a running belay between us with some good blocks to weave between.

From the top of the gully you make an exposed traverse across the ridge to this excellent spike belay just before the summit

Alex on the summit of Mt Abel. Its a really cool exposed snow arete between me and him

Descent

With a NE aspect this gets the sun early and so makes for a great early corn lap.ย  We had a good melt freeze cycle on the northerly aspects and the couloir was just releasing around 11am when we dropped in.ย  The ski is at the perfect โ€˜fun but not scaryโ€™ gradient around 45 deg, and the corn was super confidence inspiring so we flew down the line in about 10 minutes.ย  Itโ€™s a bit of a nervy line, and despite the steepness not being extreme, it traverses left above a cliff band and is camberd down towards the cliff. ย From afar it looks like theres a collecting feature on the downhill side of the line, but there isnโ€™t.ย  With every turn your sluff drops off into the void just a few metres to your right, and a fall would most likely send you off the cliffโ€ฆ.so donโ€™t get too carried away!ย  Once down the bulk of the 300m vert the gully straightens up and gets narrower, but the exposure disappears.ย 

Alex making turns in the bottom part of the coulolir

In terms of getting back to the hut, skinning up the Murchison headwall is the most obvious route.ย  This is prone to some pretty serious wind loading from the Tasman in W winds though and after a dig the night before in the vicinity we had decided we didnโ€™t want to come back up this way.ย  Luckily there are some super fun mixed routes that take you directly up to Kelman hut and so get around this problem.ย  We aimed for the fattest looking ice and missioned on up.ย  We were mainly on 70 degree polystyrene ice but with a number of mixed sections up to M3.ย  We brought 5 screws and a stripped down rack with 4 cams and selection of nuts, and used all of it in 2x 40m pitches.

On the secon pitch of the climb back up to Kelman hut. The ski line is jusrt above and left of Alex

Back at the hut by 2:30 in time for a late lunch and an early beer!

The route we took in red. If you want to avoid the climb to get back to Kelman just follow the green and skin up the Murchuson headwall over Tasman Saddle – but be aware of significant avalanche risk here.

Mt Tuwhakakaroria North East Face

The big obvious ski line visible in the distance when looking south from Wye saddle, Iโ€™d been wanting to ski this peak for years before finally getting round to it. Beautiful north facing spring corn in a striking couloir from the highest peak in the range make this a very worthwhile outing. It makes a great day trip from Lake Hope, or a big mission with a very early start from the Remarkables. We skiied the line marked in the photo on the North East aspect. A slightly steeper couloir on the North face looks excellent, but had a bare rock step that would have required a rap when we were there

Alex on the summit, with double cone visible in the background
  • Length โ€“ย 600m (300m main line, further 300m bowl to bottom of valley)
  • Steepness โ€“ย 35 deg average. Steeper at the top before opening into a wide open 35 deg bowl
  • Exposure โ€“ Nil on descent.
  • Aspect โ€“ย North East facing. Perfect for spring corn early in the day
  • Extras โ€“ย 
  • Difficulty โ€“ย 3.2 E1
  • Equipment โ€“ย Crampons, 2x tools (1x will be ok if your climbing the ski line and your confident on your crampons. Traversing from the West is a bit more involved and 2 tool was nice.) Snow stake, rap tat if your taking the central couloir as it may need a rap. Otherwise no rope needed.

Approach

We did this as a day trip from Lake Hope, where we were camping for a few nights. This is the easiest access – its a quick skin from the lake up to the ridge East of 2080. Its then straighforward to gain the 2000m contour and climb up the gully from the West, traversing the peak and then gaining the coulor. It took us 3 hours from the camp site to the summit.

Climbing the NW face, the line we took from Lake Hope marked in red

The alternative is to skin out from the Remarkables – I did this route on a seperate trip, and have attached the GPX file below. You can do this as a big day trip but you have to start very early. It took us about 4 hours from Remarks base building to the bottom of the face, and leave at least another 1.5 to 2 hours to climb the face. When we were there the corn was good to go 10:30-11 so you need to be at the summit around then. Skin to Wye saddle then point it down to the ridge west of point 2046 , then sidle up to the col between 2115 and 2122. The cruise down the the Doolans Left Branch and then head up to the small lake between 1964 and 2130. Climb the small headwall above the lake and then its a short ski down to the bottom of the face.

The approach from Remarkables ski area to the bottom of the ski line. Doolans creek left branch on the right of the photo. Point 1986 the peak in the middle of the pic (looks like a sick ski line!)

The climb is straightforward – even more so if you just climb the ski line. Just boost straight up the face and you shouldnt have any problems. Coming in from the Lake Hope side is slighlty more involved as you have to traverse across a couple of rock steps on the way to the summit. Once on the sumit its a short easy downclimb to the start of the skiing.

Ski Descent

A short downclimb from the summit puts you at the top of the snow field. From here you can blast down a 40 degree couloir for the first 500m or so, before the angle mellows to around 30 deg and it opens up into a wide open snowfield. From the 1700m countour we had to pick our way down a narrow strip of snow to the large flat area at 1500 where there was some much needed running water. If you time the corn right thiis is a super fun cruisy descent and you can really open it up and point it.

A short easy downclimb puts you onto the ski line, visible just to the right of Alex

From here, its easy to get back to Lake Hope – head up the river and round the back of 1911 then up the ridge to the col between 2087 and 2080. Be carefull as these slopes are also North facing so if youve timed the ski line right these slopes are going to be getting really soft. This ridge is pretty low angle and also when we were there you could actually stay on a rock rib almost the whole way and avoid the avvy risk completely.

The ski line. A shorter variation is posisble from the shoulder on the left, and a harder steeper one from the summit straight down the middle couloir. Check if the rock step is in or not – would have required a rap (or hero send) when we were there

Option 2 is to or start the long skin back to the Remarks. When we skinned it we took a slighlty different route back to the way we came in, which is visible on the GPX file. Same we loose risk applies as your crossing a bunch of north facing slopes late in the day. We started the same way over the col just west of 1964, but then went down north to the left branch. We then skinned basically up the river bed following the low angle slopes to the 2115/1967 col. We followed the ridge past 2020 and 2046 – this puts you on top of some super fun couloirs that drop from around 2017 down to upper Wye Creek. If you time it right these makes for a super fun short ski to end the day.

Doing this as a day trip from Remarks is a big old day – around 3000m of climbing and 25km distance. I’d expect the whole trip to be around 12 hours.

On the skin back to lake Hope. Taken from just above 1911 looking north. 2130 in the background (another fun looking south facing ski!)
Standing at the flat area at 1500m looking back up at the line. The thin stip of snow we took down to the base in the middle of the shot.

Aoraki / Mt Cook NW Couloir – Ski Descent

The wild side of Aoraki! A long and serious approach with no heli access gives the Hooker a wild and remote feel. This was my first trip to Aoraki back in 2018 and it was definitely jumping in at the deep end. While not too much steeper than the East face the NW couloirs is winding, technical and exposed nature make it a much more serious undertaking, and as such it is sees far fewer descents. Youโ€™ll be rewarded with an incredible ski line and a feeling of isolation that is definitely missing on the Plateau side. We climbed to the top of the skiiable line and turned round, but some easy mixed climbing would take you to Low Peak a couple of hundred metres higher. You would then need to make a couple of raps to get back to the line.

The line we skiied in red – we stopped at the rock just below the summit. Empress hut at the X. Alternate descent in blue from the base of the couloir to save you a trip back to the hut – wasnt in condition when we were there.
  • Length โ€“ From Empress Hut (2500m) to Low peak (3593m) is just over 1000m. Then around another 1700m down to the car park at 880m. When we were there the couloir was skiable from around 3300m
  • Steepness โ€“ Crux at the top of the couloir. 50-55 deg for 100-200m. Remainder of couloir 45 deg. Once on the Empress glacier eases to 35-40 deg
  • Exposure โ€“ Very exposed at the top, as the couloir winds over some big cliffs. Once you reach the Empress shelf this improves. Couloir prone to significant rock fall once it warms up, particularly late in the season. Very large crevasses and active ice cliffs on both sides of the Hooker.
  • Aspect โ€“ NW. Good corn skiing late season, but significant loose wet and rockfall risk late in the day
  • Extras โ€“ย We needed to make 1x 15m rap right at the bottom of the couloir to cross a small rock band
  • Difficulty โ€“ย  Climb 3. Ski 5.3 E3
  • Equipment โ€“ Glacier equipment. 30m half rope. Tat and snow stake for raps. Screws x2 each and V thread equipment.

Approach

Looking back down towards the Hooker lake from the Hooker glacier

It took us just under 12 hours in total to get from the car to Empress hut. Head up the Hooker track to the Hooker lake. We then rock hopped at the shore line most of the way up the west side of the lake. Just before after Stewart stream the moraine got too steep due to a washout and we had to climb vertically up the moraine wall to around 1200m before traversing along flatter ground and then dropping back down to the main Hooker glacier. This section was really difficult especially with heavy packs. The morraine was incredibly loose and you constantly had to be looking above you for spontaneous rockfall coming down to the lake. Taking a step into the loose morraine would cause everything to shift and would cause rocks 30m above you to start moving and coming down. It would also be easy to slip and fall all the way down into the lake which would be suboptimal while strapped into a heavy pack. Overall we felt this was the most dangerous part of the trip and we were super stoked when it was over.

Easy rock hopping up the side of the Hooker lake, before the moraine walls got steep and sketchy
Towards the top of the lake you get into this terrain – steep and loose moraine wall which is pretty sketchy. Stay a long way away from you partner and the inevitable stream of rocks they knock down

Much easier ground on the flat moraine between the lake and the Hooker glacier. South face of Mt Cook ahead

From the top of the lake we headed north staying pretty much in the middle of the glacier until we reached snow. This was the same loose moraine but on flatter ground. Tiring but safe. After a few hours of this it was a relief to be finally able to put the skis and boots on and start skinning.

The way you pass the lower ice fall on the Hooker is very condition dependent. When we were there the true left (Pudding Rock) was completely cut off and so the only option was the true right. We were tucked right into the far west of the glacier and skinned up under Dilema peak, the end of the Straunchon glacier and finally under La Perouse. Everything was very open here and we were picking our way through the crevasses over winding and narrow snow bridges (check out the end of the video below to get an idea). Complex route finding but relatively safe as what you see is what you get. From around the 2000m contour things open up and we were back to skinning straight up the glacier for the remainder to the hut.

Looking up the Hooker. The way you get past the major icefall will depend on the state of the glacier. We stuck to the far left of the picture but when its more filled in you can stick to the far right (Pudding rock)

The crevasses here are humongous – we would regularly cross 20cm wide cracks in the snow, and only when directly on top of the crack get to look straight down to see that in fact we were on a snowbridge spanning a gaping monster that disappeared down into the depths of the earth. Several times the 10m of rope between us was barely enough to keep us from both being on the same bridge at the same time. In addition the ice cliff on the east of the glacier at 2200m (just below the words Empress Glacier on the map) was highly active, regularly throwing off car sized chunks. We were thankfully able to stay far enough west to be out of the firing line. However the east faces of Dilemma and La Perouse had regular rockfall once the morning sun started warming them up and there was no way to stay clear of both and get through the crevasse maze, so we had to move fast and keep our fingers crossed.

Skinning up through the maze of crevasses on the Hooker icefall

All in all this was a pretty hectic experience and I got to the hut feeling like I never wanted to come up the Hooker again. From speaking to friends who have been up to Empress I think it was especially scary when we were there and this isnโ€™t a typical experience – later in the year and everything would be more open with no hidden surprises, earlier everything would be more filled in. Either way it put me firmly into the โ€™we should open the Hooker to heli accessโ€™ camp, especially as the whole way in we could hear the buzz of scenic flights overhead in anycase. Maybe not a popular opinion with the purists, but Im sure would increase the number of people who would enjoy the epic terrain above the Empress hut.

View out from Empress hut, La Perouse on the right

Empress Hut is a pretty special place – the difficult access means it not many people make it up there and so you can flick through decades of entries in the hut book and soak up the history of the area.

Empress hut

Climb

Will booting up the lower section of the couloir. This part is wide and straight and is the easiest skiing meaning yo ucan open it up a bit

Pretty straightforward when the conditions are good. We had a good overnight freeze and so fast efficient cramponing conditions. We skinned (ski crampons were essential) south from the hut to the base of the couloir just south of the NW ridge. From here we transitioned to crampons and booted up the route. We used the rope to cross the shrund at the base but otherwise we soloed the whole way making fast progress. The couloir fans out into a couple of possible exits at the top – if you continue directly up fall line it turns into some M2 mixed climbing up to the West ridge and Low Peak. We wanted to just maximise the amount of skiing and so didnt bring equipment for mixed climbing or raps, and headed to climbers left up a narrow couloir onto an open snow fan at around 3300m. Another option from here would be traversing north to Porter Col if you wanted the summit without any mixed climbing. For us that would have been bare ice on this section, so once the snow ran out we transitioned to skis. This was a technical transition, on very steep exposed and firm snow, and any equipment (or people) dropped at this point would end up on the Empress shelf 1000m below. We protected it with a snow stake belay.

It took us around 3 hours from the hut to climb the route. We had perfect conditions and soloed the whole route so it may take longer than this

Ski Descent

We started skiing at 9am. This was too early and the snow was still pretty firm, which given the exposure made things pretty spicy. We had to be back in the village that evening though and didnt want to be coming back down over those snowbridges too late in the day. Time to put the edges through their paces!

Joe making turns on the lower part of the couloir

The initial snow fan was a touch under 50 degrees, and wide and open (but with serious exposure to the right). Once we hit the couloir the steepness ramped up to over 50 deg, and initially only just wider than a ski length. Cue cautious high pressure jump turns. This steep technical skiing lasted around 100-200m before the couloir gets much wider and the angle eases slightly and we opened it up a little bit more. Your still pretty exposed in this section as there is a dog leg and small cliff right at the bottom of the couloir to negotiate.

Will coming out through the crux, the choke at the top of the couloir.

Right at the bottom we made a 15m rap to get through the dog bone, putting us just above the shrund. There was a good spike to leave tat around for the rap. From here we just had to make the obligatory shrund send to get into the sun and beautiful corn on mellow 35 degree slopes. Sometimes a route might go from here south crossing the Noeline Glacier to drop you at the bottom of the Hooker (passing just to the left of the W of West ridge on the map) but we had scoped this on the way in and it was a no go. So we skiied back to the hut, grabbed the rest of our kit and headed down the same way we came.

The dog bone at the bottom of the route. We made a short rap here

We blasted it down the top section of the glacier until reaching the ice fall under Baker saddle. Given how open this section is we decided to ski down through it while roped together. This is pretty difficult and theres a real risk of it causing more harm than good – if you dont have perfect timing and very clear communication as you cross the gaps you risk just pinging your partner off balance and throwing them into the crevasse. We had our system dialled and were moving slowly carefully and precisely through the crevasses – until a rock fall released from the Baker Saddle area 200m directly above us. Caution had to go out the window and we started straight lining it through the maze of narrow snowbridges to a safe spot out of the firing line. Probably one of the scarier experiences Ive had in the mountains!

Picking our way through the lower ice fall

Once through this it was a case of reversing the Moraine slog. It was pretty scorching by this point, but there are a couple of hidden water sources on the morraine to get us through. We made it back down in time for a feed and post mission beer in Twizel before hitting the road back to Chch

Mt Dixon East Face

The most accessible ski of the monster peaks towering over the Grand Plateau, Dixon offers makes for a good introduction to this kind of high stakes ski mountaineering and is often used as a warm up for skiing Cook. Easy but exposed skiing from the summit leads into short steep and technical couloir back down to the Plateau. An alternative more difficult line is to cut from the East face onto the South face and cross diagonally left between the two serac bands. This is the line we were hoping to ski but the final section was bare ice when we were there.

The line we skiied. The line cutting diagonally across the South face between the serac bands
  • Length โ€“ 800m from Plateau hut. Summit 3004m
  • Steepness โ€“ Access couloir from plateau to East face around 50 deg. East face around 40.
  • Exposure โ€“ East face is easy but exposed. Couloir is steep but a straight line to the plateau
  • Aspect โ€“East (couloir S facing). Significant wet loose risk if you leave it too late
  • Extras โ€“ As for all of these big lines spring (Sept – Nov) is generally when they are in condition
  • Difficulty โ€“ Climb : 2+ Descent : 4.1 E2
  • Equipment โ€“ 60m rad line. Crampons, 2x tools. Snow stake.

Access

Climbing the last section of the East face, Aoraki in the background

Heli or ski plane into plateau is the most common access route. Plane is cheaper if you fill it, but means you land a 20min skin from the hut so need to be more on it with your packing. The heli drops you at the door so you can rock up with a cardboard box full of food and beers and not worry about it. The heli also can fly in worse weather than the plane. Iโ€™ve always avoided the hike in, but the general beta (as of summer 2022) is to head up the Ball shelter track, and get around the husky washout generally by staying high. Head up almost to the ball hut site and get down the morraine wall to the tasman via garbage gully (series of grassy ledges). From here head up towards the Boys glacier and then up to Cinerama Col. This is changing on a yearly basis so look for up to date beta before heading up. From my experience of climbing up and down moraines its the most dangerous part of these trips and to avoid a rock to the head I want to avoid it if I possibly can. Does that make me soft? Probably.

Climb

Roping up to cross the shrund at the bottom of the couloir. The imposing ice cliffs of the South Face on the left

Skin across Plateau towards the obvious couloir at the east end of the south face. The large imposing ice cliffs on the south face are quite active and reguarly throw death chunks on top of the entrace to the couloir so dont hang around – make a plan and smash up into the safety of the couloir. Late in the season the shrund can open up and become impassible (climbing parties have been known to bring the ladder from Plateau hut to cross Himylayan ice fall style) but as a general rule if its that late you probably wont be skiing it. It pays to go and scope the shrund out from a distance the day before and work out exactly where your going to cross. Climbing the couloir is straighforward steep snow climbing up to the quite dramatic knife edge ridge at the top. Here the angle eases off significantly and you follow the snow slopes up to the summit – easy snow plodding. At the very top you gain another short ridge to get to the summit. We got to the summit at 09:20

The couloir to access the East ridge. Peet coming up through the choke
Taken from the summit. The ski line goes down the skyline

Ski

Peet making tuns on the upper section

Average 40 deg snow slopes from the summit. Most exposed right at the top, with significant hazard on both sides. We had a recent 10cm of snow which had bonded well with the underlying snowpack and so skied this section in powder. Its important to be skiing early in the day as this top section gets blasted by the morning sun. Some low cloud rolled in for us during the descent and kept the direct sun off it, but made for trickier route finding. The gradient and the exposure decreases as you descent, until reaching the ridge on top of the couloir. From here traverse across and descend the couloir. Pretty steep at the top and narrows to a choke. We made jump turns down to the choke and then had to downclimb a few metres as the choke was narrower than a set of skis and the snow wasnt soft enough for me to fancy the straight line! From here the skis went back on and it was around 45 deg back down to the shrund. After clearing the shrund we pointed it and put as much distance between ourselves and the ice cliffs as possible. Back at the hut by 11am we had a pasta feast and tried to get some sleep before heading up the East face of Cook the next day

Towards the bottom of the East face, with the ridge on top of the couloir coming into view in the cloud

Cookies and Cream, Single Cone South Face, Remarkables

A really fun steep technical ski mountaineering line just 15 min skin from the top of the Curvey chair life in Remarkables ski area. Like the South Face Classic it is better known as a M2 winter climbing route, but I think it deserves to become a classic ski line! Warm up on the sunny west facing slopes before rapping into the steep and rowdy south face. You want fat conditions before venturing onto this face. I skiied this line in Sept 2021 after a series of late season storms had left the S faces of the range coated in well bonded stable powder and had boot-top pow the whole way down. This was the first time the line had been skiied, and Will Rountree and myself had been eyeing it up for a while. When the weather window came around Will was stuck at work so I had a moment of guilt and considered waiting and getting on it together…that didn’t last long though and I headed out to get the first descent solo. Sorry Will!

Looking down the South face just below the rap. Incredible skiing

  • Length โ€“ 300m
  • Steepness โ€“ 40 deg initially on the west face. The main ramp on the S face is around 50. The step connecting the two is extremely steep, around 60
  • Exposure โ€“ Not too bad on the first section, but severe and continuous on the south face. Left trending ramp over large cliffs, a fall here will likely be fatal
  • Aspect โ€“ West and then South
  • Extras โ€“ Rap from the West face to the south face. Currently you need to leave a picket or some rock gear but Im planning to put a DBA there this winter. Another short downclimb or rap part way down the S face
  • Difficulty โ€“ 5.1 E4
  • Equipment โ€“ 60m rad line. Crampons, 2x tools. Snow stake, rap tat, nuts for anchor if needed.

The South Face portion of the line.

While not as popoular as the South Face Classic, this is still a climbing line so be super aware of climbers beneath you that will not be expecting a skiier to come down on top of them. This line is pretty safe from that perspective as once on the S face you can see the whole way down, and as it trends left your sluff goes off the cliff and not down the line, but still take care

APPROACH

Taken at the top of the line. On the far right is the summit couloir of Single Cone. I dropped in by the rock just to my right but the entry point will vary depending on conditions

Two options

  • Top Down
    • Quicker, but doesnt give you the option to scope out the conditions. As for the South Face Classic, jump on Curvey chair or skin up from the base aiming for Wye Saddle. Skin up the East Face of Single Cone to the ridge and then head up almost the whole way to the big rock band where the couloir up to Single Cone summit starts. This is where you drop into the West facing start of the line. There are a bunch of large boulders on the ridge and youll have to peek over and find the best way in. Ive marked my drop in point in red on the photo
  • Bottom up
    • What I would recommed unless youre very confident of the conditions on the route. Skin to Wye Saddle as above, and at the point you would start heading up Single Cone instead head West aiming for a snow gully that takes you down to the base of the South Face. Traverse back across for a few hundred metres to the base of a large snow fan at the bottom of the route. The climb up is generally straightforward when the conditions are fat – booting up steep snow. There is a narrow rock band to get through towards the top of the first ramp which isi pretty straightforward. The crux however is the section joining the South and West faces which steepens up significantly to around 60 deg. When I was there this section was poorly bonded to the underlying rock and crampons were going straight through onto scratchy steep slabs and is above seriouos exposure. It was too much for me without a rope, so I skiied from here back to the base, and then skinned back around to Wye Saddle and up the East Face to the top, and dropped into the first section top down. The skiing here is much easier and so I was happy skiing it top down armed with the knowledge the conditions lower down were good

DESCENT

Pick your way down through the top section between the boulders, sticking to the right side of the face. The gradient is easy and so you get a good warm up before the serious stuff starts. After a 150m or so you come to a small flat section which drops off steeply to the left down onto the south face. The snow is often icy / firm here and the exposure down the south face is serious, so I transitioned to crampons to go up to the edge and scope it out. As above, this section is extremely steep and exposed and had poor snow when I was there so I didnt attempt to ski it (but in the right conditions it would be possible – the first full descent is still up for grabs!). Im planning to get back here this winter and put some rap rings here to make this a bit more accessible as a ski descent but currently you need to either leave a snow stake or some nuts (no decent sling spots). A rap from here gets you to the main couloir on the south face.

The section linking the West and South faces. Very steep and exposed, and very thin onto rock when I was there. Possibly skiiable in a mega snow year but generally needs a rap

Once your in the main couloir the skiing is heroic – 45-50 degrees, narrow but wide enough to make good turns, and holds good snow when the conditions are on. About a third of the way down theres a narrow gully that I downclimbed before skiing the remainder of the line. Theres no collecting feature on the downhill side of the couloir, and as you cut across the face your sluff falls off the line beneath your feet – a constant reminder of where your going to end up if you fallโ€ฆa good way to help focus your mind!

At the bottom the line opens up onto a large snow fan and you can hoon it all the way down to the base. I linked it up with a ski down to the lake at the base of the Wye Creek Route before skinning back up to Wye saddle.

Lake Hope, Remarkables backcountry

A really fun zone just out the back of the Remarkables in Queenstown. Wasn’t really on my radar, but in Sept 2021 Alex Bewick and I had a week off work and wanted to get some skiing done. We had been planning on going up high somewhere but the forecast looked pretty terrible everywhere apart from Queenstown so we looked a bit closer to home. Lake Hope offers a large safe easy campsite with a ton of easy to moderate terrain of every aspect in the immediate vicinity offering 200-300m faces and couloirs. Also gives easy access to the biggest peaks in the range, Mt Tuwhakaroria and Ben Nevis

Taken from the top of 1986 looking north towards Lake Hope showing the south faces just to the north of the lake – all with excellent skiing!

Approach

We went for fly in hike out and split a heli in from Frankton airport. For this kind of trip this makes it a lot more comfortable as you dont have to skimp on gas, food, beers and can make your campsite extra comfy. We split the heli 2 ways for $170 bucks each, would be even cheaeper with more people. If you skin in, start up Curvey chair and up to Wye Saddle. On a subsequently trip I’ve skinned to the base of Tuwhakaroria from Remarks (GPX attached). Follow the Wye Creek route down to the lakes then stick left aiing for the col between point 2115 and 2122. Drop down towards Doolans Left Branch then head up aiming at the col between 2130 and 1964. You drop down the other side of this col into the valley just one over from Lake Hope (my GPX track goes from here to Tuwhakaroria). Aim up towards point 2087 and cruise down to Lake Hope. This is 11km and 1000m of vert, and would be pretty savage with a weeks camping supplies – I reckon the flight is a no brainer! The other options would be to stay in the Wye Creek valley and stay high and sidle the whole way along to Lake Hope. Ive never done this route and think it looks pretty tough the further along you get.

We were expecting some NW winds so found a sheltered spot to the south of Lake Hope behind a big boulder, pretty much where the two tiny lakes on the map are, and dug the tent in. By staying south of the lake your also comfortably out of avalanche paths for the surrounding peaks.

Super fun line from 2080 heading South West down to Lake Hope. We also skiied a couple of the south facing couloirs in the shade above our tracks which were holding some good cold powder

Skiing

So many options! Is quite similar to the area around Lake Alta, but less steep, with excellent skiing on all sides. We had a good freeze overnight and were skiing in corn and so chased the sun all day. We started with the east and north facing slopes from 2090, and once that was getting too warm worked clockwise around the slopes surrounding the lake. There were some excellent south facing couloirs down from 2071 and 2087 that were still holding good powder. Then to finish of we headed back across lake hope heading south east and up towards the col south west of 2096. We traversed along the ridge heading towards point 2071 to access the top of a west facing couloir that dropped all the way down to the Wye Creek South Branch underneath our campsite. It was afternoon by this point and the west facing slopes and nicely softened up for a 500m corn descent down to the river. It was shady and cold down in the valley and the snow was starting to lock up so we cruised back up south branch back to the campsite to get dinner on the go and celbrate with some beers.

Alex in one of the couloirs from 2080 down to Lake Hope

The next day with skiied N face Tuwhakaroria which Ive written up seperately. It gave us a view of the south faces in the next valley, esp of 1986, which looked super sick – ones for the next trip! Things were getting pretty dangerously soft on the north faces by the time were coming back up towards camp, but we were able to find a line up to the ridge between 2087 and 2080 which was entirely on rock and kept us safe from the afternoon loose wet.

Sadly the weather window was closing at this point and we had to hike out the next day. But theres easily enough skiing to keep a mixed ability group occupied for a week, especially if you venture into the Nevis Burn or Stewarts Creek. Will definitely be back!

Checking out some epic stars from the campsite

On hike out day it was bluebird and scorching (before the afternoon storm came in), and having recently re watched game of GNAR we saw a perfect oppurtunity to fulfil a life goal. We skiined up the east facing low angle slopes above lake hope and smashed out a few butt naked laps in some creamy corn. Cant recommend it enough! The stoke was at an all time high at this point (thankfully nobody took a nut busting bail) and put us in a good mental state for the hike out

Slash on one of the south facing couloirs

The Hike Out

From the lake we skinned west up to the col halfway between 2090 and 2103, which was a bit of a grunt with heavy packs. From here your above Wye creek and need to descend down to the valley floor to hit the well marked DOC track that takes you down to the carpark. It seems to make sense from here to try and traverse skiiers left as far as you can to save yourself some distance. We ended up regretting this approach because we got bluffed out at the west end of the valley. Thankfully we did find a way down through a gully but it was pretty heinous, with steep muddy slippy tussock and we both stacked it repeatedly and the gear took a bit of a thrashing. If I was doing it again I would head right from the high point and keep trending right. From where we turned left theres an easy scree slope going right and down to the valley floor. While it adds a few kms too the walk out on the DOC track Im sure it would have been way faster than the sketchy traverse and down climb we ended up doing.

Campsite beers

South Face Classic, South Face Single Cone

untitled image
The South Face Classic, Single Cone, Remarkables. DBA in yellow.

Hectic line which is up there in terms of New Zealand steep skiing, and only half an hour from a chair lift. Best known as a winter mixed climbing route, the south face is very steep and has continuous exposure meaning you can’t afford any mistakes on this line. Id been wanting to ski the South Face for at the last few years but never thought the conditions were really right. In late September 2021 a couple of good storms came through, and I headed out on a couple of trips into the Remarks backcountry to ski Lake Hope and Tuwhakaroria, and all the S faces were absolutely coated and stability was good. Seemed as good a time as ever to take a look, and the conditions on the face did not disappoint. The conditions were so good that after skiing the S face classic I climbed back up and skied a second line, Cookies and Cream, straight after. Dave MacLeod who is my local oracle of all mountain things says the South Face Classic has been skiied before but reckons that Cookes and Cream was a first descent….get in!

The first turn. Not a place to fall

  • Length – 300m
  • Steepness – Very steep at the top. 55-60 degrees for 50m. Then roughly 50 deg for remainder
  • Exposure – Extreme and unrelenting. Your on narrow traversing terraces above large cliffs continuously. A fall or small avalanche almost certainly fatal
  • Aspect – South facing
  • Extras – I made 1x 15m rap to enter the face. Good large block to sling. 15m rap to connect top and bottom snow fields – I left a snow stake. DBA at bottom for final rap, 60m to ground. If you traverse skiiers left from this DBA there is another one at 30m so a single 60m rope is ok. I was able to ski the bottom section from this lower DBA but this is unusual (normally WI3 ice route)
  • Difficulty – 5.3 E4
  • Equipment – 60m rad line. Crampons, 2x tools. Snow stake, rap tat, nuts for anchor if needed.

Looking down from the top of the line. I rapped to where Hamish (in yellow) to start the ski. You can see the tracks down – the entrance to the lower ramp is the red arrow ( not where my tracks go, I went too far and had to turn back)

When skiing a climbing line like this its your responsibility to make sure your not going to knock any climmbers off the route. Its a climbing line first and nobody is going to expect a skiier to come down it – even small sluffs can knock the leader off the face and cause a serious accident. This line and Cookies and Cream are relatively safe from that perspective as the line traverses the whole way across the face so your generally not above the climbing line – but still take extra care and wait for the climbers if needed.

Approach

Jump on Curvey chair lift (or if your feeling keen skin up from the base) and traverse across to Wye saddle. Skin up the East face of Single Cone as if you were heading up to the starndard couloir route. You want to drop in right at the top of the snow slope which is just to the East of the notch. Theres a nice big boulder you can put a sling round to rap.

Descent
Rapping down from the top to bottom snow ramps. 60m total, I left 2x pickets (which I luckily got back from Hamish and Beate!)

The first rap gets you past some rocks at the very top of the line and establishes you on the face. Also gives a chance for some final assessment of the stability and snow conditions before pulling the rope. If you have any doubts at all just ascend the rope and bail. This starting spot is very steep and exposed, and was the one spot on the route for me with firmer snow. I transitioned to my skis while still on the rope and made some very cautious jumpturns and had to side step over a couple of rocks, before jumping over one final small rock into the main upper snowfield. Here the snow was much better, confidence inspiring boottop poweder, and the angle eased off to around 50 deg.

Steep and narrow just after the middle rap

Cut diagonally right across the face towards a big boulder at the far skiiers right of the face. From here cut left and find the entrace to the lower snow ramp. I sound it easily as Id climbed the route just a few weeks earlier, but this could be a tricky spot to find otherwise. Your looking for a narrow rock and ice gully that trends sharply to lookers left and is around 40m long, so 1 rap is only going to get you part way. I left 2x snow stakes so I could rap this section, but in the interests of developing steep skiing in the Remakables I’m planning on putting in a few DBAs next year – watch this space.

Immediately at the bottom of the gully there is another short section of very steep narrow skiing, pushing 55-60 degrees. Few more jump turns here and your into the lower left trending snow ramp which takes you all the way to the DBAs at the top of touchdown ice. This was the best skiing, the angle eases off to 45-50 deg and the snow was superb, light boottop powder. Just before the DBA the angle increases a little. Take extra care here – at some point it transitions to ice, you dont want to take one turn to many and find yourself falling off touchdown.

Getting into some excellent skiing on the lower ramp

I bumped into Hamish and Beate at this point who had just started climbing the route – was becoming a bit of a running joke that we had keep running into each other in slightly outlandish spots throughout the season! Hamish was brining Beate up to the top of touchdown ice just as I got to the final gully above the DBA. I waited at the top of the section for them to get past me, and after a quick catch up and conditions chat I headed on down (as a bonus also meant I could ask them to retrieve my snow stakes, win!).

The DBA can be completely buried late season, and I had to go digging to find it. If you dont know exactly where to look this is impossible. See photos!

The location of the gully to link the two snow fields – difficult to spot from above

I was assuming I was going to have to rap a full 60m down to the snow but it was so filled in I actually only made a 15m or so rap to skiiers left onto a snow ramp and could then ski down to the base. In more normal conditions if you only have 1 rope, either expect to make a V thread or rap down and across to skiiers left where theres another DBA at 30m (again hard to find late season)

To get back to civilization , head east. Either climb the access gully to get back to the East face of single cone, or enjoy a cruisy ski south east to the lake just below the 1700m contour and then skin back up the Wye Creek route.

Location of the DBA at the top of touchdown. 60m to the ground. I was able to just rap 10m out to the right and then ski the rest. If its not this fat then there either make a V thread or there is another DBA to the right of this pic