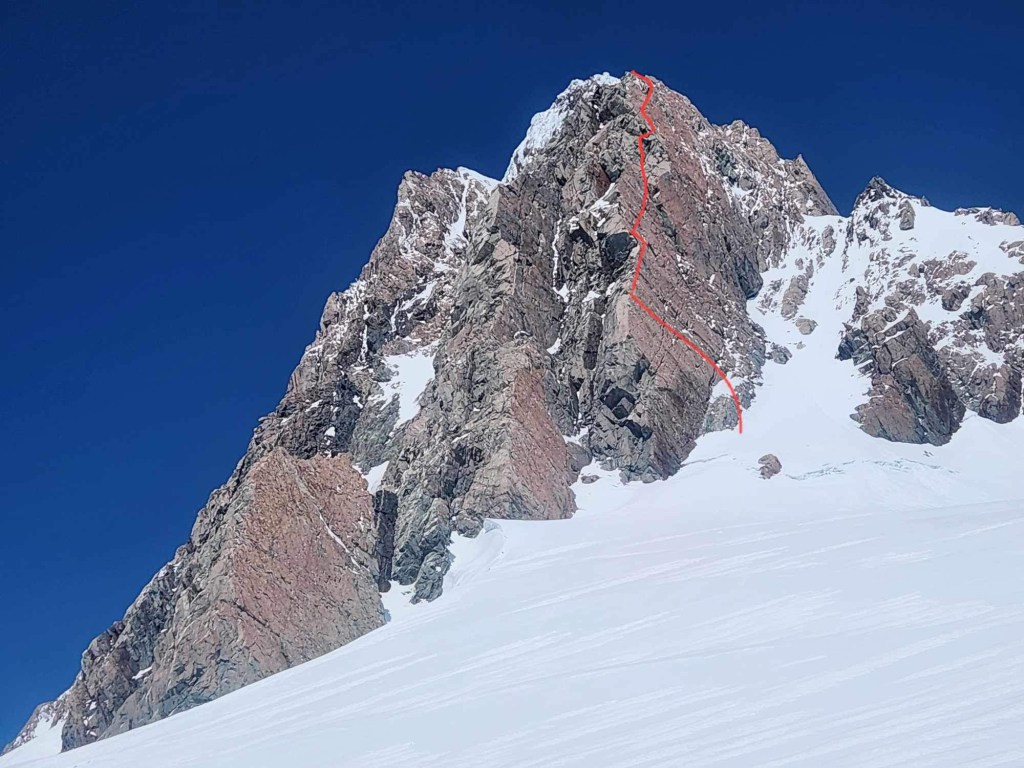
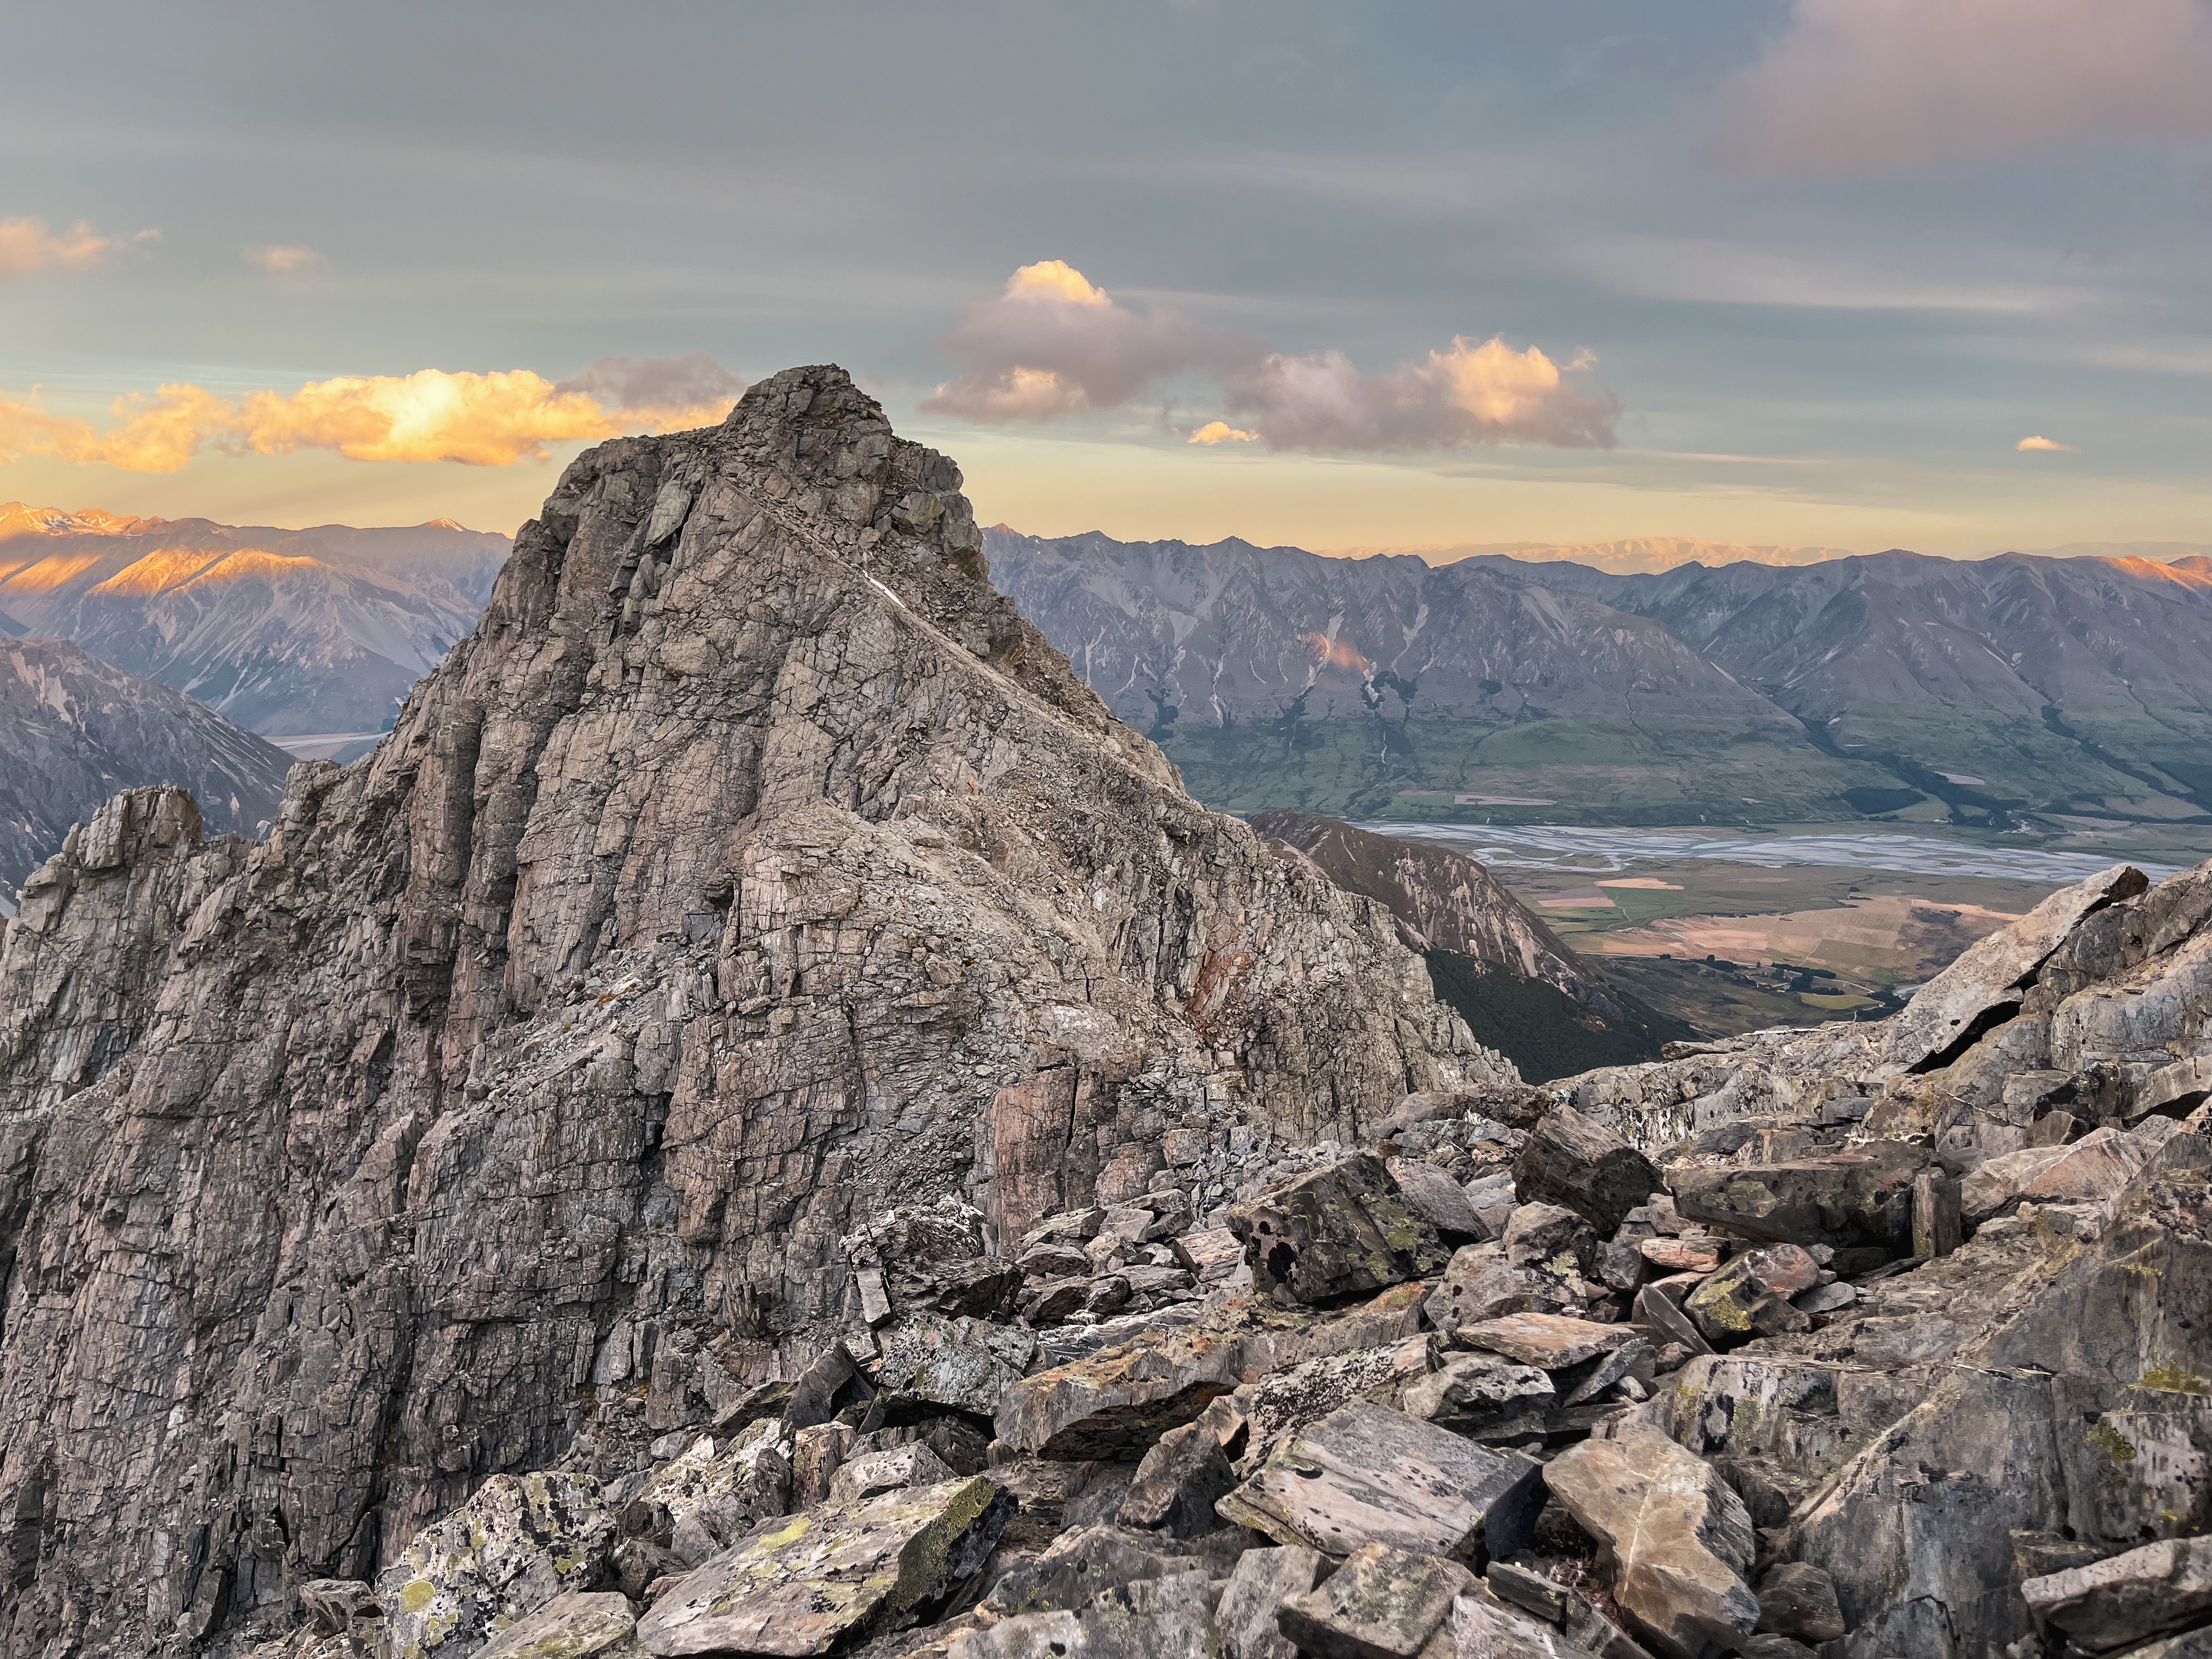
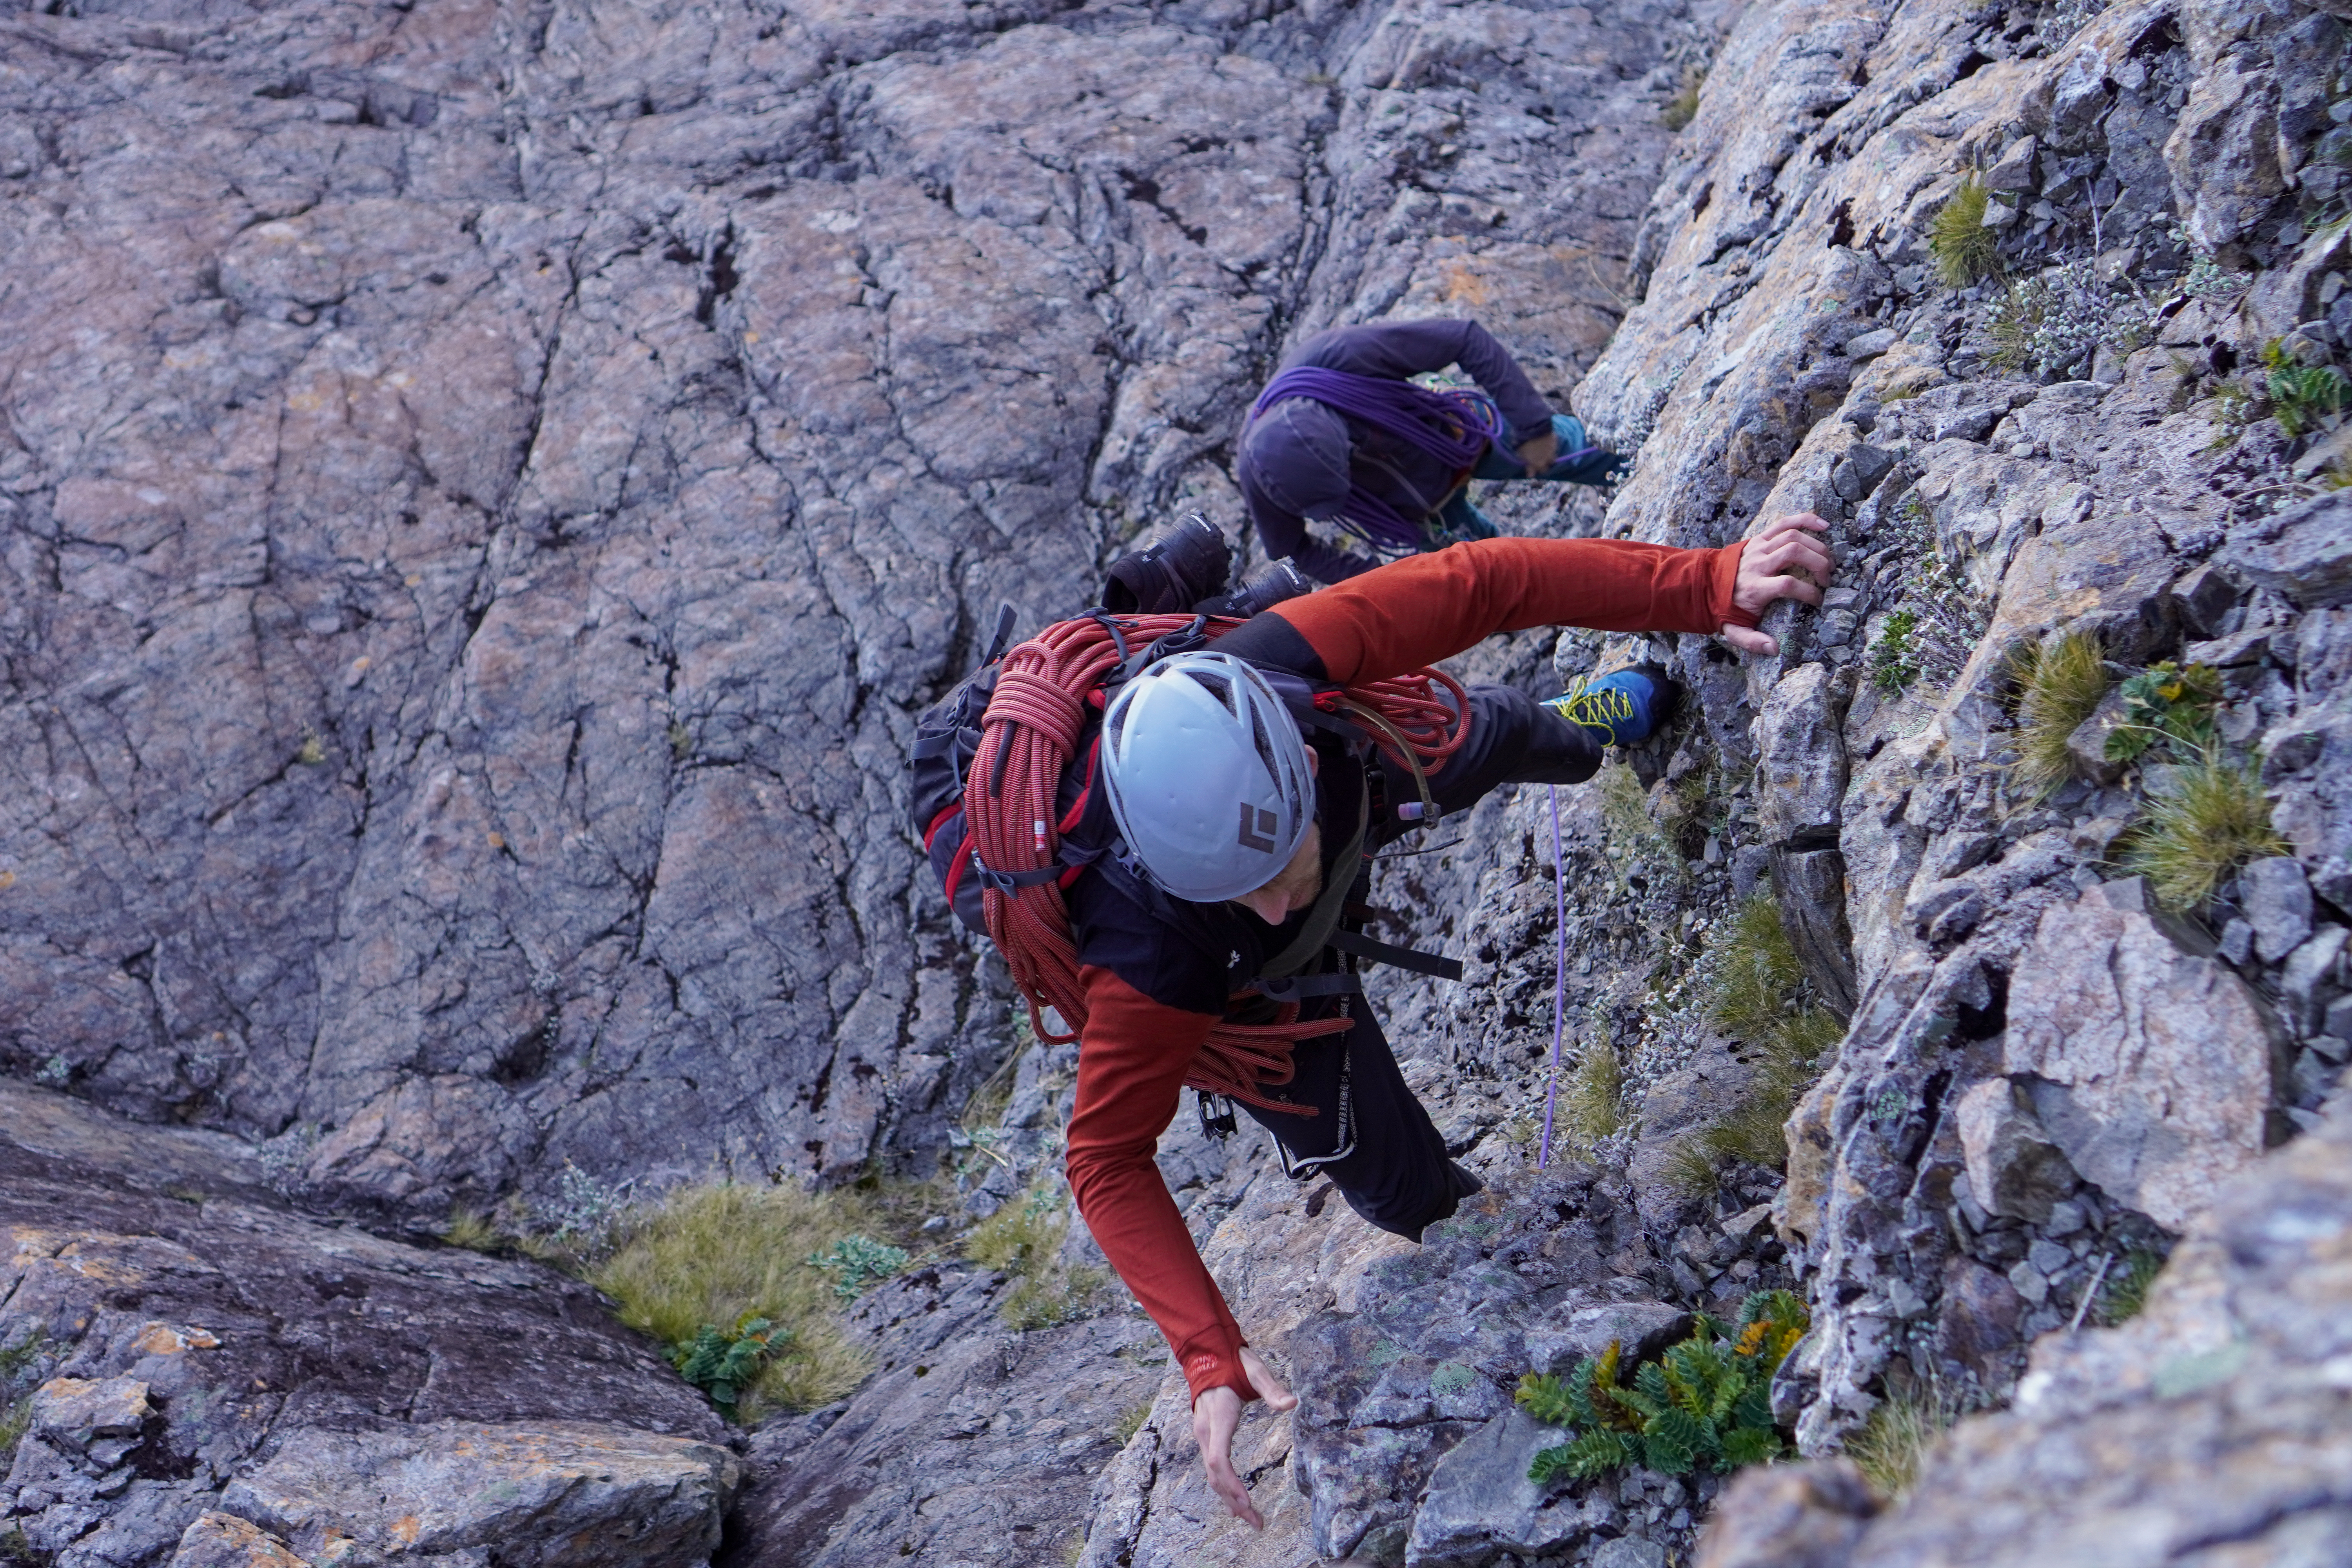
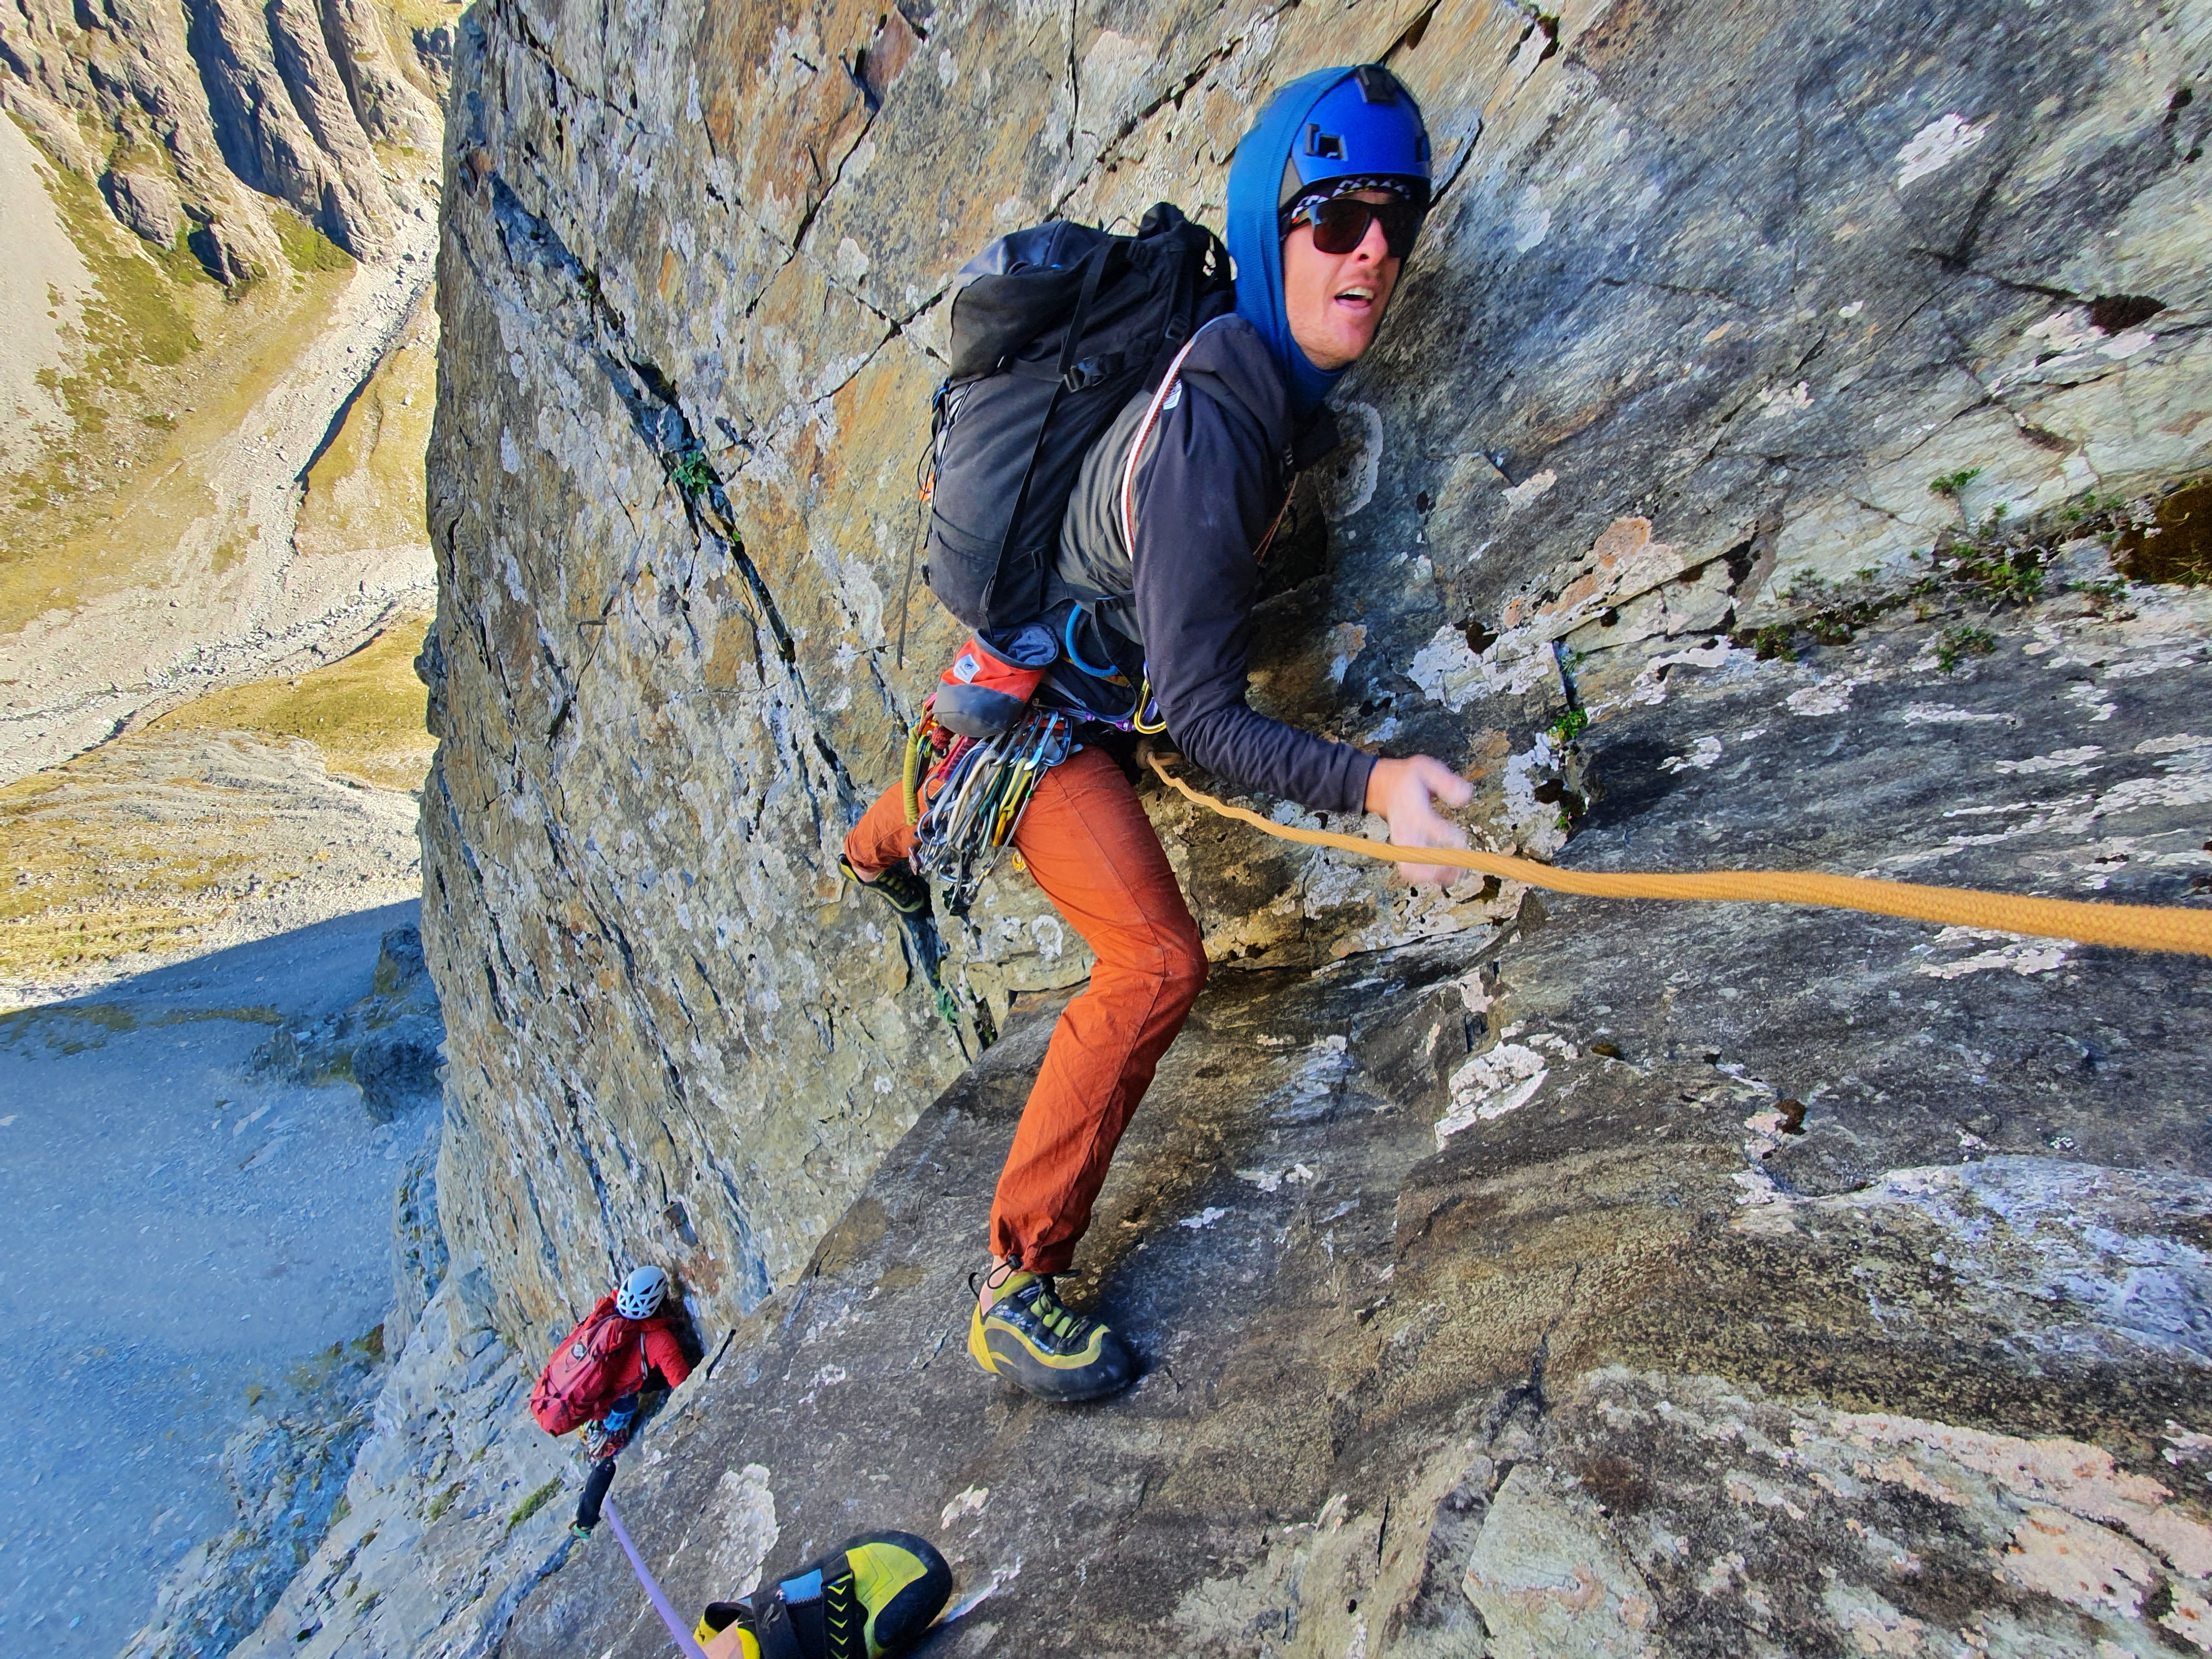
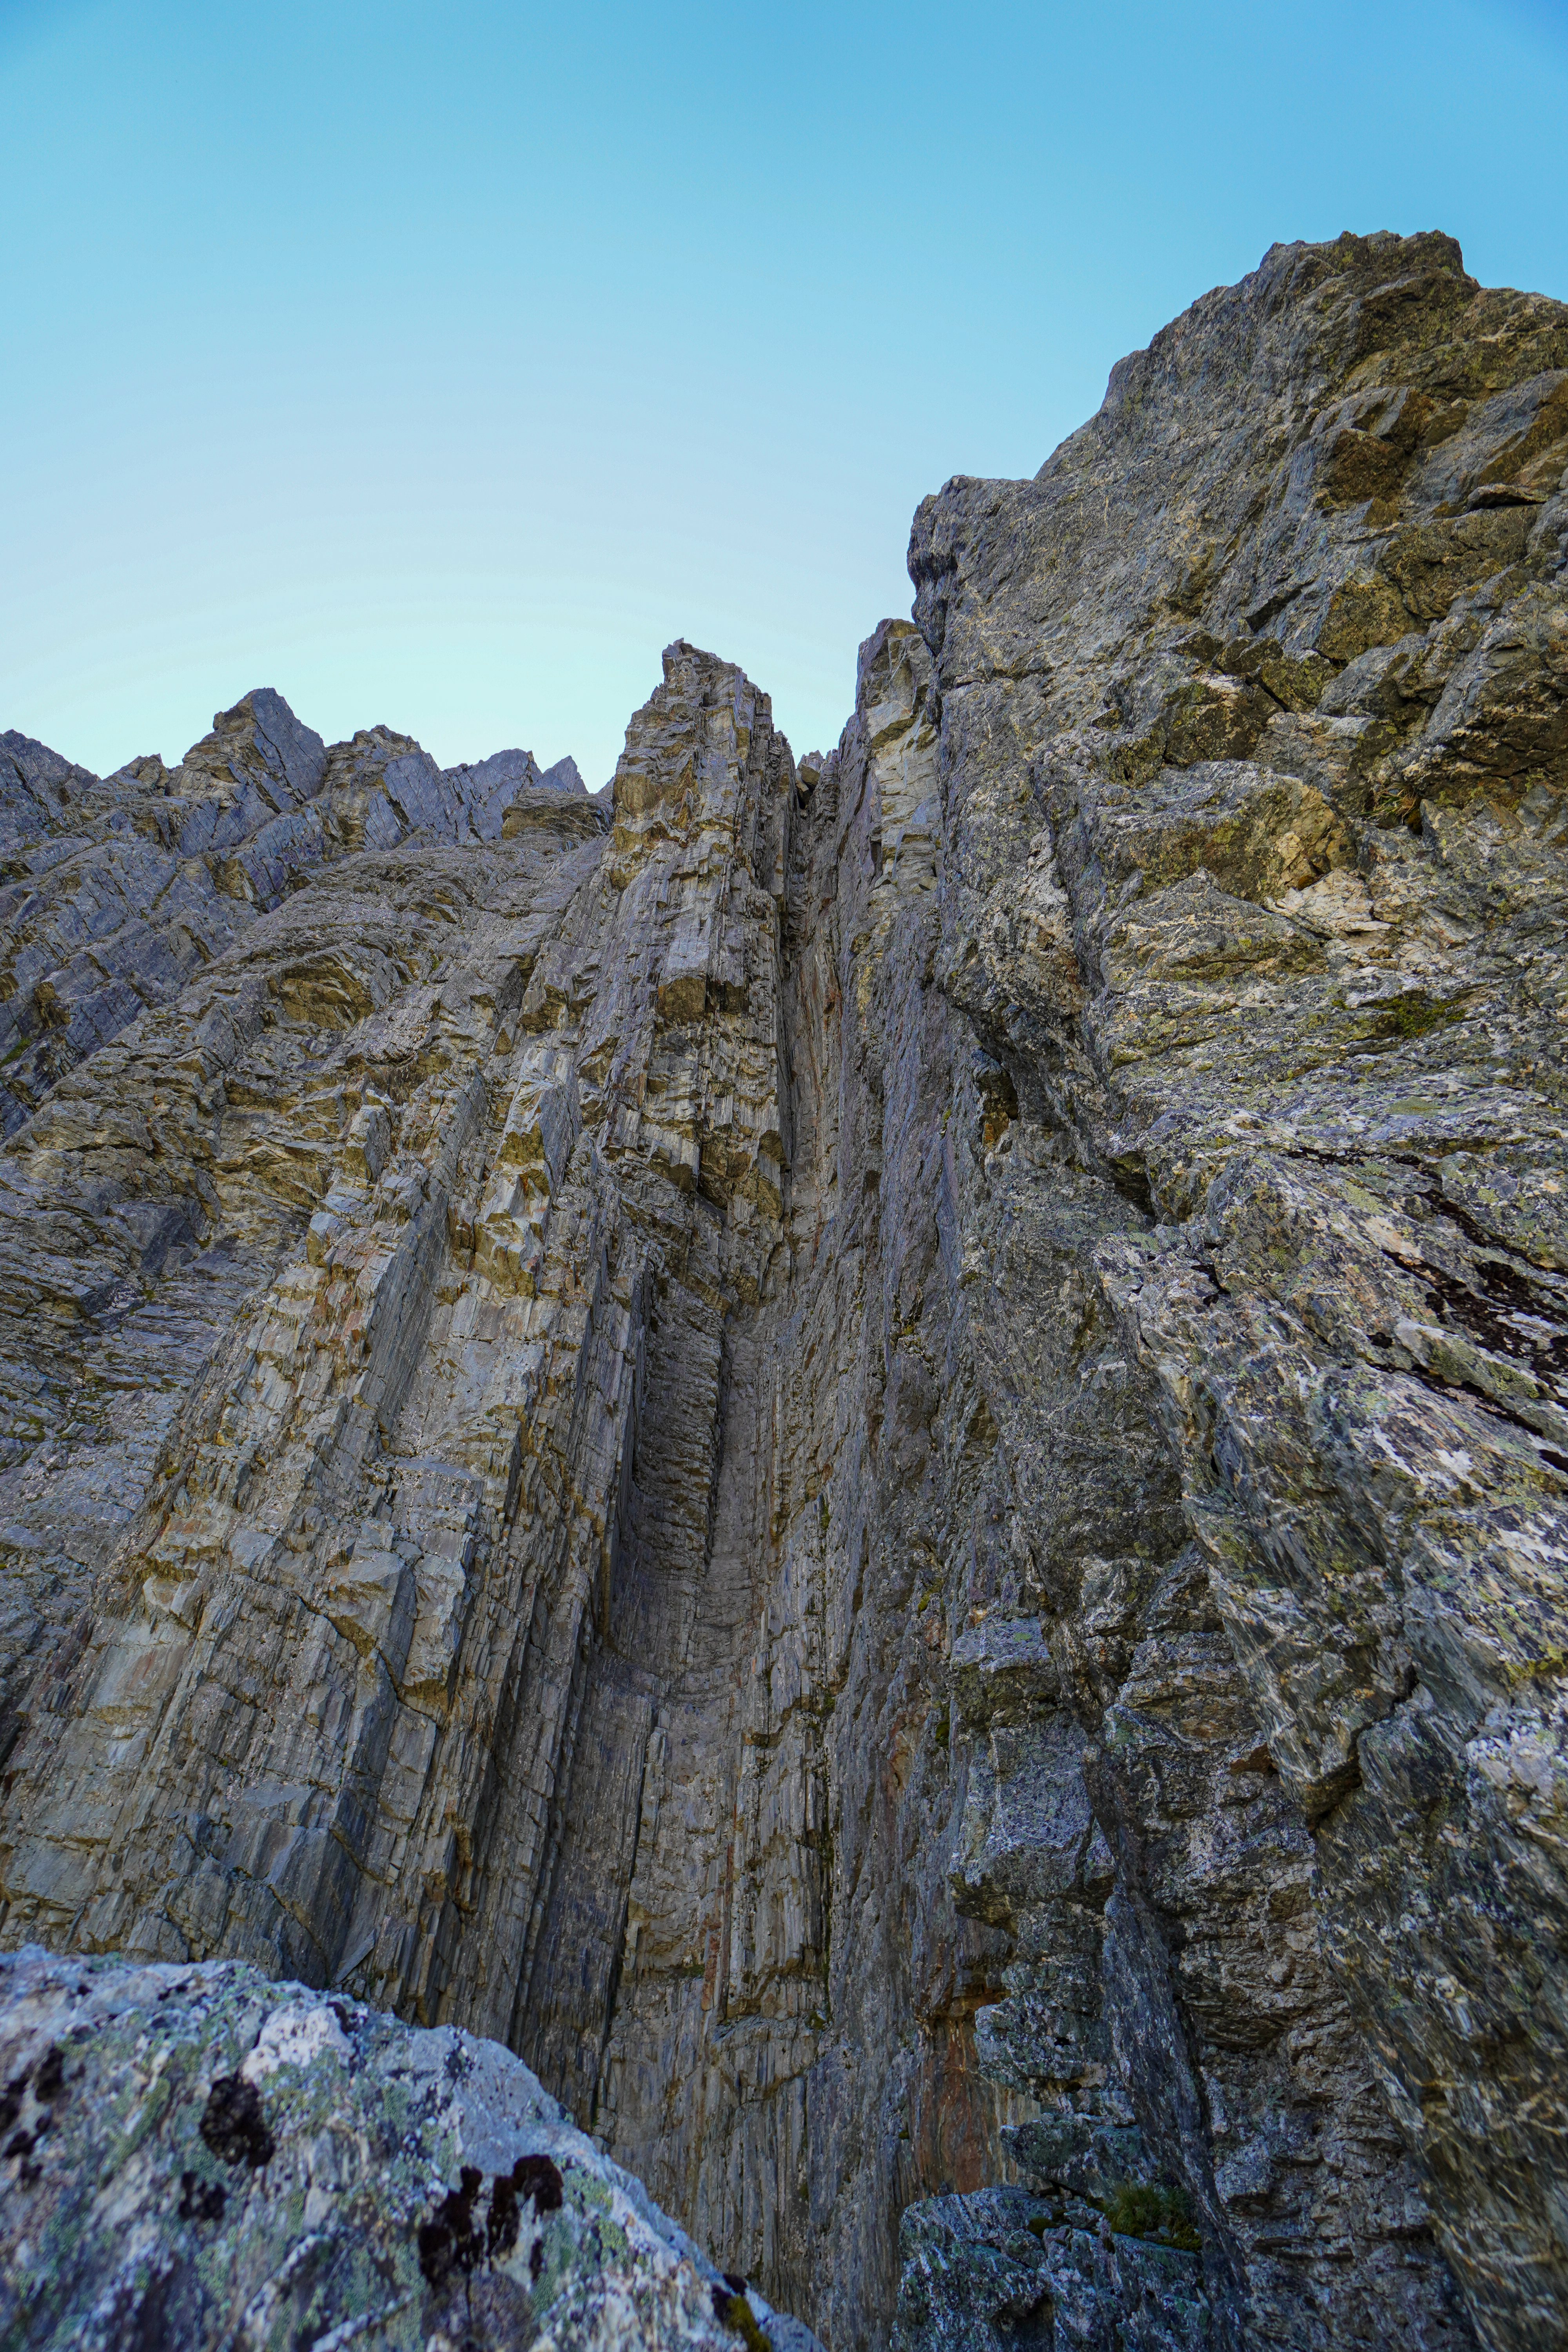
A very high quality rock route – fantastic varied climbing on solid rock basking in the afternoon sun overlooking the Fox glacier. Highly recommended.
Difficulty: Grade : II, 4+, Rock 17
Equipment: 2x 60m ropes. Double rack up to BD size 4
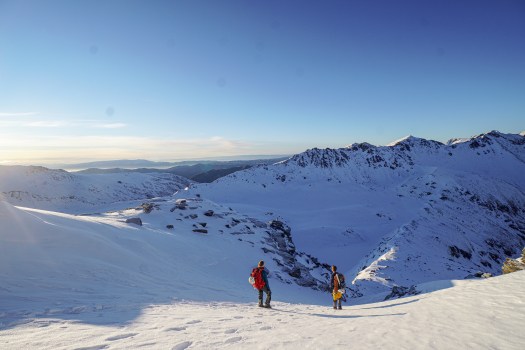
Approach time: on skis from Pioneer Hut around 1h to base of climb.
Climb time: 5h
Season: Late spring/summer. We climbed in November – still some snow around but route was clear.
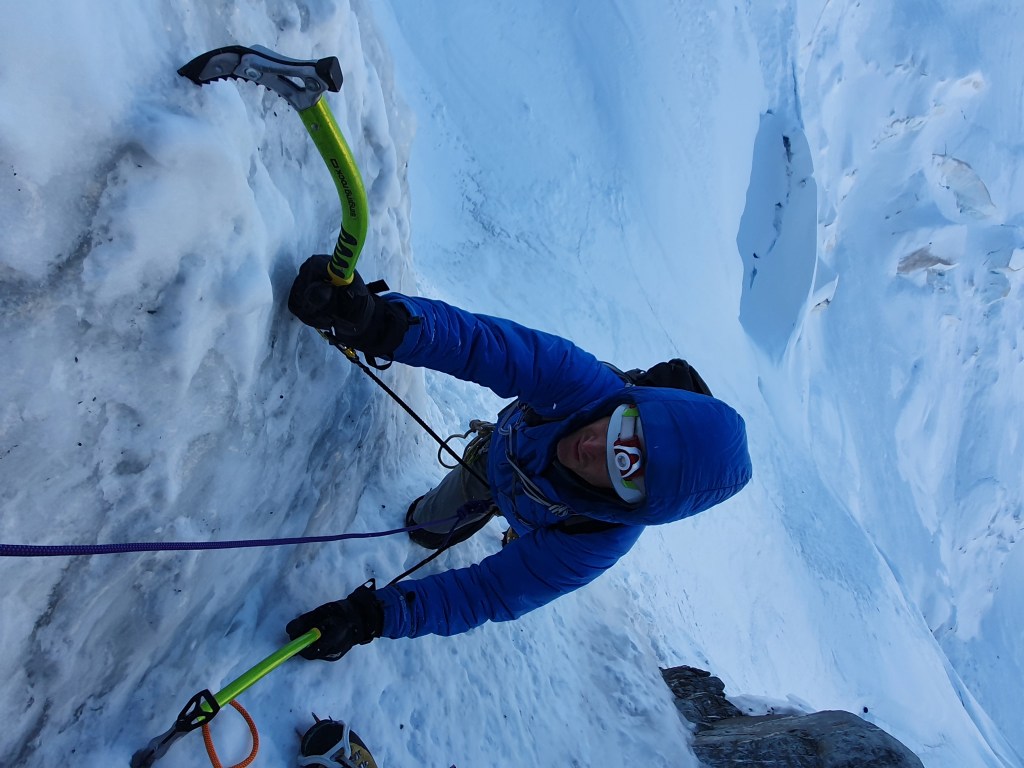
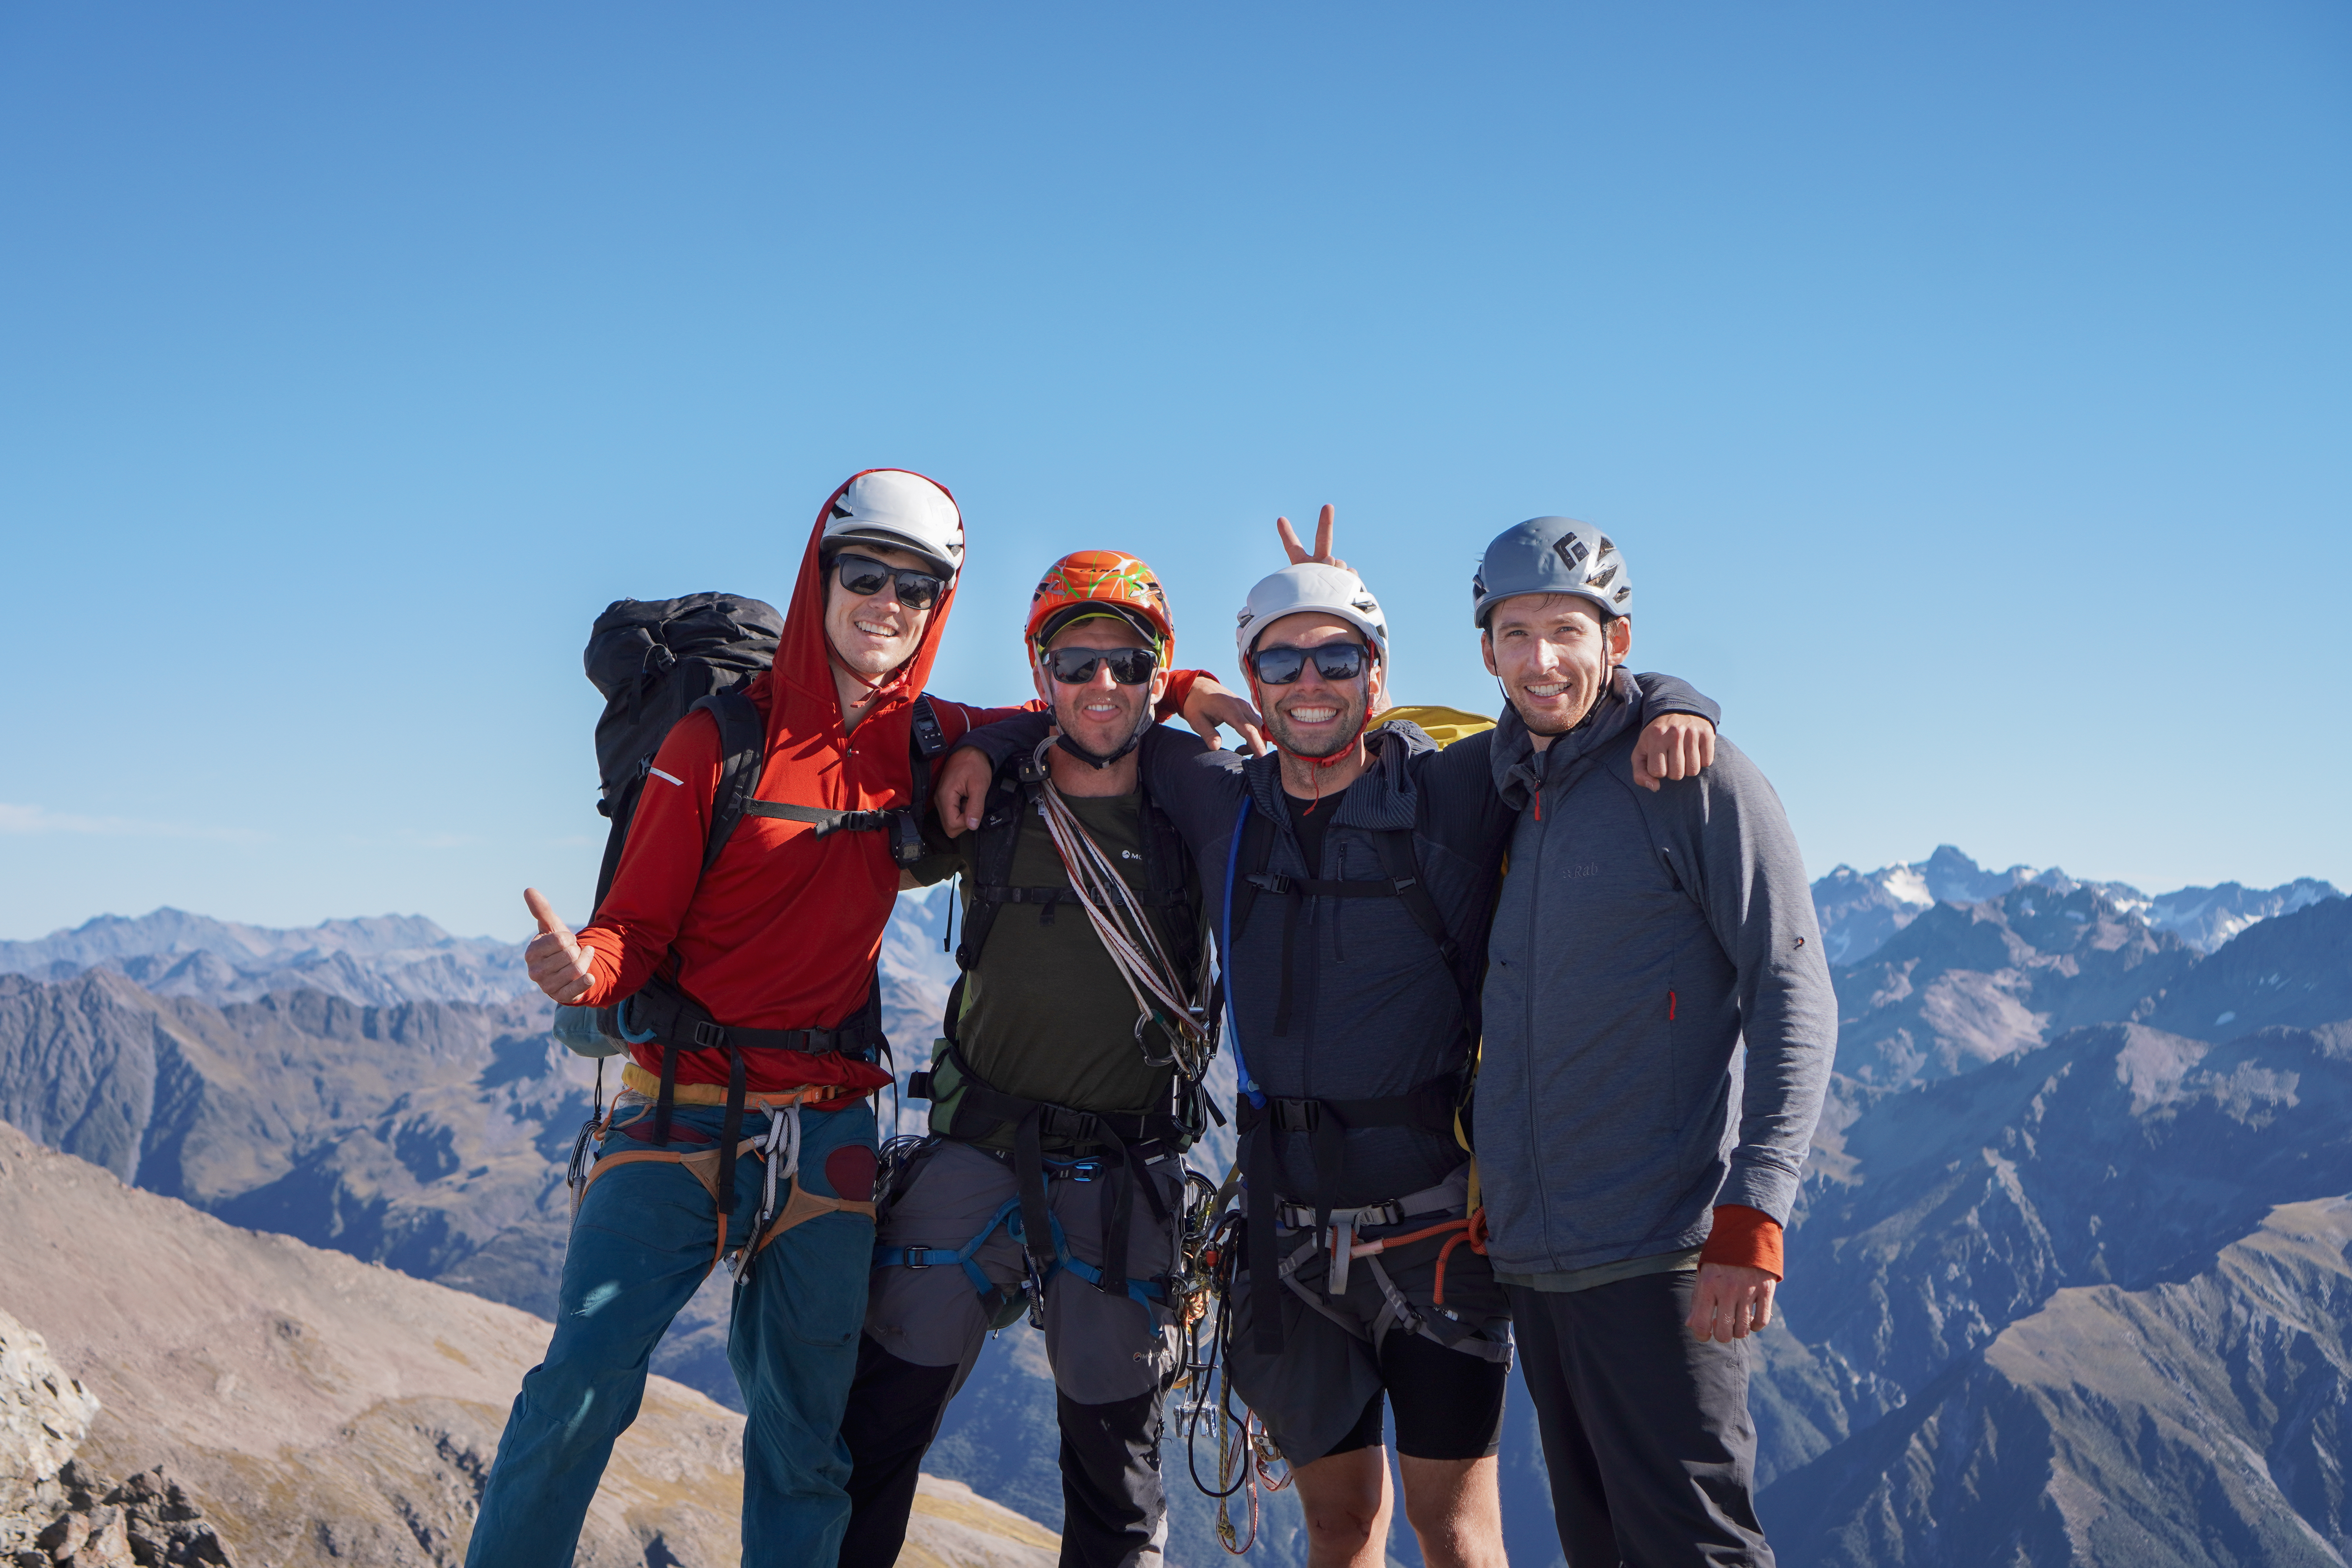
Team: Joe Collinson, Maria Koo 12/11/2024
Climb
Length : 300m (as stated on thecrag.com; we make it out to be just shy of this probably because of the snow line being high when we climbed it)
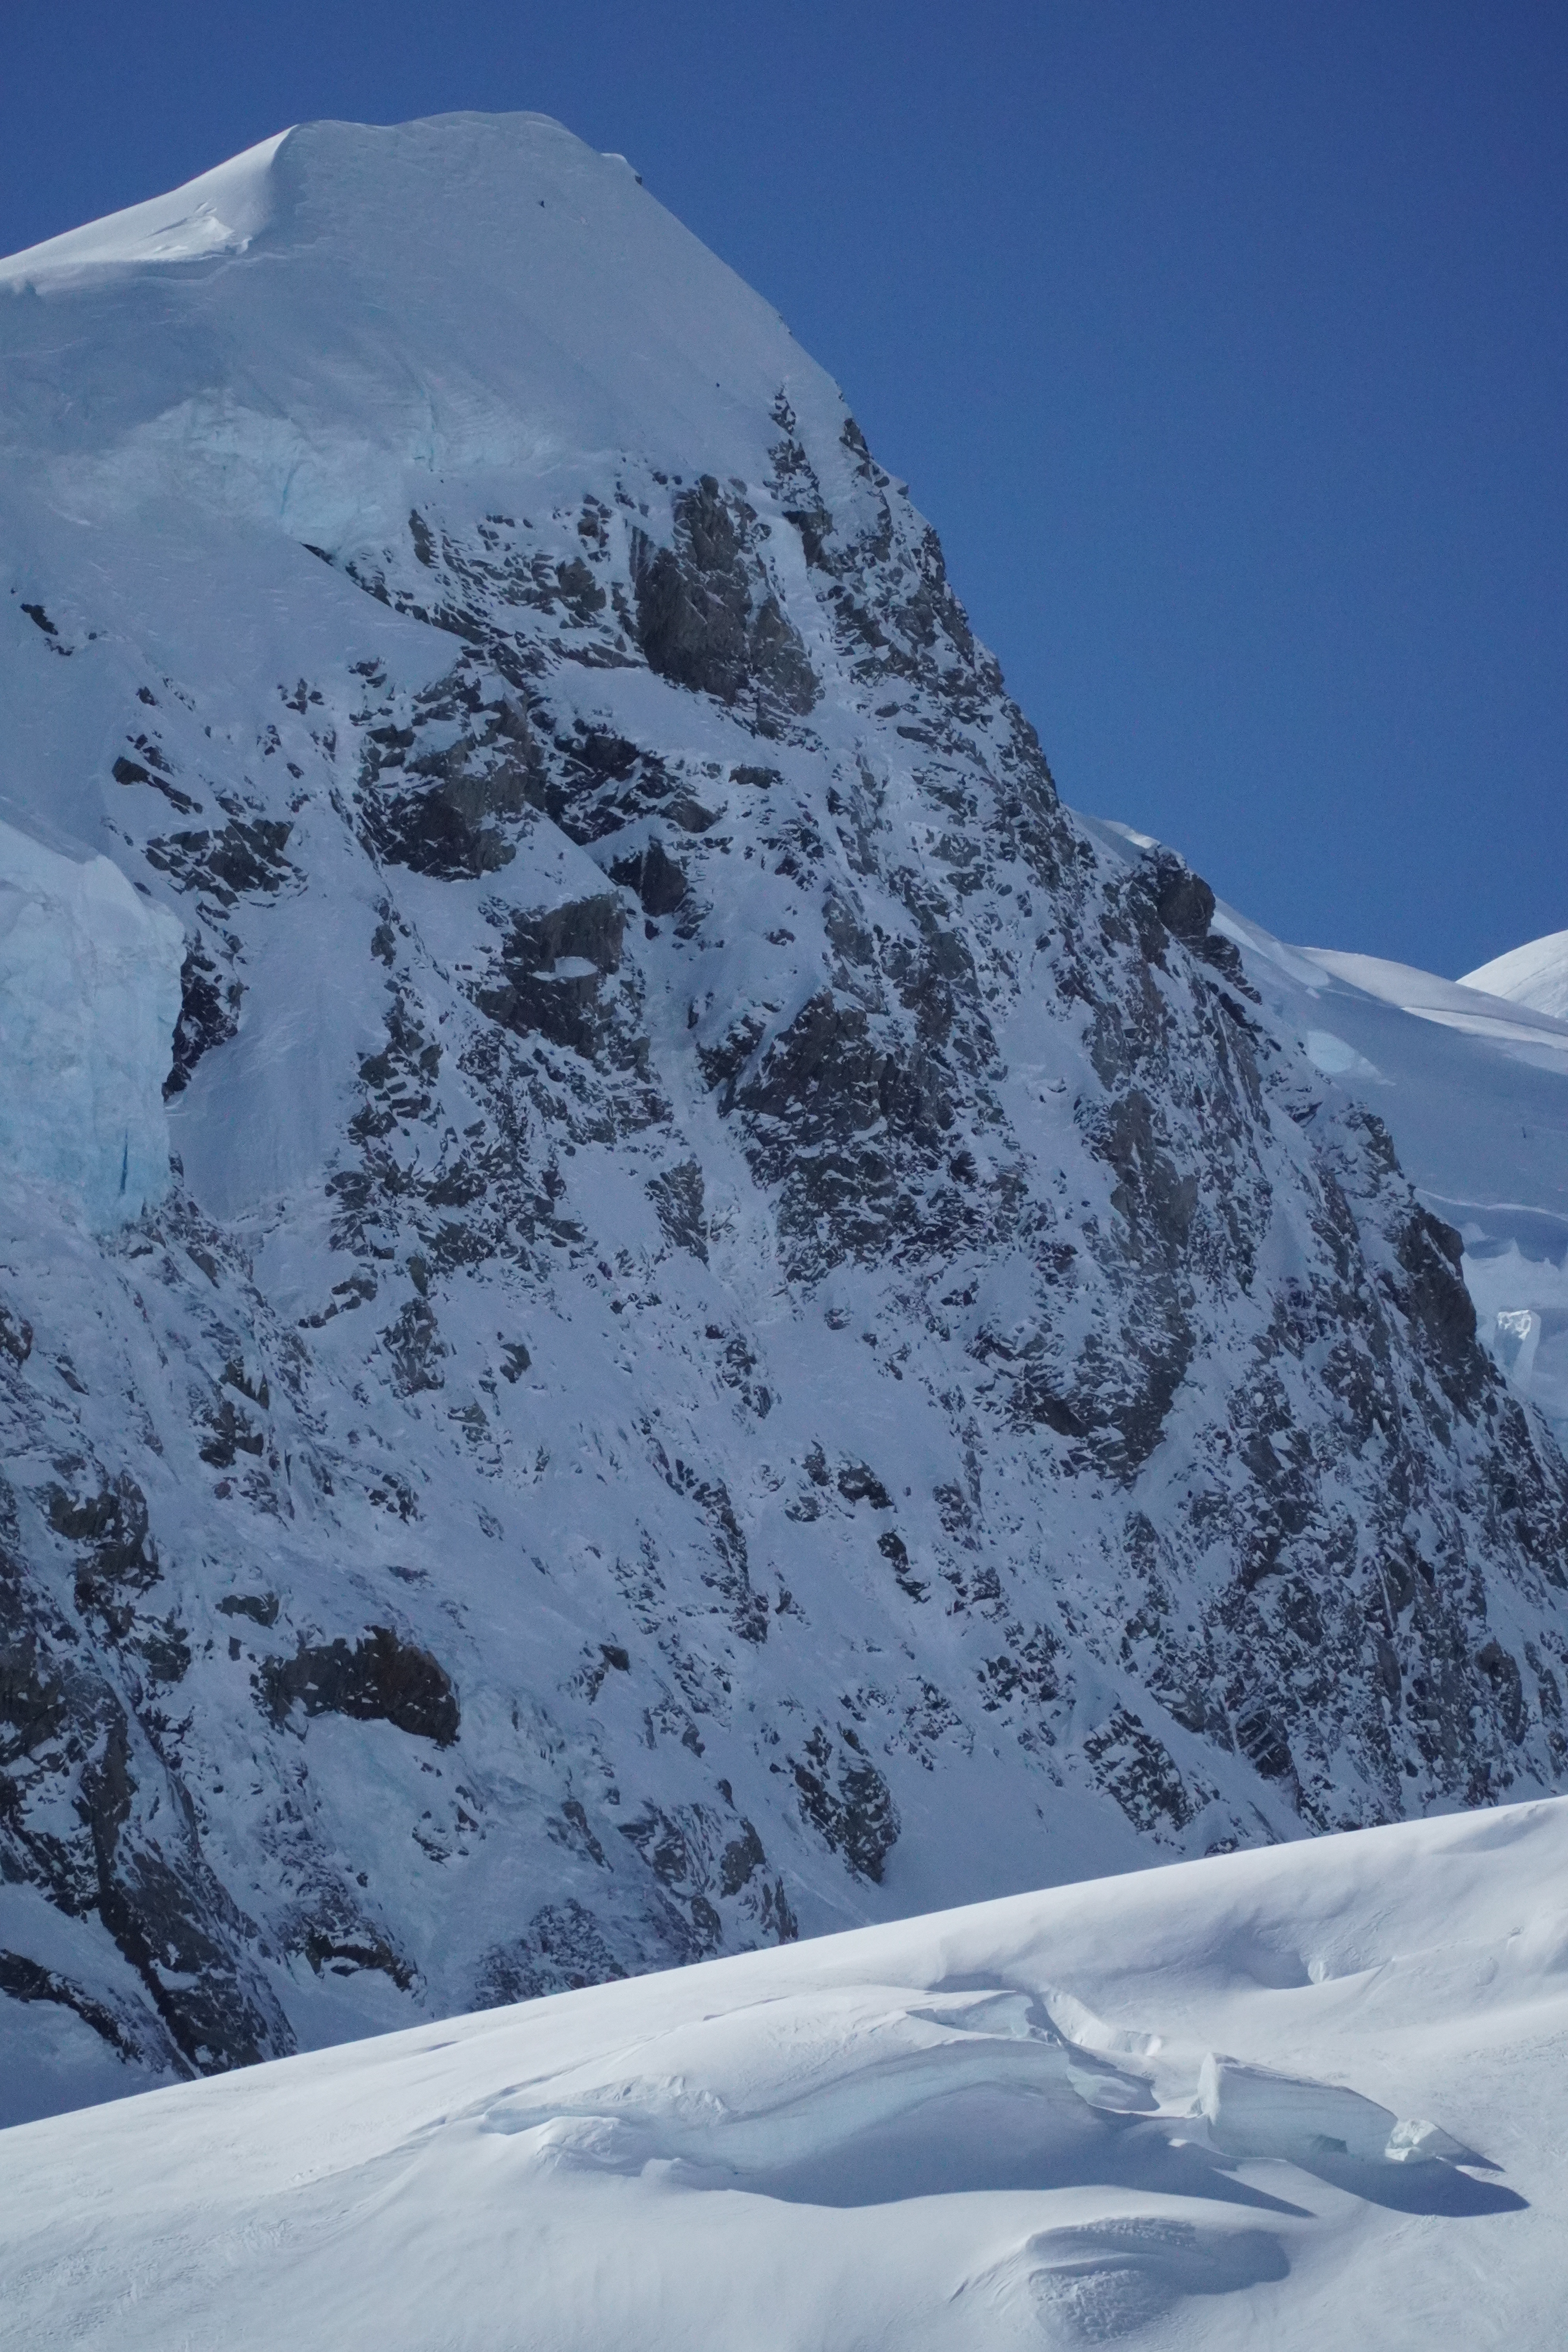
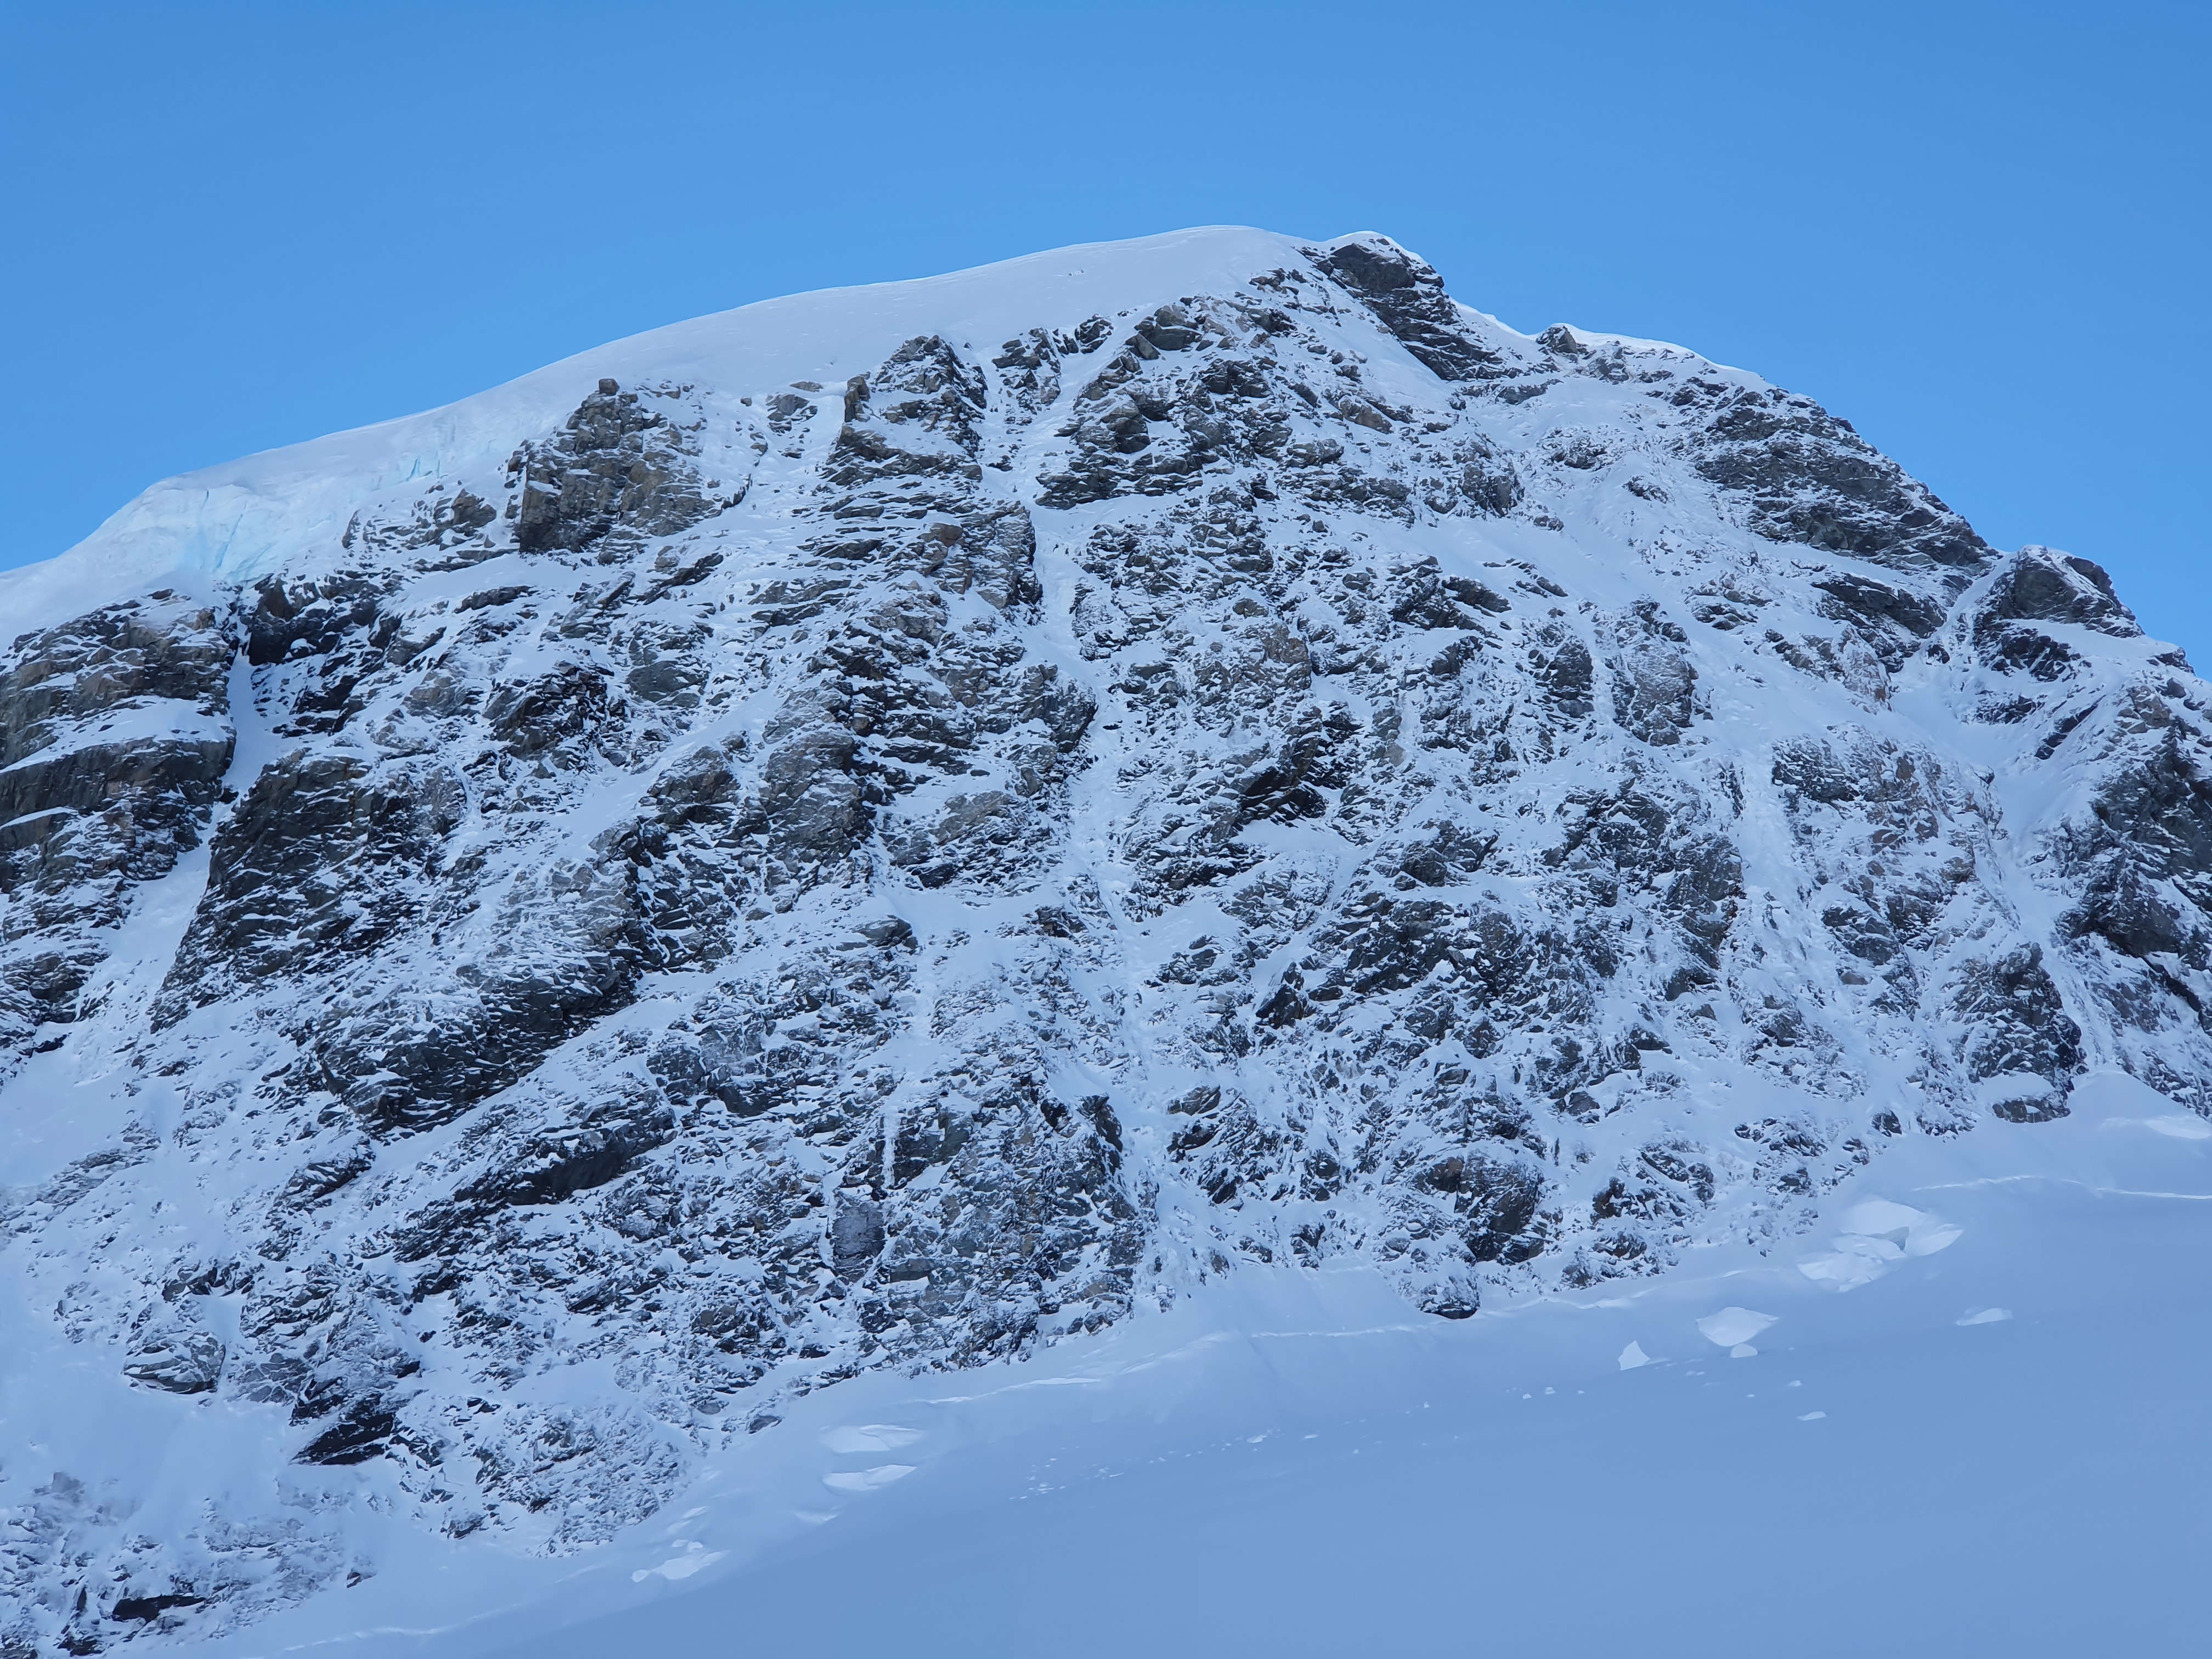
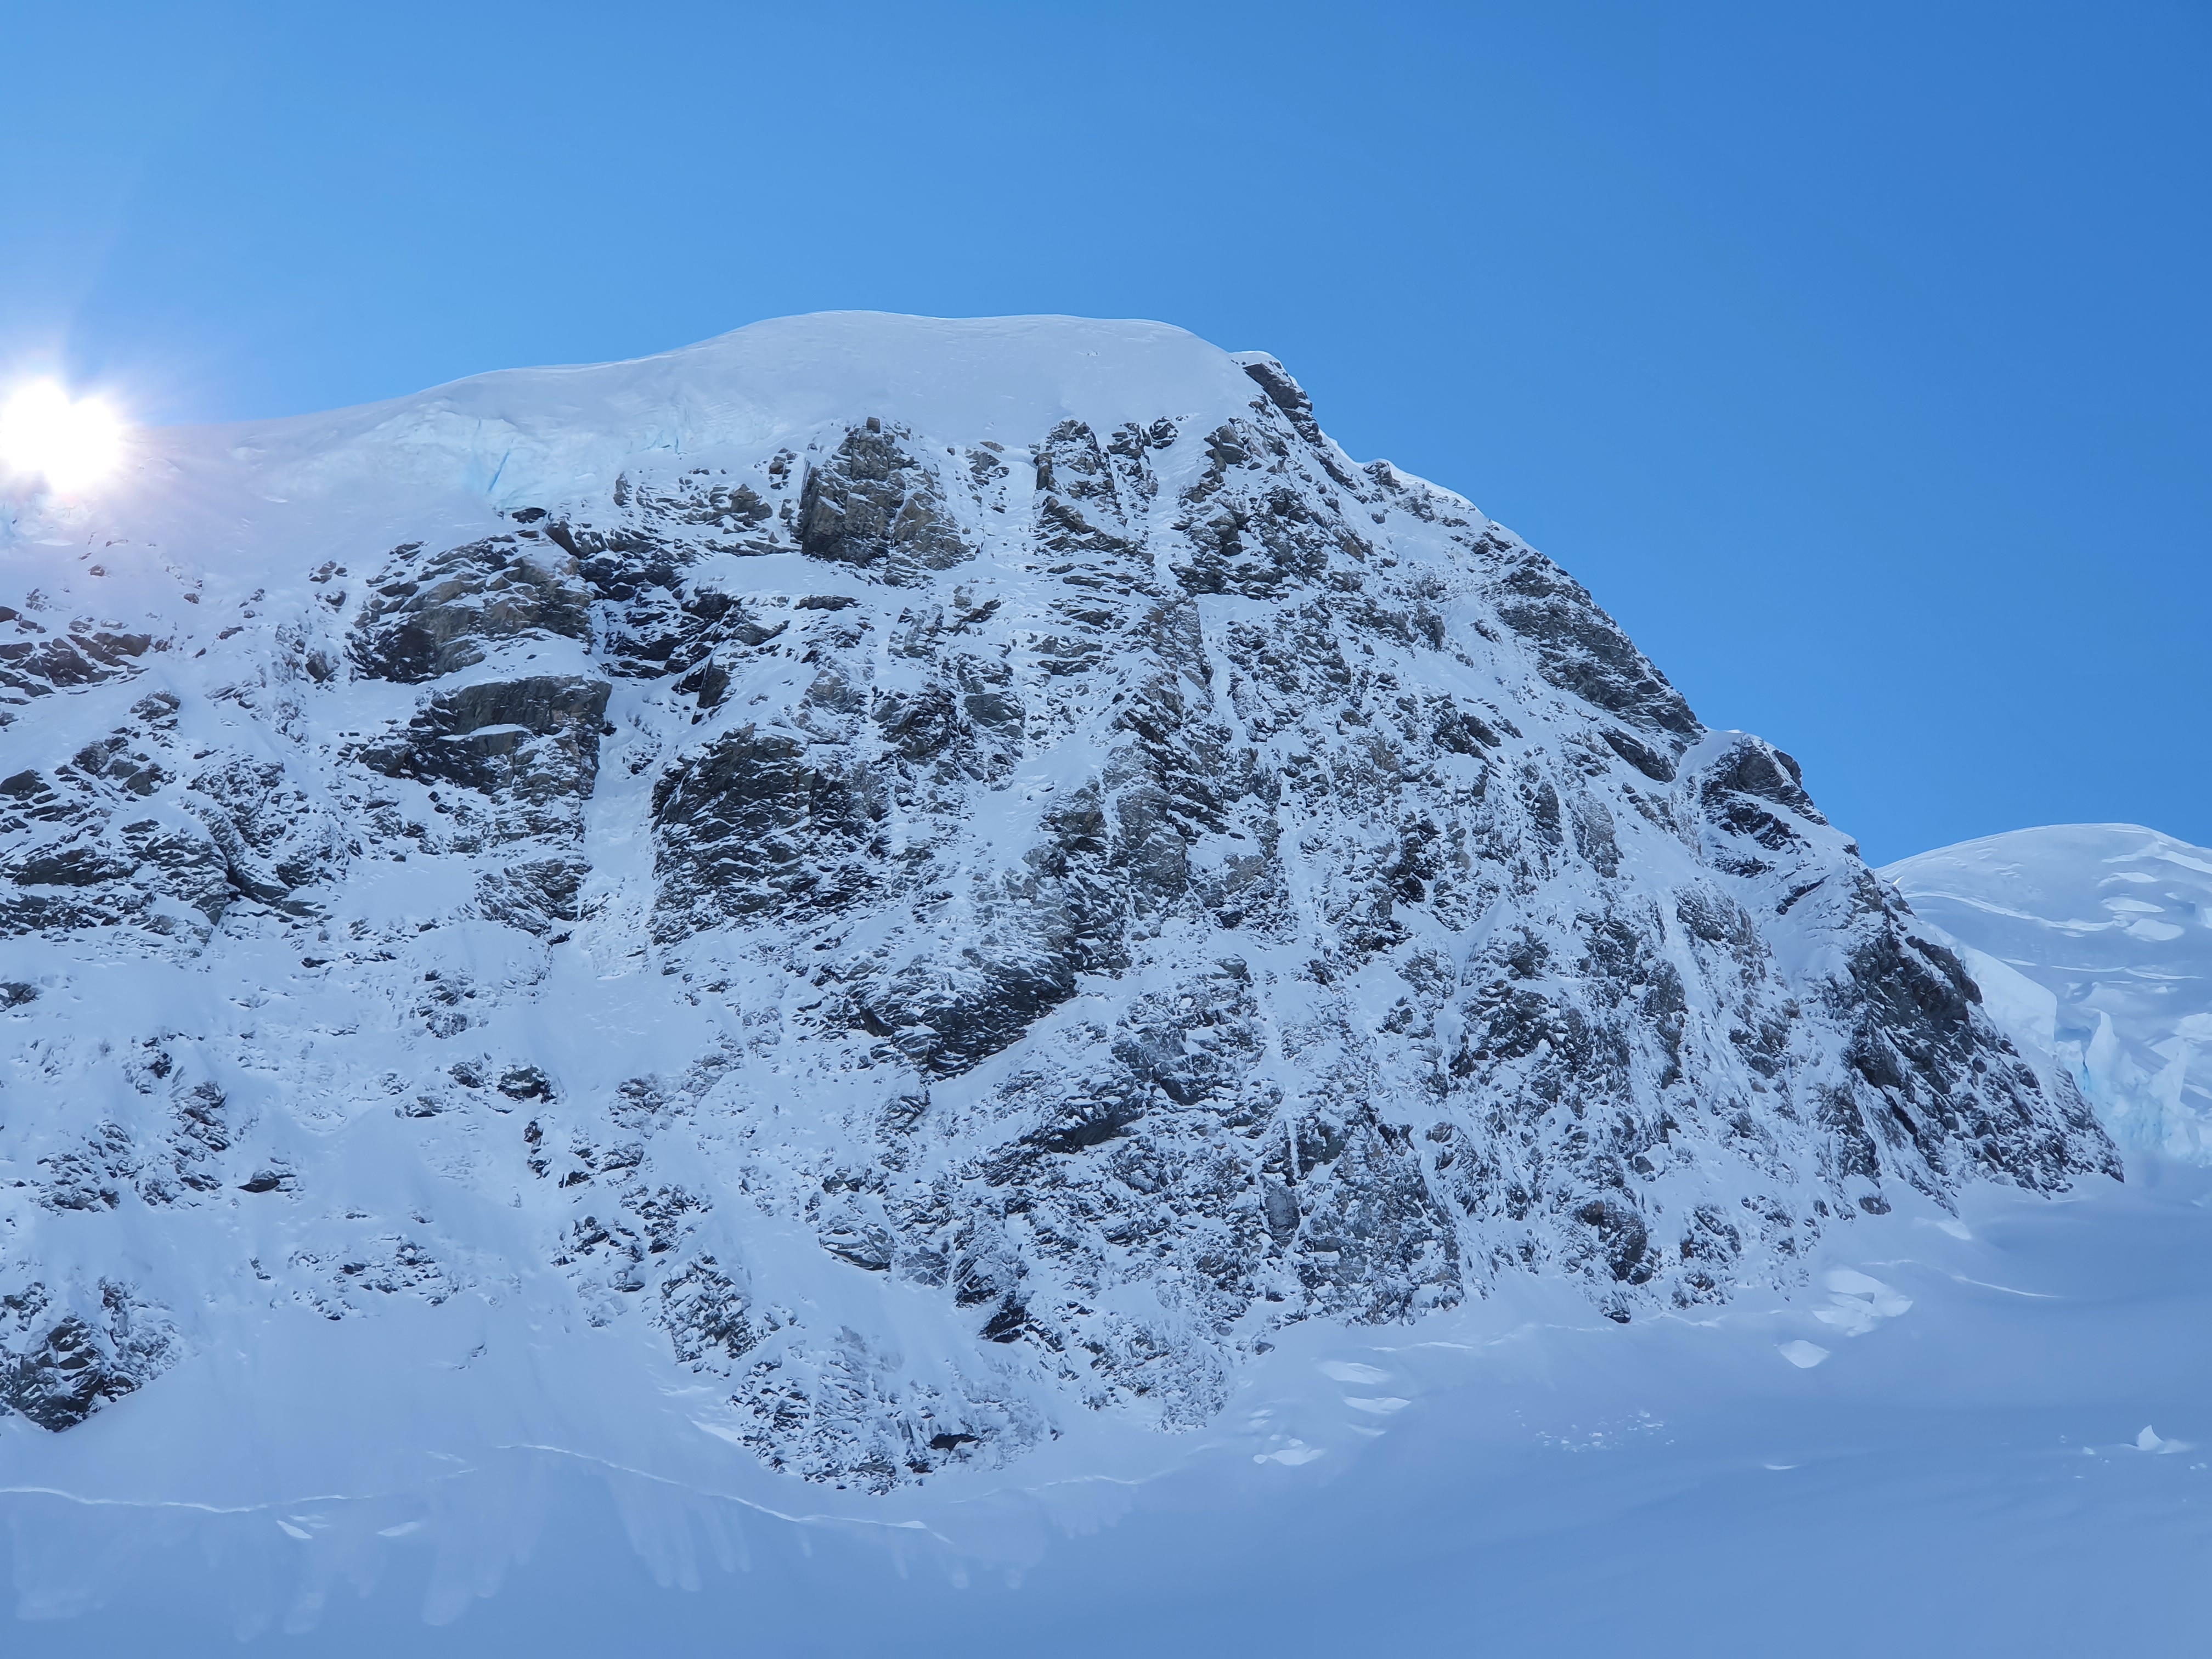
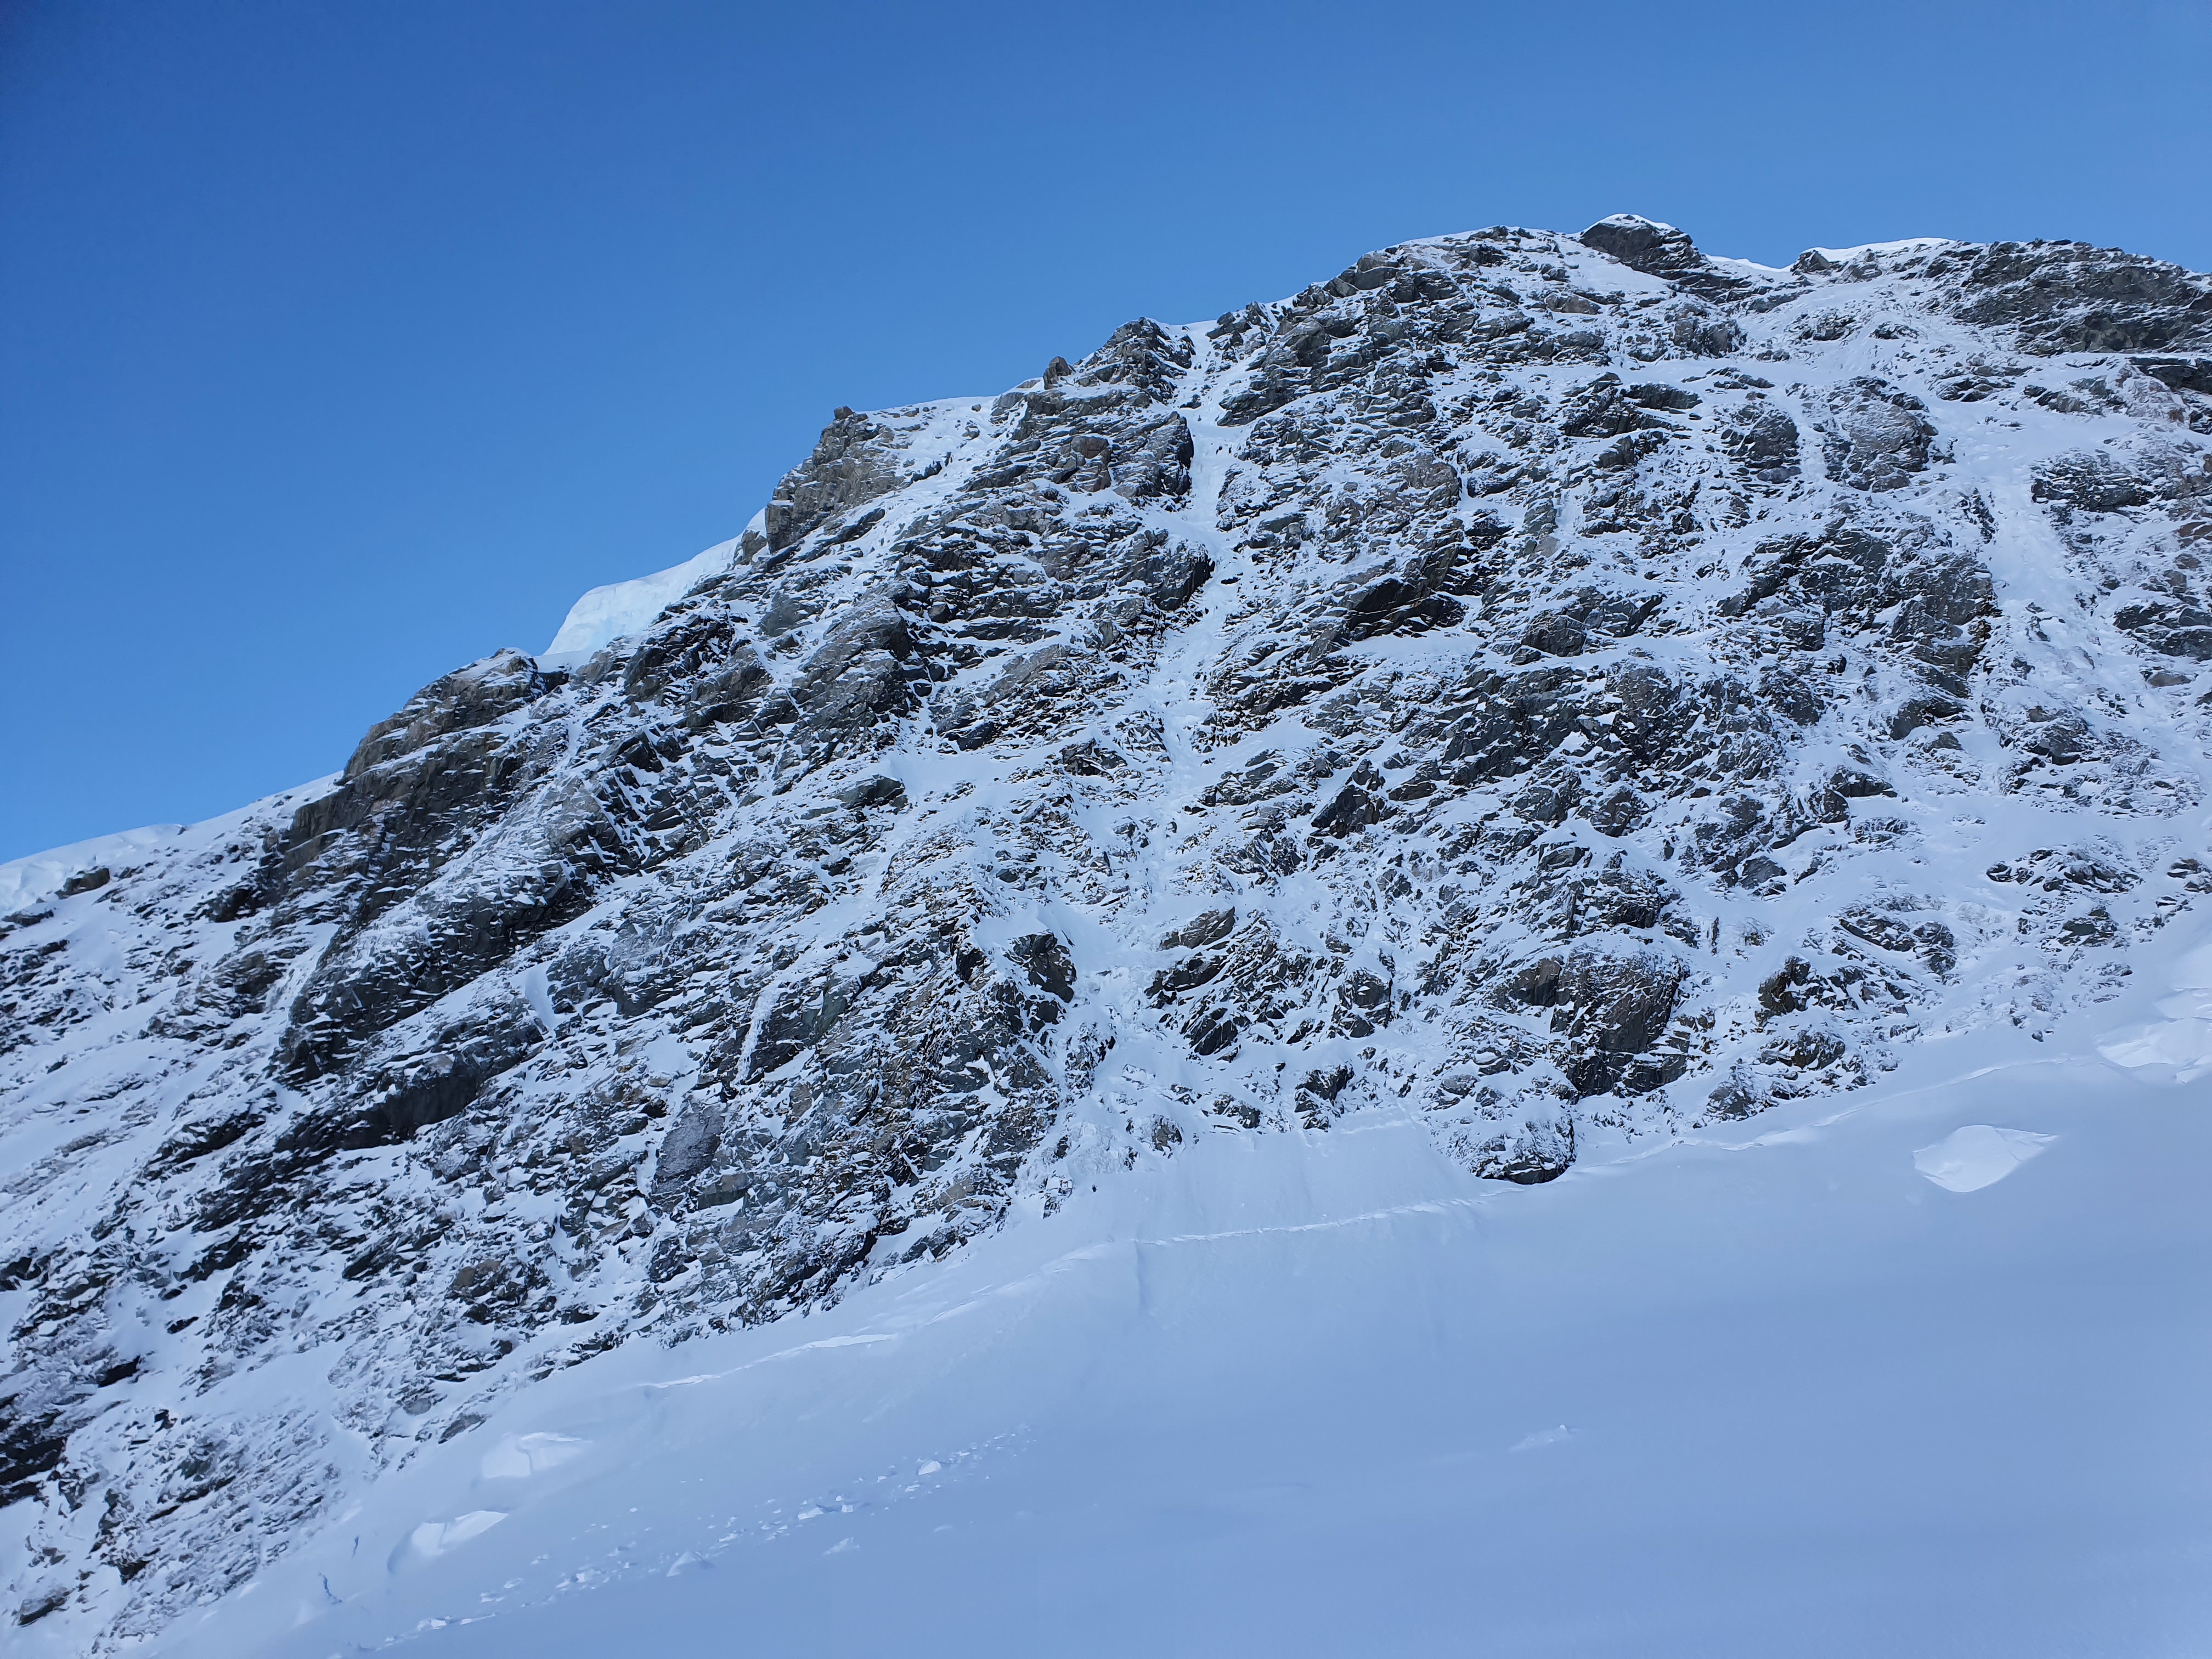
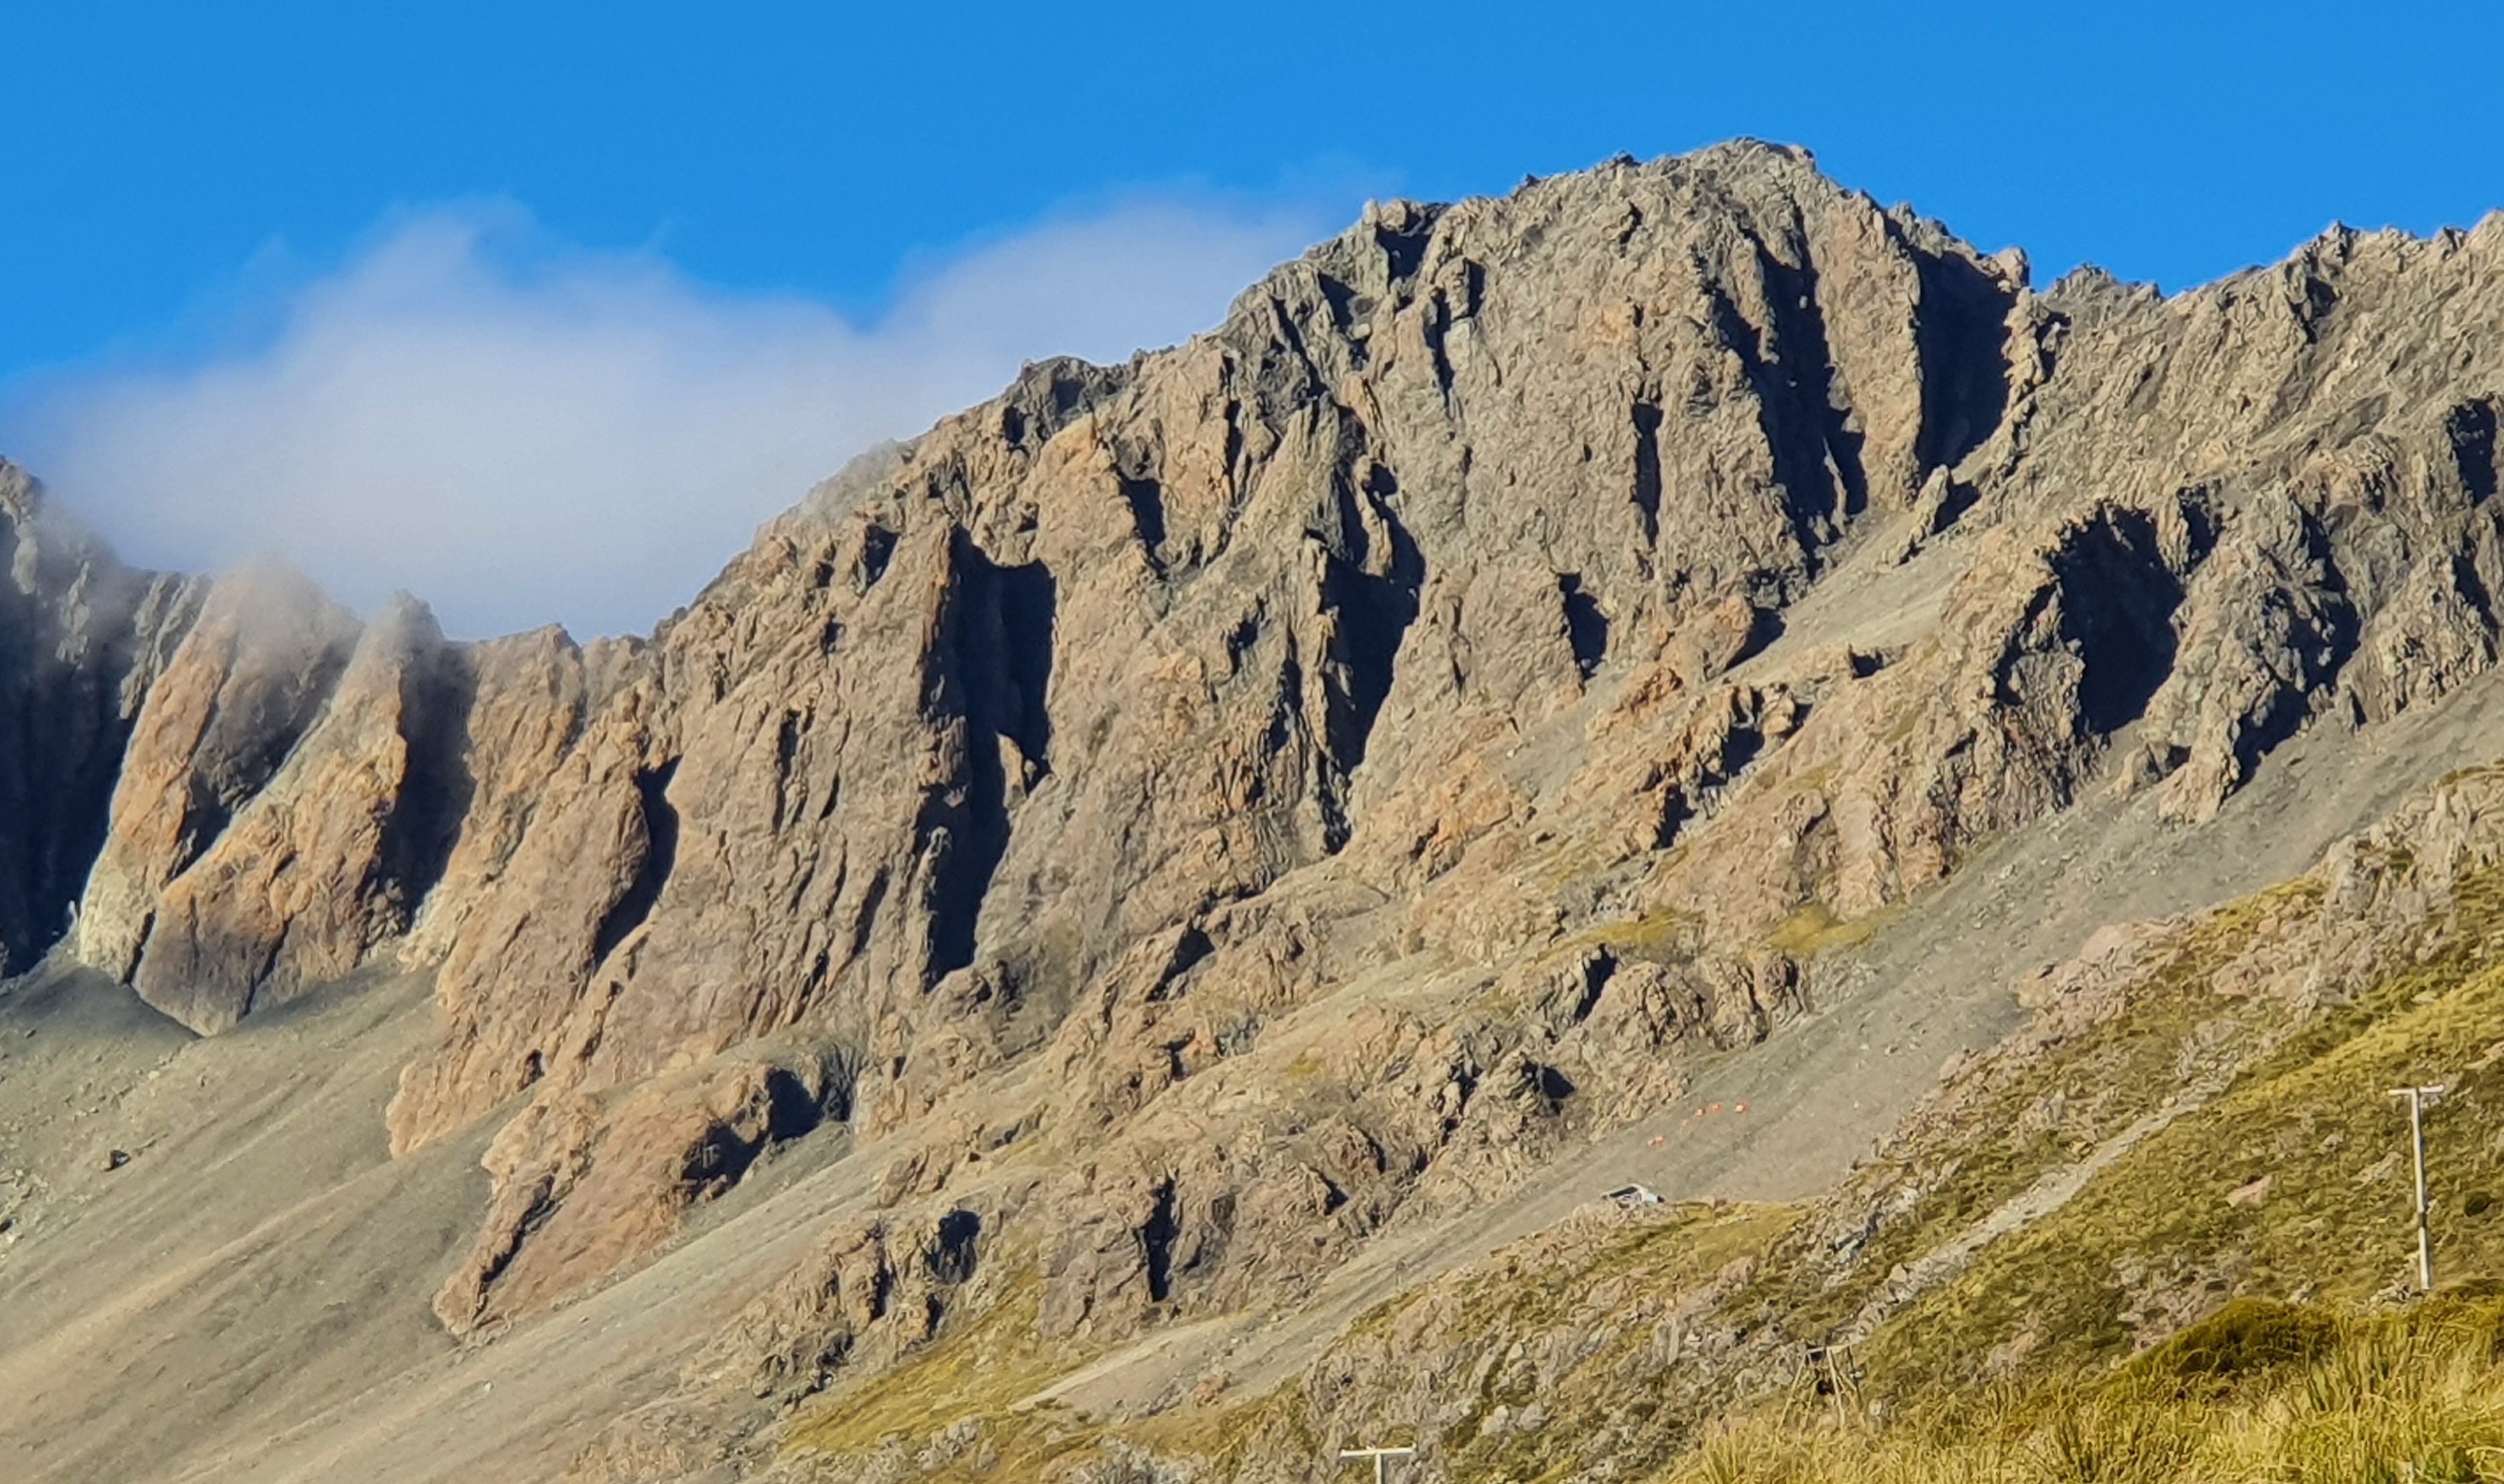
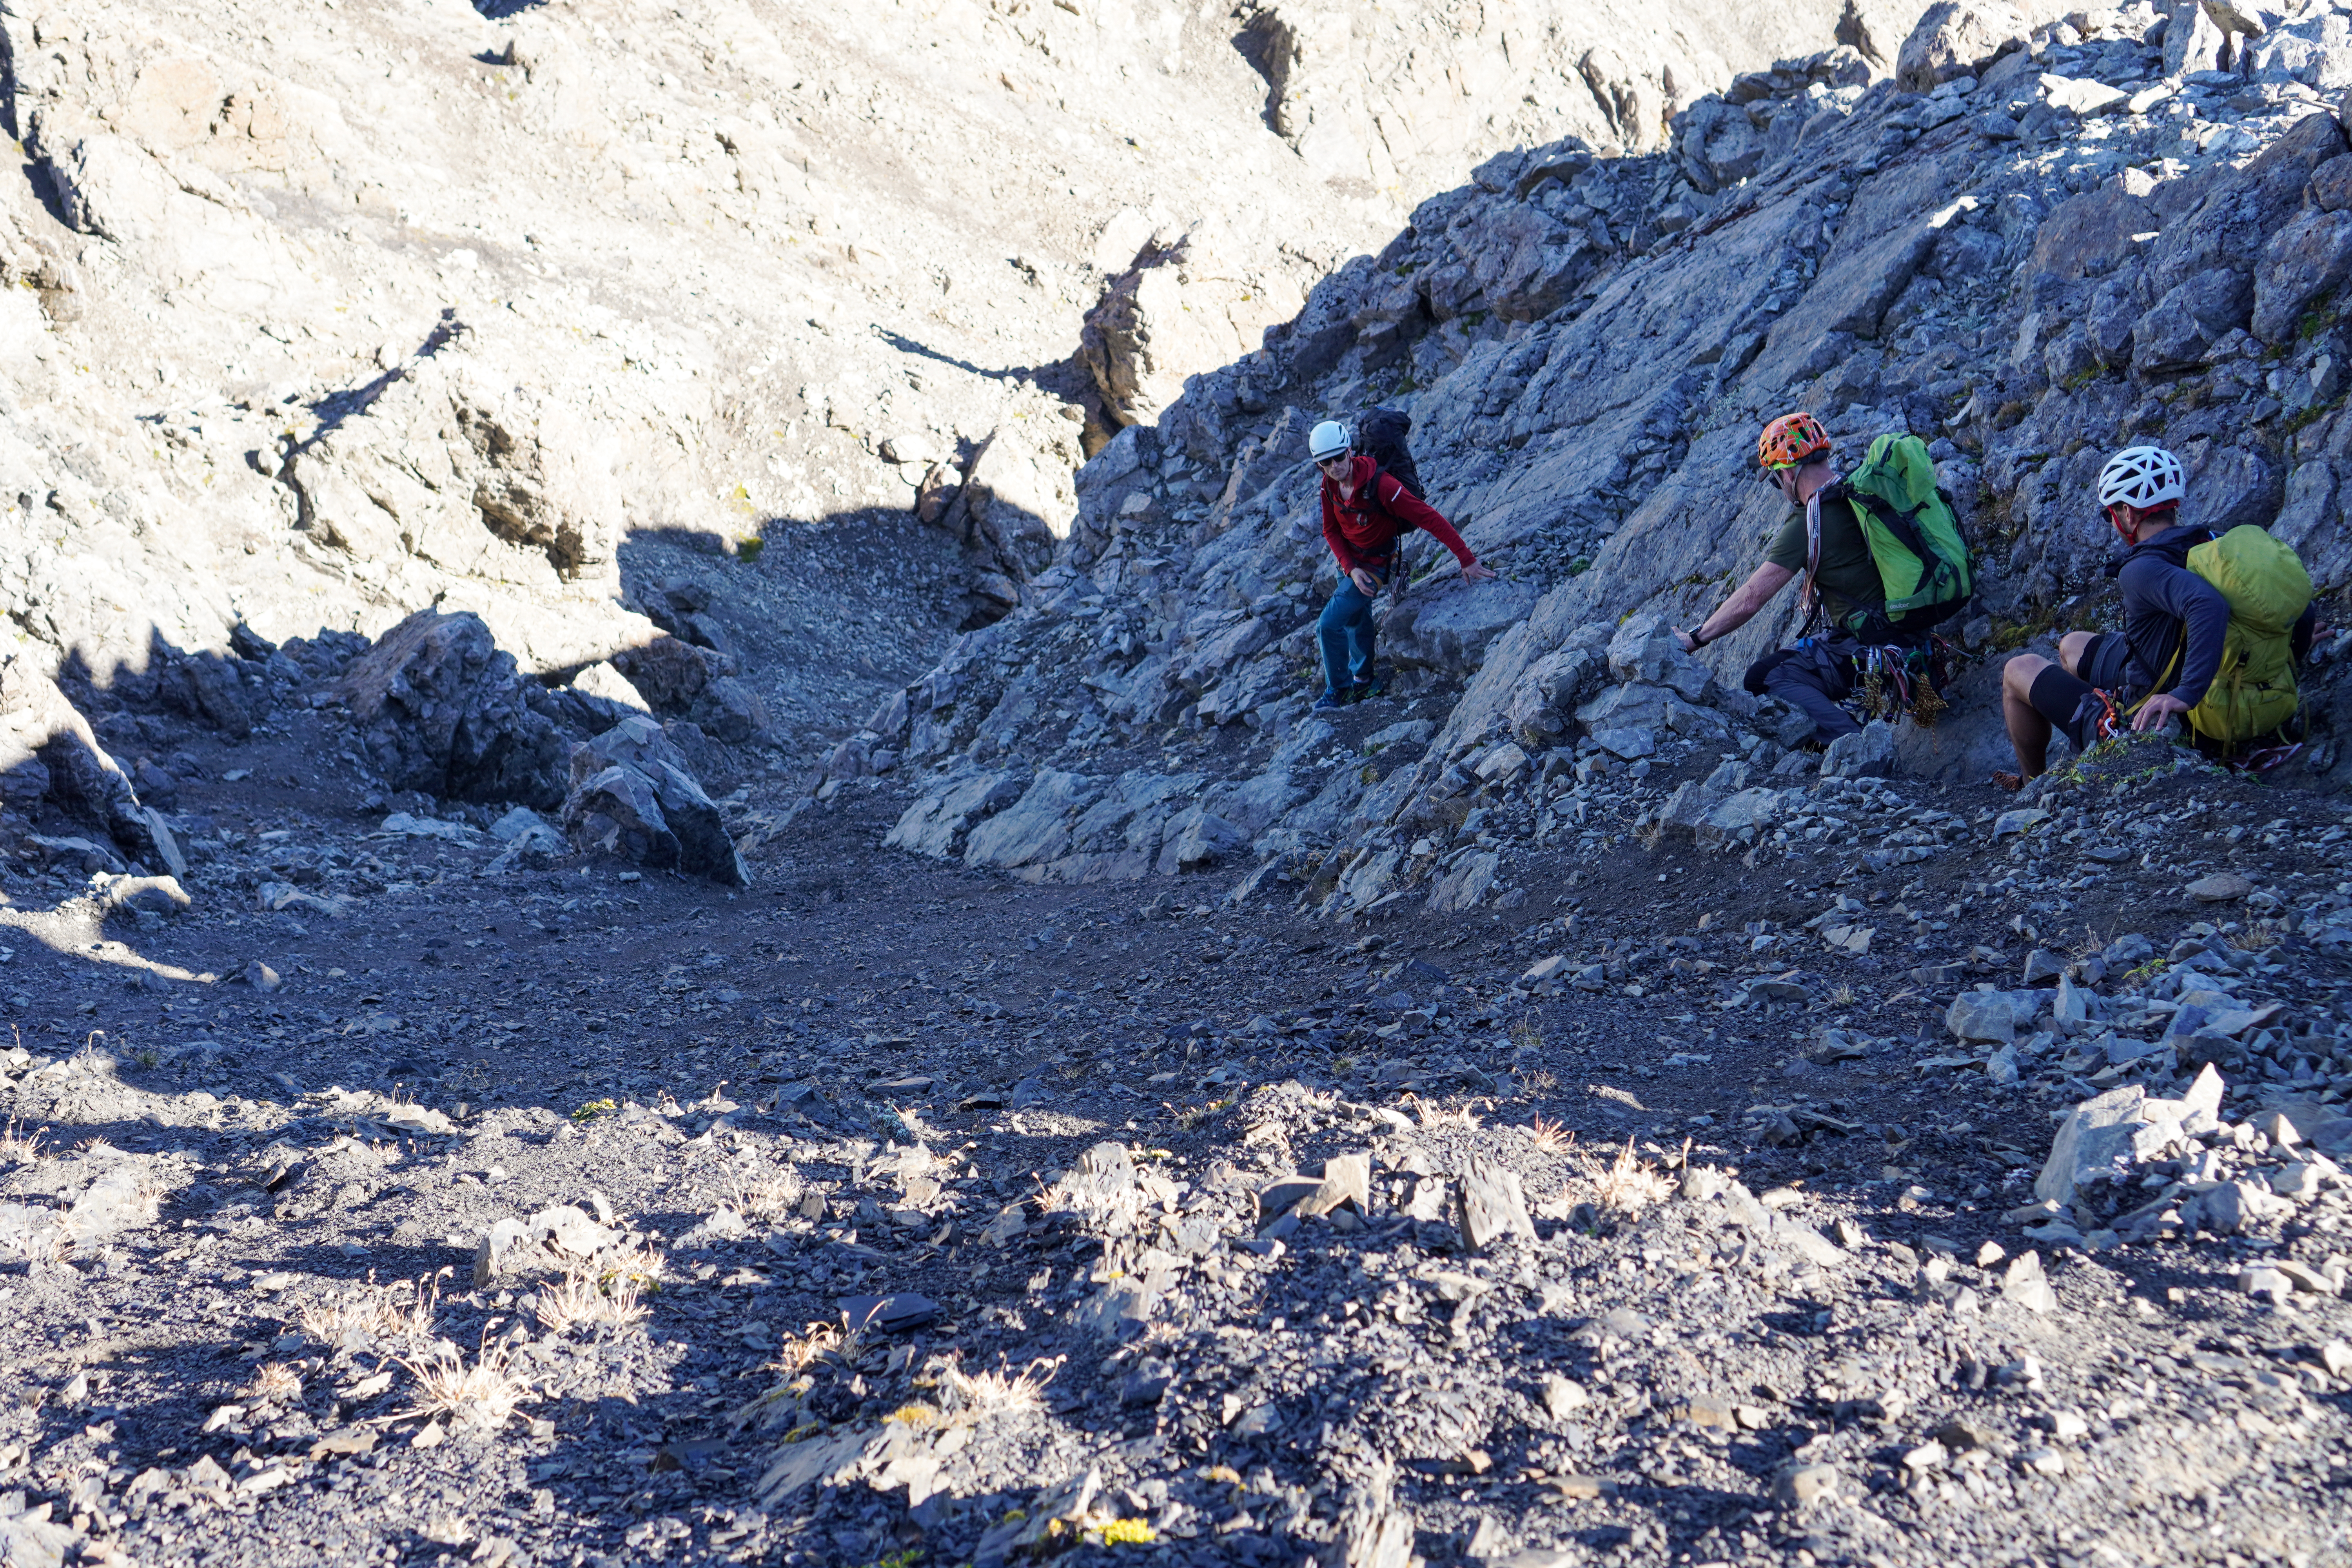
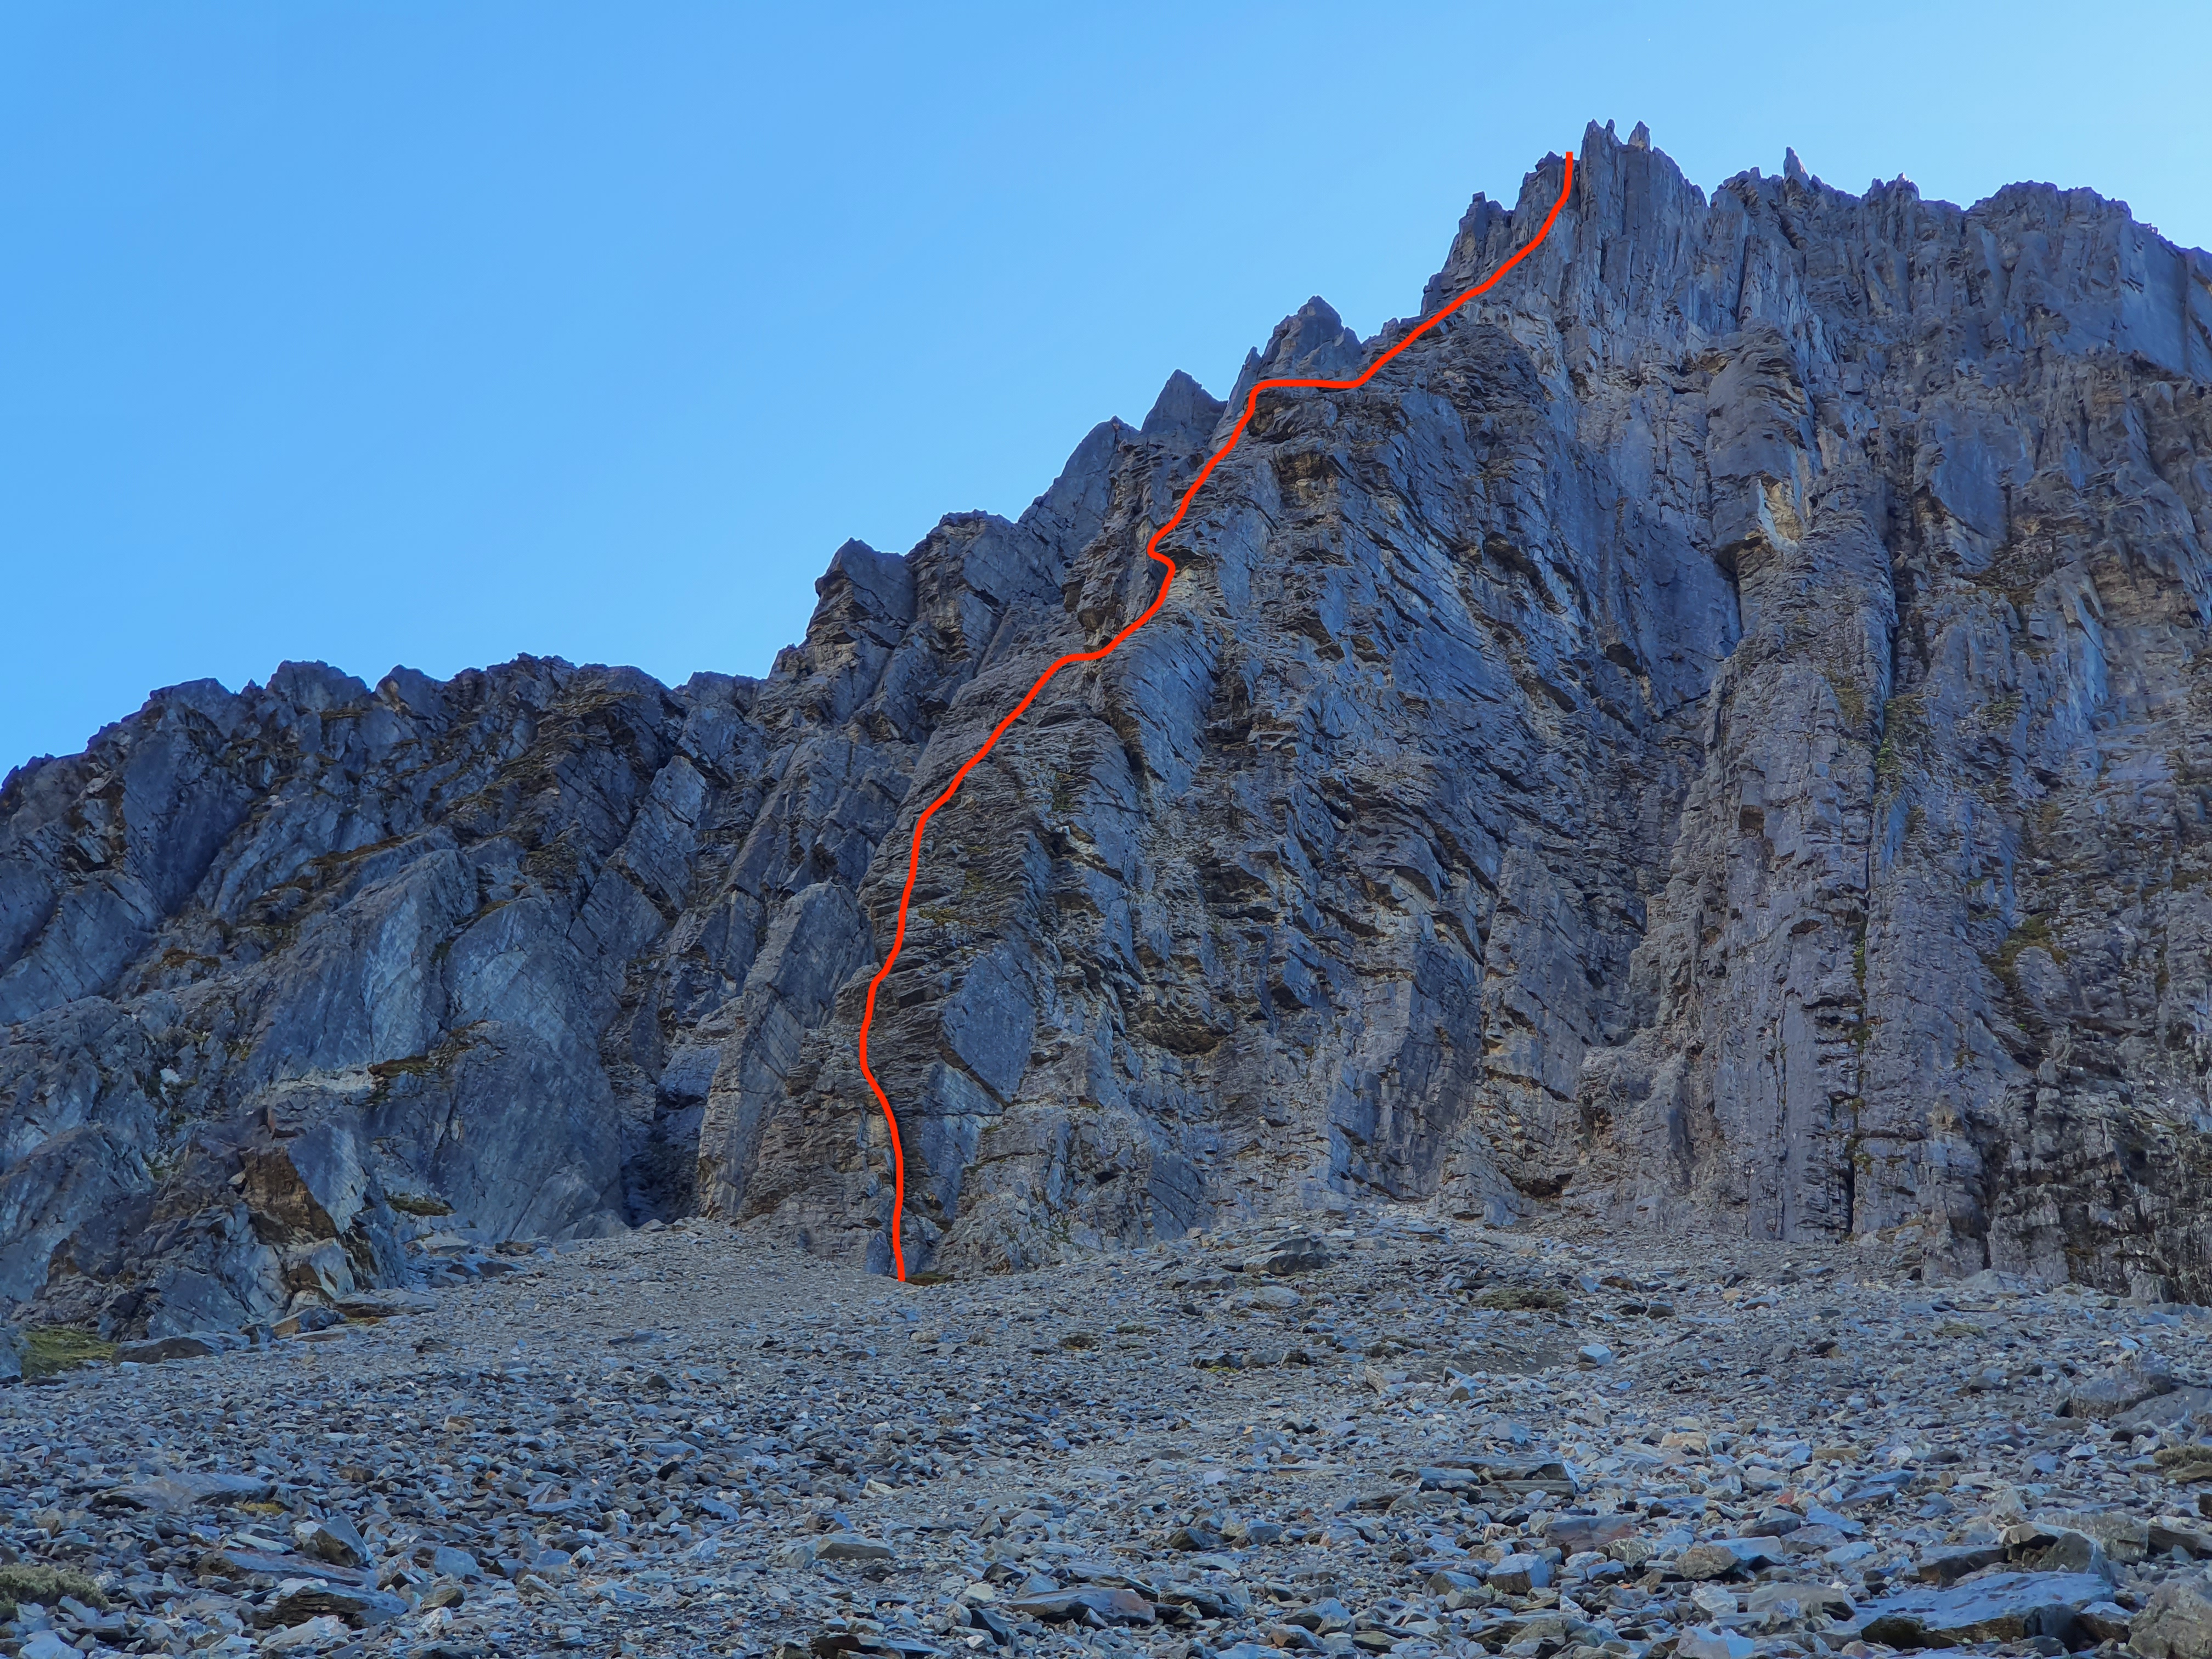
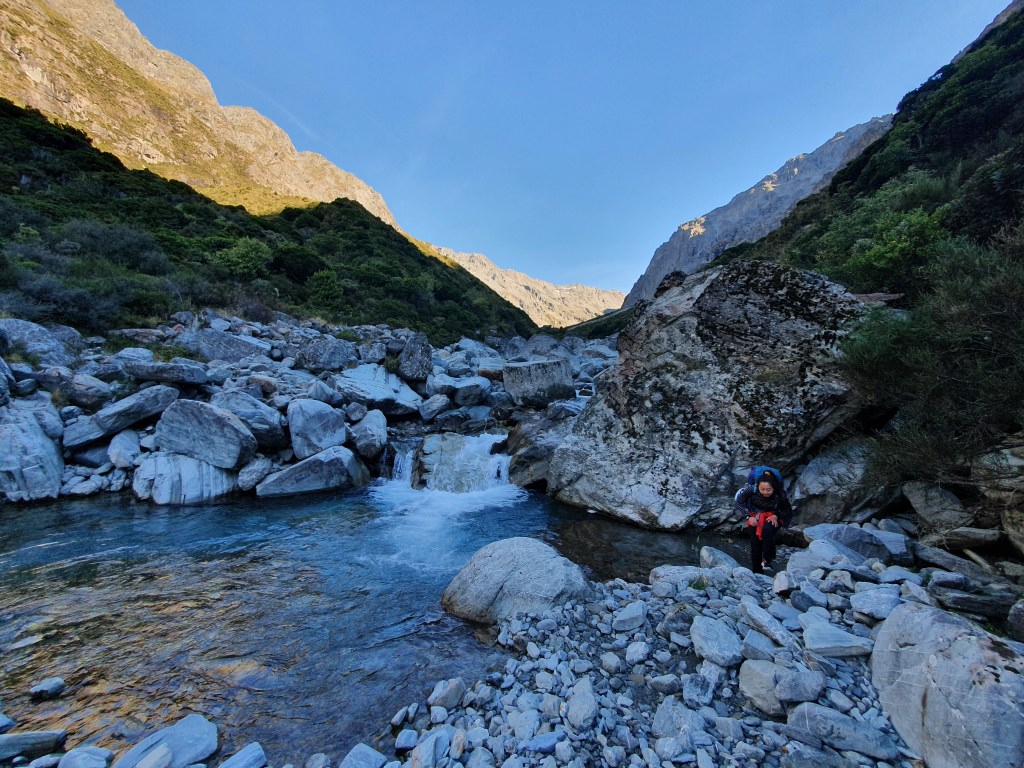
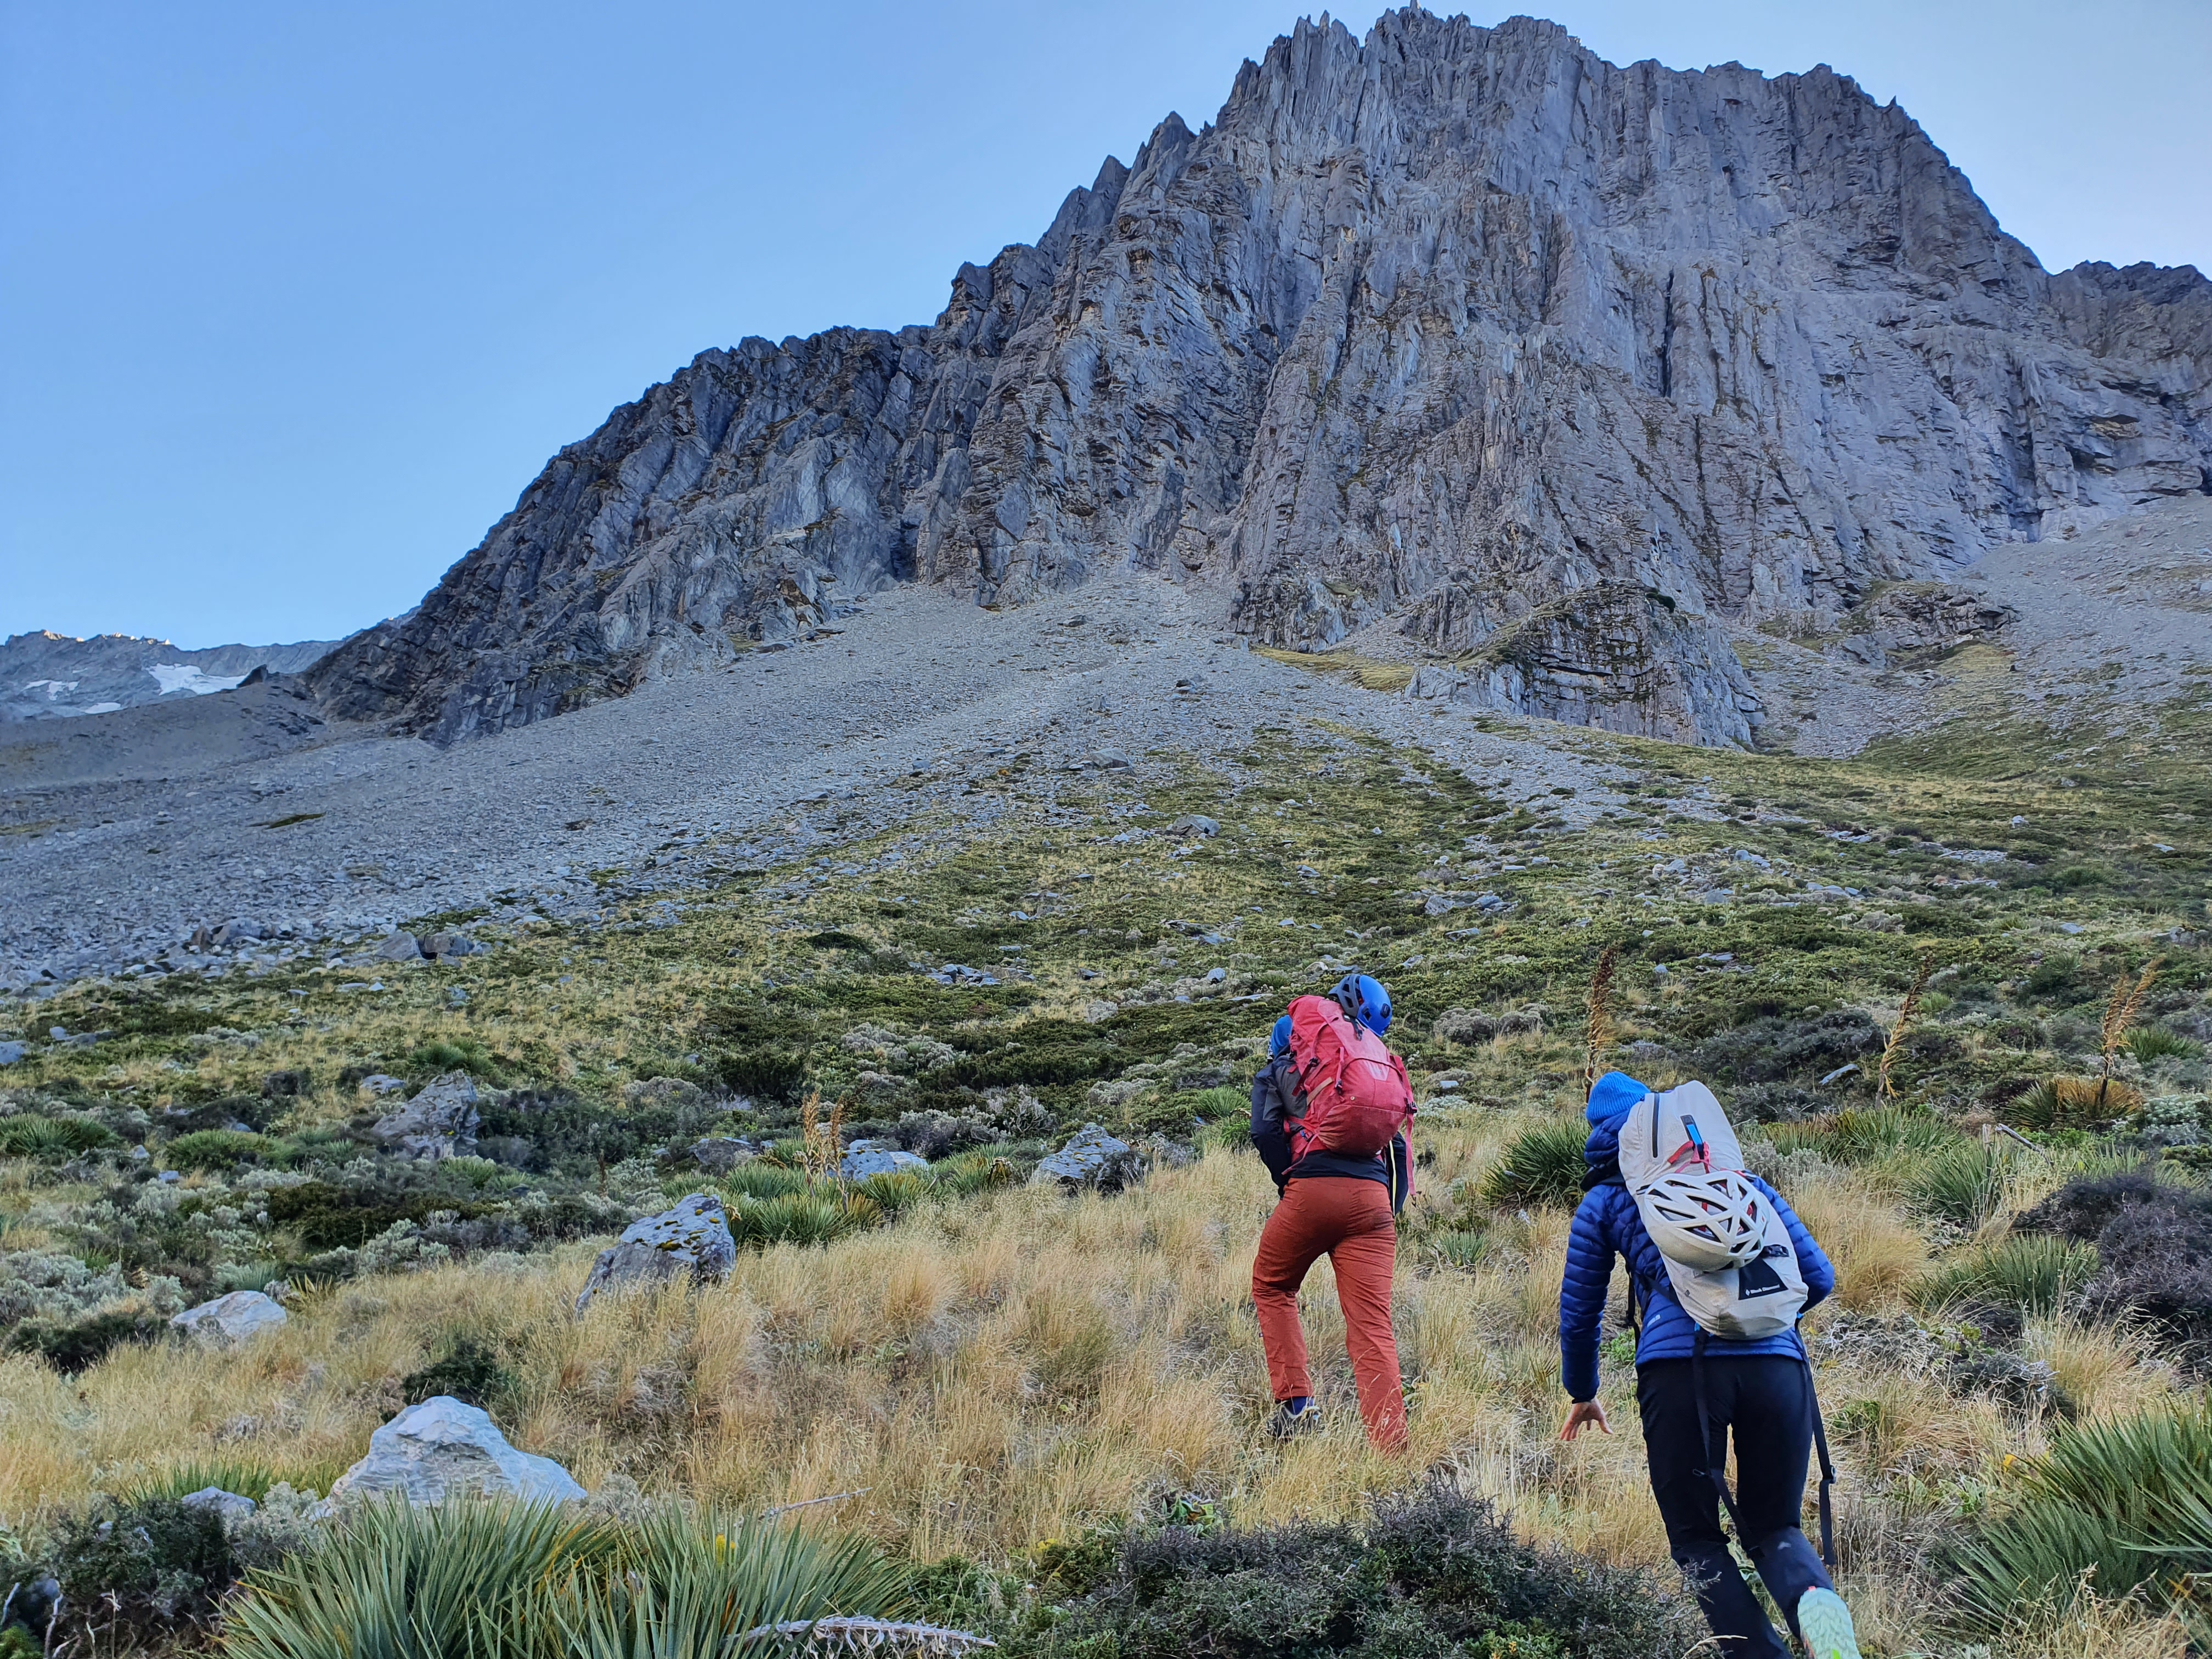
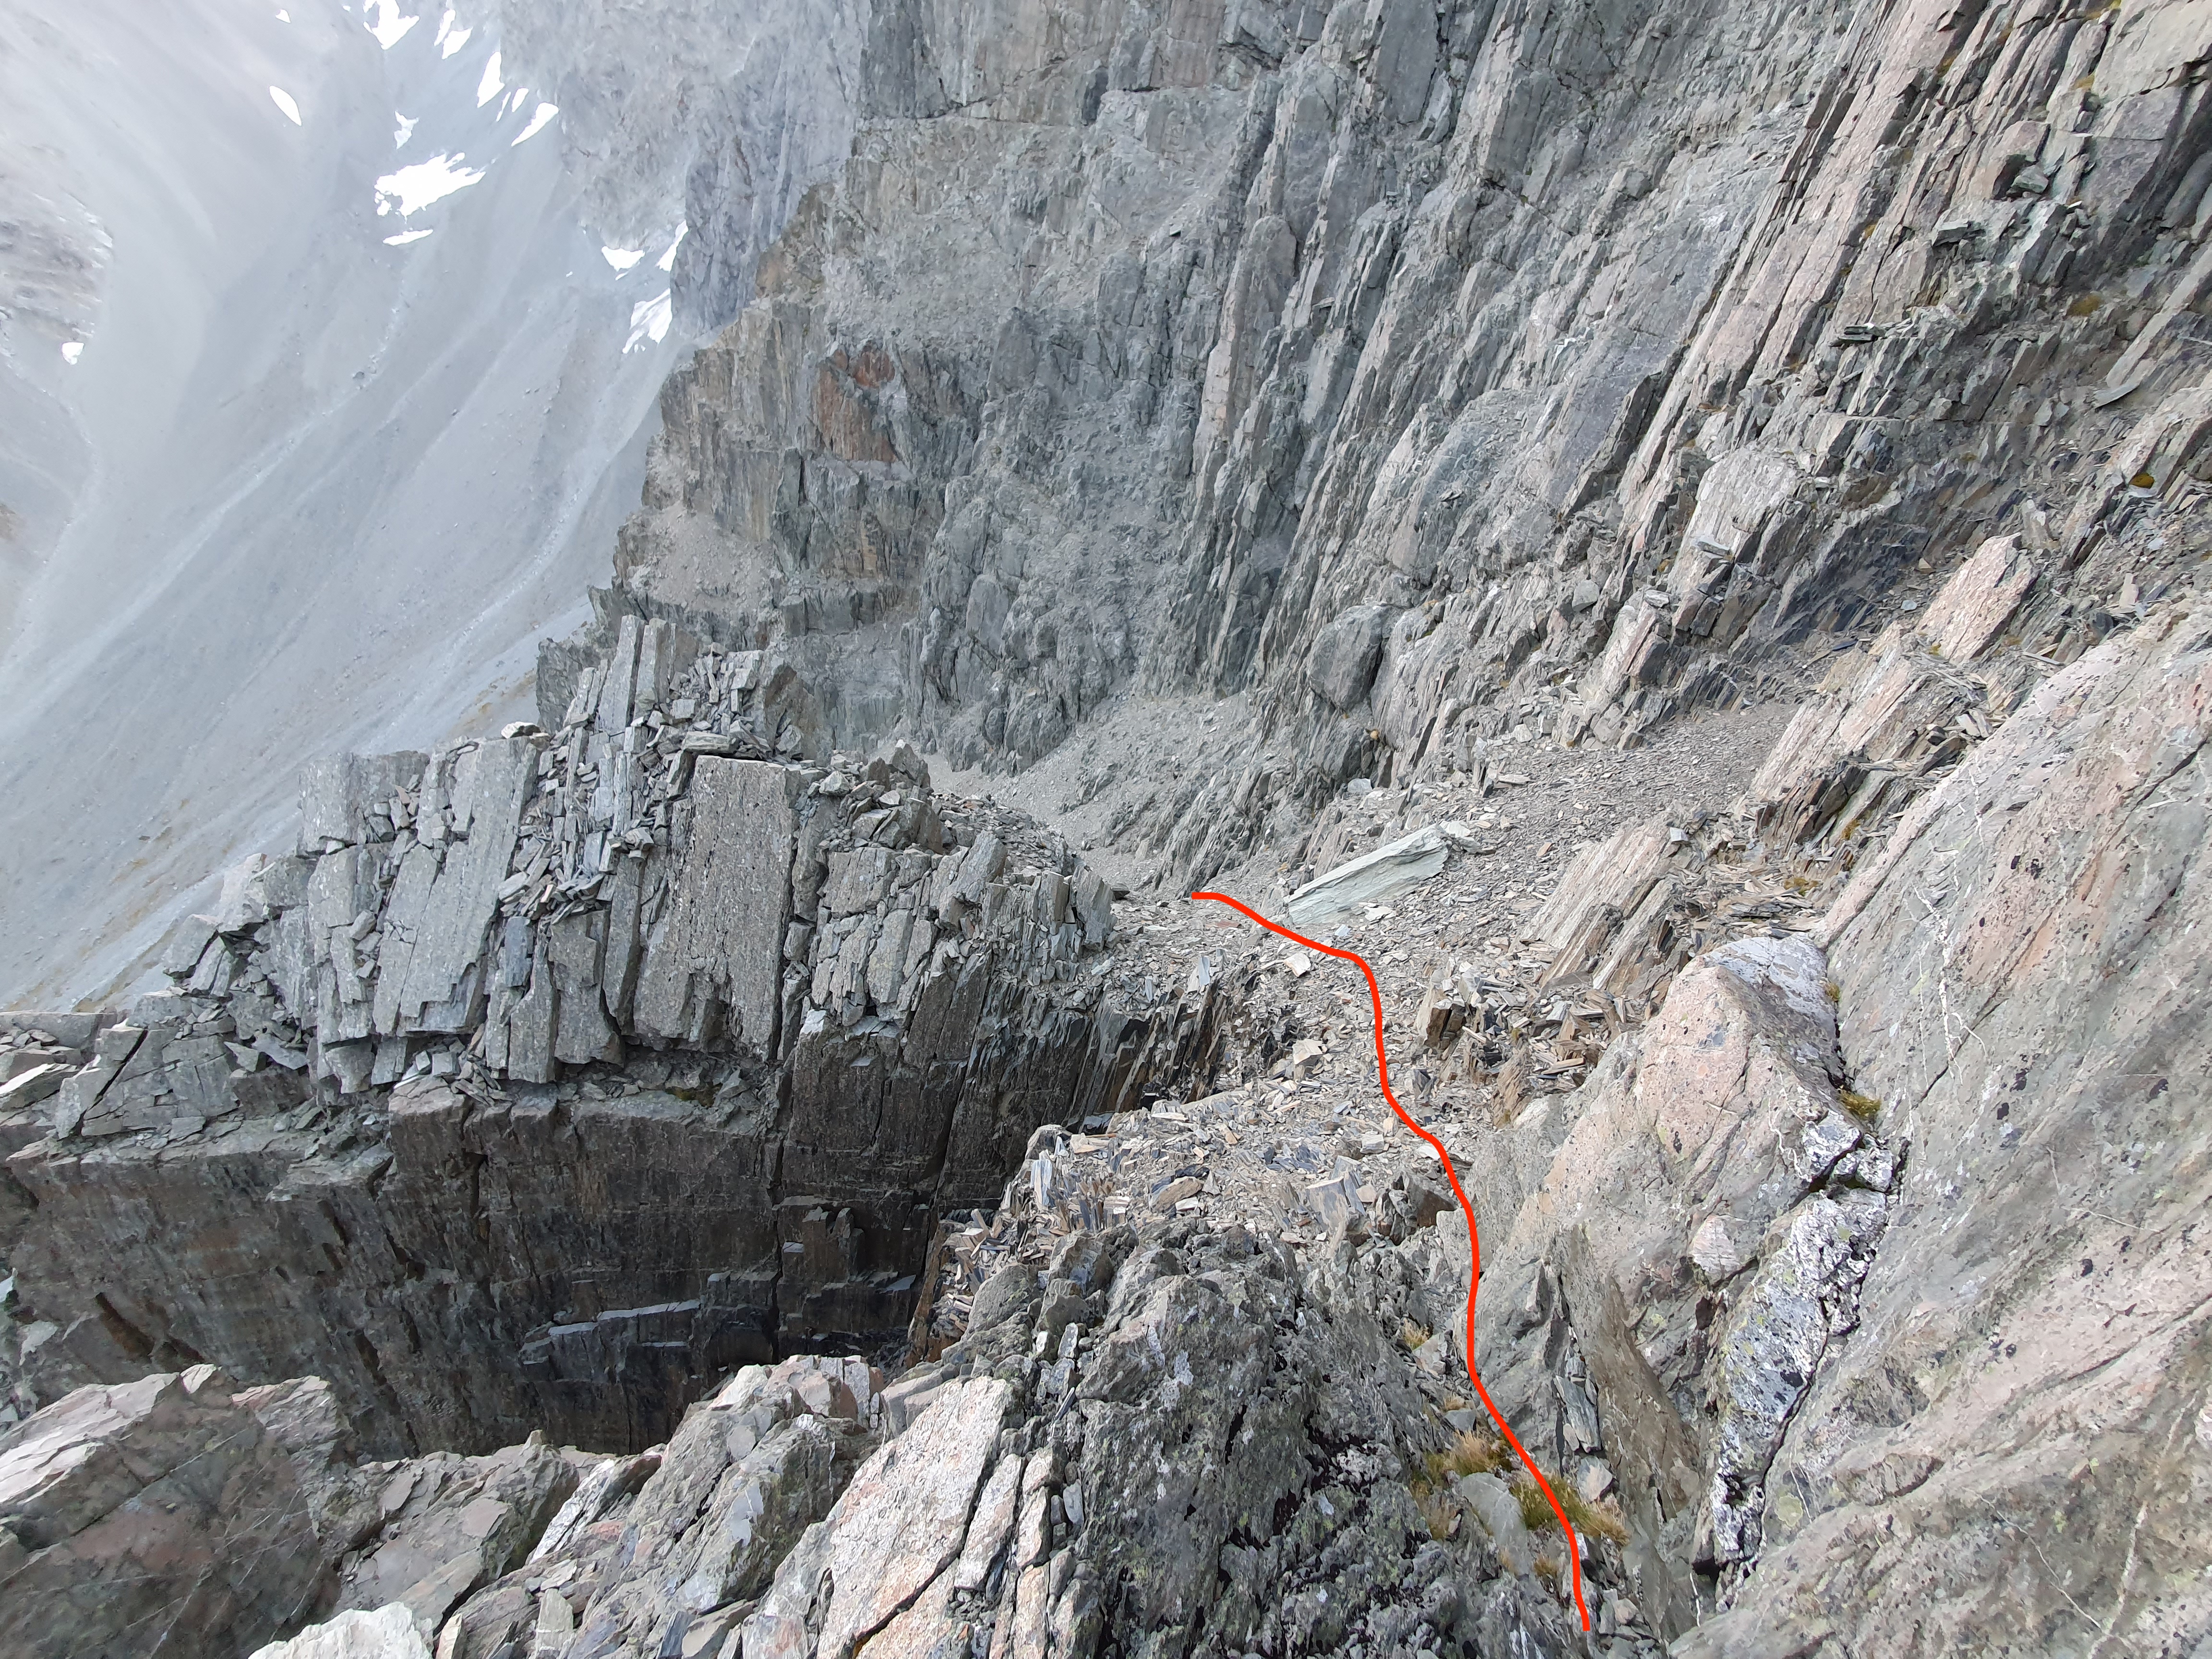
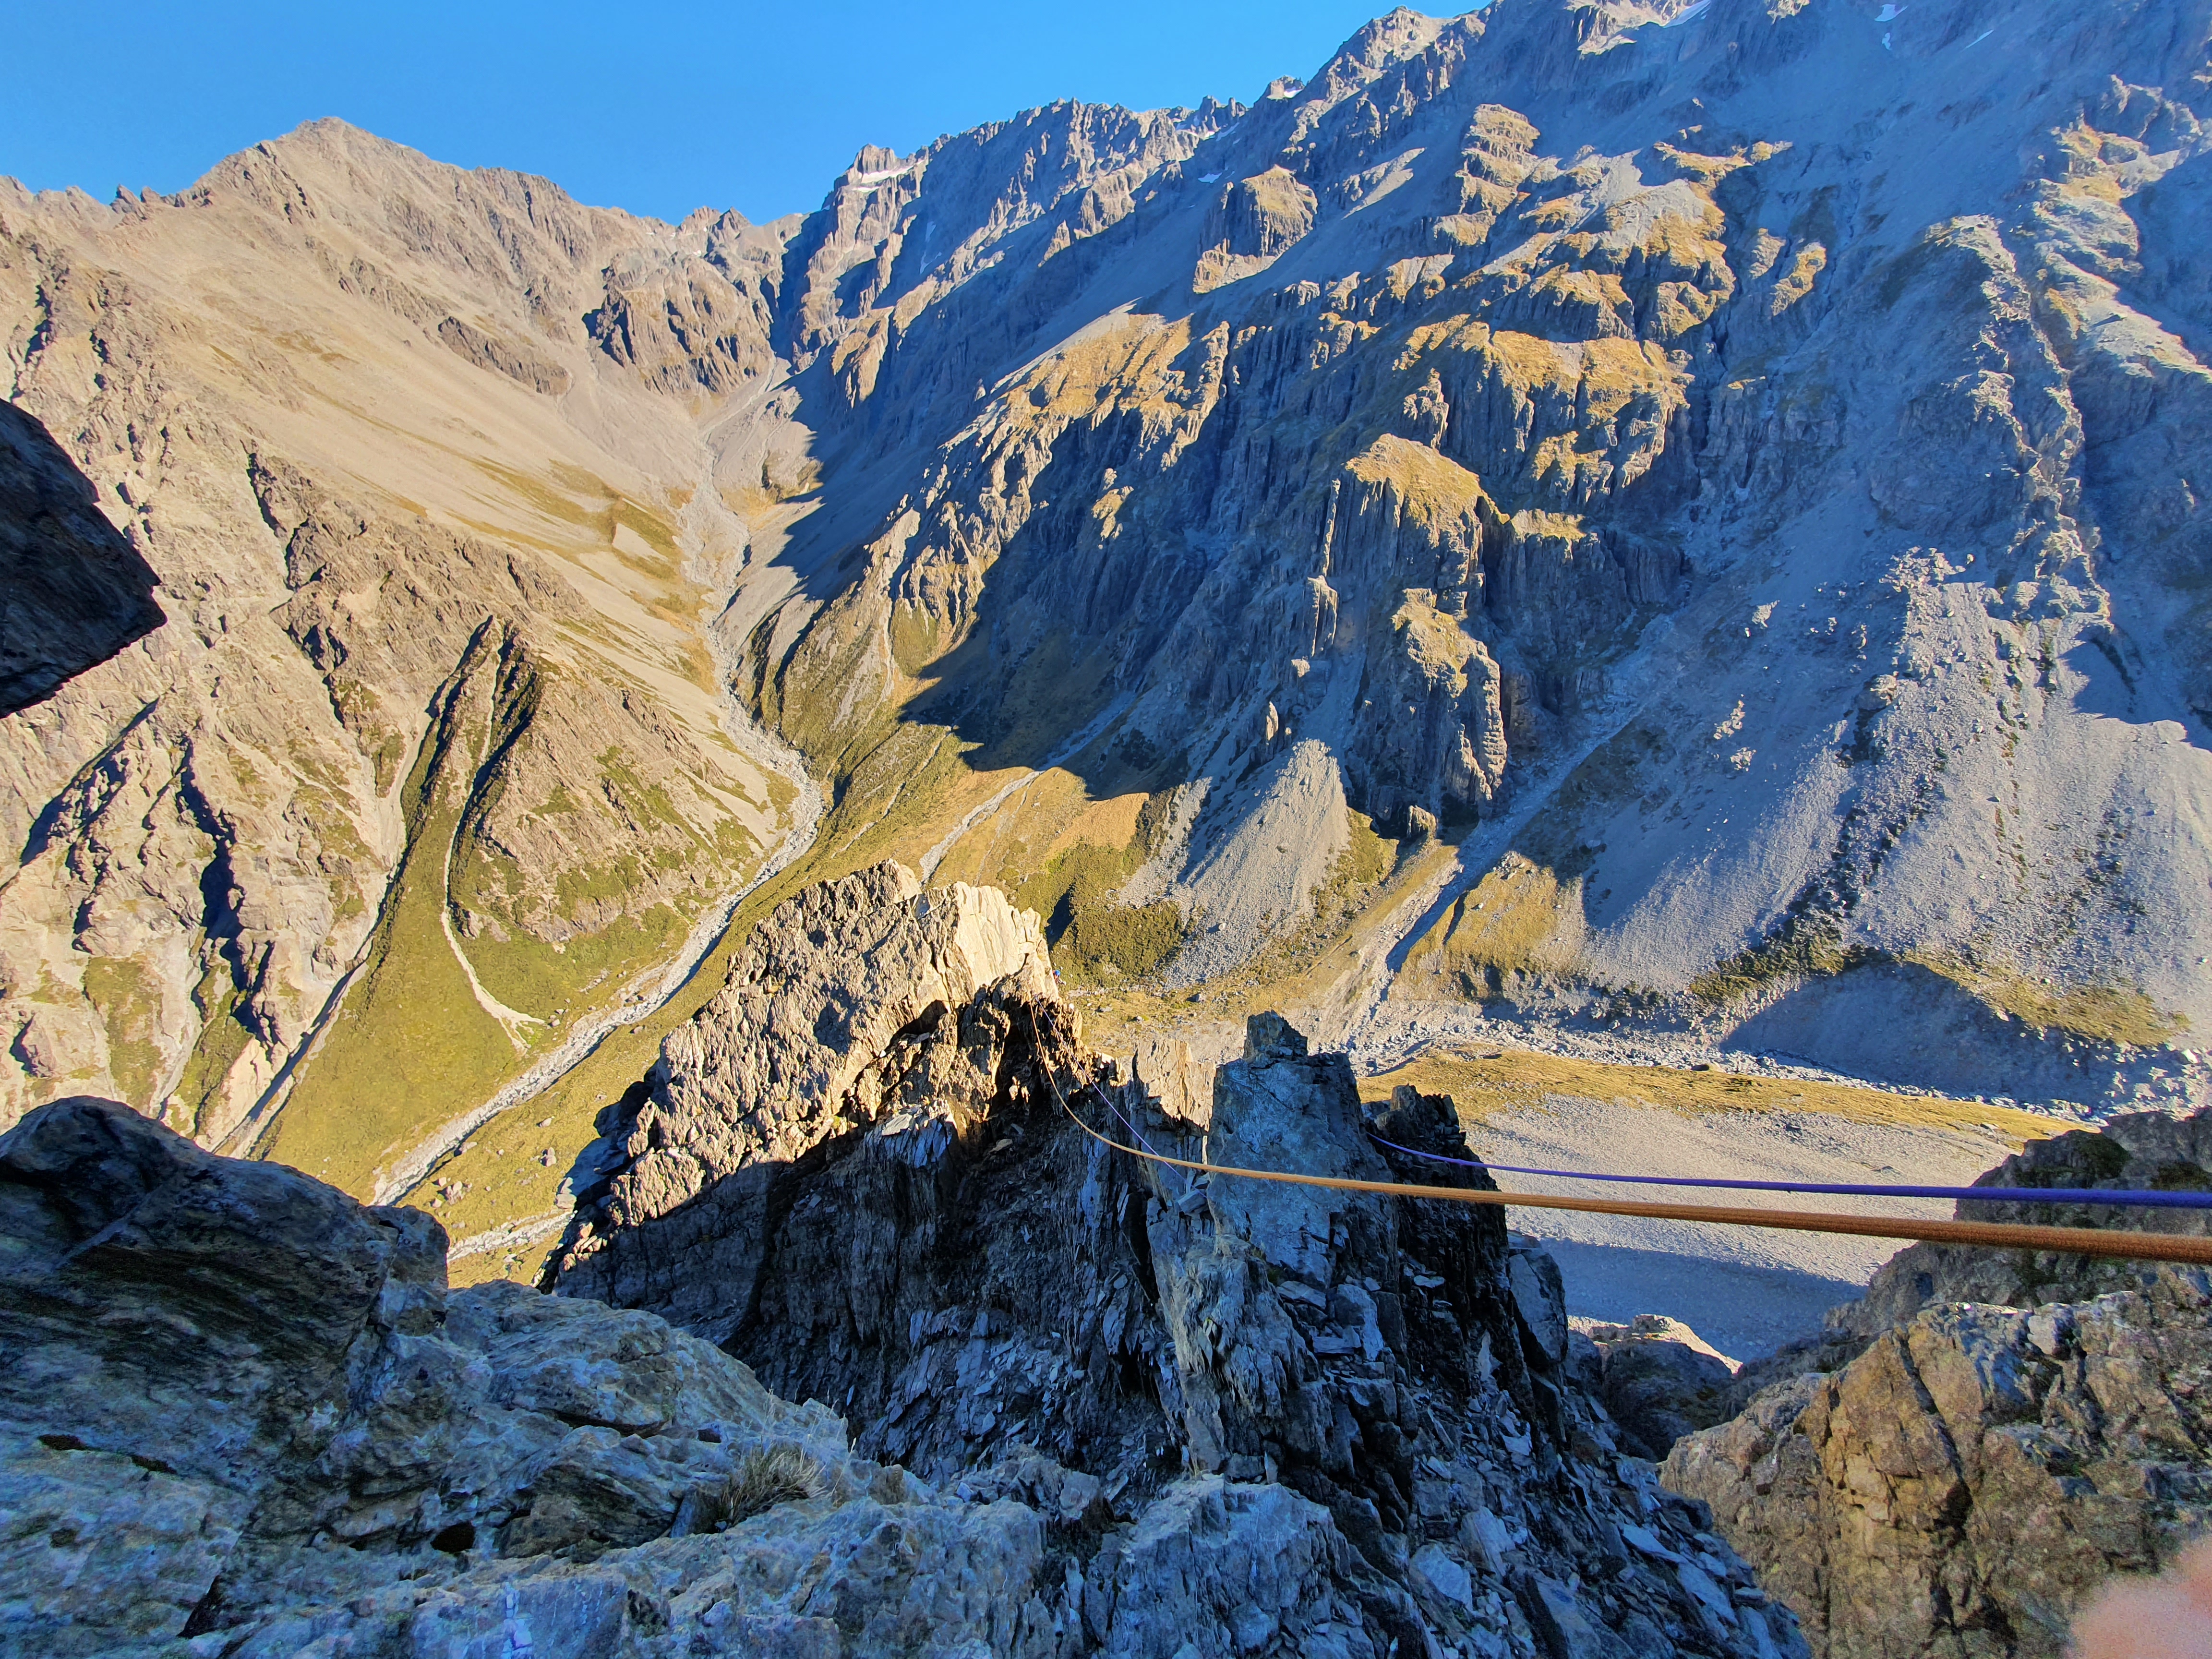
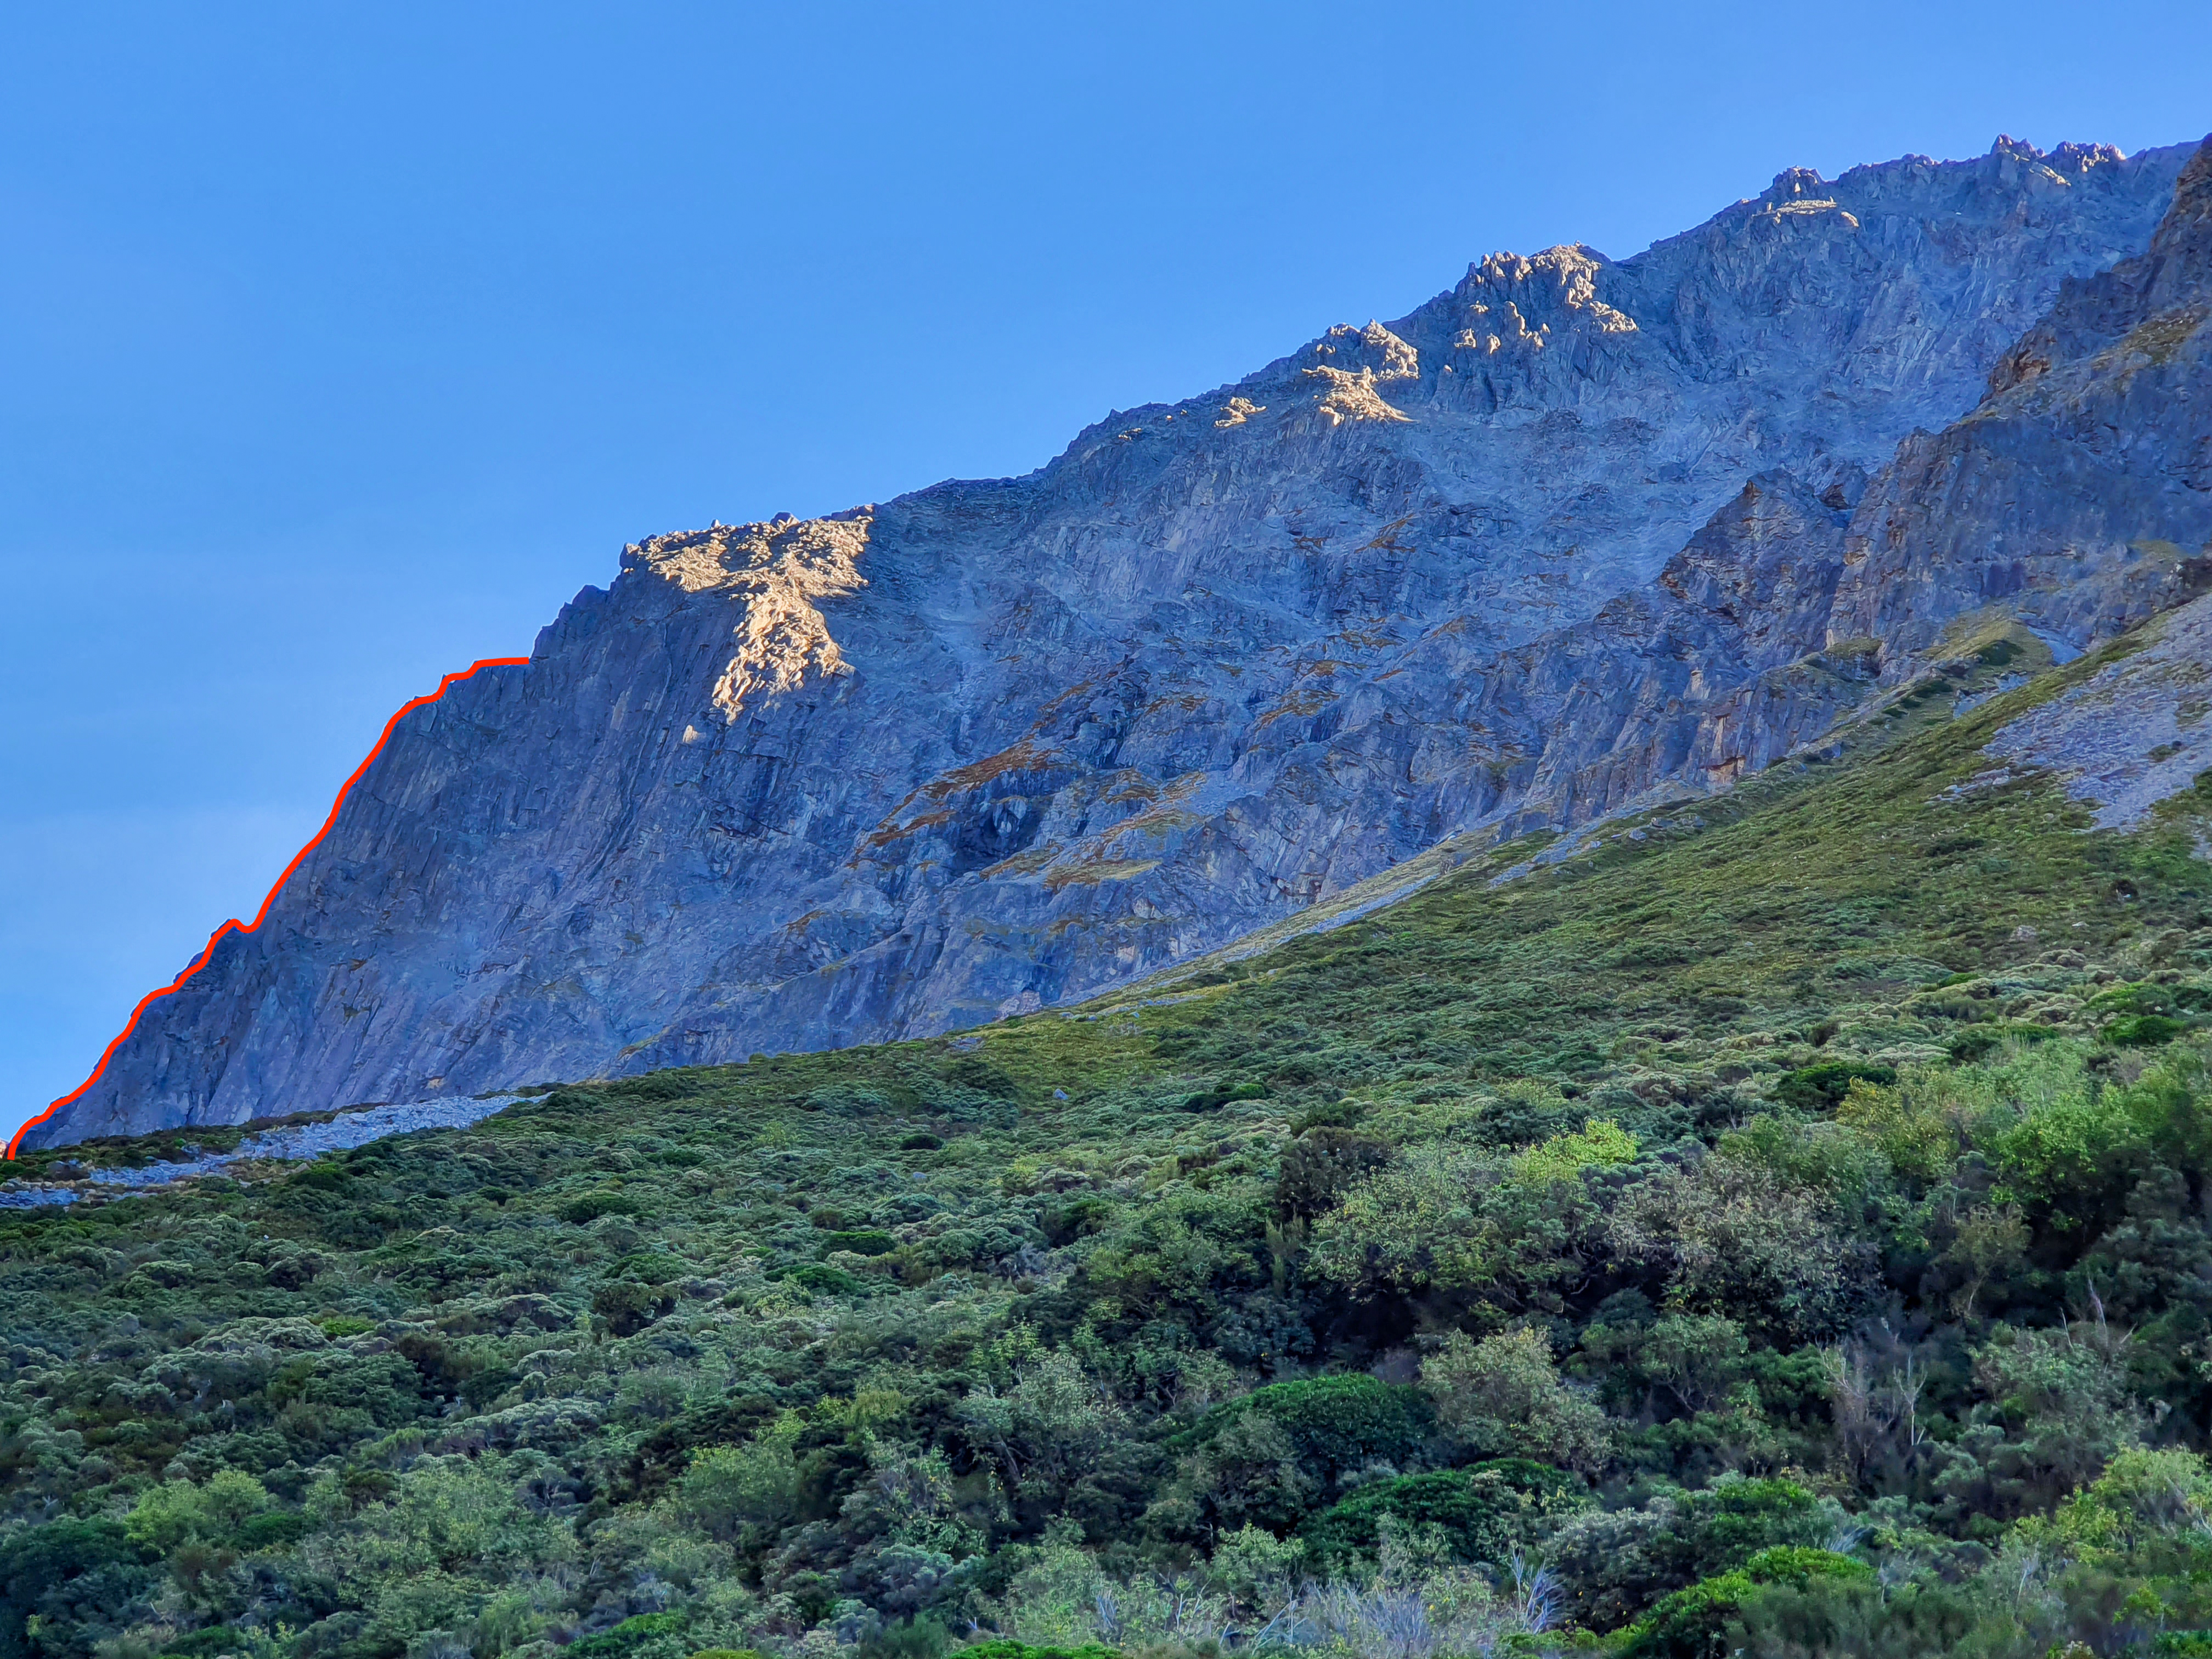
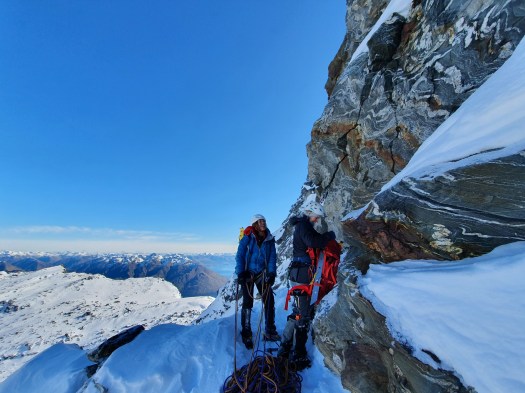
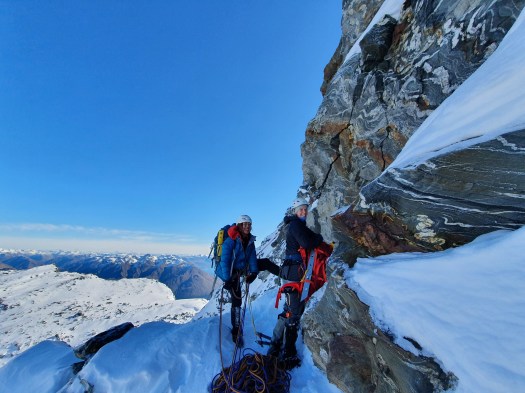
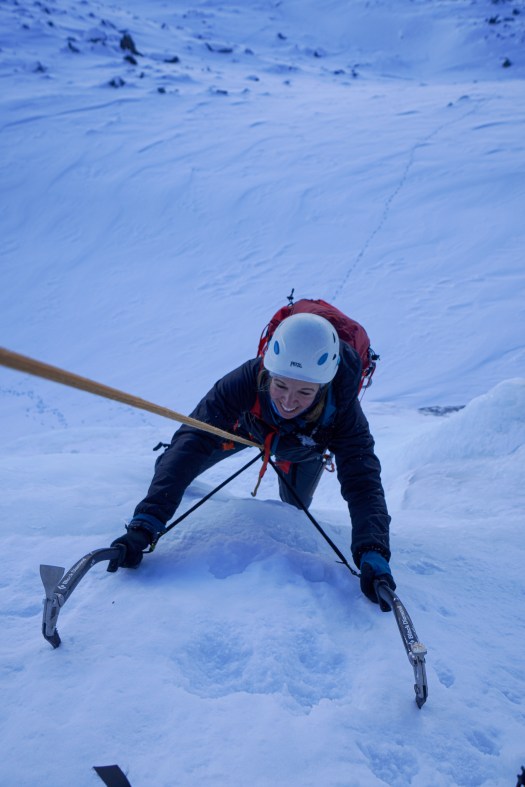
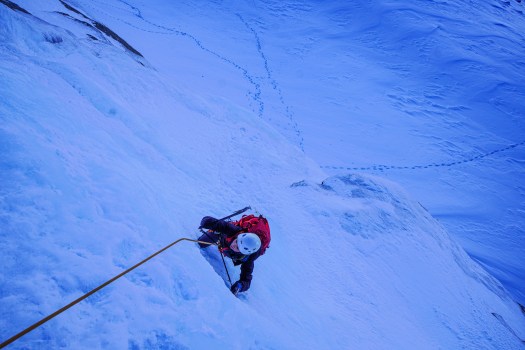
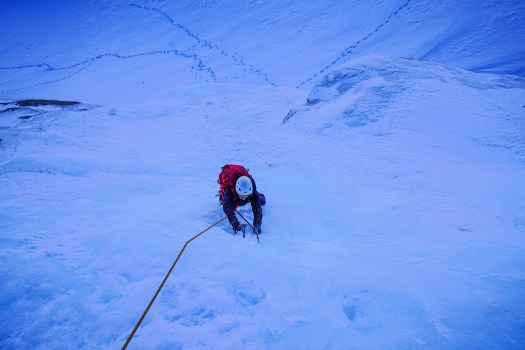
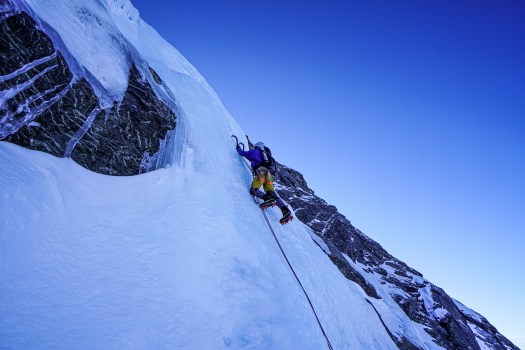
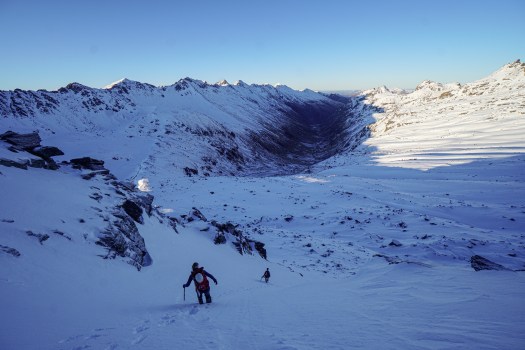
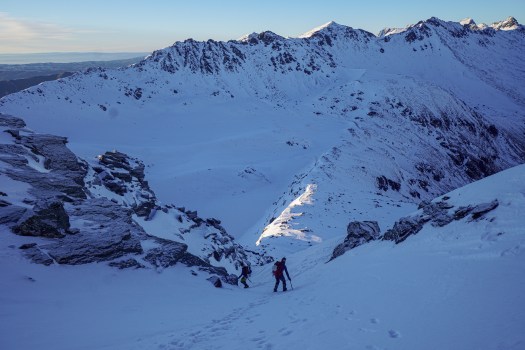
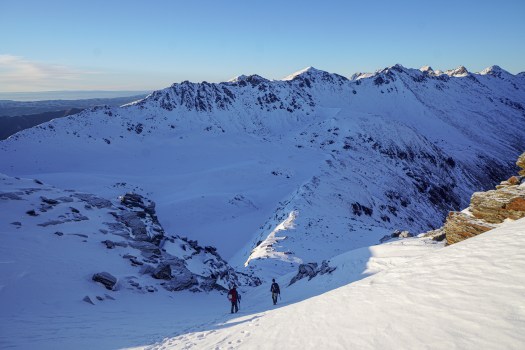
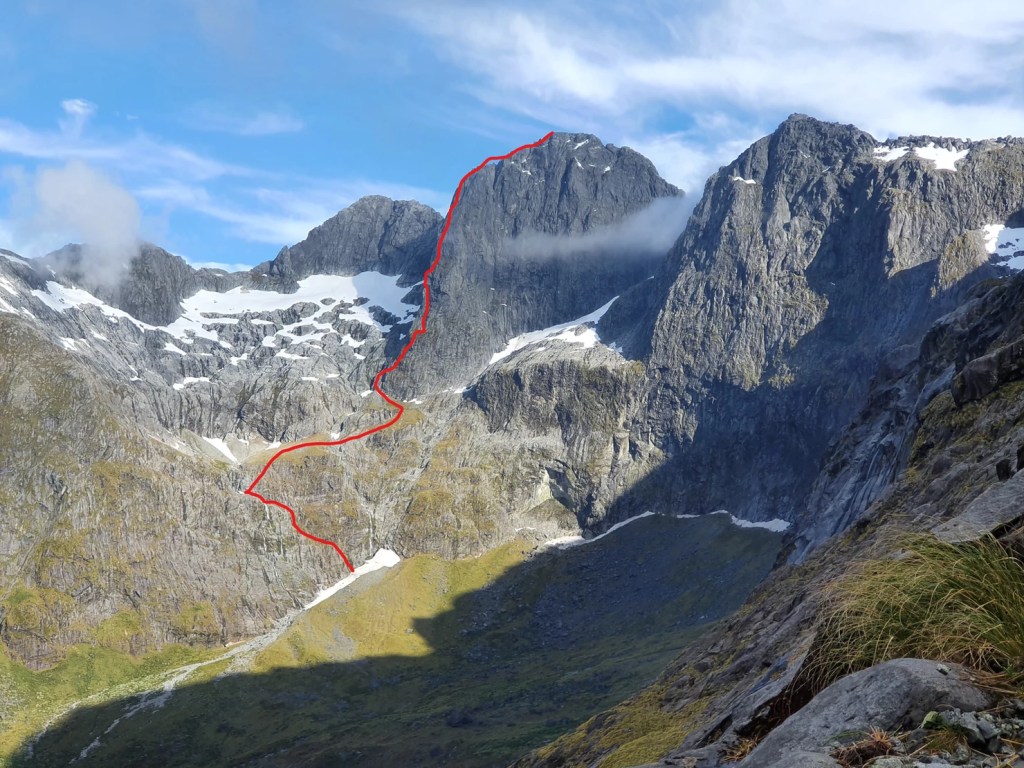
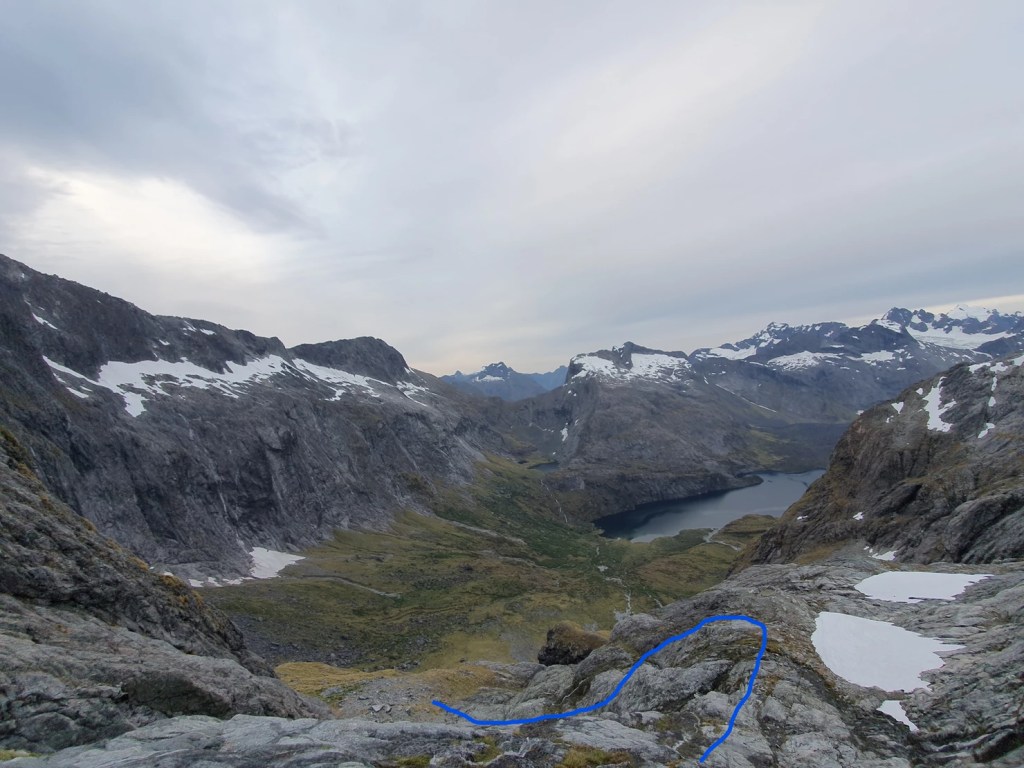
There are 3 prominent peaks on Haast – Sun Circle is on the 3rd one on looker’s right. We climbed early season so could walk up the centre of the gully to the main face – topo shows some traversing required to do this late season.
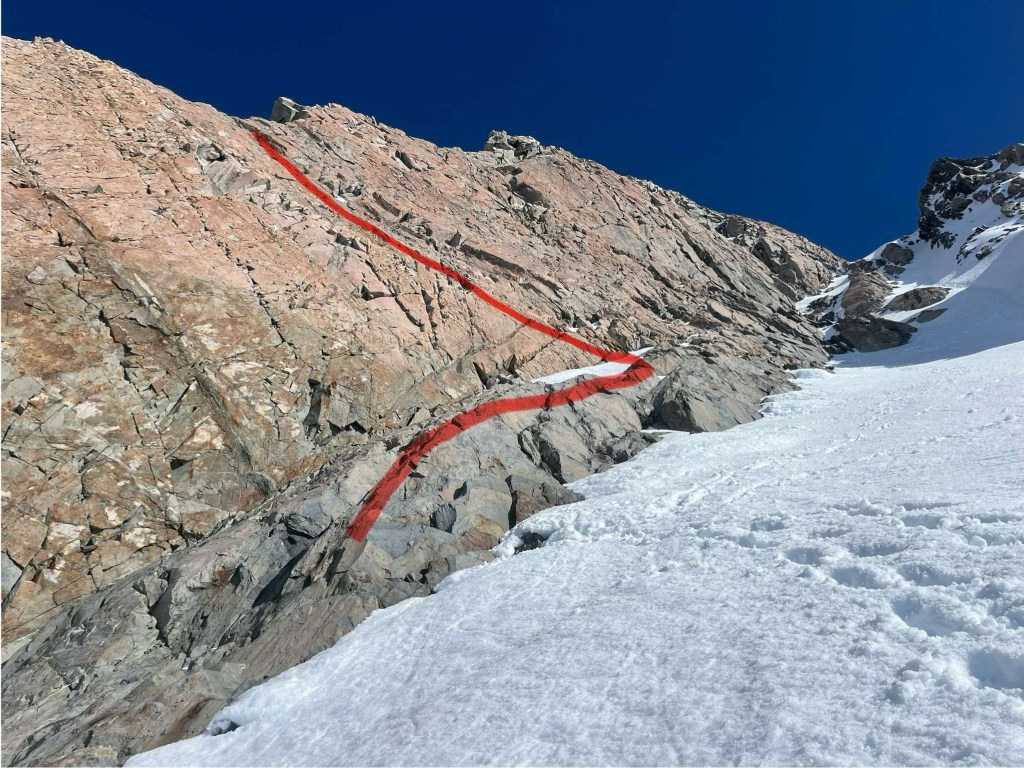
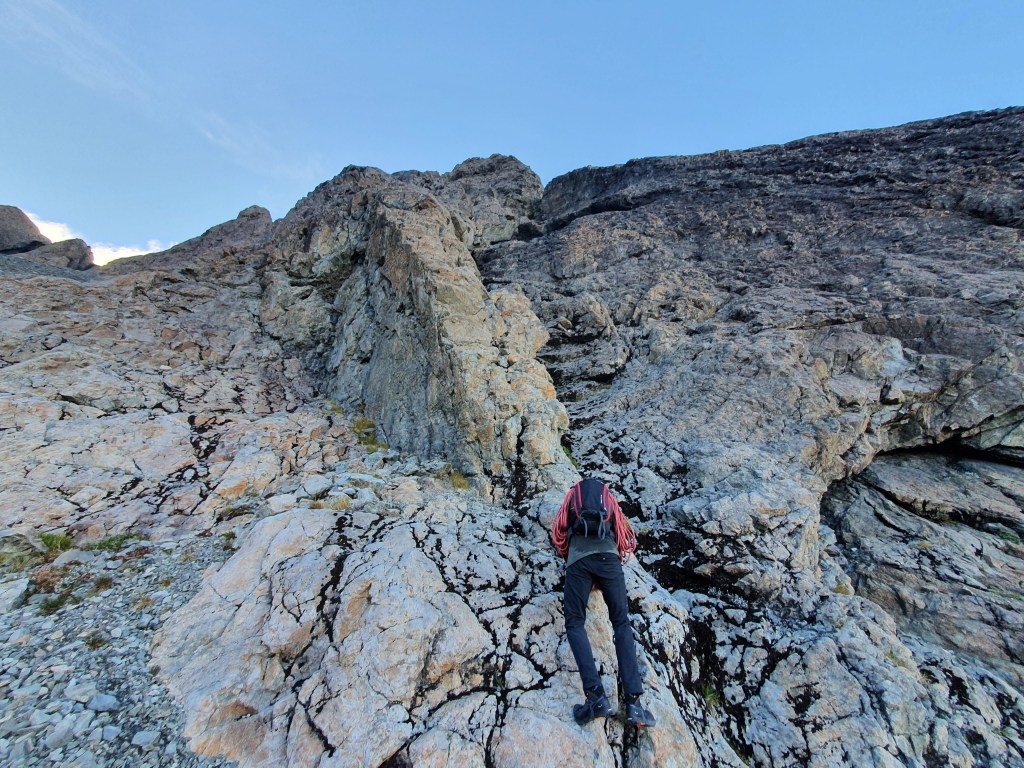
Pitch 1 Access to the main face – was easier for us as it was so early season the snow leads right up to the small rock the meets the main face where the obvious schrund is. Some scrambling up the small block to the rap tat marking the proper start of the route. From the topo this is more involved later in season and involves some traversing from out right. 15m, grade 11.
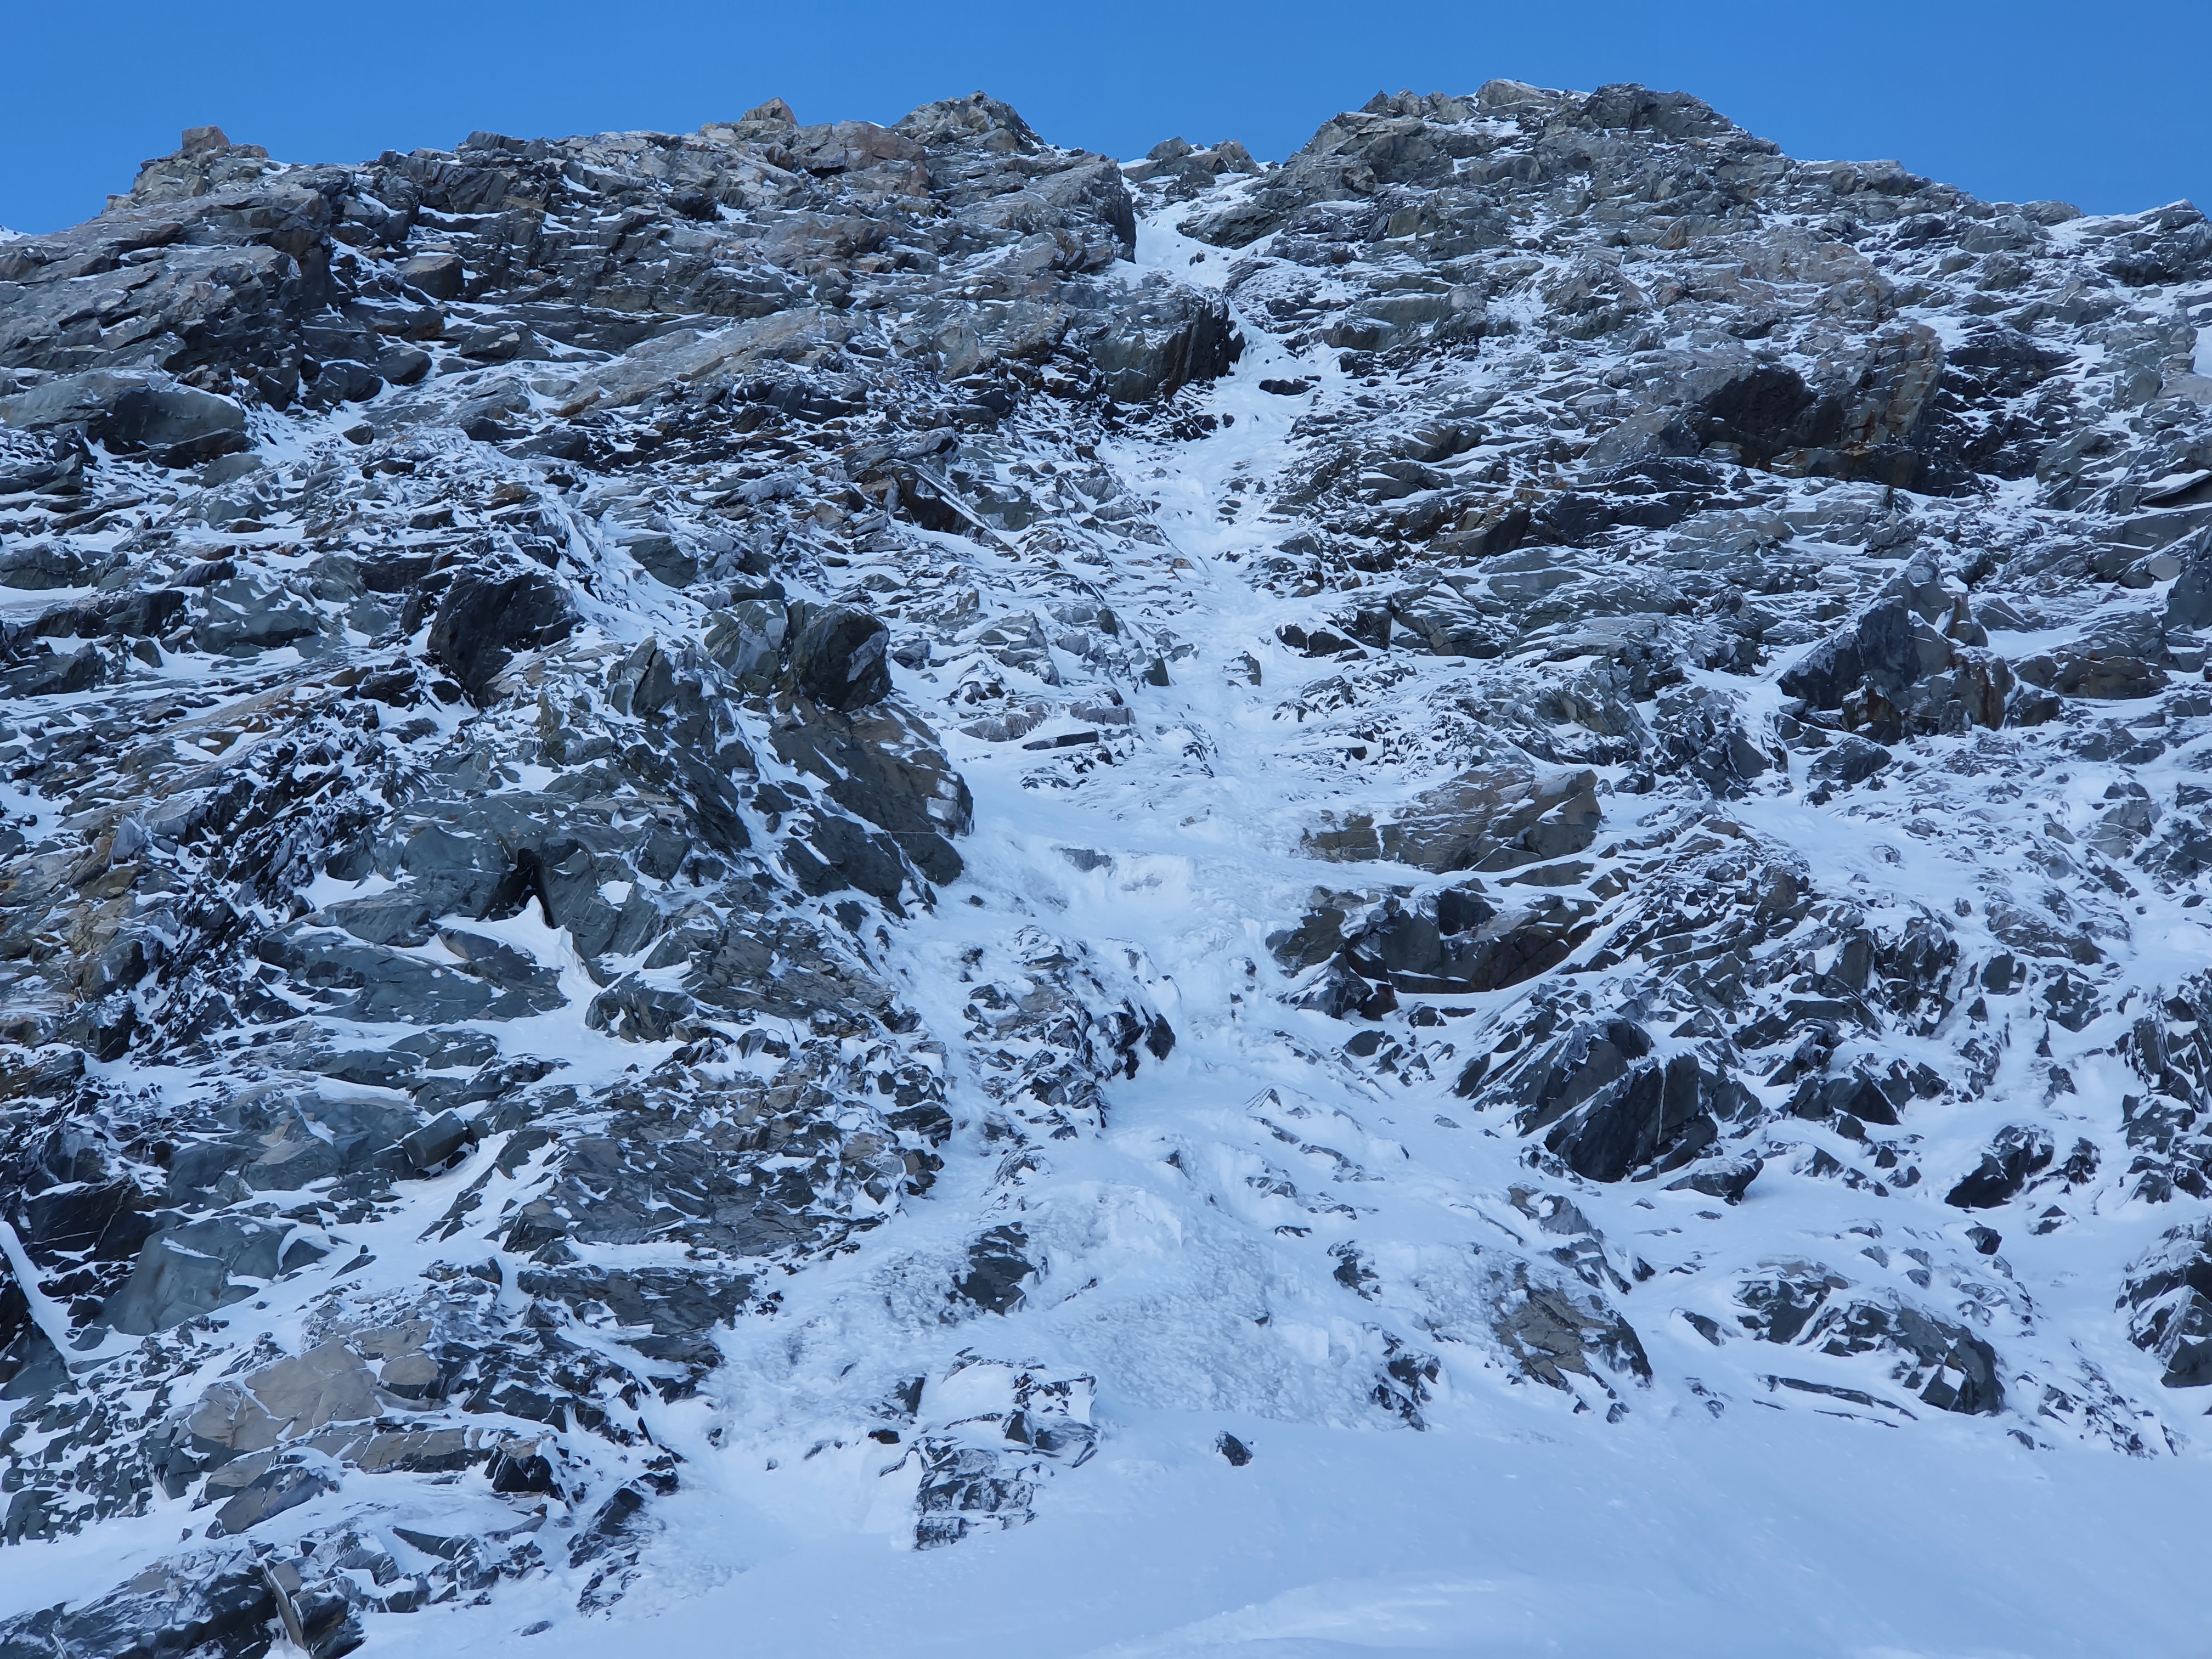
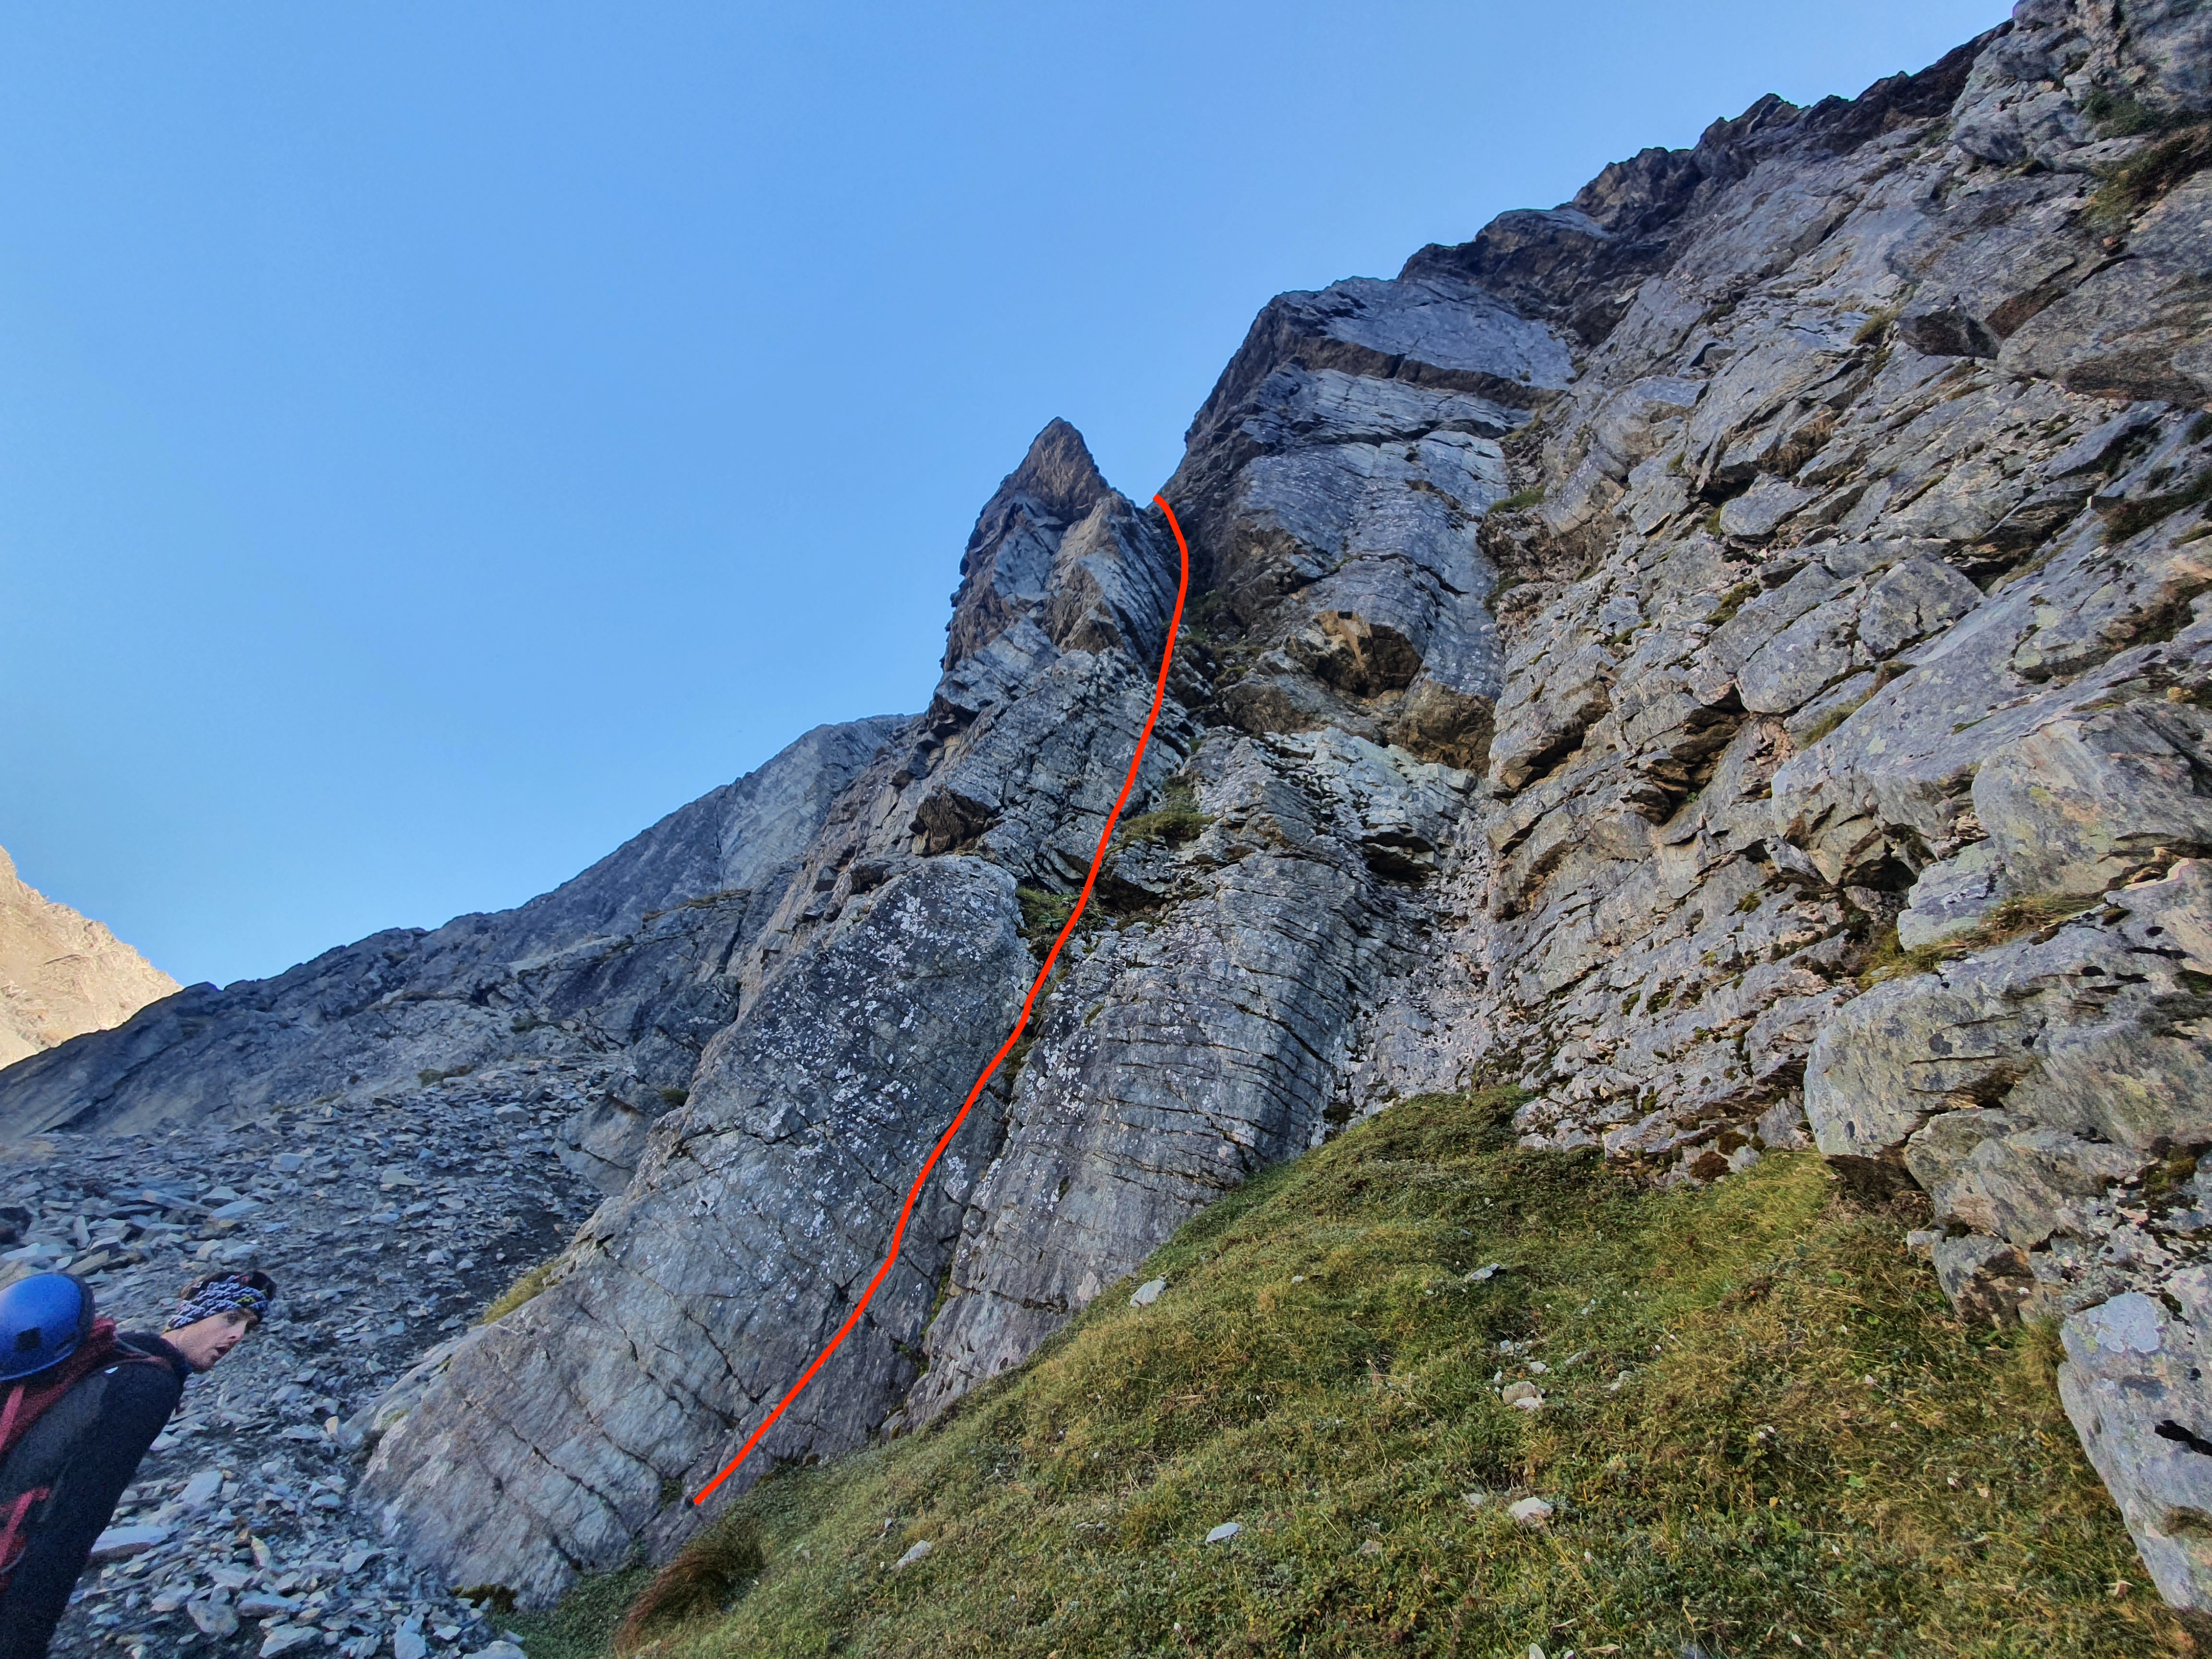
Short 1st pitch; 2nd pitch trends left at base of route proper
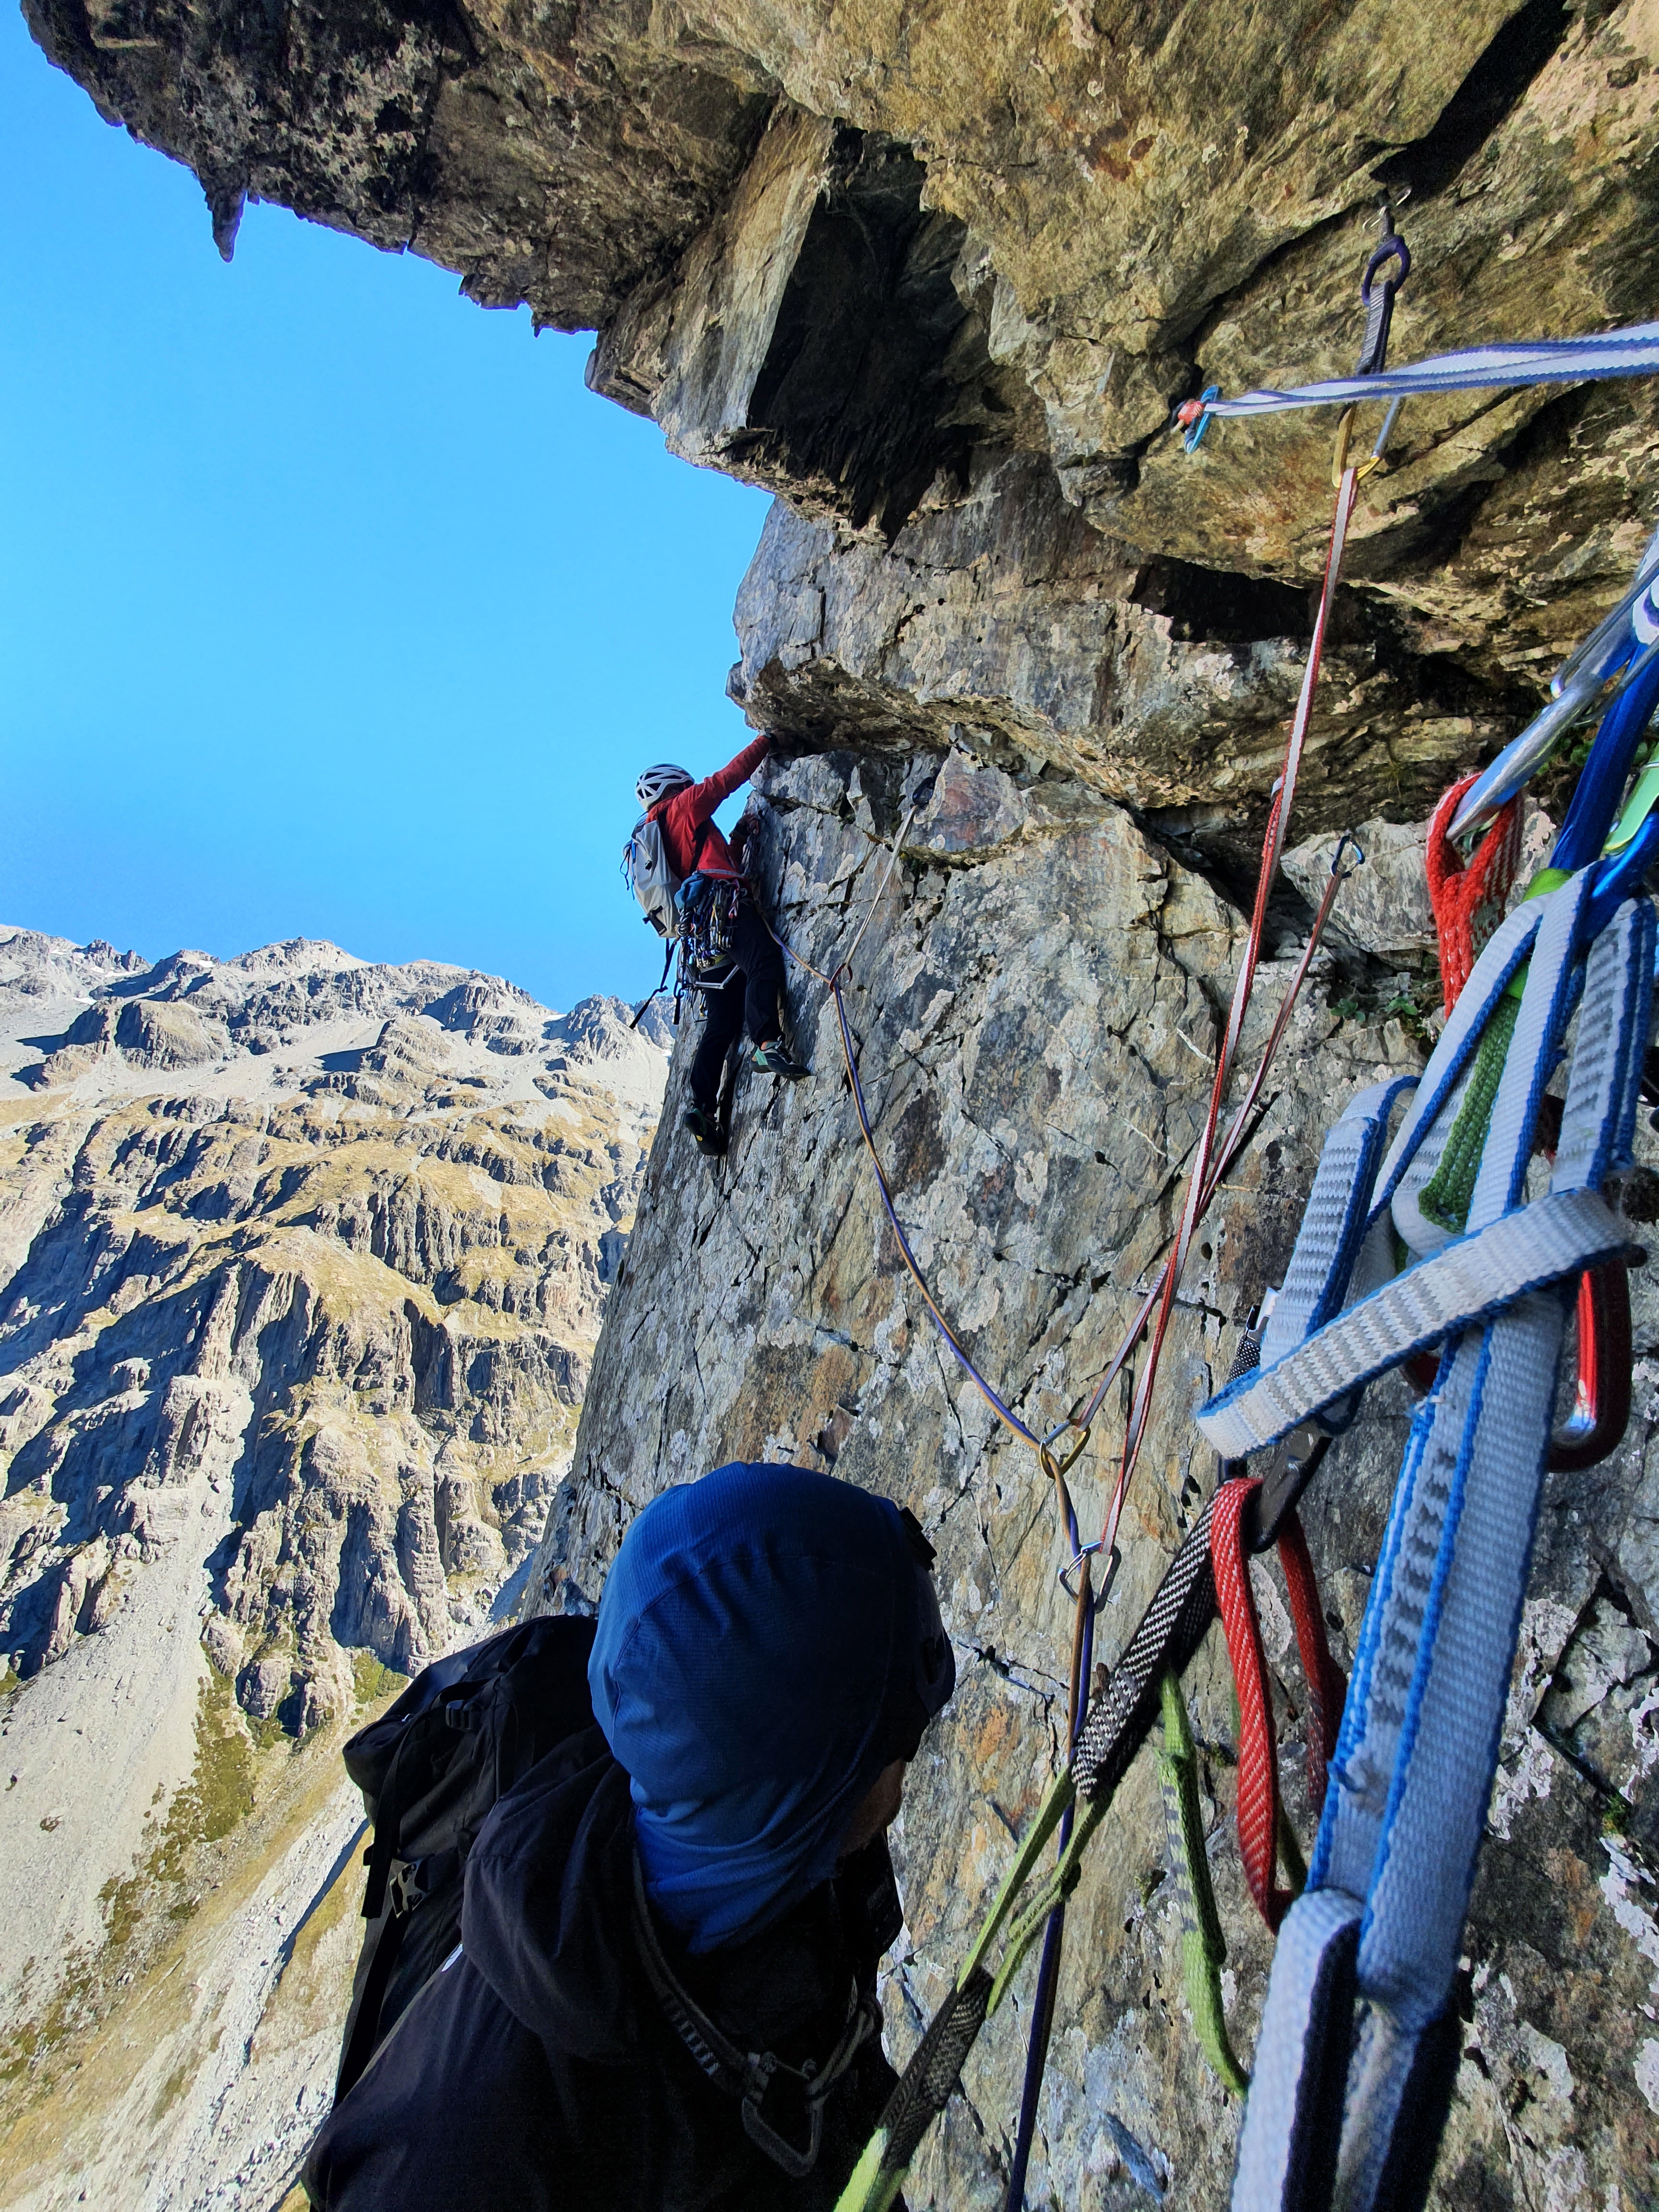
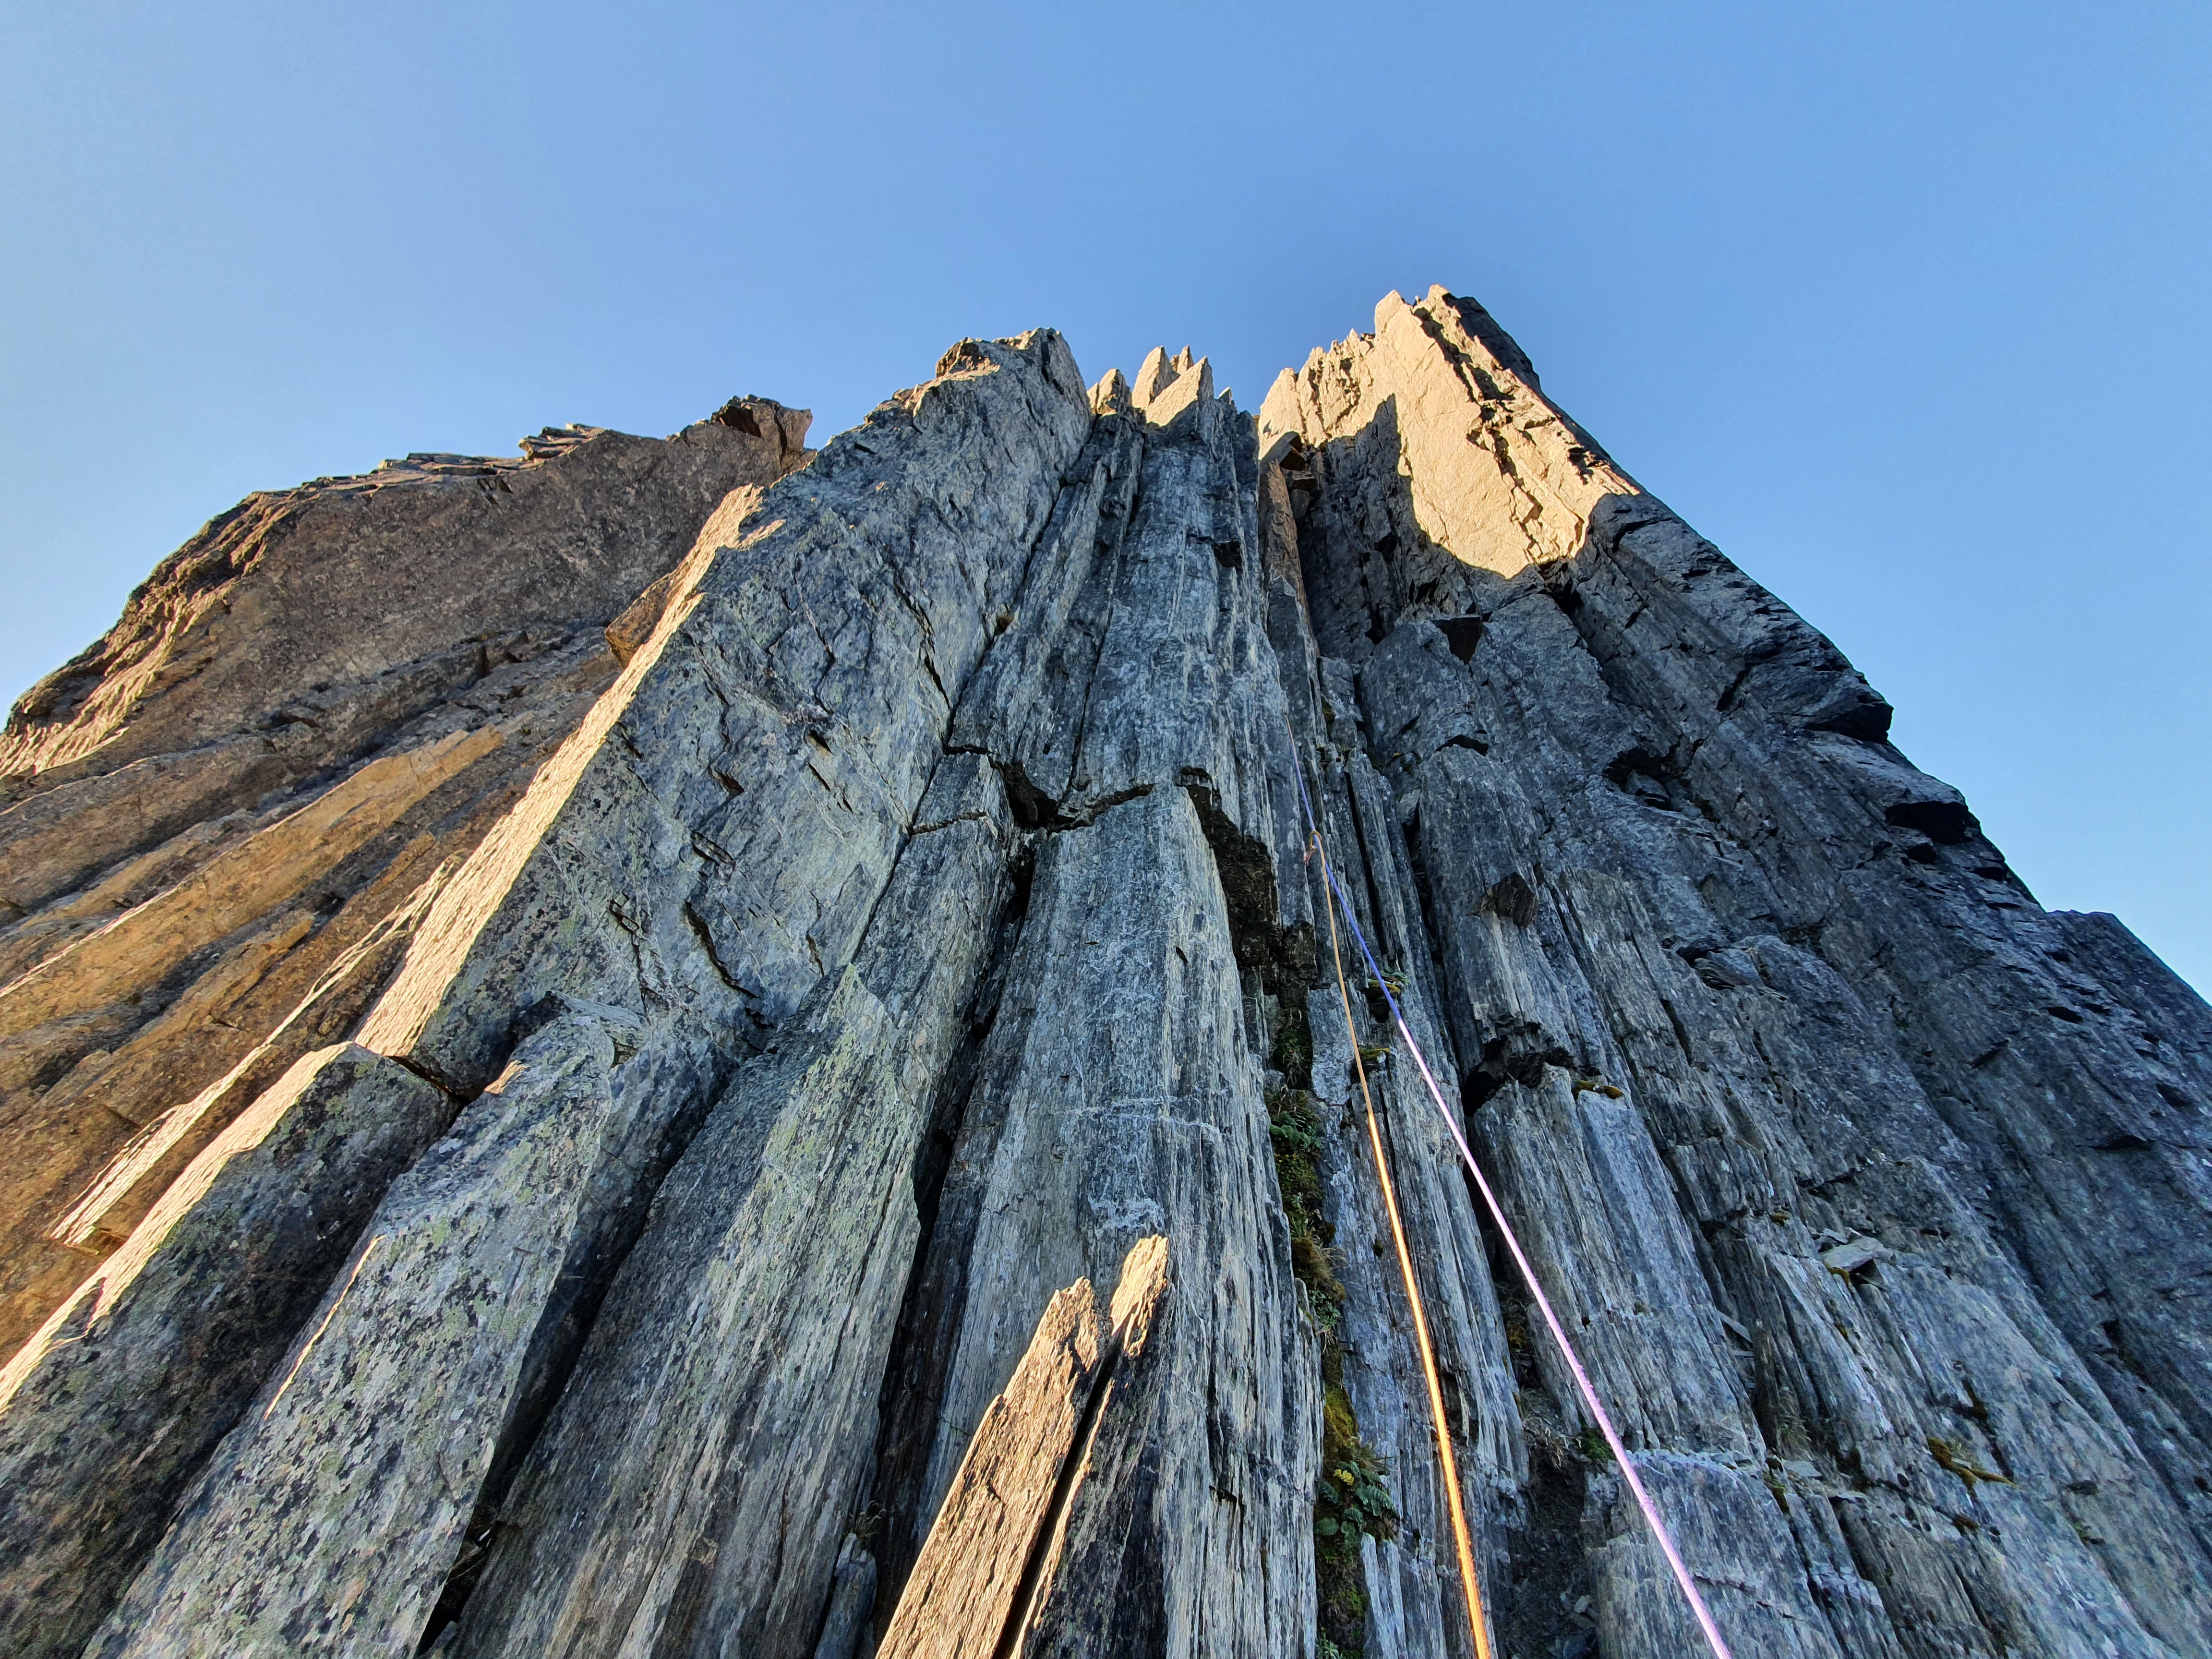
Pitch 2 On the main face there are a number of obvious crack systems that trend up and left all the way to the ridge, just left of a large obvious grey block on the top of the ridge. Some rap tat is on the rock at the bottom marking the start of the route proper. We followed the obvious line of weakness trending up and left which tops out at the ridge about 20m left of the big grey block. V good gear and solid rock. Small gear required to make anchor on the ridge (we used 3x microcams, no obvious block to sling. Around 40m, grade 15.
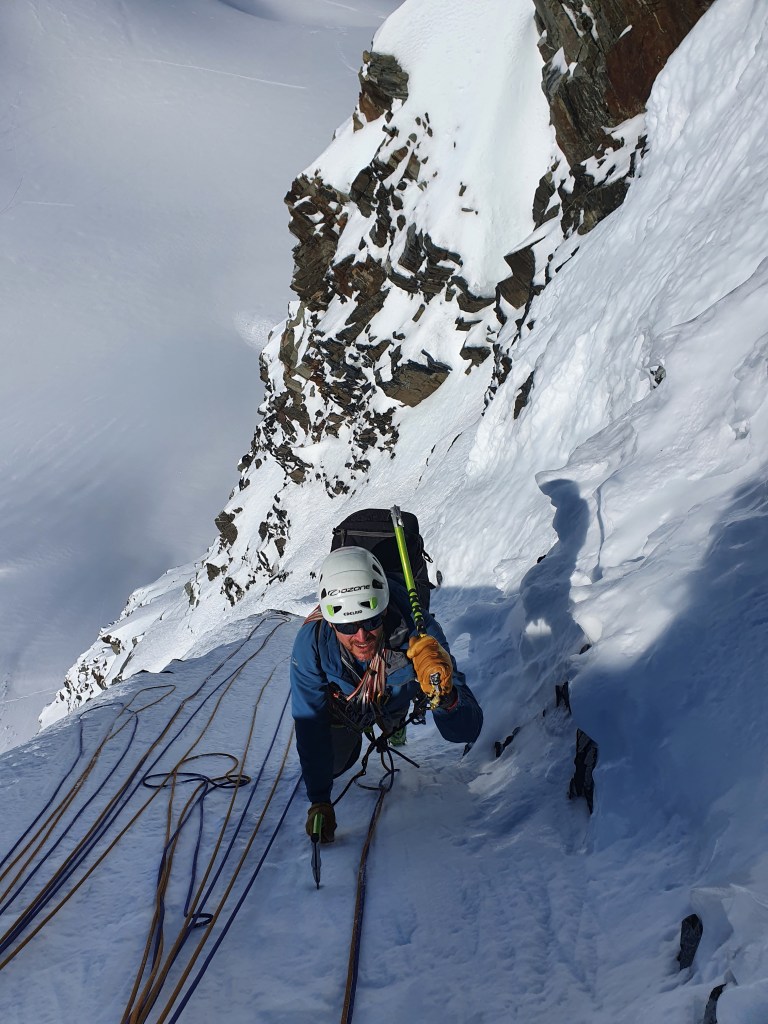
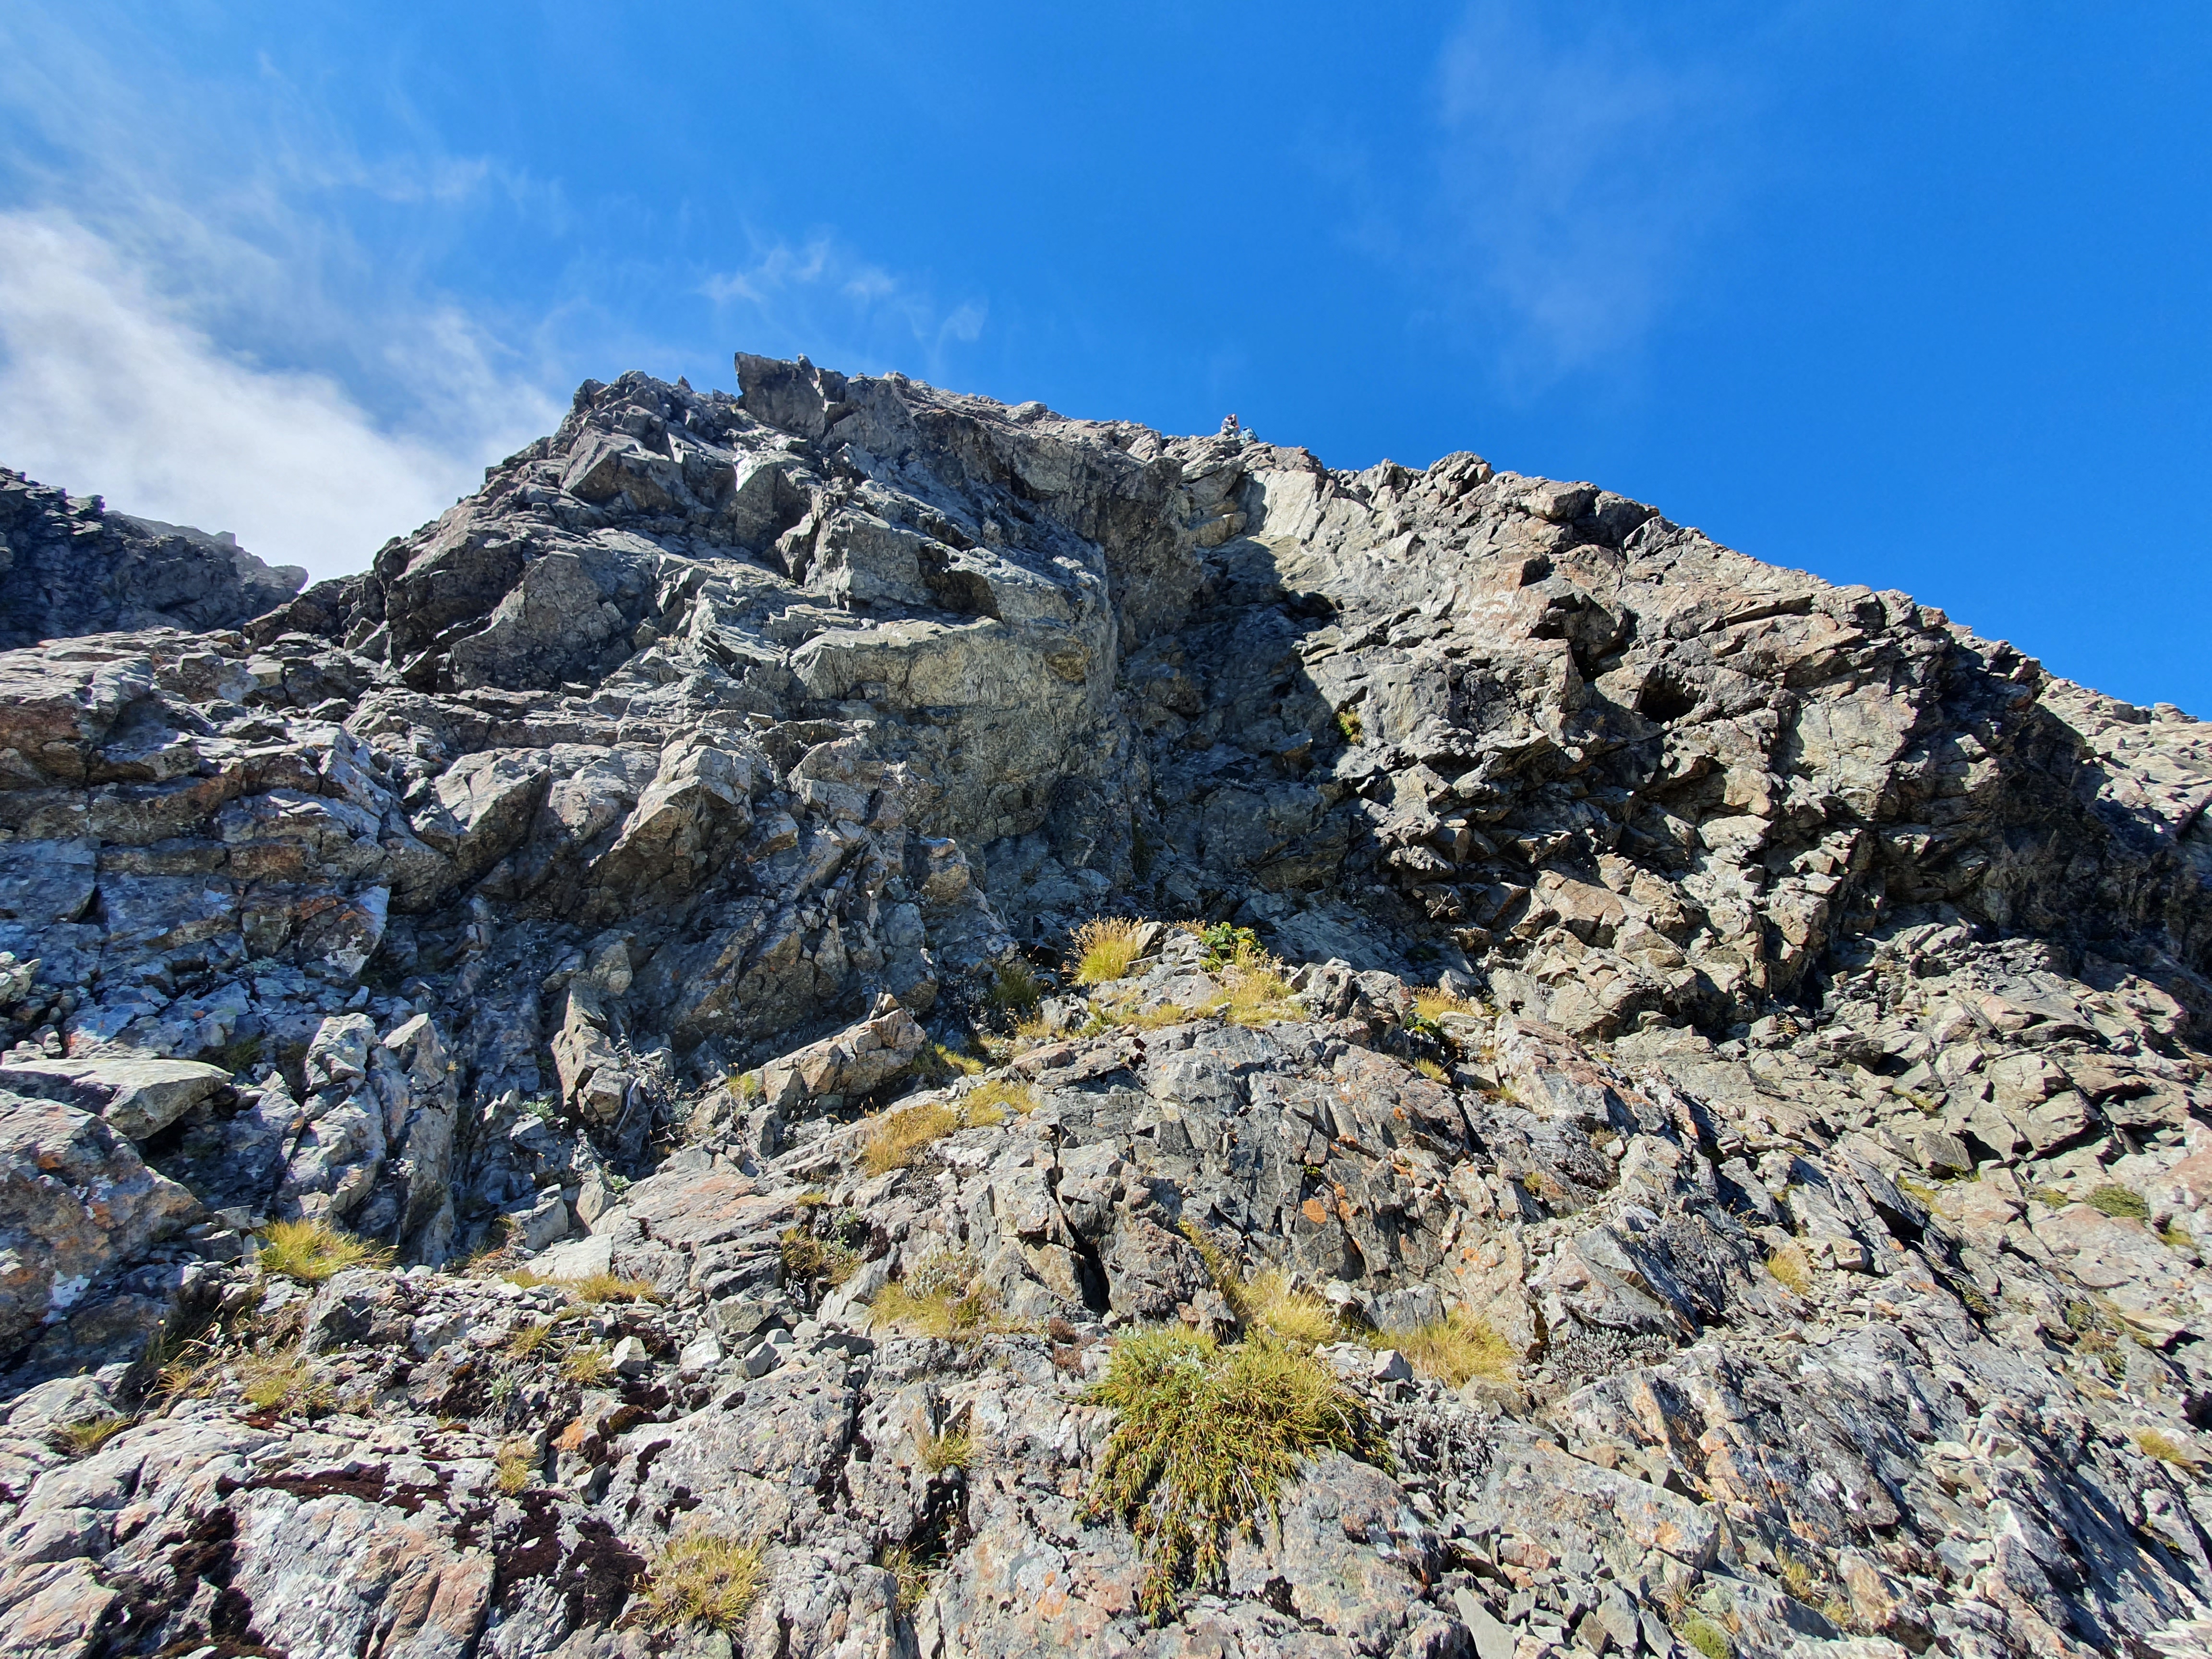
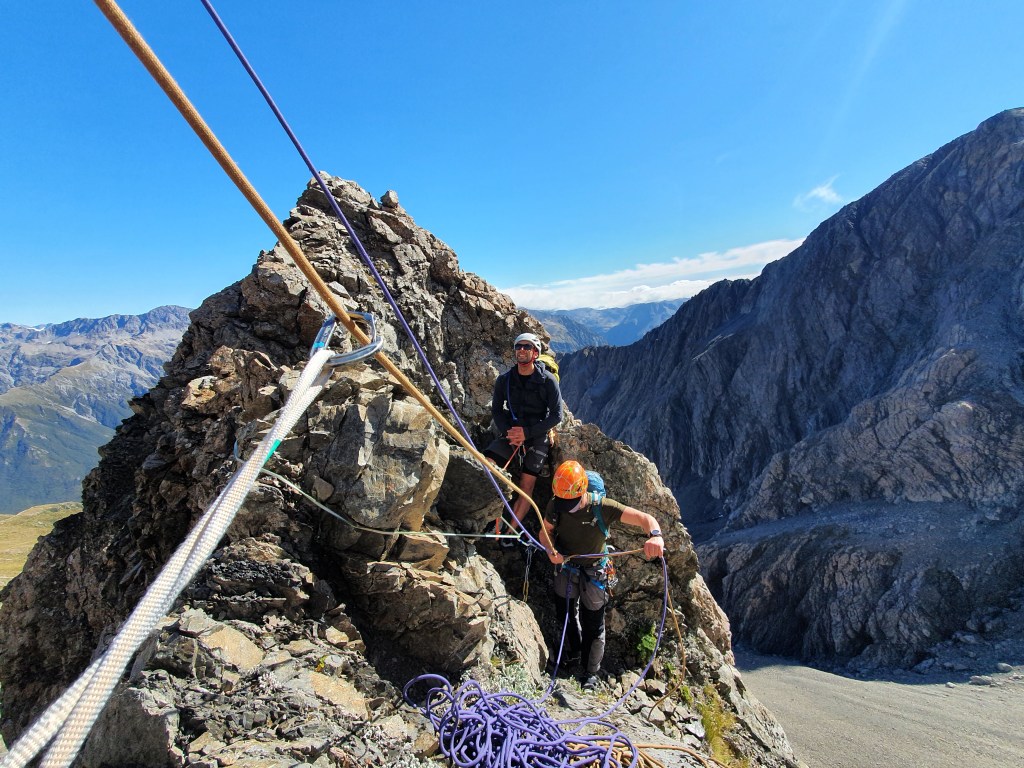
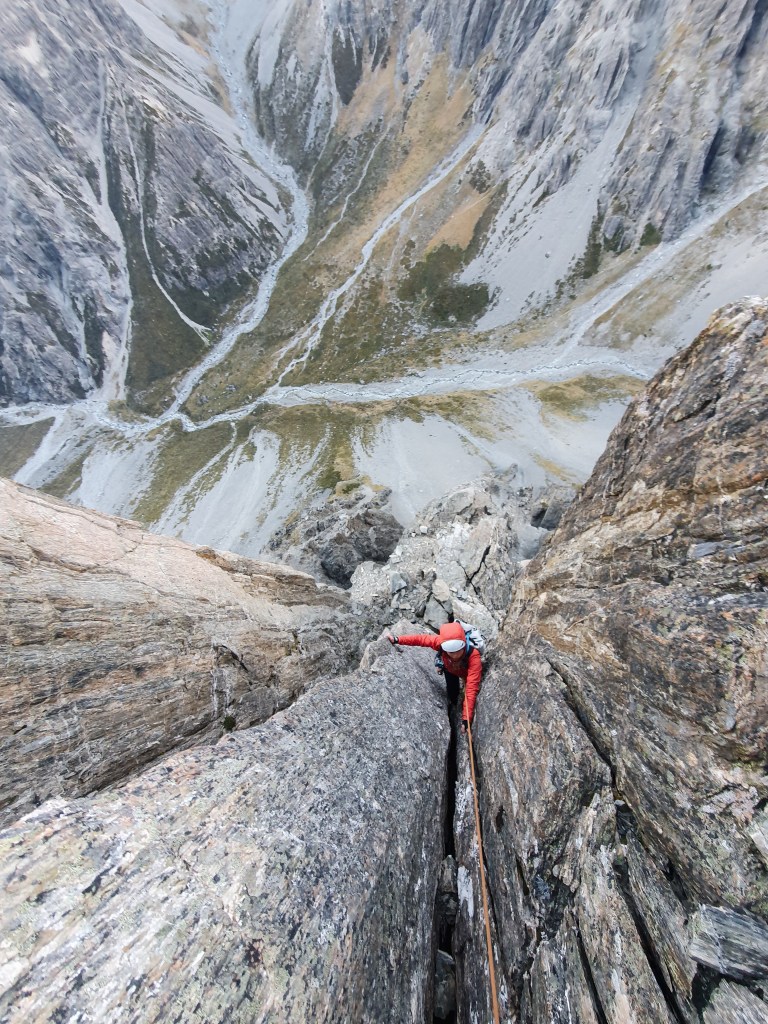
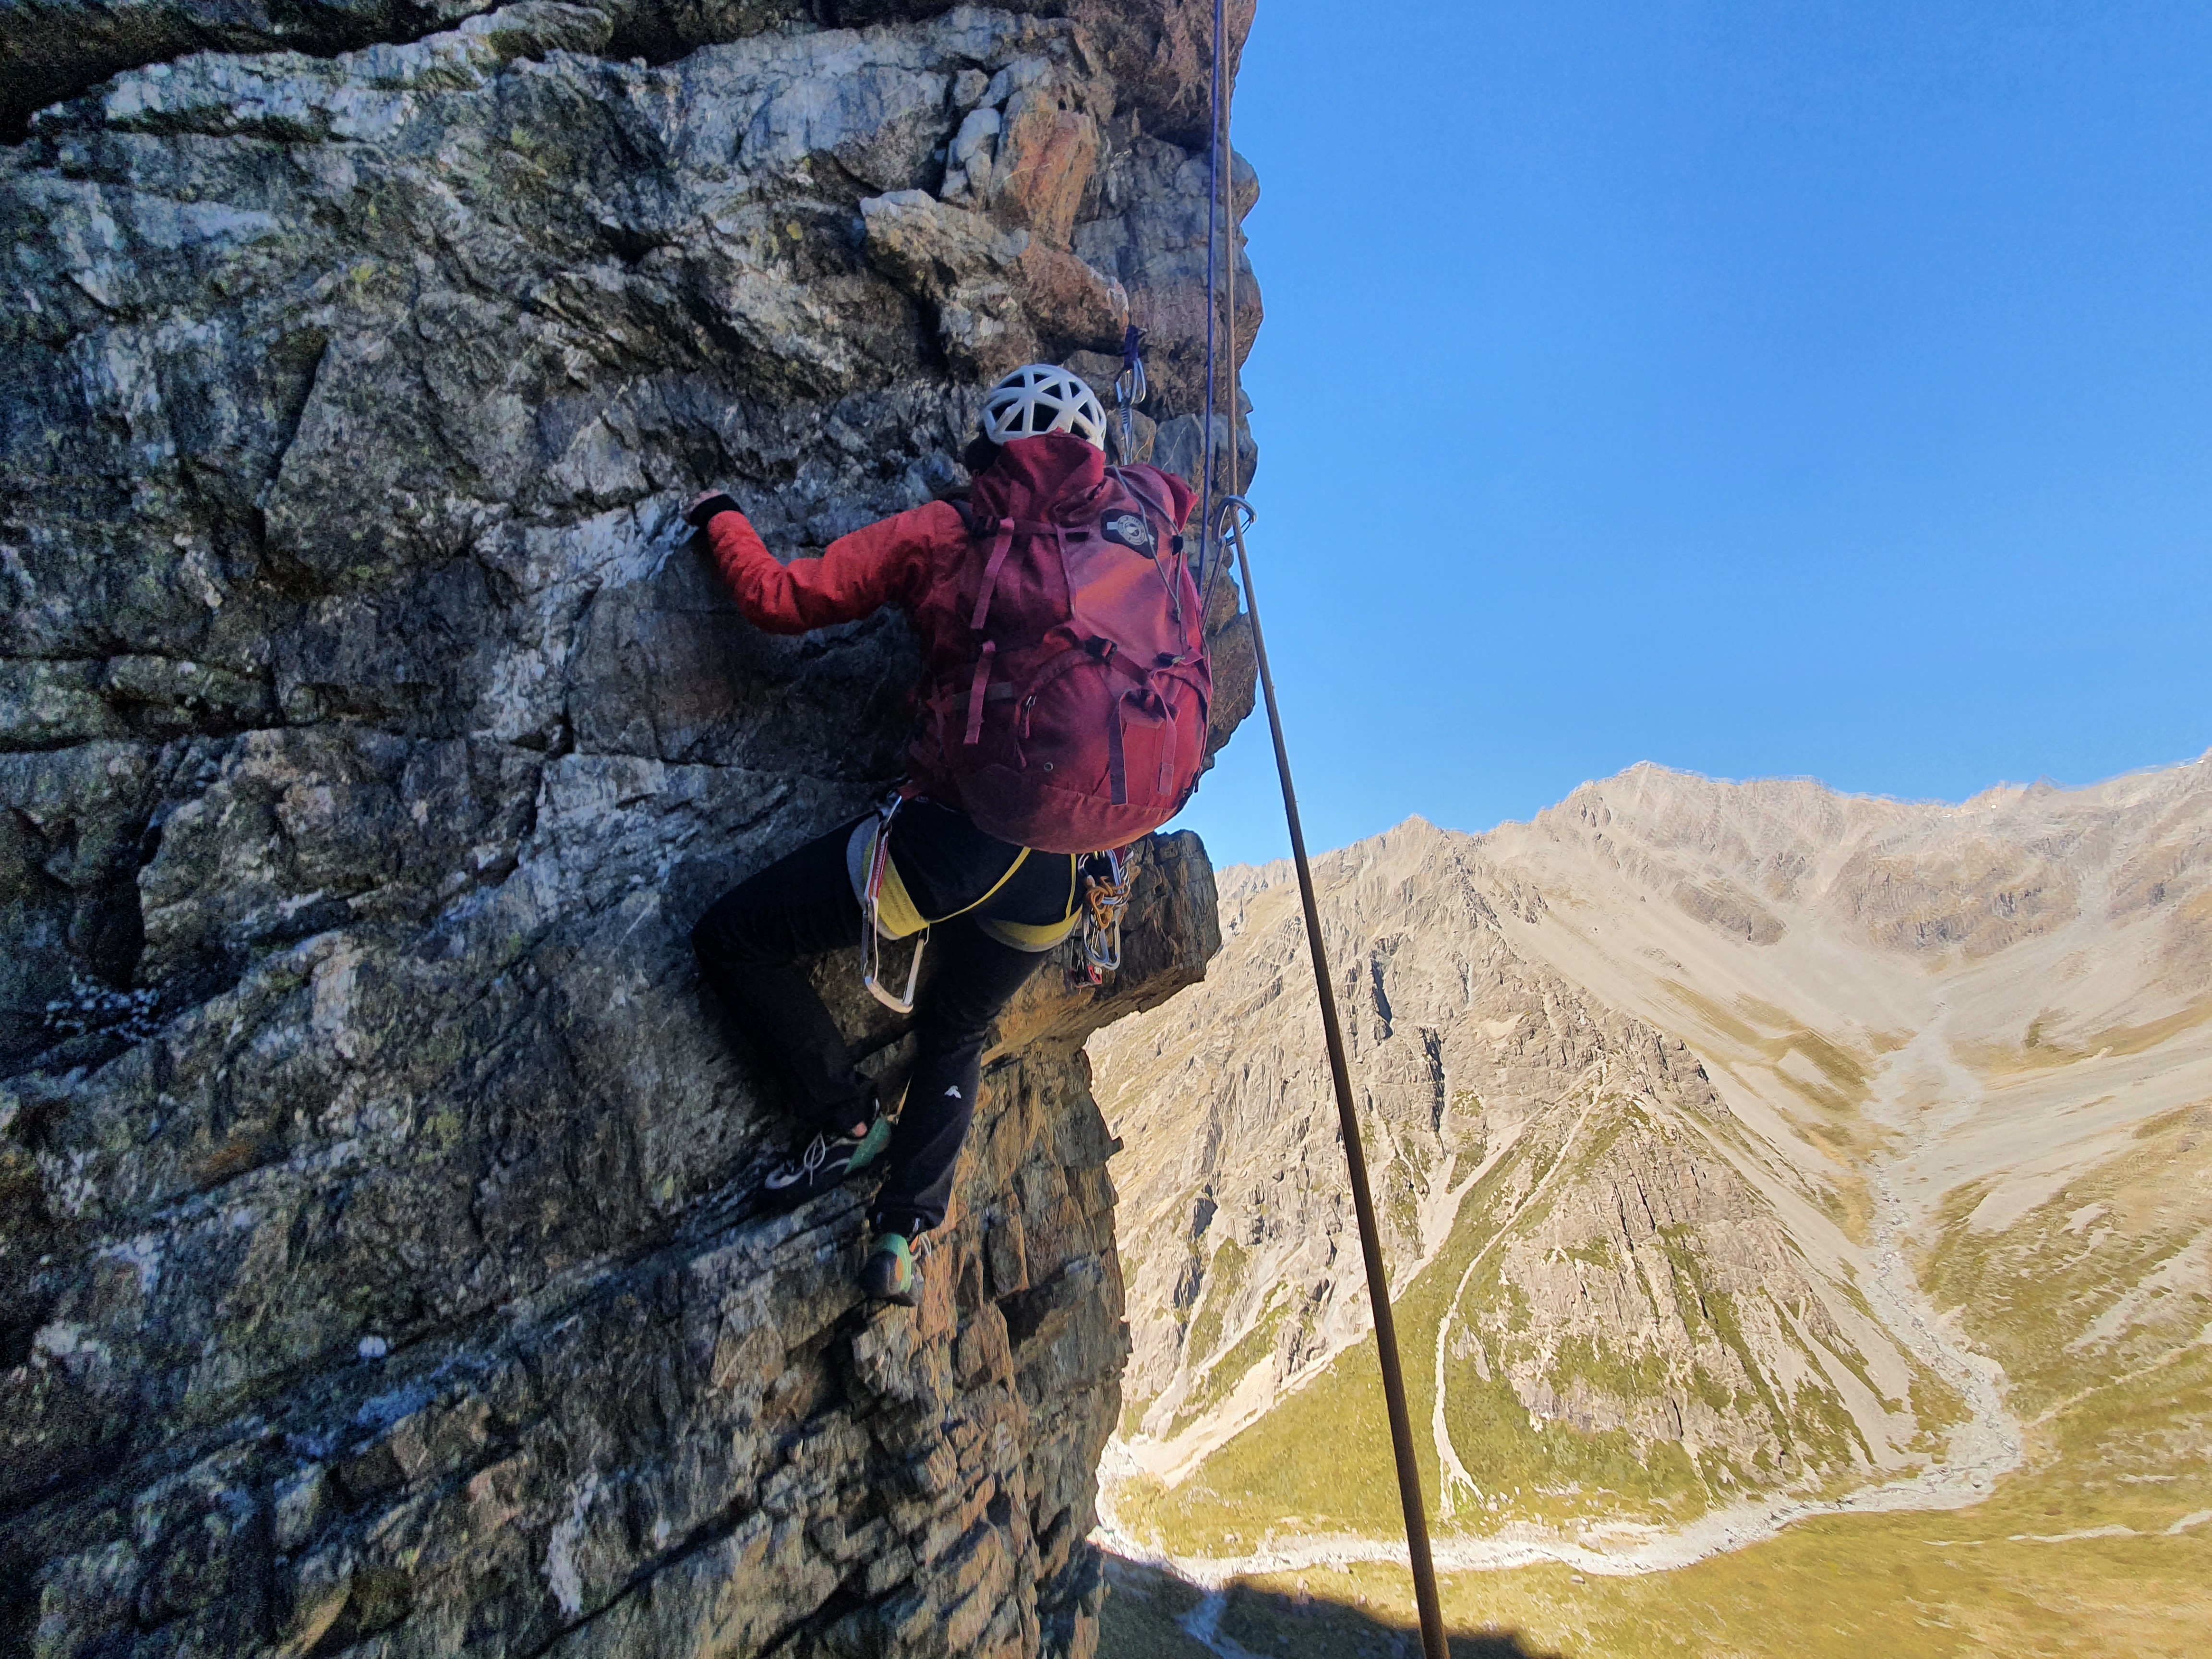
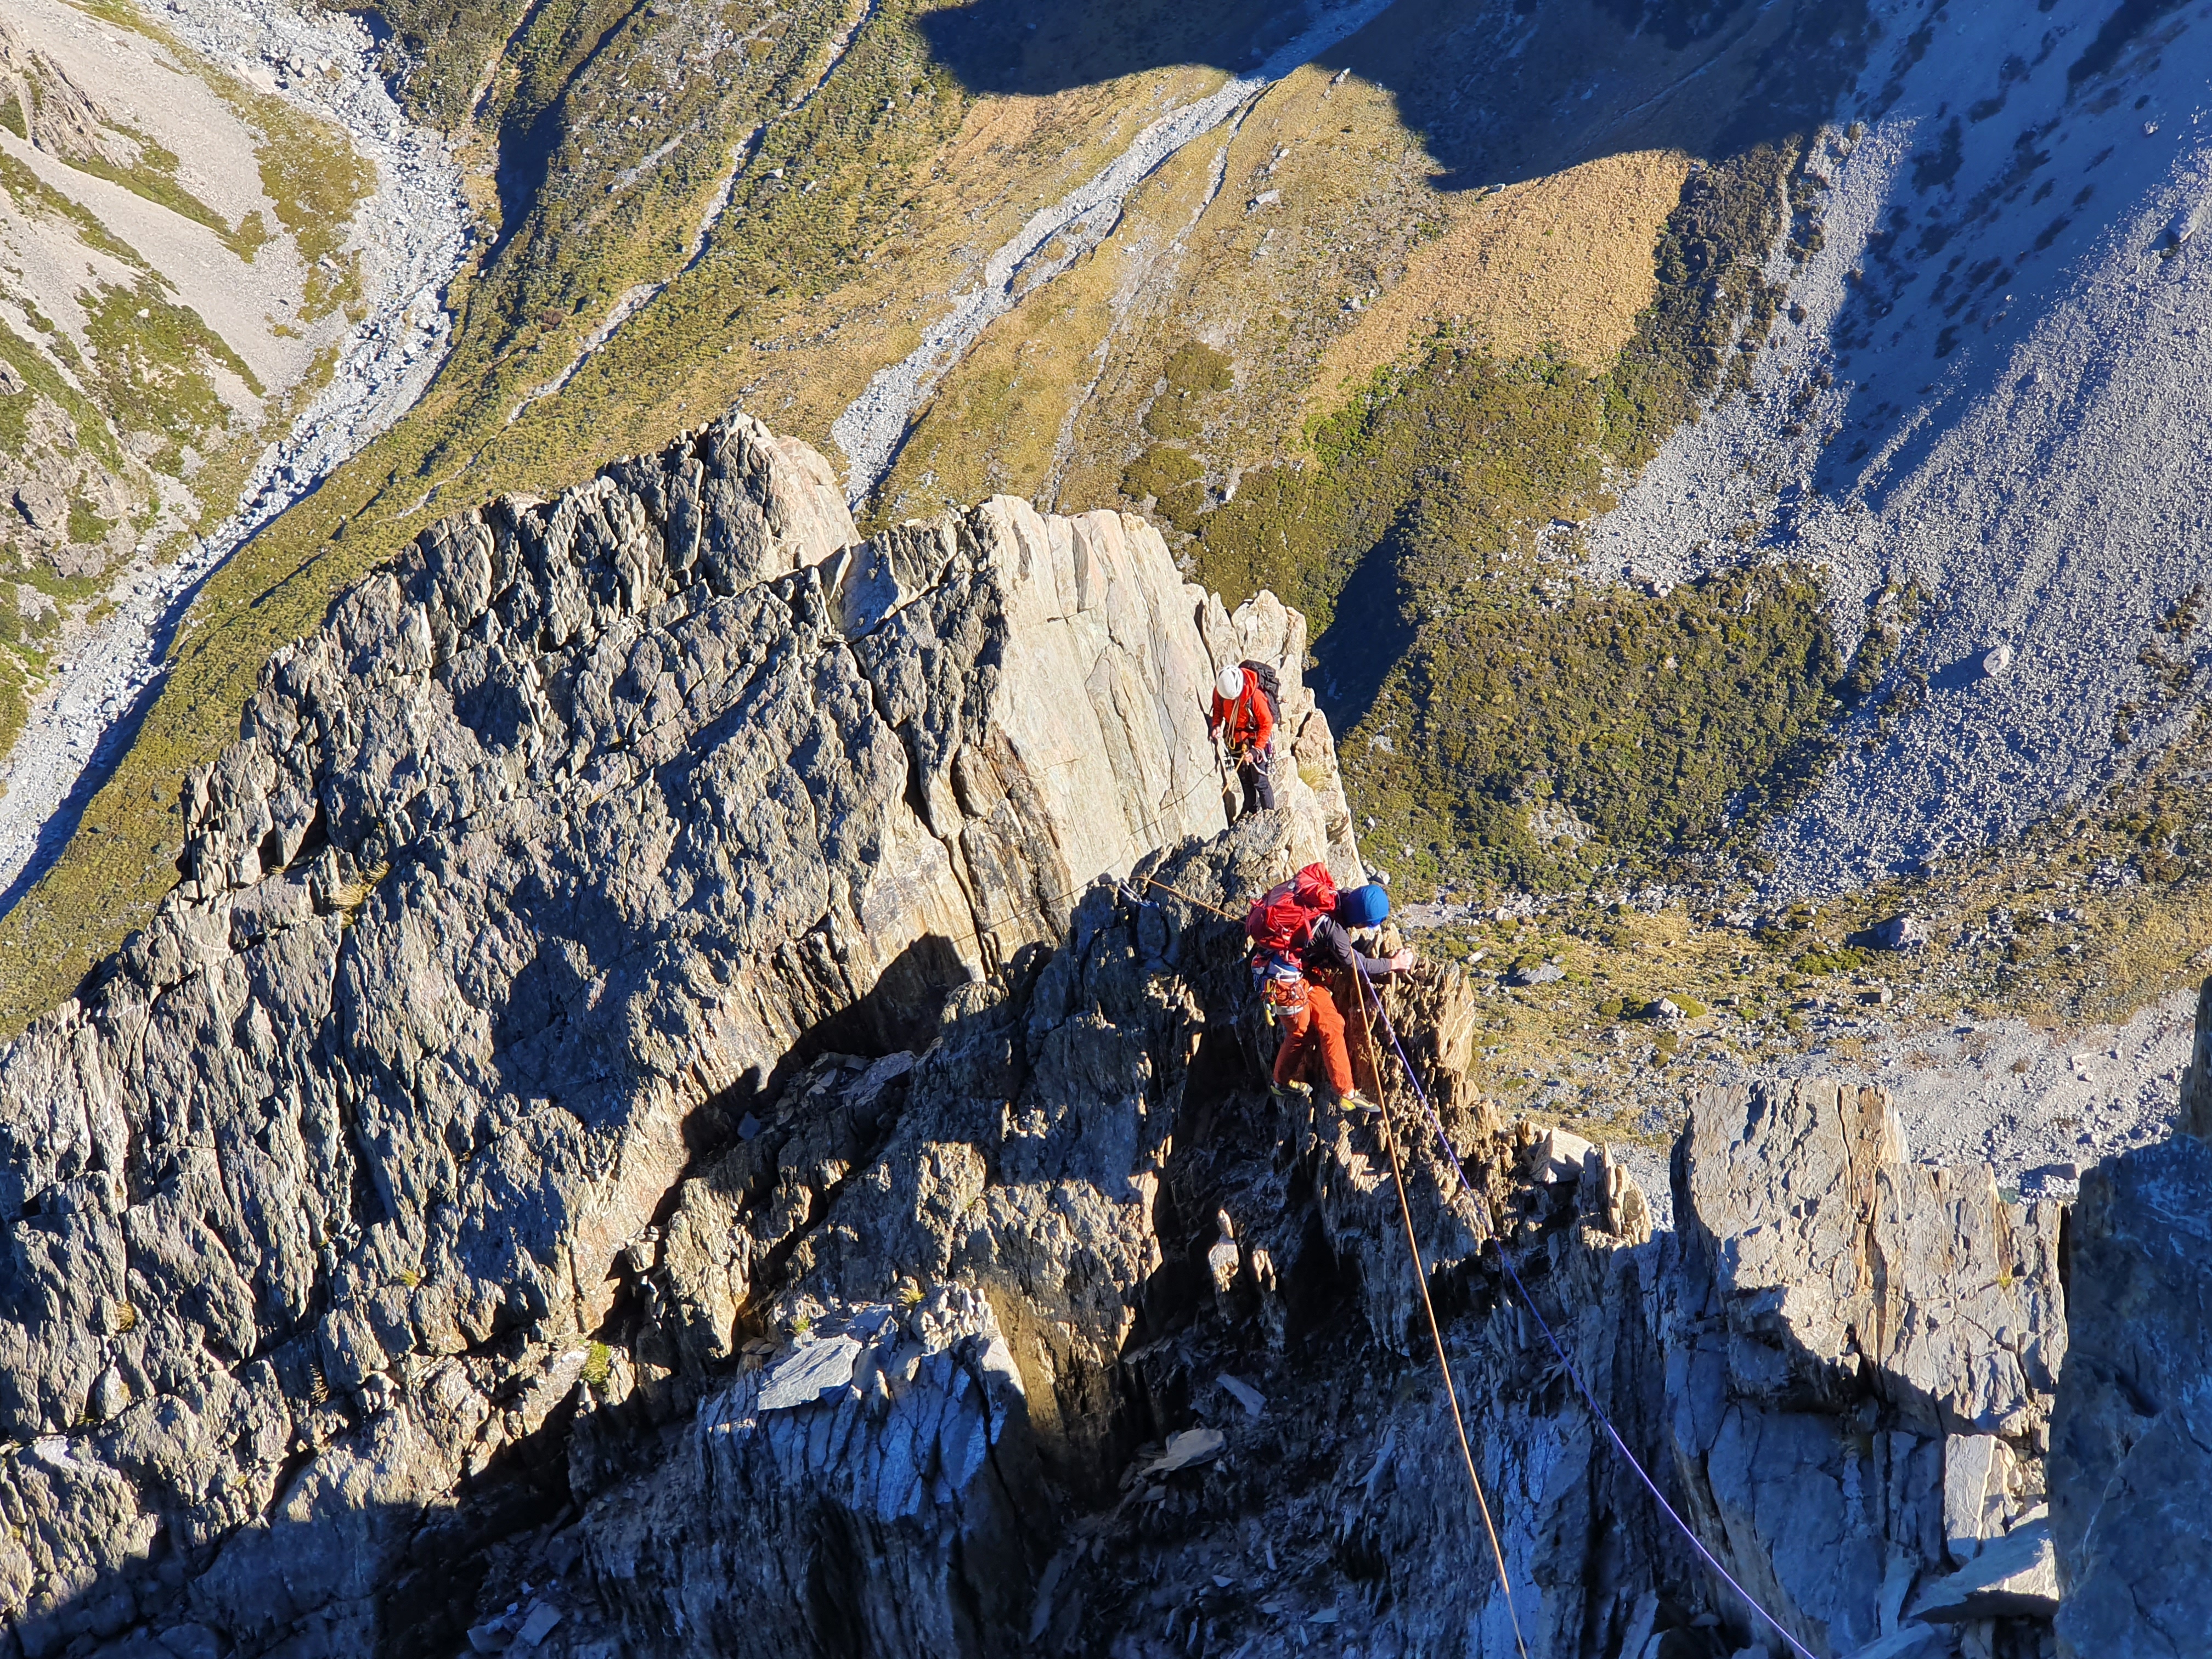
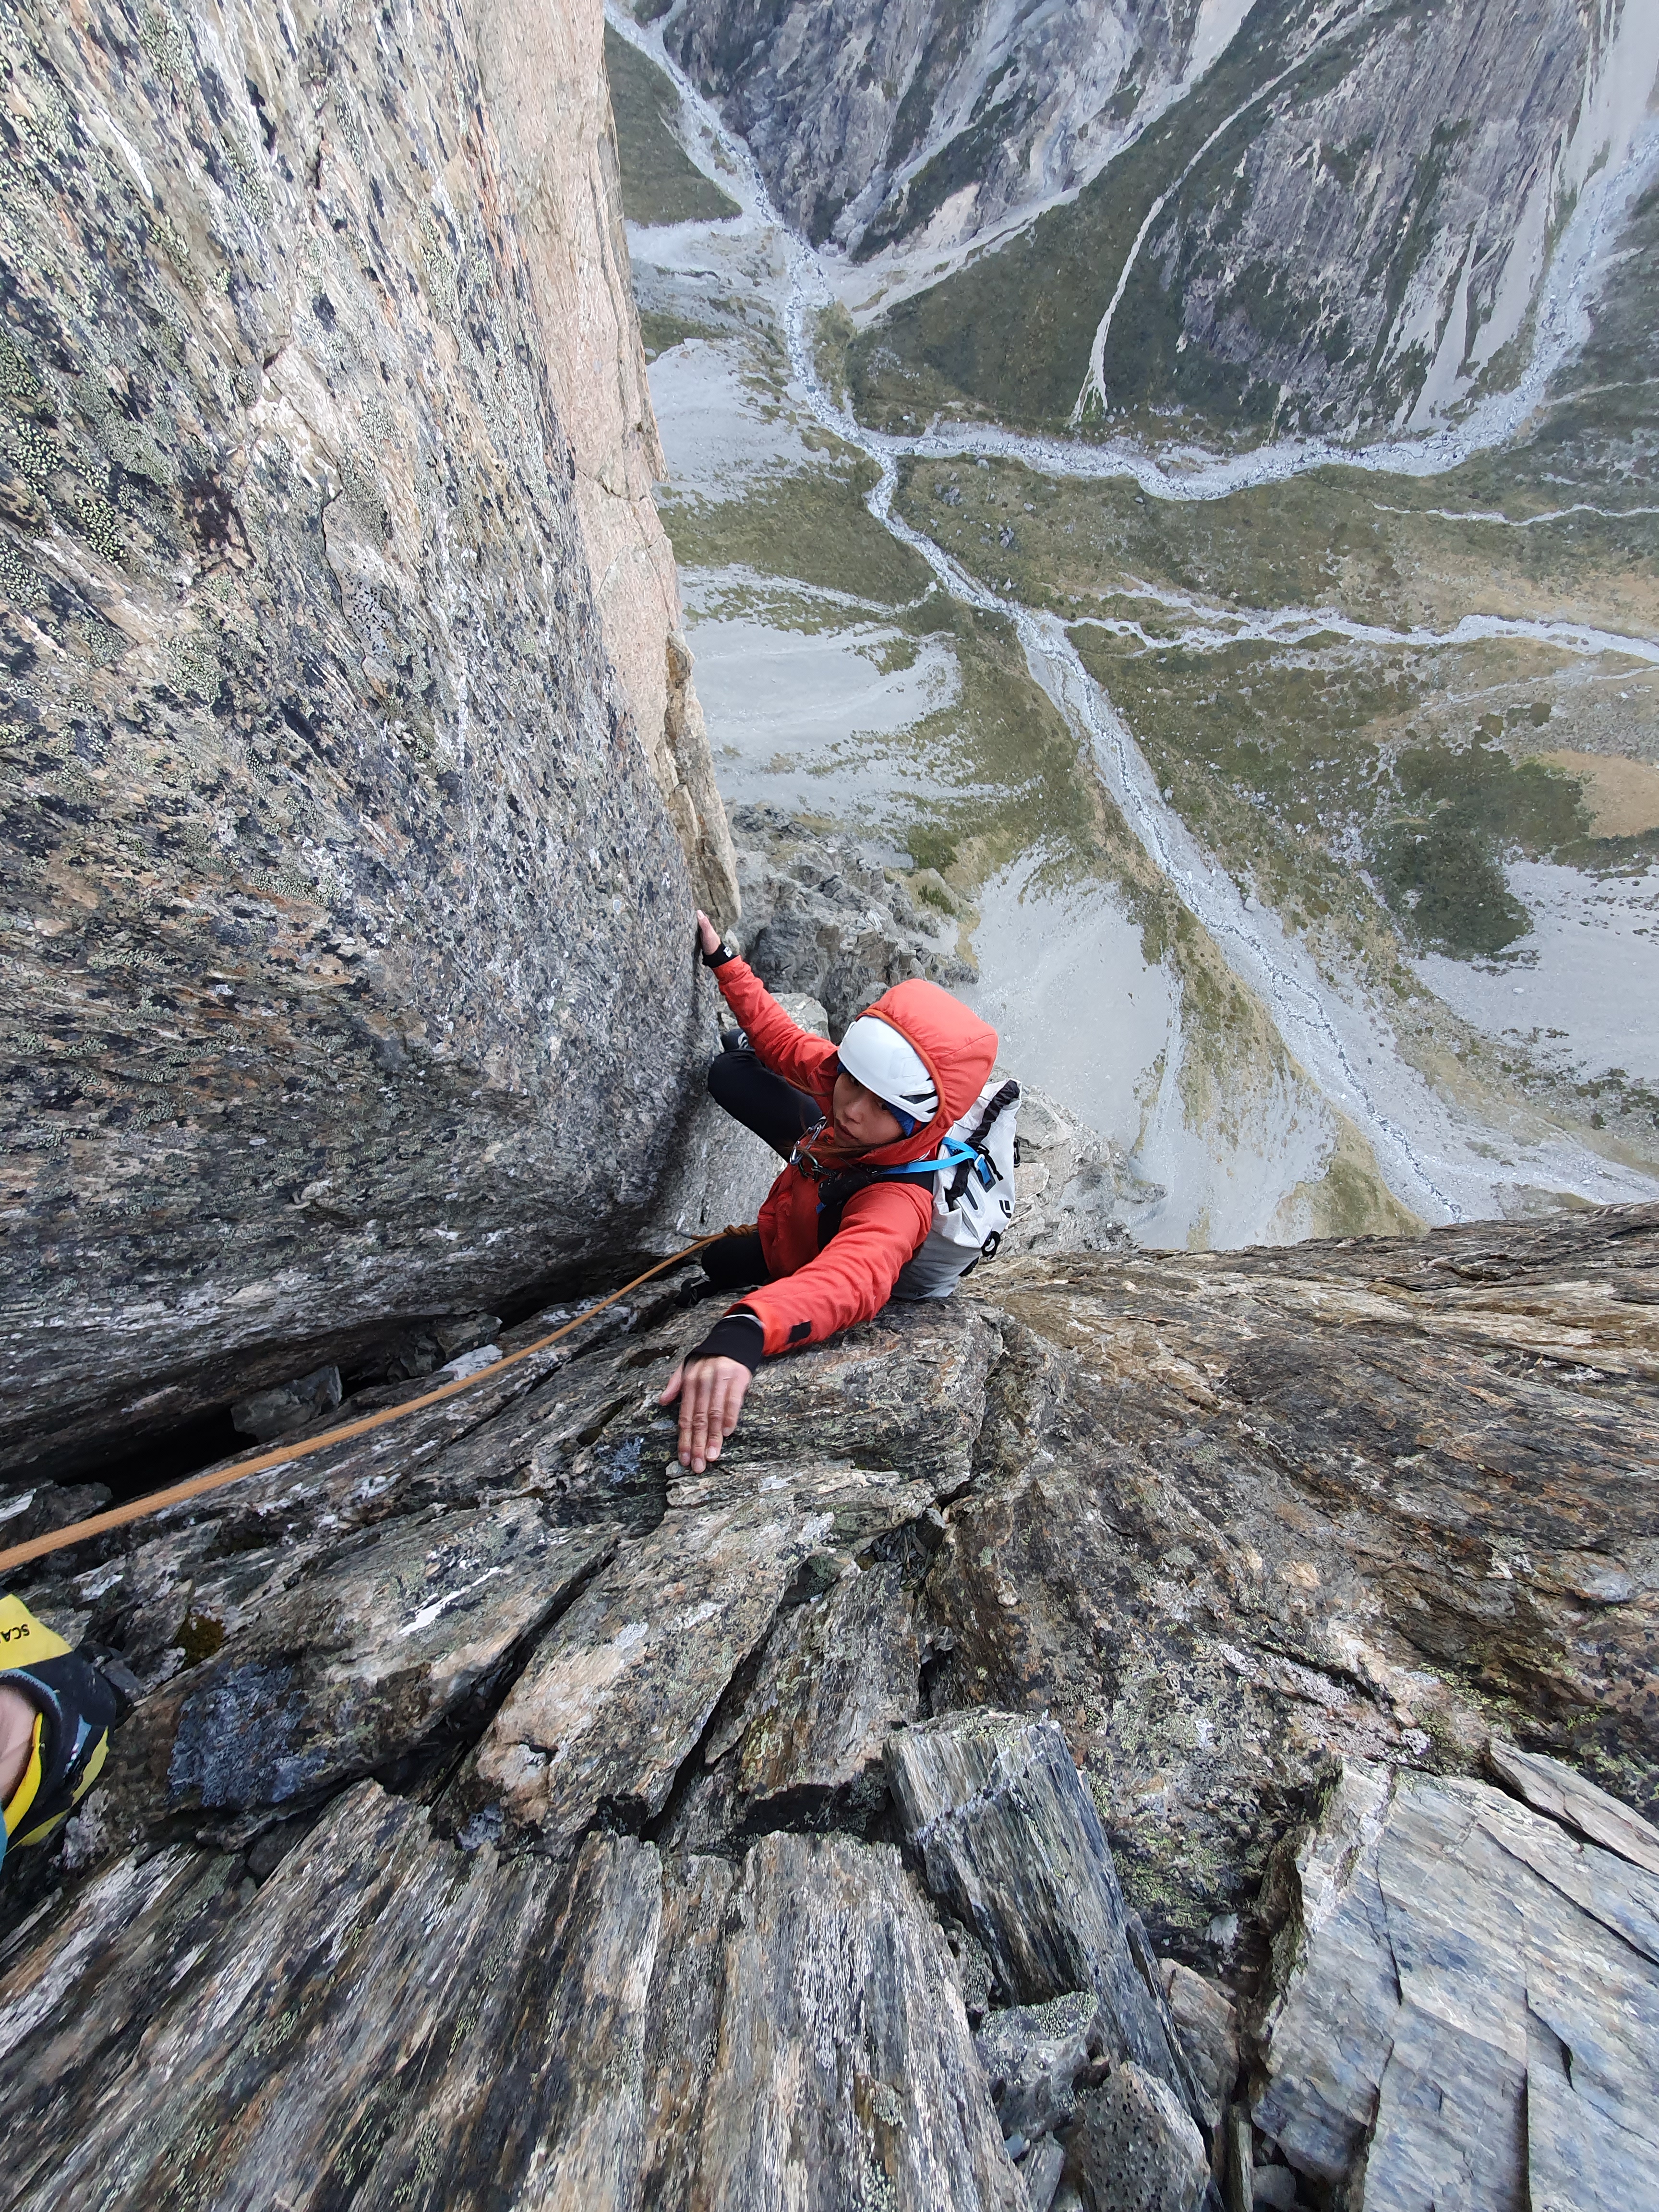
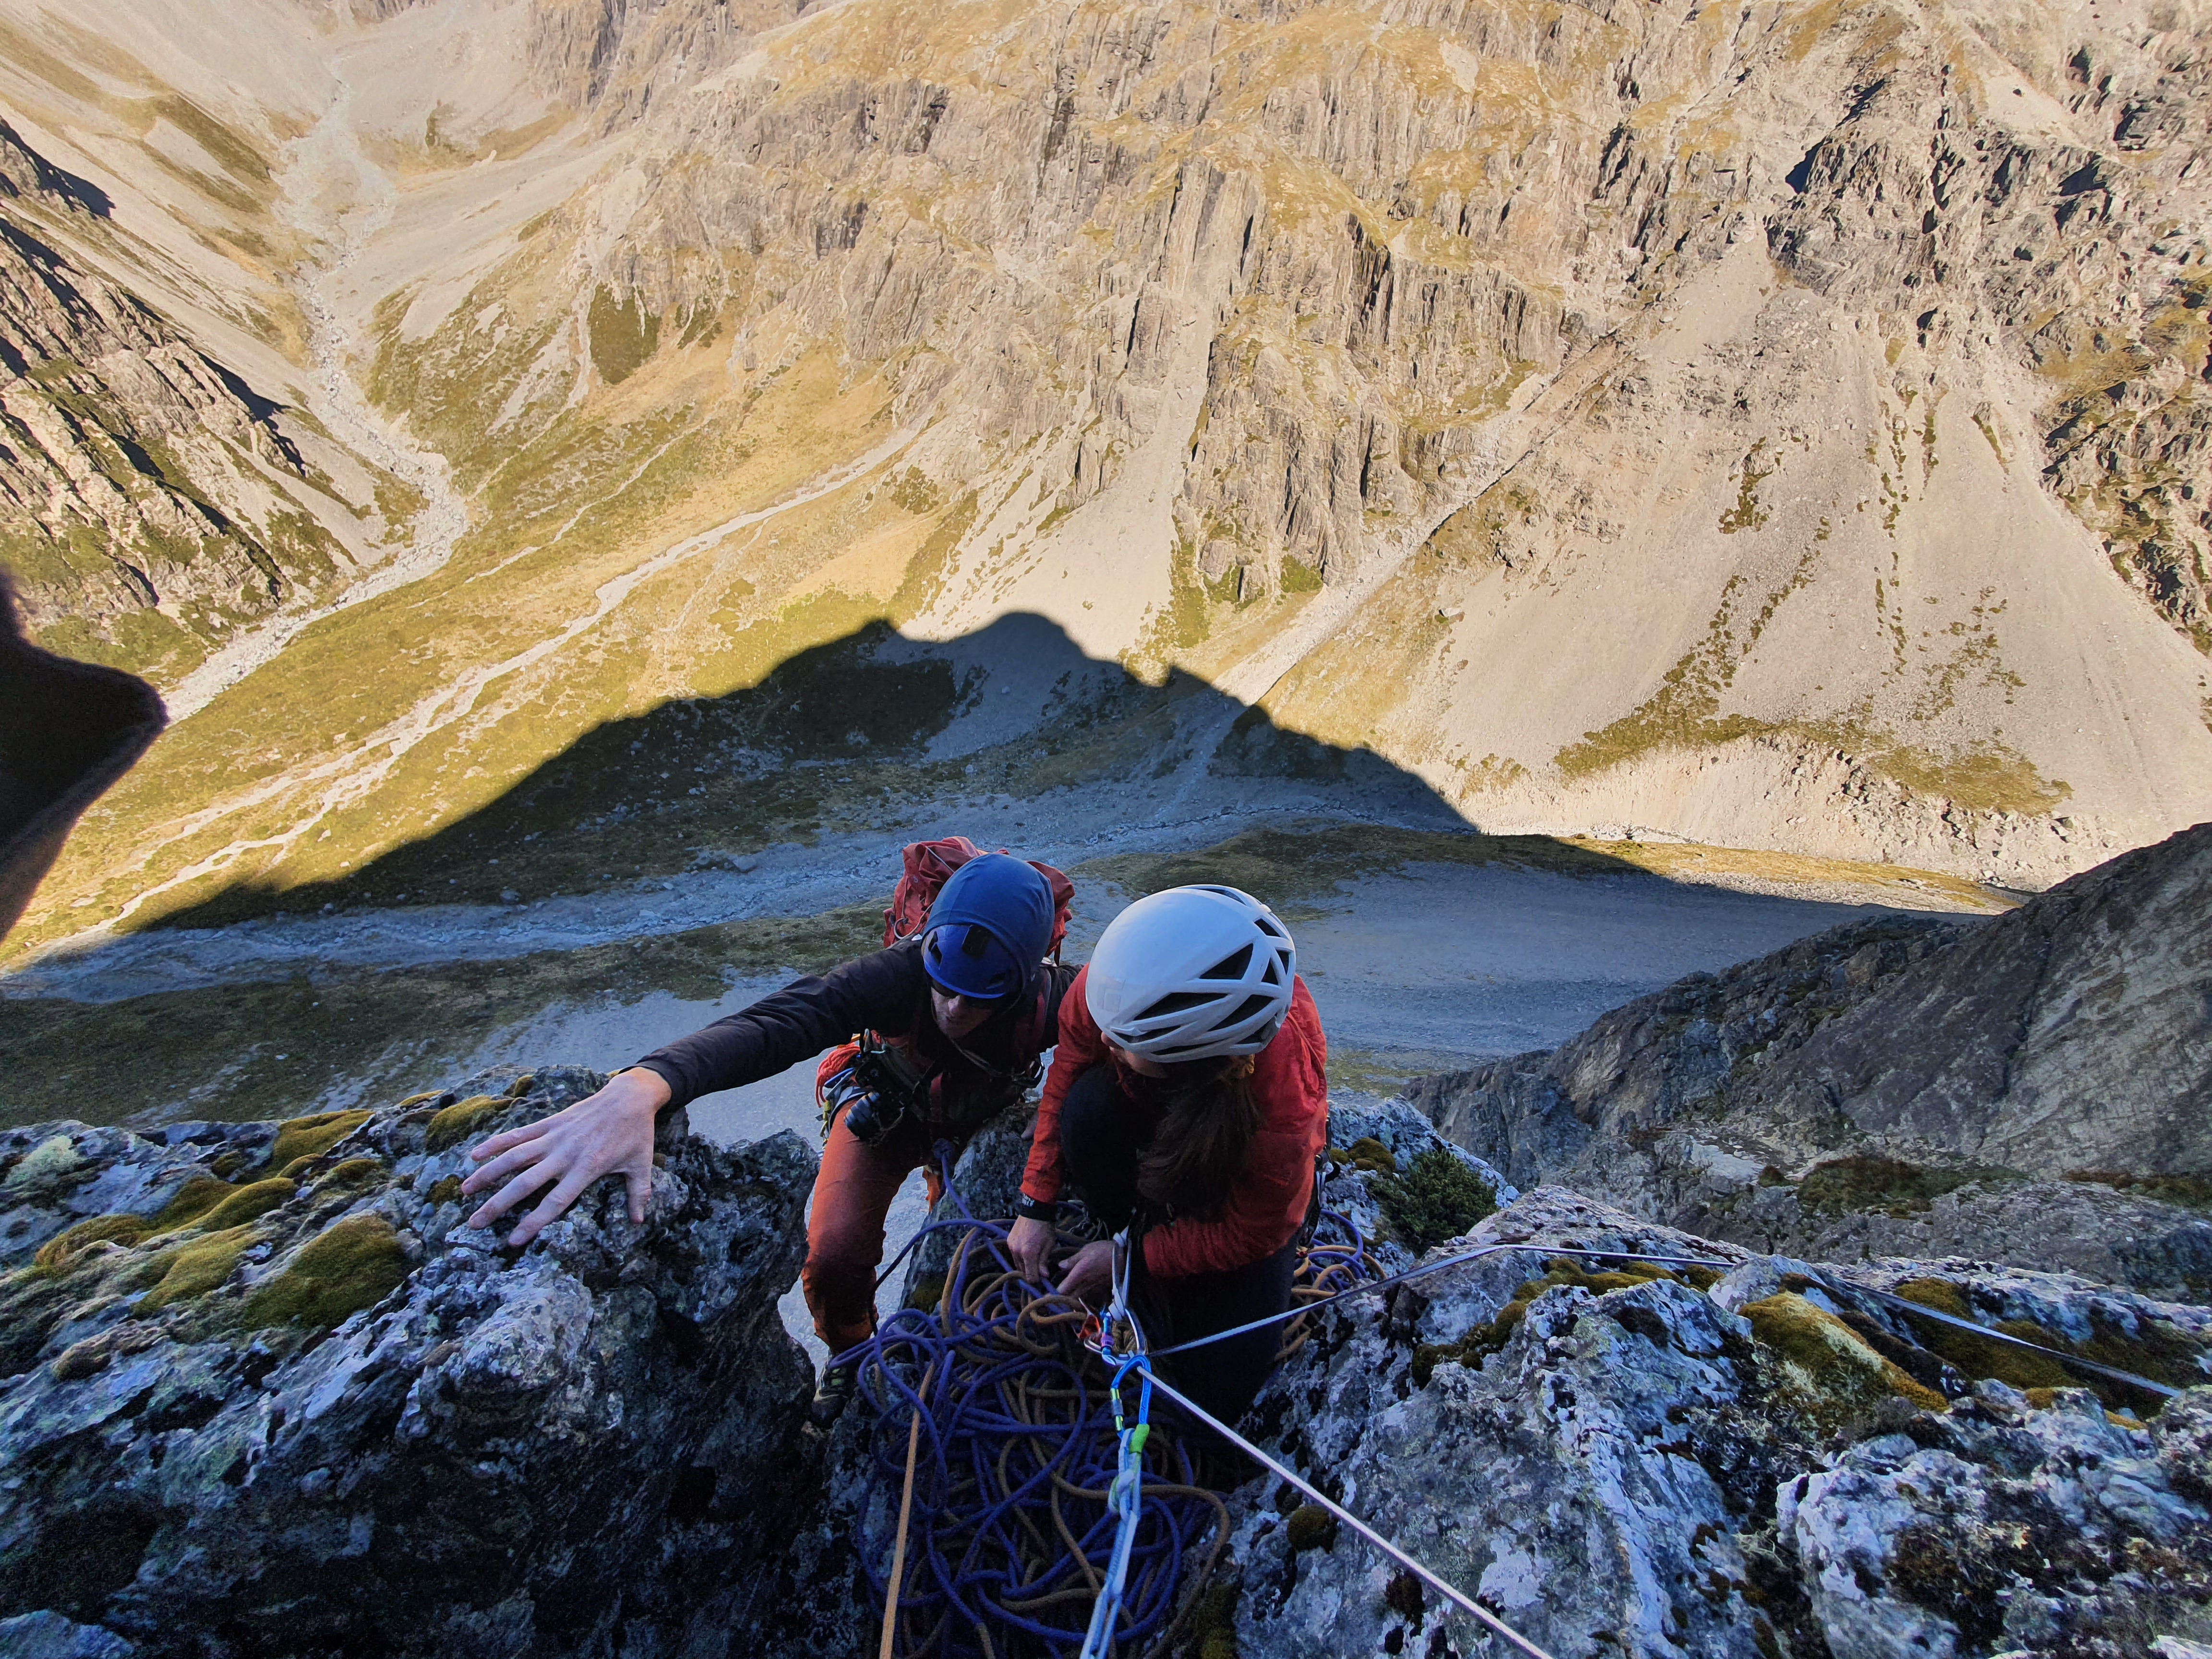
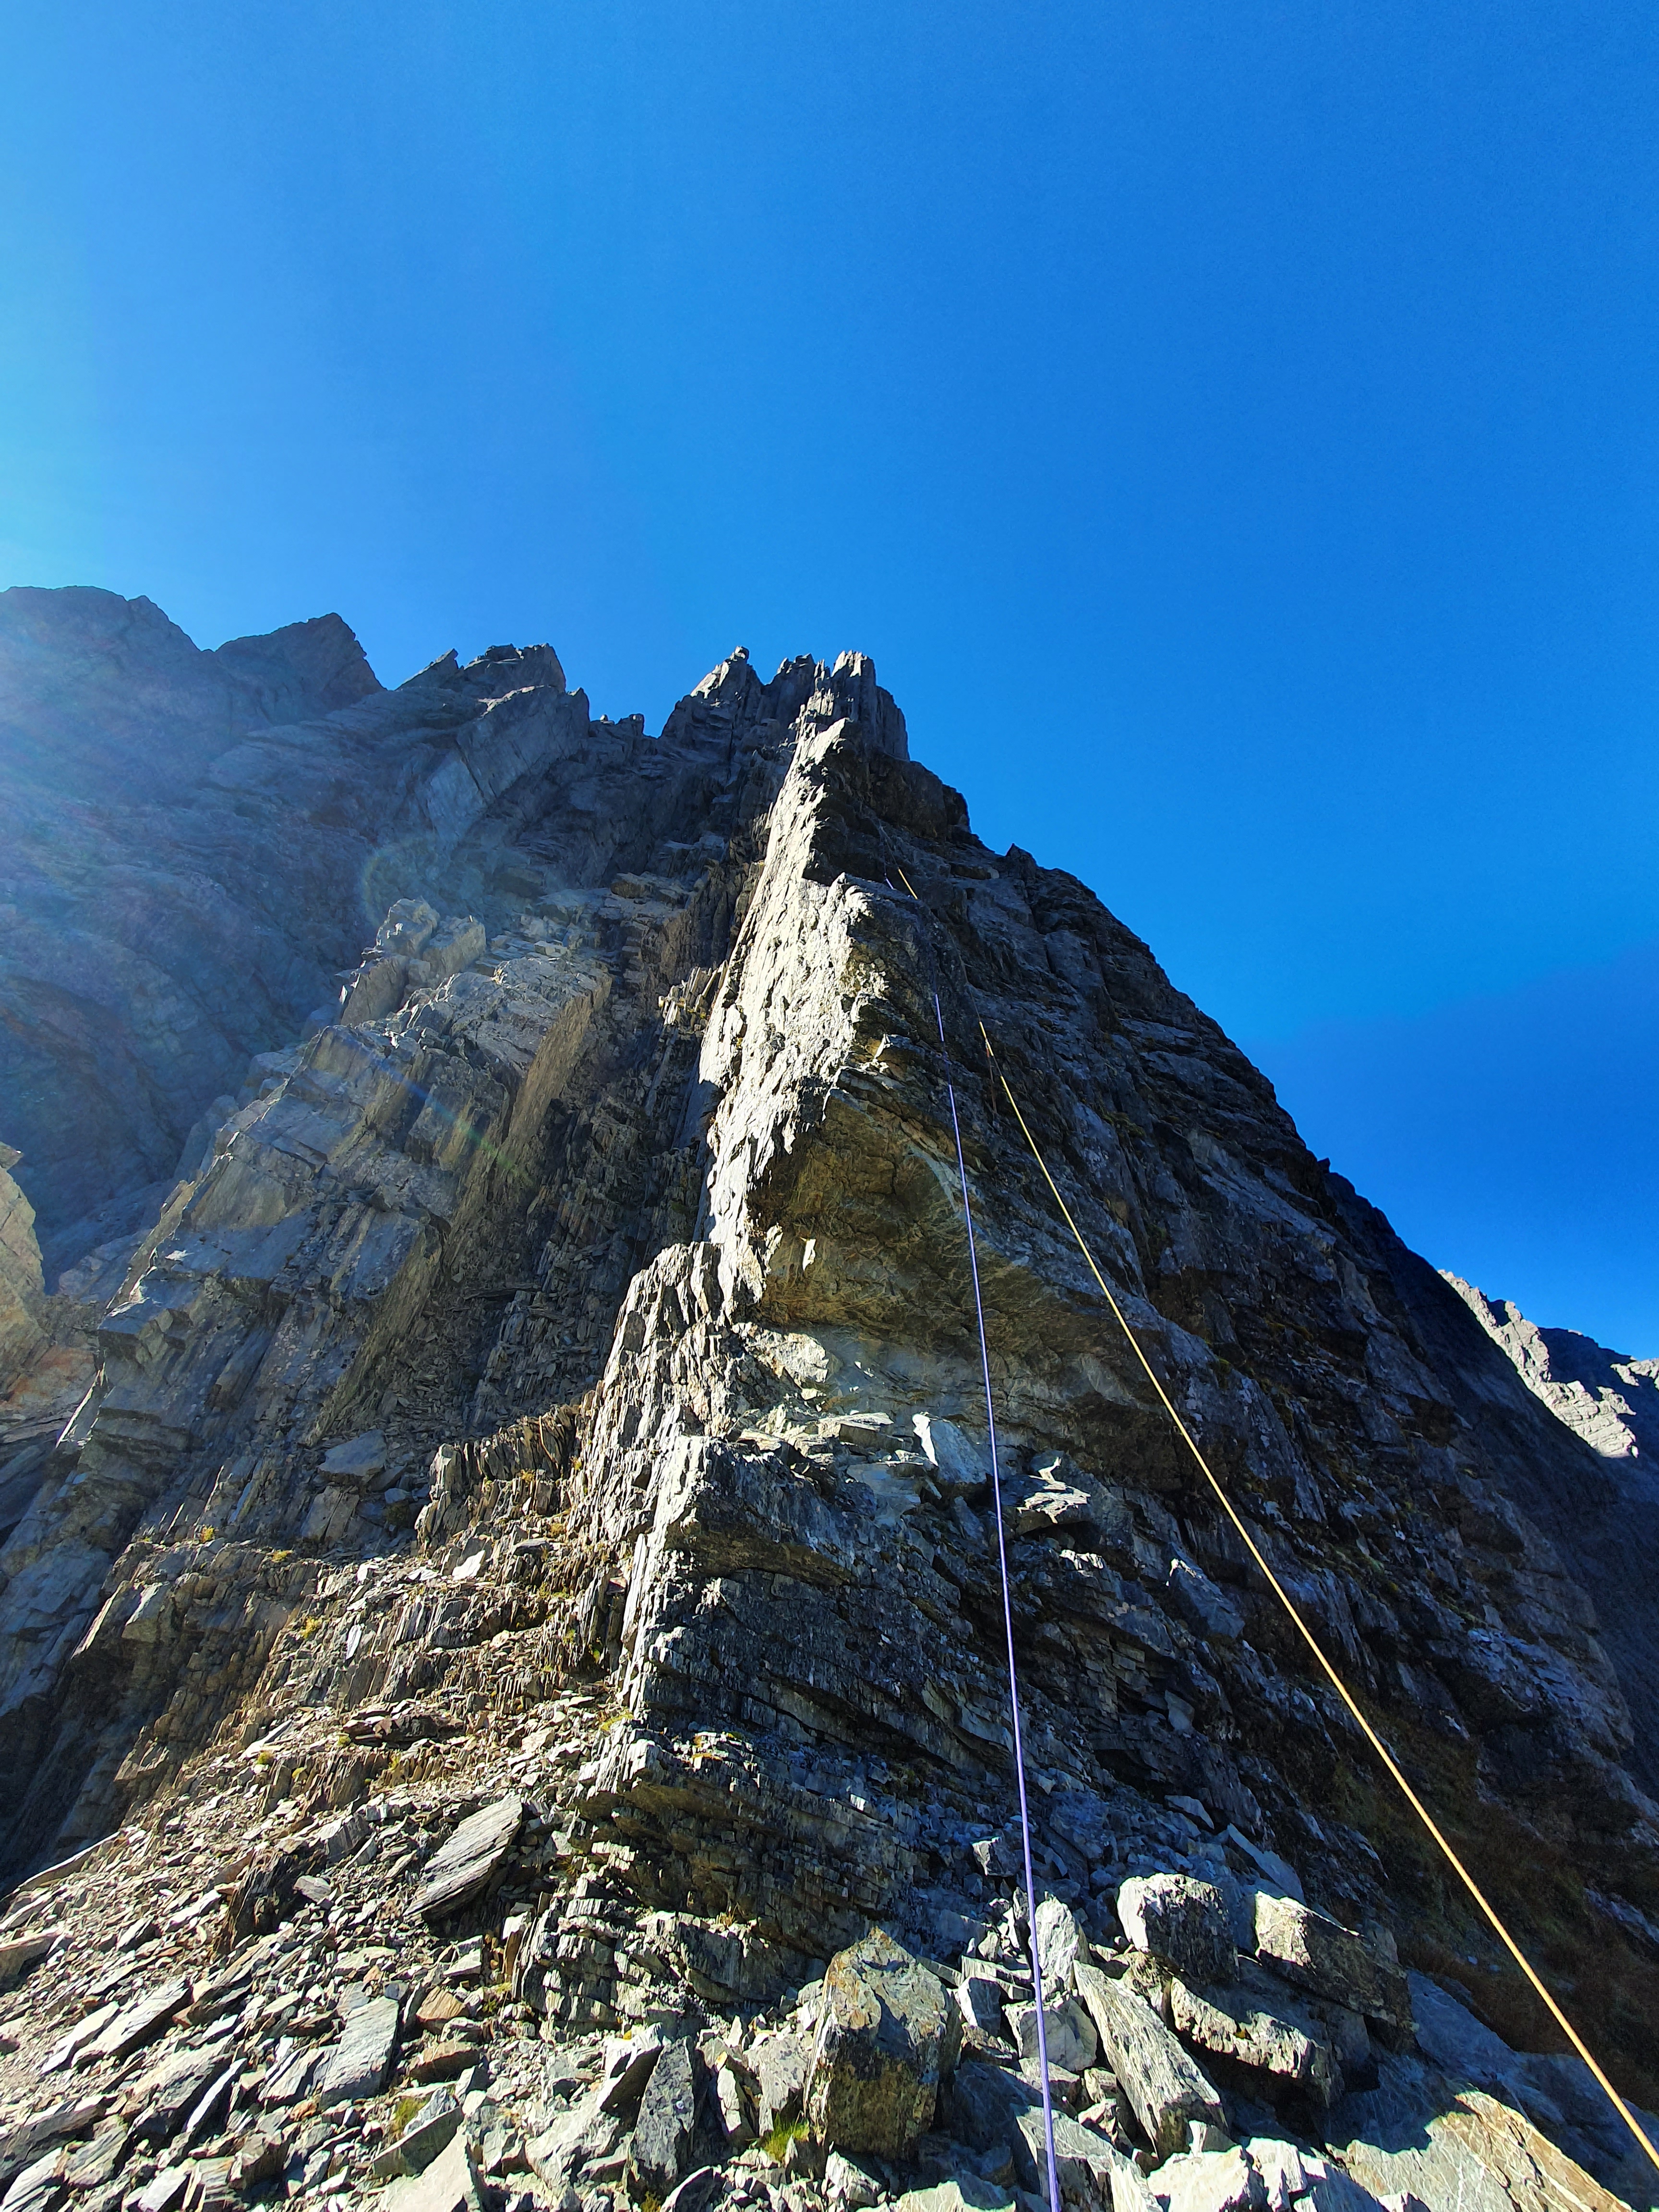
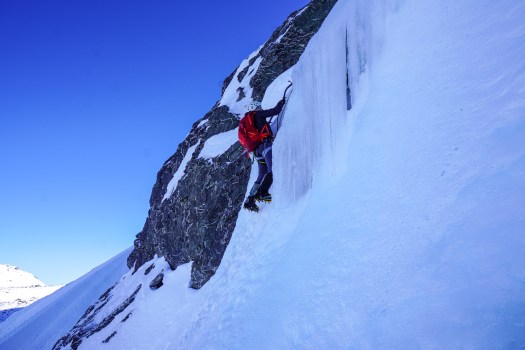
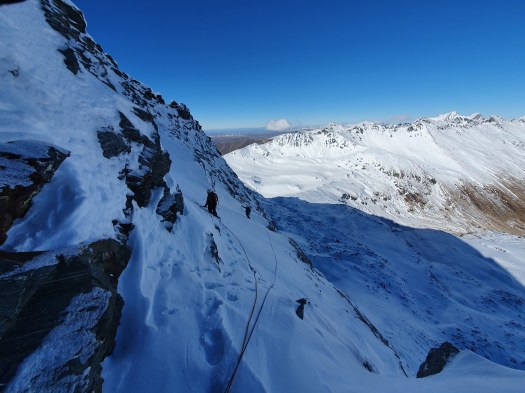
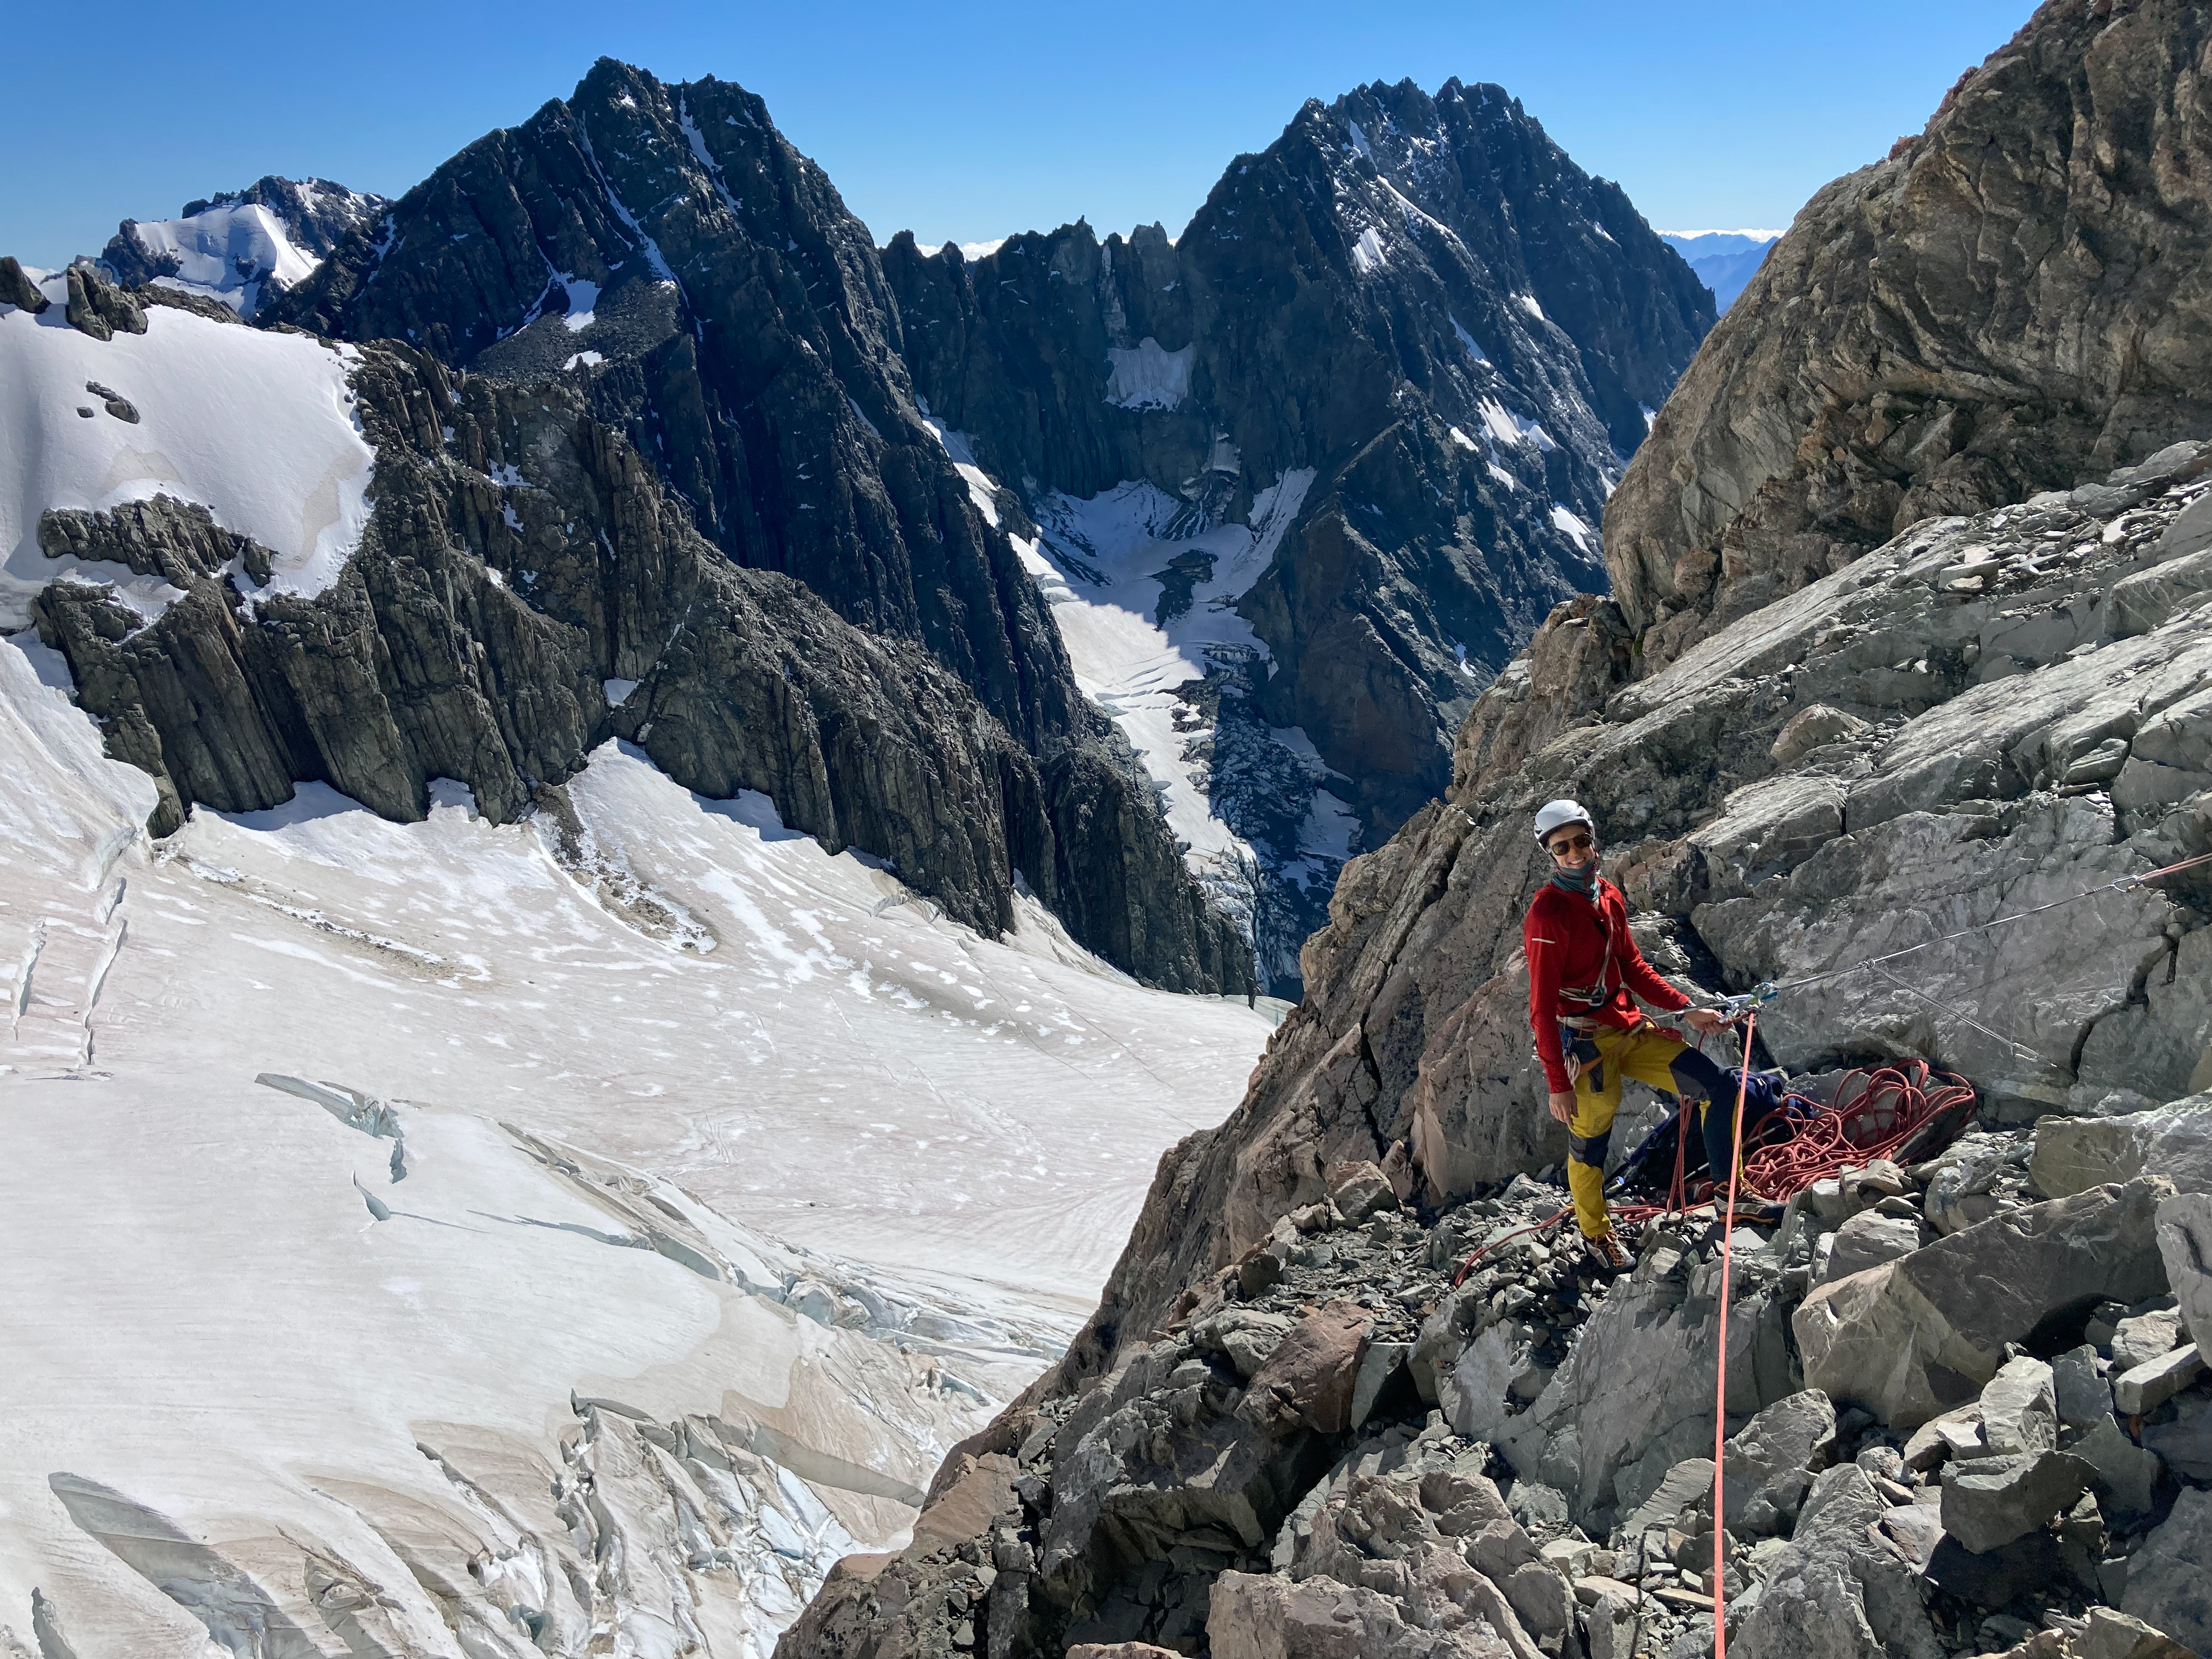
Pitch 3 Traversed along the ridge, some balancey moves with great exposure staying on the face to get past the block. Once you’re round the block, the going gets easier – keep going until you reach a large ledge which runs diagonally across the buttress. Large flake / spike belay here. 50m, Grade 17
Pitch 4 Stay low/step right from the flake and follow the crack / ledge up and right. Looking above you you can see the amazing parallel cracks that lead towards a roof with lots of large grey blocks. We aimed for the right hand side of this. Some cool moves traversing some flakes / cracks. We built an anchor just where the rock turns grey and the parallel splitters start as was running out of gear. For full value link this and the first half of the next pitch finishing at the rap tat. 50m, Grade 16
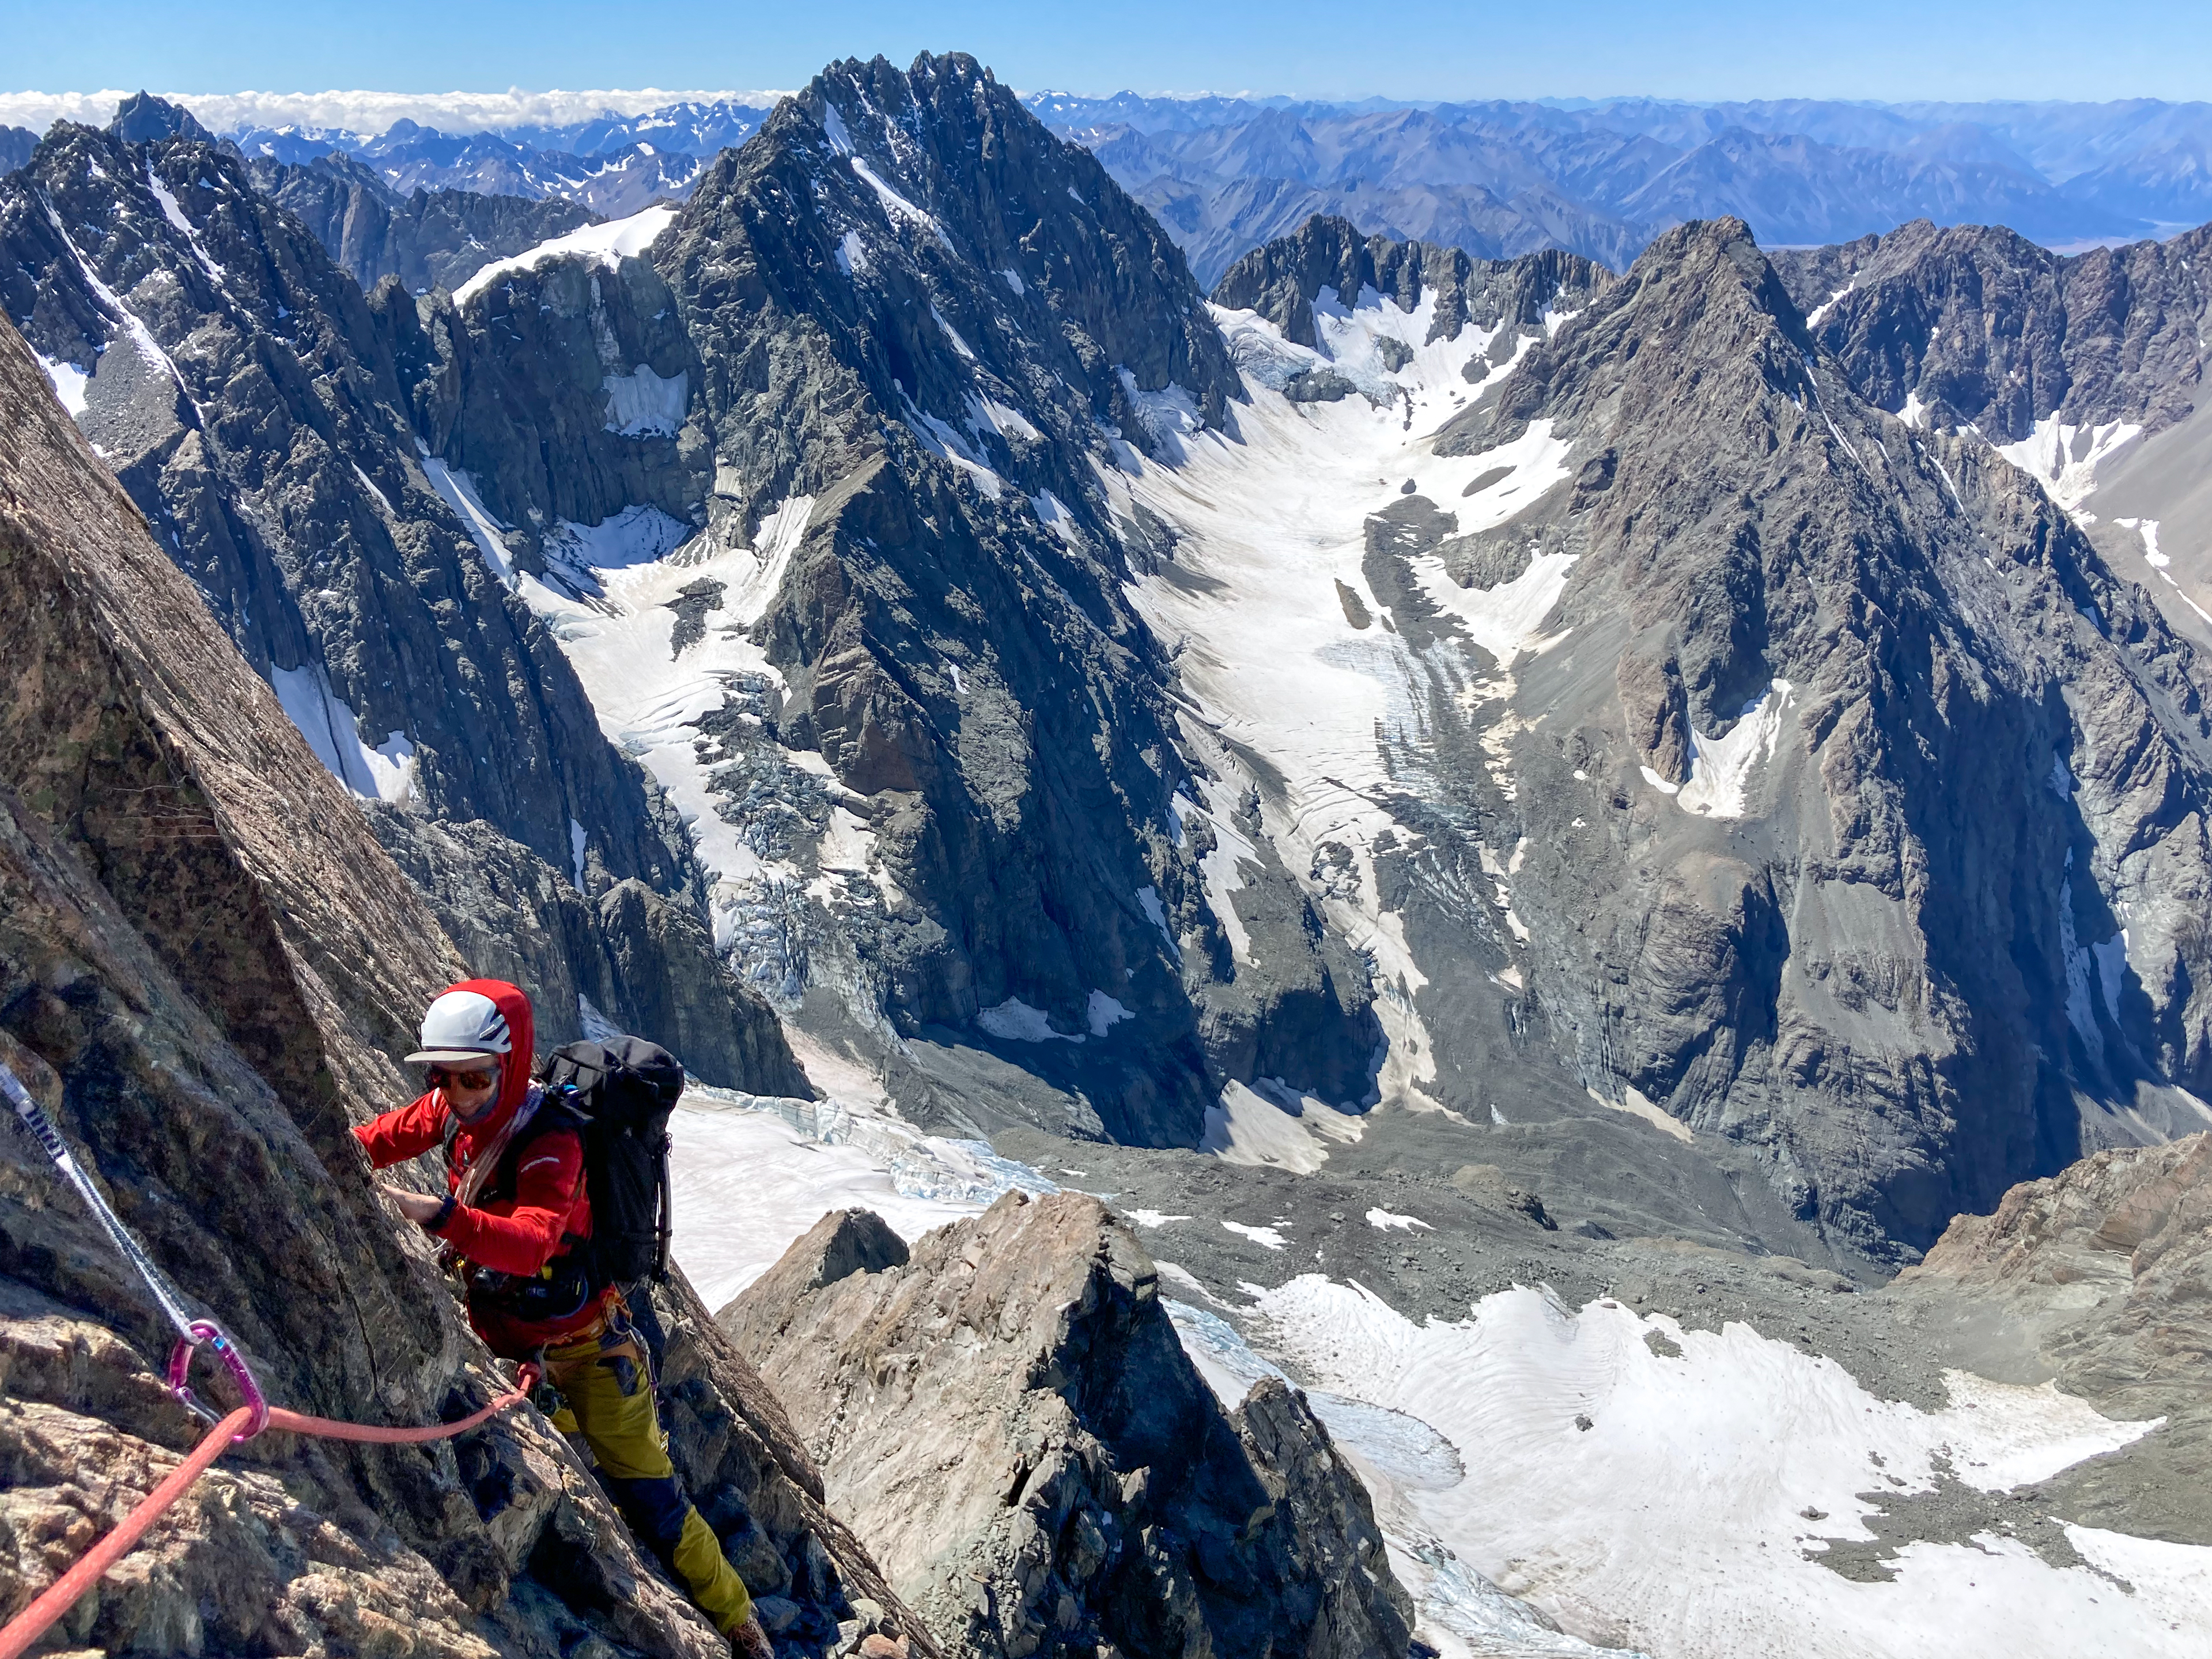
Pitch 5 Phenomenal climbing up finger cracks, stepping round a square block and then trending right around the corner just to the left of the large orange block at the corner. This puts you on a ledge with a bunch of rap tat for the descent. But its a bit too soon to build an anchor here – turn left and head up the face until the drag gets too much. 50m, Grade 17
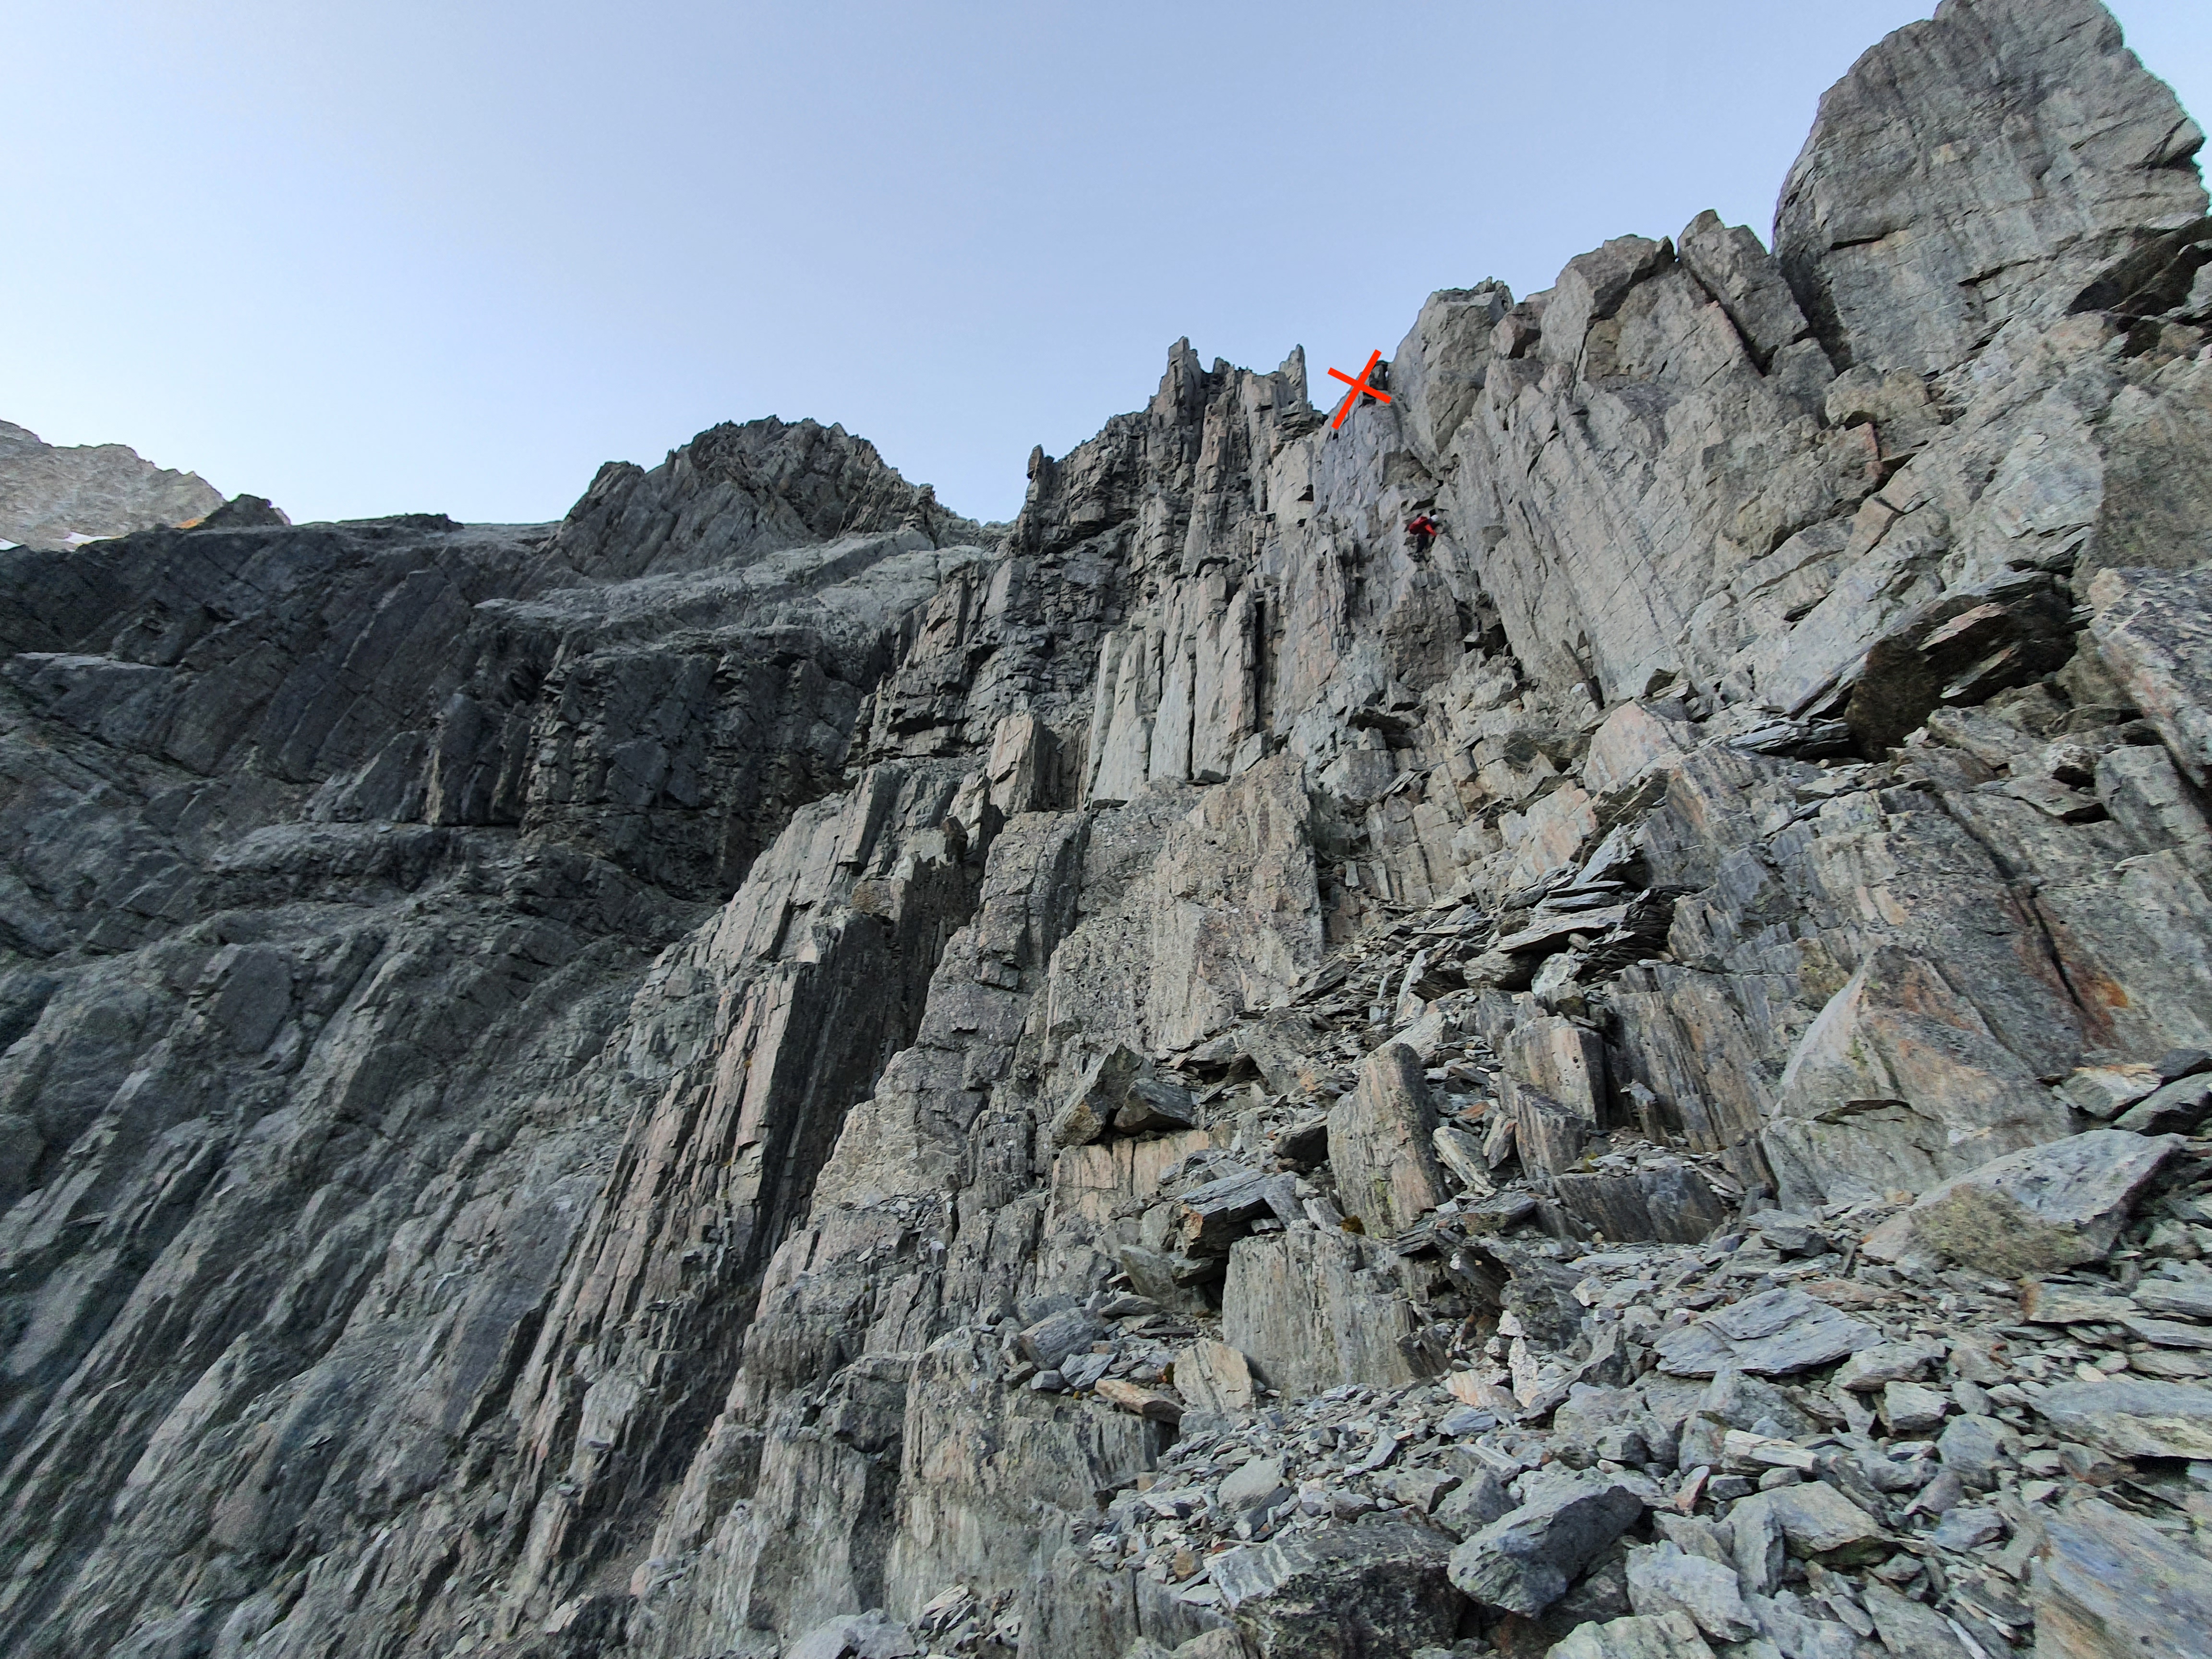
Pitch 6 Trend up and right to the summit. Another amazing fist crack that trends right up to a roof feature of a few overhanging blocks. Easiest to get through on the right, onto flatter ground with a load of large loose blocks. Spike belay from which we rapped. 60m, Grade 15
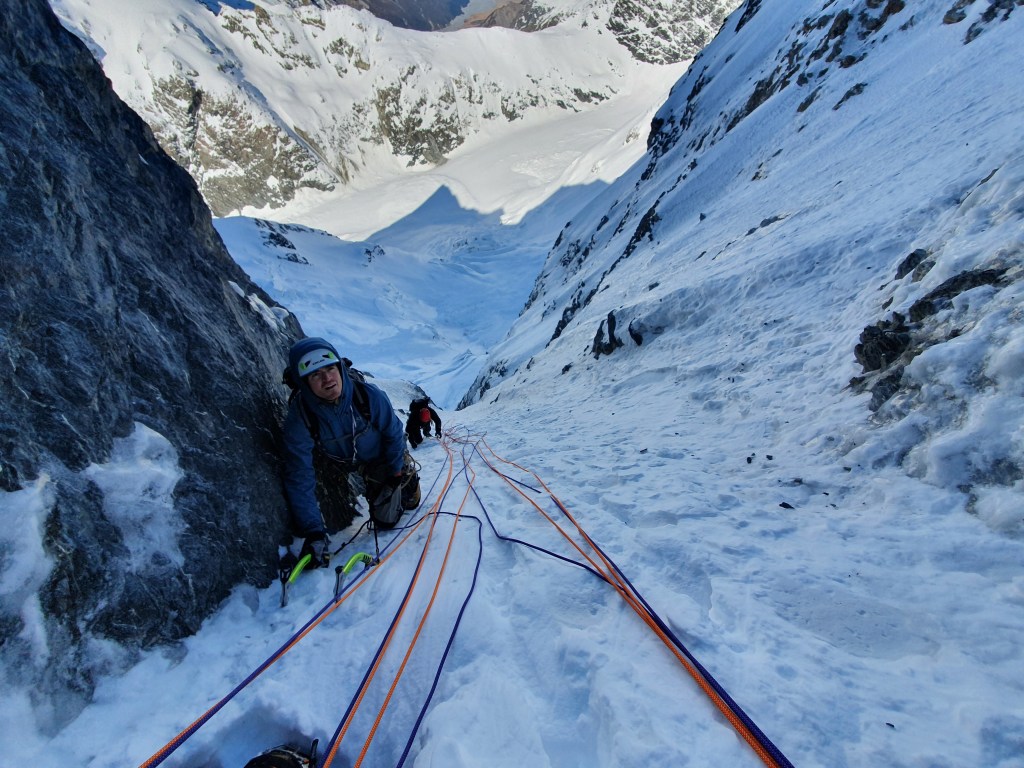
descent
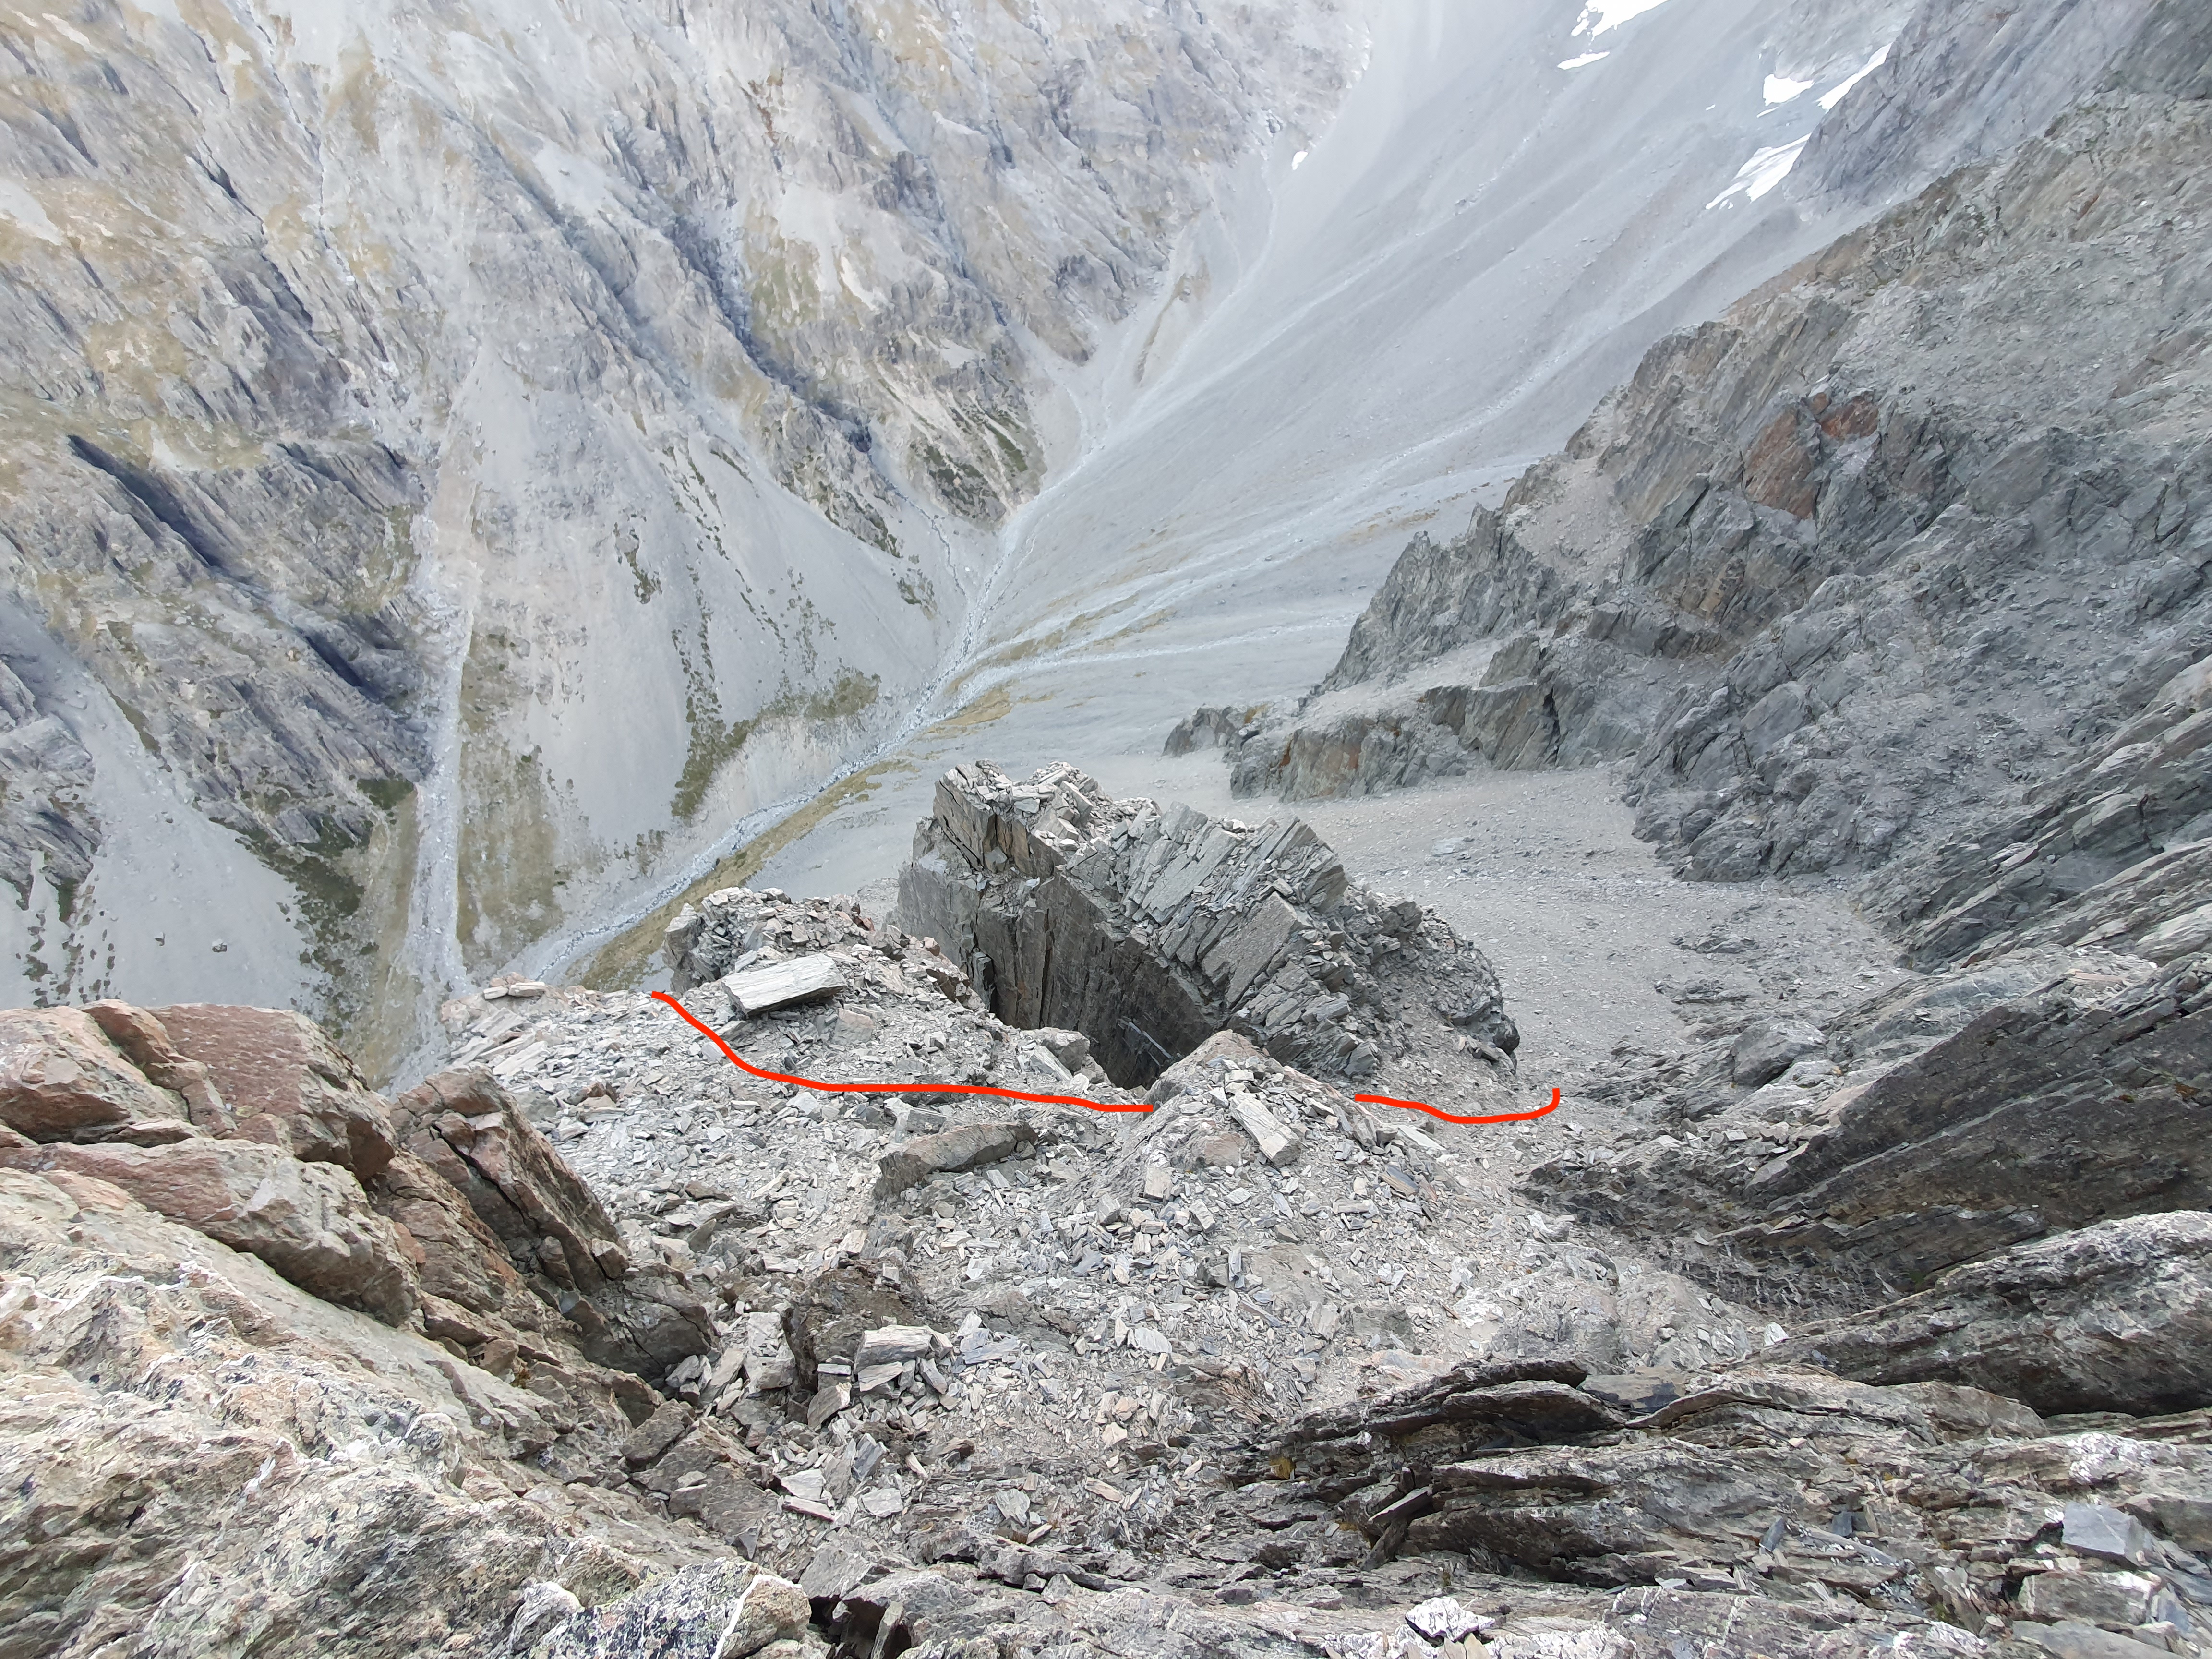
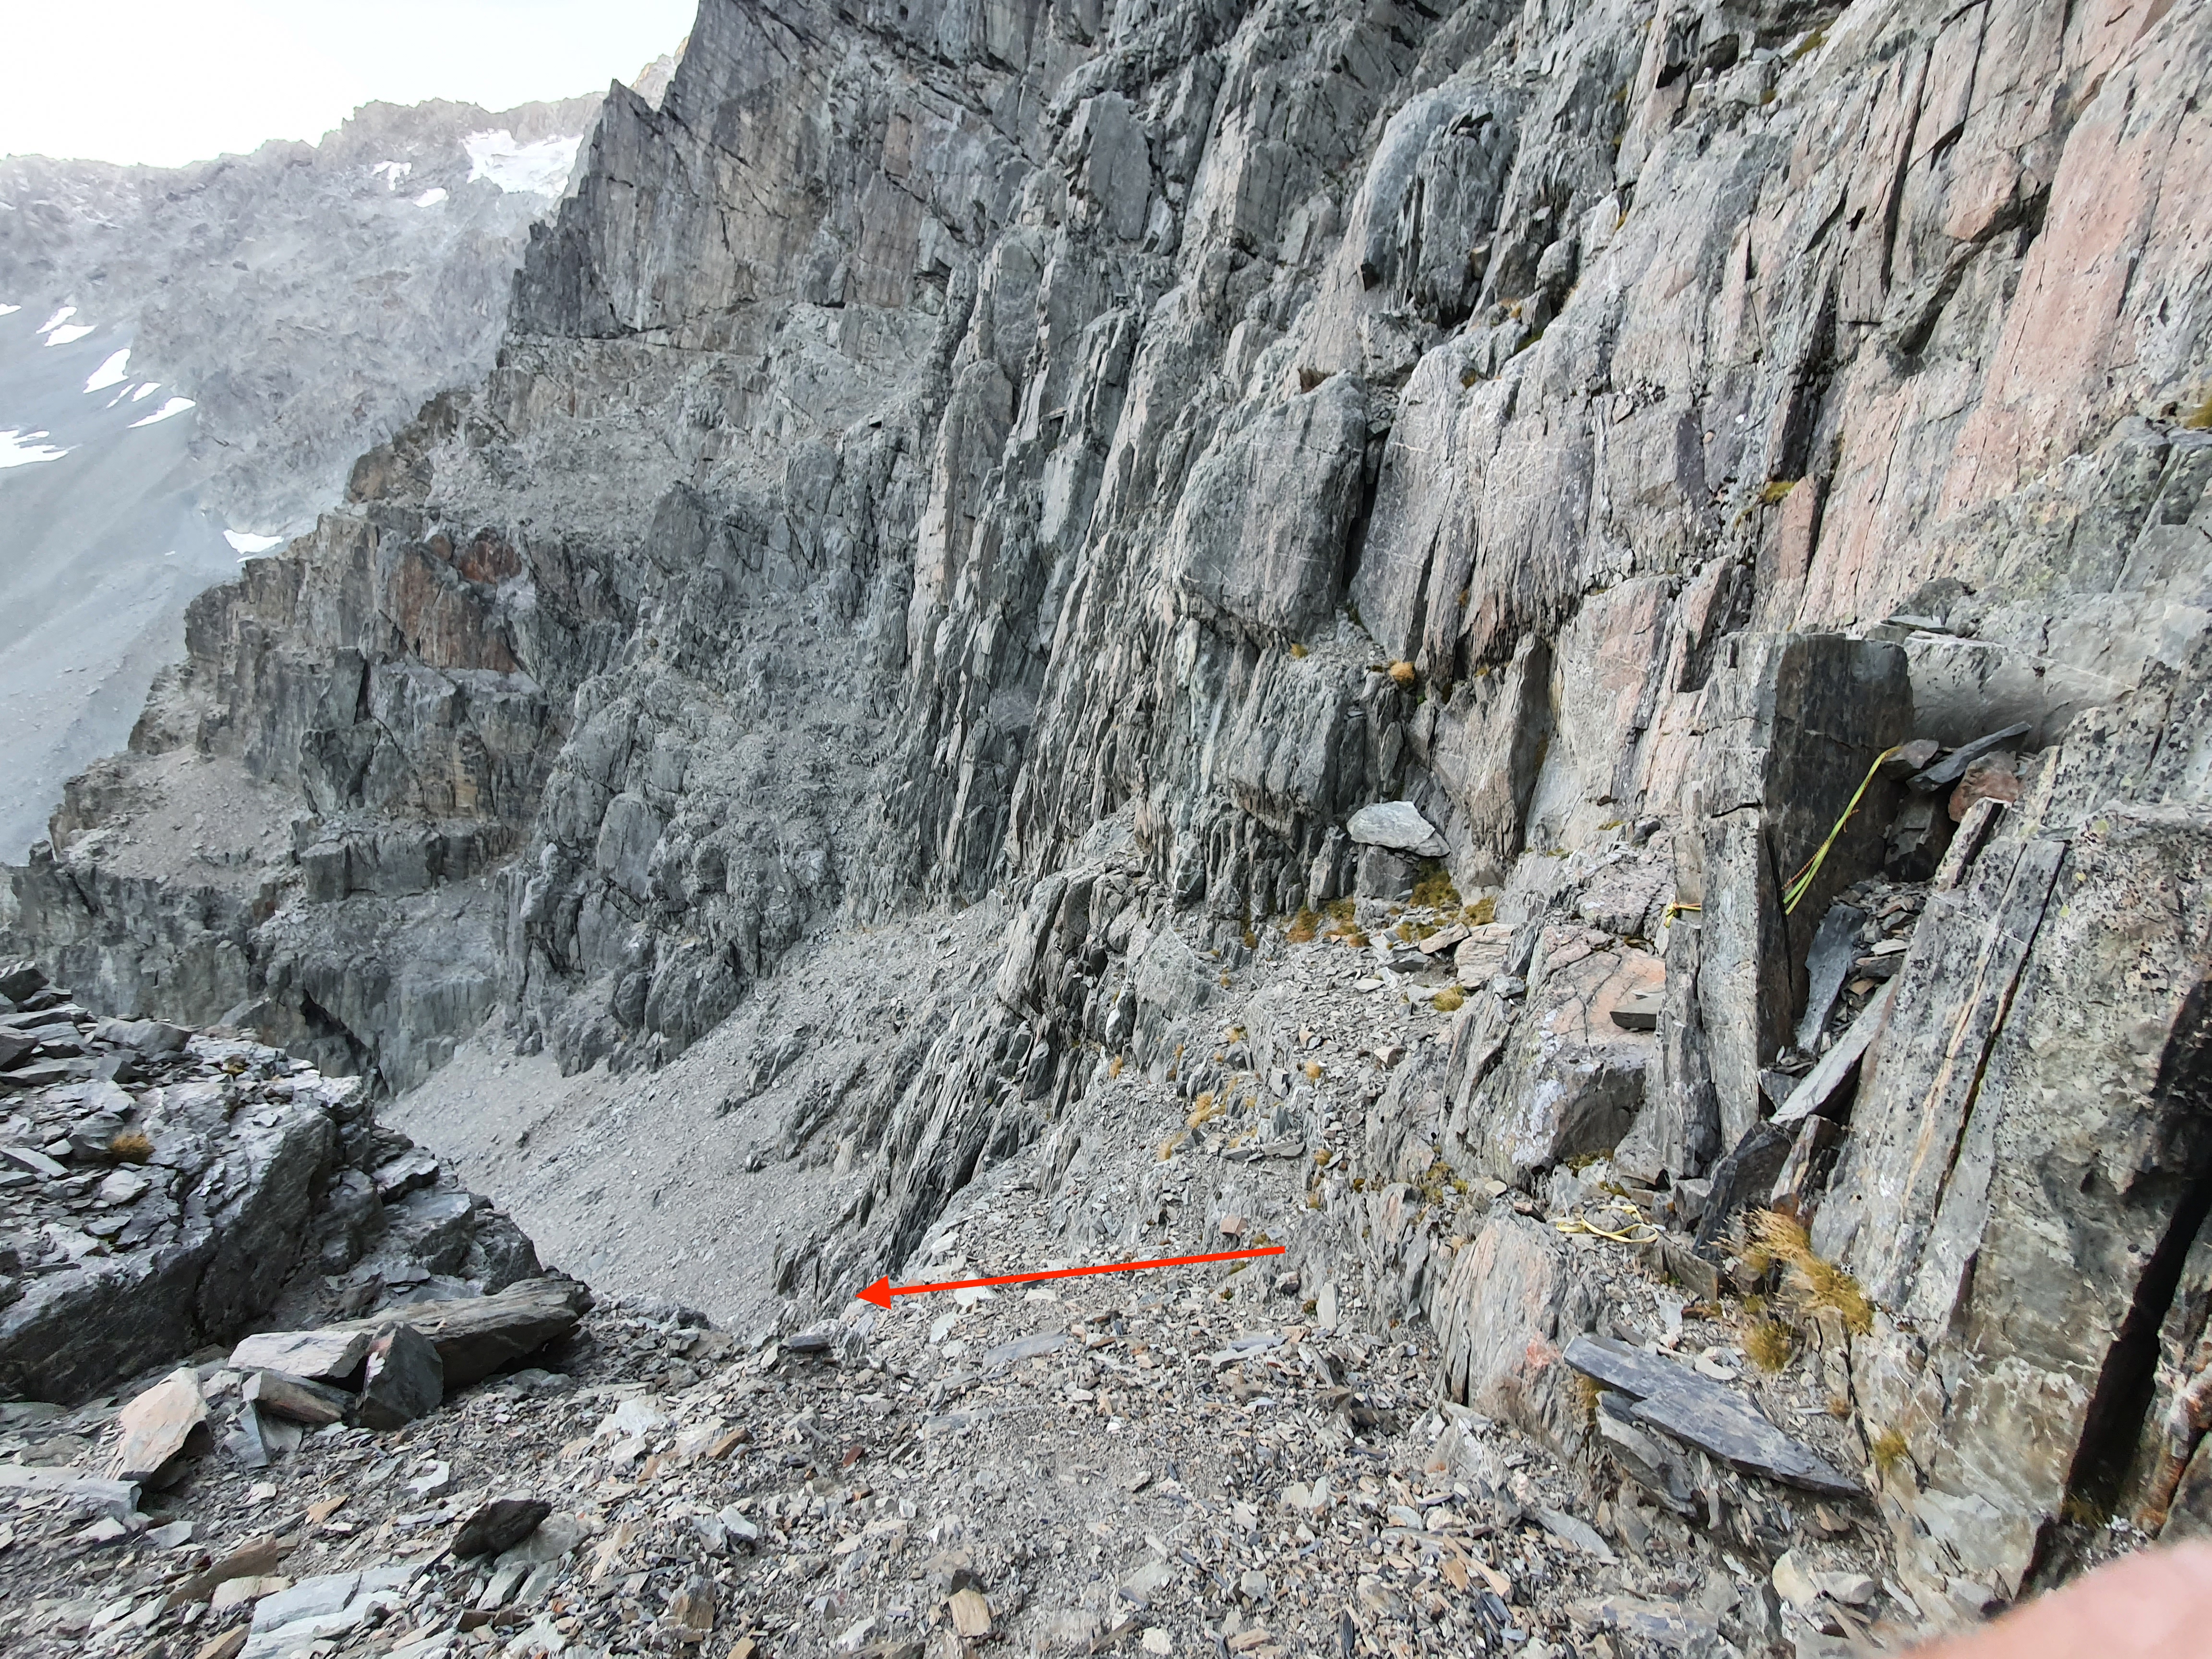
Real risk of getting ropes stuck – lots of blocks and cracks and not vertical ground so be very careful. Rap back down to the tat you passed on pitch 4. We got our rope stuck pulling on this first rap but thankfully only 10m above the anchor so had enough rope to lead back up to it and free it. From here there’s a steep gully down to the left which is pretty clean (and was full of snow when we were there) which we rapped down and put us back to the snow about 80m above the start of the route. Some good spikes here to rap down the snow gully back to the start of the route / your gear.
Come on a trad multi-pitch climb, she said. It’ll be fun, she said… This was Jack’s first trad/alpine climbing experience and the first on which I lead by myself. The climbing was easy with a crux of 14, and the rock was decent, however a leisurely pace meant we were near-benighted as we struggled to find the walk-off in the dark. Route finding in pitch black and 60kph winds… Not advisable!
Moral(s) of the story – need to work on simul-climbing, bring a lighter rack, a single rope would have been fine, 1 bag of car chips to come back to is not enough
Grade: 5 IV 500m. Crux grade 14 (Largely sub 14, 10-14). All trad including anchors. Good belay ledges.
Equipment: Full trad rack, singles up to #2, full set of nuts. No need for RP/micronuts. 2x 240 slings for anchors. 5-6 alpine draws sufficient including some 120s if confident at the grade – I was only placing 4-5 bits of gear on most pitches. We used 2x 60m half ropes but with long slings a 60m single rope would be fine. We walked off but did come across tat from another party’s rap descent – always a good idea to have some spare tat.
Approach time: 4-5h via the North Temple track/Gunsight Pass
Climbing time: 12h (we took it v slow, a fast party could climb it in half the time)
Season: Best in Summer, for those long days and warm rock. Being on the SW aspect we were largely in shade so layers were appreciated.
Team: Maria, Jack 29/12/2022
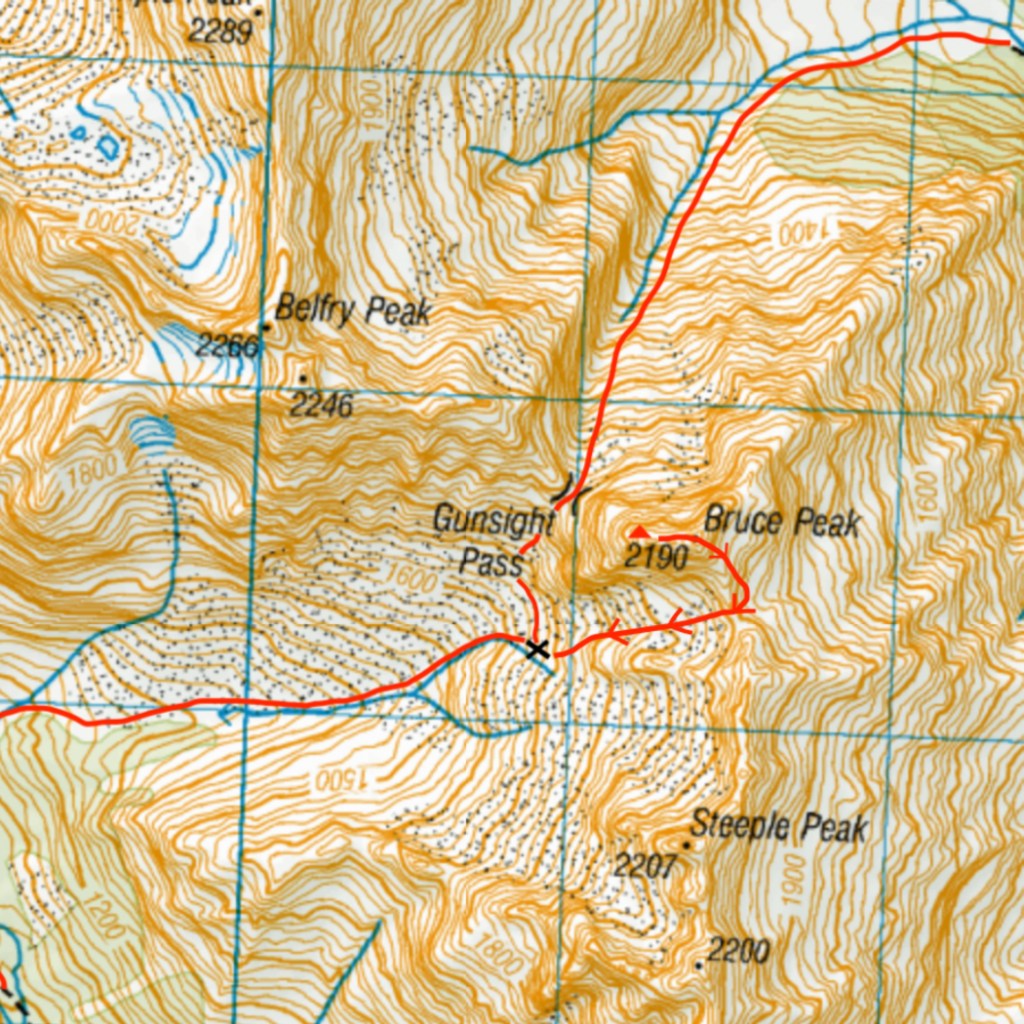
Approach
Park at Temple Campsite.
Option 1: Walk in/out via N Temple Track. 1.5h along a doc trail – a few landslides along the way make for navigating some fallen trees. Getting up and over Gunsight Pass to the biv spot took 4-5h. I would not want to descend this chossfest, so would not recommend this as a way out.
Option 2: Walk in via N Temple and out via S Temple (9km, 5-6h in and 16km, 6-7h out). This was the route we opted for. Walk out from the biv to the S Temple track required multiple river crossings. Once you hit the doc trail follow the cairns (there are no regular orange markers until you hit S Temple Hut).
Option 3: As per the guidebook/climbNZ, start on N Temple Track then turn off at BZ14 433 141 and head straight up through scrub towards Bruce-Steeple col. Looking up at the dense beech forest, we thought this might be slow going but I’d be open to trying it next time.
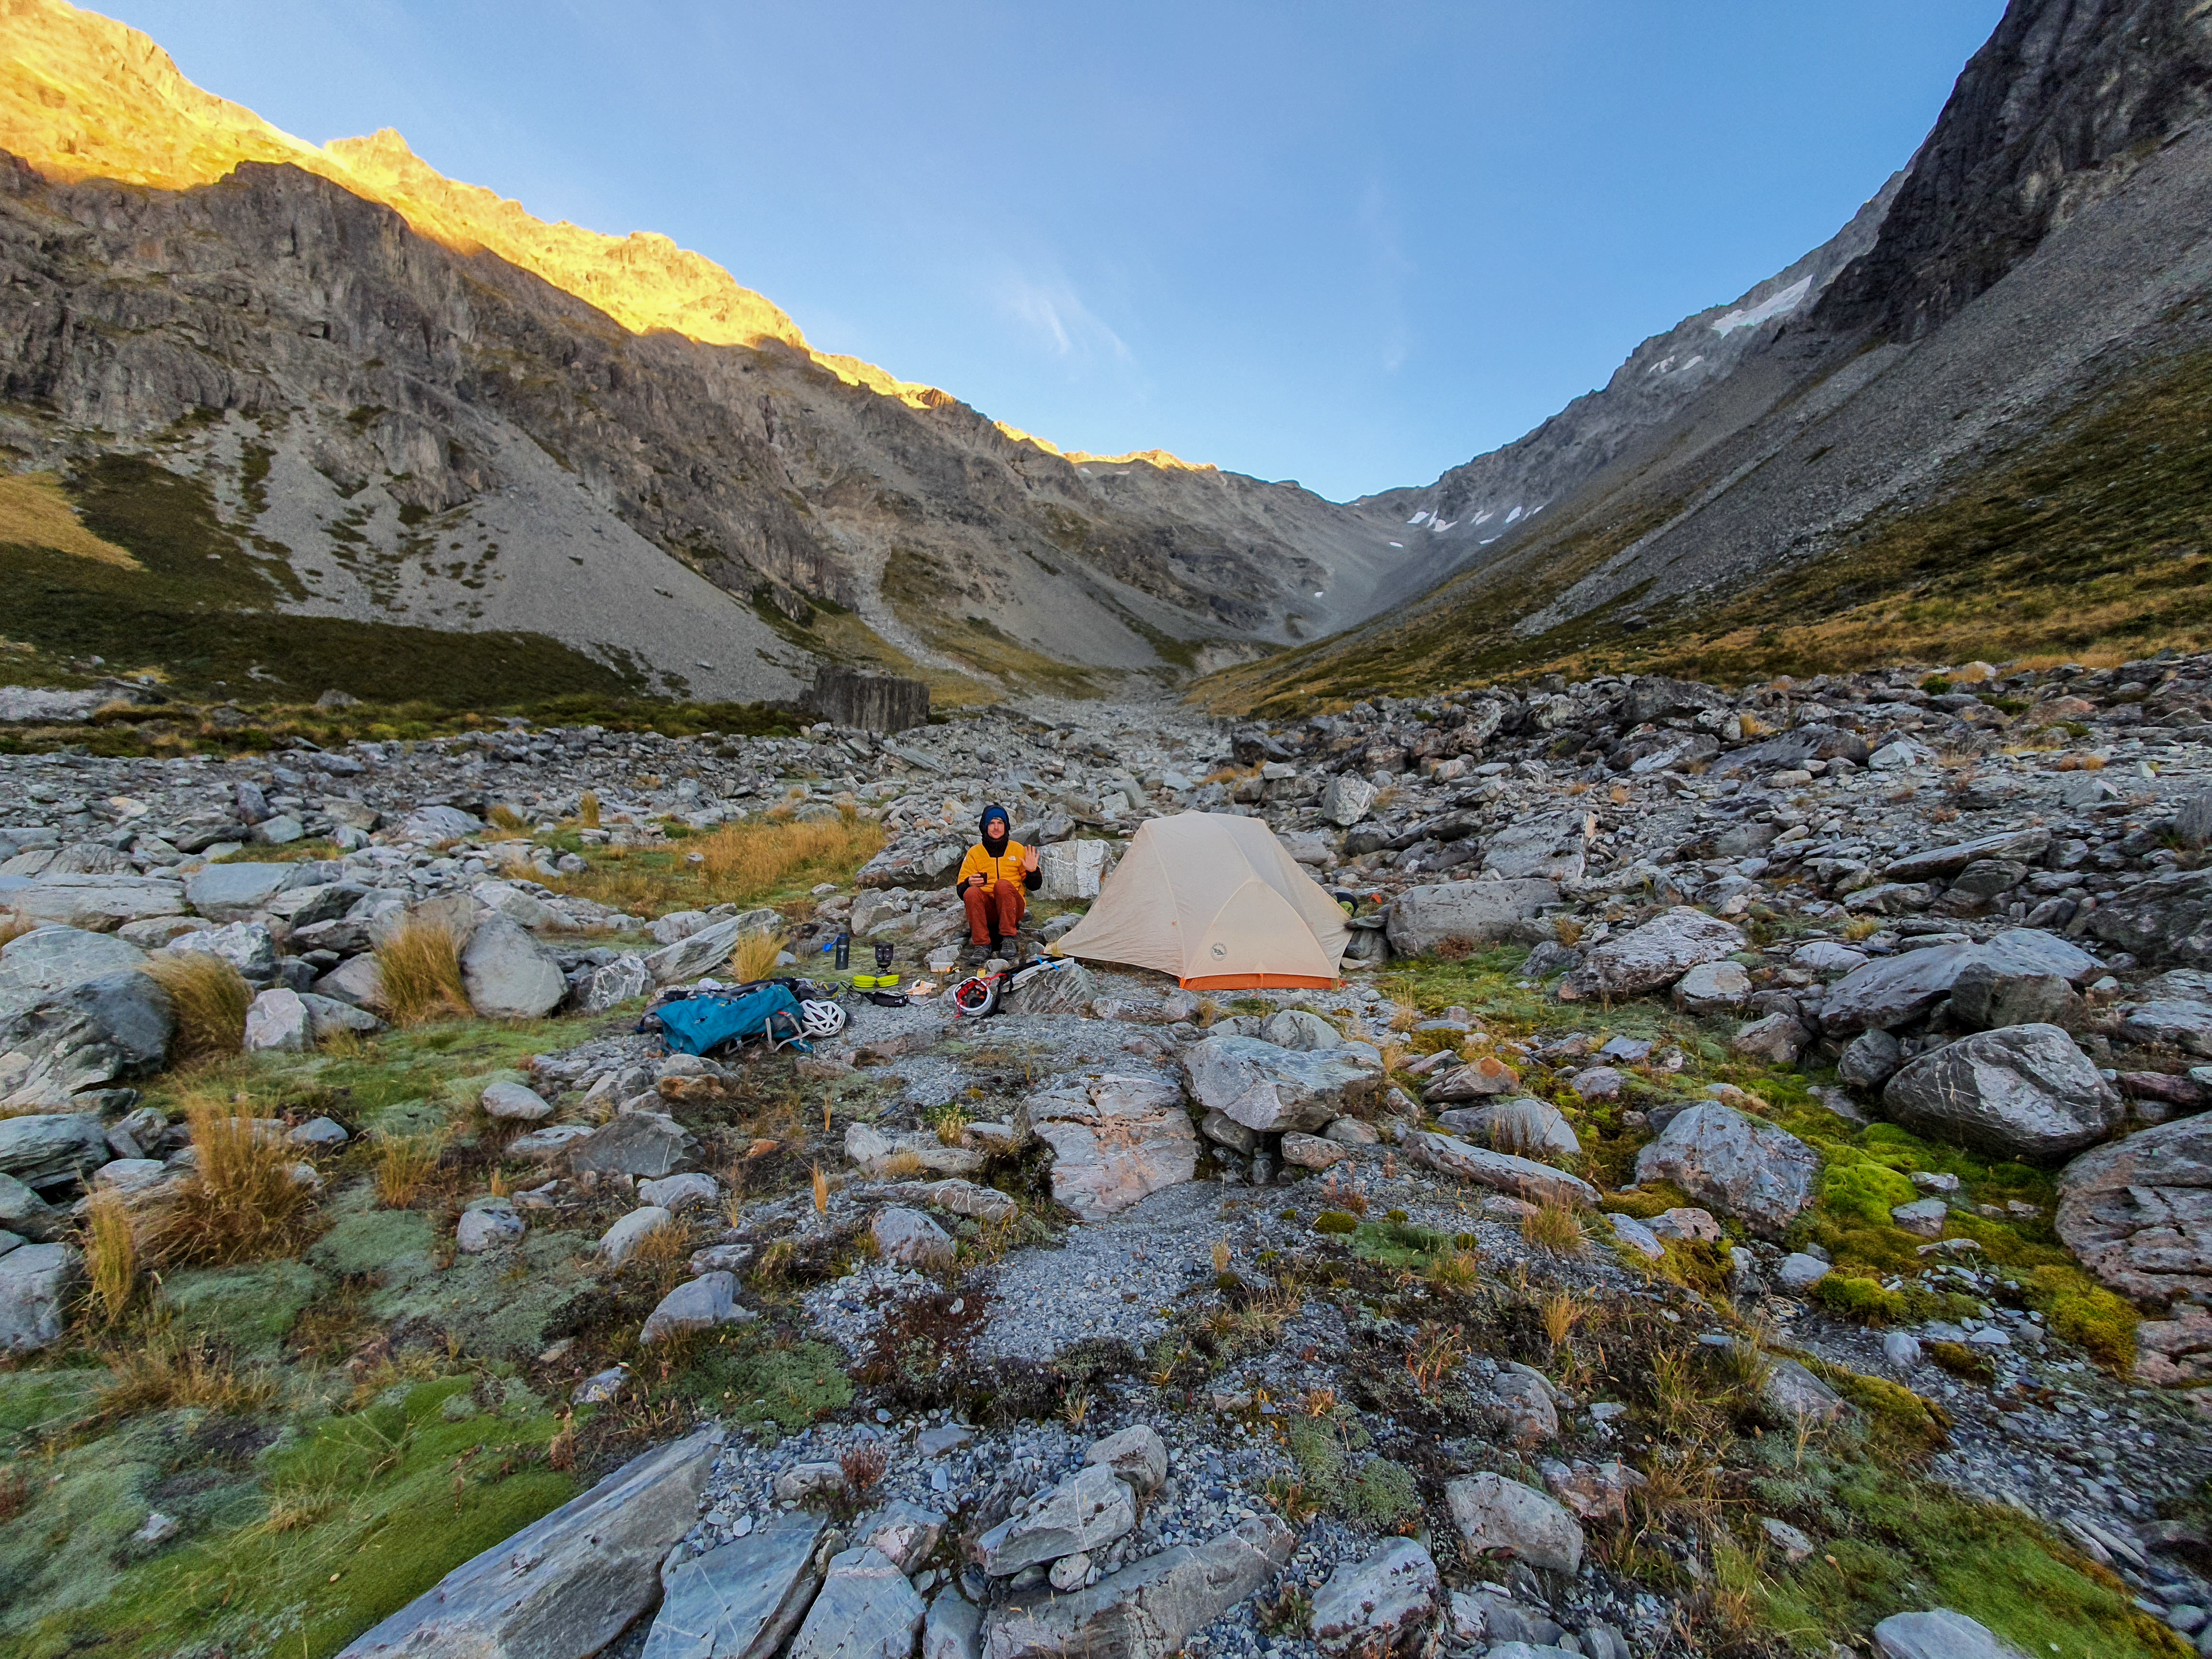
We camped on a strip of tussock amongst the scree marked by X at around 1650m. There’s running water right beside it.
X marks the biv spot; Triangle marks route top out. From the triangle marks our descent route. Climb route not shown, see below.
To get to the base of the route, sidle 200m North of the biv spot along the same contour towards Bruce Peak. The climbing starts at the lowest point of the buttress.
P1: (14, 60m) Poor gear. Climbing no harder than a 14 but felt harder as was difficult to protect.
P2: (10, 60m) Very easy scrambling, can be simu-climbed for confident parties. Minimal gear was placed with much better protection than in the first pitch. Finishes over a wide grassy ledge.
P3: (11, 60m) Similar to above. Follow the arete.
P4: (14, 60m) Probably the hardest pitch yet, grade 14 interspersed with easy grassy ledges. Decent gear. Some steeper areas directly up, however can avoid by sidling right.
P5 (13, 60m) Some staunch moves in between easy climbing.
P6-8: (11-13, 60m each) Can stick to the arete but we chose the path of least resistance, going diagonally left which leads you to a rocky platform.
From here we took the rope off and scrambled the last 50m or so up to the top via an easy gully. The true summit lies 100m East of where you top out. It’s easy ground heading to the true summit then you have to navigate ledges down to Bruce-Steeple col. Would have been much easier in the light but doing it with head torch illumination alone resulted in a lot of back/forth. We ended up actually going down the NE face then coming back up the N side of the col. Came across a block that a party had rapped off down the S face – perhaps in the dark as well? Basically, I’d leave plenty of daylight to figure out the descent. Would expect it would take 1-2h to get back to camp.
All in all a great 3 day trip, and awesome to be able to share in a friend’s first trad climb. A little dose of suffering is good for the character anyway…
Addit: struggling to upload the gpx file at the moment. Just comment if you want it and can send through directly.
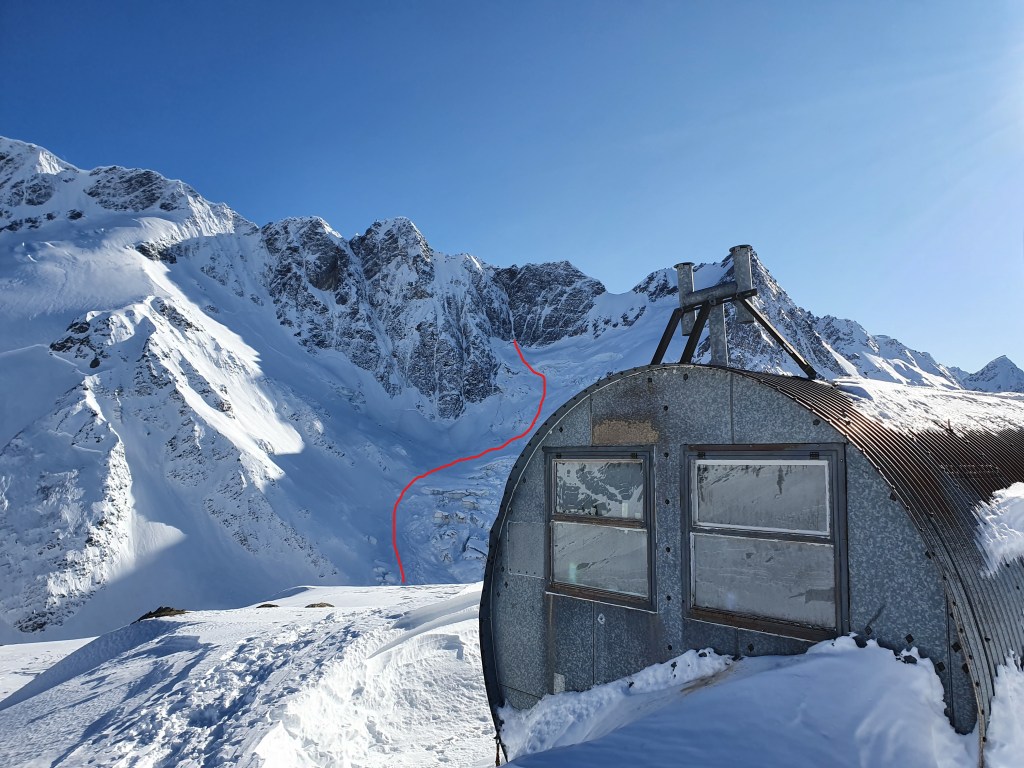
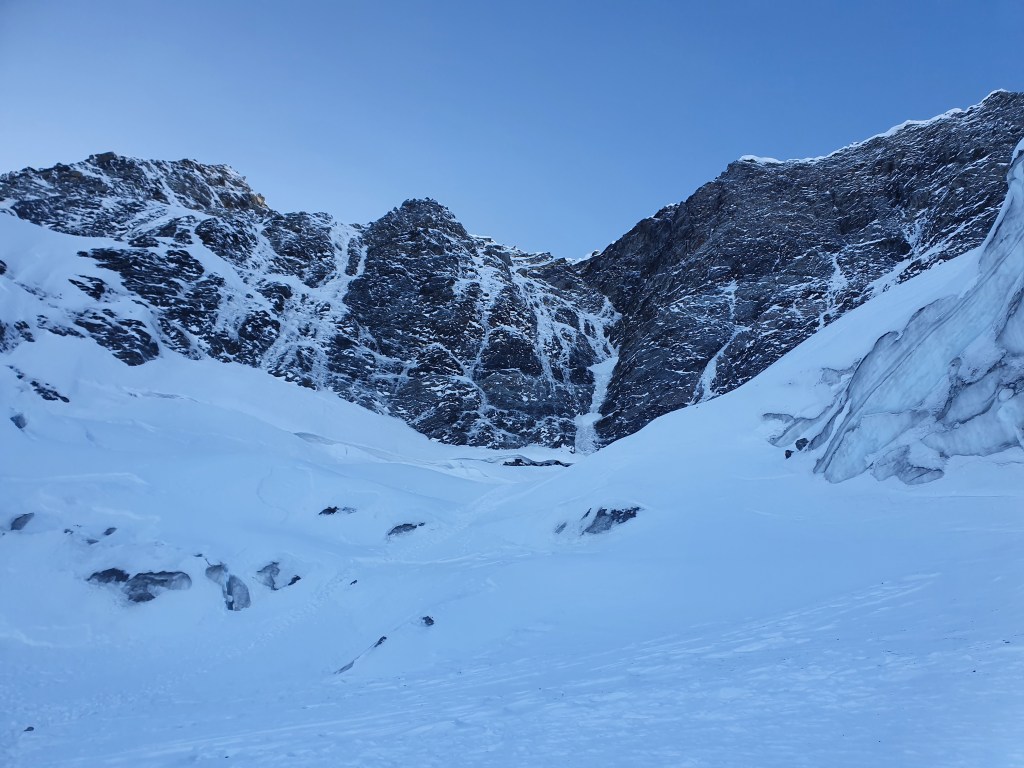
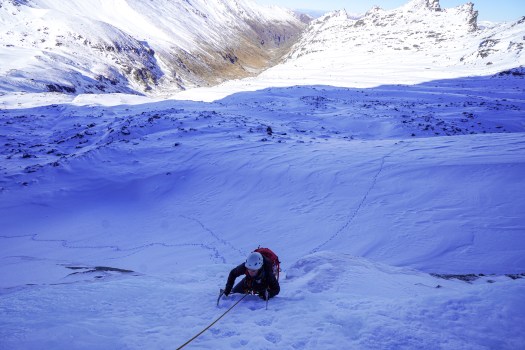
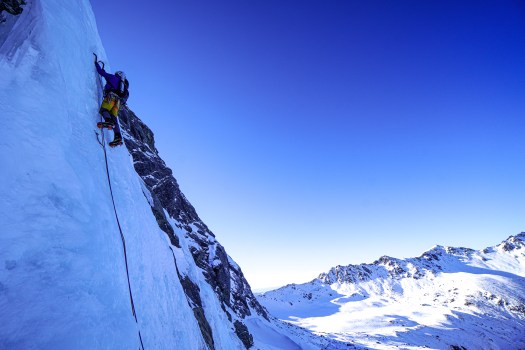
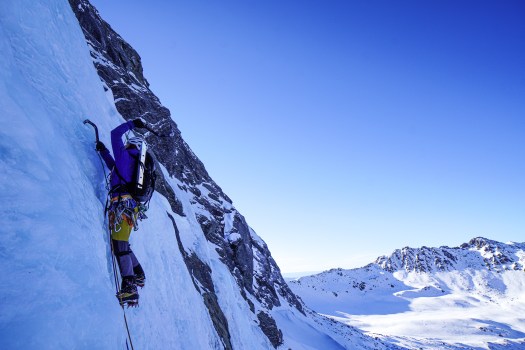
A high quality 350m WI3/4 ice route with easy access from Baron Saddle hut. Unfortunately a large rockfall has affected the South face of Vampire since we were there and I havent heard of anyone going up there since so I have no idea how stable the rock is or if the line is even still there. Hopefully it will be climbable again as the whole zone is awesome
The climbing line with approx belays marked with yellow crosses. We linked the first 2 pitches into 1, but meant we needed a short simulclimb to get to the good belay ledge
Approach
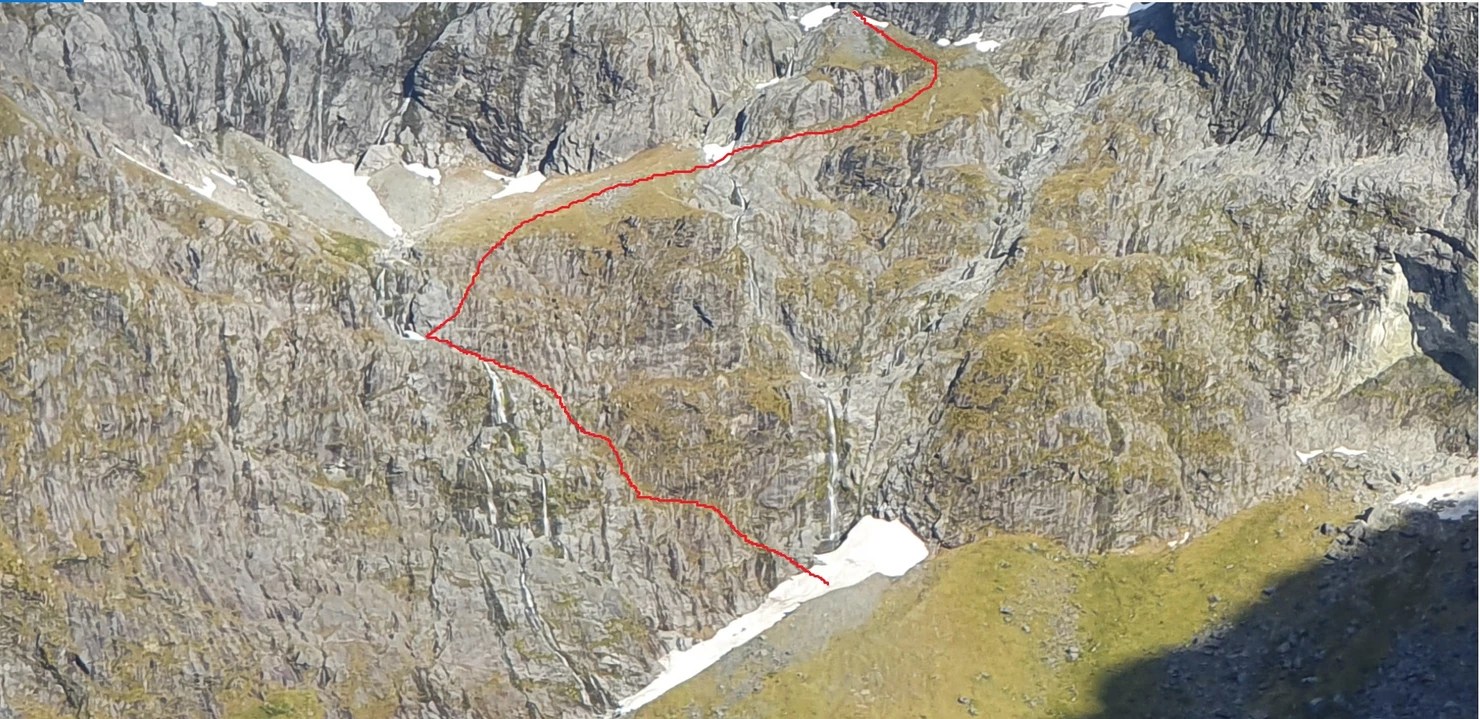
Base yourself at Baron Saddle hut. Access either via the Sealy Tarns track and Mueller hut then across the Metelline, Sladden and Williams glaciers, or a 5 min heli ridge from Glentanner. We flew in an hiked out as we only had a couple of days off work to get the trip done. I would avoid access via the Mueller glacier – the access around the Mueller terminal lake looks terrible, and then the glacier itself gets unrelentingly pounded by rockfall from above.
Baron Saddle hut with Vampire in the background. The approach to the route in red
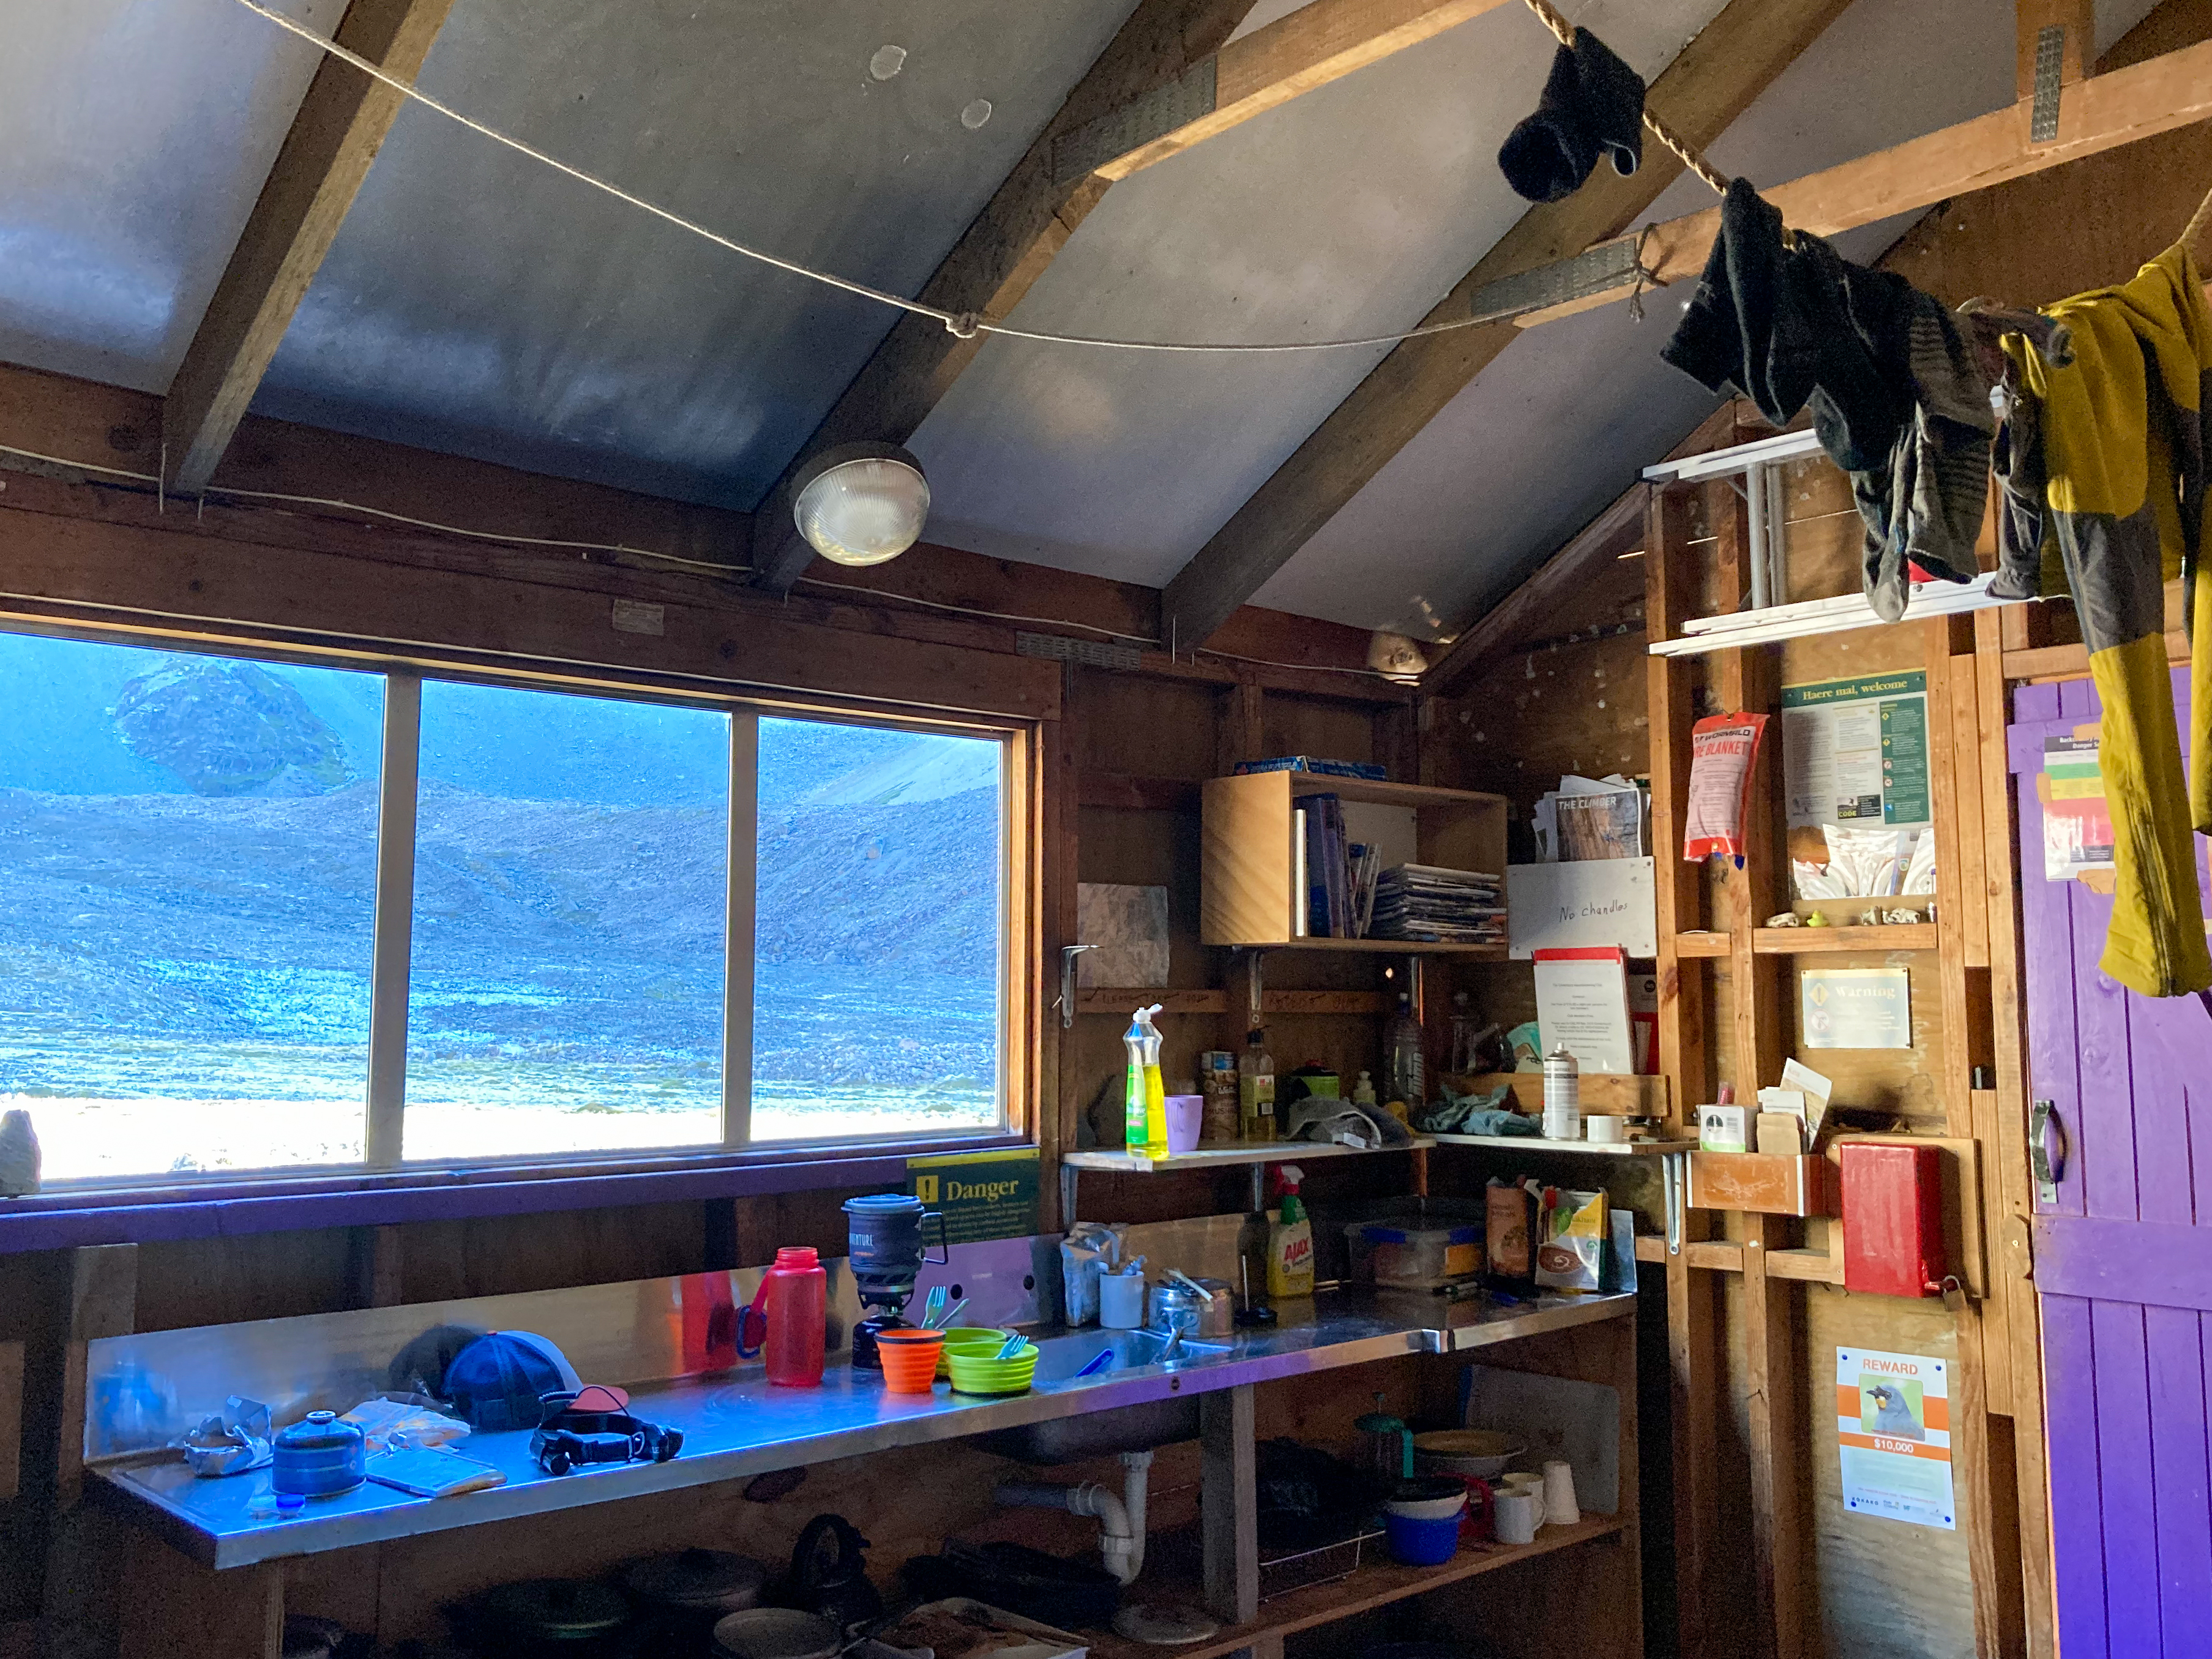
Barron saddle hut is a compact little barrel with bunks, but no gas or cooking equipment so bring everything.
From the hut we headed to Barron Saddle and then across to the Bannie glacier. From here its a simple 3-400 vertical metre plod to the start of the route. We went up the night before to figure out the route in daylight, and left a bunch of gear at the base of the route. Skis would speed things up significantly but Sean was between skis at that point so we were booting it.
Climb
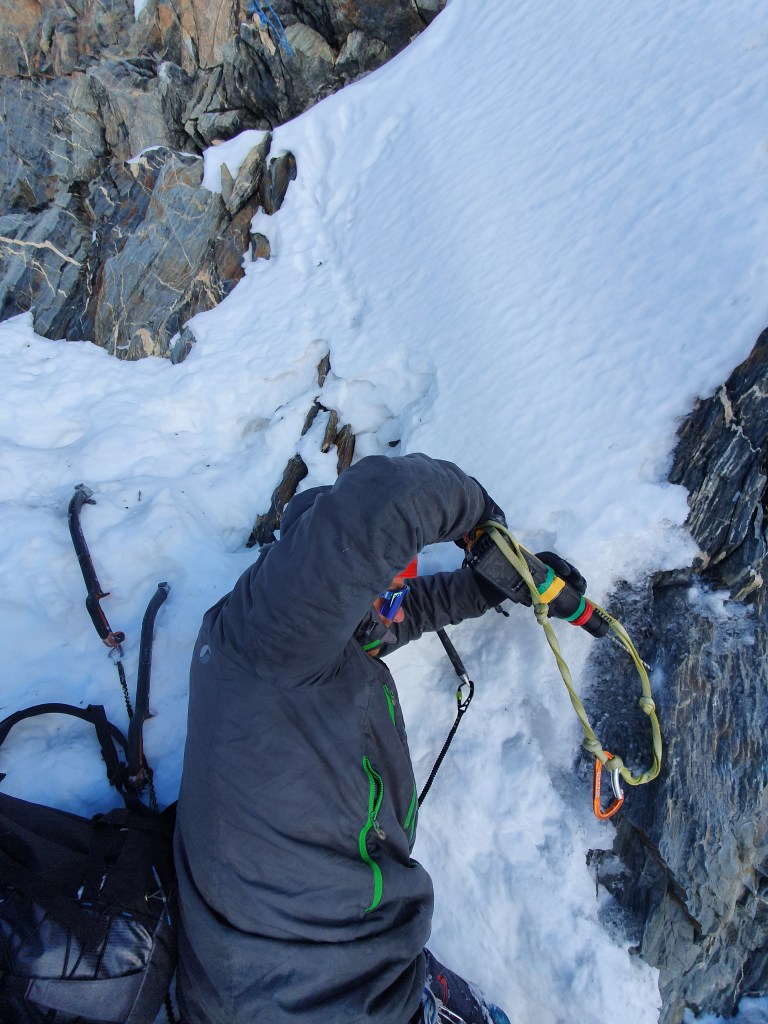
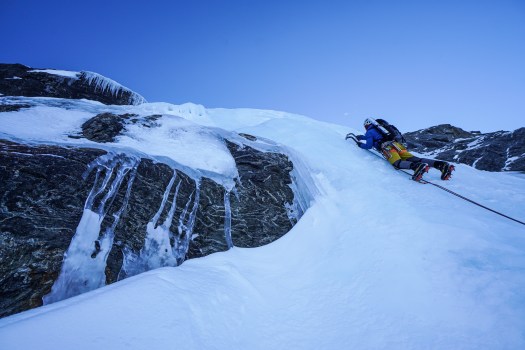
Crossing the shrund was a bit tricky and involved so traversing out to the west before sidling back in under the route.
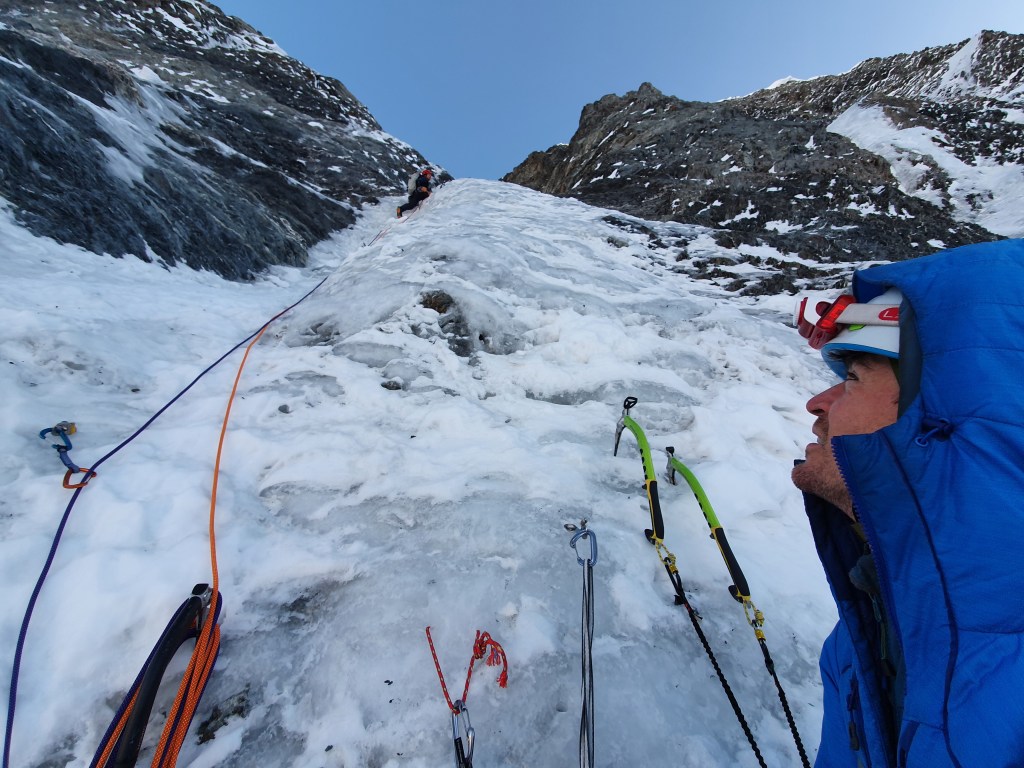
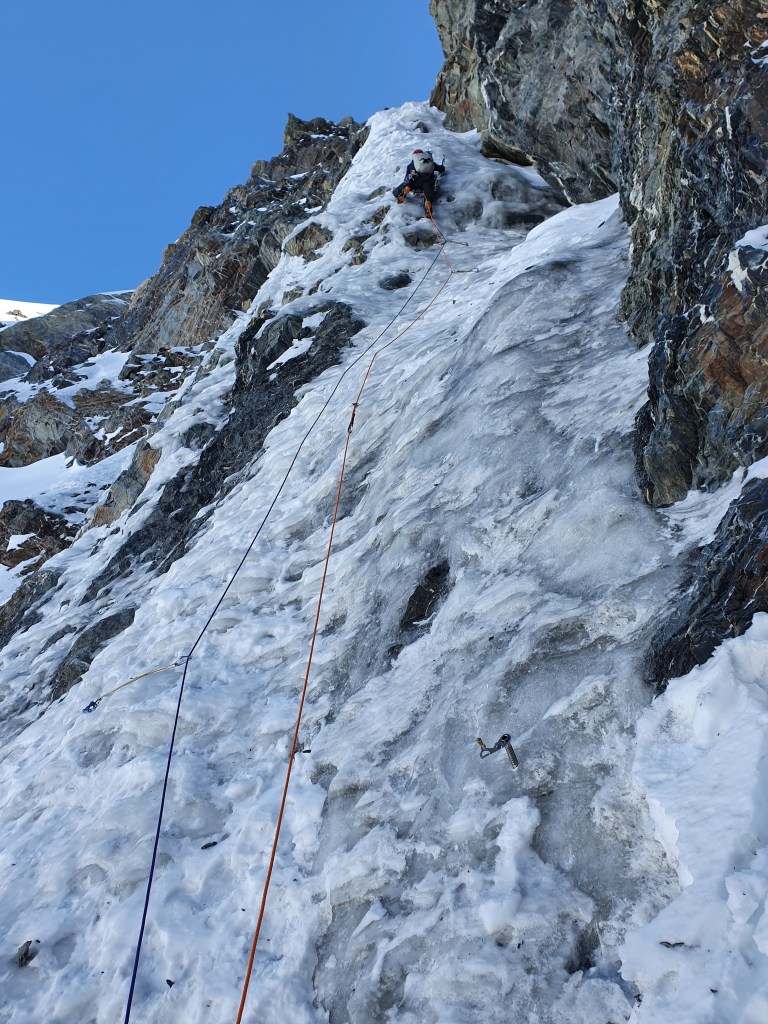
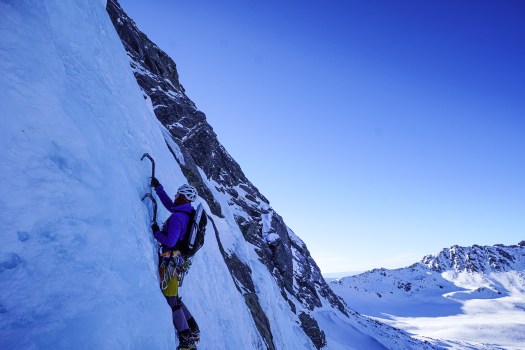
Bottom of the 1st pitch
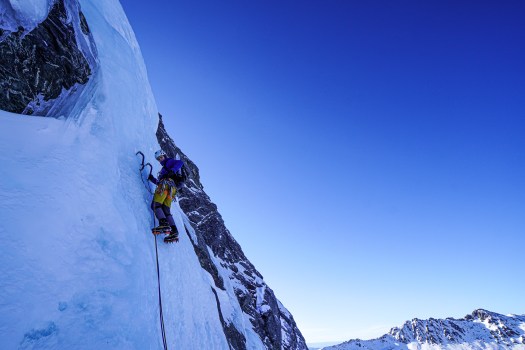
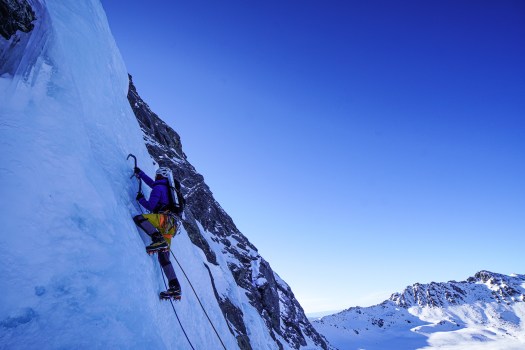
Pitch 1 : 2x 25m sections joined by a short low angle snow ramp. The first was WI3 but the second was near vertical for the second half, at WI4. Tubbs led this first pitch and did both sections in one long pitch. We ran out of rope and so had to simul a few metres to get him up to the snow ramp above to build a belay. To avoid the simul you could turn this into 2 pitches
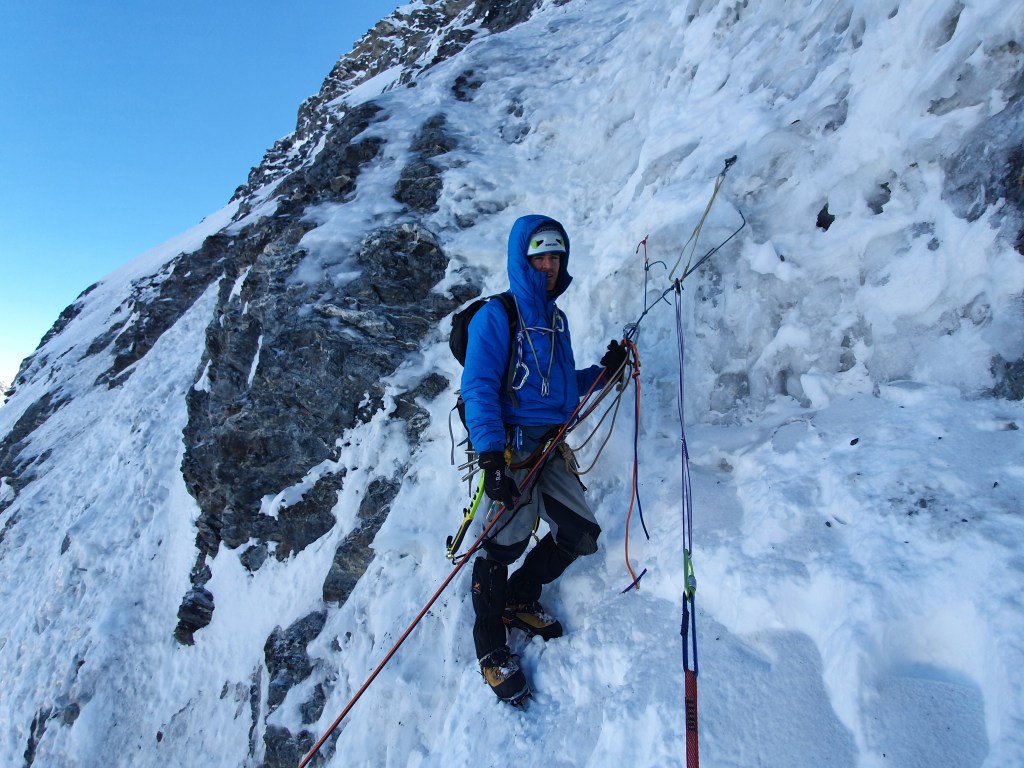
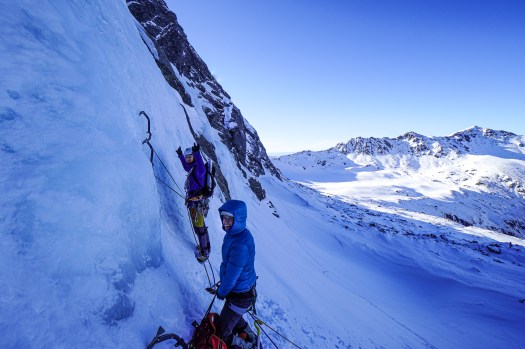
Sean coming up the 1st pitch
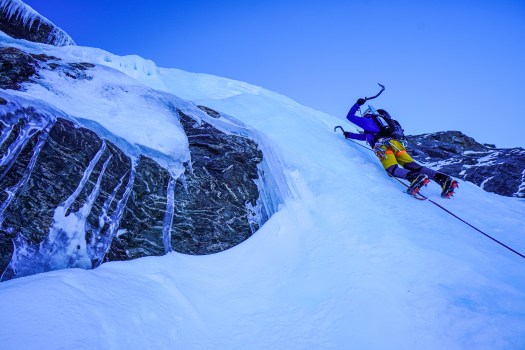
Pitch 2 : Snow ramp into WI3 ice traversing right up to a screw belay and the start of the next section of steep ice
Good ice climbing up the third pitch of Swiss Virgins, Vampire
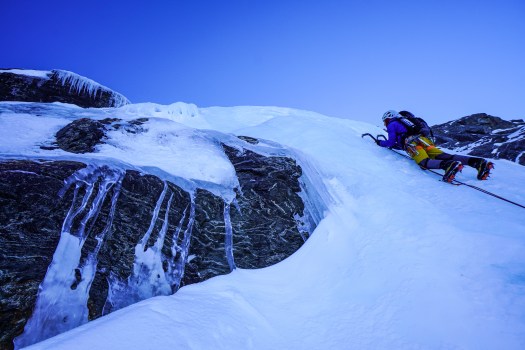
Pitch 3 : Steepens up for the next WI4 pitch. The ice was a little thinner here with a few mixed moves thrown in. Culminated in a near vertical 2m pillar to get onto the low angle snow field
Pitch 4 : Another 40m of WI3 to another good screw belay
Mark leading up the crux 4th pitch.
Pitch 5 : 20m of WI3 into a steep snow gully up to the summit
Descent
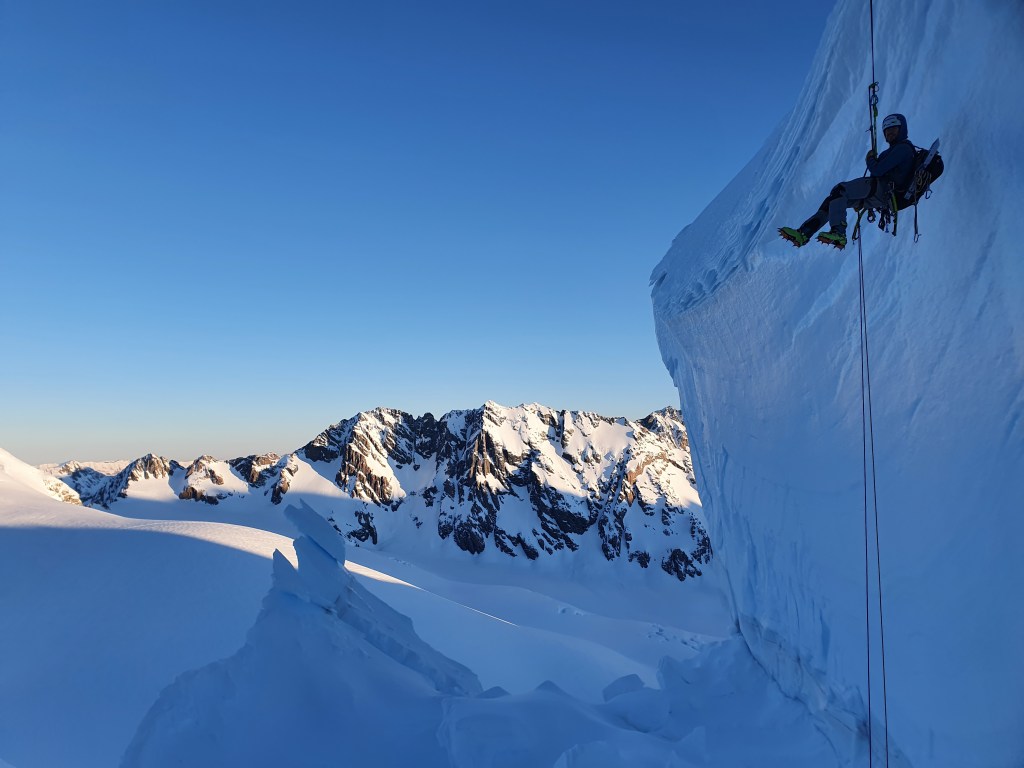
Good V threads all the way up, except right at the very top where we threw in some bolts
There were excellent screw anchors the whole way up, and a team of 3 is ideal for prepping the V threads on the ascent to maximise efficiency on the descent. However when you reach the very top anchor options are slim. The unconsolidated loose snow meant a picket was no good and the ice runs out so threads arent an option. There is a big rock at the top which has a thin crack in it that can fit a knifeblade piton, but the direction of pull for the rap was straight out of the crack. We had spoken to a group that had climbed the route a few days earlier and told us about the top anchor situation and we decided to do a bit of a public service and bring a power drill up and install a nice shiny new DBA with rap rings. We were hoping this was going to becoming something of a classic ice route and would get a lot of traffic – after the big rockfall I dont know if these bolts are even still there. Im sure they are still securely in the rock, but the rock may now be at the bottom of the valley…..
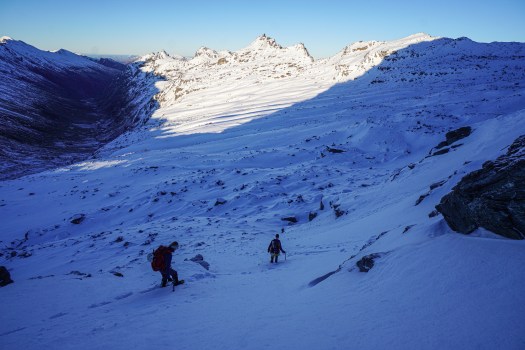
Heading home across the Sladden glacier
From the hut it took us around 5 hours to get to the car on foot – would be significantly faster on skis. The section getting to the Sladden glacier (passing under the Williams glacier) was quite thing and over some big exposure – take extra care if crossing this late in the day and a small wet loose could cause a big fall down to the Mueller. The same is true (but to a lesser extent) between the Annette and Mueller hut.
The route from Barron Saddle hut (x) back towards Mueller hut staying high on the terraces. Gets the sun later in the day so go early. Right from the hut it the way up to the routeLooking up the routeIm going to start bringing a power drill on all my alpine outings….
An excellent multipitch ice route. The ice tends to get fatter the higher you go so if its on at the start you can be pretty confident its only going to get better.
East face of Mt Walter. If you look closely you can see me and Sean on the summit snowfield making a dash for the top
Grade : 5 . 400m of ice climbing, mostly WI3 but with short sections of WI4
Equipment : We had 2x 70m half ropes, 12 screws with long runners, small rock rack (4 cams and small selection of nuts) which we didnt need but would be useful if thinner conditions. 2 x snow stake. Tat for V threads. Skis make approach much easier.
Approach : 1 hour from Kelman hut on skis. 2 hours back. Less from Tas Saddle
Climb time : 8.5 hours
Season : 14/9/2021. Sept – Nov is prime season. Before this likely to be pretty thin
Team : Joe and Sean Cox
Approach
Sean coming up the ramp pitch
We got a ski plane up to Kelman hut. By linking up with 2 other skiiers the flight was pretty cheap. One day I’ll walk into the tasman…..but not on this trip.
Skis make getting to and from the route much quicker. Tas saddle hut is significantly closer to the start of the route, but on skis theres only half hour in it. Tas Saddle was full when we went up so we headed to Kelman. Kelman also has the advantage of gas and cookers so you dont need to bring that stuff up with you, and the seperate kitchen and sleeping areas means you have a bit more chance getting some sleep and not getting woken up everytime someone wakes up (although on this route your likely to be the first up anyway). It was pretty hectic when we were there, packed to the rafters with every bunk taken and people sleeping on the benches and kitchen floor. Made for great evening chat with everyone in the hut sharing their mission plans for the next day, but made sleeping more challenging. I slept in the bootroom on my airbed which meant I avoided any snoring….but got a rude awakening every time anyone went for a middle of the night pee.
Consistent polystyrene ice
We had gone and checked out the route the day before to make route finding in the dark easier and get an idea of conditions. We left the hut at 03:15 and were starting to climb just as it got light.
The route has a large snowfield threatening it and gets the morning sun – if its been loaded and/or a big increase in temps then theres a real risk of avalanche coming down the route, or you triggering something while going up the summit snowfields. Curtains and Original route are a little more protected from this perspective.
Cruising up pitch 5
Climb
We made 7 pitches to get to the summit snow field and then simulclimbed to the summit ridge. It took a bit of poking around to find a spot to cross the shrund and get established on the route. From afar we were a little worried that the first pitch looked a bit scratchy and thin, but once we got to the face there was pretty perfect polystyrene ice the whole way up. Right from the first pitch the protection was good, sinking 16cm screws and taking 19cms for the anchors. The route essentially goes straight up, with a rightward trending ramp about halfway up. This first half is sustained WI3. Past the ramp there are 2 small low angle snowfields linking the last 2 pitches. The climbing is the hardest on these last pitches at WI4. We had a 4-5m section of vertical ice just before the 1st snowfield, and then another similar section on the last pitch with some awkward traversing and a couple of mixed moves to get established on the final ice gully to the summit snowfield.
Topping out on the summit ridge.
We made ice anchors the whole way up except for the last but one in the final snow field where we made a rock anchor. There was good ice but having brought a rock rack all the way up there felt like we should probably use it!
The is a fair bit of East in the aspect and we were climbing in the sun from pretty much first light until around 11am. Excellent for shaking off the early morning barfies!
As we were getting to pitch 4 a heli came and hovered about 100m from us obviously scoping us out. In our sleep deprived and mission focused mind set we assumed it was the guys from the hut who we had been chatting to the night before – we knew they were flying out around then and they were stoked on the fact we were climbing the route so assumed they were just stopping by on the way out to take some photos. We gave them some enthusiastic shakas and carried on climbing. After a few minutes they flew off. Only when we got to the summit and got phone signal and a thousand panicked whatsapps did we realise Sean had butt dialed his Spot PLB, sending a distress message to his wife who had promptly triggered a SAR rescue. Seeing us climbing on and giving our most enthusiastic chakas they figured out what had happened and left us too it – cue grovelling apology and box of beers brought to the SAR boys on our return. Sorry about that!
It turns out that this is a really common occurrence with SPOT PLBs and SAR have had multiple false call outs this season alone. In addition, when they were analysing our distress signal the GPS co-ordinates were totally wrong and were telling them we were on the West coast somewhere. Time to upgrade to an inReach Sean!
We hit the summit at 15:00, spent half an hour calling significant others to explain what had happened (and apologising) we started to make our way back down.
Descent
Rapping down to the Walter Ellie col. Ellie on the right.
From the top of the route head north east to the summit of Walter on easy low angle slopes. From the summit traverse an exposed ridgeline around 100m long. This can be heavily corniced on the east side and is steep and exposed to the west. It was covered in rope snagging sastrugi when we were there so we soloed this section. From here its a single 60m rap down to the Walter Ellie col. We left a picket behind to rap off. From here walk down the Anna glacier to the start of the route. Its well worth getting a look at this/taking some pictures from the bottom as there are several big seracs and the route finding is not obvious from above. When walking down from the col youu need to go further left than you think – we went too far right and ended up having to make another rap off a v thread over a serac band. Once you leave the col your threatened by seracs from above, so move quickly. They tend to be more active further east.
Went the wrong way and ended up rapping off this ice block.
An alternative (especially if you brought your skis up with you or the Anna is cut off) is to ski south from the summit of Walter past Divers col and down to the 2000m contour on the Tasman. This would be a big old day on foot.
After munching the rest of the food we had stashed we chased the last bit of evening light back up the Tasman and ended up back at Kelman around 21:00, 18 hours after setting out.
When we got back to the hut everybody was talking about our SPOT cock up – as part of the rescue attempt every guided group in the park had been alerted to what was going on. And to make matters worse when leaving the hut I had managed to put on the wrong pair of ski boots – there were about 25 pairs of boots and I had picked up an identical pair to mine in almost the exact same place, just 1/2 a size bigger. So they were extra comfy for me….but not so comfy for the guy that ended up with my boots. (I was wondering why they didnt quite fit into my bindings…but had just readjusted them for my other boots and assumed I just hadnt adjusted it quite right). He had spent the whole day touring in them and then flown out early afternoon so never got a chance to give me a bollocking in person. I can only imagine how pissed off he was……..but he didnt let it show when I called him once I was down to arrange the swap. Sorry buddy! So that was a second box of apology beers from one trip – a good lesson to me to write my name on my boots in huts from here on in.
So a successful trip in terms of climbing but otherwise managed to totally kook it! (although I can really recommend climbing in ski boots half a size too big….extremely comfy!)
The final part of the descent. Surrounded by big seracs, dont hang around
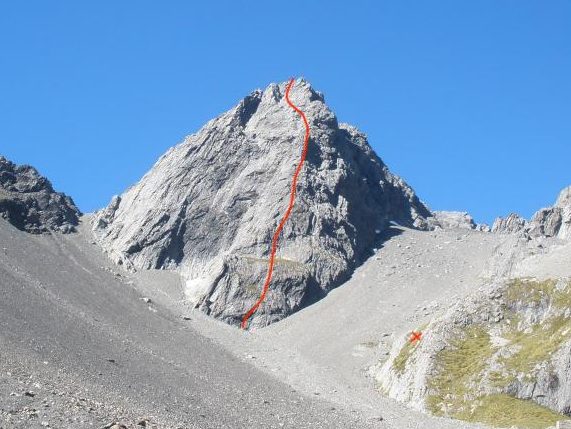
A fun day out that’s easily accessible as a long day trip or cruisey overnighter from Christchurch. We made a weekend of it staying at CMC’s Kennedy Lodge the night before, then staying on for canyoning down Agility Creek the next day (what was supposed to be our ‘rest day’ but turned into a borderline quest – but that’s another story).
Generally low easy scrambling (grade 12 ish) but with 2 well defined overhanging cruxes that I reckon are more like 16 than the topo 14. You can avoid these if you want to. Rock is loose in places but generally decent and the gear is spaced but not as run out as I was expecting from the climb nz description. Crucially the anchors are bomber, with big spike belays for 240cm slings on all 4 pitches. Easy scree descent.
Grade: III, 4+, crux 14 according to topo; I think this is a bit of a sandbag, the overhanging crux is more like 16 but is short. All trad, no bolts including anchors.
Equipment: full trad rack – singles of cams up to #3, full set of nuts (RPs were very handy), tat, 2x 70m half ropes
Approach time: 1.5-2h
Climb time: 4.5h
Season: Summer into autumn. West facing so gets the afternoon sun.
Team: Joe, Tom, Alex, Dave, Maria 02/04/22
approach
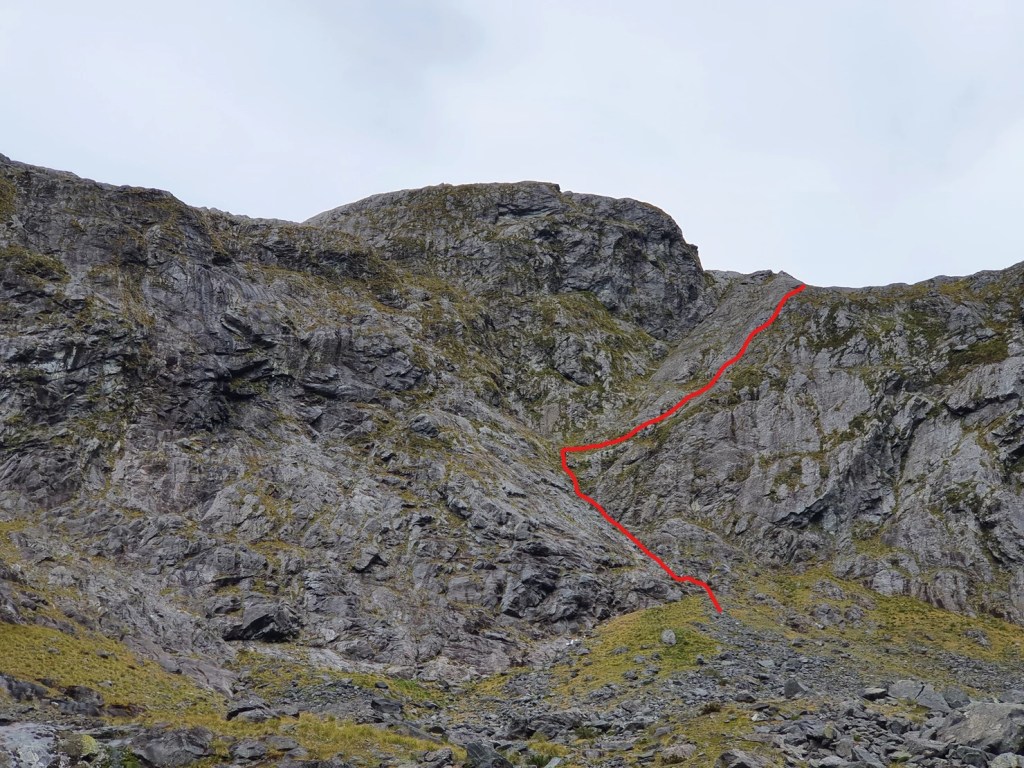
Park at Temple Basin ski field carpark and head up the 4WD track that turns into a well maintained walking track to the lodges. Central buttress is flanked by a left and right buttress. It extends into the scree further than the Left/Right buttresses do making it easy to spot.
The route
It isn’t really obvious from the Climb NZ topo that this route is actually a series of pinnacles, and so you need to make 2 short raps during the climb to link them together. Multiple variations to the route exist – the Climb NZ topo shows 3 alternative starts, coming together towards the top. We chose the line on looker’s left of the buttress. Other routes start further right.
Note the 2 raps required mid-route
Scramble the first 40m
Pitch 1: (10 40m) Scramble up the detached stand alone block in front of the buttress to get to the scree platform at the base of the buttress. We went up just to the right of the obvious deep crack. We soloed up this section in approach shoes, pretty limited options for gear if you want to pitch it. Is easy to just walk around this section to the base of the main buttress if you want to avoid it.
Pitch 2: (12 50m) We chose to climb the arete on the far lookers left of the buttress which starts from a small grassy patch. Either stay left in the groove for easier climbing but looser /mossier ground, or right on the face for better rock but more difficult and run out climbing. About halfway up is a small overhang which is easier to get through on the left. Some pretty loose rock on the overhang so watch out. After almost a full rope length you get to a large grassy platform about 5m wide with a big boulder you can sling as a belay.
Pitch 3: (16 50m) We climbed up the right hand side through the small overhang (see pic) which has some cool stemming moves. There was some loose rock and average gear just on the crux move which made this a bit stressful. If you stay left sticking to the ridge you could avoid this section. Once over this is you scramble up grade 10 blocks to a ledge on top of the first pinnacle and make an anchor with a sling over the very top of the pinnacle. There were a few slings and a maillon left there when we were there. From here you need to make a short rap (5m or so) onto a small ridge and walk along this above steep gullies to the start of the next pitch. Very loose rock on the ridge so take care.
The crux
Pitch 4: (12 30m) There’s a small area you can tuck into at the base of the next buttress to belay from. Head up the groove on the right hand ride of the buttress. The angle then eases off up to a spike belay at the top of the second pinnacle. Another sling/maillon was insitu here. Make another short rap to the start of the final pitch.
Pitch 5: (15 30m) Generally easy climbing but with a well defined crux half way up. Step right into the overhang. Great gear (#2 cam just below the crux) and huge jugs to haul on to get you through. Then scramble up to the top where you can make another good sling anchor around a boulder.
From here we took the ropes off and scrambled through the shingle to the cairn on the summit.
The second pinnacleLooking back towards the N face of the 1st pinnacle
Descent
From the summit, head South along the ridge towards temple col then drop down into one of many scree gullies back down to Temple Basin ski field. We cut off halfway between the summit and the col down a scree couloir, and then trended left picking our way through the bluffs to get down to the ski field base building in around 1.5 hours. The scree is pretty hard work and Maria stacked it losing a phone and cracking her camera so watch out!
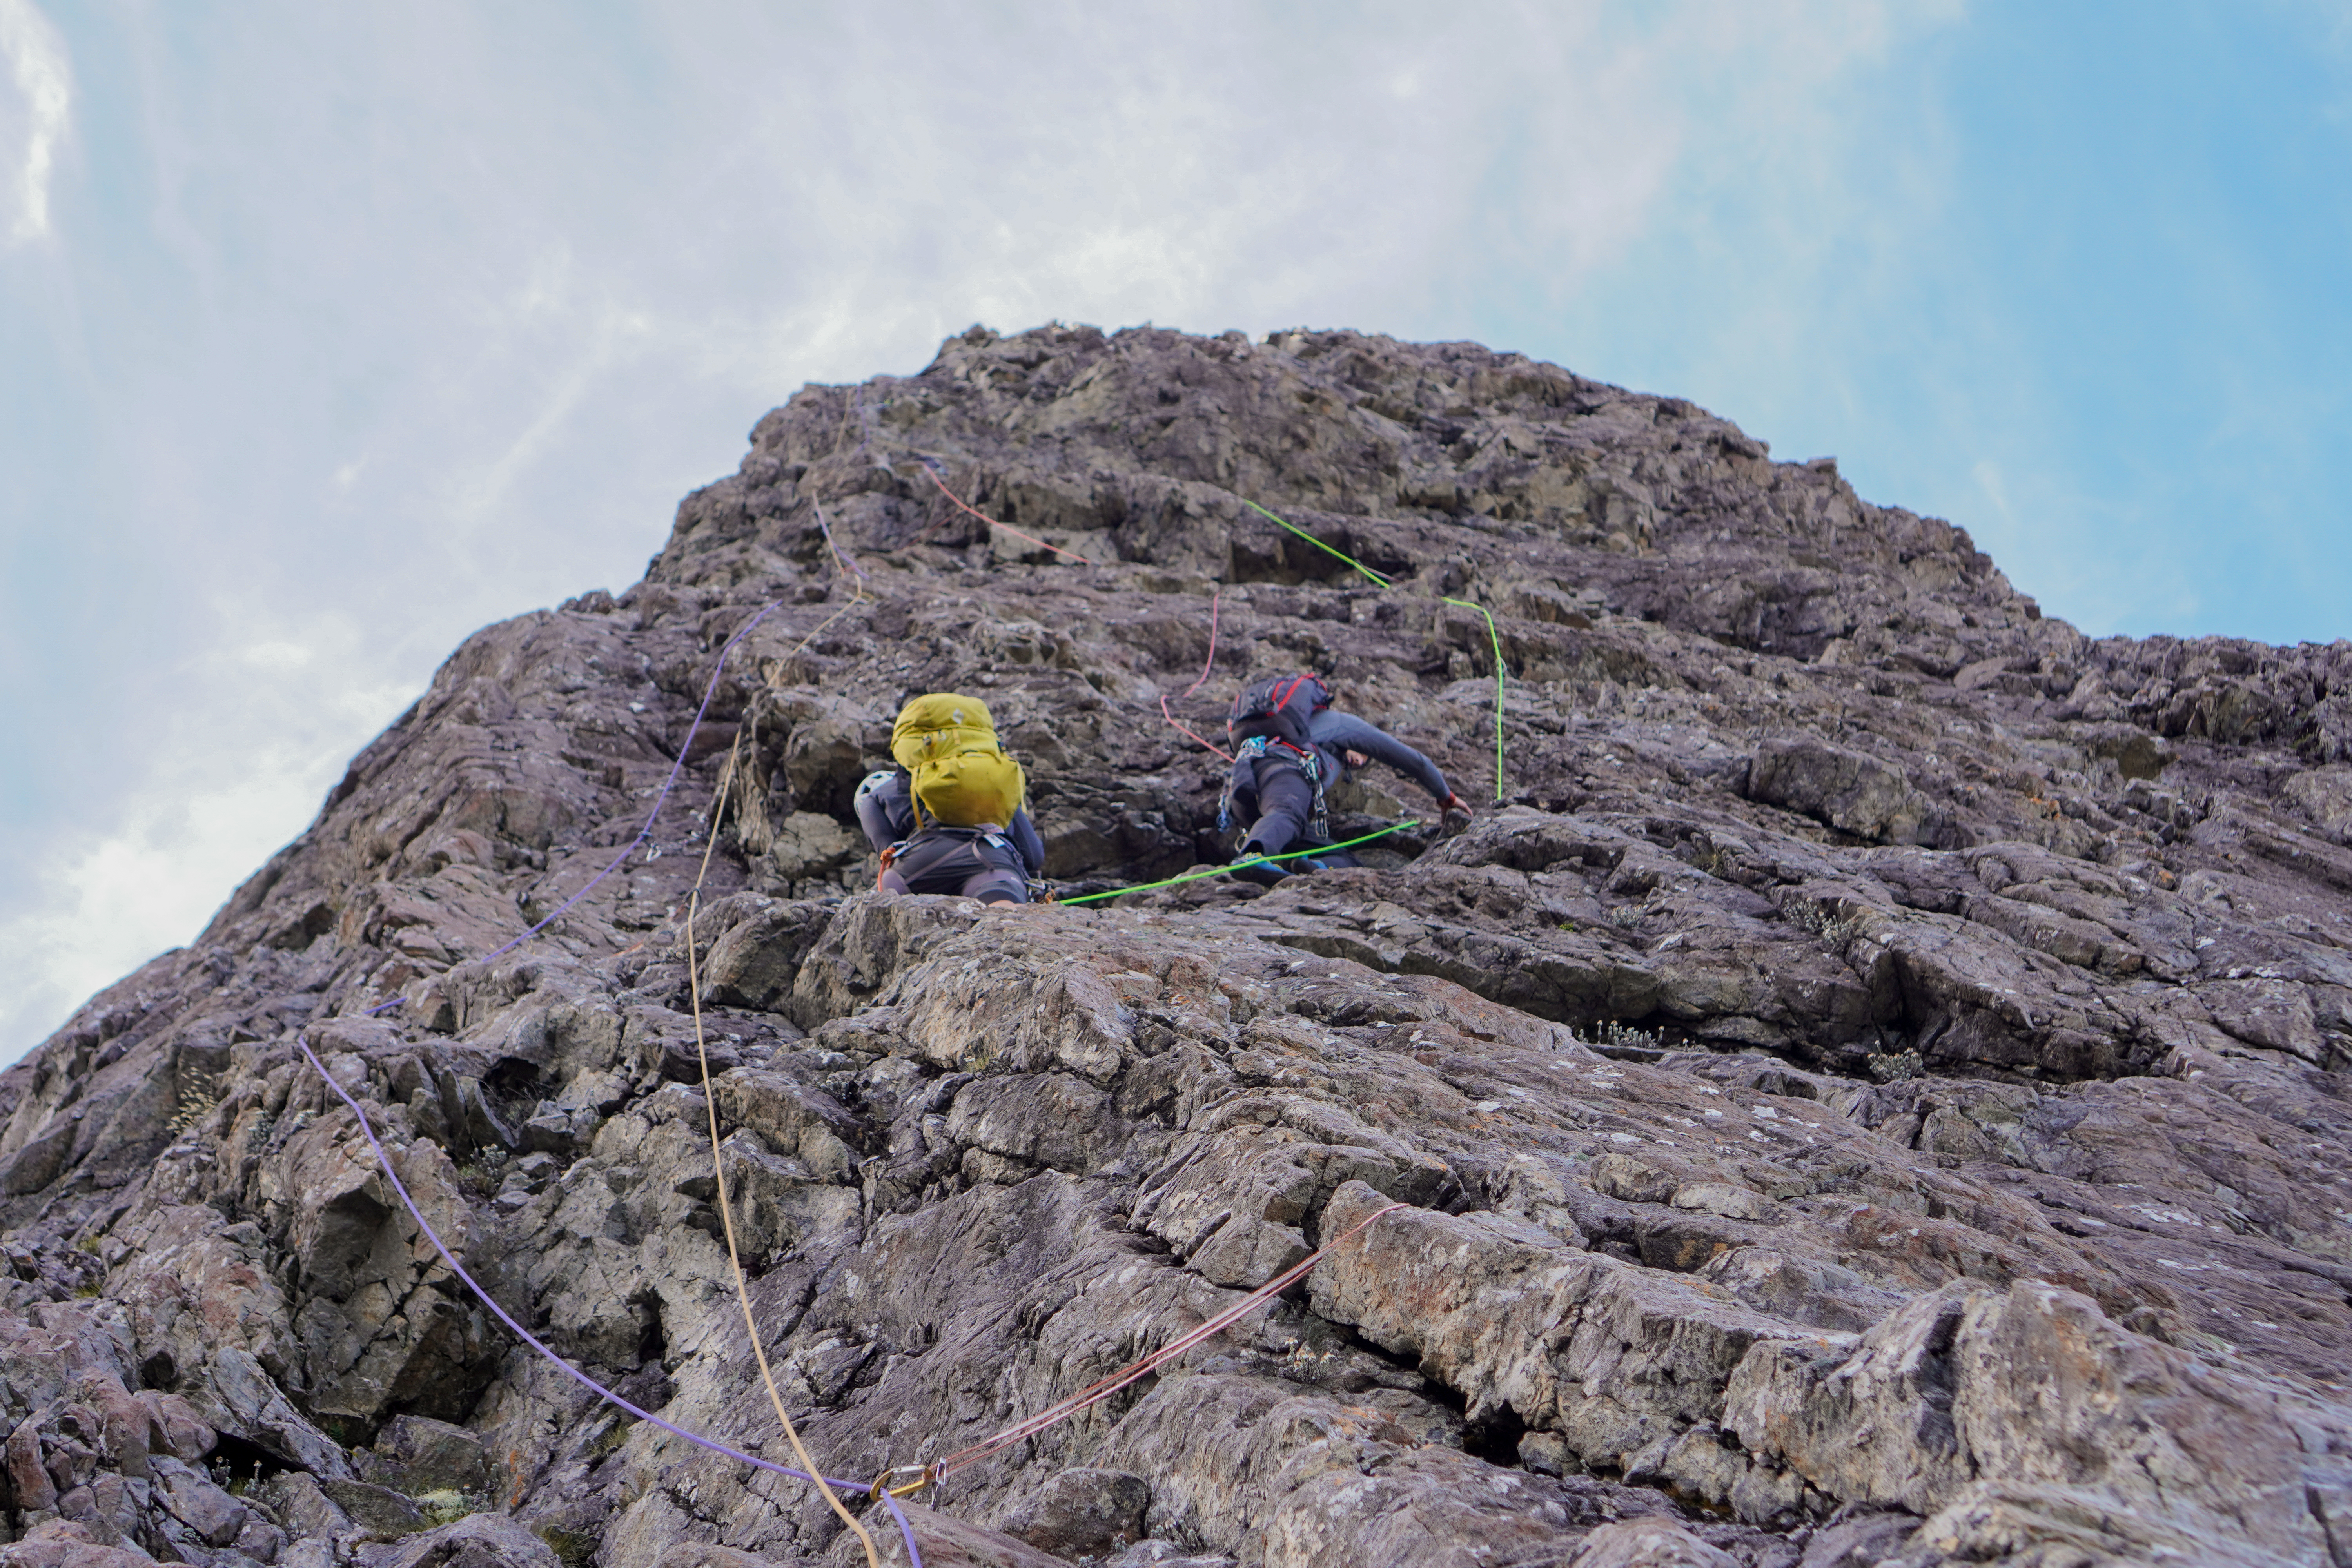
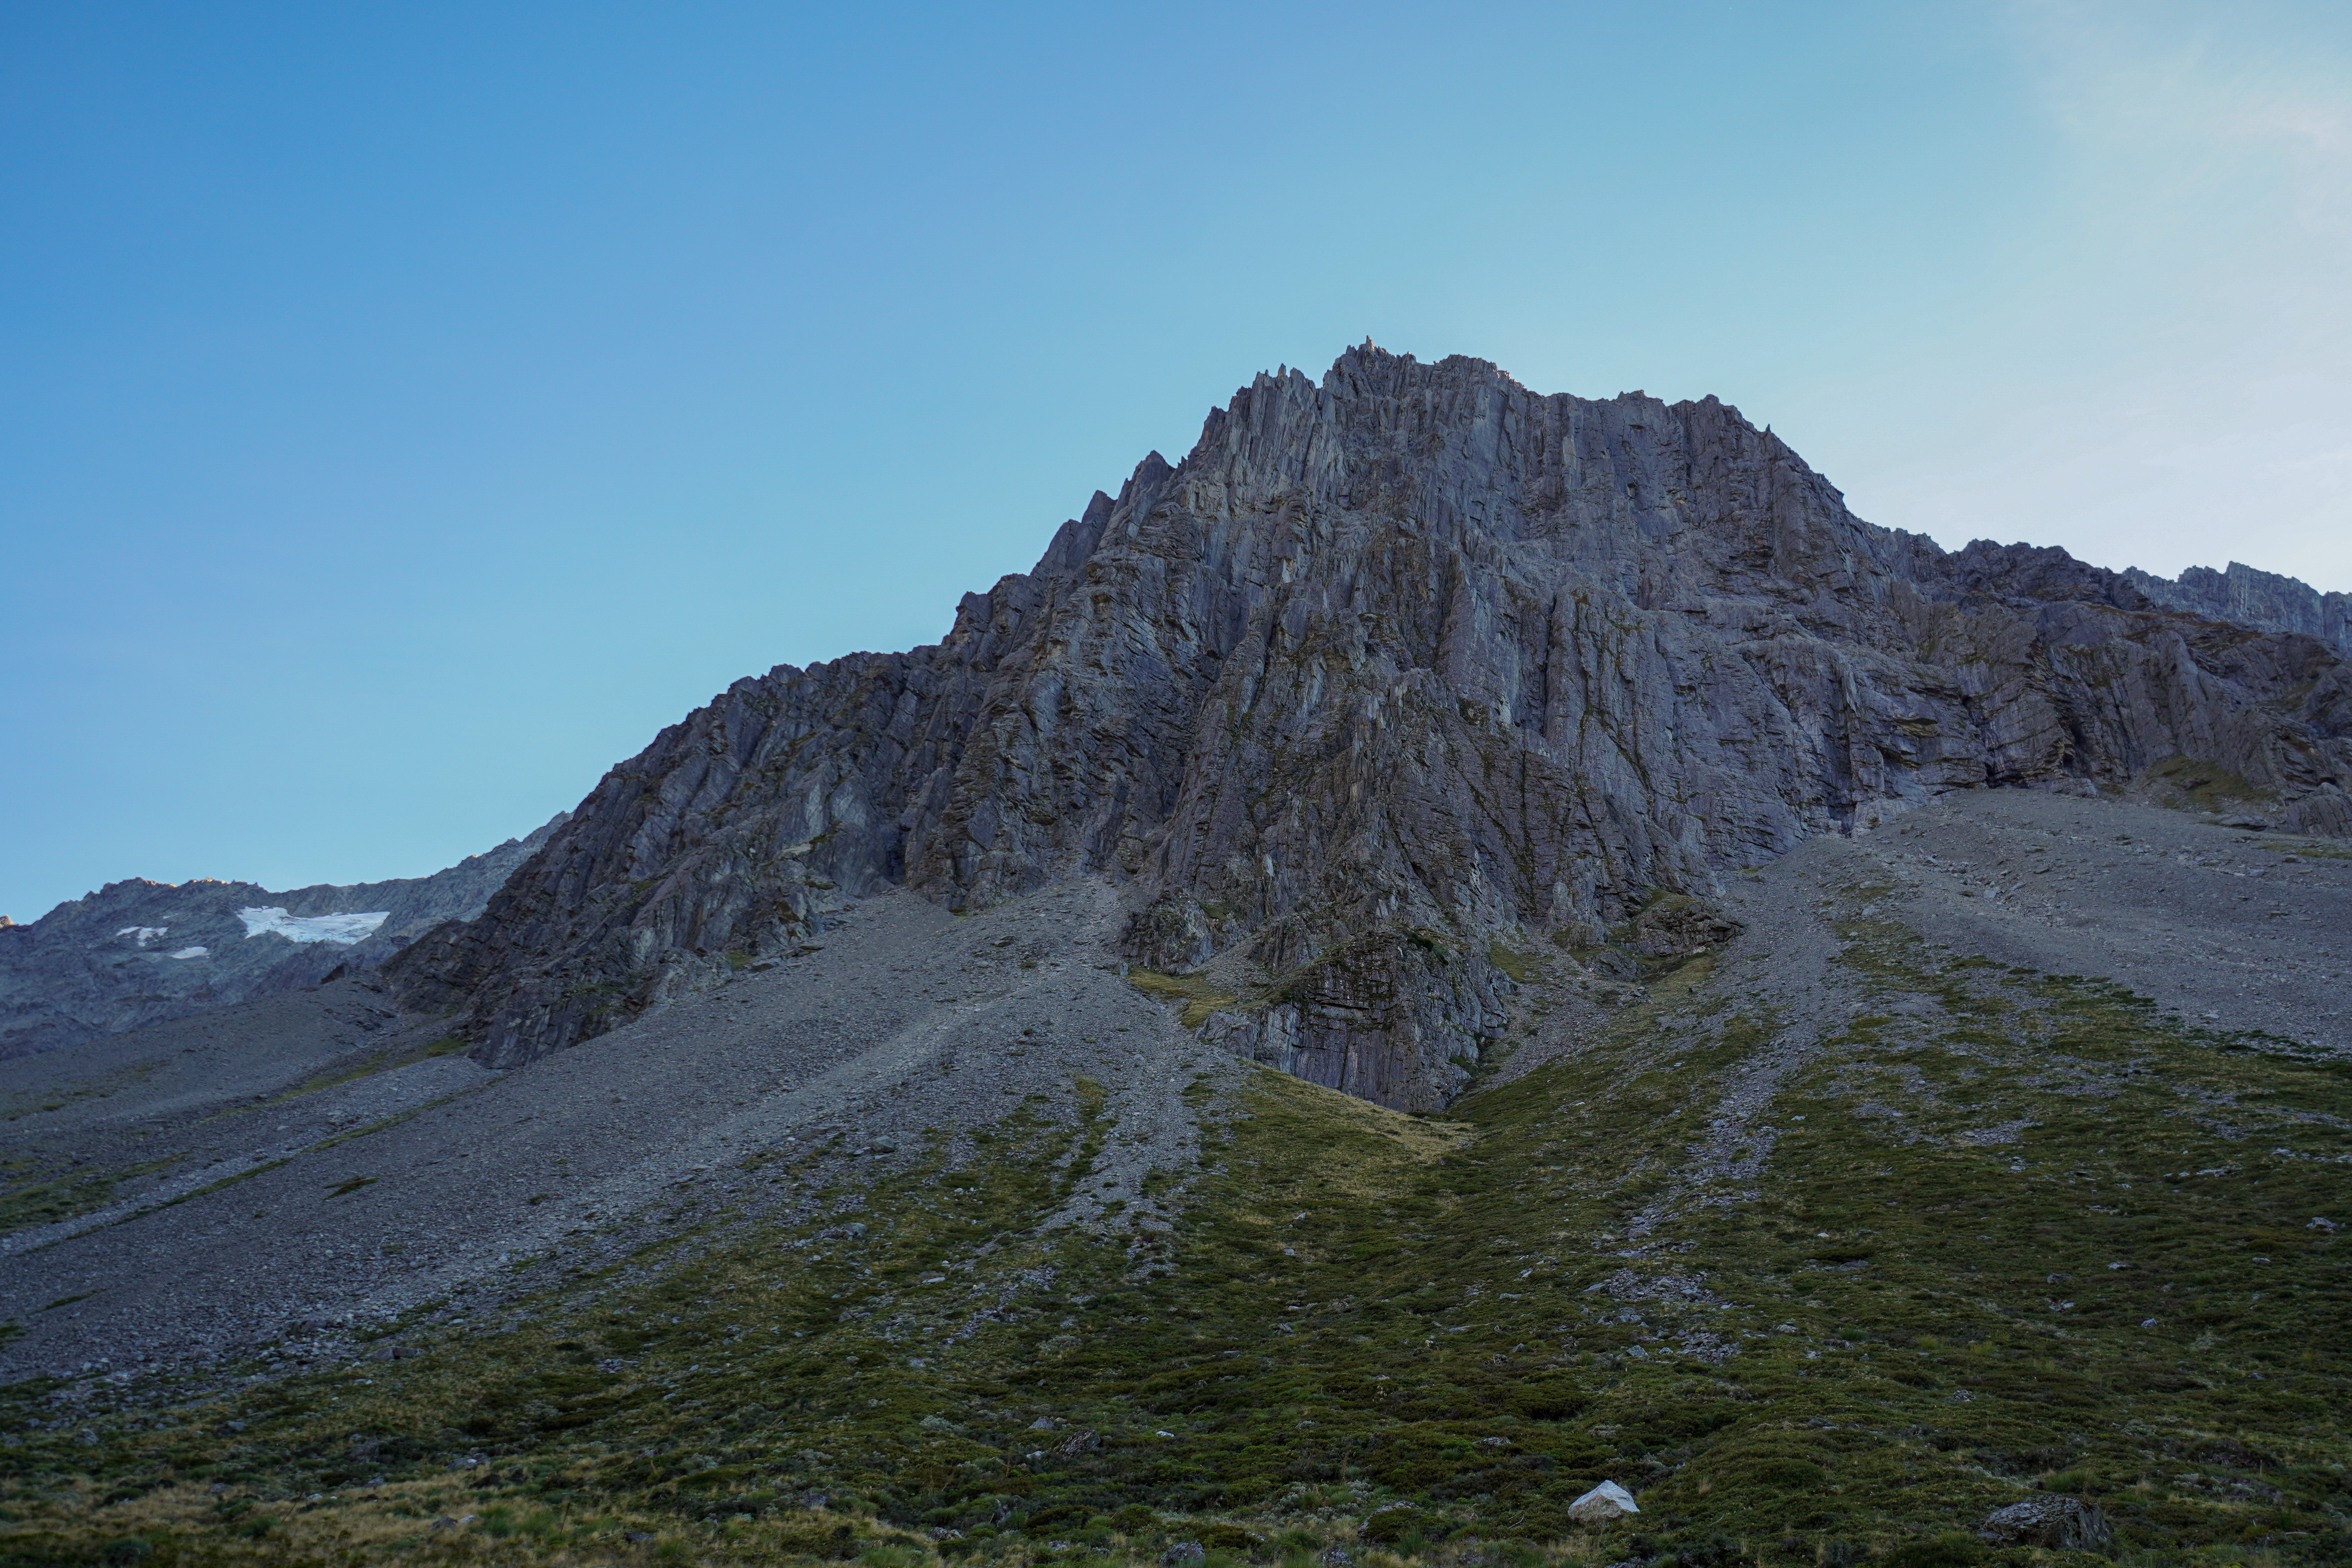
A 550m grade 19 trad route on solid rock with varied interesting climbing, just a 3 hour hike from the Mount Cook Road. This route wasn’t really on our radar until Will suggested it, but turned out to be the best multi-pitch route we’ve climbed outside the Darrans. Better than Sabre peak!
Maria coming up the final crack pitch
Grade: 6 IV 550m. Crux grade 19 (According to topo…I think more like 20). All trad including anchors.
Equipment: full trad rack, doubles up to #2, full set of nuts. RPs/micronuts useful. 2x 240 slings for anchors. 5m of tat to sling the big boulder for the descent (its a massive boulder). 12-14 alpine draws including some 120s especially if your planning on doing long pitches like we did. Wandering route, 2x ropes definitely better than a single.
Approach time: 3.5 hour hike from road or 5 min heli and 30 min walk
Climbing time: 7.5 hours
Season: Best in Summer, you want long days and no snow on the route. It’s South facing so you dont get any sun. I wouldn’t have wanted to climb it any later in the year than we did, it was pretty cold and we just got it done before dark
Team: Joe, Maria and Will Rowntree 09/4/2022
The route. Generally stick to the ridge. About half way up step right onto the right facing black wall up to the big yellow roof
Approach
The riverbed approach
If hiking in, park up in the lay by just south of the bridge at the end of Bush stream. The track is initially fairly well trodden but after a km or two you’re rock hopping up the river bed, crossing multiple times. It’s uneven ground but fairly easy going, and no bush bashing is required. The climbing line is super obvious as you come up the valley, dominating the skyline on the northern side. As you get to the upper valley under the route the river bed flattens up and you can cruise up scree slopes to the base of the route. It should take around 3.5 hours to get to the base of the route from the car (it would be pretty difficult in the dark though). The alternative (and what we opted for due to only a short time window) was to fly in from Glentanner airport and then walk out. A flight was $580 so pretty affordable between 3, and the 08:30 had us at the base of the route and climbing by 09:30.
the route
Walking up from the river bed to the base of the route
Follow a line up the obvious prominent buttress. Varied climbing with delicate slabs, stemming corners, excellent finger and fist cracks and juggy overhangs. There are multiple short defined cruxes which are generally 4-5 moves long before the difficulty eases again. You generally follow the ridge apart from one section – the most obvious feature from the ground is the right facing black corner about halfway up that ends with a big yellow roof. You stem up this corner and traverse left back onto the ridge under the roof. The gear and rock quality is pretty consistently good and it never felt particularly run out or scary. The route finishes at about 1700m (so significantly lower than the summit of Mt Brown), from here you can either make one 30m rap to a scree field and descend or continue on to the very top which is a lot of scrambling and it looks like a few more pitches of climbing.
The topo on climb nz describes 14 pitches, but we ran a few of these together to end up with 9.
Pitch 1: (14 40m) Don’t judge the route by this pitch! Start at the base of a mossy grassy gully which trends up and left. Either stay in the gully for easier but mossier climbing or step left onto the slab for harder but cleaner climbing. Marginal gear on this first section but it isnt too difficult. Once past this mossy section the gear gets better, and you pull over a slightly steeper section onto a large low angle slab with a great fist sized crack that takes #3/#2 cams to make an anchor.
Pitch 2: (16 40m) The start of the good climbing. Fantastic layback crack from the anchor. Eases into low angle slab after 3-4 moves. 2 more of these steps up to a spike belay on a boulder on left hand side of the ridge.
First pitch, bit mossy. It gets better!Anchor at the top of the first pitch. Great moves up this crack to start the second pitch
Pitch 3: (17 40m) Head up and right from the belay to the top of the arete. From the flat platform step right onto the steep wall hanging out over the edge and traverse up and round to the right. Mega exposure! Big jugs and good gear. Once you’re up over this section the angle eases off. Aim for the right hand side of the ridge to make your belay.
Big jugs and good gear stepping out onto this section on the 3rd pitch. Good exposure.
Will coming up through the crux of the 4th pitch. Stemming up the black right facing corner.
Pitch 4: (19/20 50m) First crux pitch. Traverse right from the belay on a balancey slab with underclings on a small roof. Try and stay low and use long runners on the traverse to reduce drag. After the traverse head up the black right facing corner to the roof where you make a hanging belay. Really cool technical climbing with stemming in the corner. A stuck in #1 red cam and 2x abandoned nuts on the right mark where you’re aiming for! There’s good gear up the corner, gobbles up small cams, especially #0.5 and smaller. The crux is the last move before the anchor, with delicate moves pulling up over a blank black overhang. Save a #2 cam and a micronut / RP to protect this move. Try not to use your #3 in the anchor as you’ll want it for the next pitch.
Pitch 5: (19 40m) From the hanging belay head left under the roof along the crack to the arete. Solid gear (#3 cam) and big jugs for hands but delicate feet and great exposure! Crank up and over onto easier ground.
Maria leading off from the hanging belay on the 5th pitch
Pitch 6: (16 50m) Low angle scrambling straight up the ridge to a large flat platform several metres wide. Cranky move to get up over onto the next section.
The ledge traverse at the top of pitch 7. Its tempting to go up to the top, above and left of Maria, but then you’ll have that big down climb to negotiate, so stay left where Maria is.
Pitch 7: (14 50m) Head up towards the top of the ridge. Stay to the left and traverse along the ledge – it’s tempting to go right up onto the very top but if you do there’s a difficult downclimb of a few metres. From here you get to a knife-edge ridge about 20m long made of quite loose flaky rock. Take care traversing this and get to the base of a series of steps up blocky ground.
The final section – around 10m finger crack then into a similar length fist crack. The most fun climbing of the route!
Pitch 8: (17 50m) Head straight up a series of corners / cracks which initially is quite loose but the quality improves as you go up. Some great stemming and laybacking towards the top. Good spike belay.
Pitch 9 : (19 70m) we did this all as one but probably better broken into 2 (or 3) pitches. Easy ground from the belay for 20m up to a ledge. Then up the big black towers to the top! Up the finger crack first to another small ledge, then into the fist crack which slowly widens to the top. Fantastic jamming and excellent gear on super interesting rock! Then scramble up the final scree gully to the big flat ledge system which it the top of the route.
Maria doing the last moves on the final fist pitch
descent
From this large scree platform there is a lot more vert up to the top of Mt Brown, but the standard route cuts off left down the scree ledges to a north facing gully. There is a giant block here which you can make a 30m rap down to the large scree slope to the North and then it’s an easy walk all the way back down to the valley. It took us around an hour to get from the top of the route back down to the valley.
From the top of the fist pitch its temping to go up here to the Red Cross like we did. If you want the standard route don’t bother, turn left from here and aim for the second gully to rap downFrom the top of the fist crack head down here to the rap
Carrying on to the very top looks like it would involve 2 more pitches of climbing (beyond the Red Cross in the above picture) and then a good few hundred metres of walking up through scree fields.
Doing the route in April meant the days were short and by the time we got back down to the valley it was fully dark. Thankfully we had left a GPS dot on our camping gear or we would never have found it after burying it under rocks for Kea protection. The whole river bed is covered in good bivvy spots, or if you cross to the south side of the river near the big boulders there are some even bigger spots.
Biv spot
It’s a really leisurely day to fly in and then camp, and we got stuck into our soups and curries feeling pretty smug we werent going to go straight into a big walk out. Saying that in summer with more daylight it would be no problem to do the route and walk out the same day.
After a good night’s sleep we cruised out to the car in 3 hours and then headed back up to Christchurch – all up one of the best weekend trips from Chch I’ve had with an unprecedented ratio of actual good climbing compared to slogging through approach. Highly recommended!
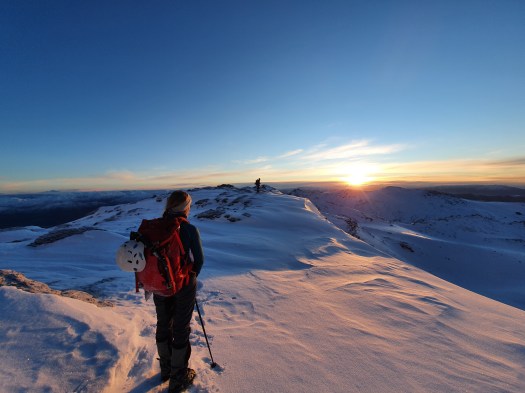
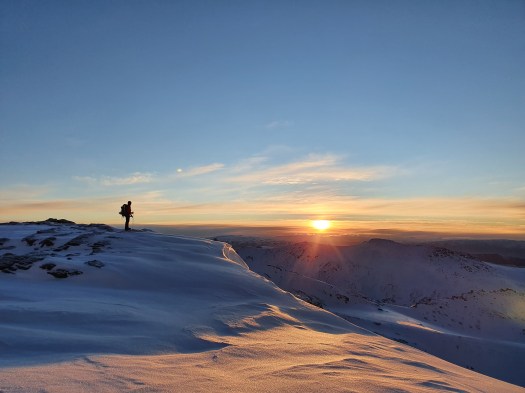
We took Maia on this climb as a warm up for Aspiring SW ridge. An absolute winter delight.
Bit of difficulty route finding at the top lead to a bit of time in stasis for me and Maia. The cold was character building! After the trip, Maia invested in some new gloves – and perhaps new friends…
Touch Down is a section on the S face of Single cone that consistently sees good ice year on year. It’s a great area for those learning/honing their ice climbing skills as there is a double bolt anchor at the top allowing you to top rope/rappel easily. If you’ve climbed here and feel confident, then the S face classic route is a natural progression. The route is 300m long. In reality, the hardest ice climbing is at the beginning and the rest is largely snow. The crux of the climb was definitely the routefinding.
To give you an idea of the route (in reverse), here is Joe skiing it. Note it is much later in the season with an exceptional amount of snow.
Difficulty: WI3
Equipment: 2x semi technical tools. Ice screws – enough for a full 60m pitch (depends on your tolerance of running it out; we brought 10). 1x picket each. We climbed on 2x half ropes as a team of 3 but as a 2 a single 60 would be fine.
Approach time: 2h from Lake Alta, 3h from Remarkables ski base
Climb time: 8h (we had some route finding difficulty, could be done in 6-7)
Season: mid-late winter allowing time for the ice to be established
Party: Joe, Maria, Maia 06/08/21
Approach
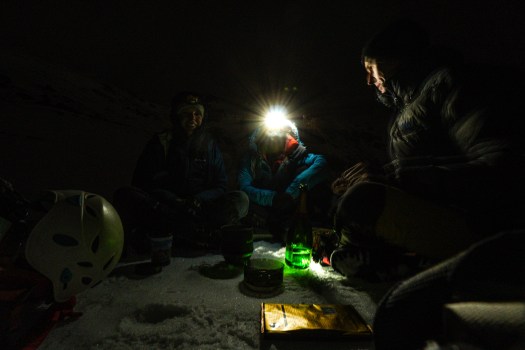
We chose to camp the night before to get an early start the next day. From the base building at Remarks, we walked up towards Lake Alta and chose a spot to sleep under the stars. Joe had recently finished exams so to celebrate we had lugged a bottle of bubbly up (courtesy of the Collinson parents!). After the fizz had settled, so did we.
Woke up at 7am – leisurely! Access is via the back of single cone. From Lake Alta walk up and over Wye Saddle then towards the E face of Single cone before heading down an obvious gully. As you go over, you’ll see Wye Creek for miles and the Doolans to the left.
Walk another 150m across to get to the first of the routes on the South Face. A further 100m or so is where Touch Down, and the start of the route is.
Yellow marks our belay spots; blue marks where we initially tried to go upCloser up shot of the route
The Climb
We started climbing at 10.30am. P1: WI3, 60m. Straight up touch down, once over the edge the DBA is on the RHS P2: 60m. Up the snow gully trending left; we made an anchor just before the snow field P3: 50m. Trend left across the snow field until it narrows up a snow gully P4: 50m. Head up through the rocks, squeezing through onto another snow ramp. Go up and left onto an obvious ledge. P5: 50m. We wanted to head straight up (blue line below), but there was just a thin layer of snow on bare rock (yeesh) so we came back down and traversed 50m out to the right before heading up another snow gully towards the ridge P6: 30m. Up the rock step to the ridge
Coming up the snow gully, end of 3rd pitchAnchor porn! Joe starting the 4th pitch
We reached the ridge just after 6pm. Too tired we forgot to take a group summit pic. Boosted down towards Lake Alta, picked up our camping gear then retraced our steps down to the carpark at remarks. Down in 1h or so. Time for curry.
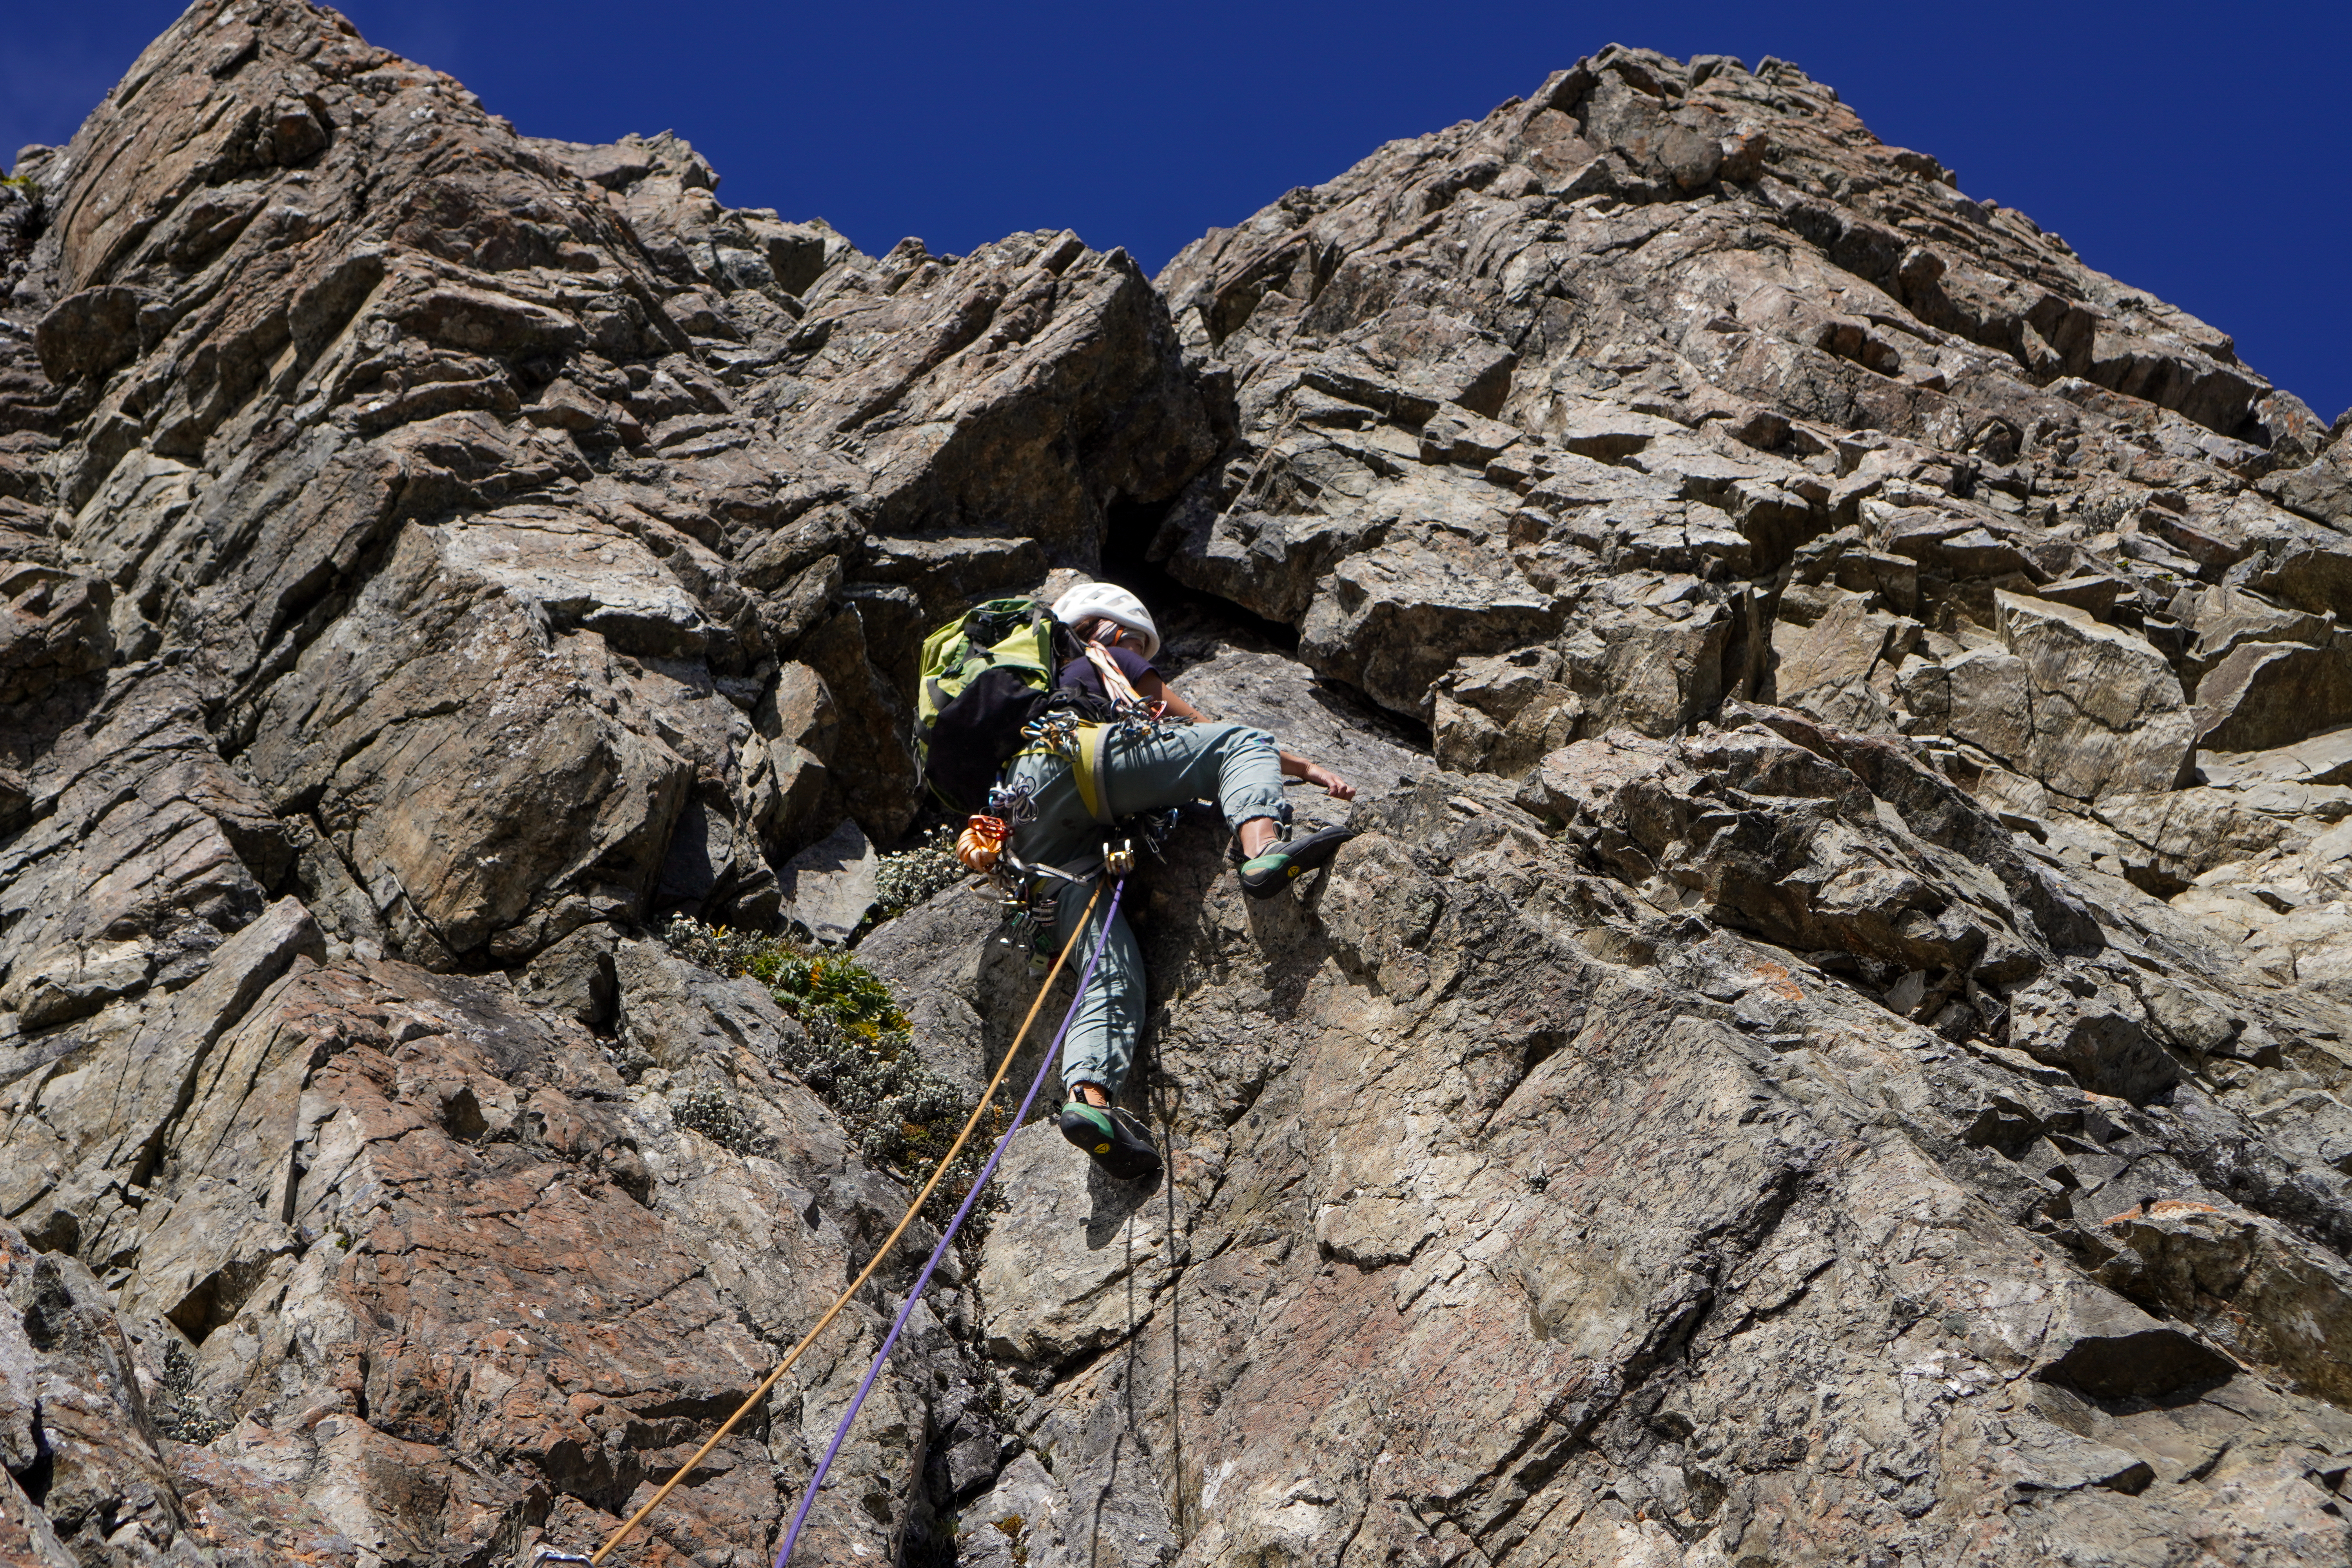
New Years day. Hungover and sleep deprived. What better way than to sweat it all out in a 3-day adventure into the Darrans?
This was a good old NZ epic in the back country. The approach was not merely a way to access Sabre; it felt just as much a part of the trip as the actual climb. I’d steel yourself up against the good slog in and out, and a long day out for the 500m climb up this beast. But the rewards are pretty sweet – with the elegant backdrop of Lake Adelaide, Sabre juts out impressively, true to its name, and has been luring climbers to it since the first ascent in 1959 via the West ridge.
The line we took on Sabre Peak. Marian to the right.
Grade: 17
Equipment: 2x 70m half ropes. Full rack including 1x set of cams, nuts, long slings. Lots of tat to rappel.
Approachtime: 6h to Phil’s Biv
Climb time: ~16h biv to biv
Season: best in summer as minimal snow and dry rock
Team: Joe, Maria 1-3/01/2022
approach
From Homer Hut carpark, take the well signposted track for Gertrude Saddle. It is a popular day walk so plenty of people coming and going. At gertrude saddle (around 1.5h to here), follow the obvious path NE towards Barrier’s Knob. There was a bit of snow for the last hundred metres up to barrier knob, but we were in our light-weight crampons and trail runners and had no issue.
From Barrier knob, head down the ridge to Adelaide saddle (further 1h or so). Route finding to Gifford’s crack/gap is fine here as long as you go all the way down to the saddle. Don’t make the mistake we did and drop down too early, as we had to descend steep moist tussock and make one rap off a dubious spike to reach the valley floor.
Gifford’s crack is steep but in dry conditions could be down climbed carefully. There is a faint hint of a trail to reassure that you are on route. There are a few single bolts you can use to rap down it (unclear to me why someone would go to all the effort to bring a drill, just to drill one not two bolts…). Going up it felt fine, but for less confident parties can be climbed in 2-3 pitches.
Giffords from the bottom. You come in from Barrier Knob on the skyline top left, cross over the rise in the middle by staying west and then drop down into Adelaide saddle. Theres an obvious gully to downclimb with a couple of bolts.
Once down in the basin, soak in the views of Sabre in the distance. It looks really steep and intimidating from a distance – but don’t worry, it feels way more approachable up close!
We made another error here and stayed low in the basin and headed towards Sabre, but the scrub was thick and the travel was slow. Took us 2h but can be faster if you stay high as we did on the way out. There is a definite break in the bush that leads you all the way to Phil’s Biv – aka a 5 star hotel.
There was no vacancy that night at Phil’s Biv, but we had brought a tent just in case, and set up for a dinner and early night. I realised I had forgotten to pack any spoons for Joe or myself. This was a downer but made so much worse by then realising I had also forgotten the coffee! I was not popular…
the route
Alarm set for 5am. As we were eating breakfast (quite challenging without spoons) we saw 3 head torches in the distance heading up and we knew we would have company for the day. Getting to the base of the route is a bit tricky so we were grateful for the cairns en route. Head to the the left of the obvious waterfall on the North Buttress – see picture below. There was some snow here when we were there, stretching 50m or so. Gain the tussock ramp on the left, climbing up before reaching another waterfall. Zig zag back right at this point where the ground flattens off.
Swipe to see the route we took – it isn’t as bad as it looks from afar. Pretty similar to Giffords crack in steepness. The track is cut into the cliff a bit and as long as its dry never feels too sketchy. The hardest route finding was at the top where it cuts back hard right on itself (the furthest left point of the red line) – just head up the low angle slab towards the tussock.
I would divide the route into 3 distinct sections.
Part 1 Getting to the crux – can be done either through the yak pastures (what we did) or via the direct variant graded 19 (what we wished we had done), and ending at a massive obvious spike belay and ledge right on the ridge of the N butress. Its not obvious from the above photo but once you hit the yak pastures there a deep obvious gully that cuts up diagonally from the right hand edge of the yak pastures towards the ridge. Its going to take a varying number of pitches depending on exactly which way you go and has the potential to be very time consuming. We took 5 in total.
P1: Started up the low angle slabs on the left
P2: head diagonally towards the right which takes you to a spot which you can see the yak pastures from.
P3-4 : Full quest time. Awful, slimy, mossy, run out. We were heading up through the muddy slippy tussock which was pretty unprotectable and not a lot of fun. When you eventually get up to the yak pastures it levels out and you can find a good anchor on the rock band on the right
P5 – Start on the far right of the yak pasture and follow the gully that goes diagonally up and left towards the ridge where the spike belay is and the actual climbing starts! The rock quality and pro is actually decent in this gully, a welcome reprieve from the last few pitches
Swipe up for route/annotations. Gettting up to the Yak pastures wasn’t a lot of fun. Mossy, muddy, wet, hard to protect. This is how we went but probably a much better way. The crack straiught down from the spike apparently goes at 19 and looks much nicer! Once your at the Yak Pastures it gets much better.
This angle gives a much better view of the gully from the yak pasture up to the ridge, and the belay ledge that signals the start of the good climbing!
Part 2 The crux aka the good climbing! – 3 pitches of super fun well protected grade 17 climbing – not really the crux because grovelling through the slimy tussock of death below was way scarier and harder. Took us around 4h to get here.
P6: 16, 45m. Very enjoyable, finally nice clean granite just as we were promised! Super fun exposure swinging out left onto a ledge before heading up the obvious crack. Spike belay and ledge here.
P7: 17, 40m. Stem city. Fun moves up the corner straight up, following the obvious line of protection.
P8: 16, 40m. Again straight up.
Part 3 The final pitches to the summit – Lots of different ways you can go, angle mellows out significantly. Choose the path of least resistance, grade 14 or so is possible to the top (although we veered right under an overhang/roof section which was very cool and fun climbing, harder than it needed to be. Probably about 18/19. Worth the detour if you can be bothered.
P9: Traverse right, jugs the whole way but v exposed. Then easy scrambling up. Bit of rope drag here.
P10: Directly up.
P11: Up and towards the right takes you to a tricky overhanging roof, which is difficult to protect. Alternatively stick left for an easier option.
P12: Easy scrambling to the biv spot just shy of the summit.
We got here by around 5.30pm. Tired but great feeling of accomplishment! Quick sandwich before starting the descent.
Coming up one of the mellow top pitches with some amazing views
Descent
Scramble south past the multiple biv spots that people have built and towards the summit. To get to the rap station head East around 50m before you reach the summit, aiming towards the East ridge. The stations are pretty obvious with huge bundles of tat from previous groups. Bring enough tat to replace weathered slings and be ready to leave some nuts behind. From the top your aiming for a giant obvious gendarme – the rap line is just to the skiiers left of this. Some people downclimb to the gendarme but that seems pretty sketchy to me, especially with tired brain kicking in.
Cloud coming in at the start of the first rappel
We were down to the Sabre-Adelaide col by 8pm. We had to walk through down some snow and mossy slabs to get to where we started the climb. Took us another 2.5h to get down to camp. Had another spoonless meal and KO’d by 10.30.
Had a much needed lie in the next day then paced it out! Great way to kick off 2022.
Once you’ve walked down from Sabre Adelaide col, you can easily get bluffed out on the wet slabs especially if its dark. This is an easy way down to where the climbing started.
GPX files. GPS went slightly haywire a couple of times on the summit but you get a good picture of the approach and descent routes. The approach file is the correct way through Giffords, not the way that we took on the way in!
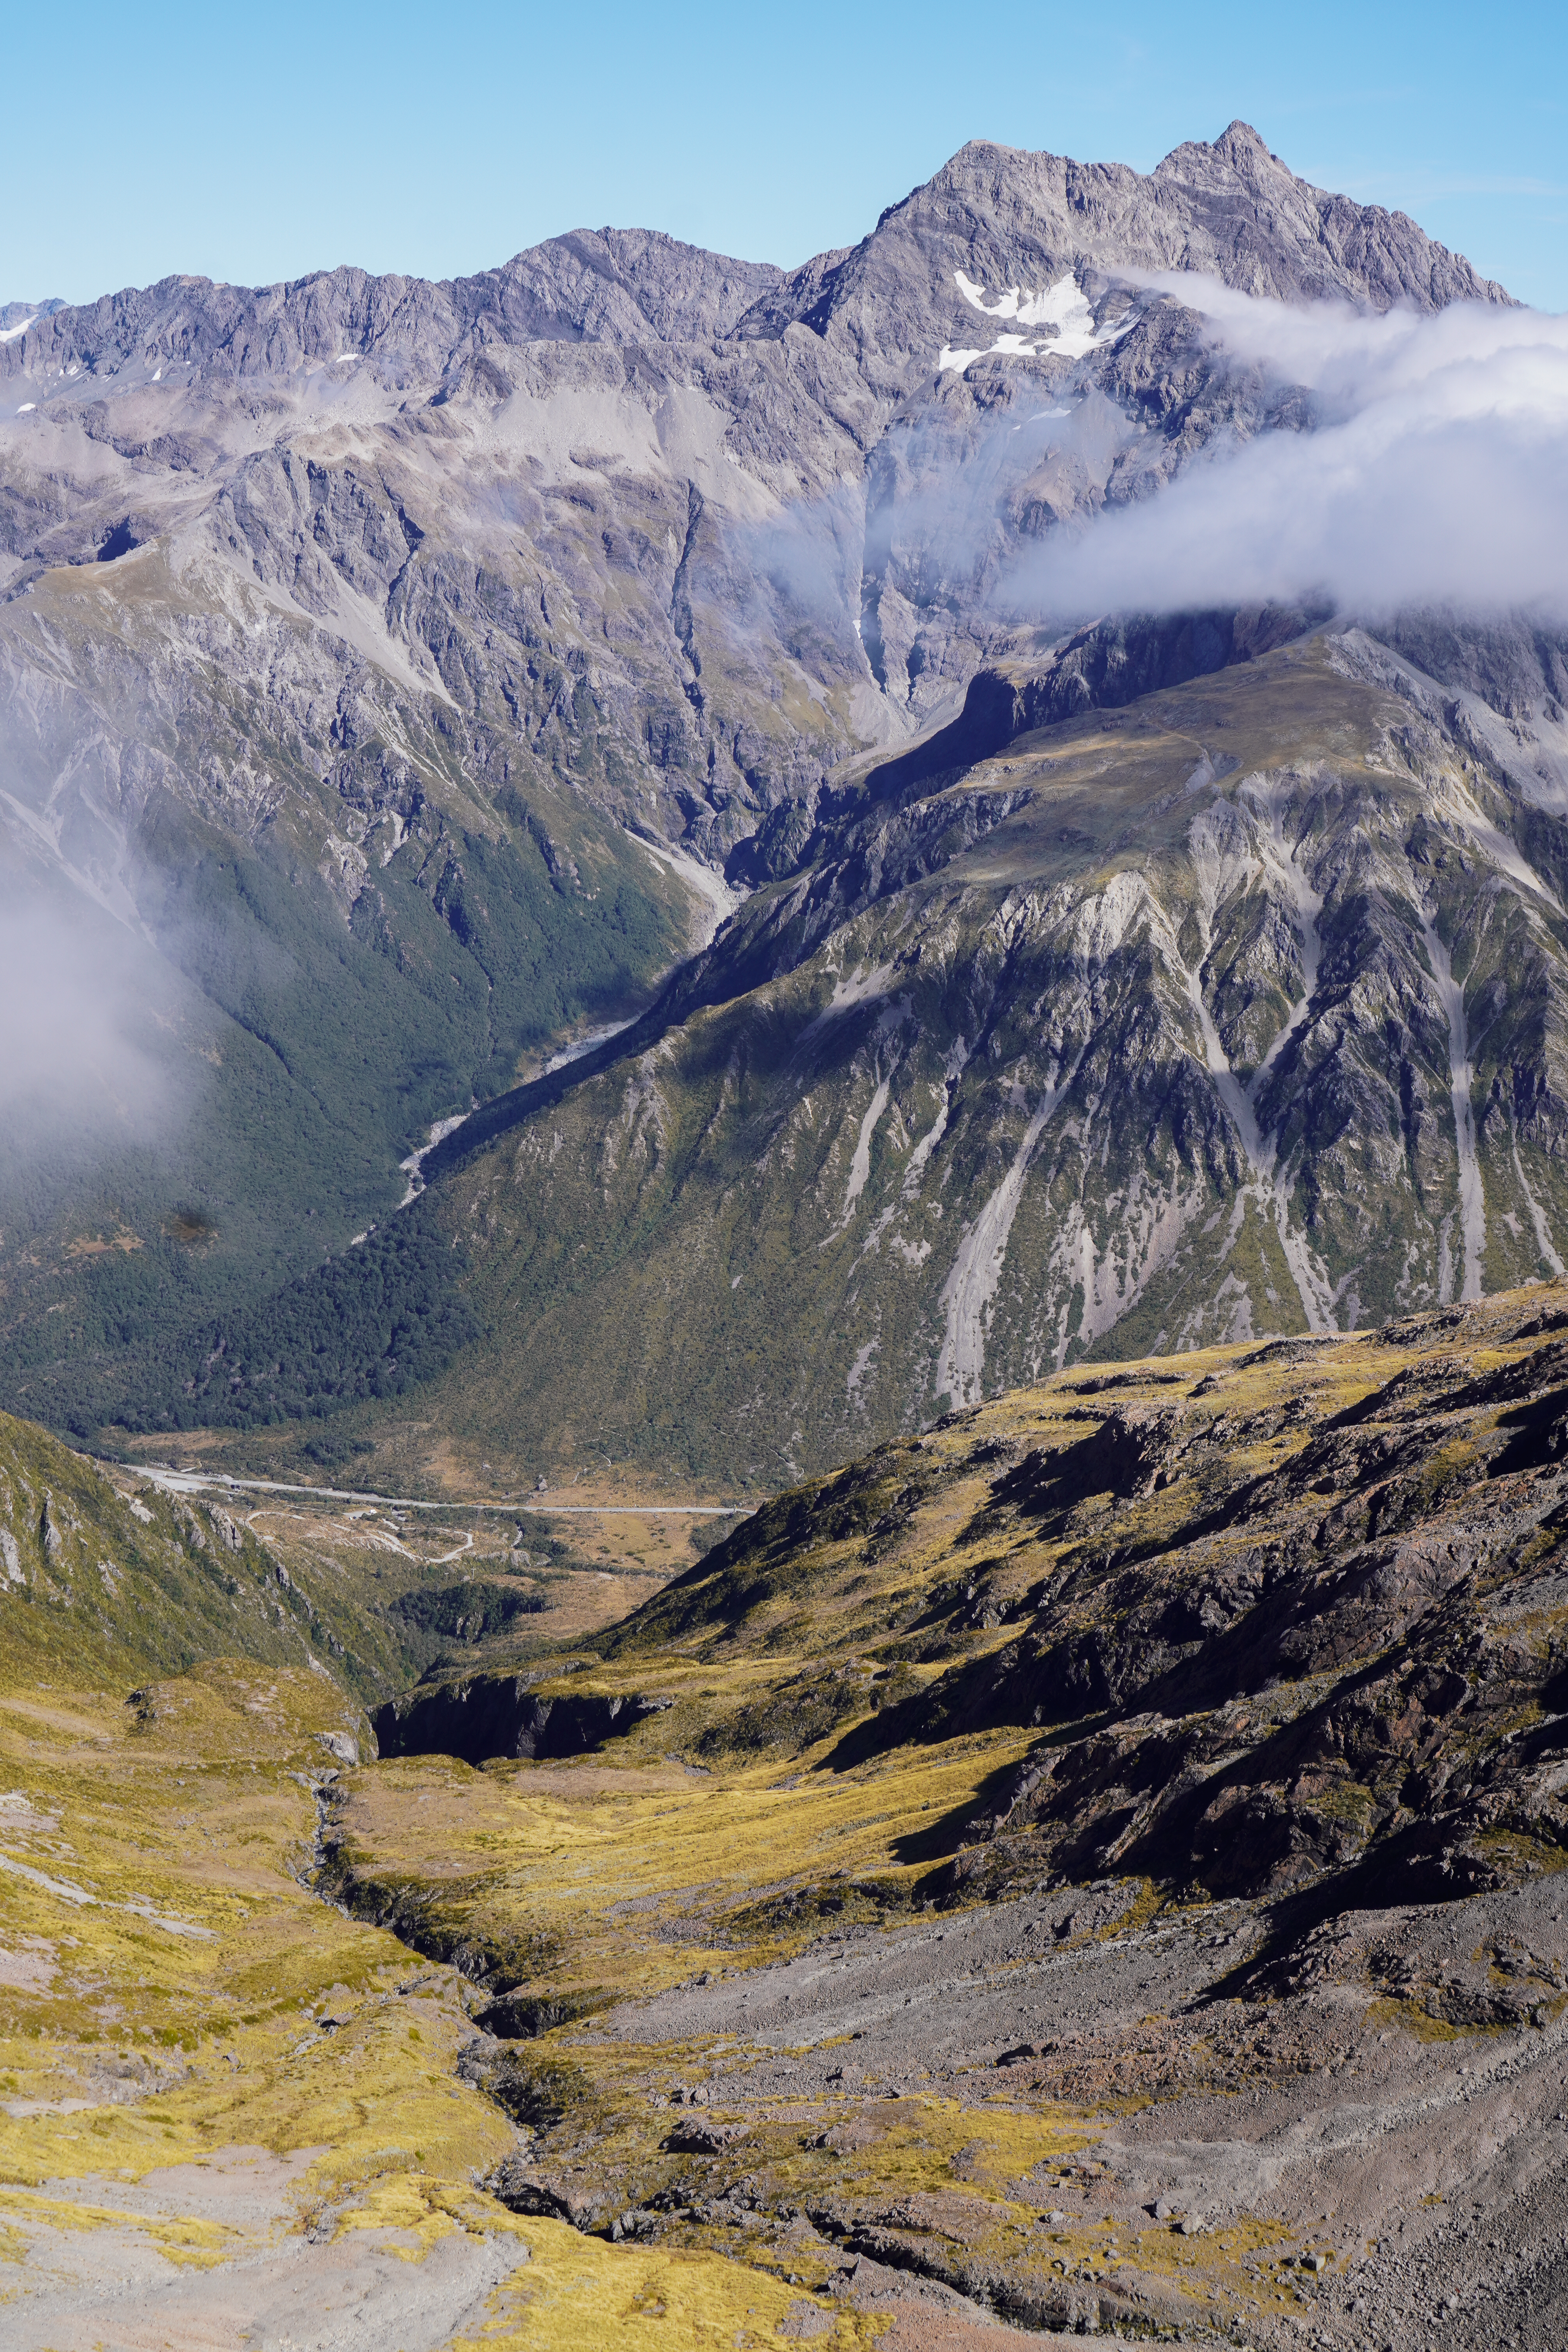
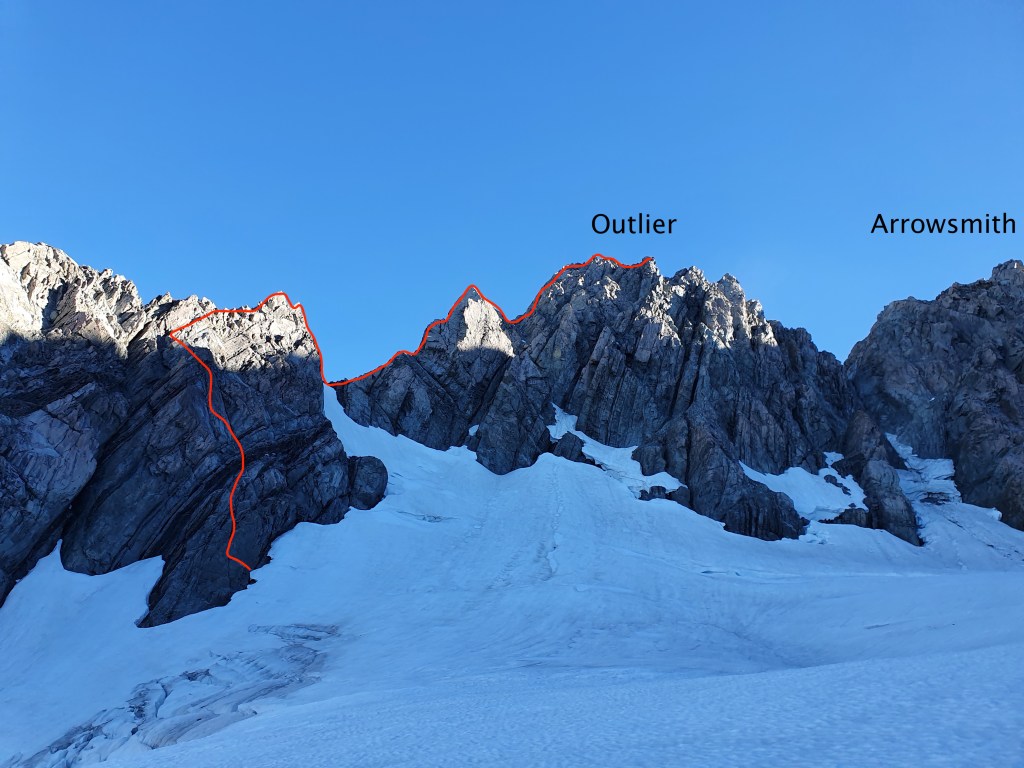
More widely known for ski touring, the Arrowsmith range is much less trafficked for its Climbing routes. We decided to check the area out mid February, savouring the last of the summer. It certainly is a beautiful area with striking peaks piercing the skyline, a downscaled version of Patagonia? Rock quality being much more questionable, of course. Wouldn’t be New Zealand without a bit of character building choss.
We didn’t actually finish the full route up Mt Arrowsmith (despite it being described as “the best part” by ClimbNZ), turning around instead at Outlier (unnamed on NZ topo at 2723). It was still a stunning climb – would just take caution on the rock and take plenty of time and tat.
Grade: 4-, crux 14
Equipment: 1x full set of cams, range of nuts, 5x alpine draws, 9x 60cm slings, 2x 120cm slings, 1x 60m rope, tat, 1x ice-axe, ATC, microtraxion, crampons (we took lightweight aluminium crampons – Petzl’s Leopard – which were sufficient), avi gear
Approach time: 4-5h (~13km direct but meanders)
Climb time: 16h 45min
Season: we climbed in February, late summer, but could be climbed throughout the summer or as a winter route, bearing in mind the avalanche risk
Team: Joe, Maria 20-22/2/22
getting there
Drive took just under 3h from Christchurch. Drive along Hakatere Heron road, past Lake Heron. Turn left onto 4-wheel drive track where you will pass a gate. Park up near the sign/intention book. There are deep ruts in the last 10m leading up to this point so some cars might want to park just shy of the sign to avoid getting stuck.
Our route
approach
Well marked trail all the way to the hut with marker posts (grey, not the usual DOC orange) – not to be confused by the tall, orange speargrass! Bit of bog, minimal bush. Follow the river. Hut is very easy to spot – hunter green with hot pink door, super distinctive. Well equipped hut with pots/pans, cutlery, industrial hand sanitiser and hours of reading material from decades old copies of The Canterbury Mountaineer.
Intentions book wrongly stated that “everything is cut off” so we altered our plans – instead of going via the South Cameron glacier, we would attempt the Douglas glacier which was in view from the hut as having minimal snow/névé to travel across. Happy with plan B, we settled in for an early night at 7.30pm.
Cameron Hut with Douglas Glacier behind
climb
Alarm woke us up at 3am – a solid sleep only briefly disturbed by the sound of Kea claws dancing on the hut roof. Set off by 4am.
It took us around 3h to get up the moraine onto Douglas glacier and then onto the col just East of East Horn (see topo above). Patchy bits of glacier meant we had to take the crampons on and off a couple of times.
We navigated across the South Cameron glacier, weaving through bands of seracs then accidentally found ourselves amidst them so had to use one cheeky ice screw to get onto firmer ground… Swinging an ice axe in one hand and a pole in the other – a well established technique.
Looking back at the col E of East Horn from the North; Douglas glacier on the other side
It was not obvious where the base of the route was, but given the crux was 14 we found a starting point that looked reasonable and went with it.
The buttress – route started around the corner
We climbed in our boots, simulclimbing 90% of the time – the ridge is very exposed but the climbing is easy. An epic cheval made for a great photo op but in reality we went along the side of it as the drop off at the other end looked steep.
Lots of variations to this route are possible; we chose the easiest line
As the rock steepened off we pitched the last 100m to the summit of Outlier at 2723m.The original route describes going across to Arrowsmith but spontaneous rock fall around us did not fill us with much enthusiasm to stay for long on the ridgeline. We also noticed a core shot in the rope at around the 50m mark – presumably from a rock falling onto it earlier in the day. Definitely time to turn around. Perhaps the ridge would be more appealing in Winter..!
Full route of the ascent; we descended on the south face
Descent
We cut the rope, tied it and rapped off. There were decent spikes to rap off the whole way. We made 3x 25m raps then walked back to a snowy col. We could see the entire S Cameron glacier from the climb – it wasn’t cut off so we chose to walk out this way.
The moraine was reasonably easy to walk down. Stay high until you reach the grassy buttress otherwise you’ll get bluffed out. Once at the grassy buttress there is a faint path in the moraine which you can follow down. It turns into an obvious path all the way back to the hut. We got back just as we were losing daylight. Boots off, salty soup and a big feed before bed.
Next day we walked out faster than the way in – lighter packs and we had no lunches so that made for motivation to GTFO!