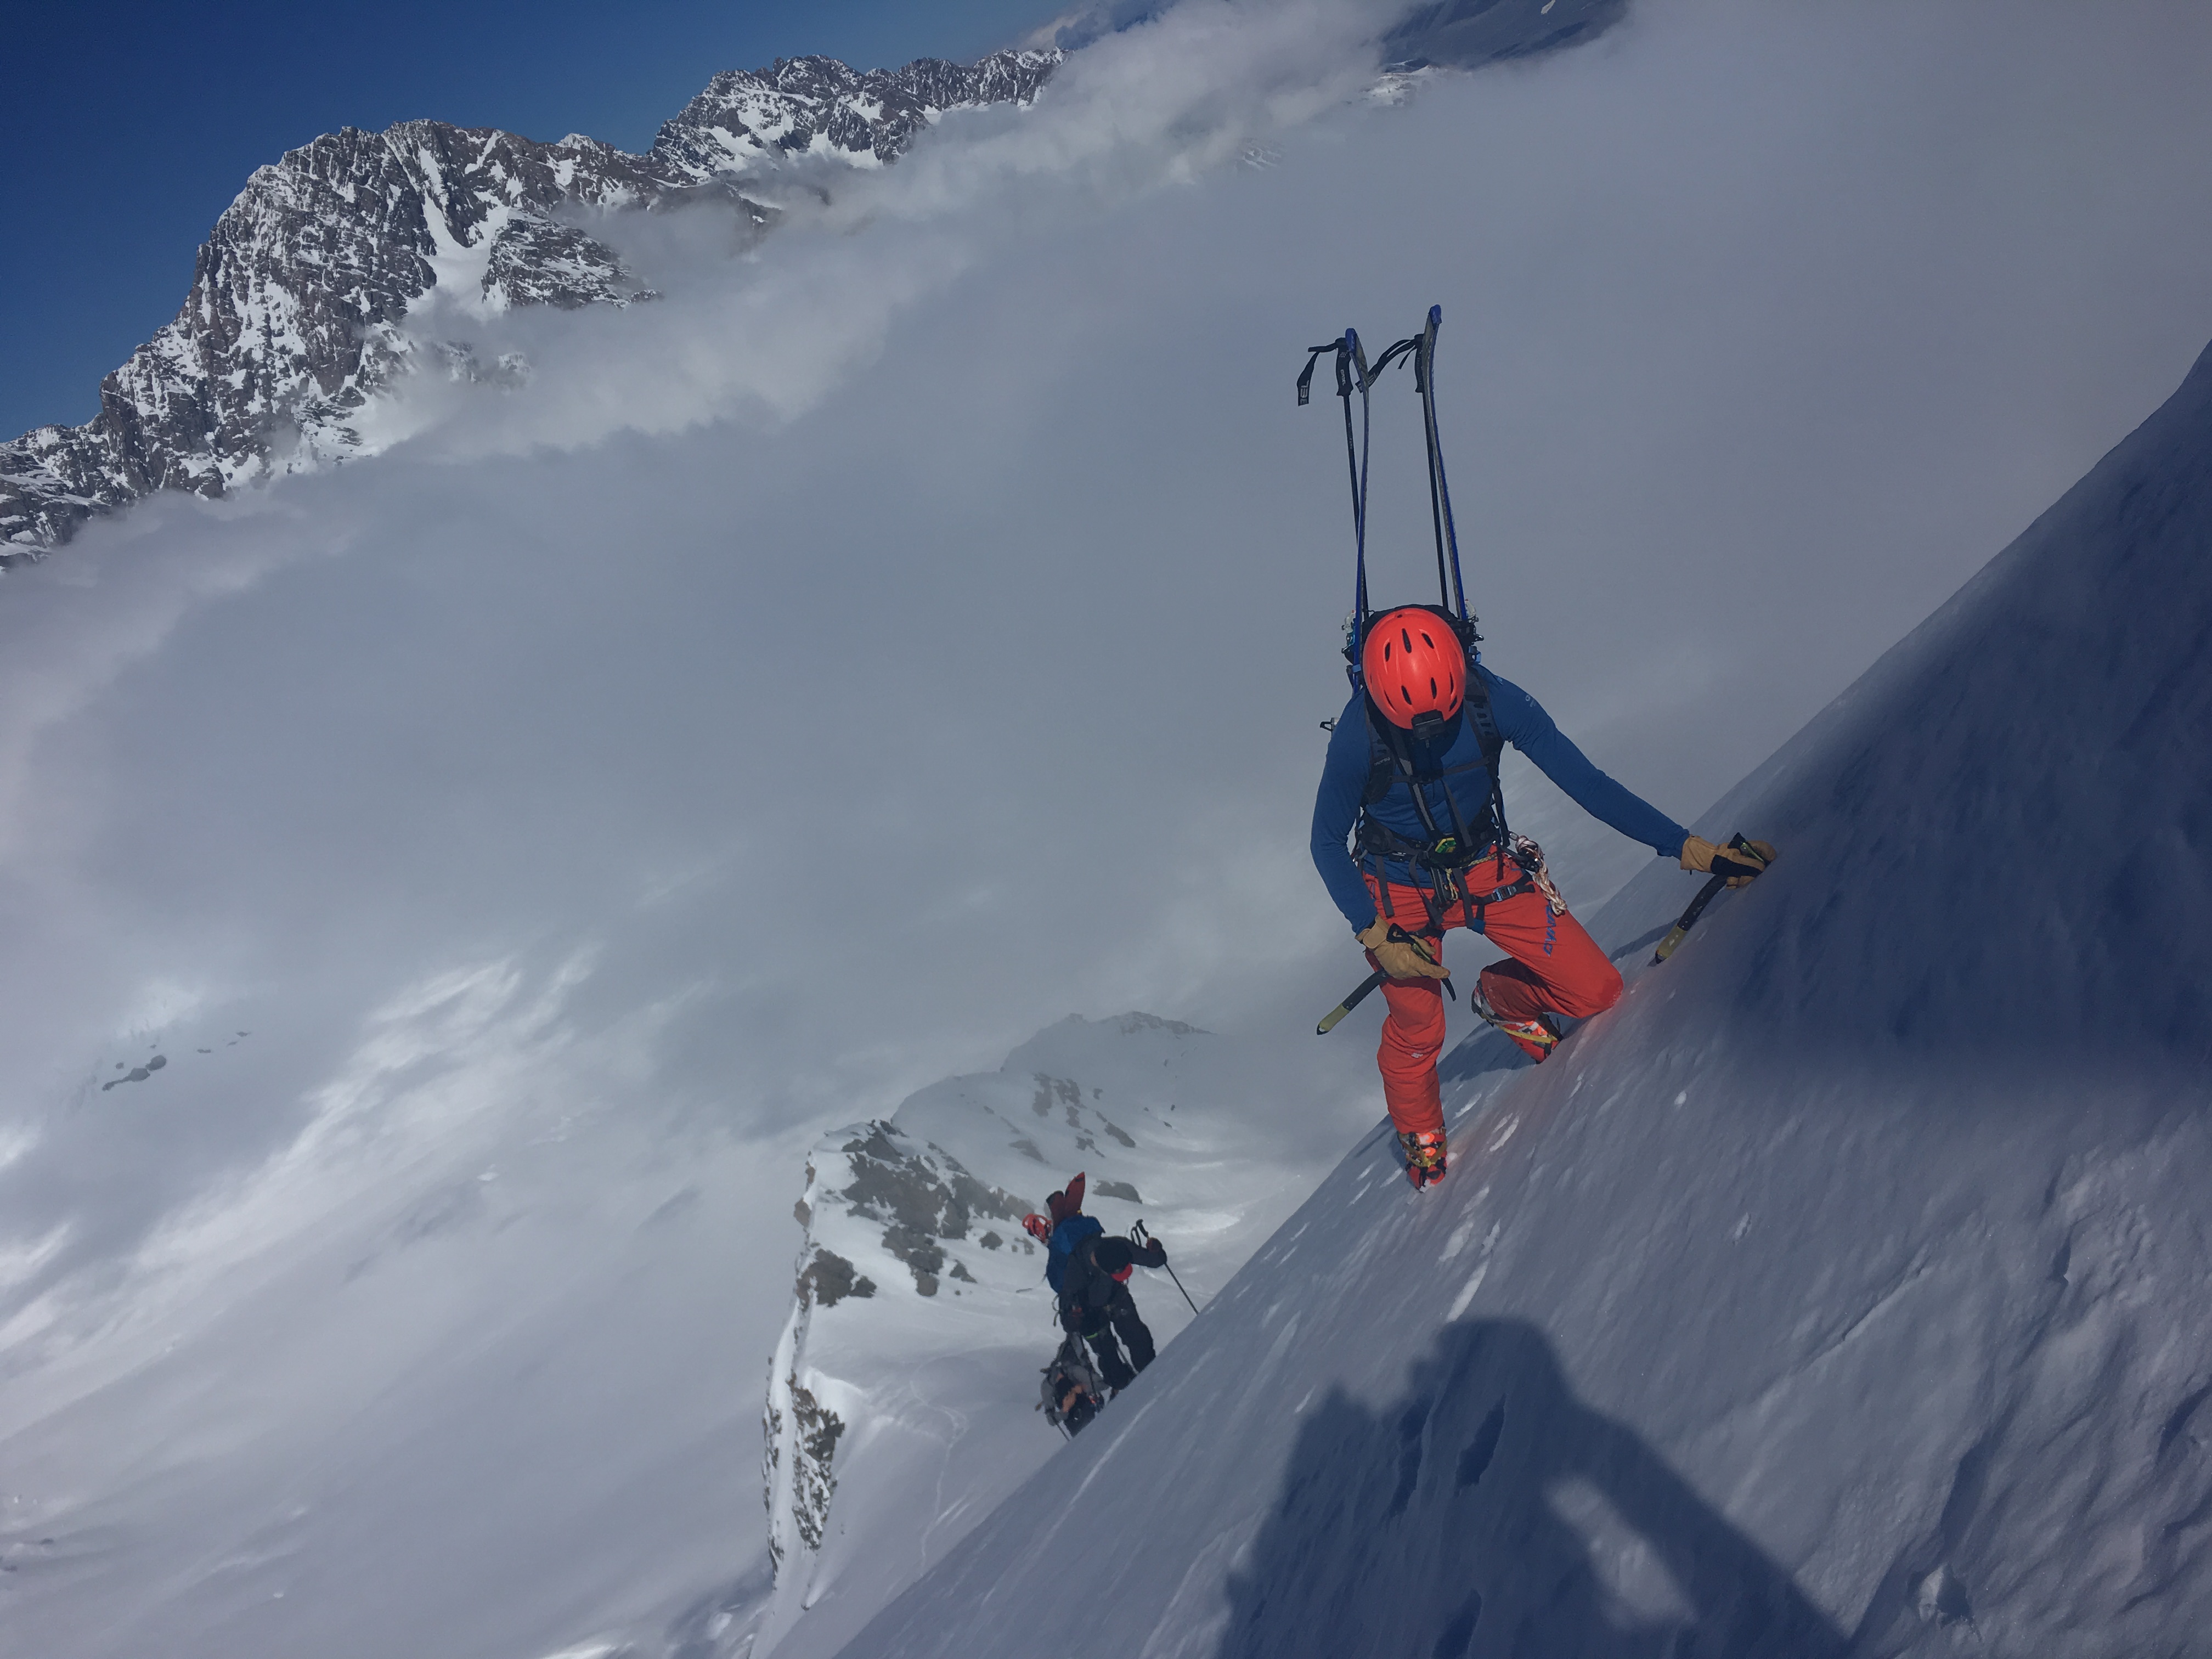
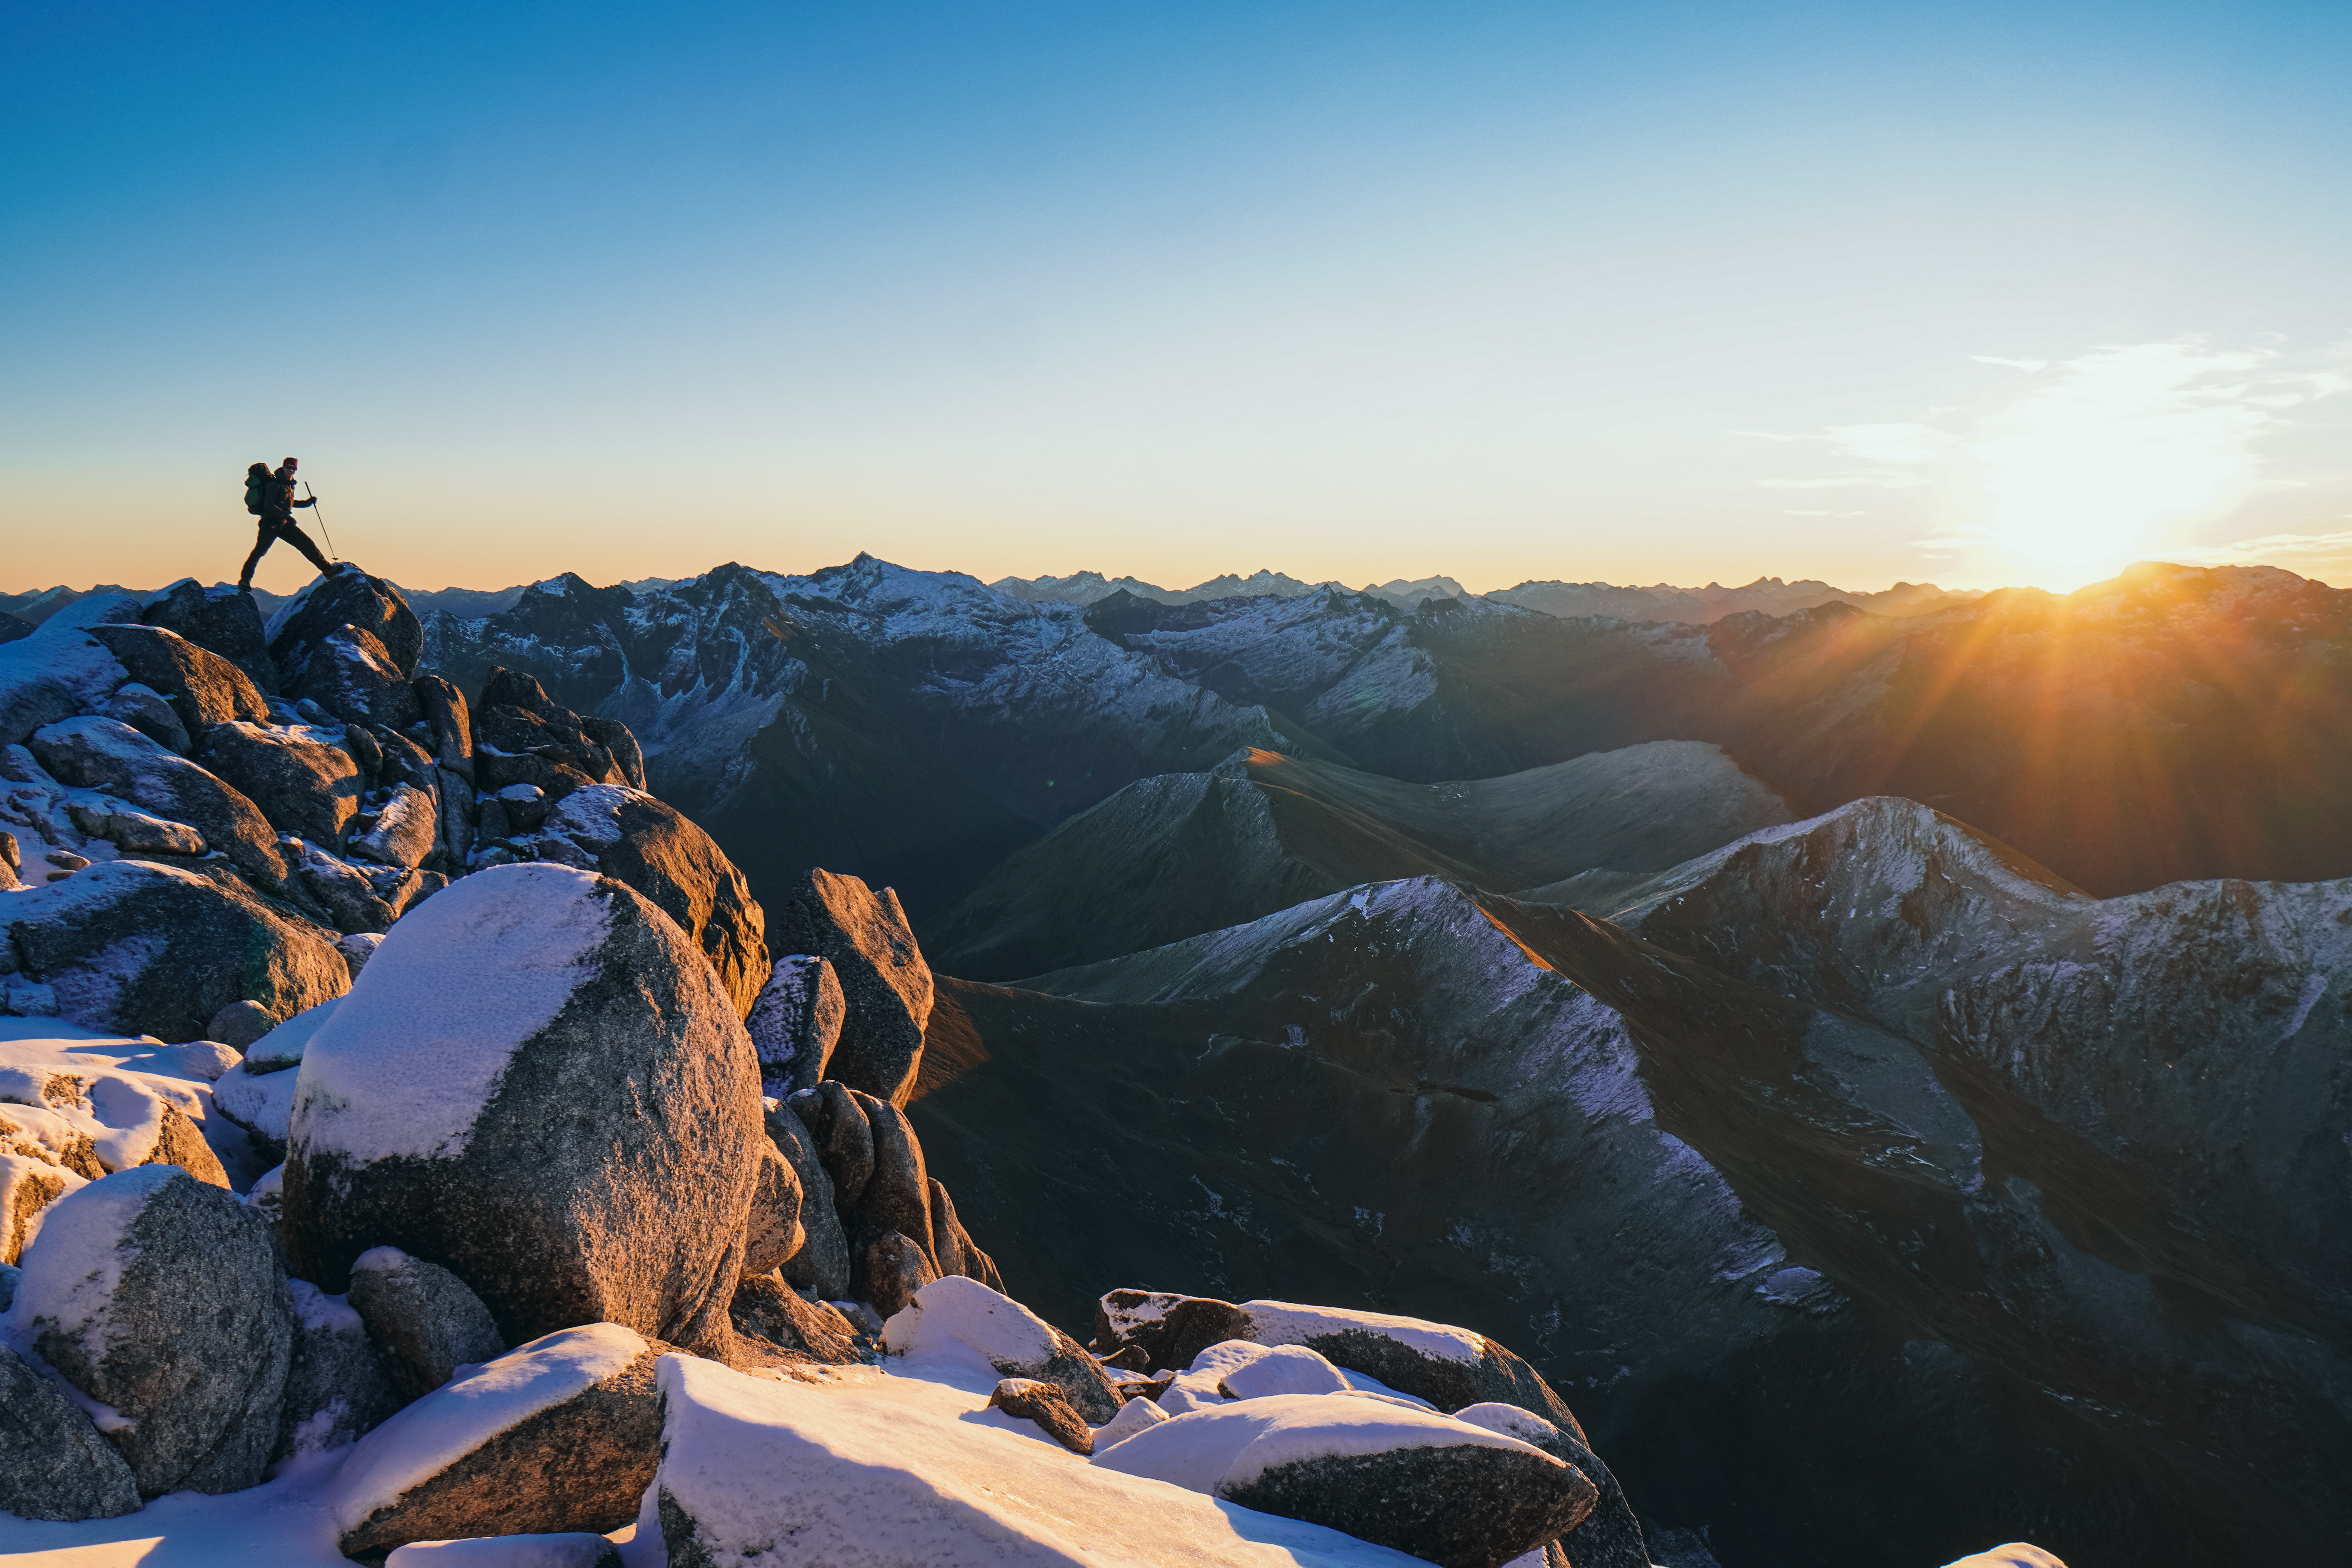
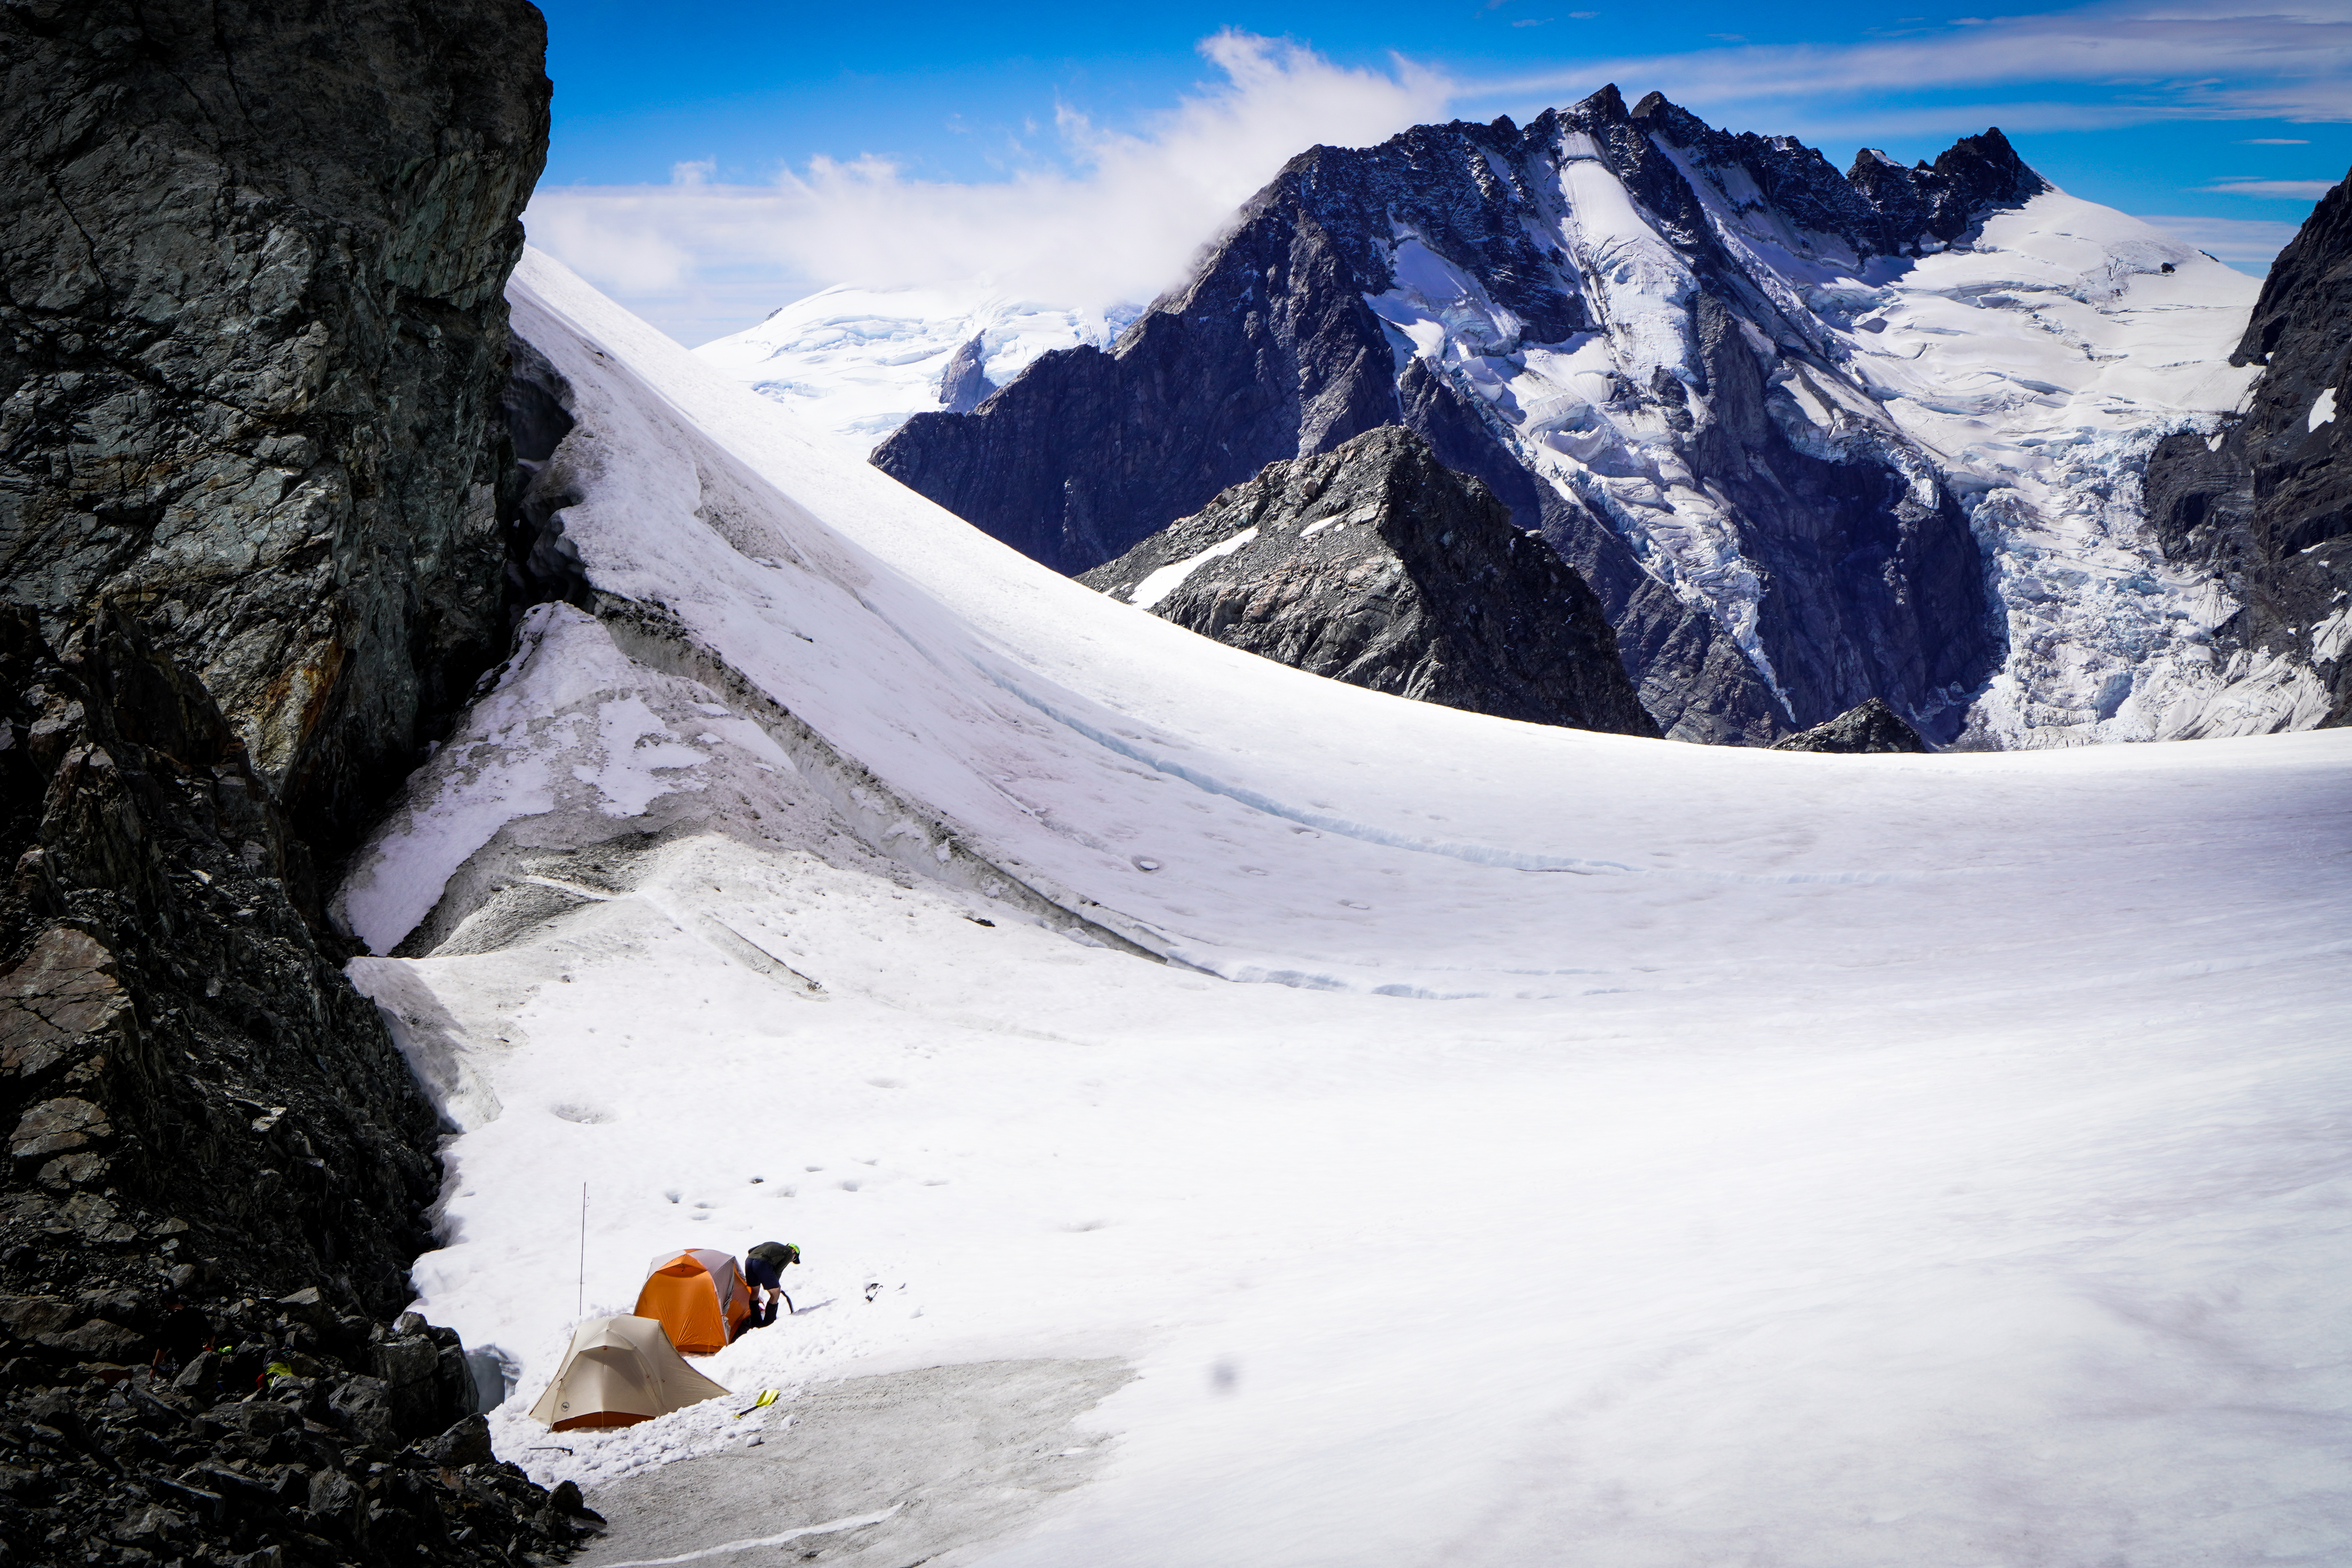
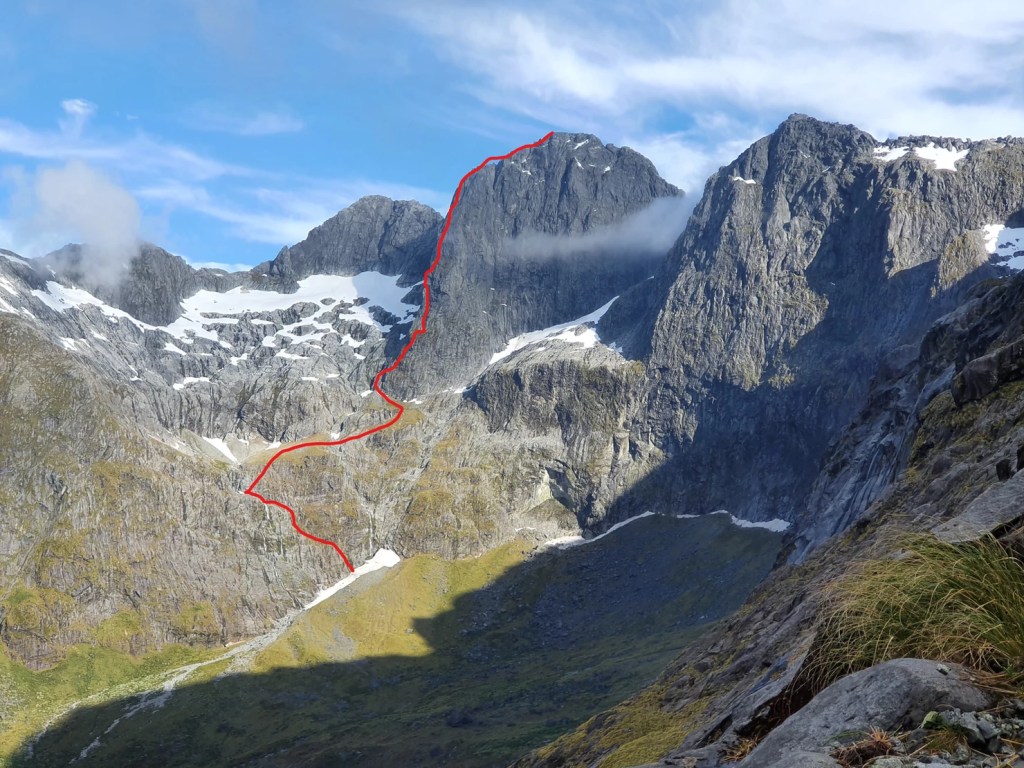
Canterbury’s answer to the Remarkables Grand Traverse they say! Located on the Main Divide of the Southern Alps, this traverse is spicier than a hike, but not as committing as a full climb. A great day tickling the spine of the South Island.
Grade: II, 2+
Time: 5h 40mins (moving time 5h)
Equipment: can be done in trail runners/approach shoes (although I wore boots due to my gammy ankle). We didn’t take a rope/rack, helmets only. If you’re used to exposure and can confidently climb grades 15+ you should be ok (nothing harder than a grade 8). Some parties have used a running belay along the ridge.
Season: we didn’t come across any snow on the route doing this in late summer, just a small patch on the S face of Phipps. In the shoulder seasons would take crampons/ice axe. Can be done as a winter route also.
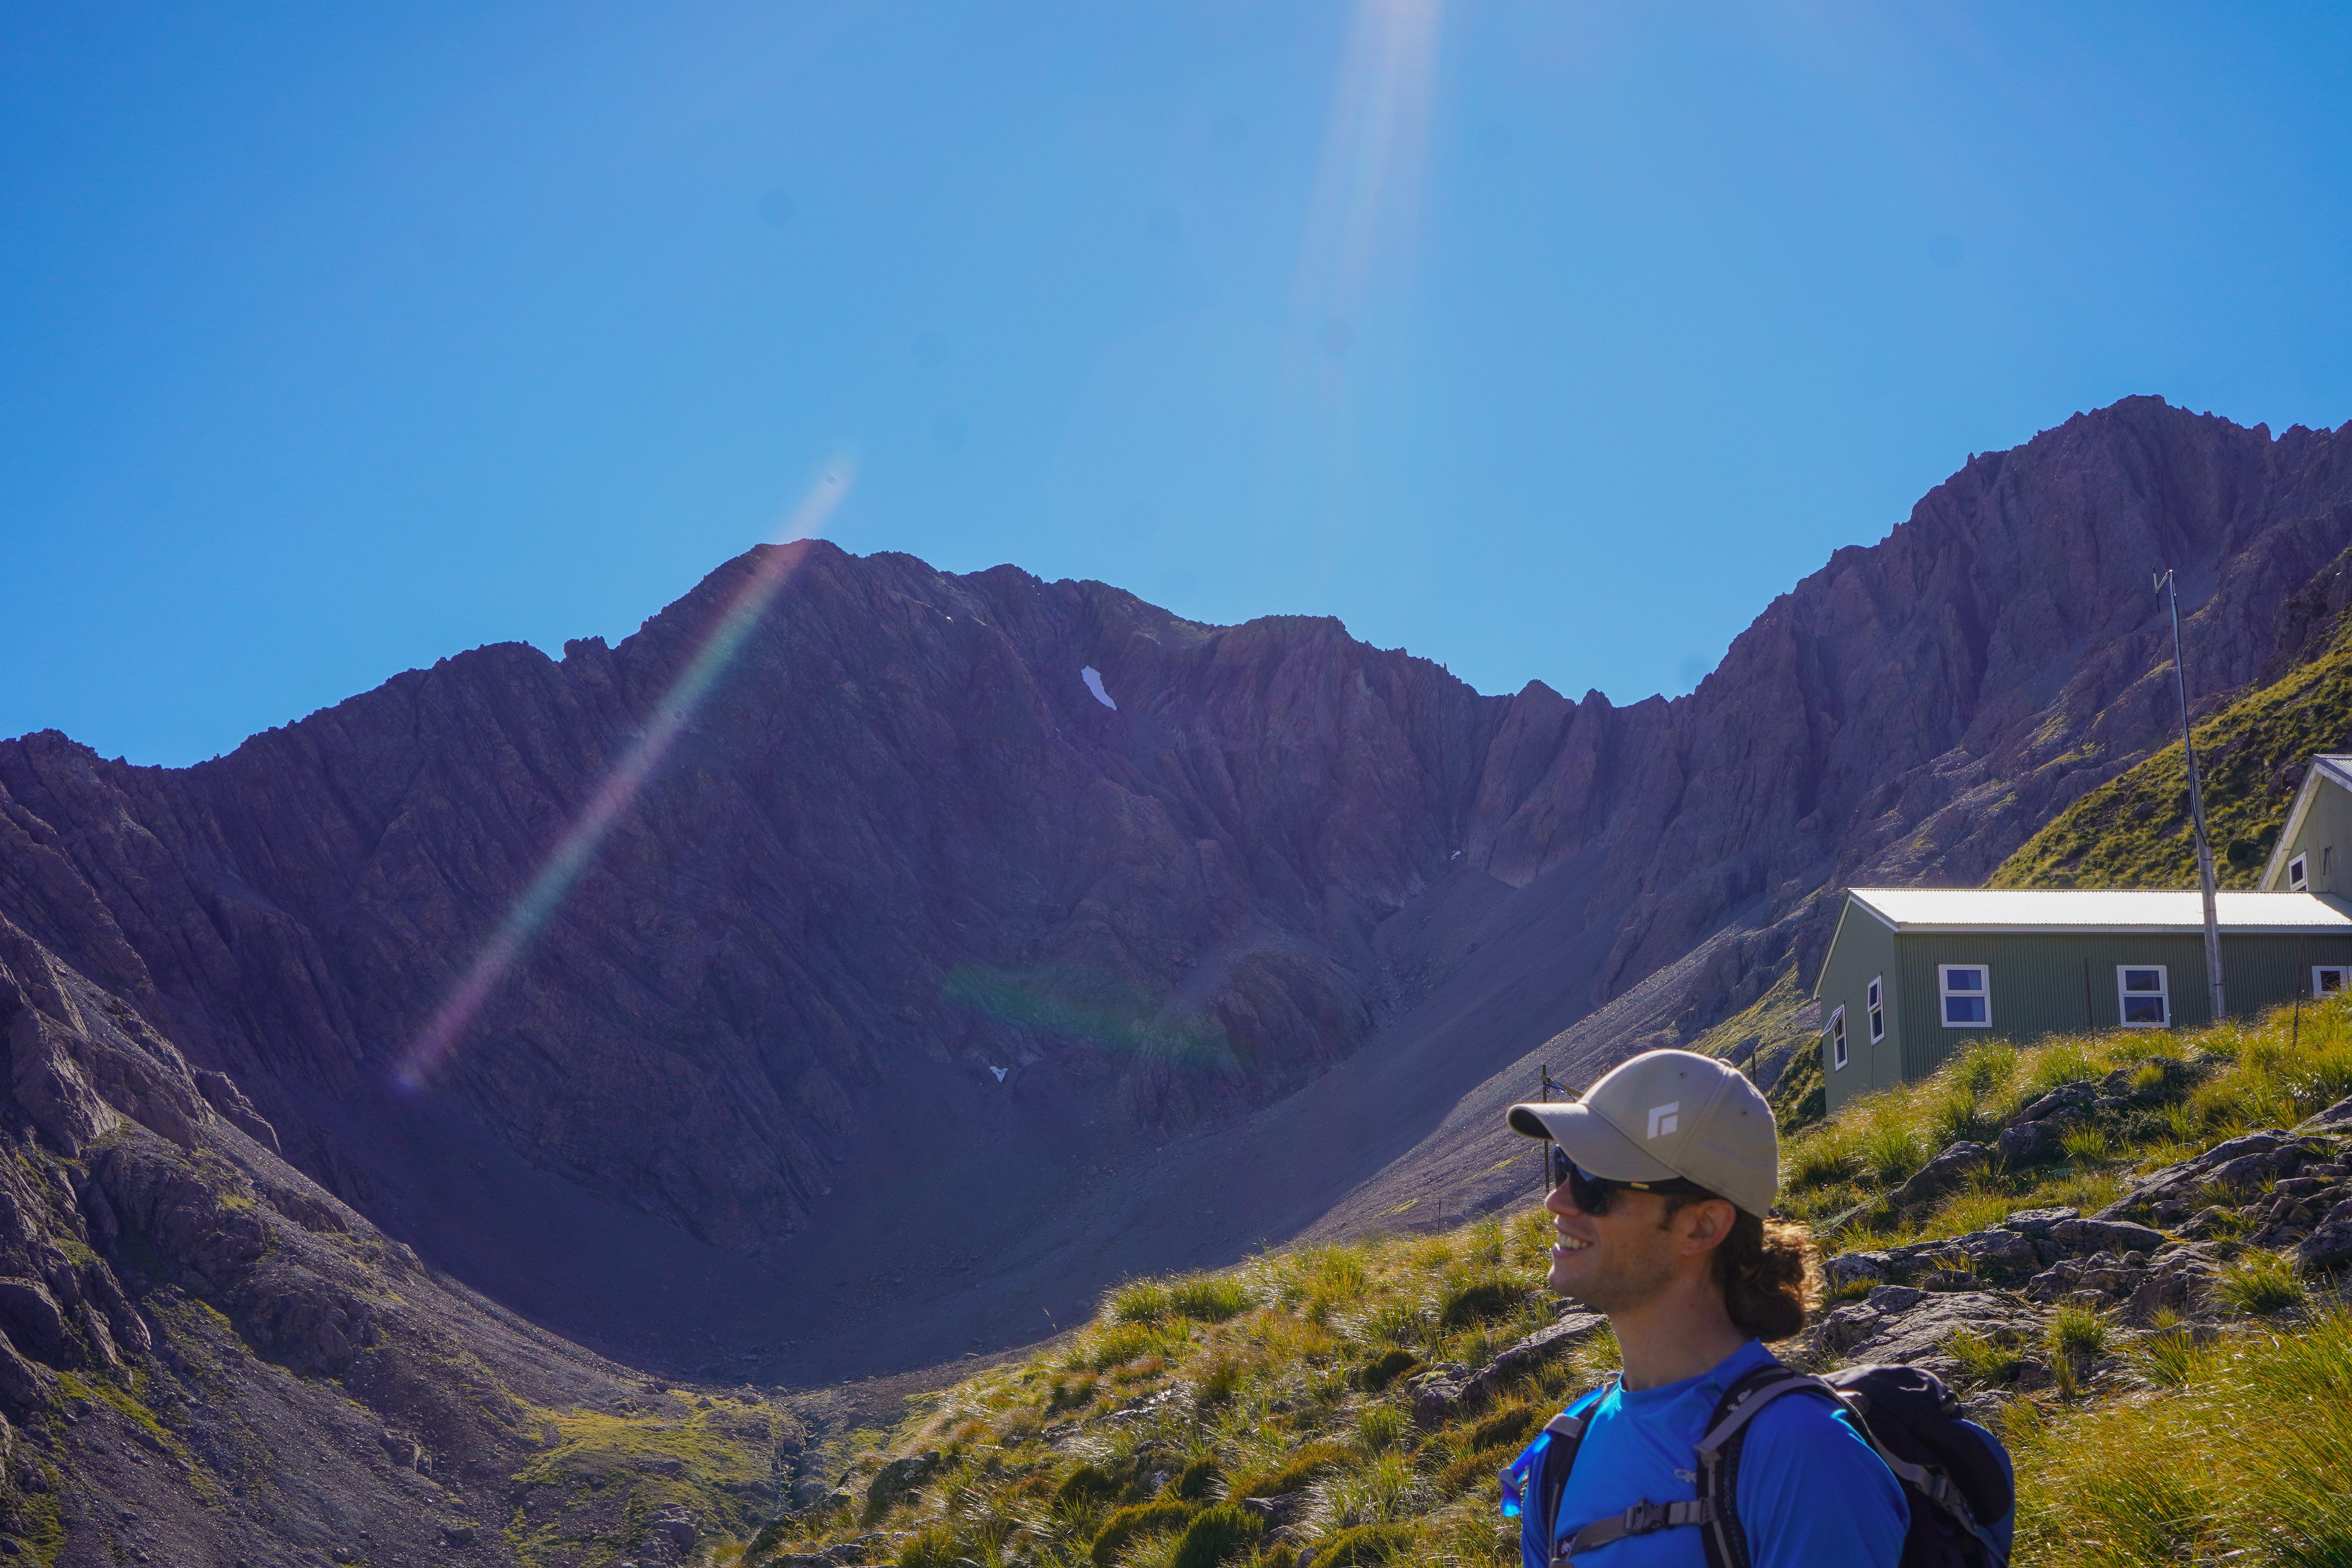
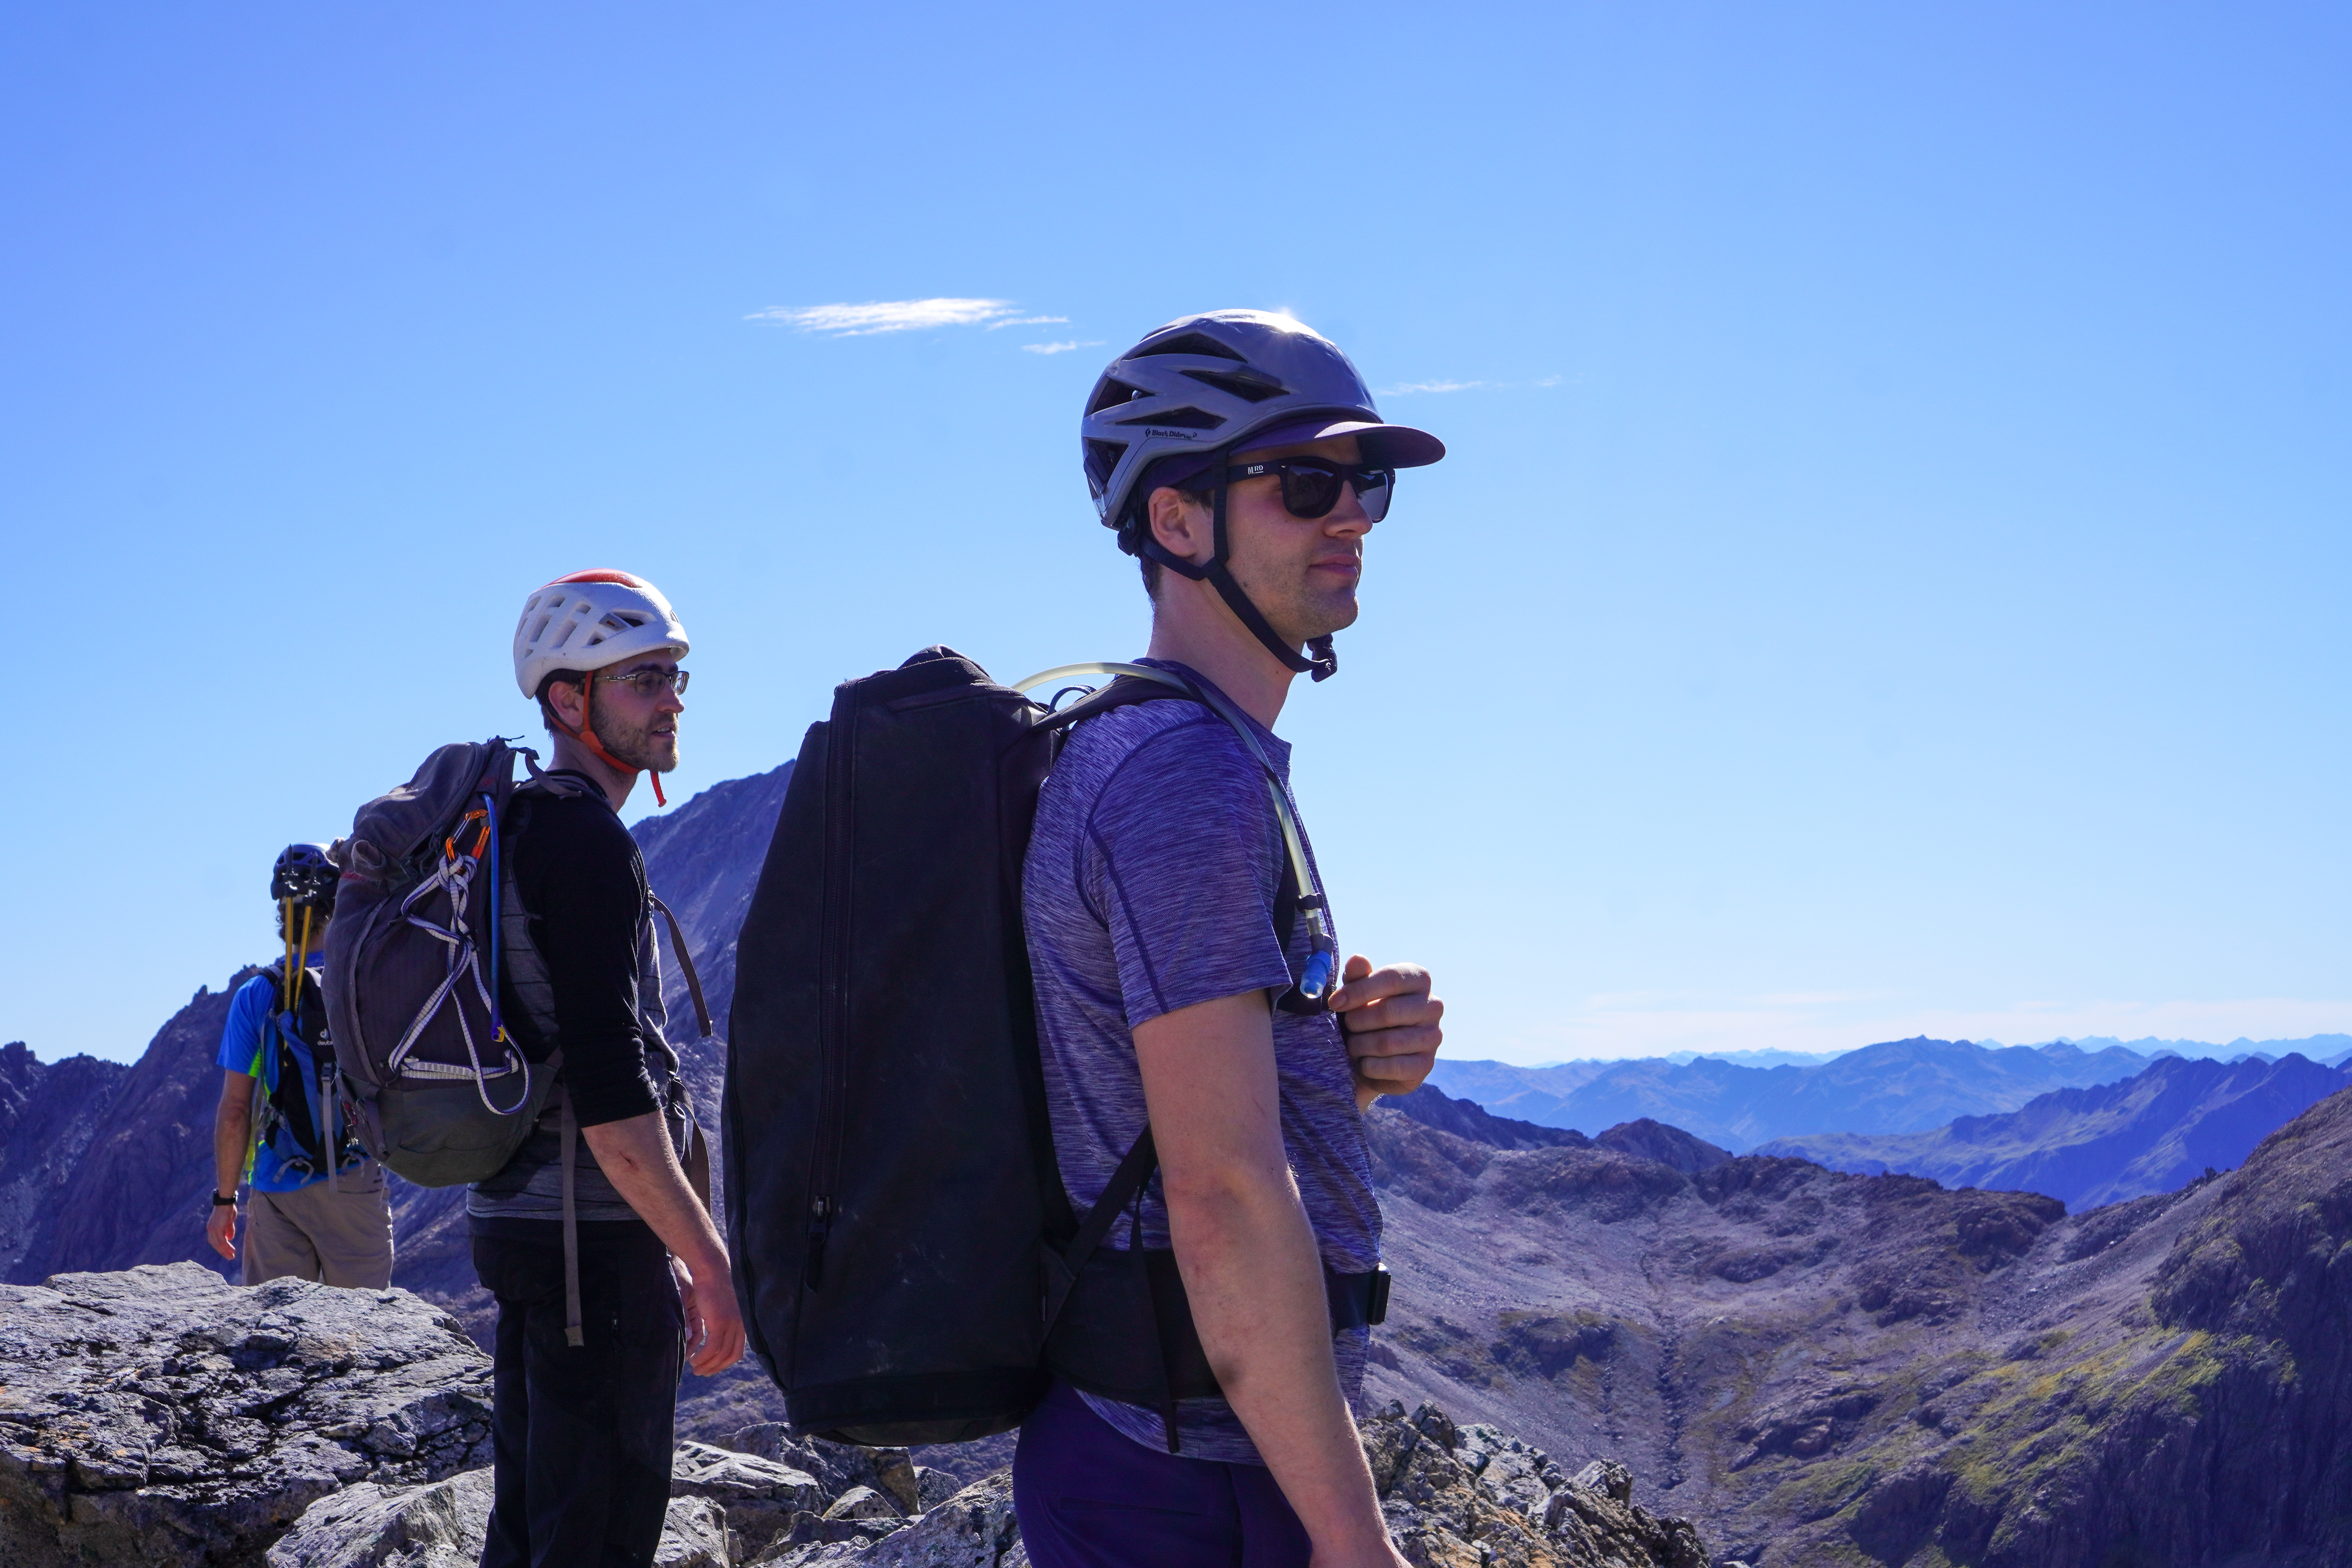
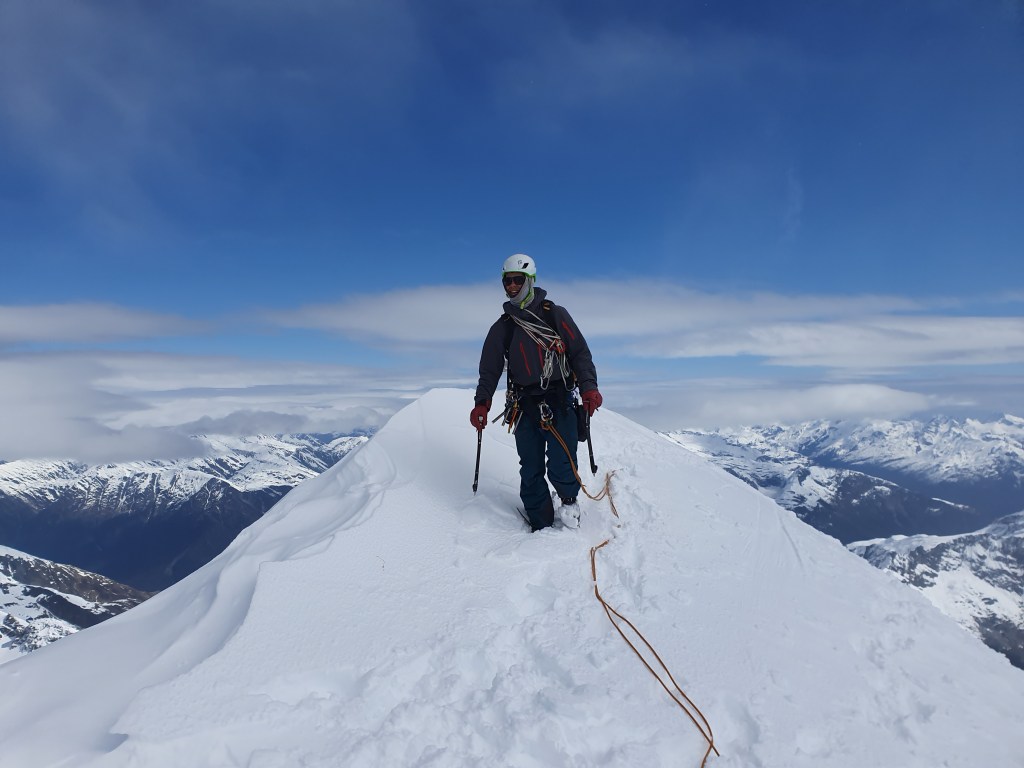
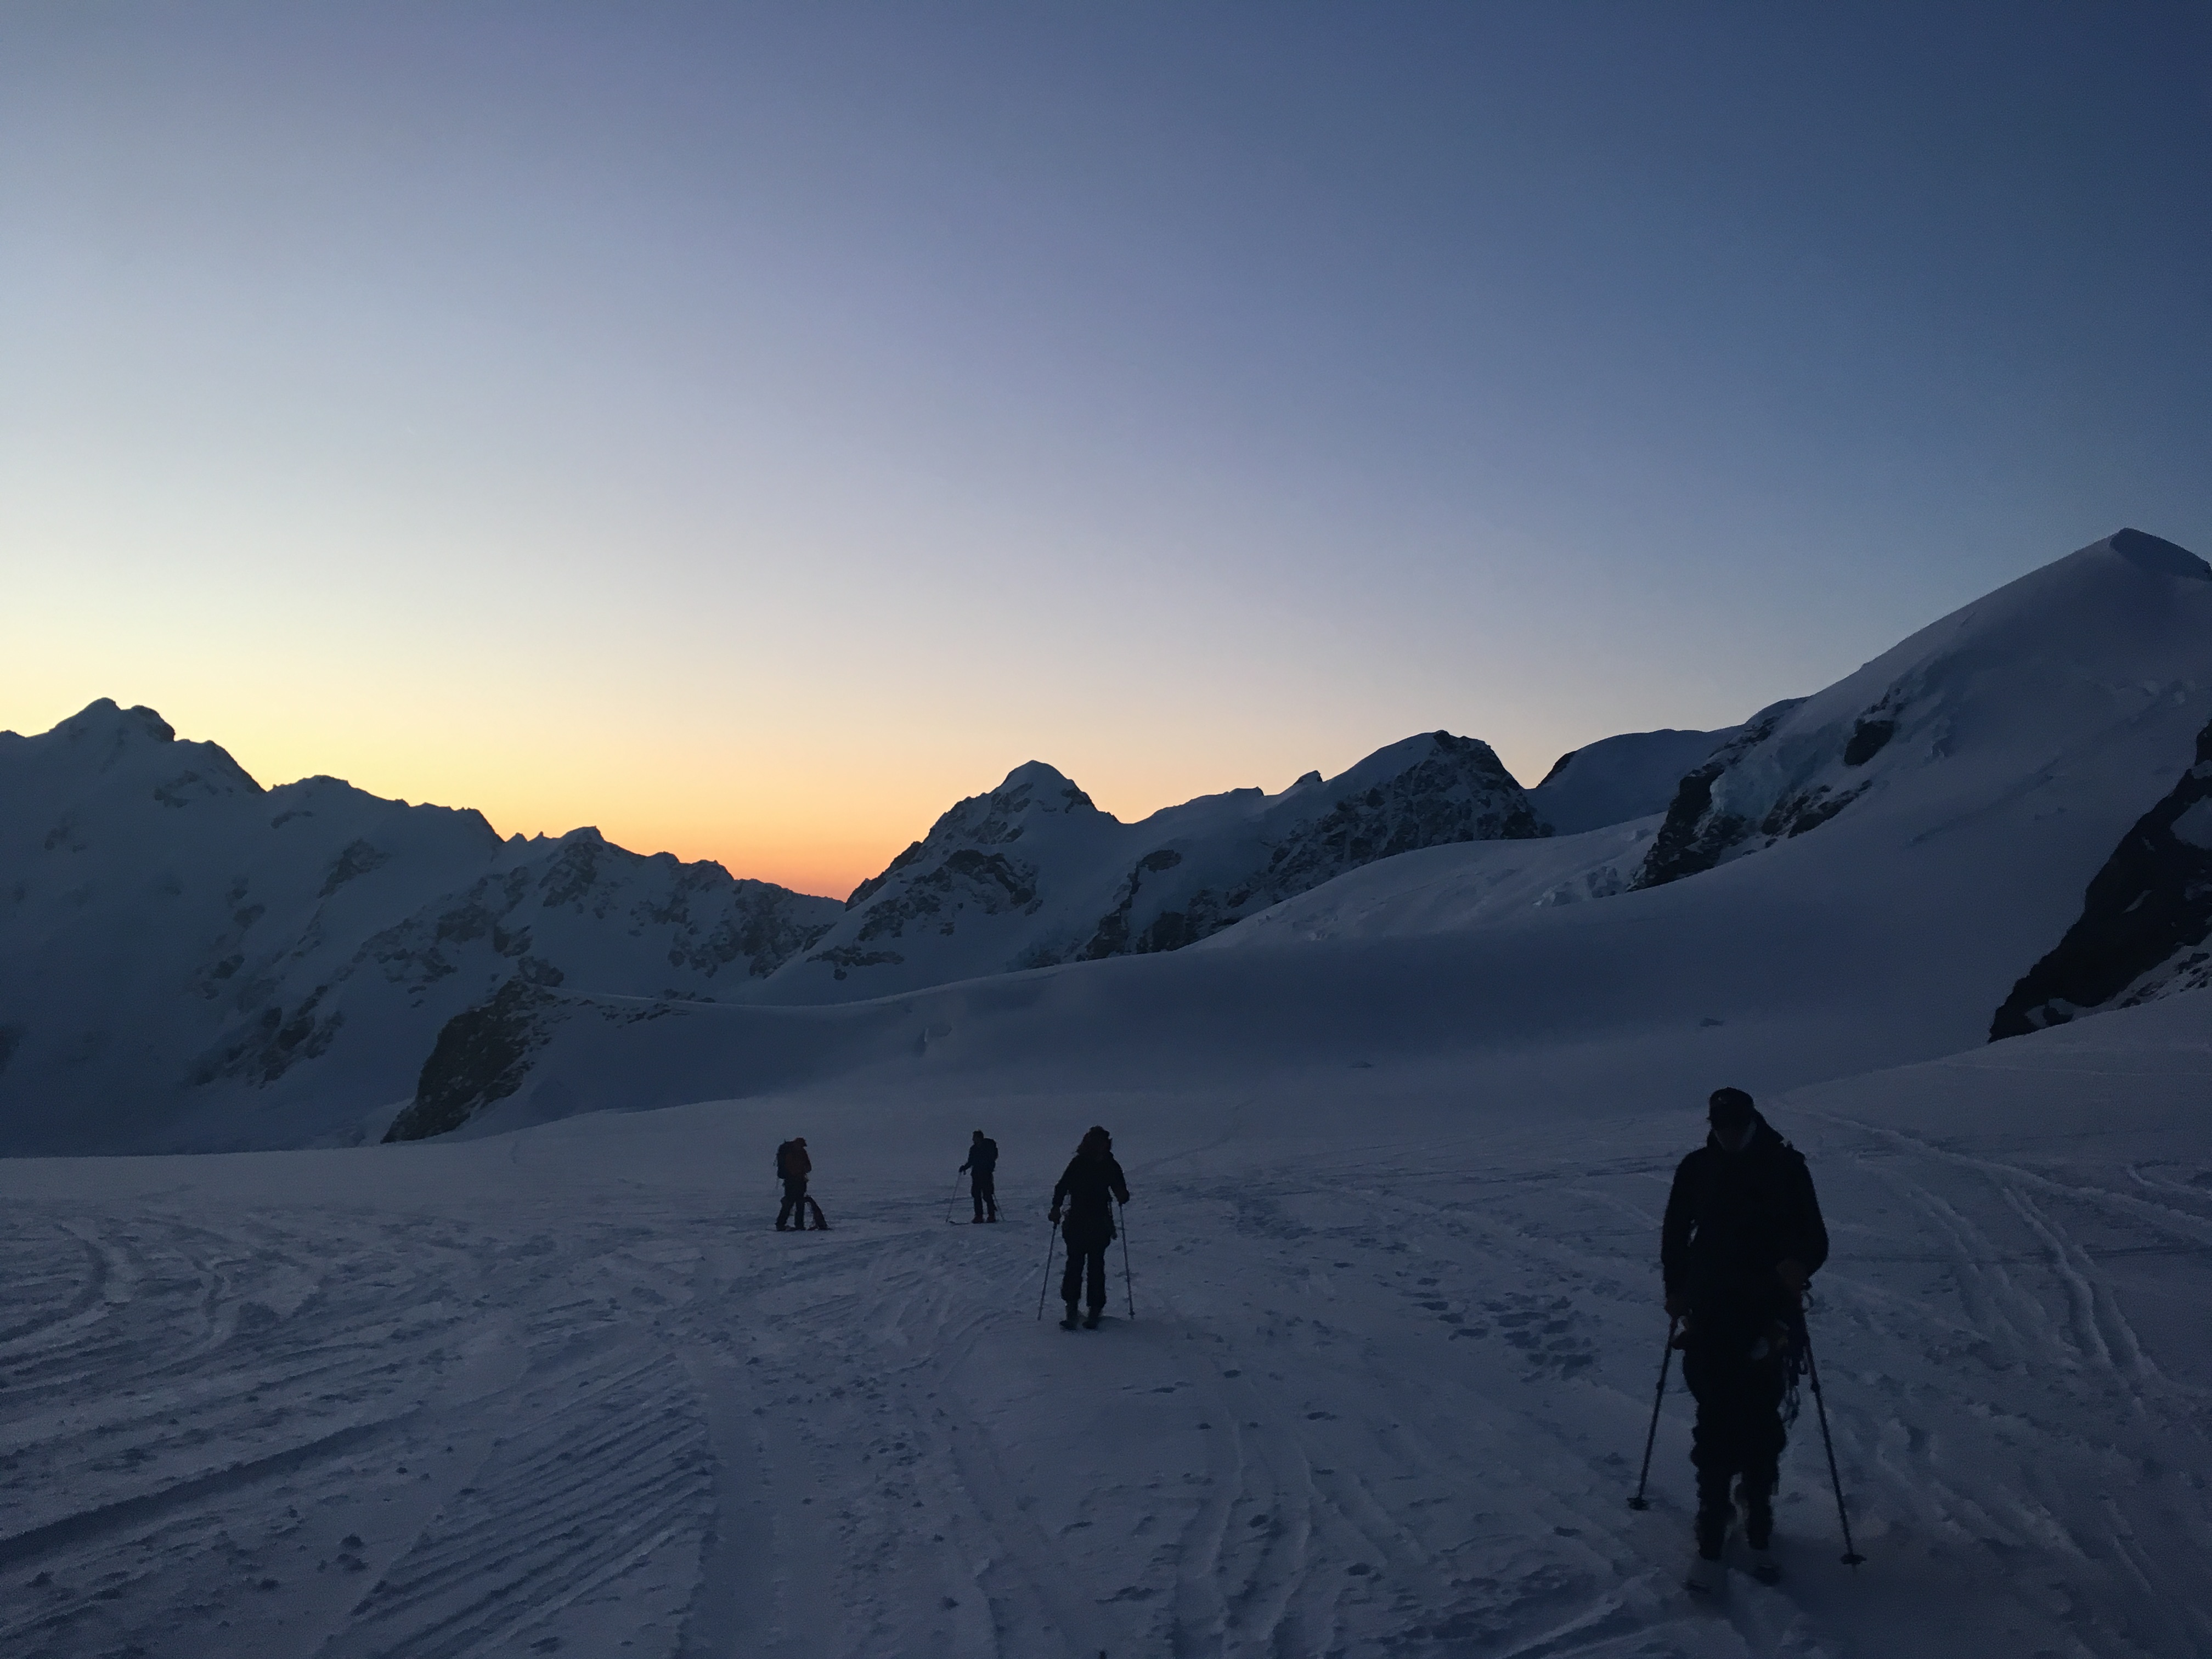
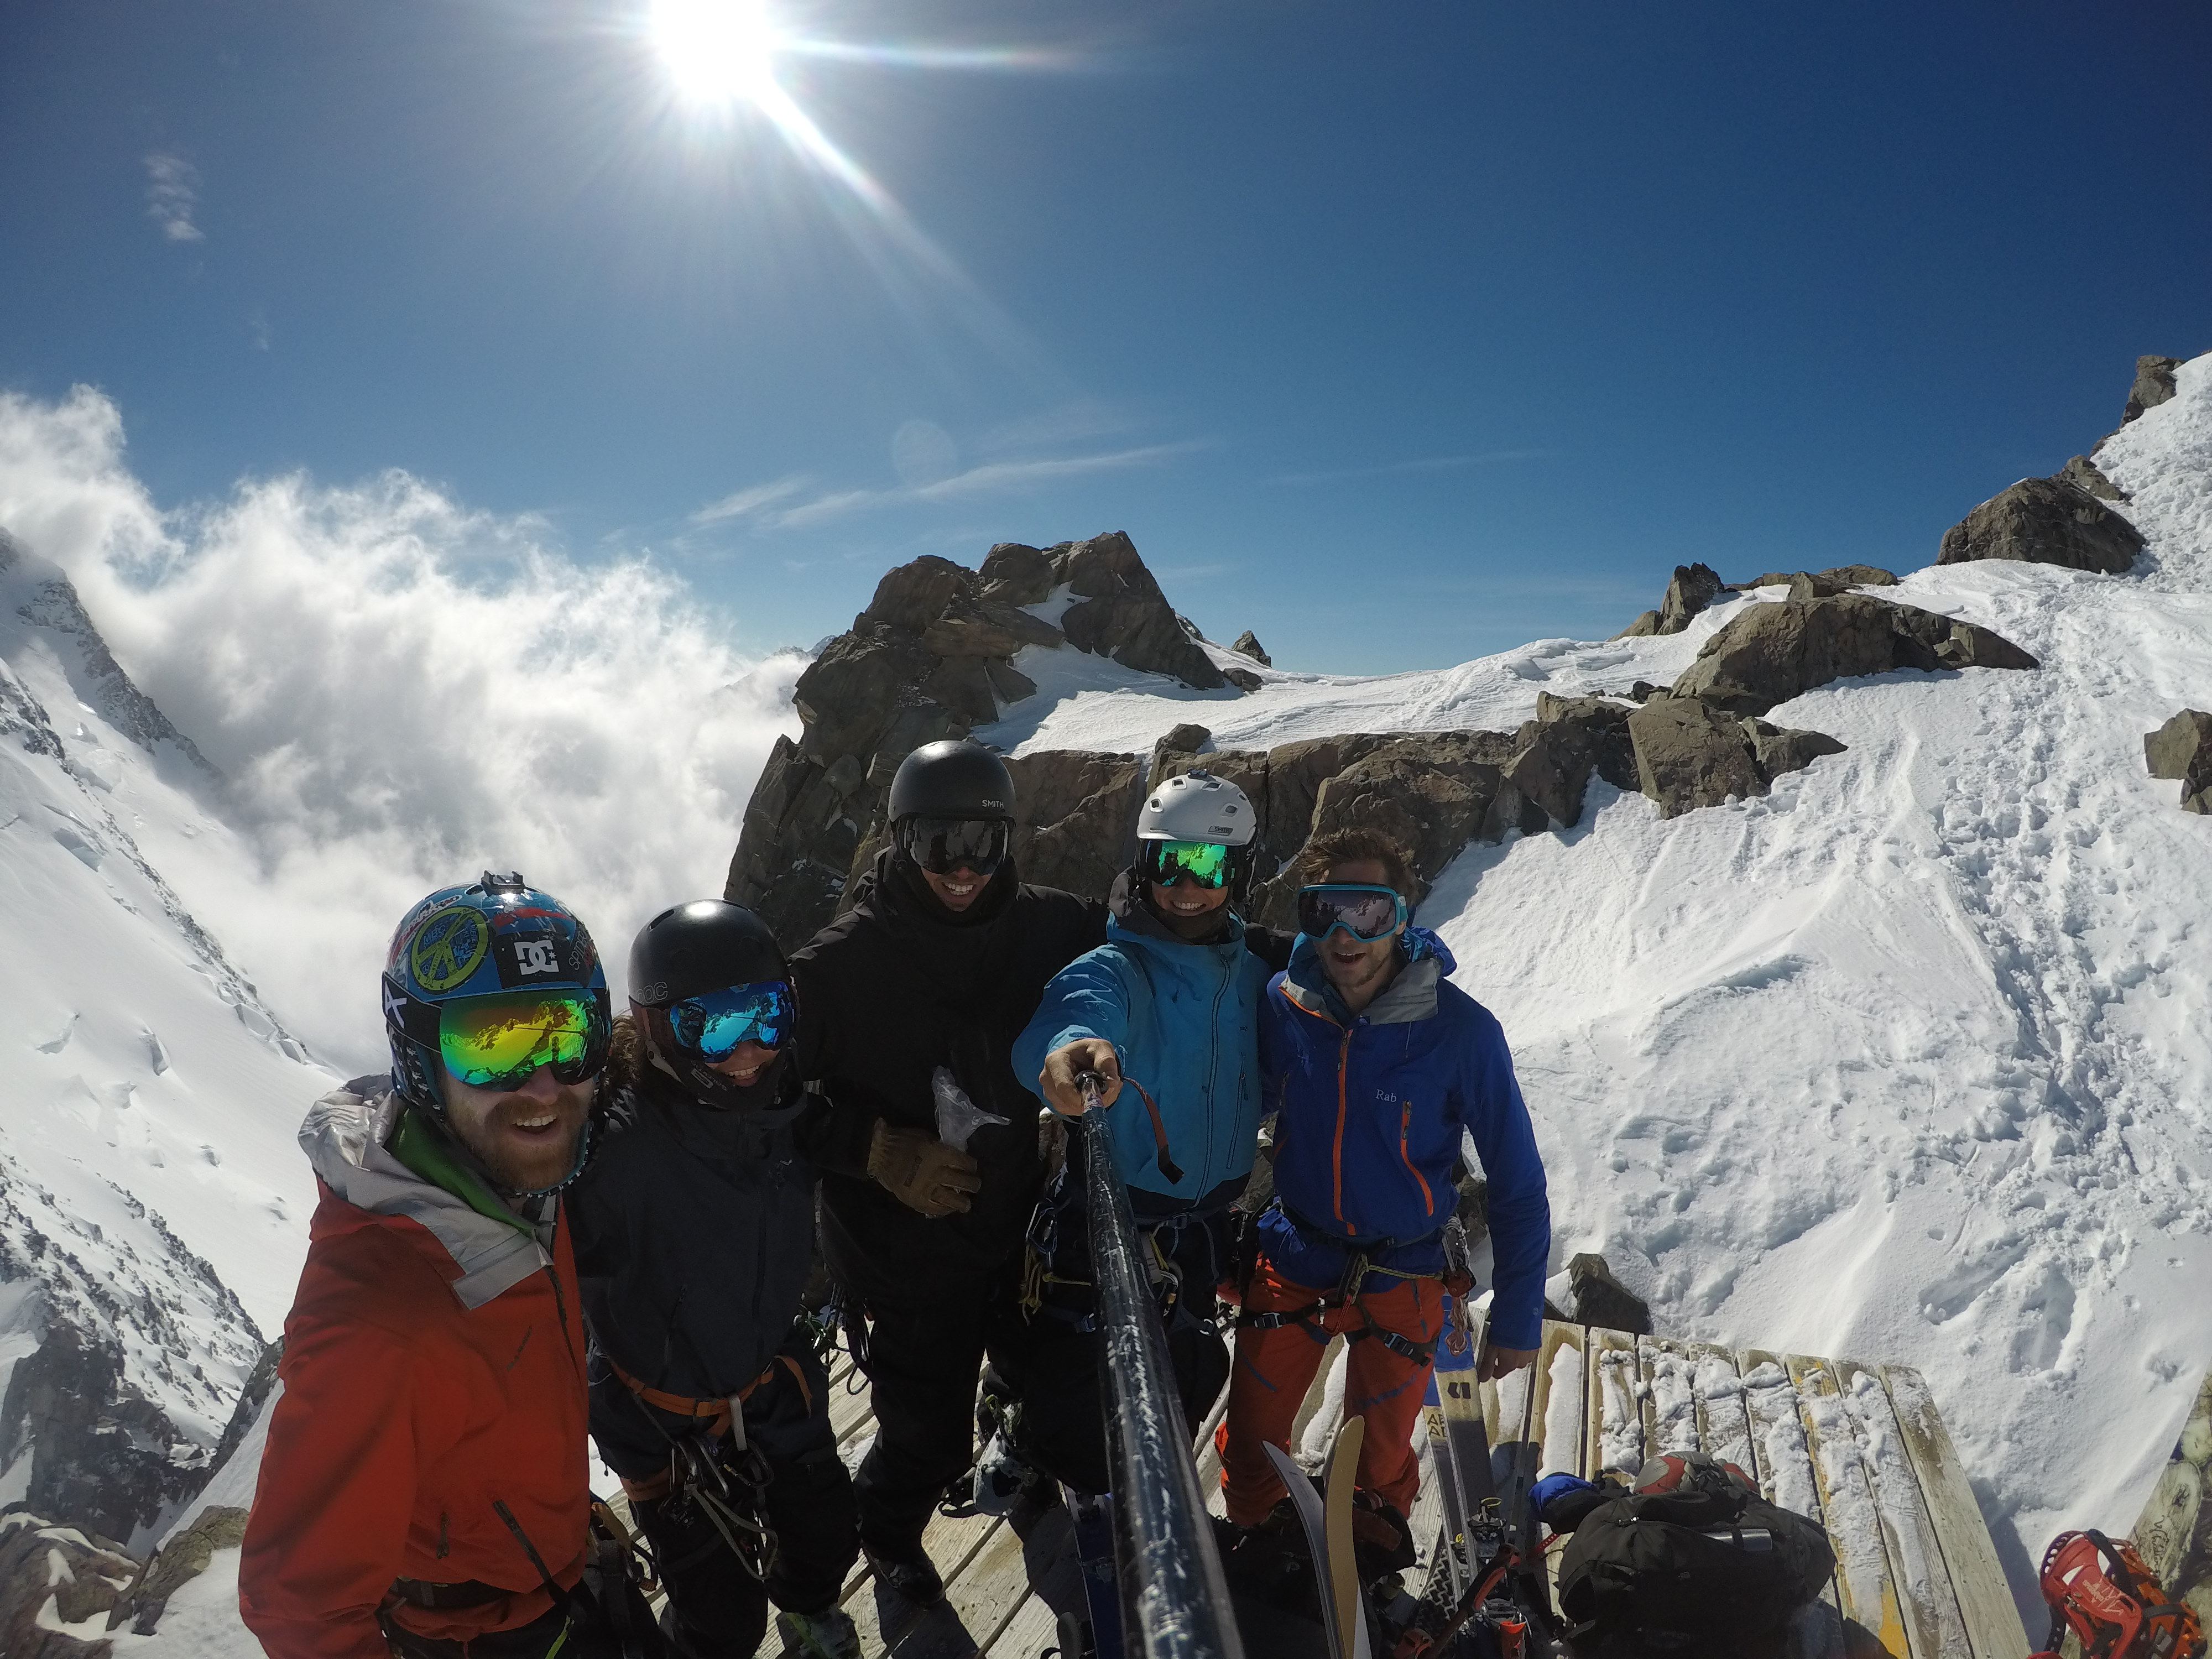
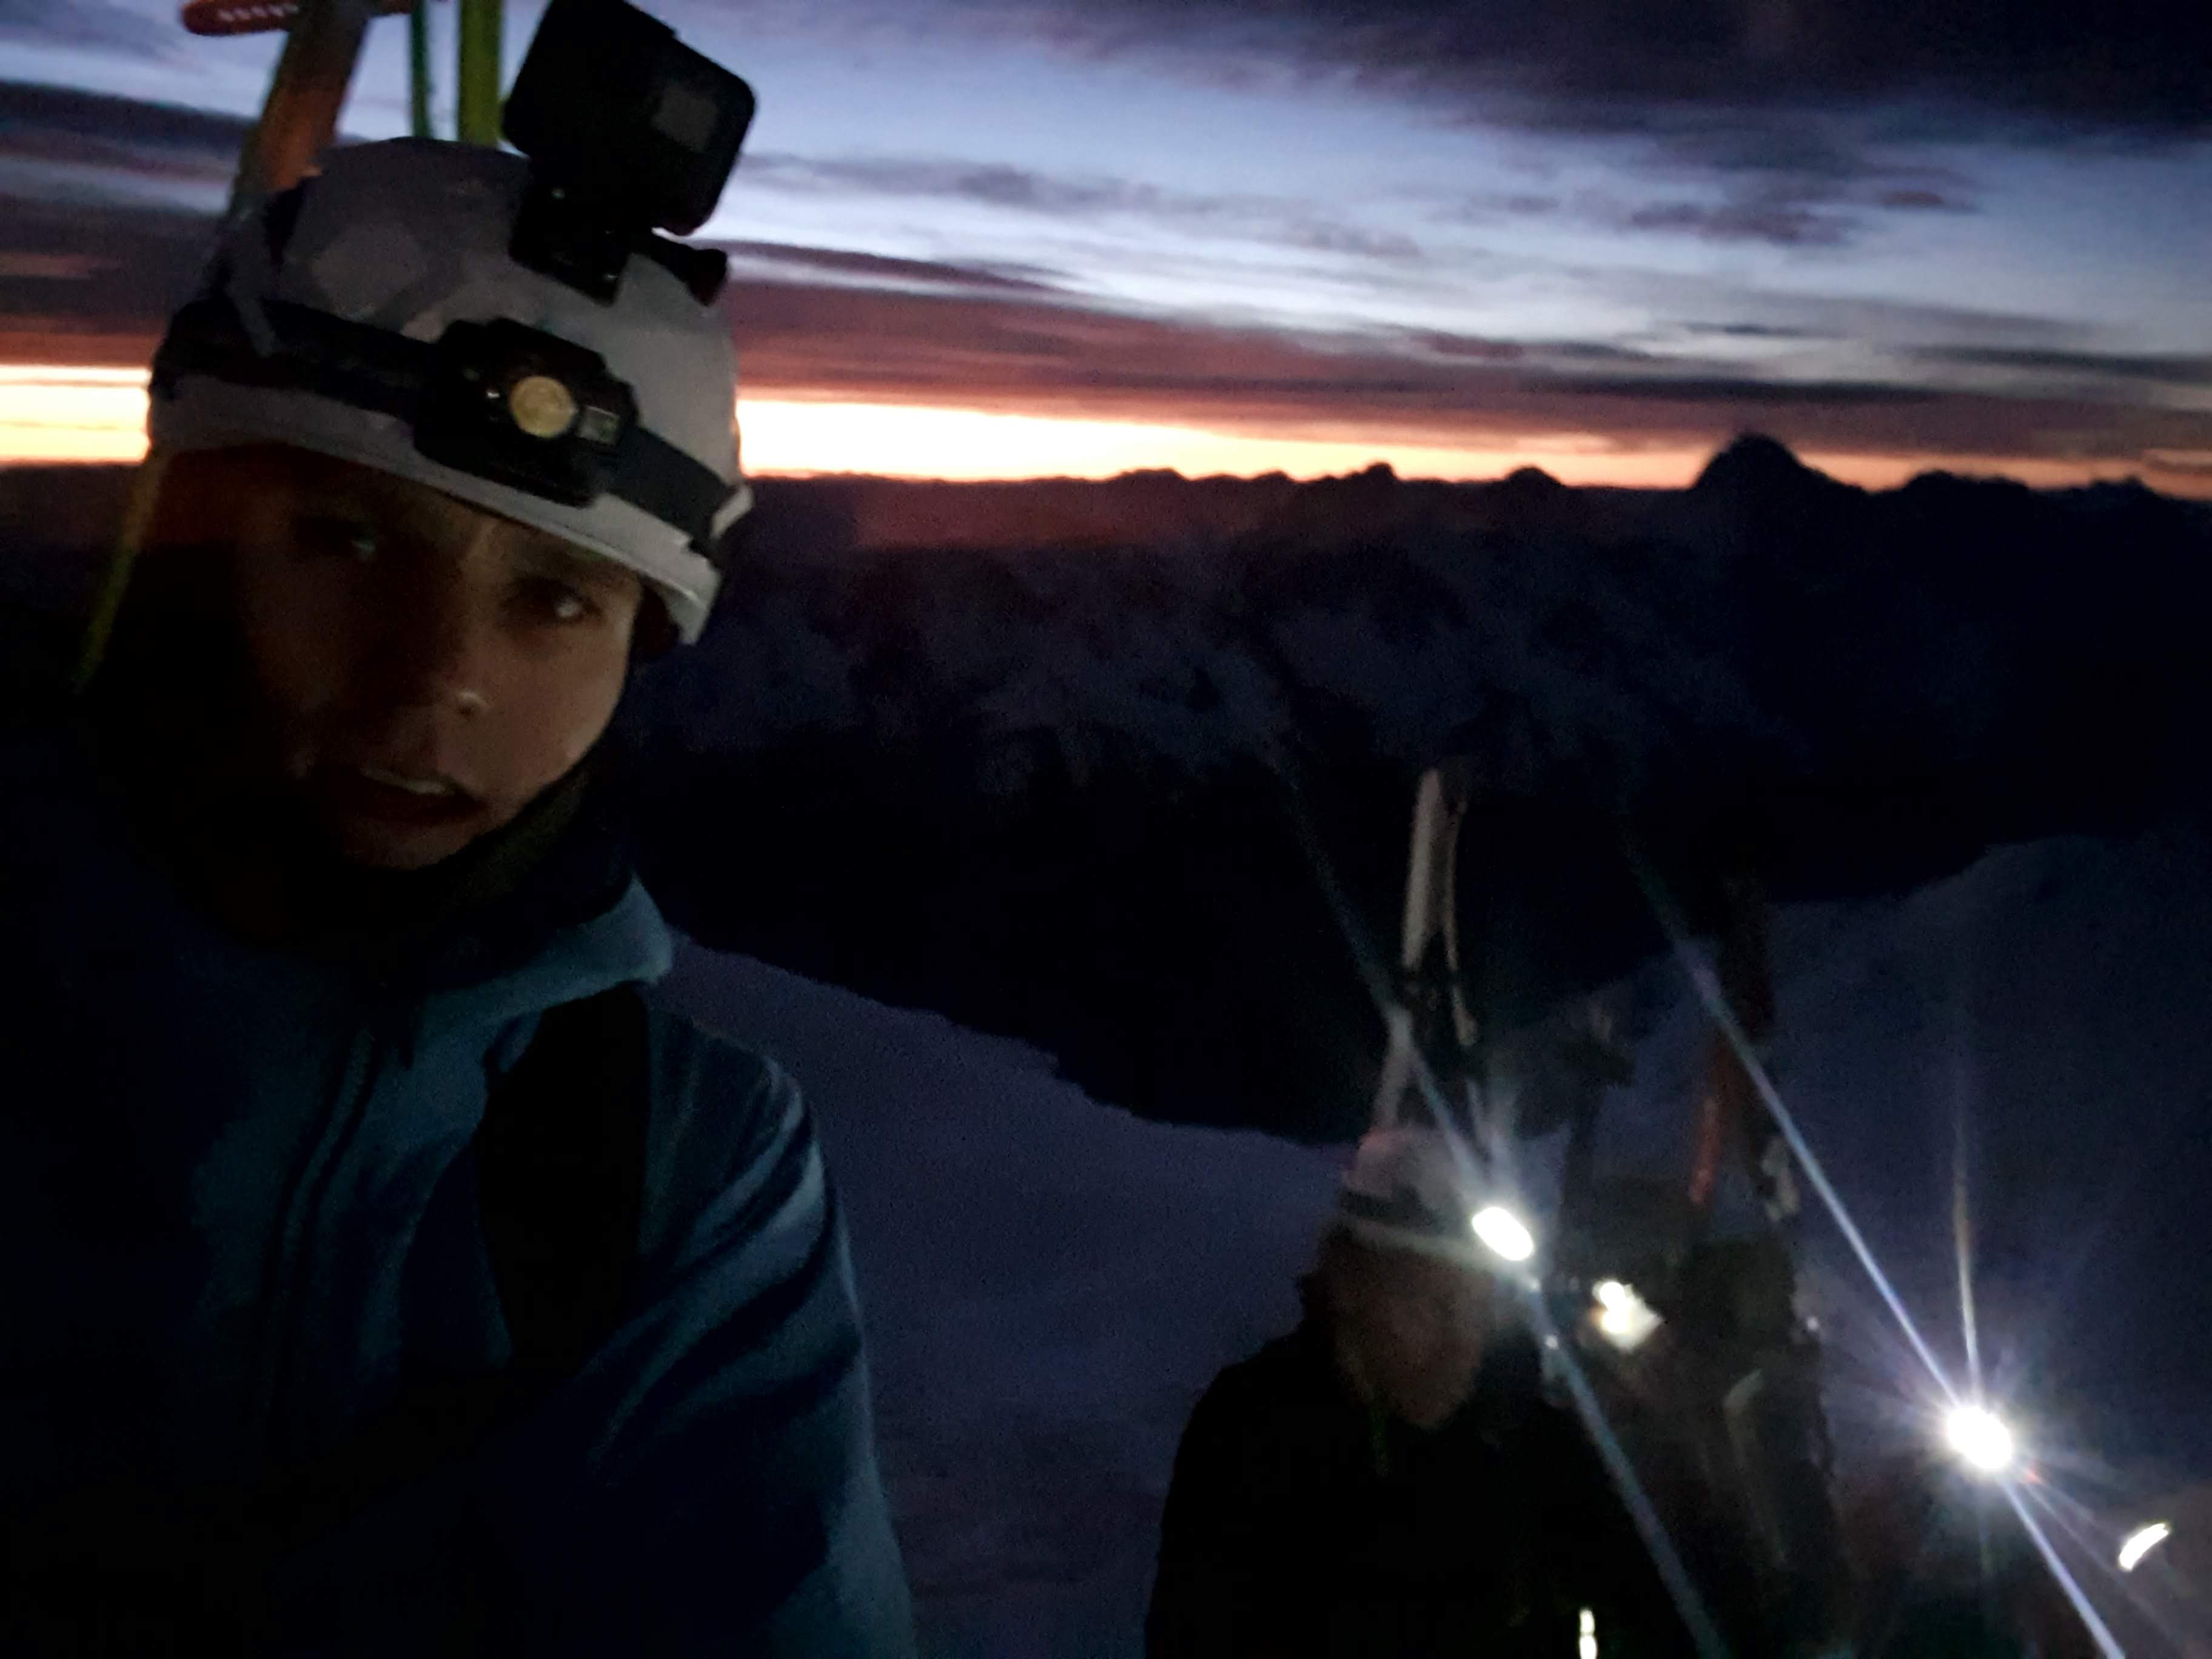
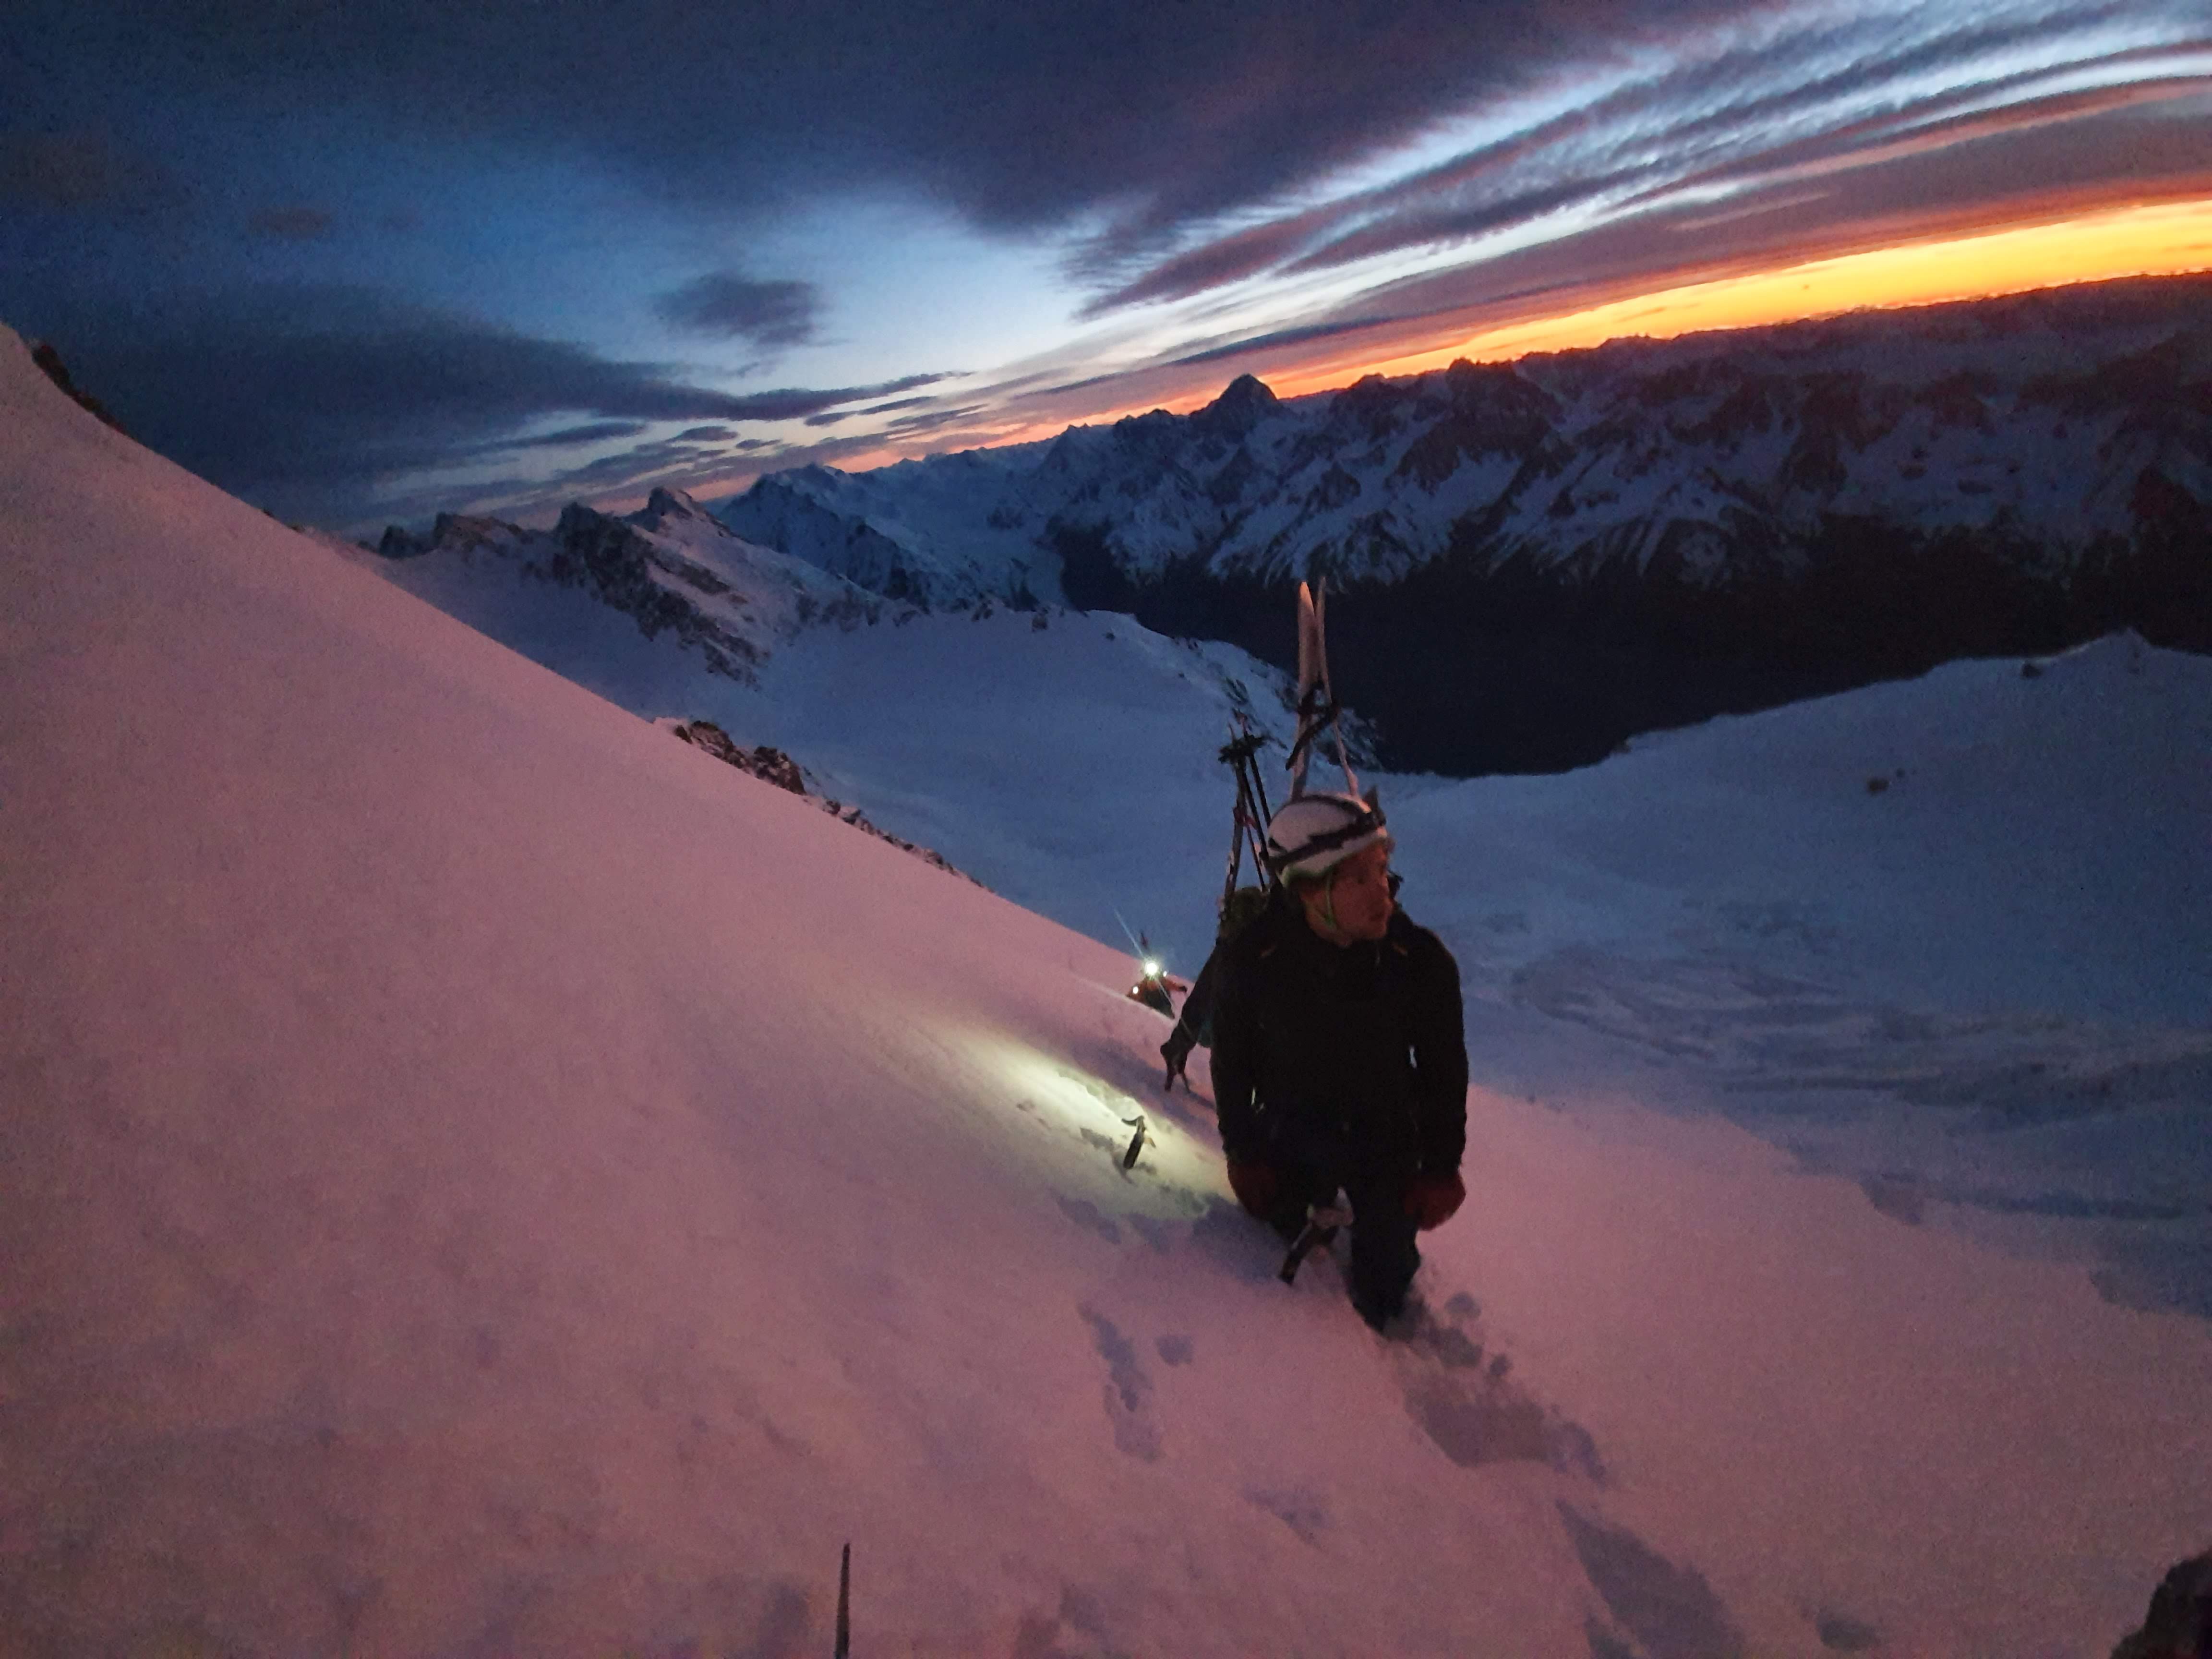
Team: Maria, Andy, Rich, David 26/03/22
access
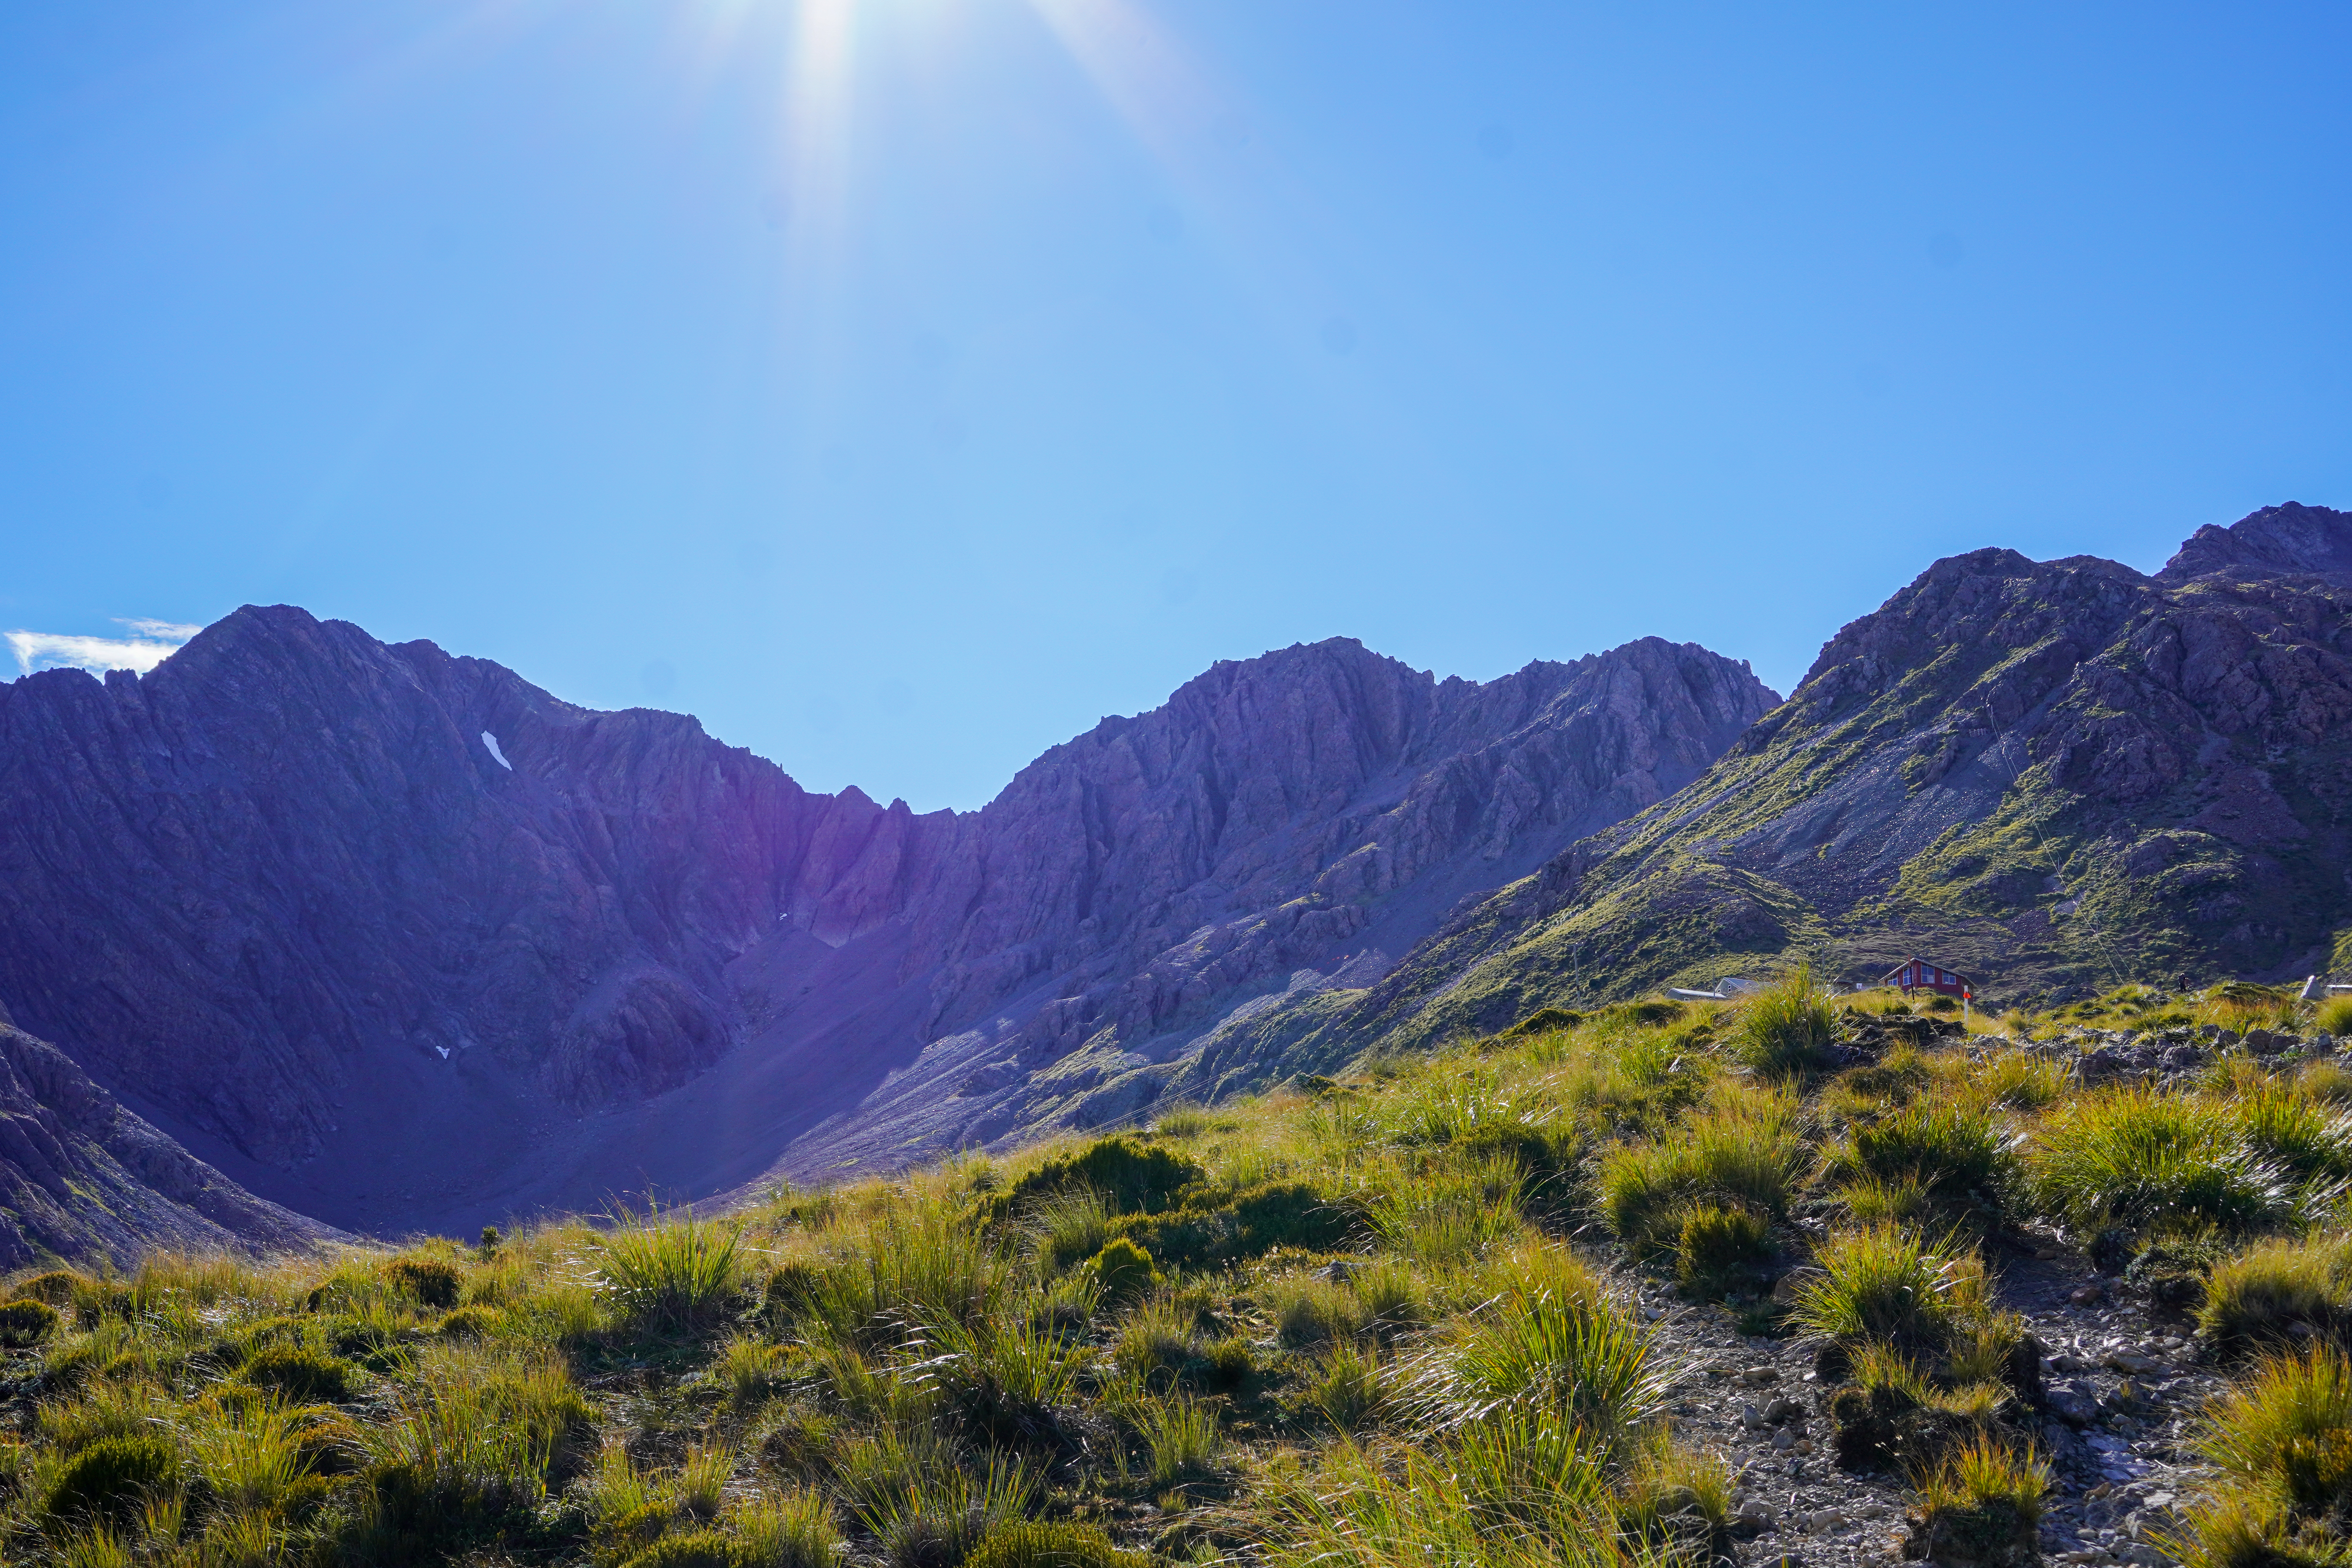
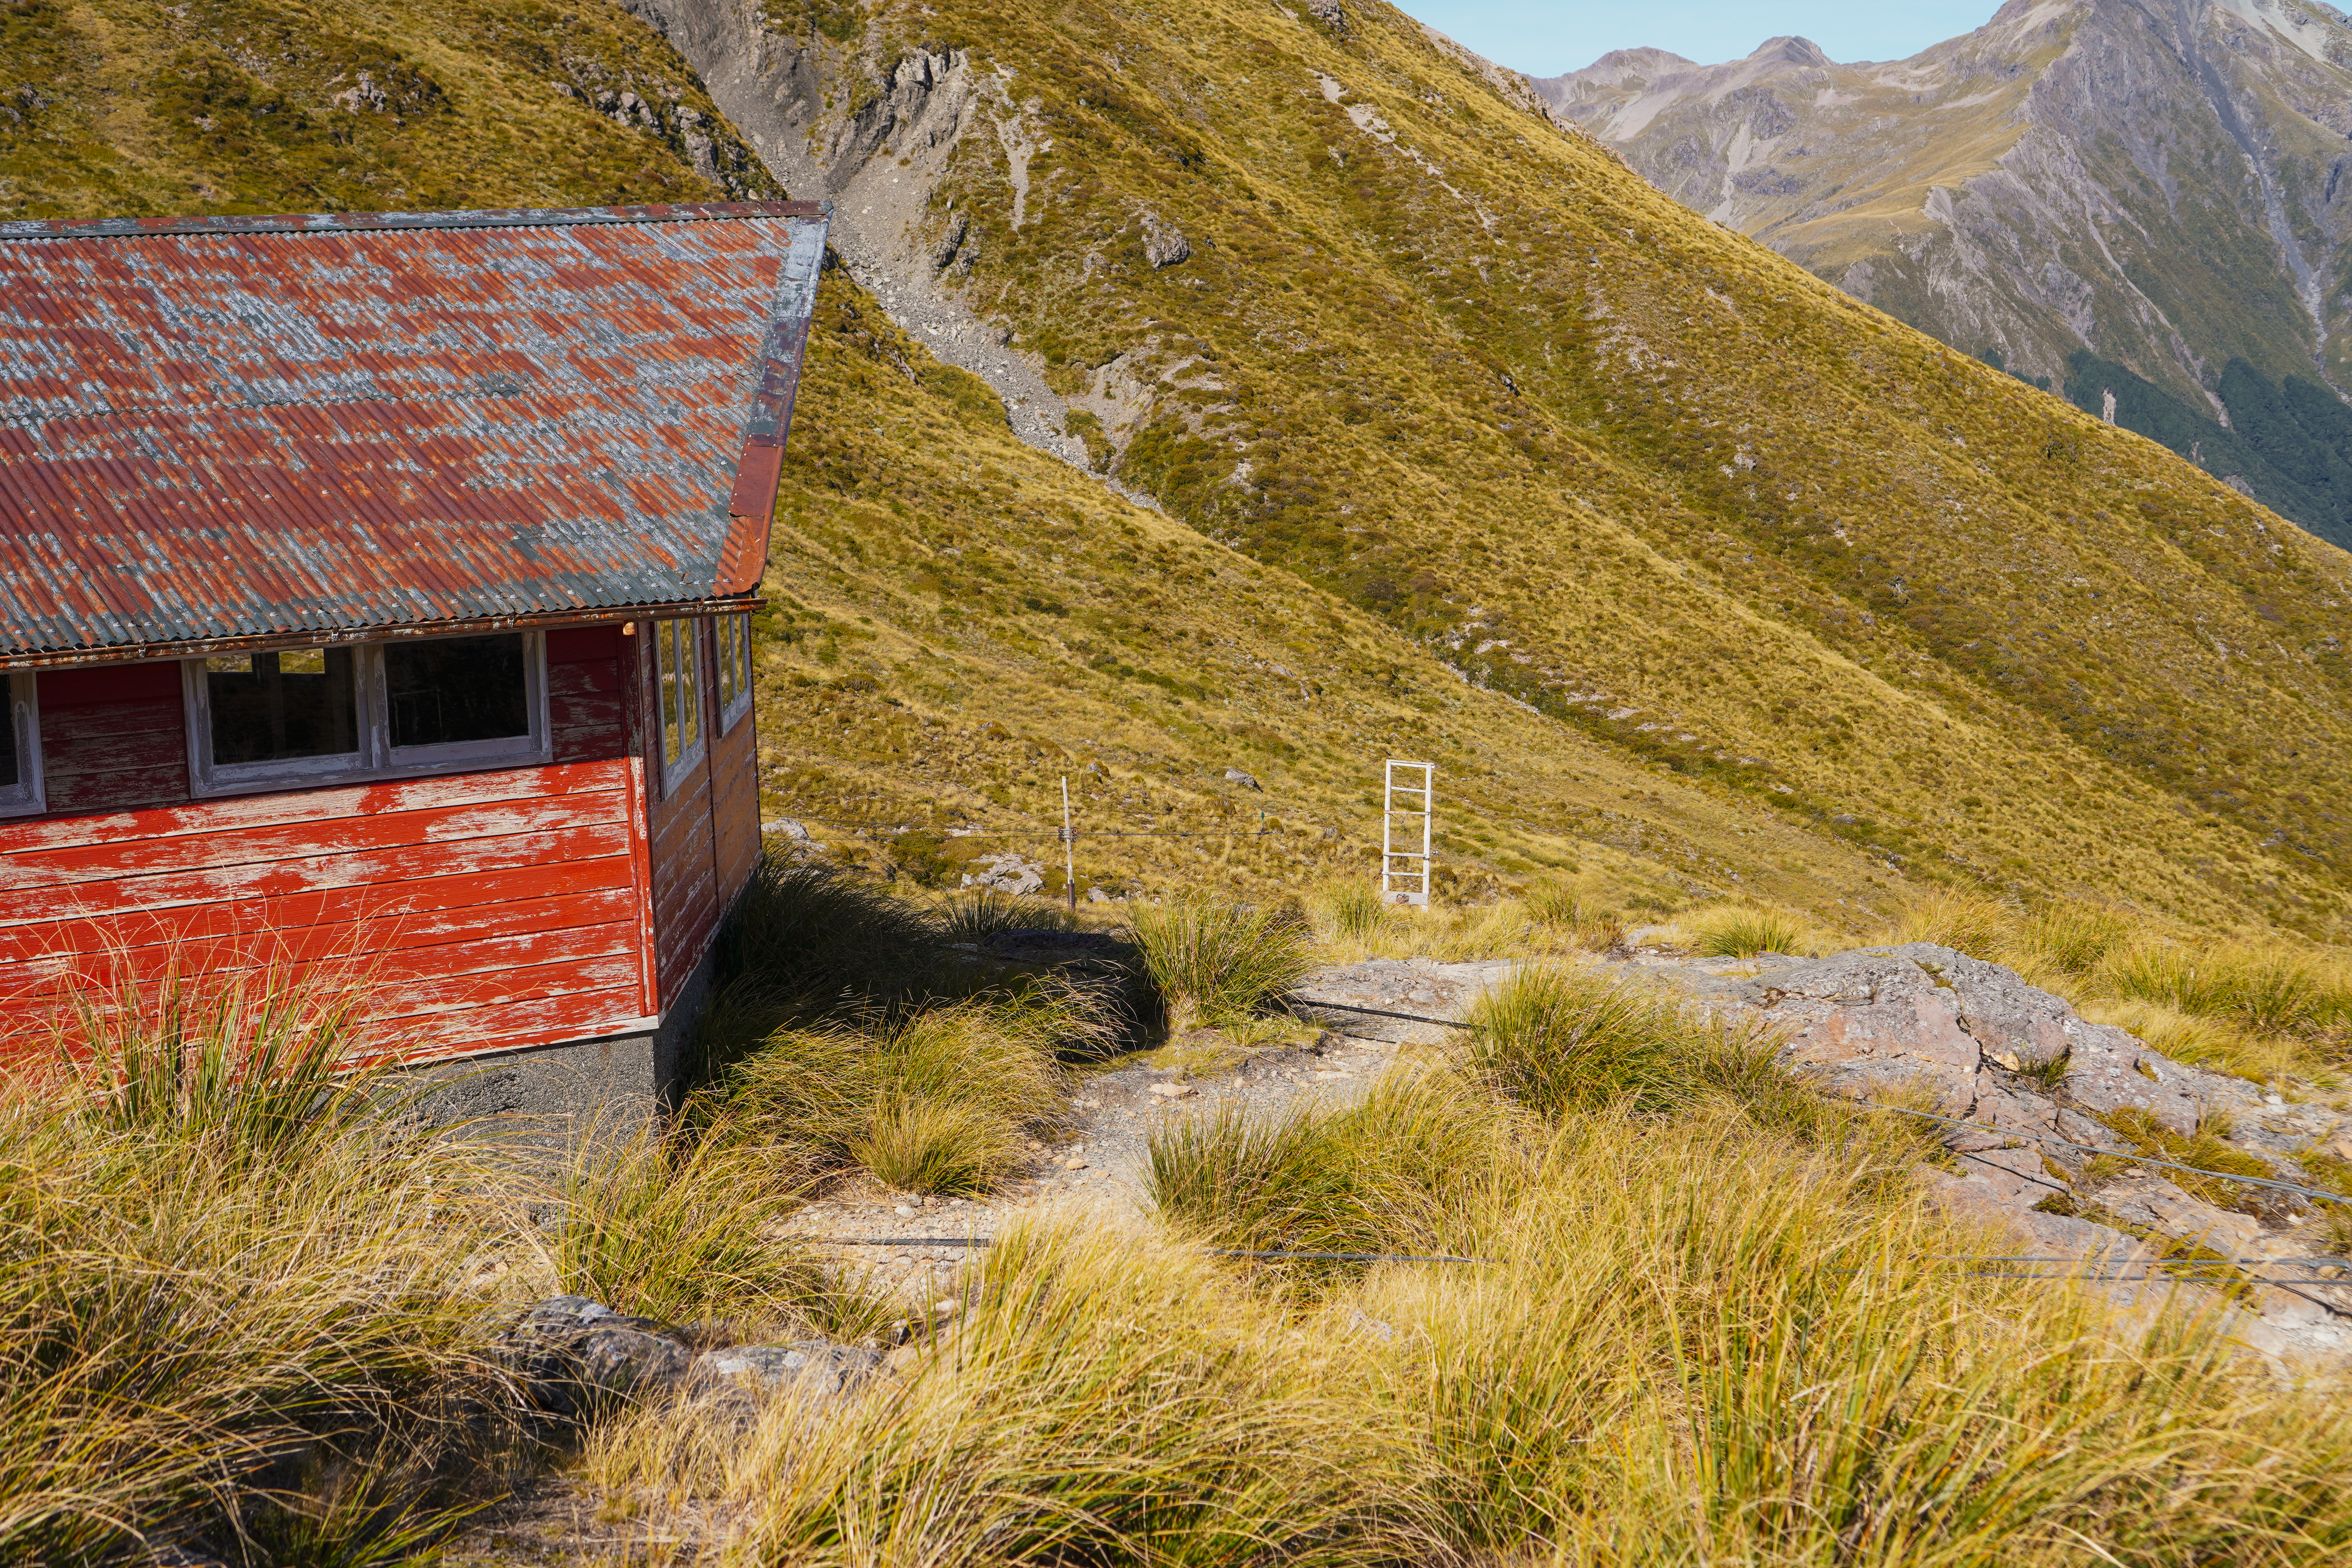
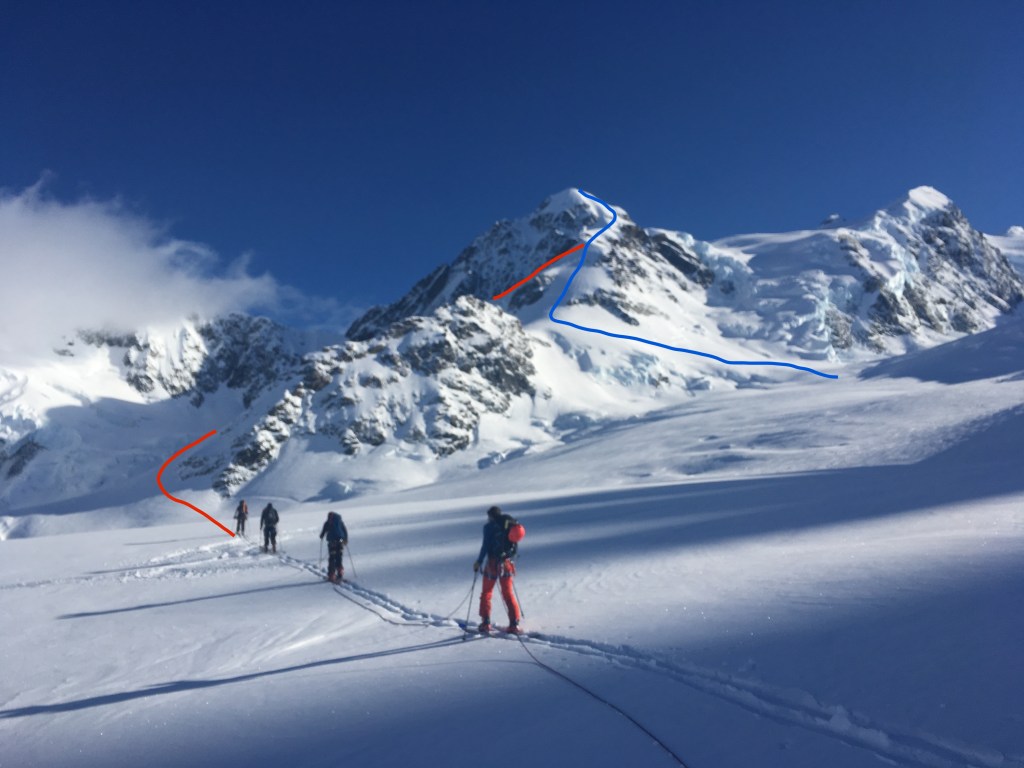
Park at temple basin ski field carpark and head up the 4WD track that turns into a well maintained walking track to the lodges. From the red building (CMC’s Lockwood shelter) at around 1380m cut across the basin NE. There is a faint trail. We aimed for a spot in the basin that would put you underneath the lowest col visible on the west ridge of Phipps (see route below). Many variations to this route possible.
climb
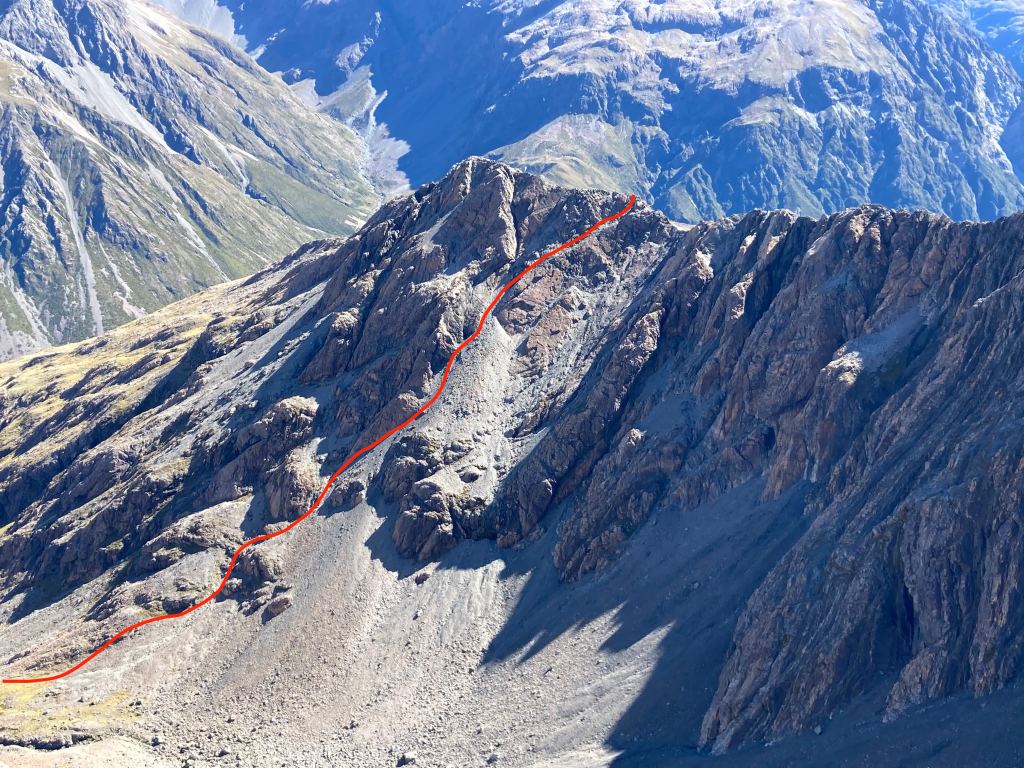
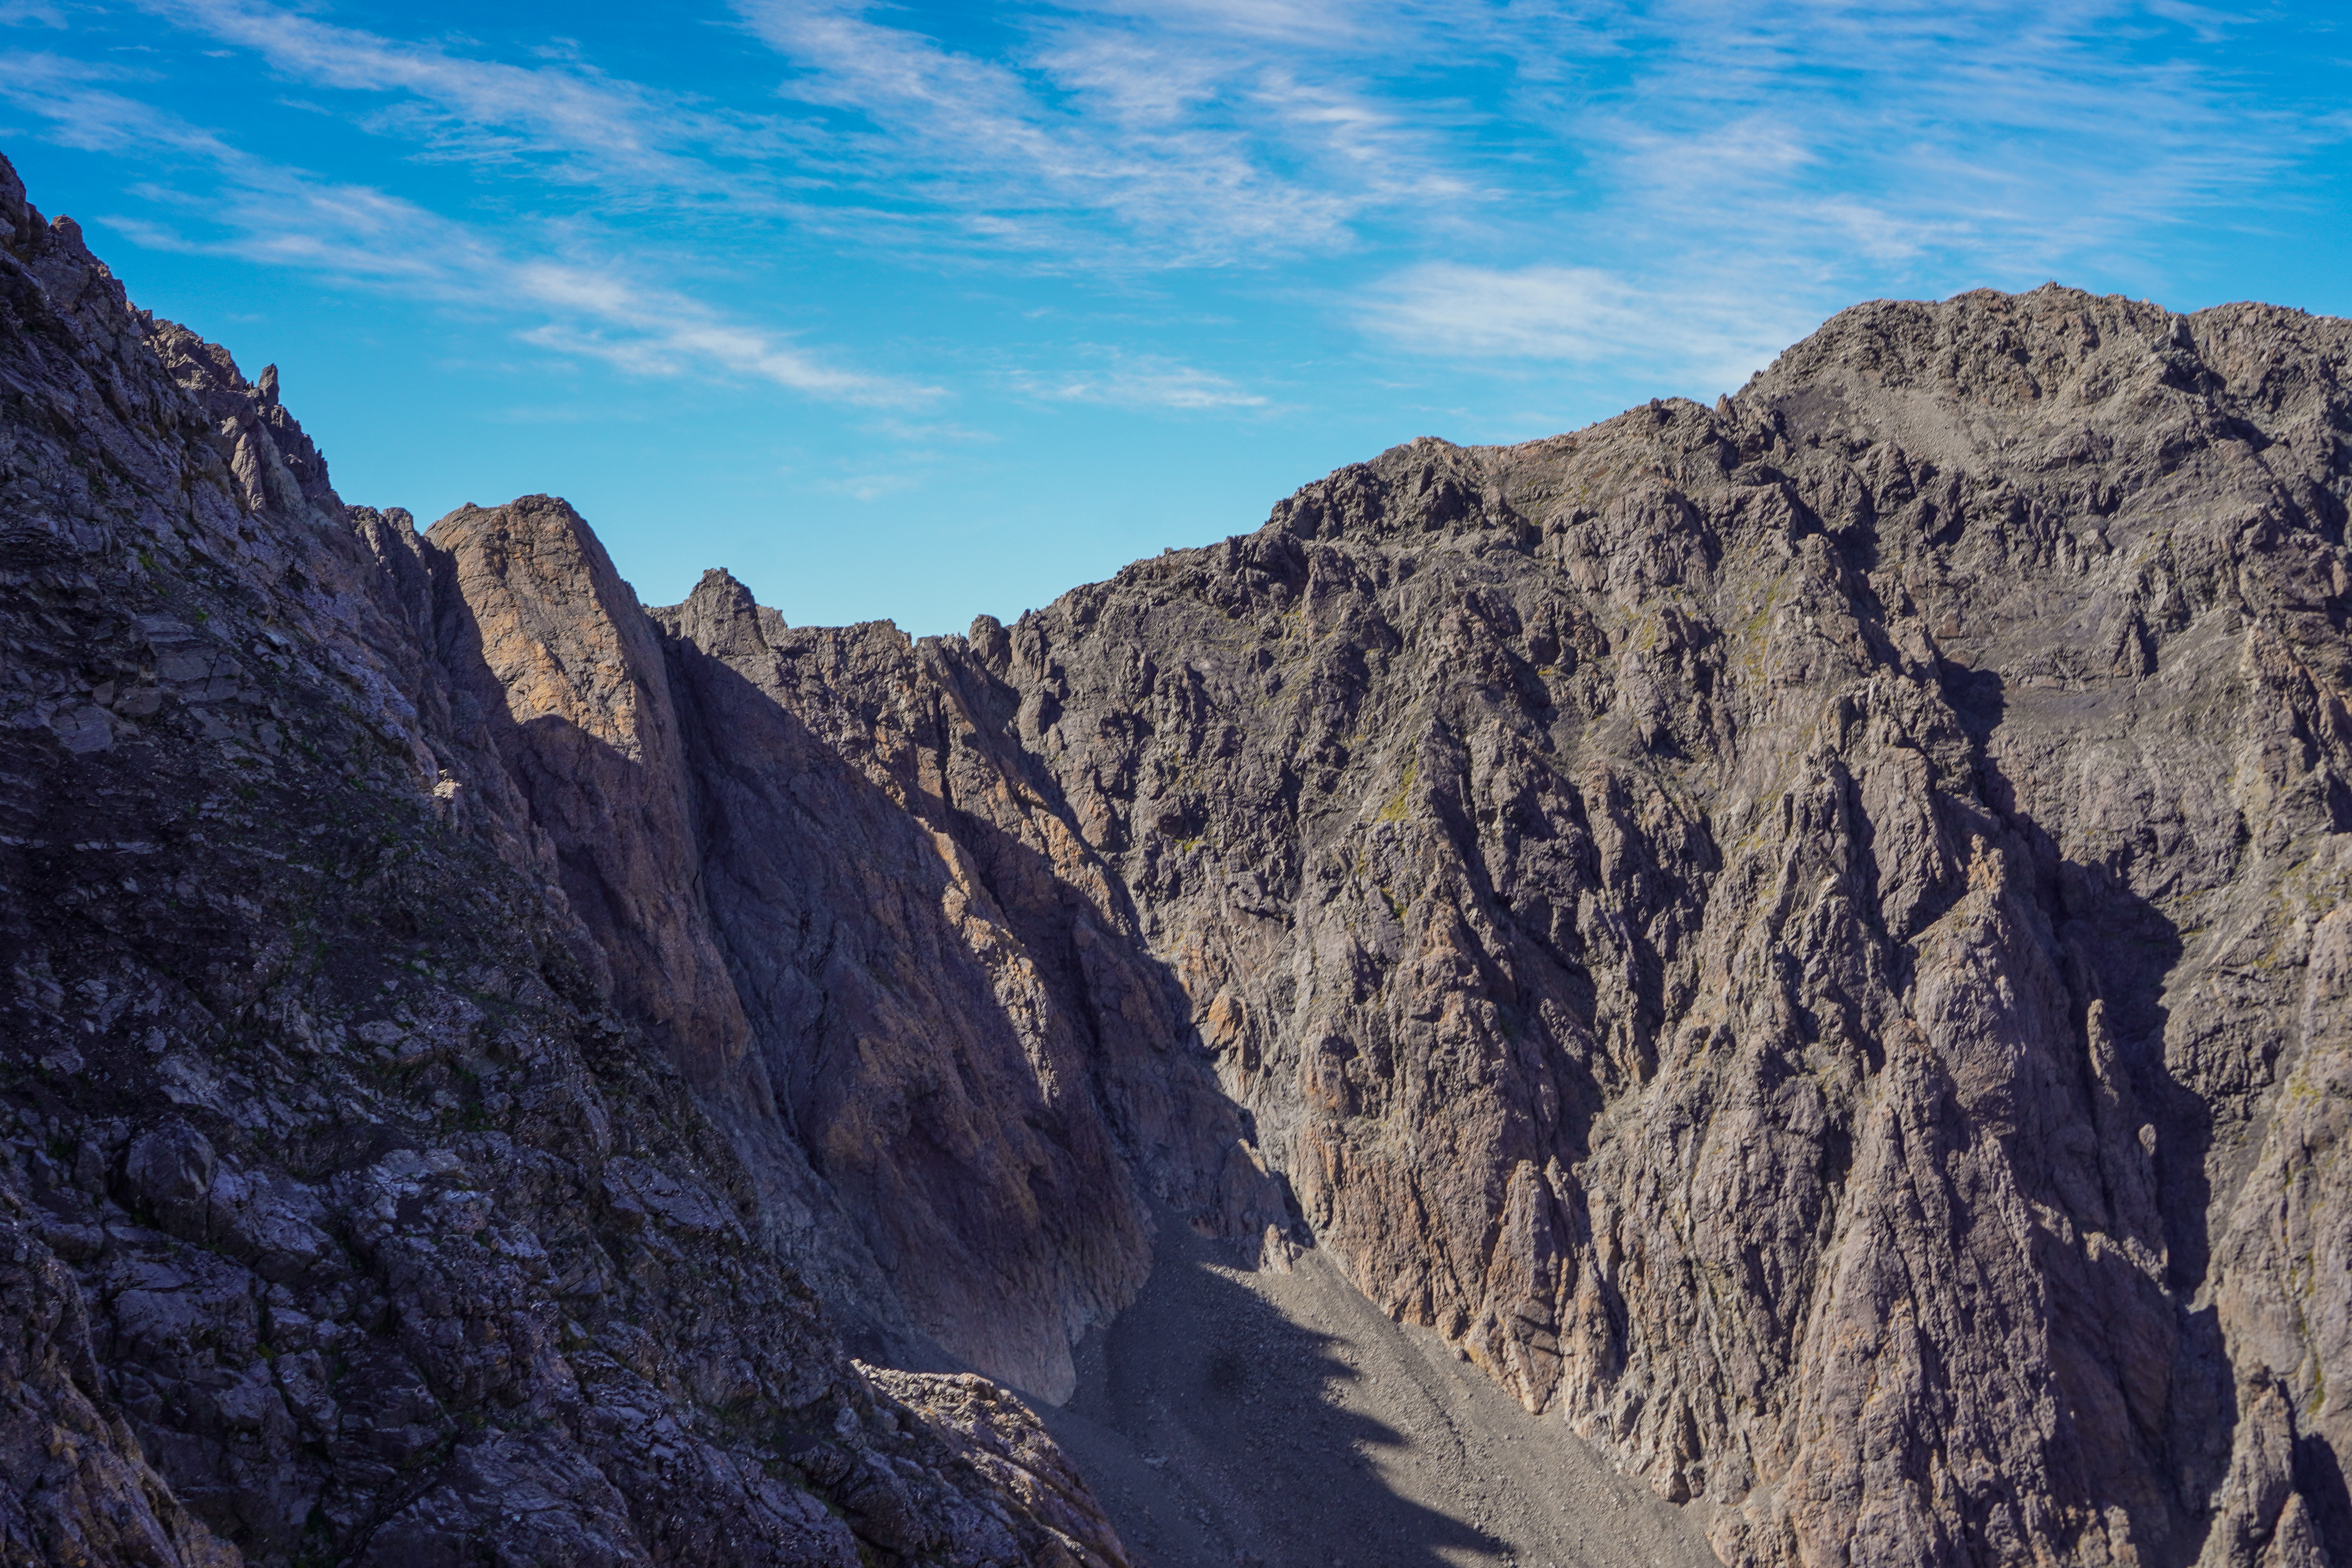
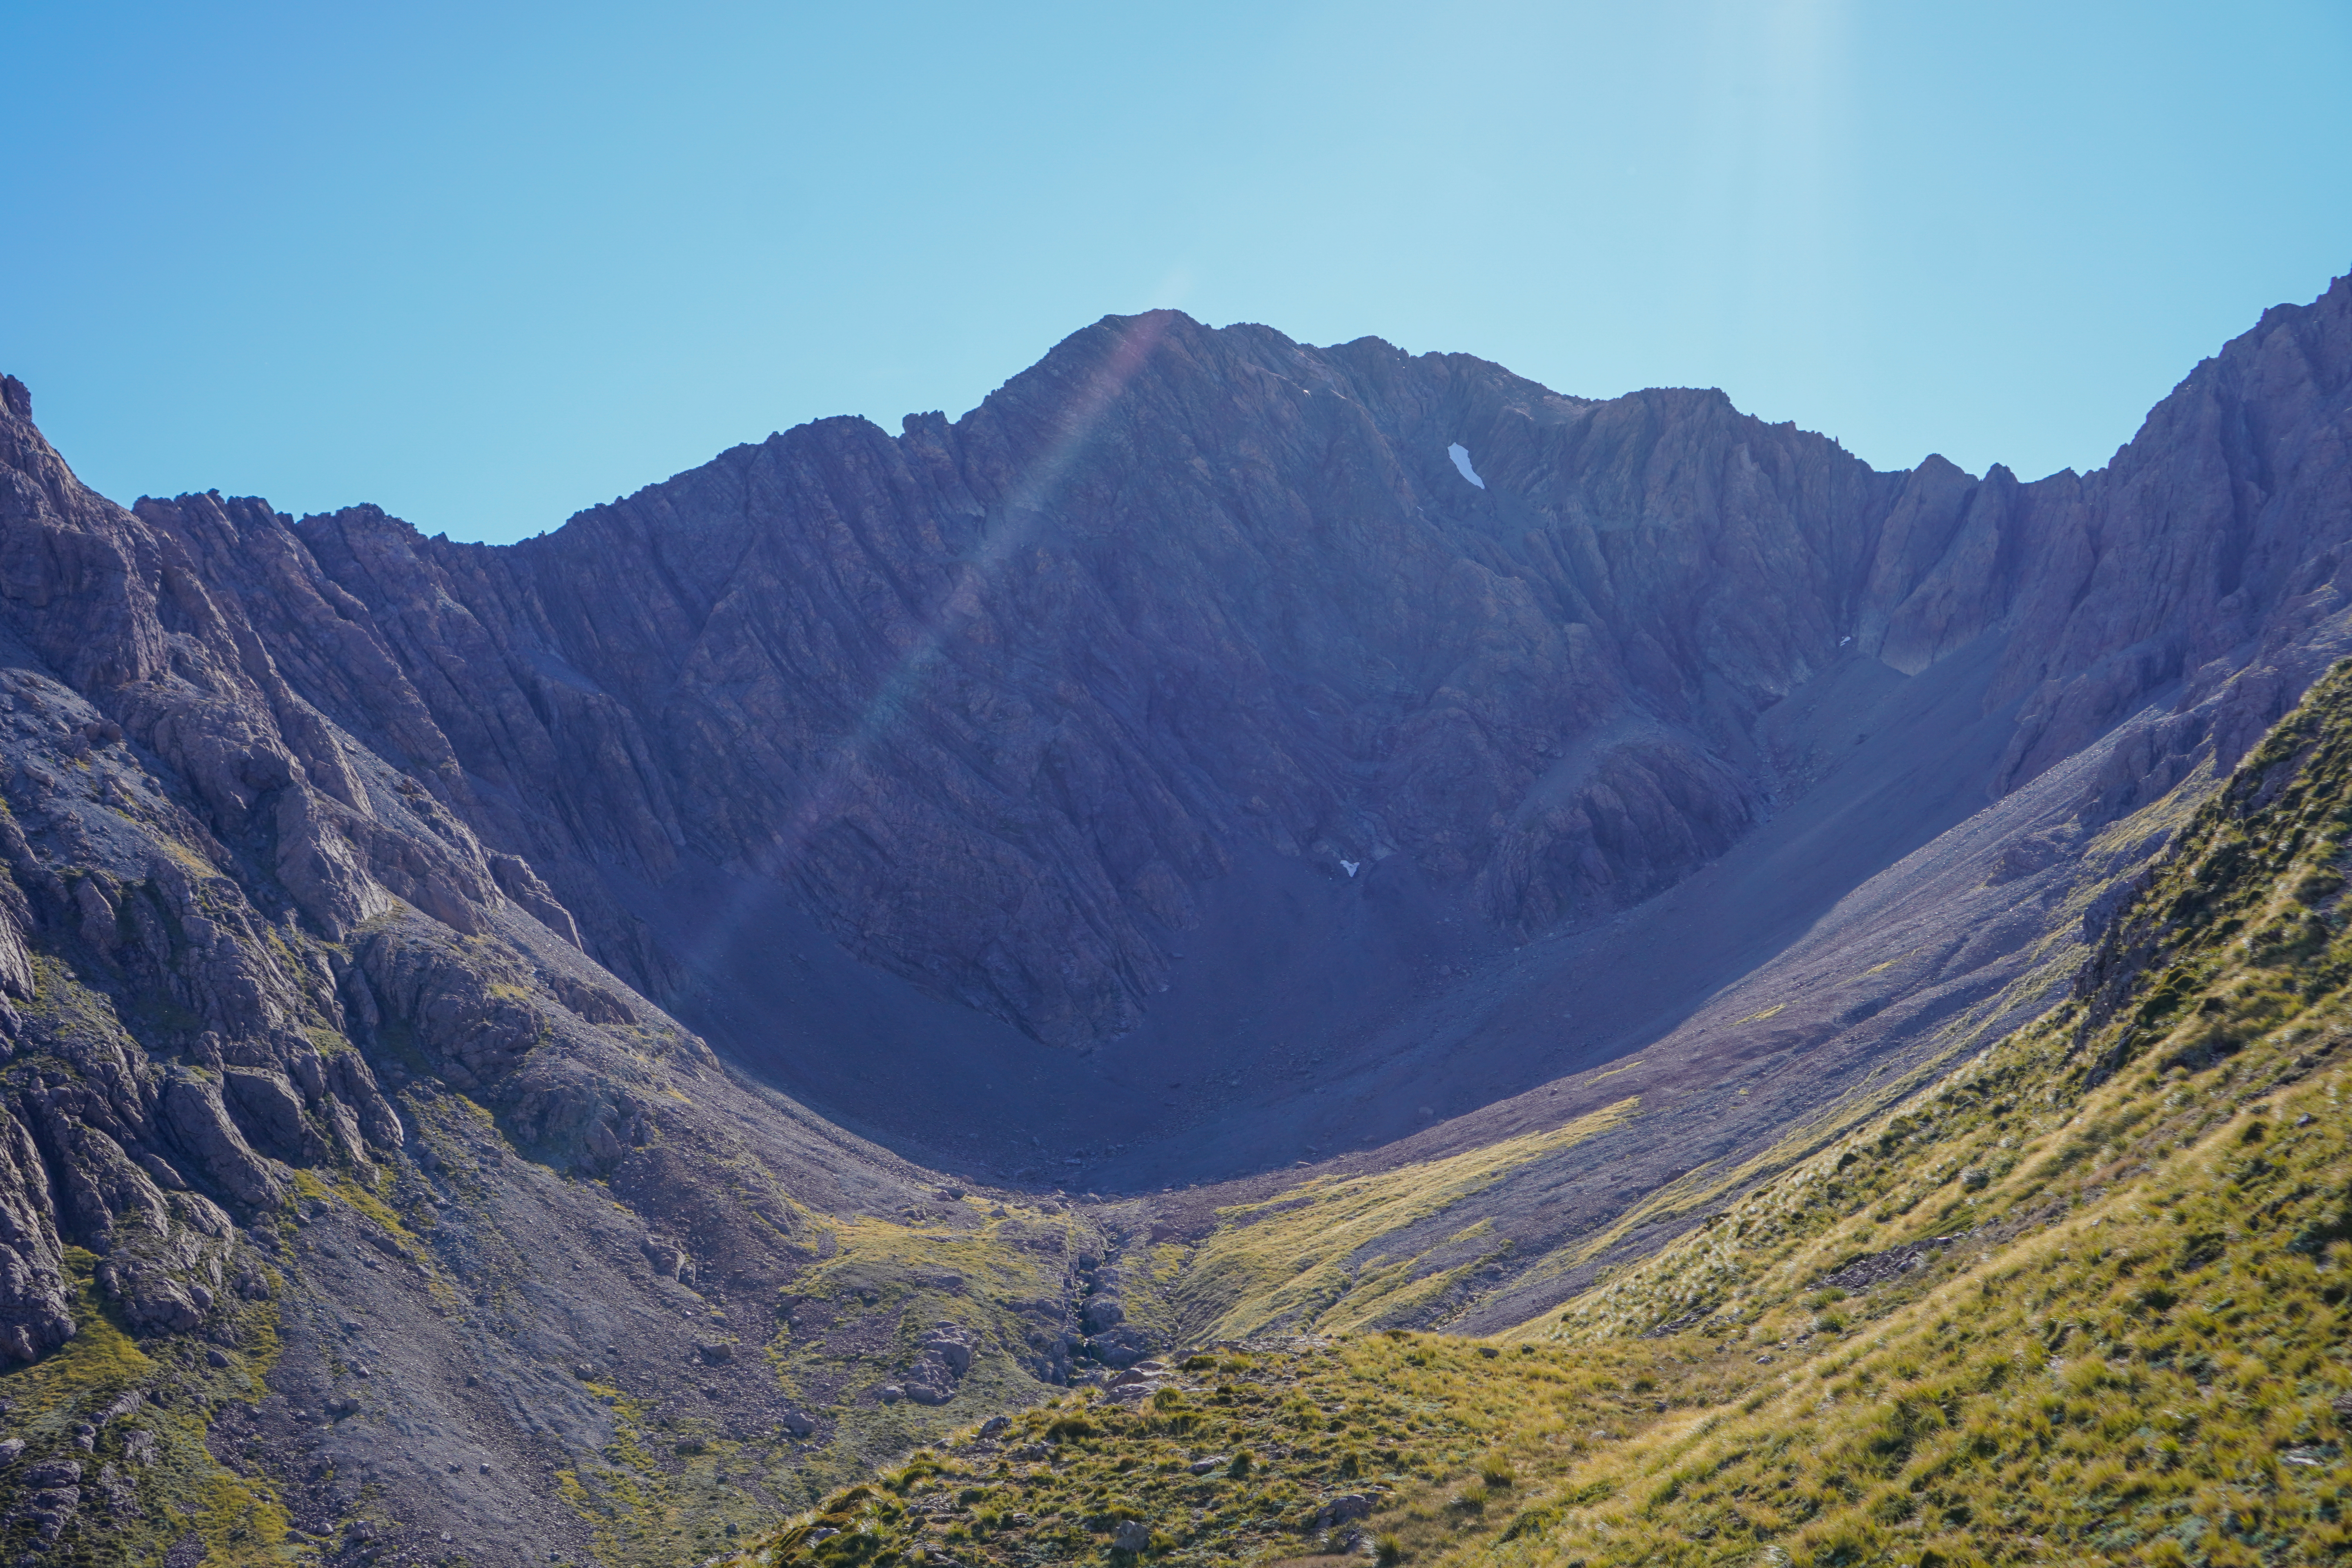
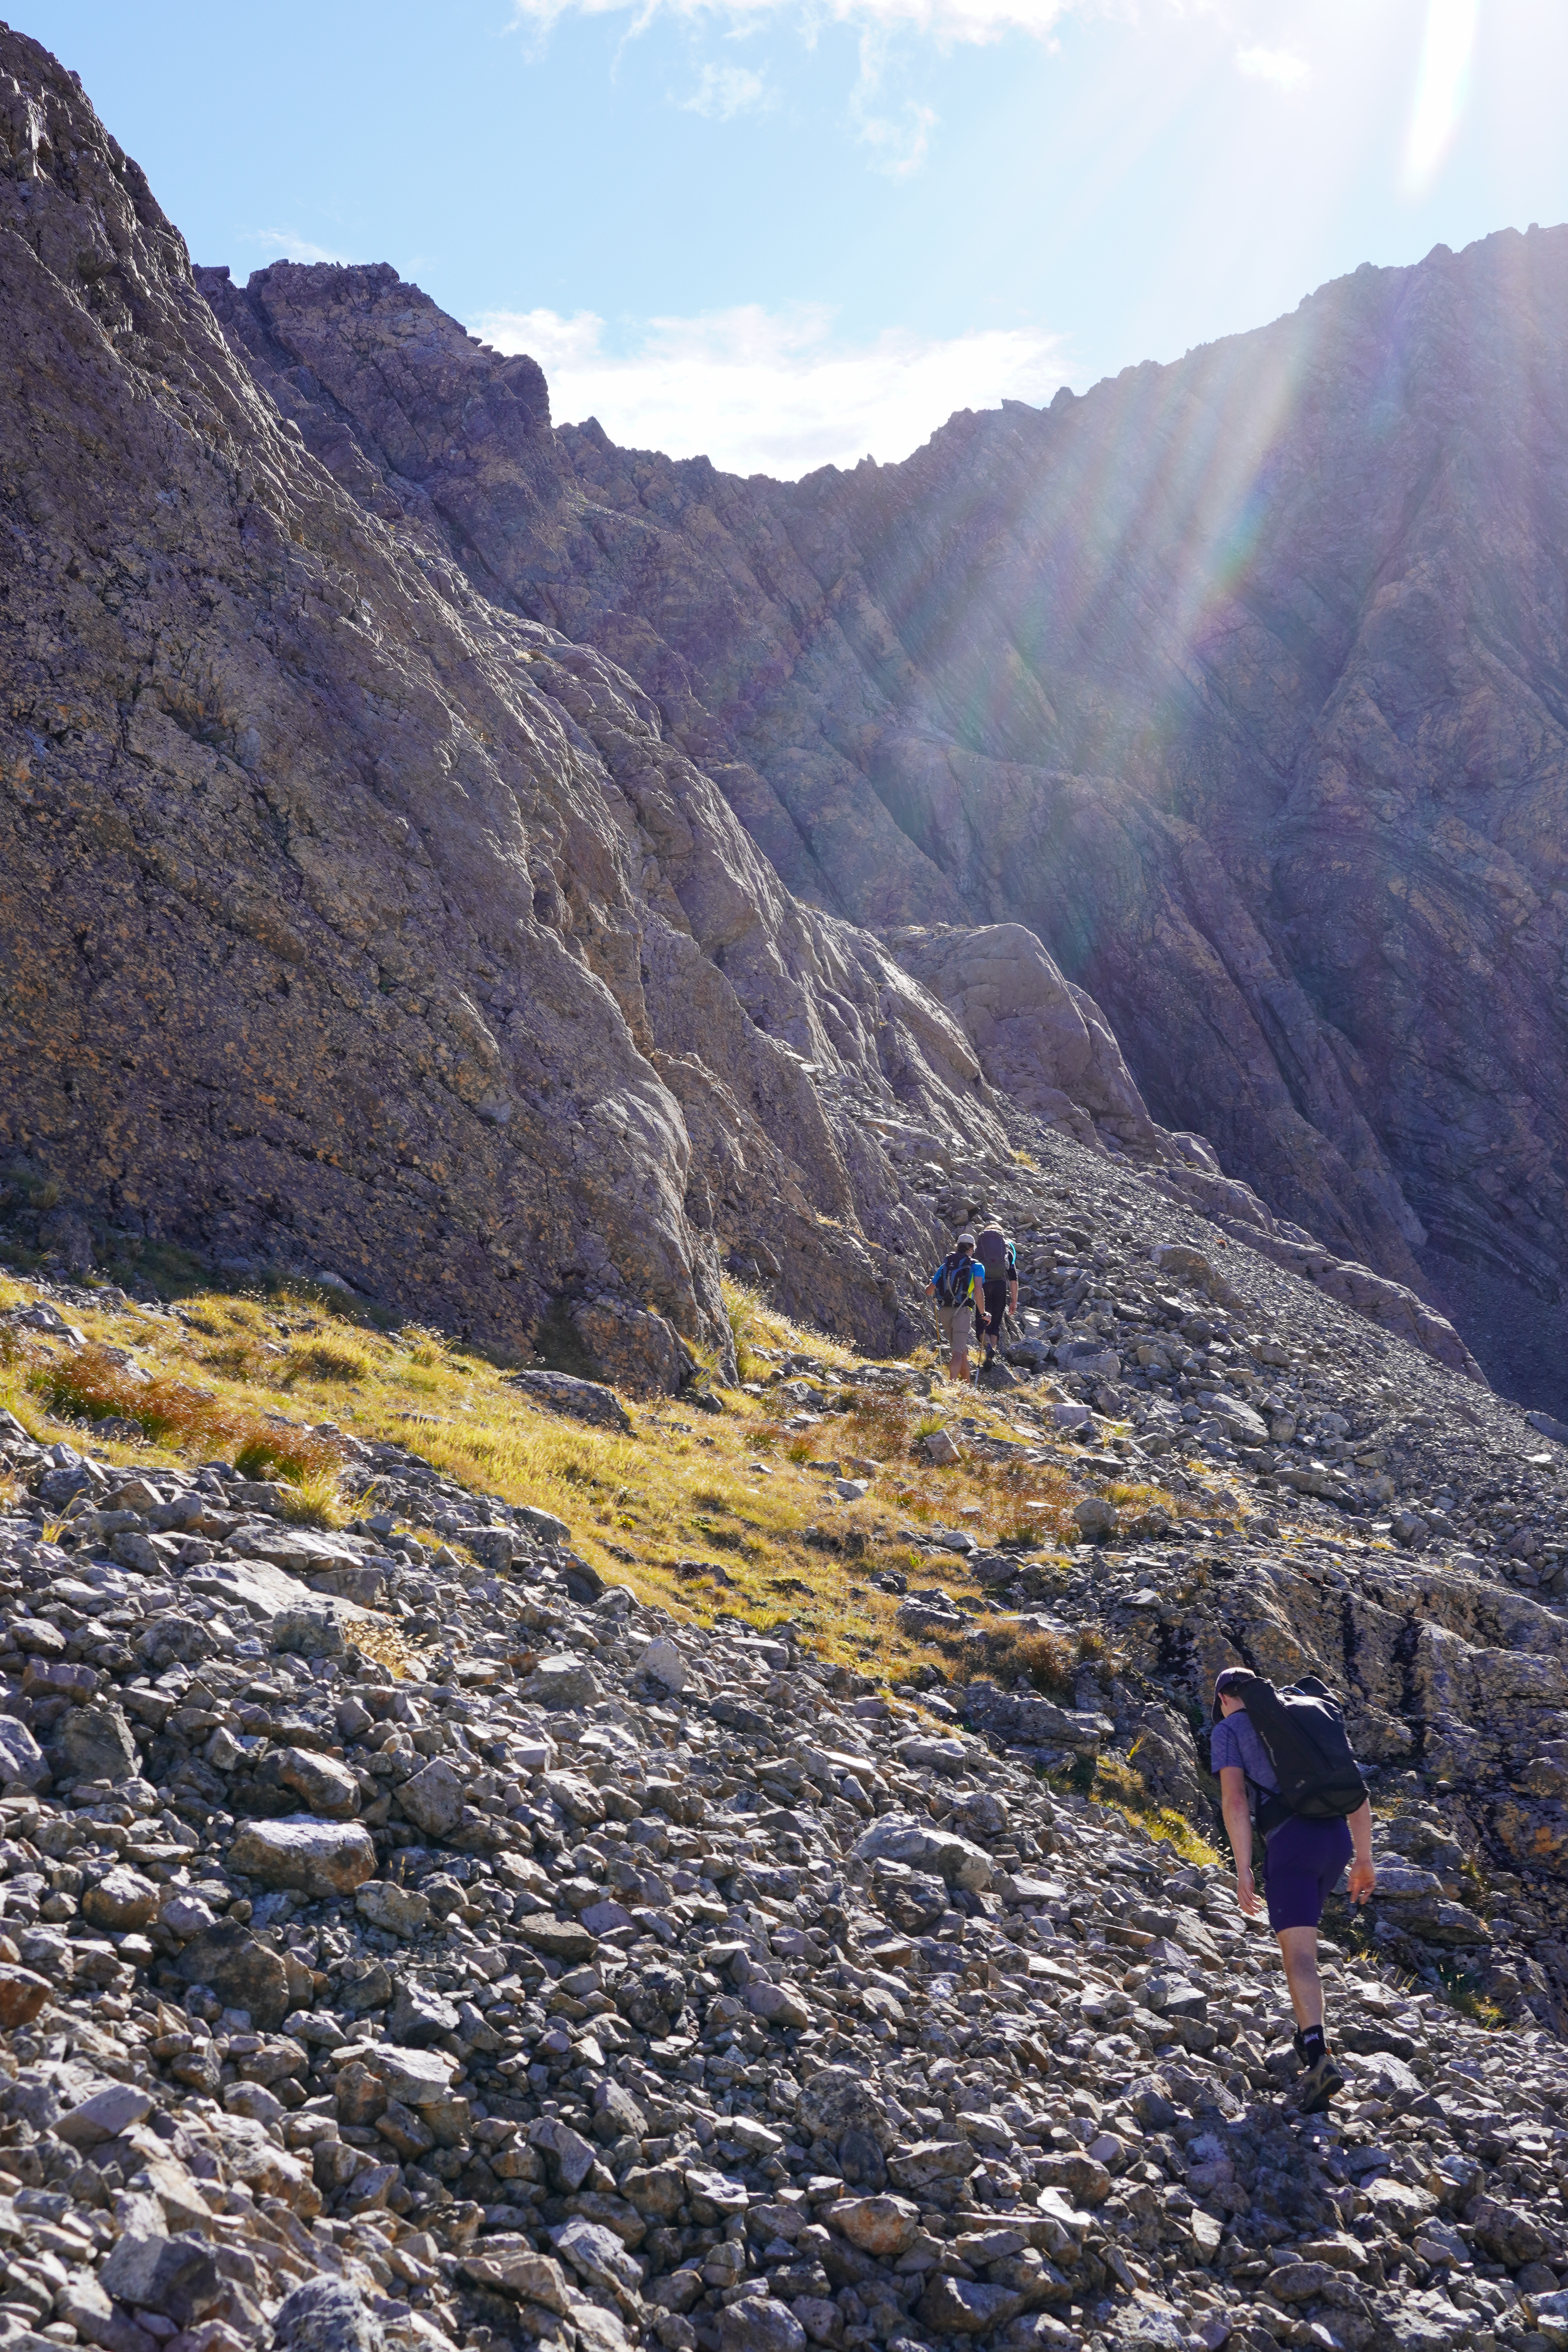
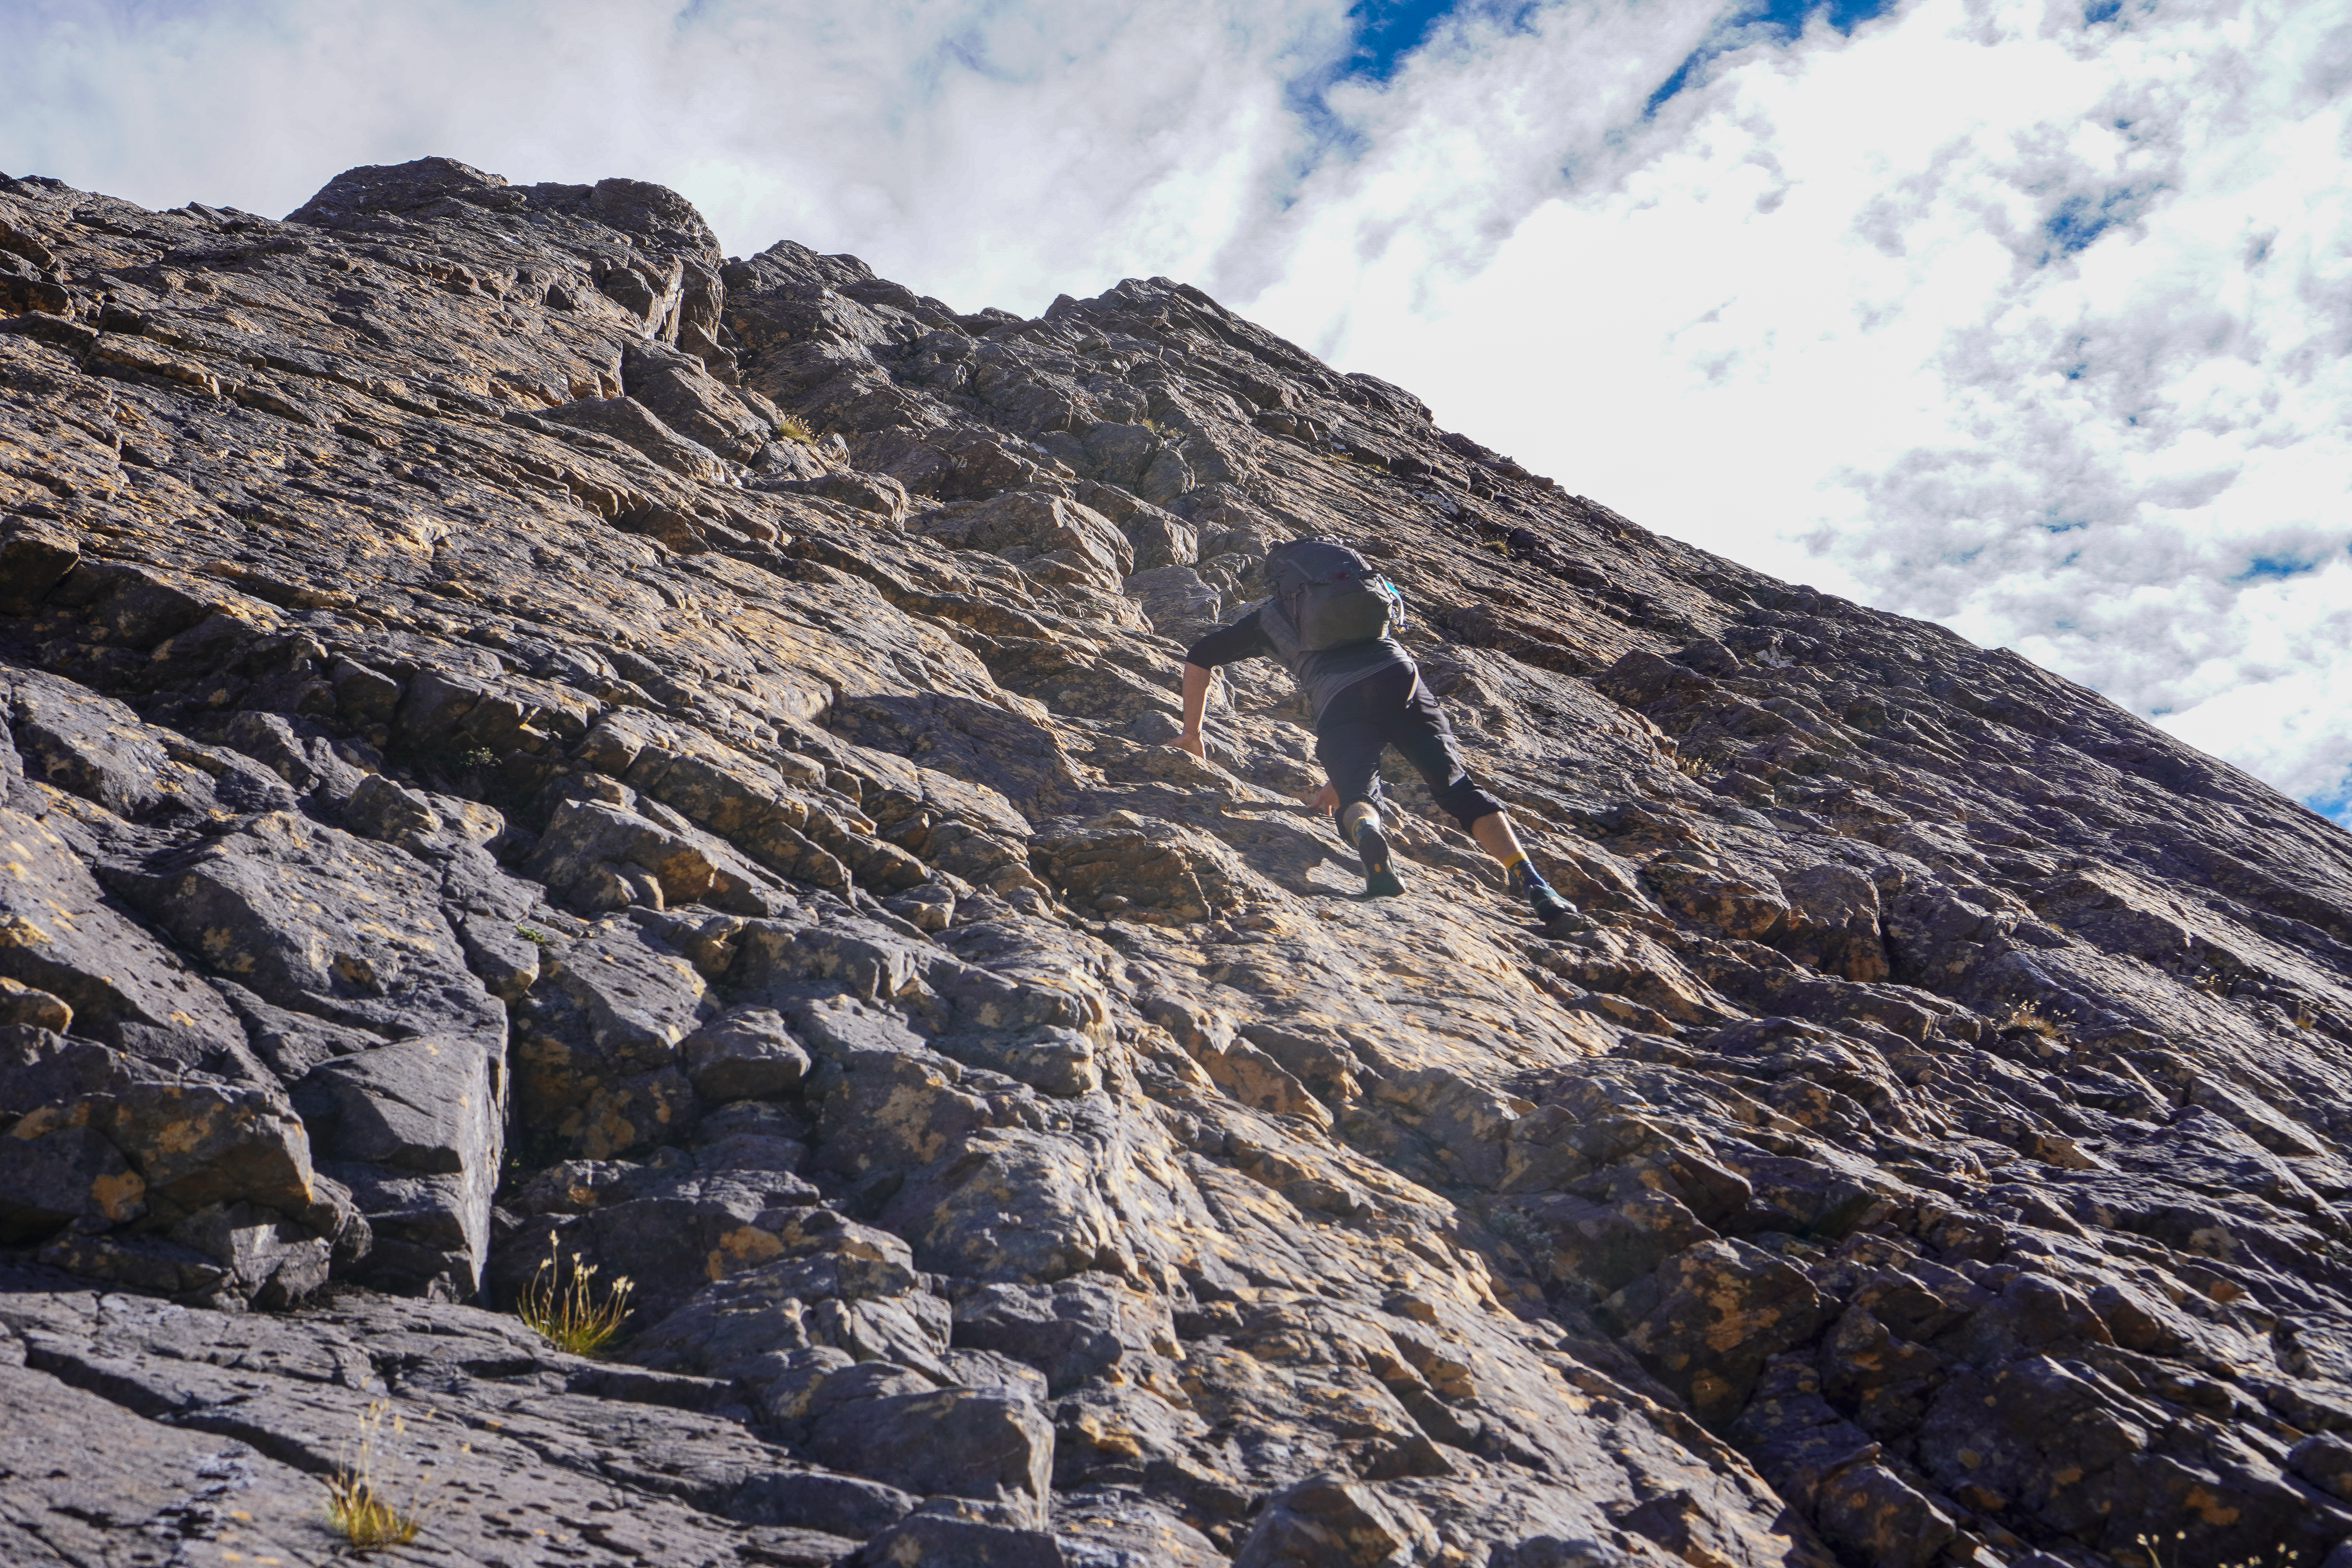
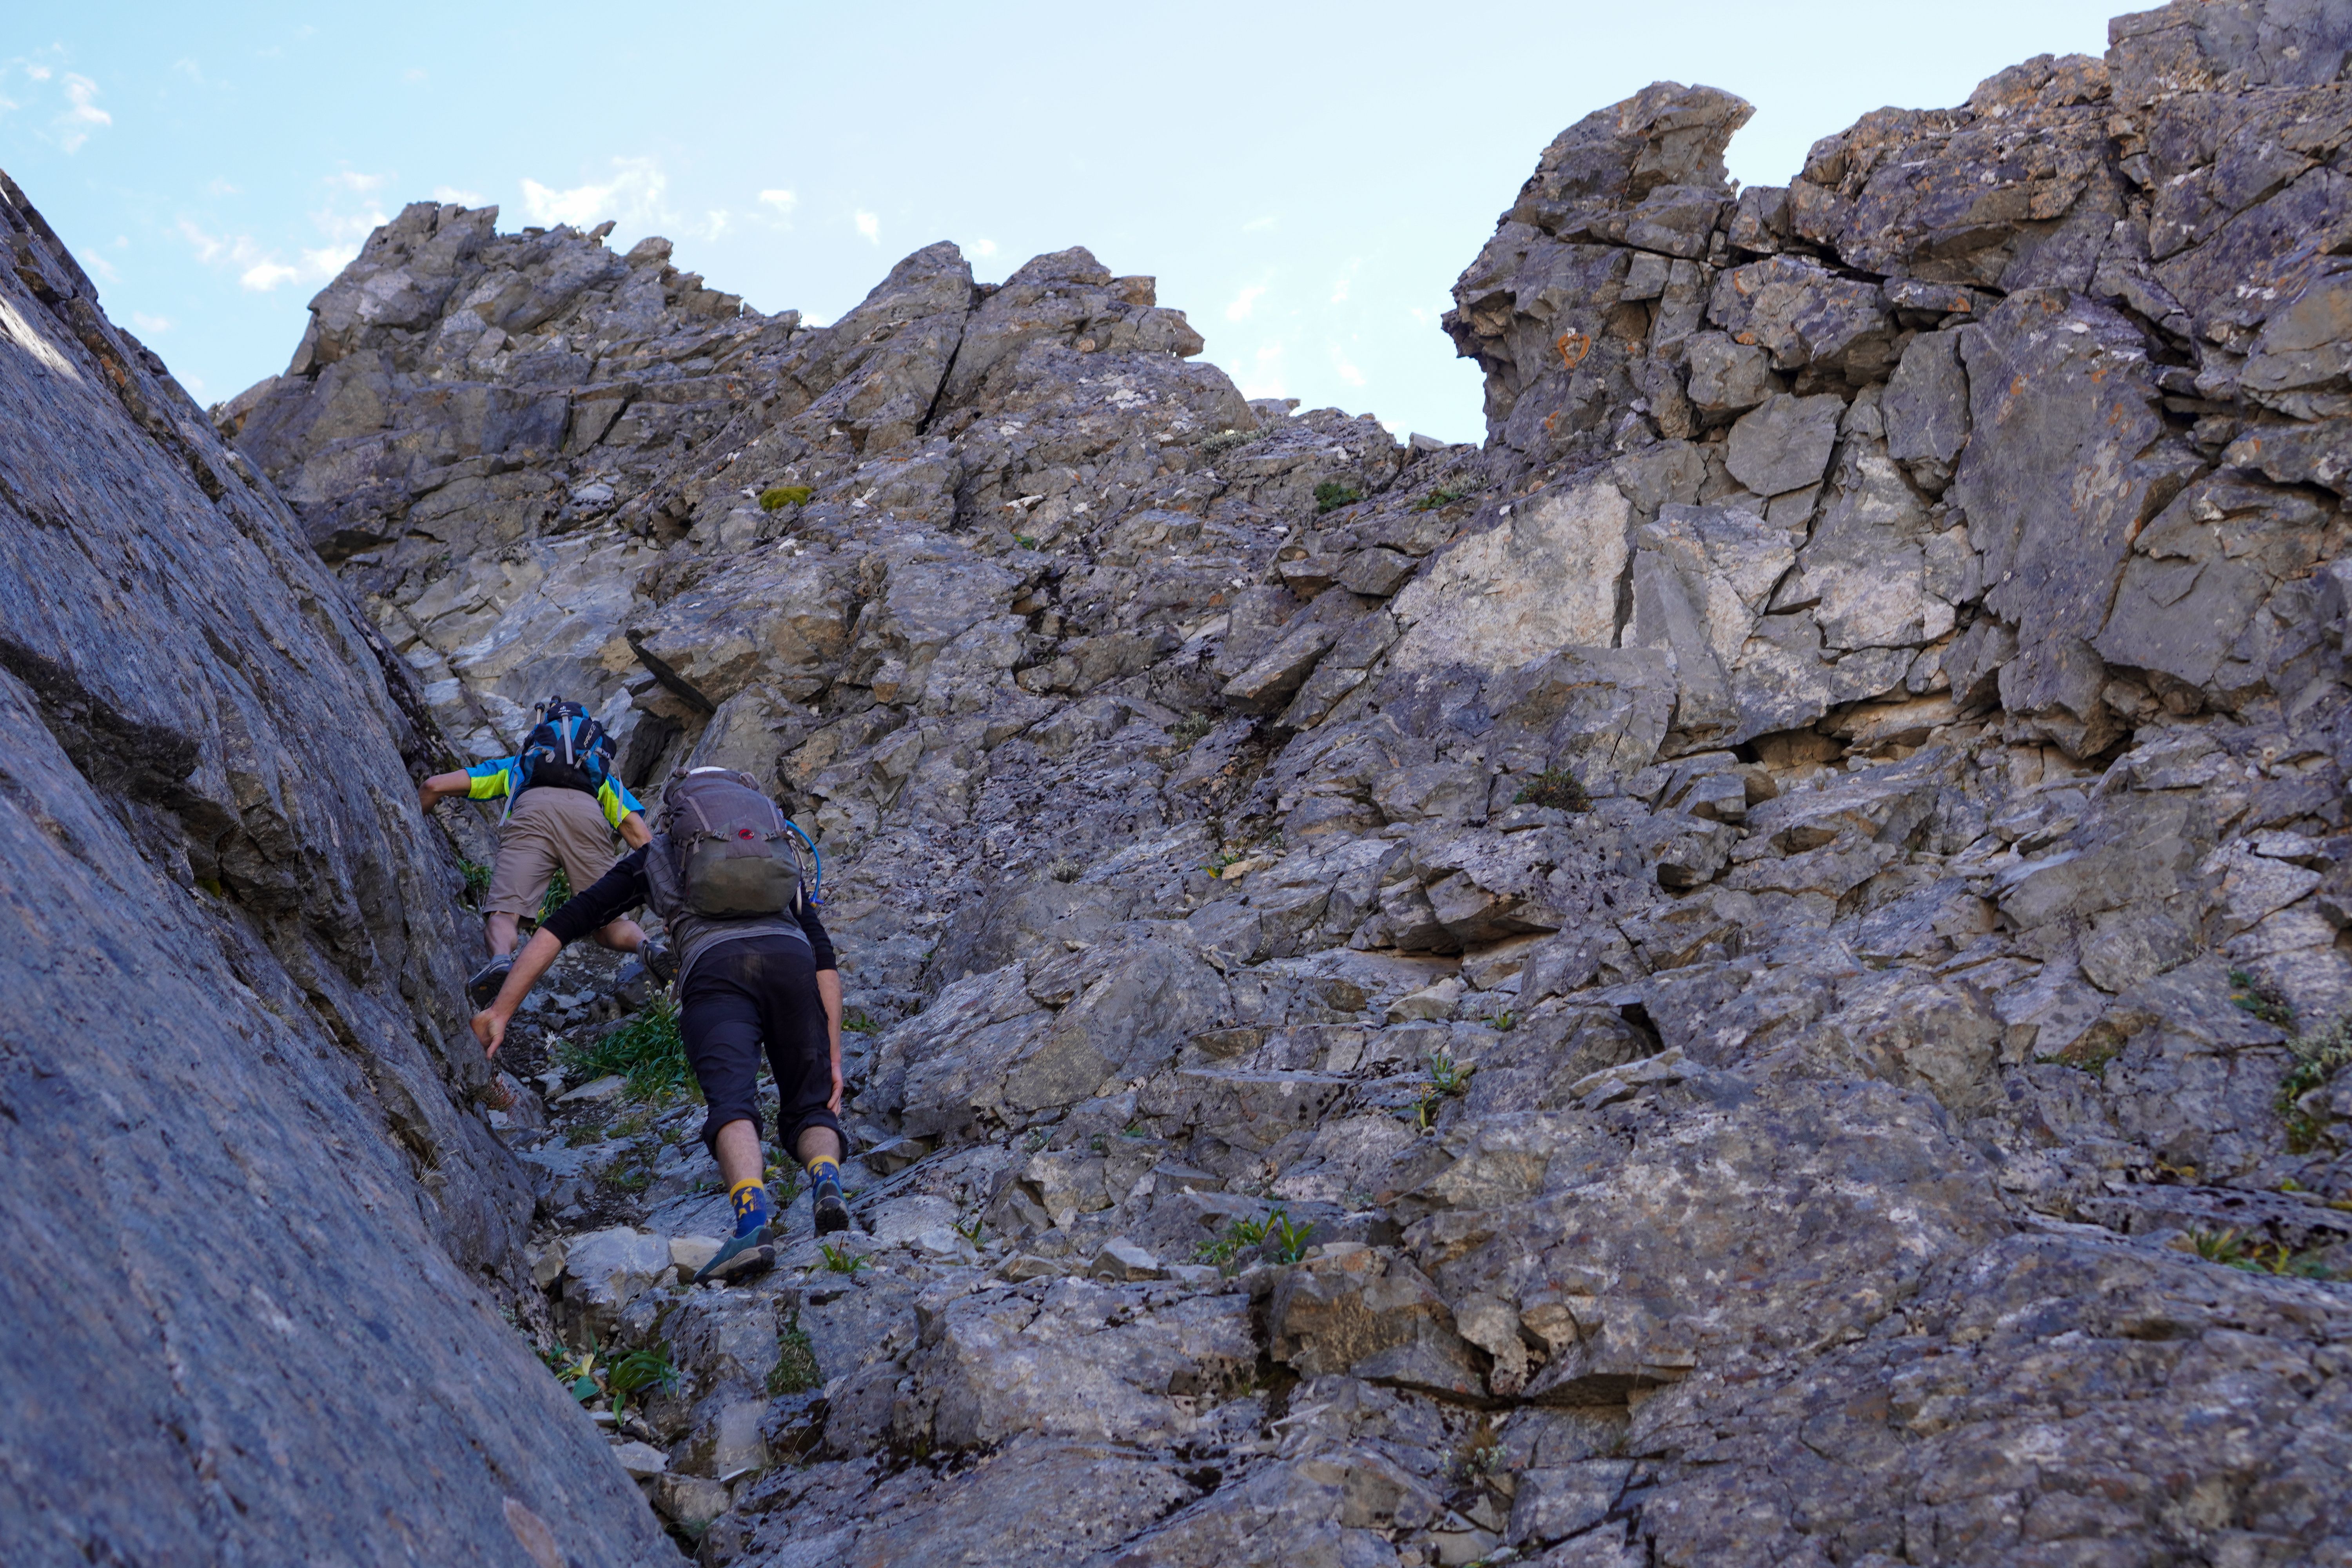
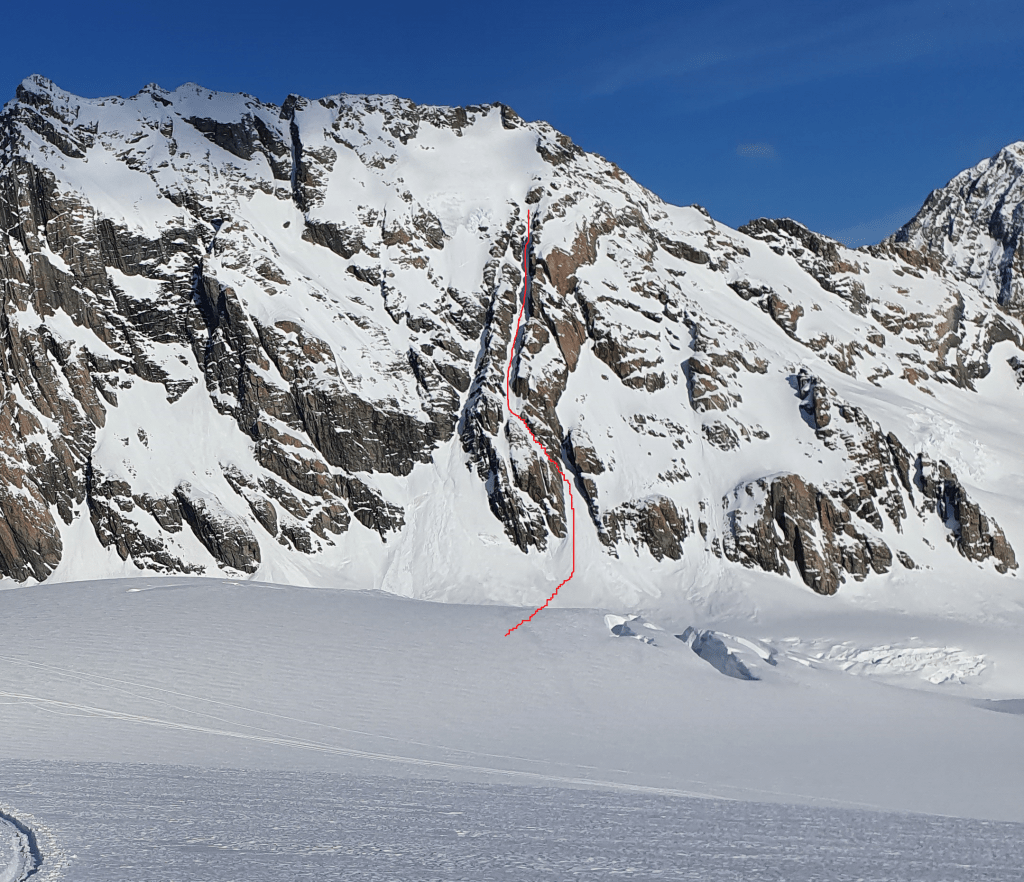
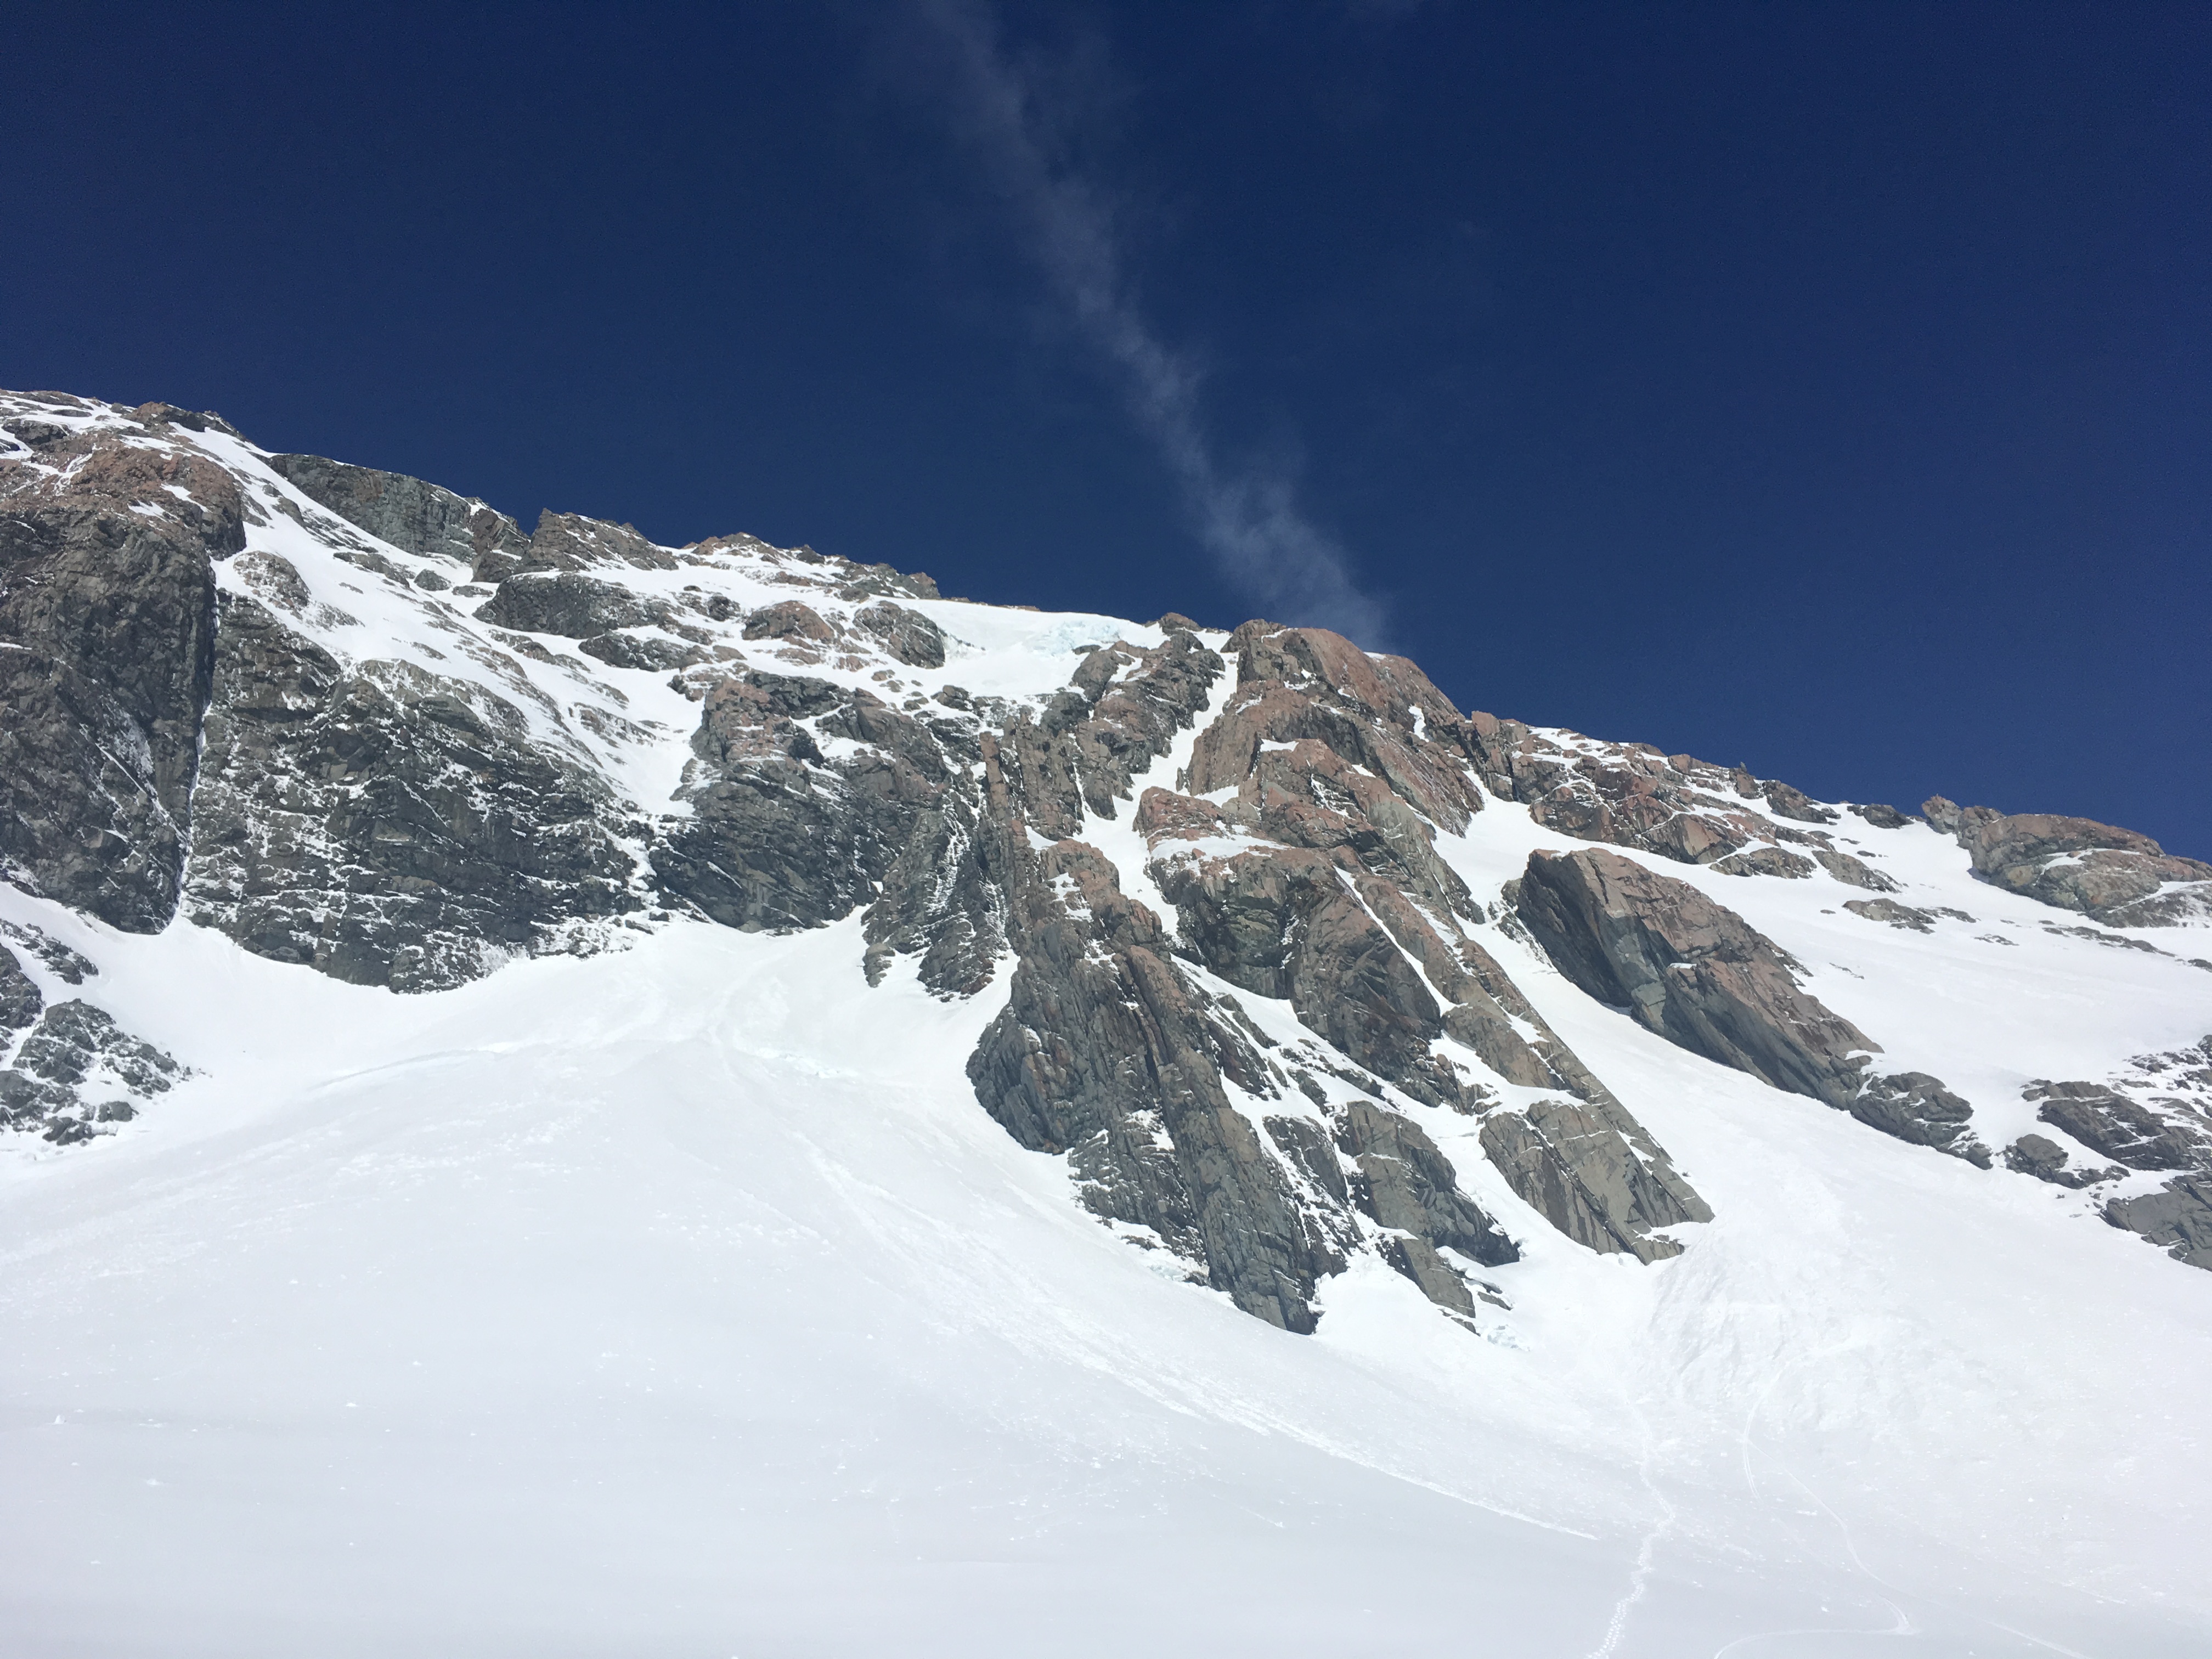
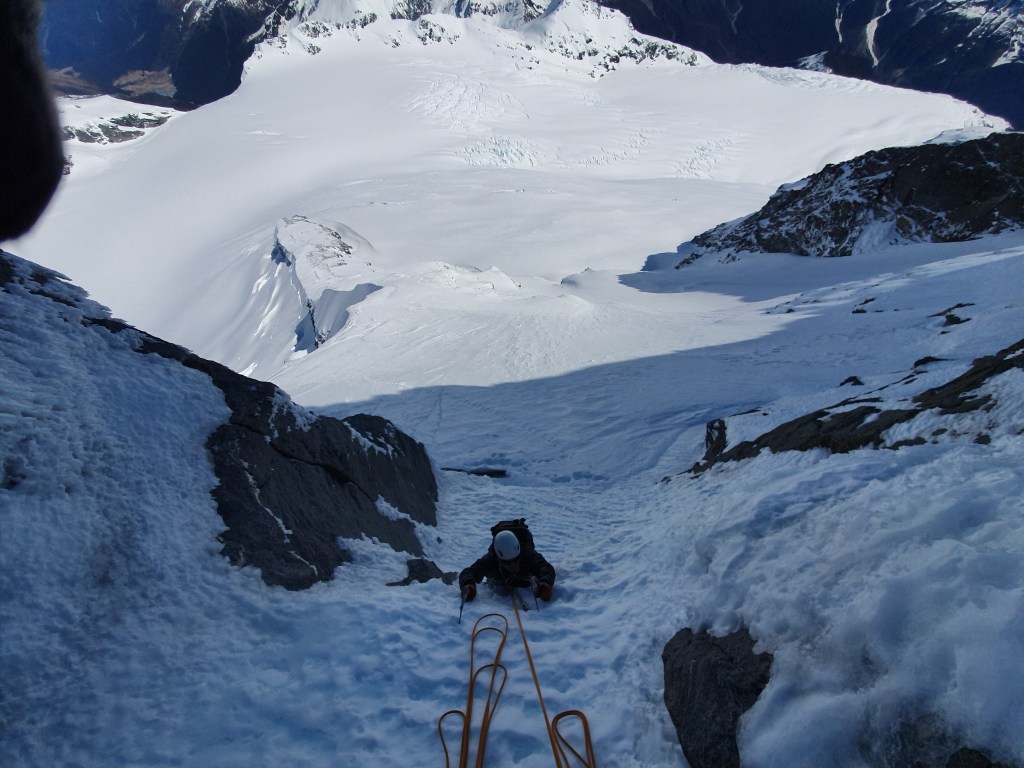
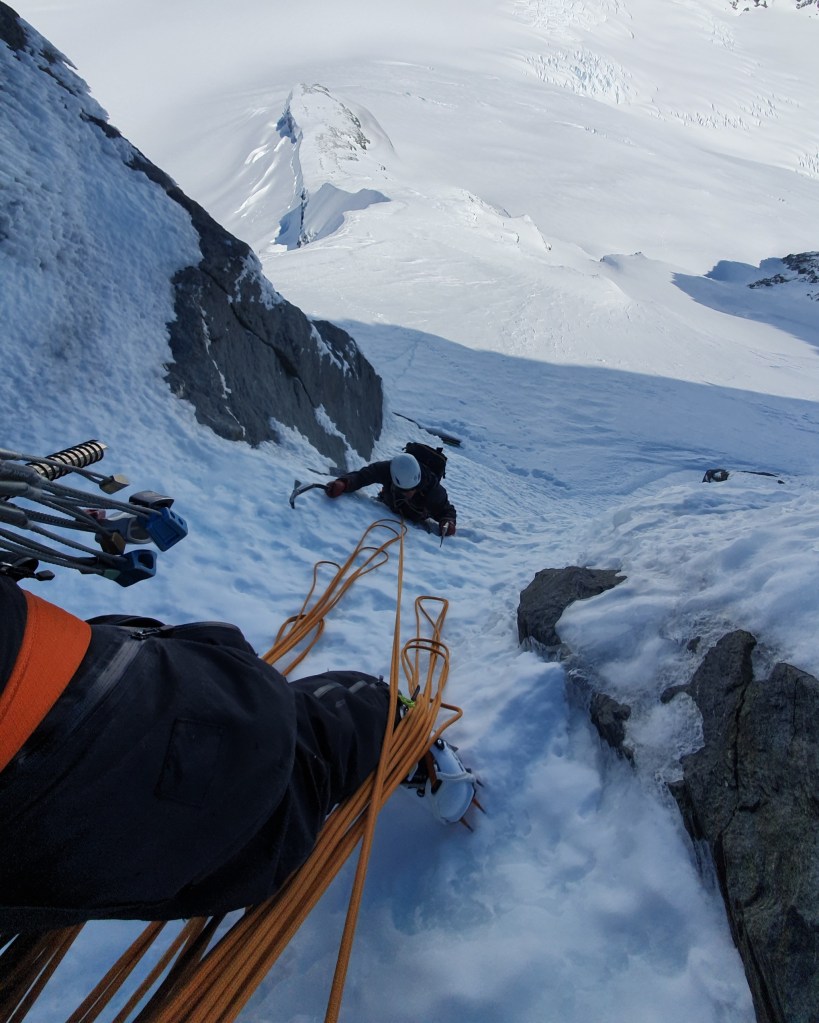
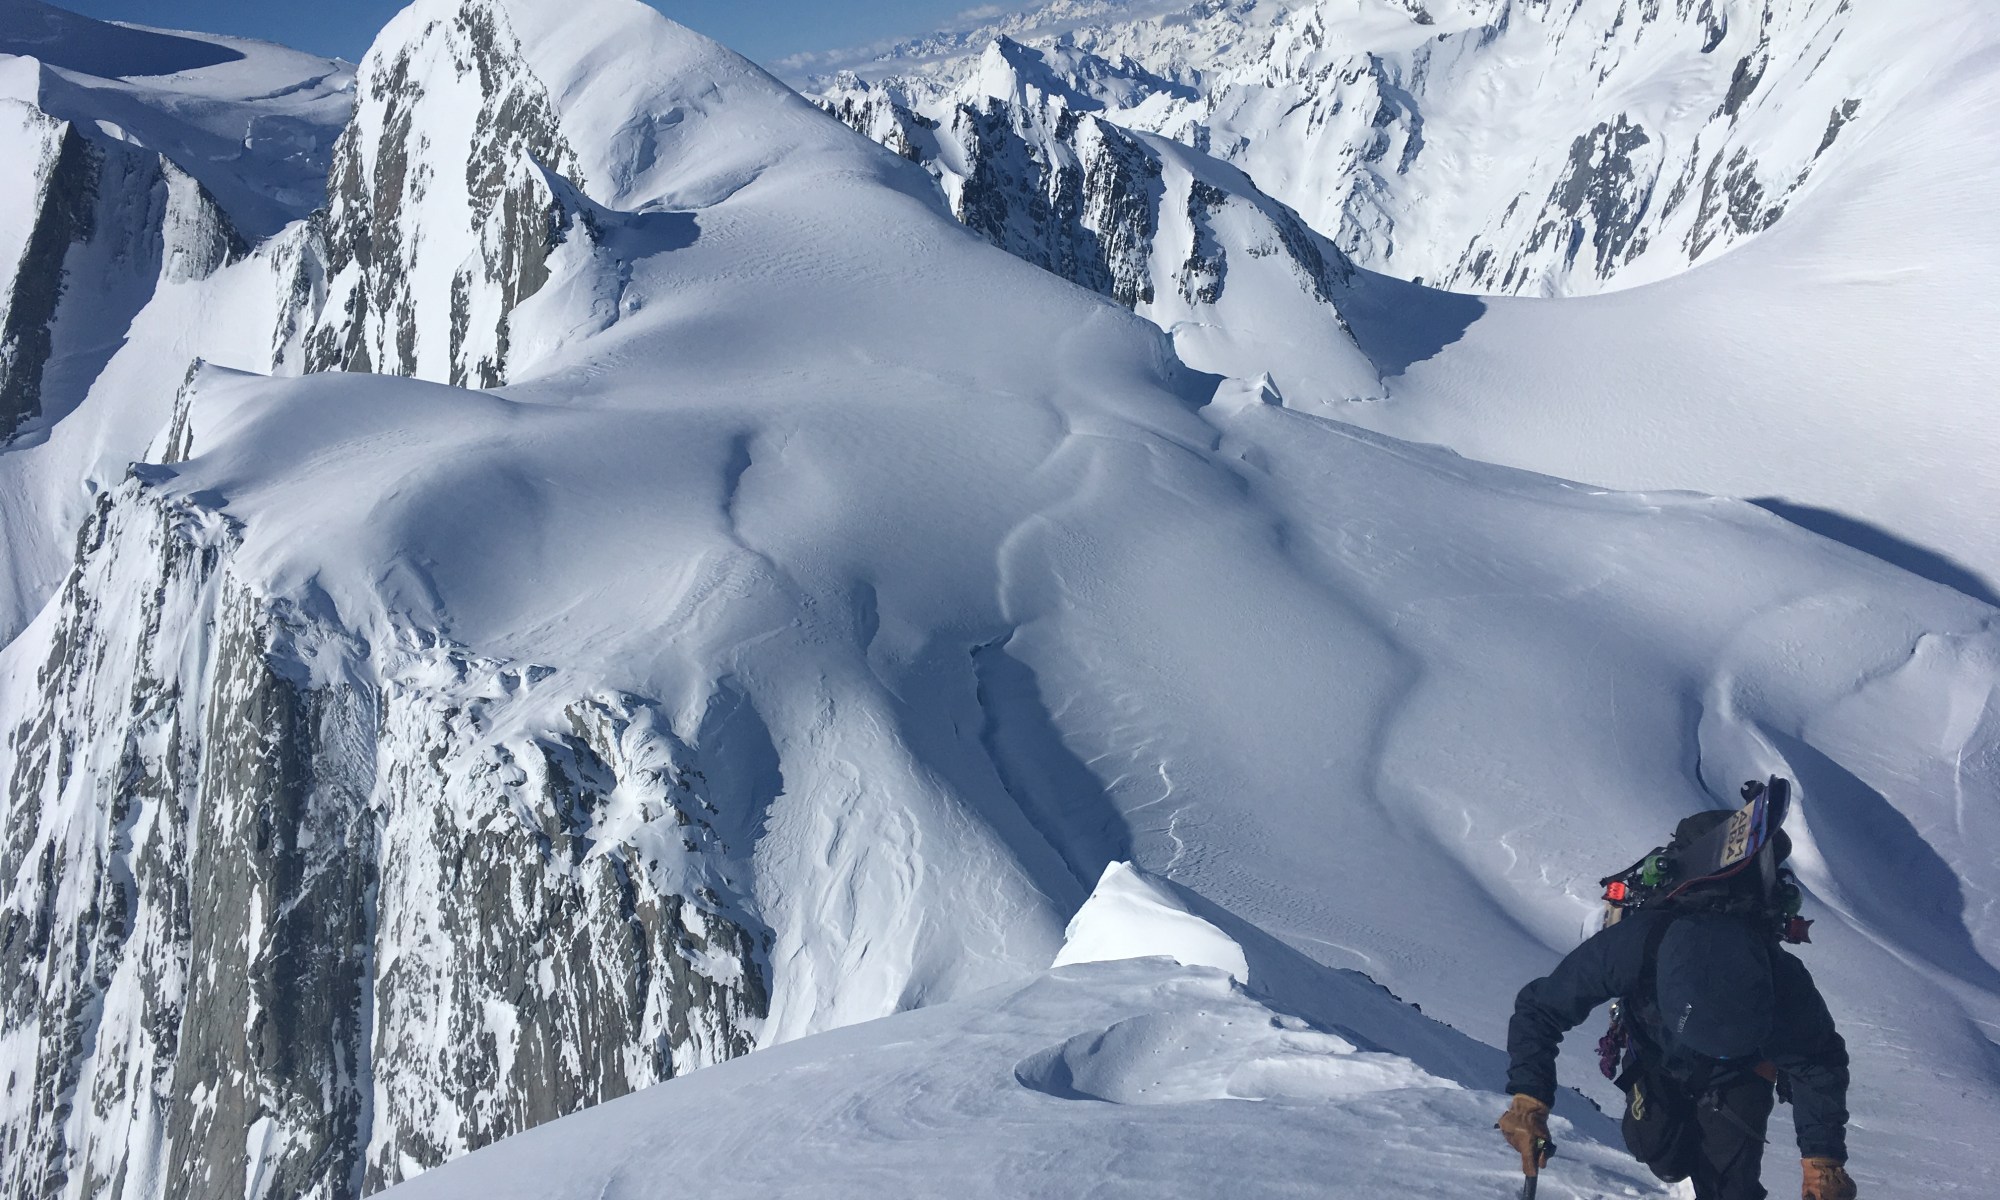
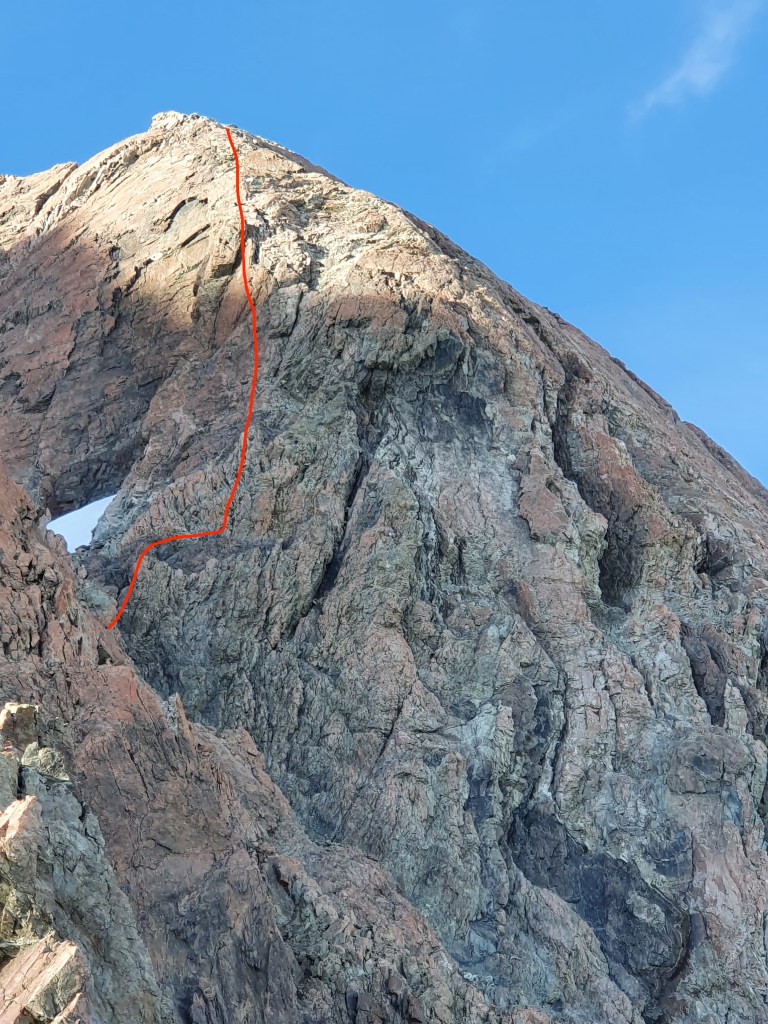
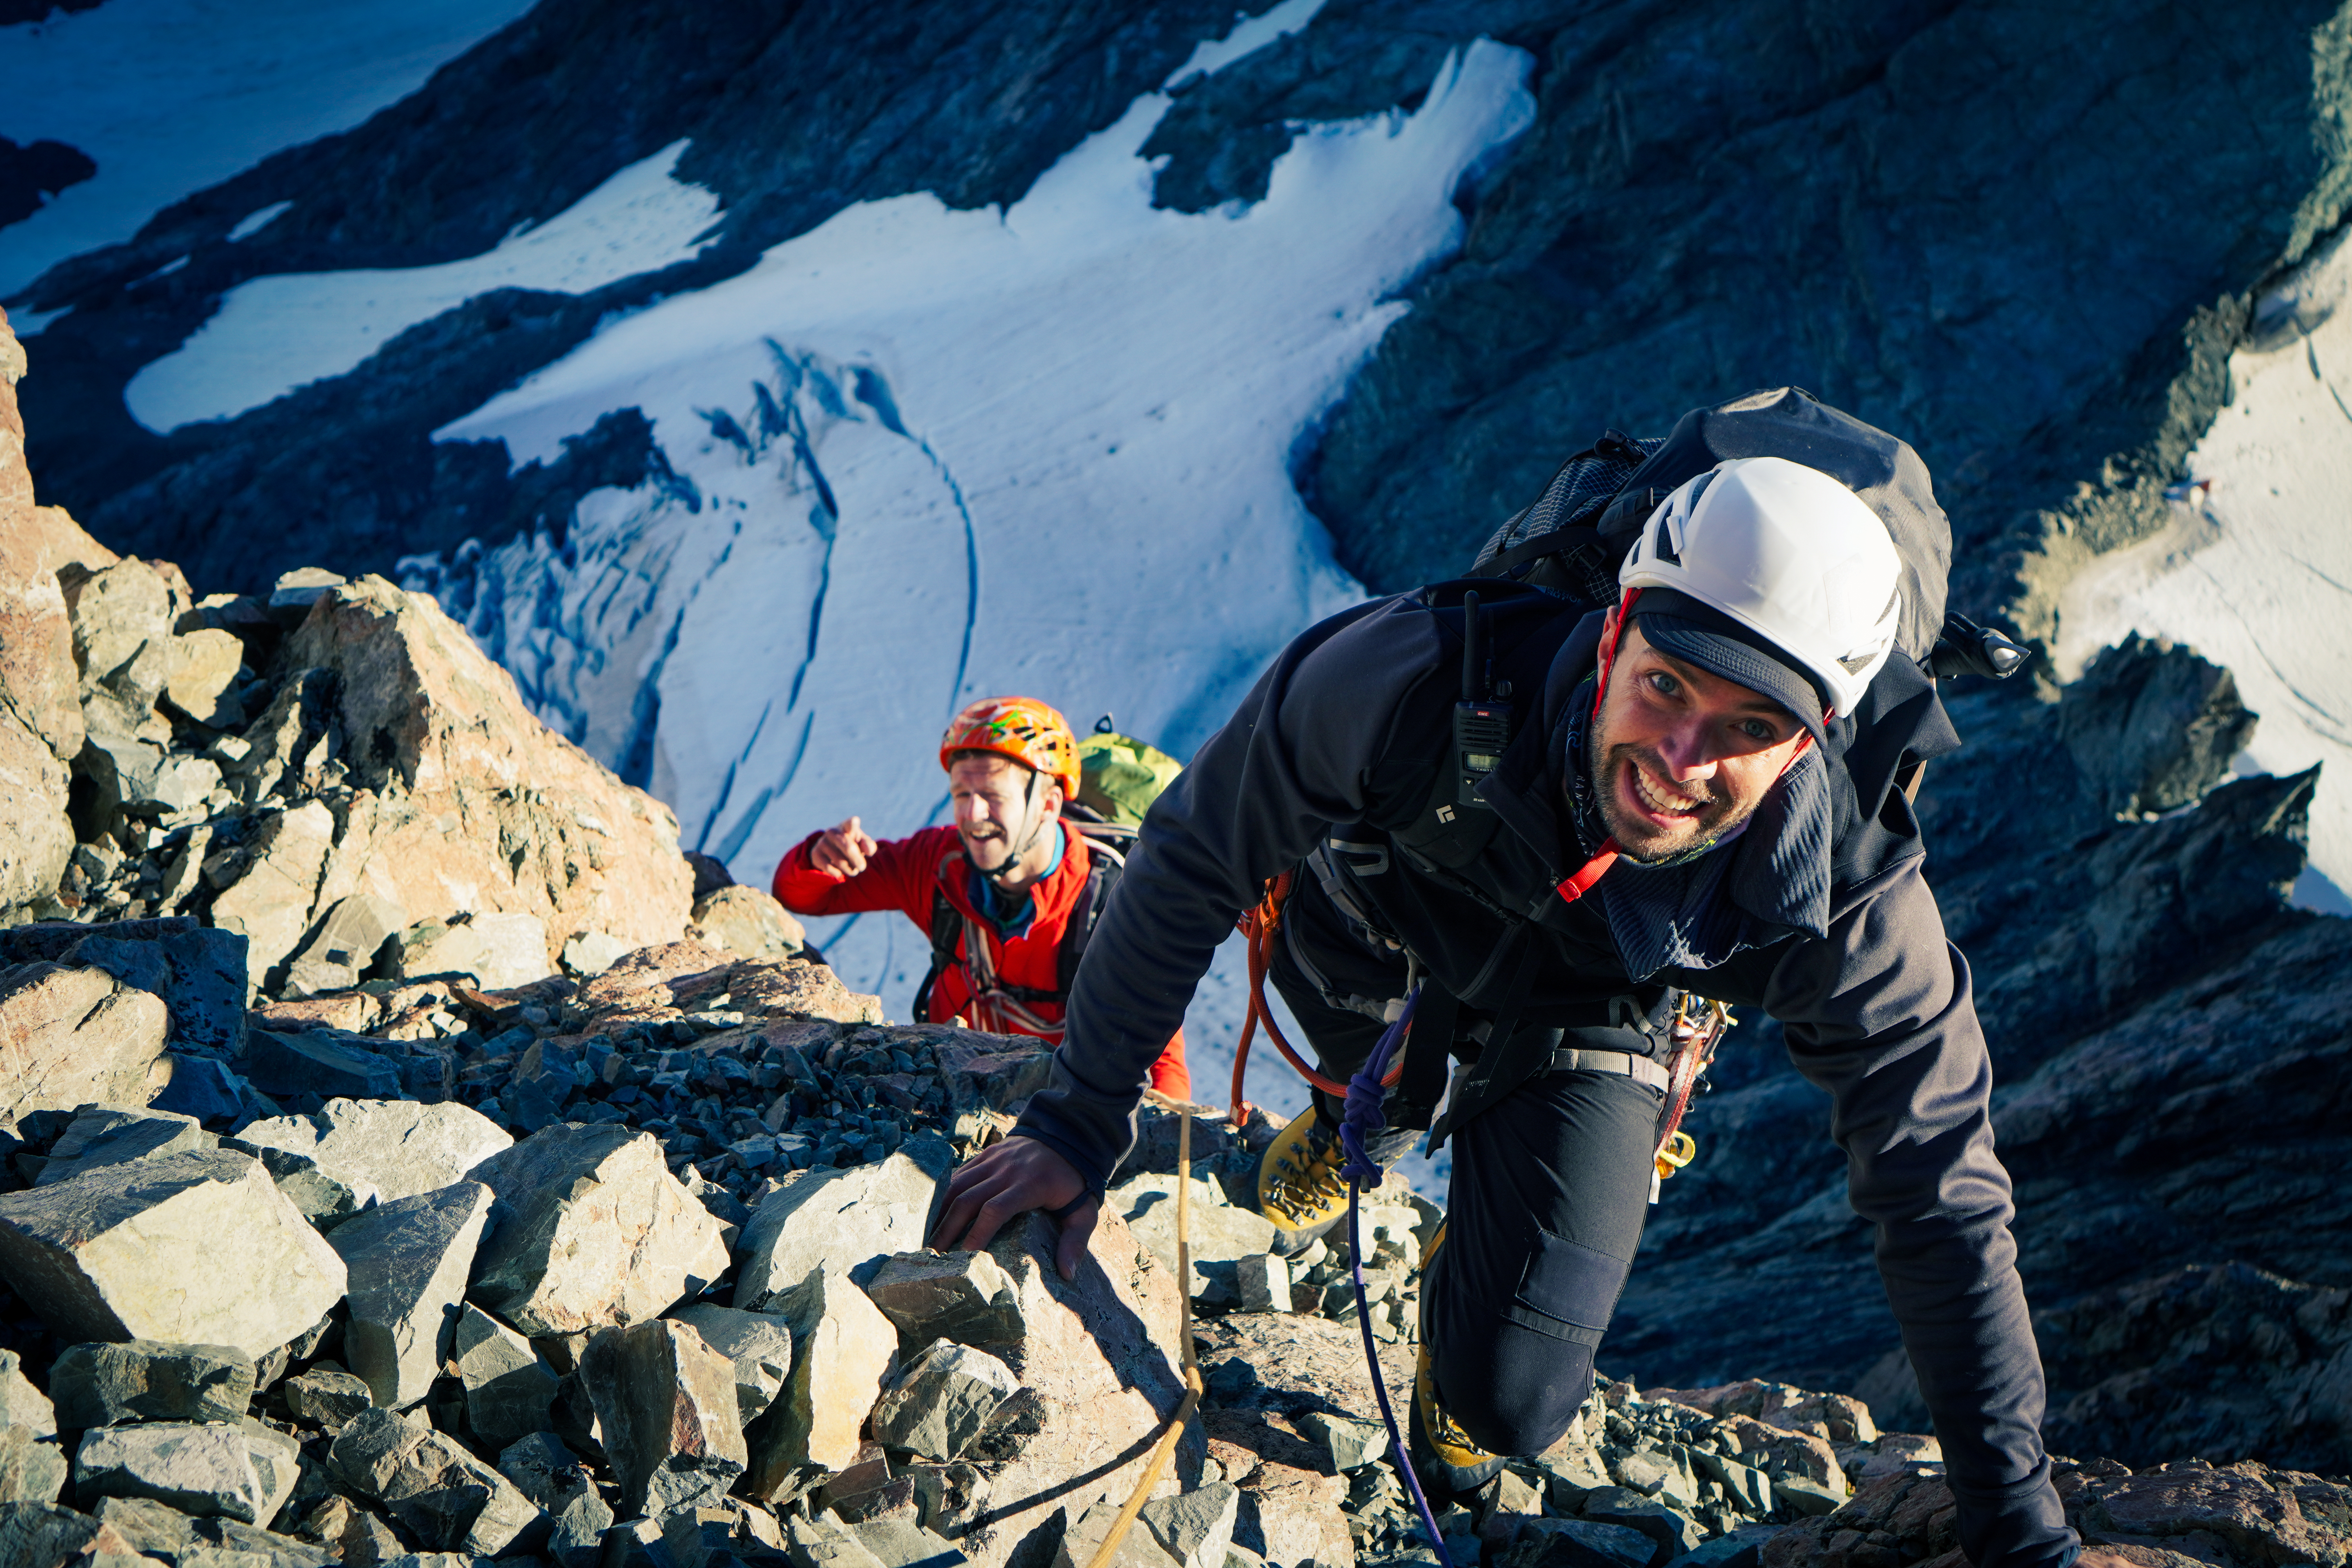
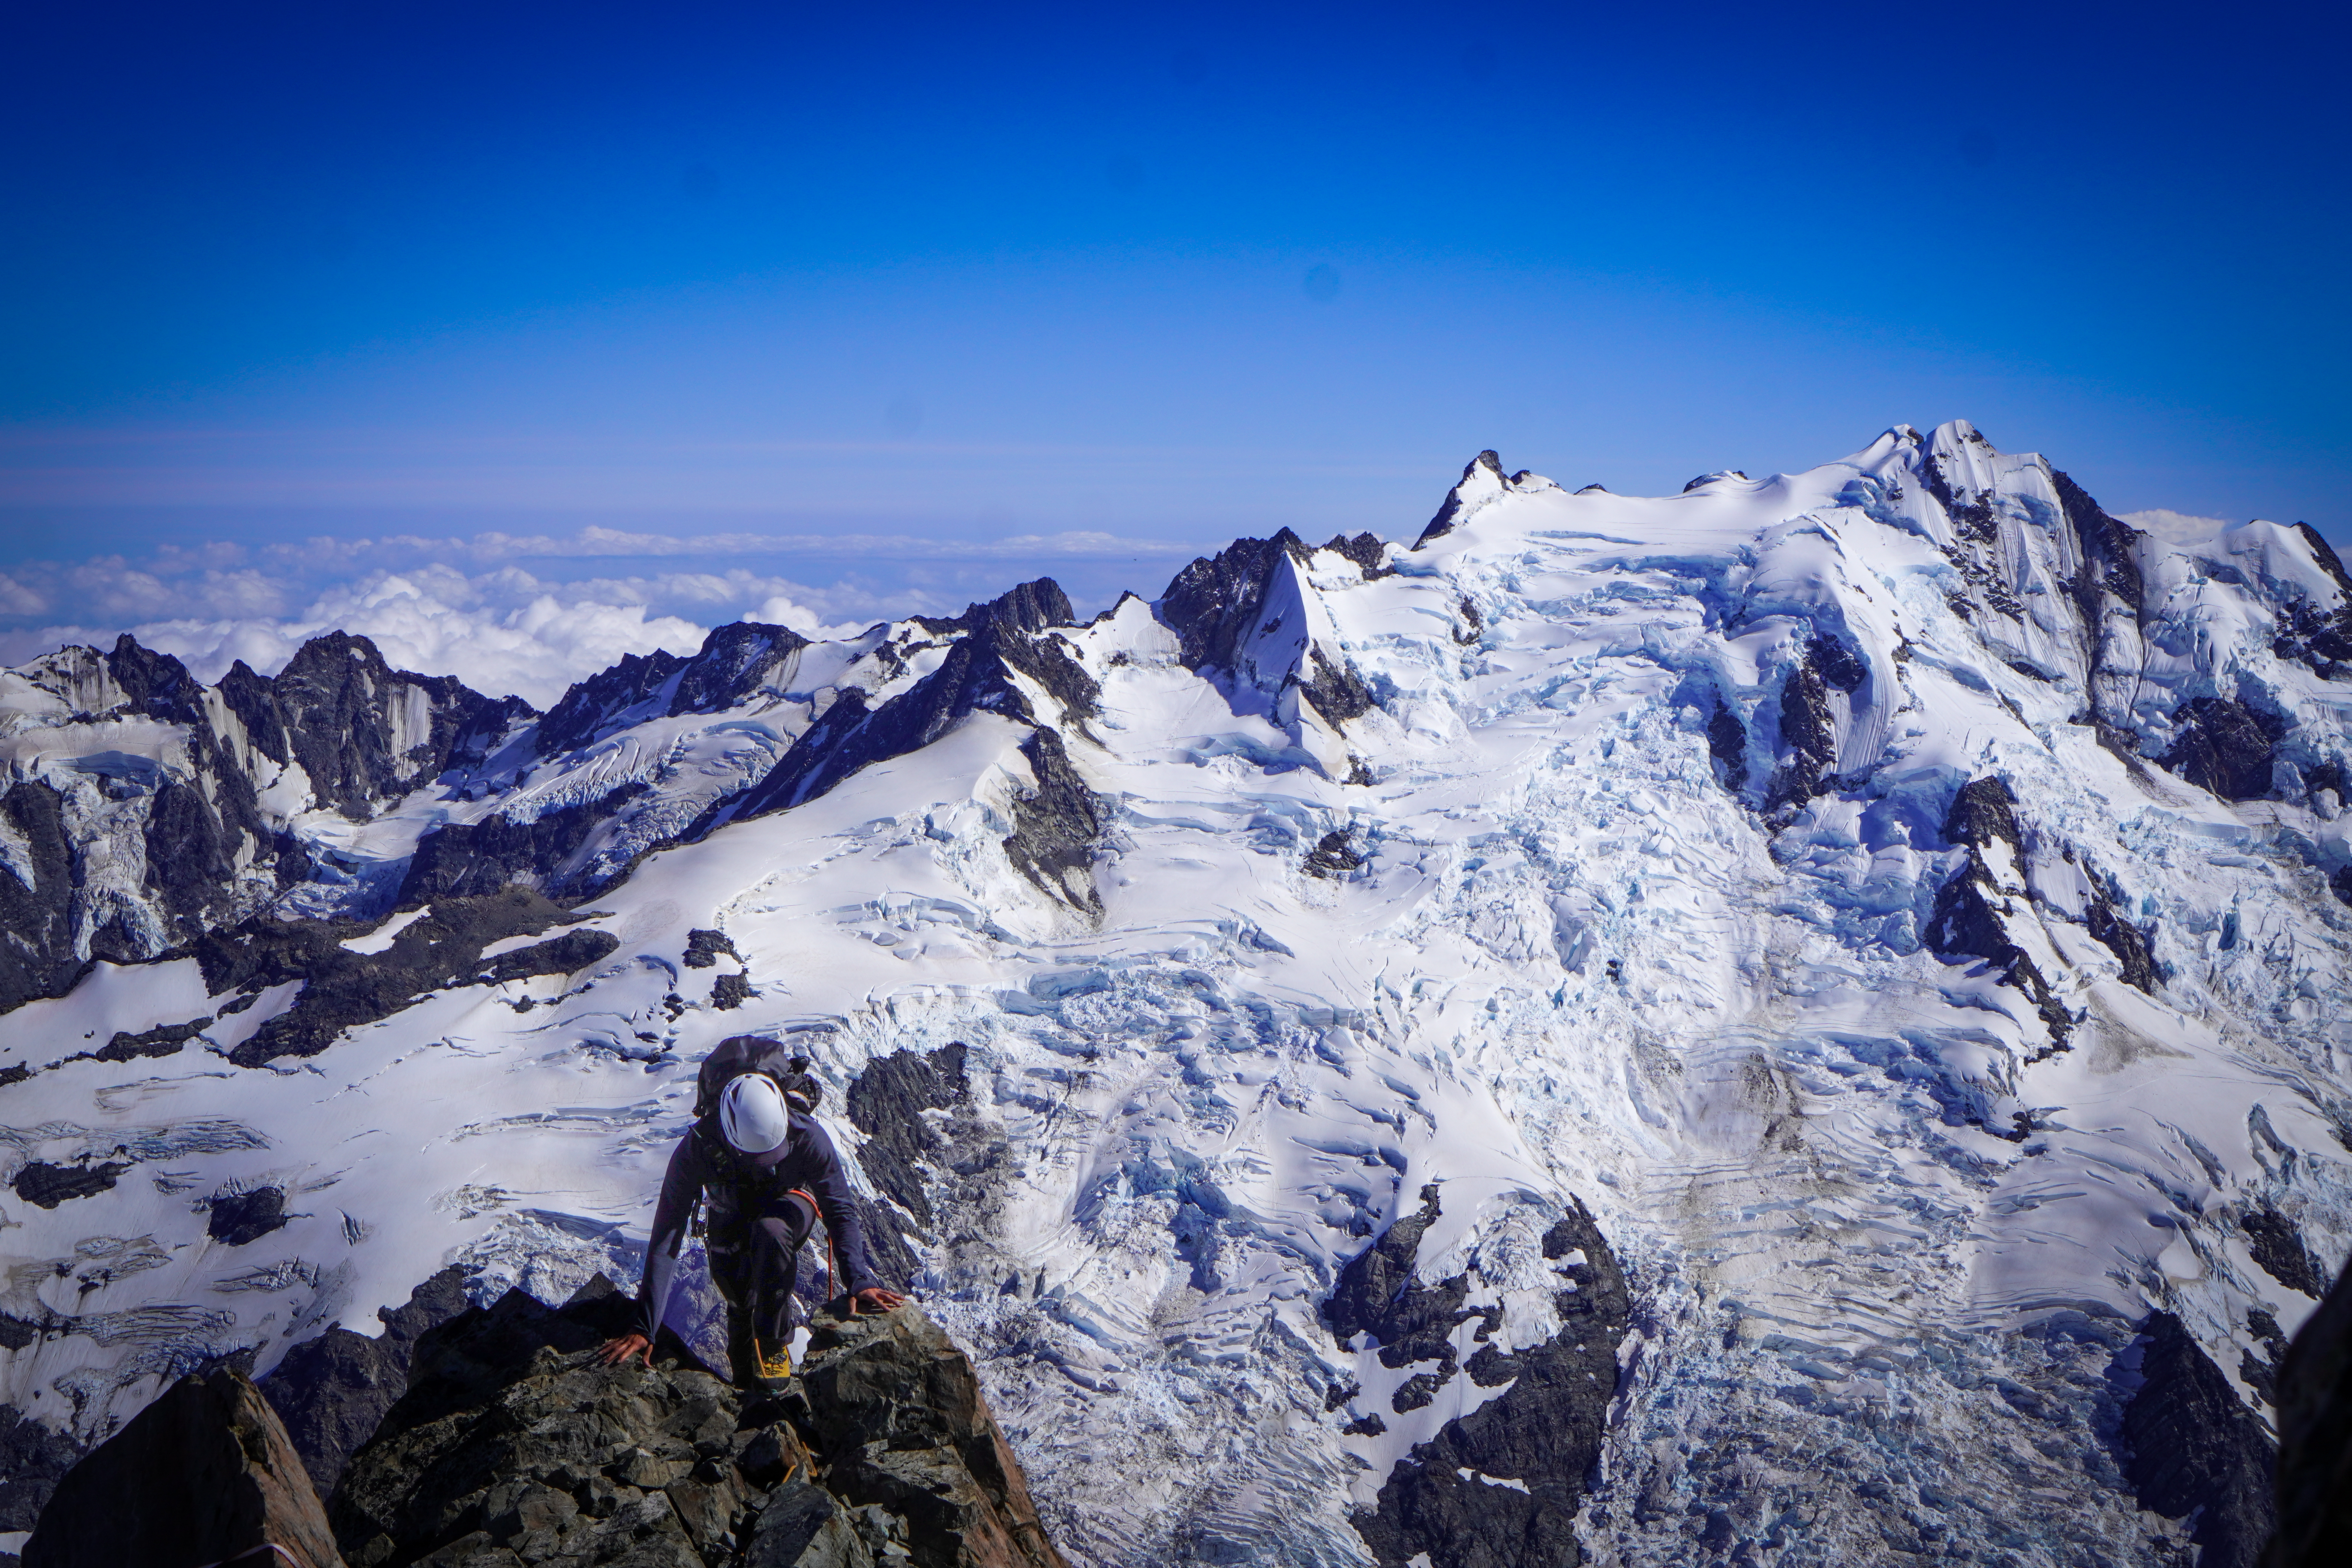
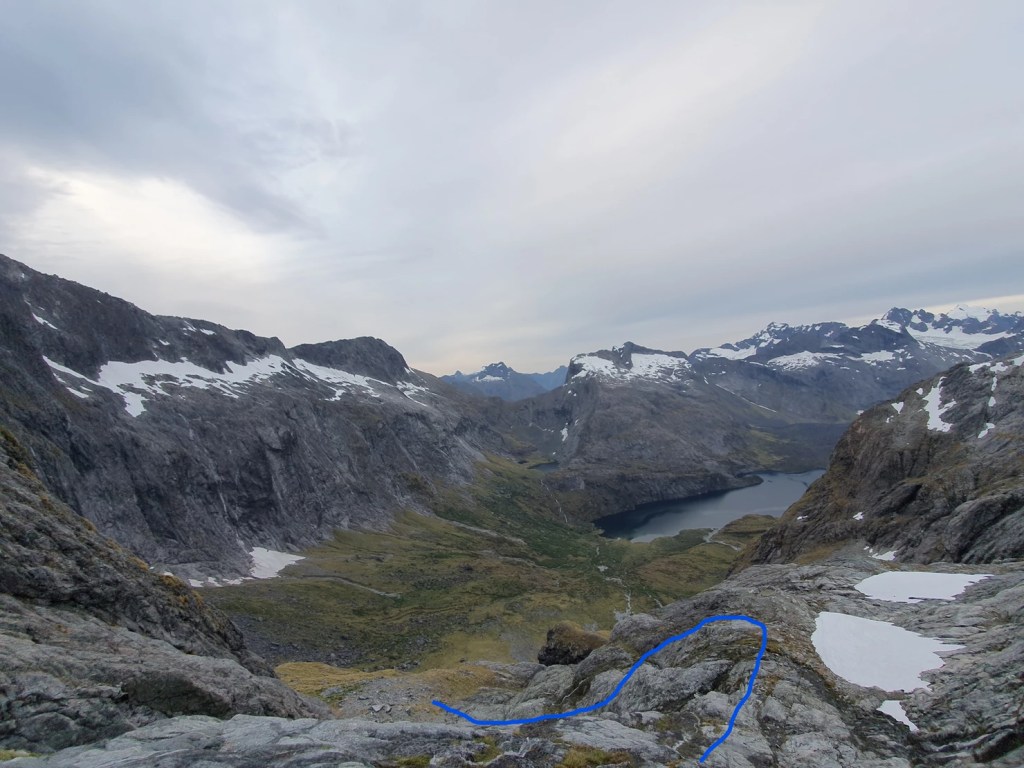
From the basin there some slabs to scramble up and over. Then stick to the margin of the scree along one of the buttresses heading diagonally right. This leads you to a thin narrow gully 15m shy of the ridge – rock was a bit loose here so watch for rockfall, was better slightly to the left of the gully staying high on the buttress. We were on the ridge within 2h.
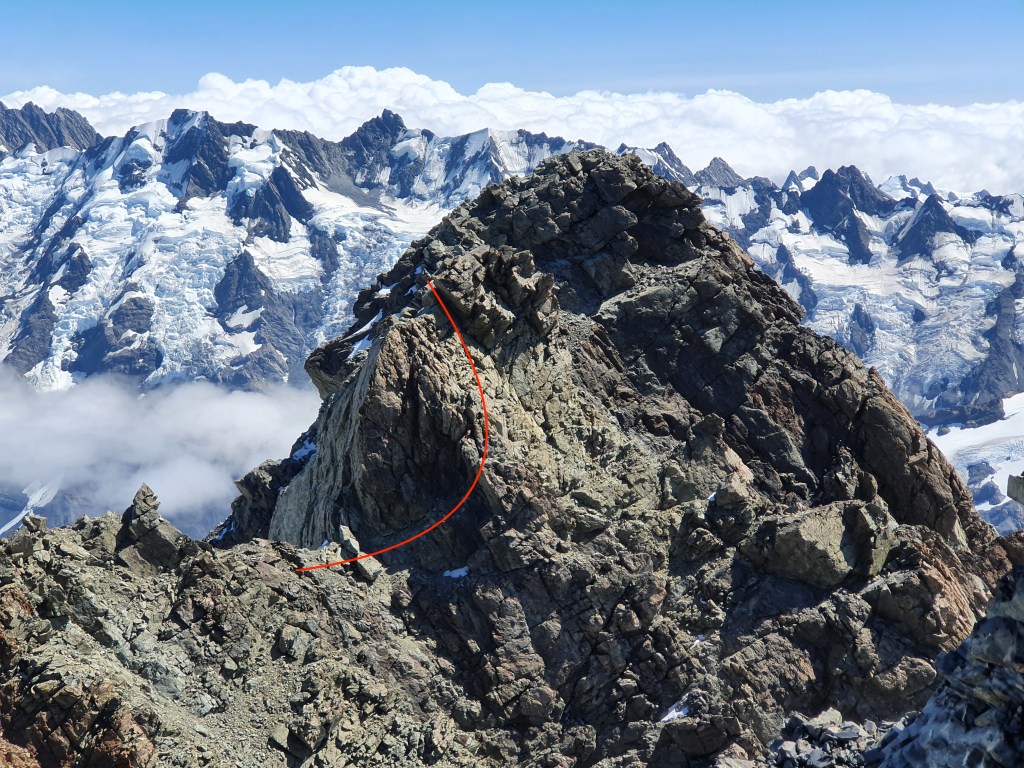
Our route up to Phipps, seen from Mt TempleOur route up to Phipps, as seen from Temple Basin
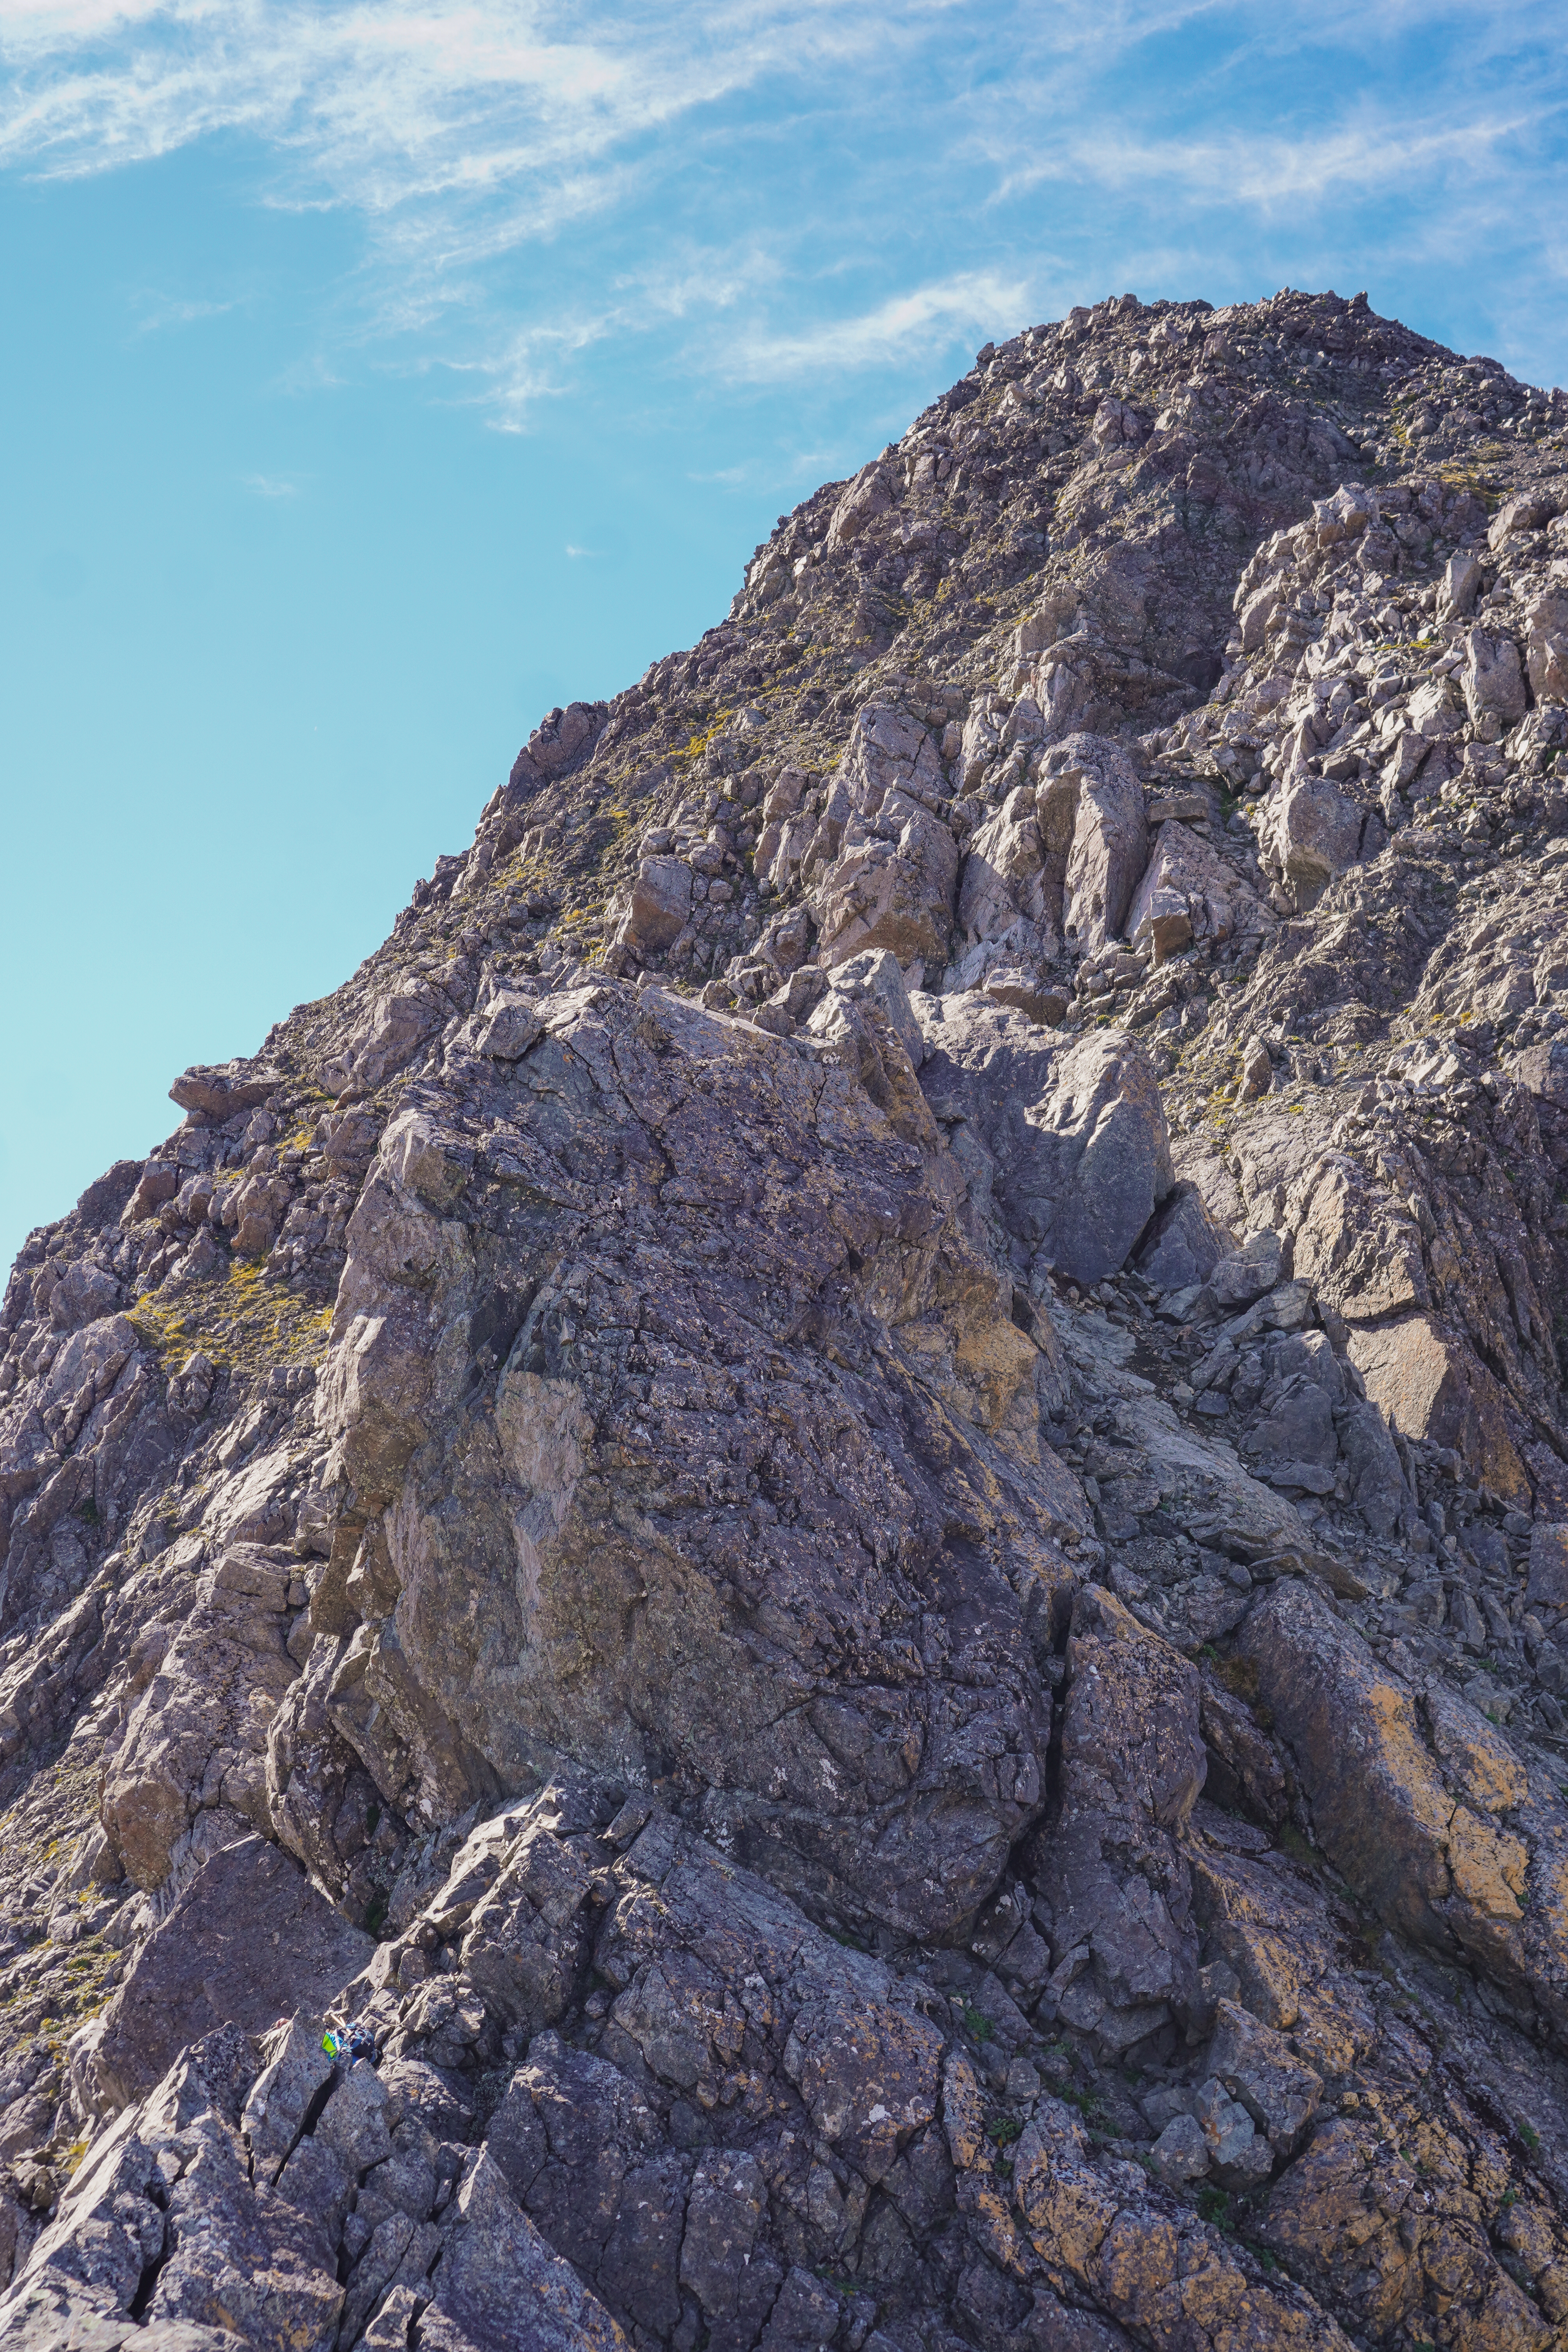
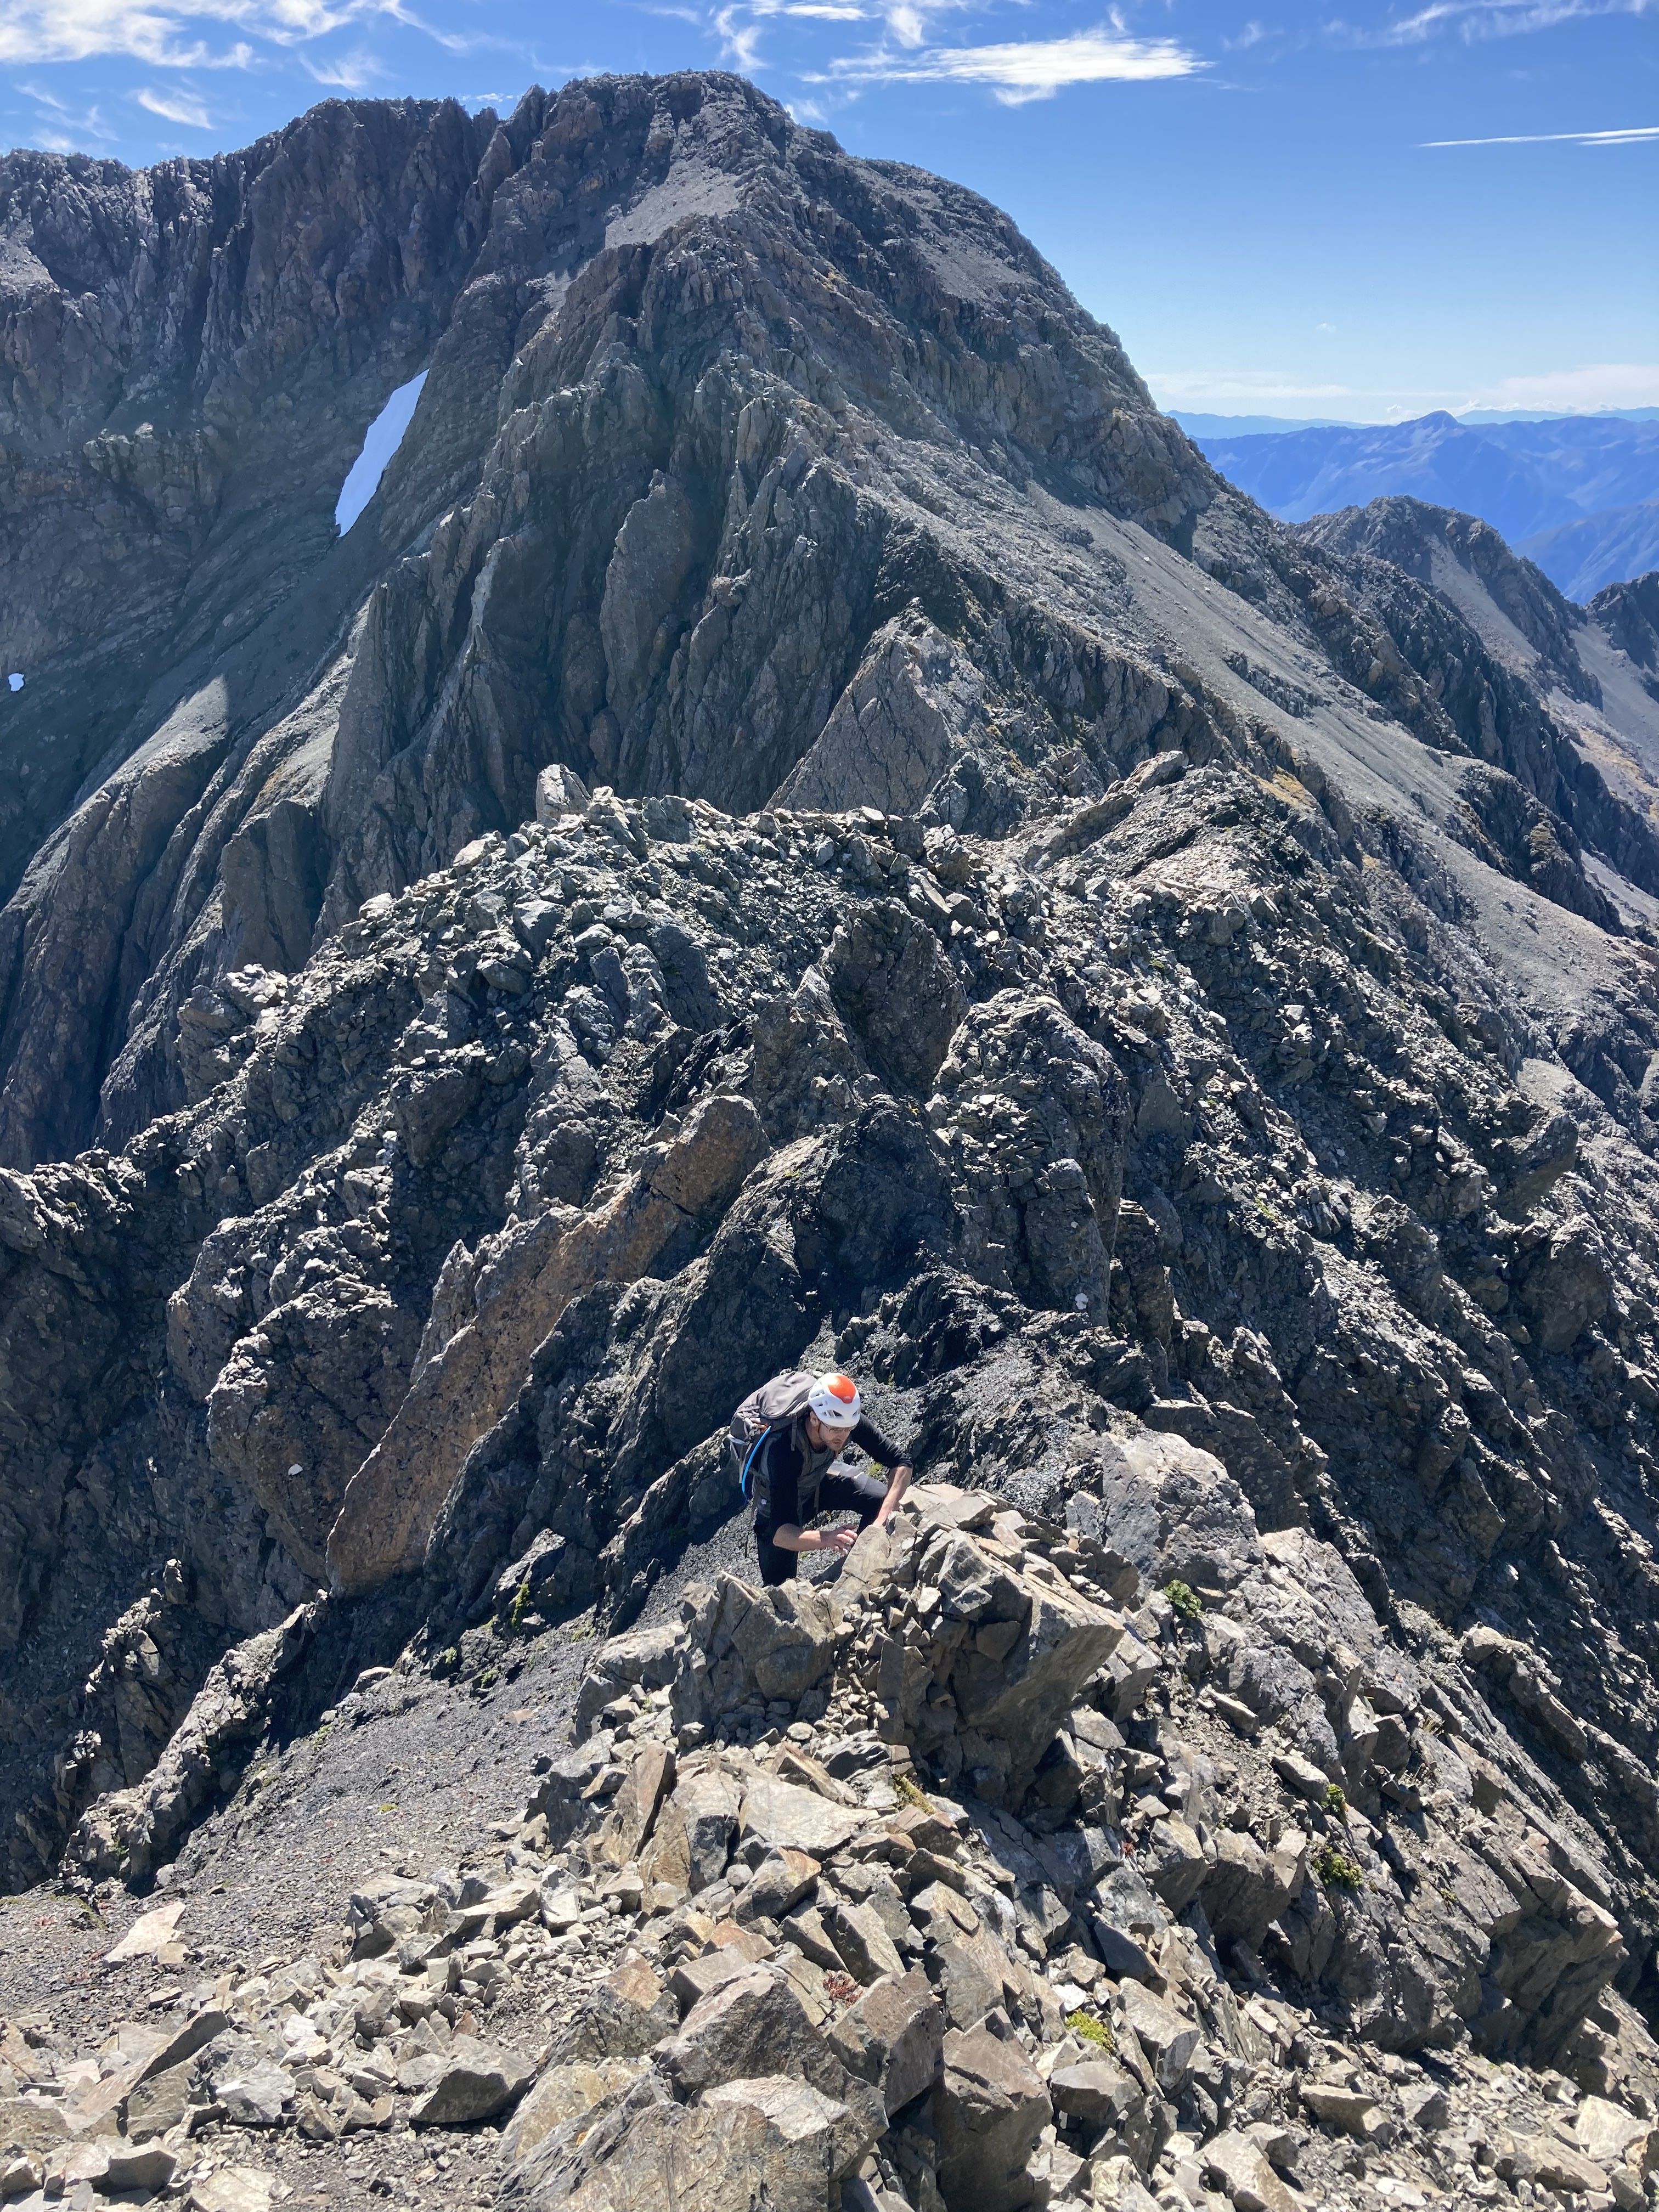
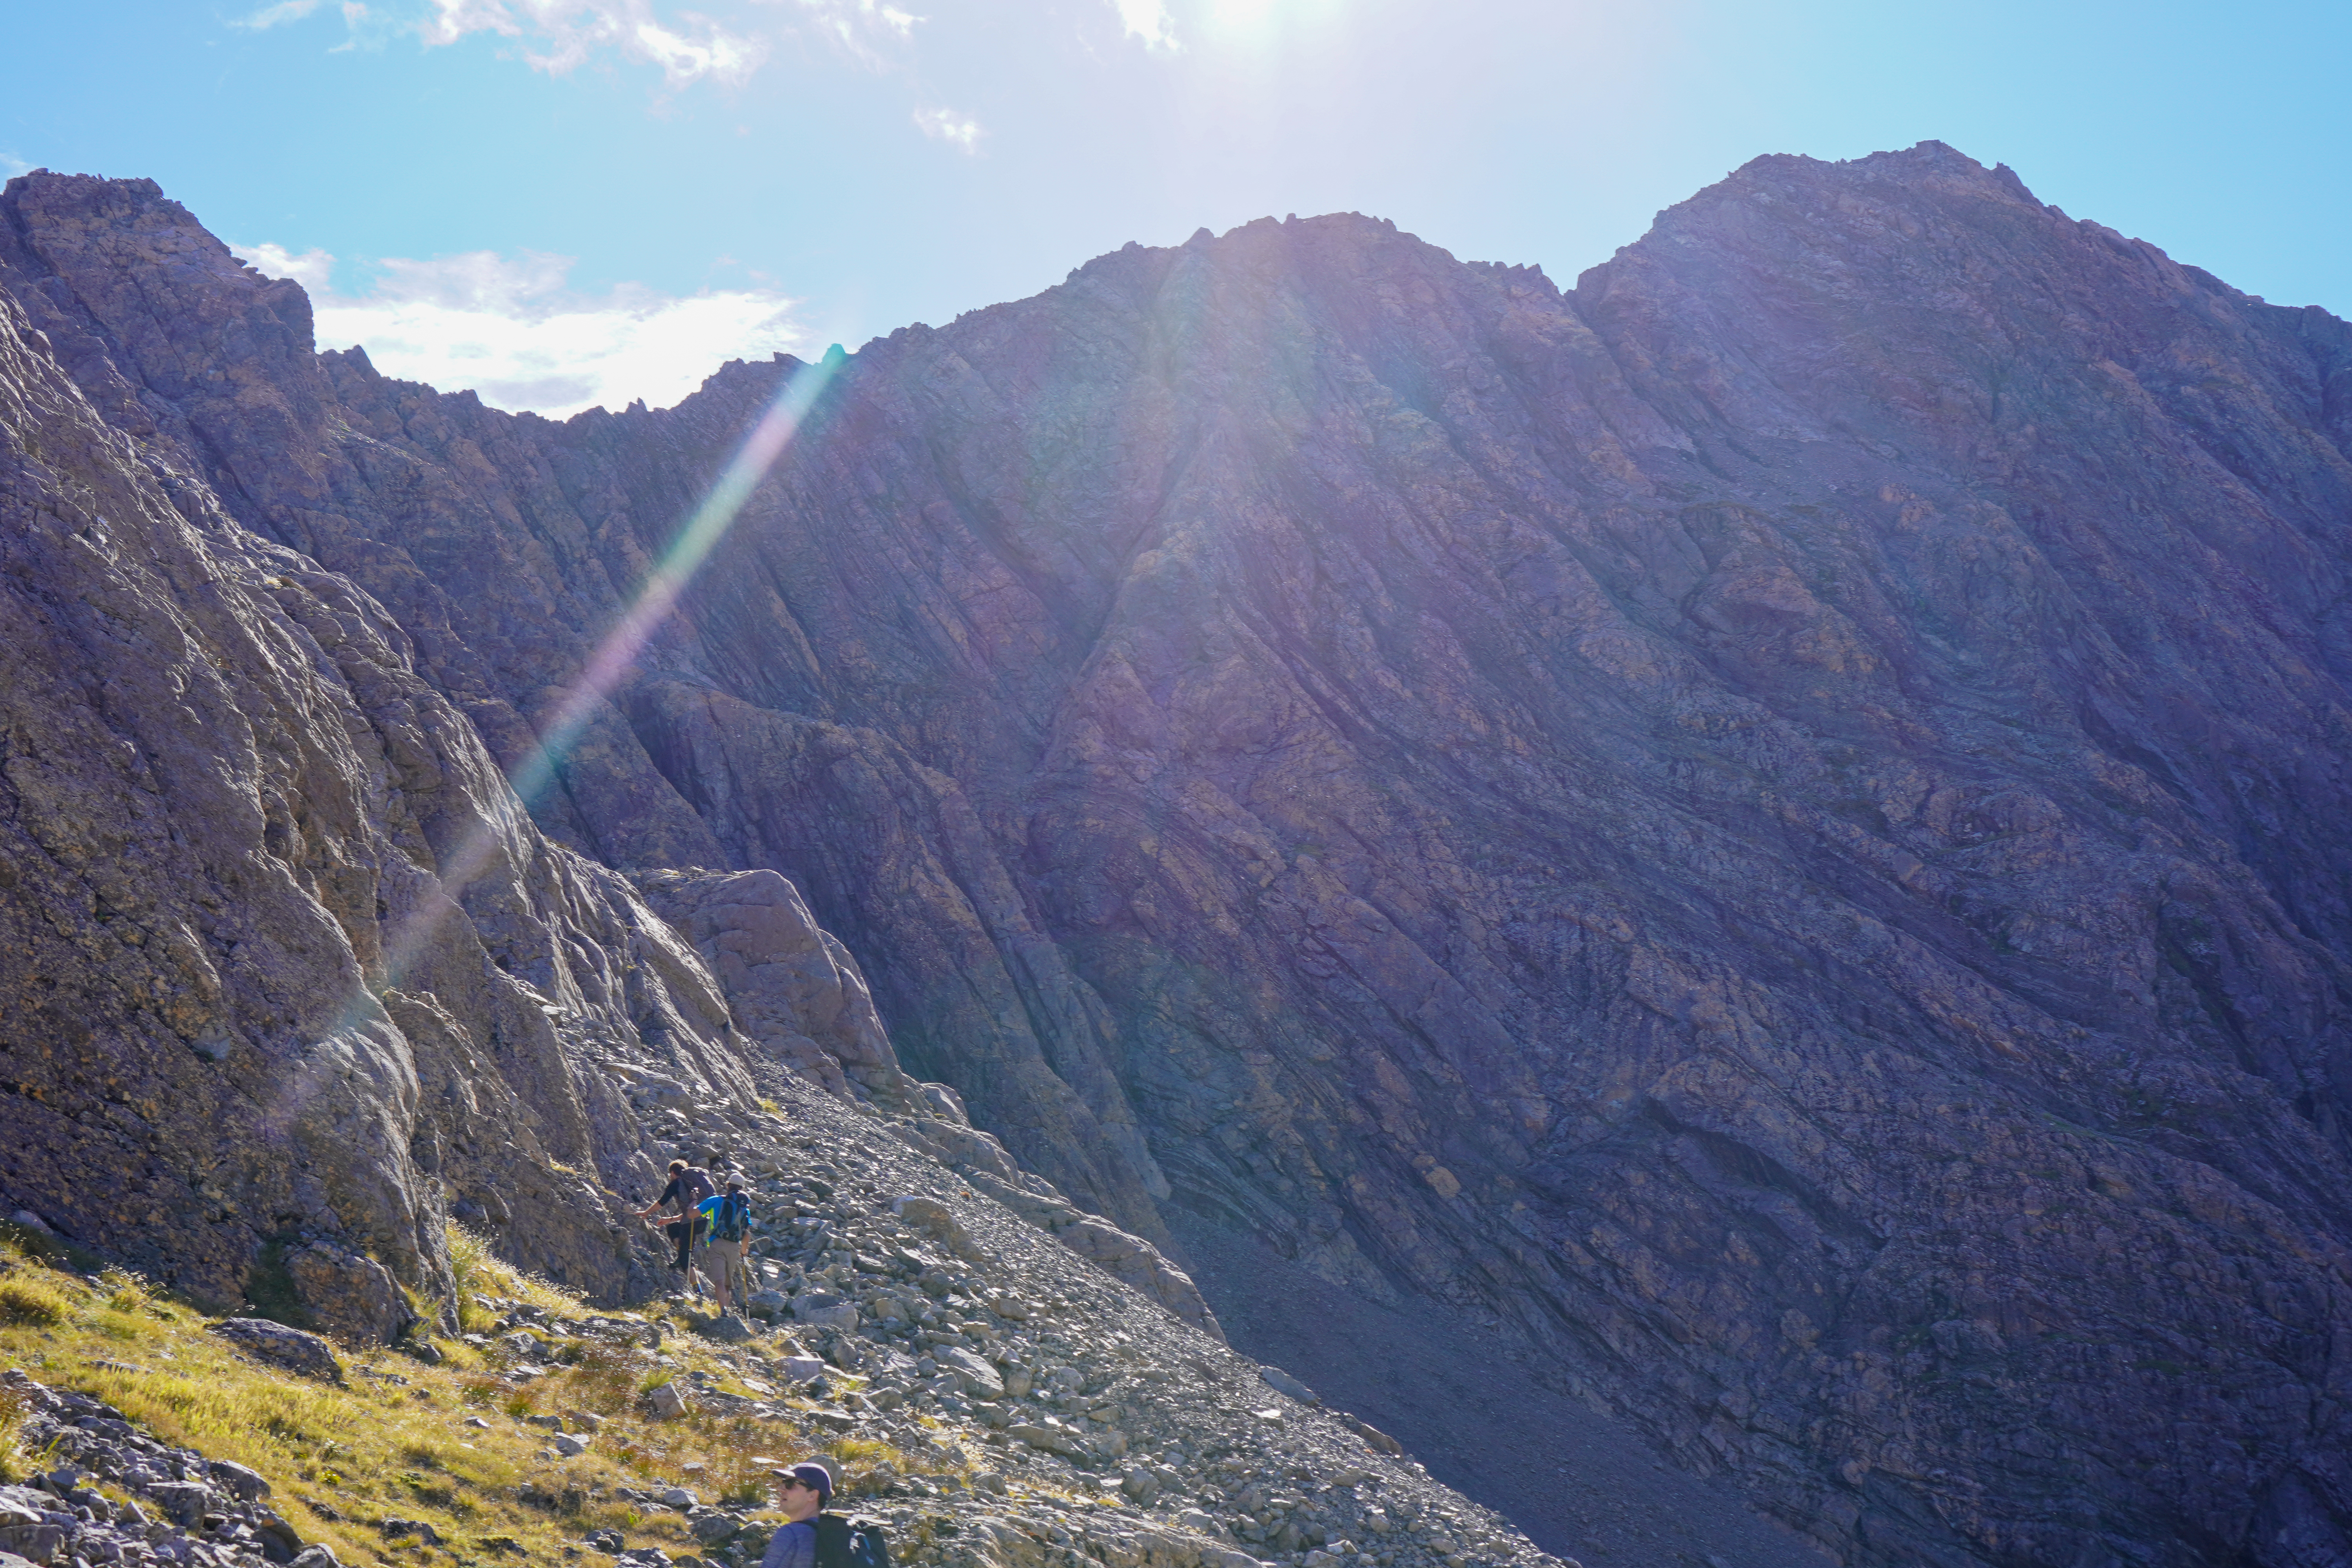
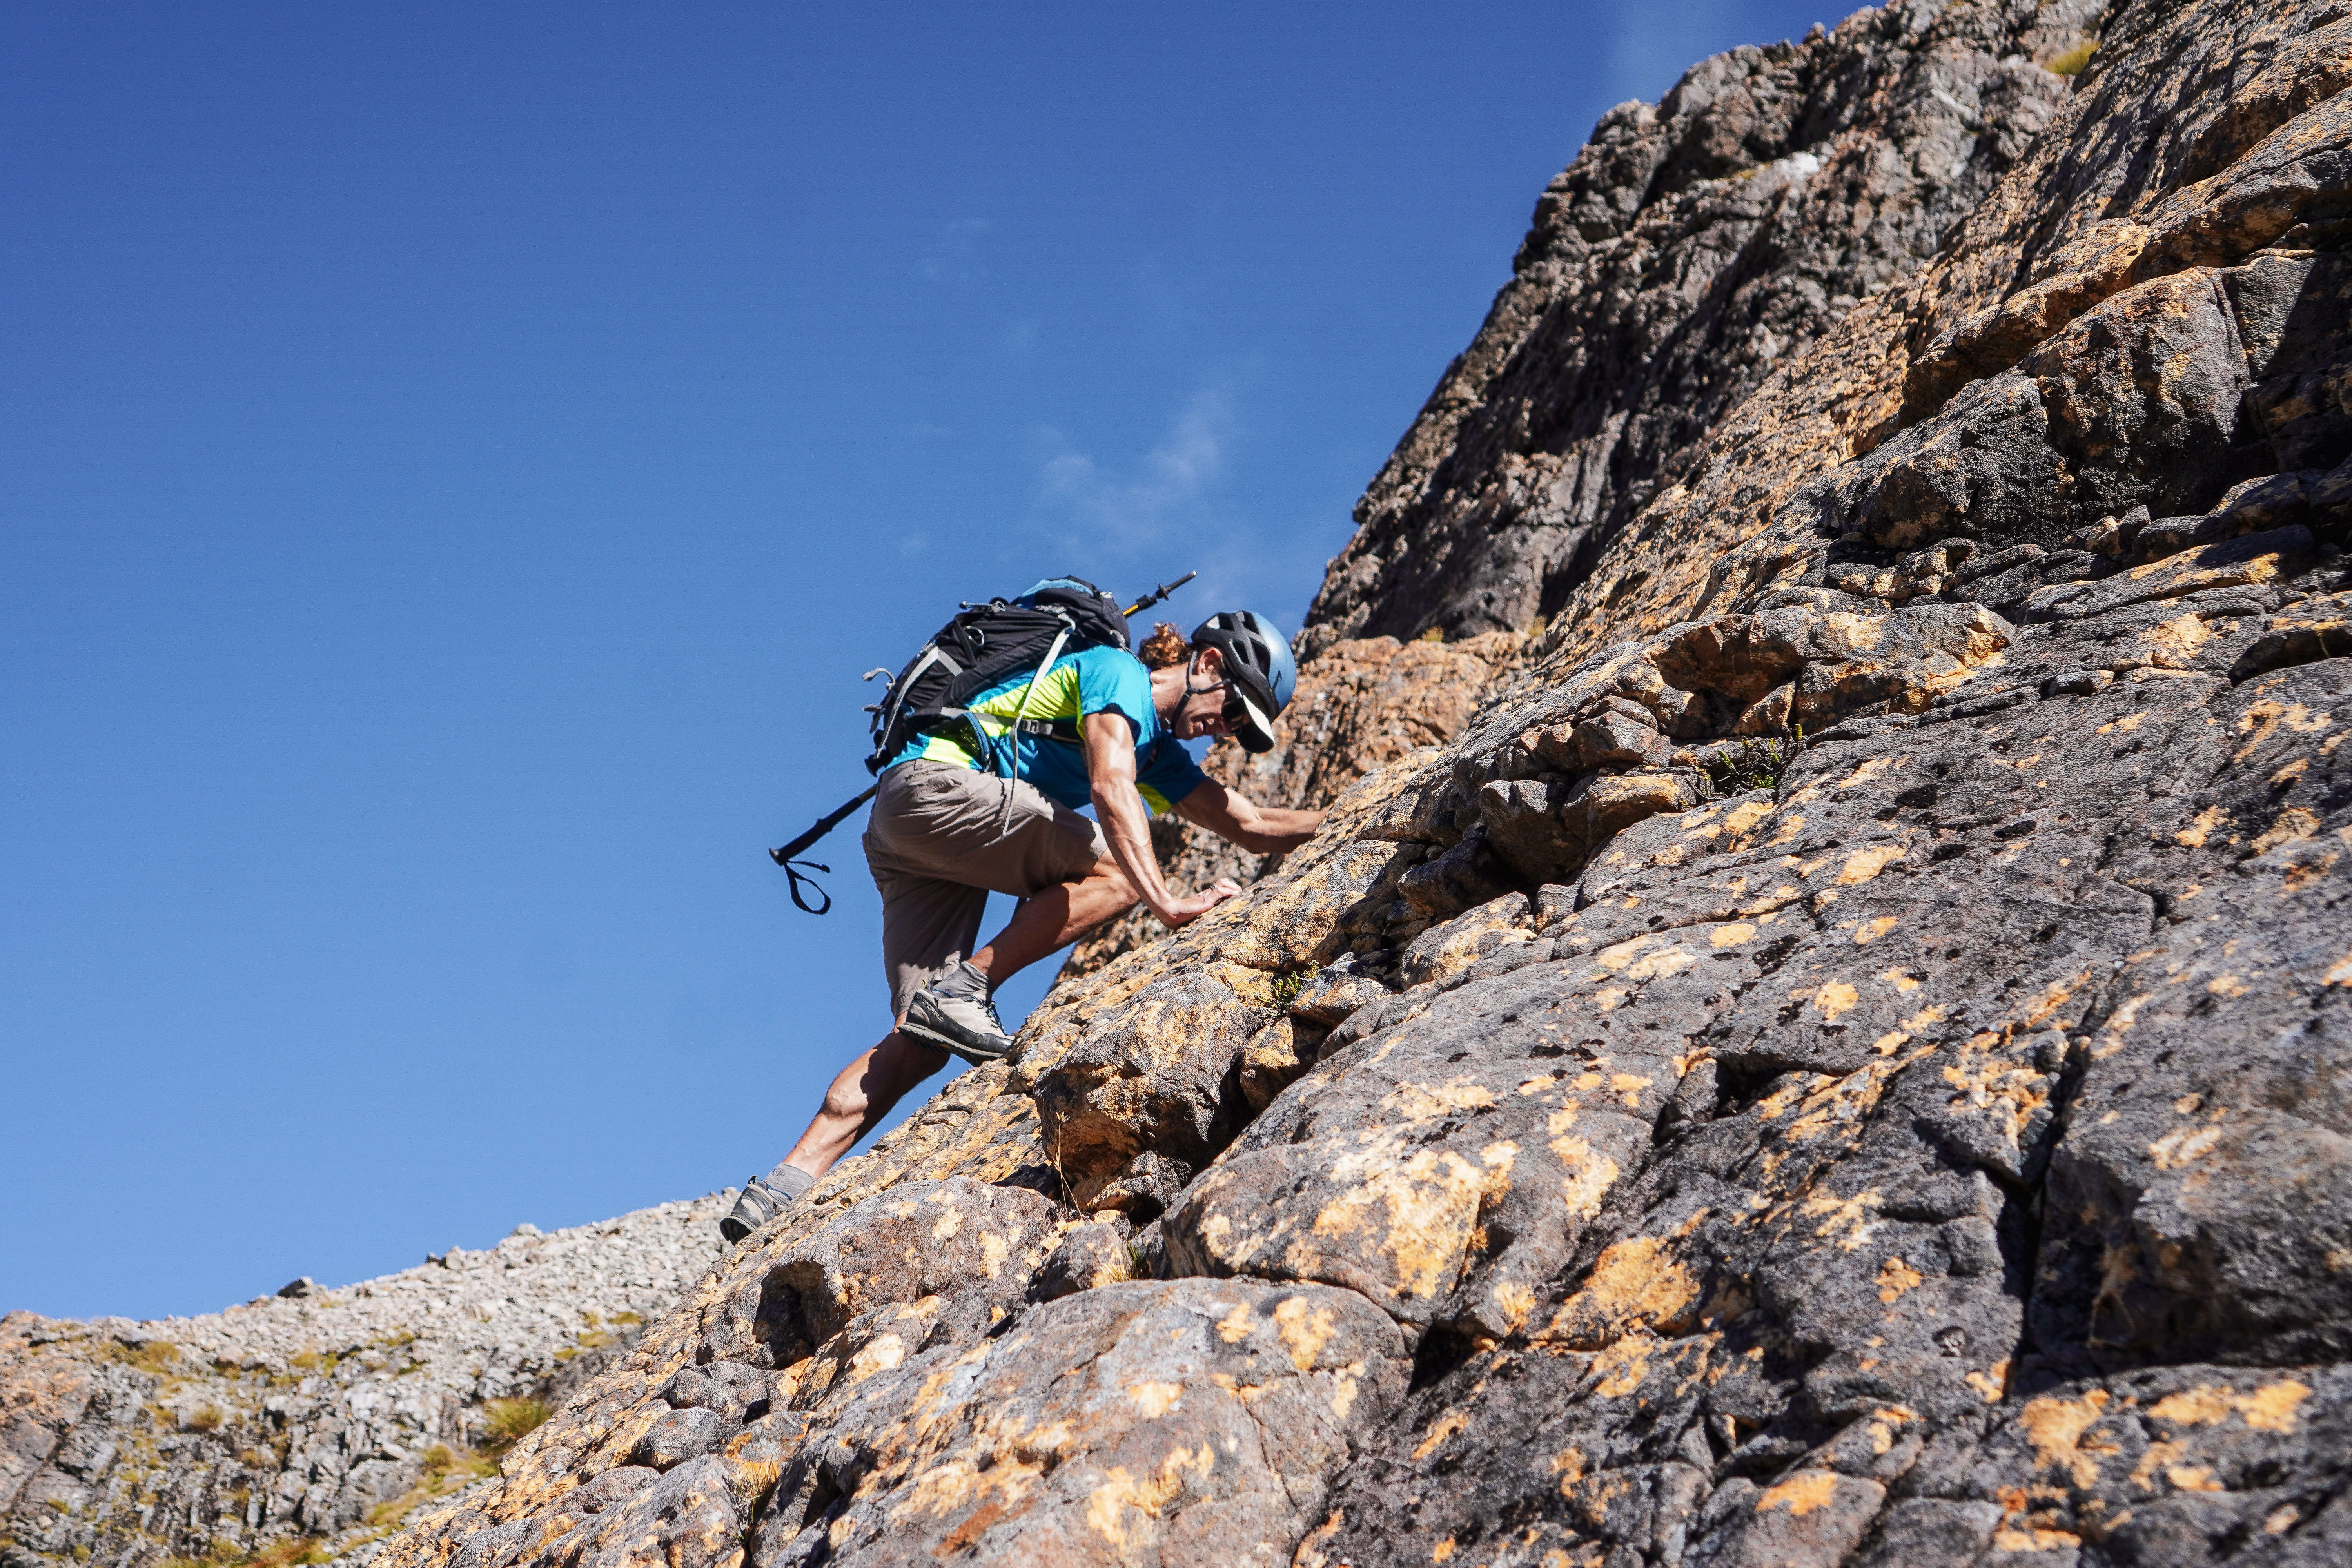
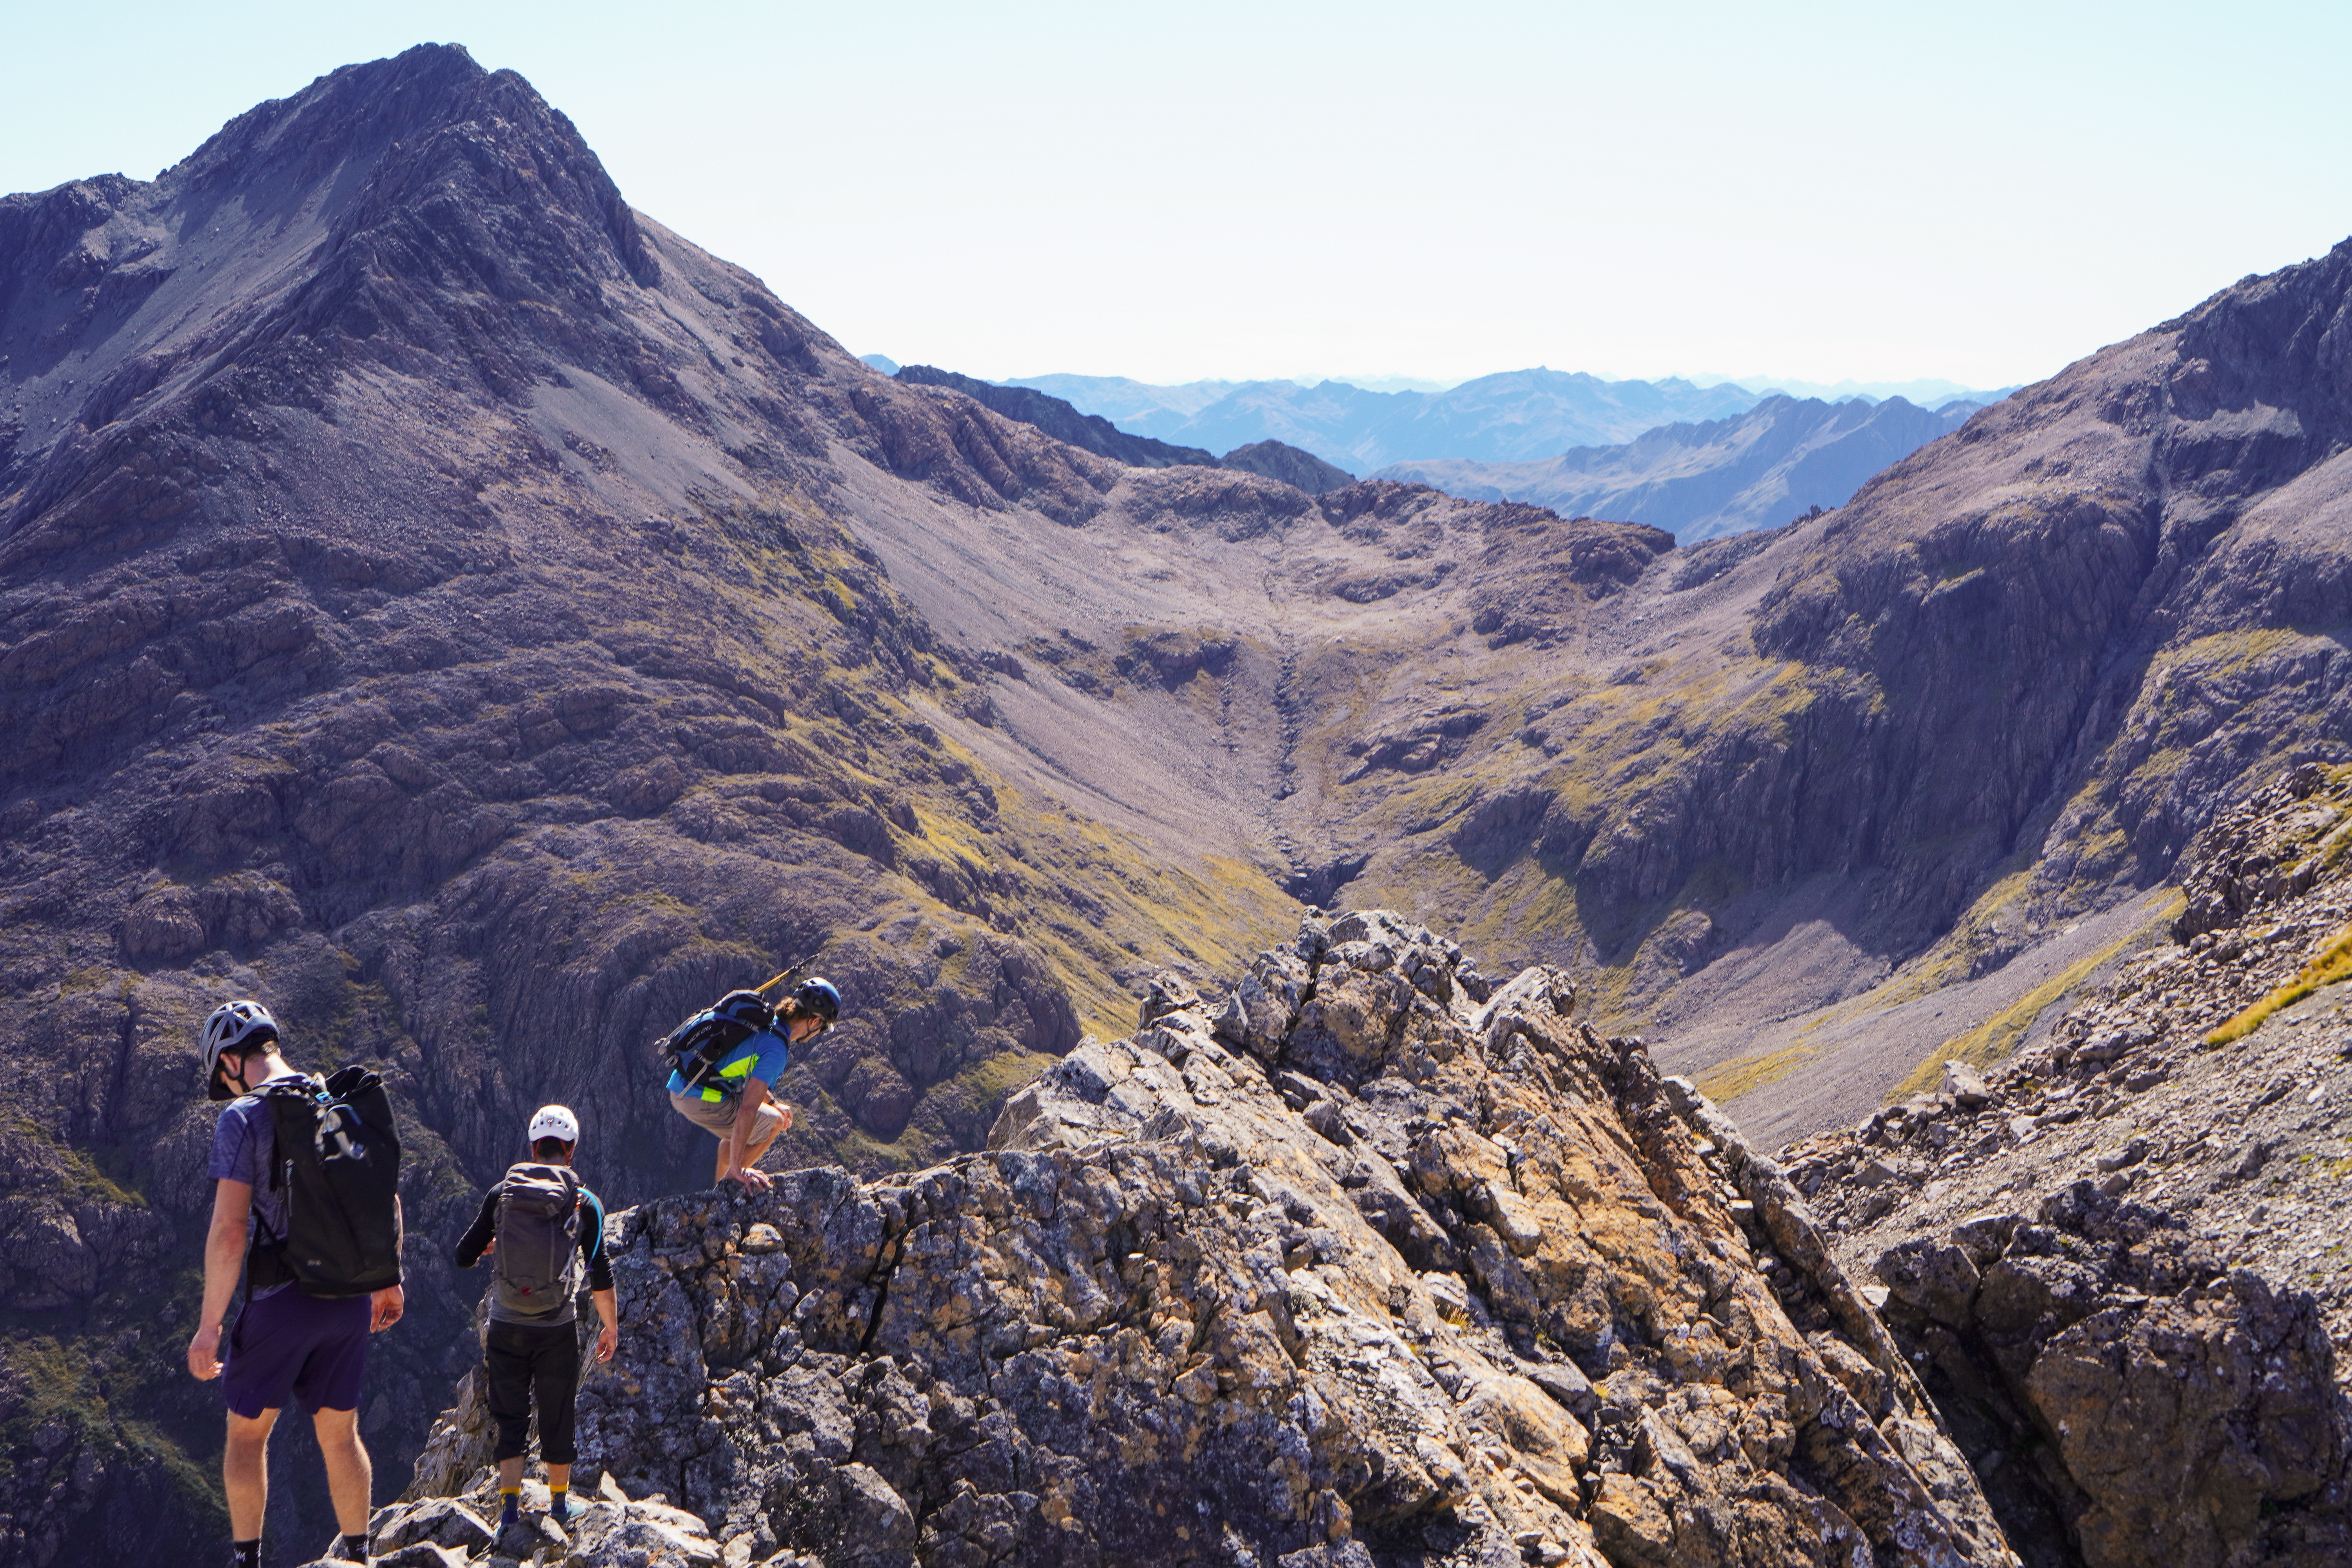
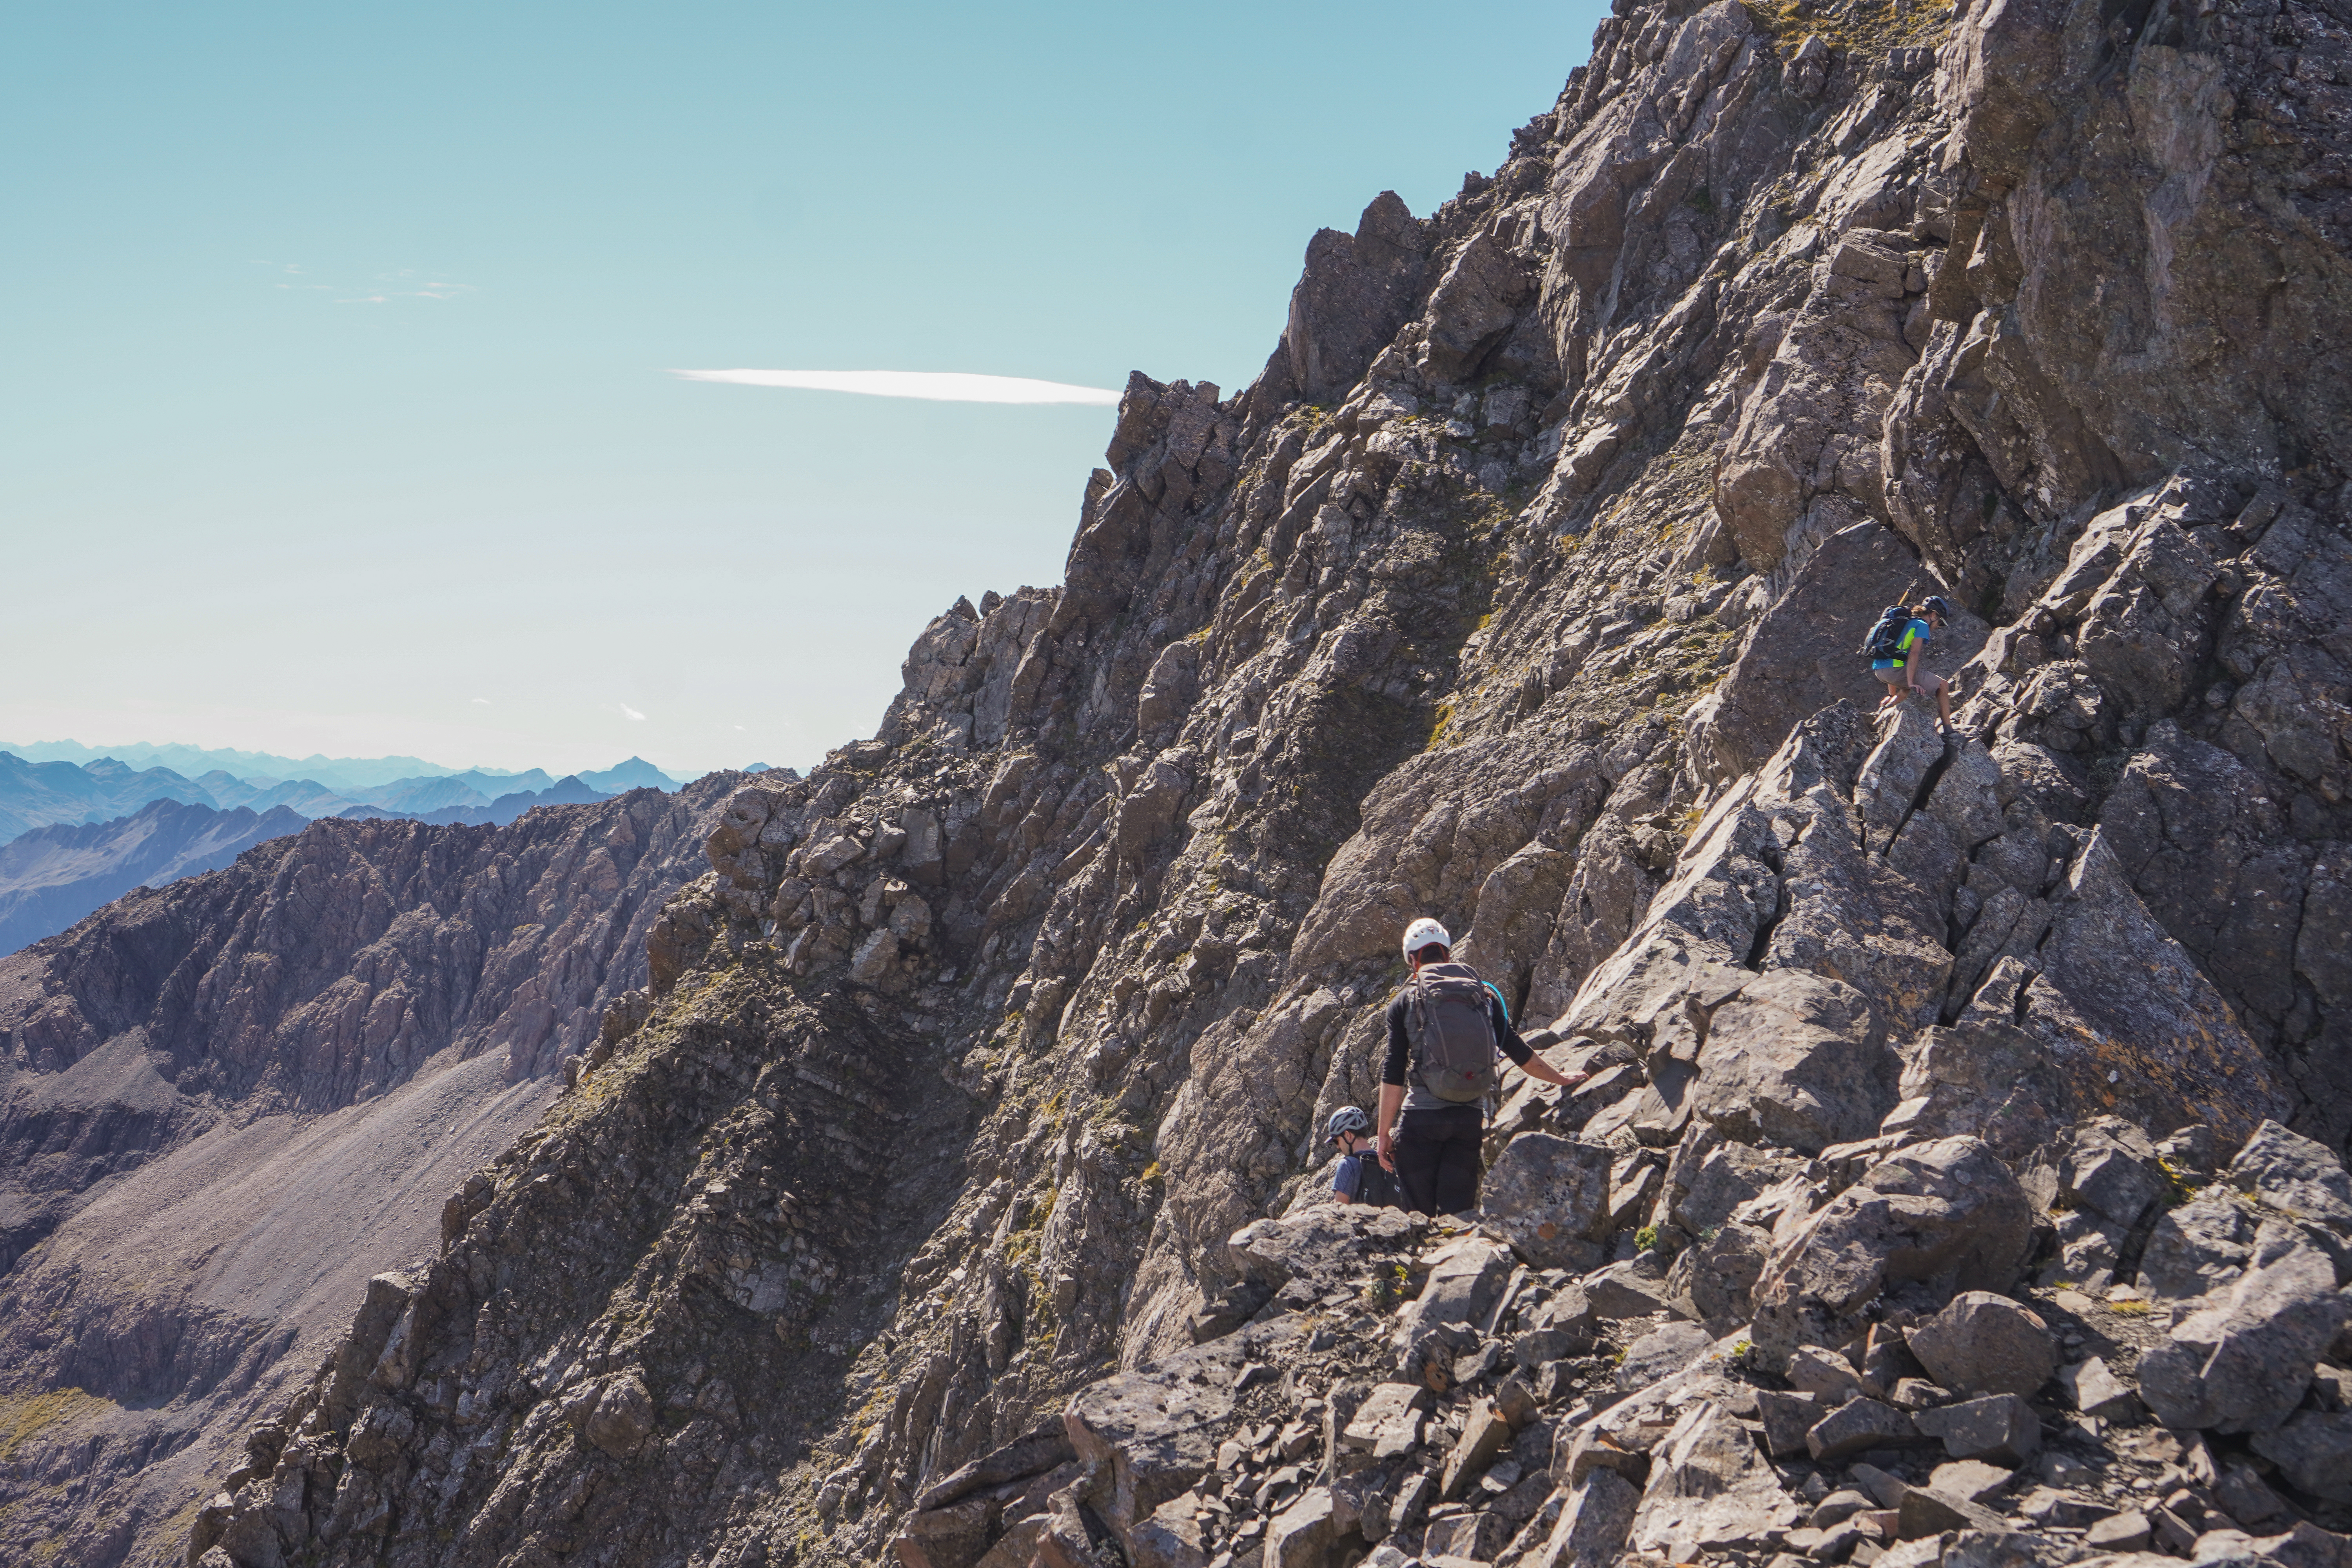
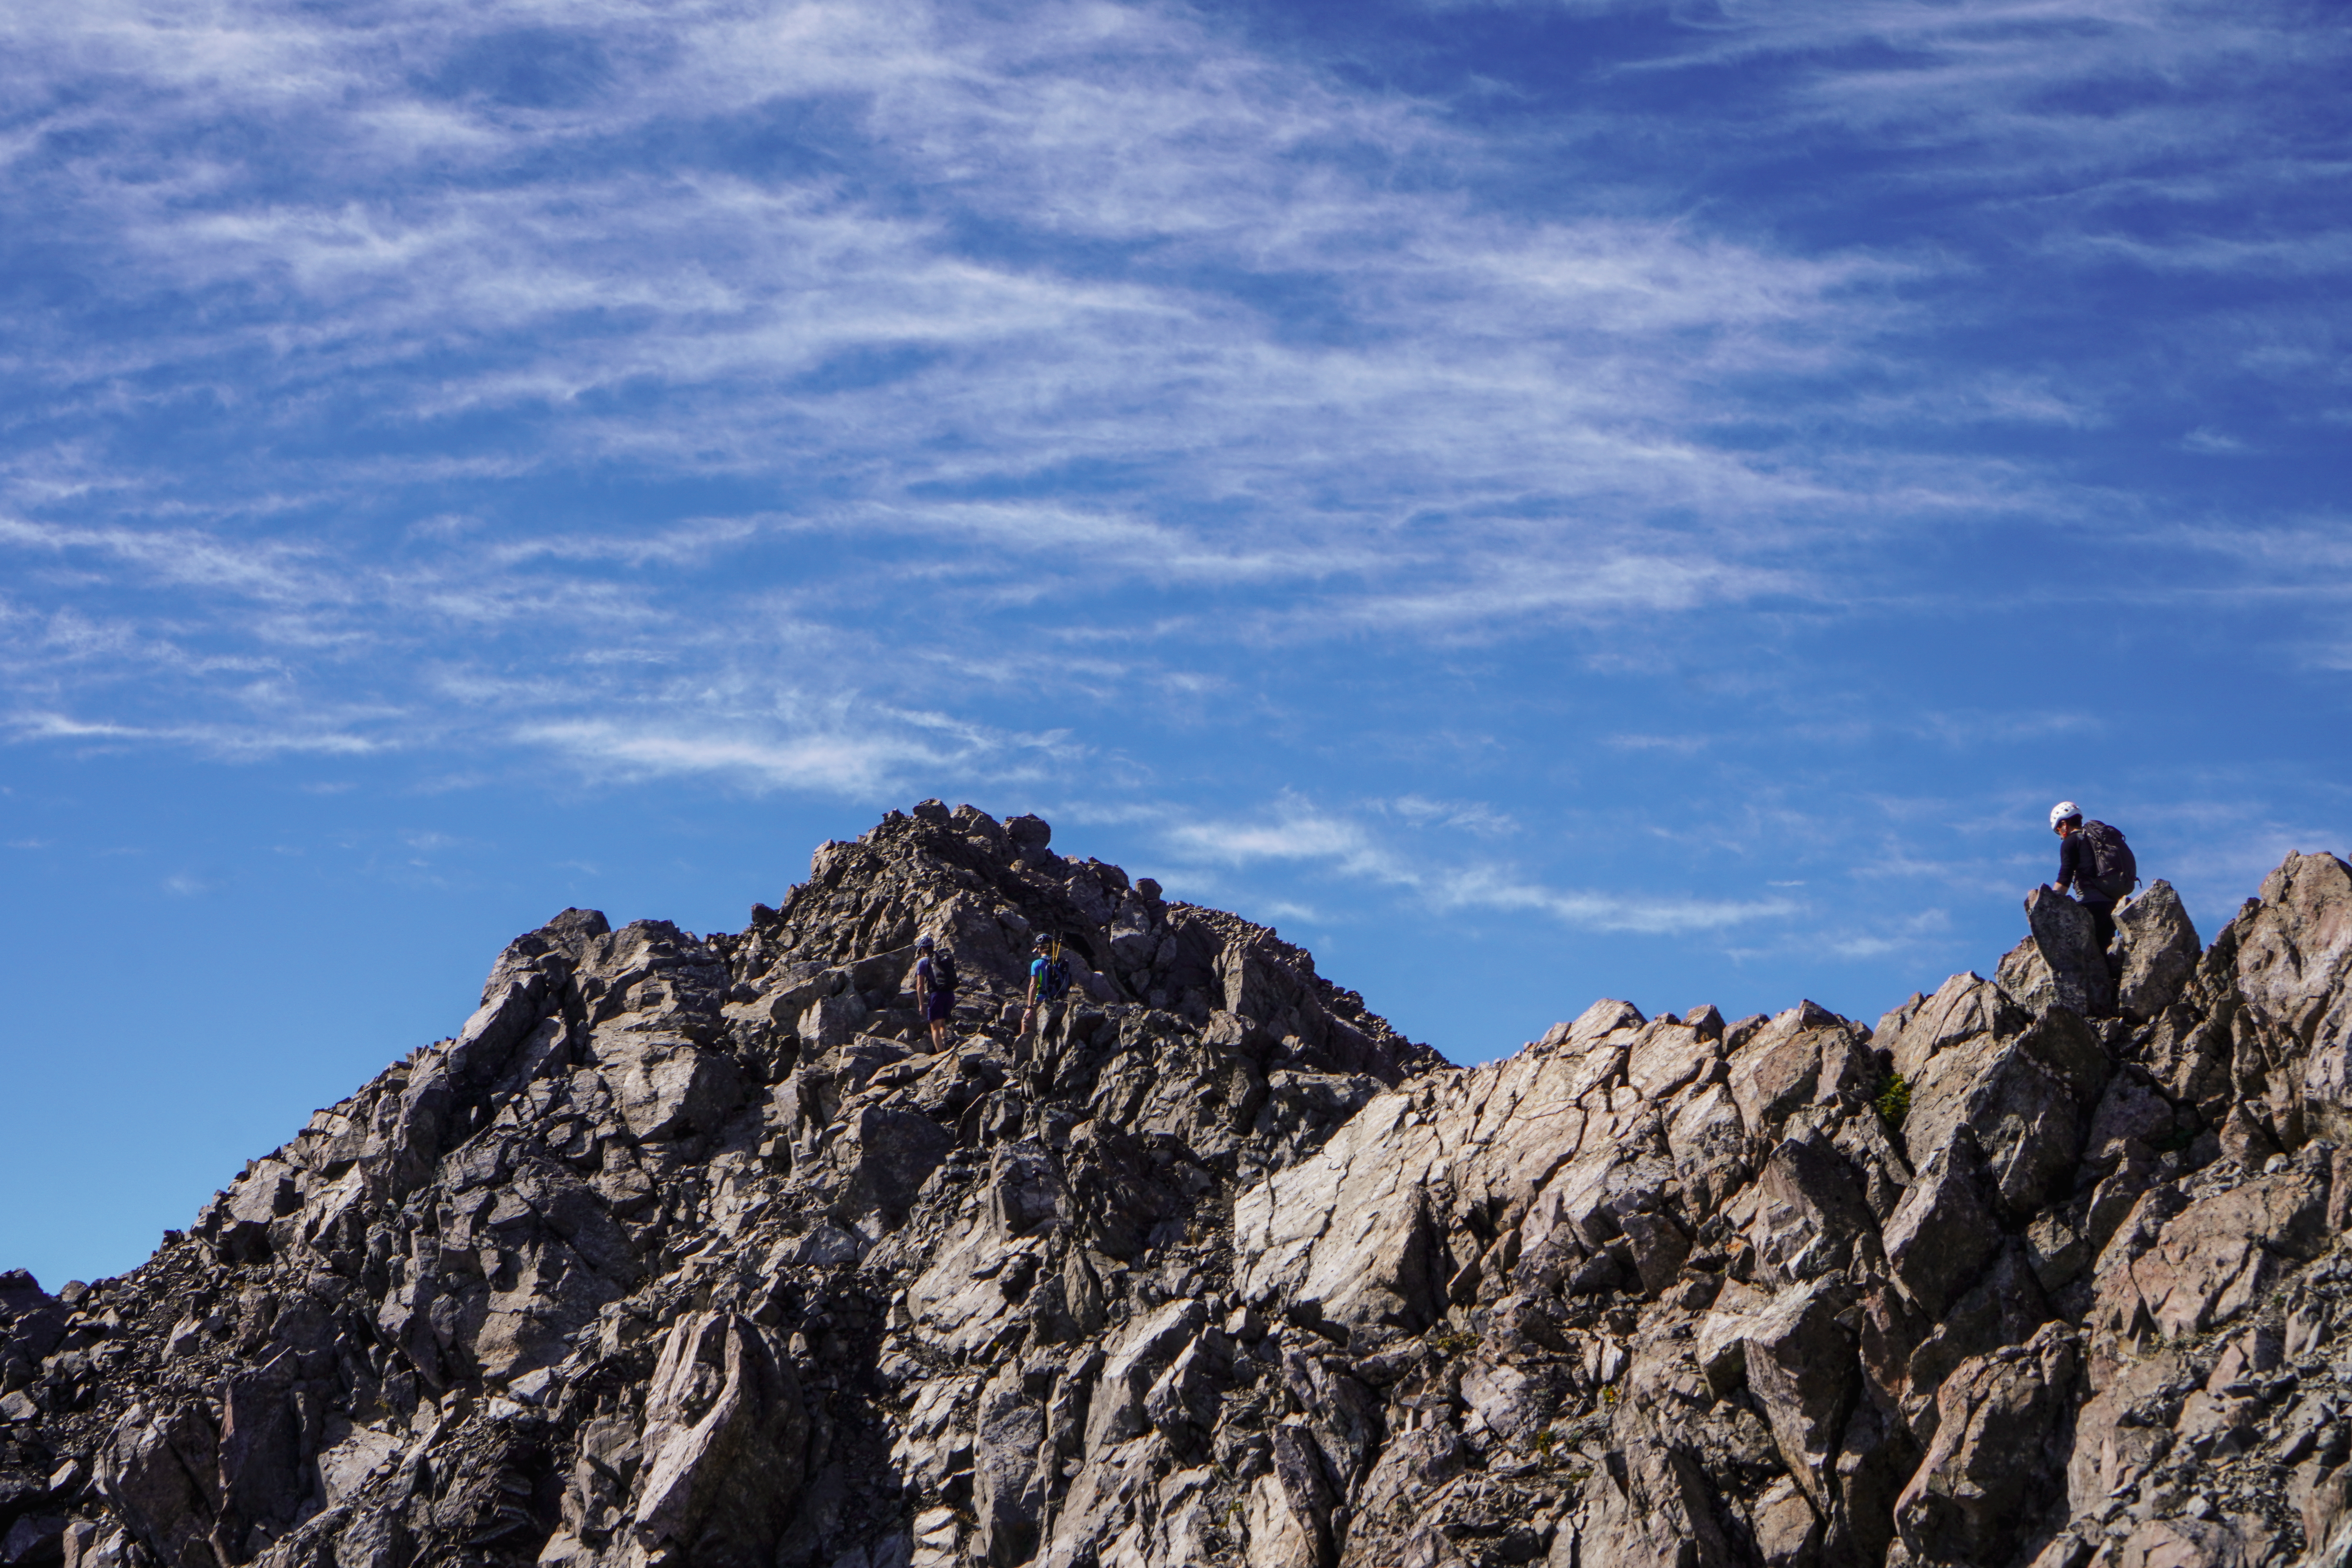
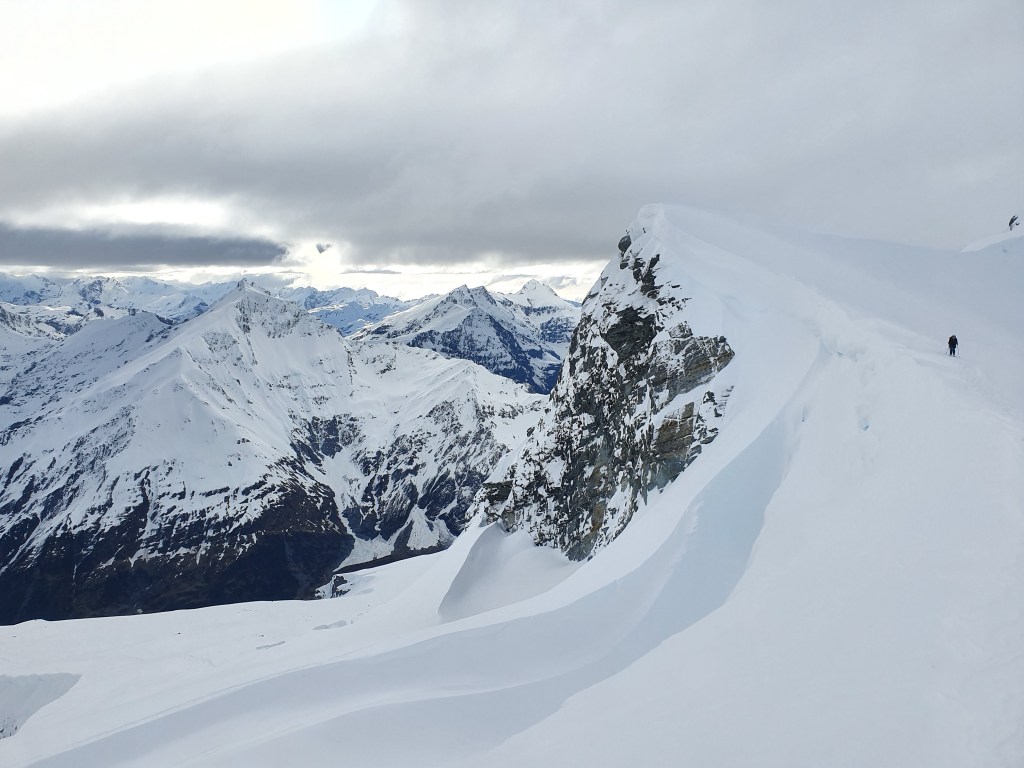
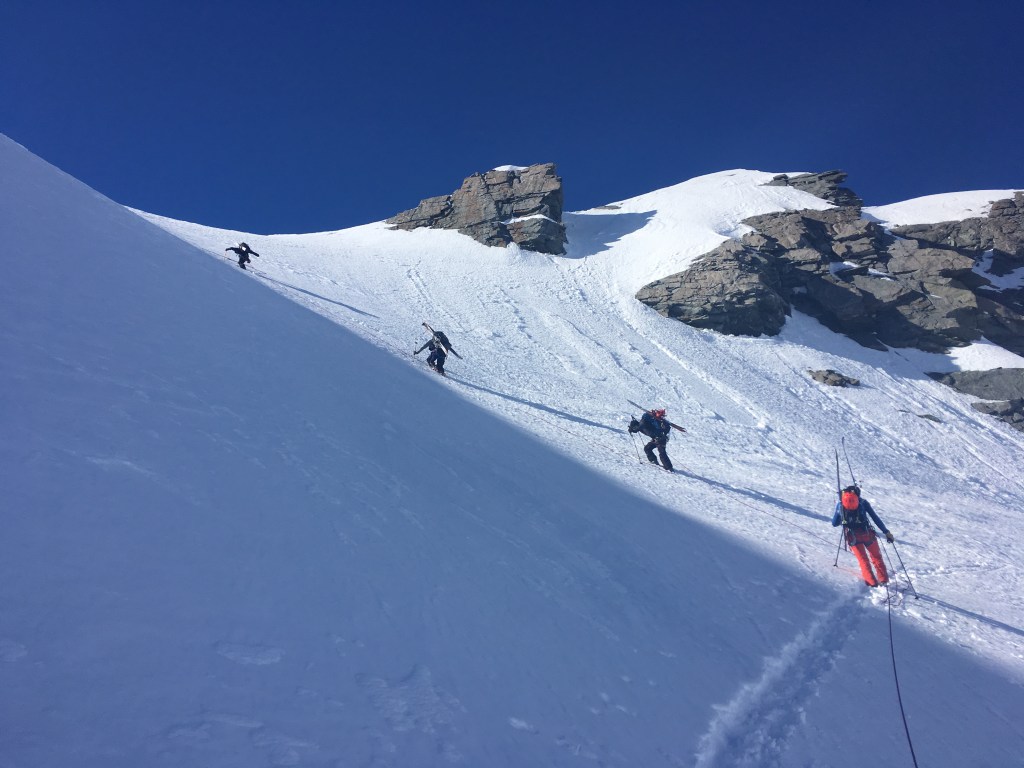
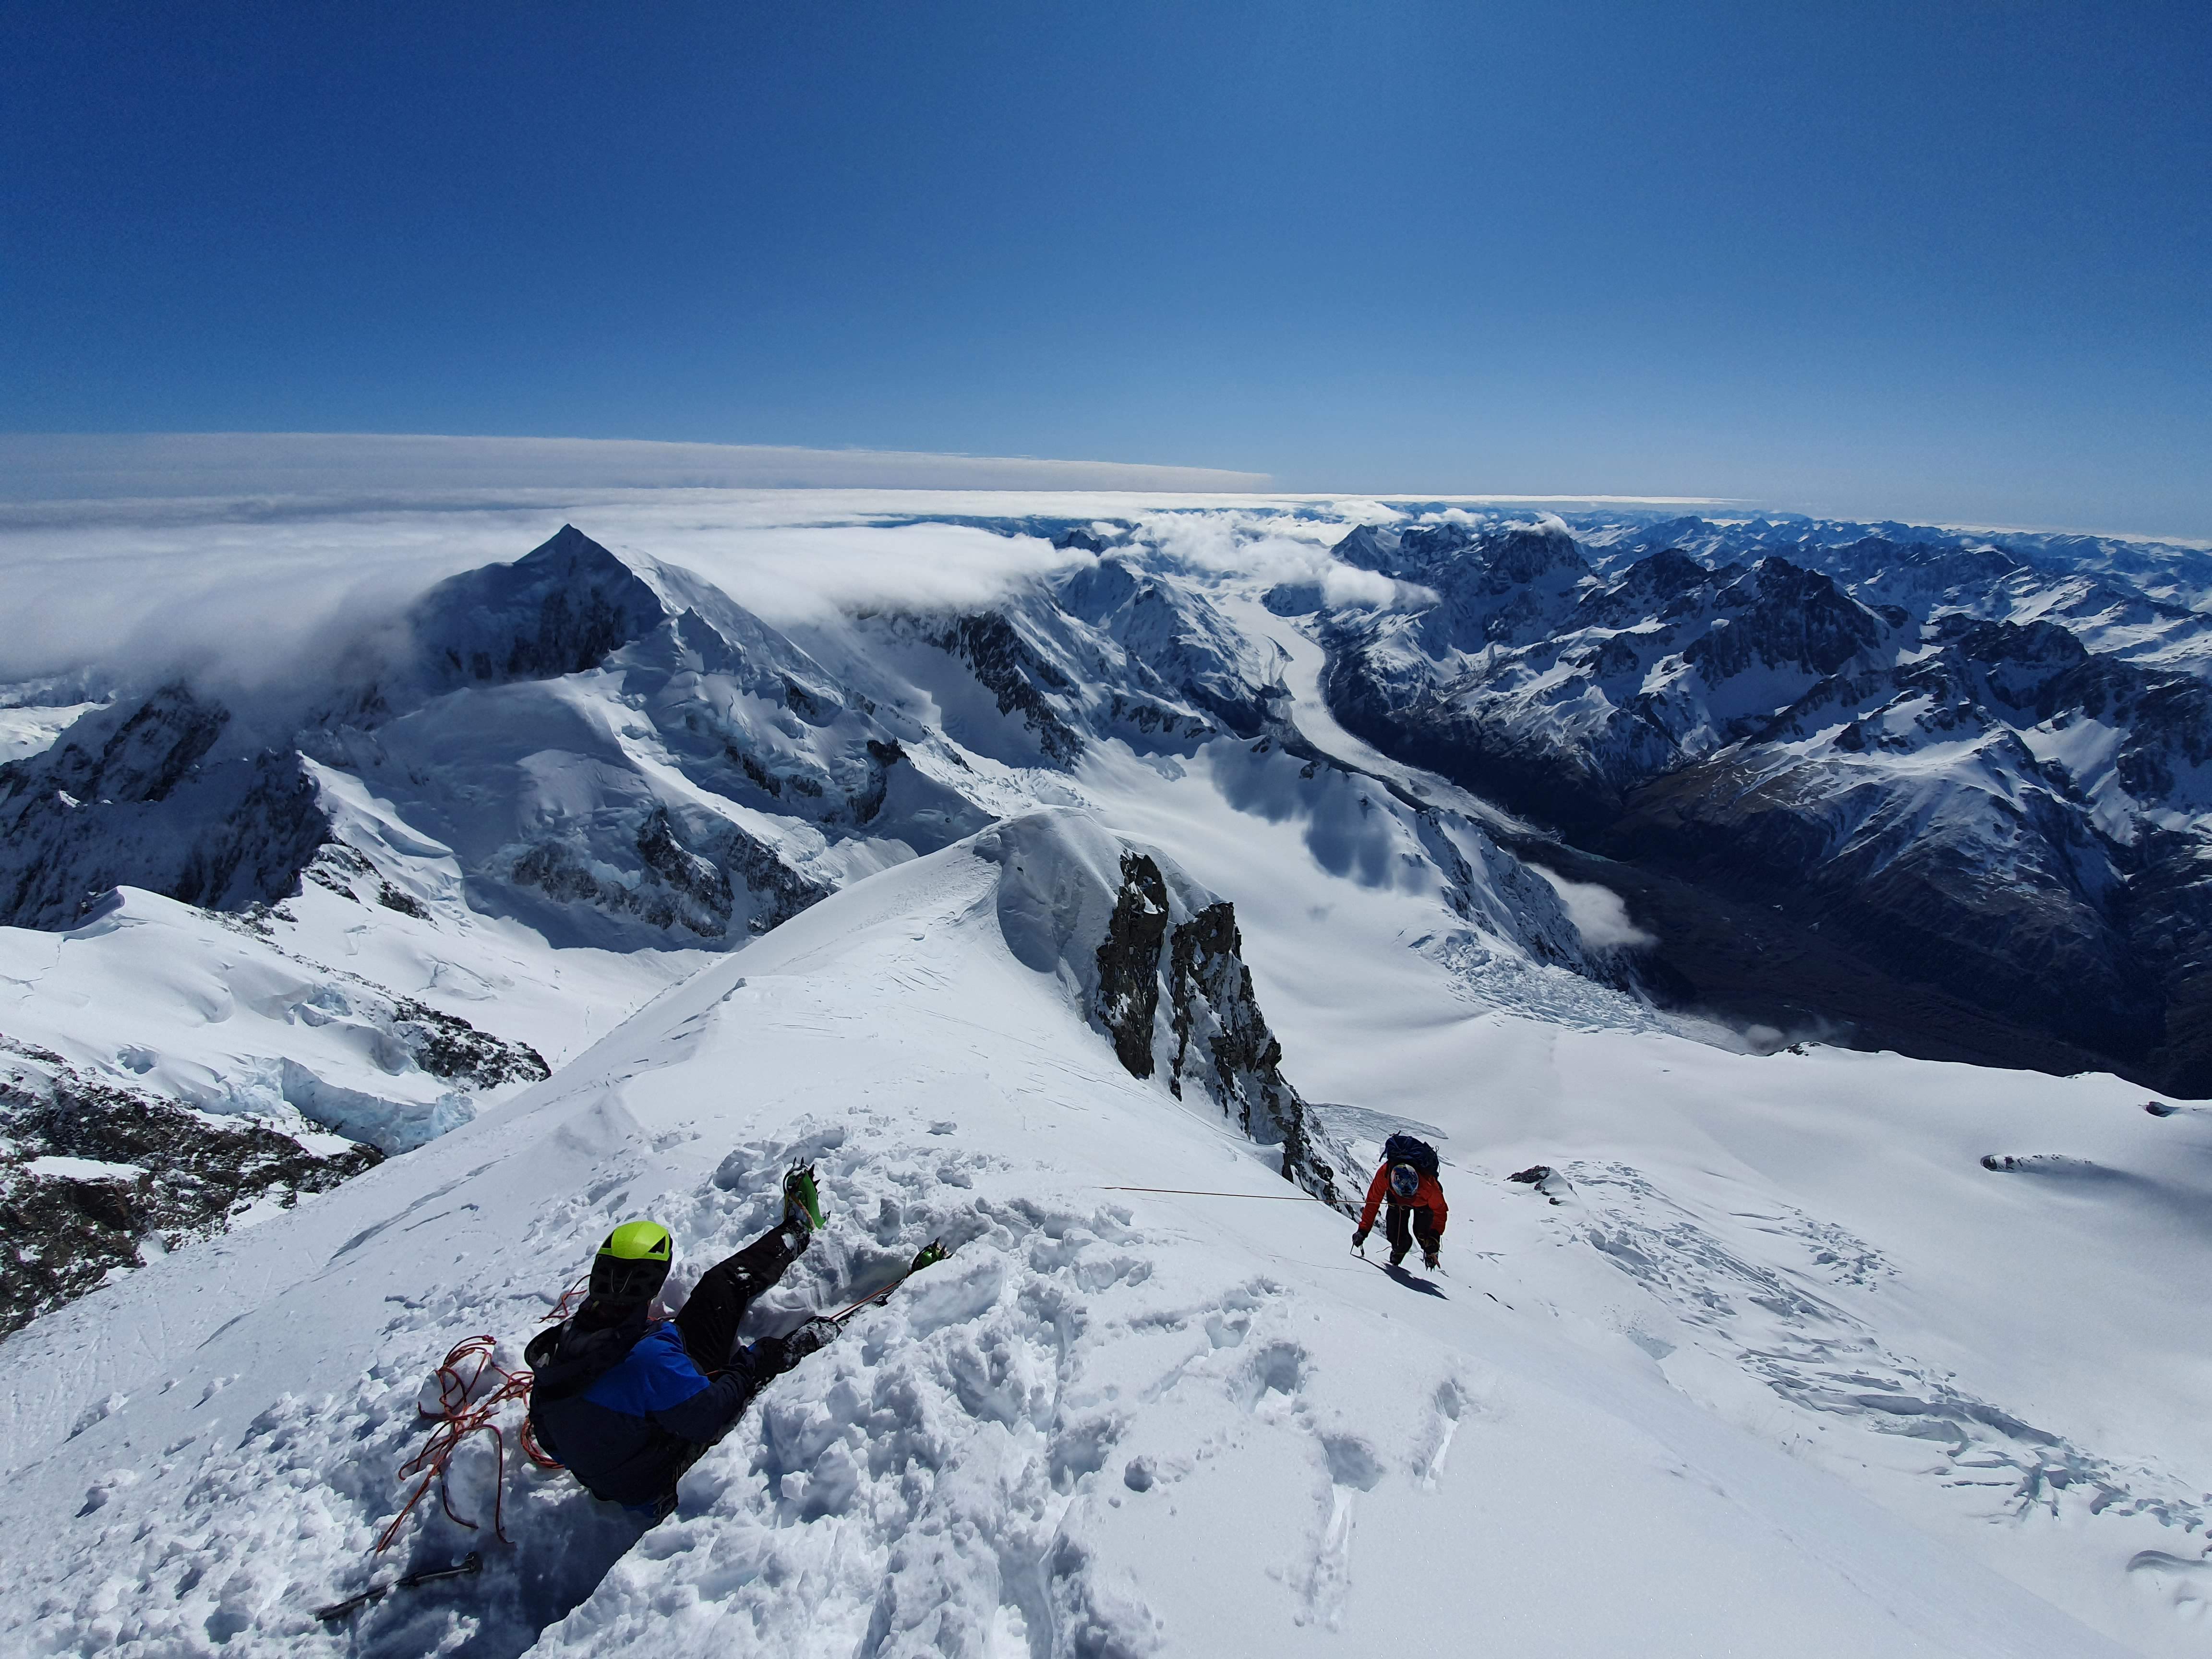
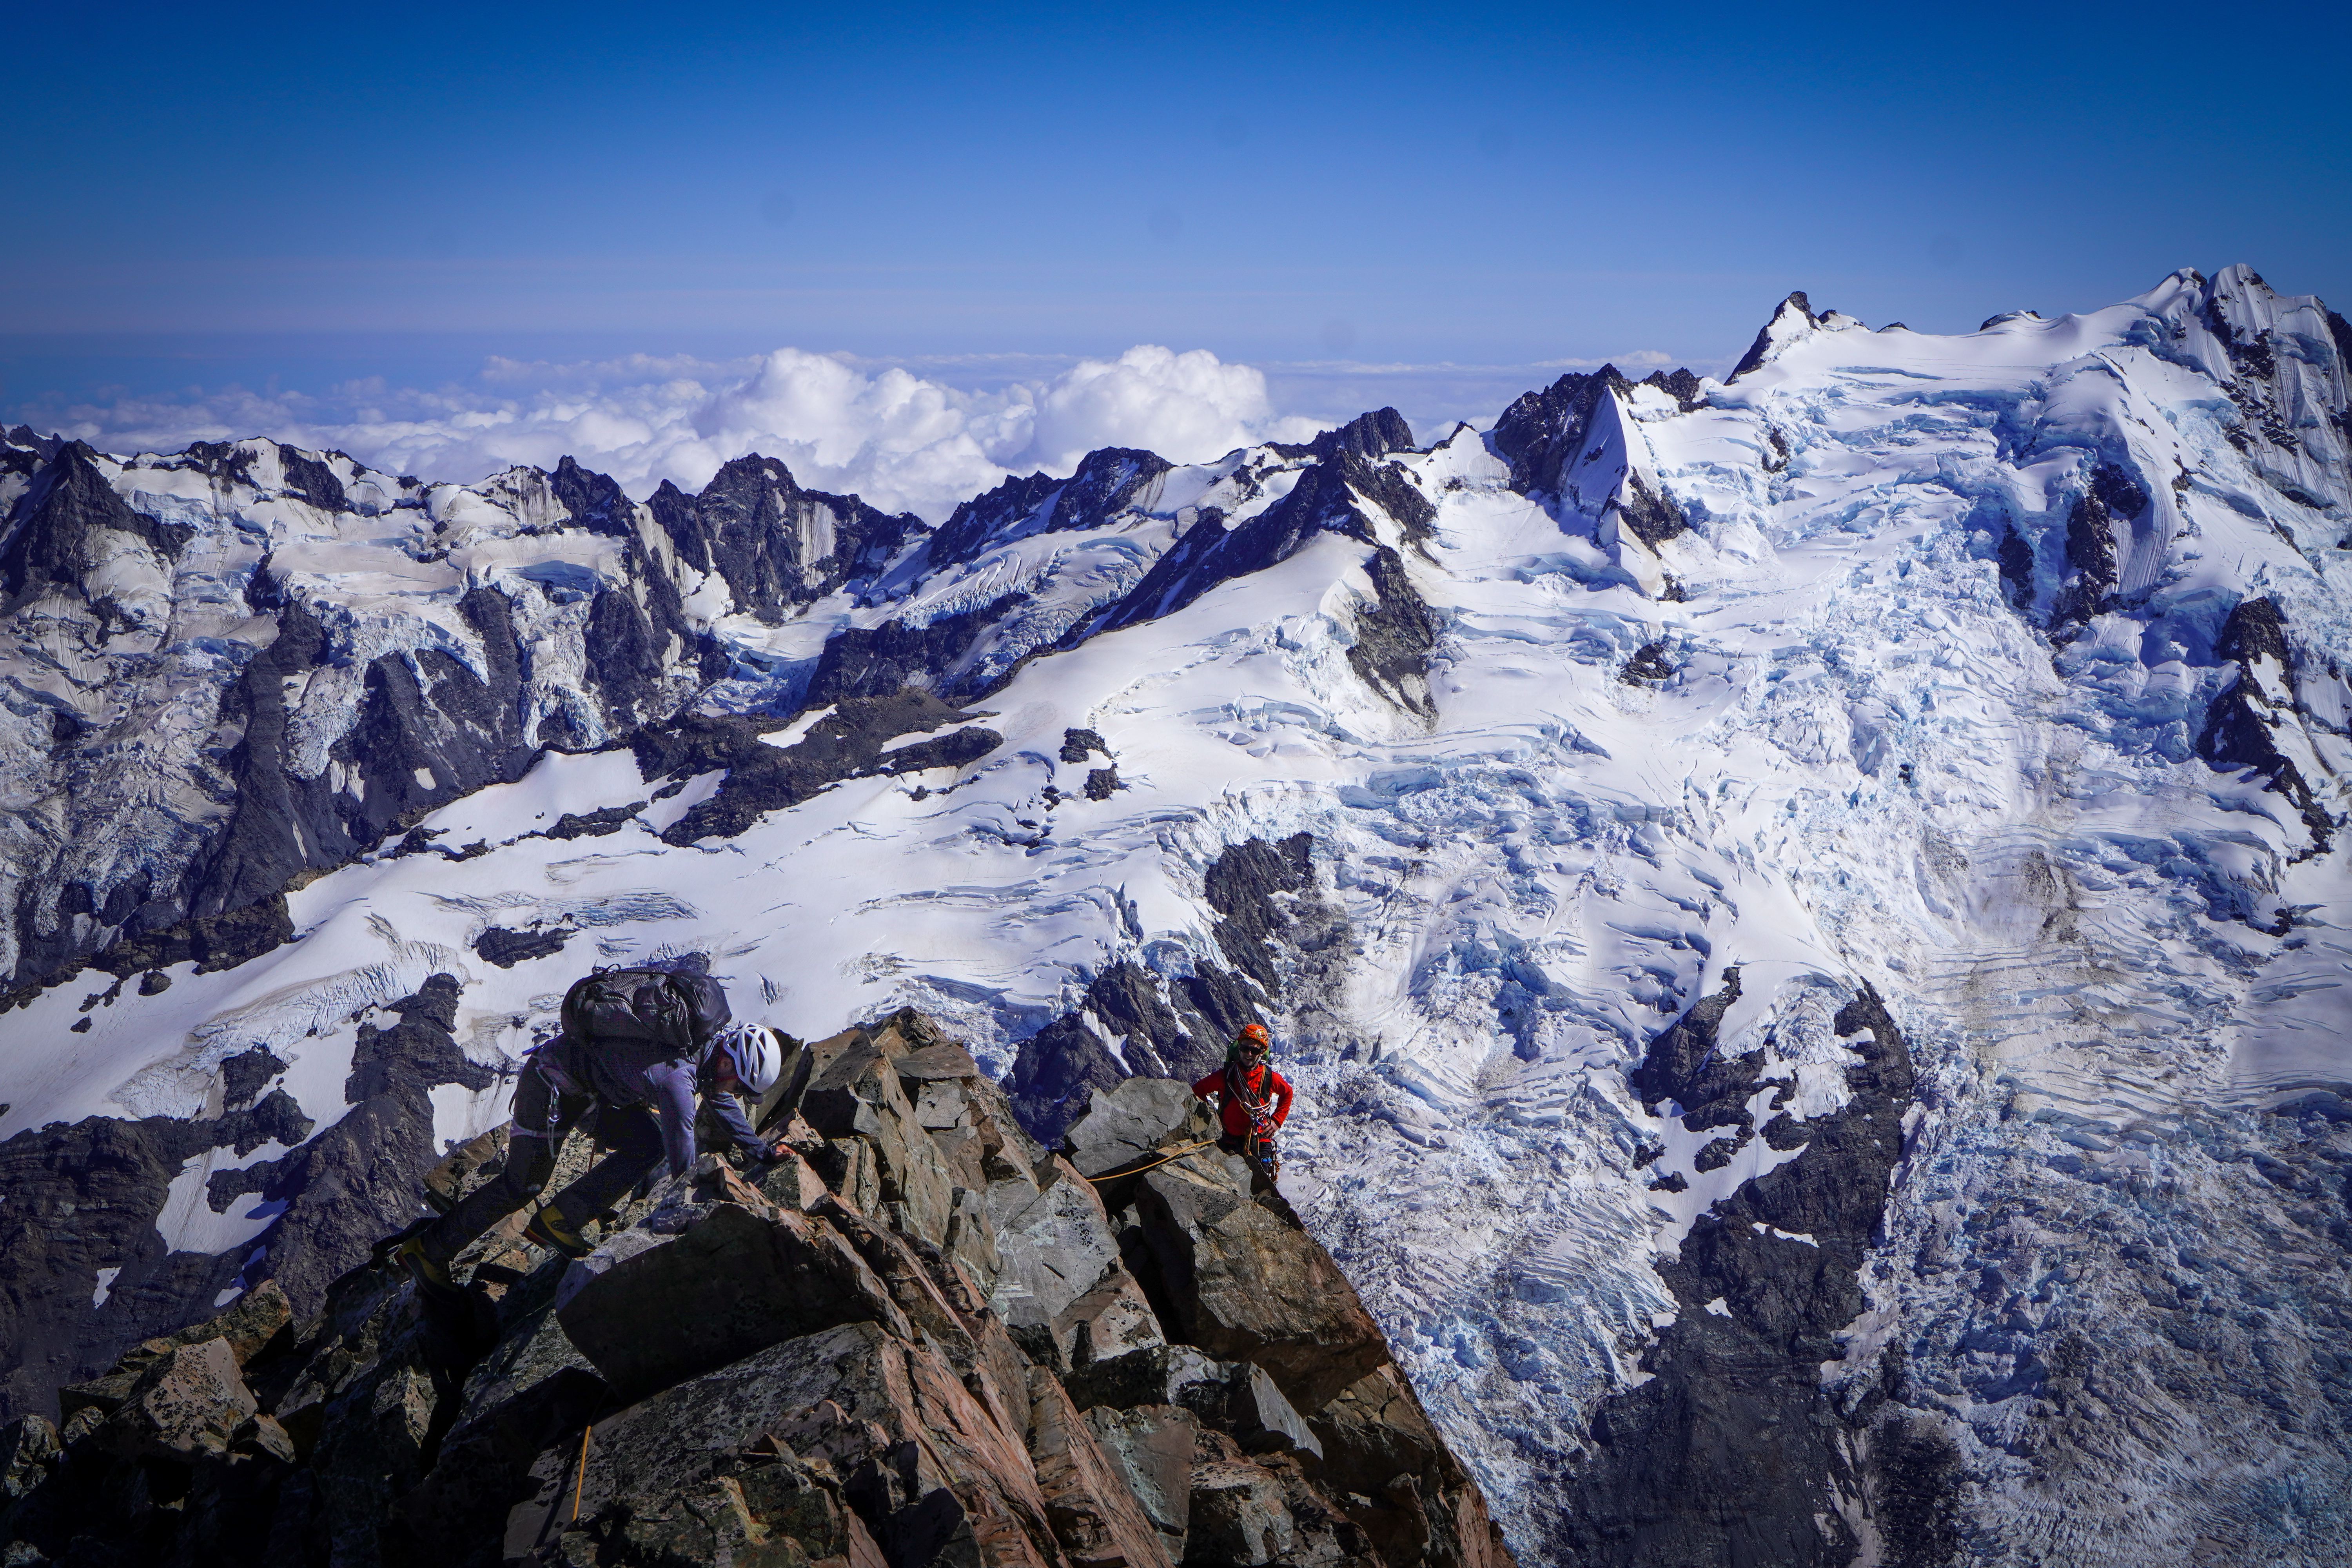
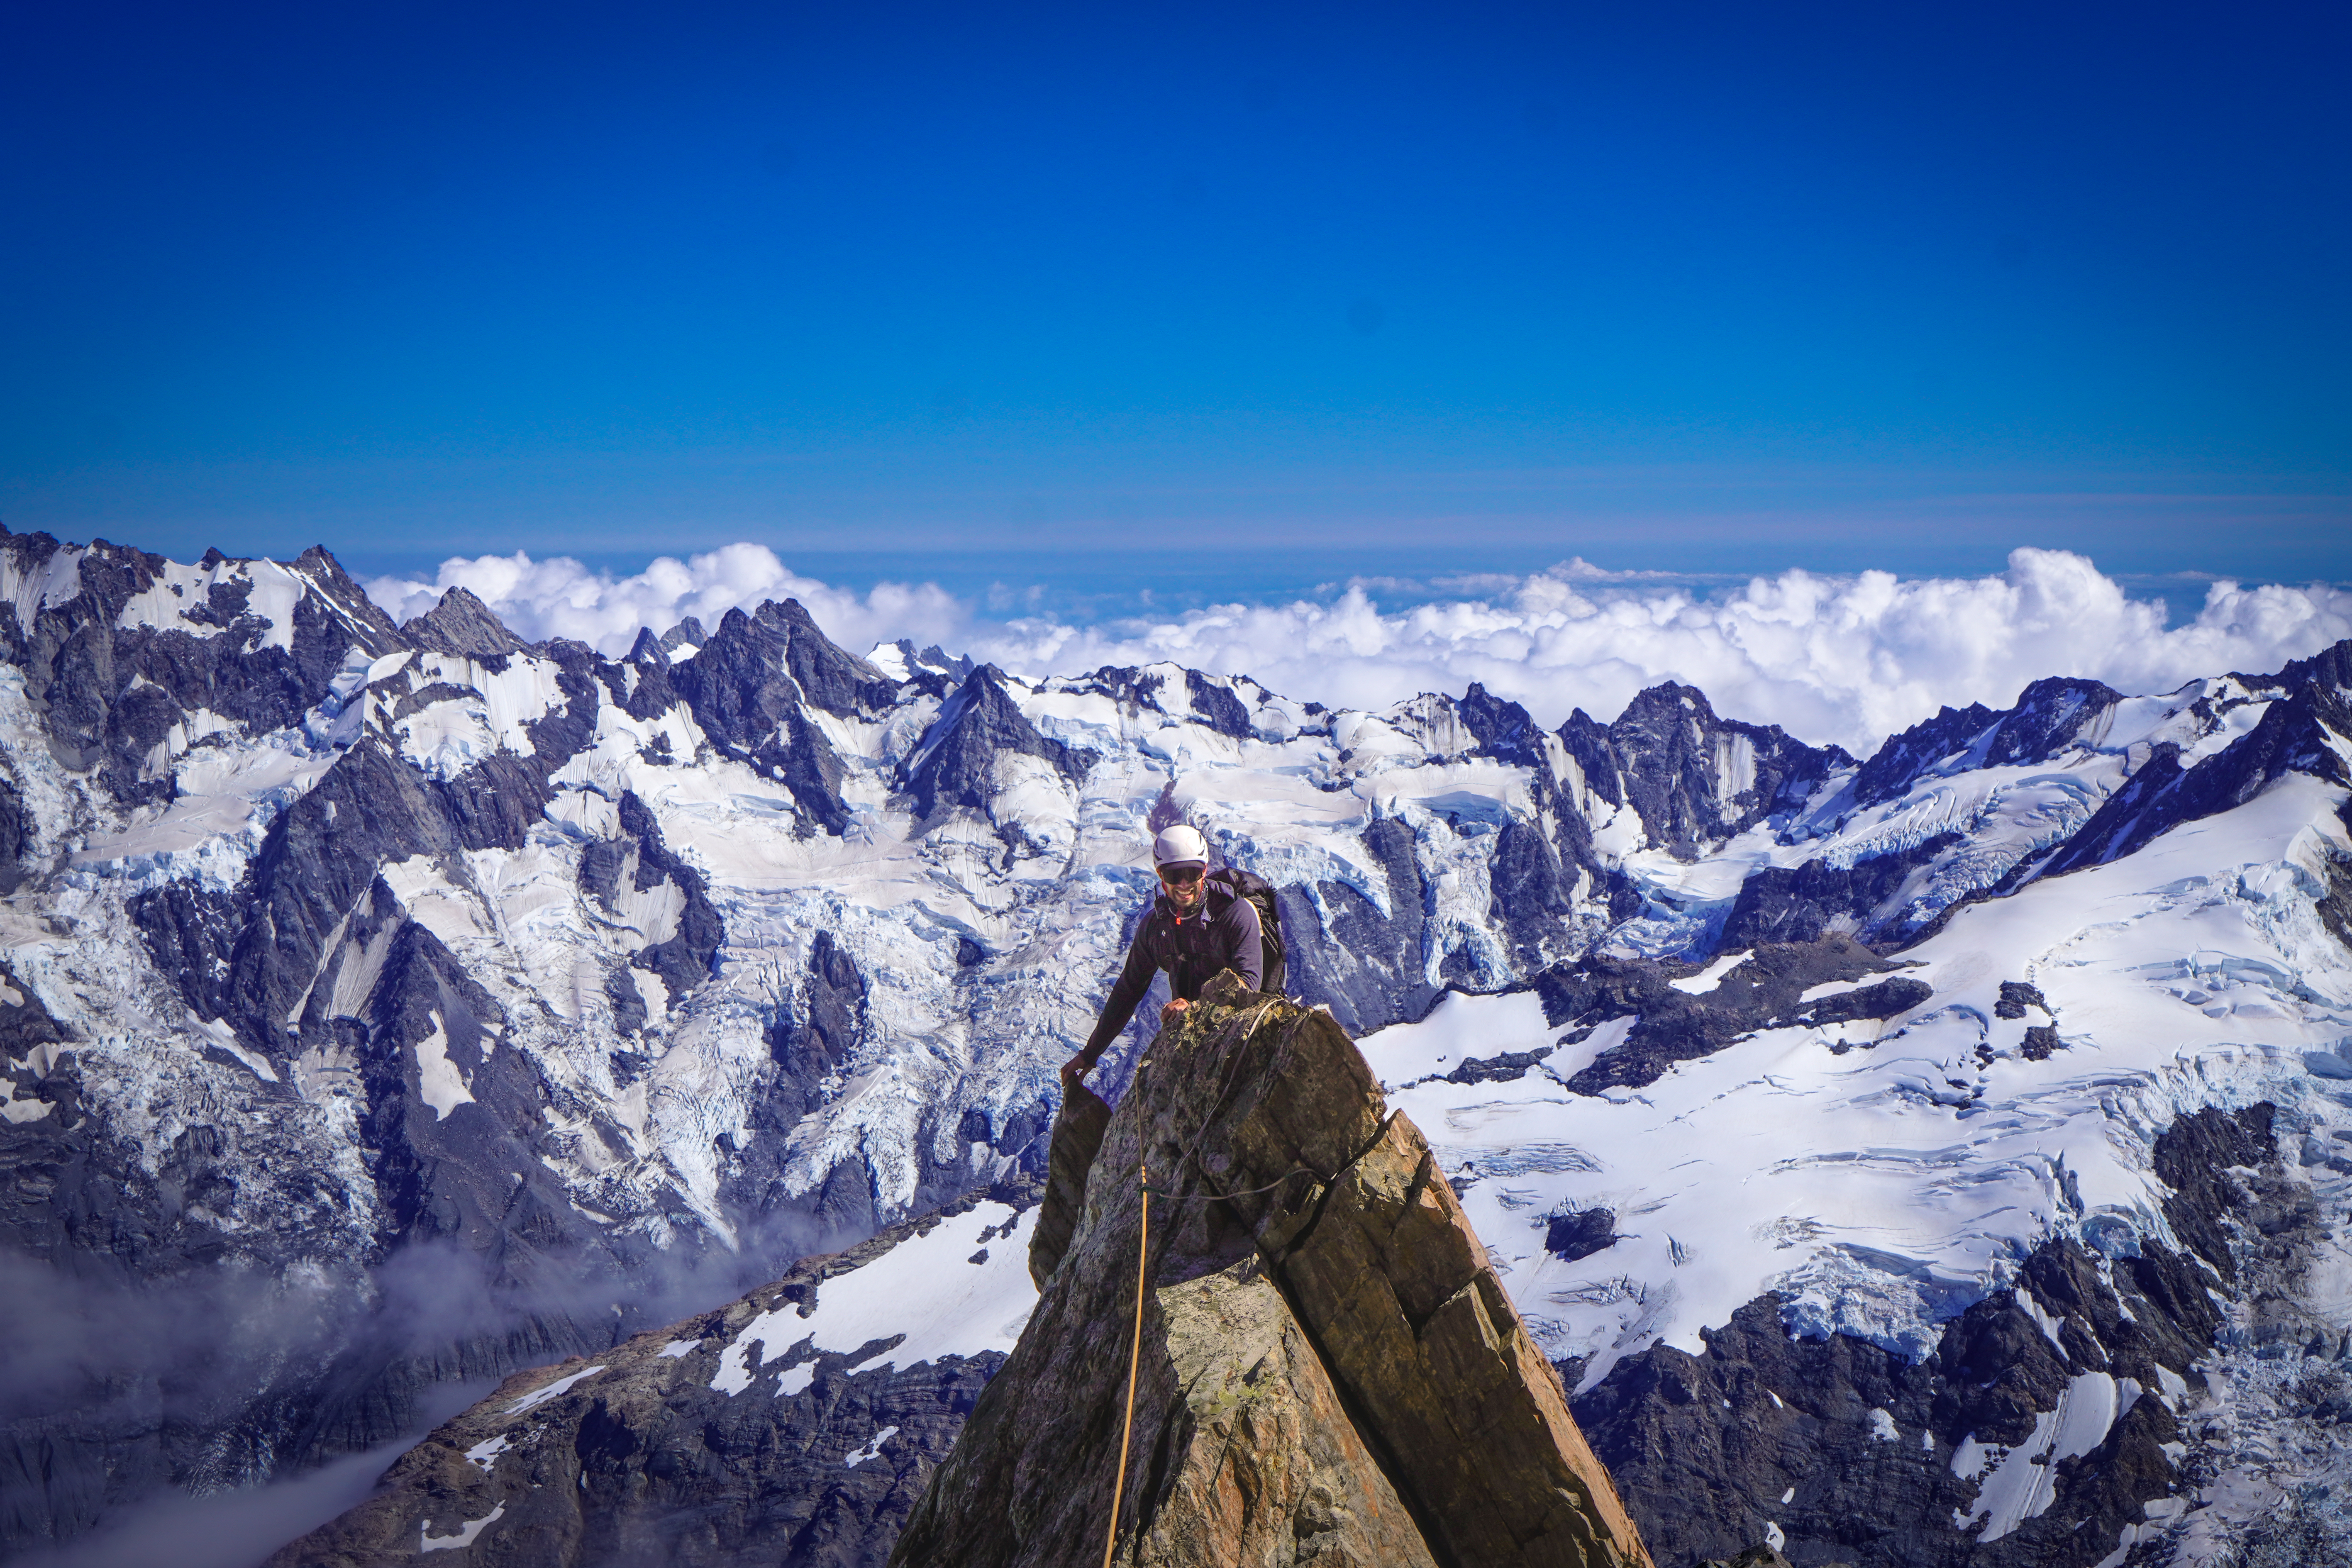
The ridge travel definitely takes a little time and focus as the rock quality is average. There are a few gendarmes forcing you to dip down low from the ridge, usually to the left but not very often and 95% of the time the easiest route was staying on top of the ridge.
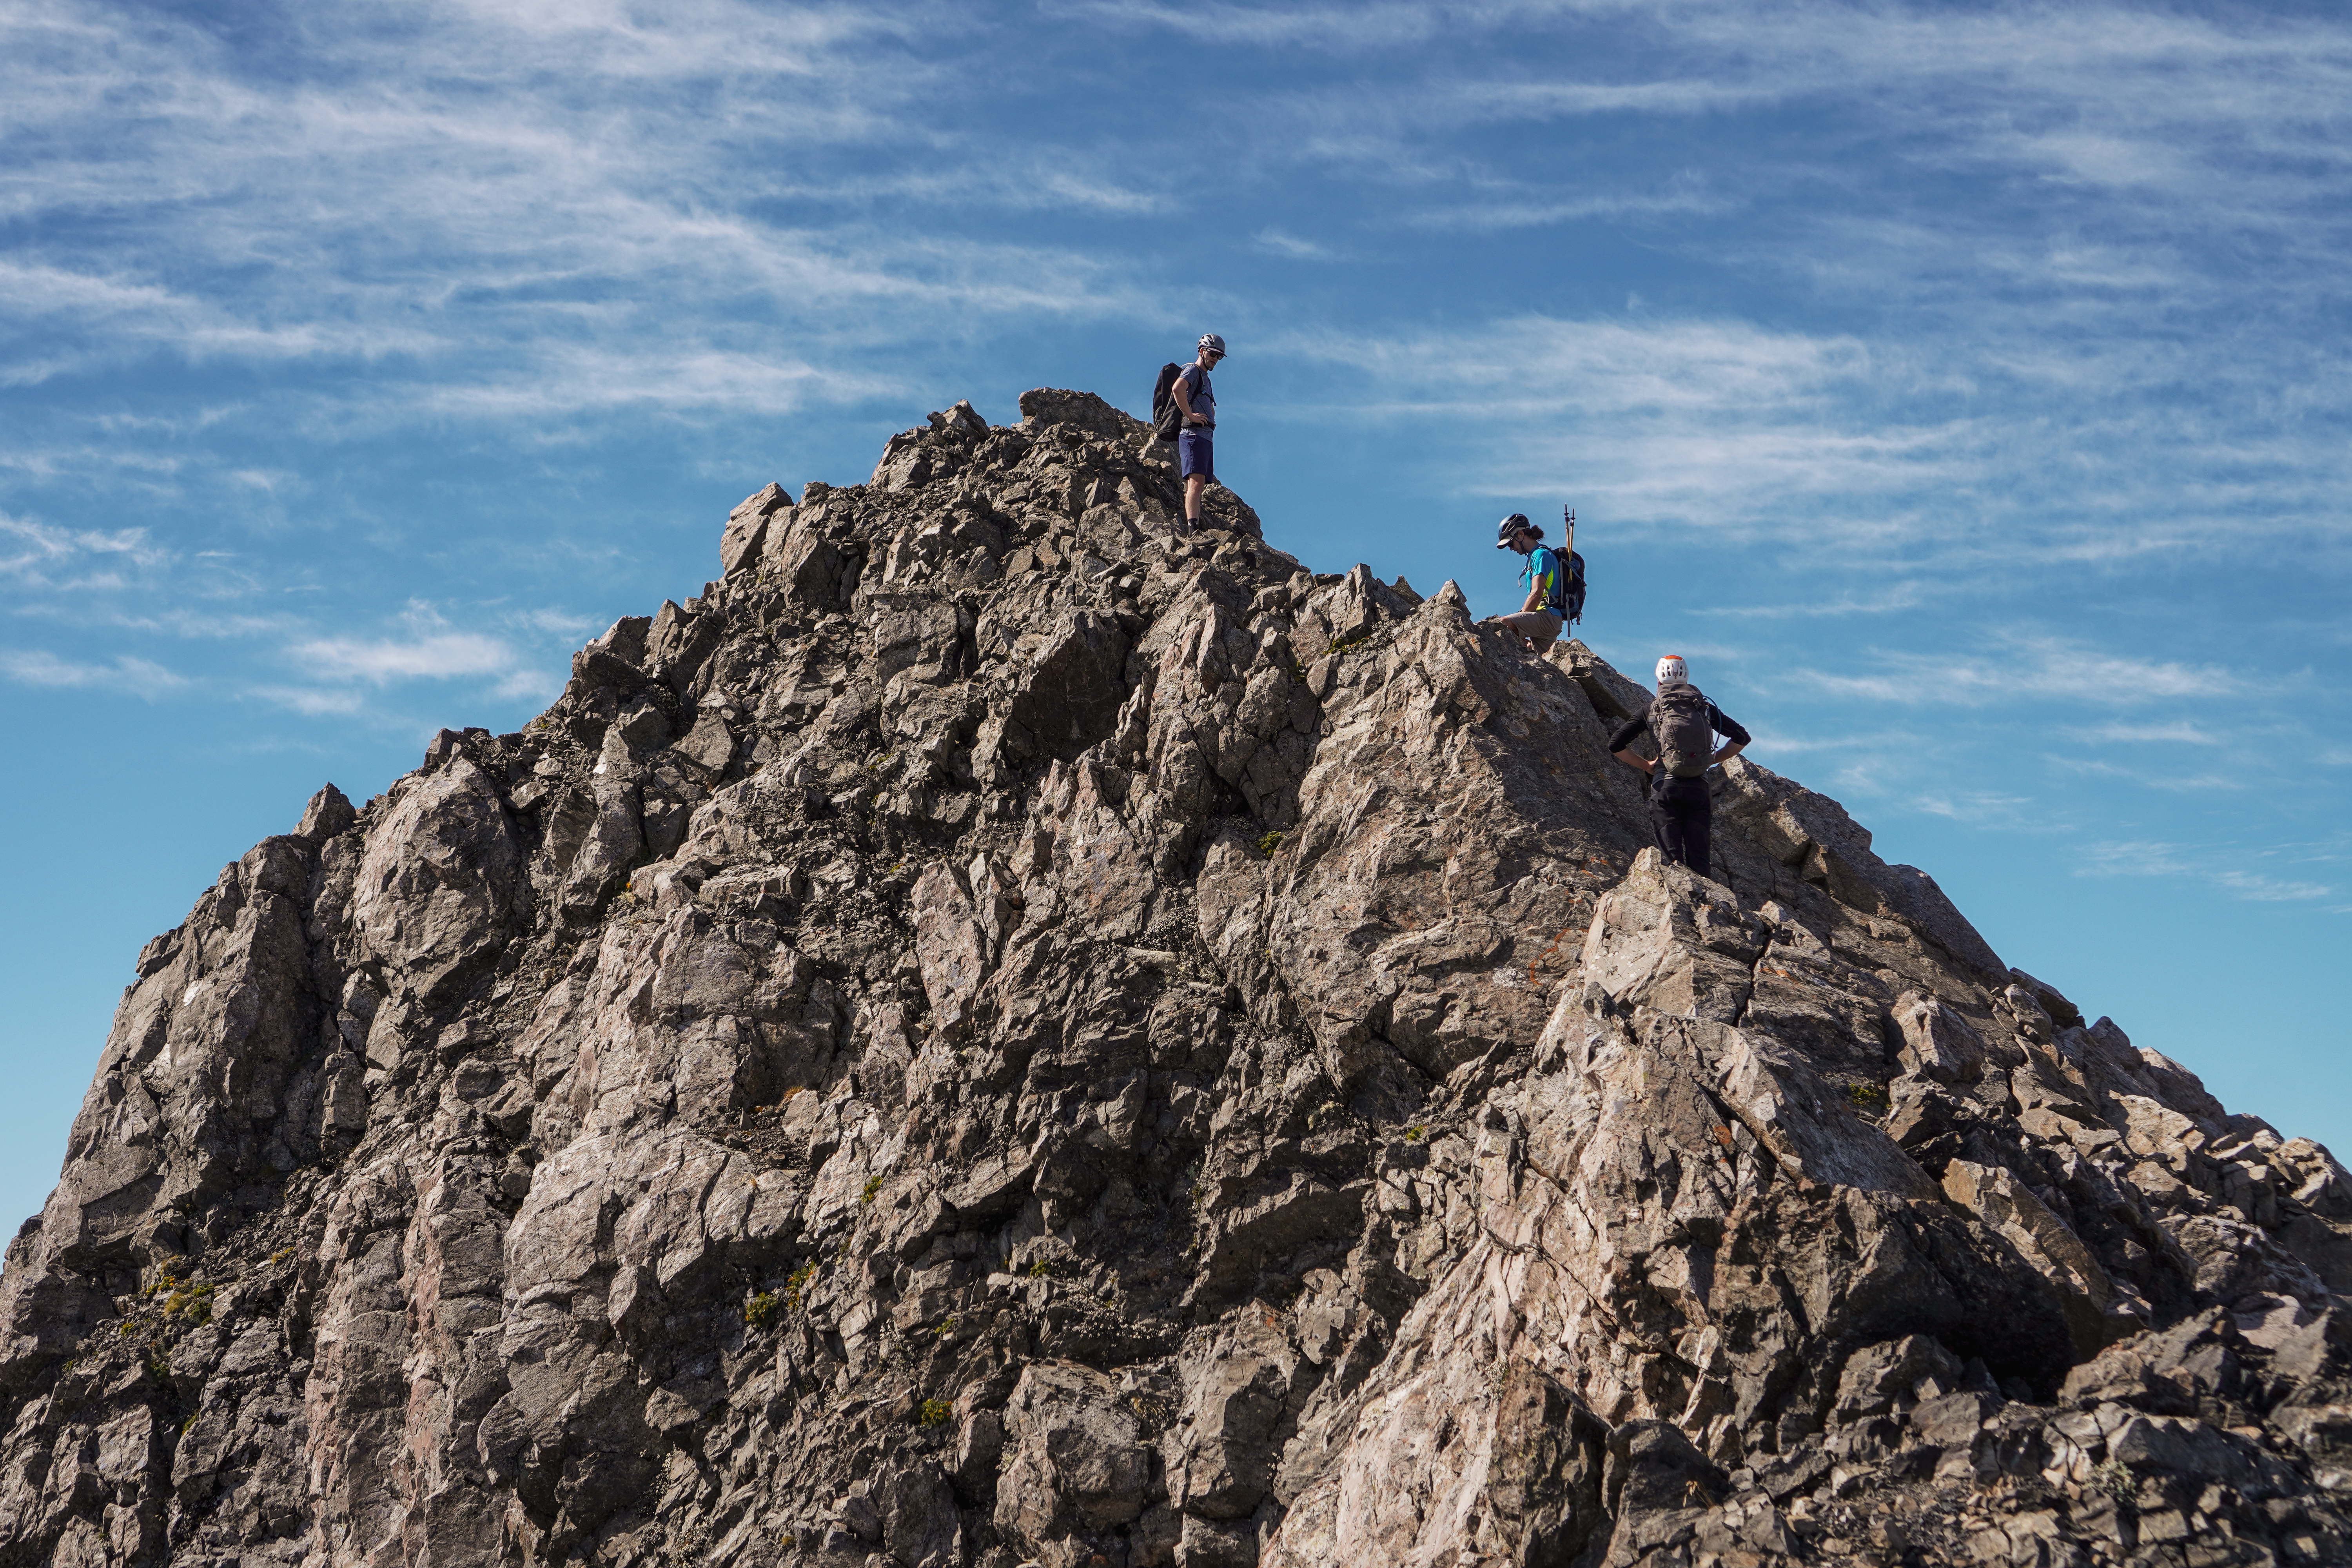
Scrambling up to PhippsNearing the summit of PhippsRidge leading up to Temple on the rightAndy coming over to Temple from Phipps
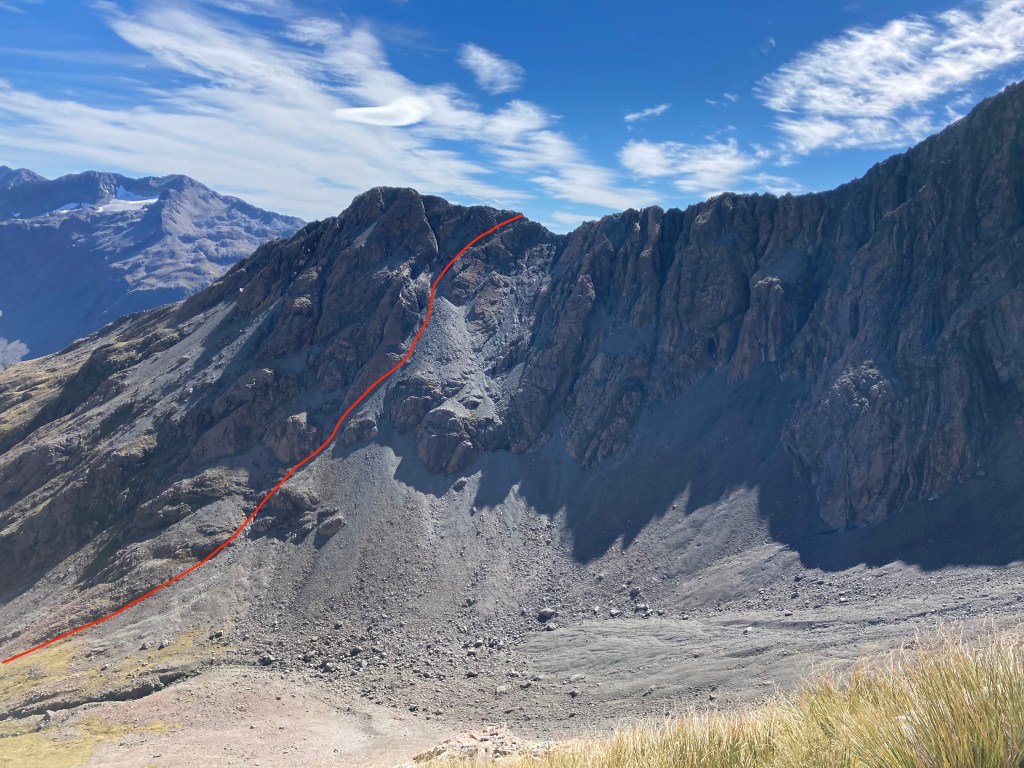
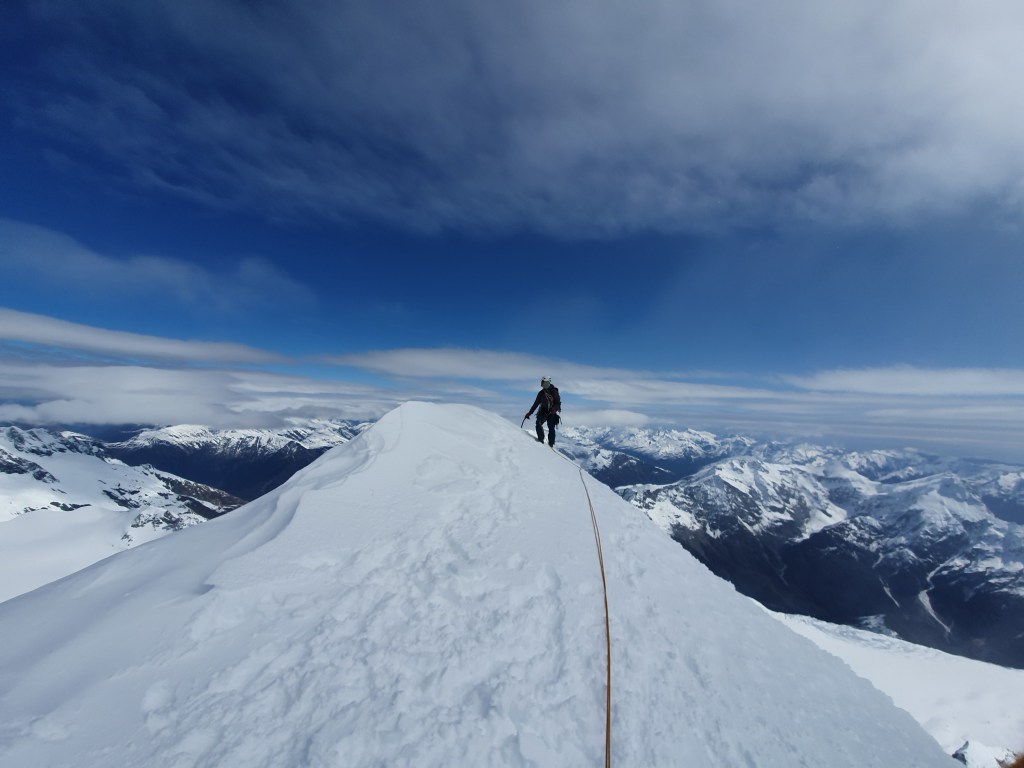
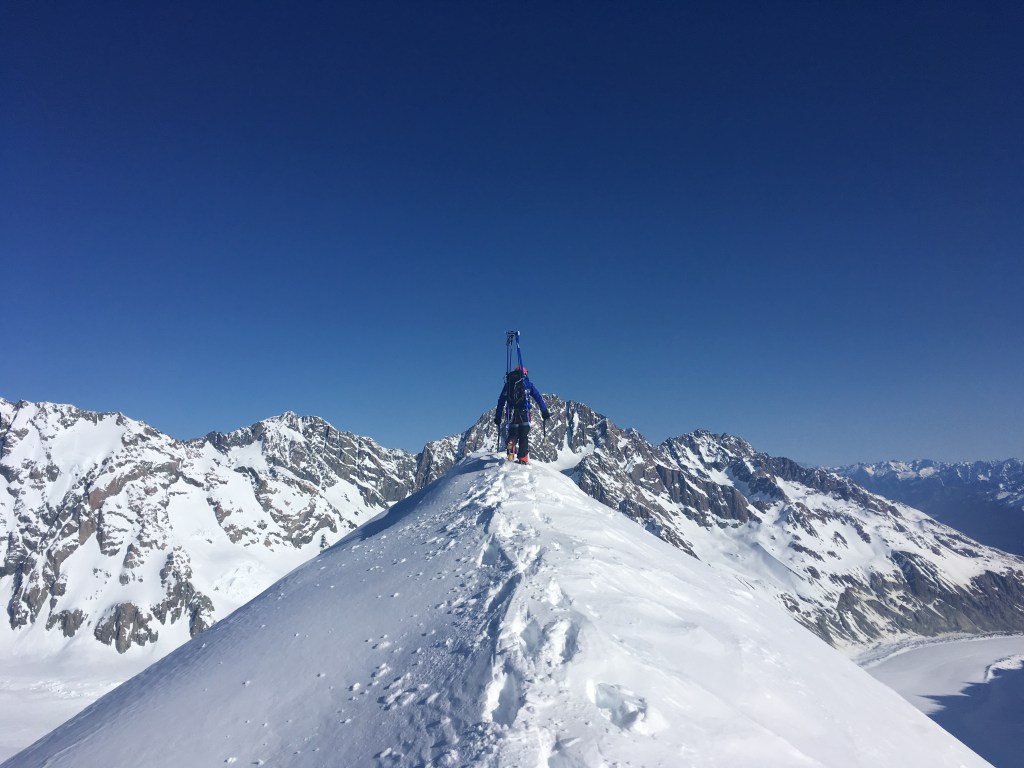
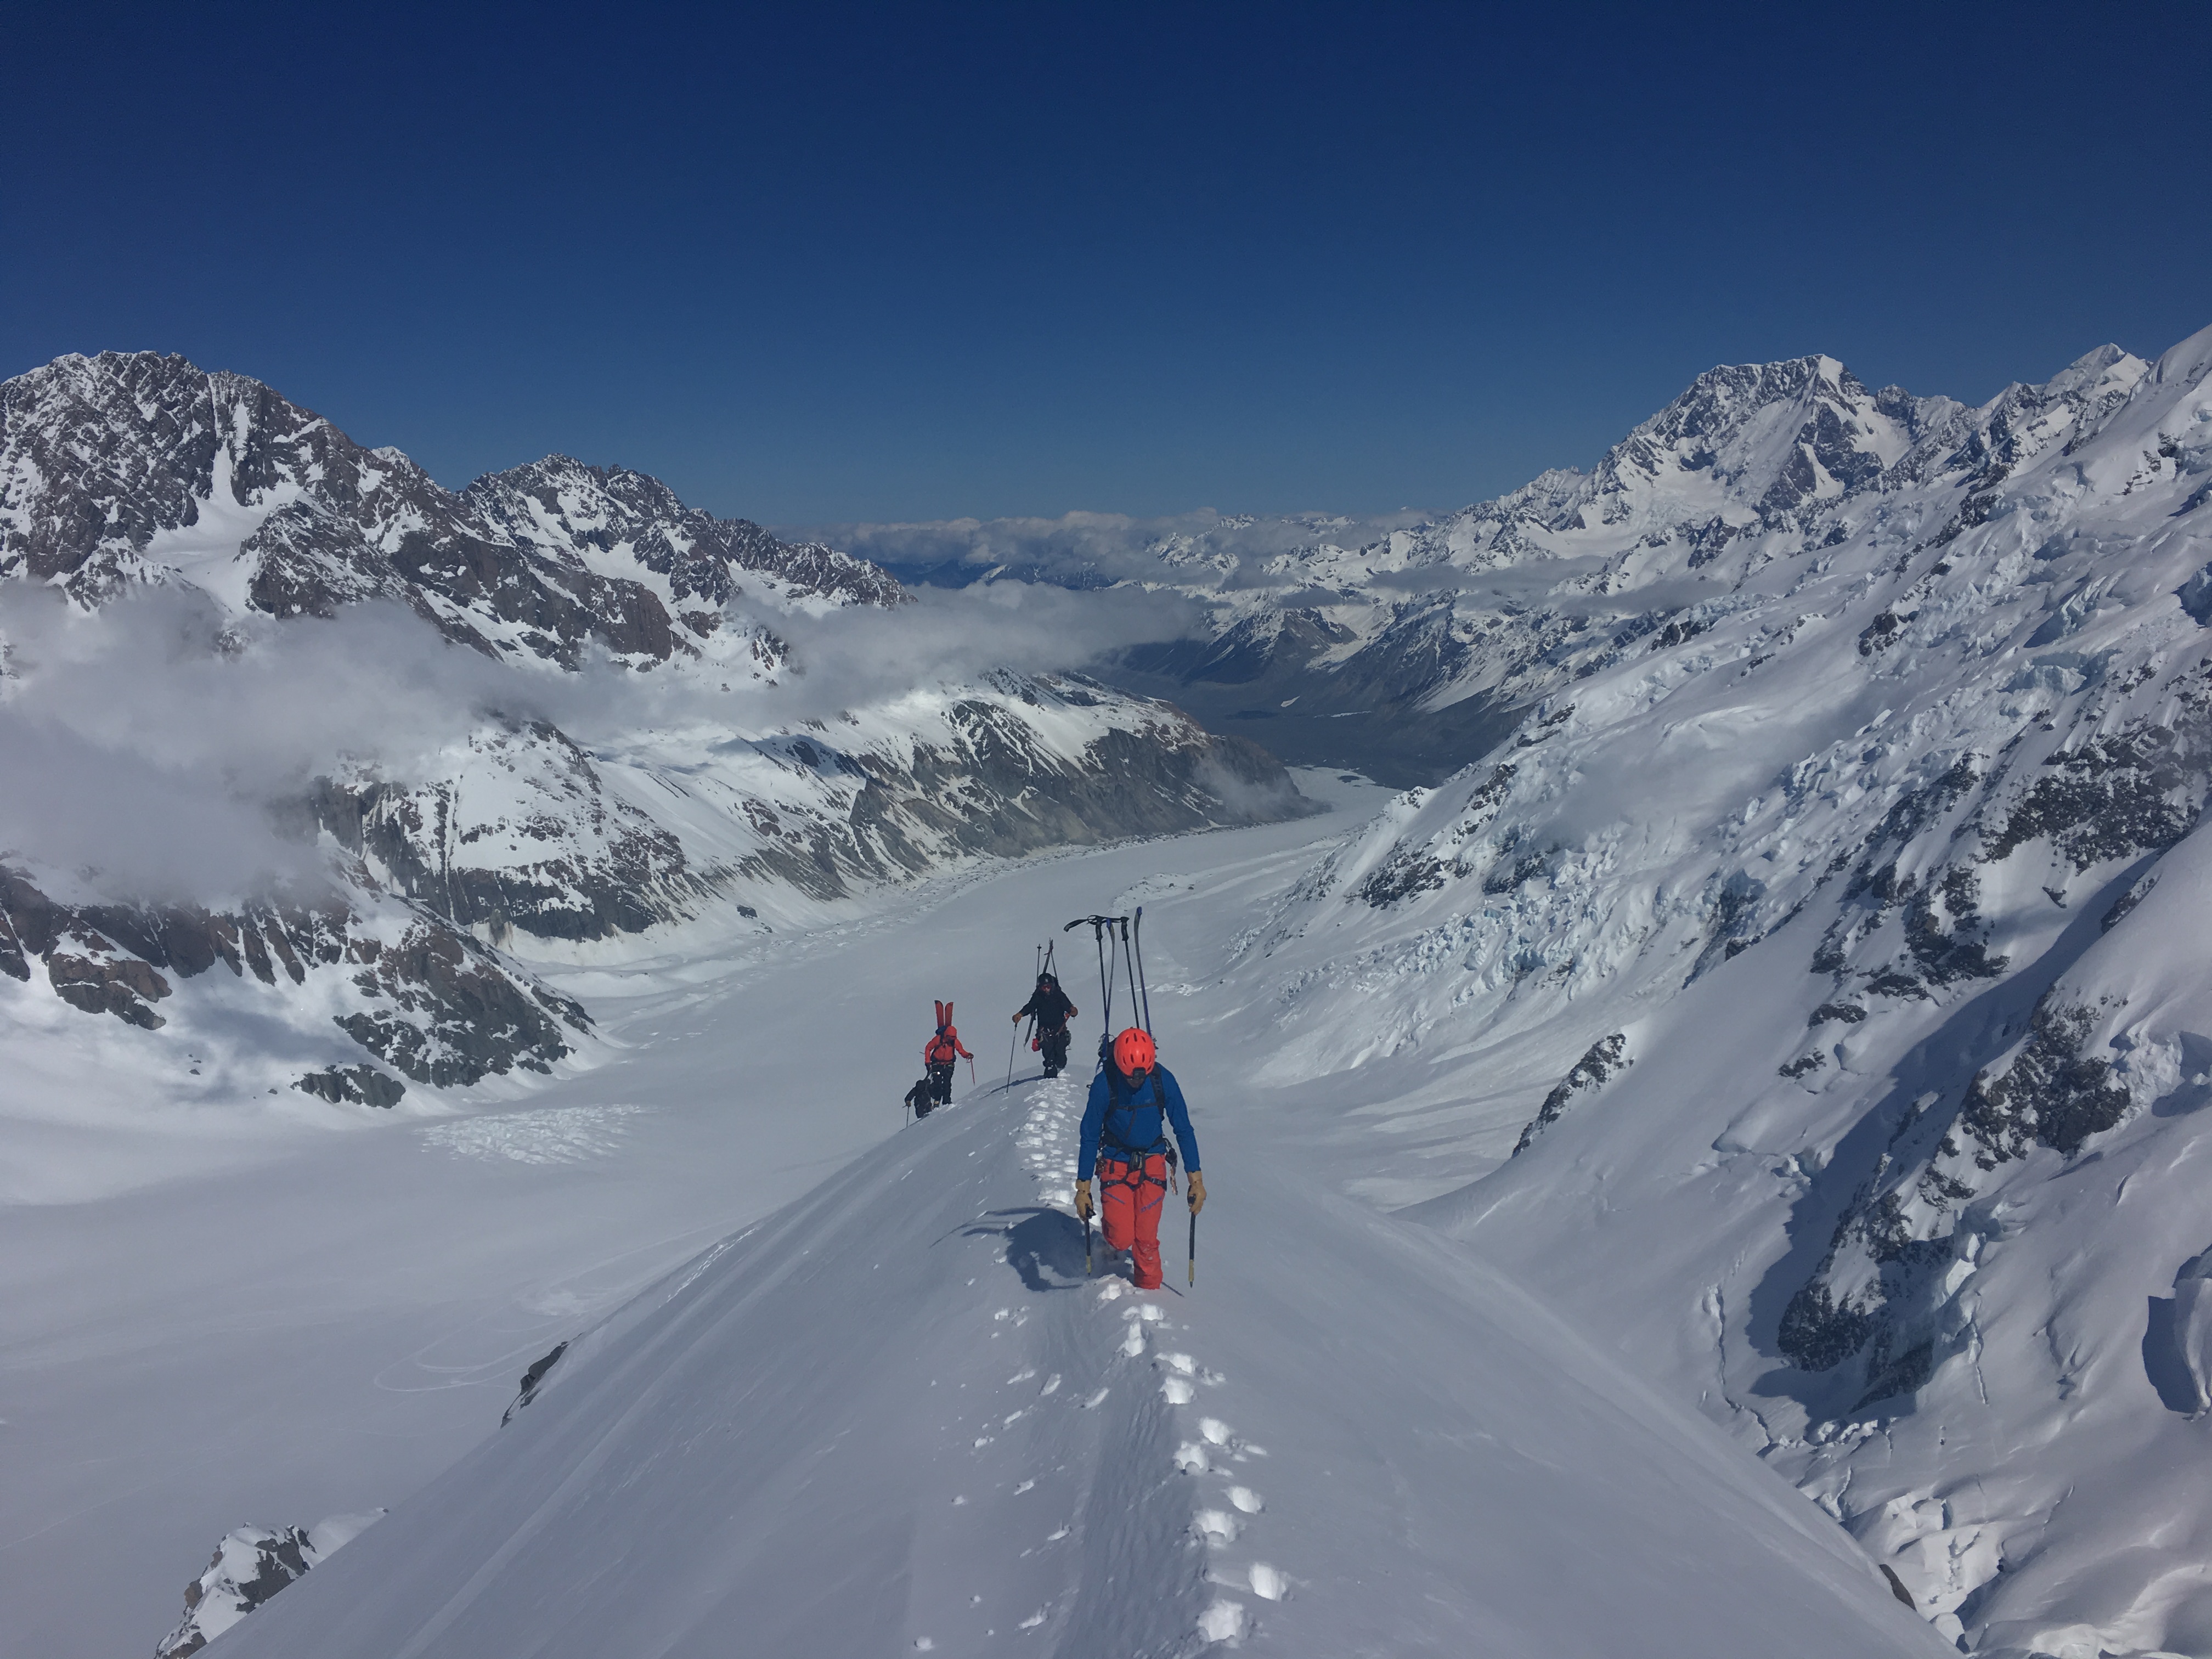
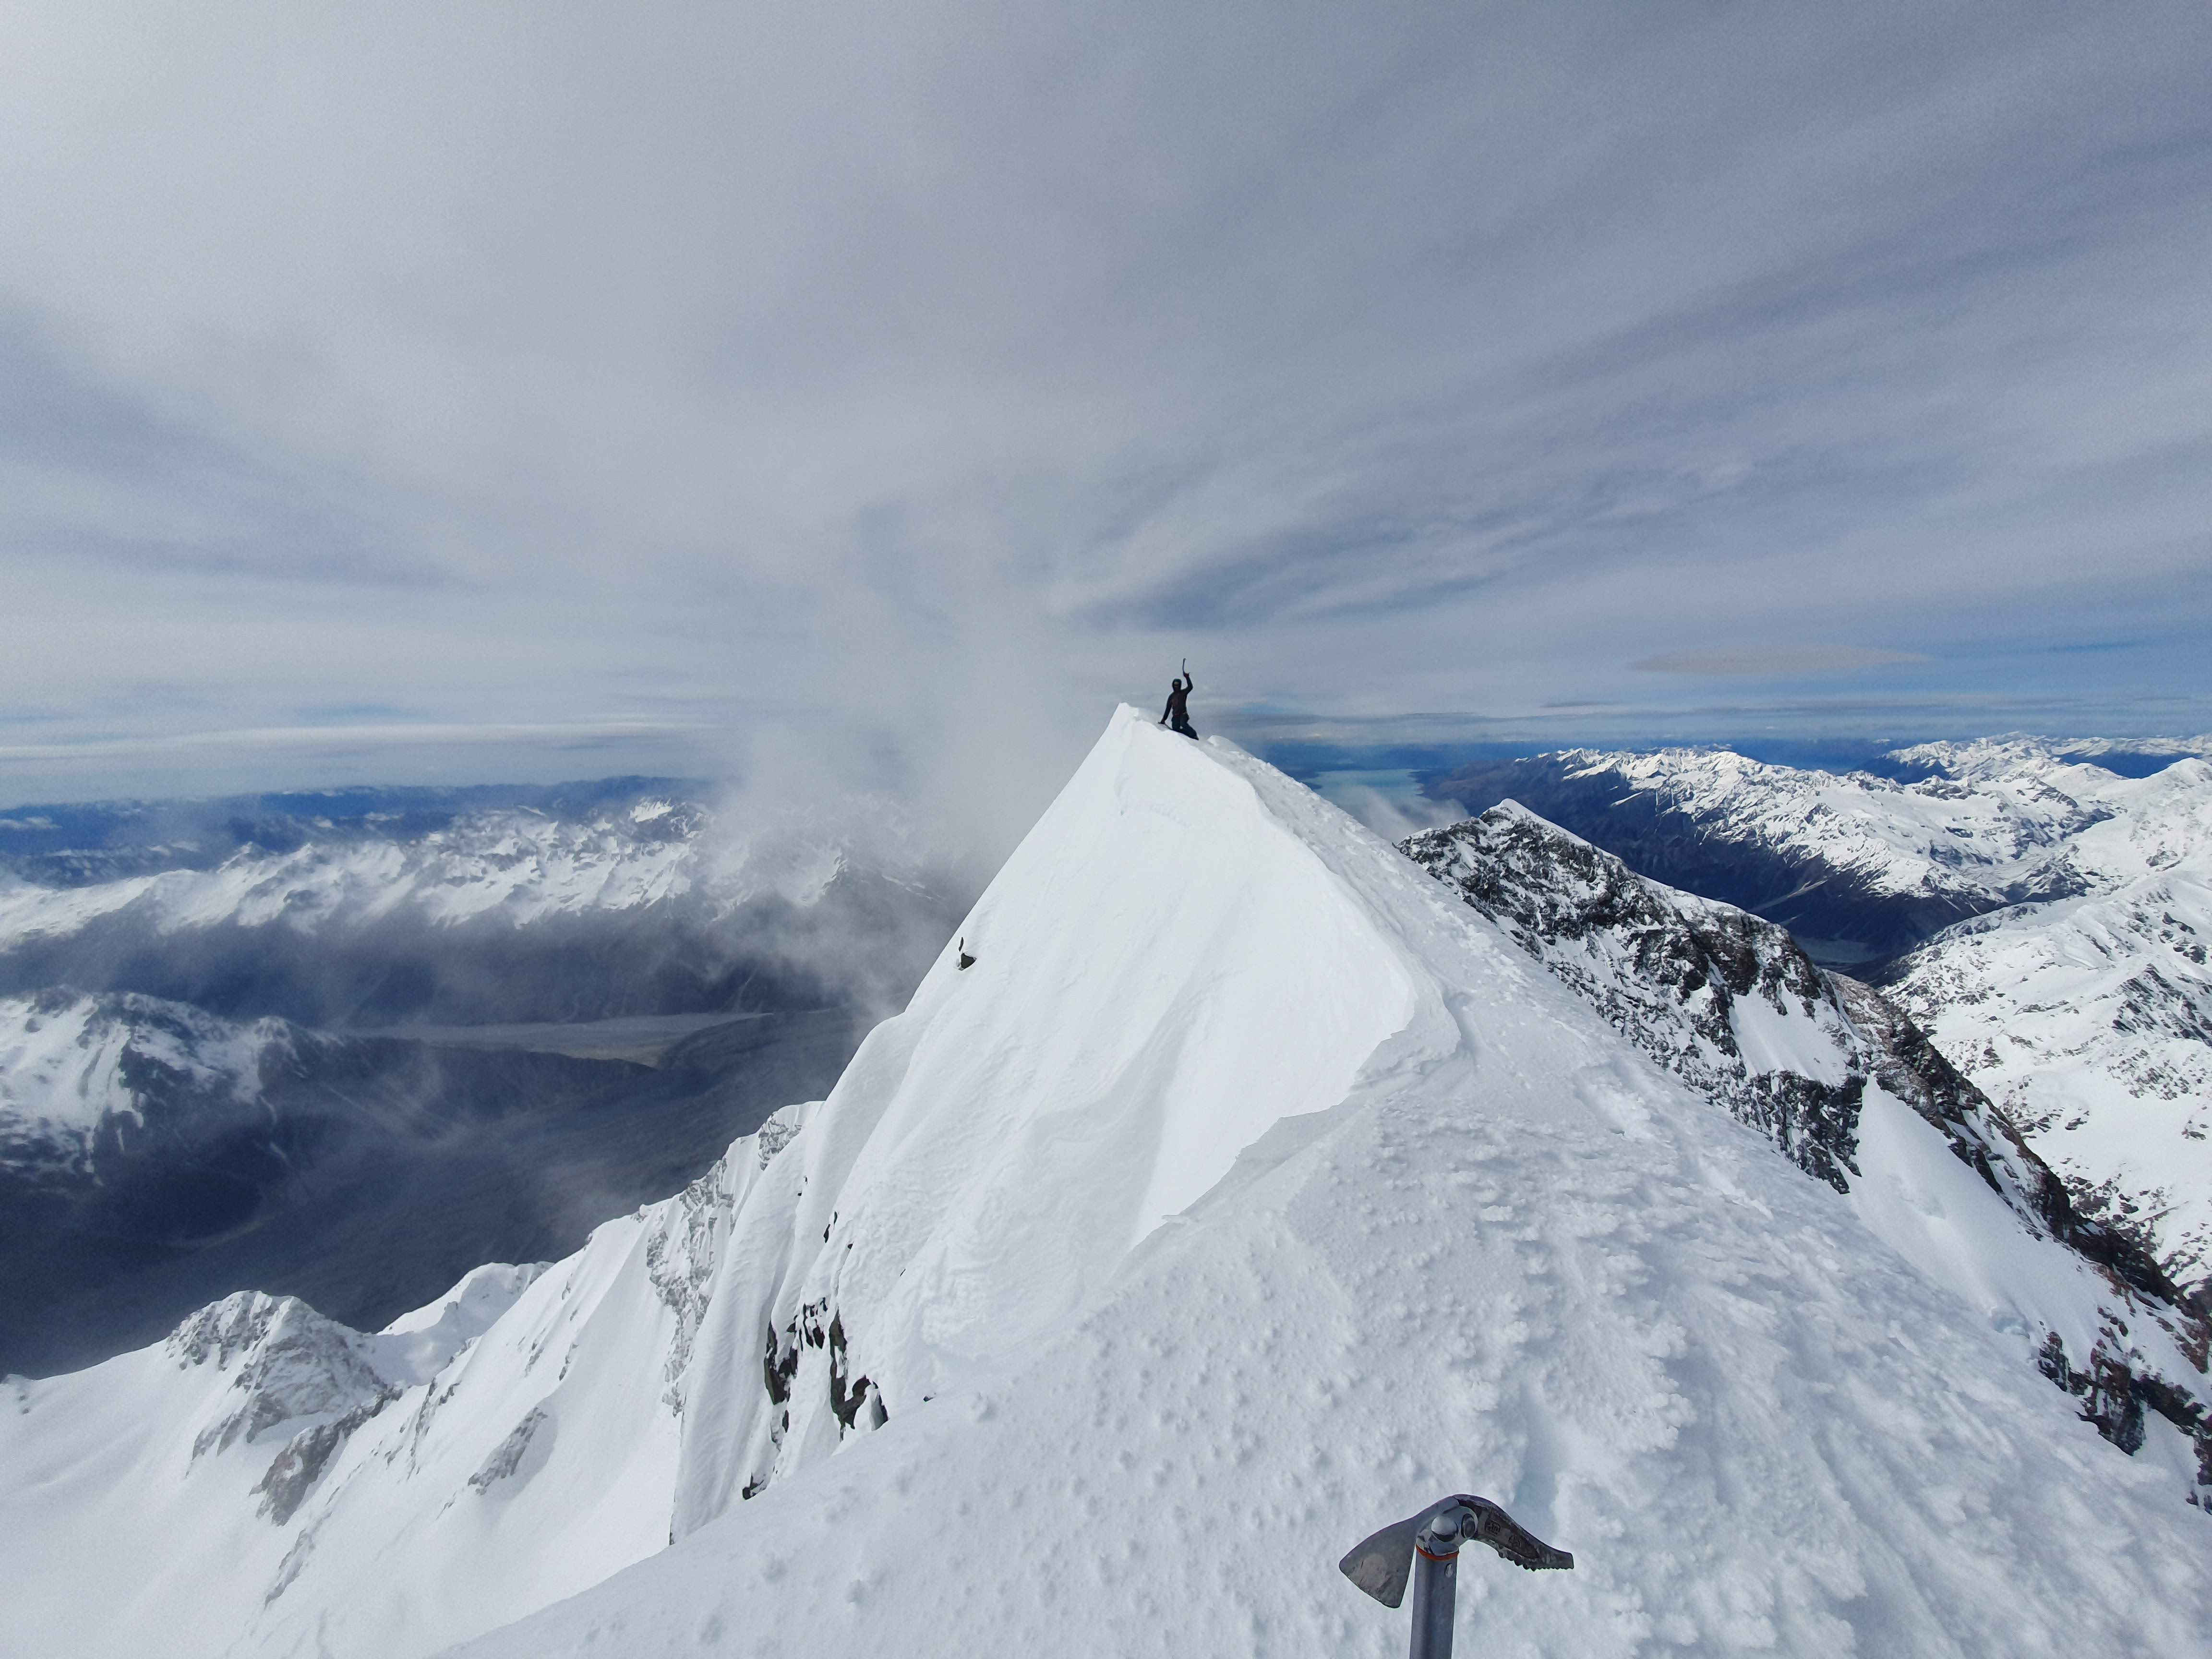
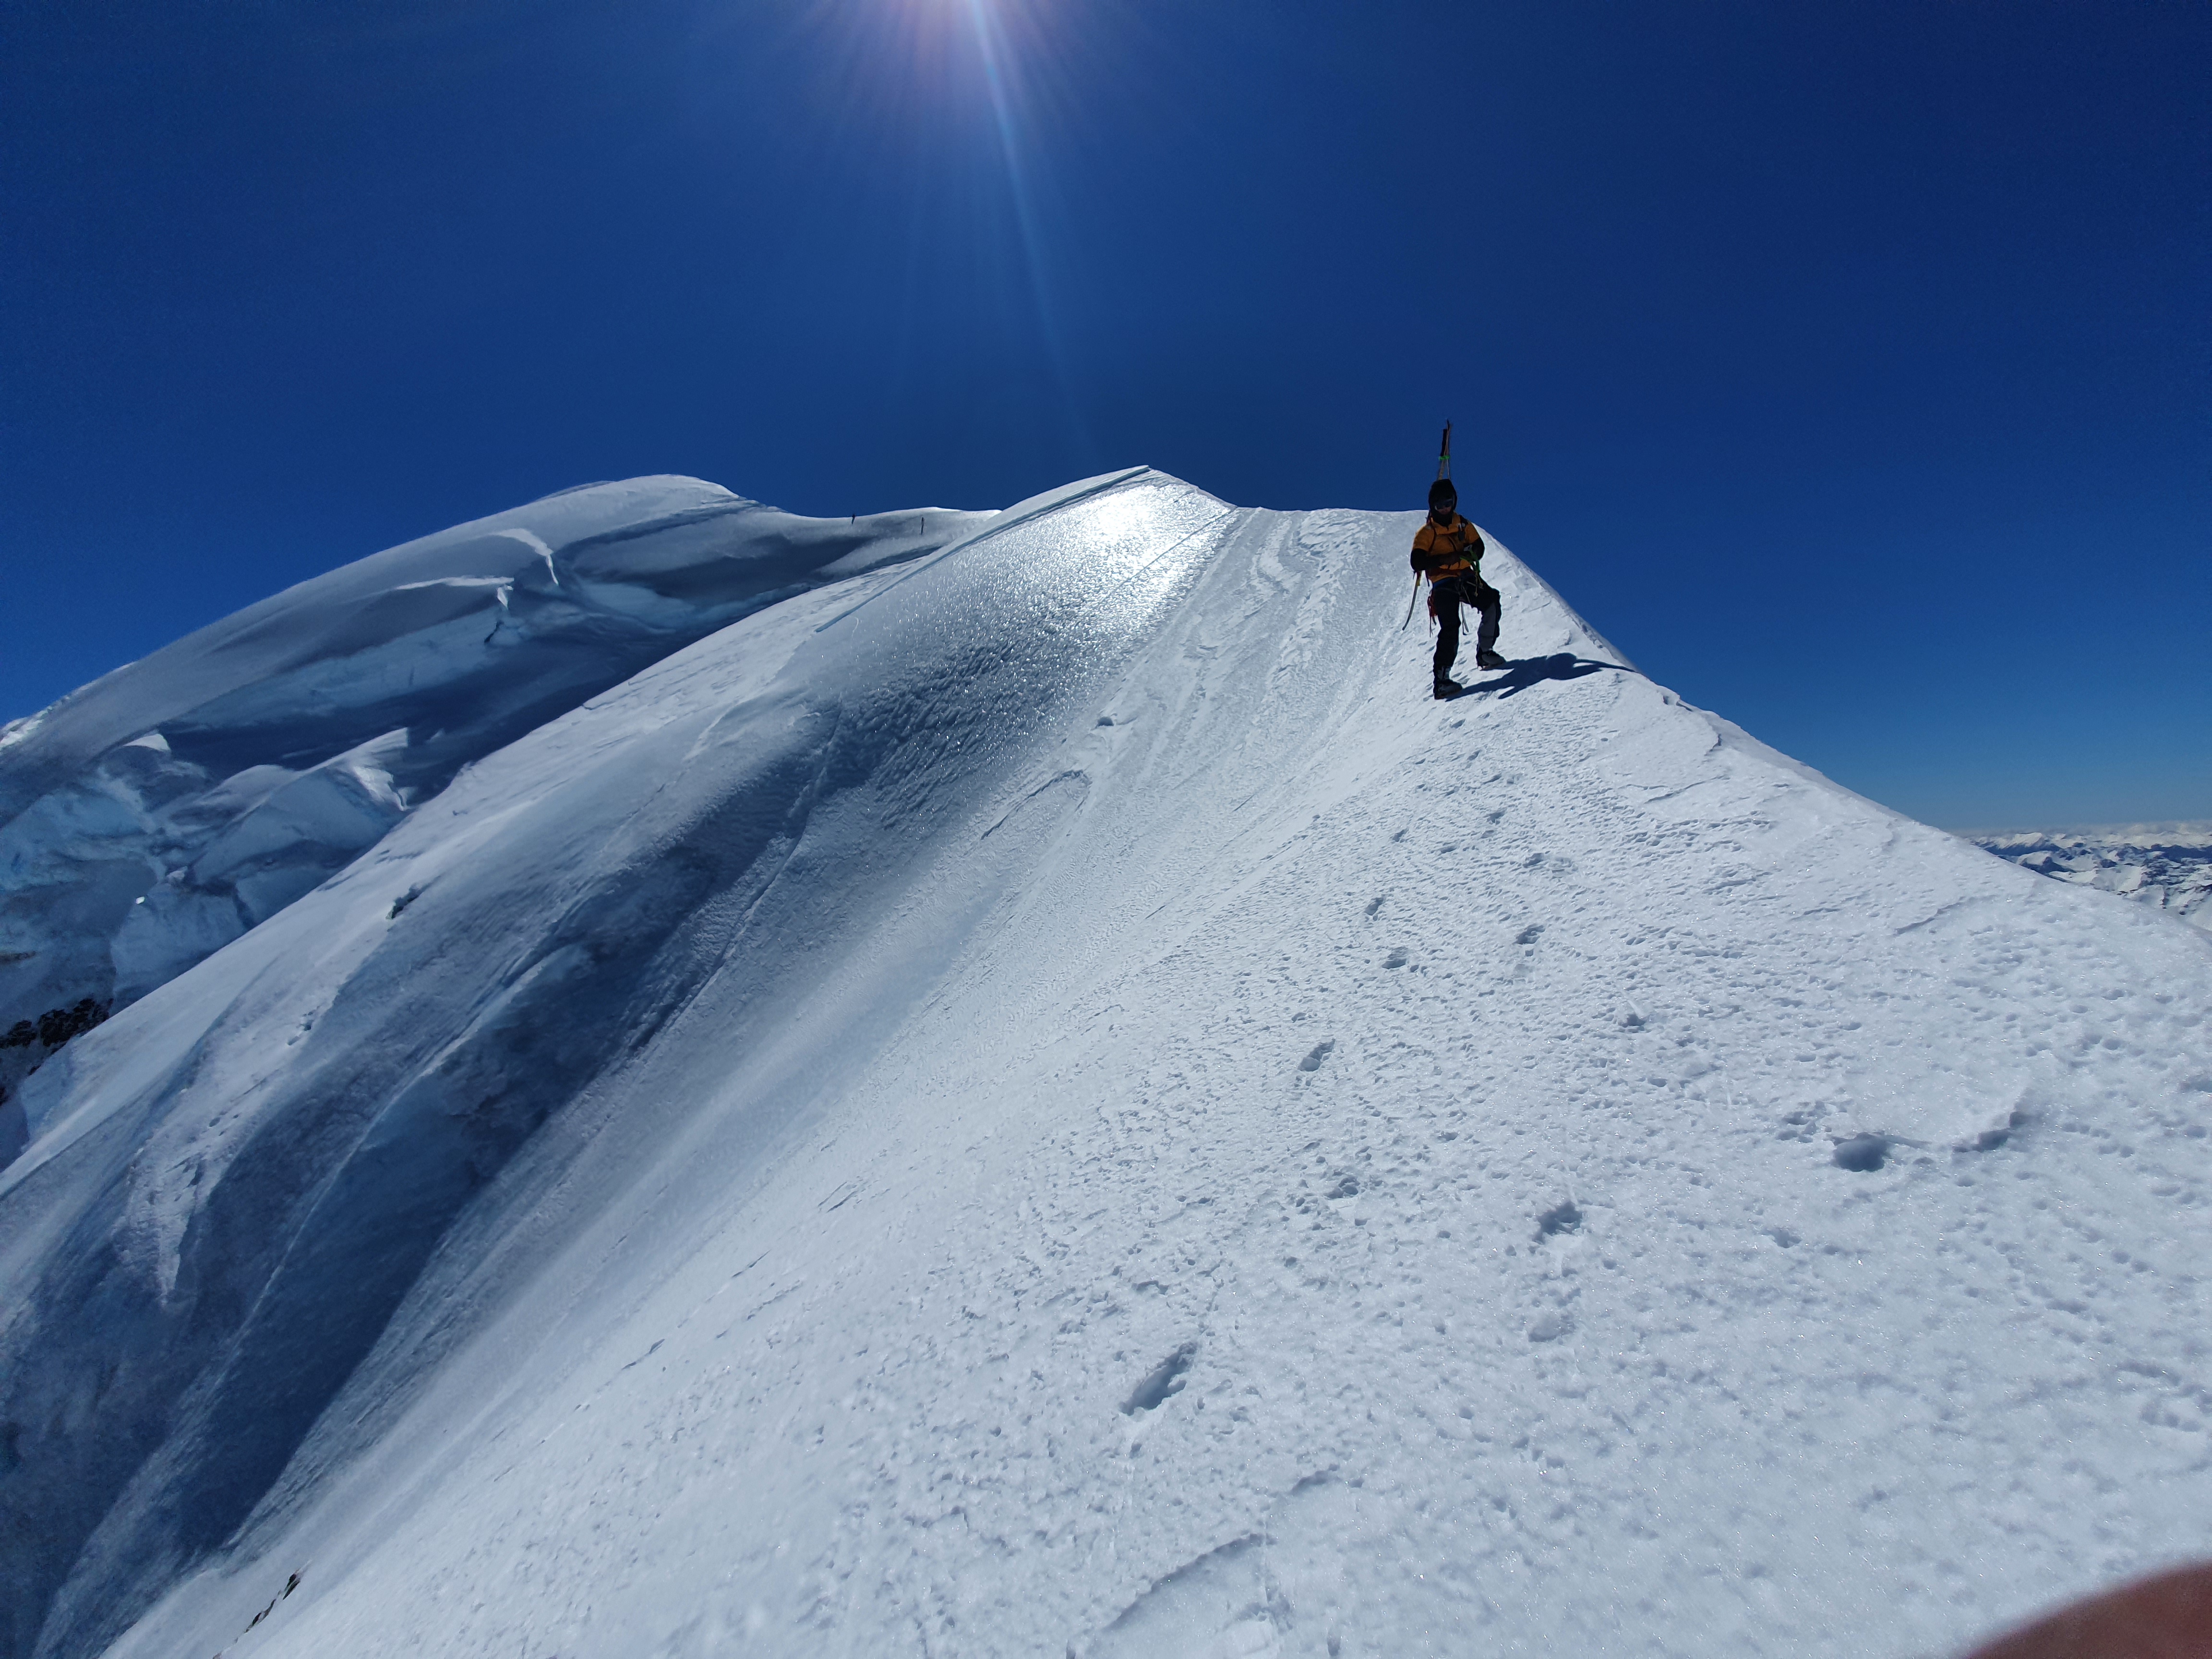
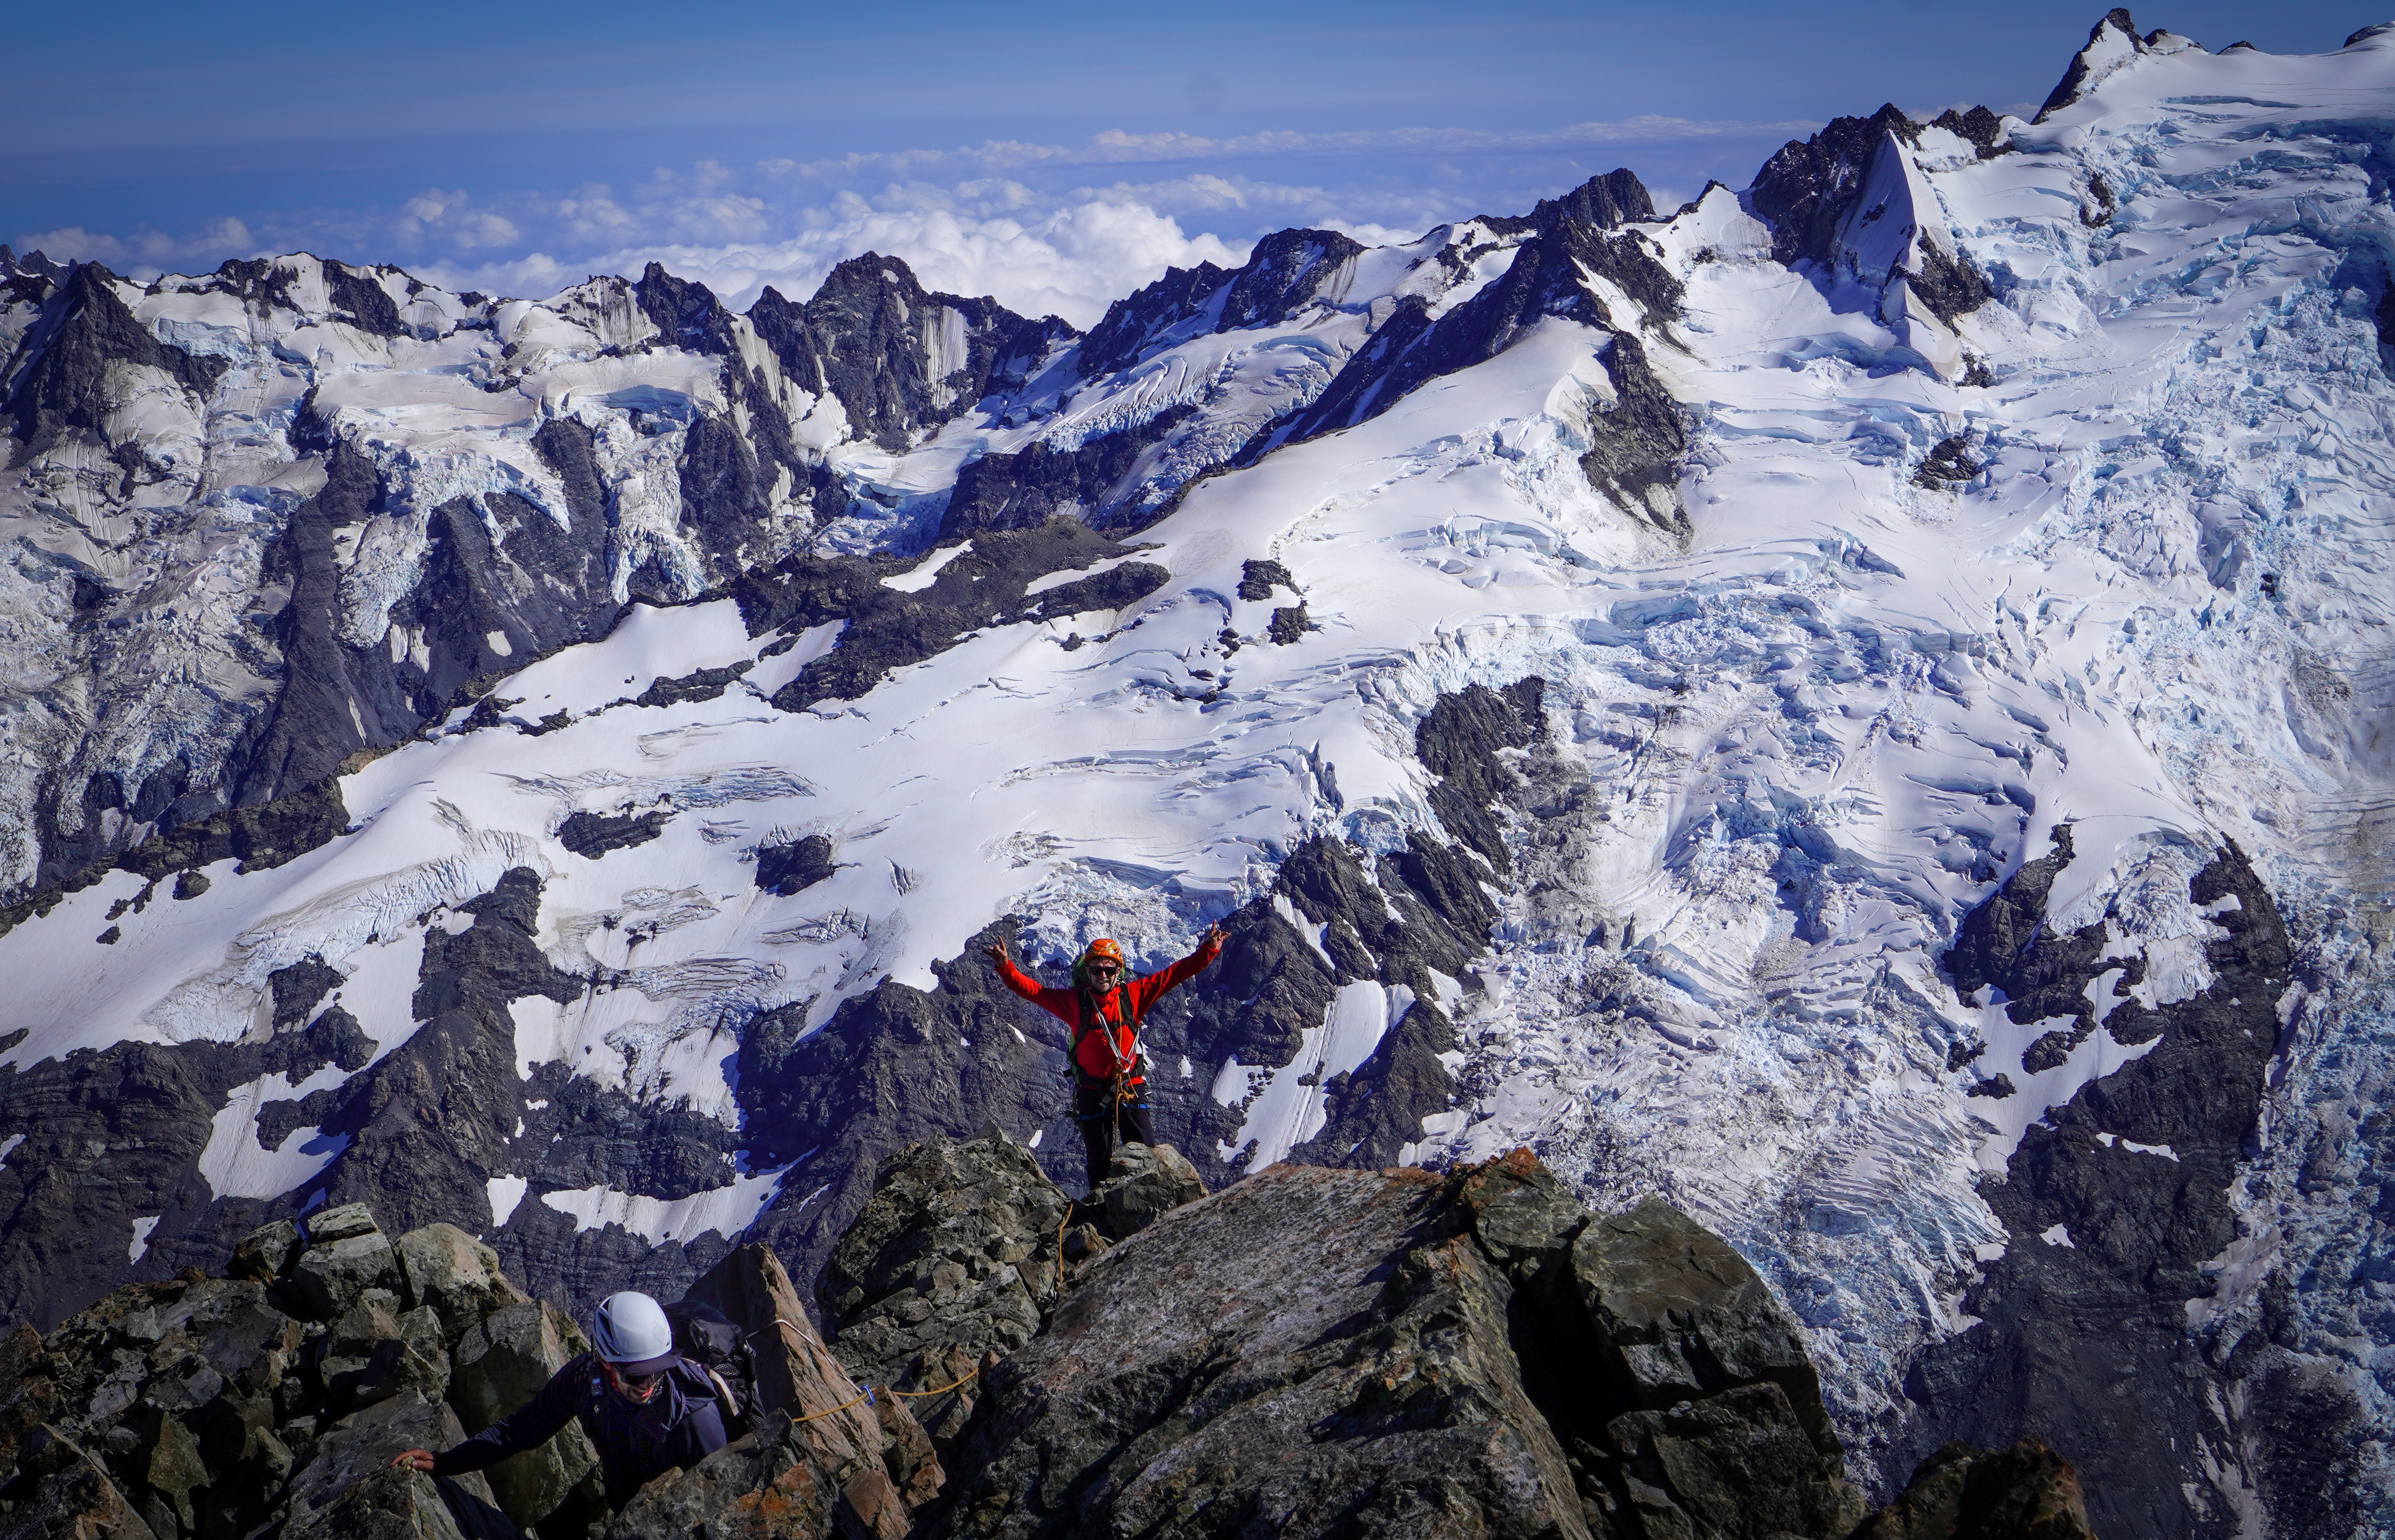
From Phipps peak (1965) its a gentle declining ridge to Temple (1913). It looks pretty hectic when you initially look at it but travelling on it was pretty fast and we got across in 40 minutes.
descent
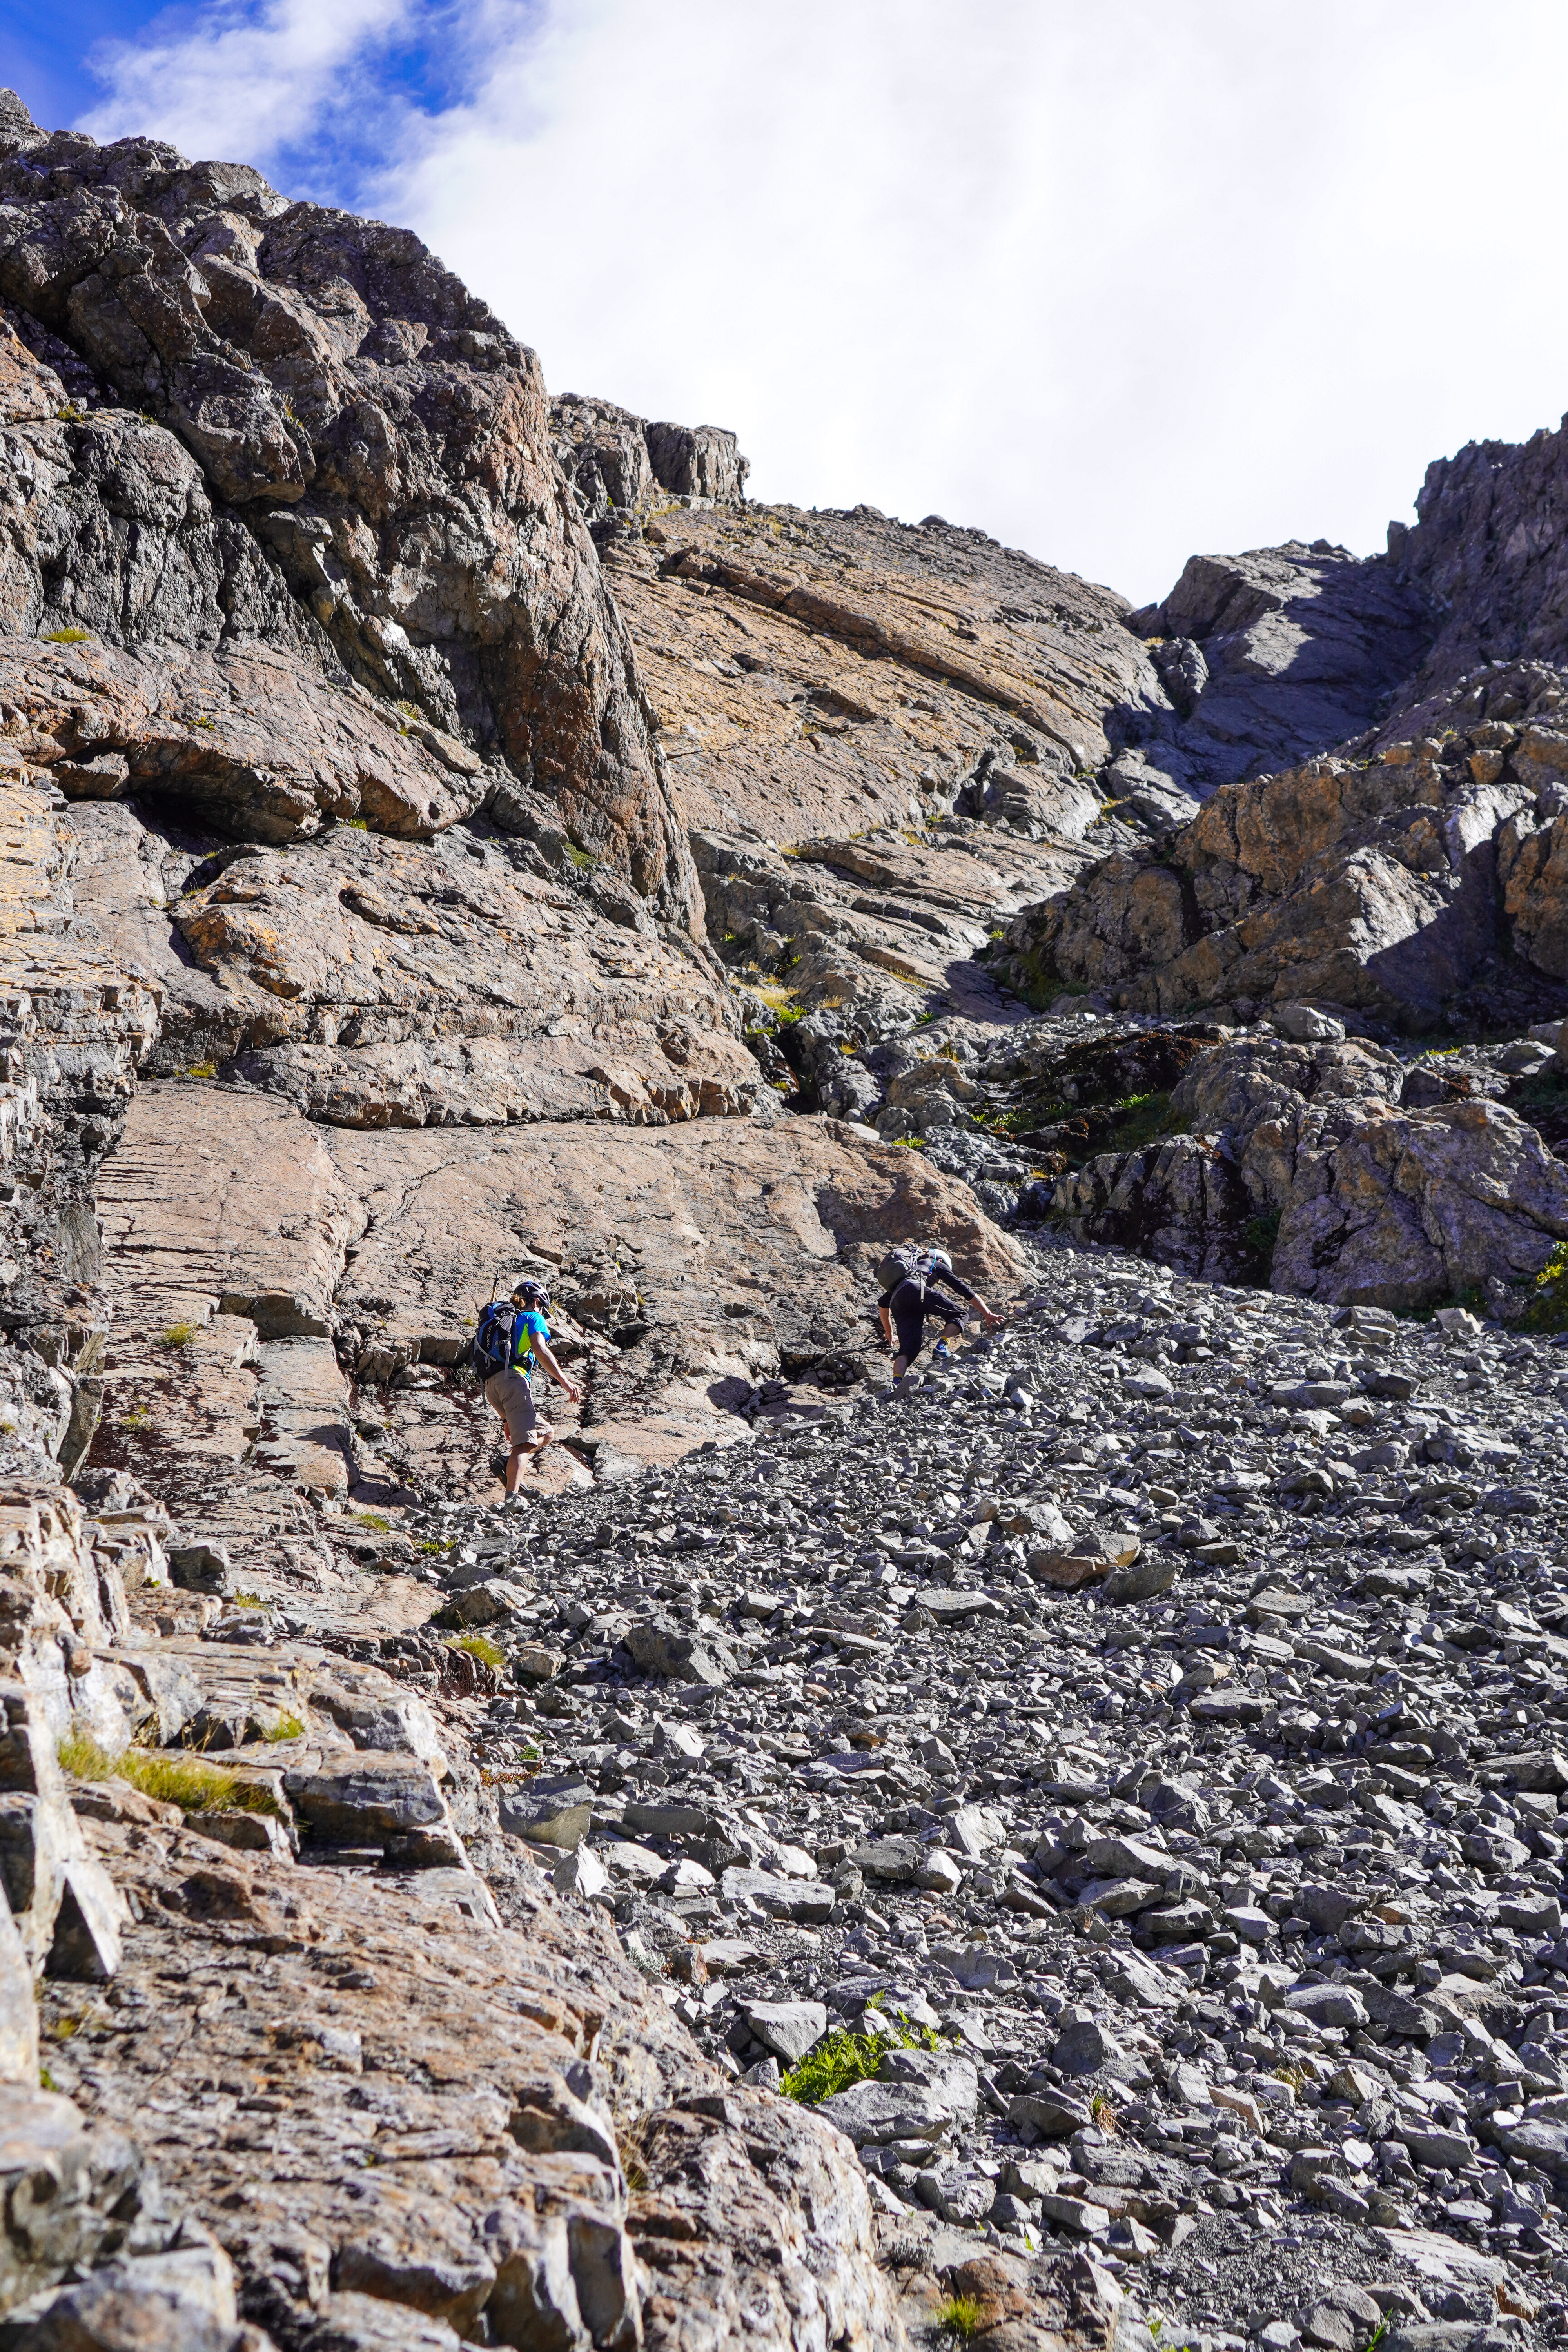
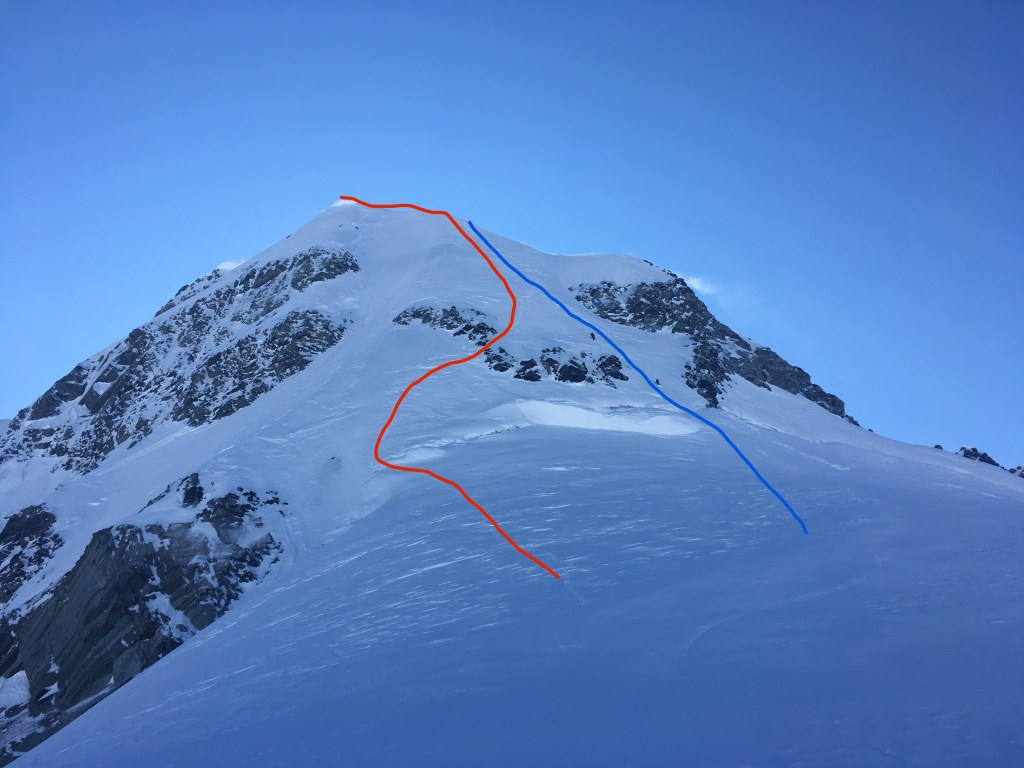
Just beyond the cairn on Mt Temple there is a steep gully – initially the ground is pretty compact and slippy but further down turns into 10/10 quality shingle/scree! We were down to Page shelter within 15 minutes. From there you can see a trail cut out heading down to Lockwood shelter. From there retrace your steps back to the car.
We took 5h 40 with a couple of leisurely stops, but speedier parties have done it in 4!
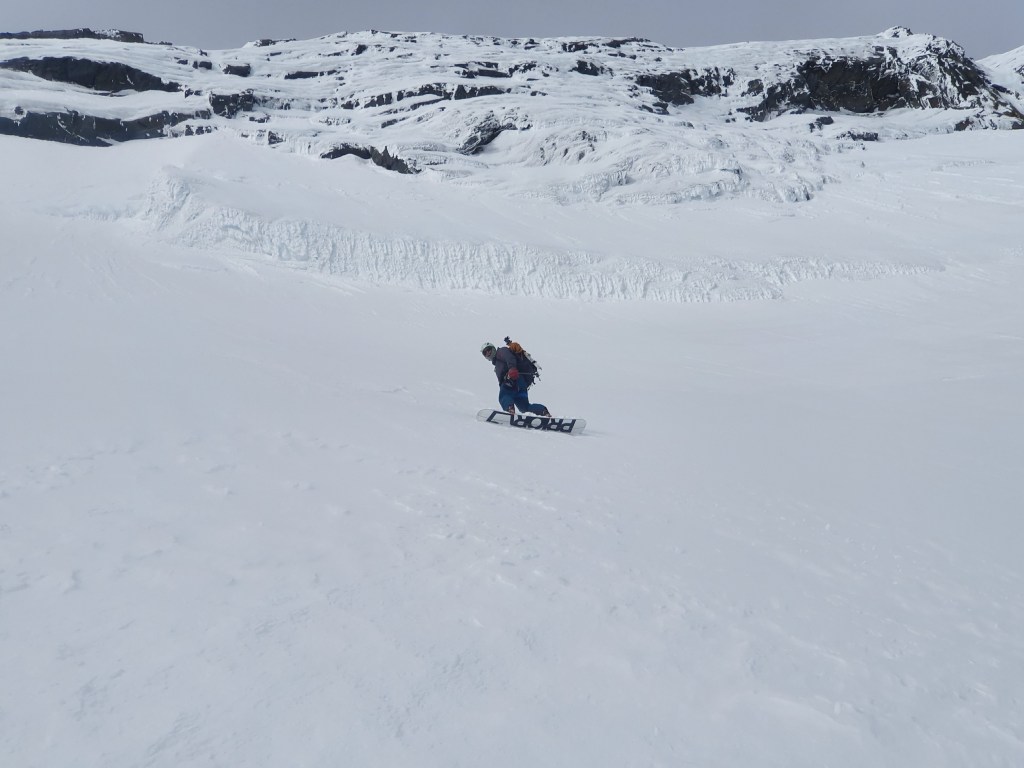
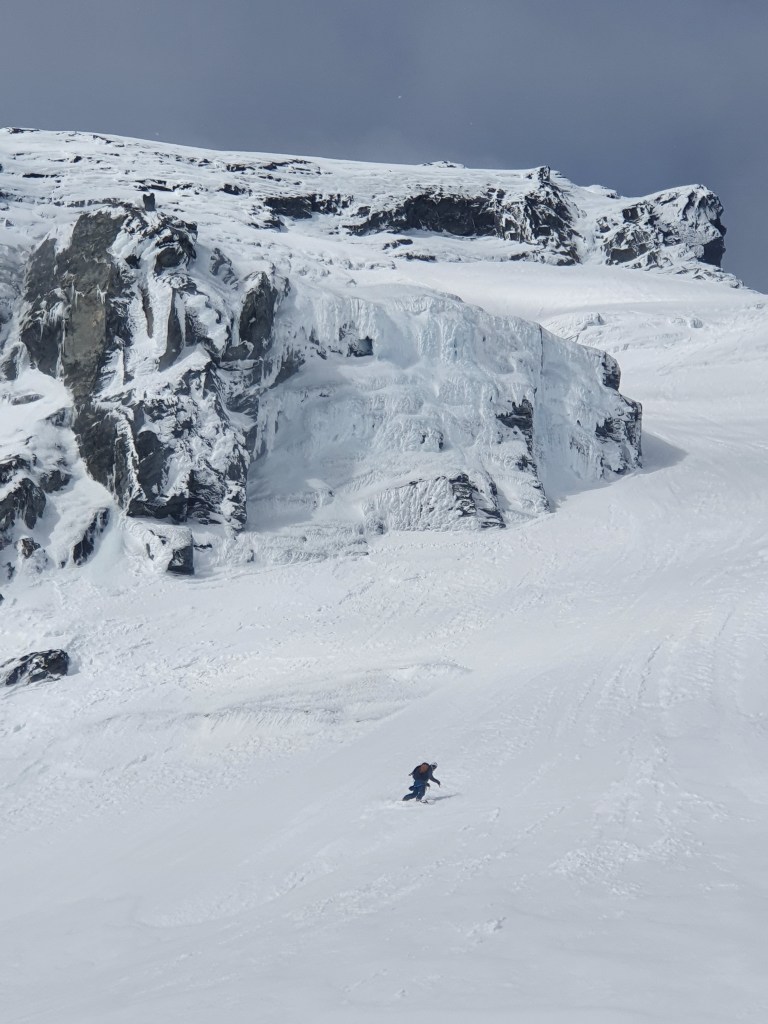
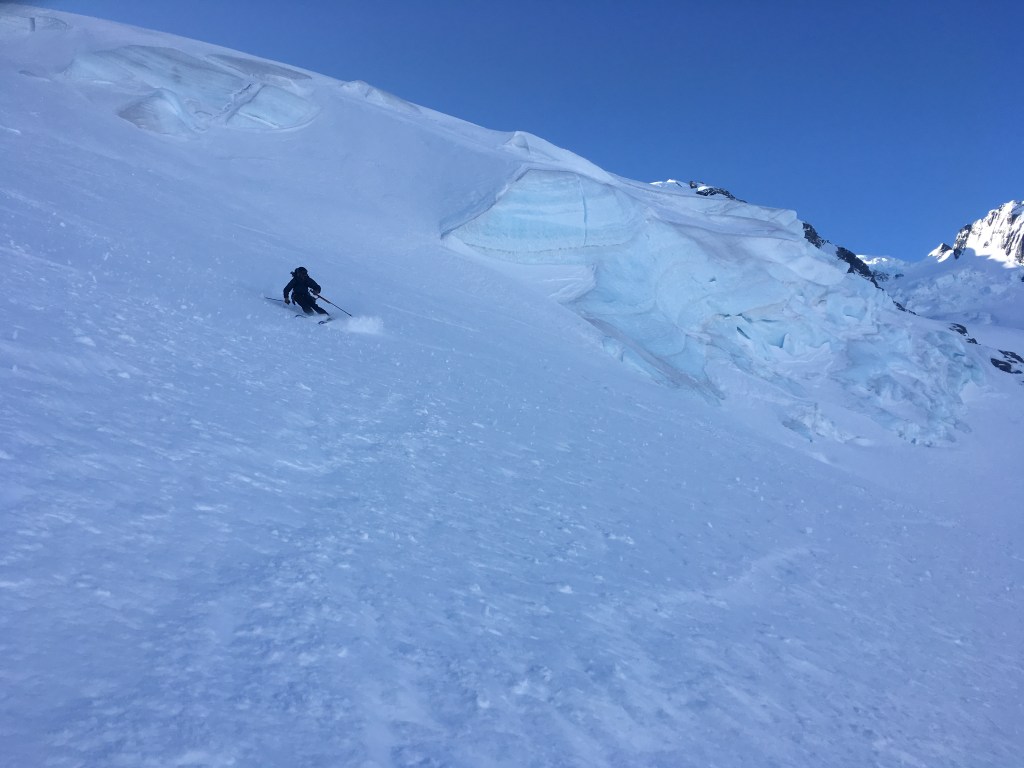
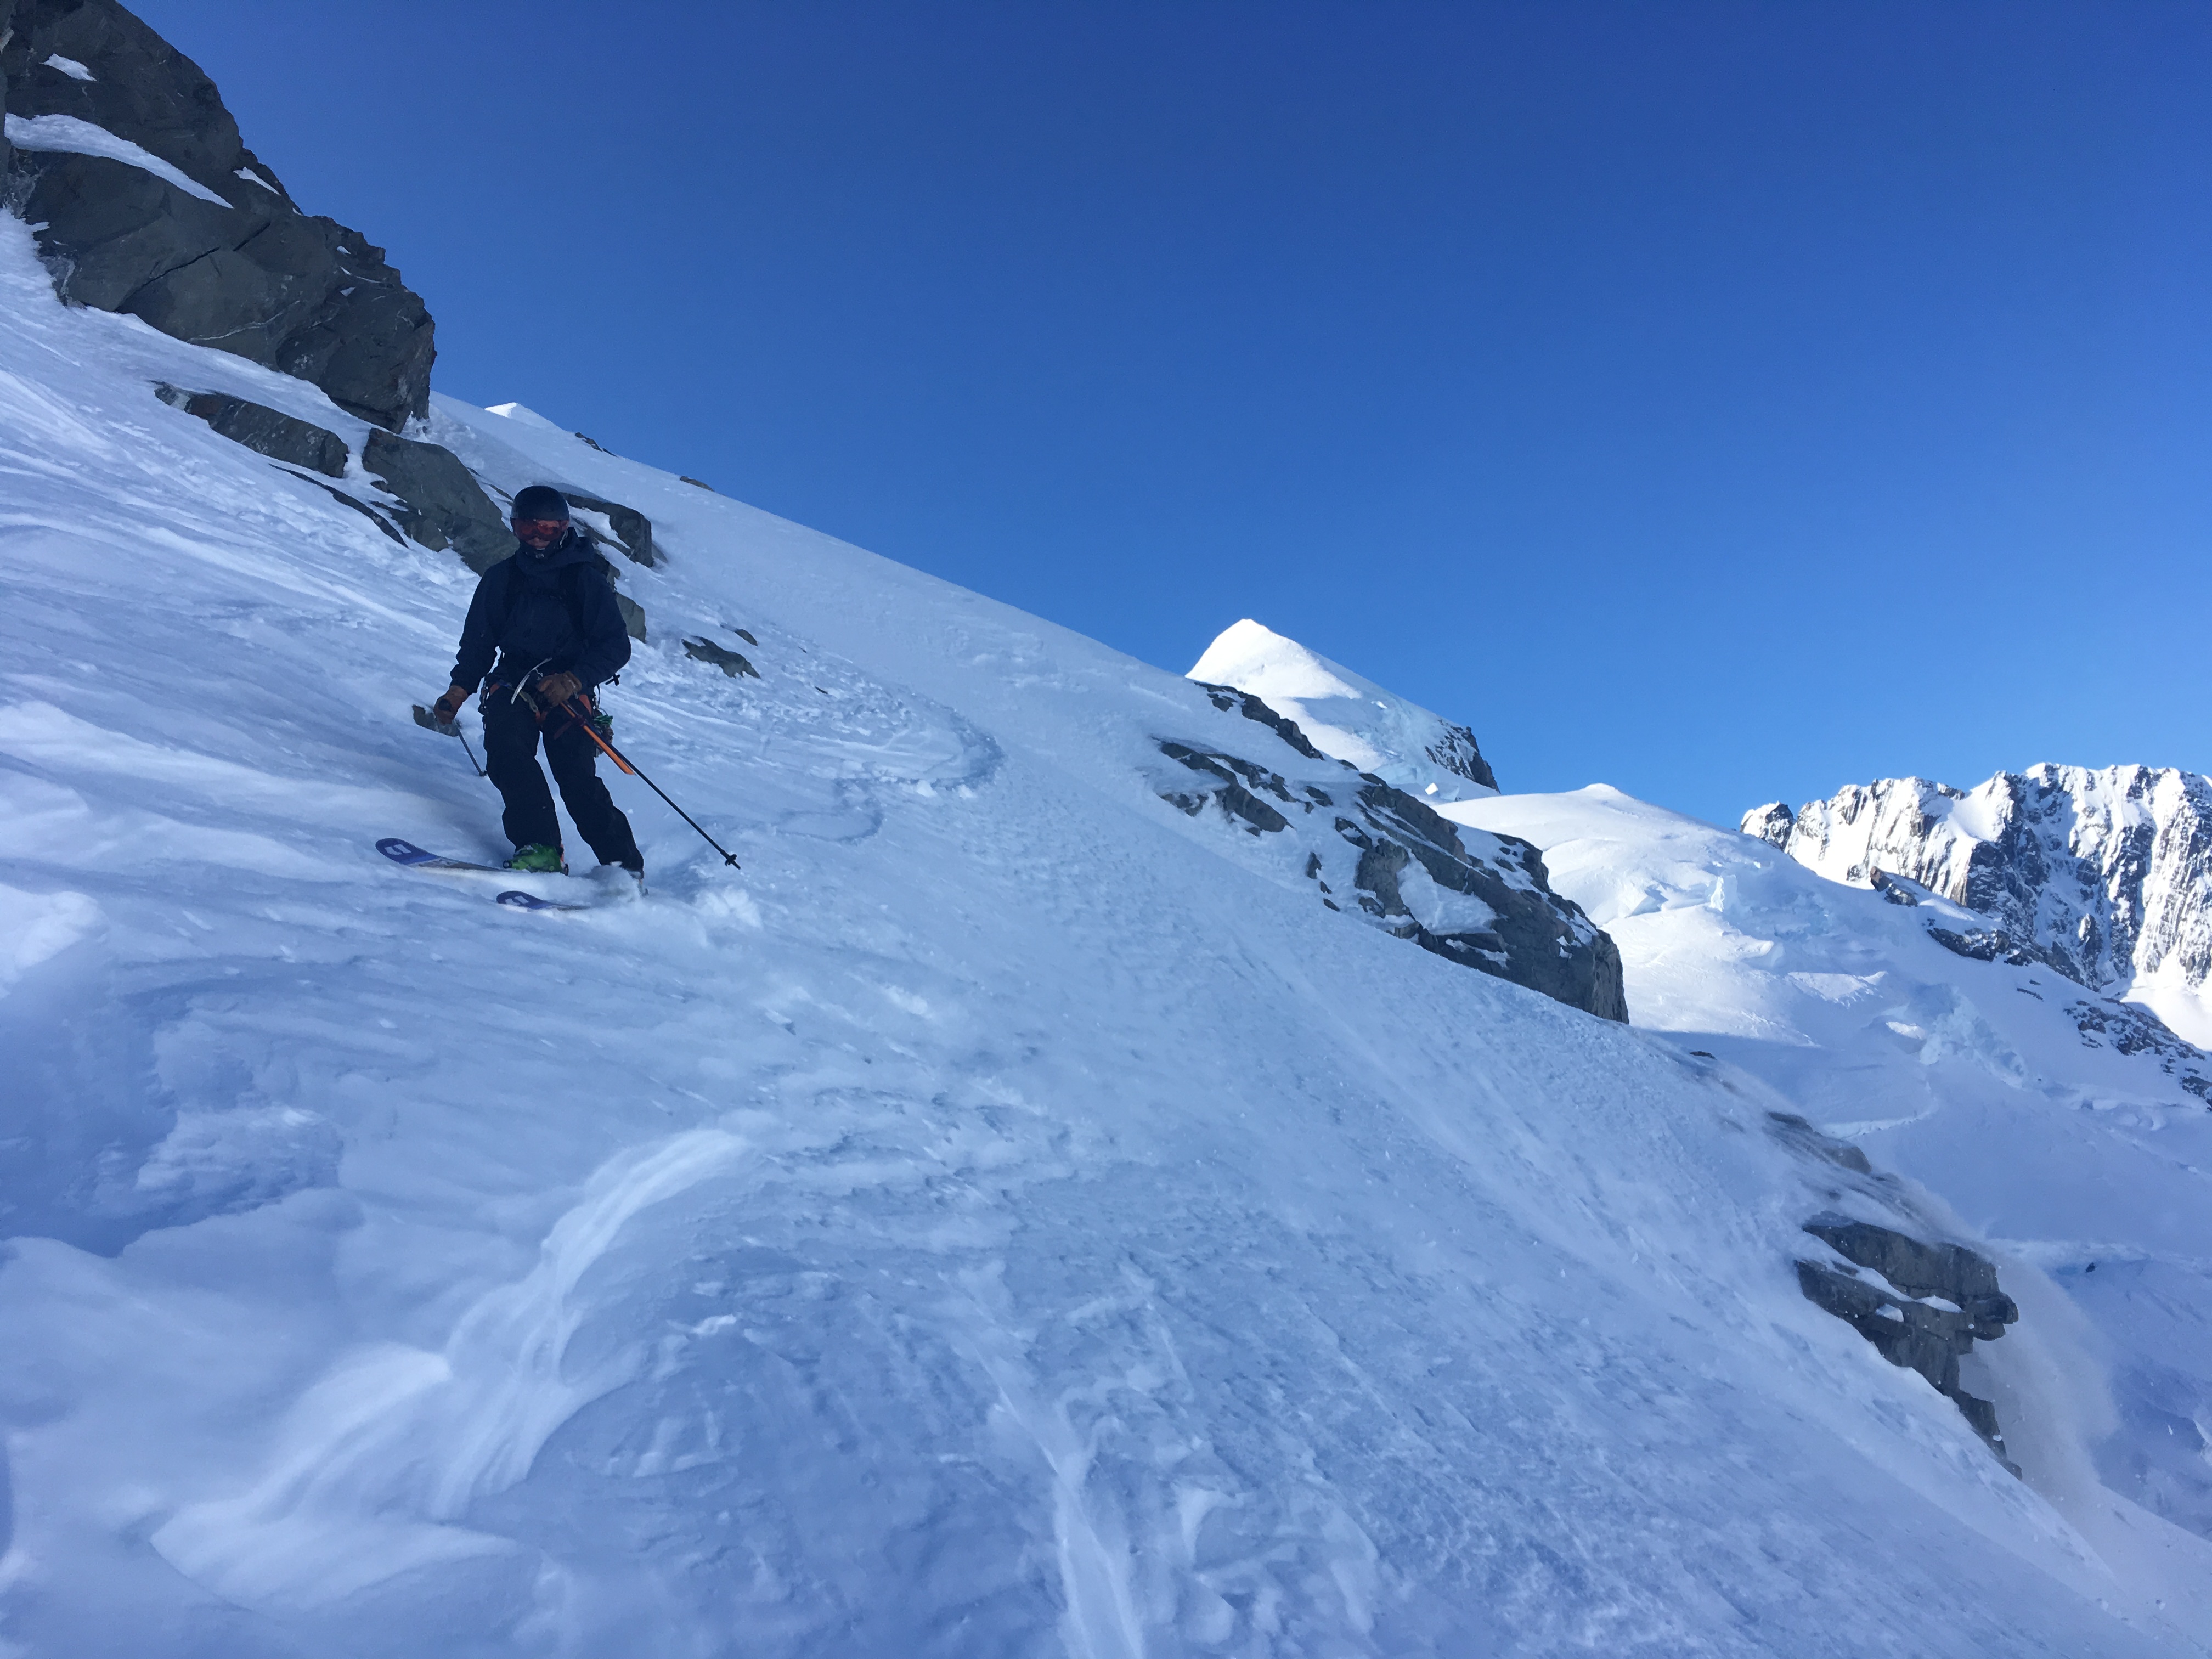
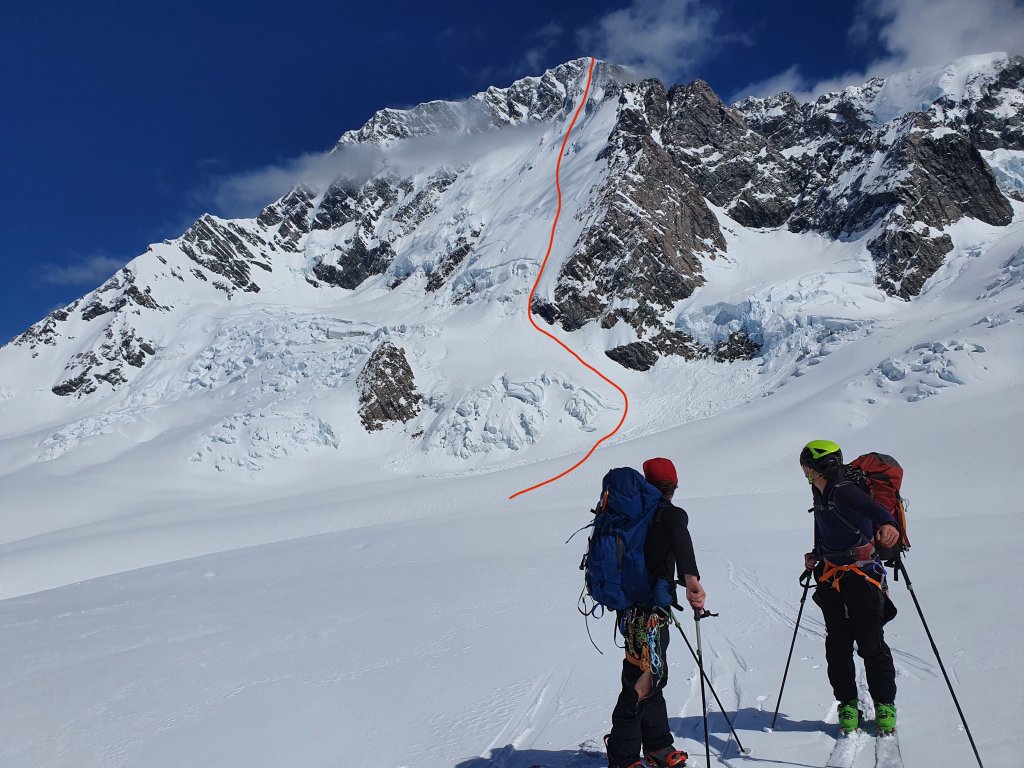
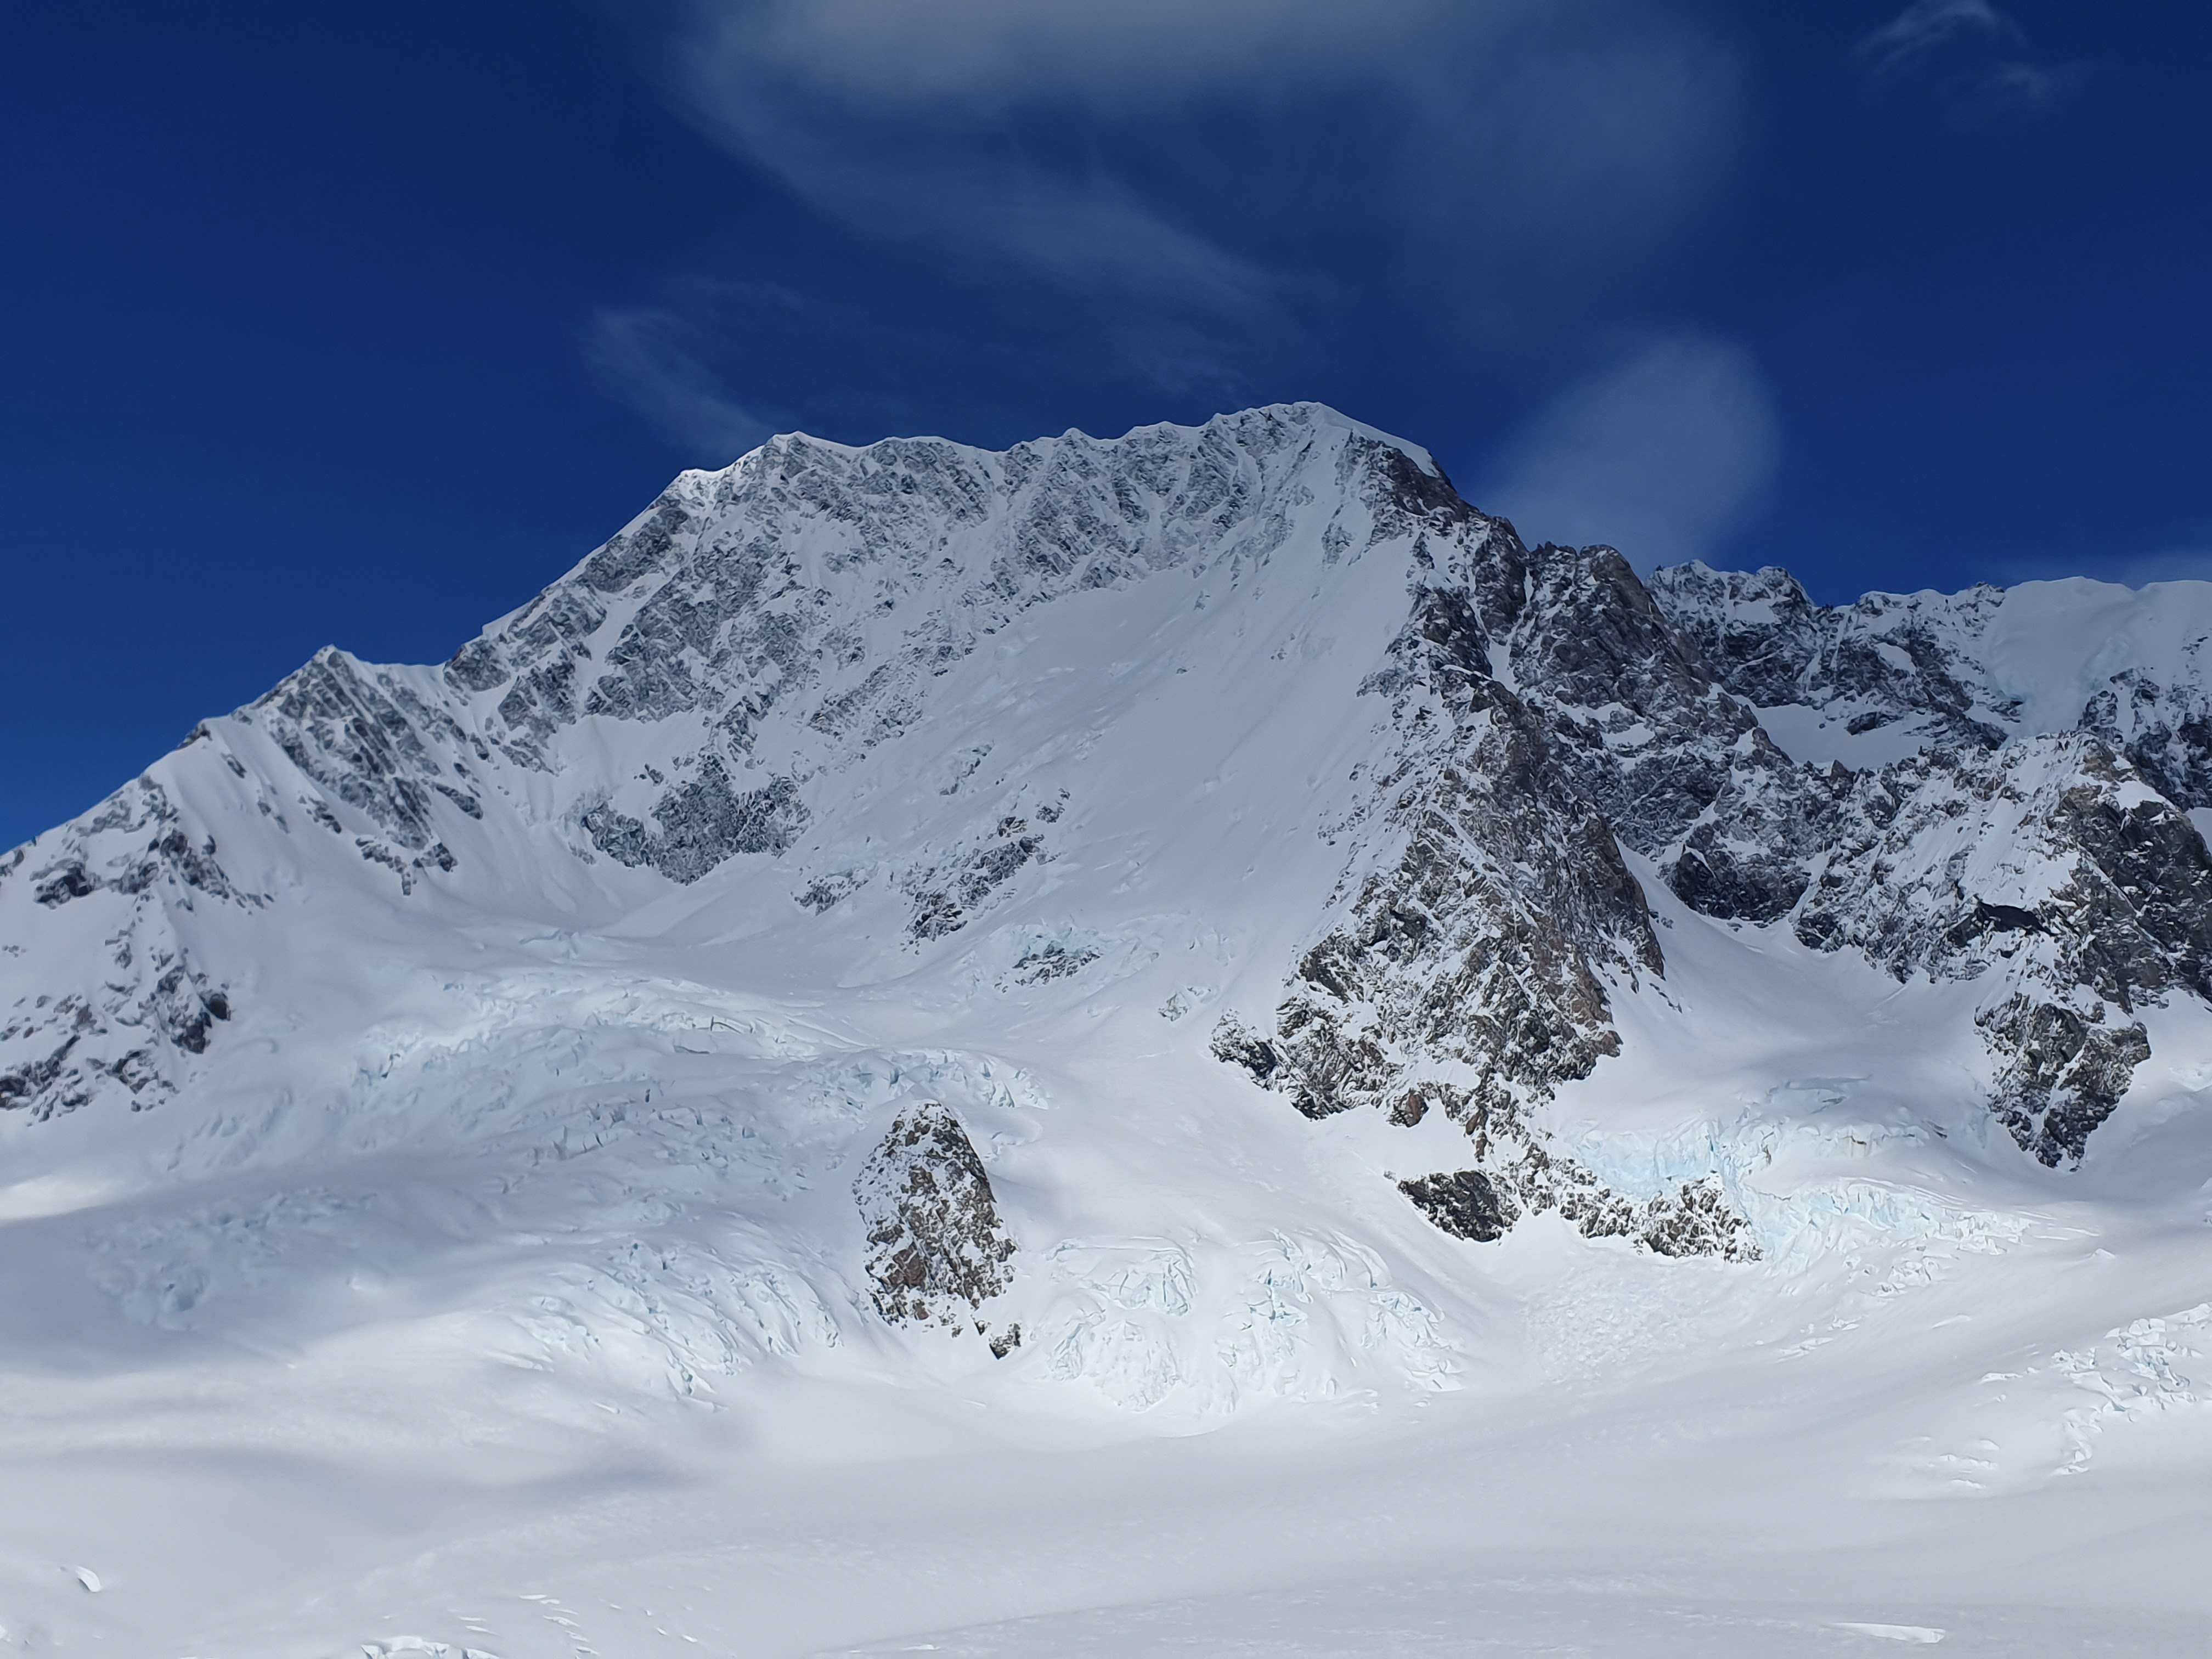
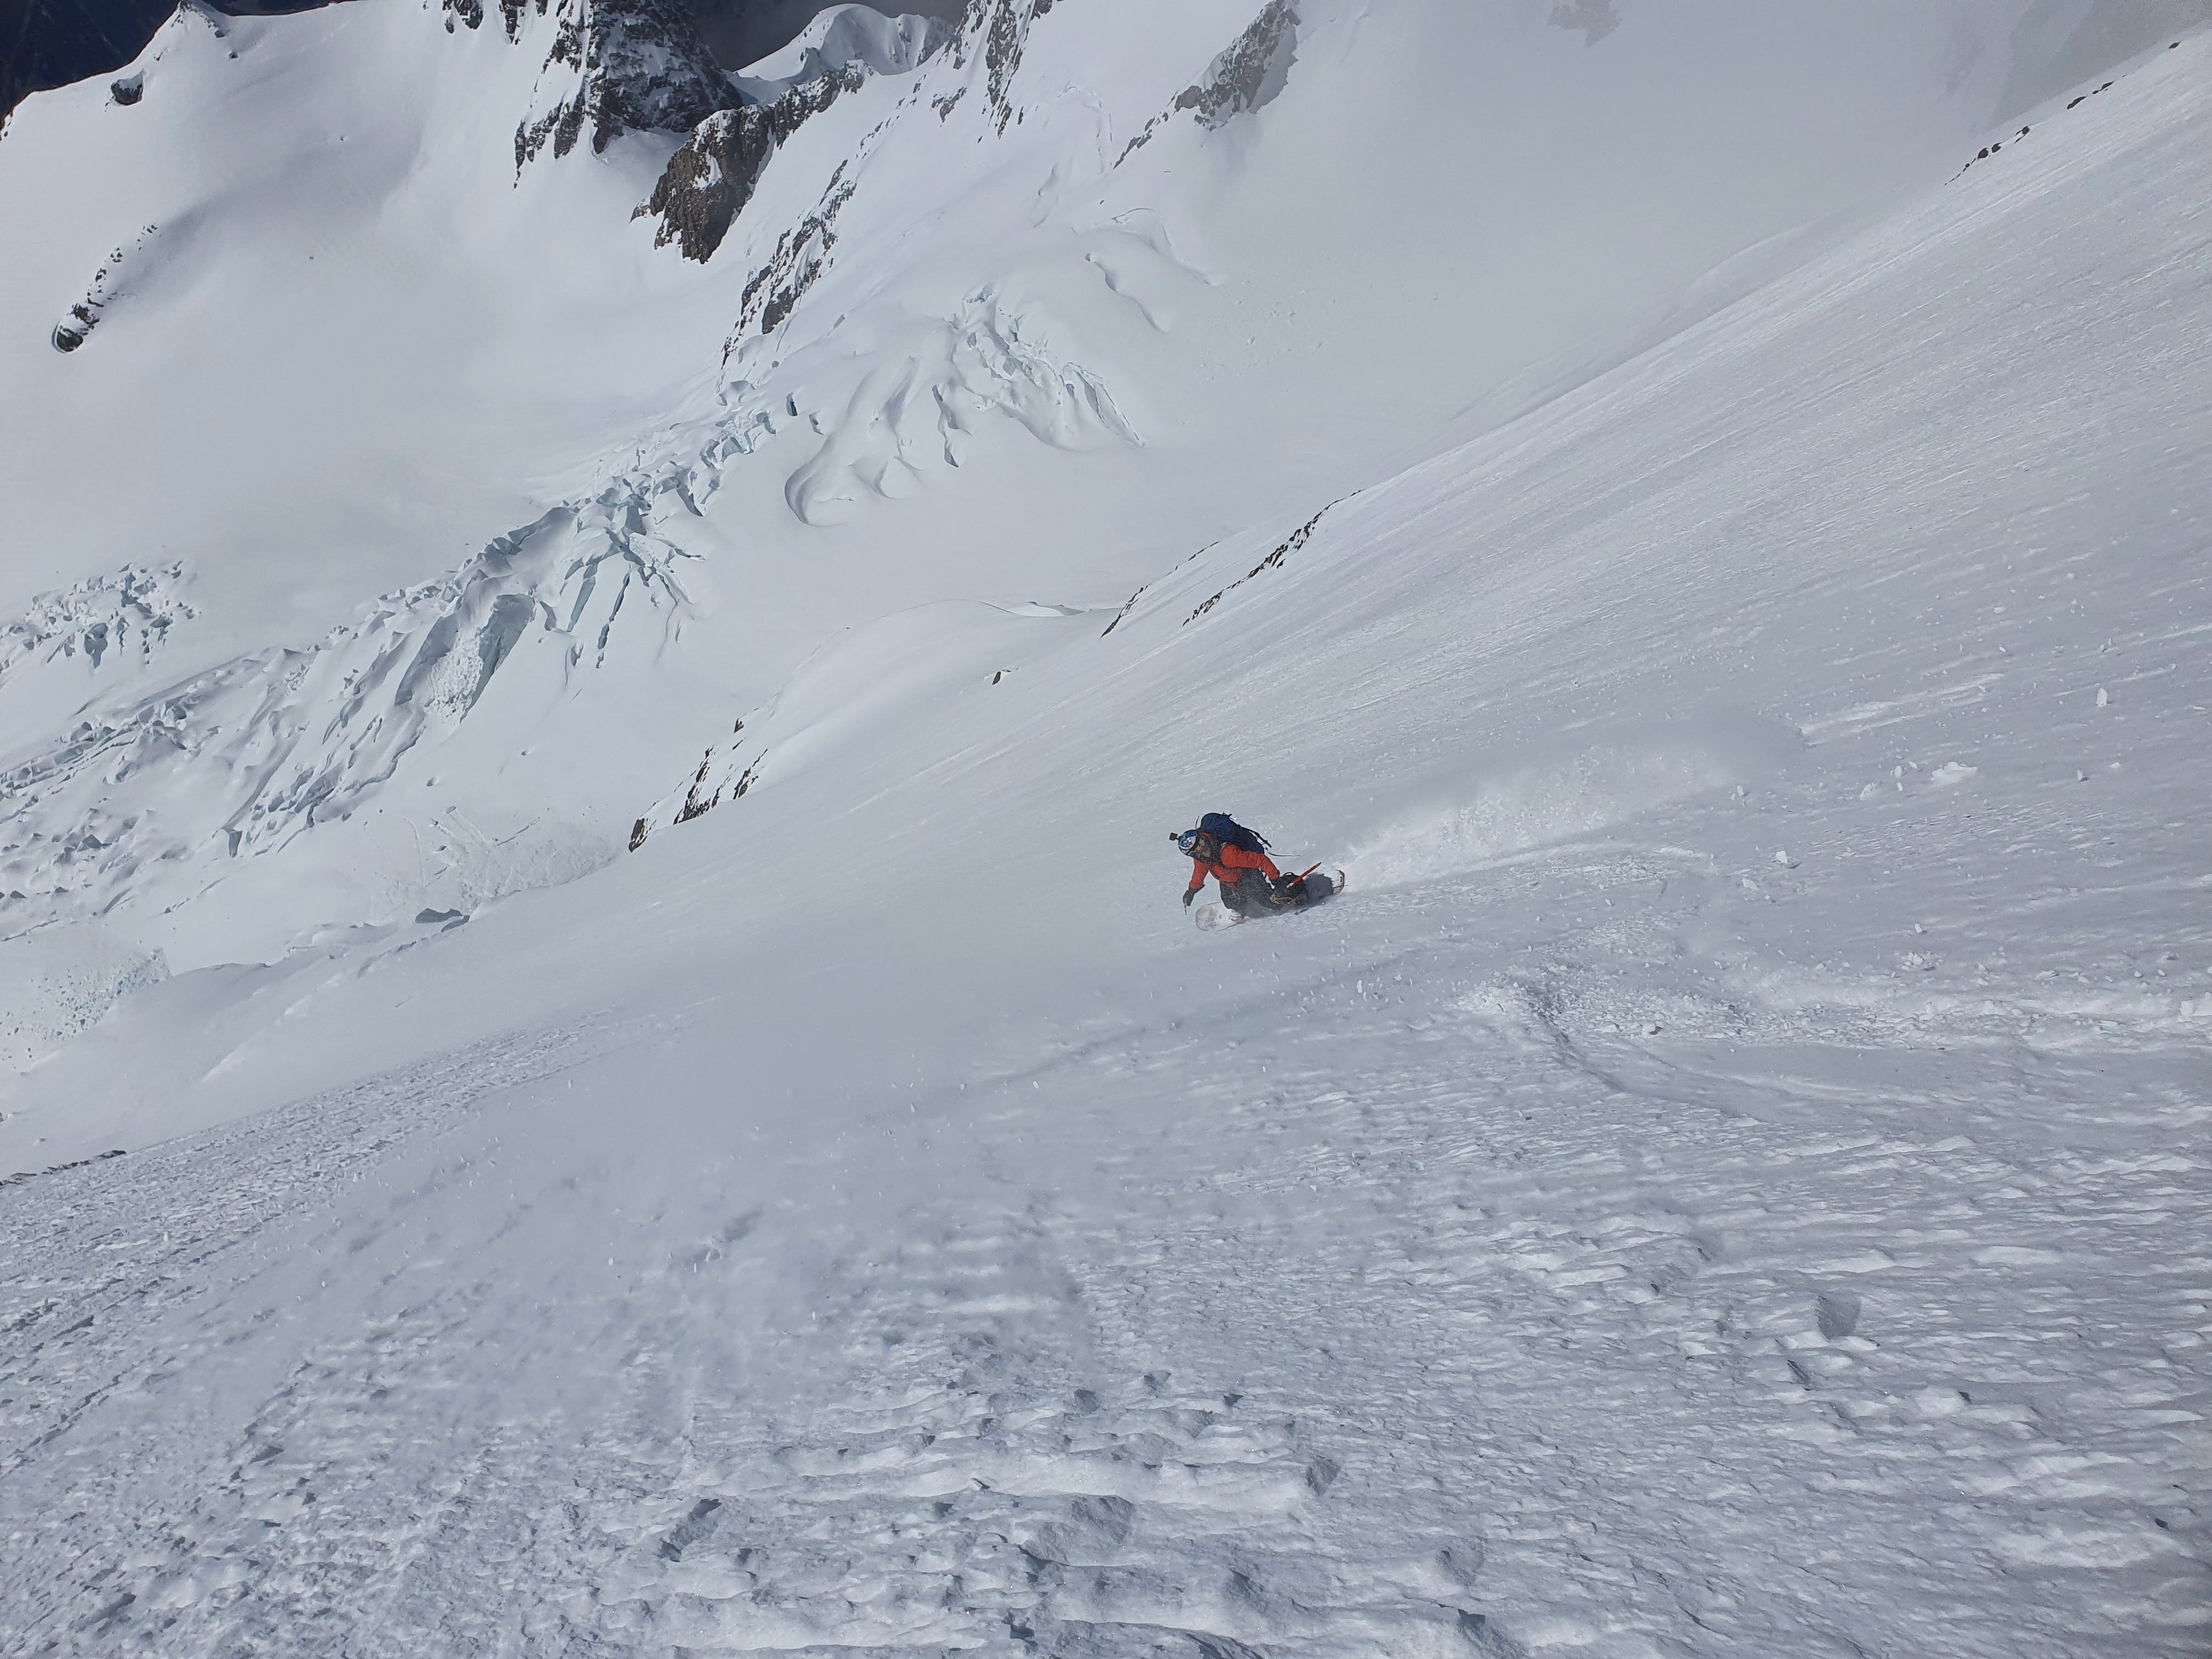
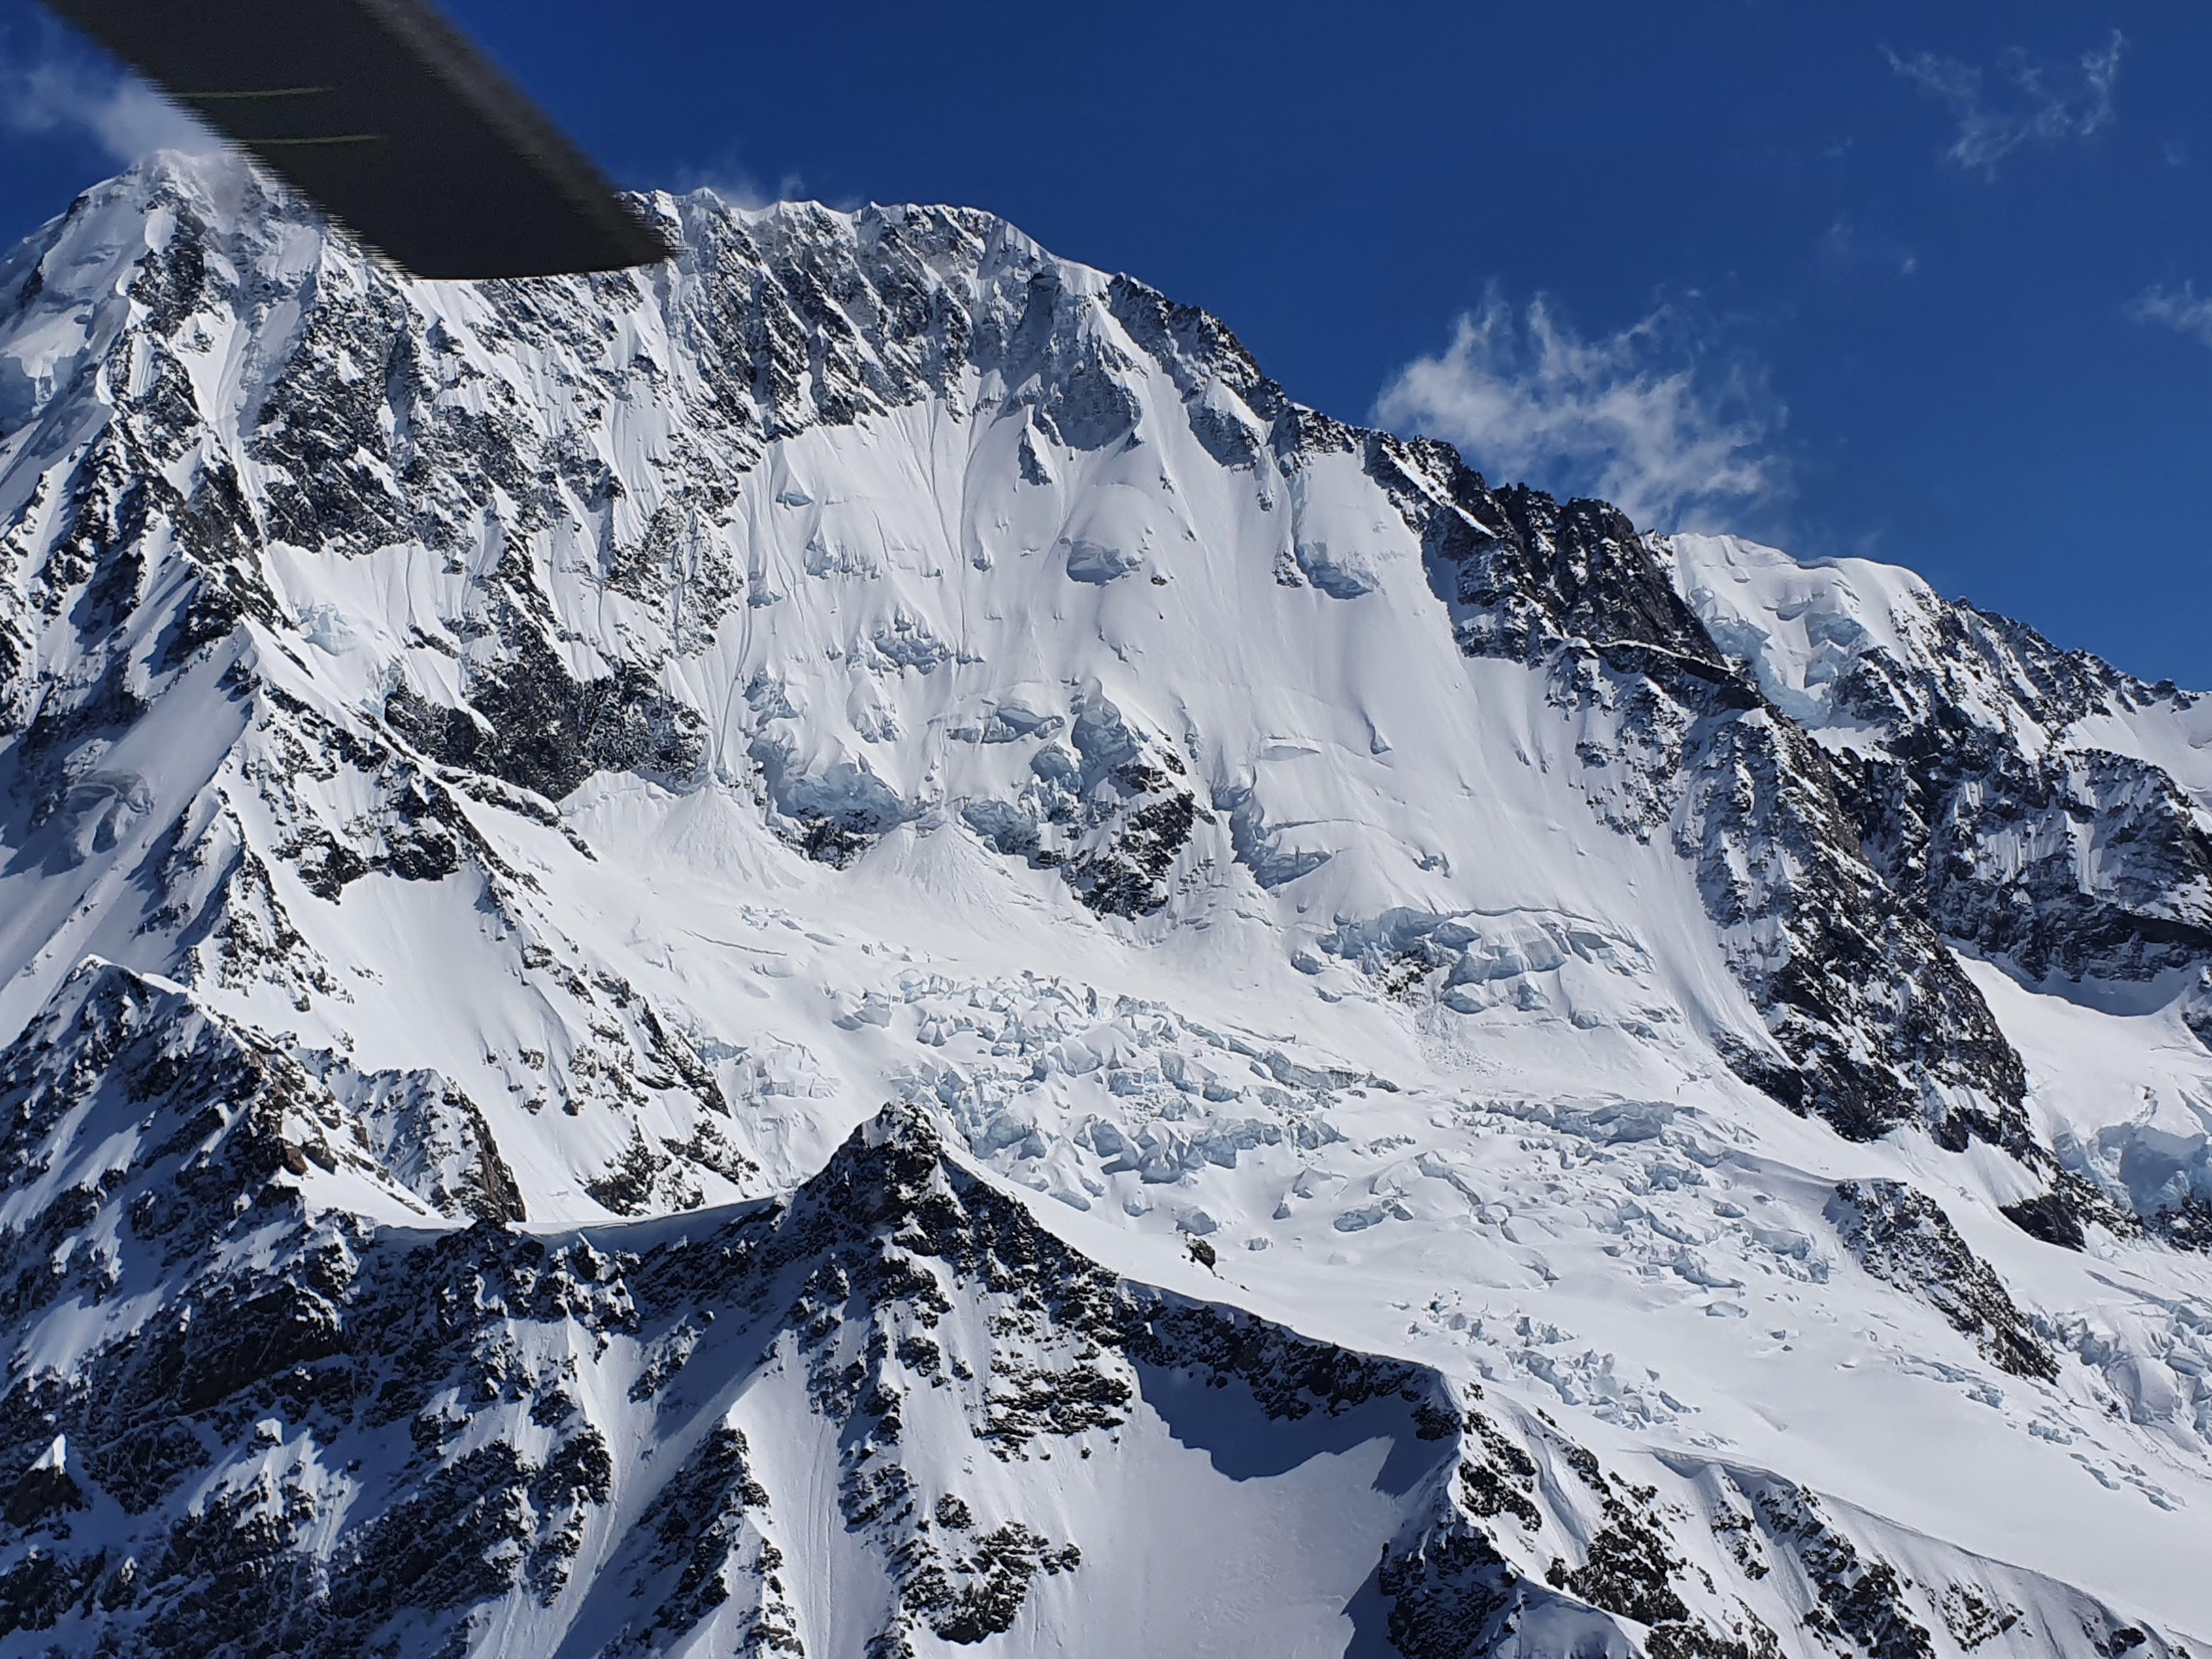
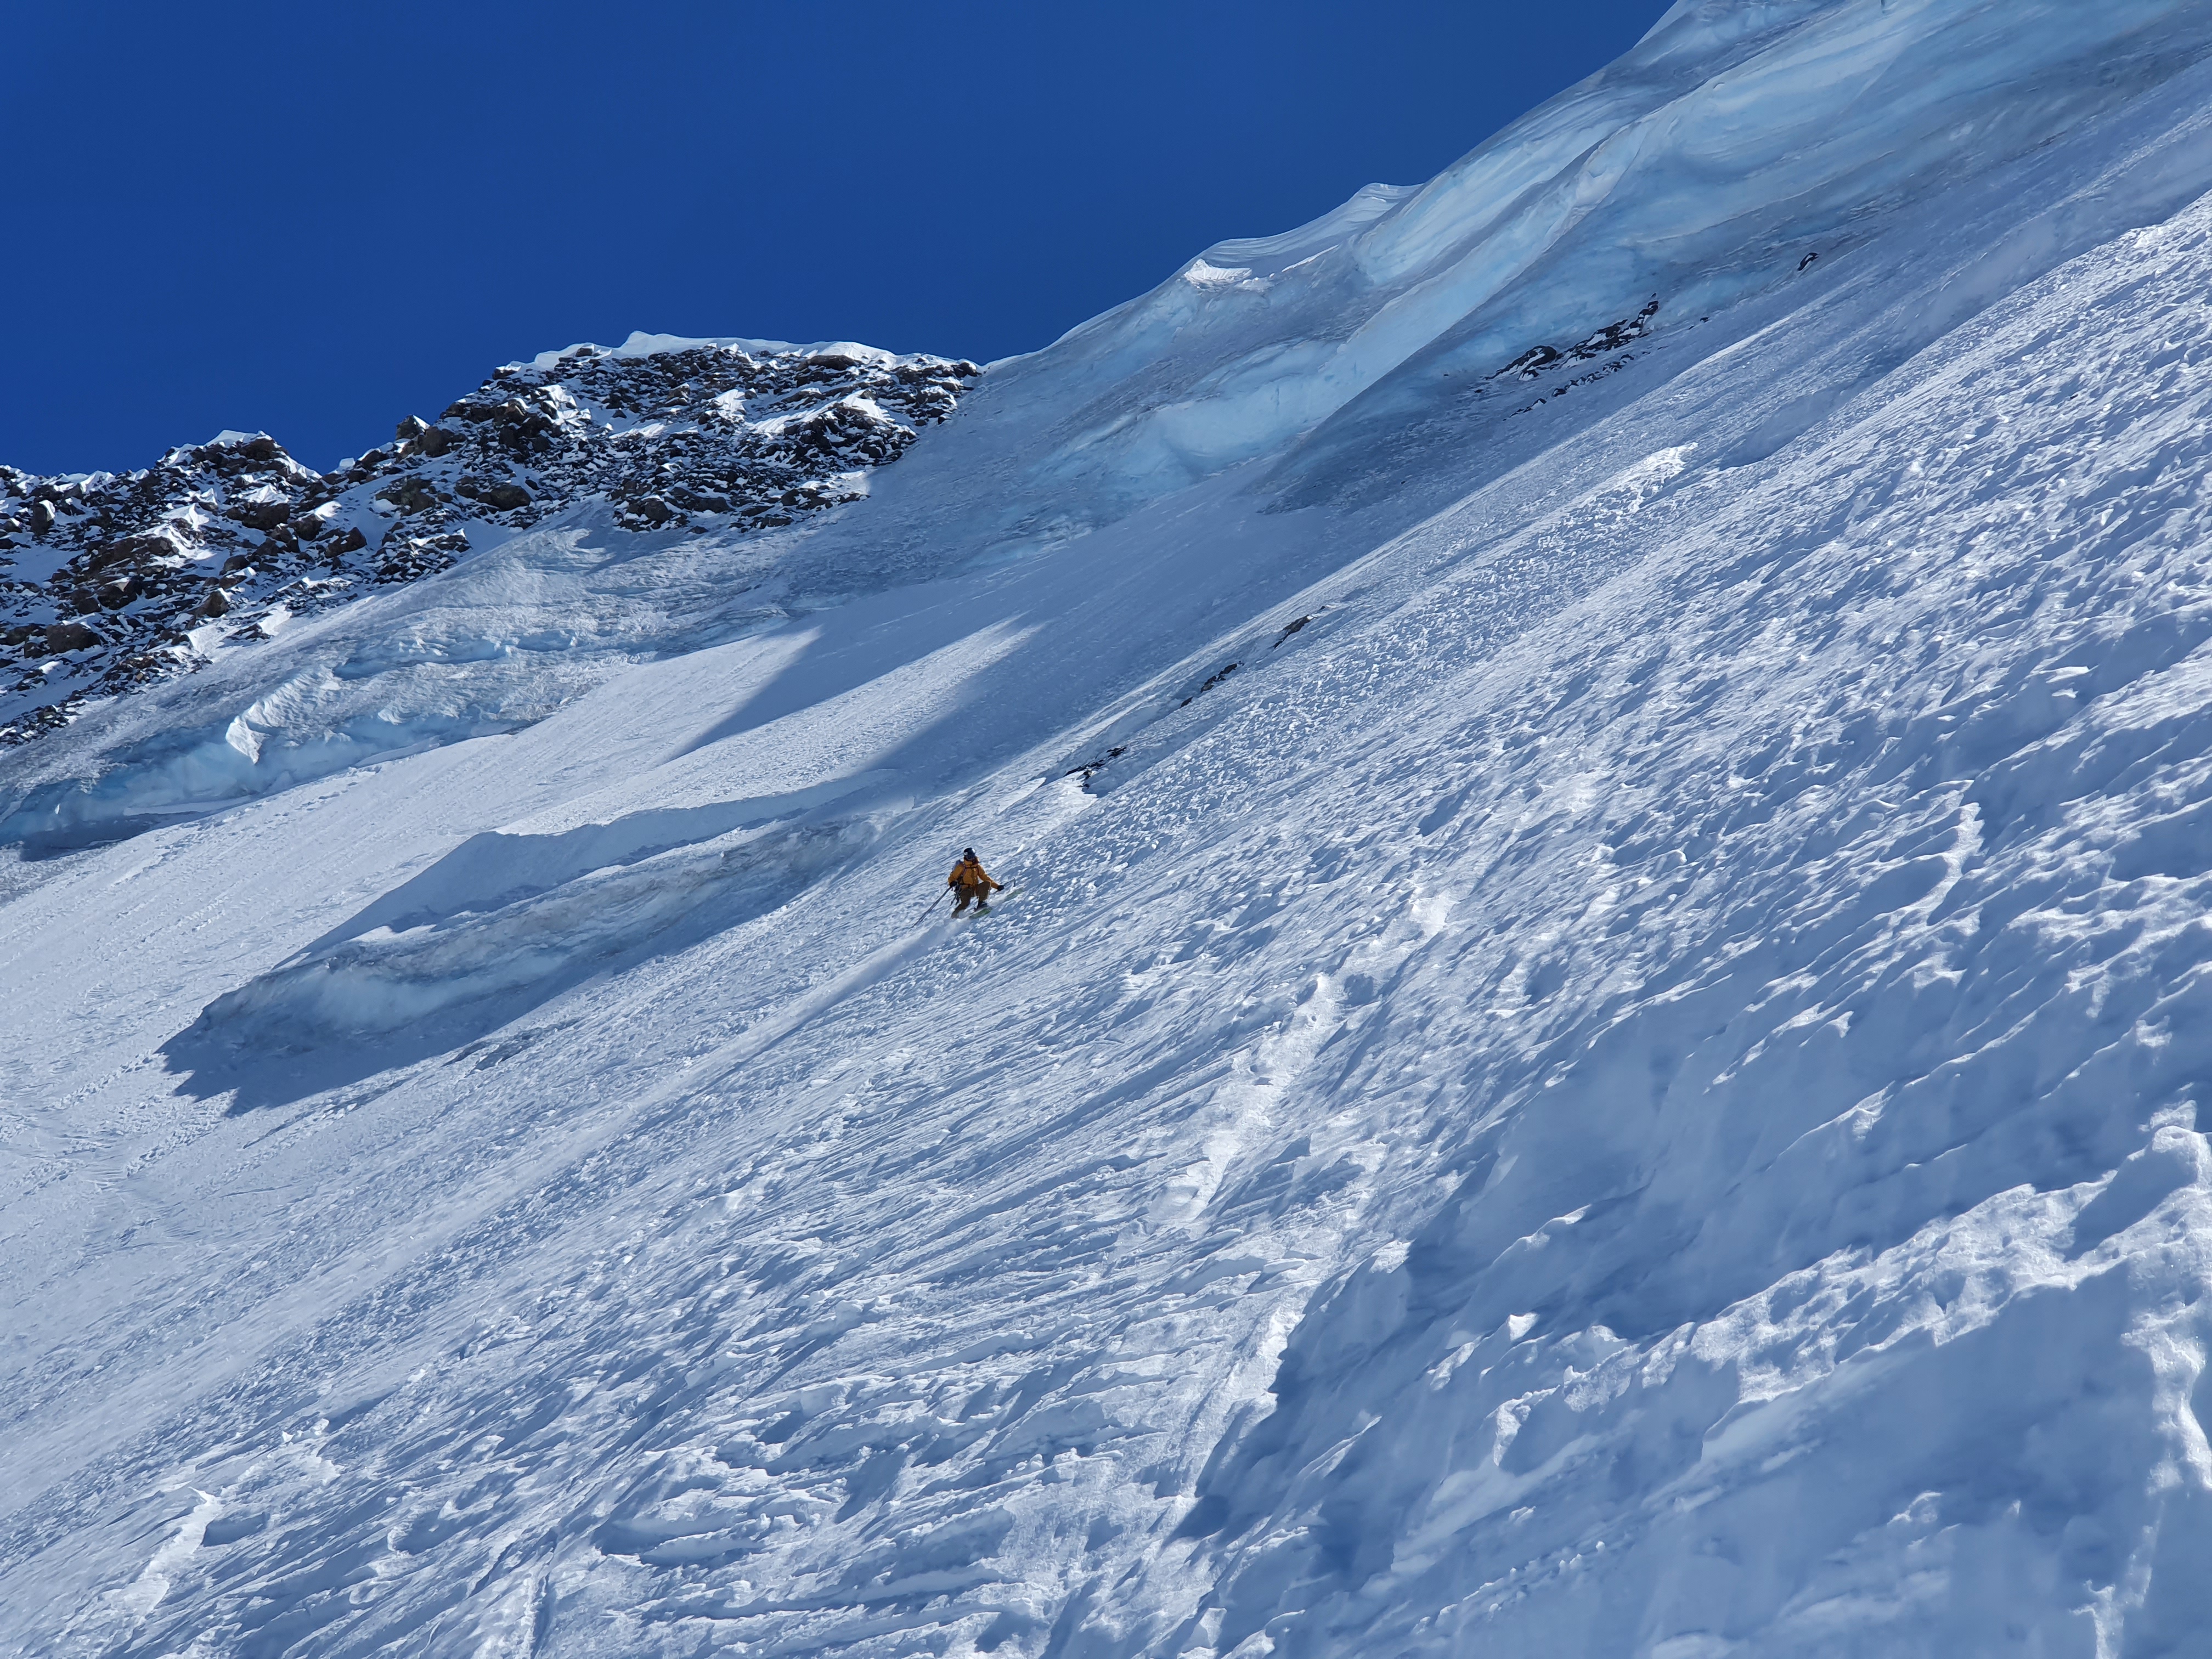
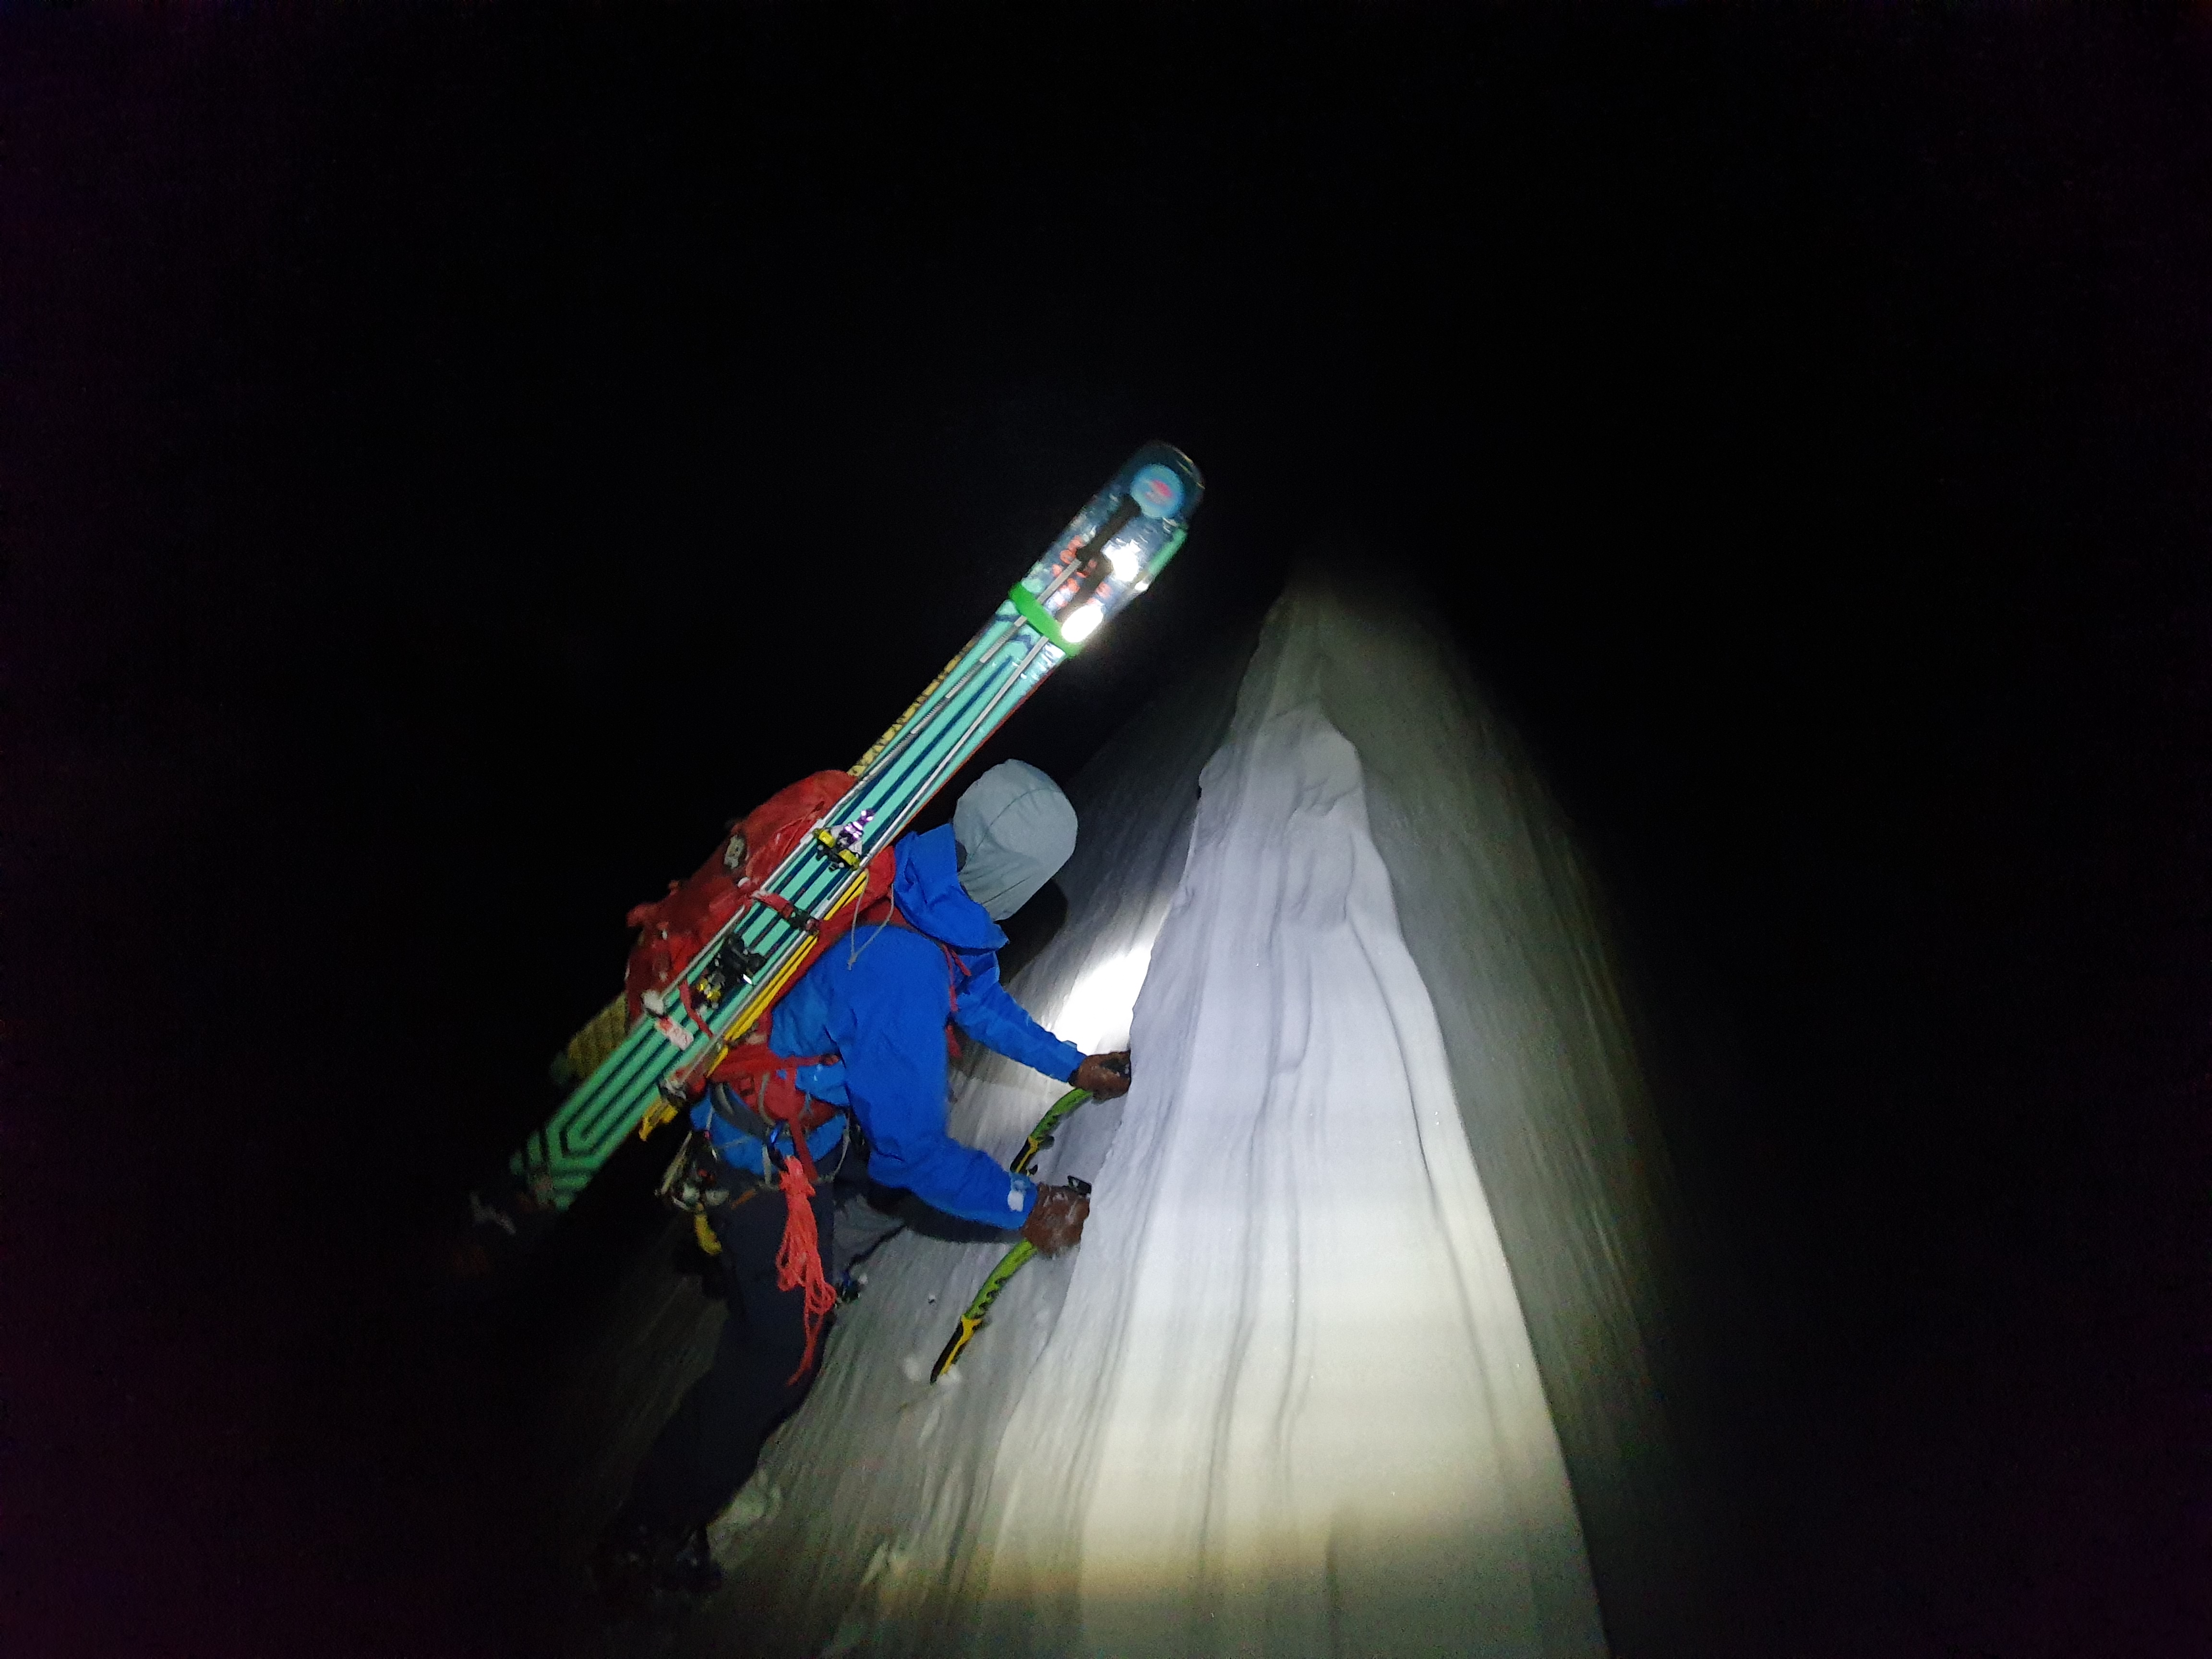
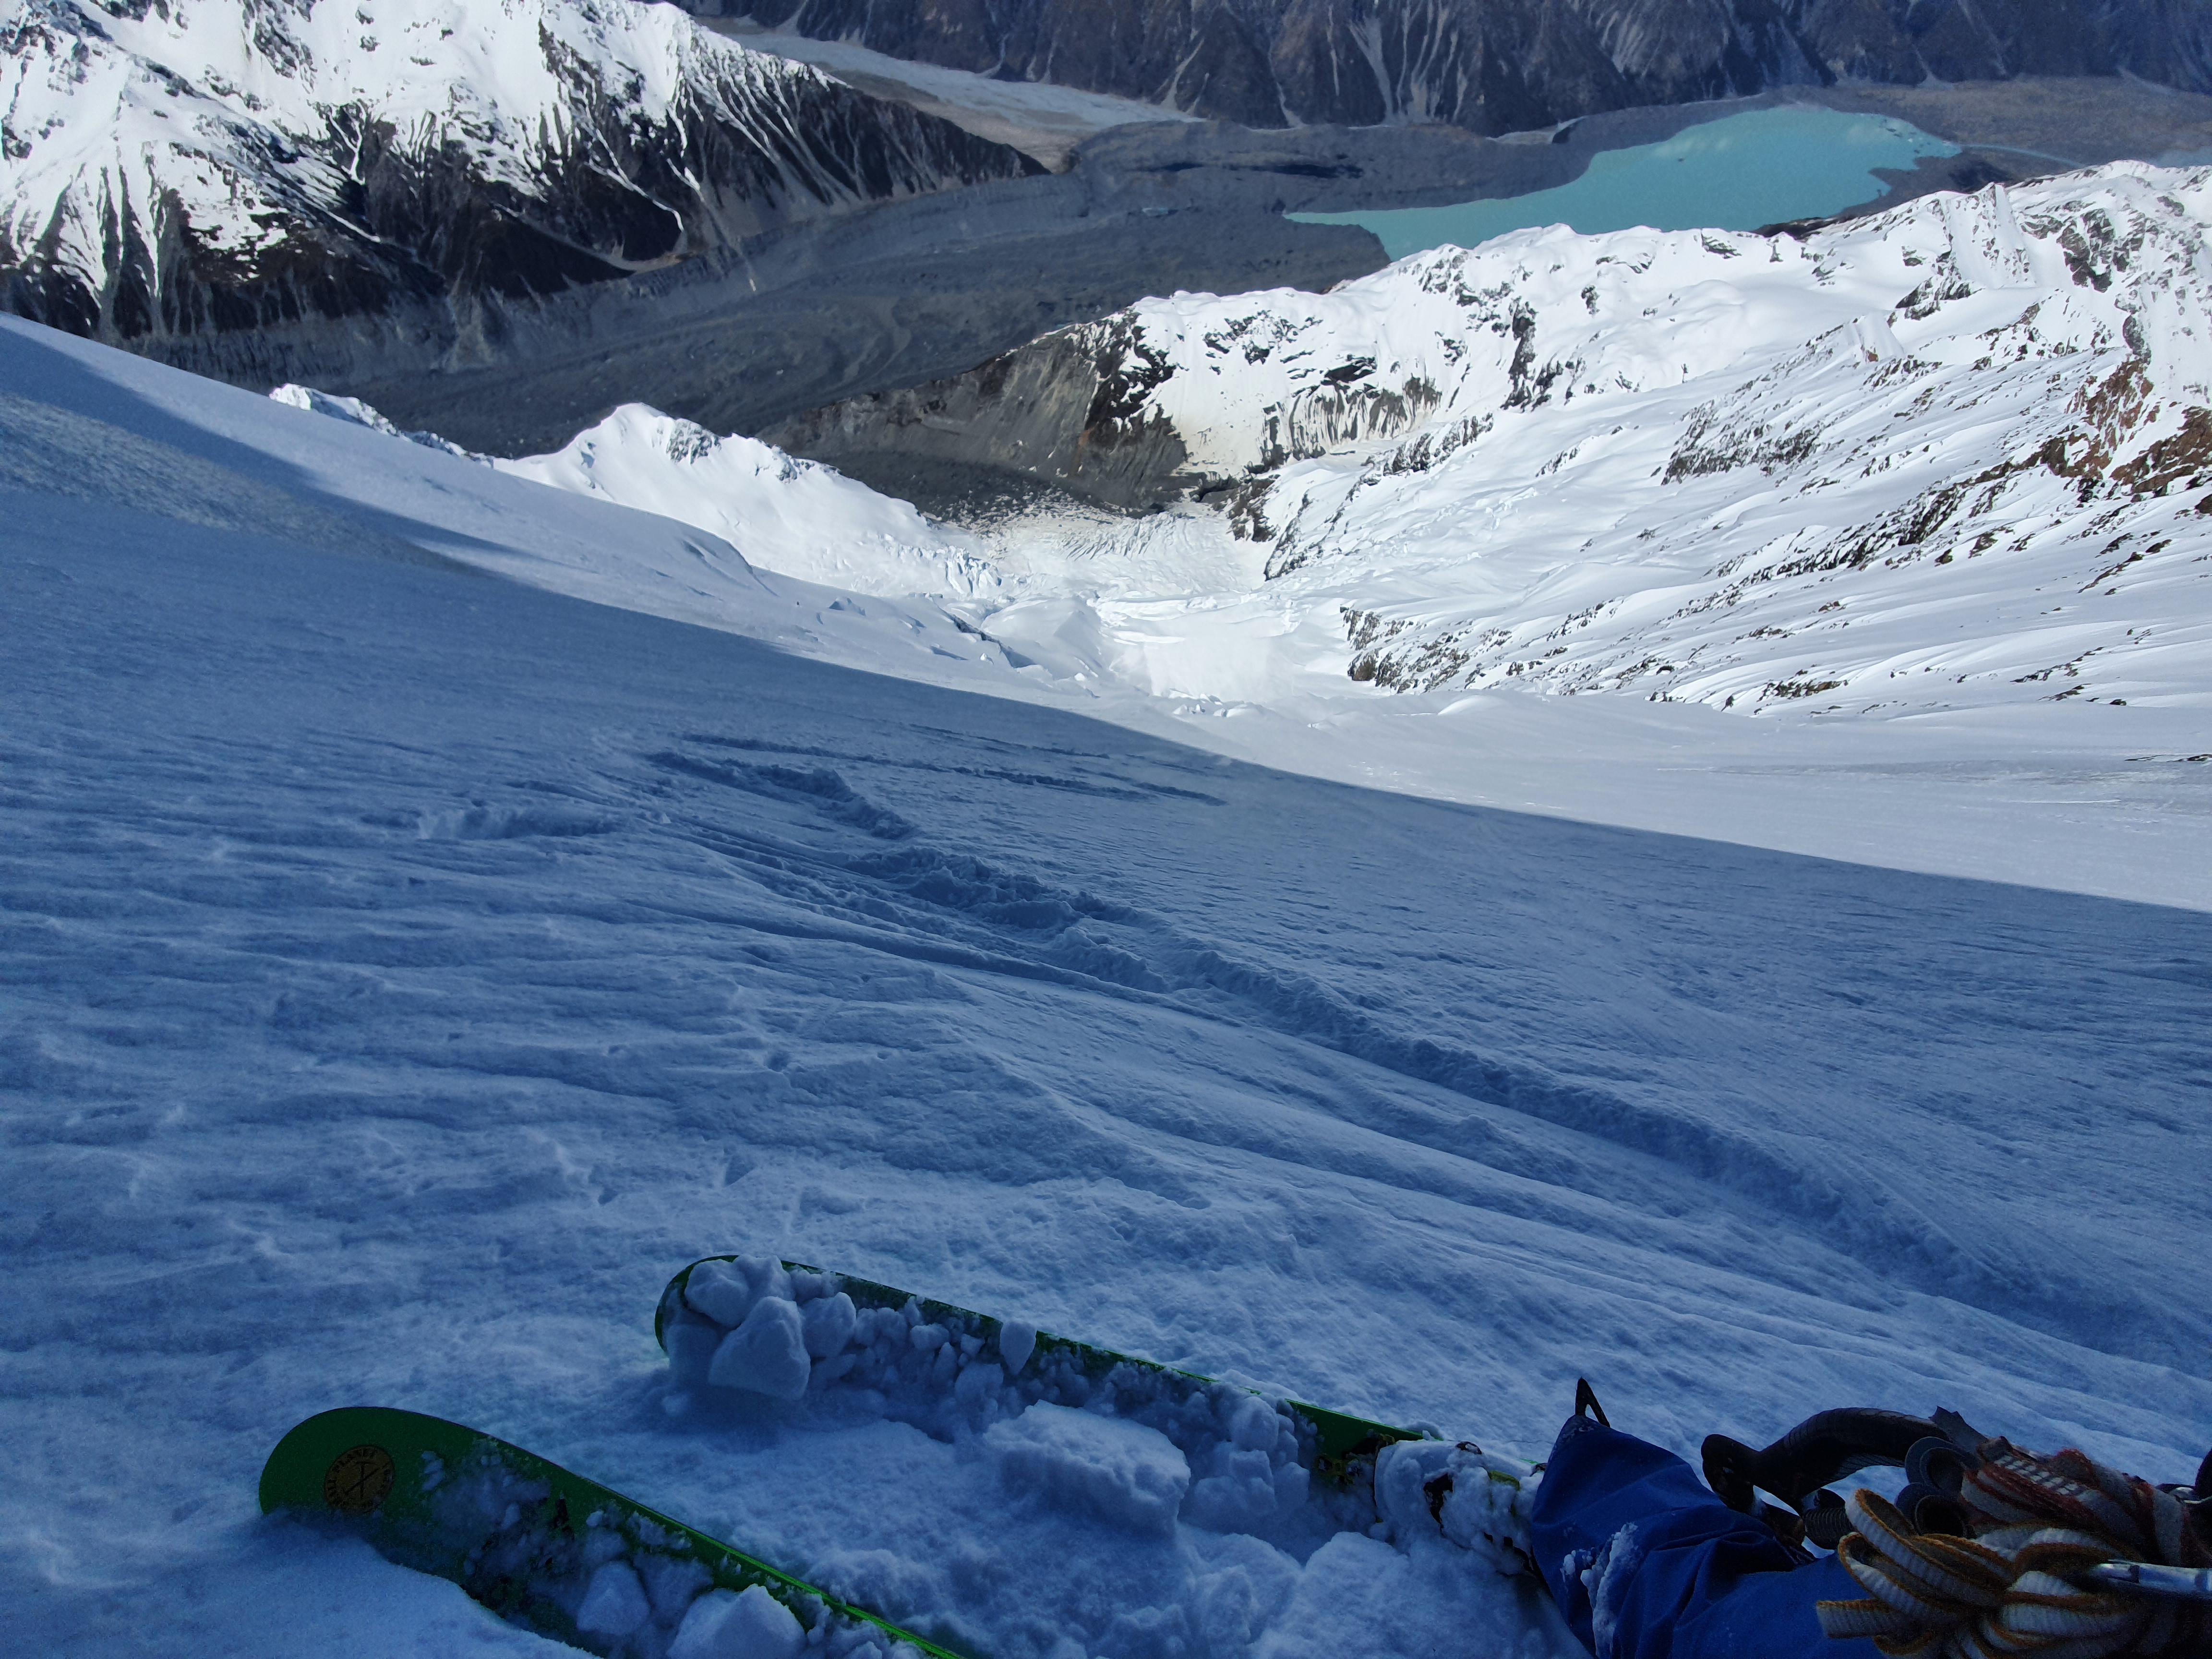
Doable in a morning from Tasman Saddle hut, we nipped up while skiing out from Kelman before a early pm heli pick up at the white ice in September 2018. Gets blasted by the sun and makes for some great corn skiing, but don’t leave it too late as the loose wet risk starts increasing. There are several couloirs on the North face of Darwin, and we skied the lookers right line. Increasingly the crux is getting through the bottom section which often isn’t filled in and is bare rock. But once you’re through this bottom section its heroic couloir skiing, consistent 40 degrees for 600m up to the summit snowfield, with another 200m or so to the summit.
We took this right hand dog leg, but in a bigger snow year looks like a direct line would go
Approach
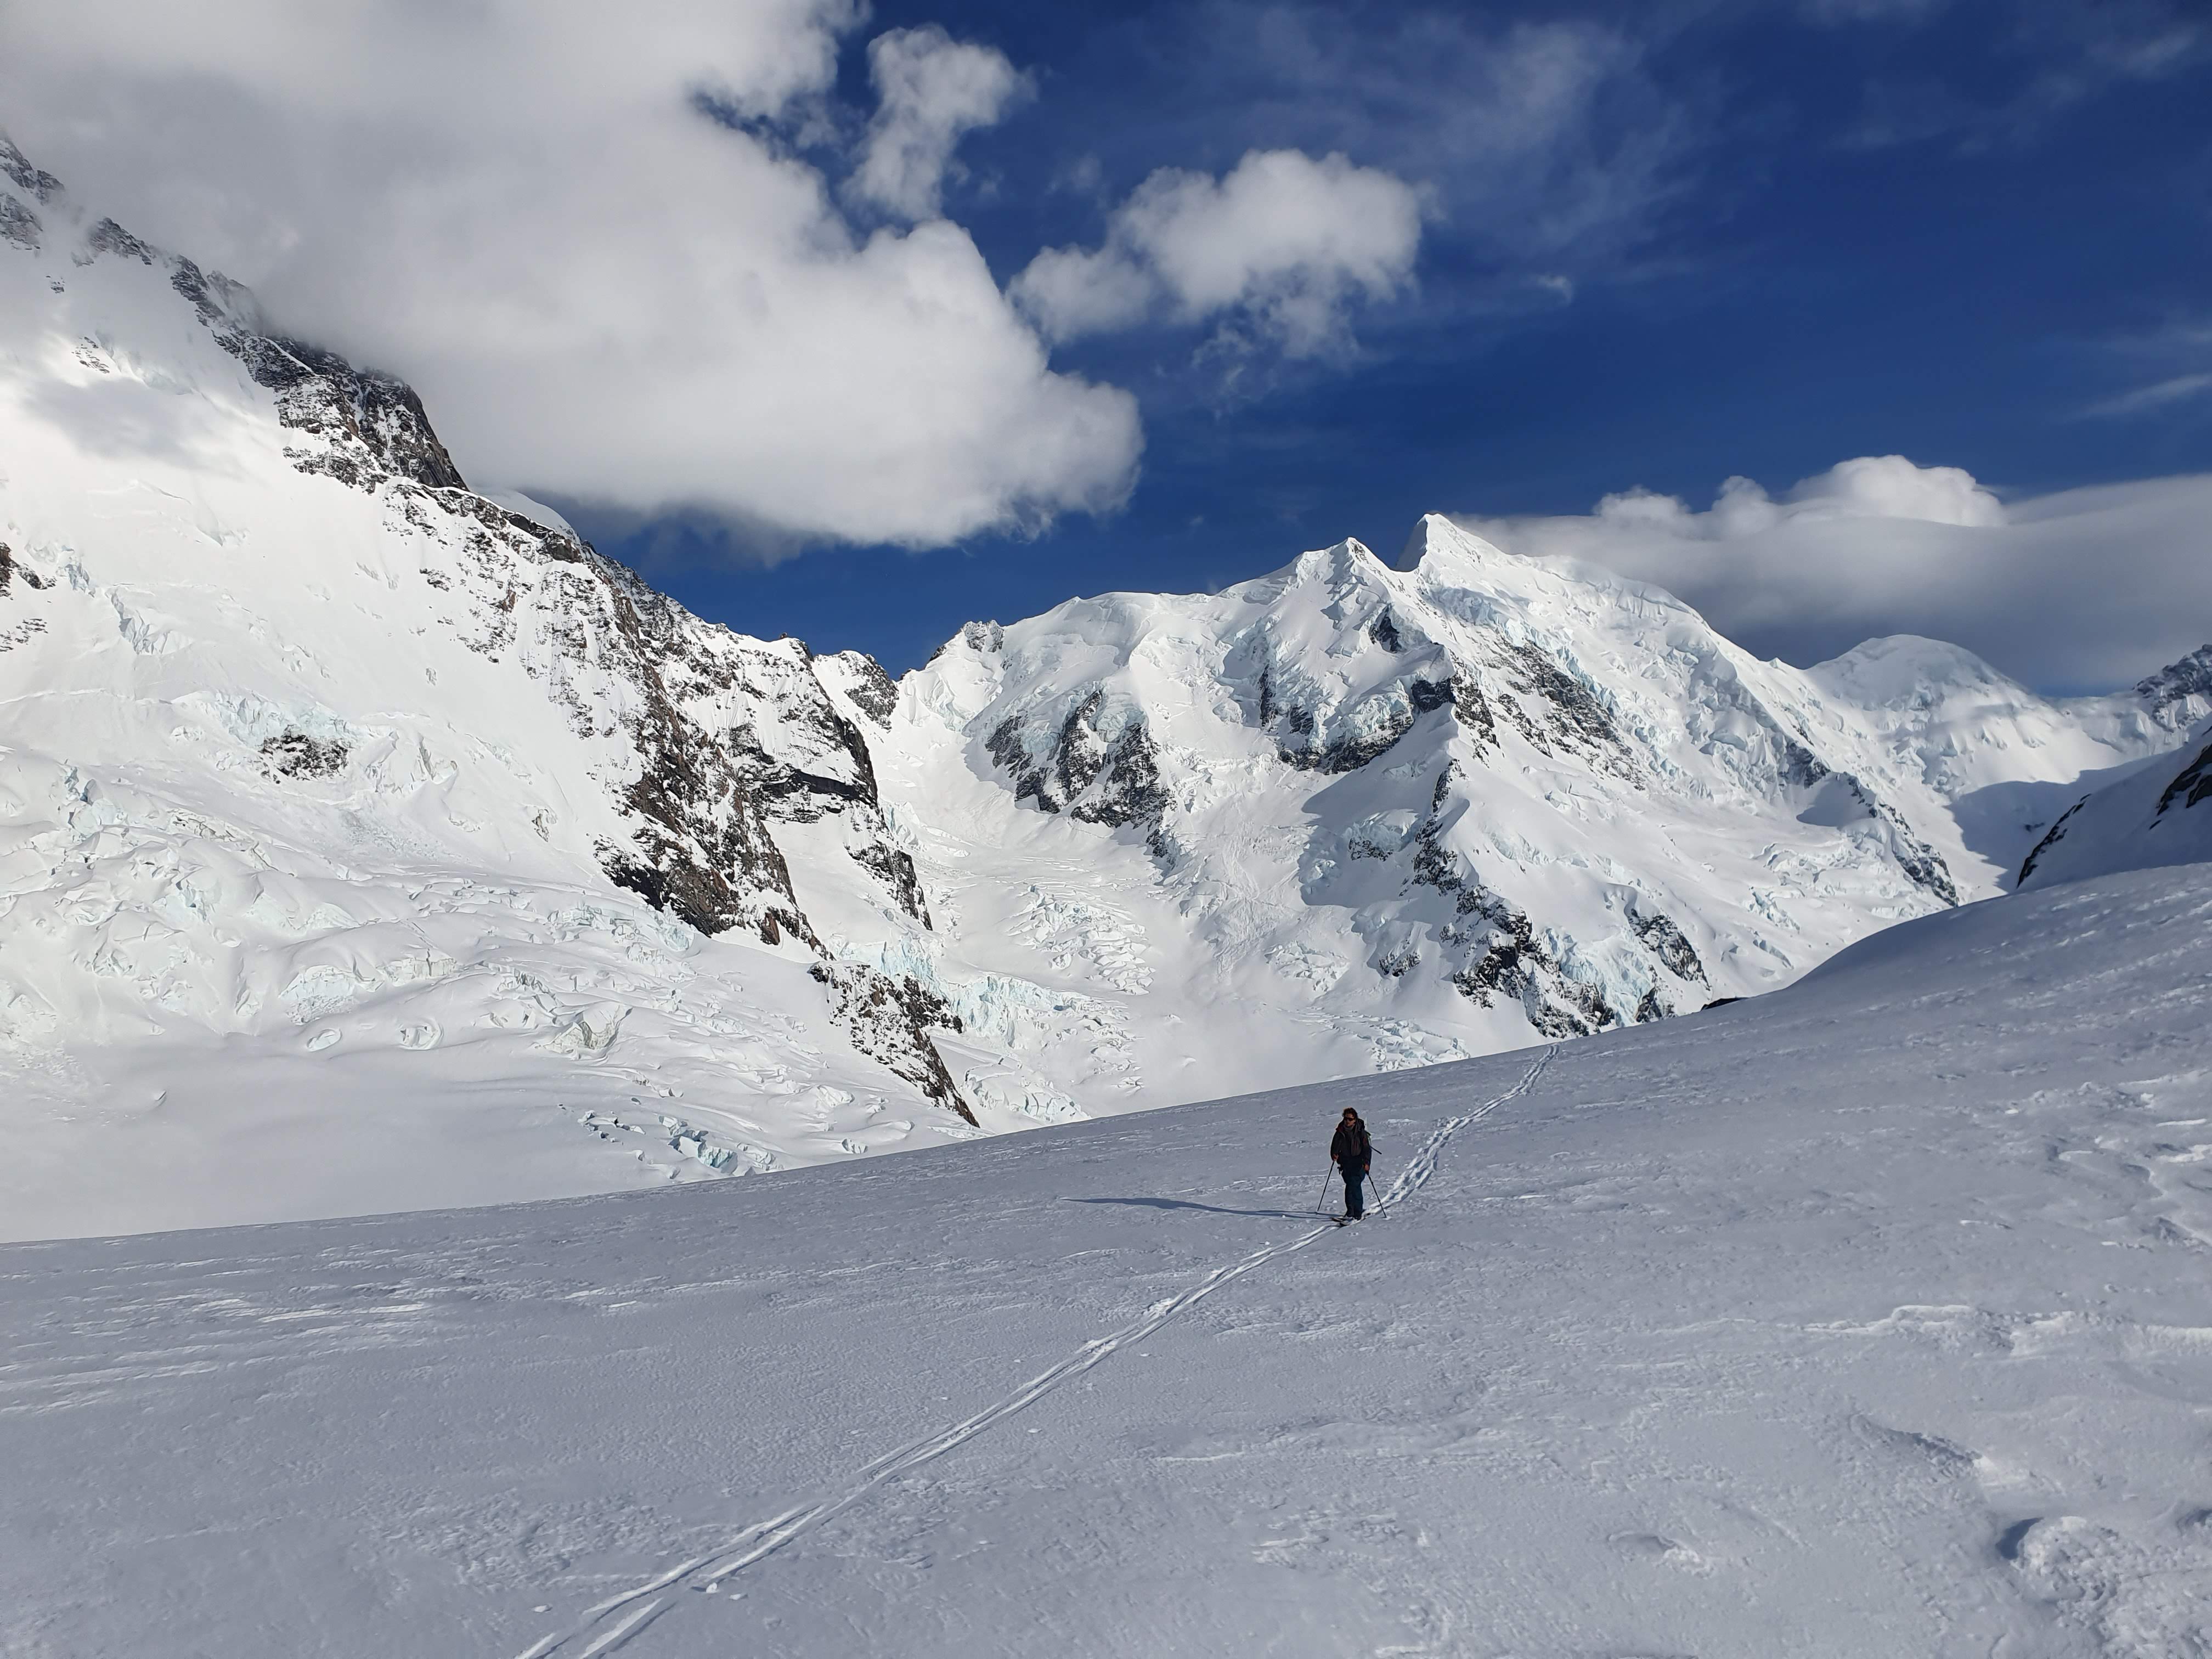
Just underneath Tasman saddle hut, you can access the start of the line within 10 minutes from the hut. The ski down from Kelman is almost as fast but if your going back up is a bit more of a slog. Works well as a morning hit on the way out before an afternoon heli pick up. Follow the glacier south of Tasman saddle hut – the section to the North has some cool seracs you can pick your way through, or stay south and blast straight down.
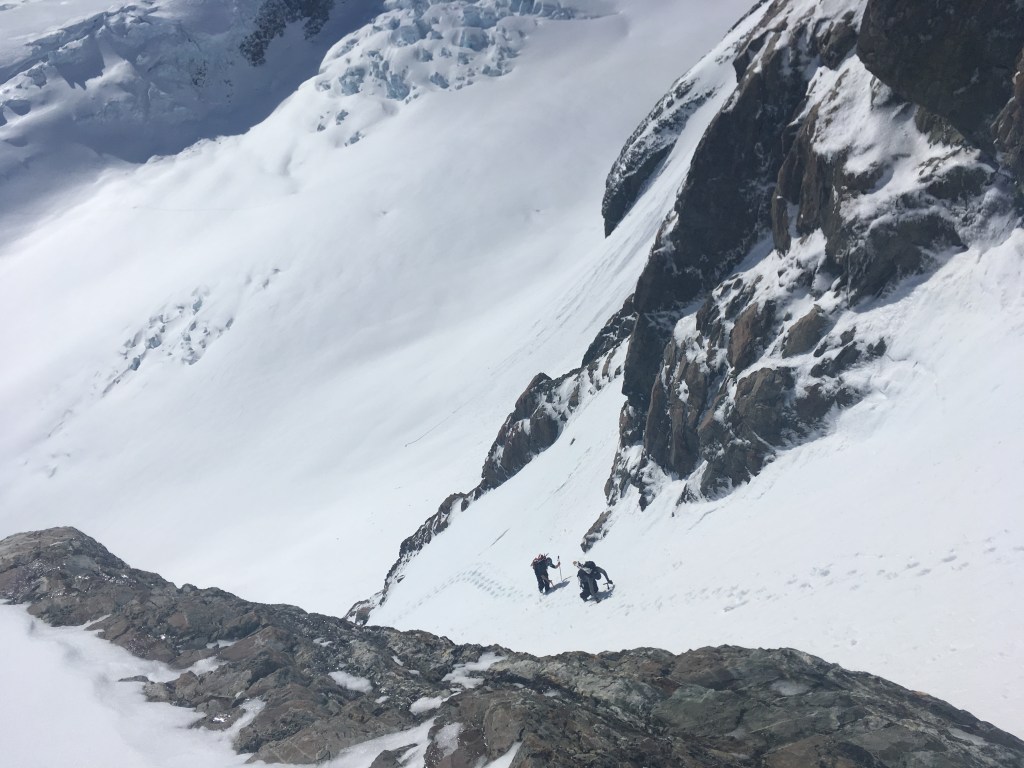
Fraser and Peet booting up the main part of the couloir
Climb
Super straightforward, just boot up the ski line. The first part was a little thin so we had to cut out to the lookers right and then dog leg back in to the main body of the couloir. Depending on the year an alternate entrance could go directly below the main couloir, or in the second couloir to the lookers left. Took us 2 hours to get to the top of the couloir.
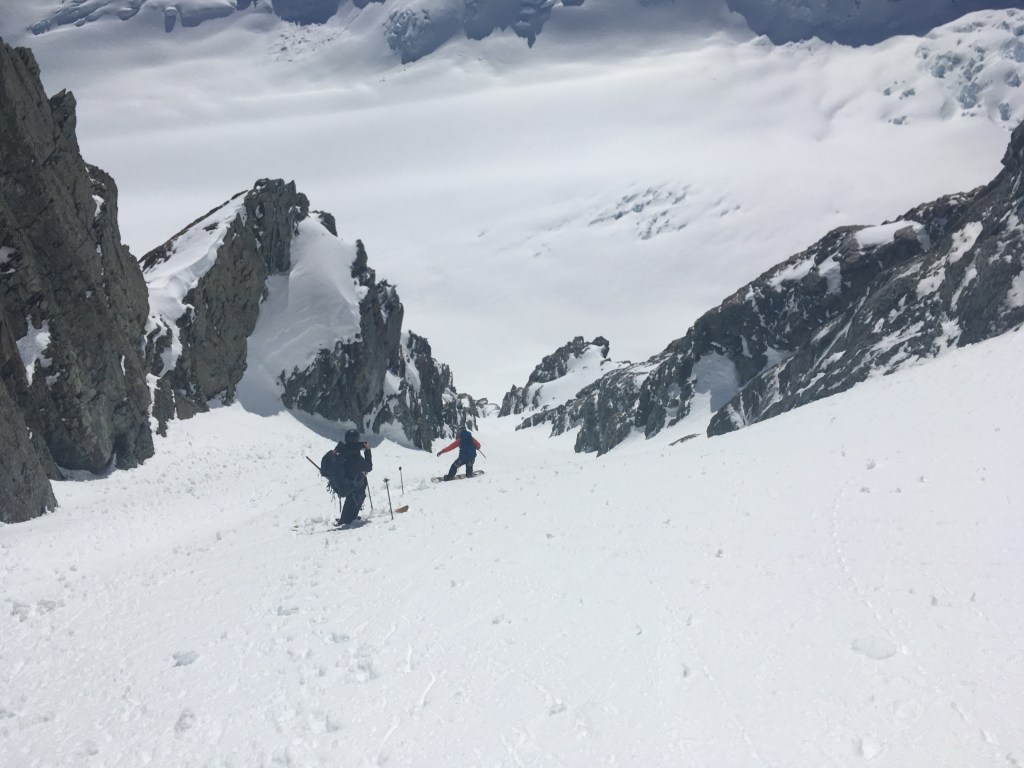
Peet dropping in
Ski
Pretty dreamy. We turned round at the top of the couloir because it was getting too hot, would be good to get back up there and ski the line from the summit! The couloir is way wider than it looks from the glacier, and was perfectly softened up meaning we could open it up and absolutely hoon it down the line in less than 5 minutes. One of those descents where you can’t help whooping high fiving and fist bumping every time you regroup! Is pretty similar in steepness and width to Elevator chute in the Remarkables, around 40 degrees, but a lot longer. Because of the dog leg there is a bit of exposure at the bottom so don’t get too carried away.
Spring skiing
Once we got back onto the glacier it was absolutely baking, so the tops came off and we hung out in the sun eating the last of our food and drinking the last of the goon before the heli came in to pick us up. Epic morning mission and perfect way to round of a week up the Tasman!
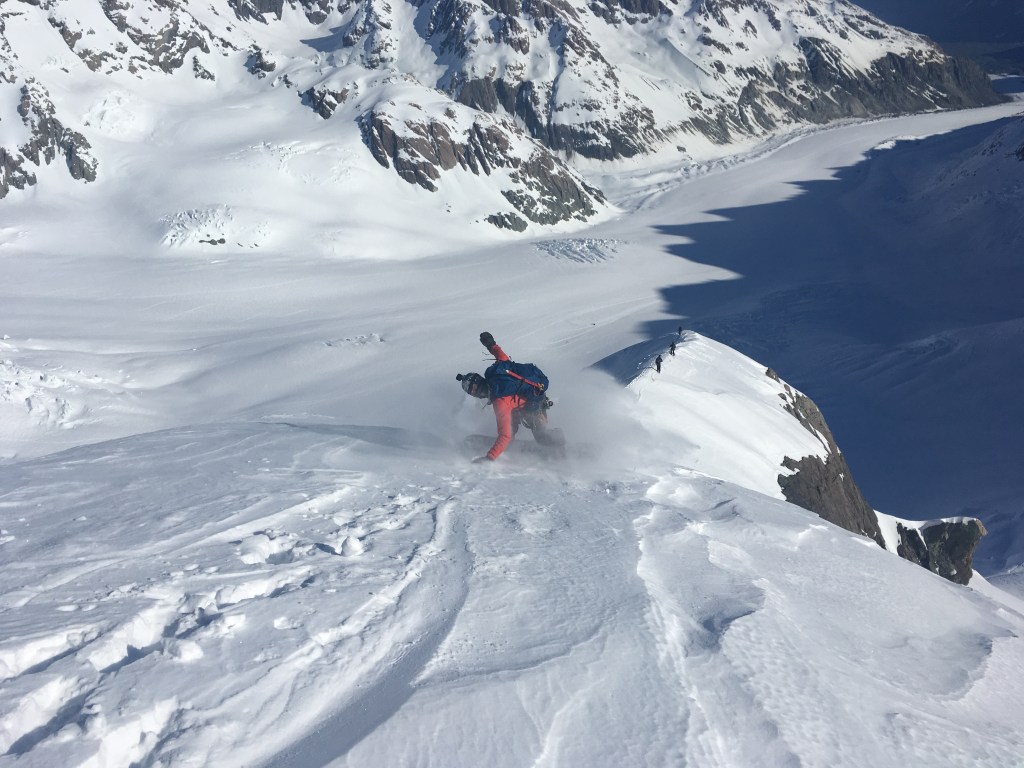
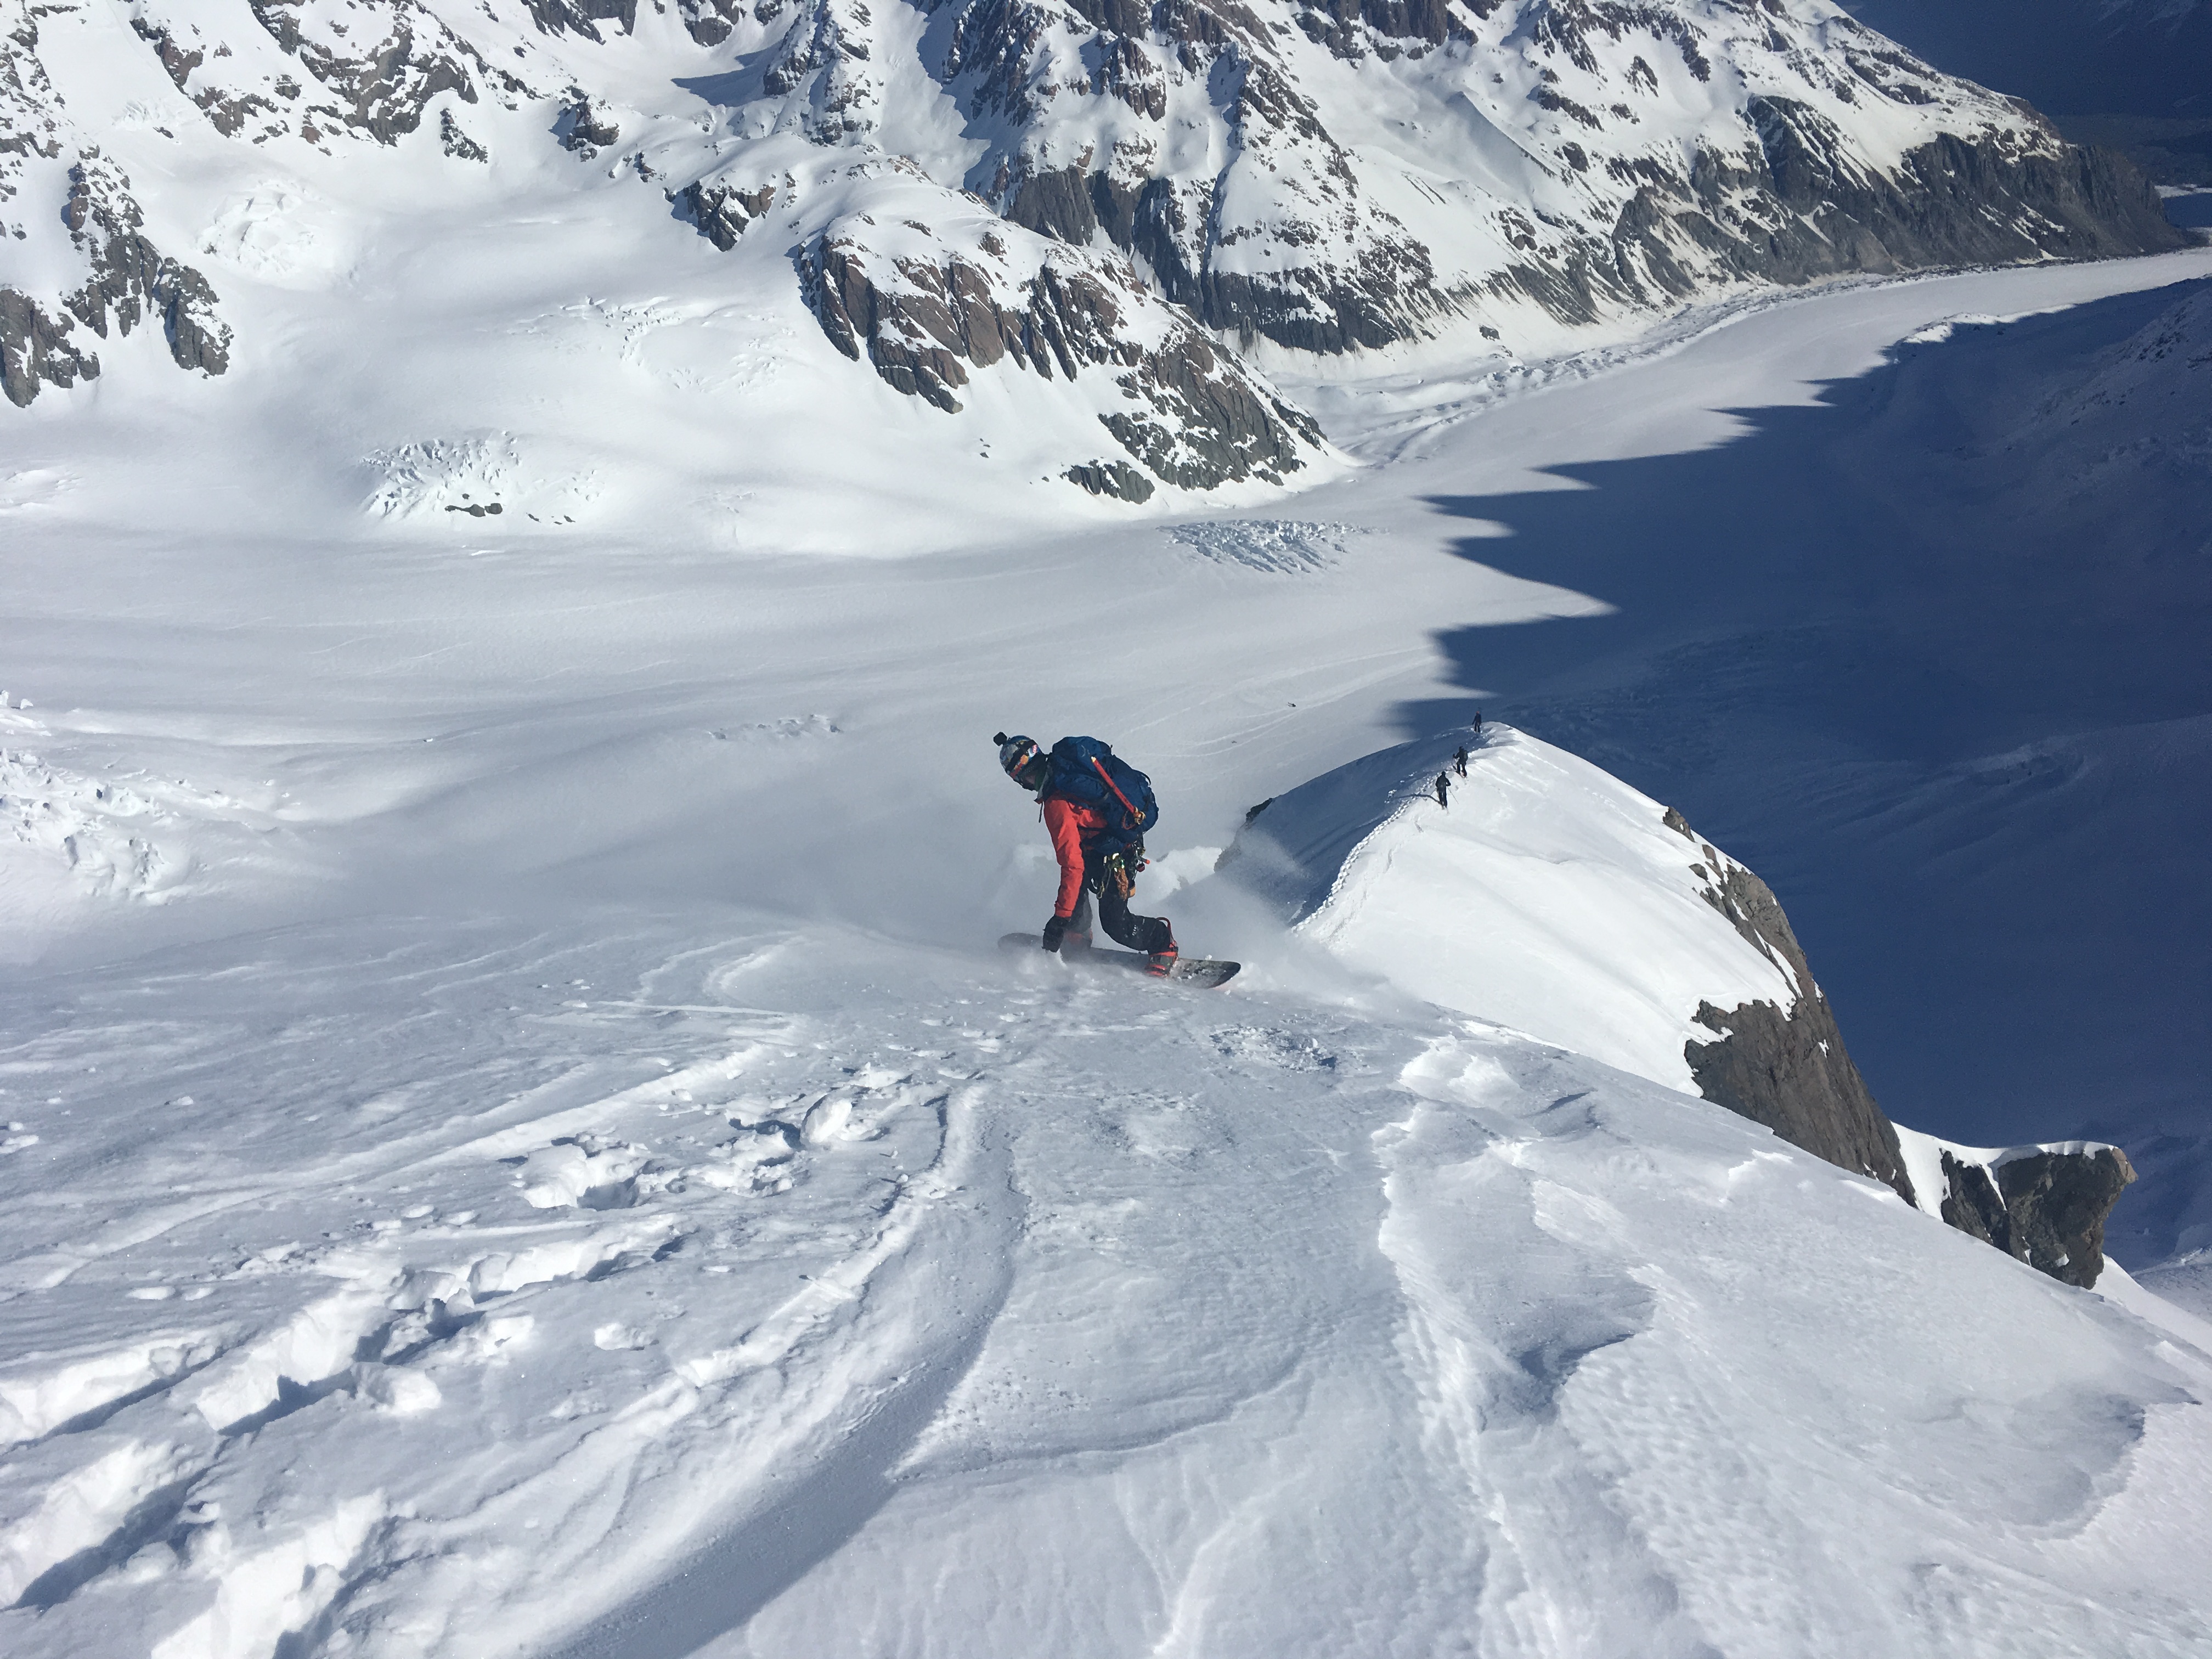
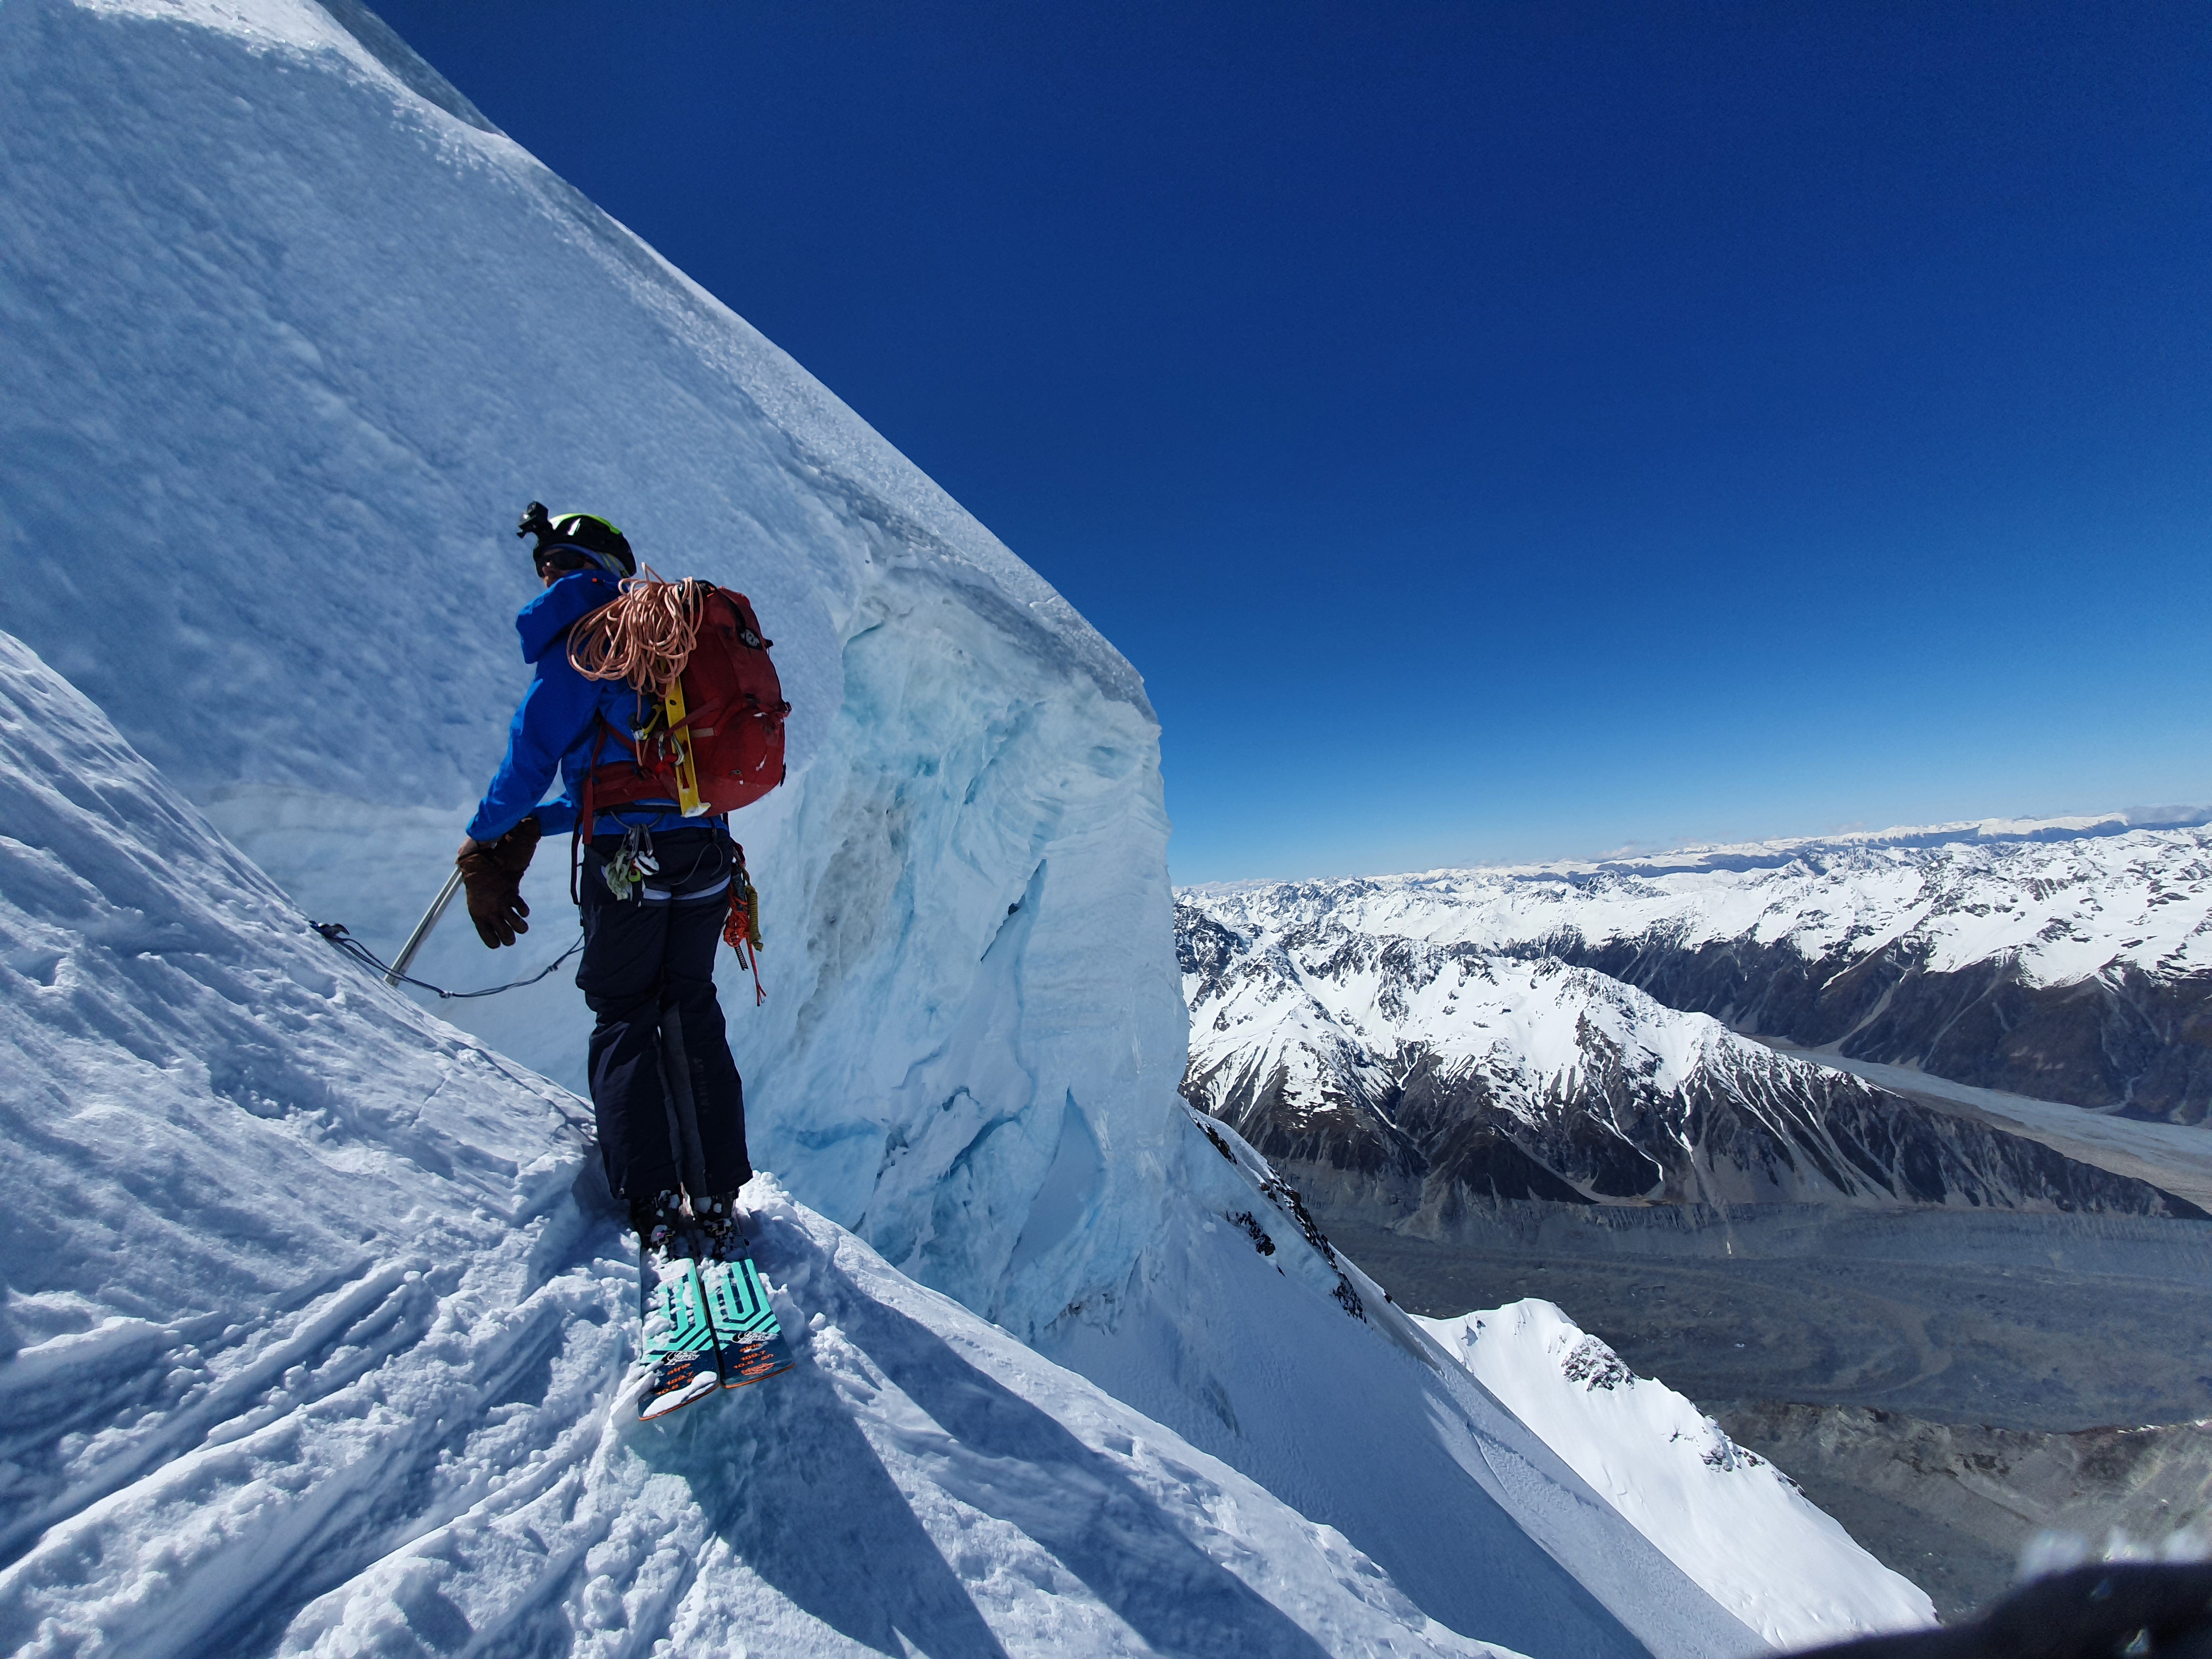
Fuck yeah! Ski mountaineering at its finest. Climb the SW ridge, a 3 star grade 3+ mountaineering route to the summit, rap the ice and then tear it up for 600m down the West face before cruising the mellow slopes down to the Bonar. I skiied this line with Sam McGrath in October 2019, and it’s one of the most fun trips in the mountains I’ve had.
We headed in 3 days after 30cms of fresh snow and cold temps aiming to ski the line in powder. But being West facing it’s also a great line to get some afternoon corn on.
Approach
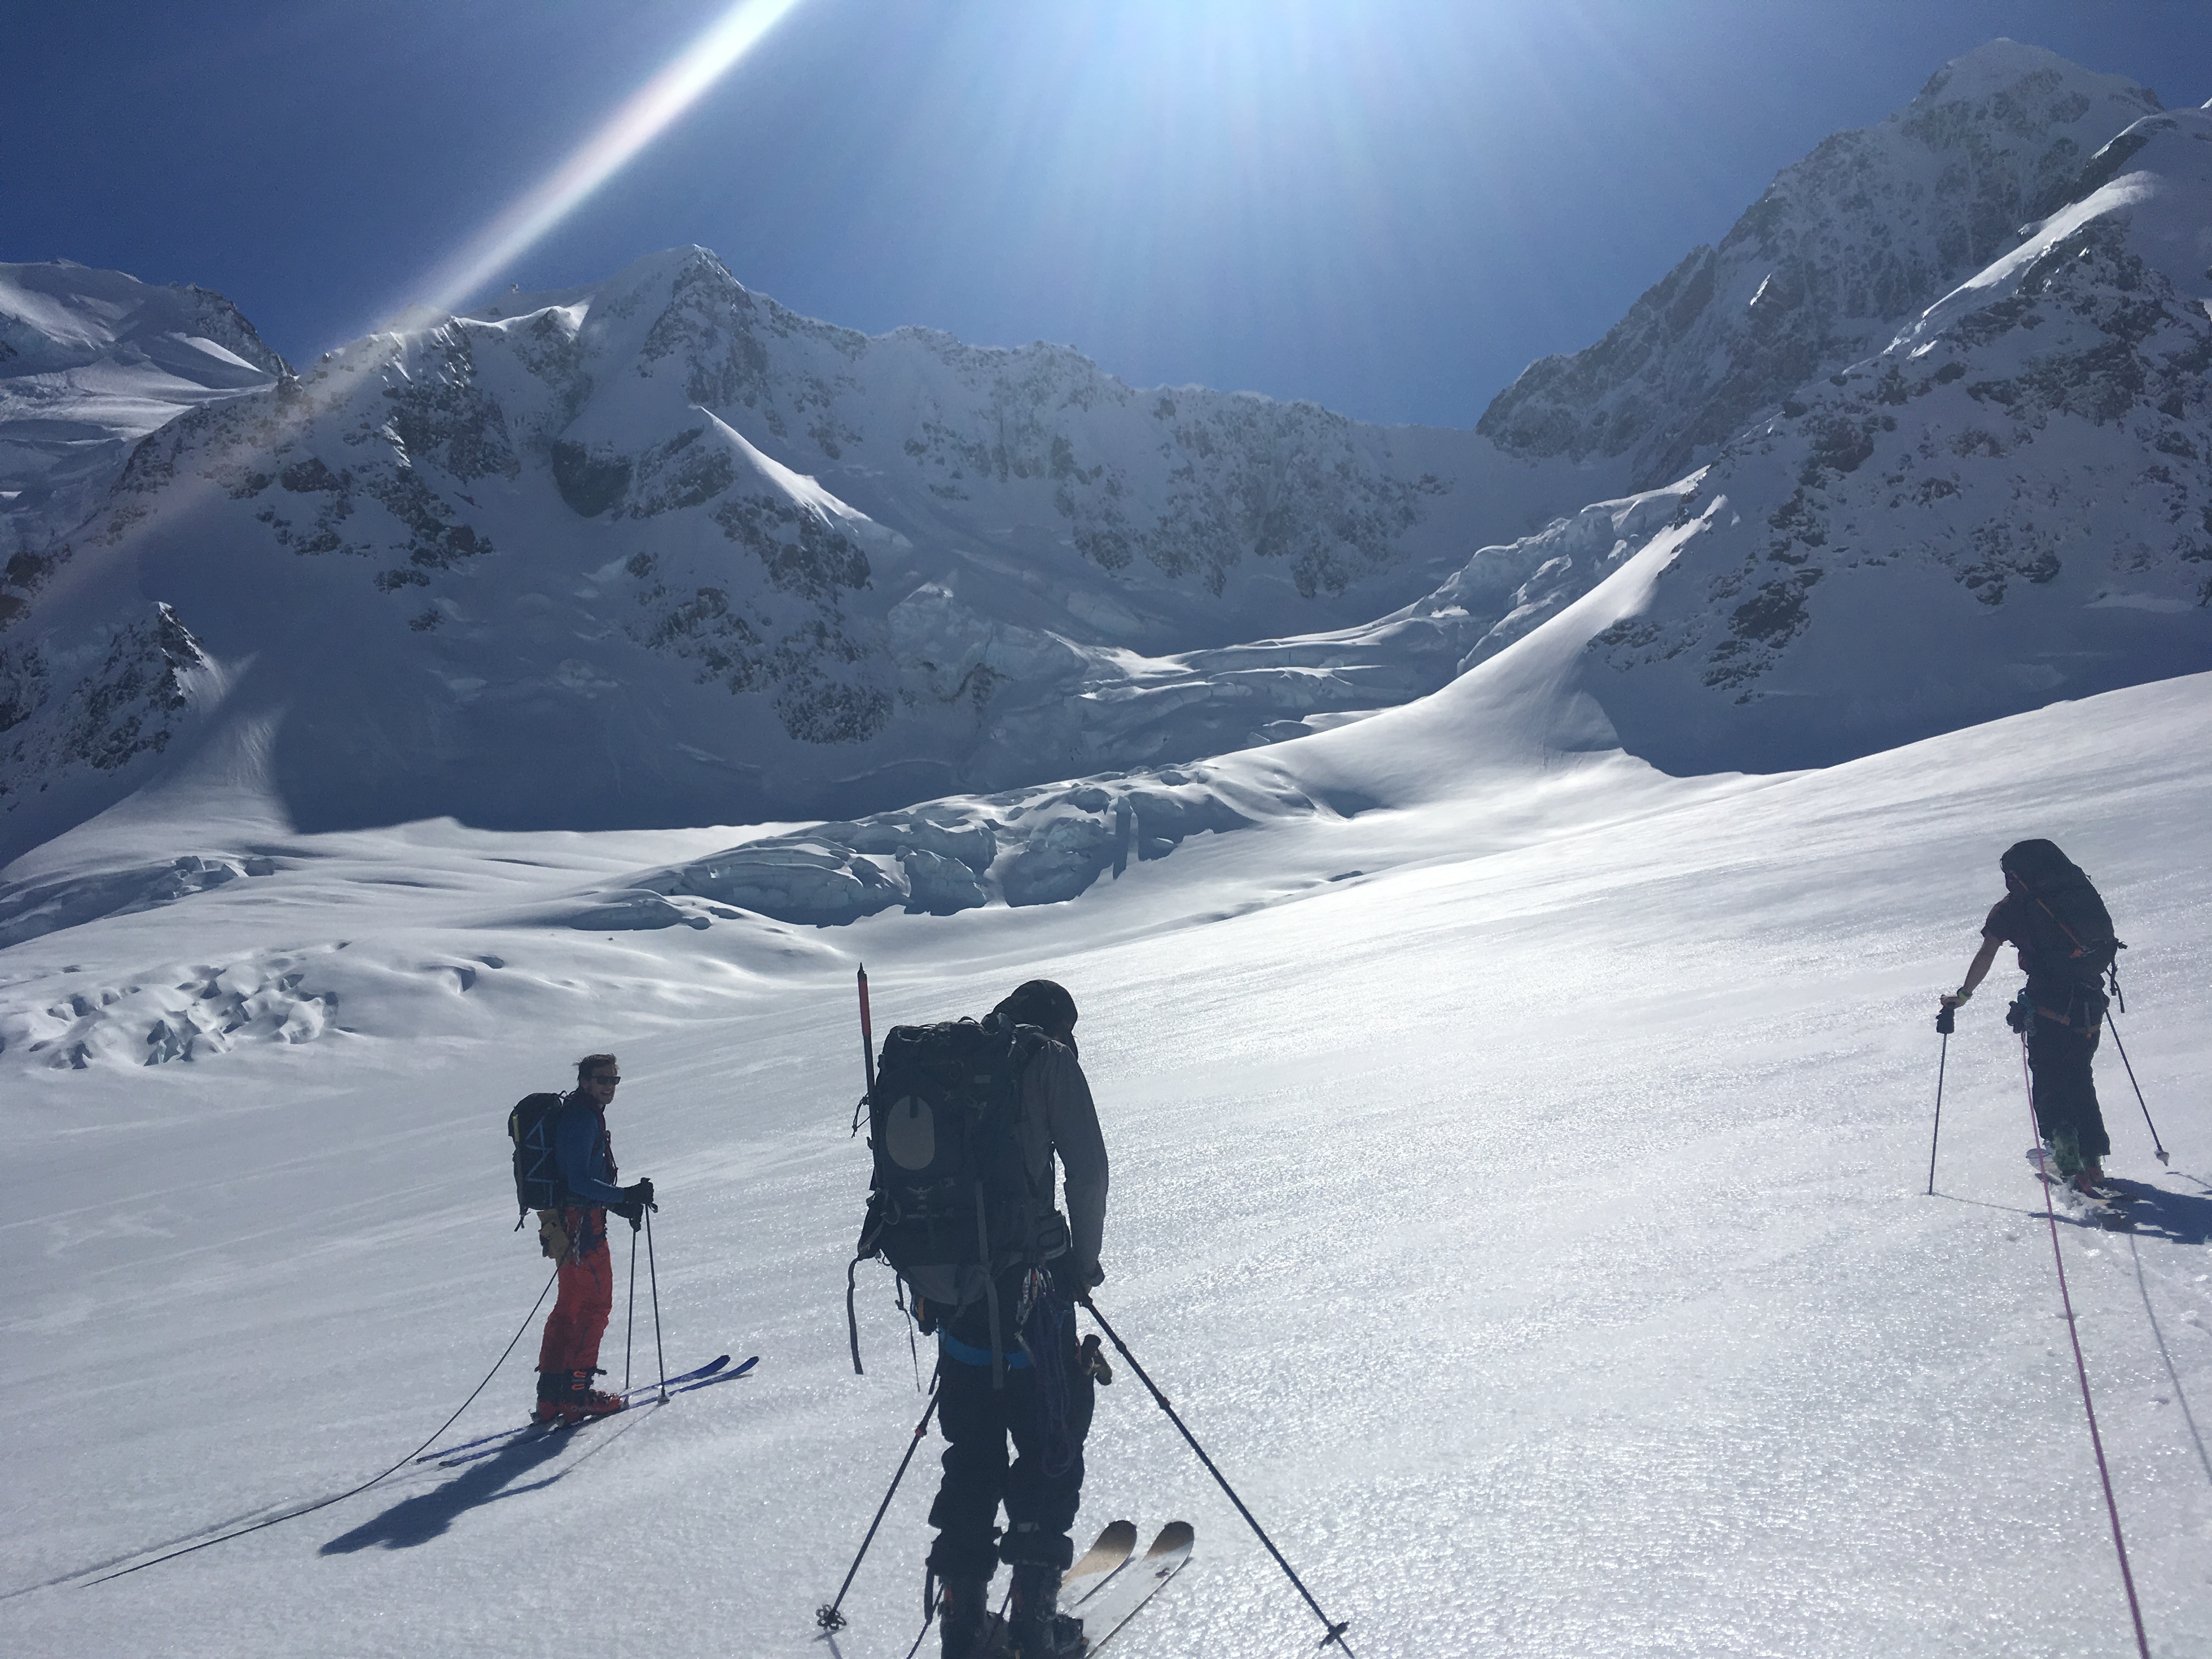
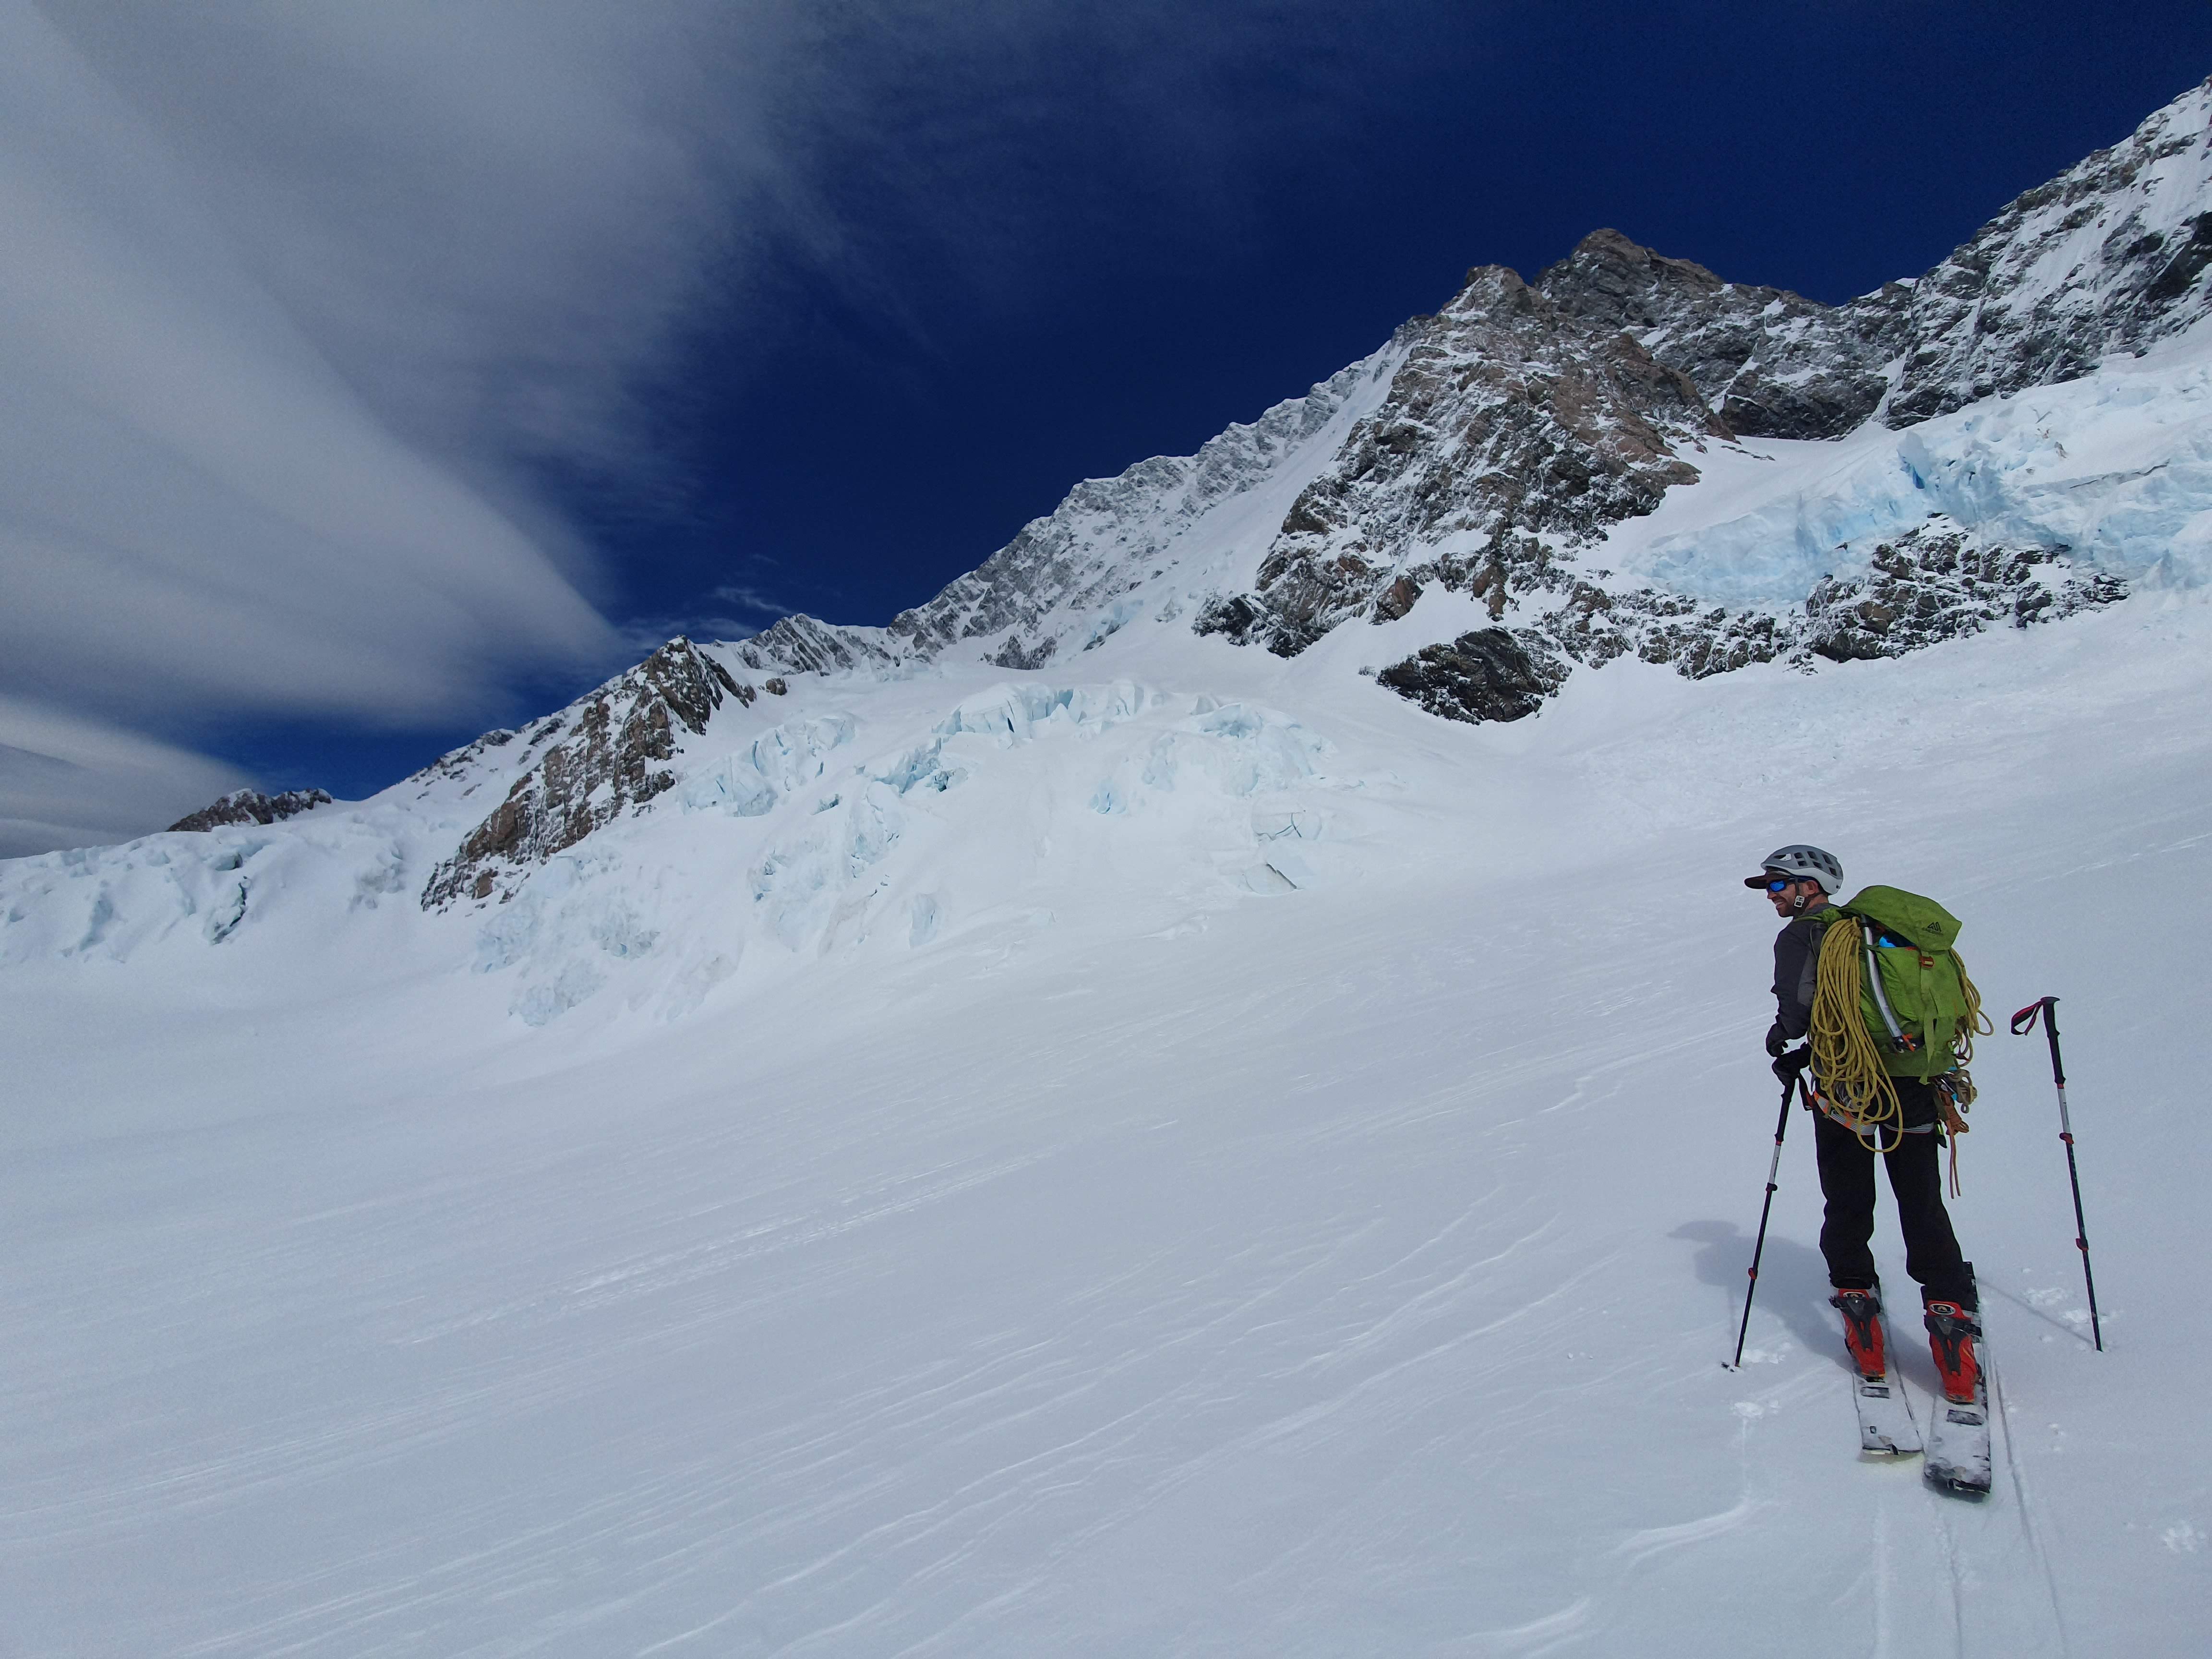
I’ve talked about the approch to the SW ridge in my post on climbing the SW ridge. If you can get through to the land owners and they give permission then driving to Cascade hut makes a biiiiiggg difference! When you’re on skis I think it’s a total no brainer to stay at French Ridge hut rather than camp up high. You cover the distance so quickly on skis that the advantages of staying at the hut (unlimited water, good nights sleep, dry gear, way lighter packs) far outweigh getting a slight lie in. We left the hut at 0600 and were on the Bonar by 0800 and climbing the ridge by 0900.
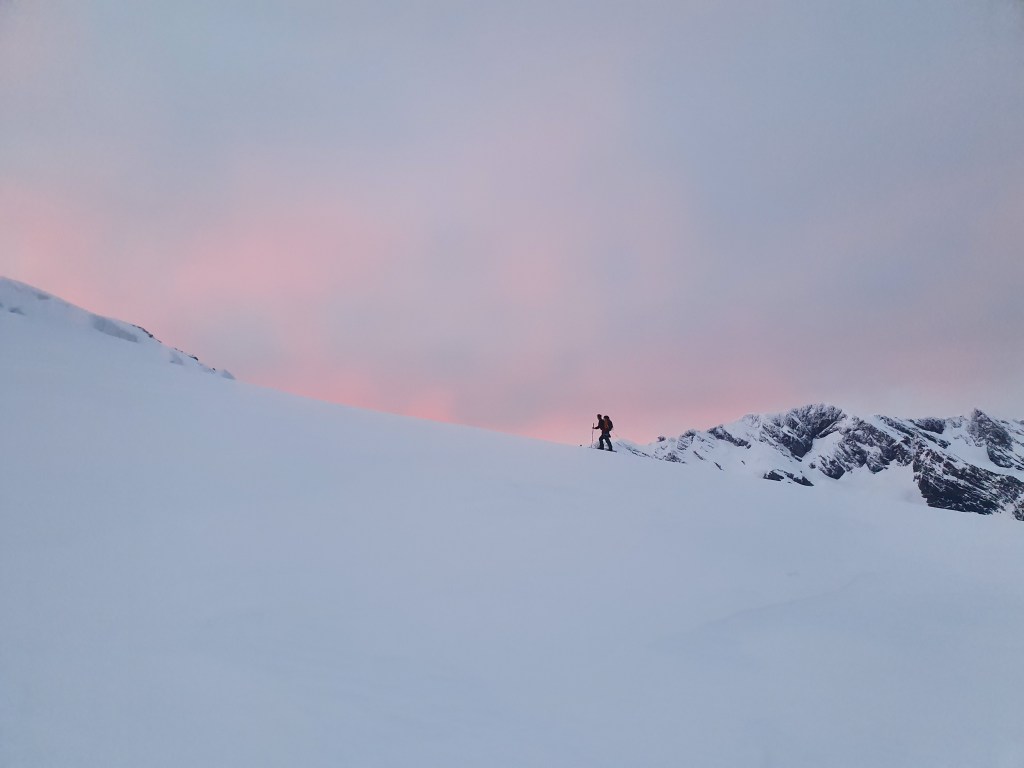
Skinning up French Ridge towards Quaterdeck at sunrise
Climb
The snow from the hut to the Quarterdeck was in full melt freeze mode, and pretty bulletproof. It’s never particuarly steep but often quite narrow with some big exposure off to the east. Ski crampons are a must! Unfortunately one of mine snapped in half about 20 minutes in so I was walking behind Sam in crampons and axe with my skis on my back.
Climbing the ridge leading to the crux
The schrund before the Quarterdeck can be an issue and becomes impassable late season
generally the further climbers right the easier it is to cross. We were lucky and everything was fat, with no signs of anything opening up.
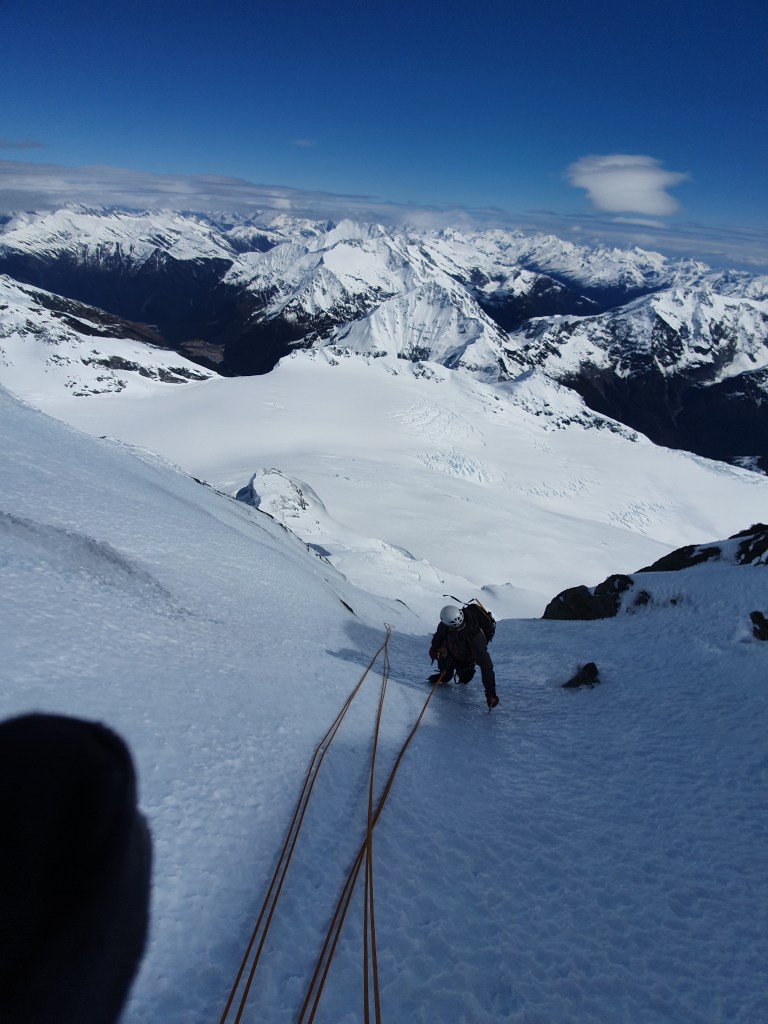
After skinning across the Bonnar, aim for the base of the SW ridge and find the best / easiest spot to gain the ridge. Generally the easiest way is to cut round to the West of the ridge and head up the snowfield running paralell to the ridge towards the West face, then cut up the snowfields from there to gain the ridge part way along. This means you miss out the rocky first section of the ridge and speed things up significantly. You’re also on a long low angle west facing slope to make stability assessments before reaching the main face, and the smaller slopes leading up to the SW ridge make for lower consequence test slopes. Once on the main ridge, the gradient is a consistent 40-45 degrees all the way up to the crux. We had chalky pressed powder on the face, but with sastrugi and windswept ice on the ridge itself. By soloing this section up to the crux we could move quickly and were at the crux just after 11:30.
The crux
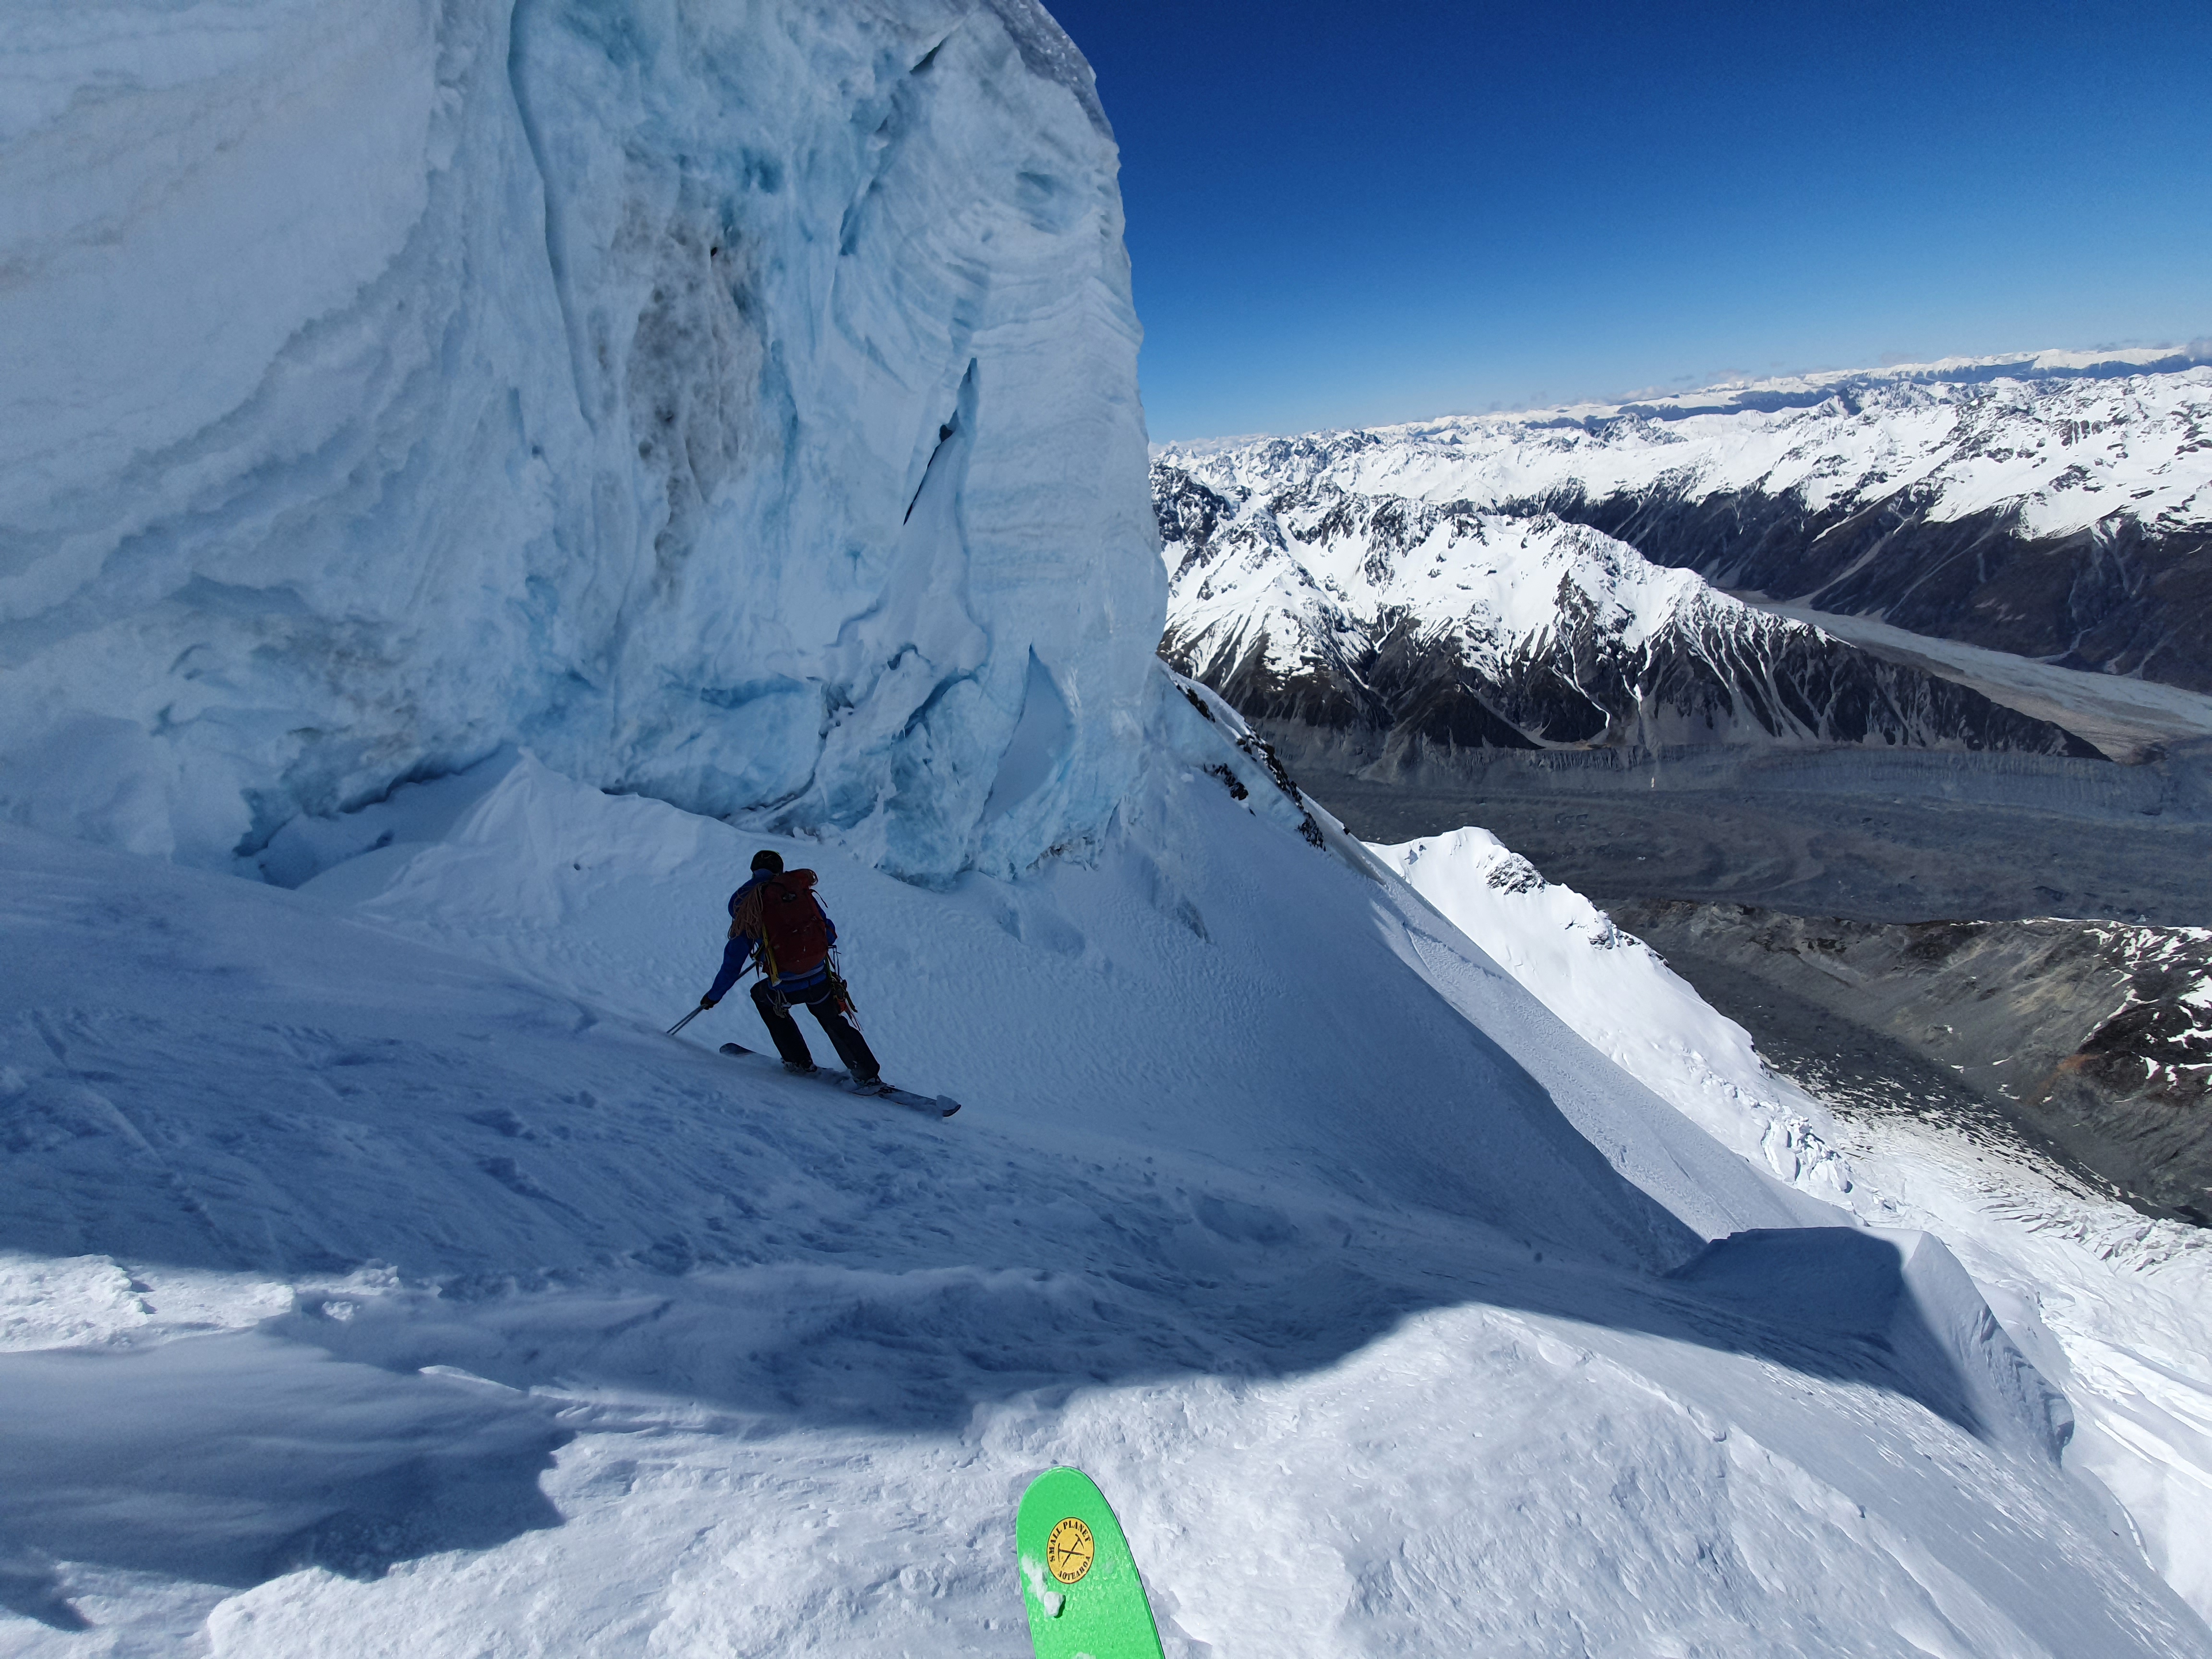
We decided to leave skis / board at the bottom of the crux as we didn’t think the snow looked particuarly great on the summit, and not worth lugging up through the crux pitches. So after stashing the gear we headed up the crux with nice light packs.
We had brought one 70m half rope to save on weight, and doubled this over for pitching the crux with me leading tied into the two ends and Sam tied into a figure 8 at the halfway point. This let us climb the crux in 2x 30m pitches. The ice was in great condition, fat and taking confidence inspiring screws. There were a couple of less than body height vertical sections / bulges with generally 70-80 degree ice. It’s pretty similar to Altered States at the Remarkables. As we were planning on rapping back down to our gear, we scoped out spots for threads / anchors on the way up.
1st pitch of the crux
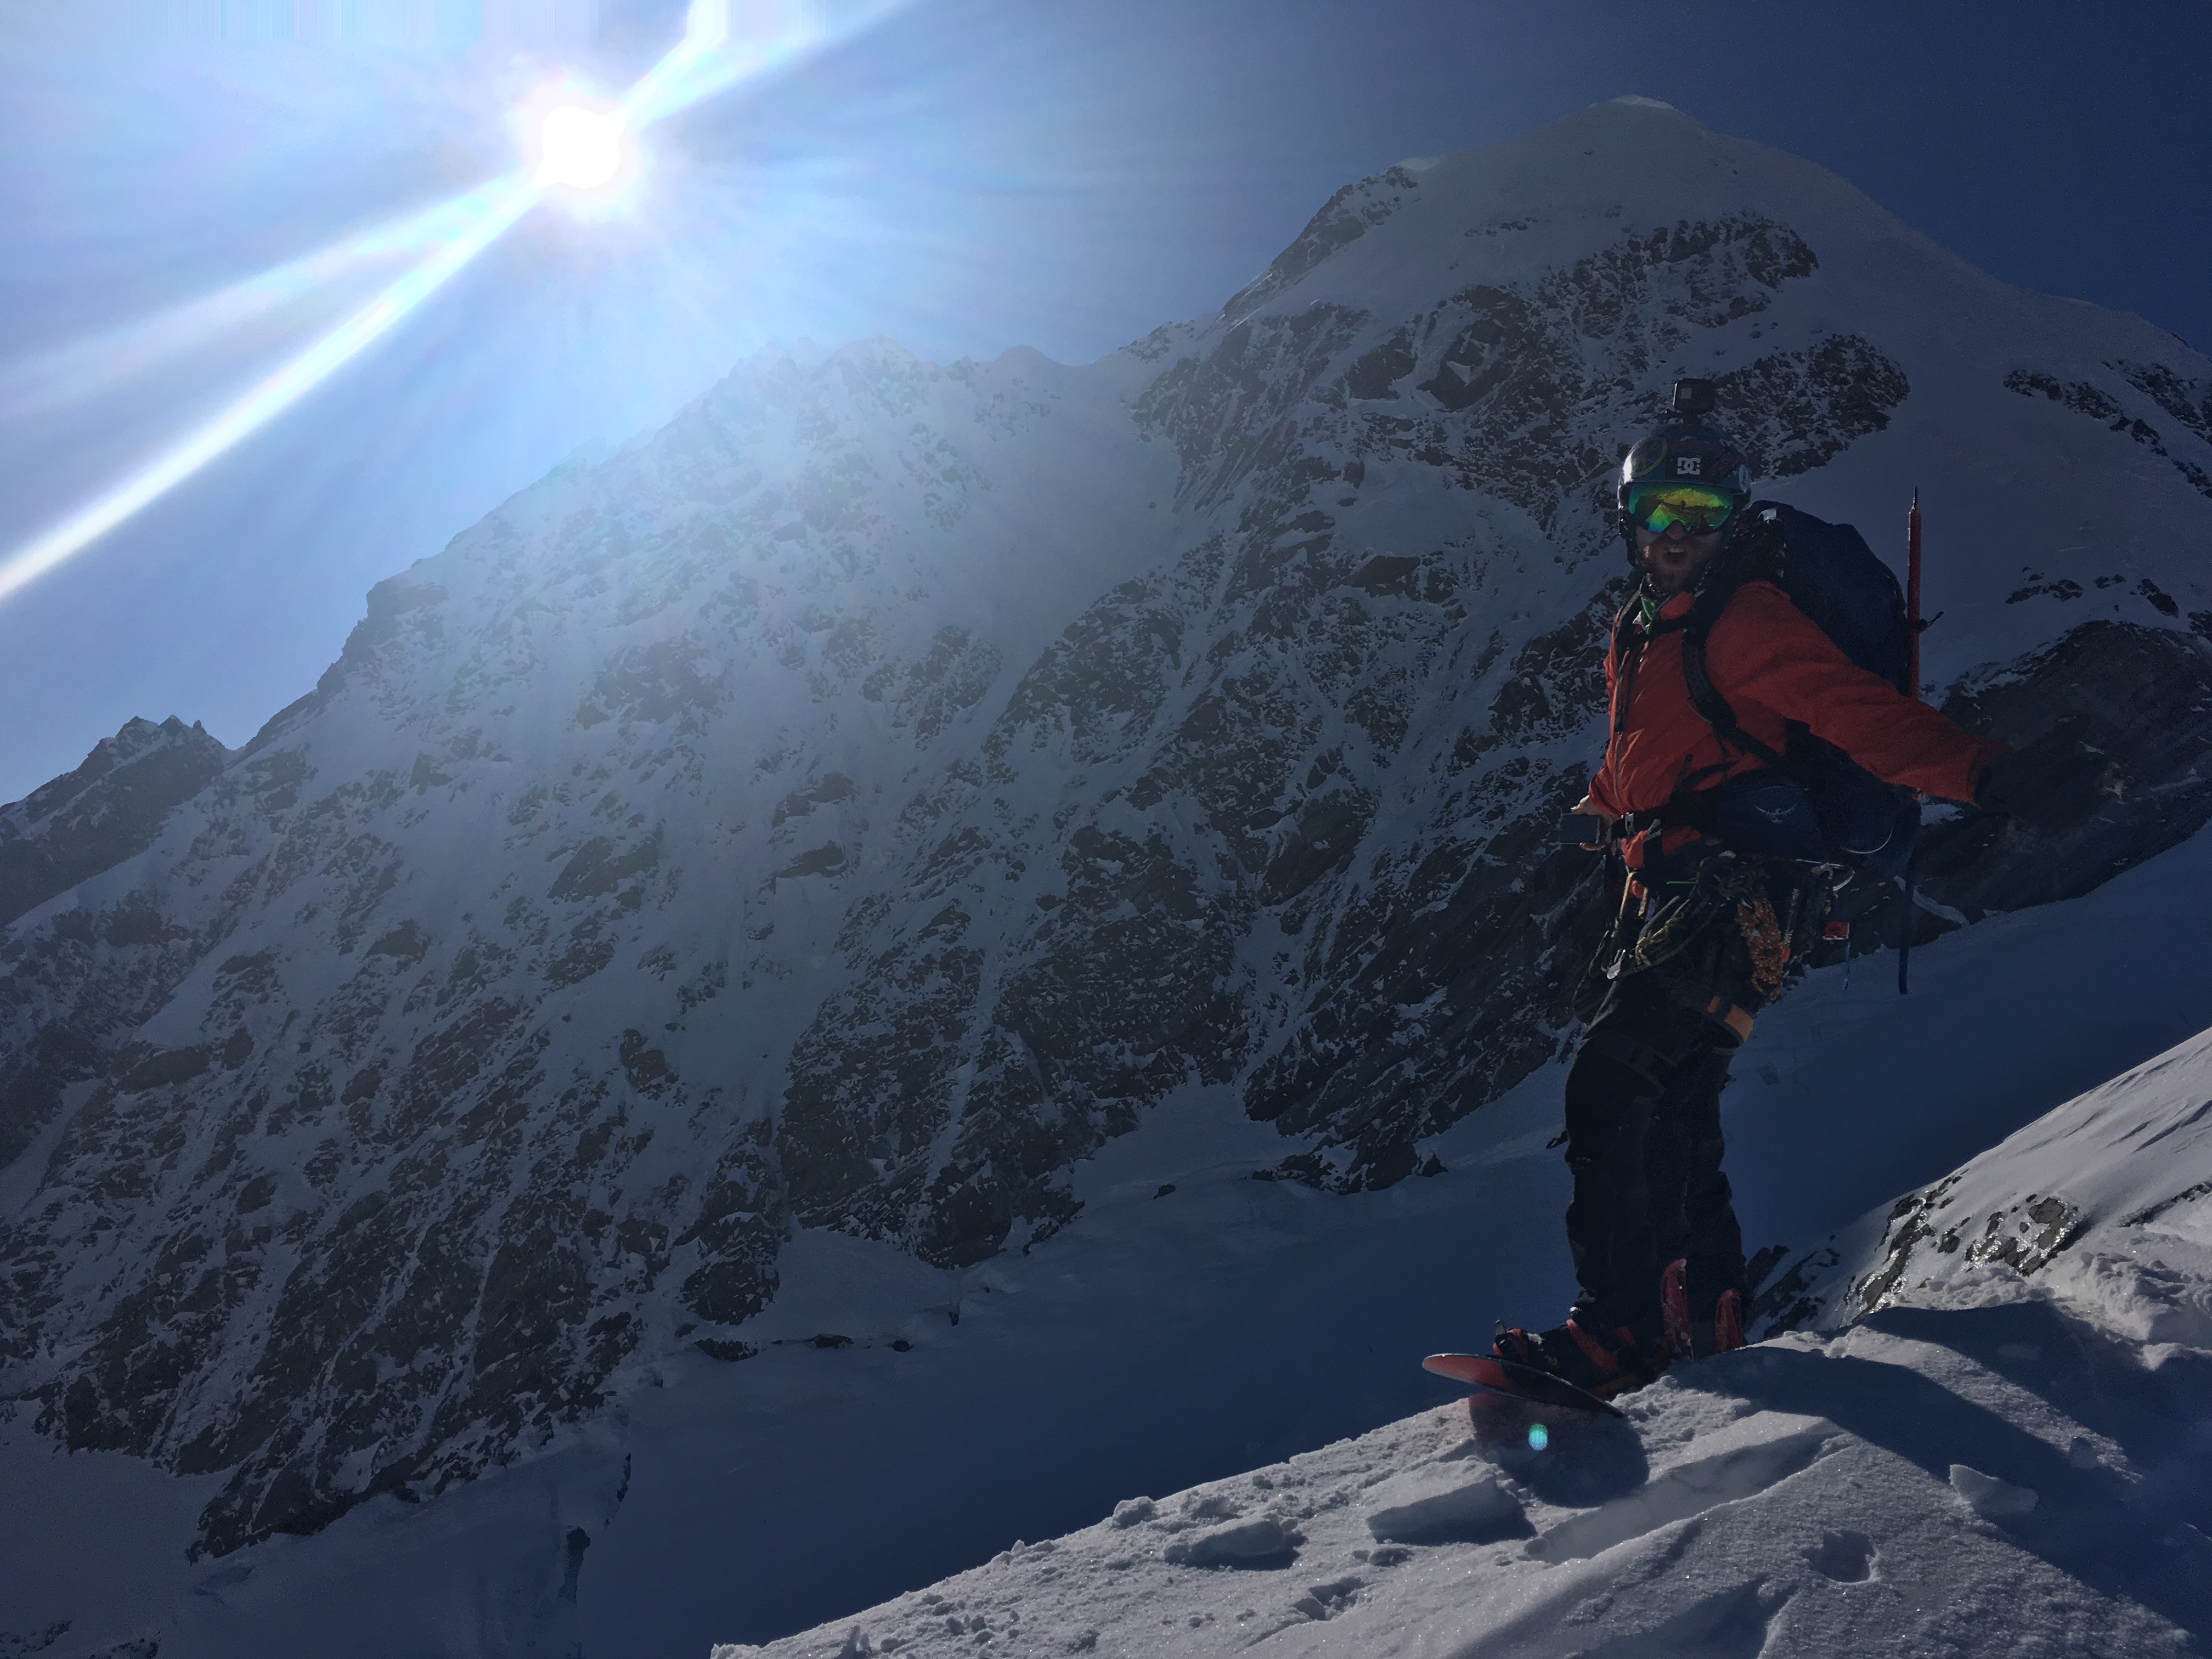
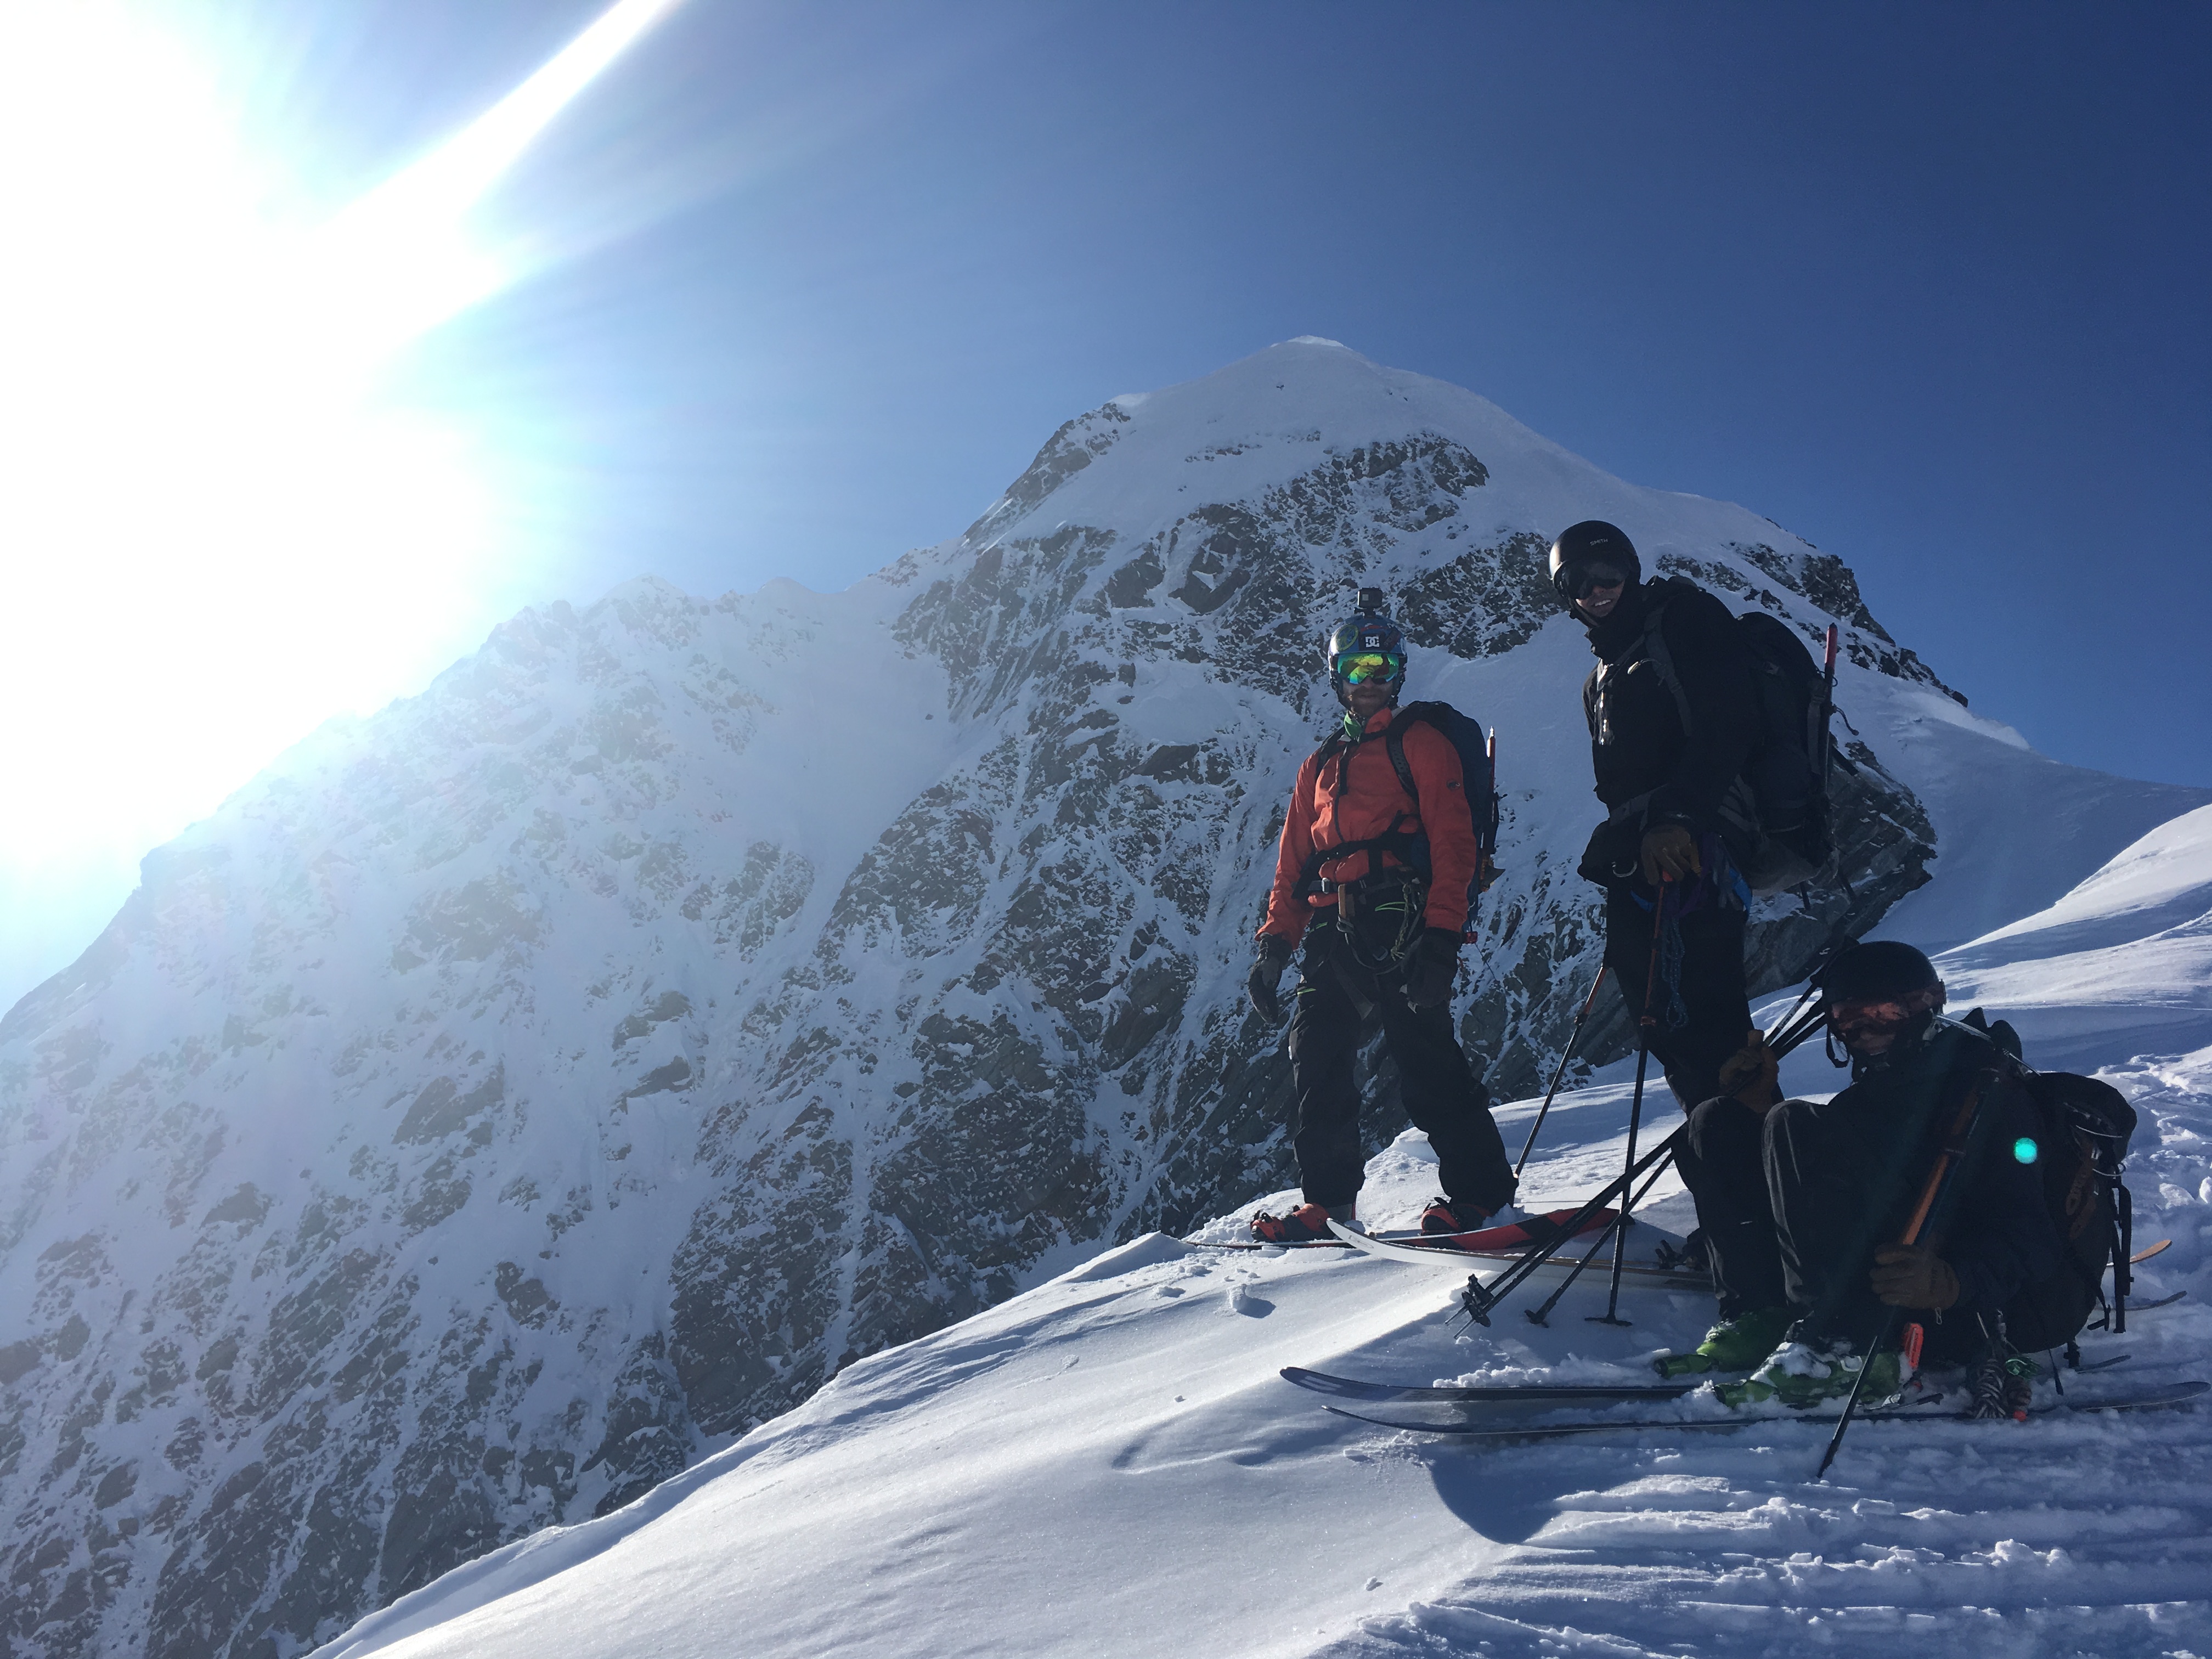
After pitching this steep section the angle eases right off and you cruise up to the summit. We got to the top at 13:30. We were glad of our decision to leave the skis/board – would have been less than 50m of skiiable snow from the summit before hitting ice above the crux.
Descent
Sam on the top part of the face
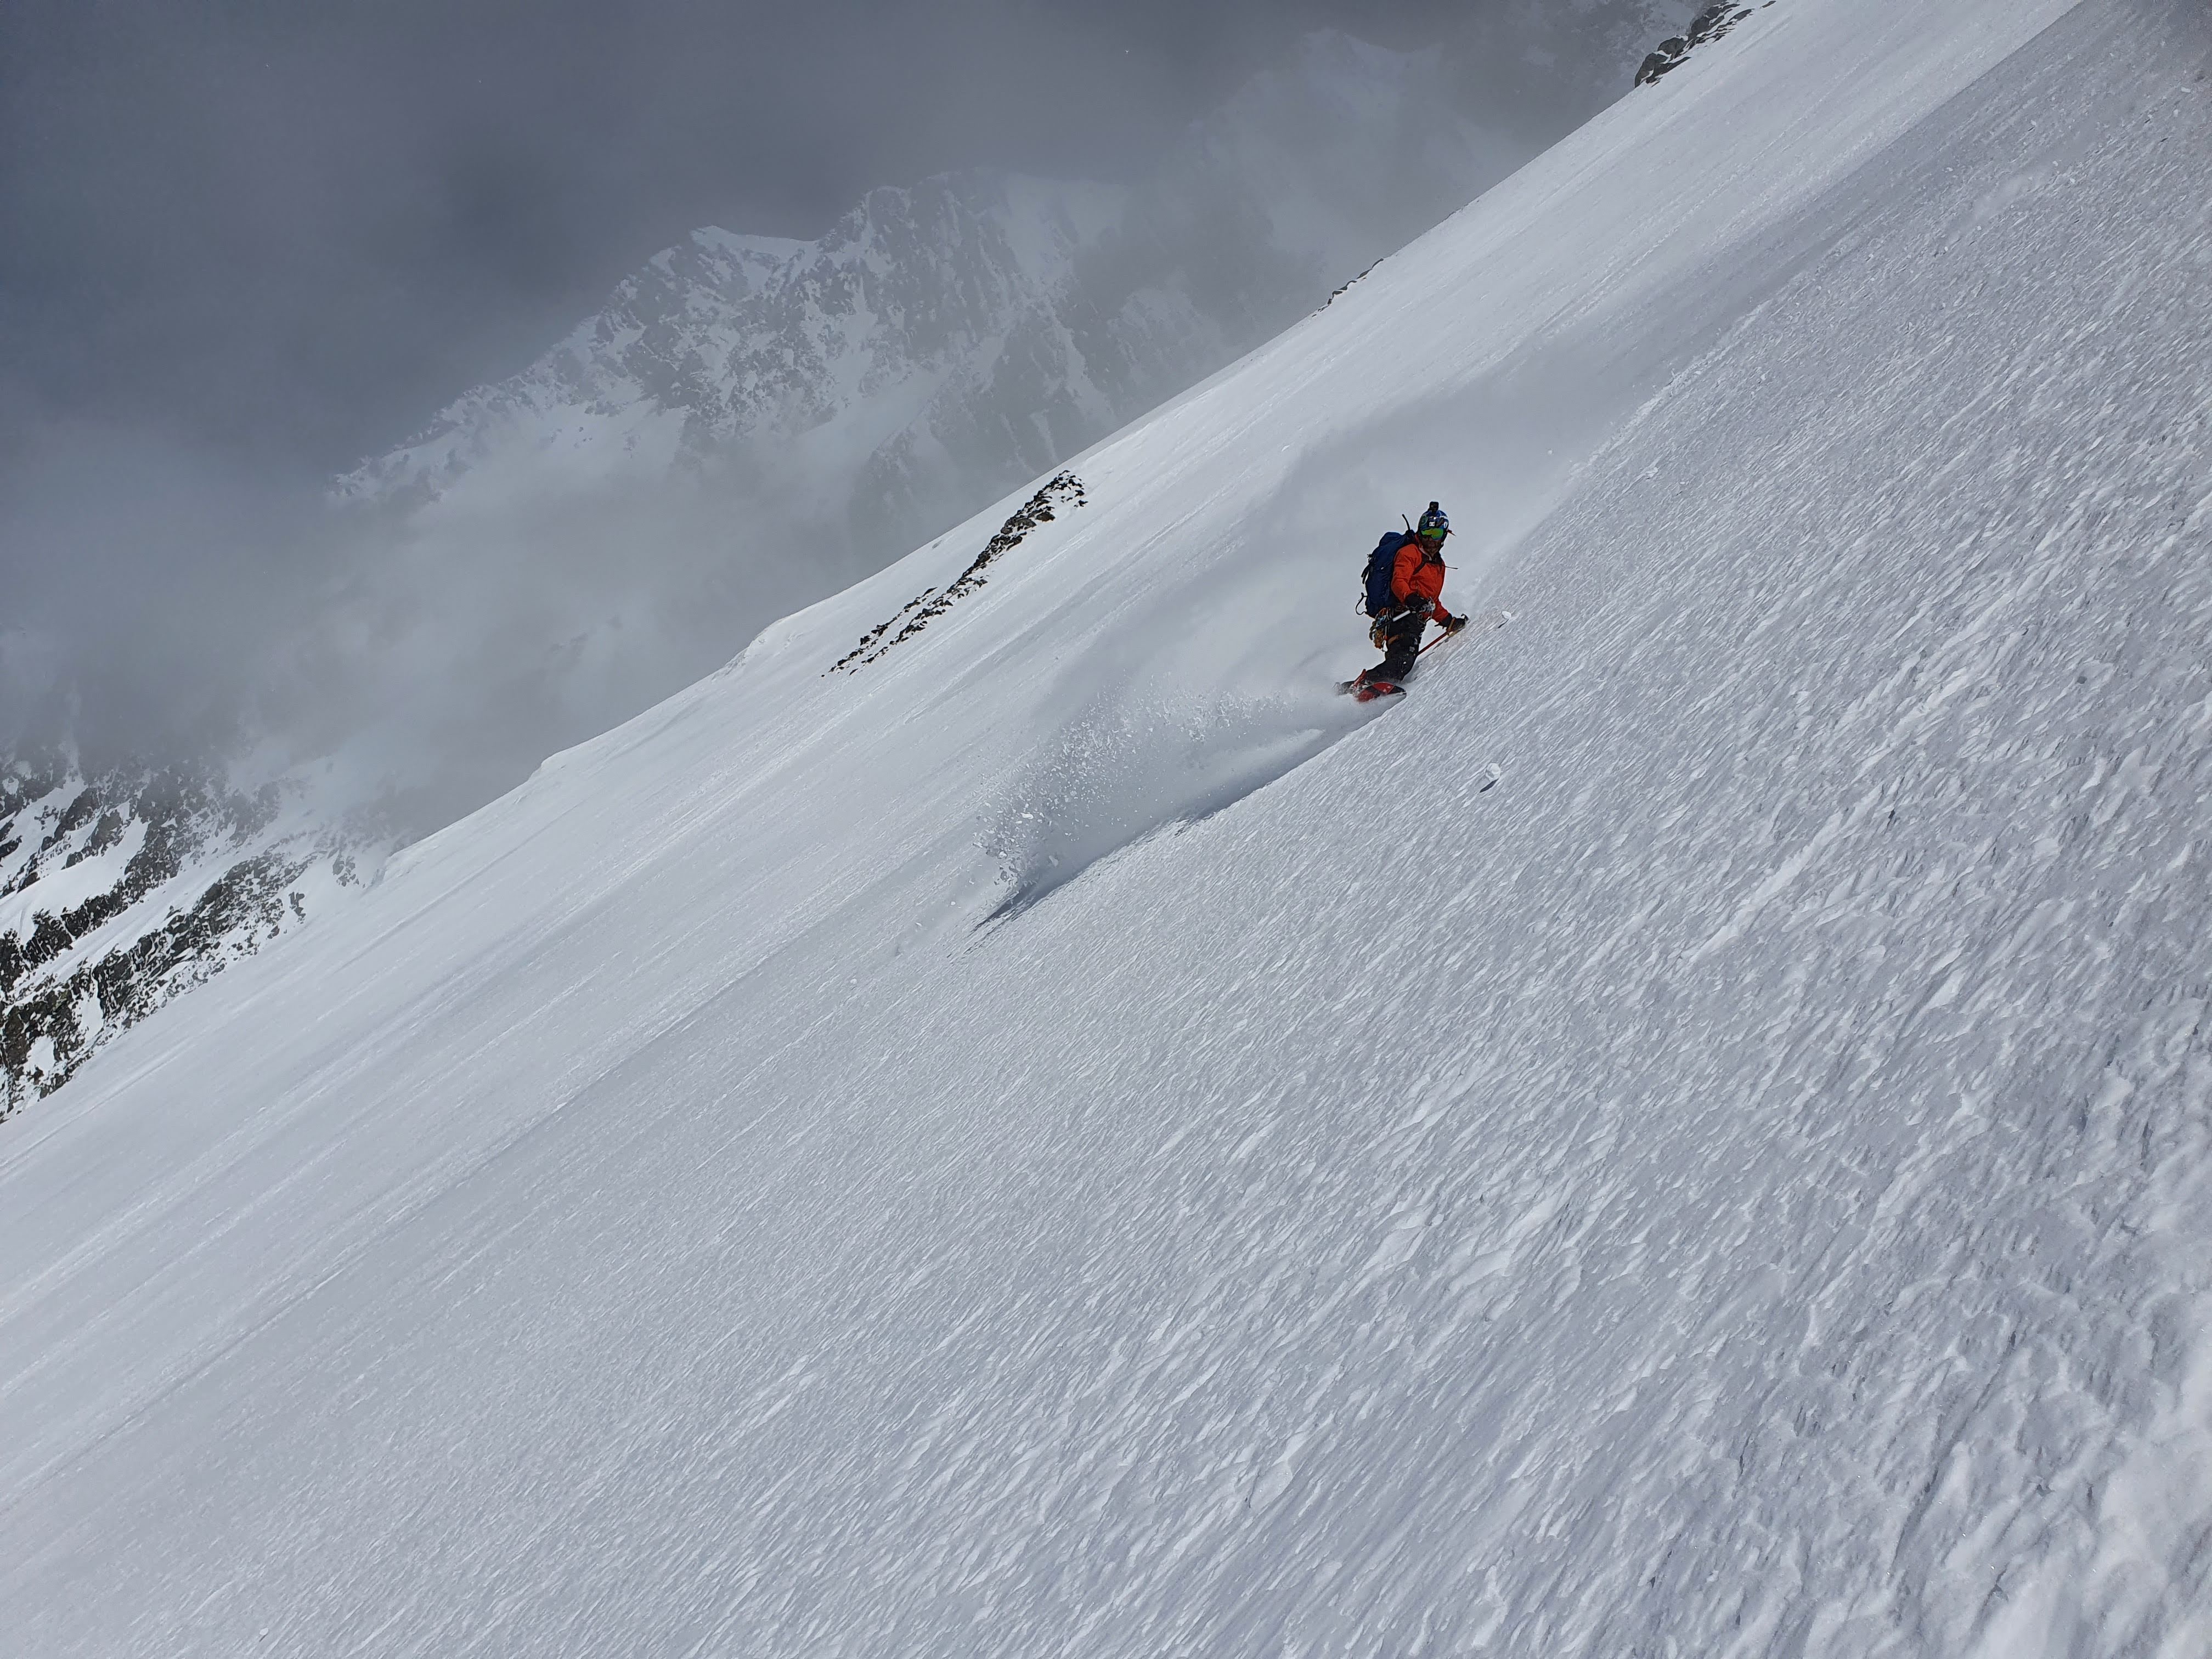
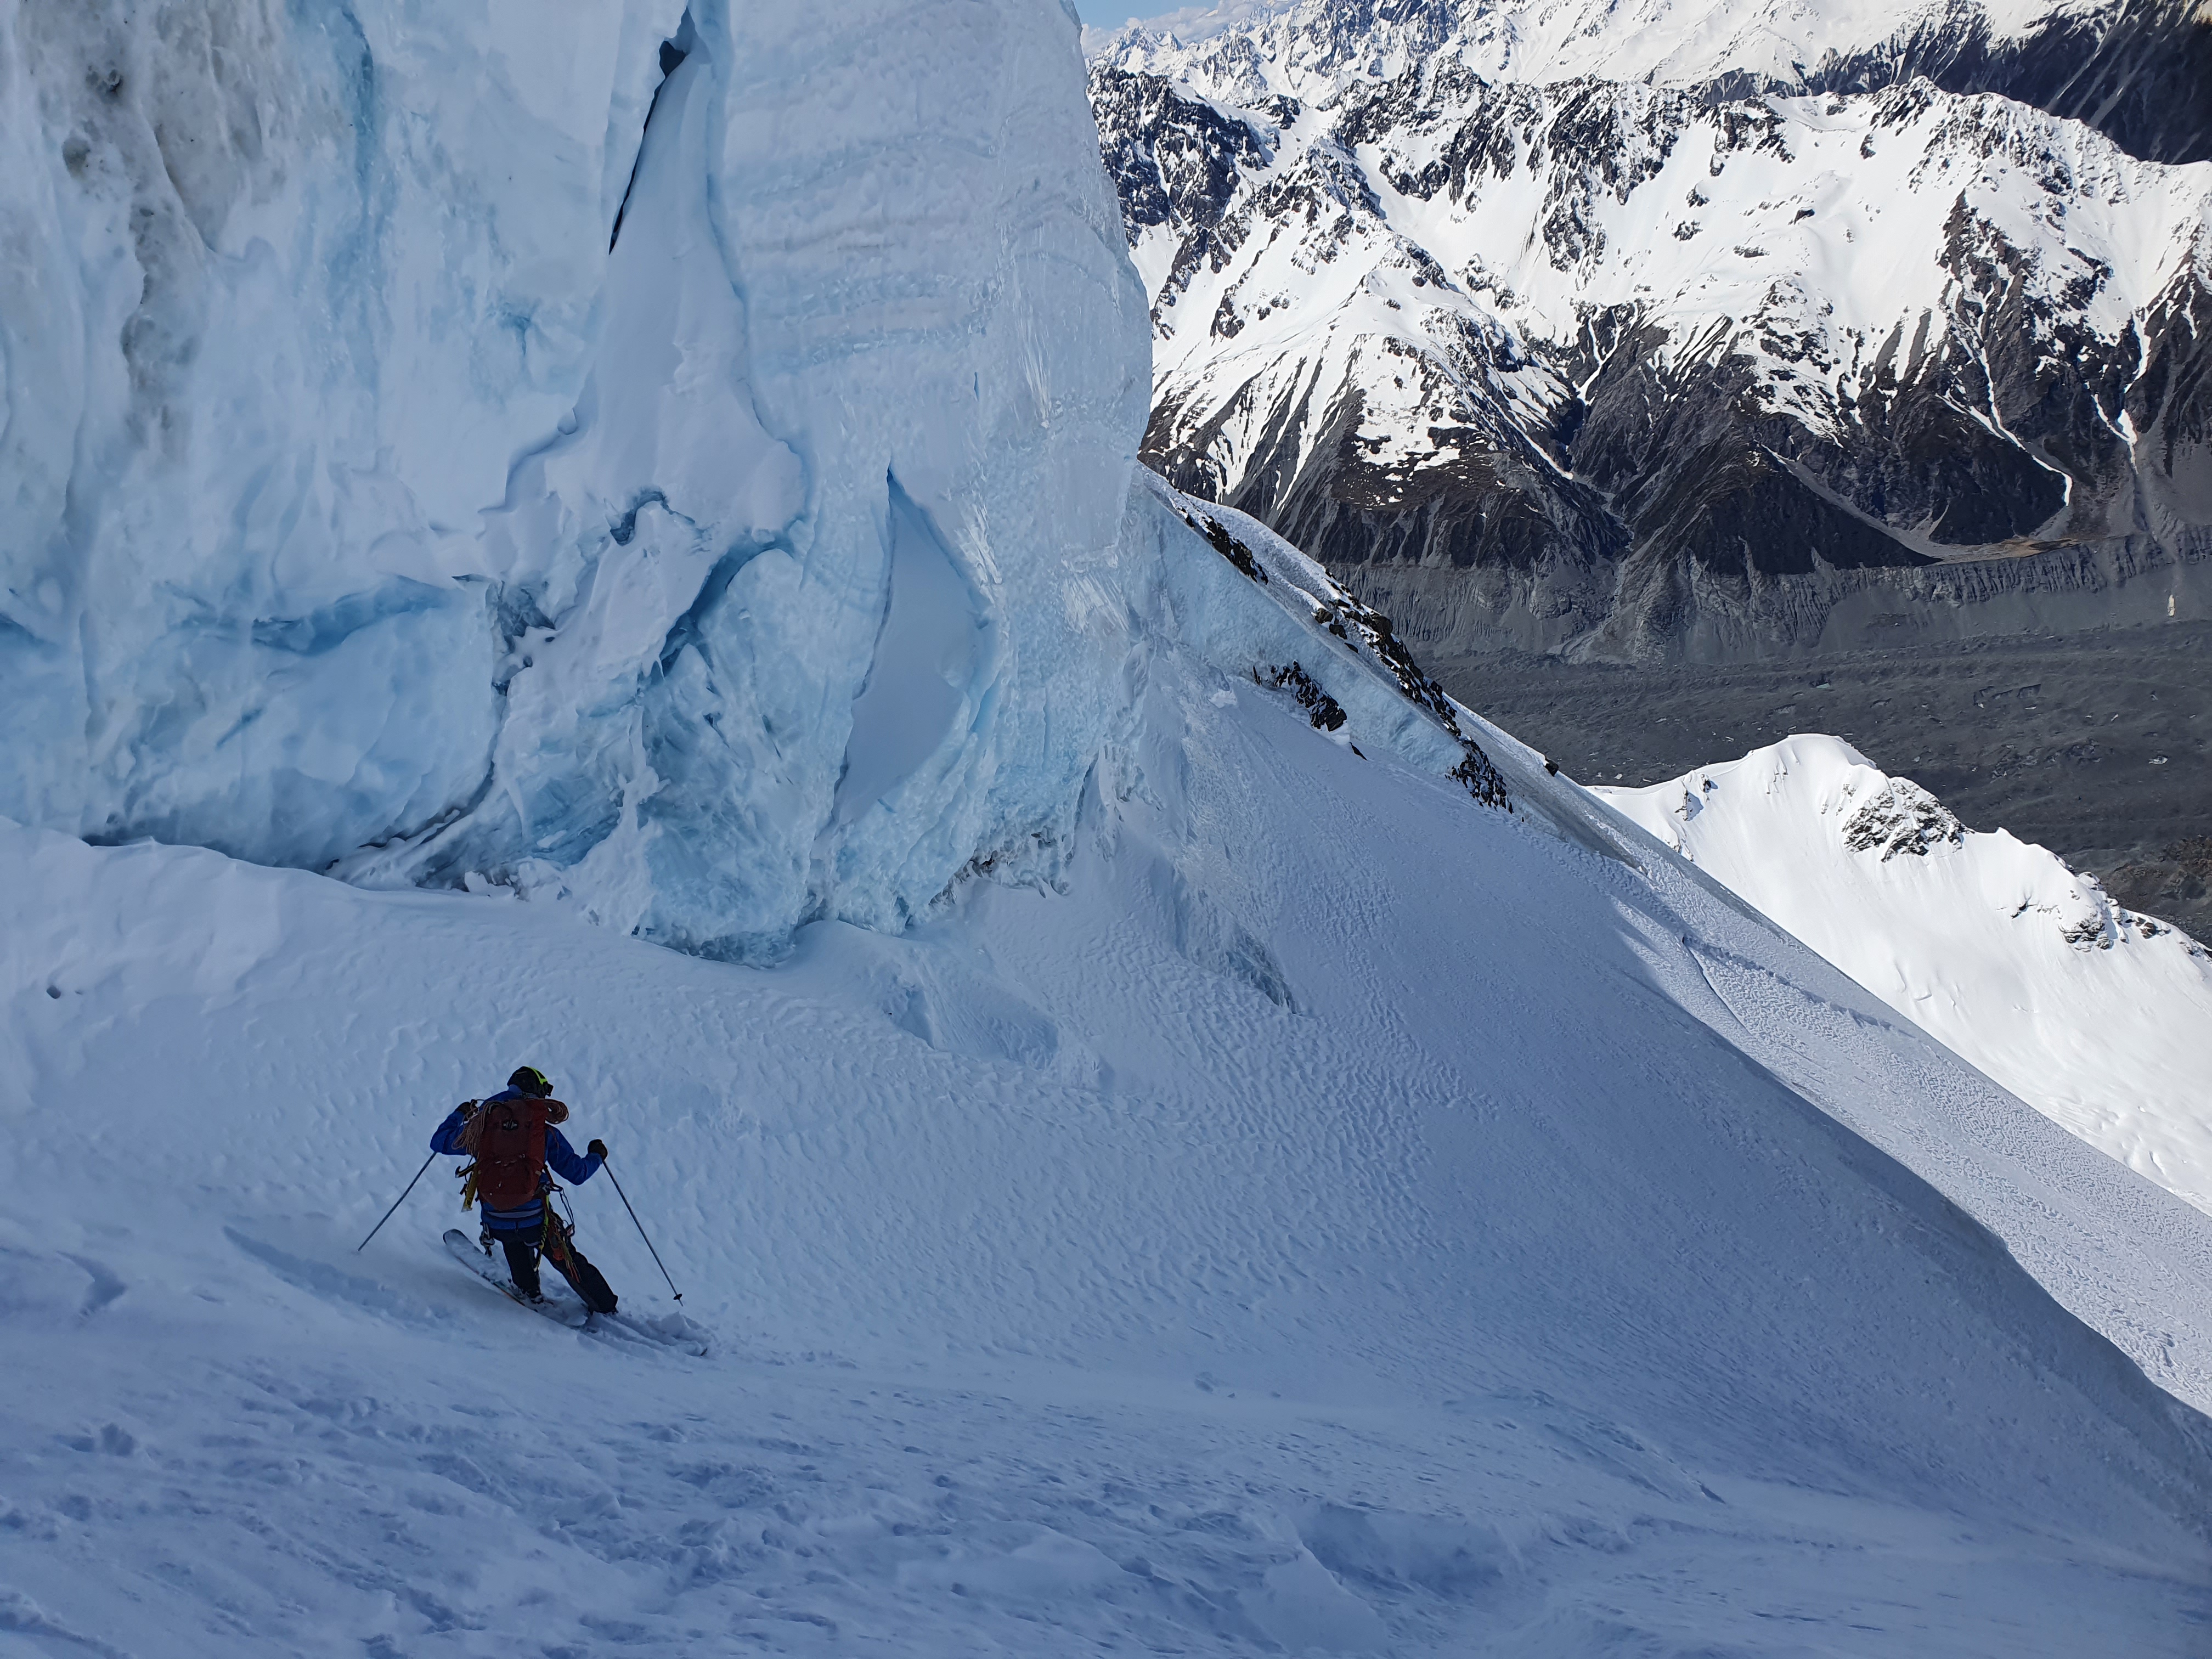
After a brief break to take in the views and refuel, we down climbed back down to the start of the ice and then made 2x 35m raps down to the skis on V-threads. Be prepared to leave a snow stake behind as often the ice at the very top is not good enough for threads. There are also some options on in the rock on skiiers right for knife blade pitons or small rock gear. We were back at the skis and ready to drop in at 14:30. The ski line is pretty straightforward – essentially fall line from the crux. However there are some big cliff bands to negotiate, so you generally have to trend right initially, before cutting left and then right again towards the bottom to get through these.
Descending the second half of the face
Also, you’re going to be skiing a different line to the climbing line so it’s worth taking the time to scope the line from the bottom to try and identify any areas of poor snow or ice that may trip you up on the way down. It’s steep enough that you probably won’t stop if you fall and its a long way down to the Bonar – there have been several nasty accidents in the past caused by a fall on this face.
Our first few turns were on firm chalky pressed powder, which then turned into boottop powder for the majority of the face down to the Bonar. Cue whooping and high fiving! We were back on the Bonar just 8 minutes after leaving the crux.
A cruisy skin back across the Bonar to the Quaterdeck and then down to French Ridge for goon and dehys! We were back by around 17:30
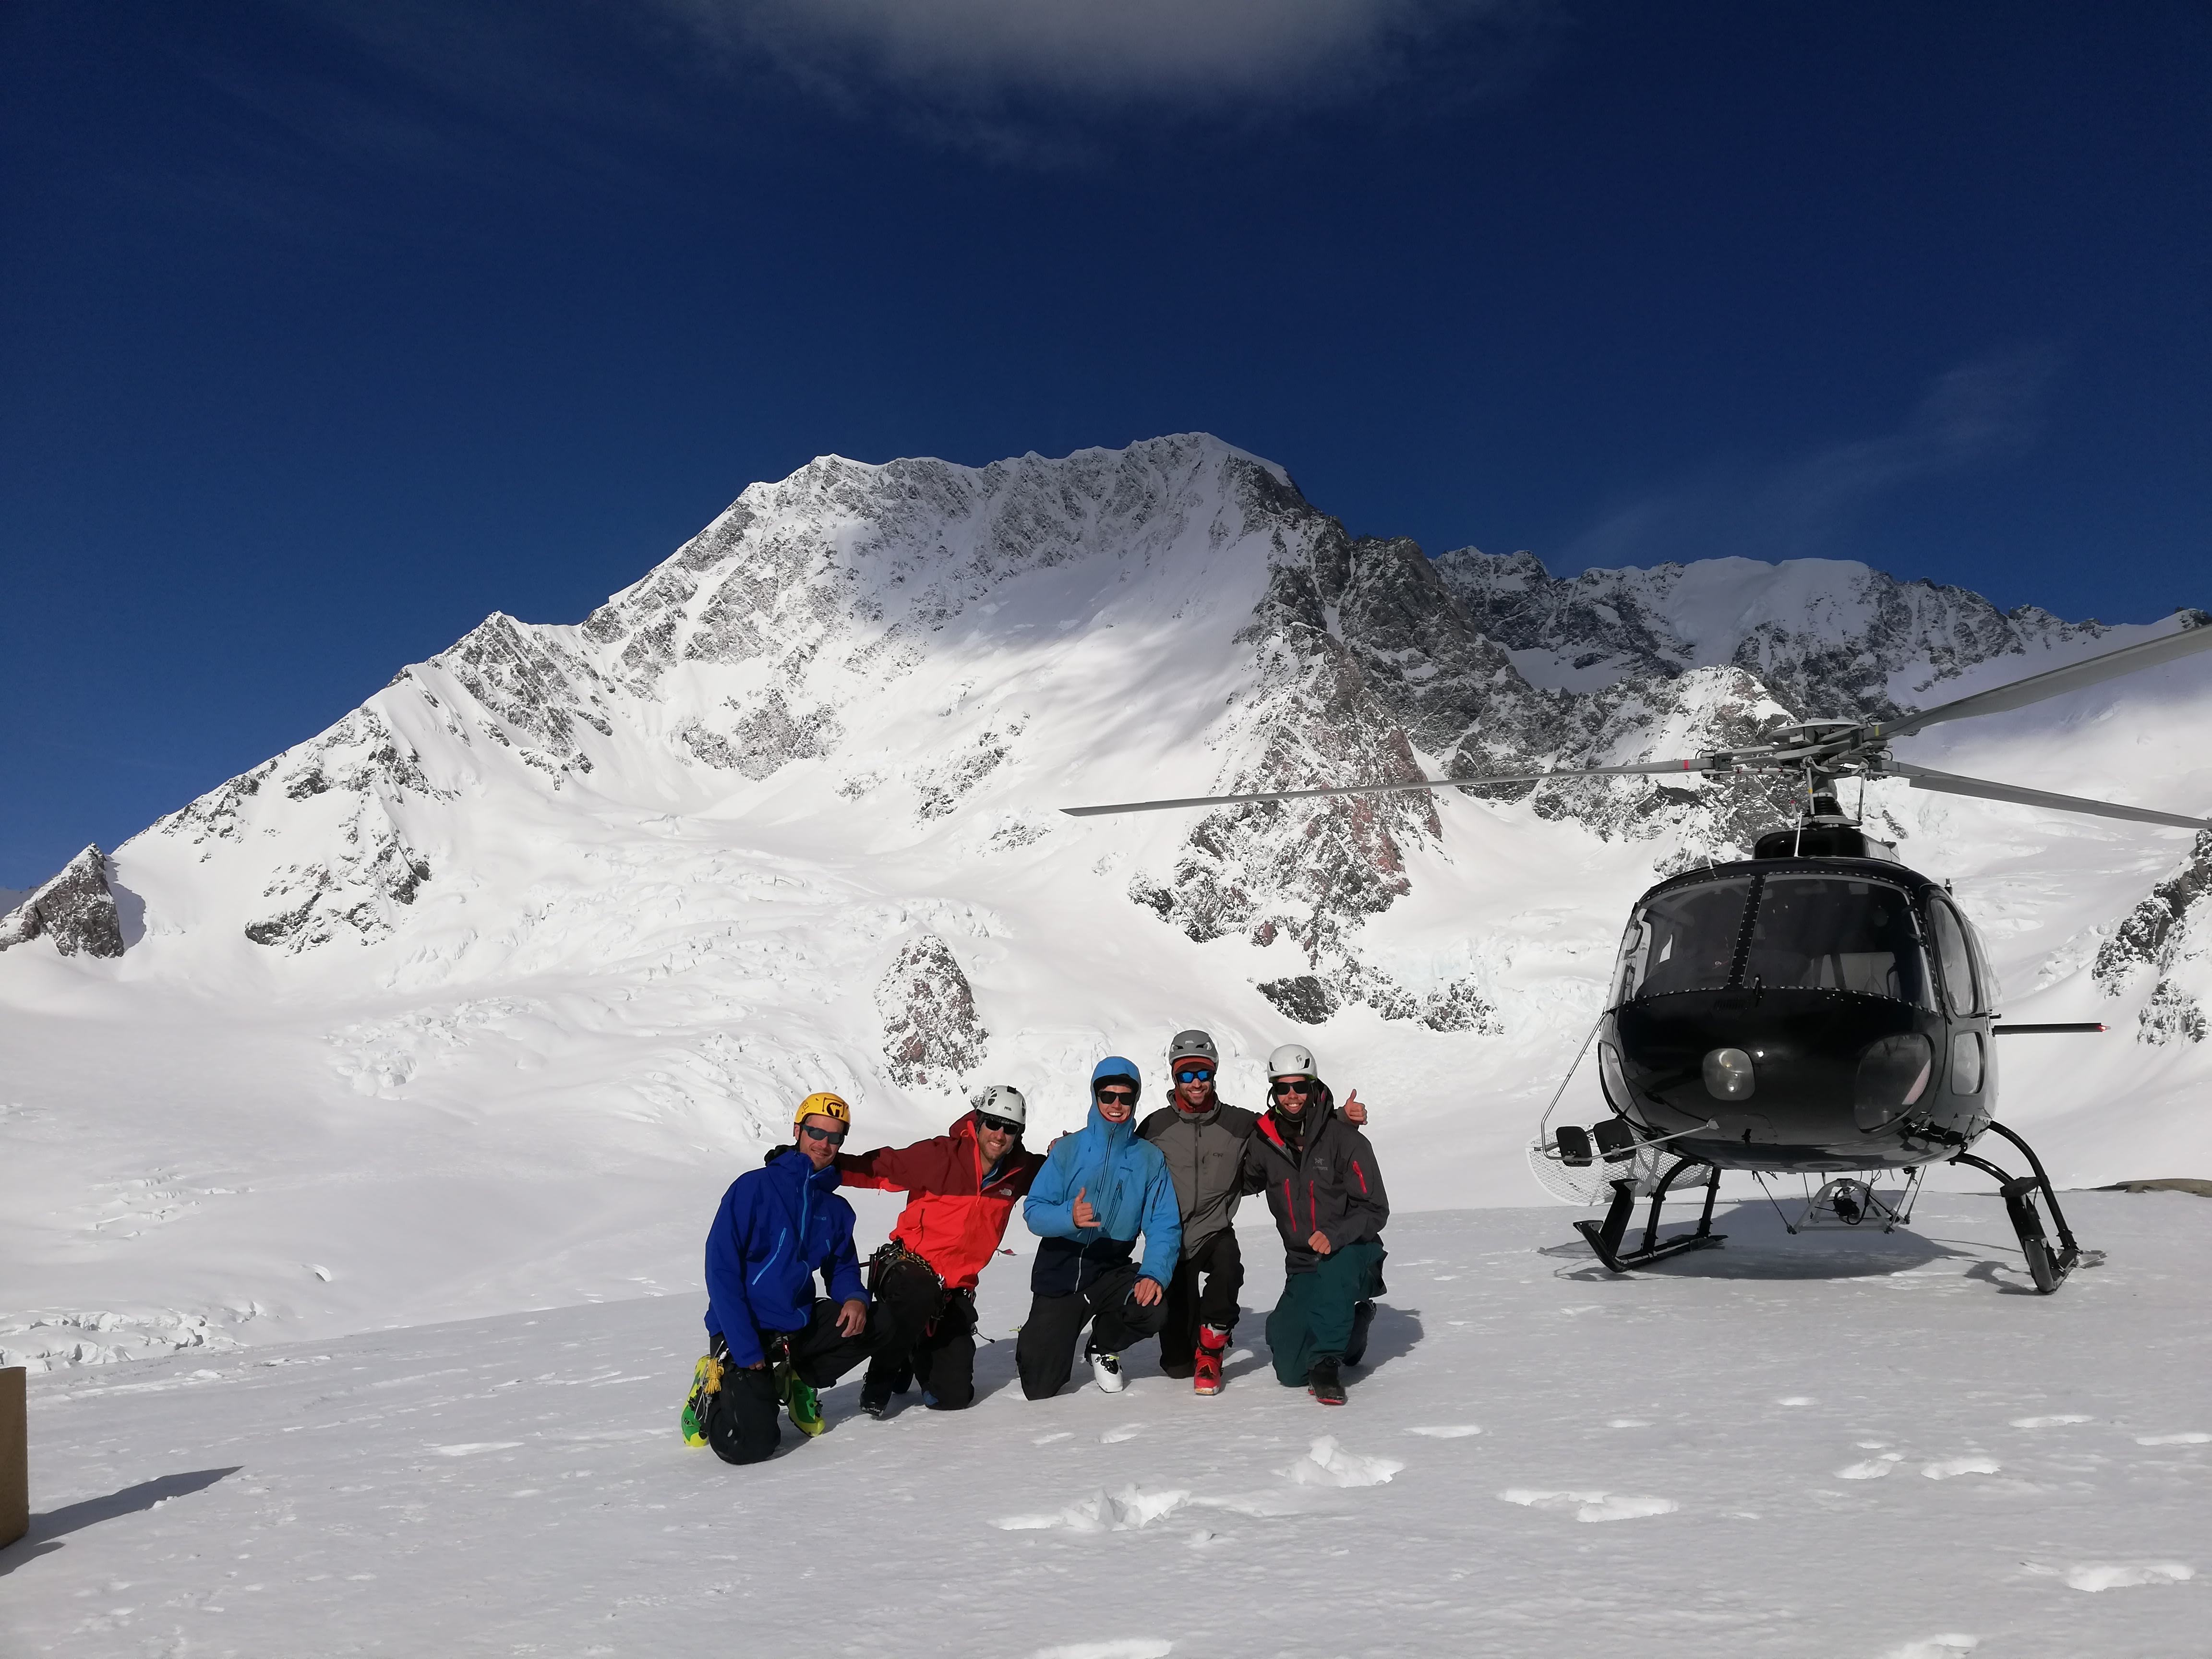
Some climbers took this shot from the Tasman, the 4 of us are actually on the summit if you zoom waaaaaay in
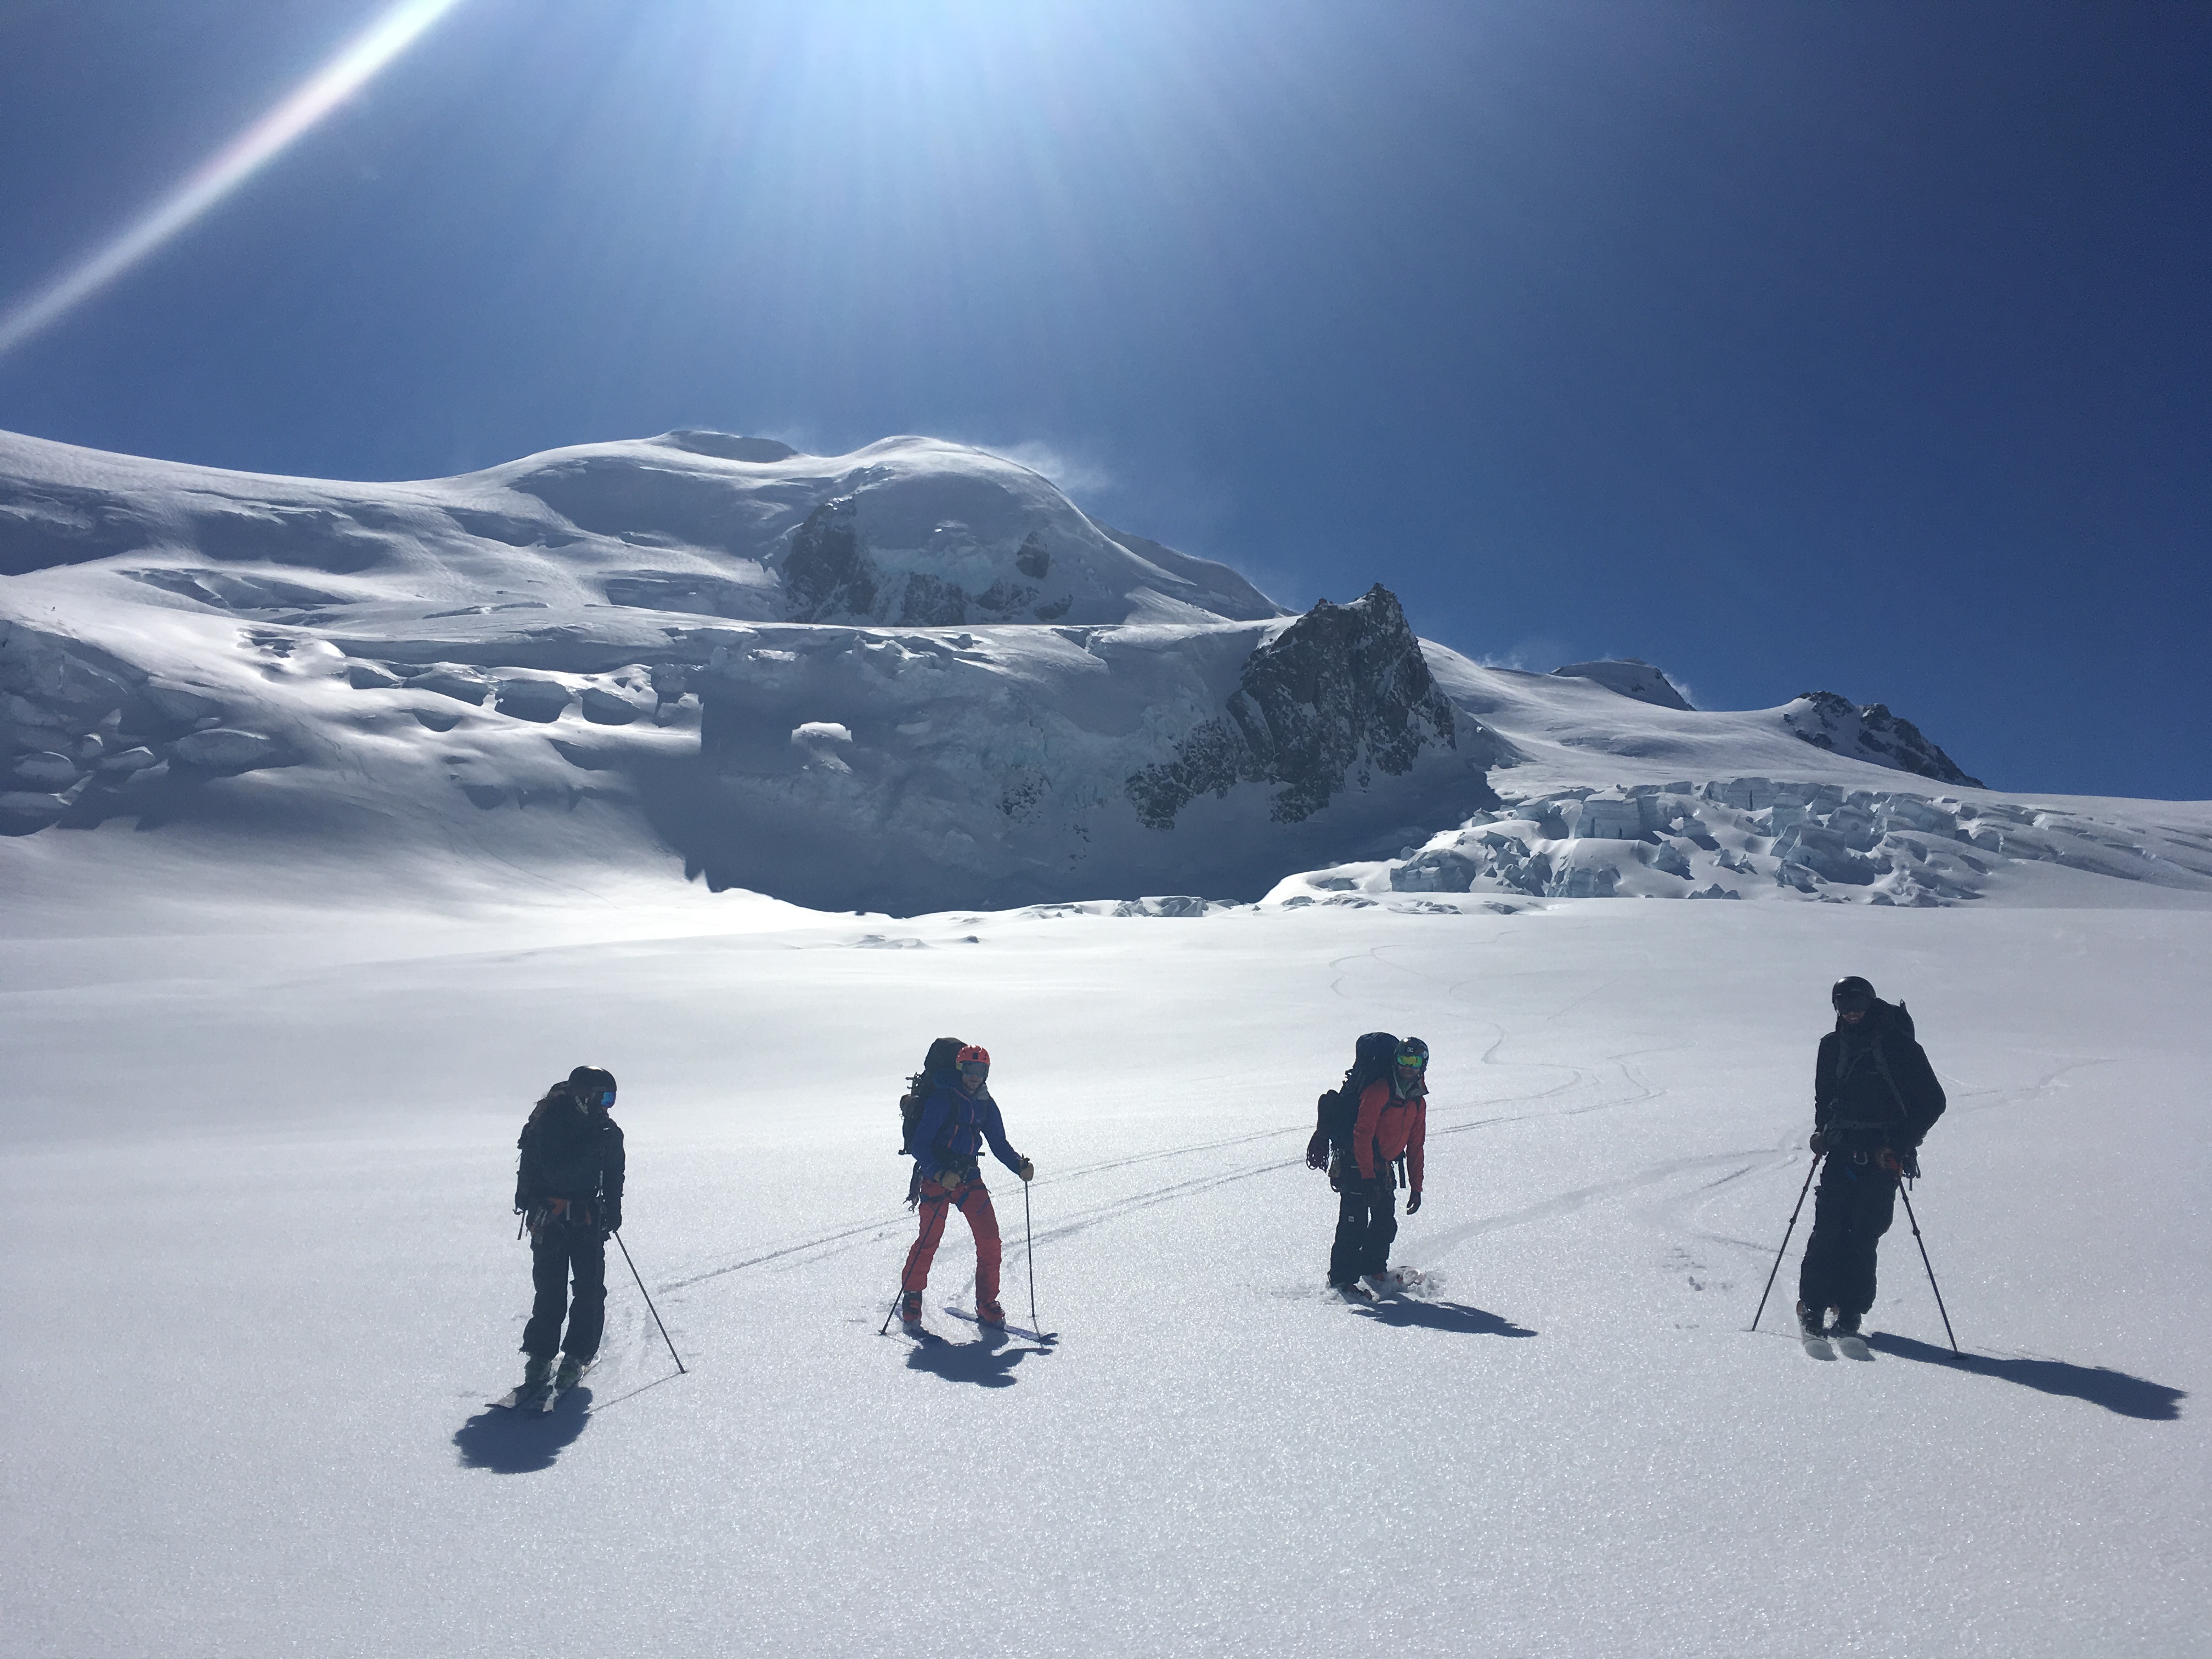
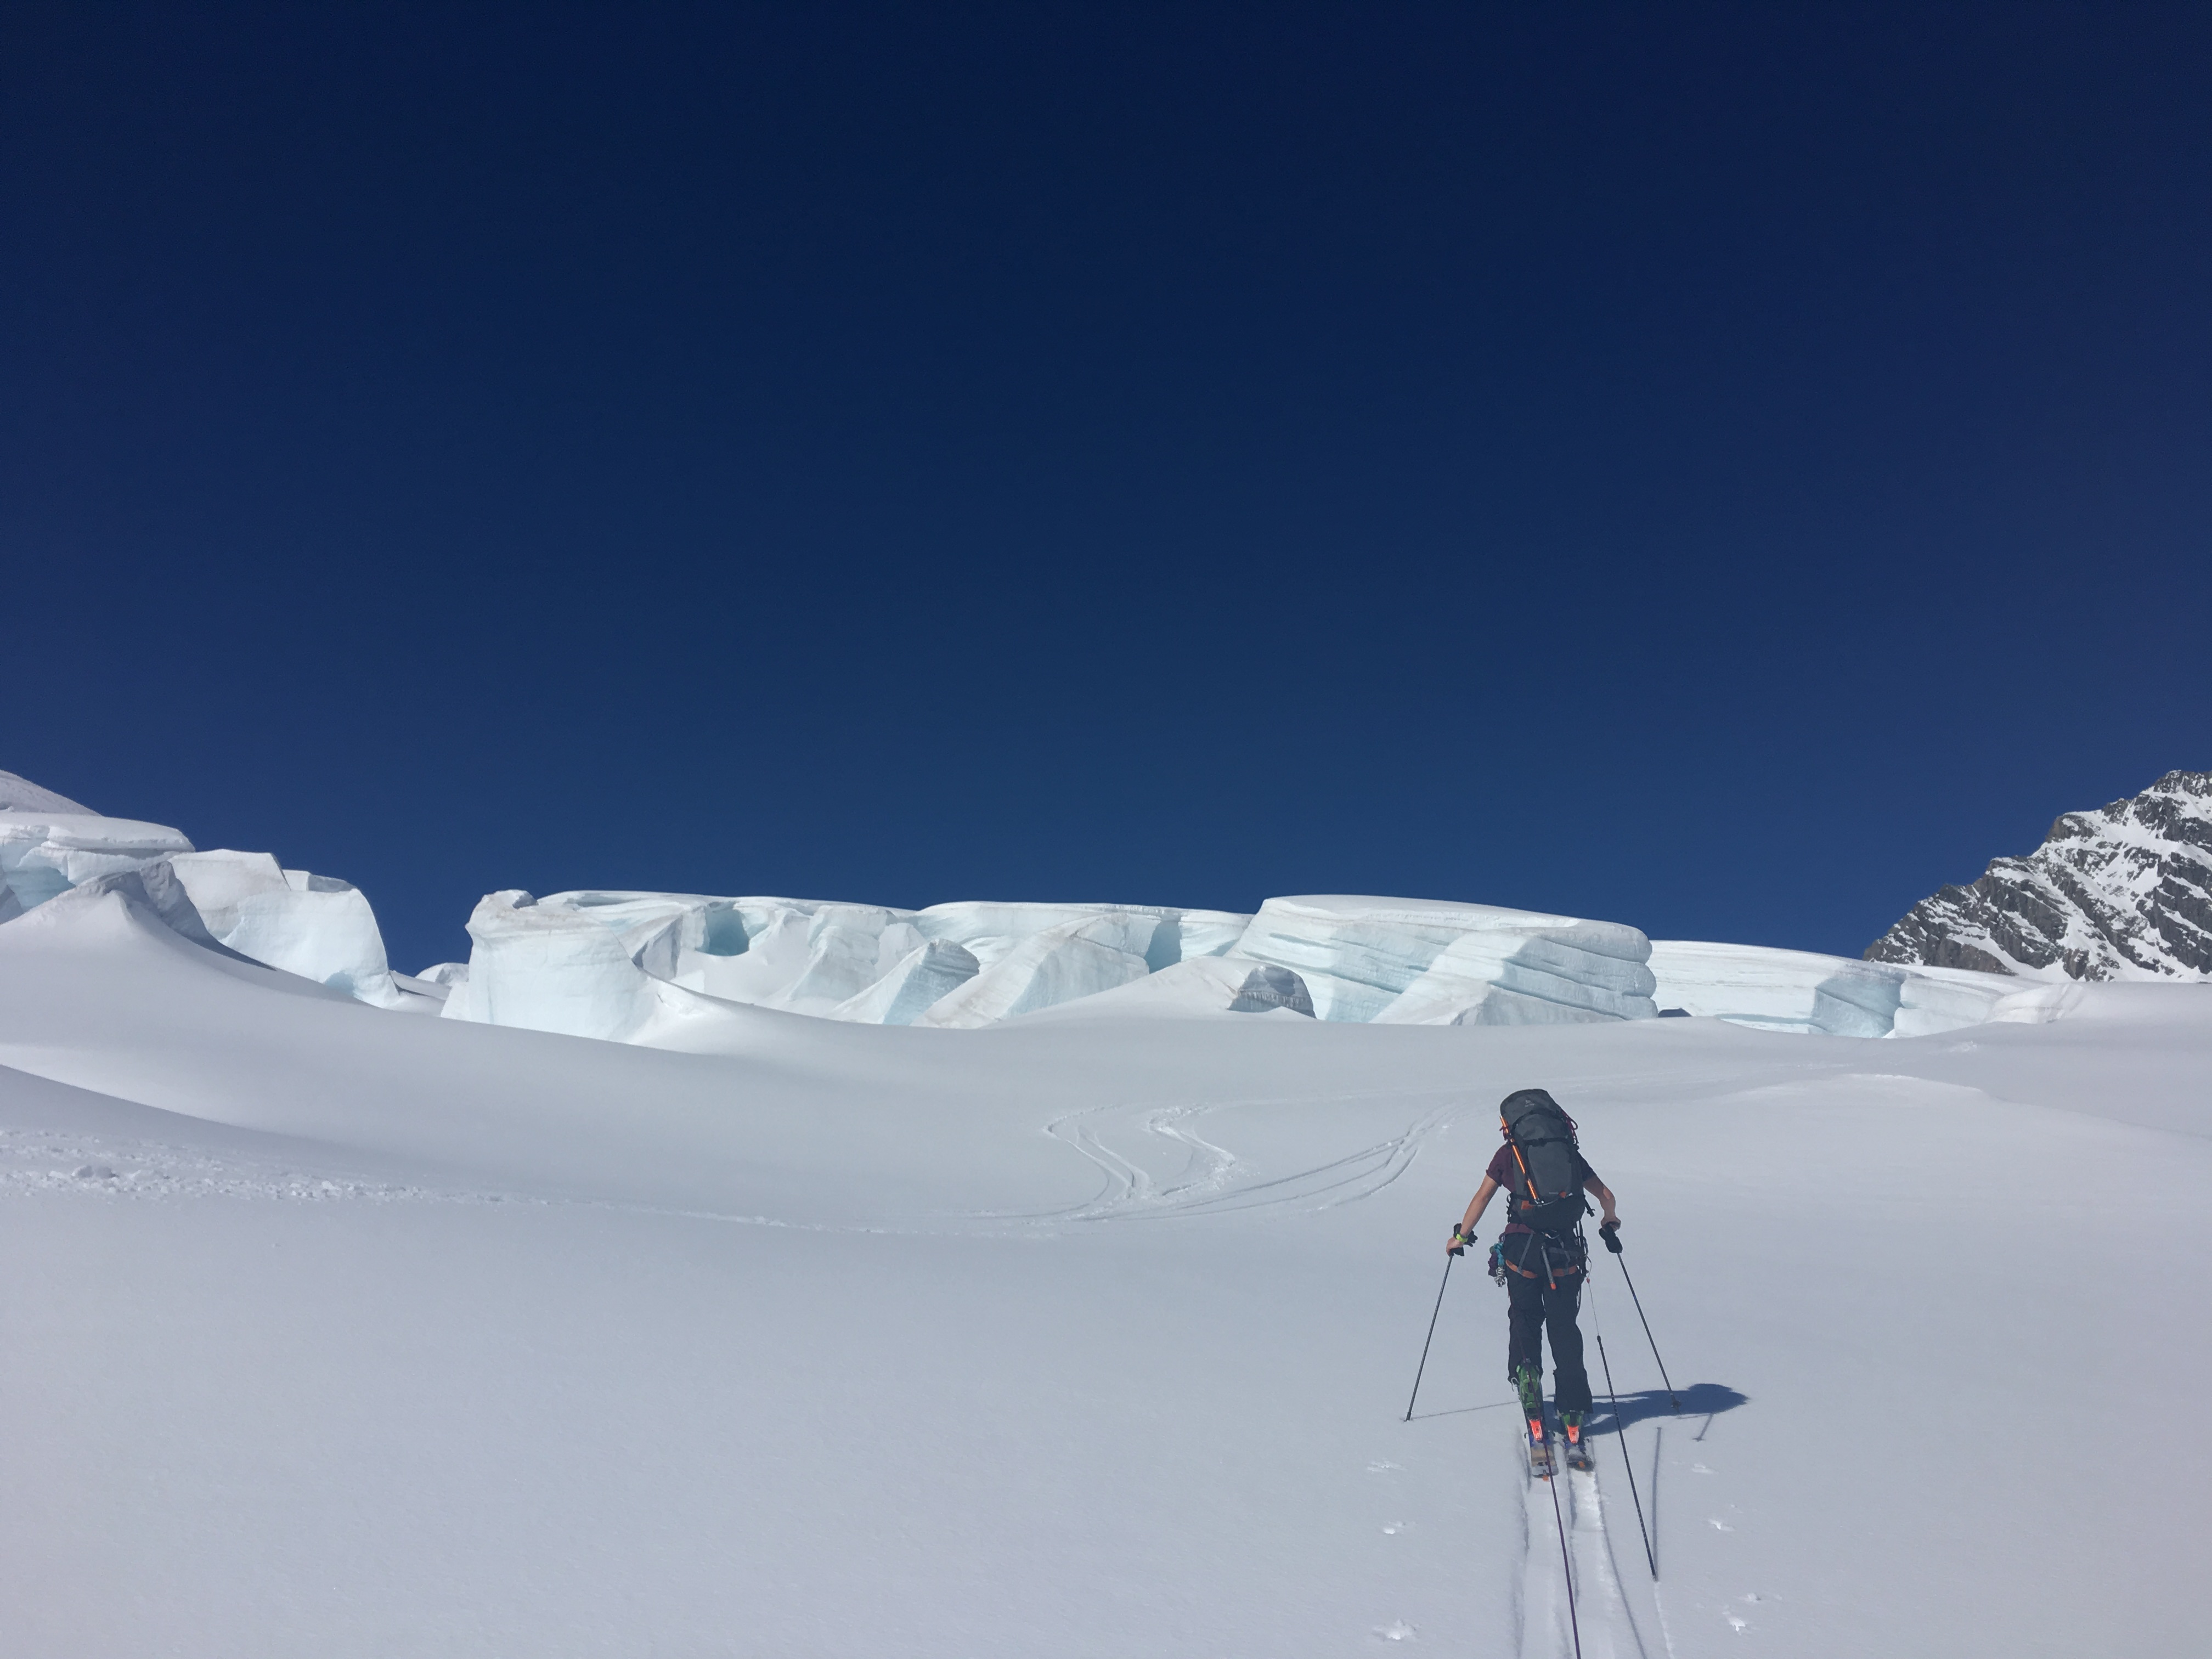
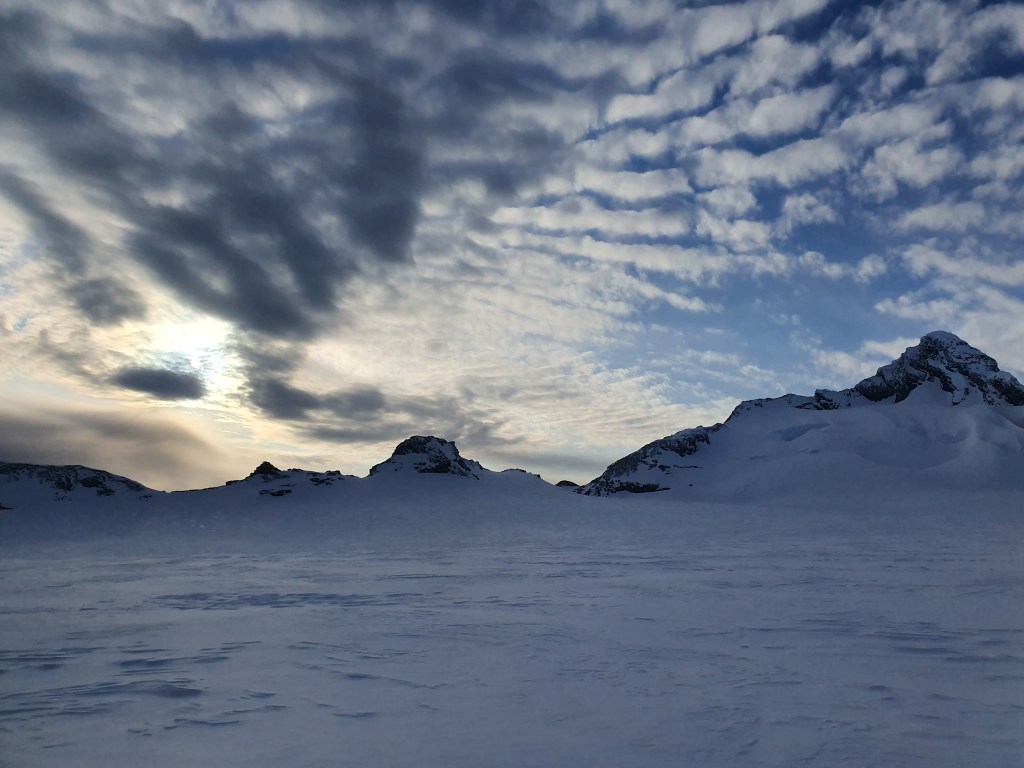
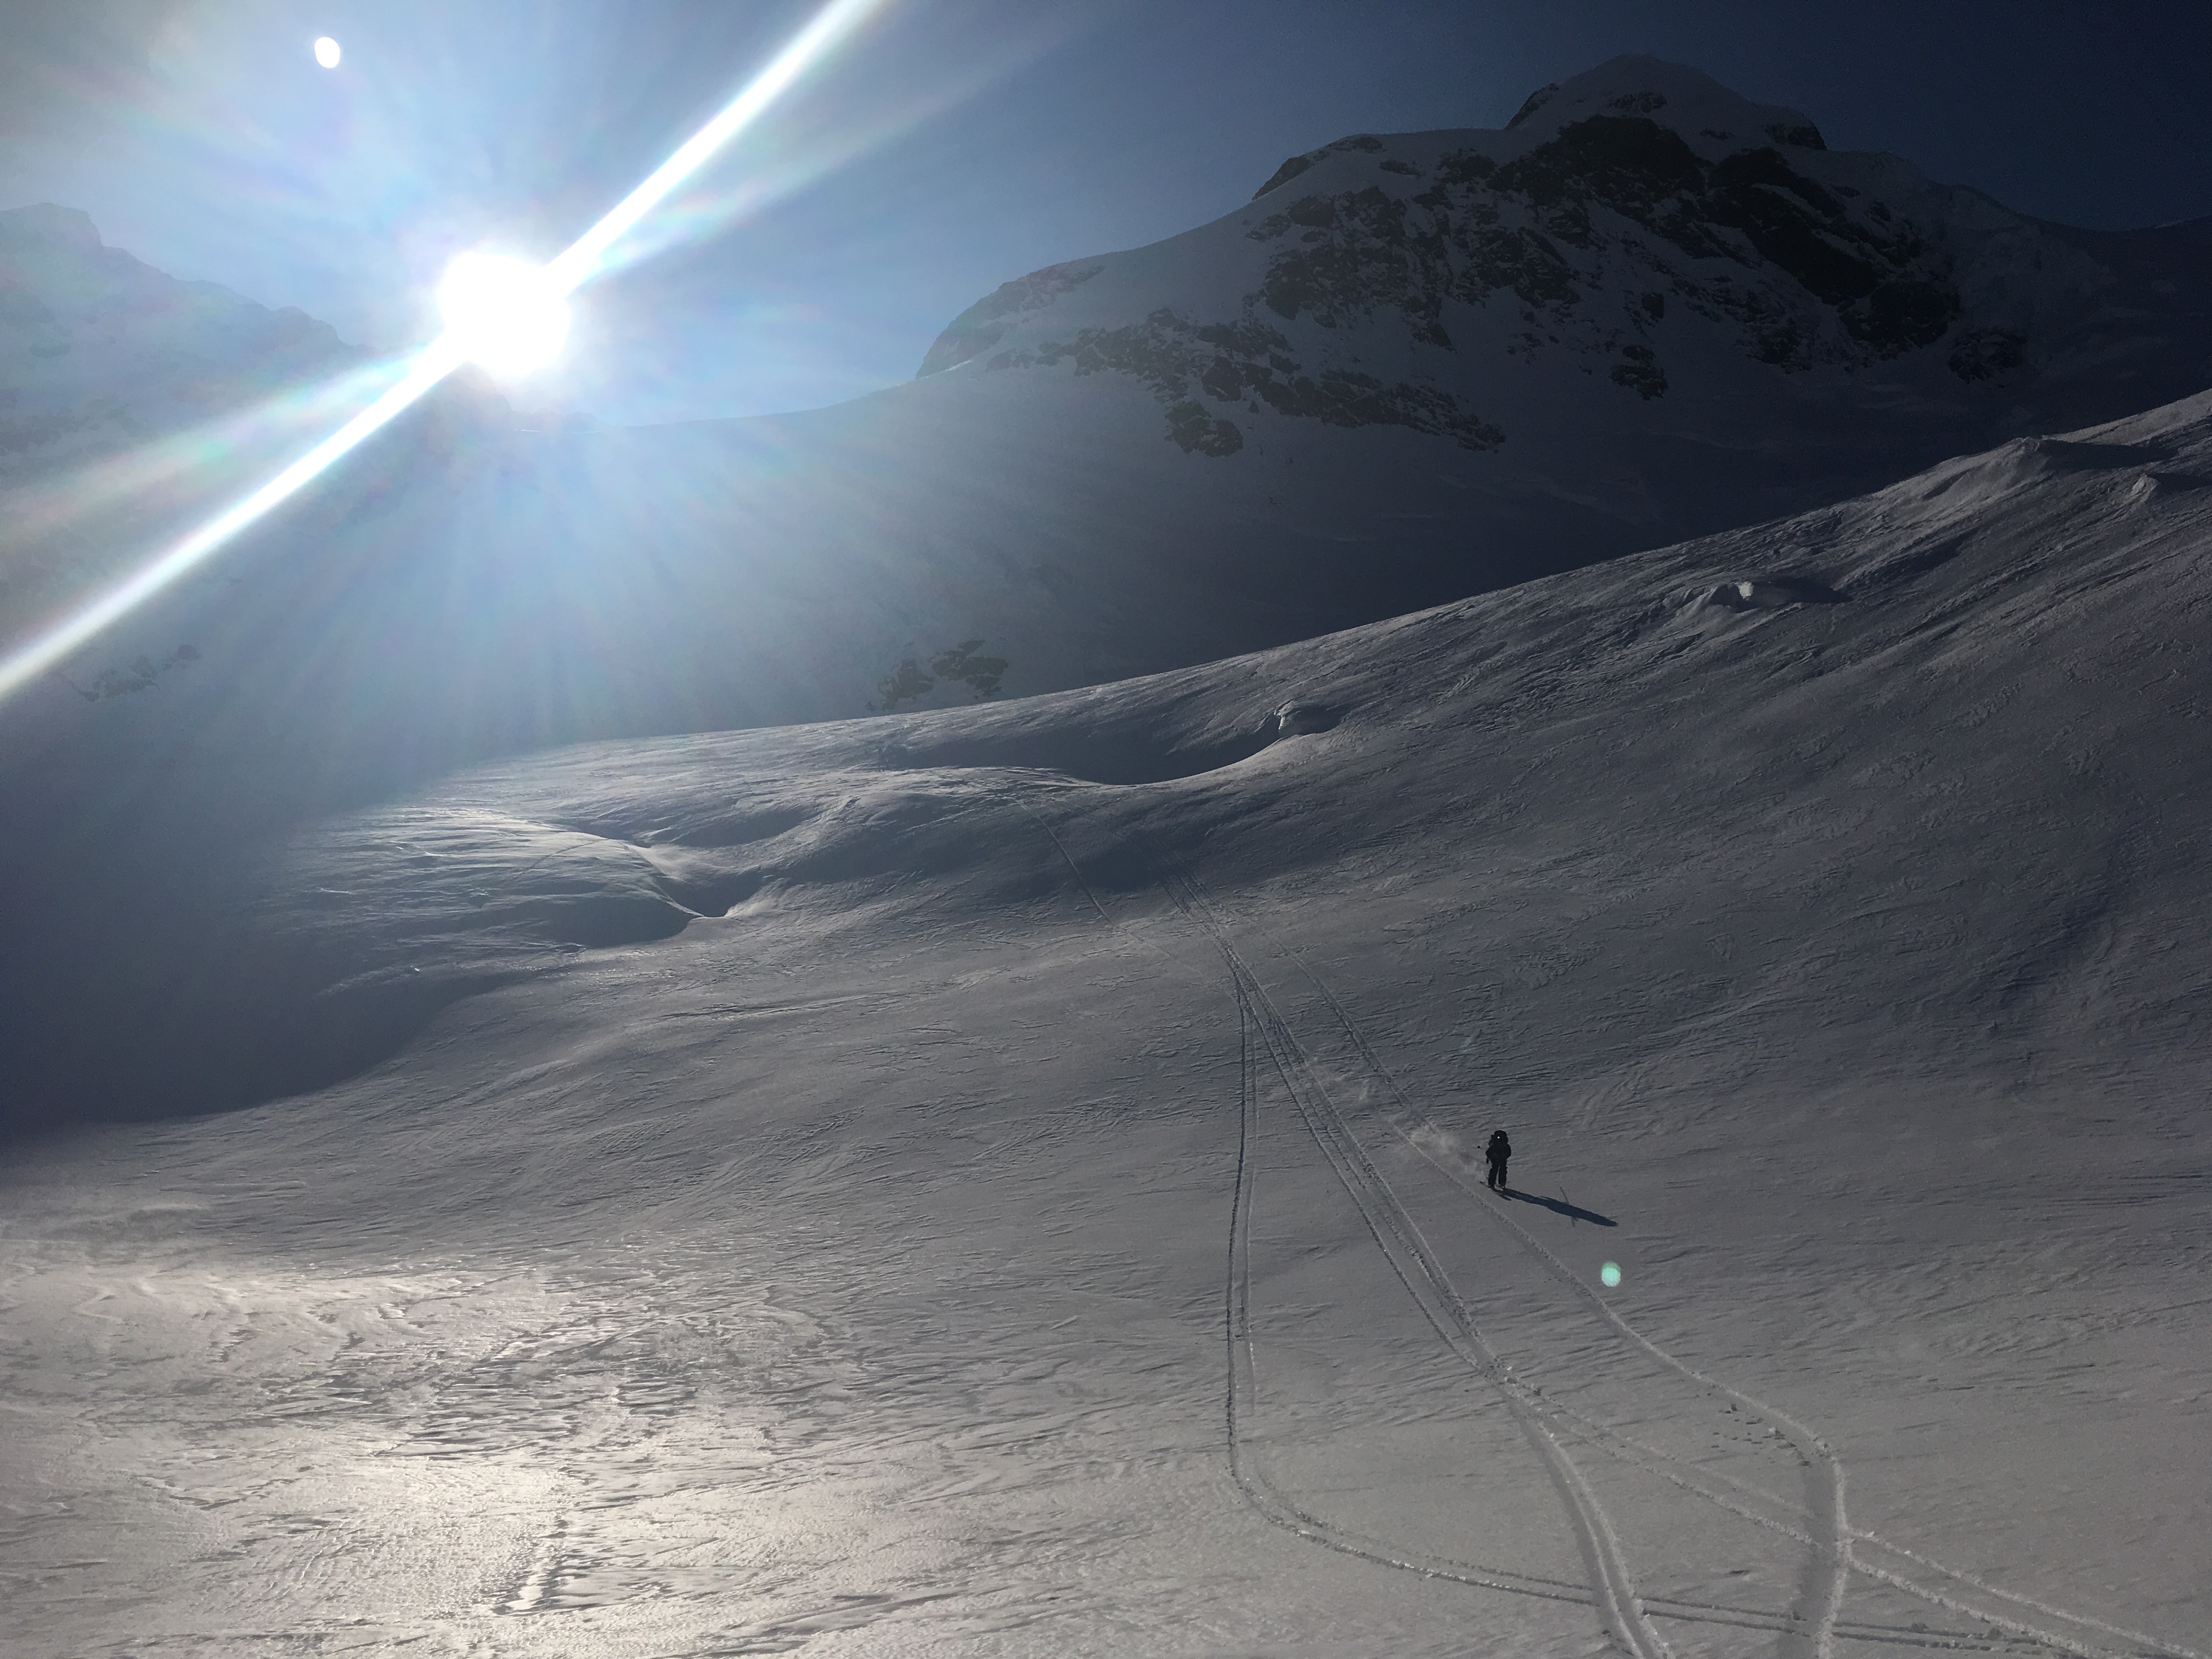
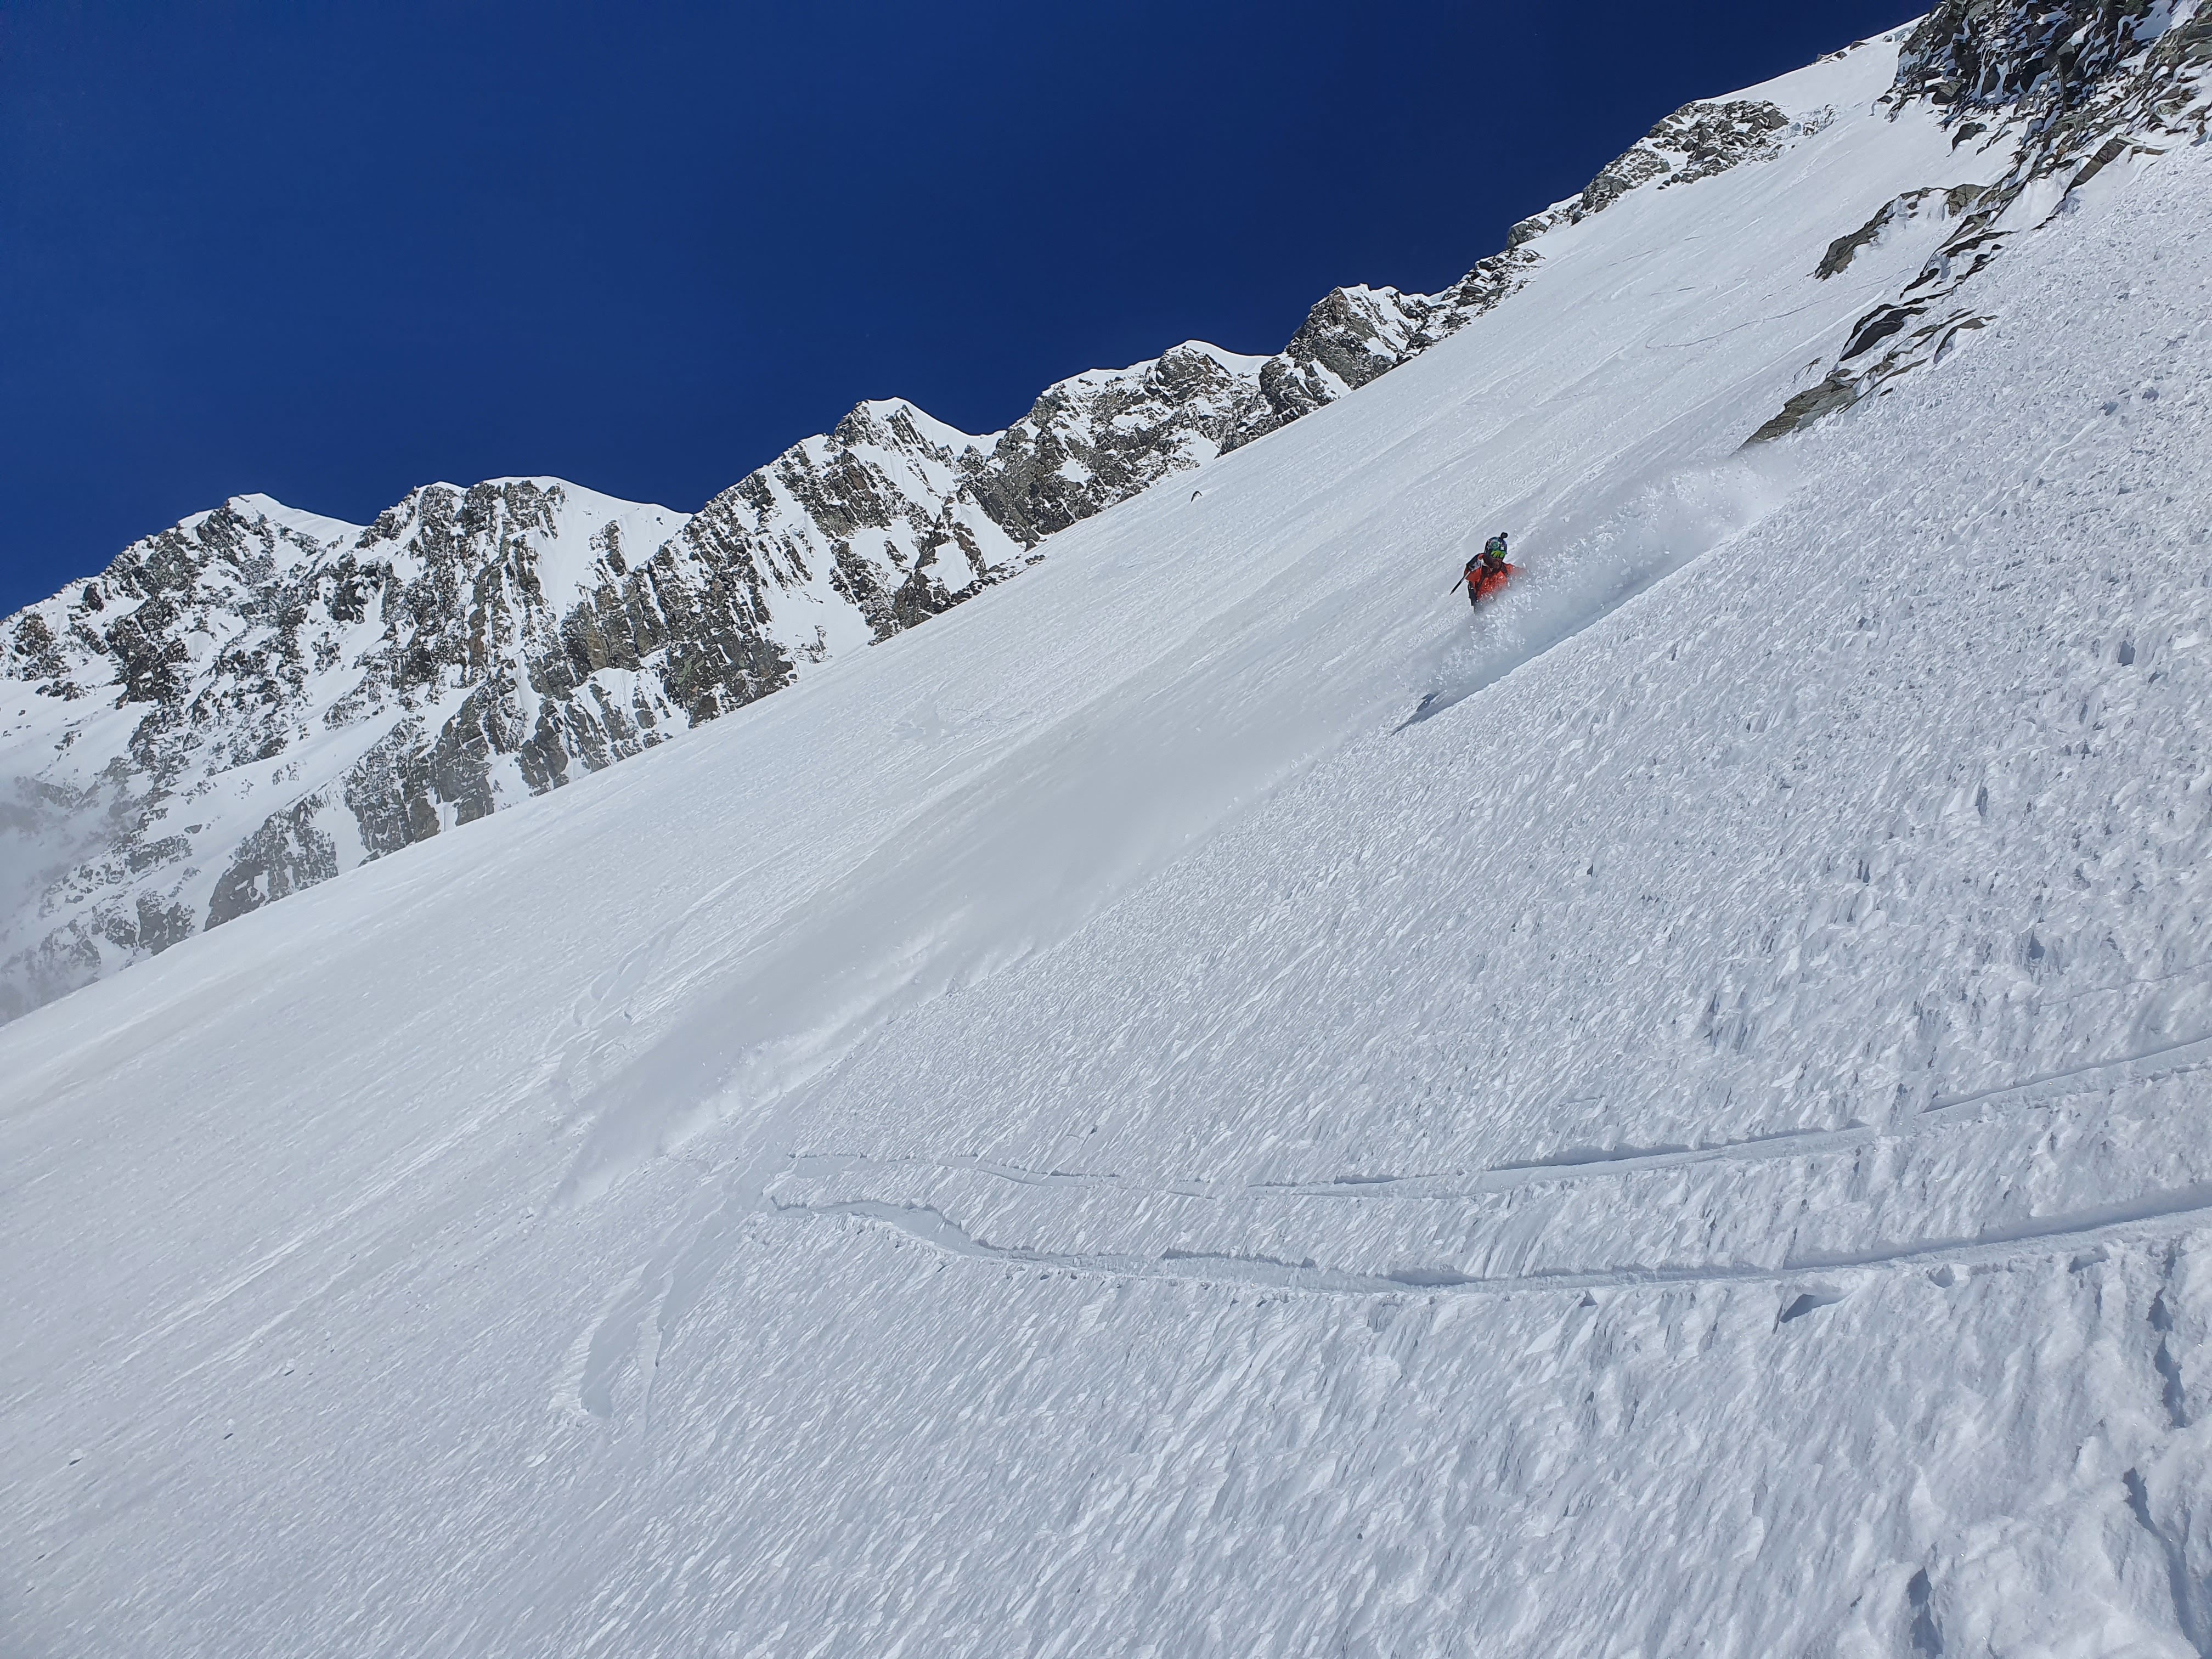
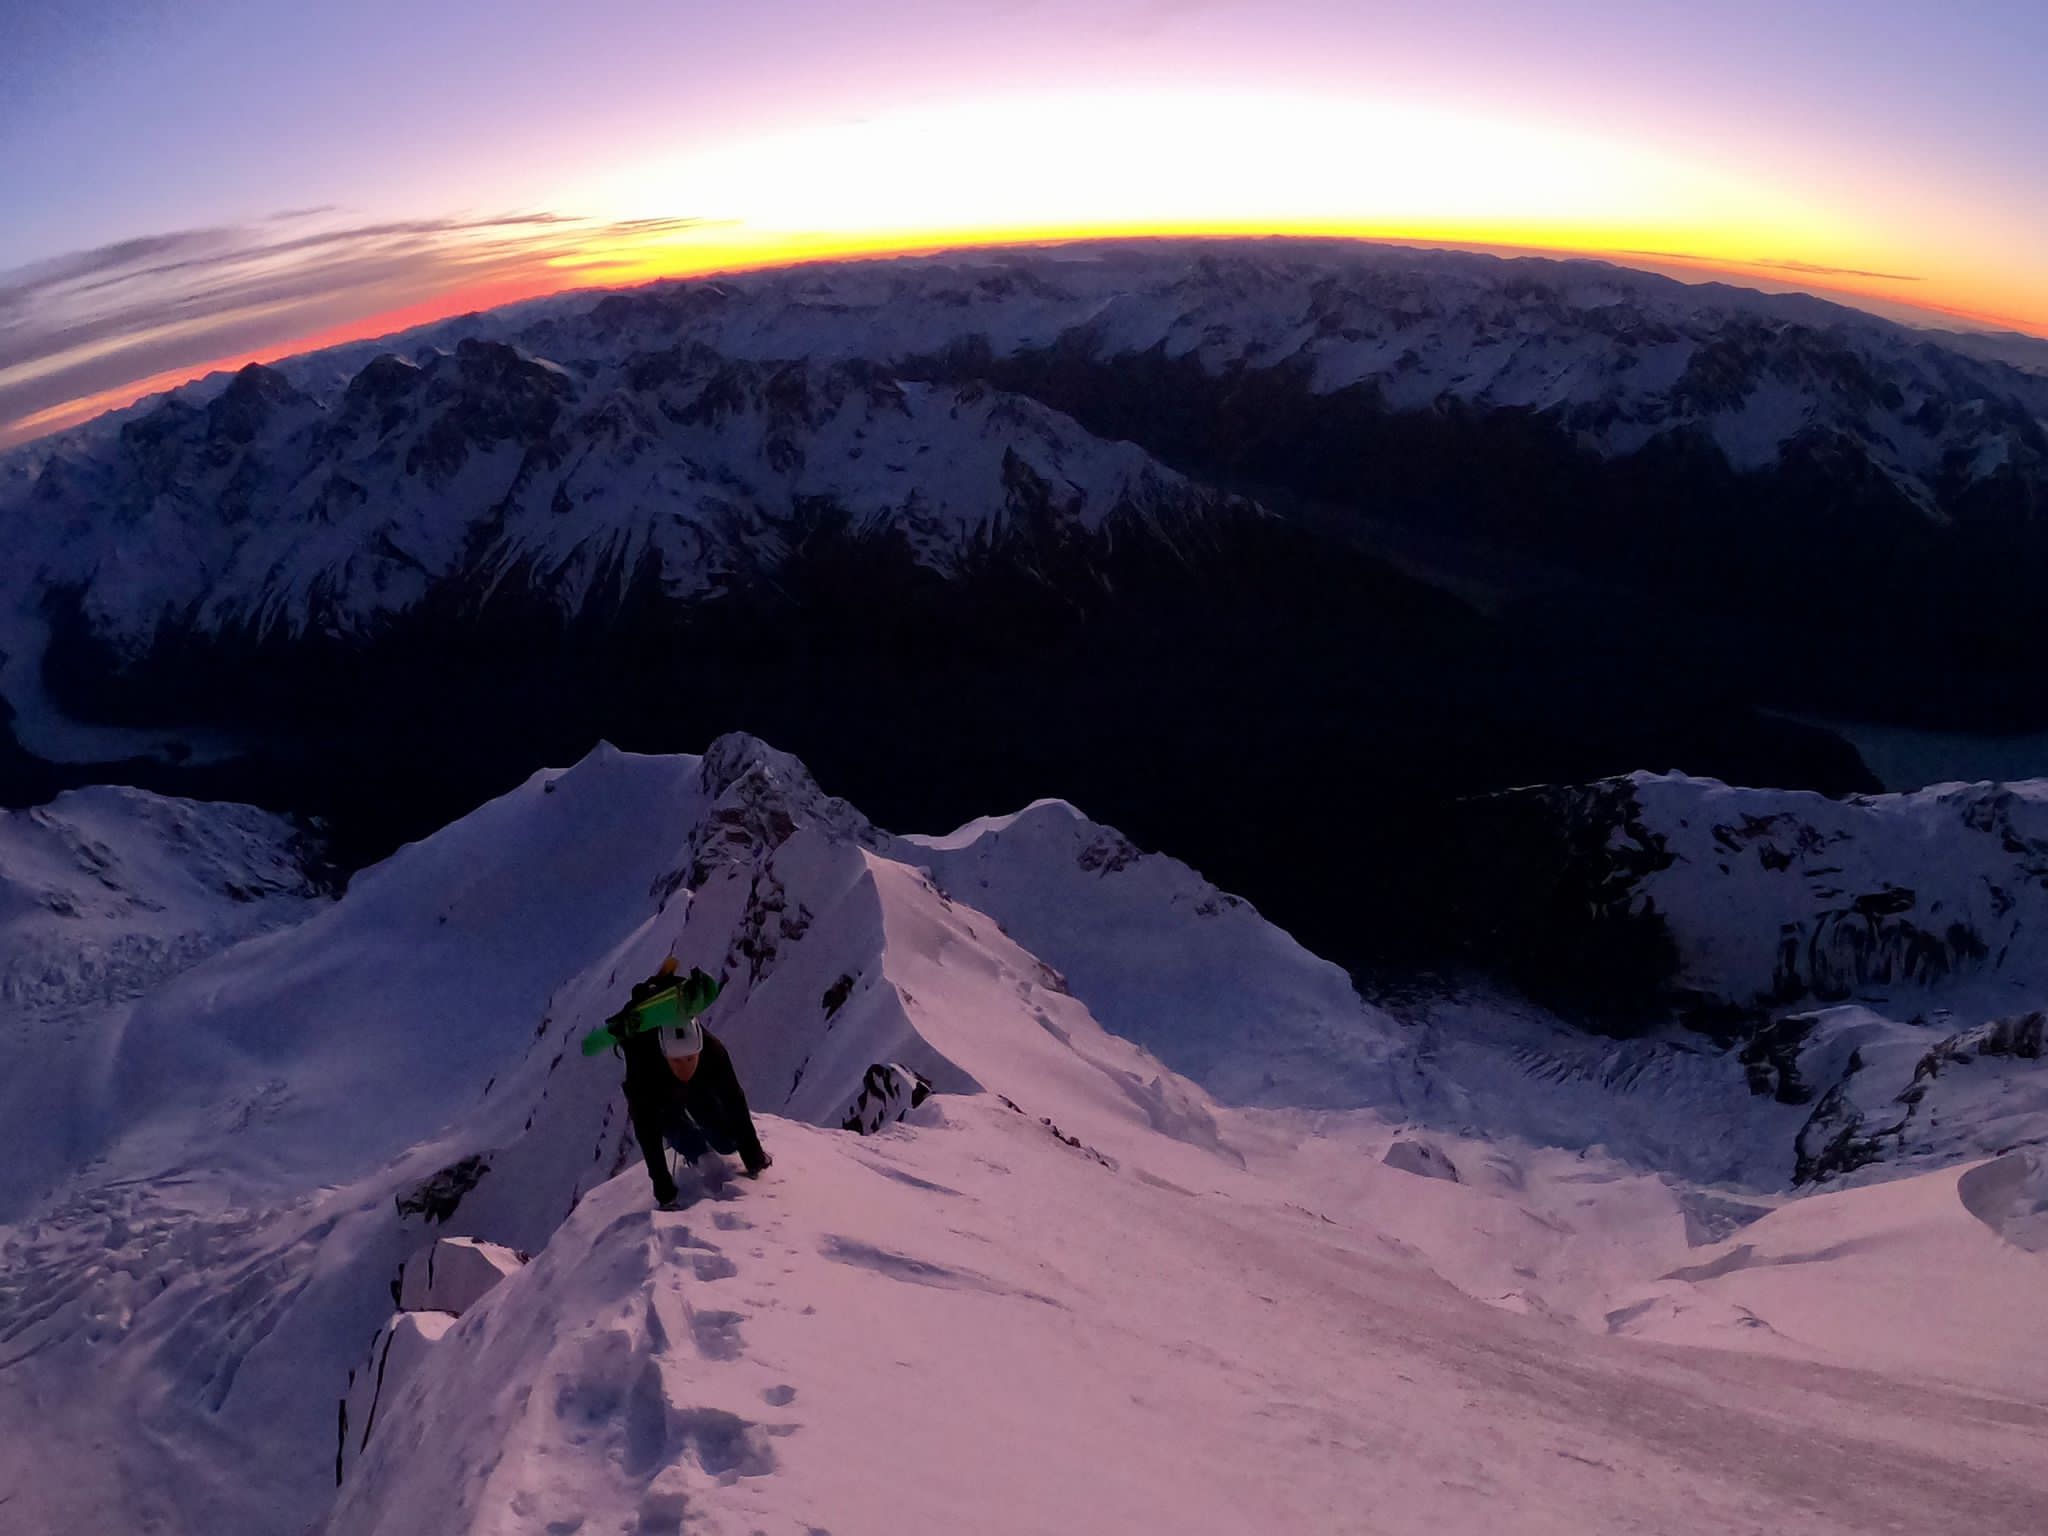
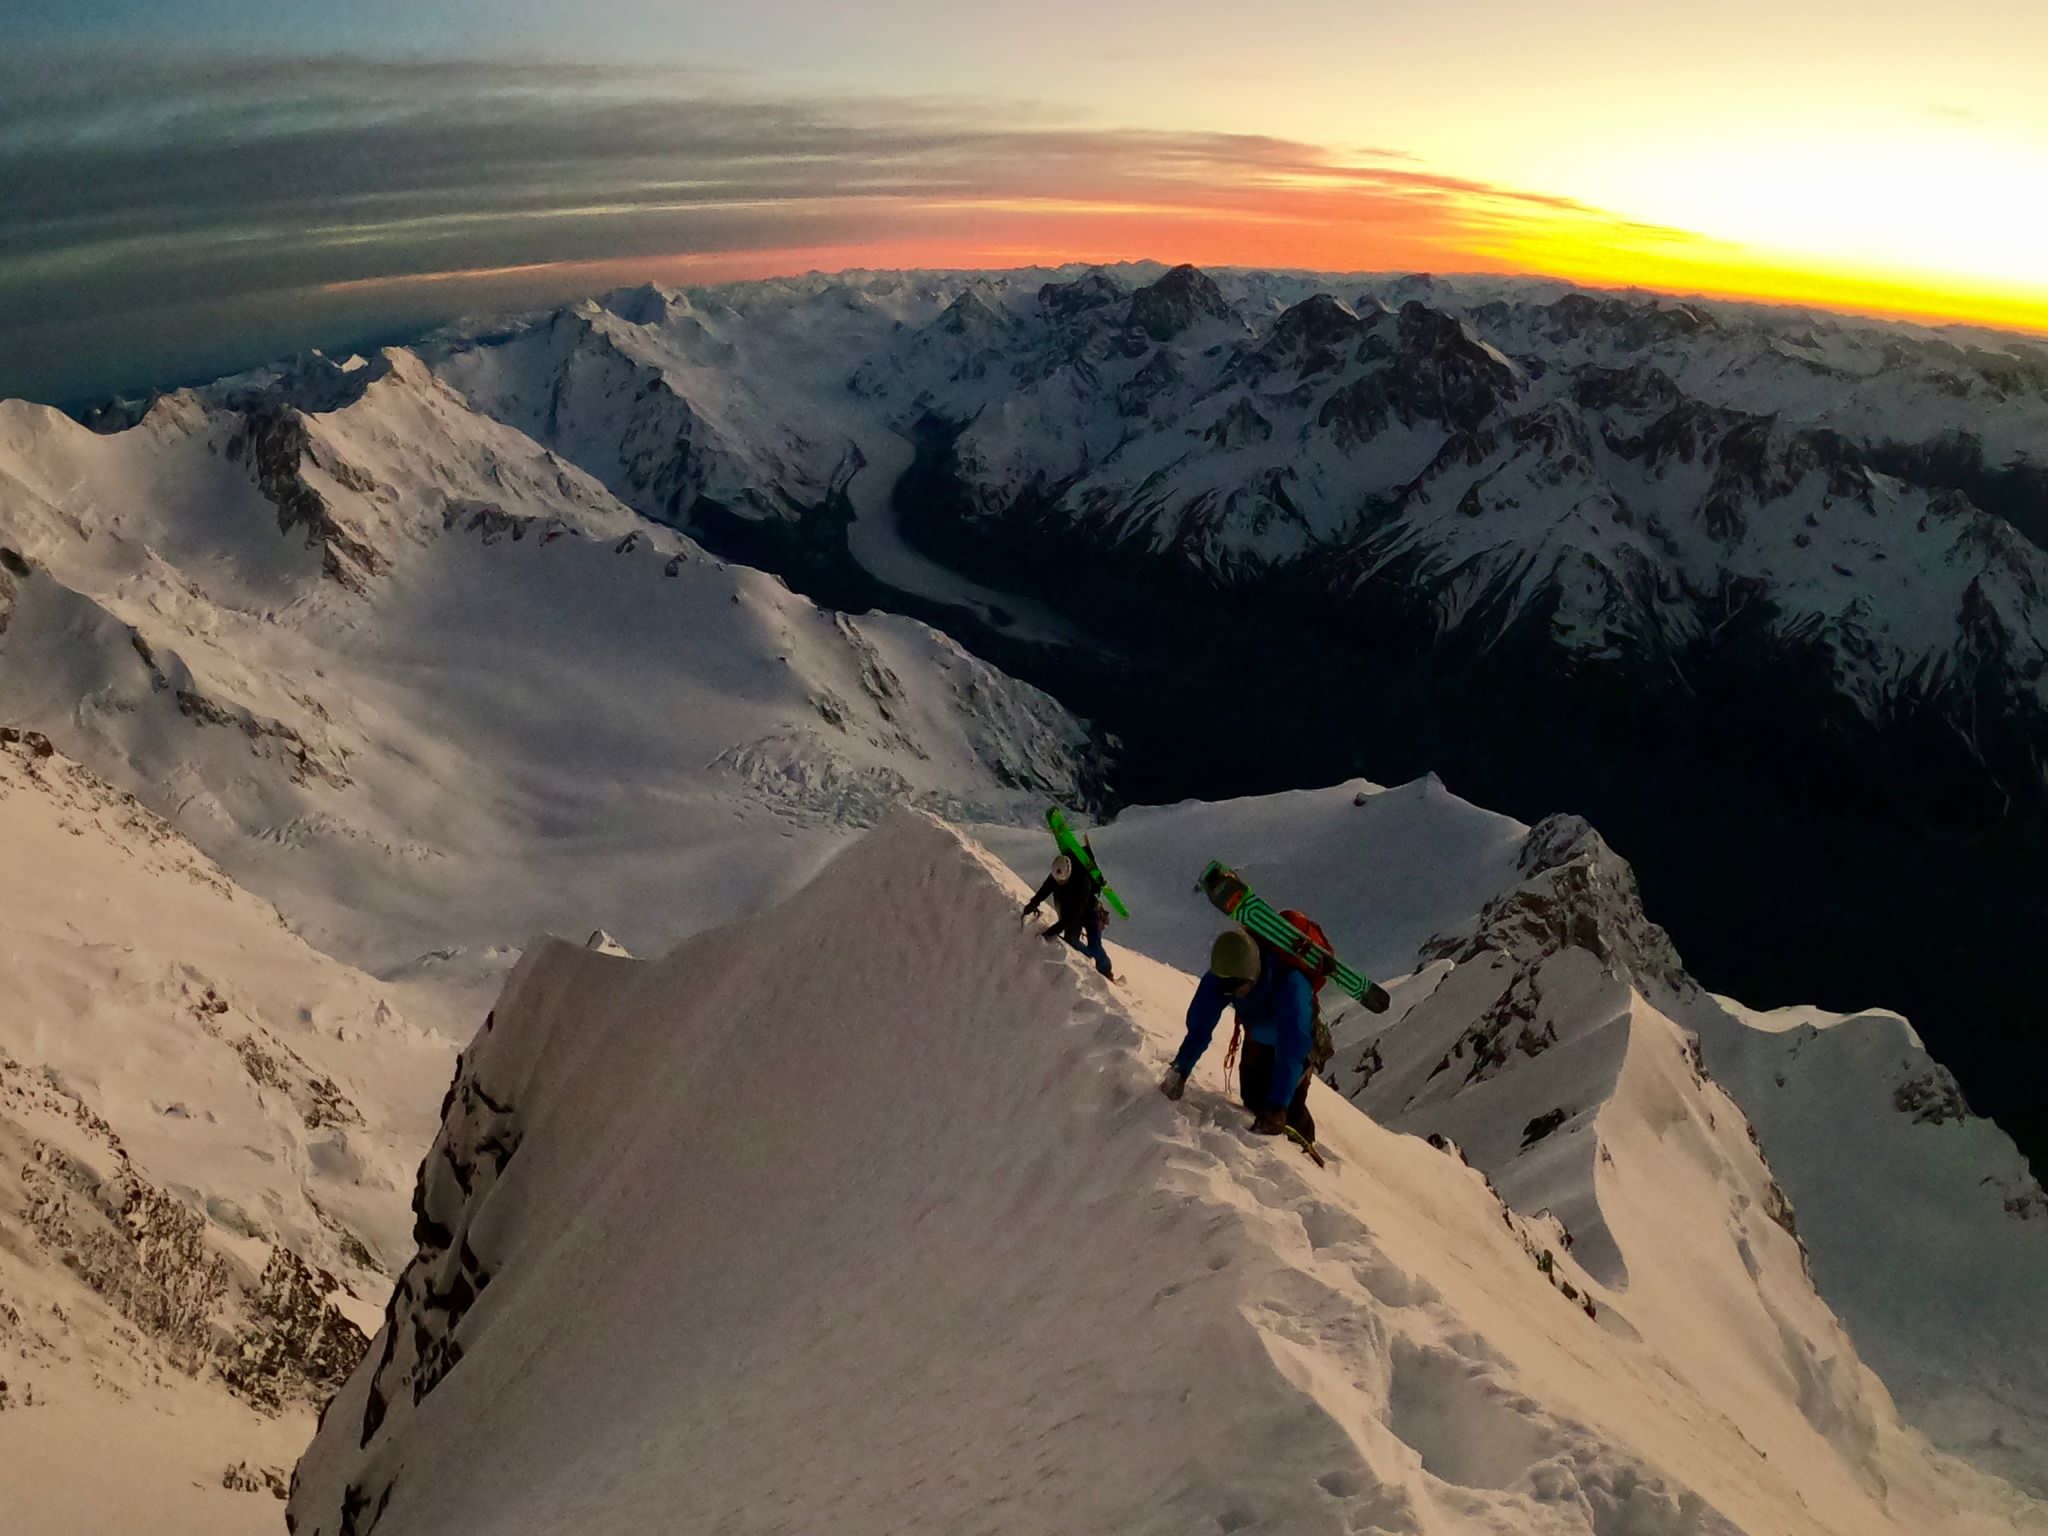
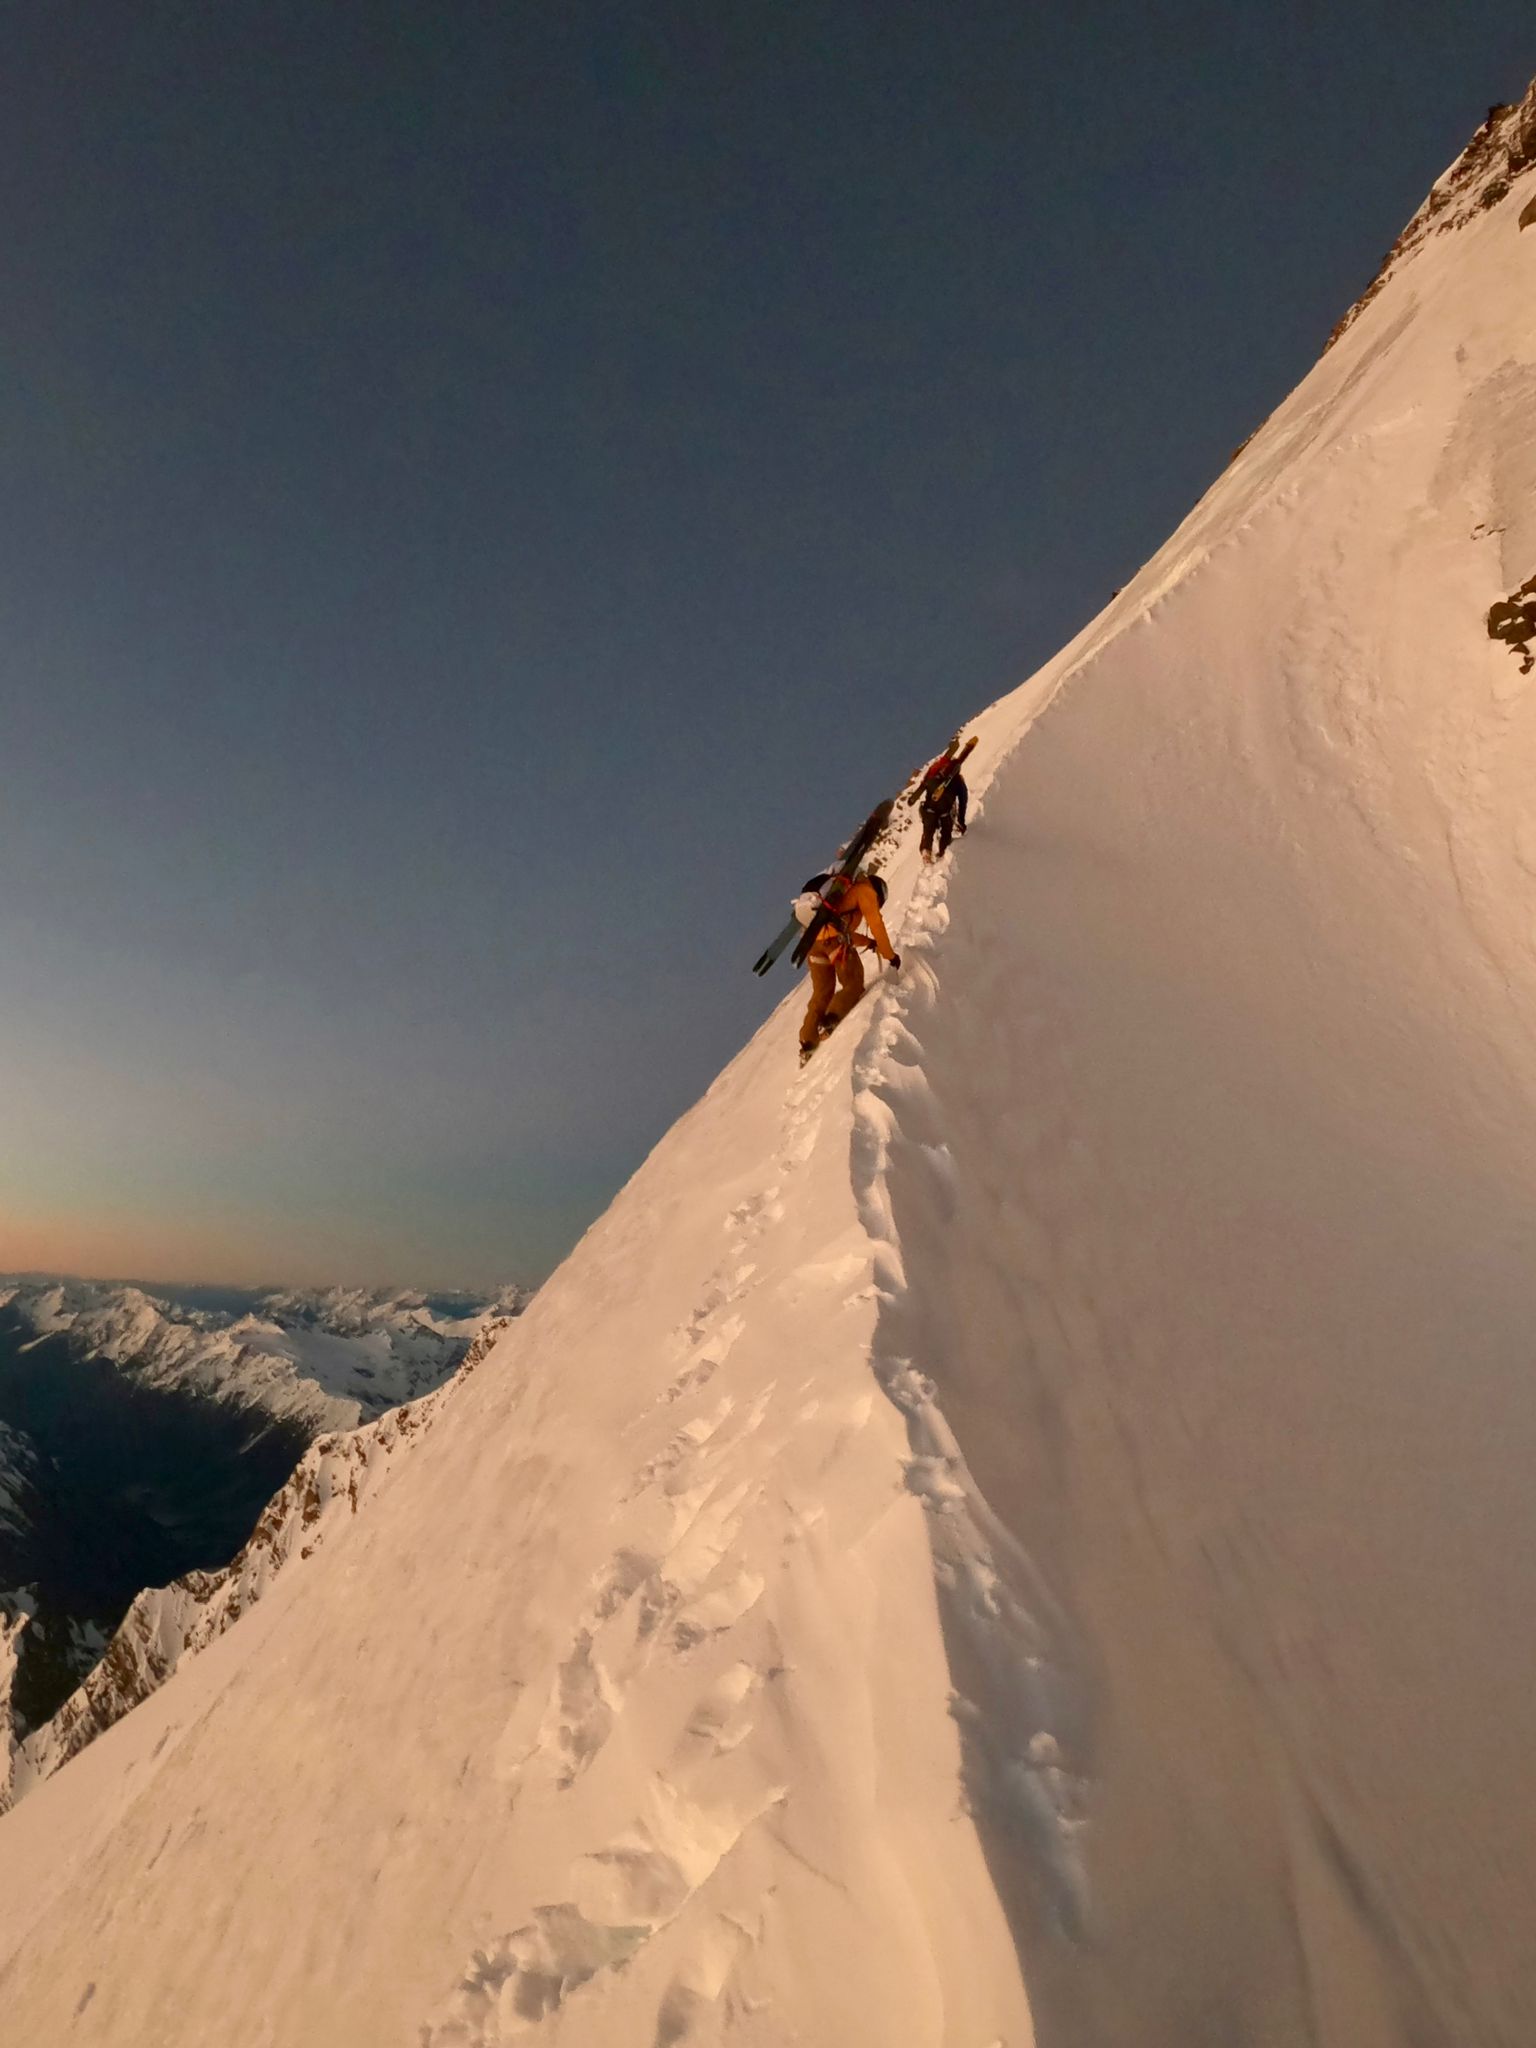
A cool line with a few possible variations. A worthwhile climb in its own right with a spectacular summit. From the summit there’s 400m or so of 40-45 degree skiing down to the plateau below divers col, followed by very cool and exposed skiing along the ridge heading south towards point 2258 before dropping back down to the Tasman glacier. I flew in for a week back in September 2018 with Pete Deytrick, Loz Luscombe, Fraser Cambell and Ari Hanna during a period of excellent weather and stability and tick off a few classic lines and drink a whole lot of goon.
Approach
Unloading under Kelman hut. Short skin from here to the hut
We based ourselves at Kelman hut – some people whinge about Kelman (aka the fridge on the ridge) but I think it’s got some advantages over Tasman Saddle. Firstly it has plumbed in gas and cookers so you don’t need to bring as much gear and melting as much snow as you need is no issue. Secondly it has seperate rooms from the sleeping area – in Tasman saddle your bed is right next to the cooking bench and so any climbers getting alpine starts will be firing up their jetboil half a metre from your head at 2am.
But it is colder up at Kelman and getting progressively leakier….
The we took up in red, descent line in blue. Other option is to climb the ski line but your exposed to some seracs you can see on the right
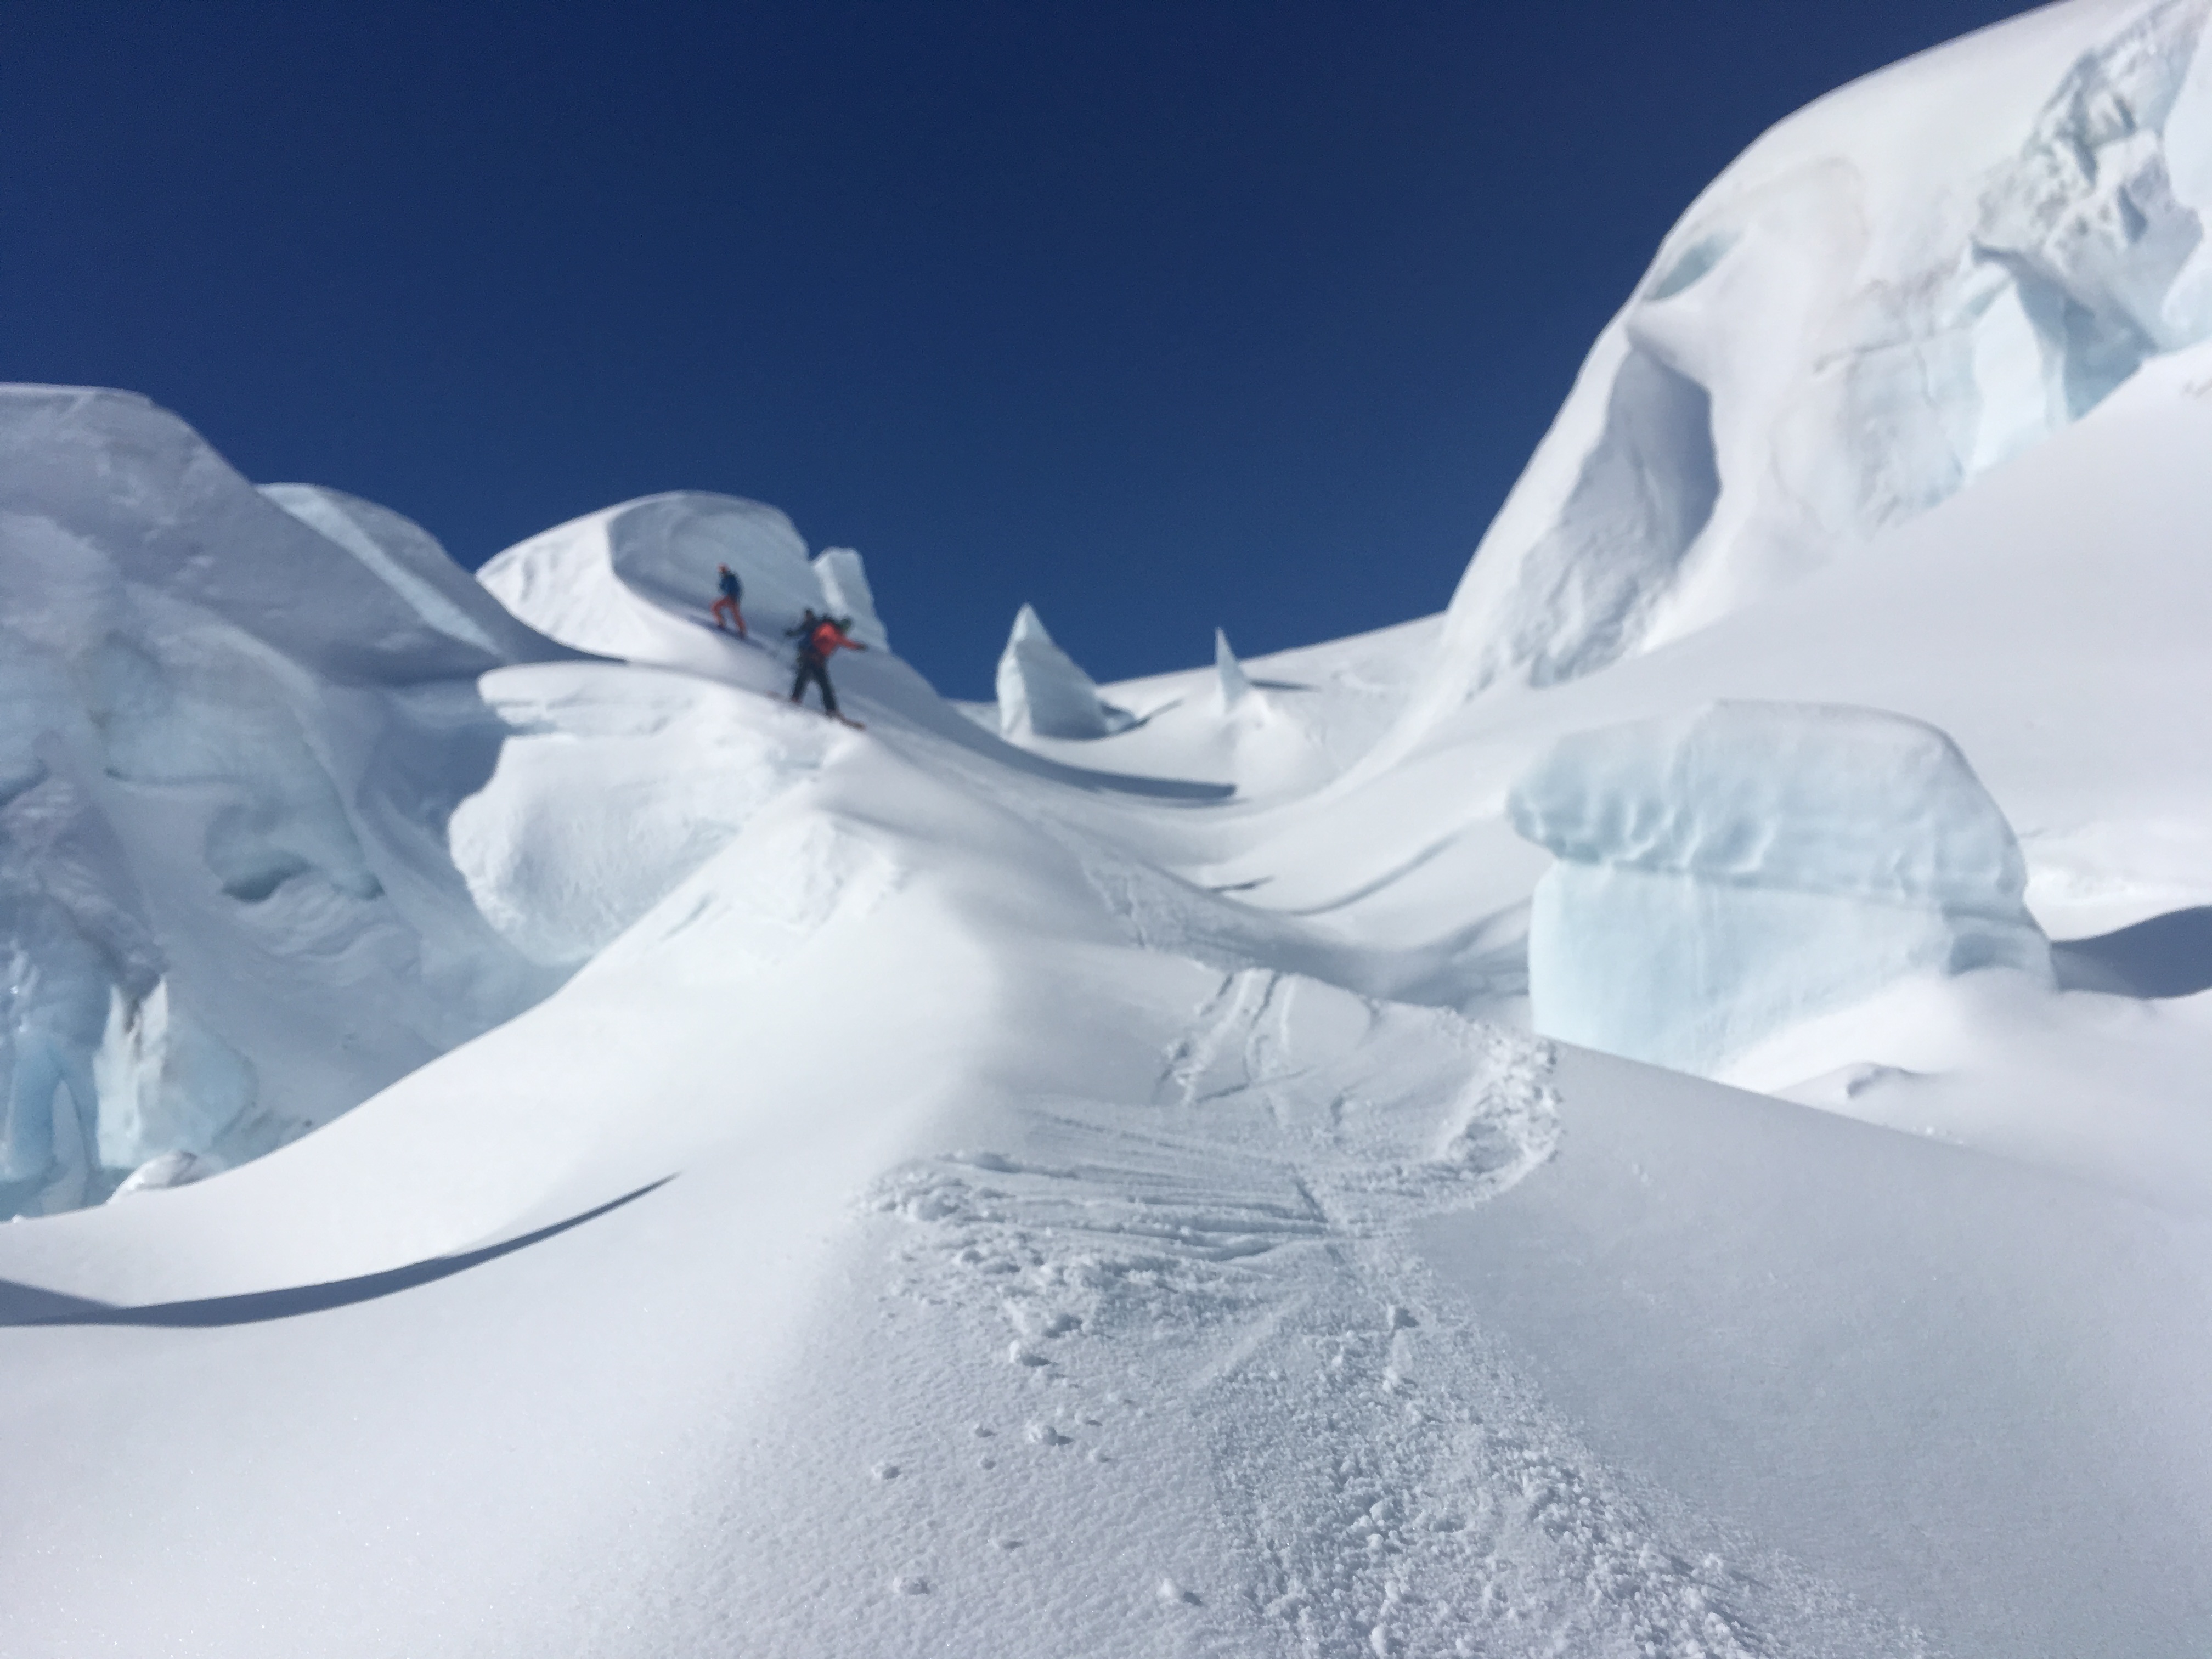
It’s a no brainer to fly in – for Tas saddle you get dropped right by the hut so can be lax with your packing / bring cardboard boxes, but for Kelman you need to skin up a steep slope for 30 min so need to pack properly.
Climb
From Kelman or Tas Saddle blast down the Tasman towards point 2258. Your two options are:
Final section up to the flat plateau under Mt Green
1) Cut south around the bottom of point 2258 and into the bowl under climbers col / Mt Green South face. From here skin up the glacier to the West of the ridge, delivering you onto the Divers Col plateau. This gets steep towards the top and you might have to bootpack the top section. This way is slightly longer and gets cut off later in the season.
2) Stay high on the Tasman and go above point 2258, skinning across up onto the ridge joining 2258 to the plateau. You then climb up ridge to the plateau, which is a low angle exposed snow arete. You may have to climb down onto the East face to bypass some of the rock bands.
This way is faster but more exposed to serac fall.
We chose option 1 as we could see the route went from the plane, and the ice cliffs over option 2 were particualy active. Either way the area at the base of 2258 has some massive crevasses so take care.
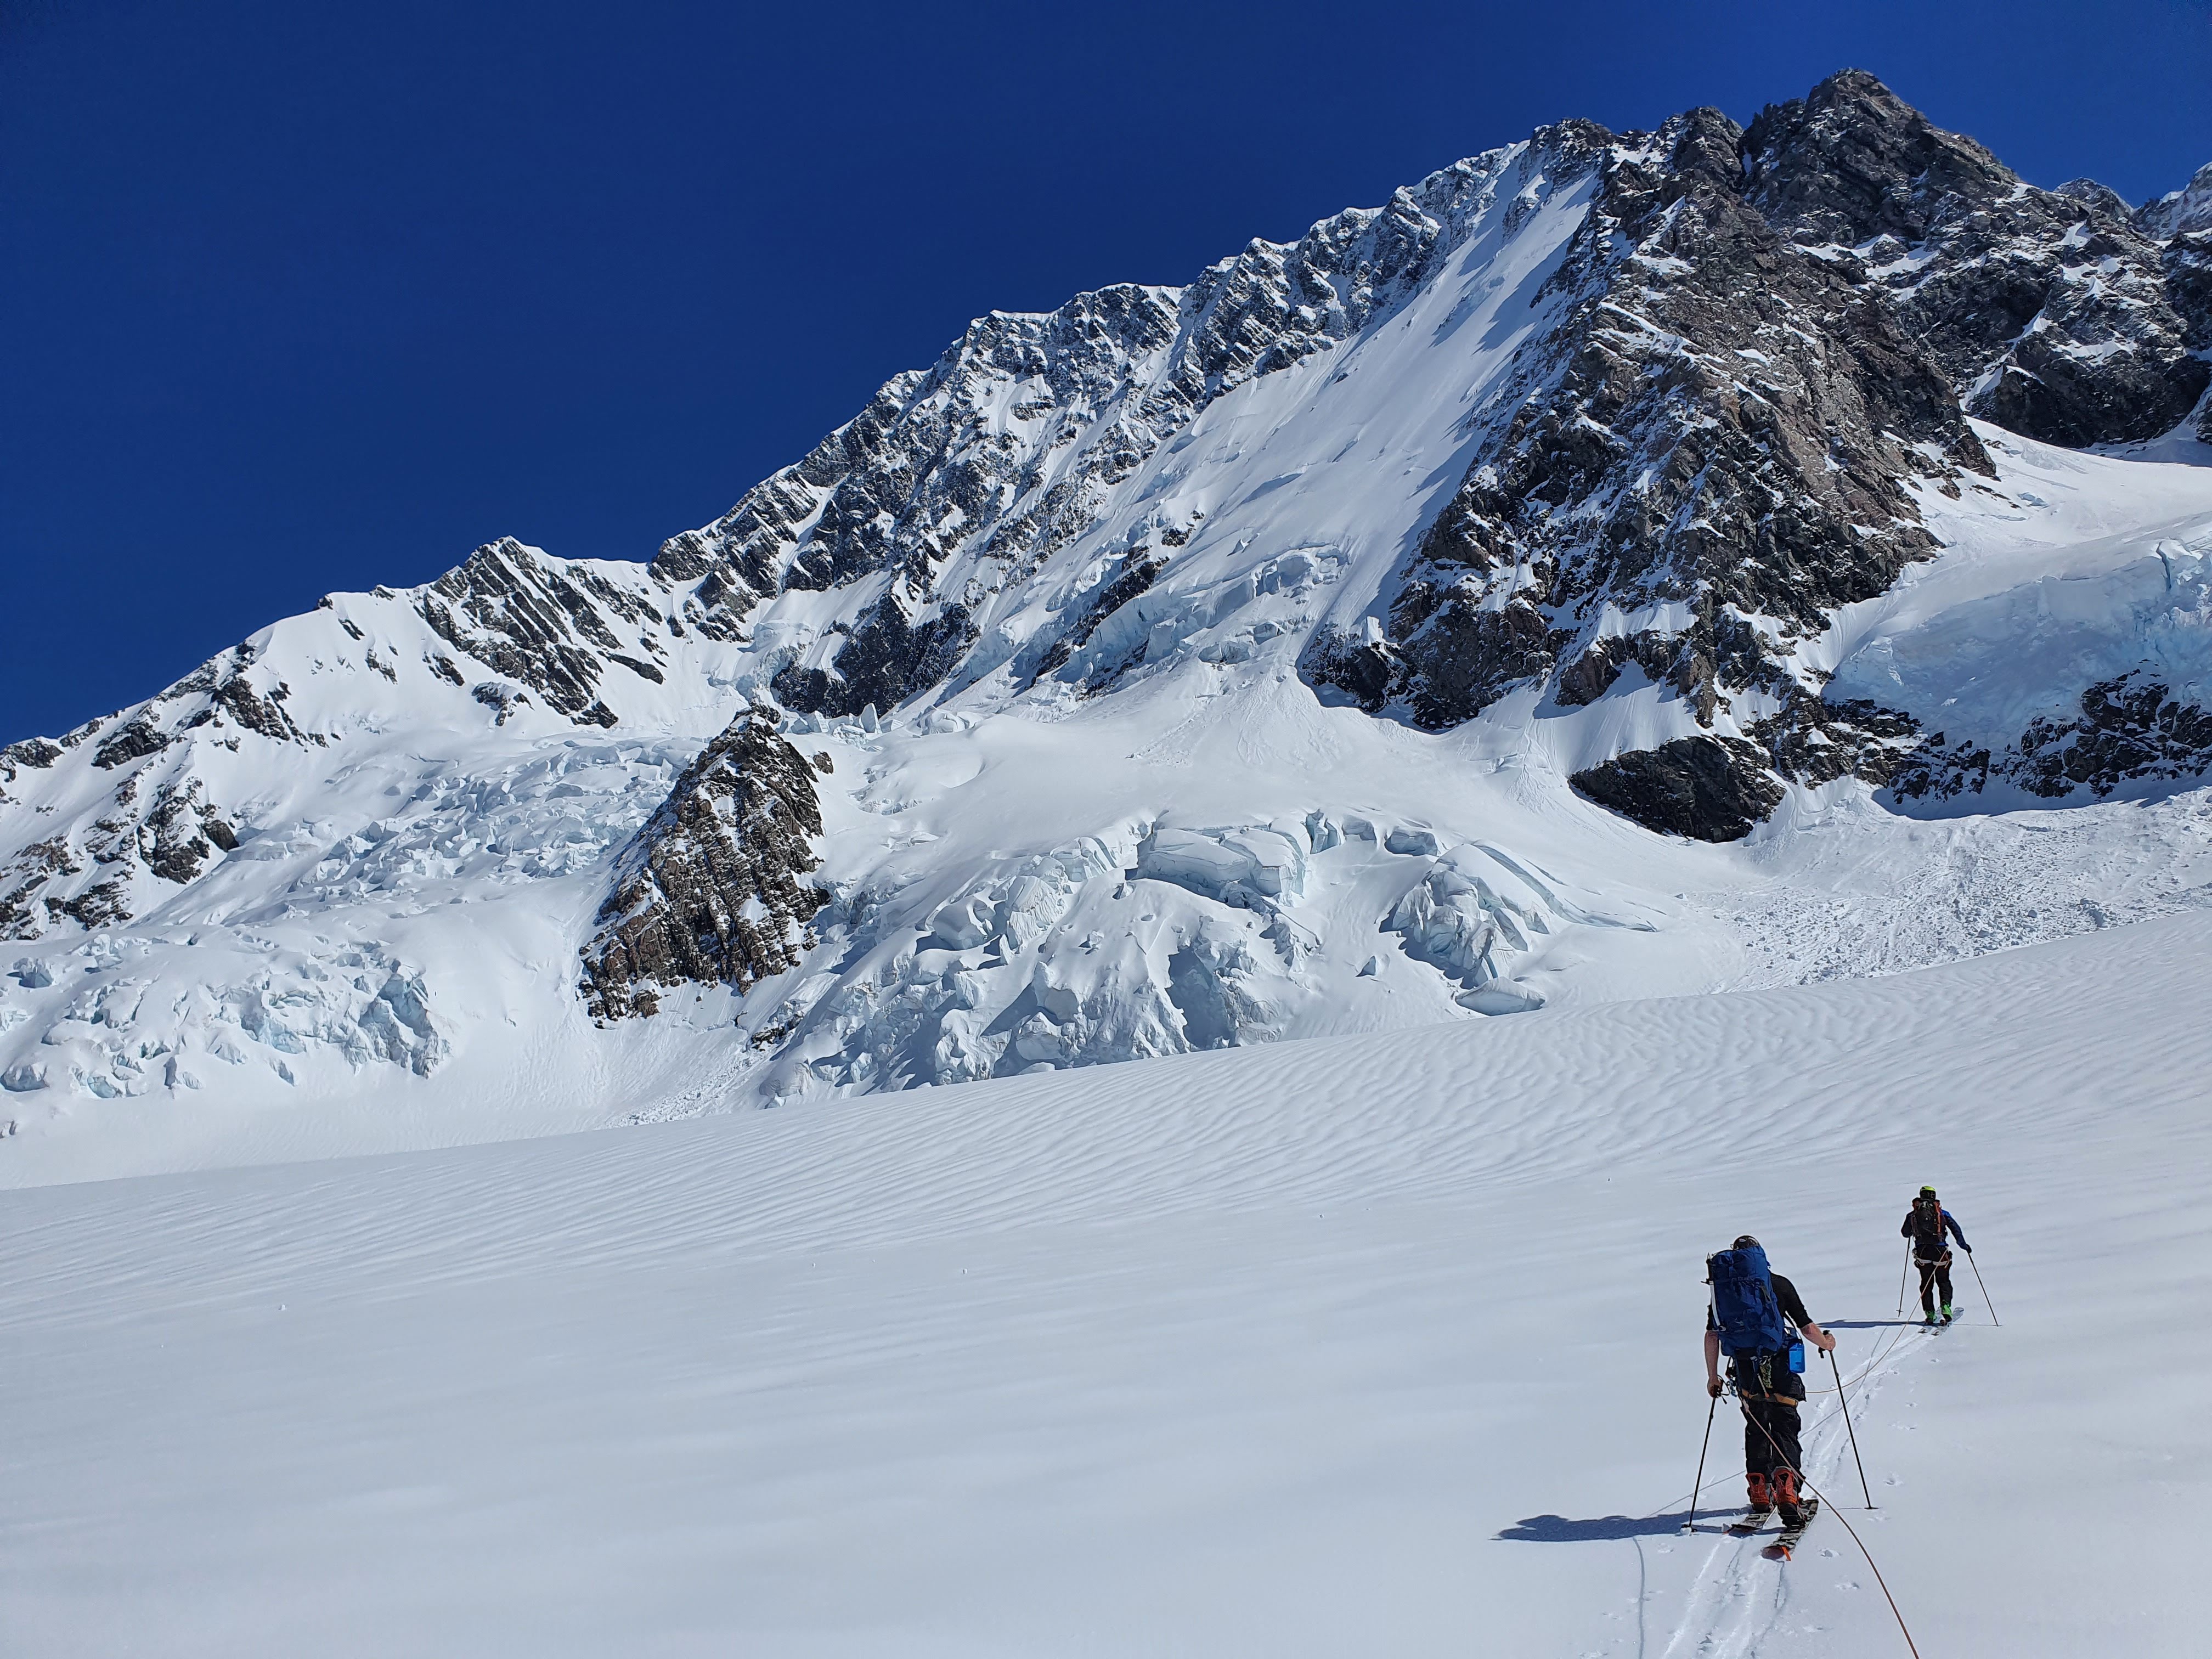
The ridge under Mt Green
From the plateau, just boost straight up the snowfields to the summit ridge. There is a large schrund at the bottom, and the spot you cross will be determined by this. The further East you go, the less serious the exposure is and the less steep the route is, funnelling down onto the plateau. To the west it steepens up and also funnels down onto the south face and major cliffs so a fall would likely be fatal.
We had to cross the schrund on the far West of the face as it opened up significantly to the East. But the West side was bare ice so we traversed across the rock band to hit the good snow on the East side. We hit the summit ridge about 50m East of the summit, then cruised up the low angle slopes to the top.
The views from the summit are pretty incredible, with a panorama of the whole of the Tasman but also into the West side of Ellie and down to the West coast
The only spot we could cross the shrund on the way up was the red line on the left, but was icy and shitty snow so we traversed over to ski the blue line
Ski
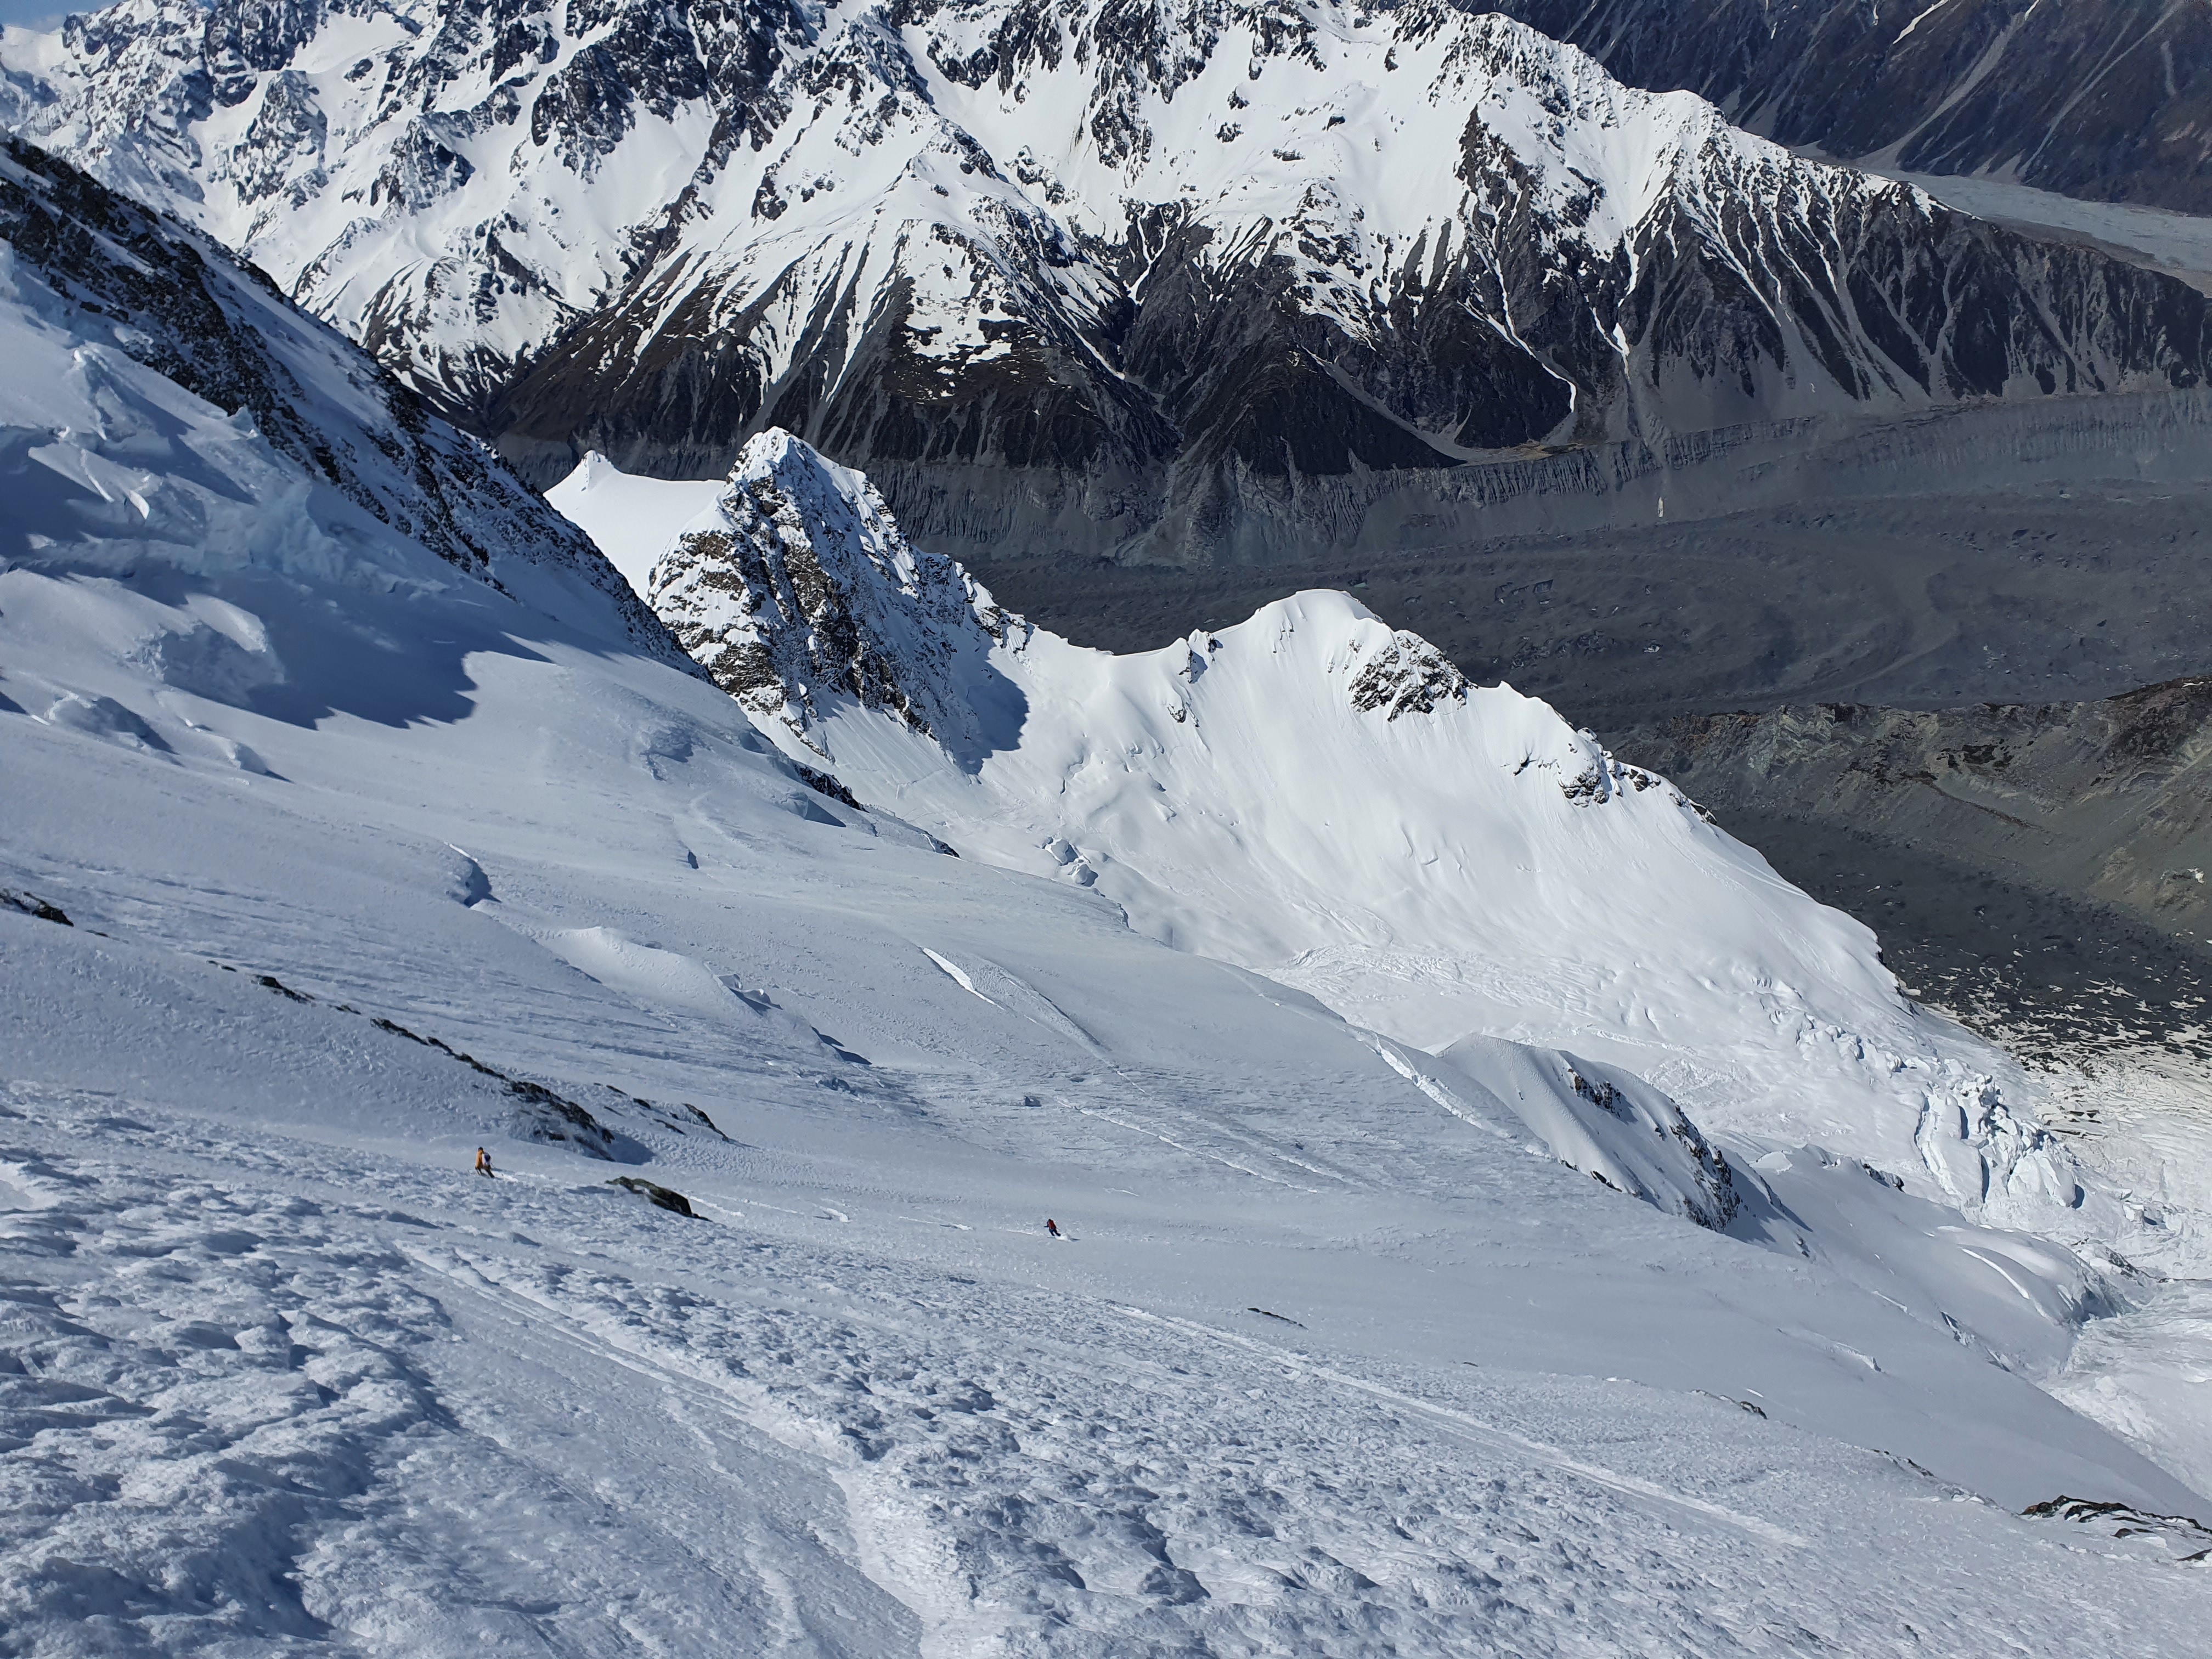
Fraser on the lower section getting down to the Tasman
Cruise down the summit ridge to your chosen drop in point. Scope out where the best snow is on the climb to decide where your going to ski. As above, the line is more serious and consequential on the West side of the face. Send the shrund and cruise down to the plateau. From here its a fun ski down the apex of the ridge – its easy ground but tres exposed.
Pete dropping into the ridge above 2258 after descending the East face
Again the best way down will depend on the conditions at the time, but we cruised down about half way down the ridge and then dropped down the face to the East just by the ice fall to take us down onto the Tasman. Then enjoy the skin back to the hut and some well earned goon!
We left the hut at 08:00 and had finished the skiing by 16:30. It was another hour and a half to skin back up to Kelman.
What a line! A huge alpine face, with 1200m of continuous 45 degree skiing that regularly holds good snow just half an hour from Plateau Hut. It’s really a testament to how New Zealand ski mountaineering has developed over the last decade that this line, which only saw its first descent in 2011 and at the time was viewed as the domain of only the top skiers in the world, now sees multiple descents per year and is a classic right of passage. The first time I skied it there were 14 people in total on the face! It felt more like being in Chamonix than in the Southern Alps. But don’t underestimate this line – it is serious alpine terrain and deserves to be taken seriously.
Pretty straightforward route finding. Note the ice cliff on the right at the bottom – this is very active and you want to stay out from under this as much as possible
I’ve skied this line twice, first on 3rd November 2019 with Sam McGrath and Zack Wentz, and again on 11th October 2020 with Pete Deytrick and Graham Dawson. It seems like a waste of a weather window in some ways to ski the exact same line twice, but it’s such a fun line when it’s in condition I would happily ski it a third time (plus me and Pete had been talking about skiing this line together for years… He couldn’t make the 2019 trip so I owed it to him to go up again!). This is definitely the time of year to go for your best chance of good stability and good coverage. Both times I skied the face in powder, which is super fun but means you’ve got to be especially careful with stability.
Approach
Taking the easy way in to Plateau
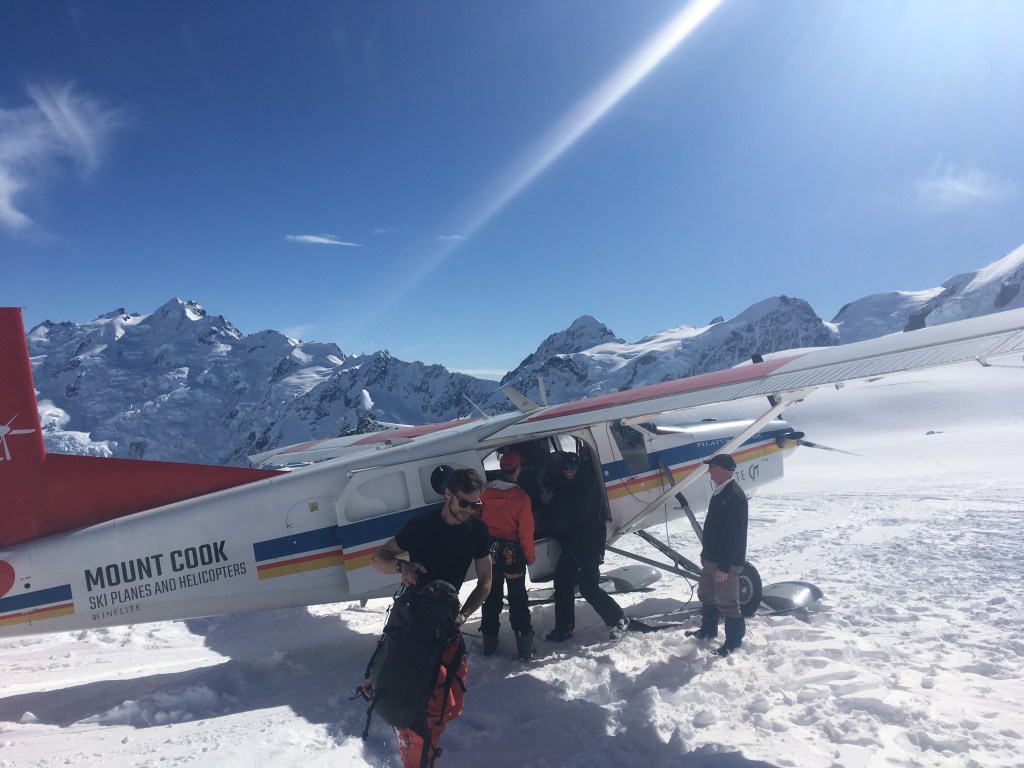
I’ve always gone for the fly in option – a flight from Cook airport takes about 15 min and there are almost always other climbers or skiers around willing to split the flight to keep the costs down (and a ski plane is cheaper again). If you can get a back flight so customers both coming in and out its even cheaper, you can get it as low as 100ish bucks per person. The hike in is getting progressively more difficult due to the moraine washing out and collapsing along the ball shelter track.
Once you’re past the ball hut, you have to descend to the confluence of the Tasman and ball glaciers and then climb up to boys glacier to Cinerama col. Rock fall and wet slides are common on the boys so don’t be there too late in the day.
Plateau hut is incredible – 33 bunks in 4 different room, with plumbed in gas and cookers in the kitchen plus all the pots / pans / cutlery you could need. The heli drops you about 20m from the hut so bringing food in a big cardboard box or bin bags is a good option. If you take the ski plane it lands about an 45 min skin from the hut so you have to pack properly.
Zack catching some wild sunrise rays half way up the East face
Climb
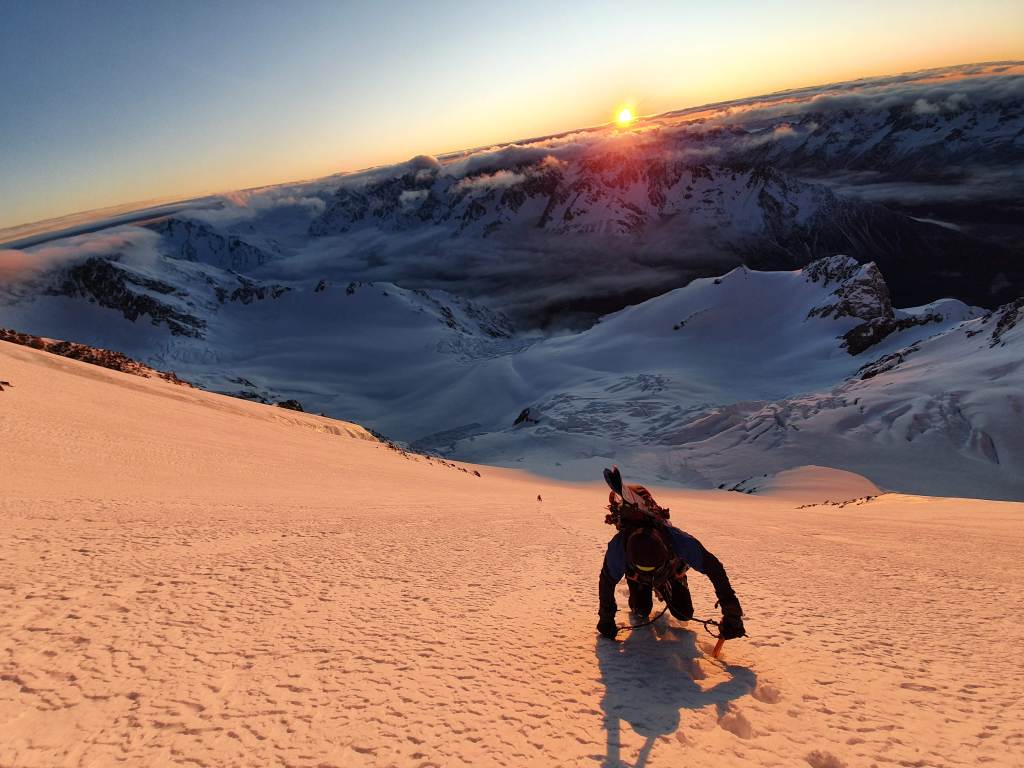
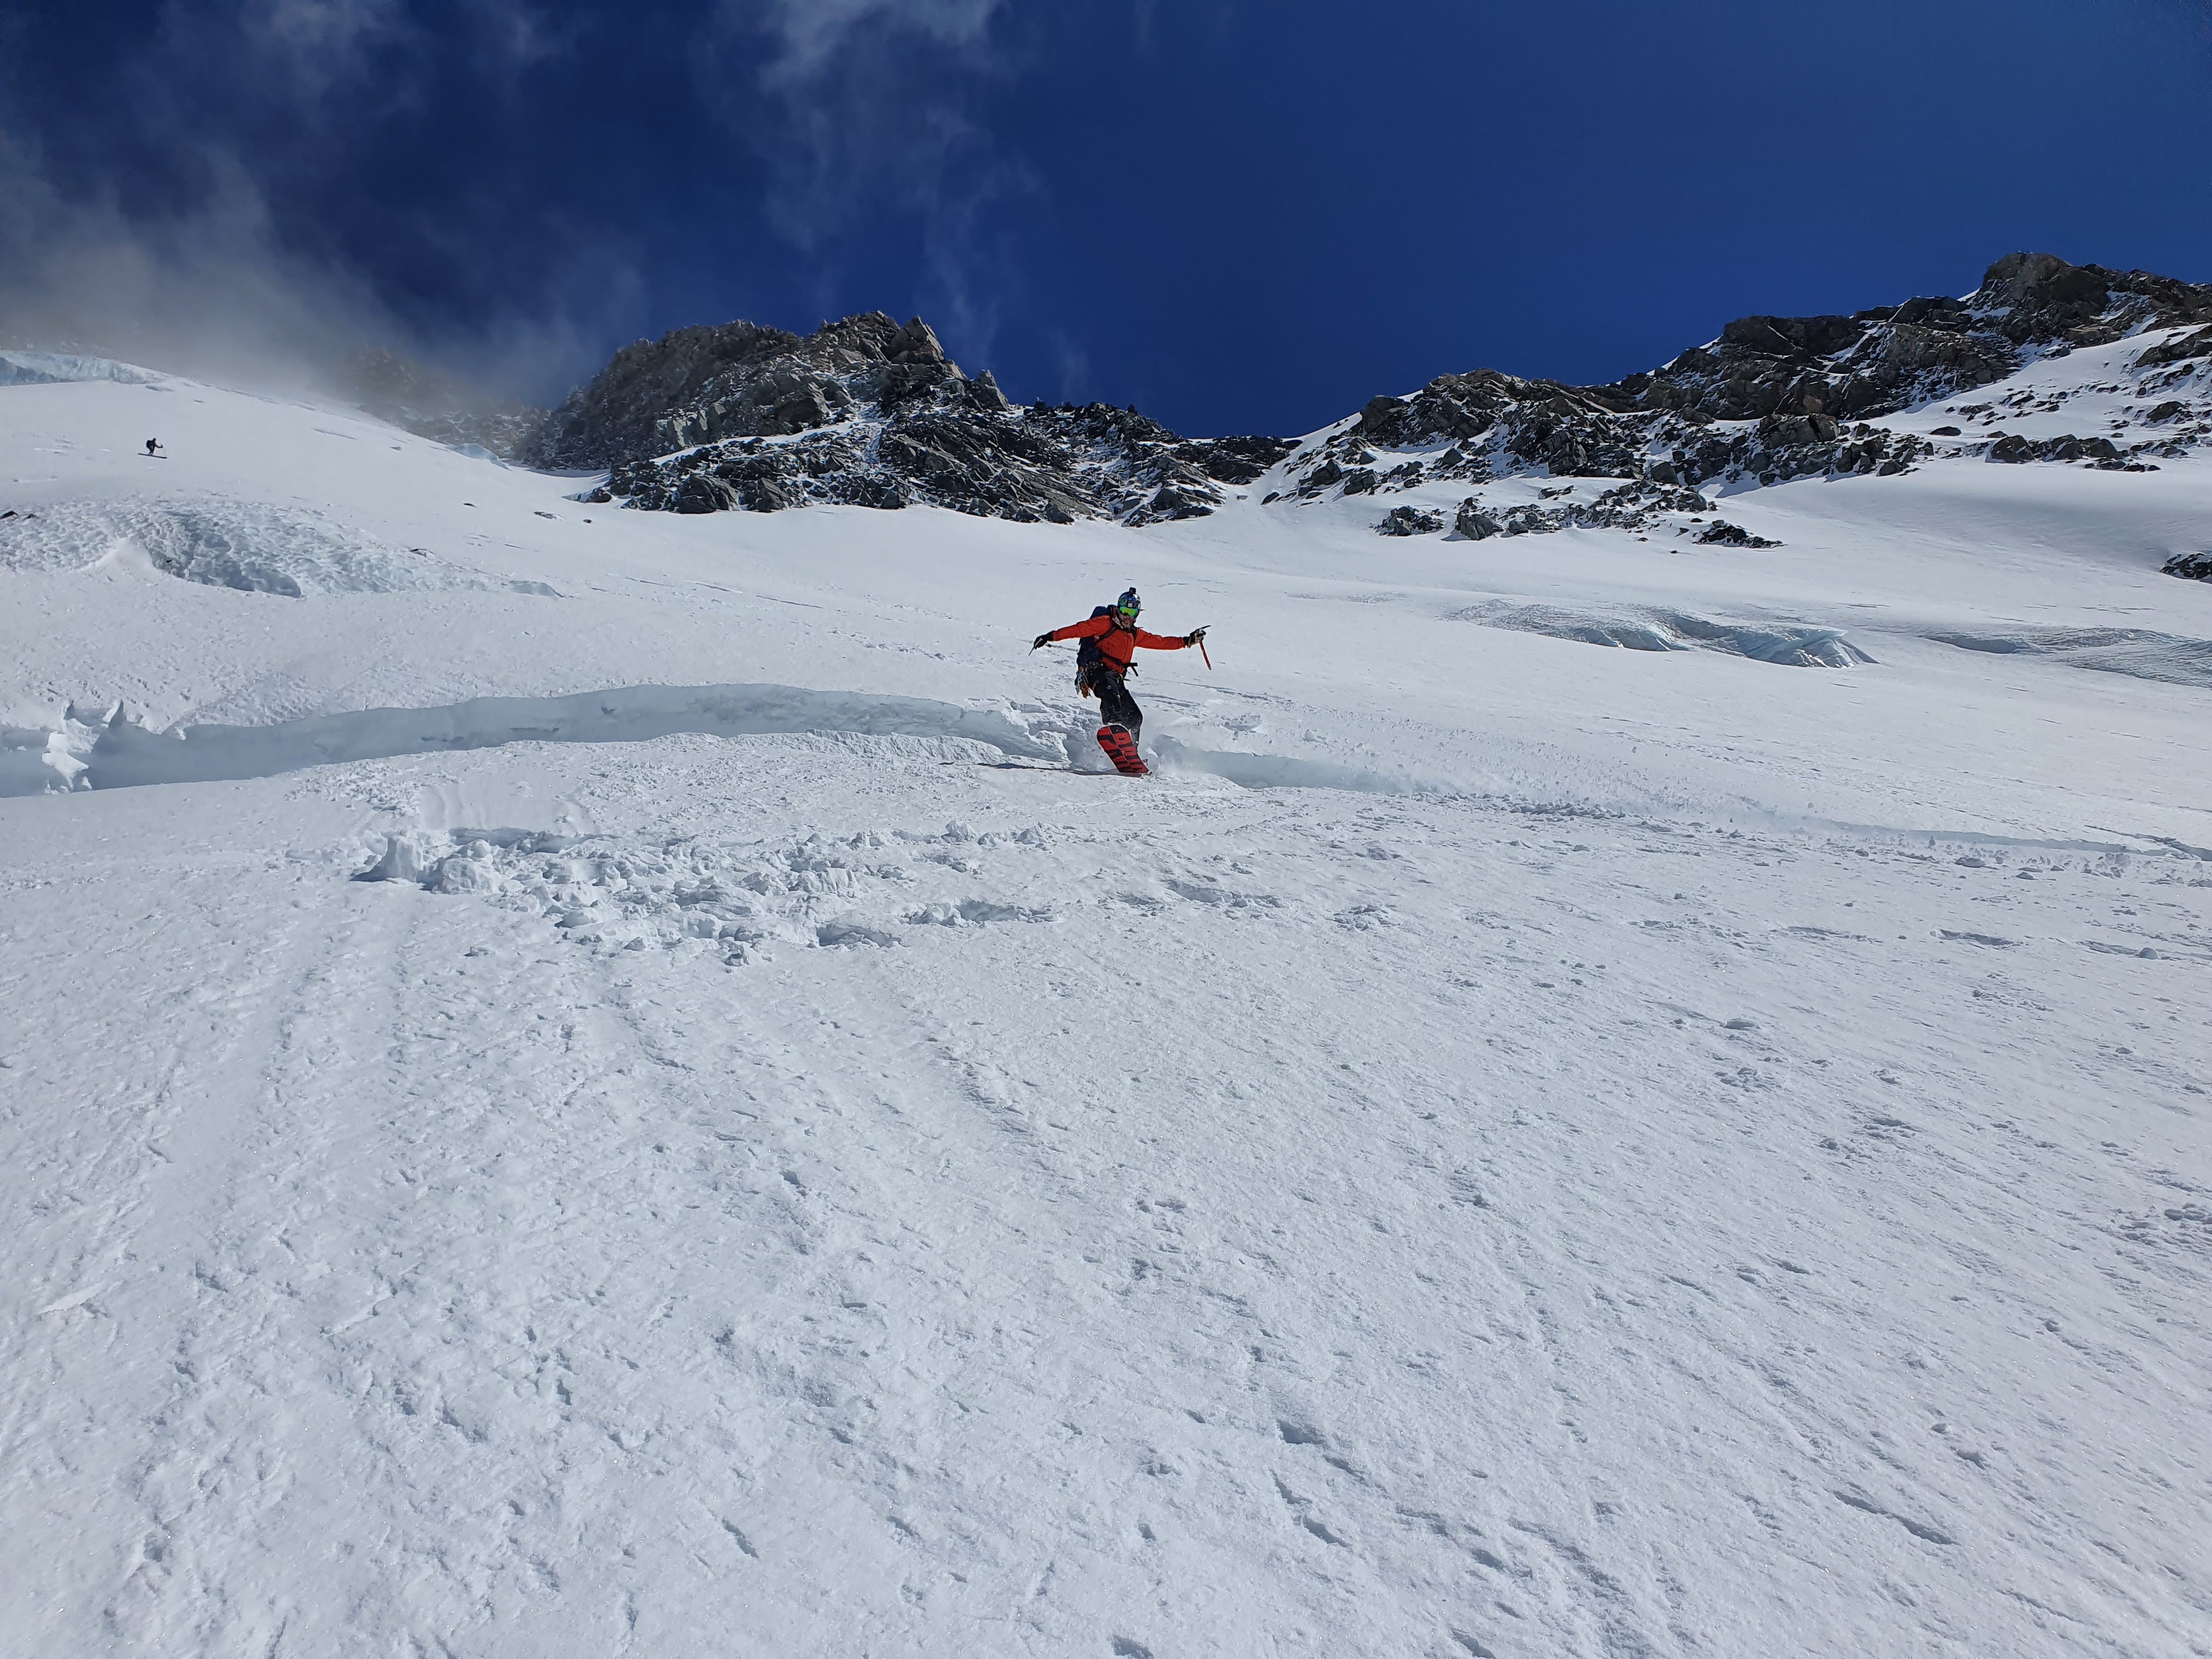
The East face gets hot fast as soon as the sun hits so you need to be out early. We got up at midnight and out of the hut at 0100. It’s worth skiing over to the base of the route the day before to figure out the best way through the shrund at the bottom because it can be a bit confusing in the dark.
From the hut it’s a quick ski to the flat part at the base of Zurbriggens Ridge. There is a big active ice cliff at the base of the ridge – don’t linger under here and get up to the base of the East face out of the firing line ASAP.
Graham and Peet heading up the East face
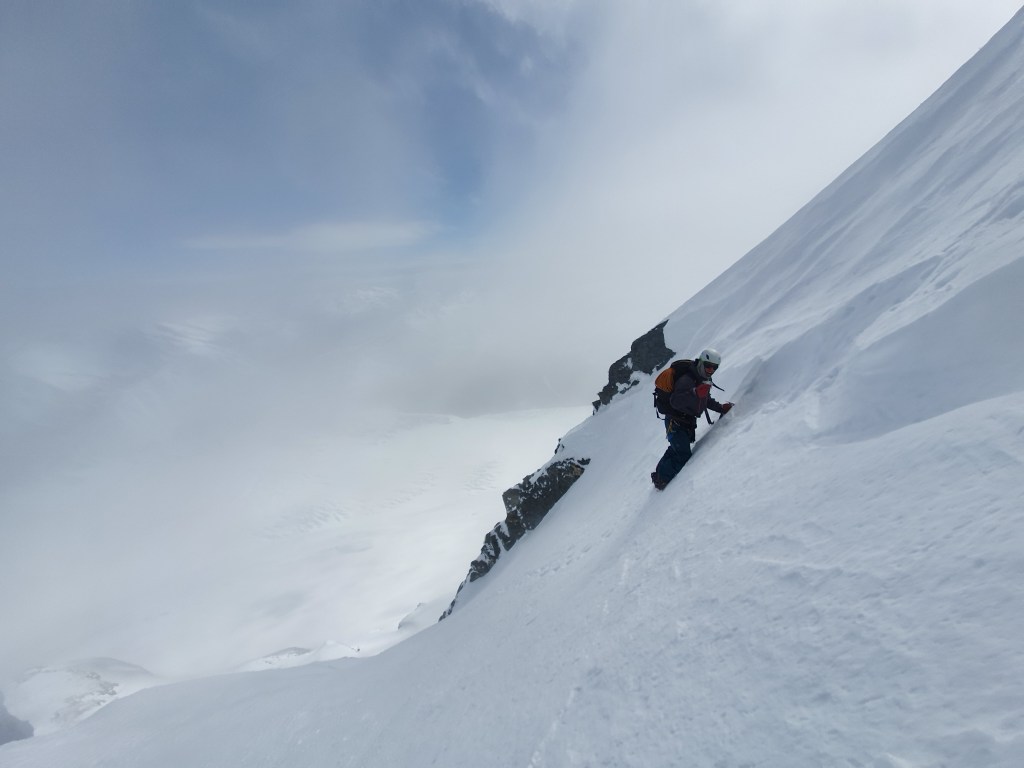
We roped up to cross the bottom schrund, quick stability check and then the rope went away and we soloed the majority of the face. It’s a bit of a slog, plugging steps for 1000m, but you’re rewarded with the most epic sunrise you’ll ever see as the first light hits the face. You need to trend left while you’re climbing – a bit more than you might expect. Once you get to the final couloir to the summit ridge, the snow quality generally deteriorates.
While this section was skiable on my first trip, on my second time it was bare ice so we made 1x rappel
When I was there in 2019 it was firm breakable crust overlying ice, just about skiable – we soloed up and we able to ski back down to make a full descent of the E face. But in 2020 it was bare glacier ice, we put the rope on for the final climb (55 deg) and rapped back down to where the snow quality got better. From the top of the E ridge it took us 45 min to the summit. It’s low angle and relatively mellow compared to what you’ve just been climbing, but was wind scoured sastrugi the whole way and we left our skis and the top of the E ridge to get the summit and walked back down.
Descent
Looking down the top section of the face with the plateau 1000m below
From the ridge the top couloir is fairly full on, 50-55 degrees on a narrow spine which is very exposed and often has wind affected snow / ice. Luckily you’re coming up this way and can make a full assessment of whether or not you’re going to ski this part or not. We made cautious jump turns down this top section. About 50m or so down from the summit the line tucks round to skiers left under an ice bulge and the snow generally improves here and you can start opening it up and tearing up the face!. The first few turns here are steep at around 50 degrees, but after another 100m or so it mellows out to 45 degrees and then stays like this all the way down to the plateau.
Sam got this sweet shot of me getting deep
Peet getting into the white room
The snow was unbelievably good for us on both trips, and we made big fast slashes and slarves getting face shots the whole 1200m down to the plateau. You trend left the whole way down the descent which is useful for dodging your stuff. Drop the schrund at the bottom and cruise back to plateau hut for the celebration beer!
If you’re skiing the face in powder be especially careful of the sun warming up the face – on the 2019 trip we had 24 hours of cold still weather after the storm for settlement and then another cold 24 hours to ski the line. The next day the temps went up to a FAFL of 3000m and we sat at the hut watching big avalanches ripping out on the face all day exactly where our tracks had been.
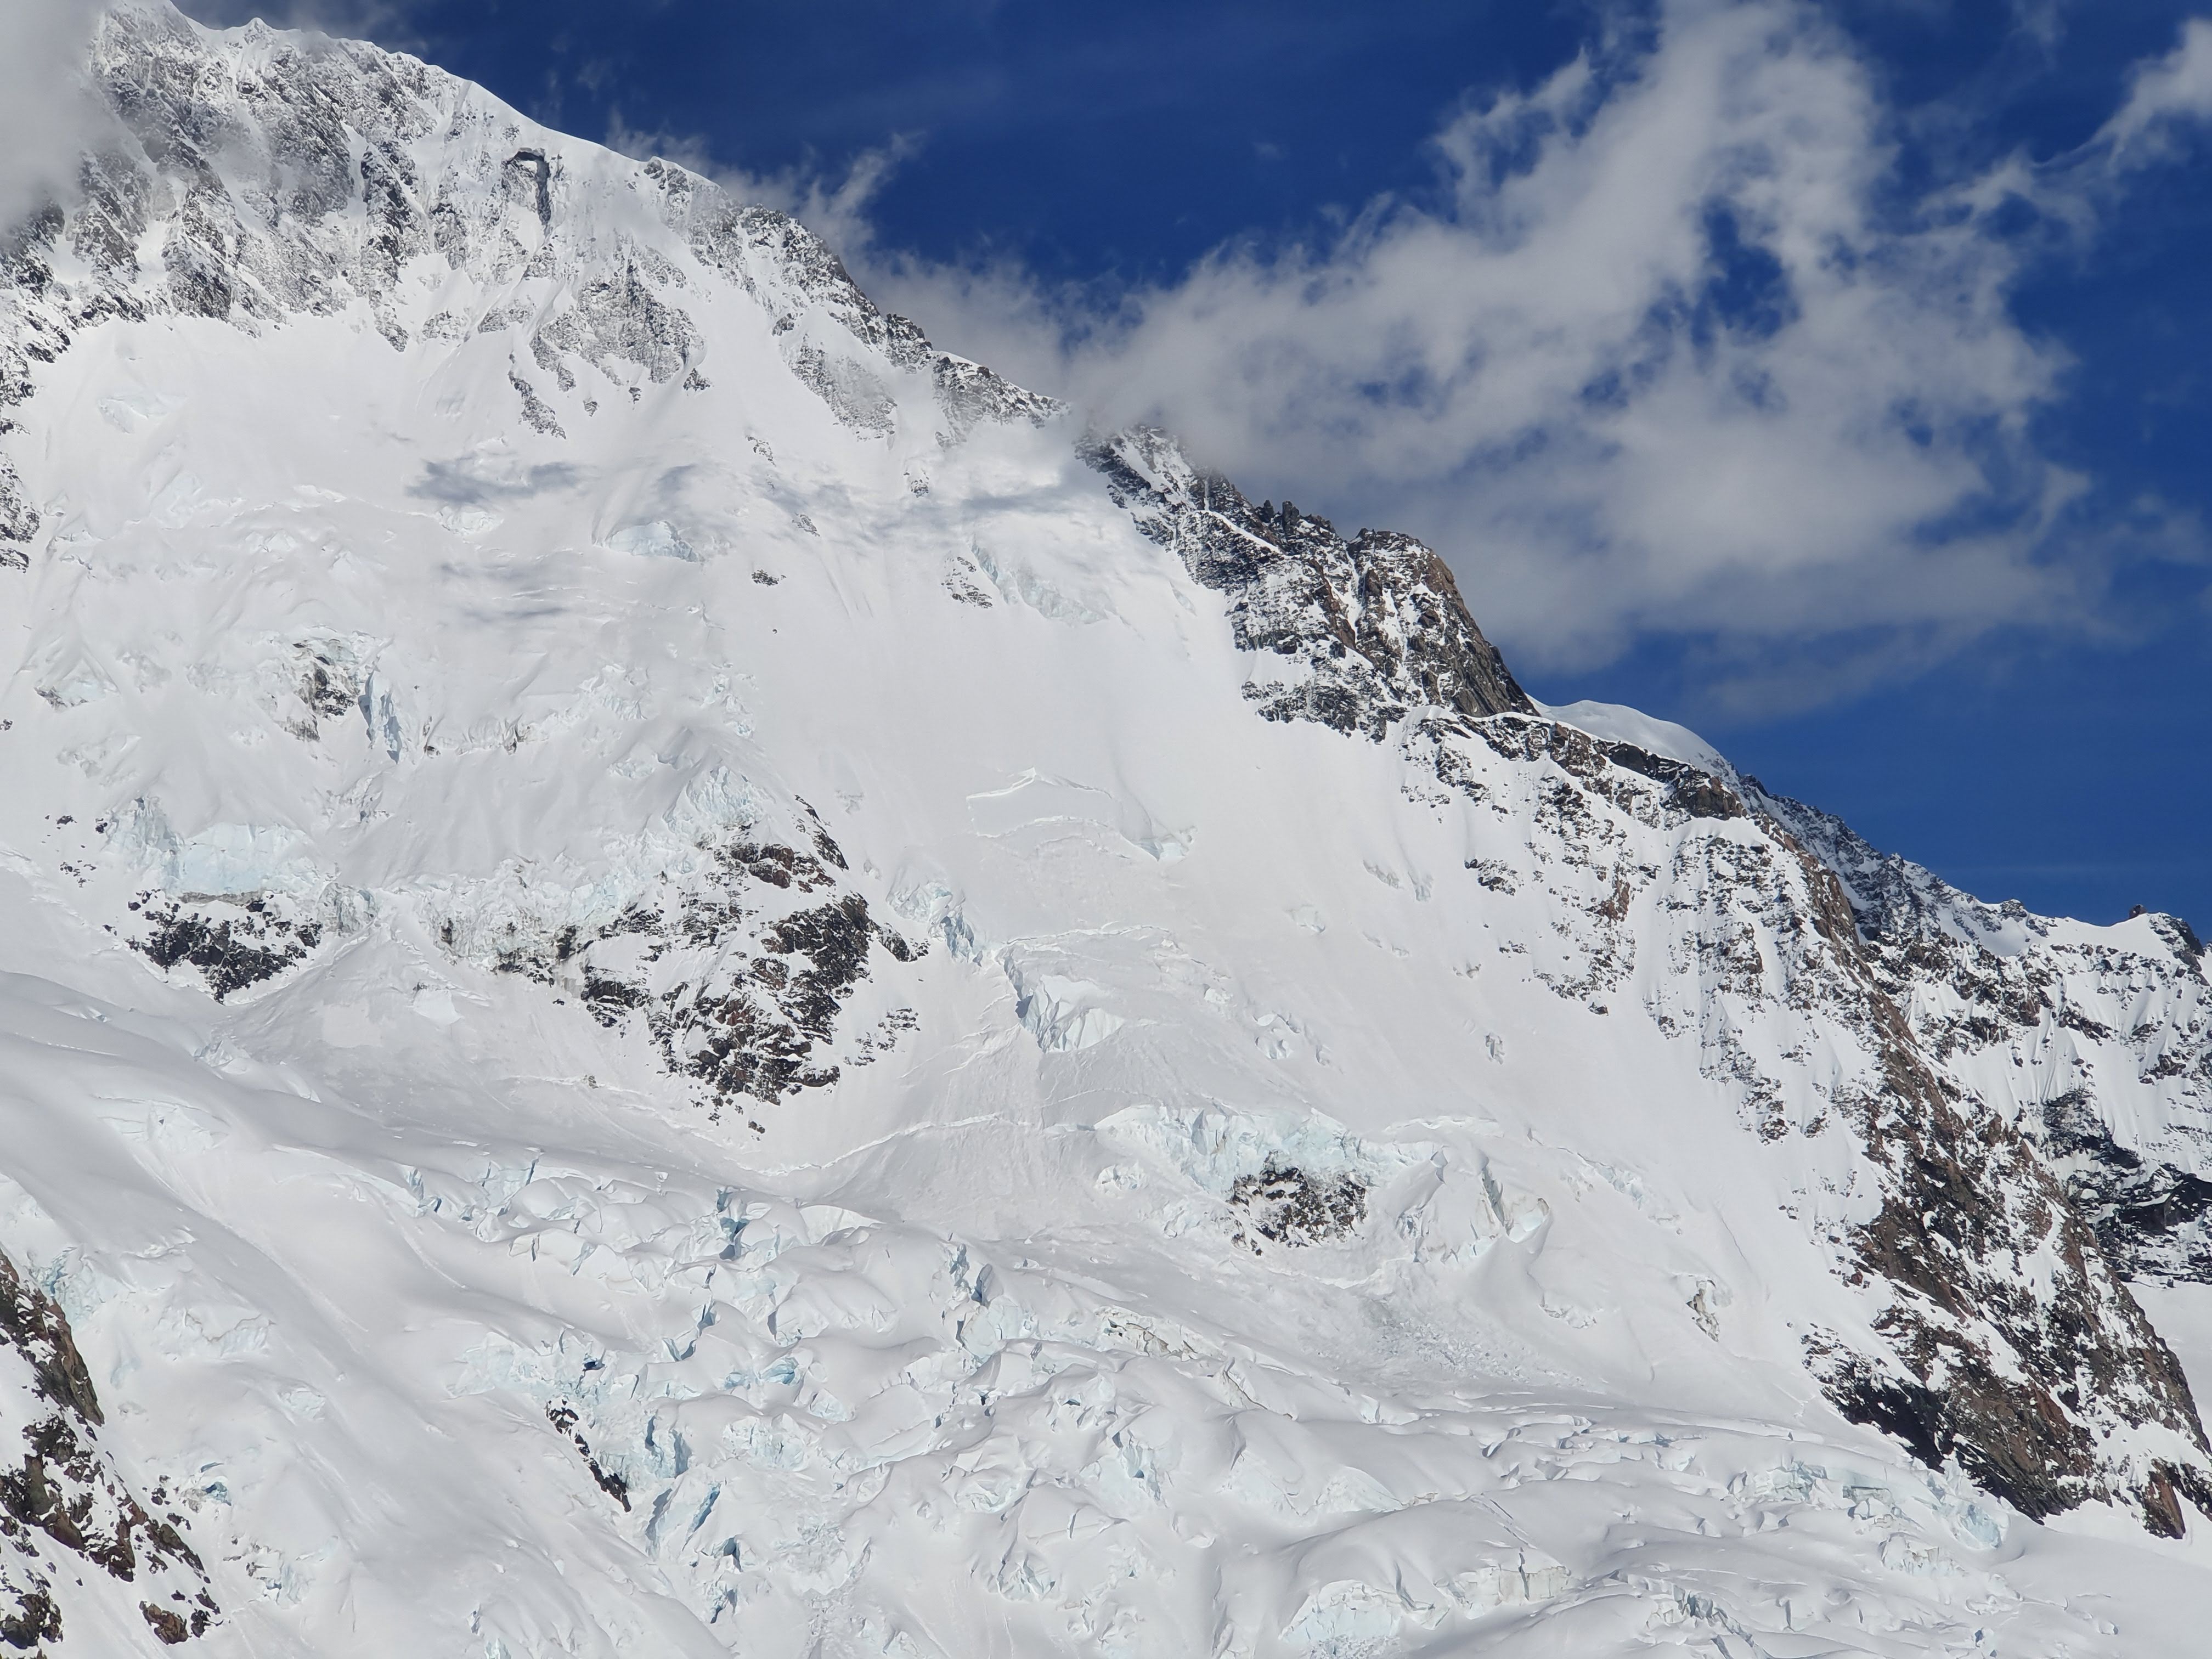
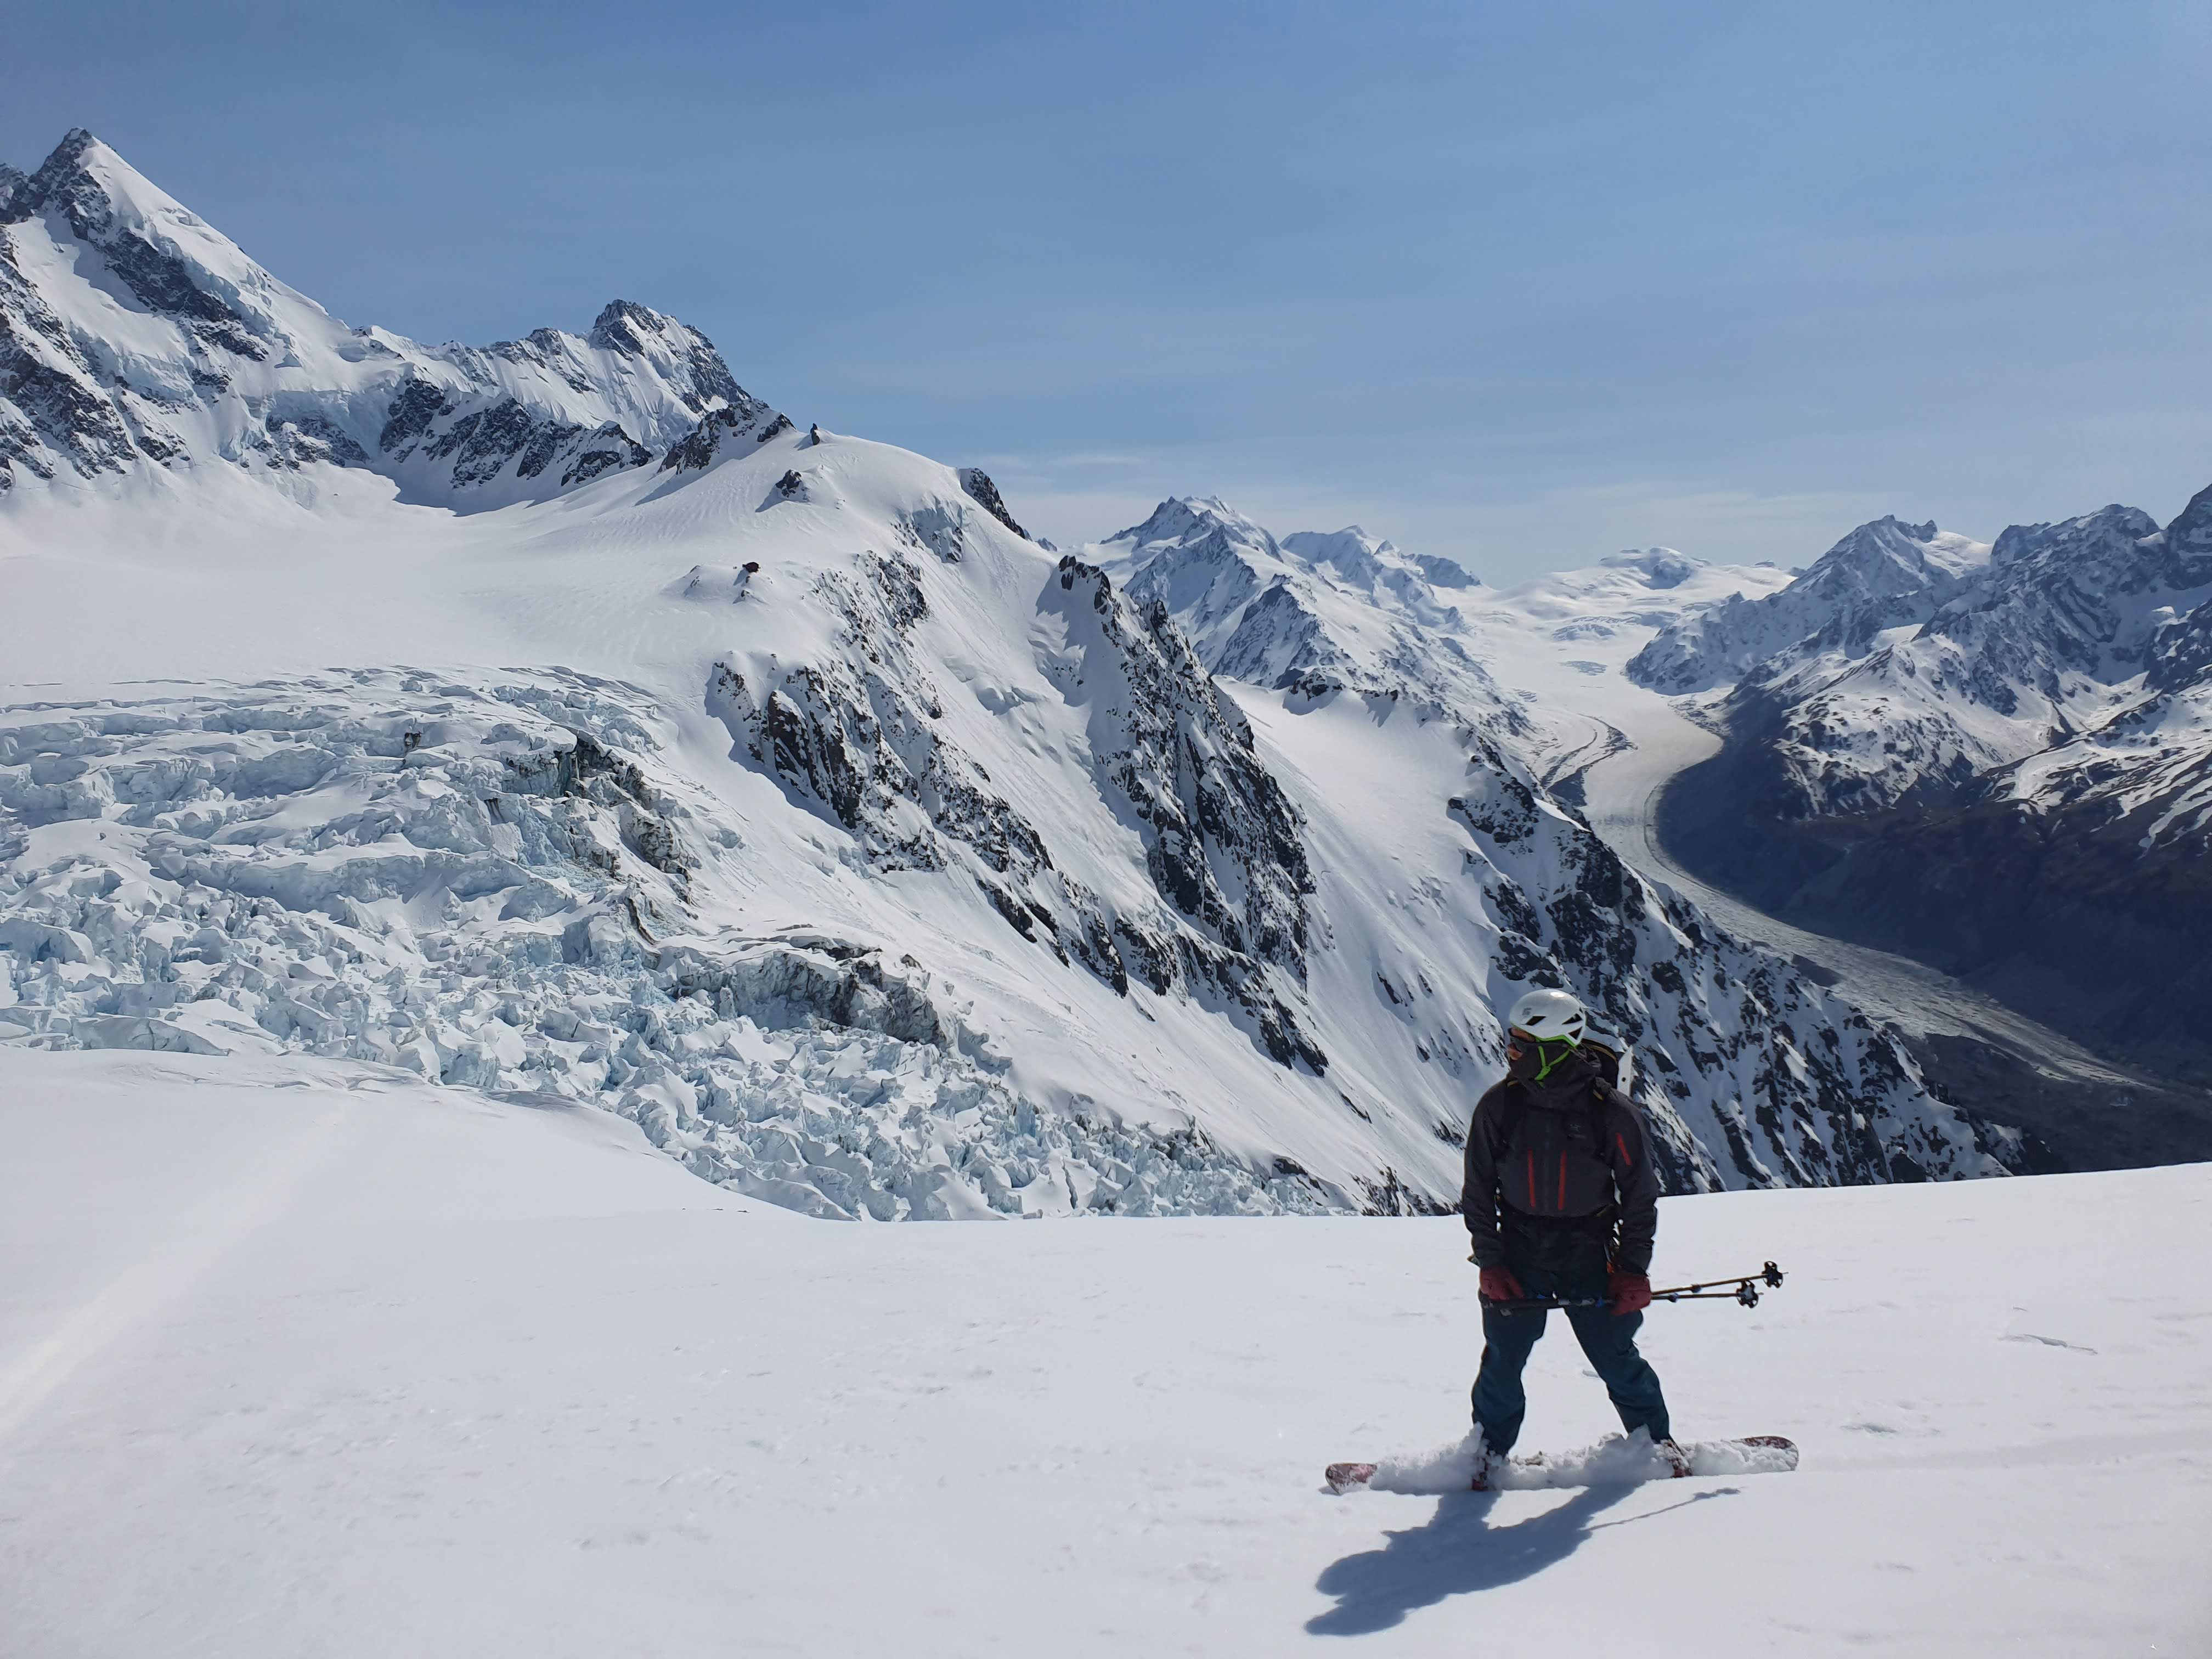
Memories of this trip – being oh-so-cold. Beautiful hike, felt like we were on the moon due to Titiroa’s distinctive white granite. Highs: the forecast was stellar and we were treated to an ocean of stars in the evening (forget Tekapo!) Lows: airbed popped and I spent the night in the foetal position Overall: a must do in Southland
Time: 10h from jetty to biv; 6.5h biv to car (17km)
Season: you want a good forecast as it’s pretty exposed at the top for bivvying; also mid-late winter you would have to take crampons
Team: Joe, Maria 19/06/21
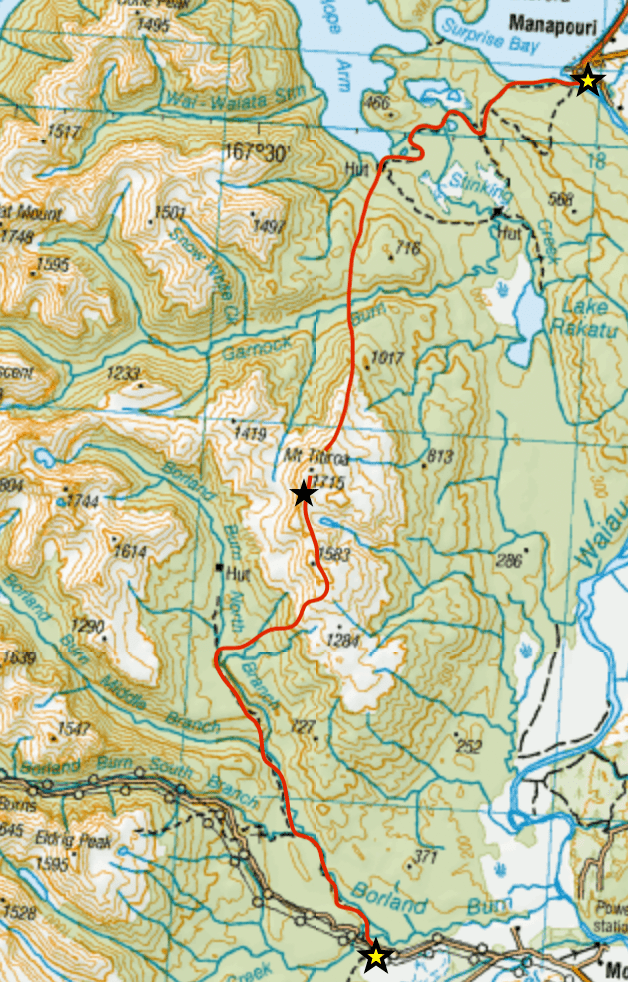
Titiroa is part of the Hunter Mountain range on Lake Manapouri. You can access it as an out and back, or do what we did as a loop track.
Black star denotes where we camped
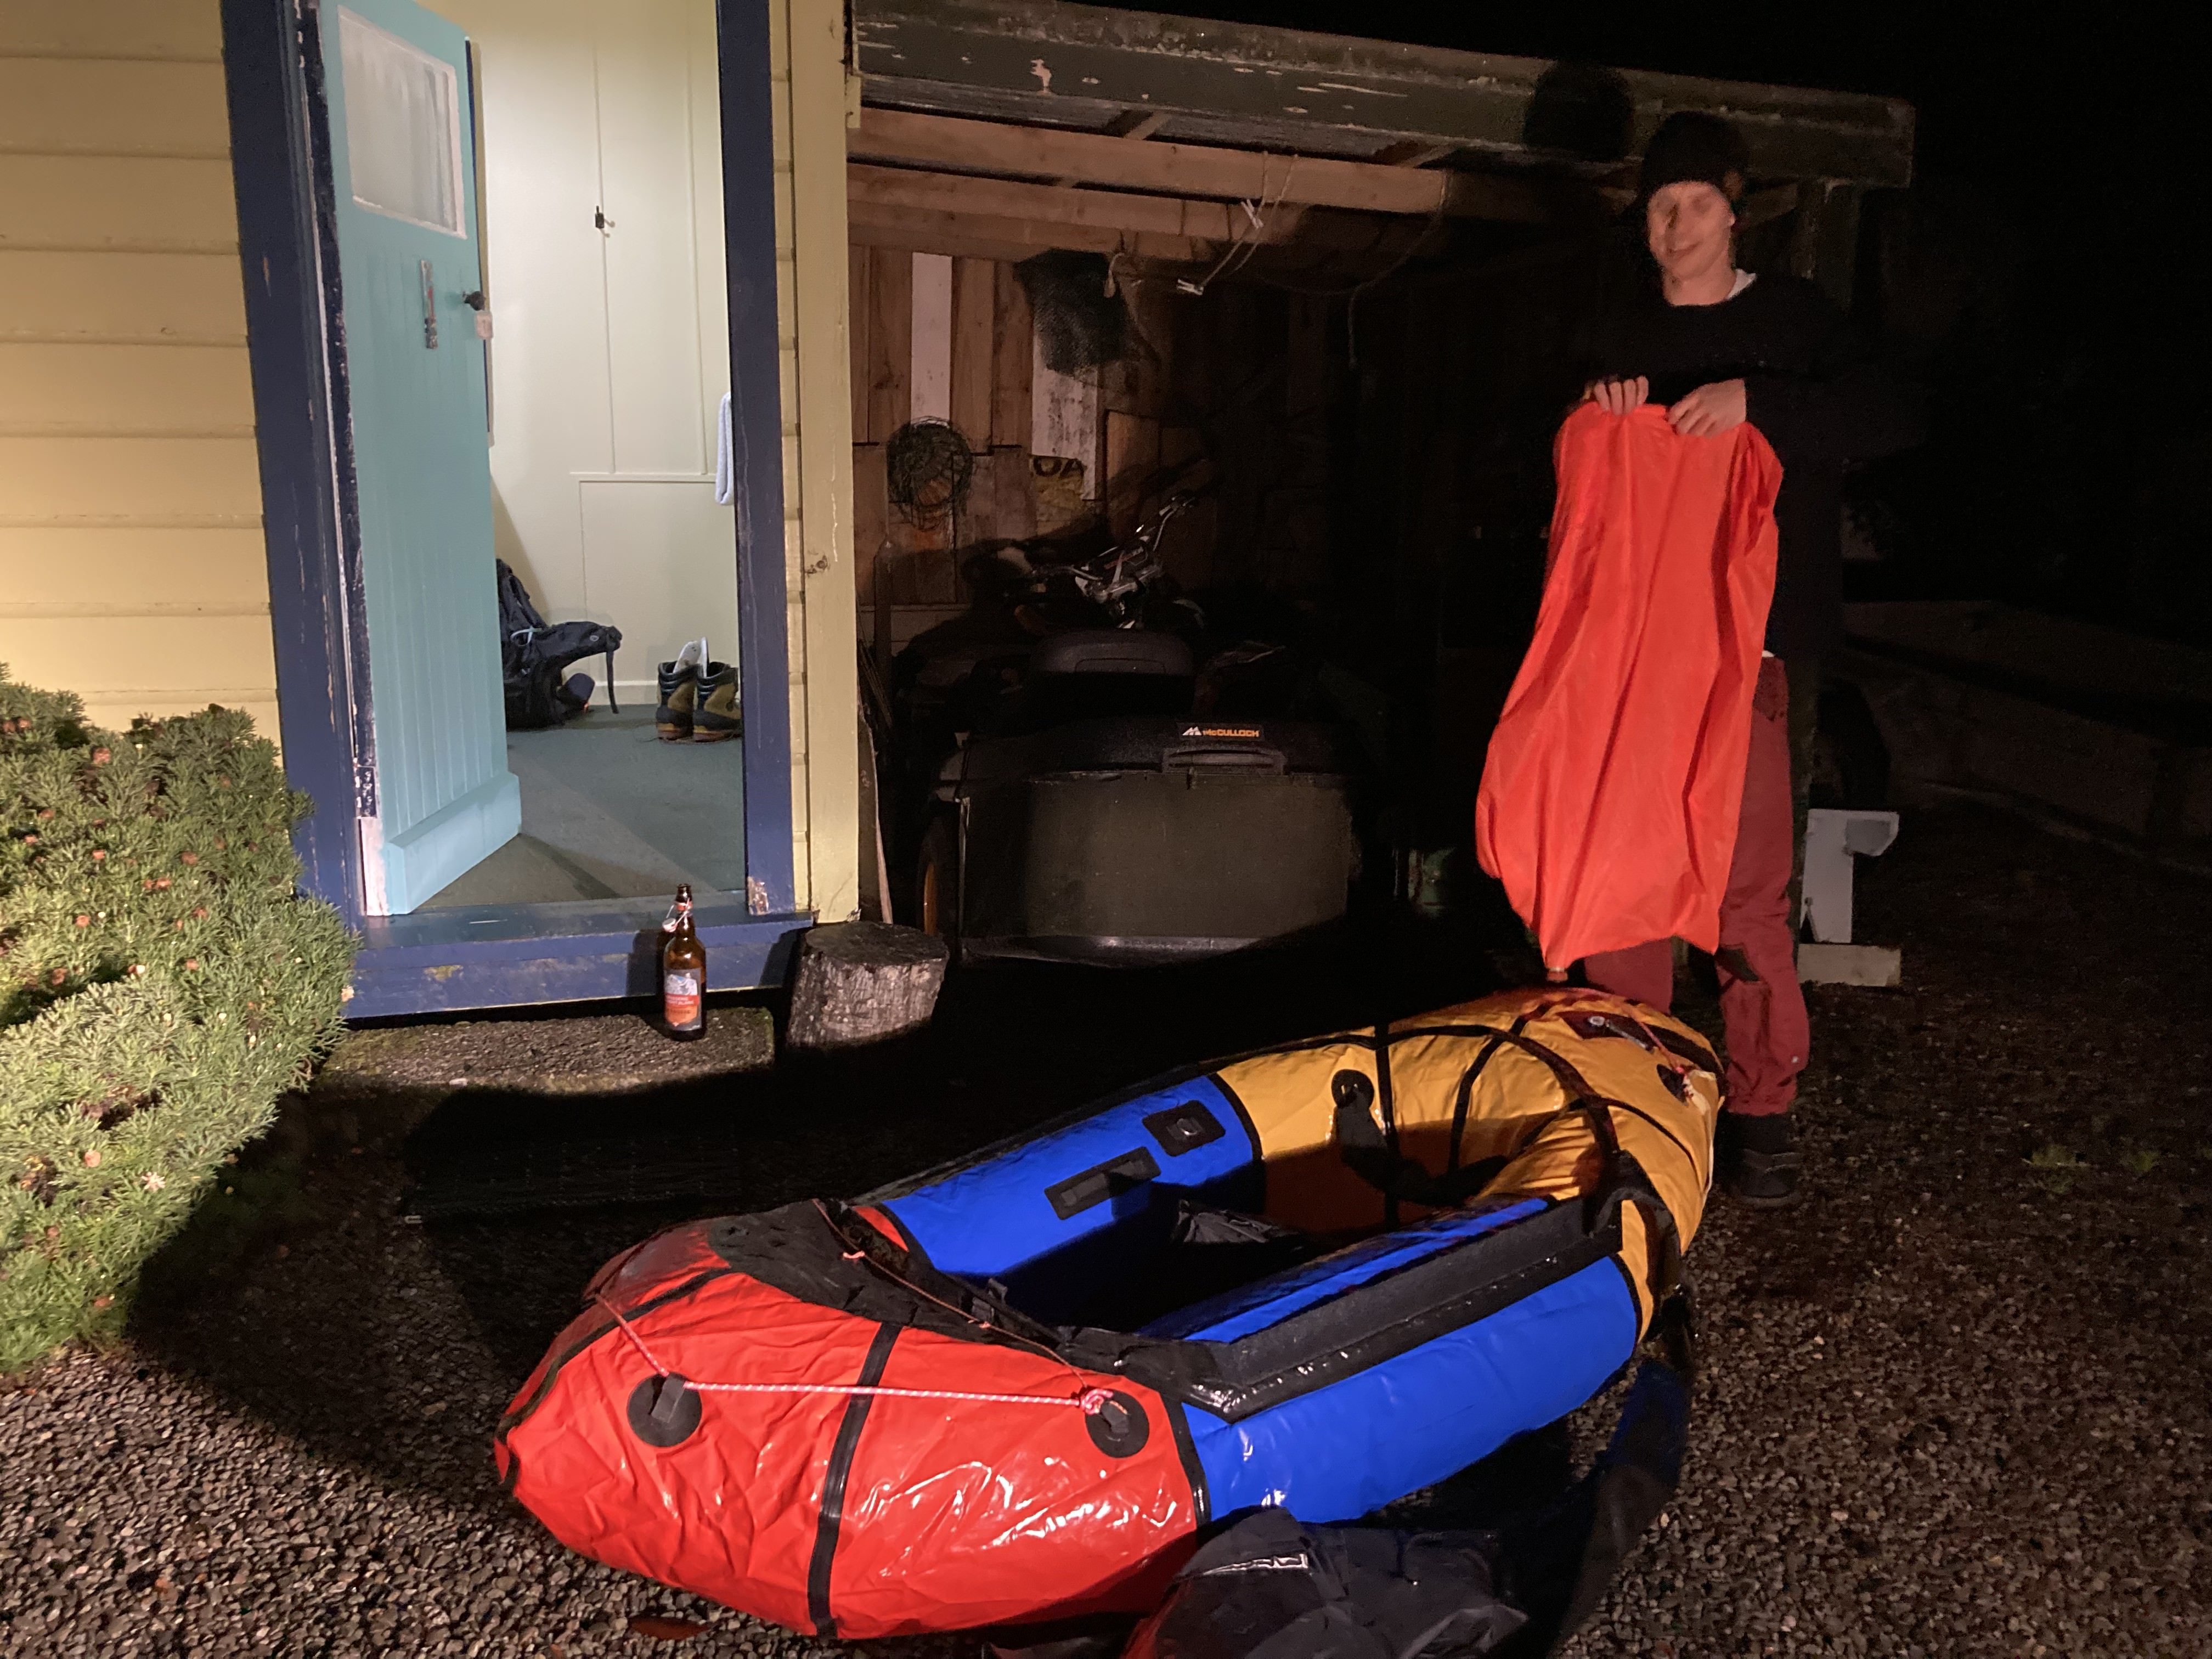
We left one car just up to road from Borland lodge. Then we drove round to Manapouri and stayed at Possum Lodge the night before – a stone’s throw away from the jetty where you start. You need to cross Waiau river to get onto the walking track. There are water taxis in the summer season but it was June and besides, it is only about 50m wide – easily doable with a packraft! Harder when there’s only one between two and heavy packs per person… Joe took one for the team and did the trip once with the bags, and the second time with me. Obviously you can use any other river worthy vessel too, as long as you’re happy to stash it somewhere discretely or just risk losing it. At the end of the trip you’ll have to retrieve whatever you left of course requiring a river swim to finish the hike! Other option is to hike with the packraft but we opted just to swim back over at the end. Just watch for passing boats… We were on the water by 0700.
Easy flat Doc track through beech forest. Stick to the trail following the lakeside as the Circle track is a loop track that takes you inland. Around 6km in is the Hope Arm hut. Take a left here heading up Snow White clearing track which takes you to Garnock burn. Ice cold river crossings had me in tears!
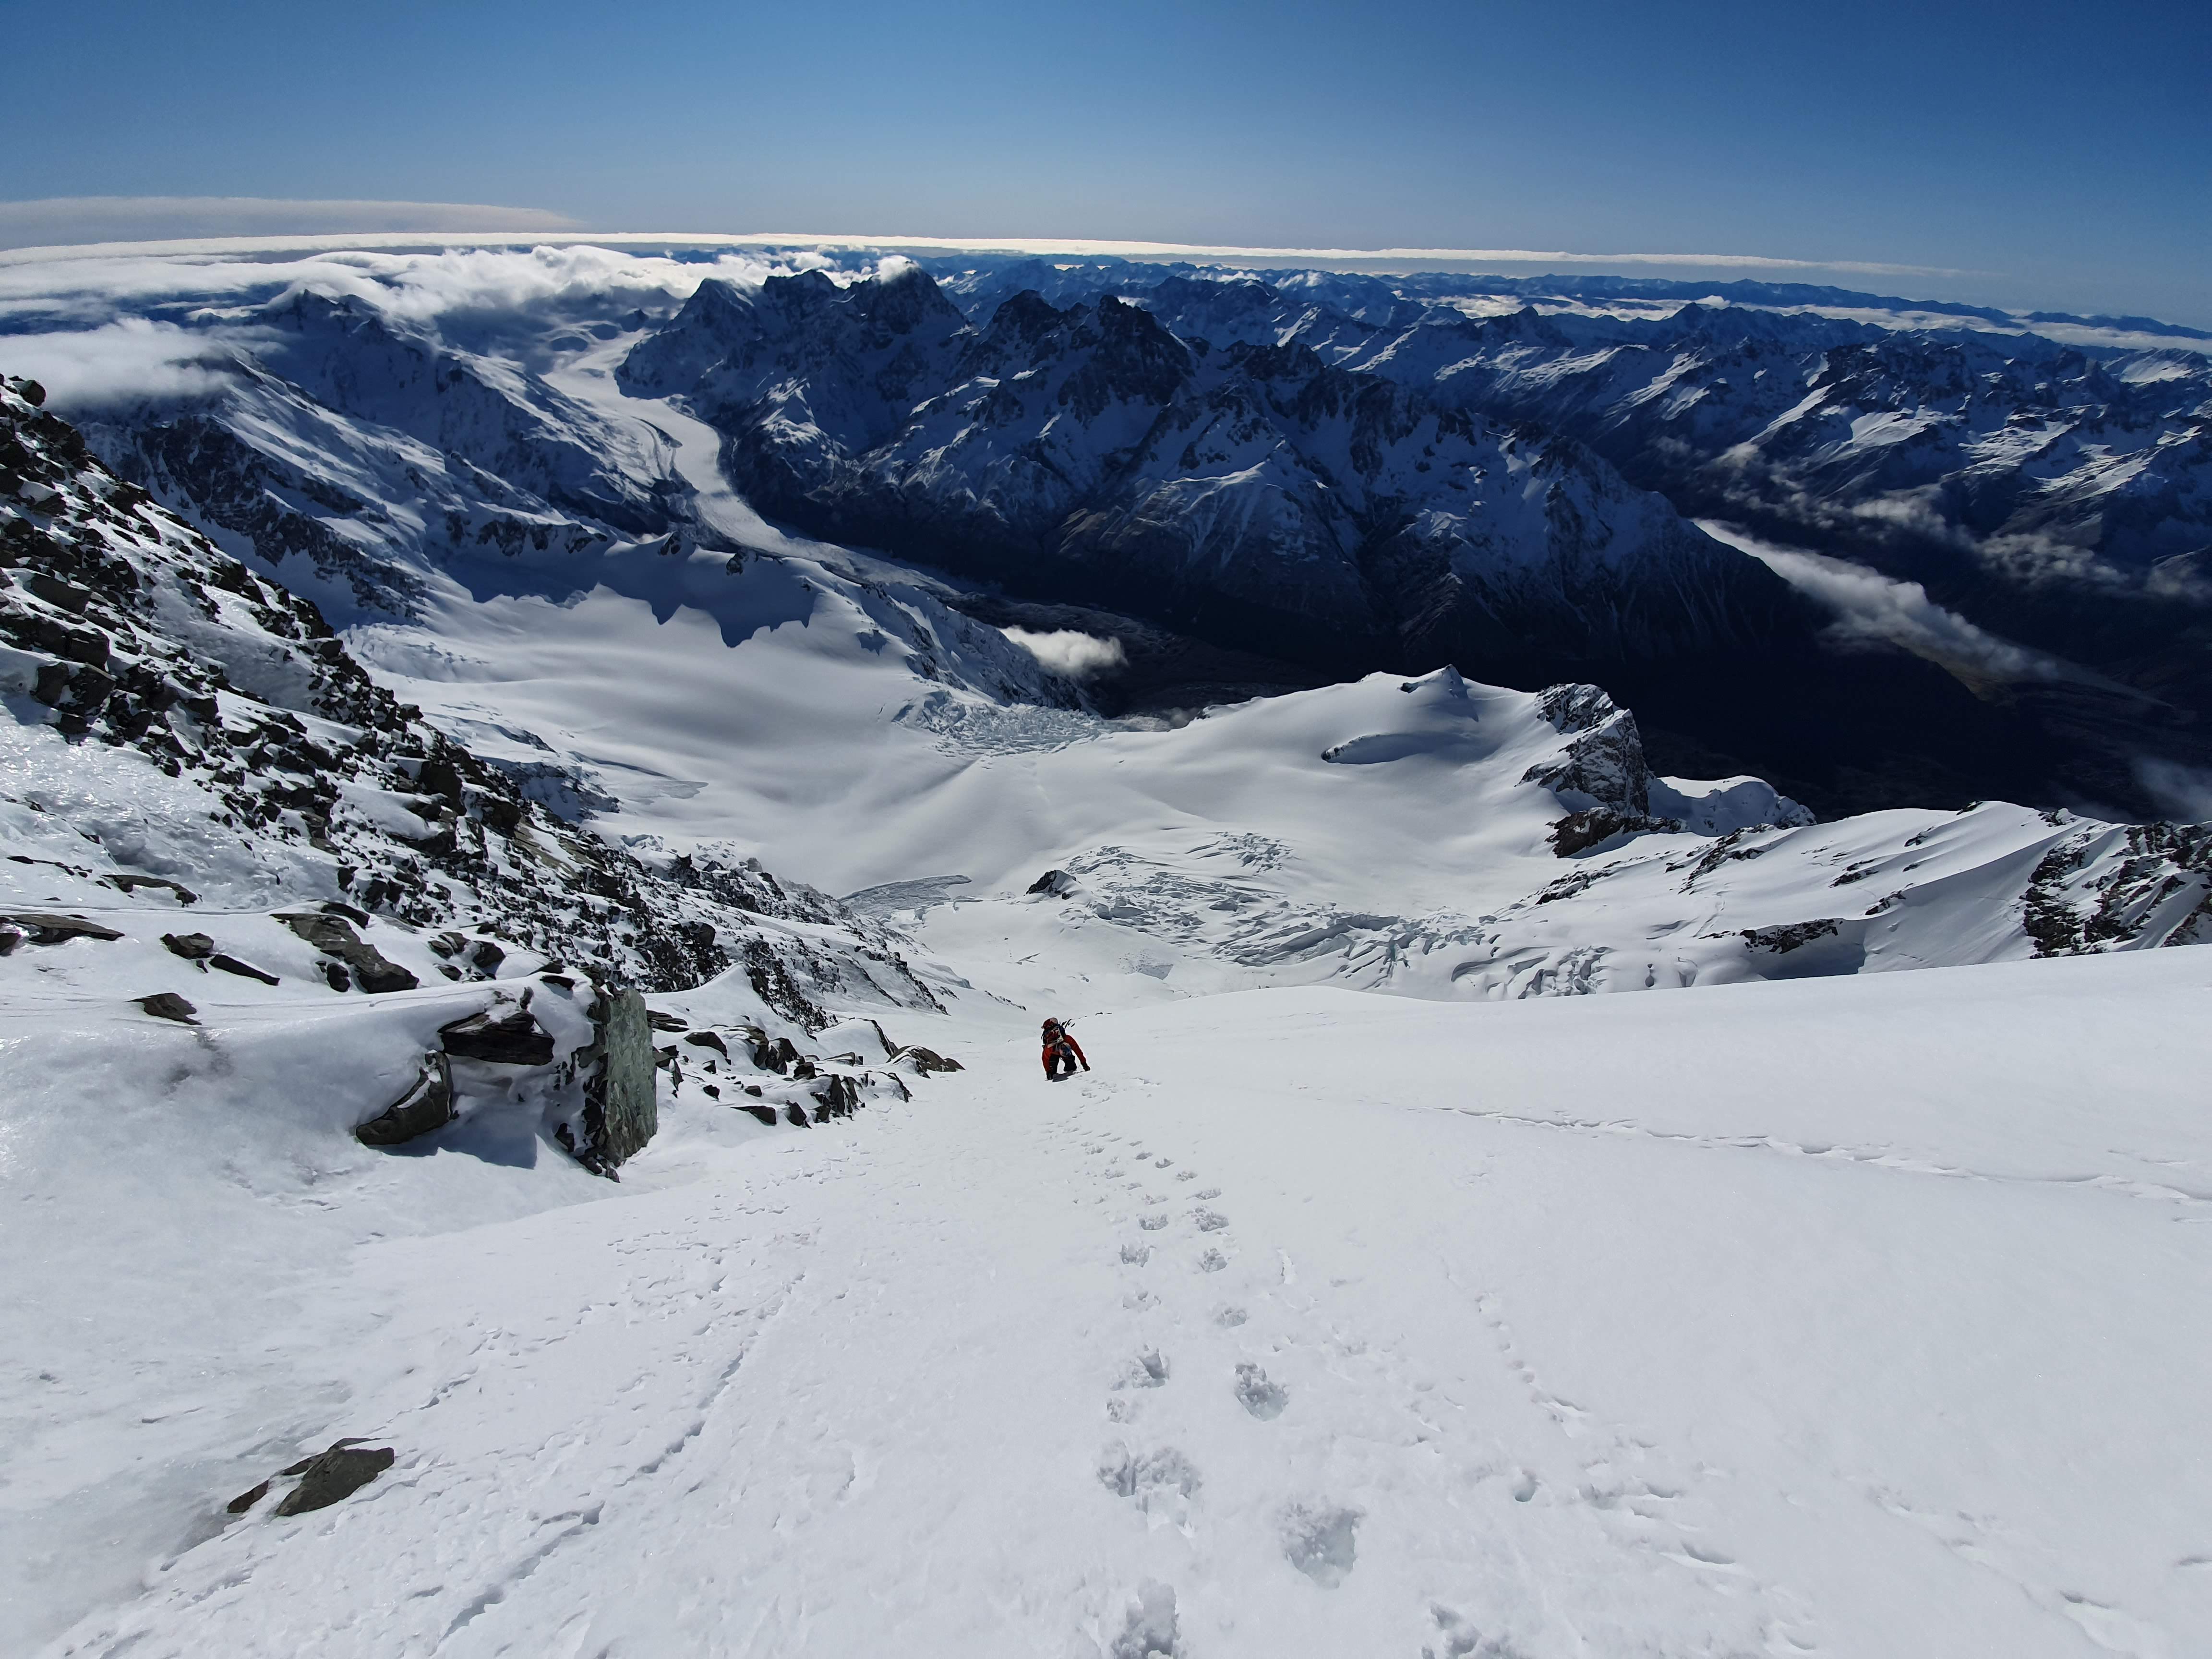
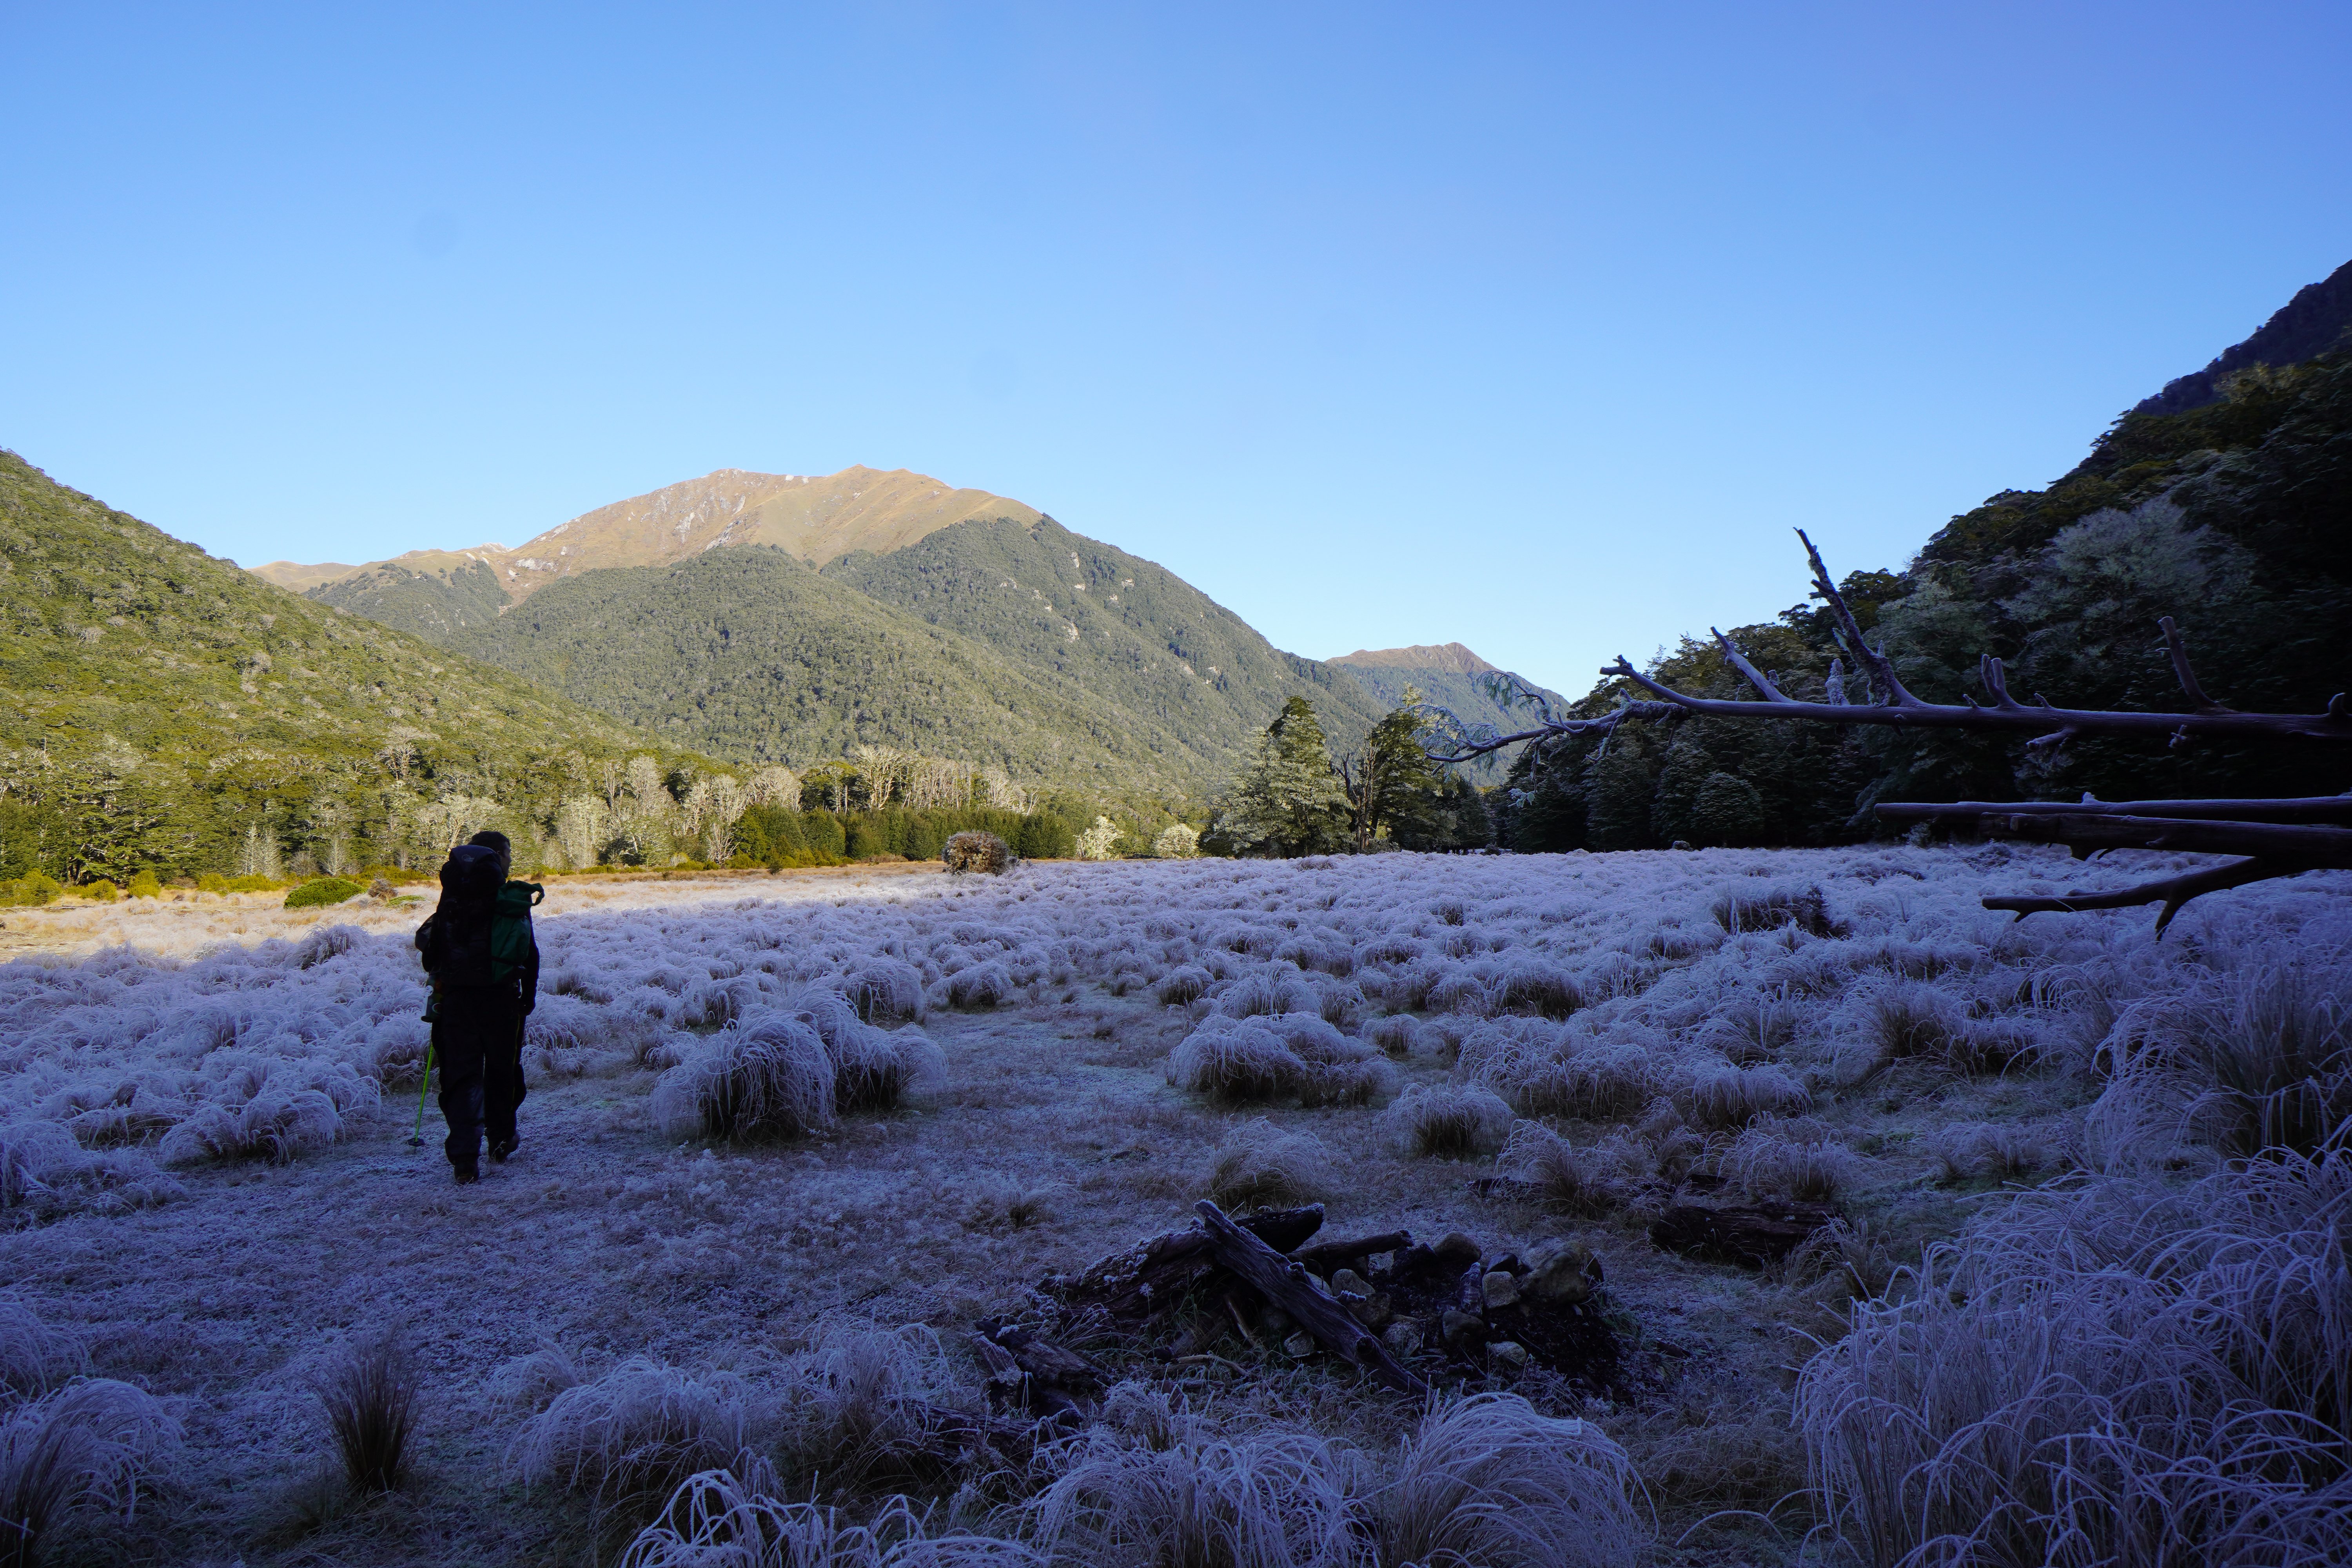
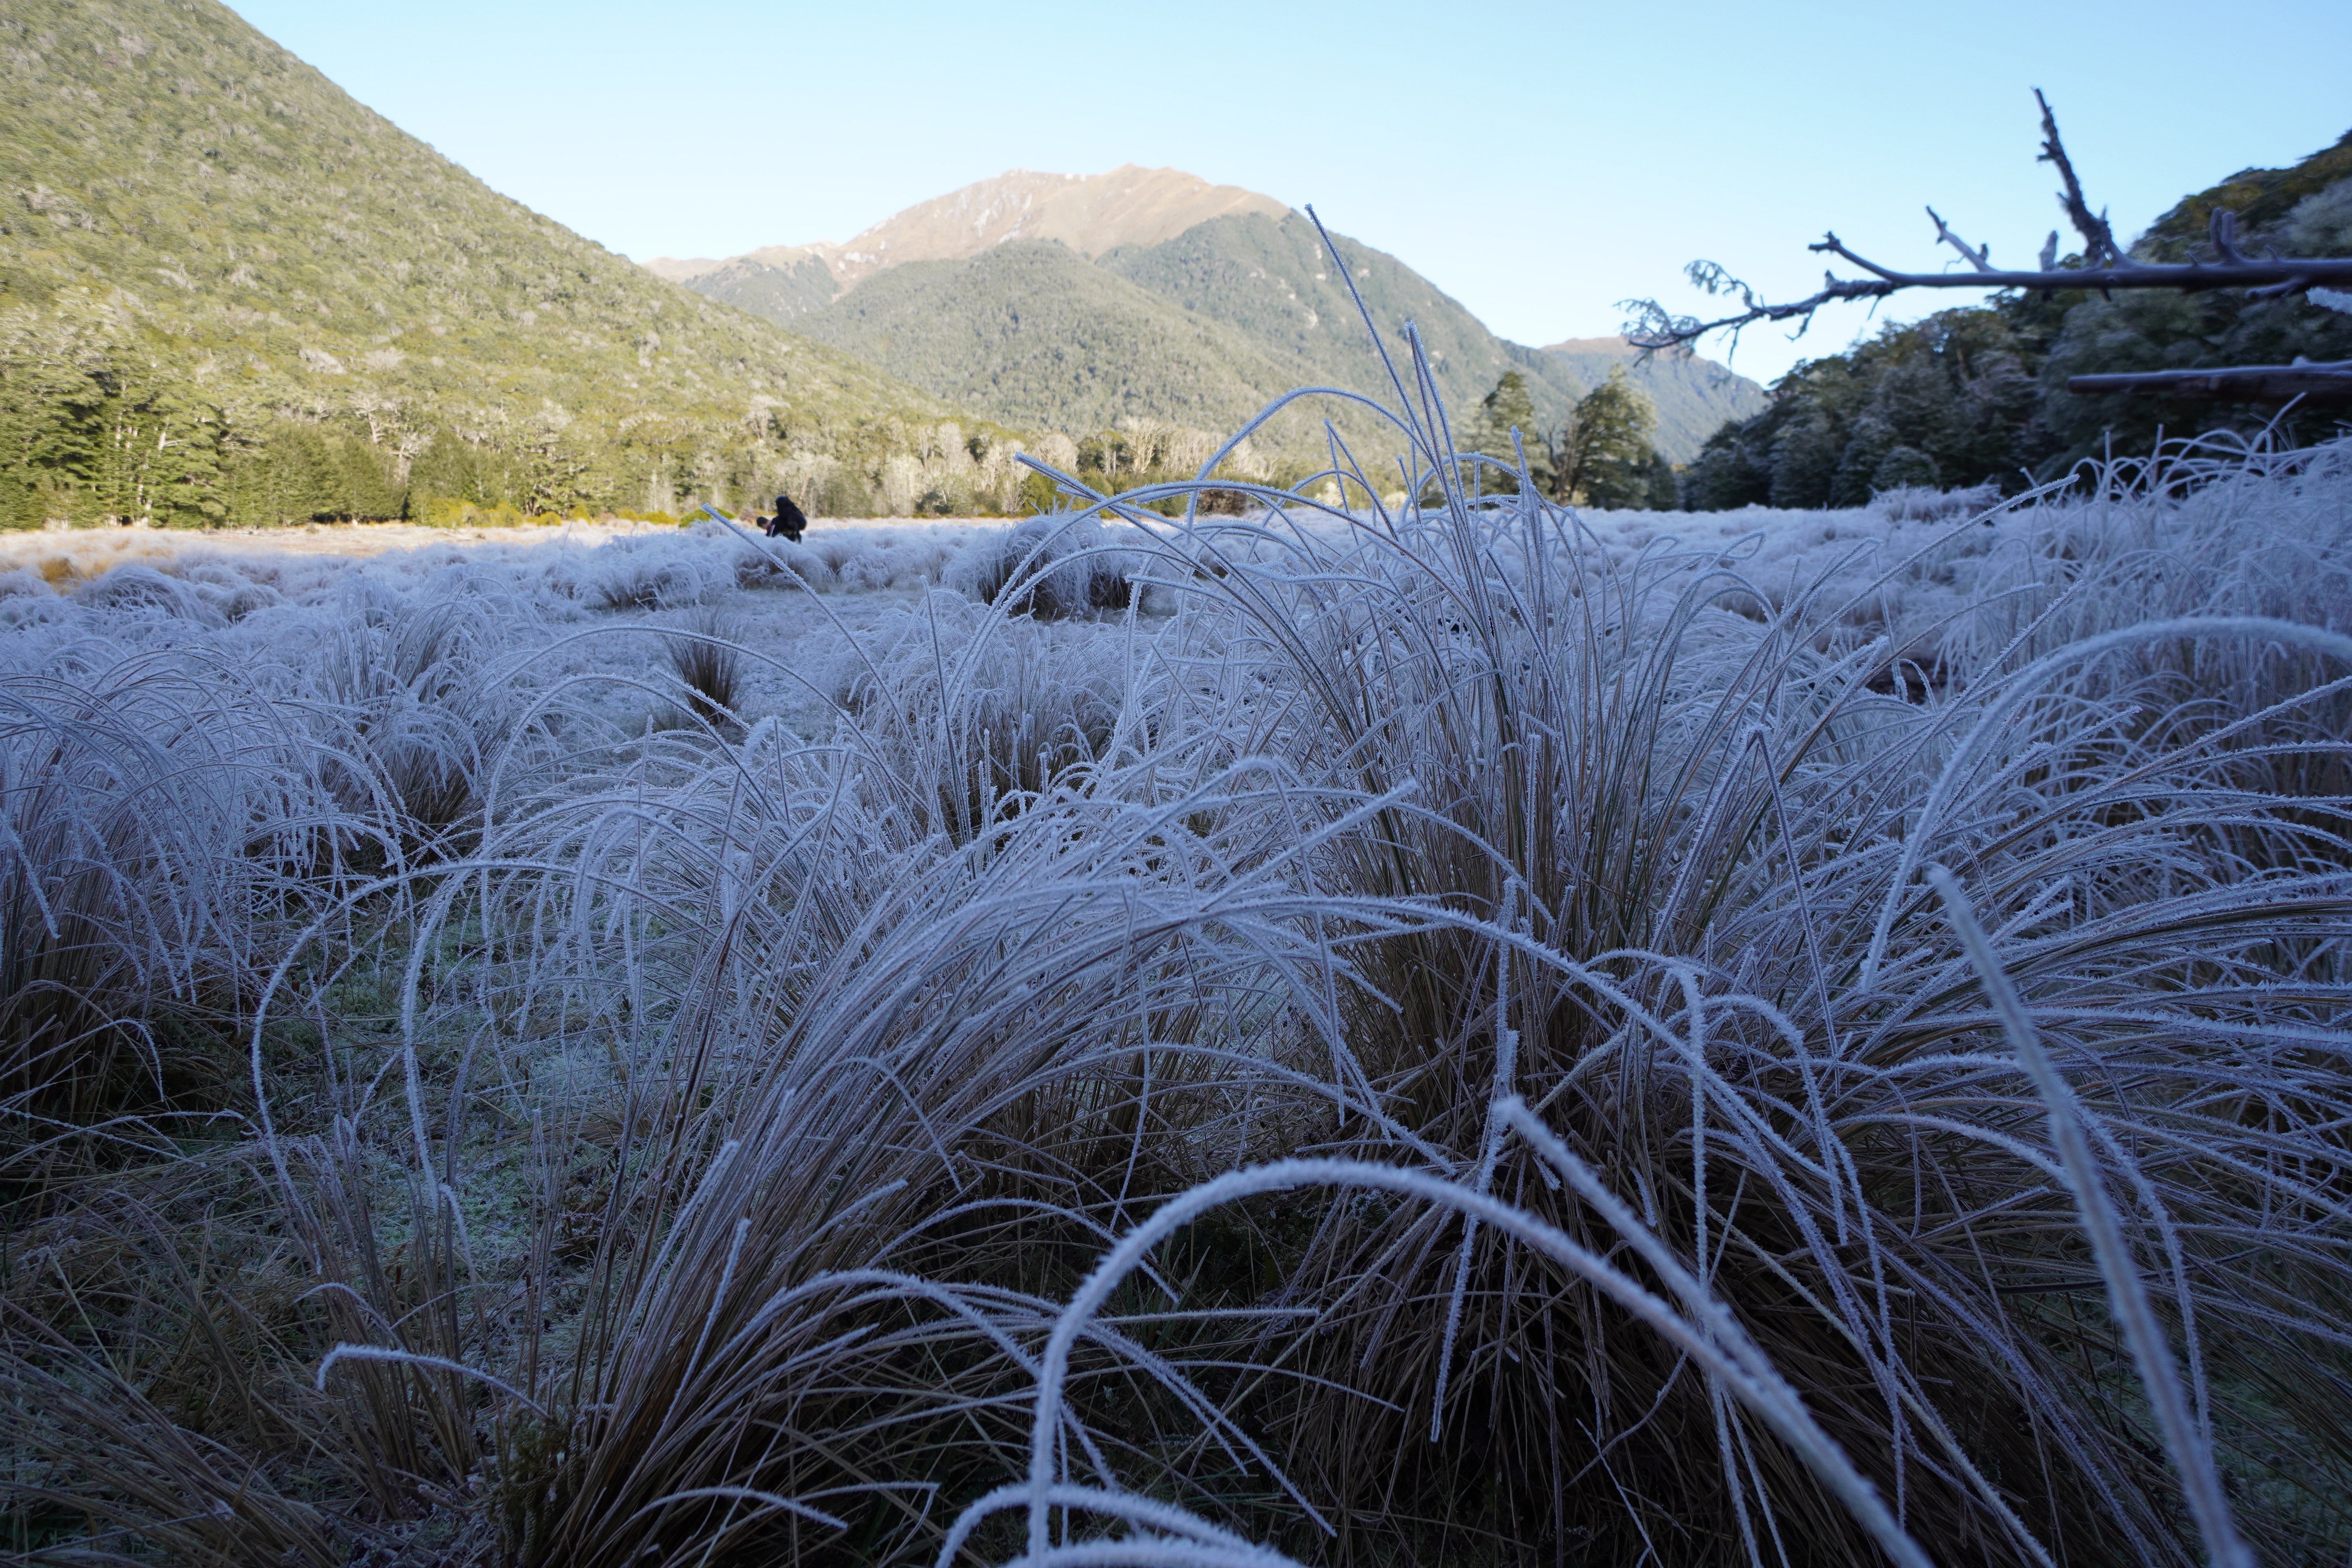
Head directly up through the bushline and stick to the ridge of Titiroa. It’s a good grunt going up to 1715m, but in total we clocked just shy of 2000m elevation in total. From the summit, soak in the panoramic views of the Fiordland surrounds! We summited just after 5pm. Smattering of snow around, lots of very oddly shaped boulders. The sun was just starting to set as we descended to find a biv spot for the night. Always love golden hour!
After a sleepless night thanks to a popped airbed / no repair kit, we set off around 8am. Boosted down to North Borland hut, and along North branch Borland river track. OJ and carrots never tasted so good. Drove back round to Pearl Harbour jetty for a brisk swim (thanks Joe!).
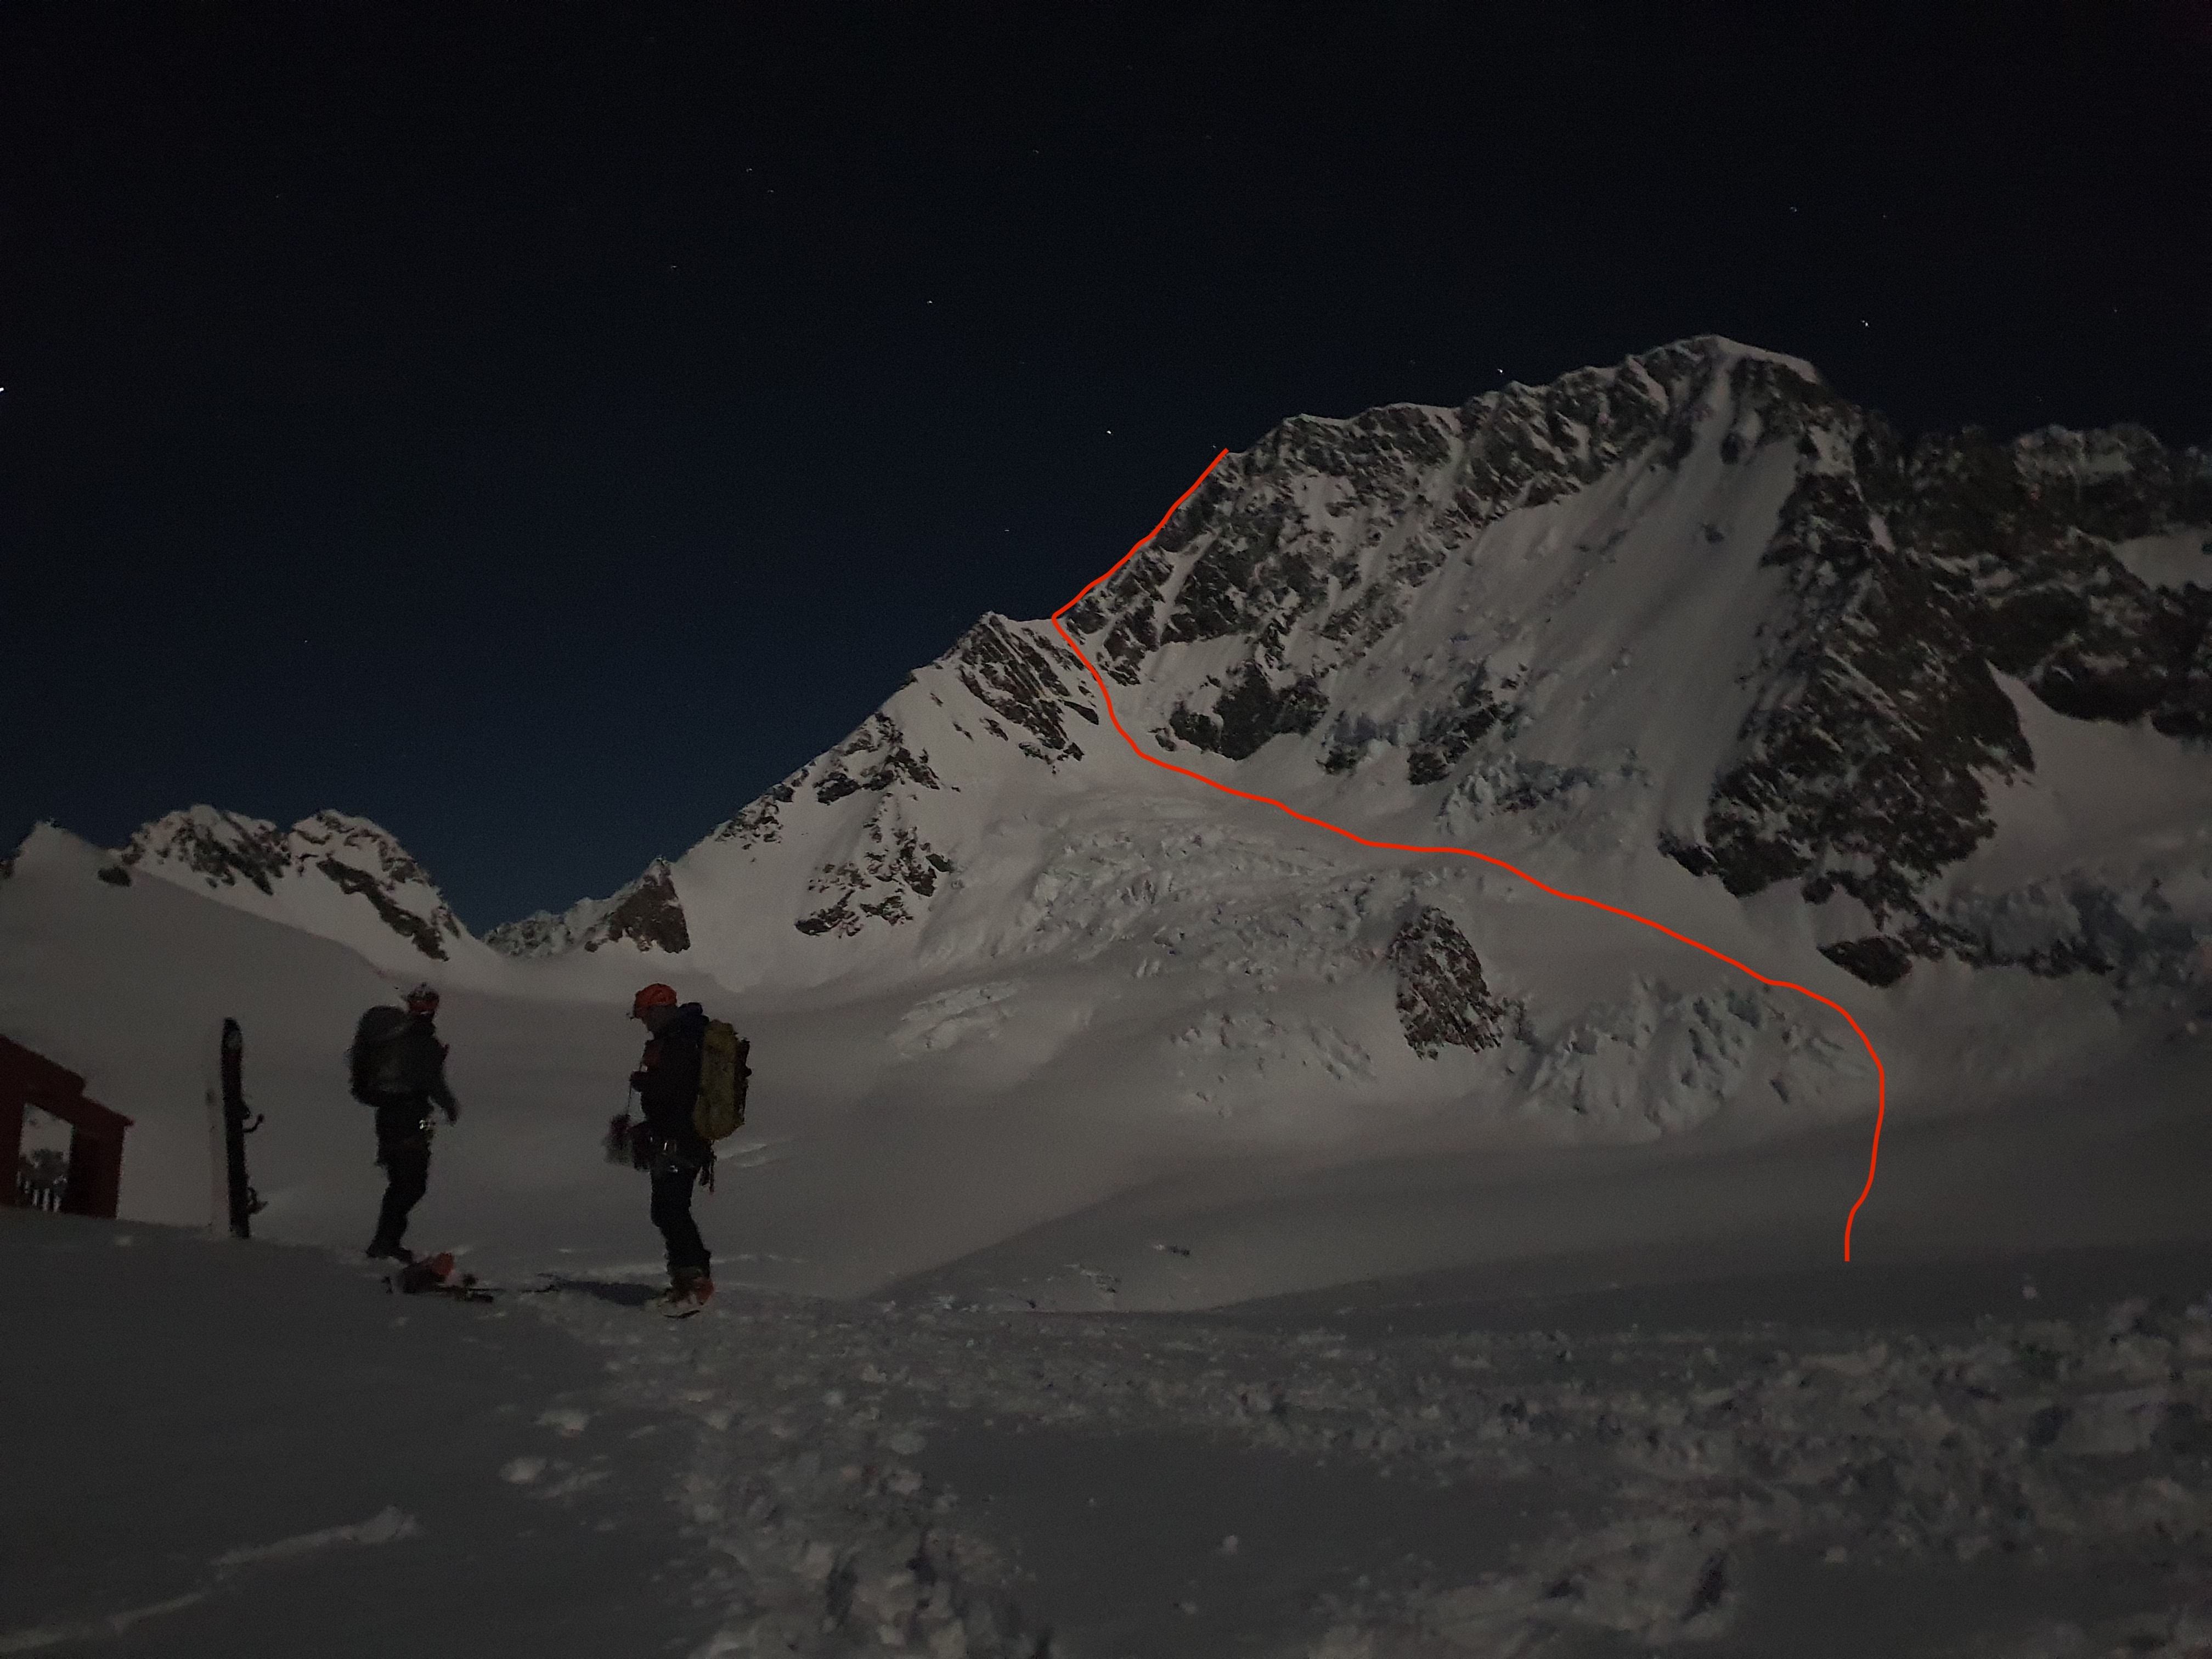
An iconic line in New Zealand mountaineering history – described as ‘the last great problem of New Zealand mountaineering’ when first climbed, it took another 40 years for its first ski descent in 2017.
This 2000m monster of a face is not to be undertaken lightly. Fickle conditions, complex route finding, objective hazard and sustained 45-50 degree skiing above serious exposure combined with a serious mountaineering route just to get to the starting gates, means you need to bring your A game for this line. For the majority of the line, a fall is likely to be fatal.
It took several years of planning, preparation and patient waiting for myself, Will and Sam to get the second descent in 2021. Without a doubt one of the most incredible lines I have ever skied, and the euphoric feeling stayed with me for a long time afterwards. But I don’t think I would ever skin the line again; the objective hazard from the constant serac threat is on the wrong side of that line separating acceptable and unacceptable risk. Even moving as fast and efficiently as possible, 2 hours spent under those ice cliffs is a roll of the dice and balancing the reward against that risk is a very personal decision.
Conditions
Really this is the crux of the route, and can be broken down into the condition of the ice cliffs and the condition of the snow.
Ice cliffs – the state of the face changes significantly year on year, and also throughout the year. While the basic line that Ben Briggs and co took in 2017 is the same as our line, we crossed the 2 main serac bands in different places, and the next descent is likely to cross somewhere else again. Regularly following the state of the face through the year is key, and thankfully climbers and skiers are constantly flying past the face generating a beta stream. Once it looks like it’s in, the pilots will give you a really good fly by on the way to plateau. Multiple photos from multiple angles is crucial to get the line dialled, choose rap spots and make an assessment of coverage. We spent an hour or so zooming in on different spots on the face trying to find tell tale grey / blue shine that might suggest bare ice.
Snow – we wanted to ski the face in powder. Corn is the other option, but your time window between the top section softening, which is steep and super exposed, and the bottom section becoming dangerous is going to be pretty narrow given the complexity and length of the route. The biggest concerns here are avalanche risk, and hitting a section of hidden ice just beneath the surface which would knock you off your feet and you’d be gone. For a line like this I would normally climb the ski line and get a good look at conditions and identify any ice patches on the way up. Given the serac threat this isn’t an option of the Caroline so you have to ski the line top down, and back yourself that you’ve assessed correctly and can deal with the conditions you encounter. Our approach was to wait until late spring and generally stable conditions, and then wait for a system that was going to bring in warm precip turning cold during the storm, hopefully providing well bonded right way up snow sticking to the underlying ice. We wanted at least 24-36 hours of cold still weather for settlement and then another day of the same to ski the line. This is not common in New Zealand but in November 2021 everything seemed to be lining up so we flew in to take a look.
Approach
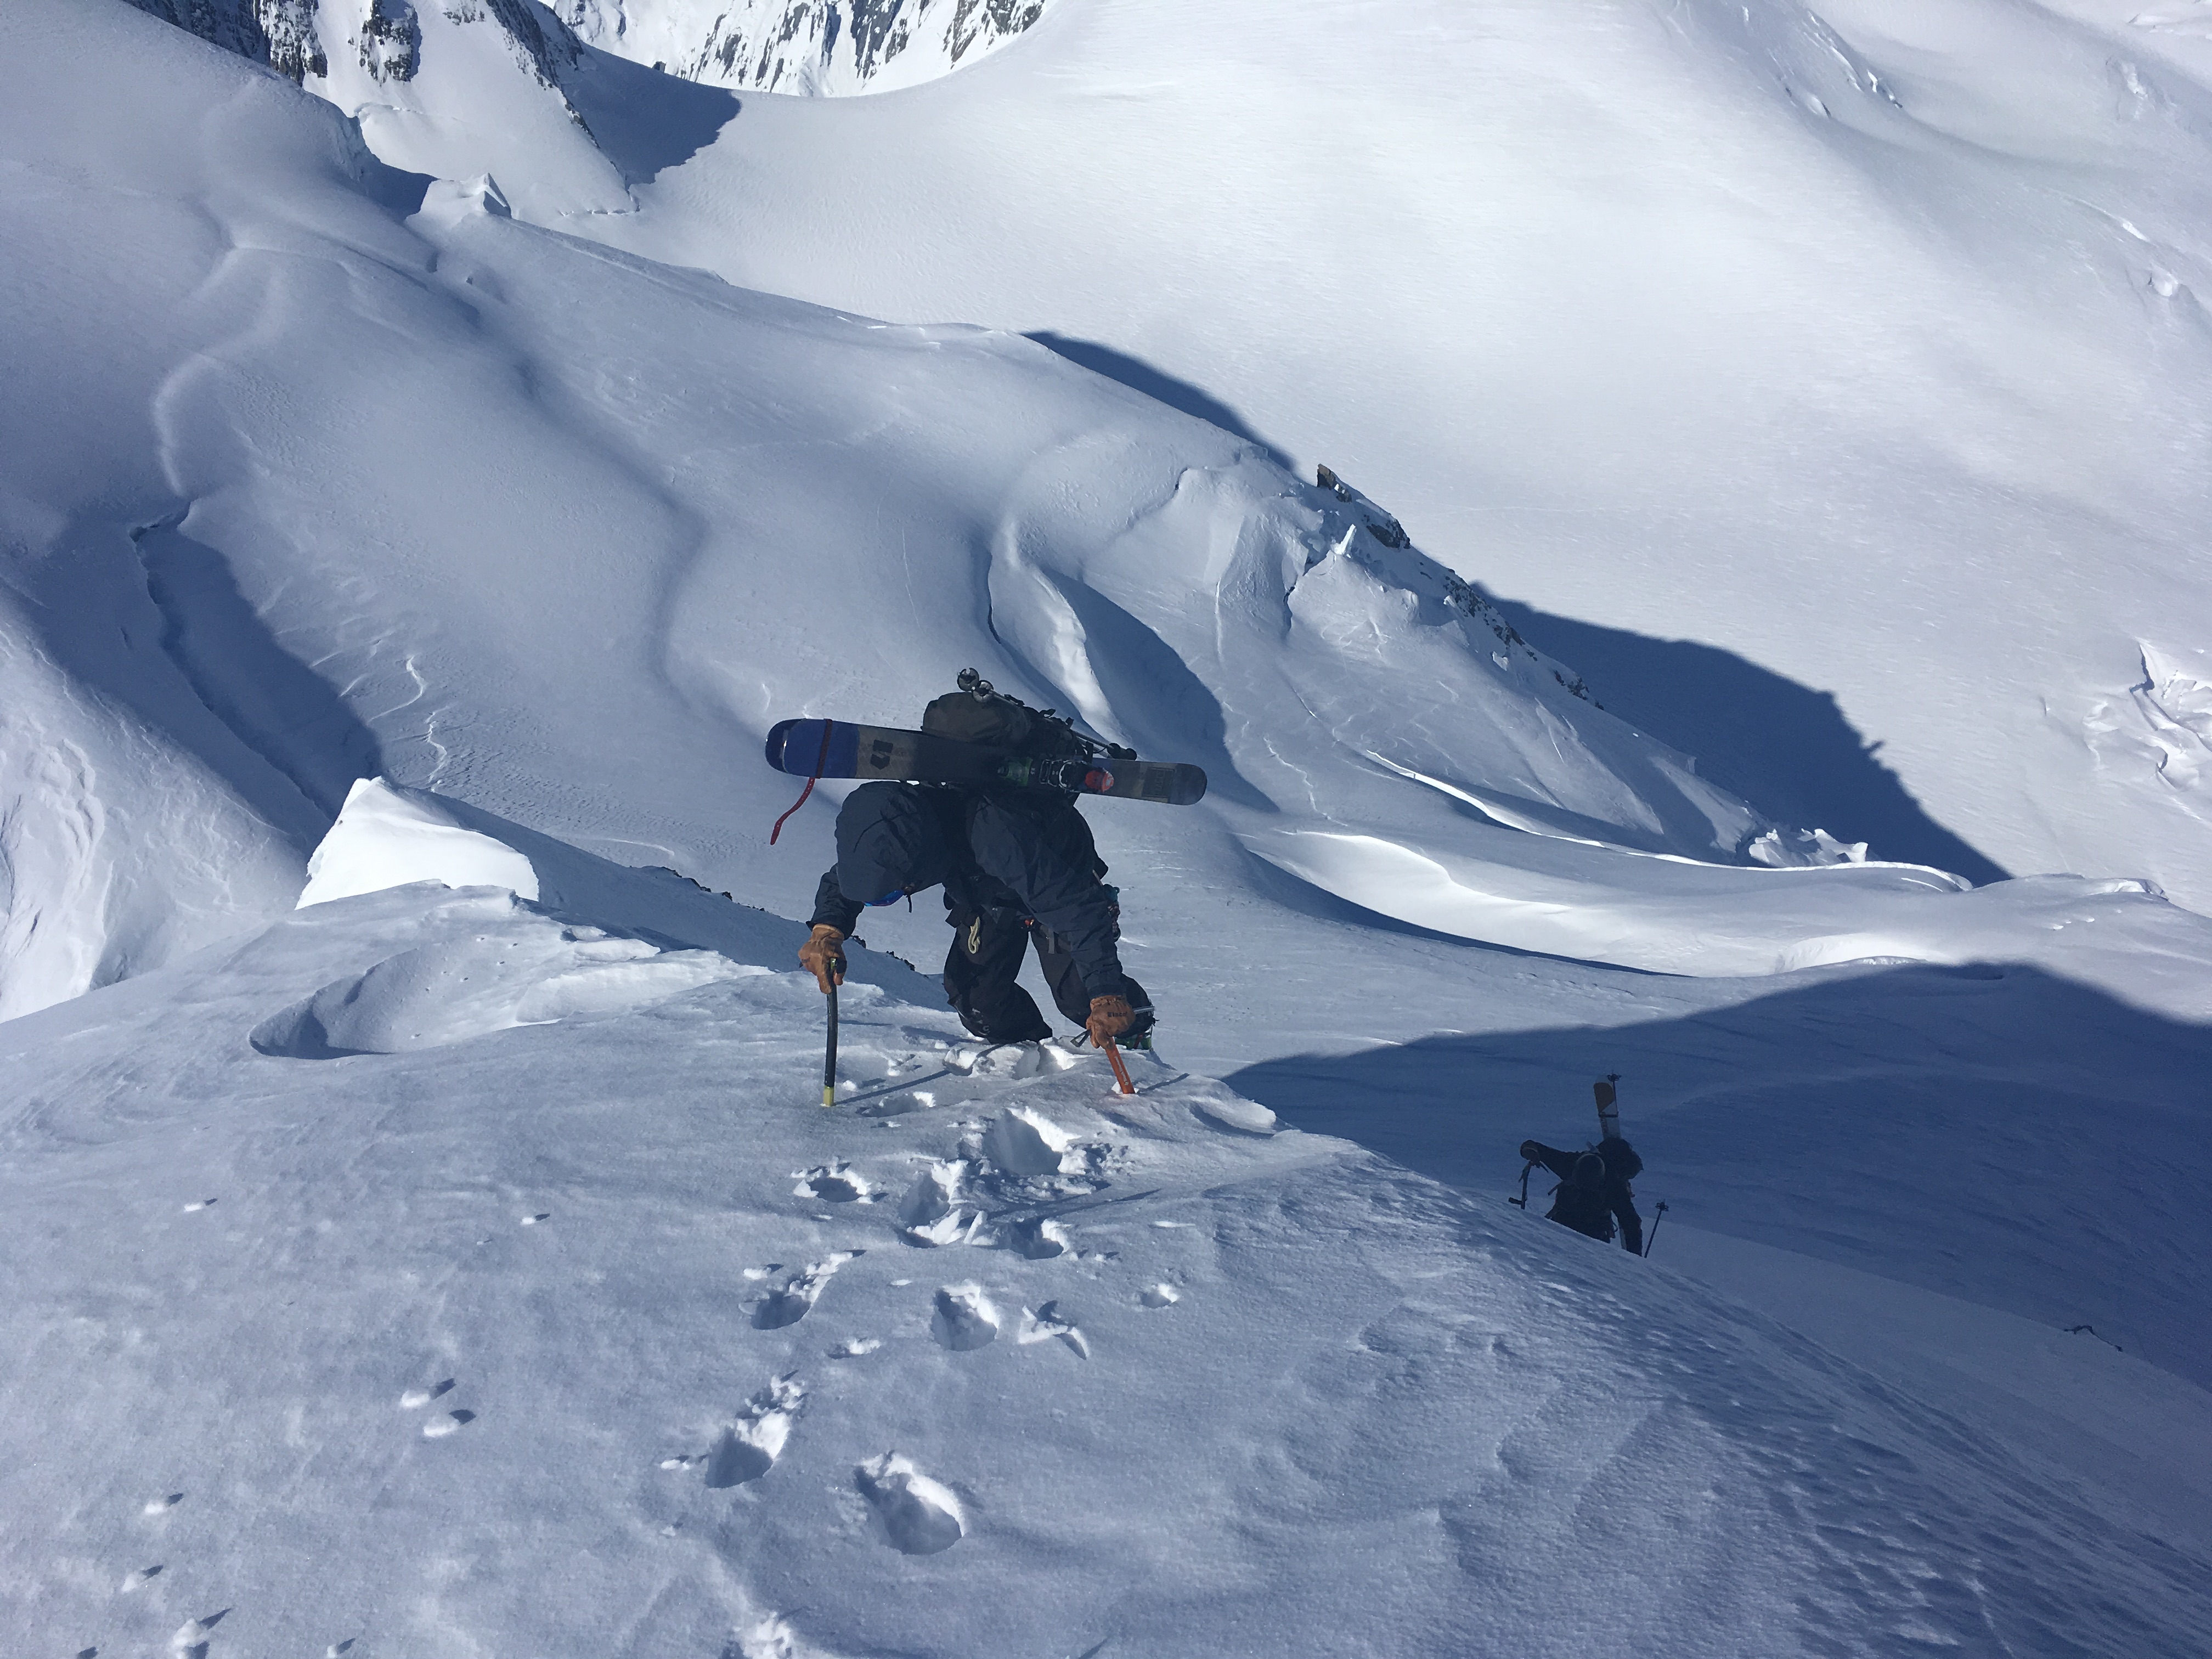
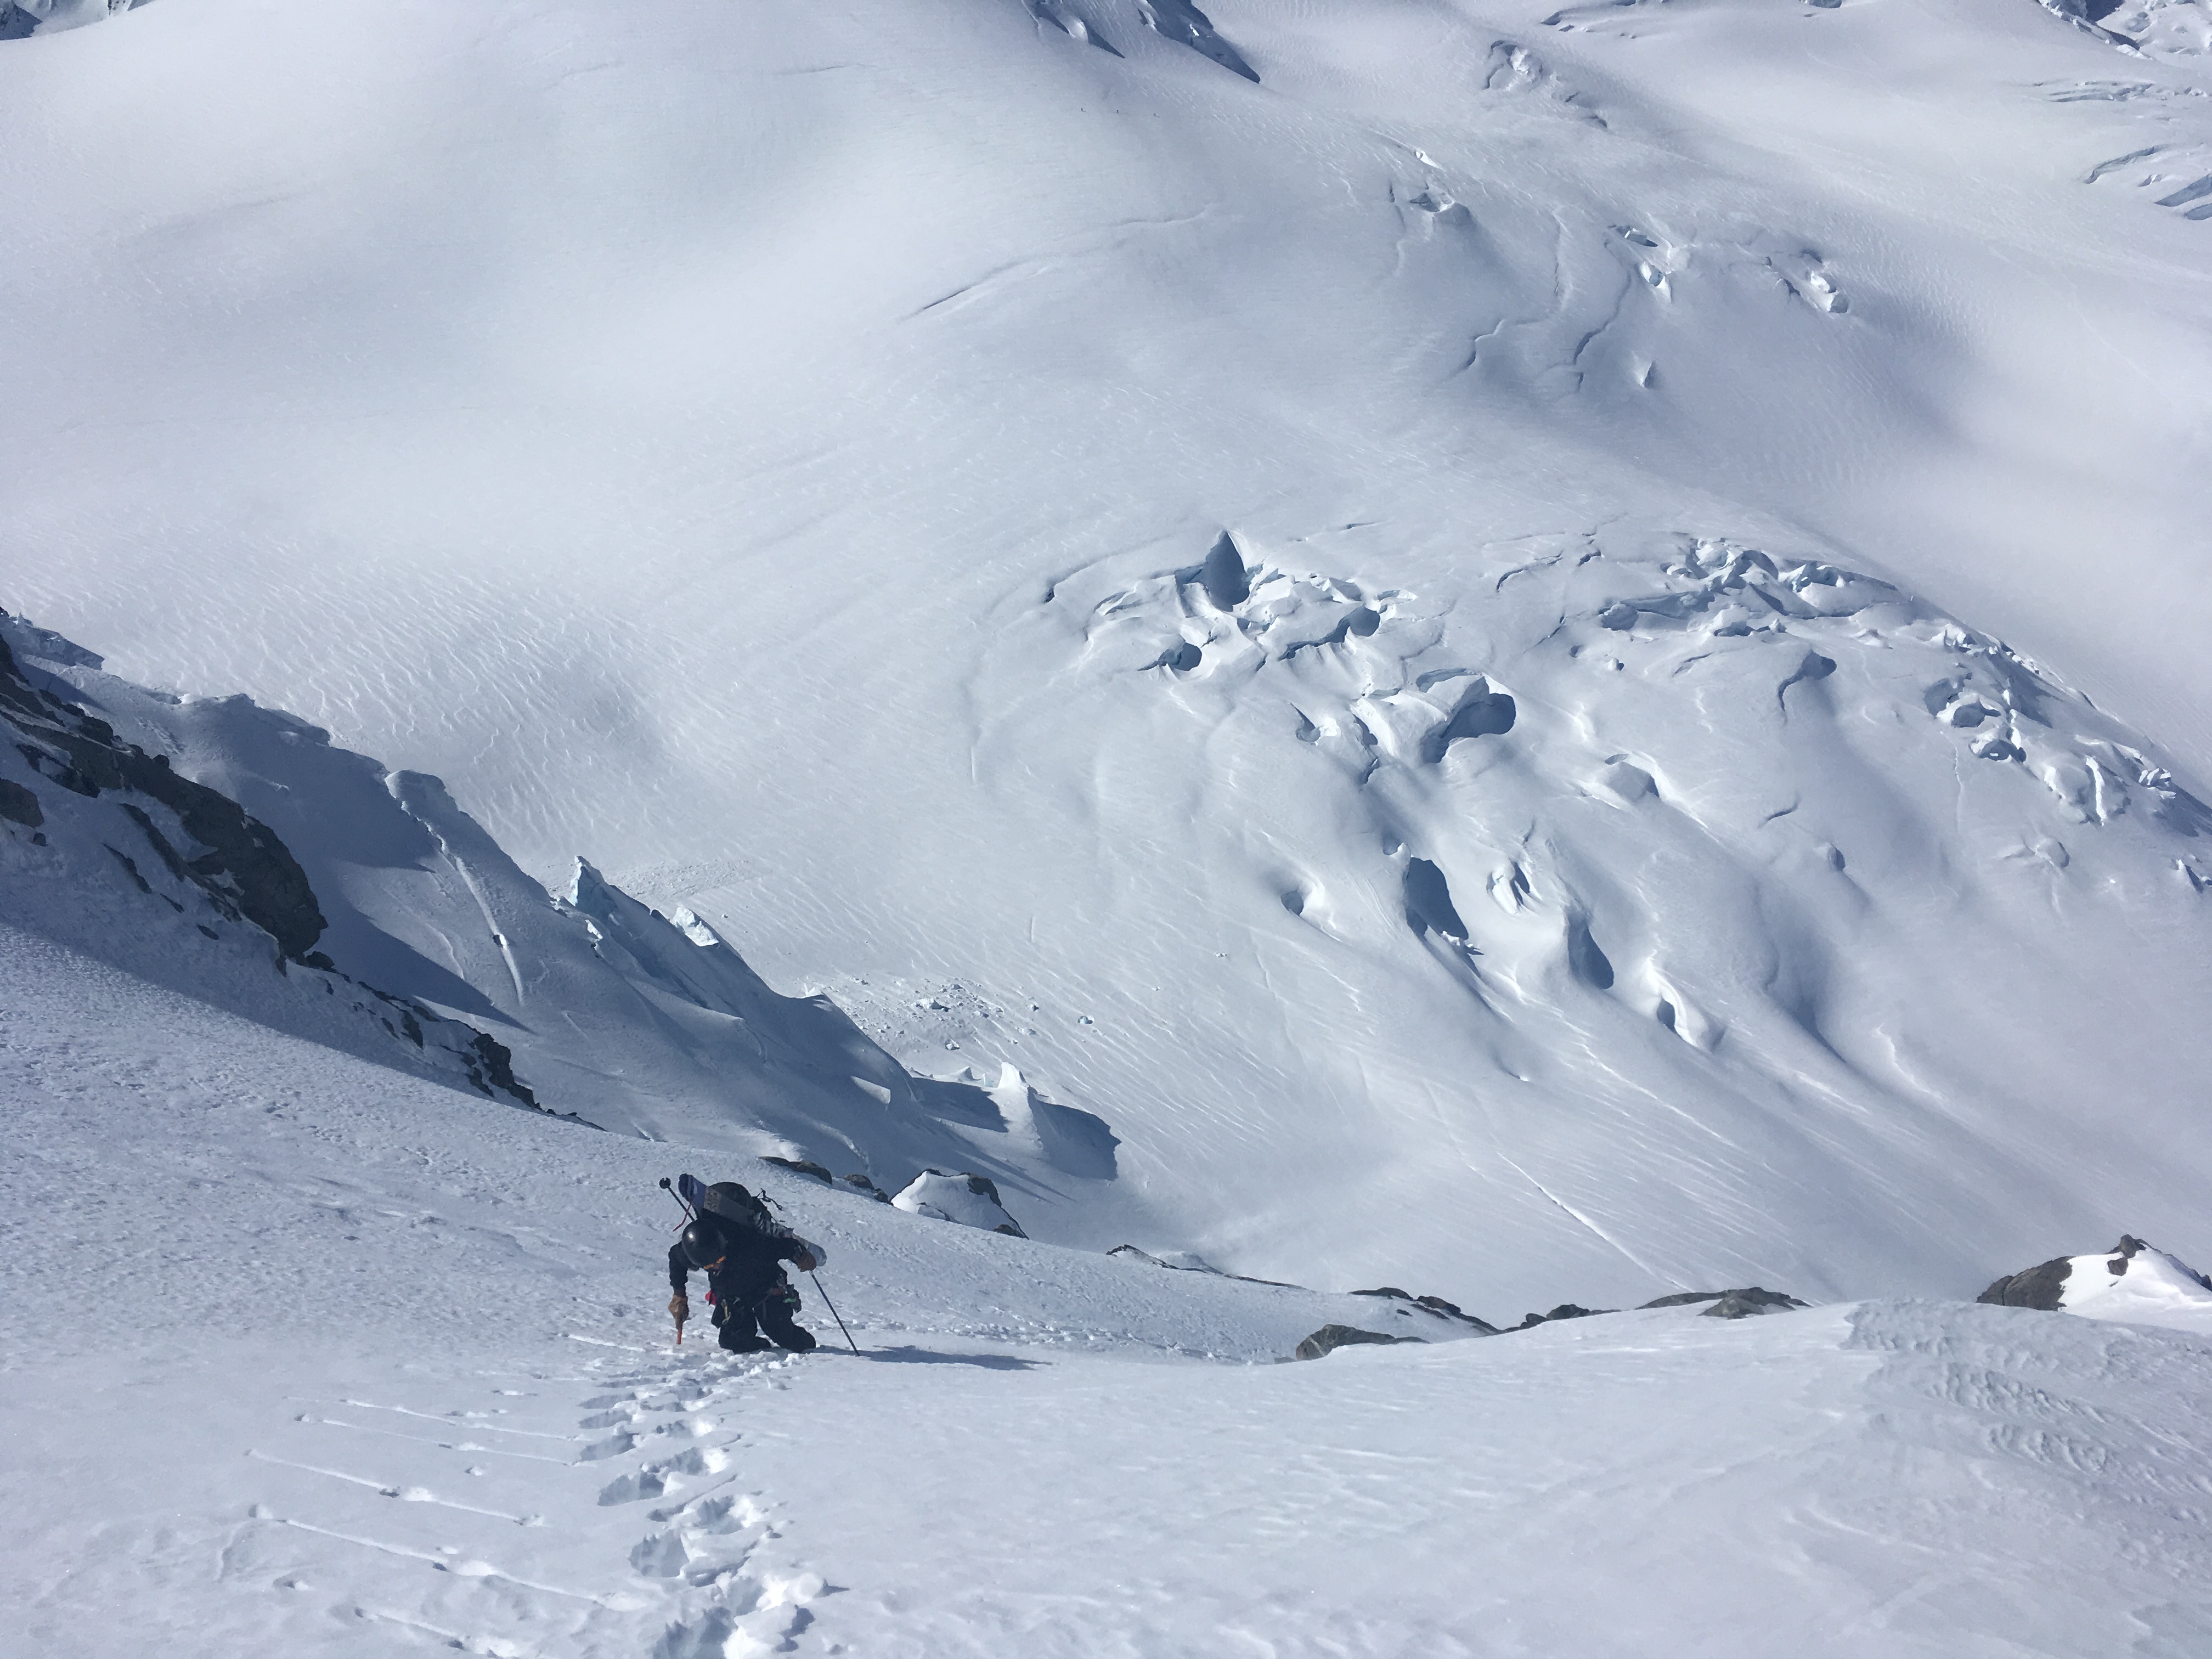
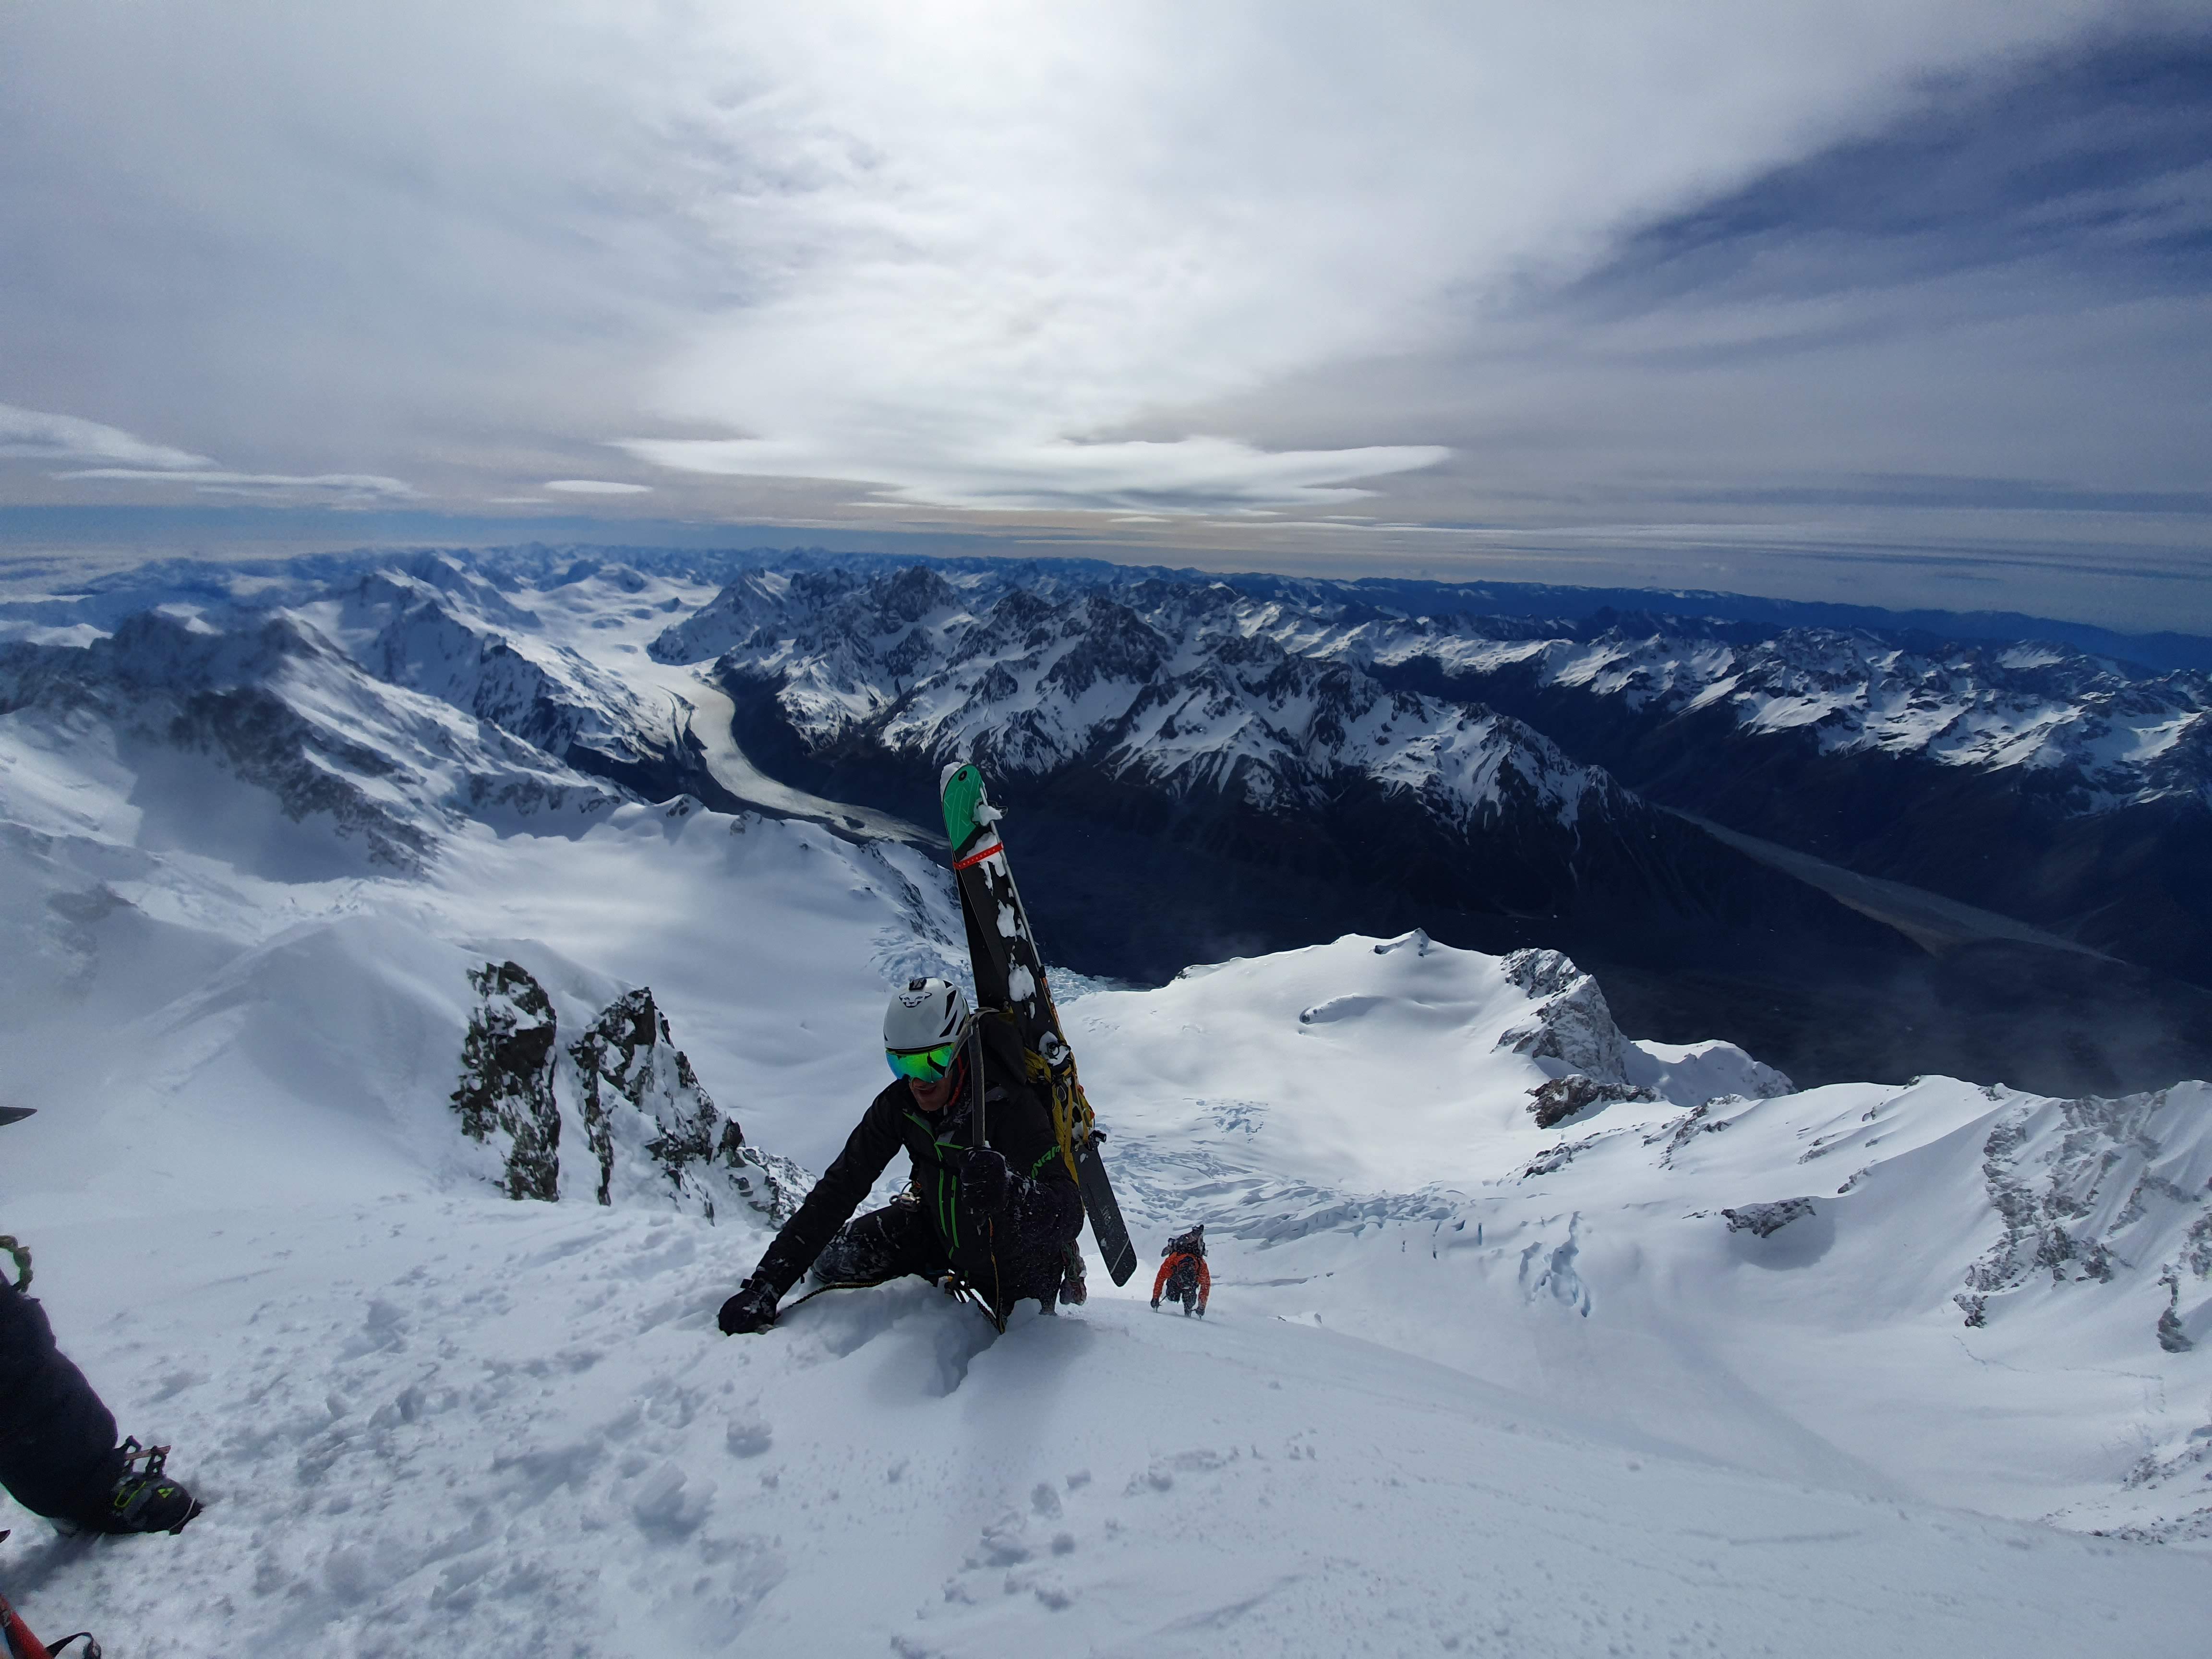
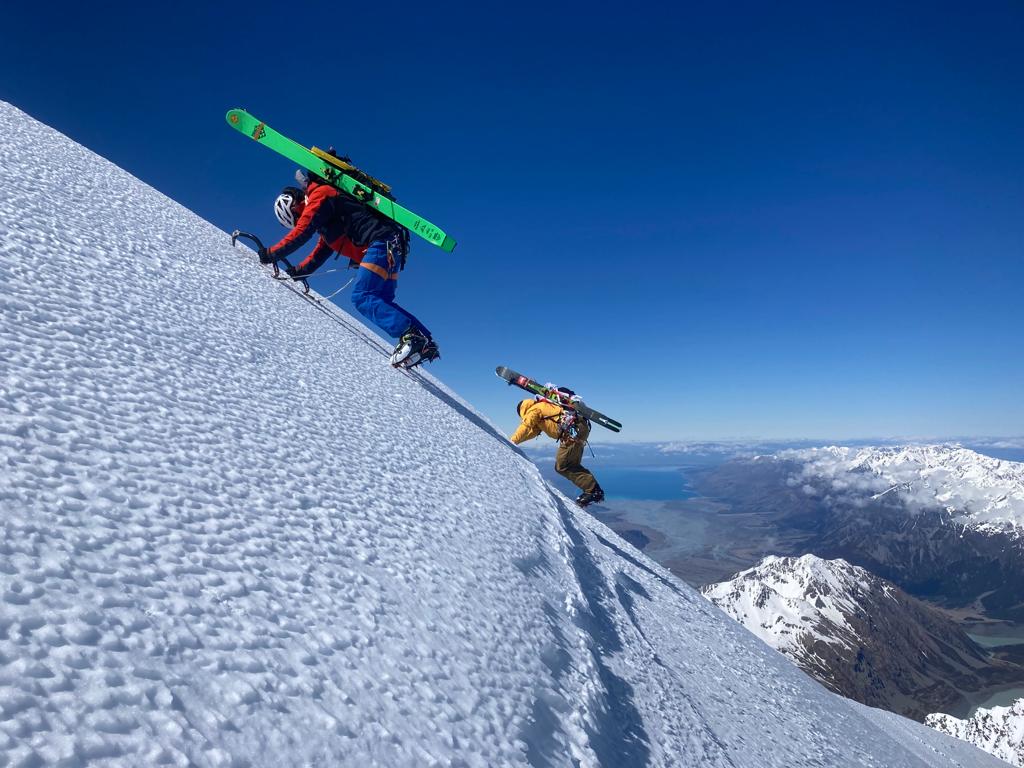
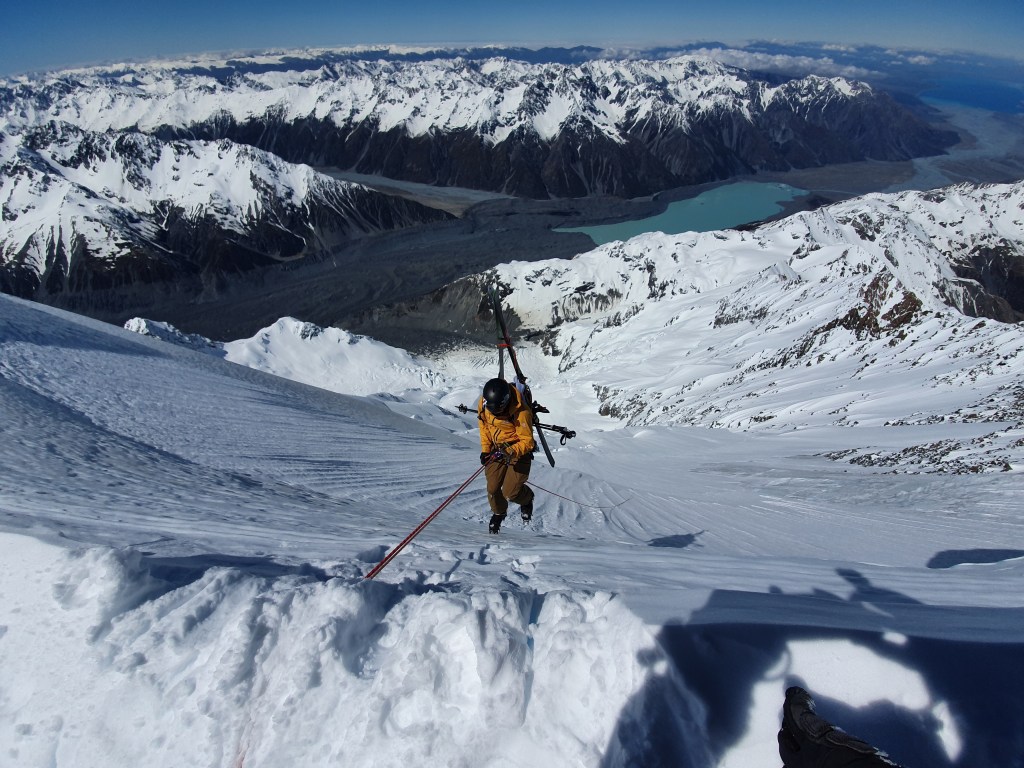
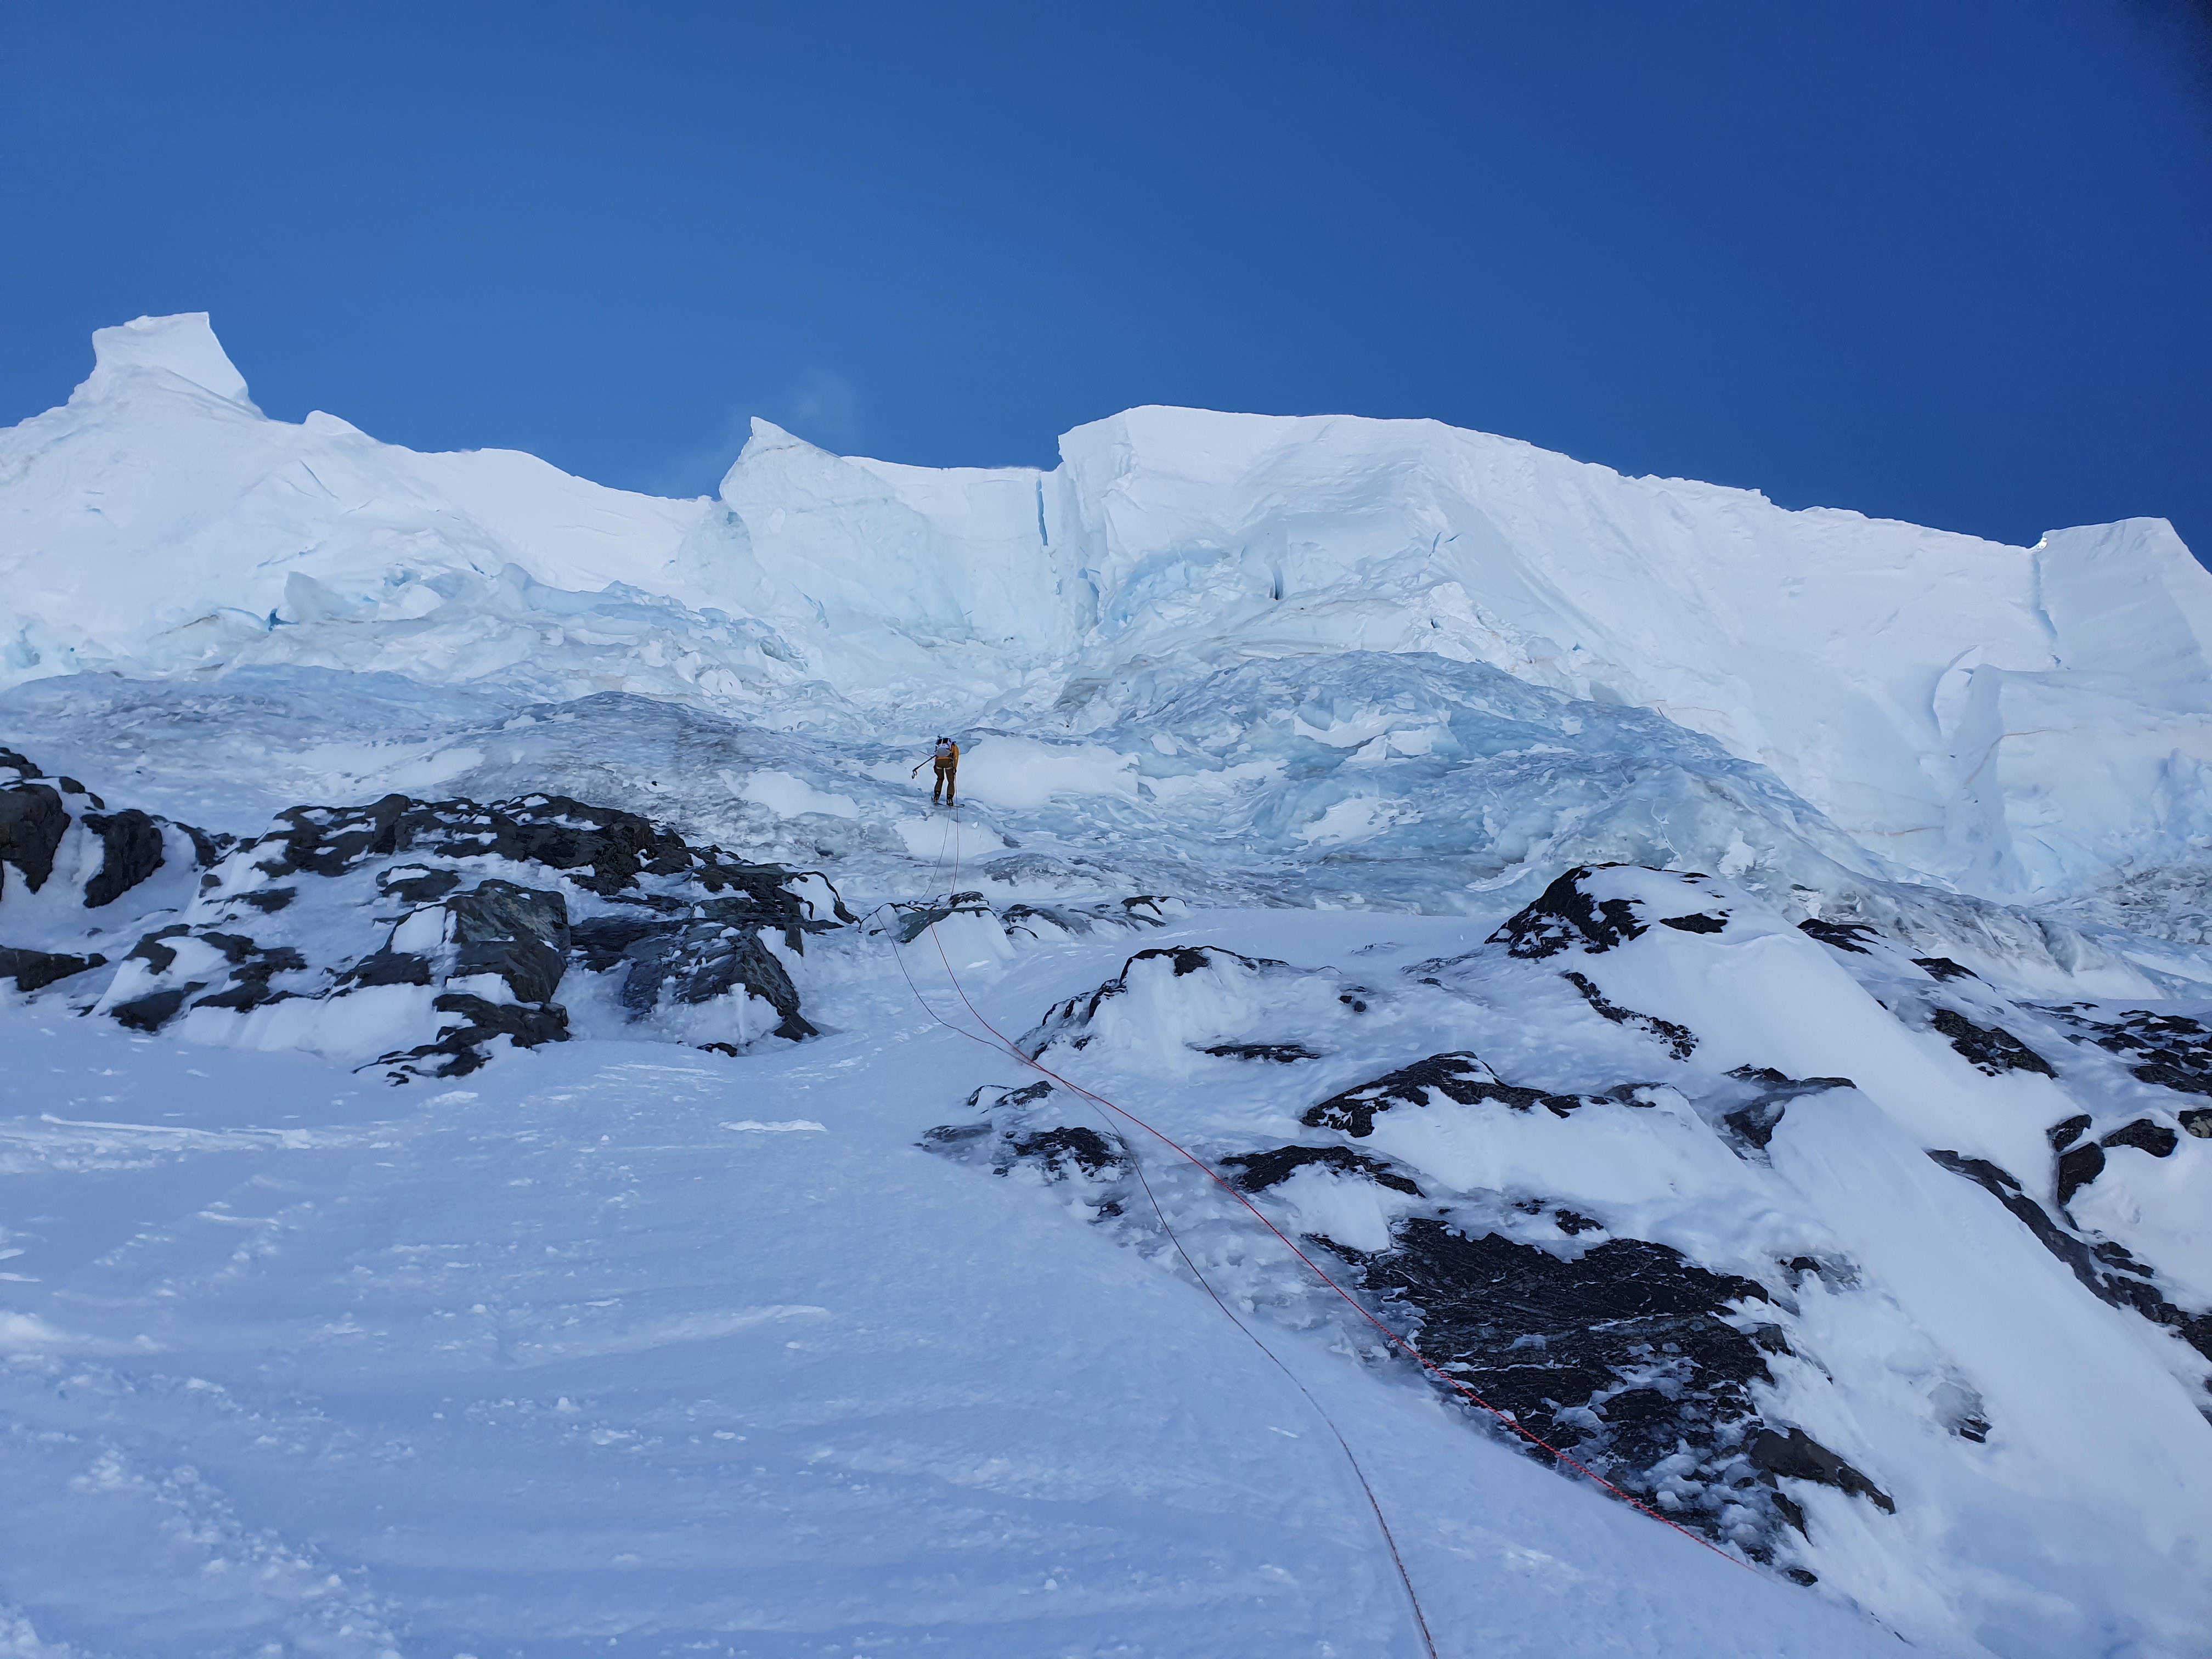
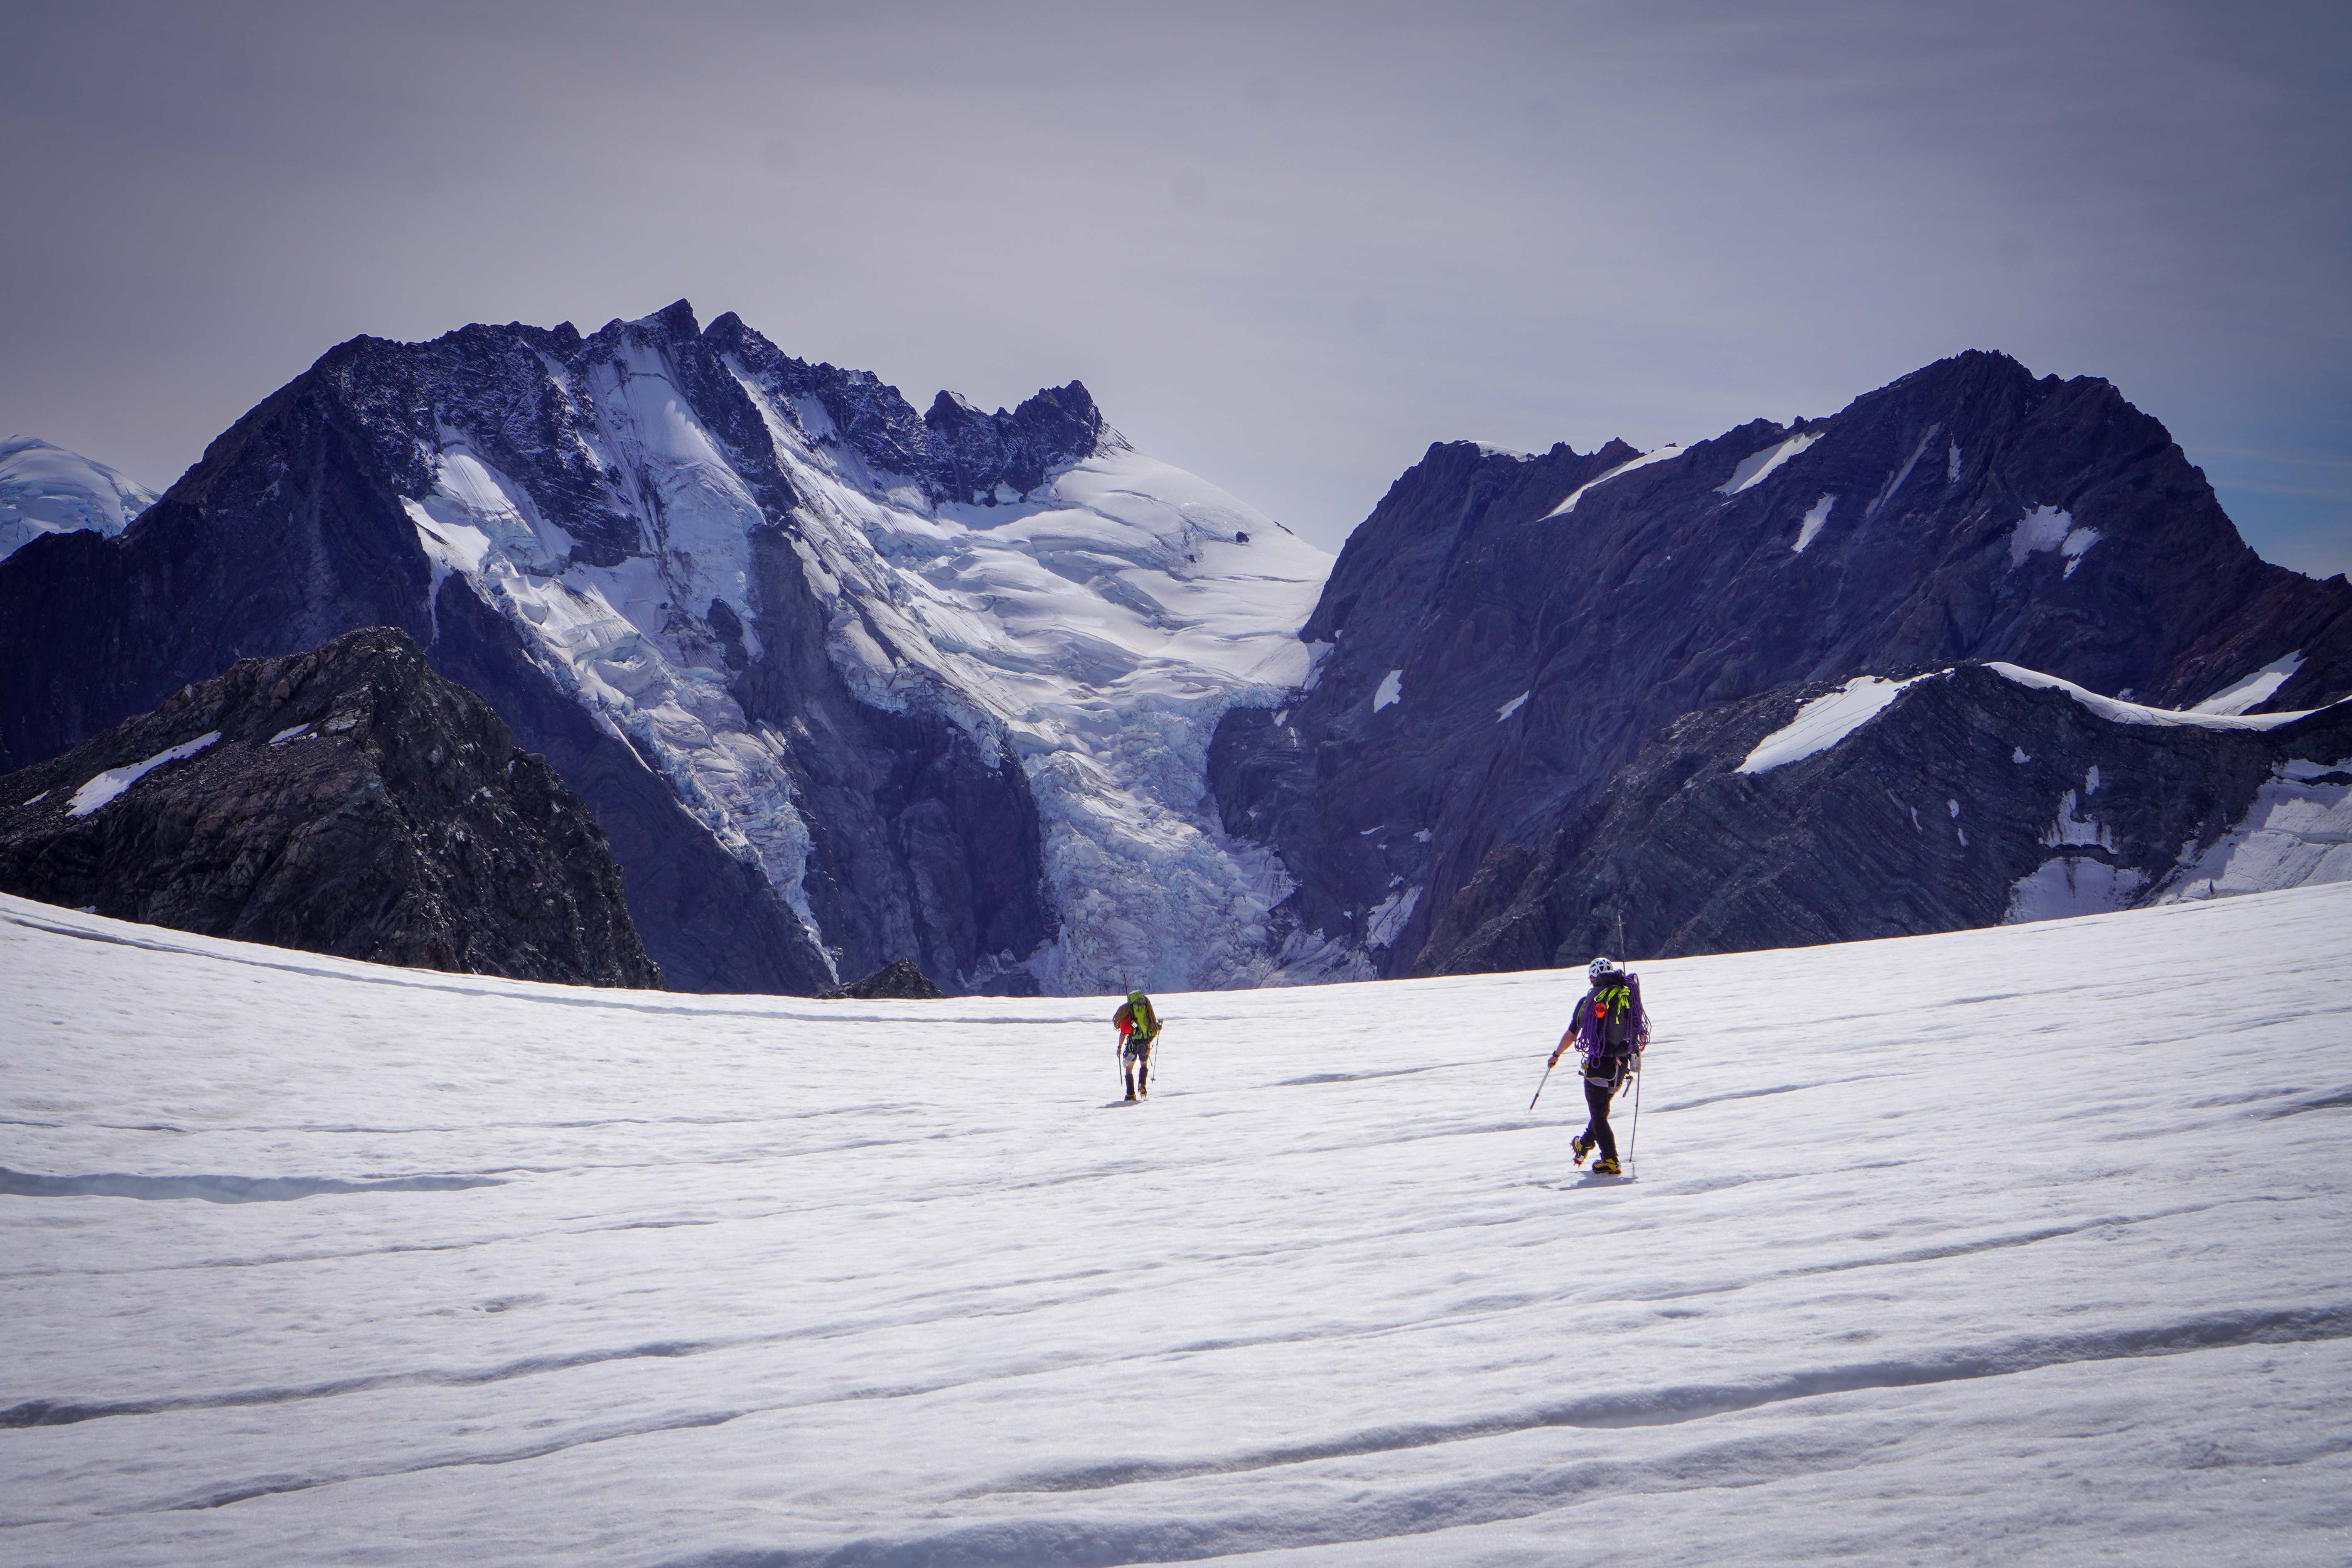
Plateau hut is incredible – the majority of New Zealand 3000m peaks within a 30 minute skin. The best approach to the Caroline is to head towards the East face and traverse high, climbing the snow gullies to reach the East ridge. This means you miss the first 400m or so of the East ridge, significantly speeding the climb. Once on the ridge, the soft confidence inspiring snow meant we made pretty fast progress by soloing the majority of the route. It also gives the opportunity to sidle onto the Caroline and assess the stability for the first time.
With everything looking good we continued up the East ridge. Once we hit the last couple of hundred metres it turned from soft to bare glacier ice so we put in 4 pitches up to middle peak. The climbing was super fun, easy WI2 , mostly 50ish degree ice with short steps up to WI3 over outrageous exposure. Halfway up the climb we saw a massive 500m wide avalanche rip down the face to our left reaching all the way down to the Ball Glacier. From the ridge you don’t get a full view of the face and it was impossible to see exactly where this had started – if it was on our line then either it was a slab avalanche and we had totally misjudged the avalanche risk, or if a serac collapse (the most likely thing) it would have cleared all the snow off the line leaving bare ice. Either way not good. We decided to carry on to the top of the east ridge and asses and discuss – if we were not happy then the bail out options from there would be the Grand Traverse and down the Linda, or down the NW couloir to Empress.
From the top of the East ridge, Porter Col is just a short distance South West. We took particular care here – the ice was totally bulletproof and a slip would mean a fall all the way down to the Empress Shelf. This was the spot that Magnus Kastengren tragically died in 2013 attempting this line, and that thought was in the forefront of our minds while crossing this section. From Porter Col for the first time we got a full view of the top section of the line – it was clear the avalanche we had witnessed earlier had come from serac collapse on the far lookers left side of the face, and had not affected any part of our line. The snow looked incredible from the top and after a long final discussion we decided to rap in and commit to the line.
The Line
Routefinding is key – have photos of the face on standby on your phone to reference, and have a mental image of the major landmarks on the face. Climbing back up under those seracs is not a position you want to be in!
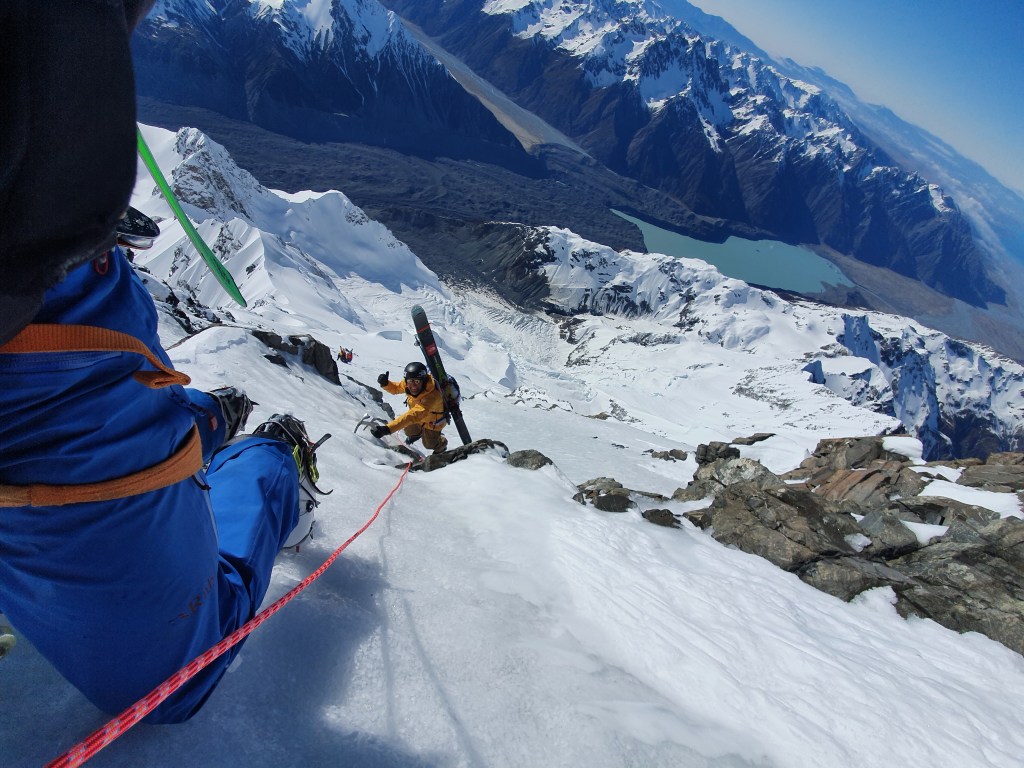
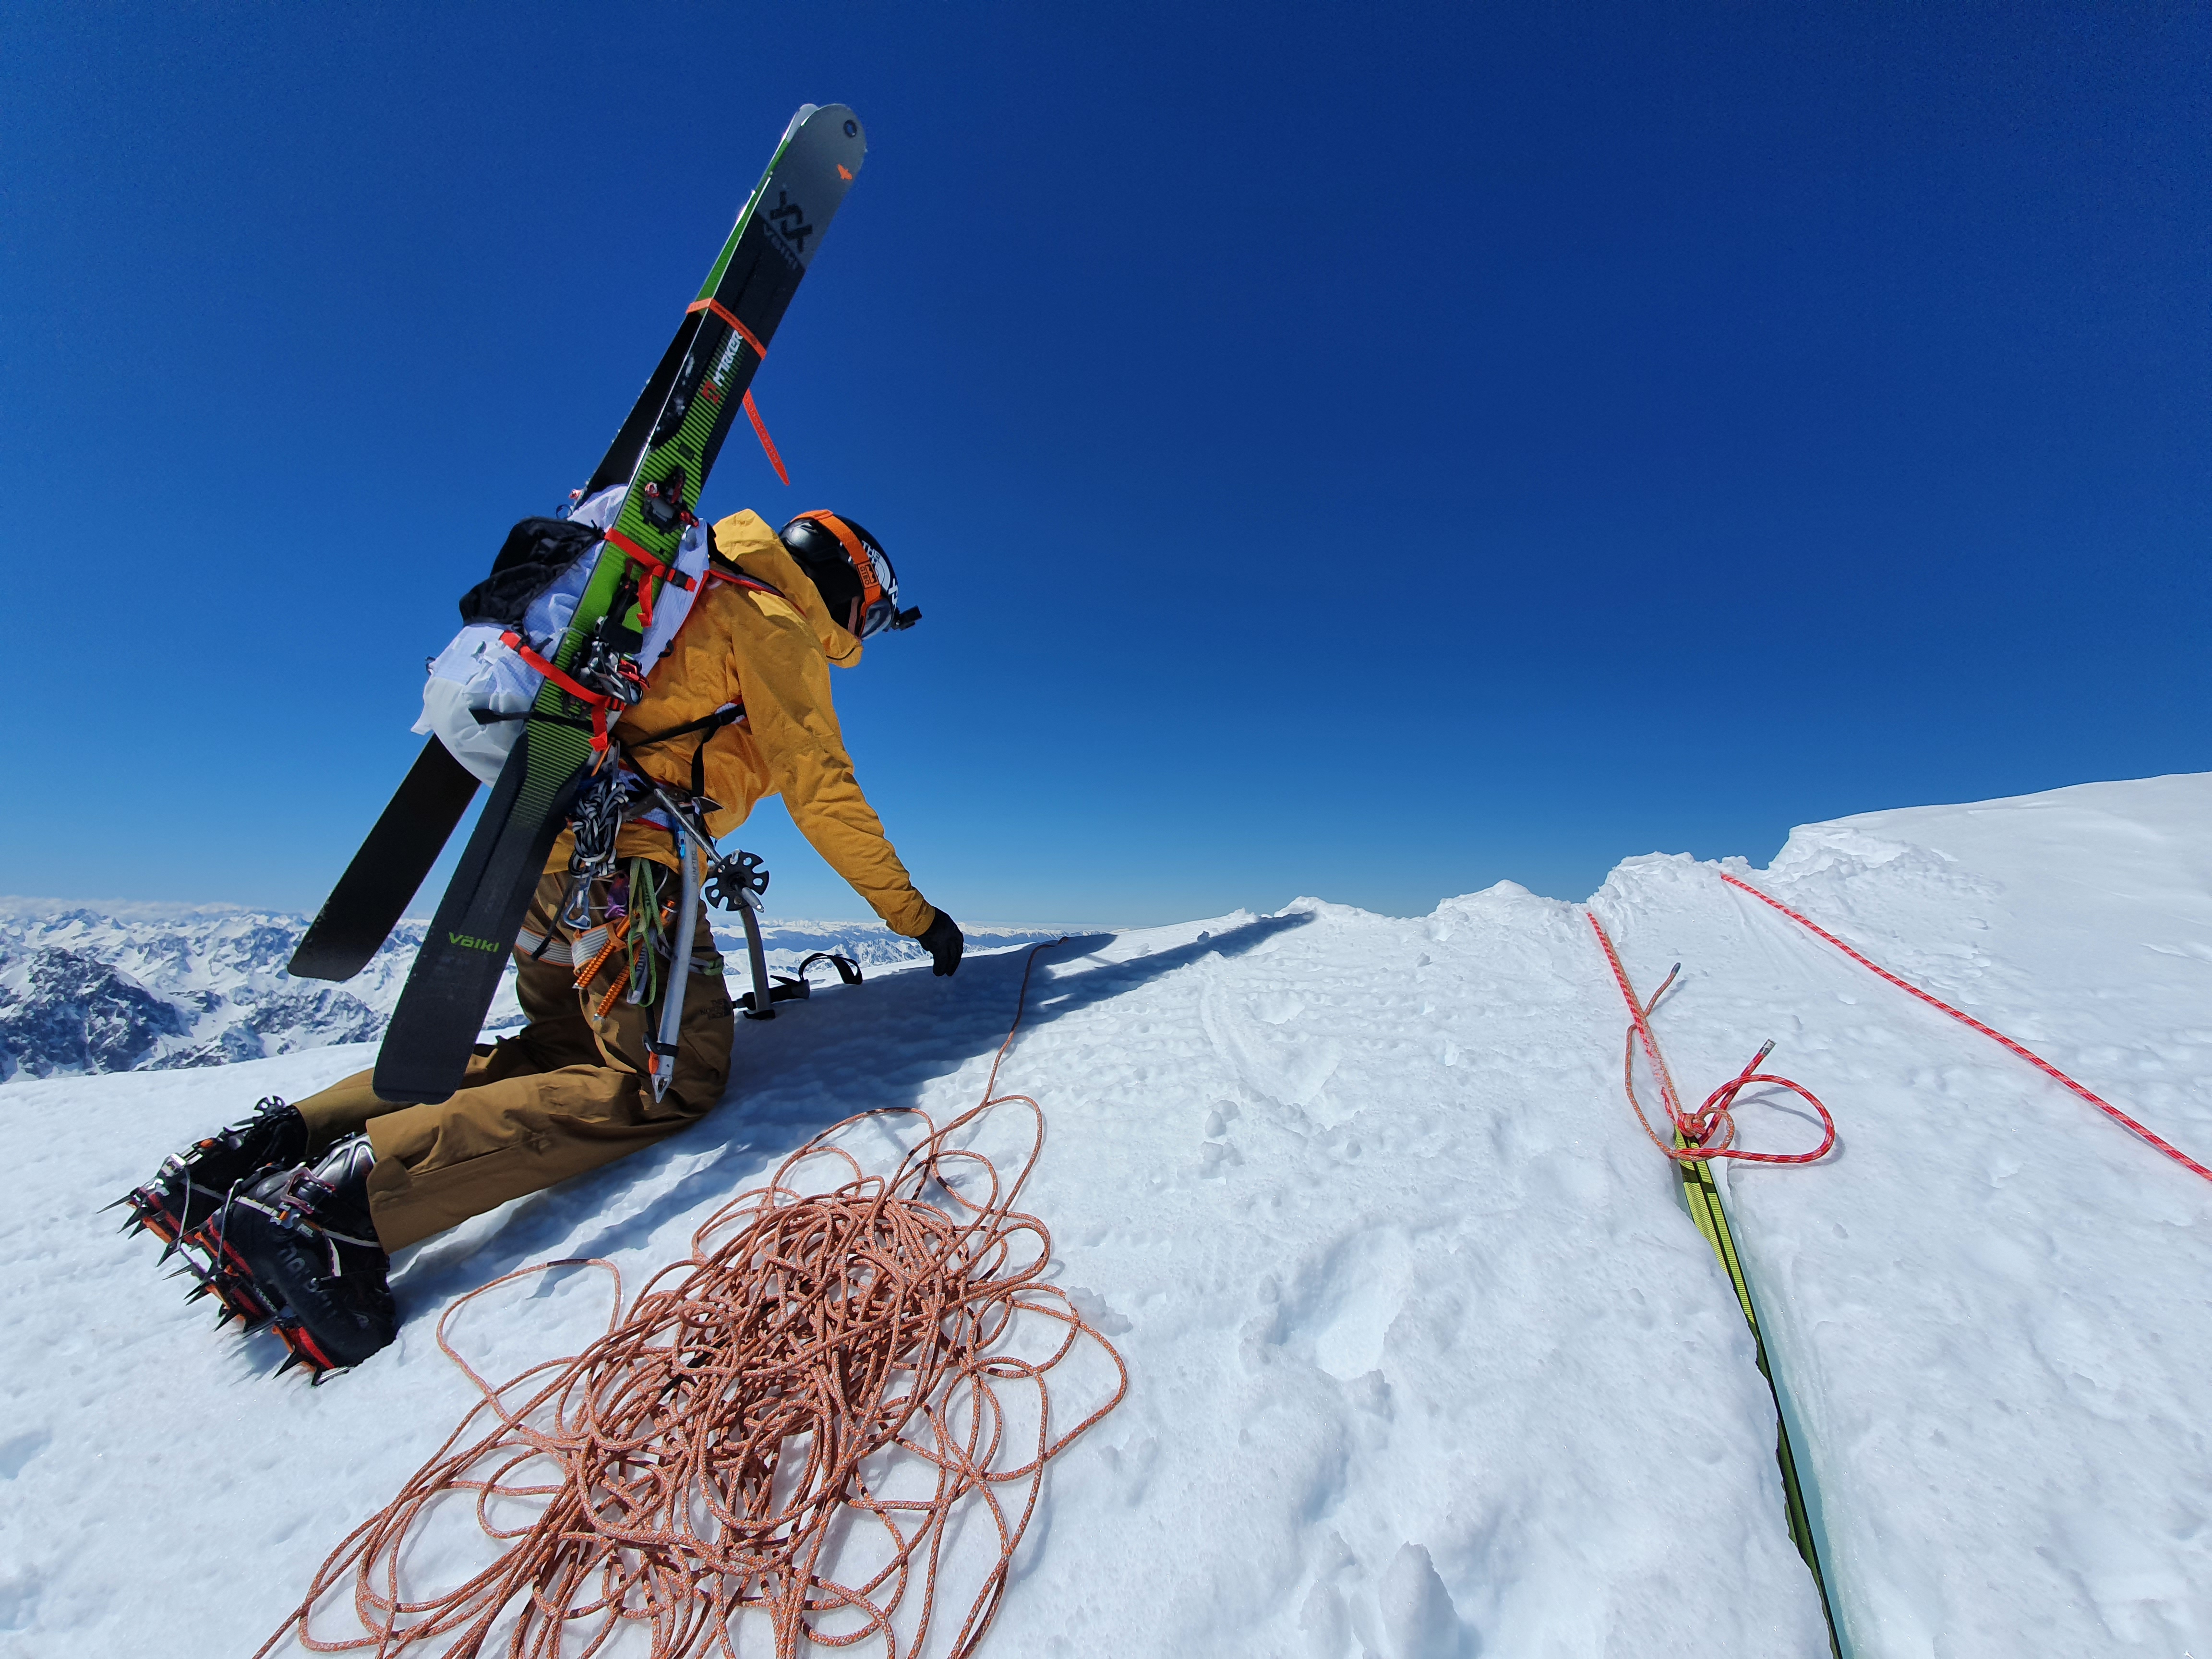
Rap entry – I can’t imagine there would ever be a time when this top section would be skiable. A stretch of blue ice just below the ridge where it has been blasted by high winds, leading to the snow. We rapped around 80m in 2 raps, leaving a snow steak on the summit and a V thread half way down.
This is fairly committing – be ready for some WI4 ice to reverse this if the snow isn’t what you expected when getting to the face. Once at the snow we built another anchor for another stability assessment – while everything looked perfect we decided the first person down would ski 50m on the rope as a final assessment. Will took one for the team and dropped in first – a test of belaying skill to let slack out fast enough! With everything looking primo the rope went away and it was on.
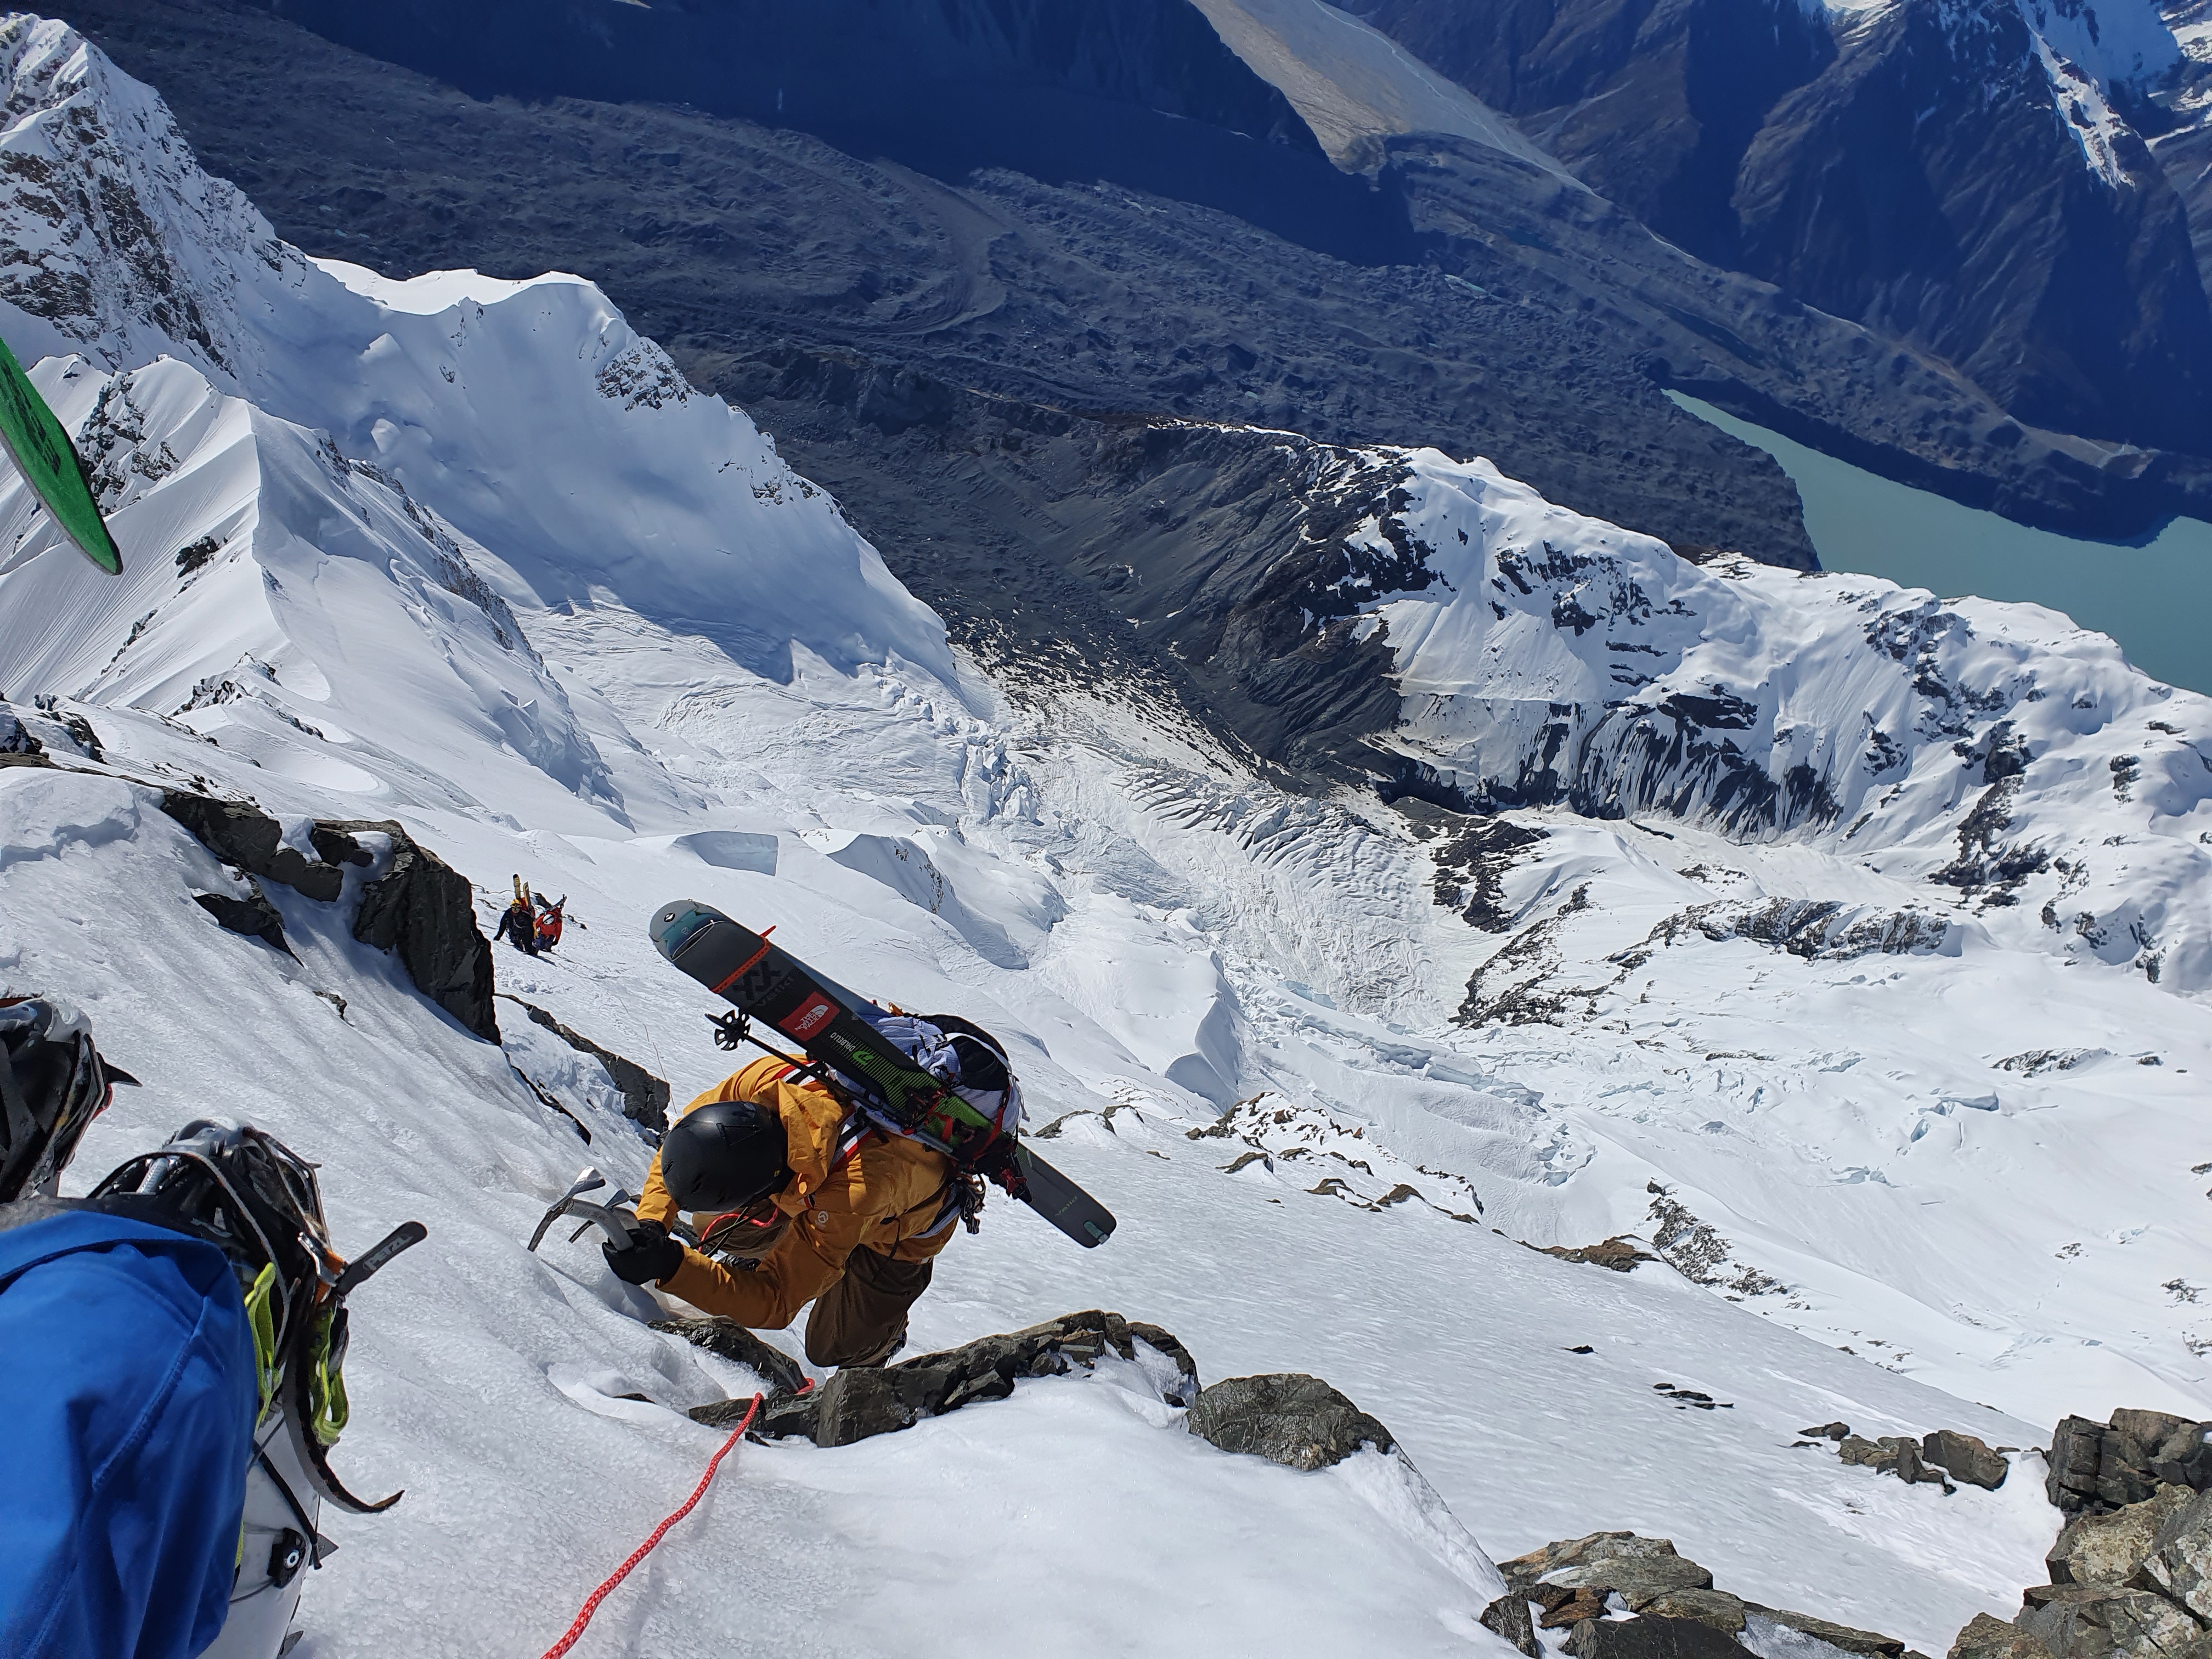
The first pitch is the steepest, around 55 degrees for a couple 100 metres. We then cut hard left for a long traverse to the feature we called ‘The Nose’. The traverse is pretty critical – from the photos we had some concern about ice on this section. A tool in each hand and screws ready to go to make an anchor and switch back to crampons if needed. The traverse takes you to the top of the nose.
This section wasn’t how it looked from the photos – was a lot wider and less sketchy than we were worried it might be, and the angle eases off to be similar to there E face at around 45 degrees. But it does mark the start of the serious overhead hazard which just gets worse from here on down. There are also a couple of bail out options here. If you can’t get through the nose, you can climb back up and right towards middle peak following the top part of the Clit Route. Or if you get through the nose but its looking bad underneath that, you can cut hard skiers left and could traverse back to the East ridge.
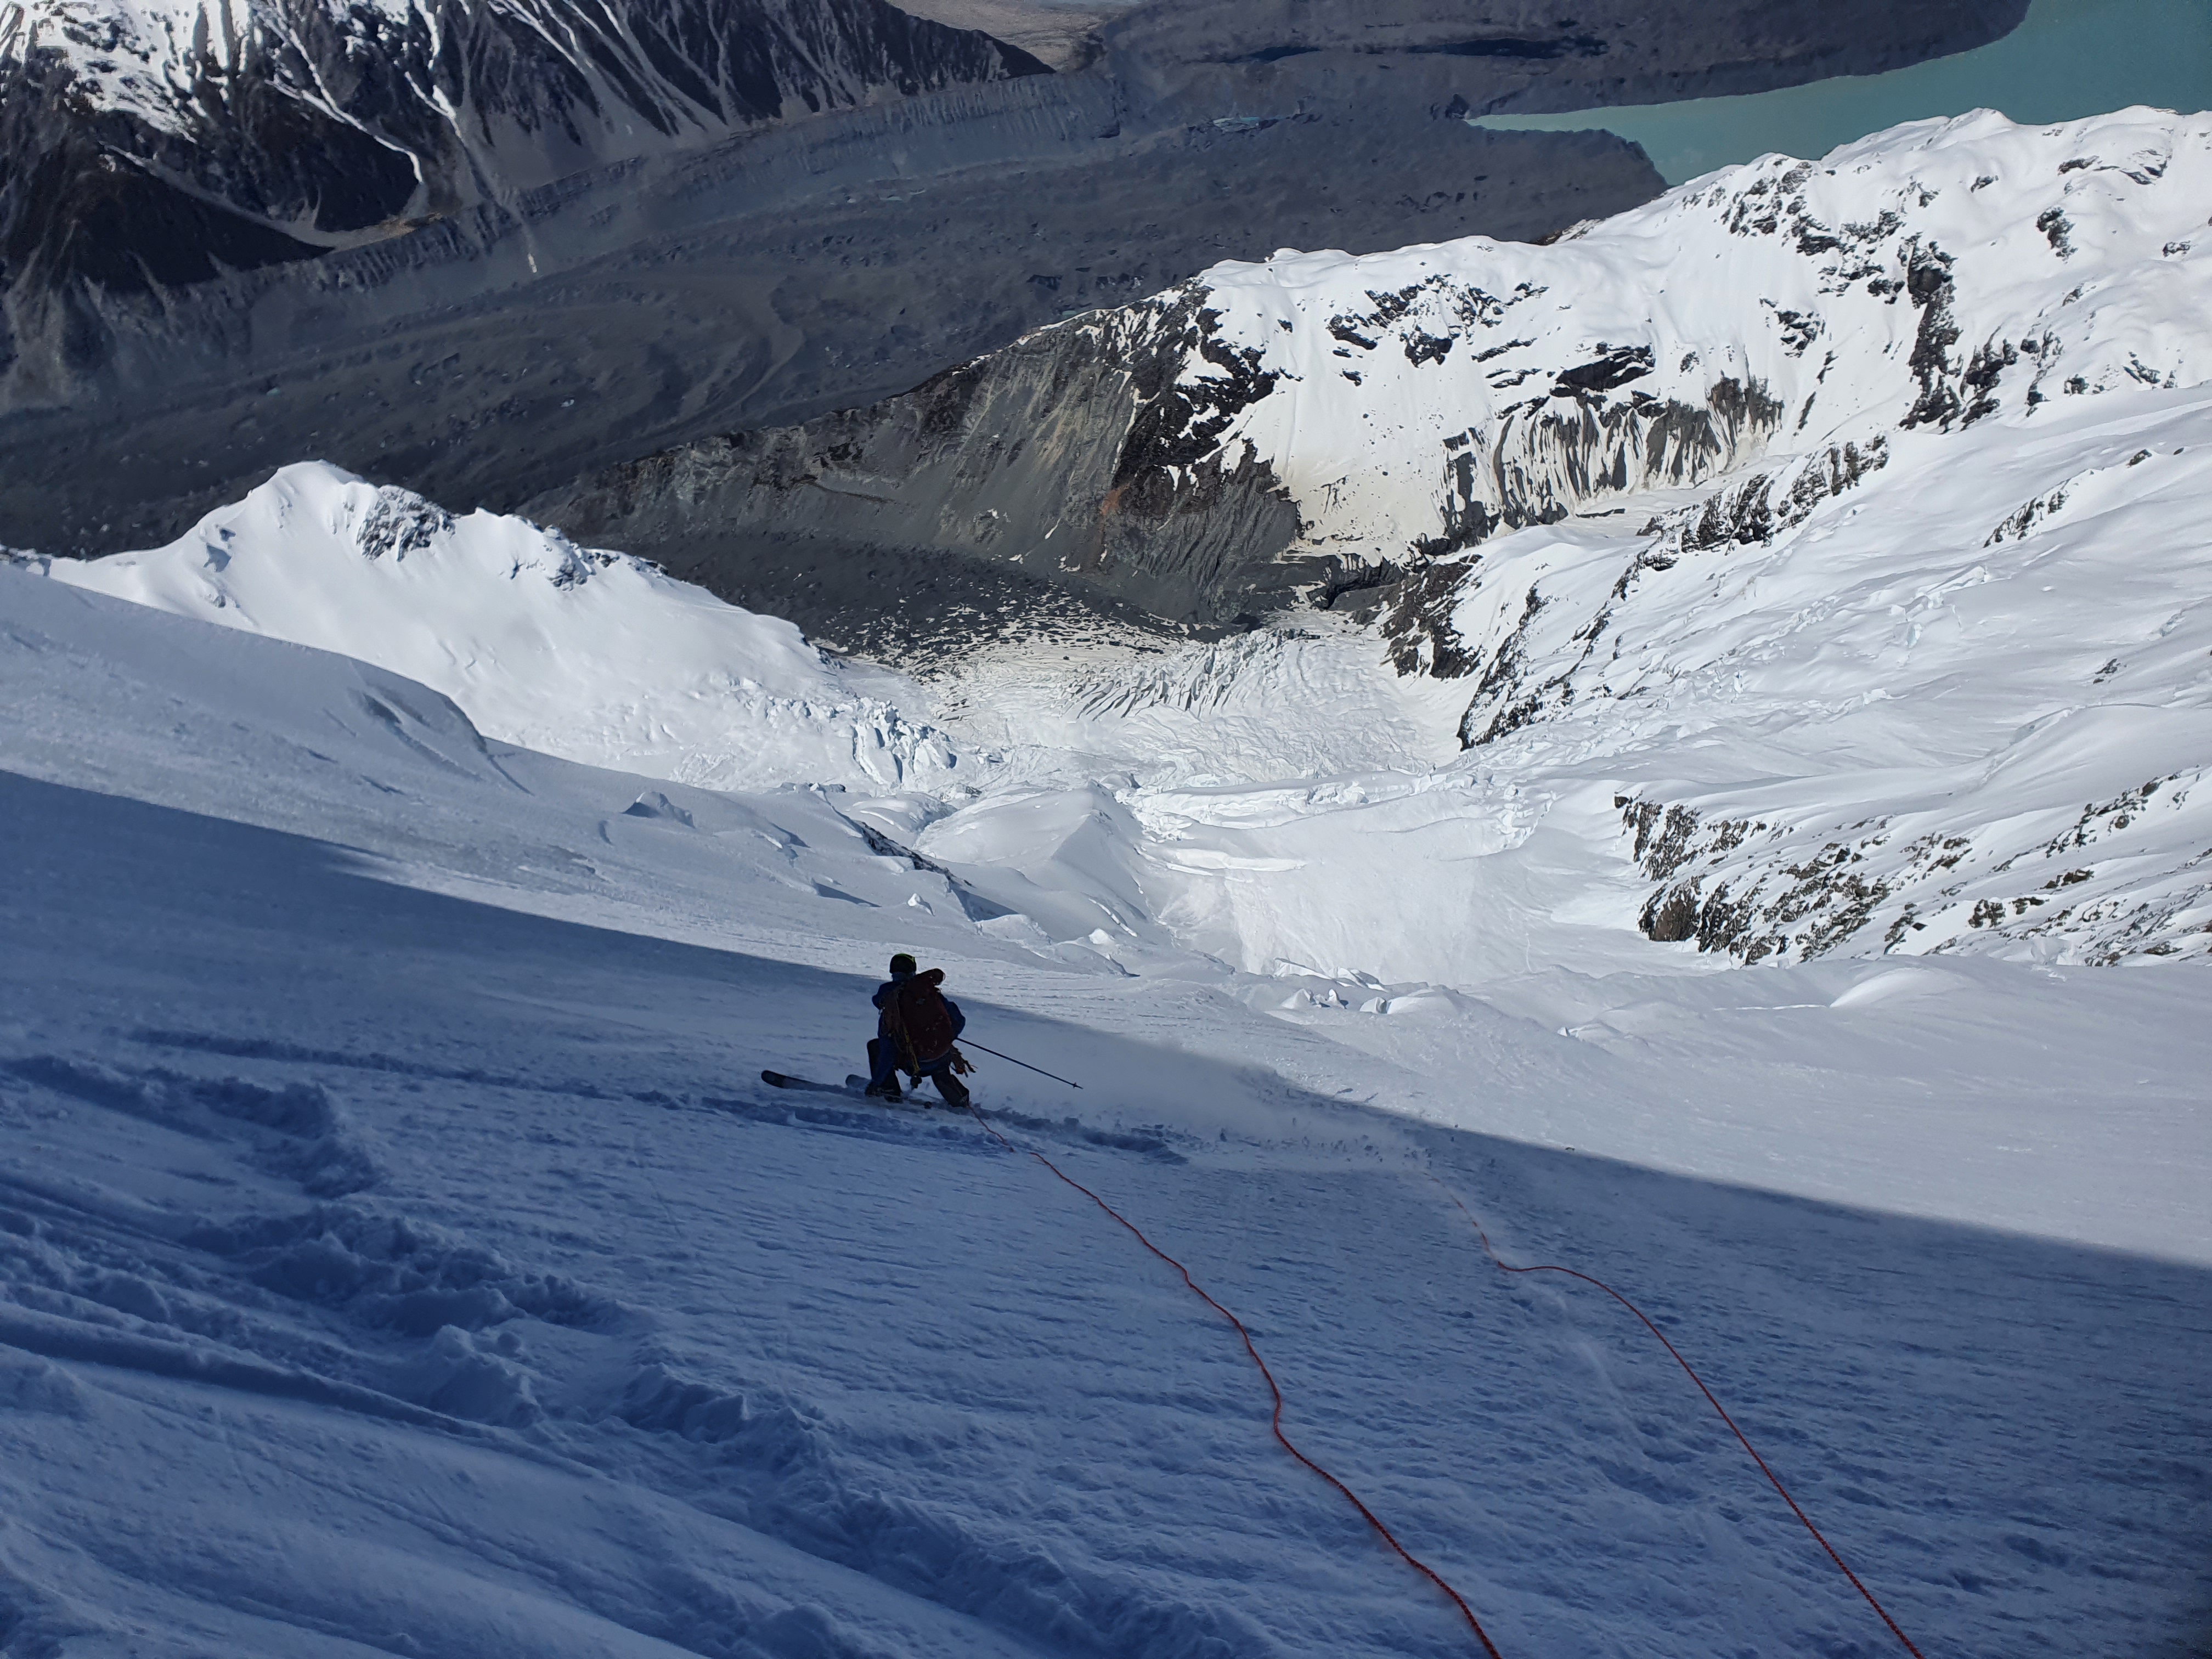
The skiing from the nose to the middle serac band was really incredible – shin to knee deepcold powder on consistent 45 degree slopes. Be sure to cut right at the bottom – finding the correct spot to rap the middle serac band is critical. Too for to skiers left and the cliff is 100s of meters of overhanging ice, too far right and you under the much more active and dangerous seracs.
2 V thread raps from here got us down to the lower snowfield. Speed is really of the essence from here on in, as you’re now under the maximum serac exposure. We managed to get our rope stuck on the final rap – knowing this was the last rap we just left one of our ropes behind in the interest of reducing time spent under the seracs. A momento left on the face and a good talking point for the scenic flights for the next few weeks! The last section involves cutting left to the major rib and then cutting down through the final cliff band. There are a few options to get through this and is another point to ID before starting down the line. Then straight-line down through the debris field across the Caroline Glacier and out of the firing line! It took us 2 hours from the summit to the bottom, and then a cruisey skin back up to ANZAC col and across to Plateau Hut, and some celebration beers.
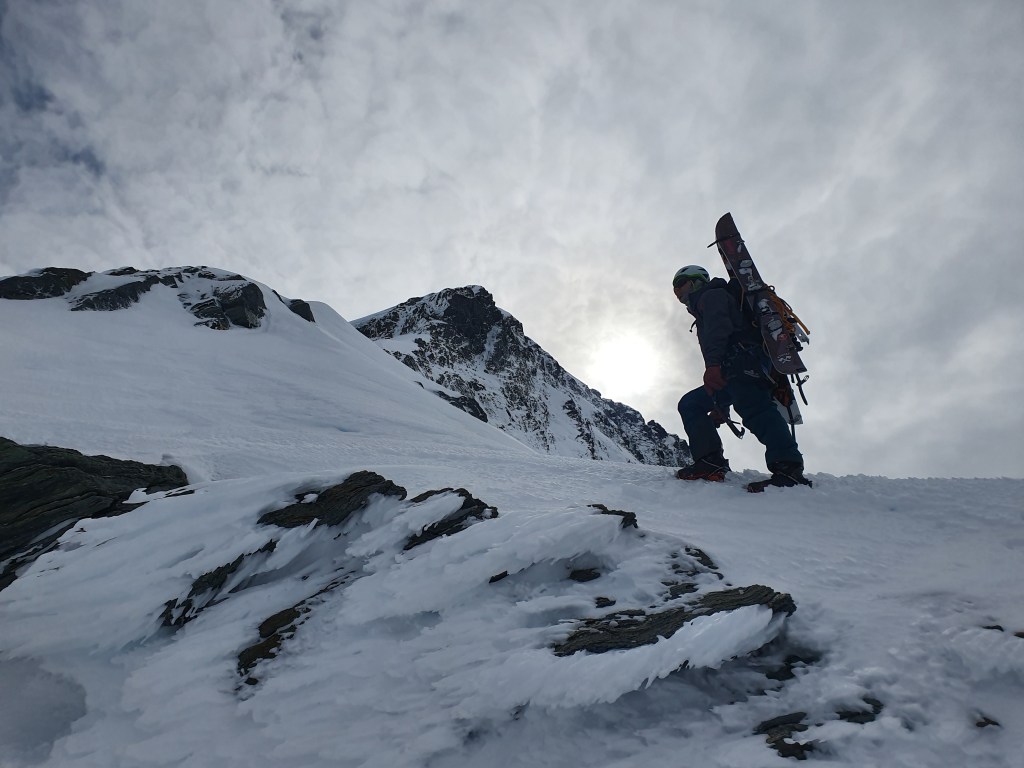
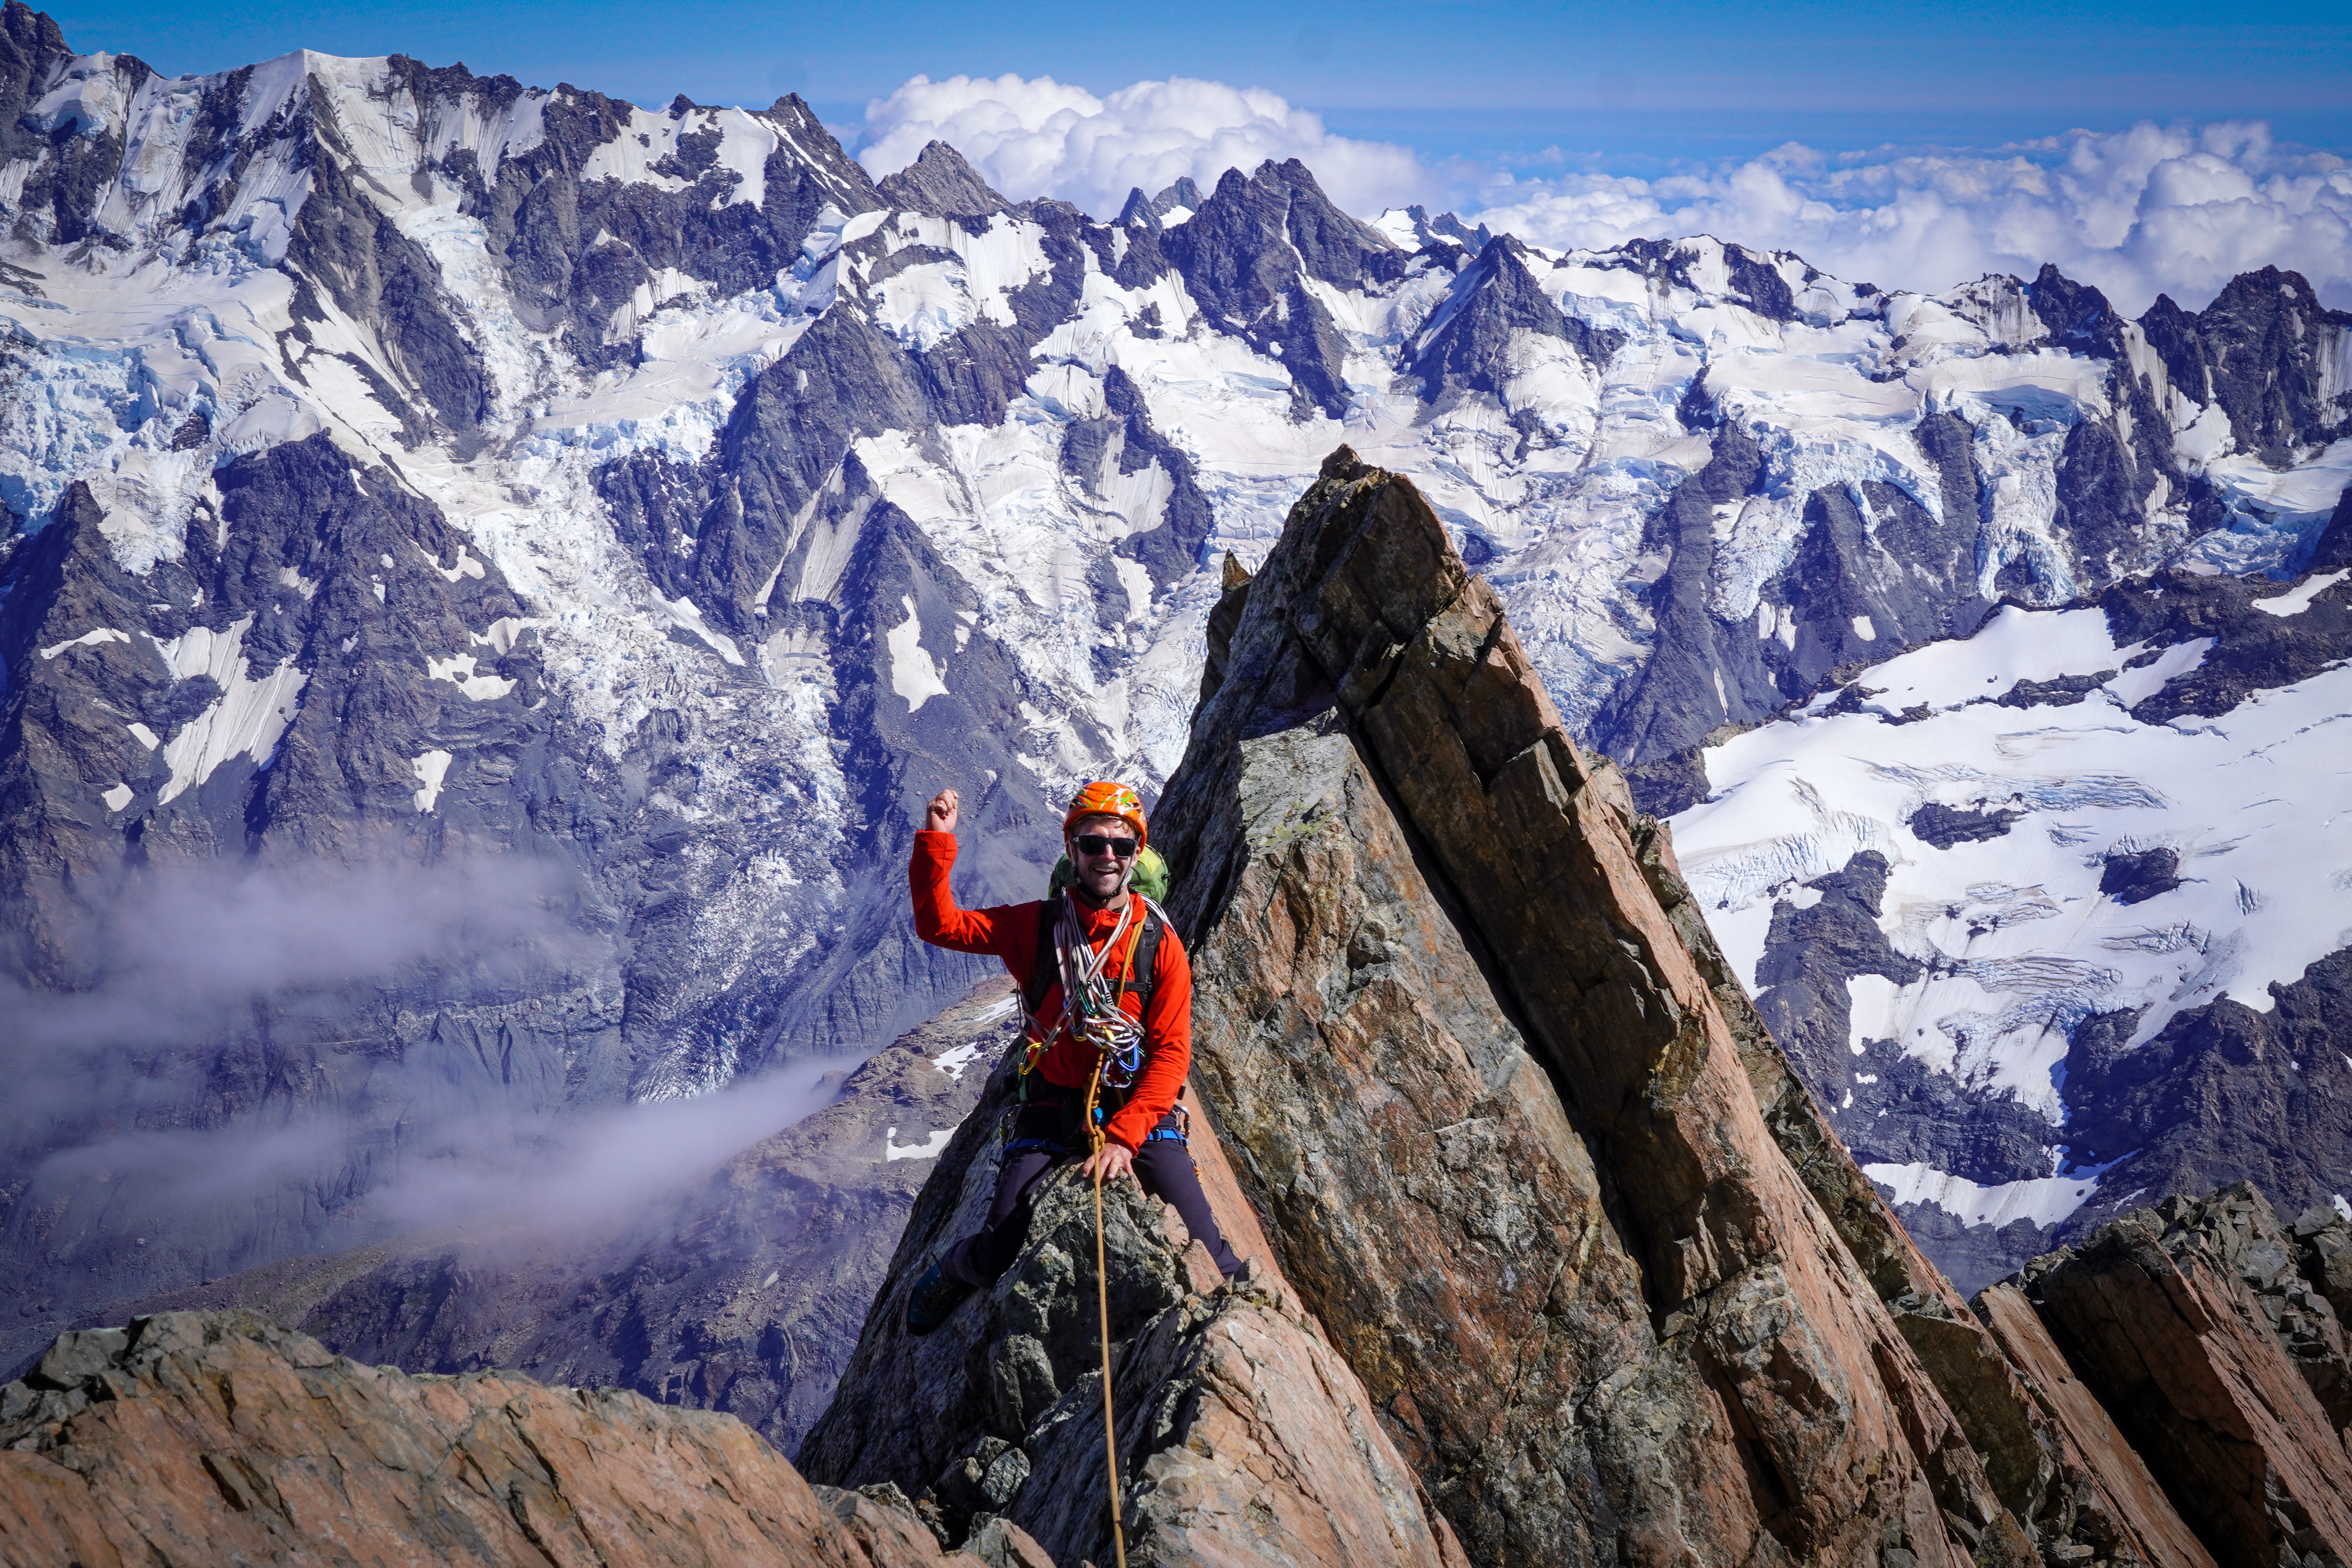
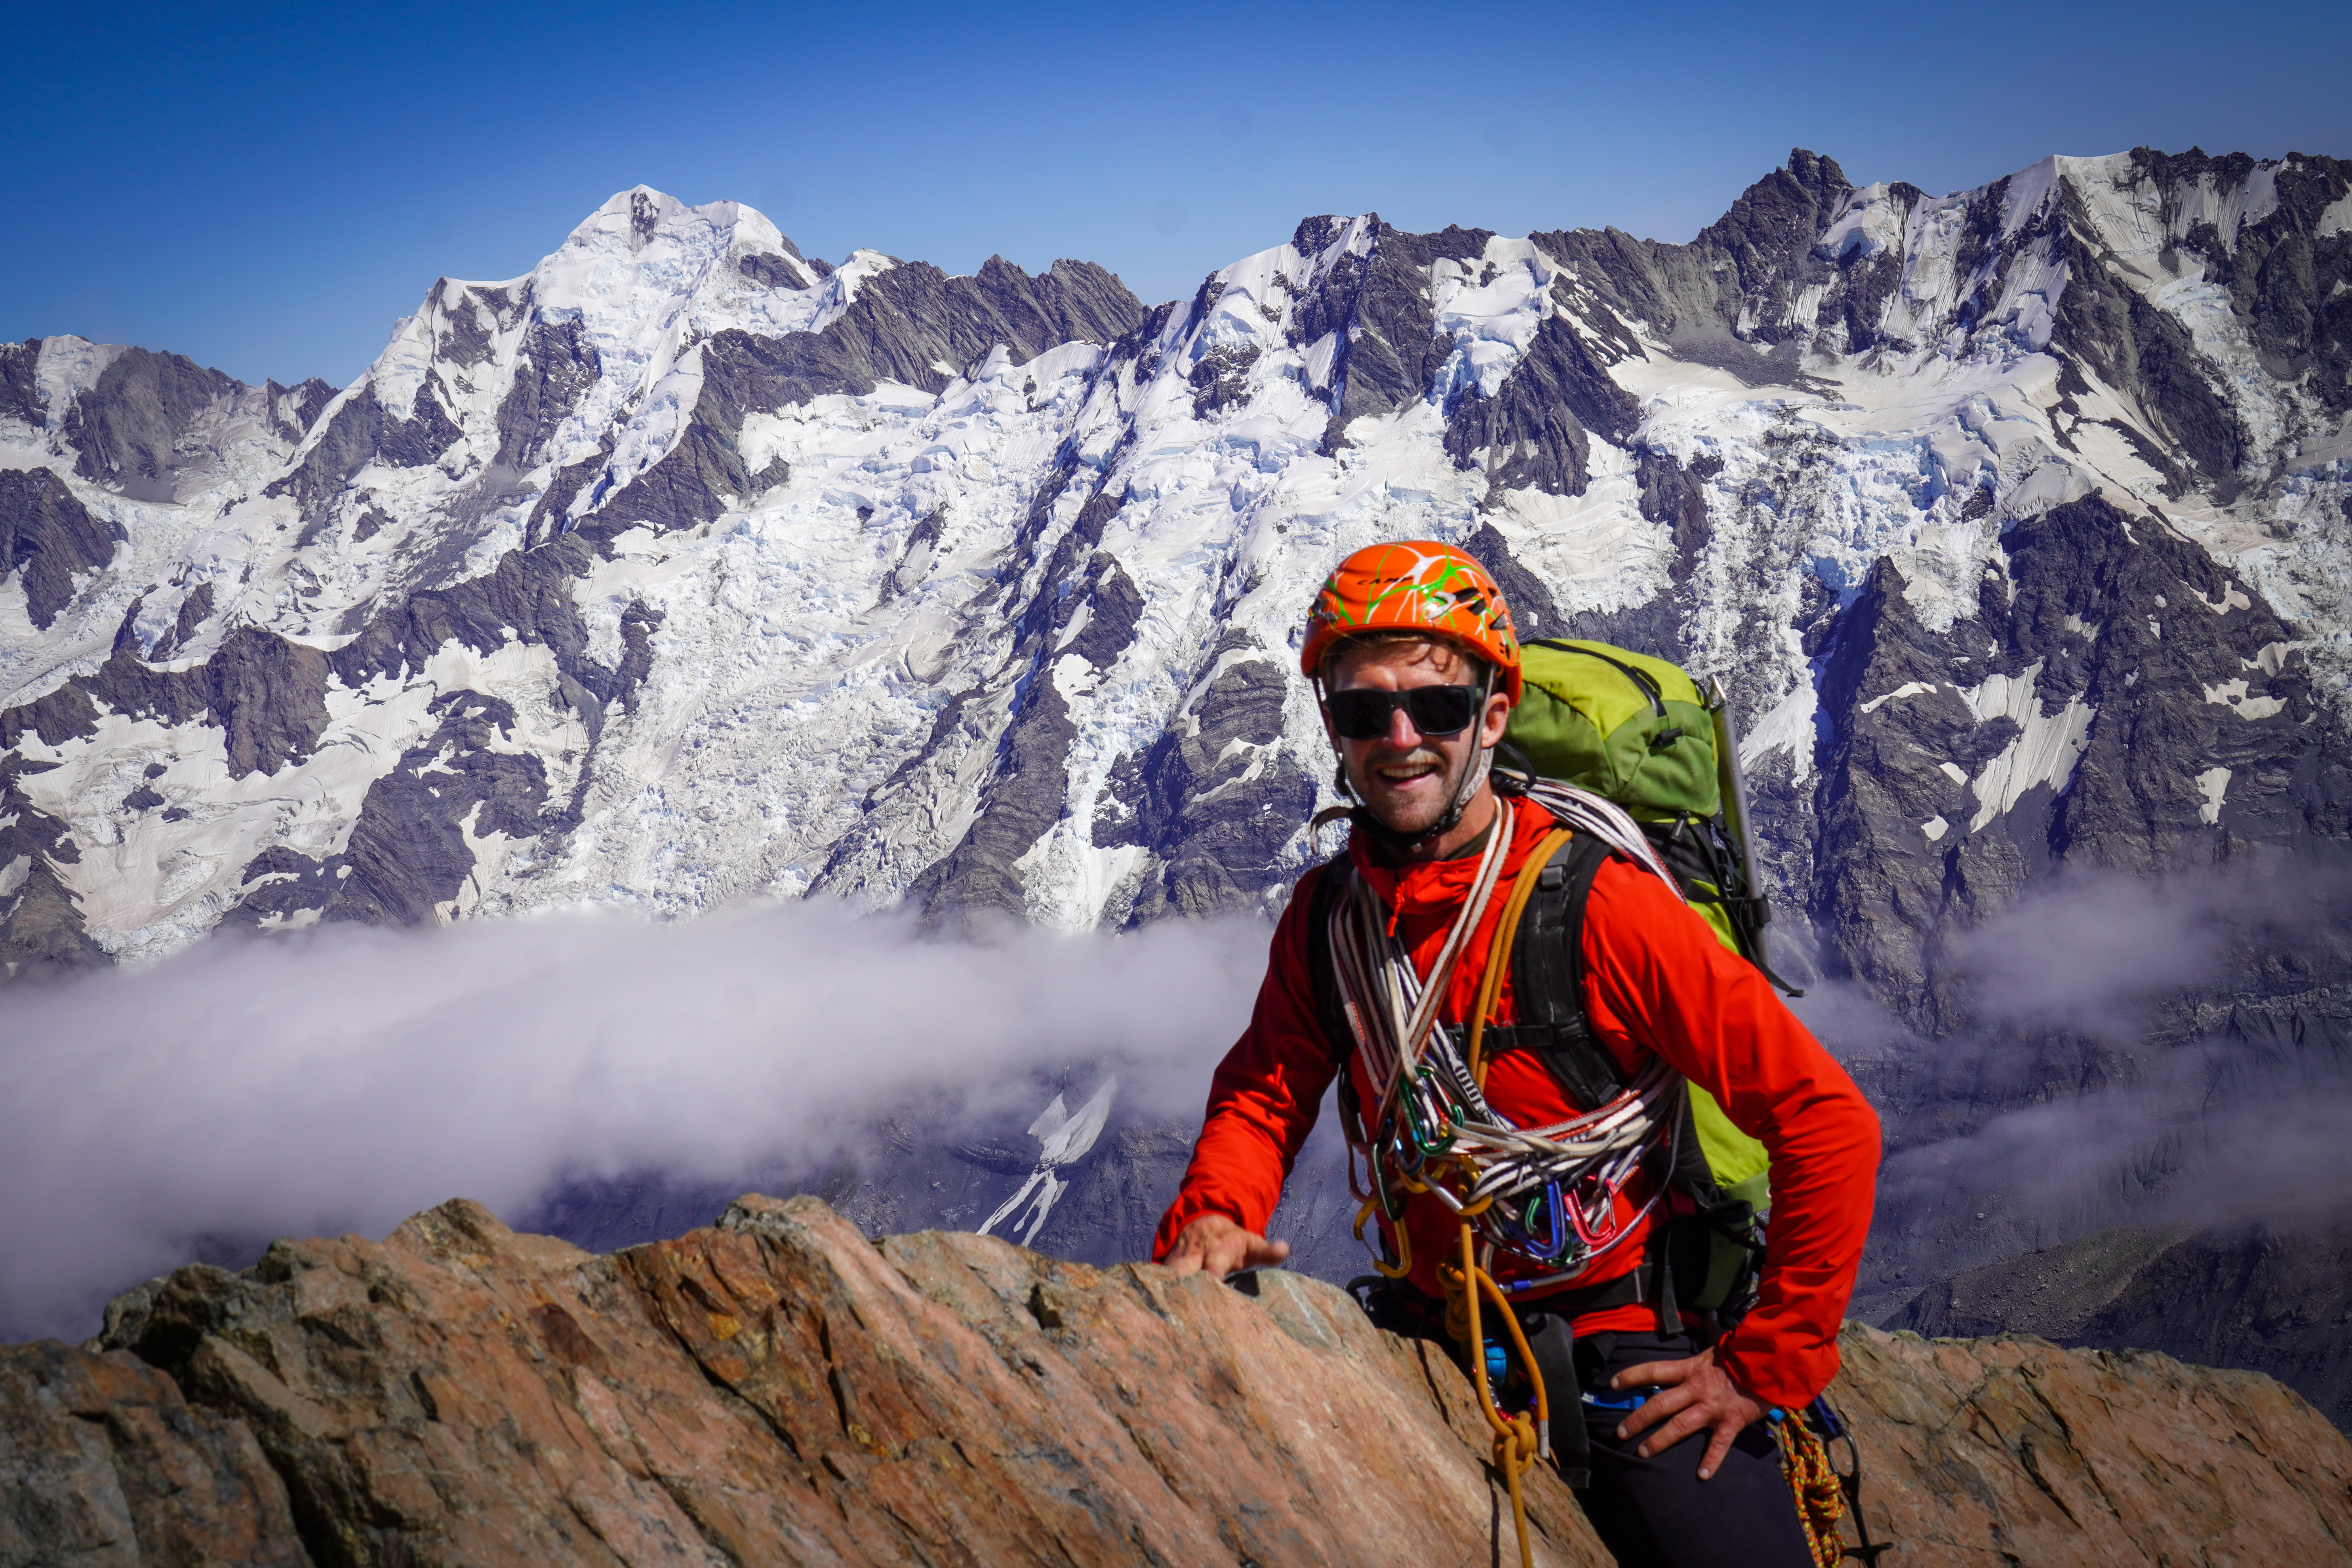
A New Zealand Southern alps classic route! Got a brief weather window in late Feb 2022 to sneak up this route. Popular with good reason – easy grade 10-12 scrambling on solid (by NZ standards) rock up to the west ridge, then a spectacular ridge traverse to the summit over the famous cheval.
Highly recommended. Would be especially good for a first foray into this kind of mountaineering – the Bonney rib is fully equipped with high vis rap stations with 2 rings every 30m, so a retreat is very easy, lowering the level of commitment.
Difficulty: Grade 3 Rock crux 12
Equipment: 3-season mountain boots. 1x set cams up to blue, small set nuts. 8-10x runners, plenty of 120cm slings. Microtraxion if simulclimbing. Tat for raps on the top section (before the bolts).
Approach time: time was short so we opted to fly in and out to Darwin corner. A back flight between 3 people was only $150 each – maybe less than the damage to your equipment from walking over the Moraine?
Climb time: we took 12 hours tent to tent, but pitched all of the route to the cheval. Much faster if simulclimbed.
Season: late summer. You want all the snow to be off the route, and even at the end of a long dry summer in 2022 no issues crossing the glacier.
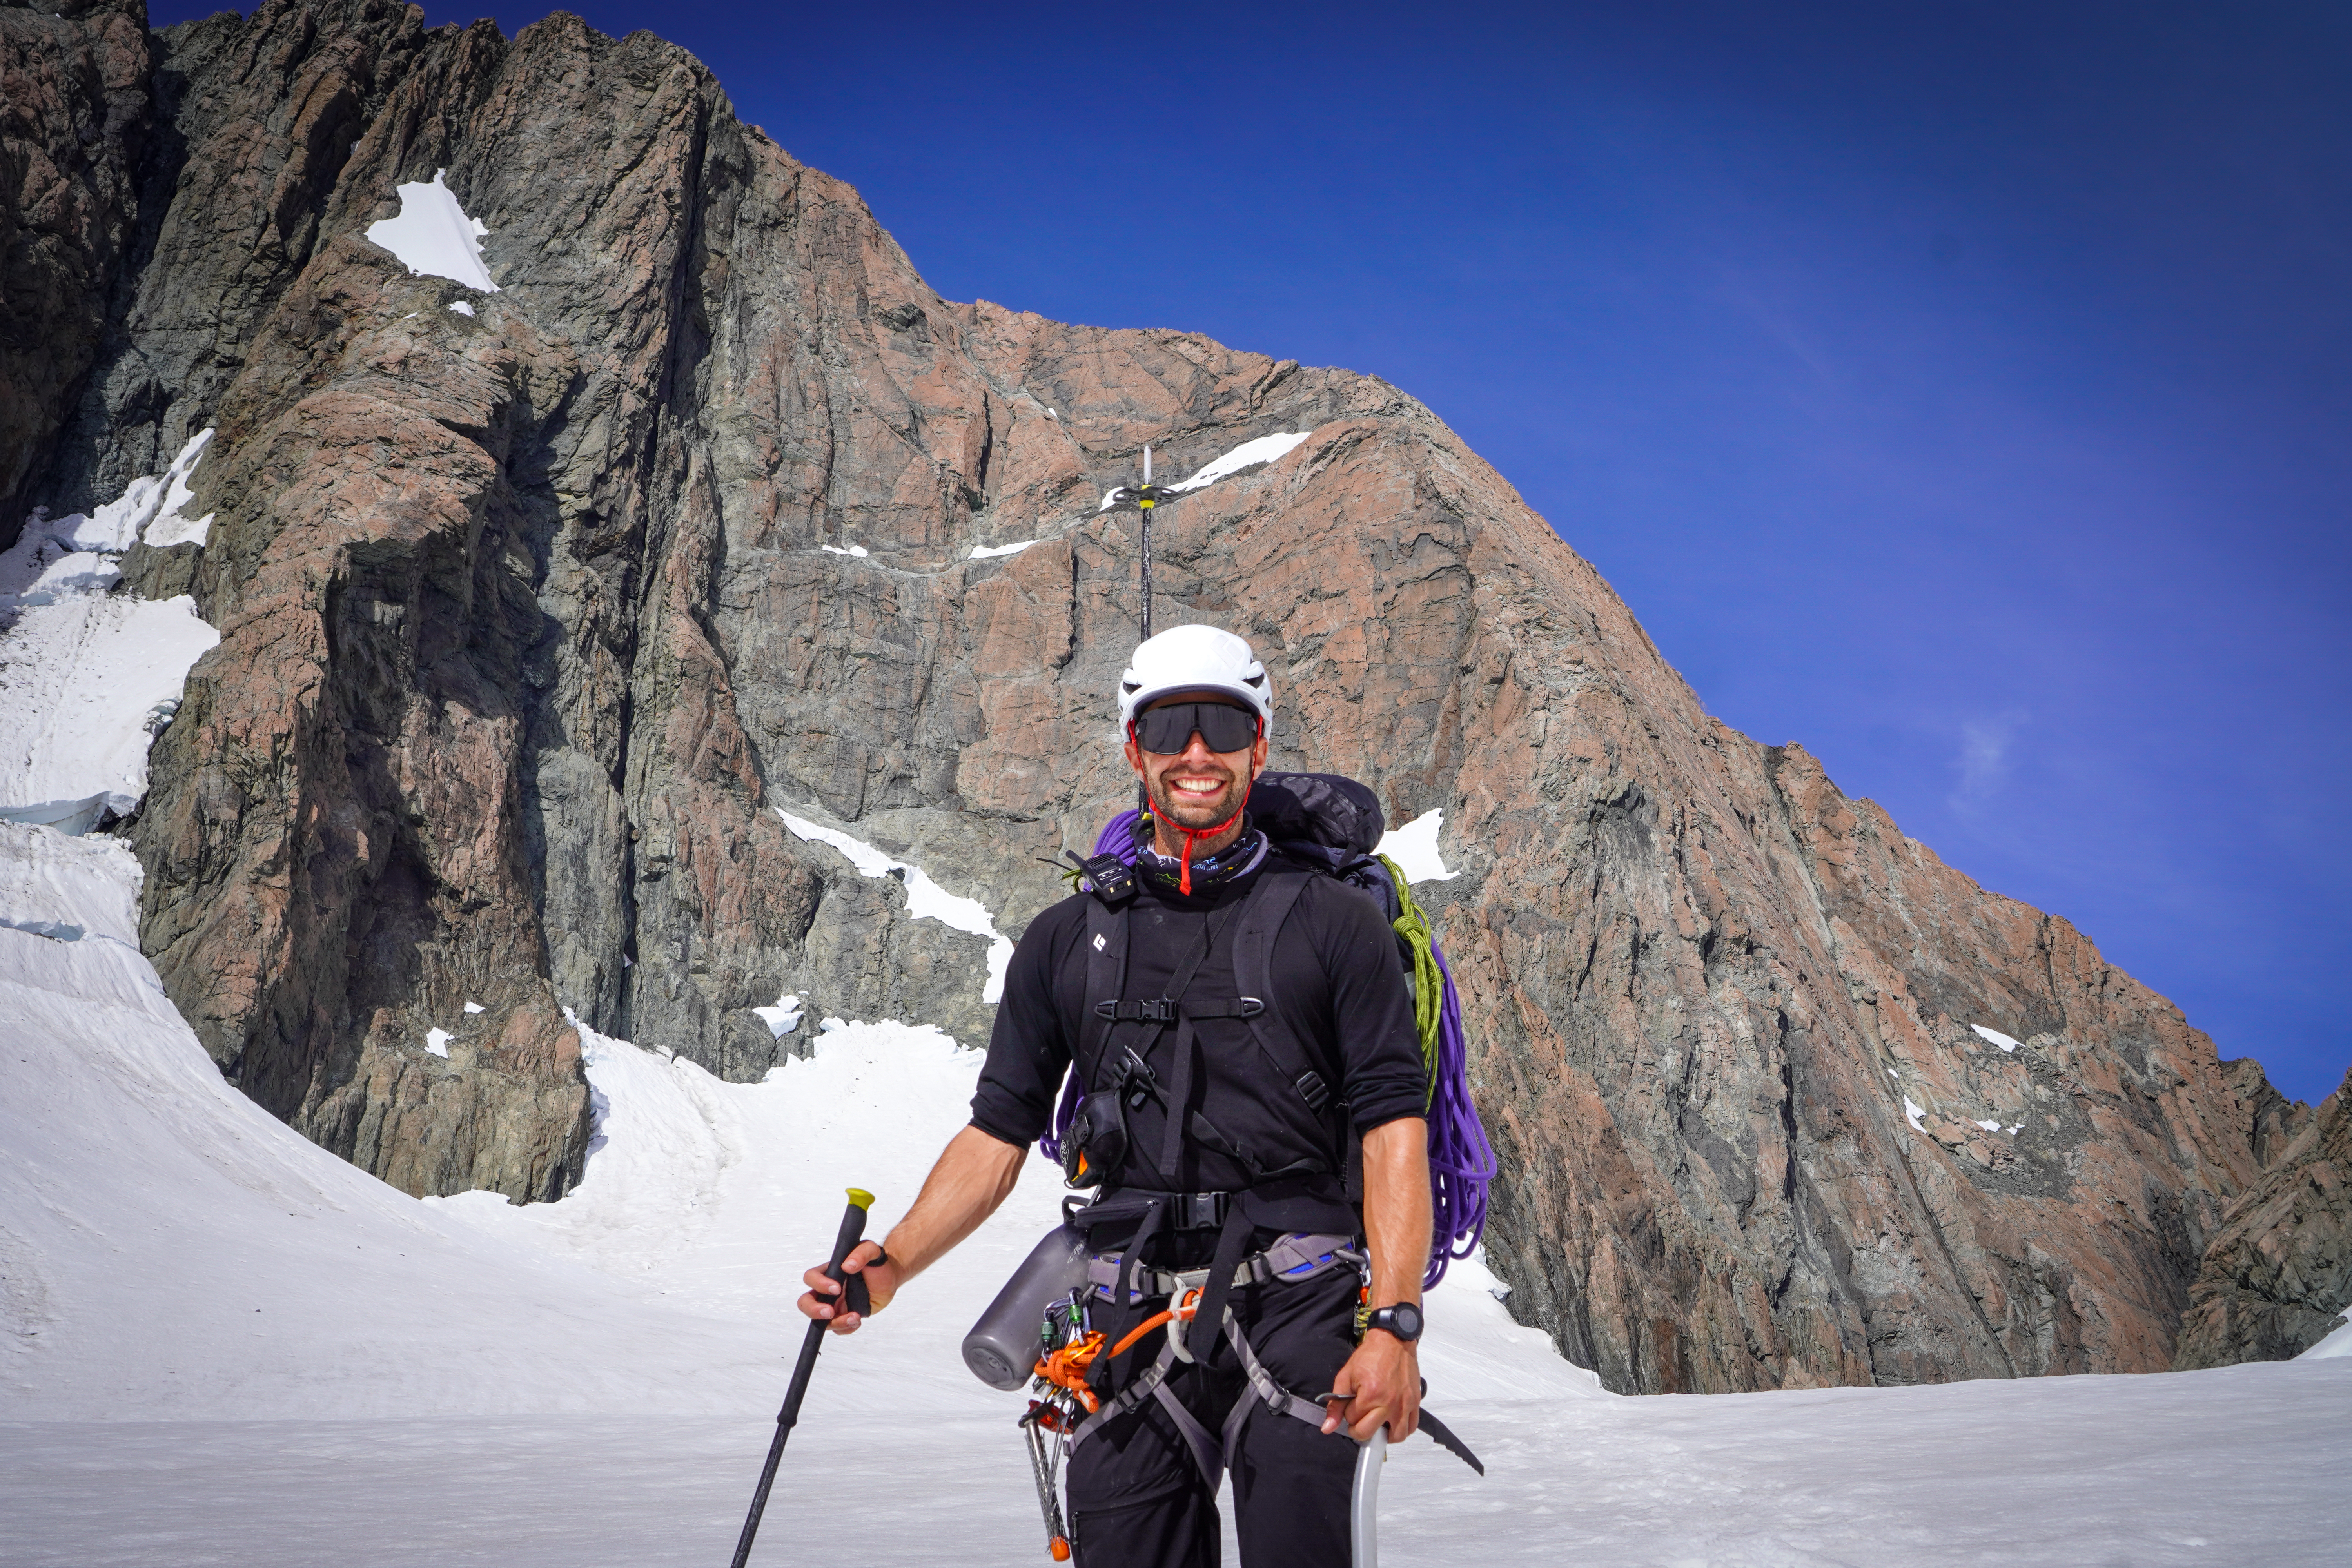
Team: Joe Collinson, Alex Bewick, Tom Brown 28/2/2022
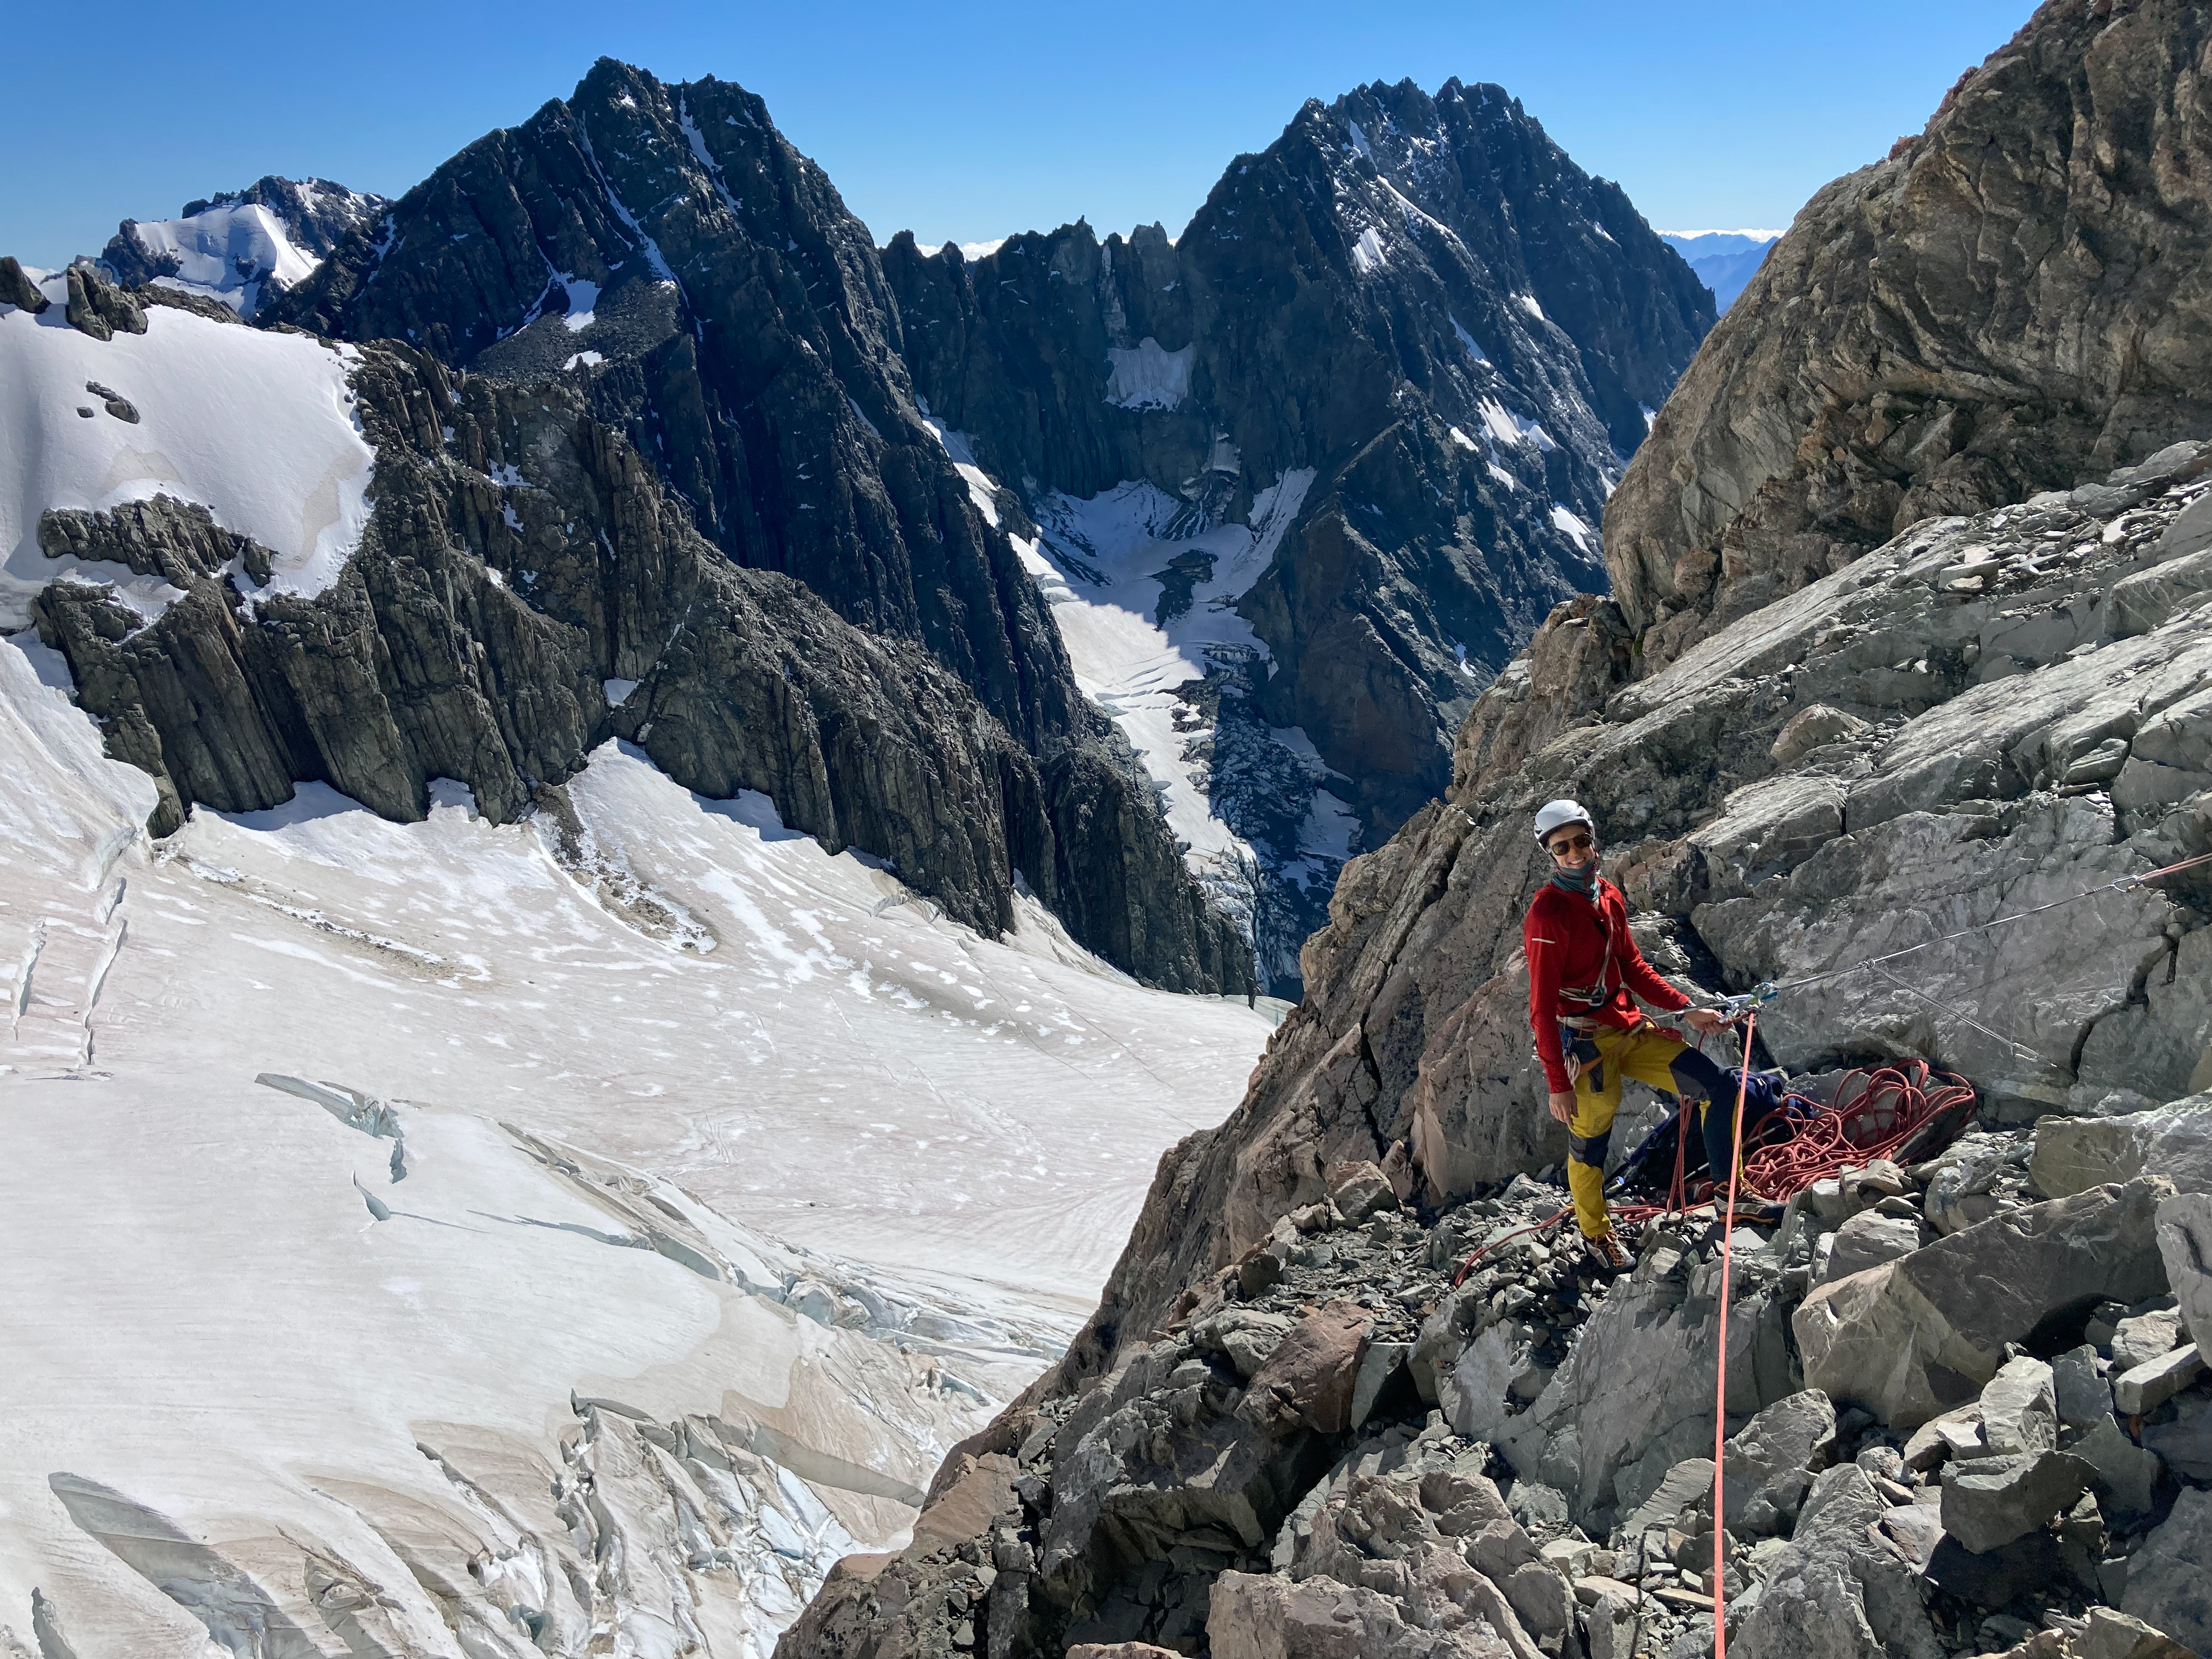
Riding the cheval – Tom (front) and Alex (back)
Access
Access from Darwin corner to the Turnbull. Steeper / sketchier the further right you go
From Darwin corner, access the Turnbull glacier by first ascending the moraine wall. Probably the most dangerous part of the trip (especially the descent). Steep and loose with lots of large unstable blocks to knock down onto yourself or your partner. As of March 2022 the moraine wall is less steep the further lookers left you go, with the area to the right divided into a series of steep and scary looking gullies. We ascended almost directly under Mt Turnbull and then traversed to lookers right across the scree slope above.
Lake at point 1906 with Turnbull glacier above left, Mt Turnbull on far left, pt 2350 of Rumdoodle in centre and Malte W ridge on the right
You pass a lake near point 1906 and then there is some boulder hopping onto the Turnbull. The Turnbull glacier has receded significantly and gave us no problems, although at around 35-40 deg, be careful of avalanche risk especially when getting warm. Where the Turnbull joins the Bonney there are a few crevasses to negotiate but even at the end of Feb 2022 which was especially hot and dry there was no issue crossing these to get to the campsite.
Turnbull glacier. Snow slope the whole way (tucks in behind the rock band)
Don’t be tempted to go up the Malte Brun glacier – the moraine access at the bottom looks pretty terrible and the glacier is much more broken. Also the final bit up to the Bonney is a steep pile of horrible cross. Took us 4 hours from Darwin corner to campsite.
Camp
On the rock rib at the top of the Malte Brun glacier there is a good bivvy spot. Two flat areas in the rock have been cleared out which are about the size of a 2 man tent each.
Campsite at top of Malte brun glacier. You can see the two small rock areas cleared on the ridge. The glacier is more airbed friendly
We opted to sleep on the snow just next to the ridge as we thought our inflatable airbeds wouldn’t stand up to the sharp rock. There was no water near the campsite so don’t forget the jetboil (like I did… The risk of packing straight after a night shift!). We were able to find running water across the schrund at the point marked in the photo, which saved the trip but it was a real faff and took forever. Another option would be to camp down by the lake if you don’t want to melt all your water – allow an extra 1-2 hours to get up to the start of the route.
The Route
We took the classic Bonney rib but many variations are possible! From the campsite, follow the snowfield up staying just to the left of the large gendarmes. Cross a schrund and climb a 40 deg snow slope up to a small gully with a boulder wedged in the top of it. The climbing starts from here.
This route doesn’t follow the DBAs – they step out to the lookers right after the second DBA
The first DBA is 60m above the boulder and then every 30m to the ridge. The first 2 are in a fairly straight line, but then after that they step out to climber’s right significantly and then meander round a fair bit. The most simple and least committing option would be to follow the DBAs all the way up, but the climbing is more interesting and on more solid rock if you follow a more direct line up the face. The DBAs can also be pretty difficult to spot from below, but there are high vis reflector strips drilled into the rock above each station so finding them on the descent even in the dark / bad weather is super easy. 5x 60m pitches to the ridge. Climbing is around grade 12-14 but obviously varies depending on which exact route you take. We pitched the whole thing as some members of the group hadn’t spent much time on rock, but could save some time simulclimbing in a confident party
Once you gain the ridge, it took us about an hour to traverse to the end of the cheval. Exposed ridge travel , but with plenty of options for pro (especially loads of spikes – bring plenty of 120cm slings) for simulclimbing. Send the camera out front for the obligatory cheval shot! Theres an old rusty piton next to a good platform at the end of the cheval.
It gets easier from here up to the summit but took a surprisingly long time as we took the rope on and off a few times and needed to make 1x rap: it took us nearly 2 hours from the cheval to the summit. The route finding wasn’t super obvious at one point on the way up passing one final gendarme – we made an unnecessary rap down the south face and then climbed back up a snow field. When viewed from above you can easily turn the gendarme on the north side (see pic below!).
Obvious from above but not so obvious on the way up. The final false summit before the top, turn this gendarme on the N side and save yourself a time consuming rap onto the S face
Approximate rap line with 10x DBAs. Watch out for the big traverse between the 2nd and 3rd DBA
To descend, there are multiple spikes to rap from to get you back to the cheval, which is likely a faster option depending on how confident your down climbing is. Once you’re back across the cheval, 10x 30m raps on DBAs gets you back to where you started. Lots of loose blocks around so be careful of rockfall. Would advise against 60m raps, high chance of getting the rope stuck.
We were moving pretty slowly and were around 12 hours camp to camp but with a bit of simulclimbing, you could expect that to be a fair bit faster. But don’t underestimate how long the final ridge can take, more than one group has spent a night on the route!
New Years day. Hungover and sleep deprived. What better way than to sweat it all out in a 3-day adventure into the Darrans?
This was a good old NZ epic in the back country. The approach was not merely a way to access Sabre; it felt just as much a part of the trip as the actual climb. I’d steel yourself up against the good slog in and out, and a long day out for the 500m climb up this beast. But the rewards are pretty sweet – with the elegant backdrop of Lake Adelaide, Sabre juts out impressively, true to its name, and has been luring climbers to it since the first ascent in 1959 via the West ridge.
The line we took on Sabre Peak. Marian to the right.
Grade: 17
Equipment: 2x 70m half ropes. Full rack including 1x set of cams, nuts, long slings. Lots of tat to rappel.
Approachtime: 6h to Phil’s Biv
Climb time: ~16h biv to biv
Season: best in summer as minimal snow and dry rock
Team: Joe, Maria 1-3/01/2022
approach
From Homer Hut carpark, take the well signposted track for Gertrude Saddle. It is a popular day walk so plenty of people coming and going. At gertrude saddle (around 1.5h to here), follow the obvious path NE towards Barrier’s Knob. There was a bit of snow for the last hundred metres up to barrier knob, but we were in our light-weight crampons and trail runners and had no issue.
From Barrier knob, head down the ridge to Adelaide saddle (further 1h or so). Route finding to Gifford’s crack/gap is fine here as long as you go all the way down to the saddle. Don’t make the mistake we did and drop down too early, as we had to descend steep moist tussock and make one rap off a dubious spike to reach the valley floor.
Gifford’s crack is steep but in dry conditions could be down climbed carefully. There is a faint hint of a trail to reassure that you are on route. There are a few single bolts you can use to rap down it (unclear to me why someone would go to all the effort to bring a drill, just to drill one not two bolts…). Going up it felt fine, but for less confident parties can be climbed in 2-3 pitches.
Giffords from the bottom. You come in from Barrier Knob on the skyline top left, cross over the rise in the middle by staying west and then drop down into Adelaide saddle. Theres an obvious gully to downclimb with a couple of bolts.
Once down in the basin, soak in the views of Sabre in the distance. It looks really steep and intimidating from a distance – but don’t worry, it feels way more approachable up close!
We made another error here and stayed low in the basin and headed towards Sabre, but the scrub was thick and the travel was slow. Took us 2h but can be faster if you stay high as we did on the way out. There is a definite break in the bush that leads you all the way to Phil’s Biv – aka a 5 star hotel.
There was no vacancy that night at Phil’s Biv, but we had brought a tent just in case, and set up for a dinner and early night. I realised I had forgotten to pack any spoons for Joe or myself. This was a downer but made so much worse by then realising I had also forgotten the coffee! I was not popular…
the route
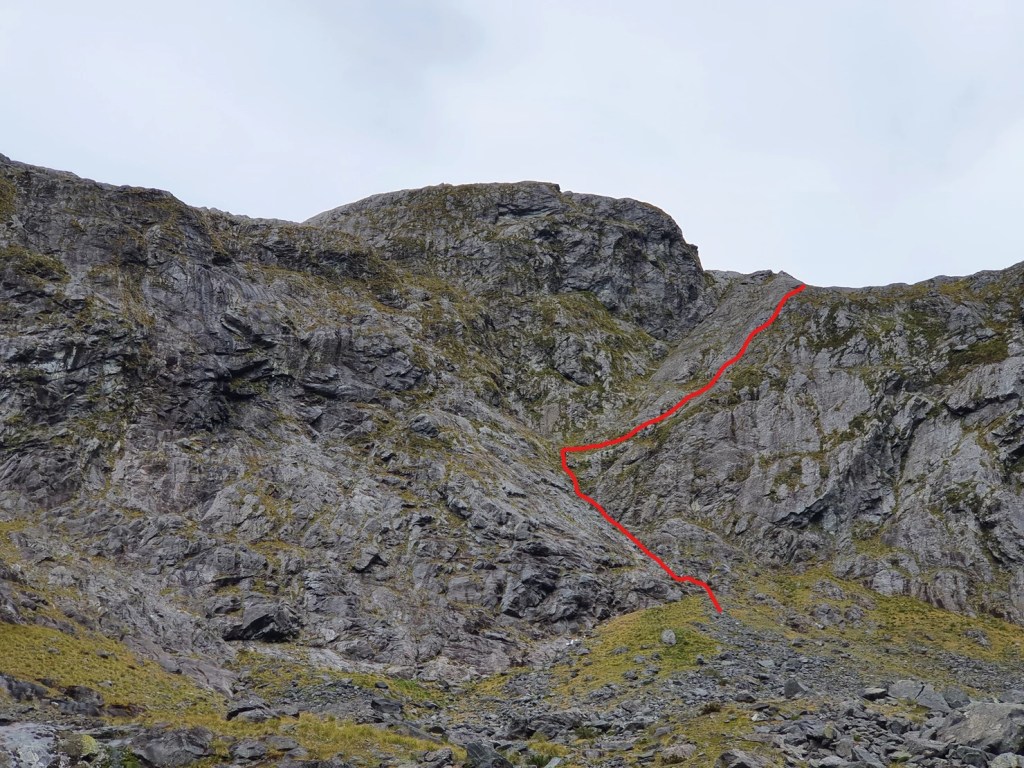
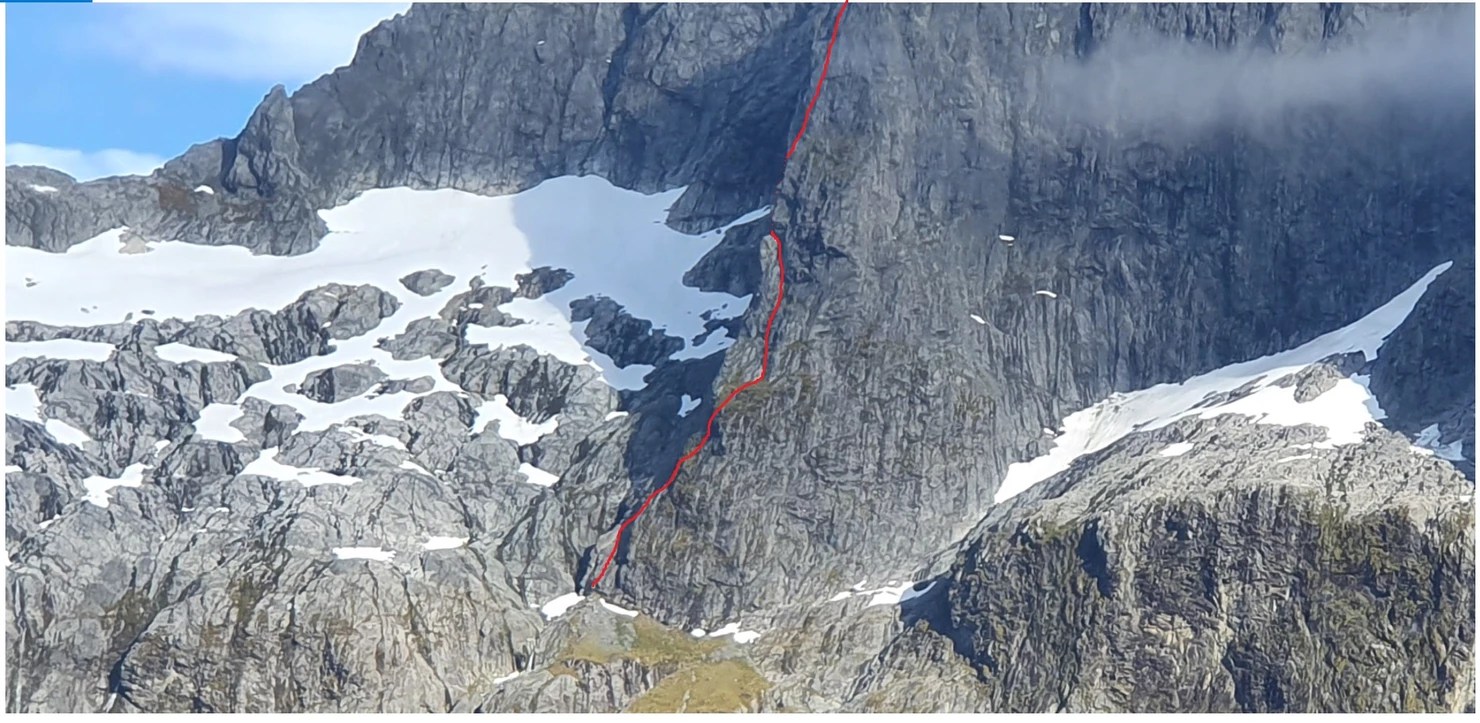
Alarm set for 5am. As we were eating breakfast (quite challenging without spoons) we saw 3 head torches in the distance heading up and we knew we would have company for the day. Getting to the base of the route is a bit tricky so we were grateful for the cairns en route. Head to the the left of the obvious waterfall on the North Buttress – see picture below. There was some snow here when we were there, stretching 50m or so. Gain the tussock ramp on the left, climbing up before reaching another waterfall. Zig zag back right at this point where the ground flattens off.
Swipe to see the route we took – it isn’t as bad as it looks from afar. Pretty similar to Giffords crack in steepness. The track is cut into the cliff a bit and as long as its dry never feels too sketchy. The hardest route finding was at the top where it cuts back hard right on itself (the furthest left point of the red line) – just head up the low angle slab towards the tussock.
I would divide the route into 3 distinct sections.
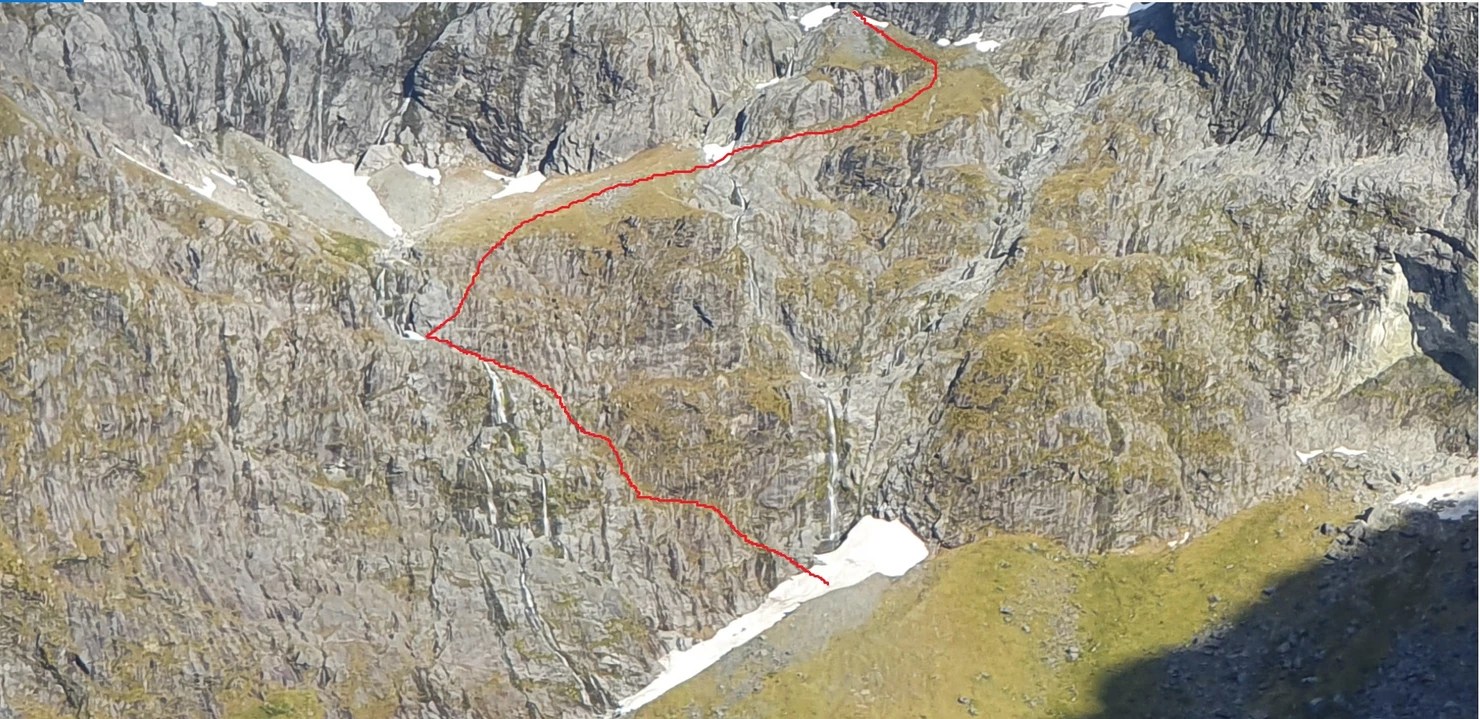
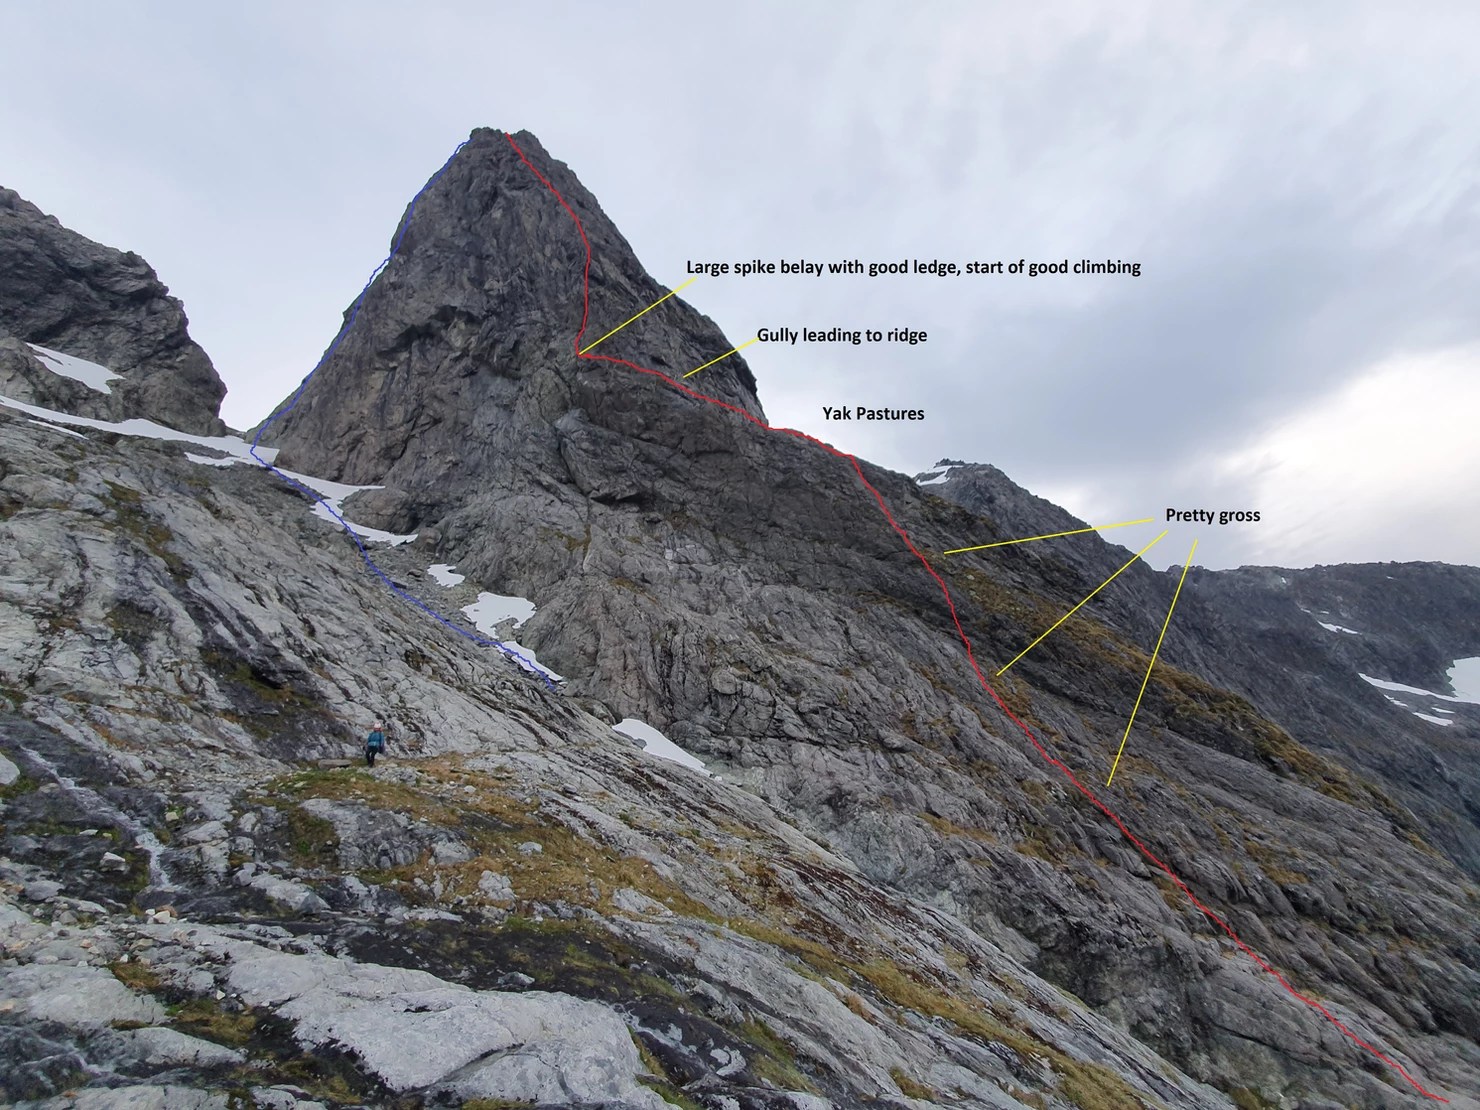
Part 1 Getting to the crux – can be done either through the yak pastures (what we did) or via the direct variant graded 19 (what we wished we had done), and ending at a massive obvious spike belay and ledge right on the ridge of the N butress. Its not obvious from the above photo but once you hit the yak pastures there a deep obvious gully that cuts up diagonally from the right hand edge of the yak pastures towards the ridge. Its going to take a varying number of pitches depending on exactly which way you go and has the potential to be very time consuming. We took 5 in total.
P1: Started up the low angle slabs on the left
P2: head diagonally towards the right which takes you to a spot which you can see the yak pastures from.
P3-4 : Full quest time. Awful, slimy, mossy, run out. We were heading up through the muddy slippy tussock which was pretty unprotectable and not a lot of fun. When you eventually get up to the yak pastures it levels out and you can find a good anchor on the rock band on the right
P5 – Start on the far right of the yak pasture and follow the gully that goes diagonally up and left towards the ridge where the spike belay is and the actual climbing starts! The rock quality and pro is actually decent in this gully, a welcome reprieve from the last few pitches
Swipe up for route/annotations. Gettting up to the Yak pastures wasn’t a lot of fun. Mossy, muddy, wet, hard to protect. This is how we went but probably a much better way. The crack straiught down from the spike apparently goes at 19 and looks much nicer! Once your at the Yak Pastures it gets much better.
This angle gives a much better view of the gully from the yak pasture up to the ridge, and the belay ledge that signals the start of the good climbing!
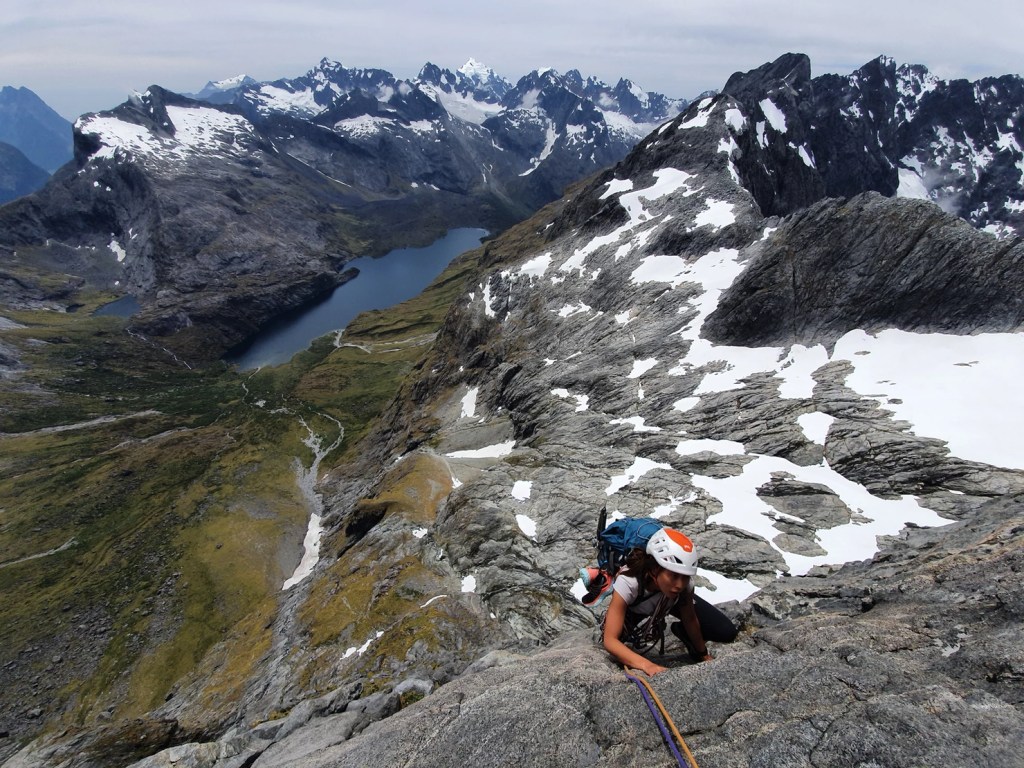
Part 2 The crux aka the good climbing! – 3 pitches of super fun well protected grade 17 climbing – not really the crux because grovelling through the slimy tussock of death below was way scarier and harder. Took us around 4h to get here.
P6: 16, 45m. Very enjoyable, finally nice clean granite just as we were promised! Super fun exposure swinging out left onto a ledge before heading up the obvious crack. Spike belay and ledge here.
P7: 17, 40m. Stem city. Fun moves up the corner straight up, following the obvious line of protection.
P8: 16, 40m. Again straight up.
Part 3 The final pitches to the summit – Lots of different ways you can go, angle mellows out significantly. Choose the path of least resistance, grade 14 or so is possible to the top (although we veered right under an overhang/roof section which was very cool and fun climbing, harder than it needed to be. Probably about 18/19. Worth the detour if you can be bothered.
P9: Traverse right, jugs the whole way but v exposed. Then easy scrambling up. Bit of rope drag here.
P10: Directly up.
P11: Up and towards the right takes you to a tricky overhanging roof, which is difficult to protect. Alternatively stick left for an easier option.
P12: Easy scrambling to the biv spot just shy of the summit.
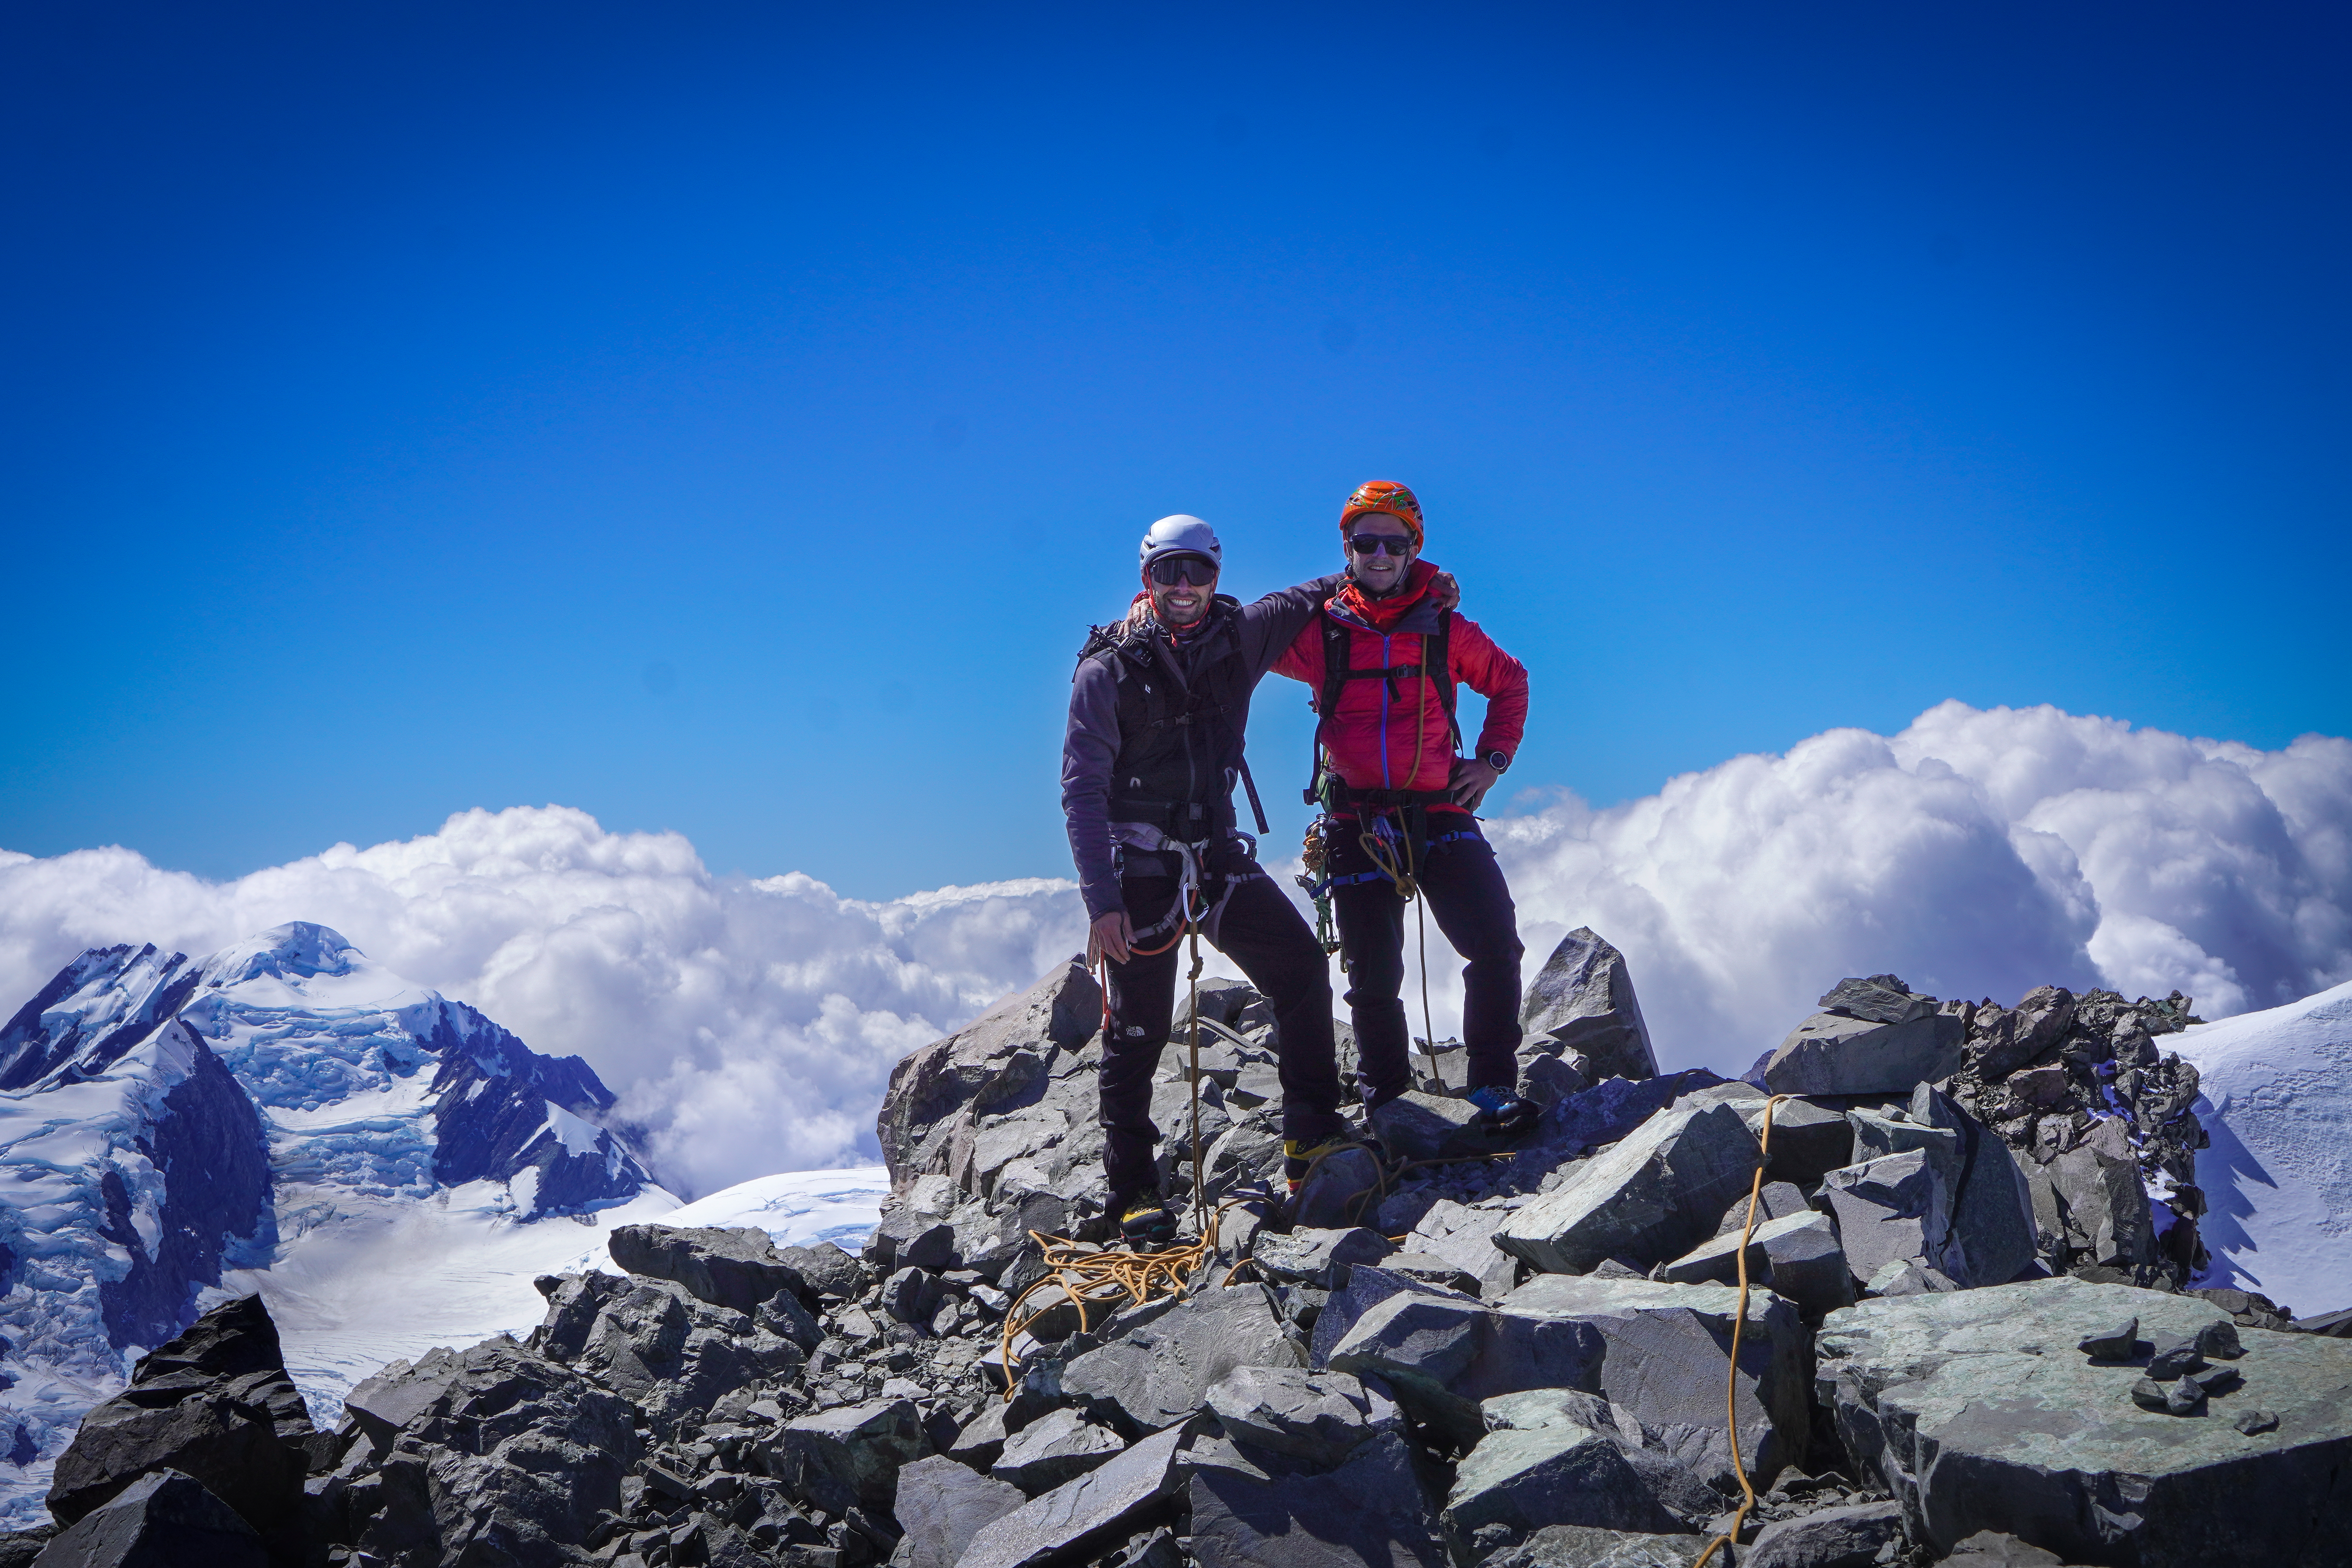
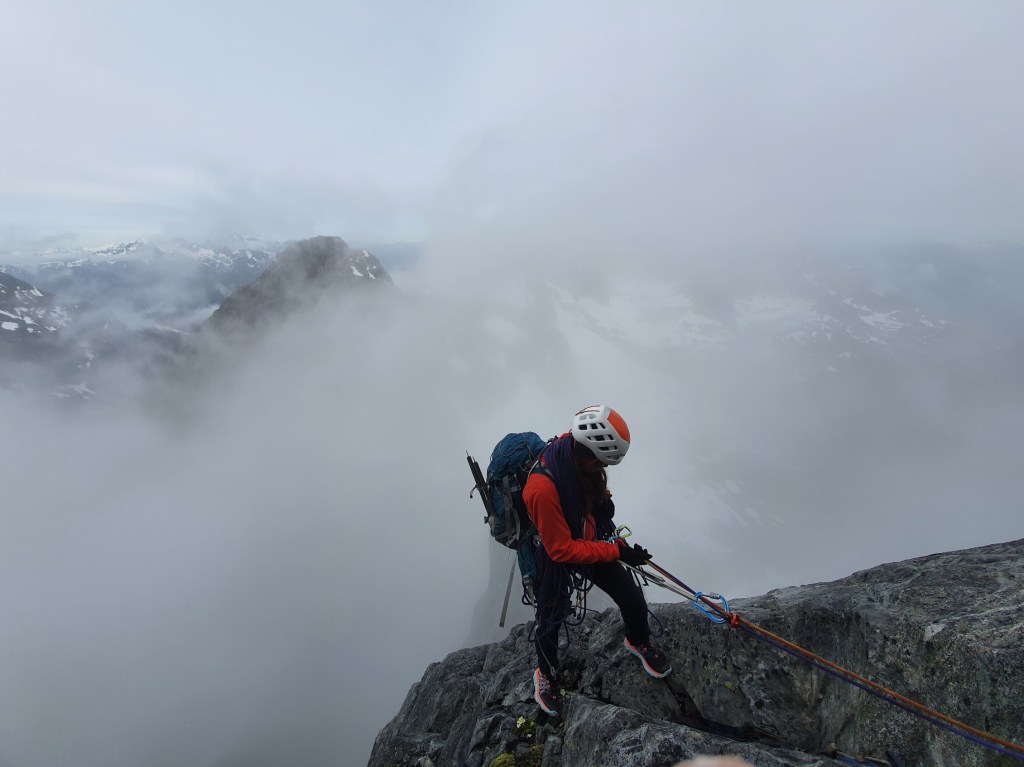
We got here by around 5.30pm. Tired but great feeling of accomplishment! Quick sandwich before starting the descent.
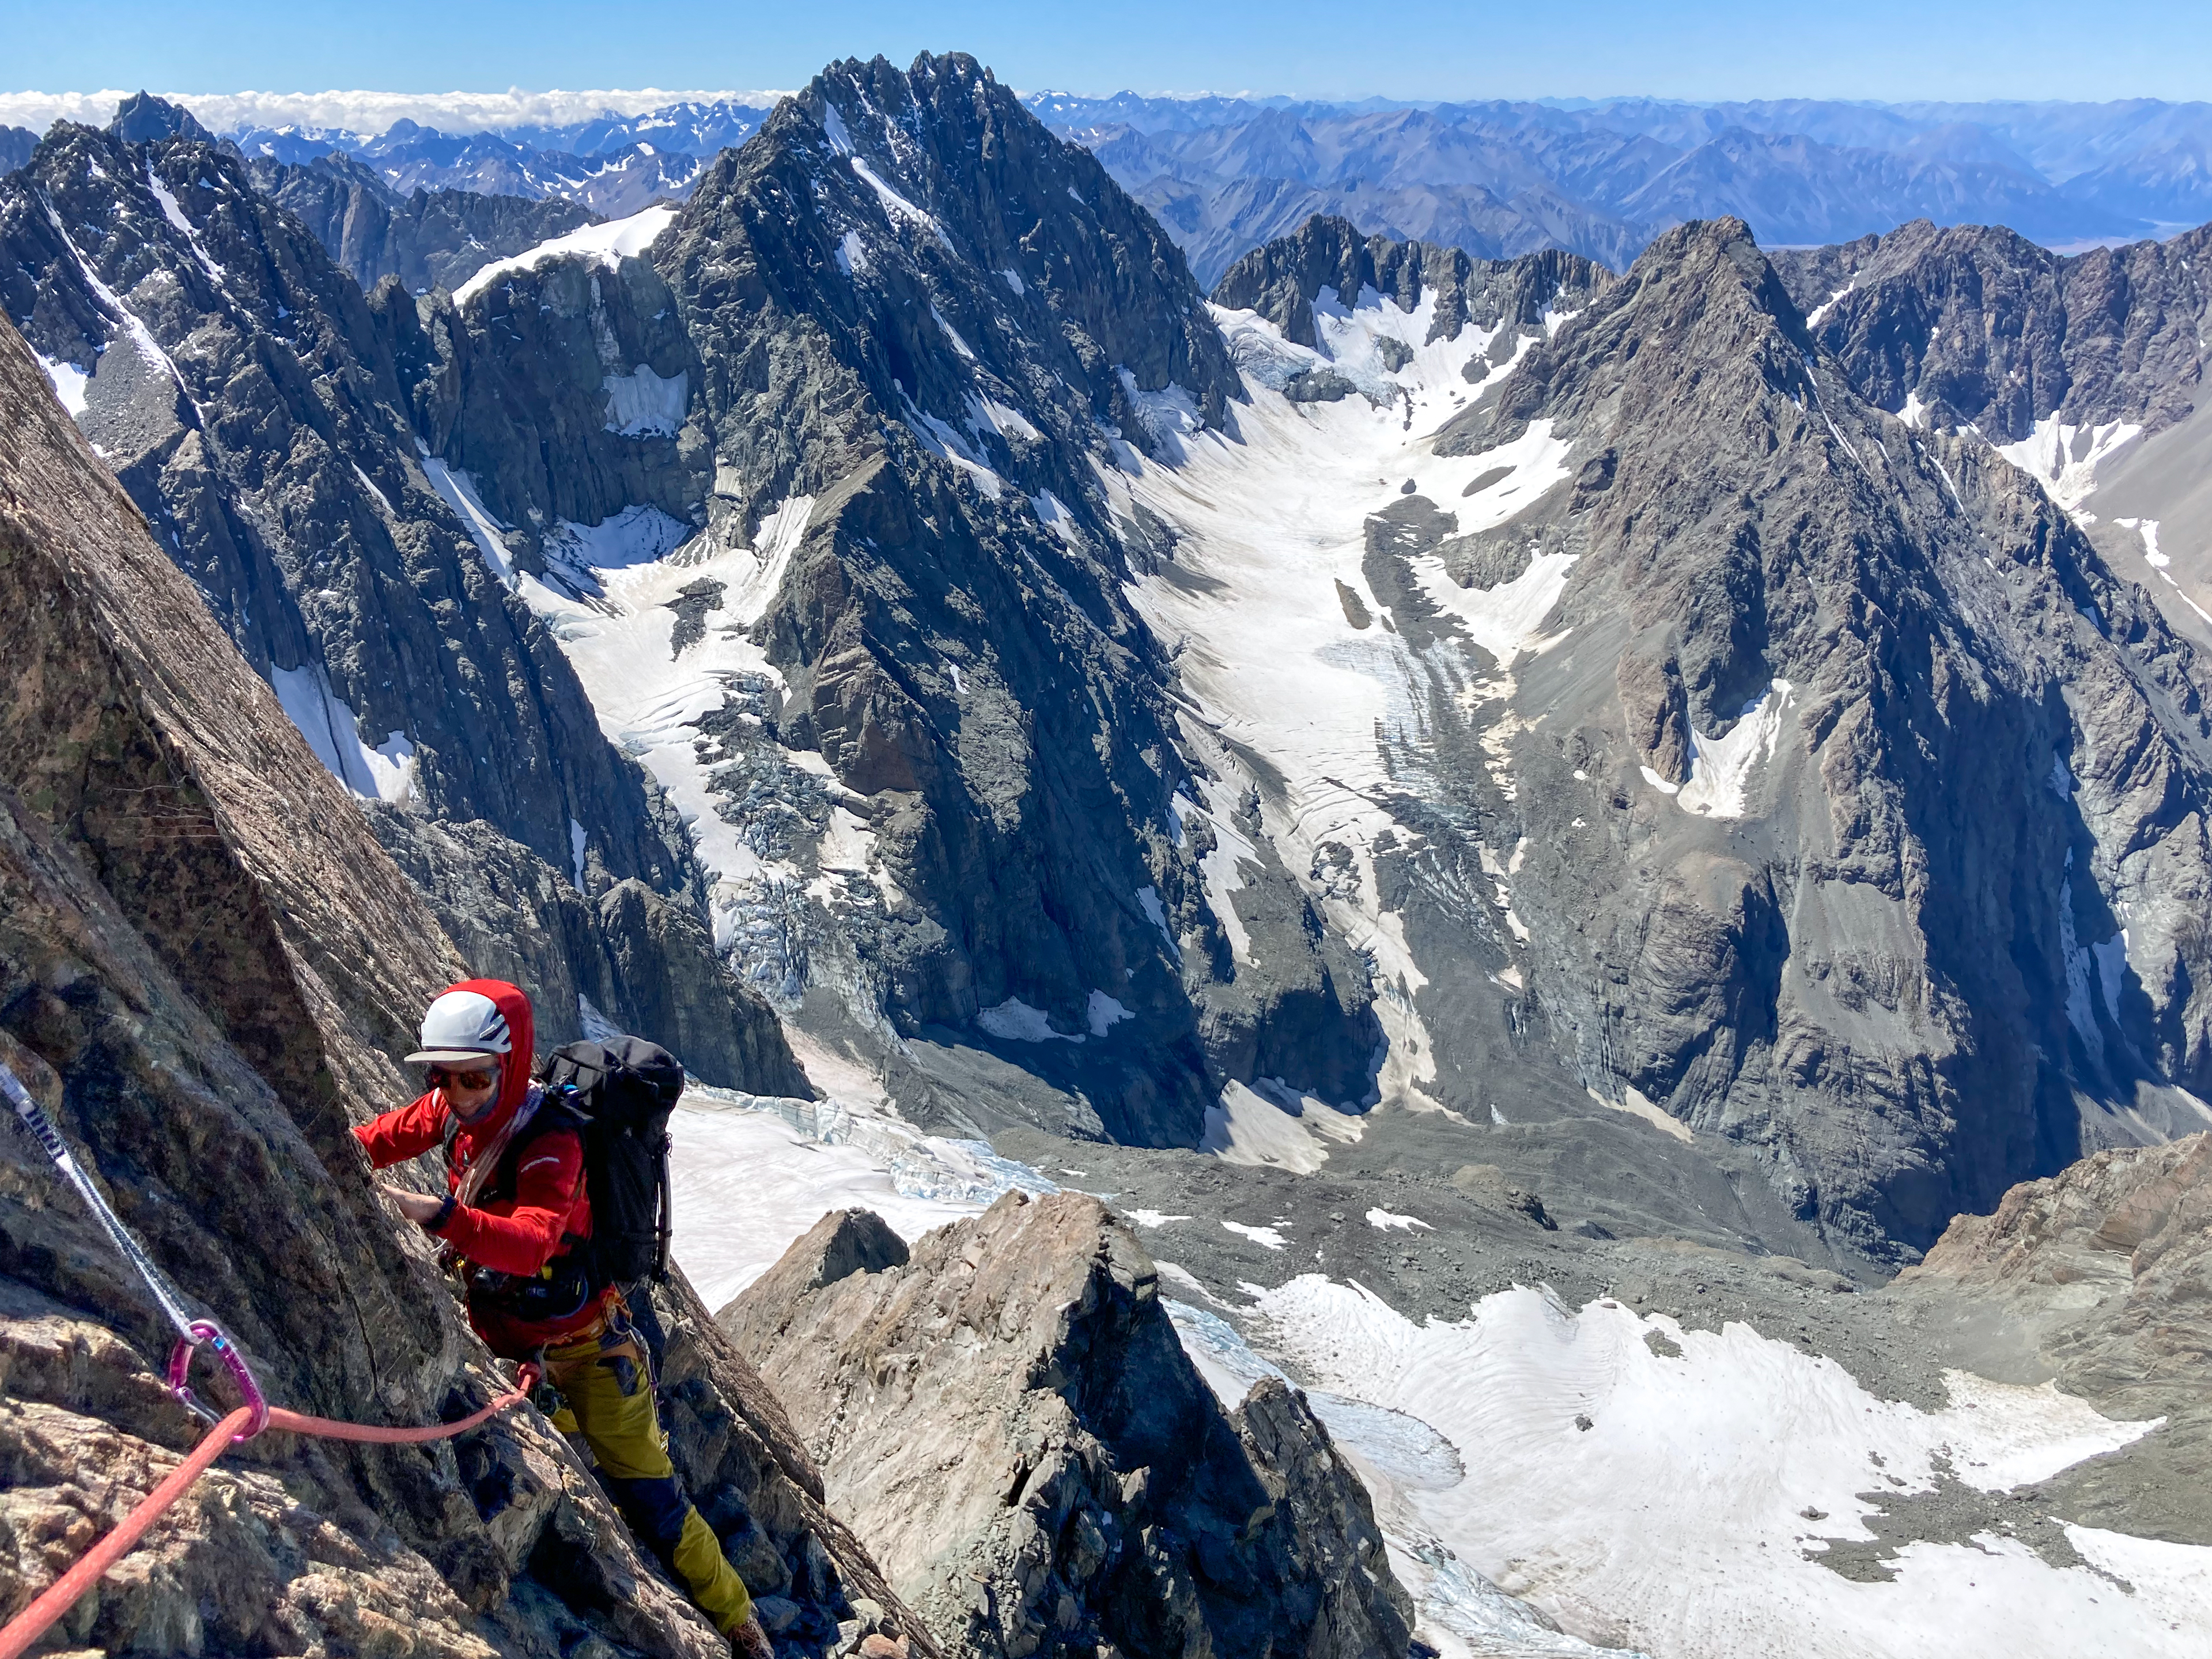
Coming up one of the mellow top pitches with some amazing views
Descent
Scramble south past the multiple biv spots that people have built and towards the summit. To get to the rap station head East around 50m before you reach the summit, aiming towards the East ridge. The stations are pretty obvious with huge bundles of tat from previous groups. Bring enough tat to replace weathered slings and be ready to leave some nuts behind. From the top your aiming for a giant obvious gendarme – the rap line is just to the skiiers left of this. Some people downclimb to the gendarme but that seems pretty sketchy to me, especially with tired brain kicking in.
Cloud coming in at the start of the first rappel
We were down to the Sabre-Adelaide col by 8pm. We had to walk through down some snow and mossy slabs to get to where we started the climb. Took us another 2.5h to get down to camp. Had another spoonless meal and KO’d by 10.30.
Had a much needed lie in the next day then paced it out! Great way to kick off 2022.
Once you’ve walked down from Sabre Adelaide col, you can easily get bluffed out on the wet slabs especially if its dark. This is an easy way down to where the climbing started.
GPX files. GPS went slightly haywire a couple of times on the summit but you get a good picture of the approach and descent routes. The approach file is the correct way through Giffords, not the way that we took on the way in!
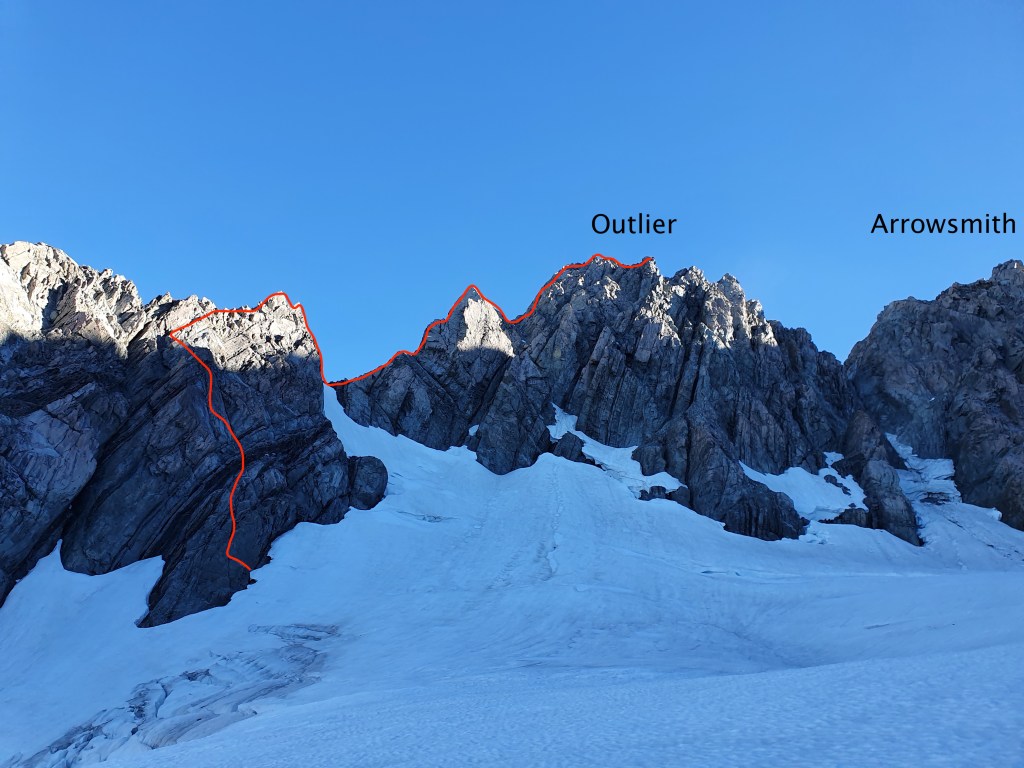
More widely known for ski touring, the Arrowsmith range is much less trafficked for its Climbing routes. We decided to check the area out mid February, savouring the last of the summer. It certainly is a beautiful area with striking peaks piercing the skyline, a downscaled version of Patagonia? Rock quality being much more questionable, of course. Wouldn’t be New Zealand without a bit of character building choss.
We didn’t actually finish the full route up Mt Arrowsmith (despite it being described as “the best part” by ClimbNZ), turning around instead at Outlier (unnamed on NZ topo at 2723). It was still a stunning climb – would just take caution on the rock and take plenty of time and tat.
Grade: 4-, crux 14
Equipment: 1x full set of cams, range of nuts, 5x alpine draws, 9x 60cm slings, 2x 120cm slings, 1x 60m rope, tat, 1x ice-axe, ATC, microtraxion, crampons (we took lightweight aluminium crampons – Petzl’s Leopard – which were sufficient), avi gear
Approach time: 4-5h (~13km direct but meanders)
Climb time: 16h 45min
Season: we climbed in February, late summer, but could be climbed throughout the summer or as a winter route, bearing in mind the avalanche risk
Team: Joe, Maria 20-22/2/22
getting there
Drive took just under 3h from Christchurch. Drive along Hakatere Heron road, past Lake Heron. Turn left onto 4-wheel drive track where you will pass a gate. Park up near the sign/intention book. There are deep ruts in the last 10m leading up to this point so some cars might want to park just shy of the sign to avoid getting stuck.
Our route
approach
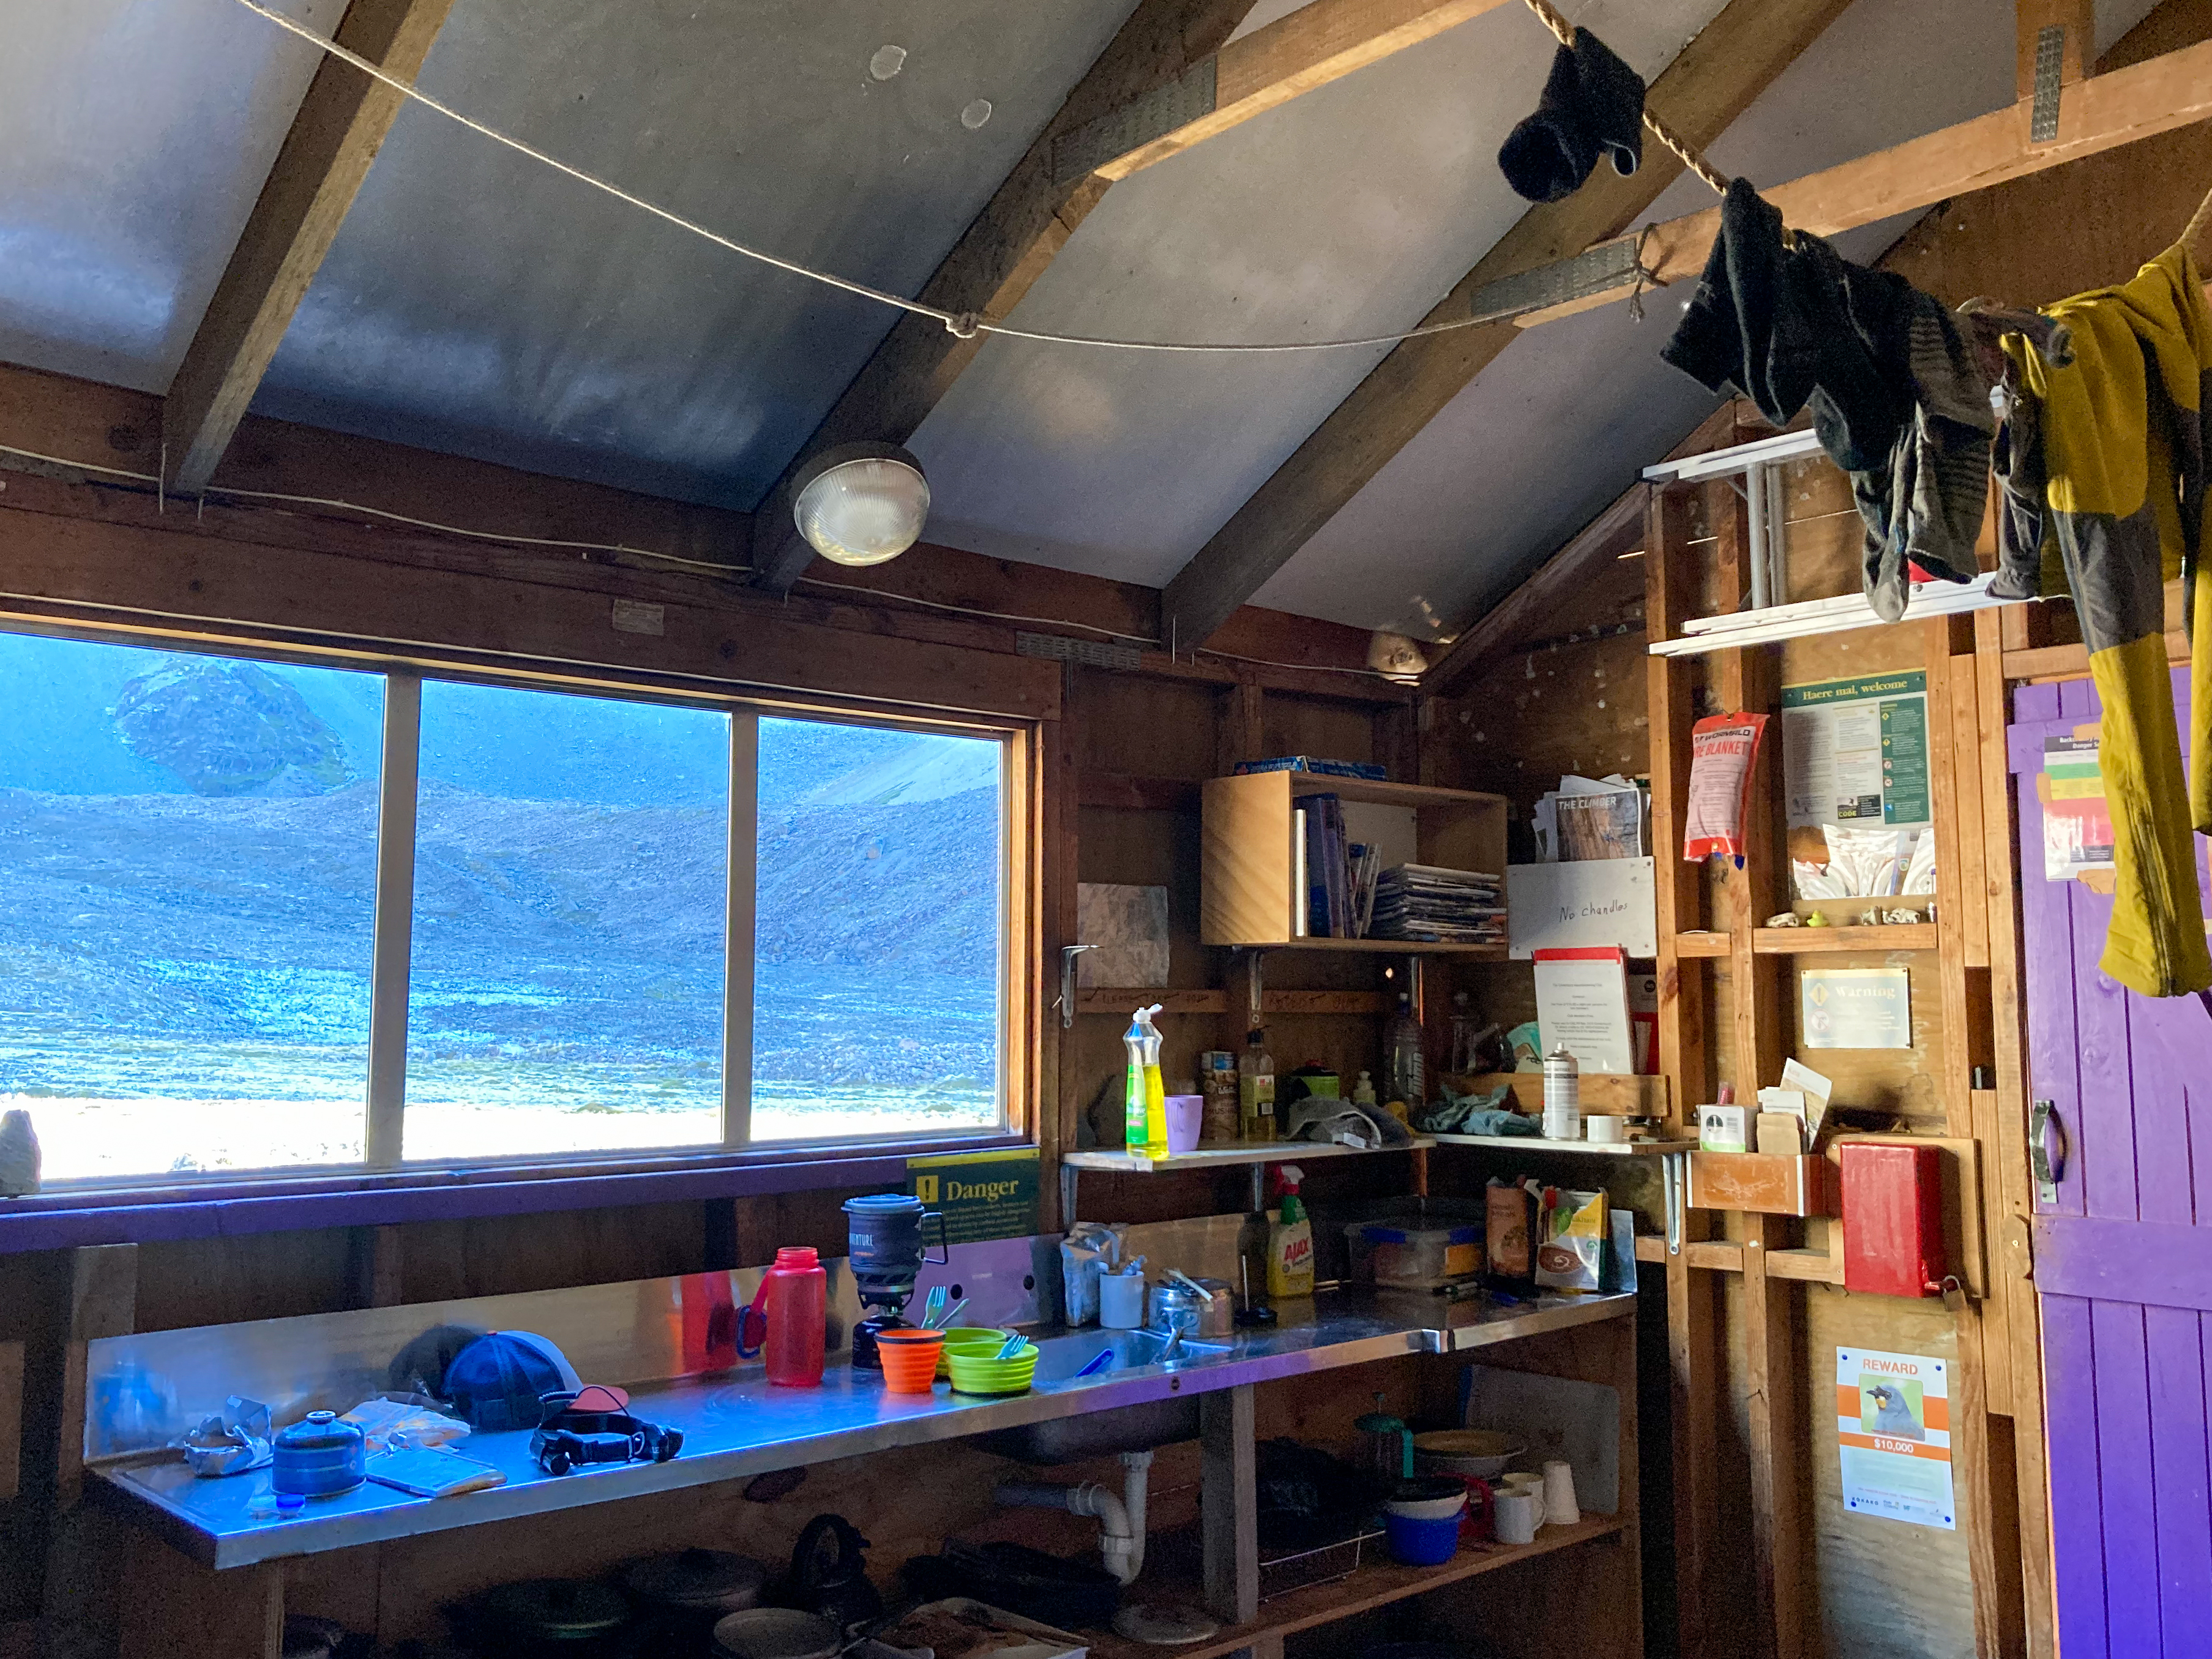
Well marked trail all the way to the hut with marker posts (grey, not the usual DOC orange) – not to be confused by the tall, orange speargrass! Bit of bog, minimal bush. Follow the river. Hut is very easy to spot – hunter green with hot pink door, super distinctive. Well equipped hut with pots/pans, cutlery, industrial hand sanitiser and hours of reading material from decades old copies of The Canterbury Mountaineer.
Intentions book wrongly stated that “everything is cut off” so we altered our plans – instead of going via the South Cameron glacier, we would attempt the Douglas glacier which was in view from the hut as having minimal snow/névé to travel across. Happy with plan B, we settled in for an early night at 7.30pm.
Cameron Hut with Douglas Glacier behind
climb
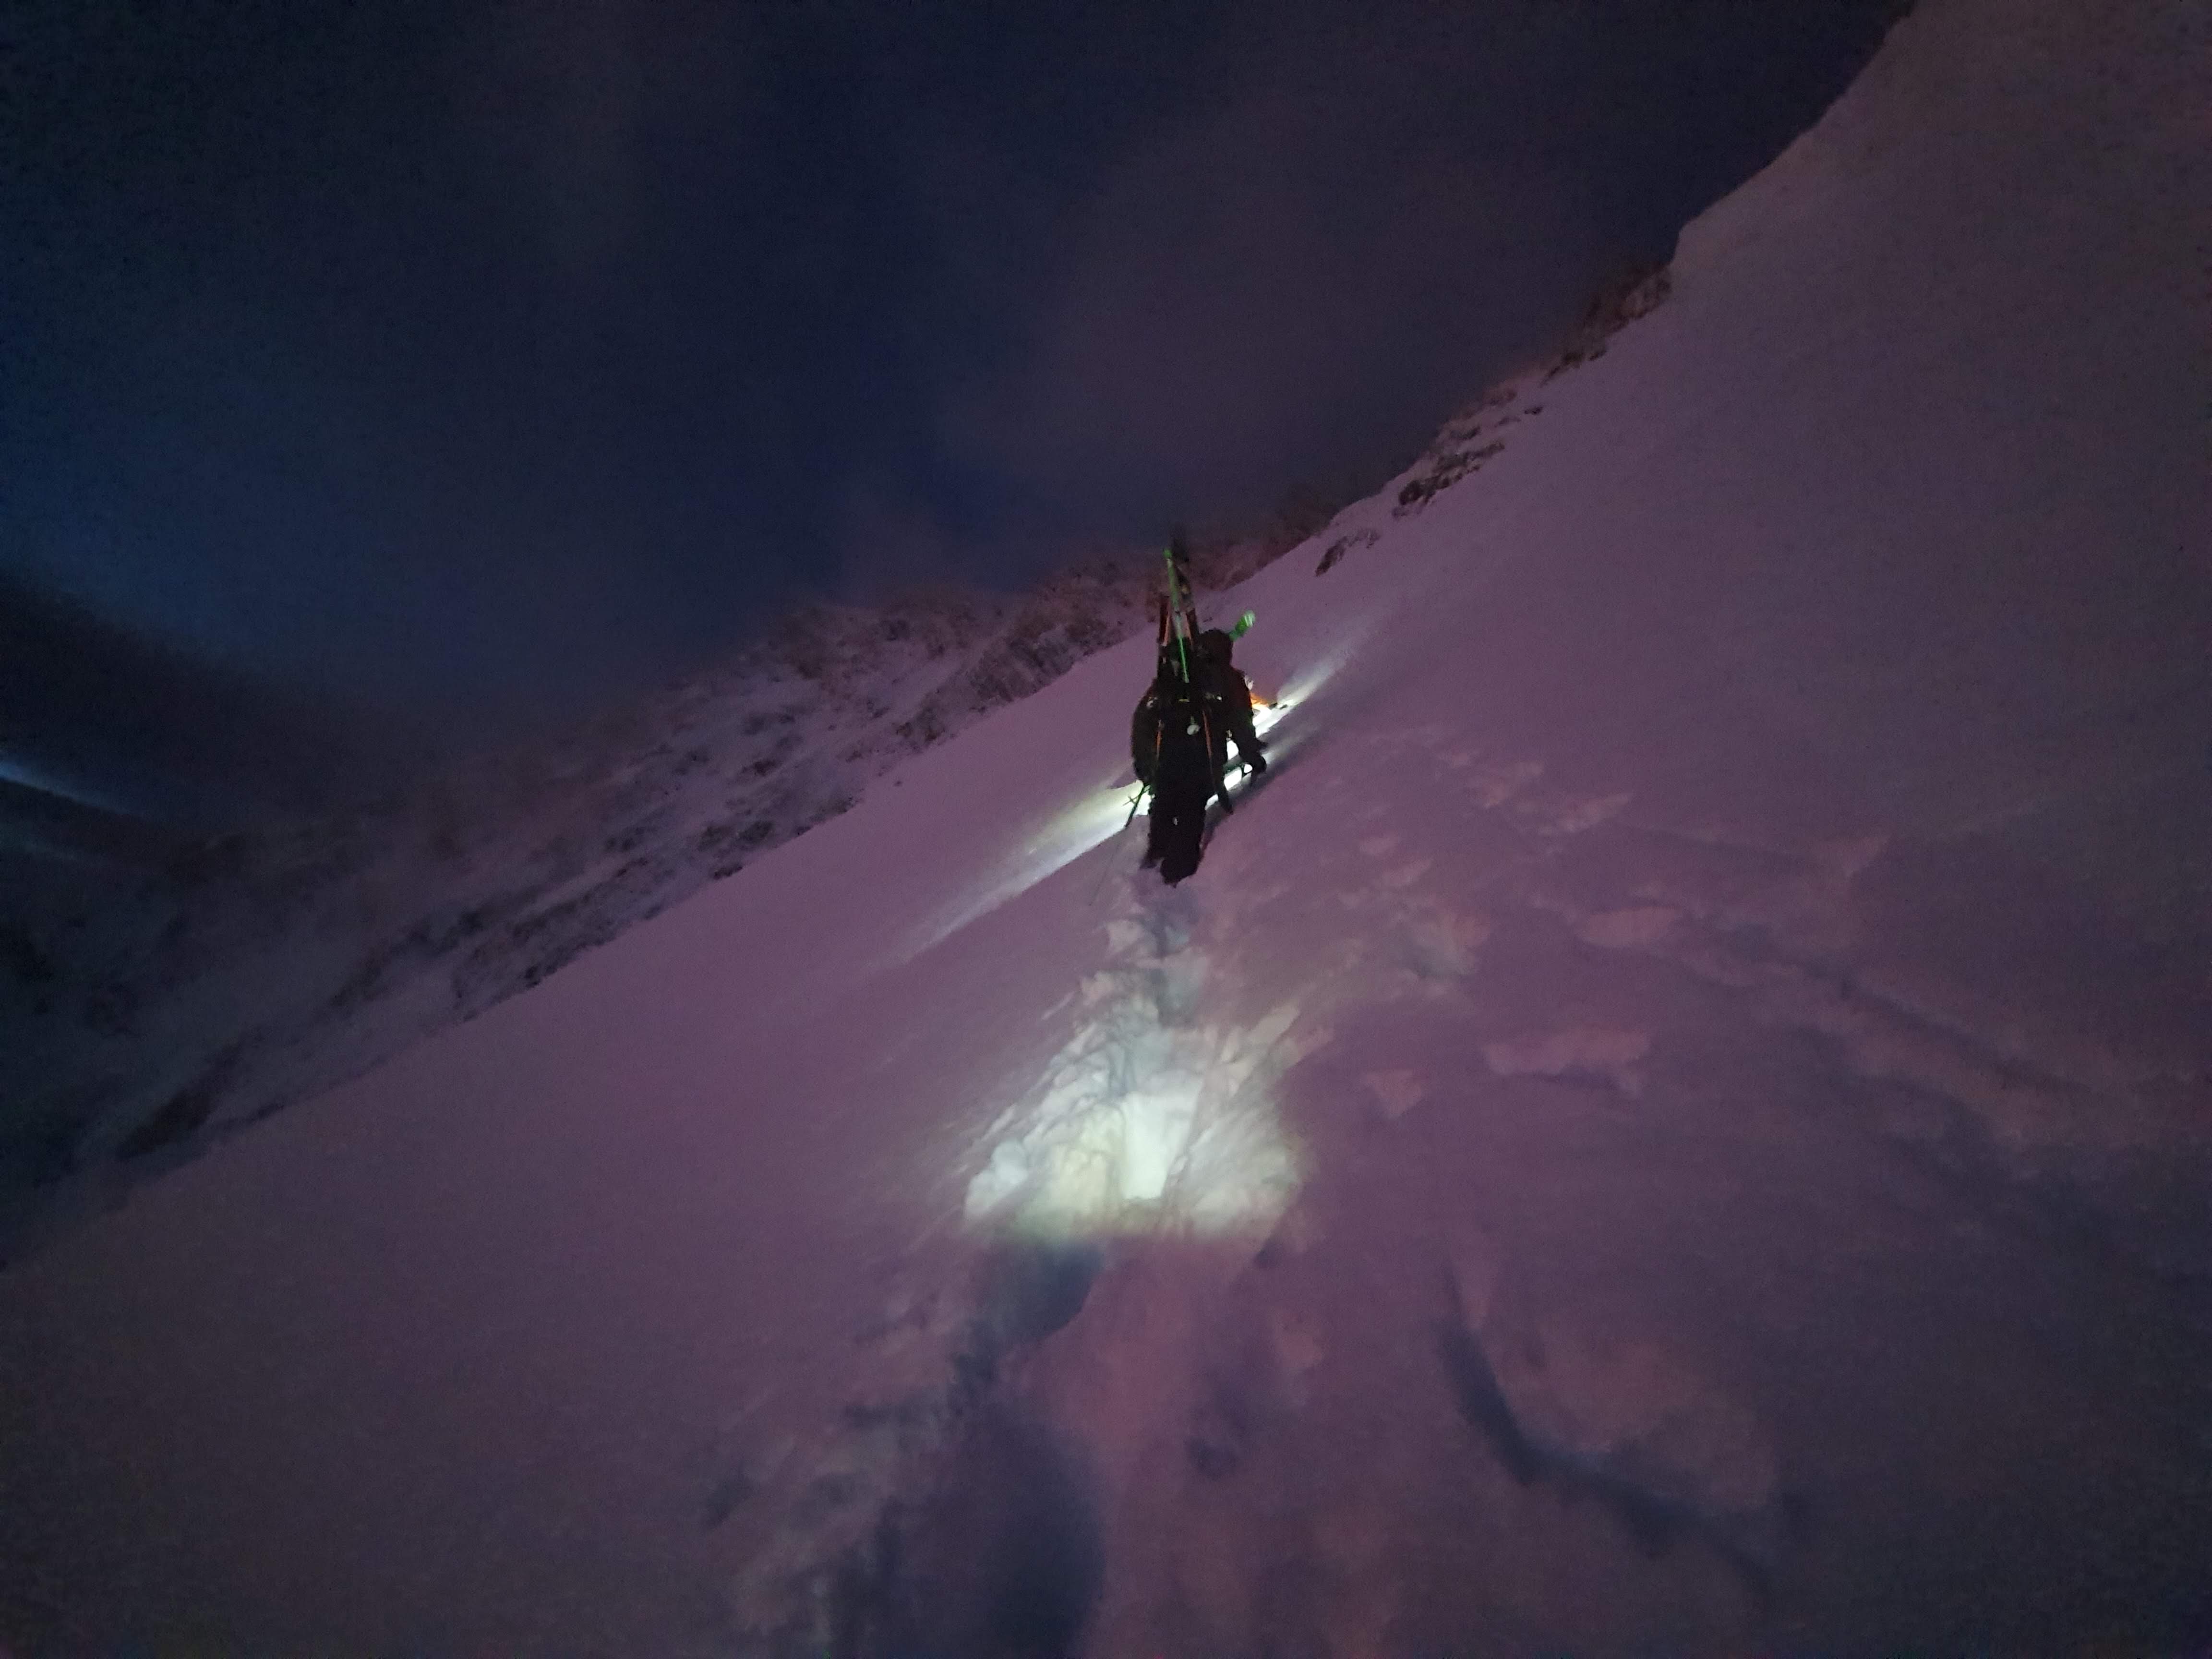
Alarm woke us up at 3am – a solid sleep only briefly disturbed by the sound of Kea claws dancing on the hut roof. Set off by 4am.
It took us around 3h to get up the moraine onto Douglas glacier and then onto the col just East of East Horn (see topo above). Patchy bits of glacier meant we had to take the crampons on and off a couple of times.
We navigated across the South Cameron glacier, weaving through bands of seracs then accidentally found ourselves amidst them so had to use one cheeky ice screw to get onto firmer ground… Swinging an ice axe in one hand and a pole in the other – a well established technique.
Looking back at the col E of East Horn from the North; Douglas glacier on the other side
It was not obvious where the base of the route was, but given the crux was 14 we found a starting point that looked reasonable and went with it.
The buttress – route started around the corner
We climbed in our boots, simulclimbing 90% of the time – the ridge is very exposed but the climbing is easy. An epic cheval made for a great photo op but in reality we went along the side of it as the drop off at the other end looked steep.
Lots of variations to this route are possible; we chose the easiest line
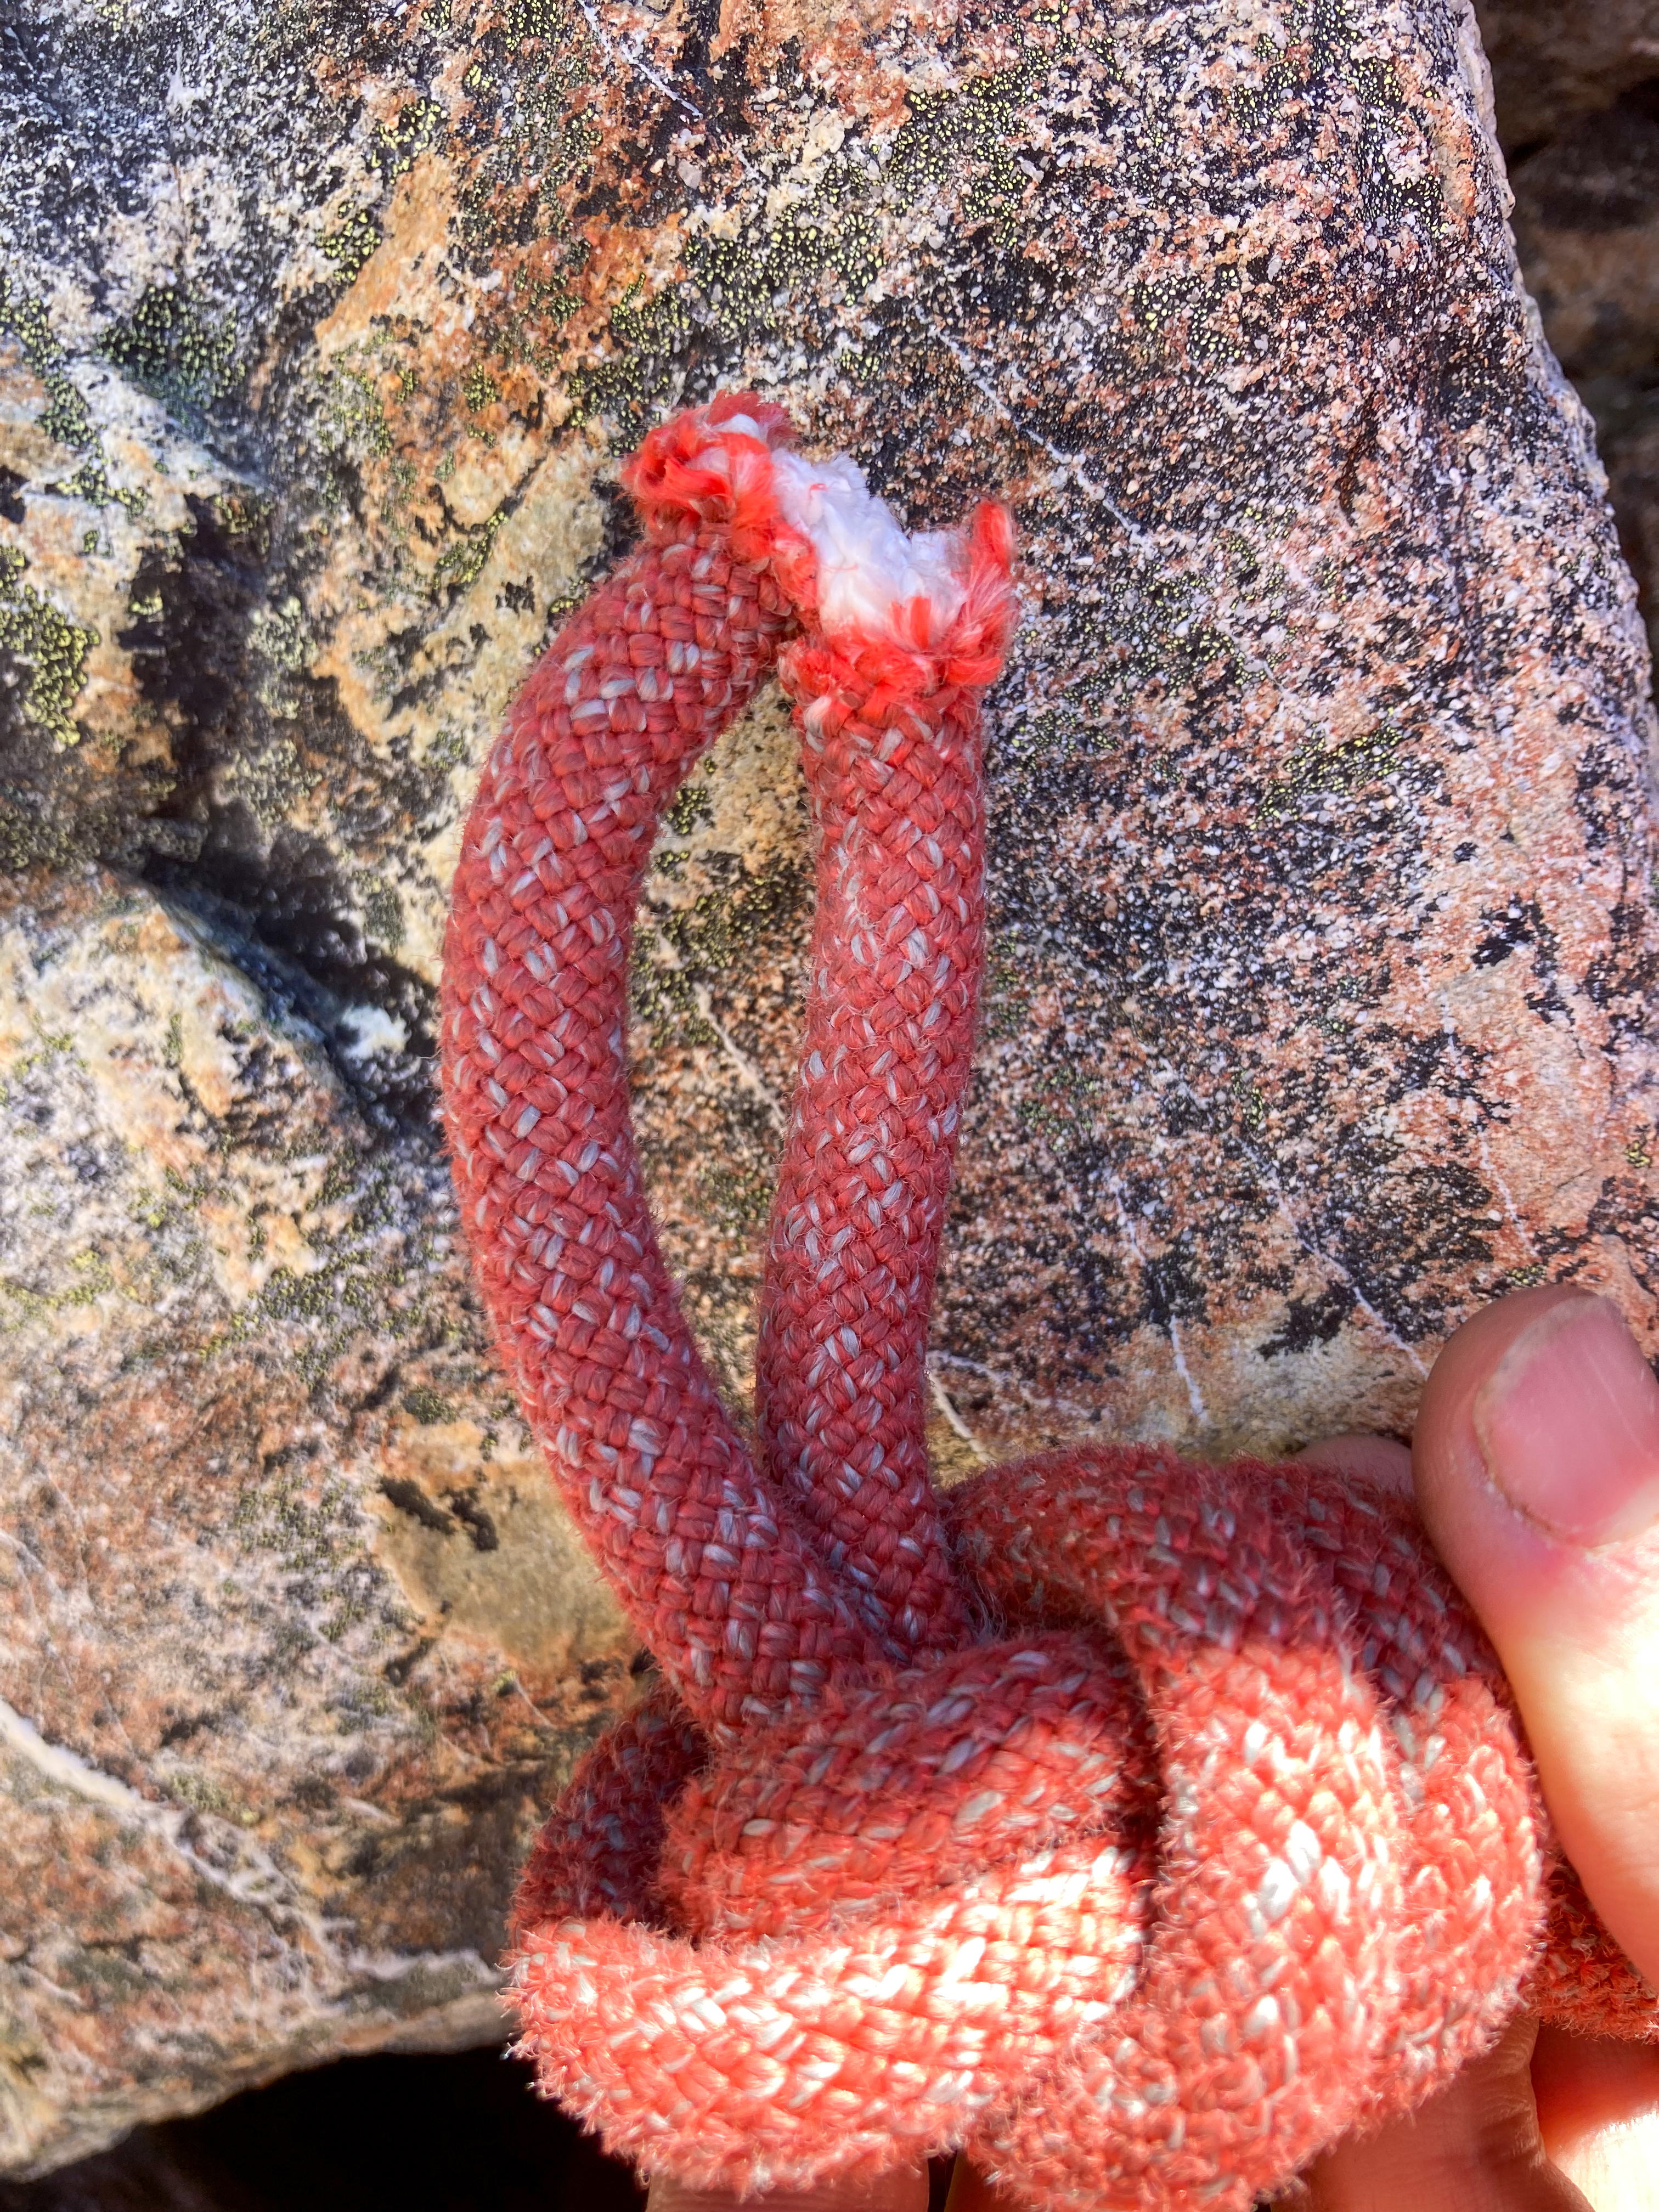
As the rock steepened off we pitched the last 100m to the summit of Outlier at 2723m.The original route describes going across to Arrowsmith but spontaneous rock fall around us did not fill us with much enthusiasm to stay for long on the ridgeline. We also noticed a core shot in the rope at around the 50m mark – presumably from a rock falling onto it earlier in the day. Definitely time to turn around. Perhaps the ridge would be more appealing in Winter..!
Full route of the ascent; we descended on the south face
Descent
We cut the rope, tied it and rapped off. There were decent spikes to rap off the whole way. We made 3x 25m raps then walked back to a snowy col. We could see the entire S Cameron glacier from the climb – it wasn’t cut off so we chose to walk out this way.
The moraine was reasonably easy to walk down. Stay high until you reach the grassy buttress otherwise you’ll get bluffed out. Once at the grassy buttress there is a faint path in the moraine which you can follow down. It turns into an obvious path all the way back to the hut. We got back just as we were losing daylight. Boots off, salty soup and a big feed before bed.
Next day we walked out faster than the way in – lighter packs and we had no lunches so that made for motivation to GTFO!