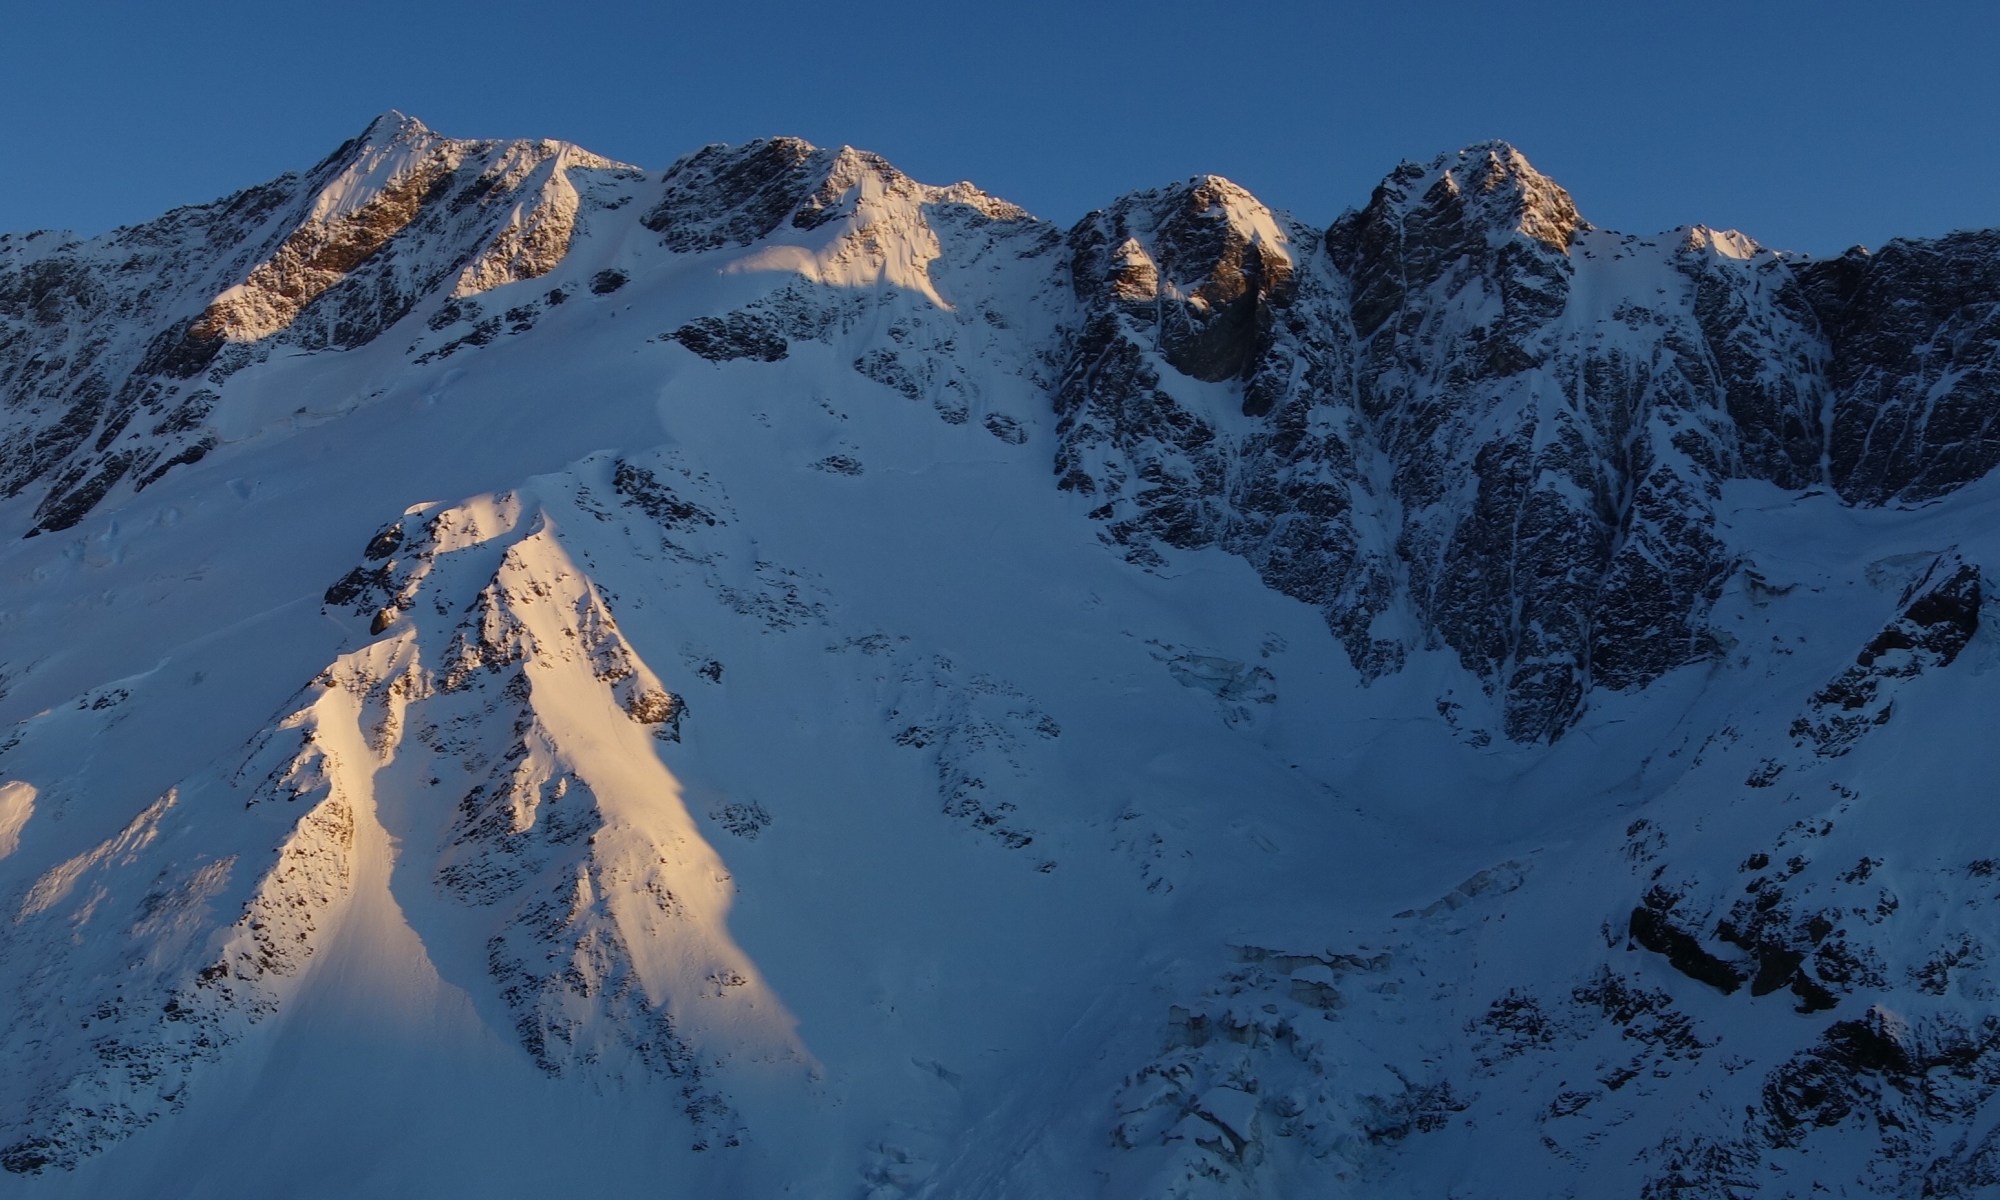
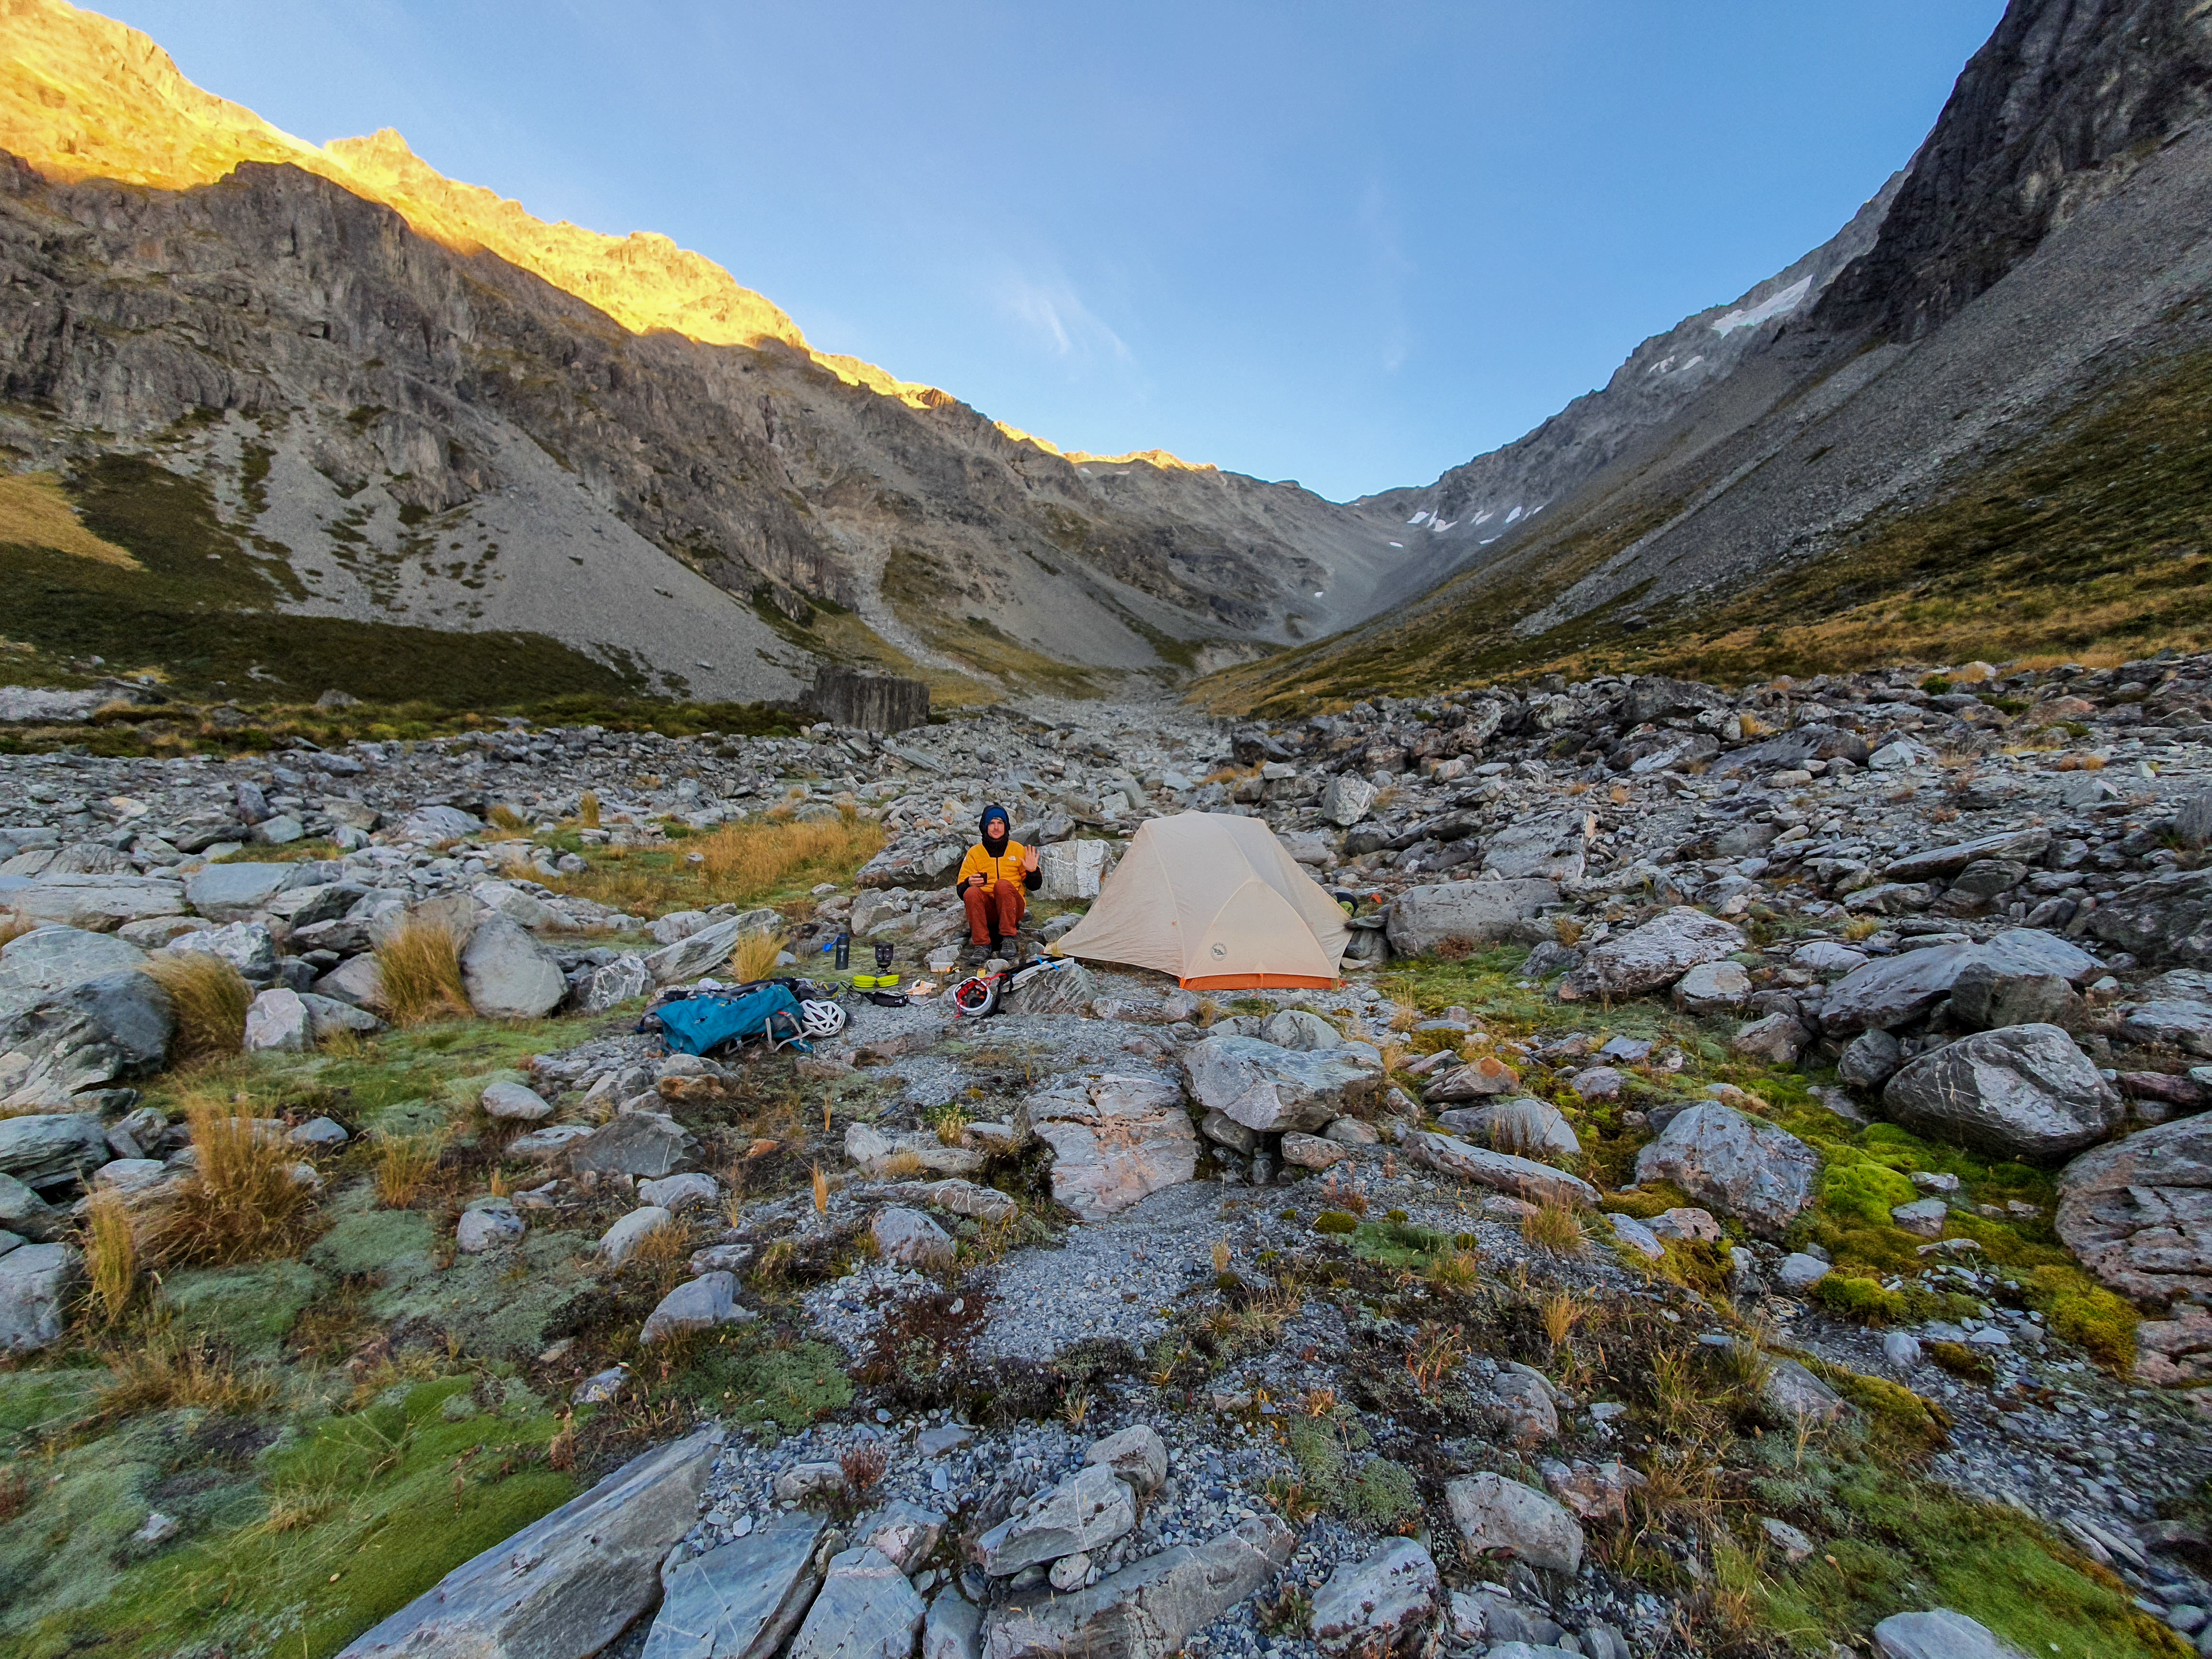
A classic climb on the proudest peak in Arthurs Pass, or a steep and technical ski mountaineering line easliy accessible as a day trip from Christchurch. Up there in terms of the steeper and more sustained lines Ive skiied in New Zealand, and with big exposure the whole way this is a serious ski. I went with Maria, Sean and Marije in early September 2023 to climb the route. I’d been thinking about the possibility of skiing the face for a while, but had no recent beta on conditions and it had been a particuarly thin winter so almost didnt bring my skis, but once we hit Rome Ridge and found cold dry snow on the shady aspects it became apparent it was on! Firm windpressed powder and some breakable crust – not dream conditions, especially on such a steep line, but edgeable enough to make it work. Would be an incredible line to ski in powder!

Length – 400m of steep ground with optional further 500m down towards the crow rived
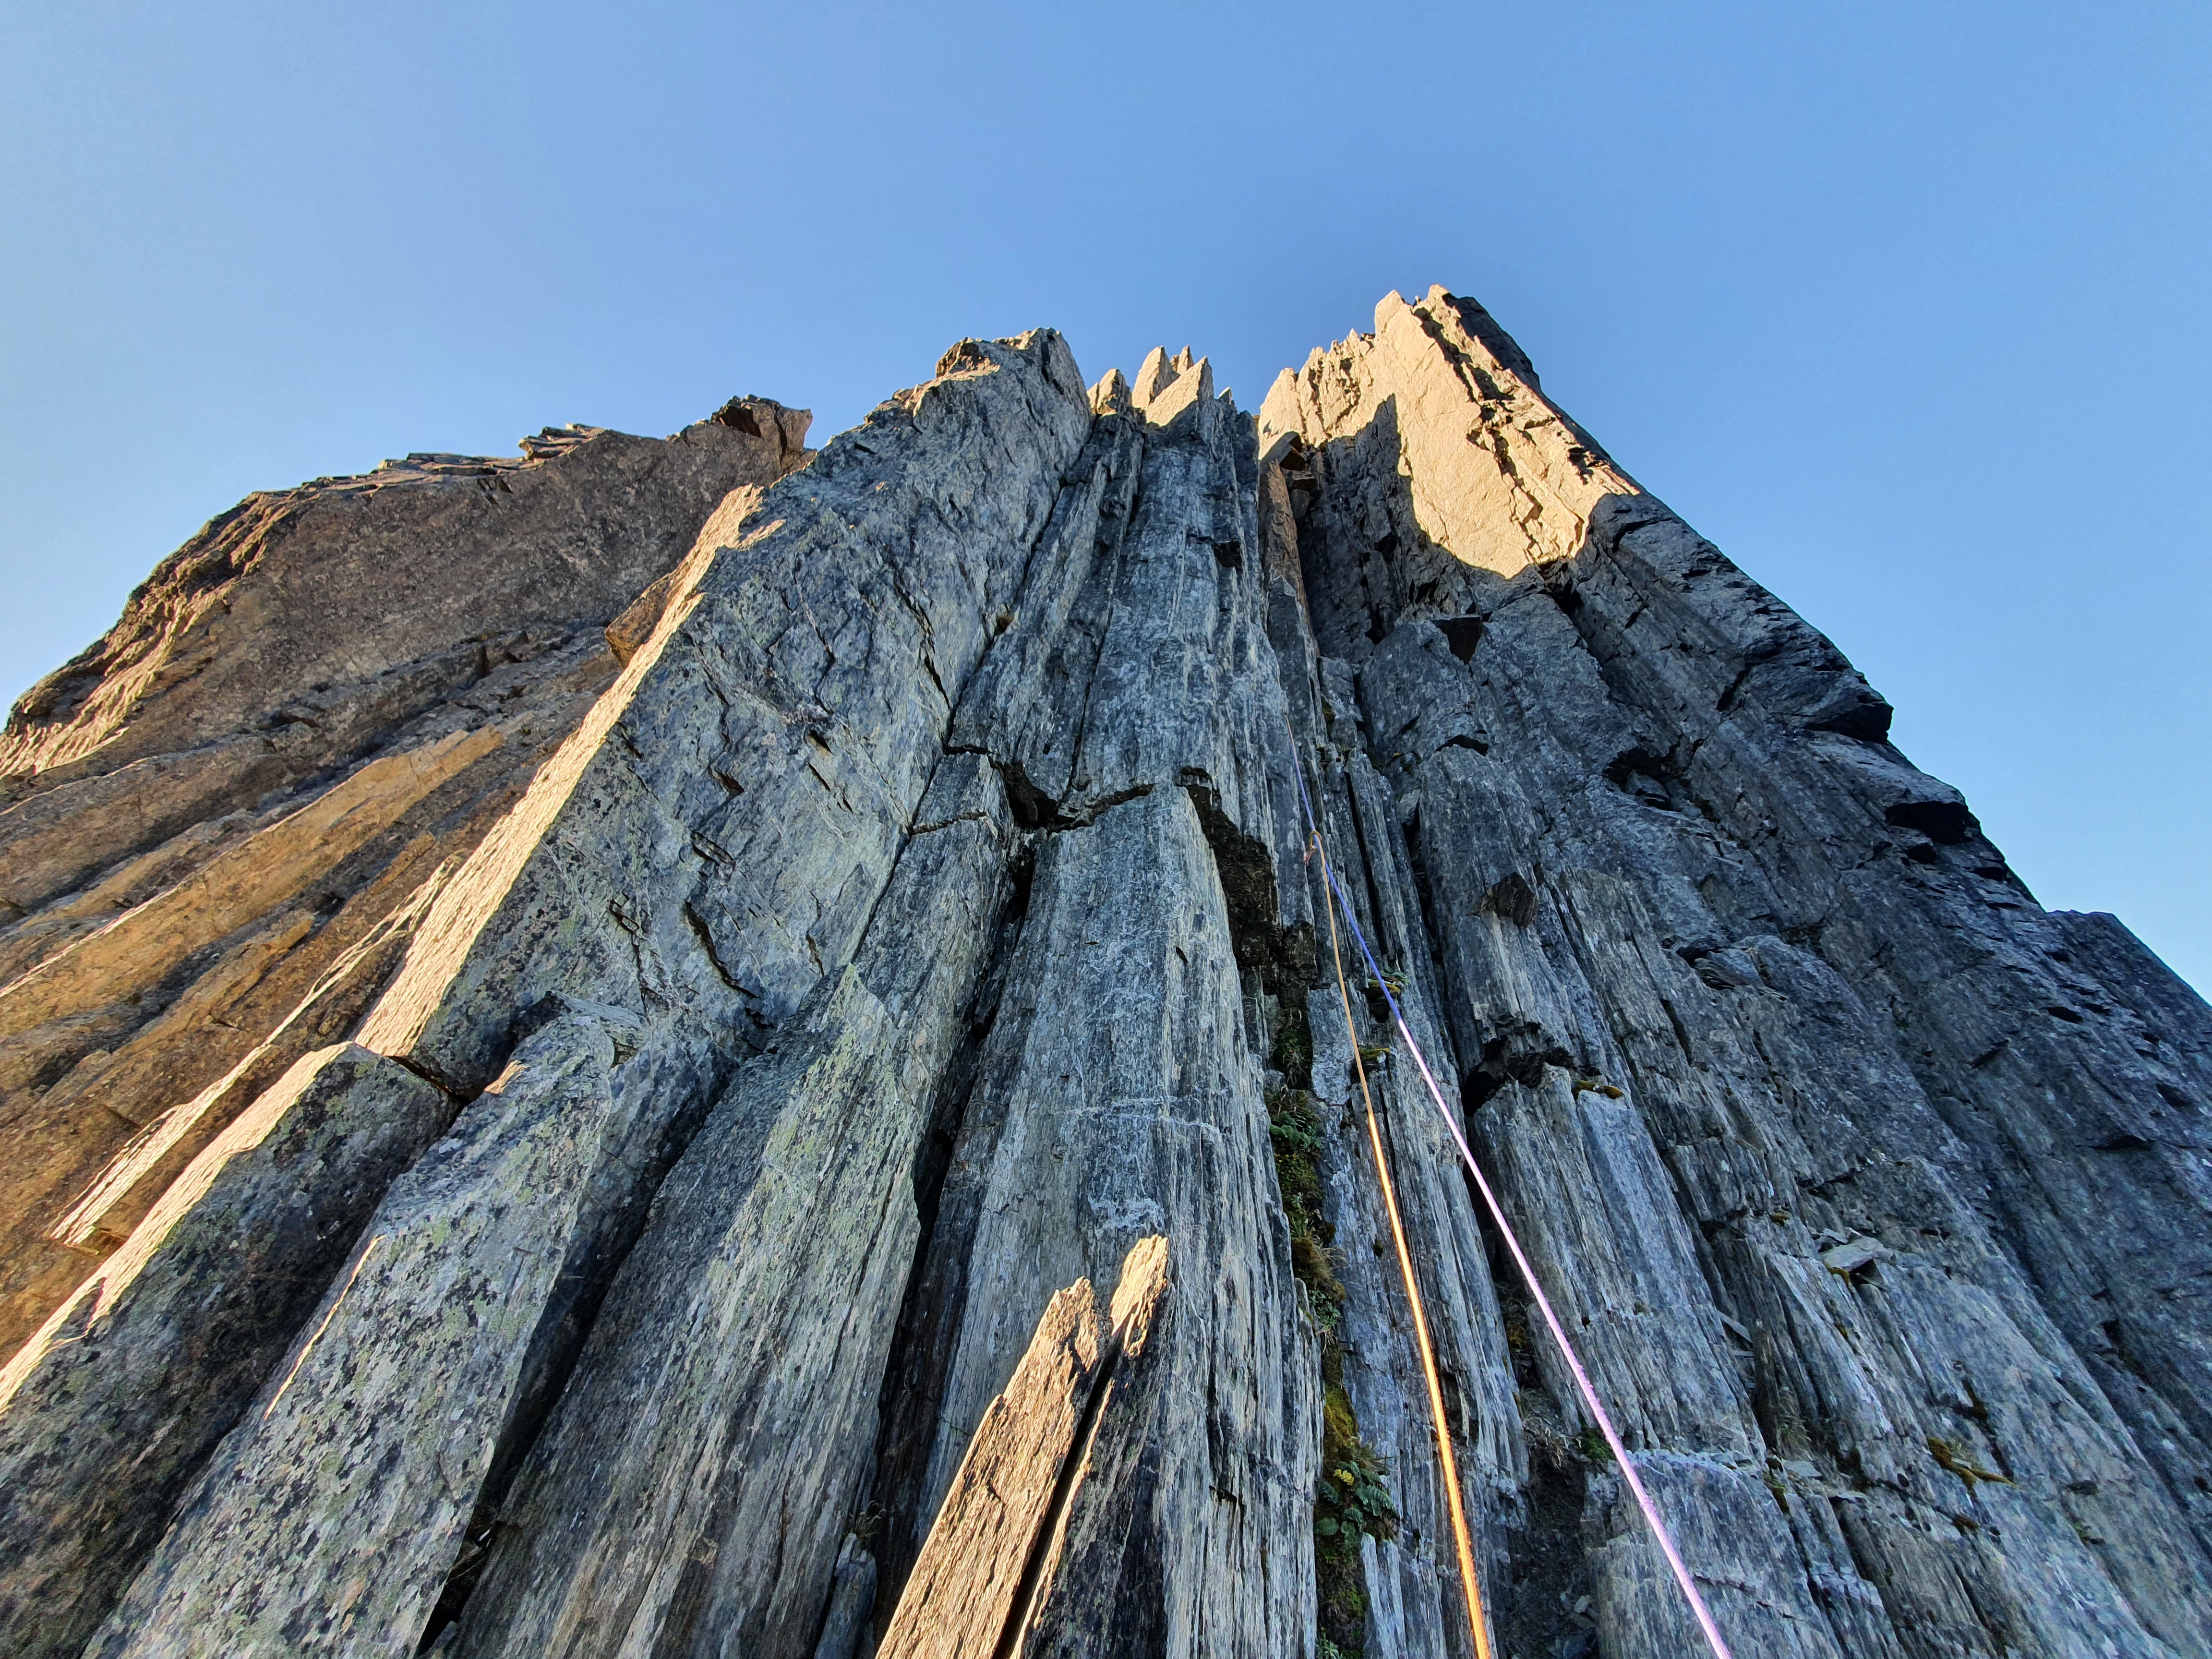
Steepness – Very steep and sustained. Opwards of 55deg at the top
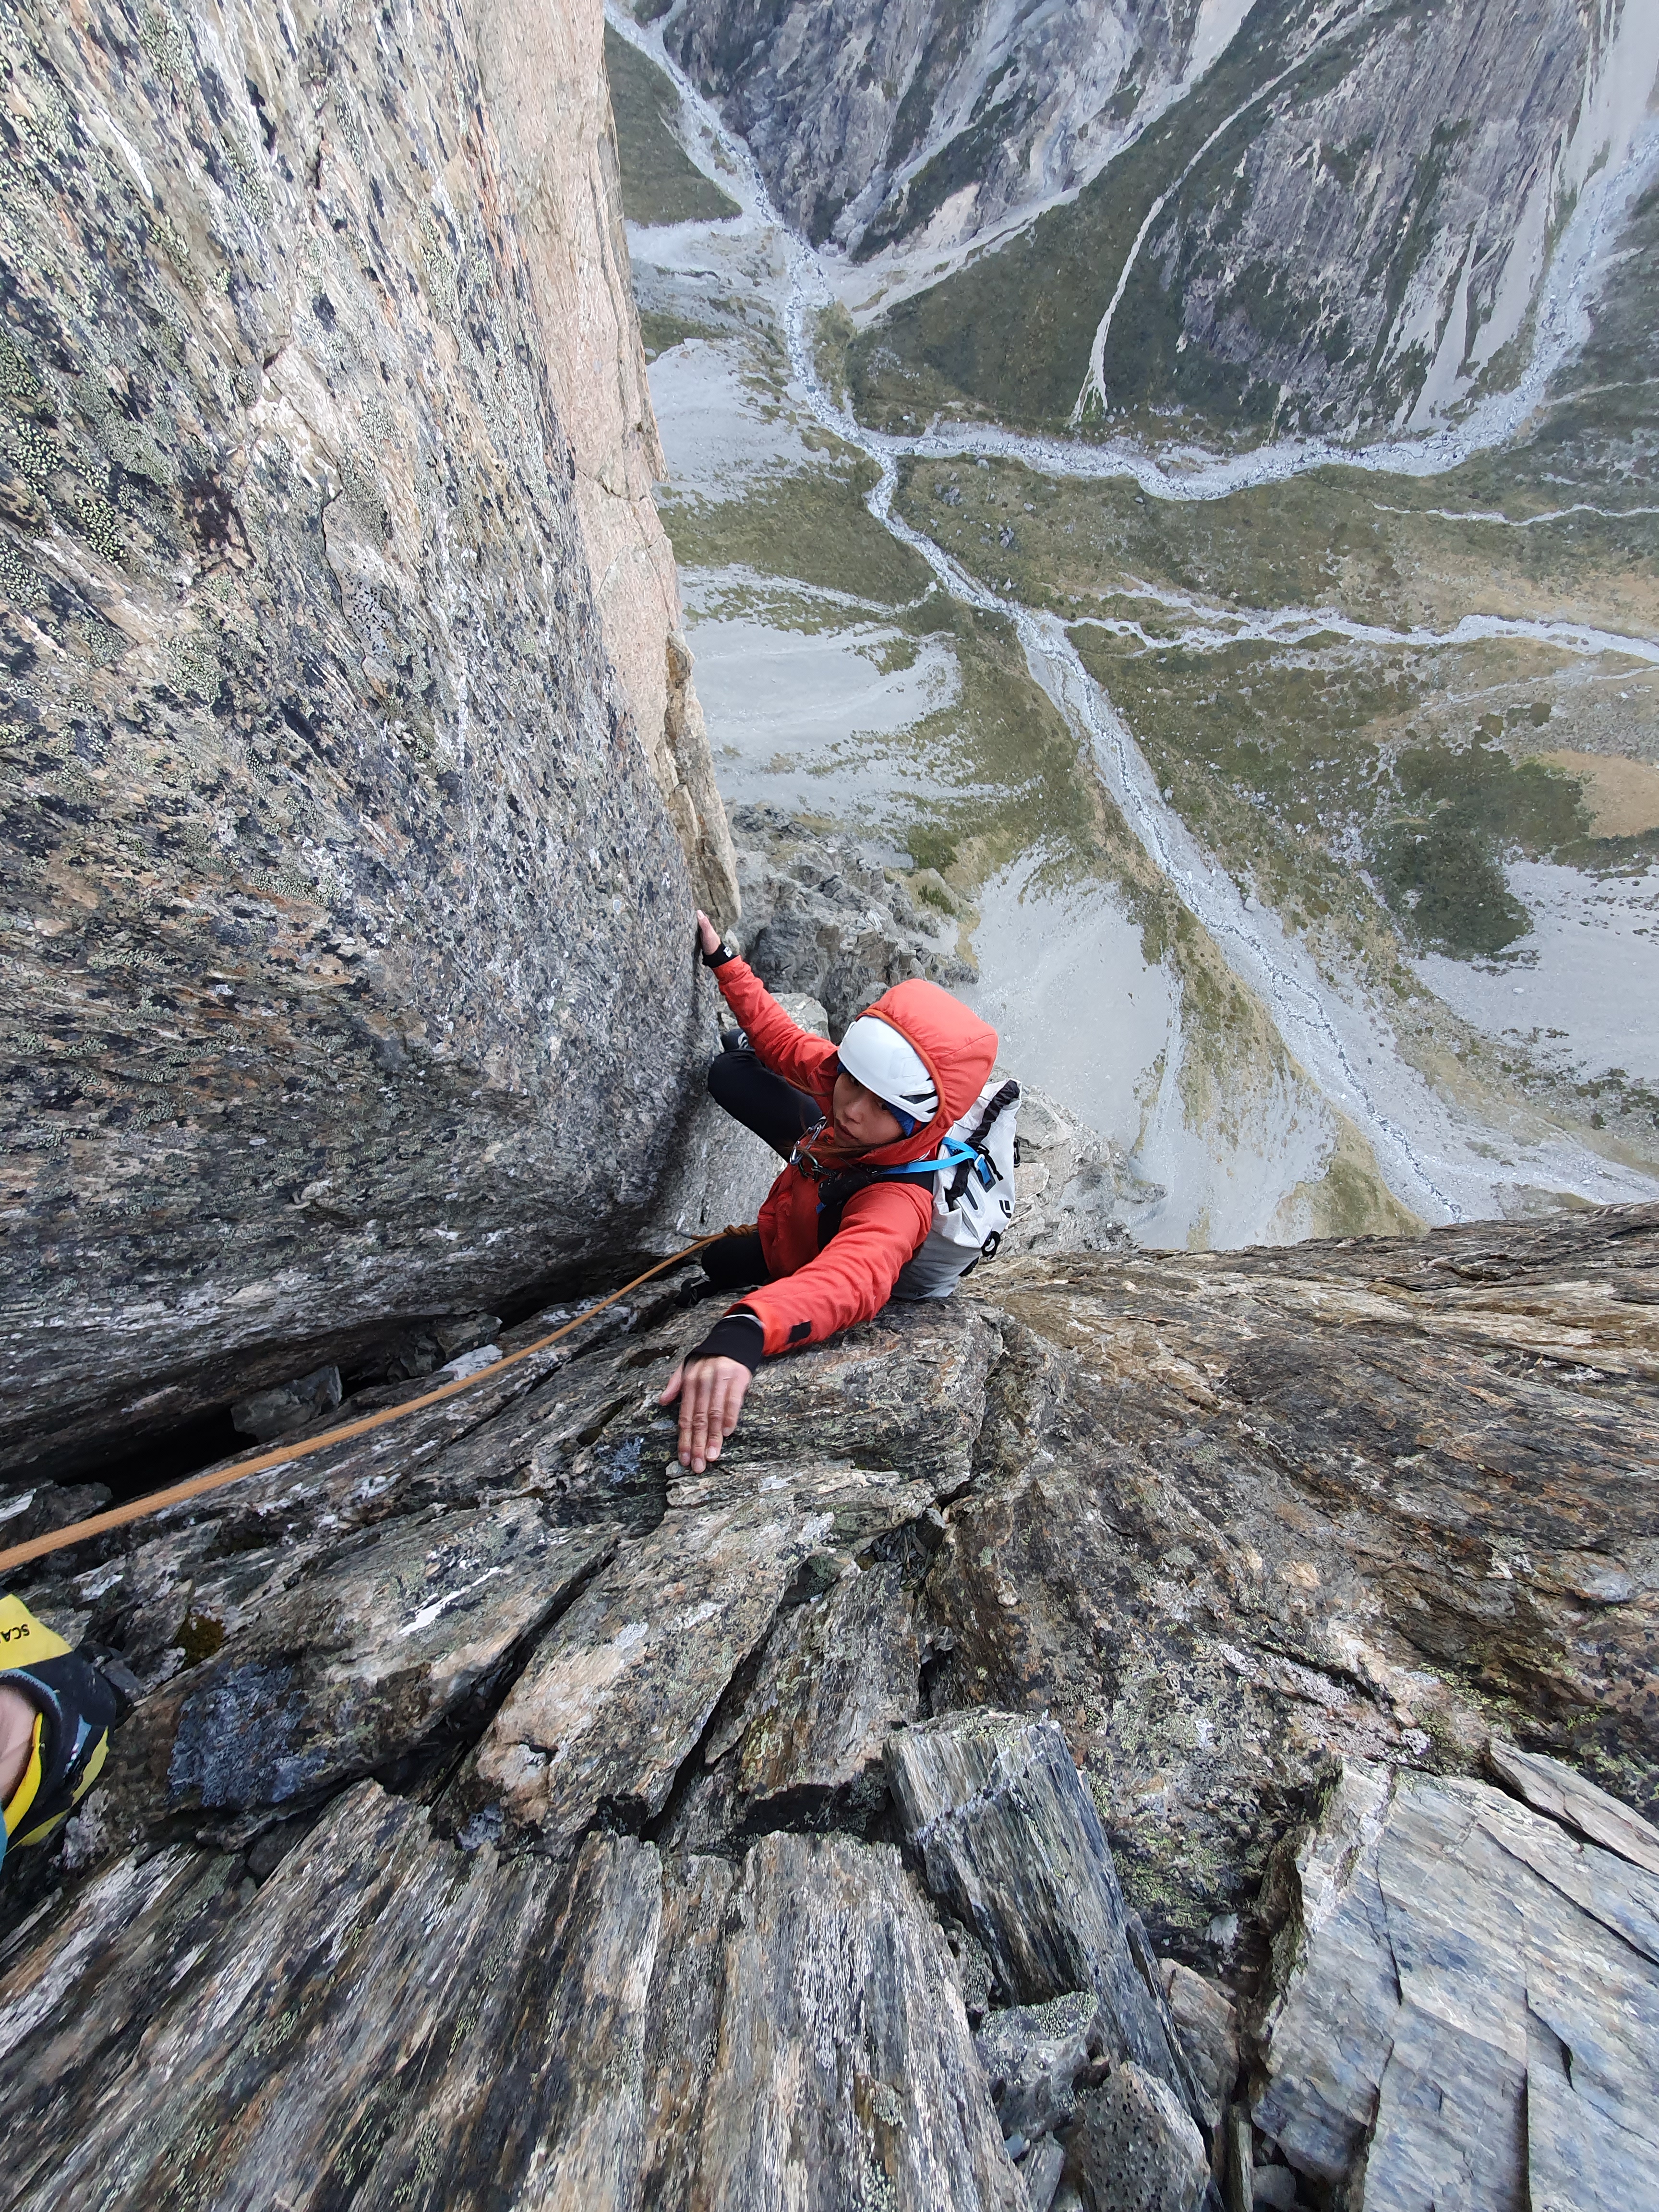
Exposure – Constant serious exposure the whole way
Aspect – S
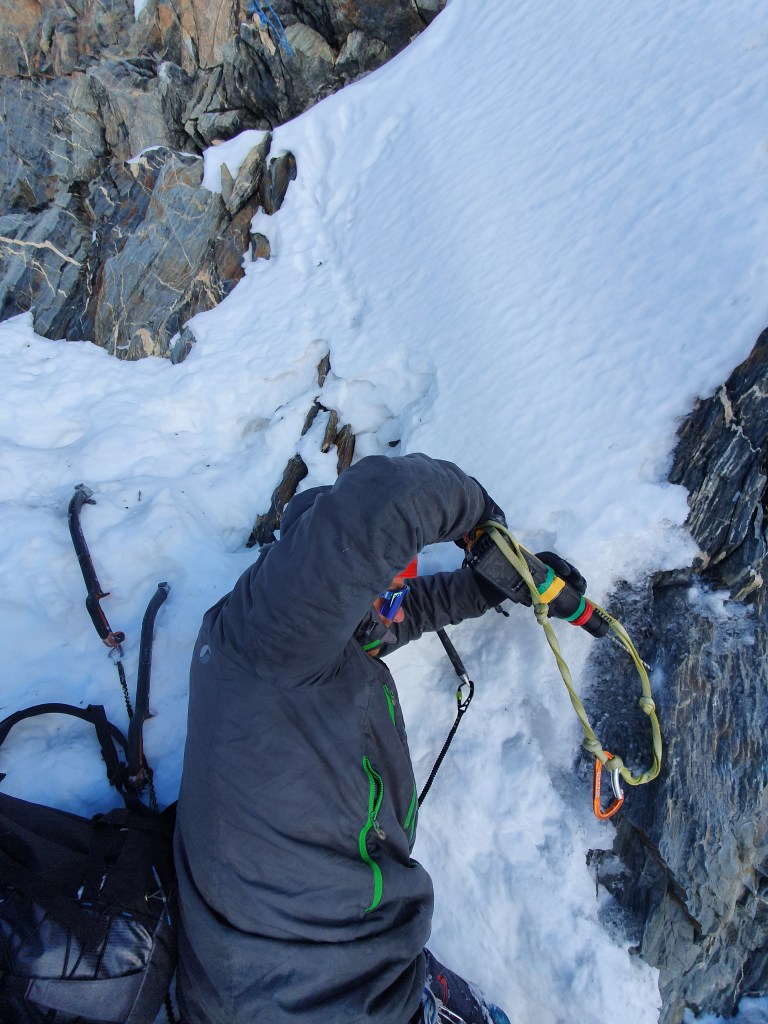
Extras – Picket for rap. Rad line. Screws – 3-4 to protect the climb. Threads may be possible for the descent
Difficulty – Climb 2. Ski 5.3 E4
Equipment – Glacier equipment.
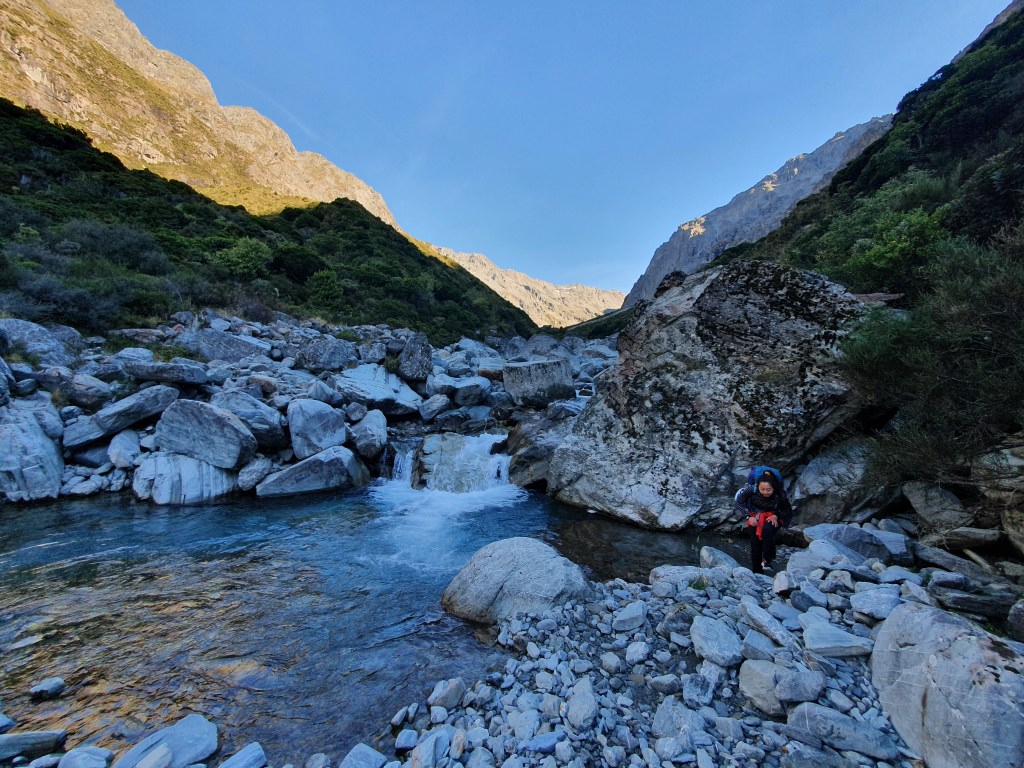
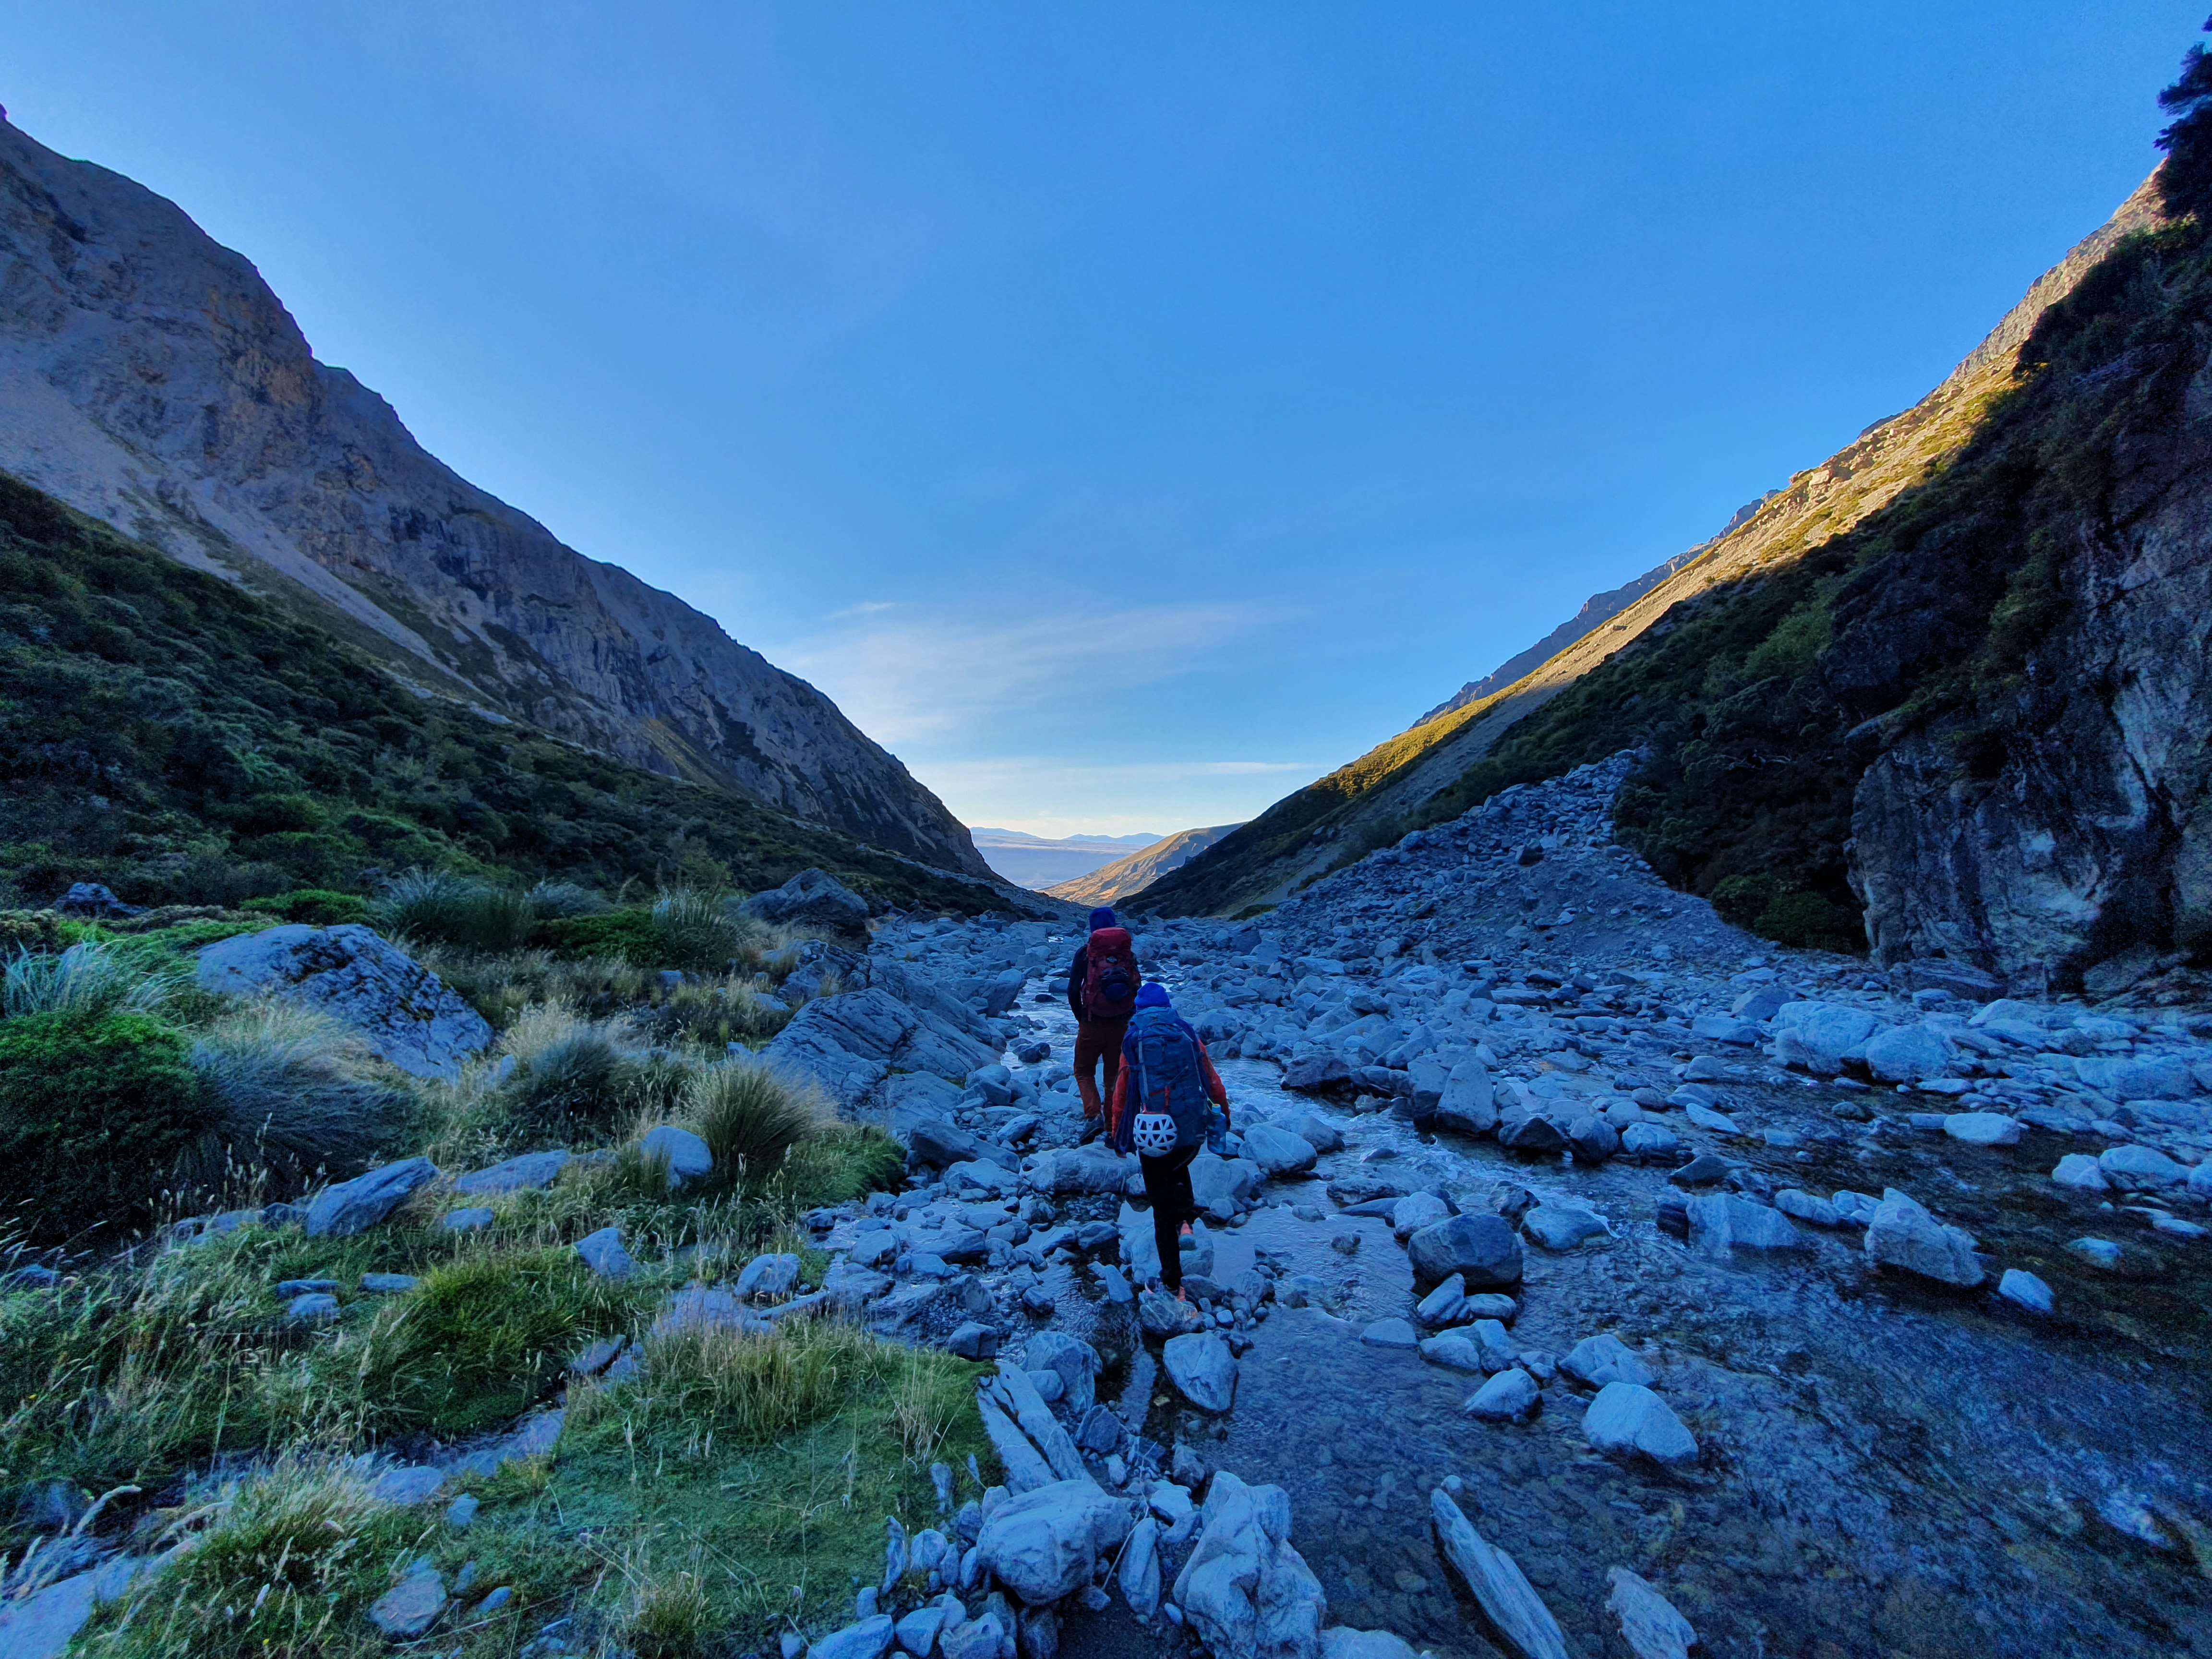
Approach
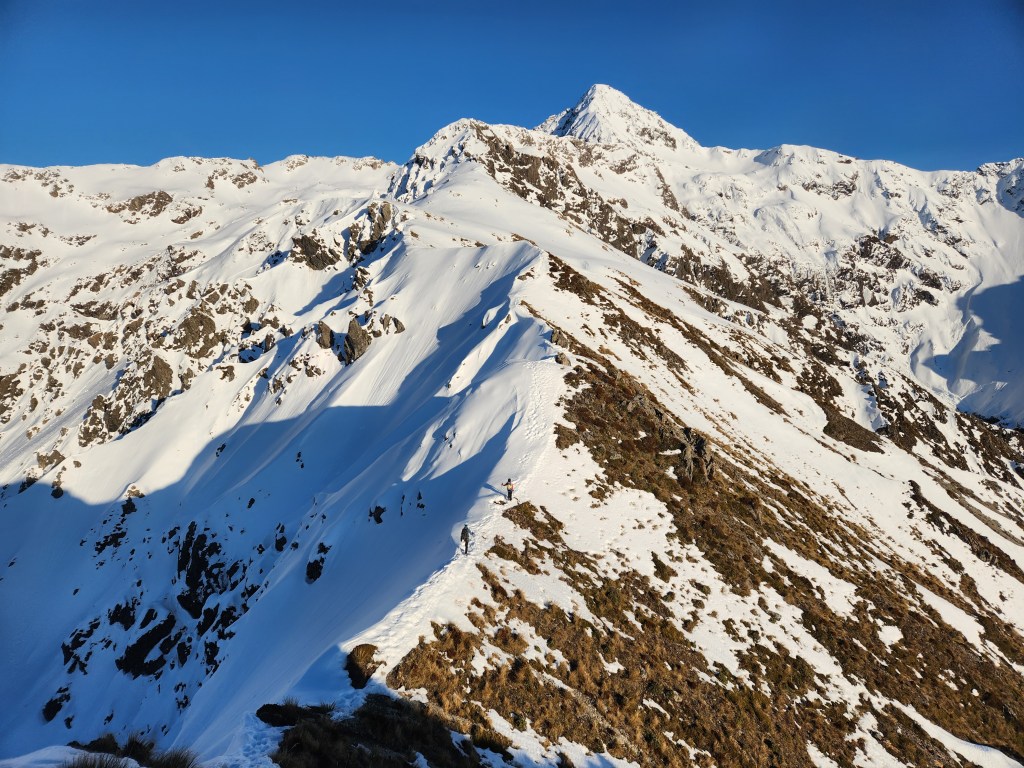
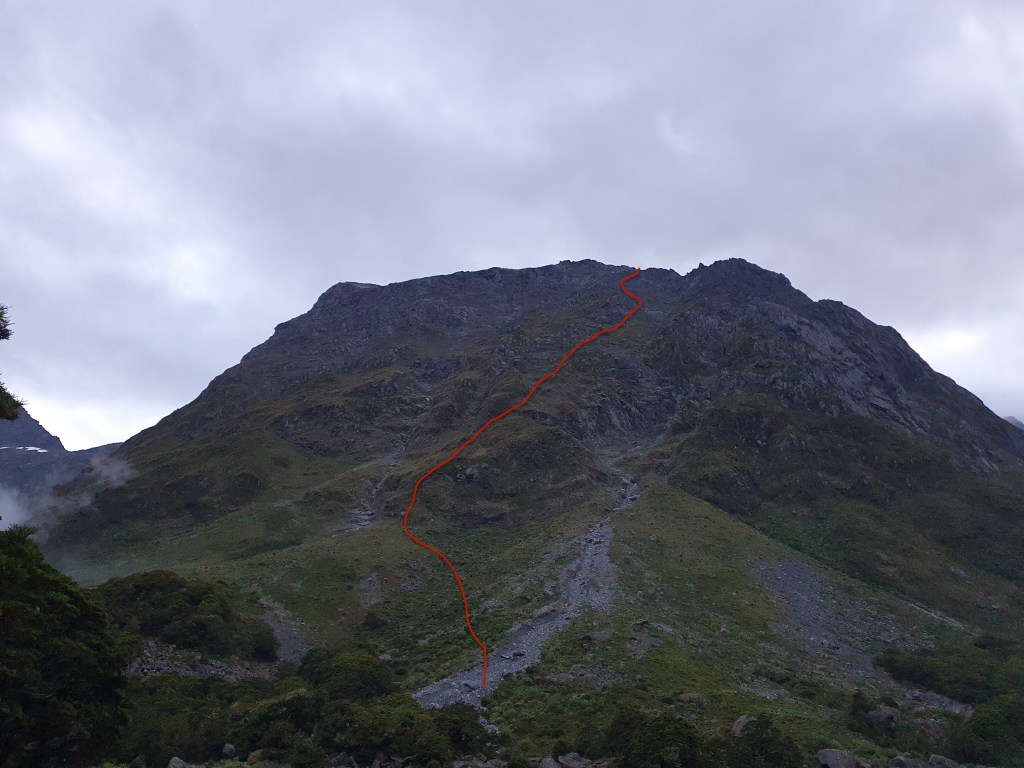
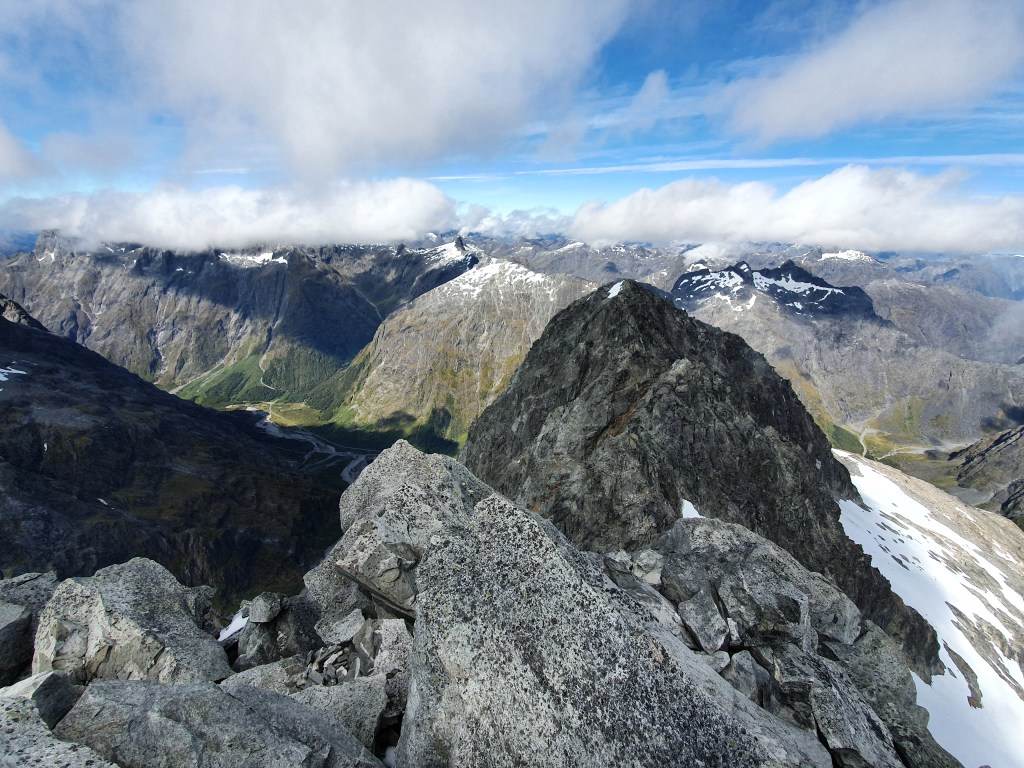
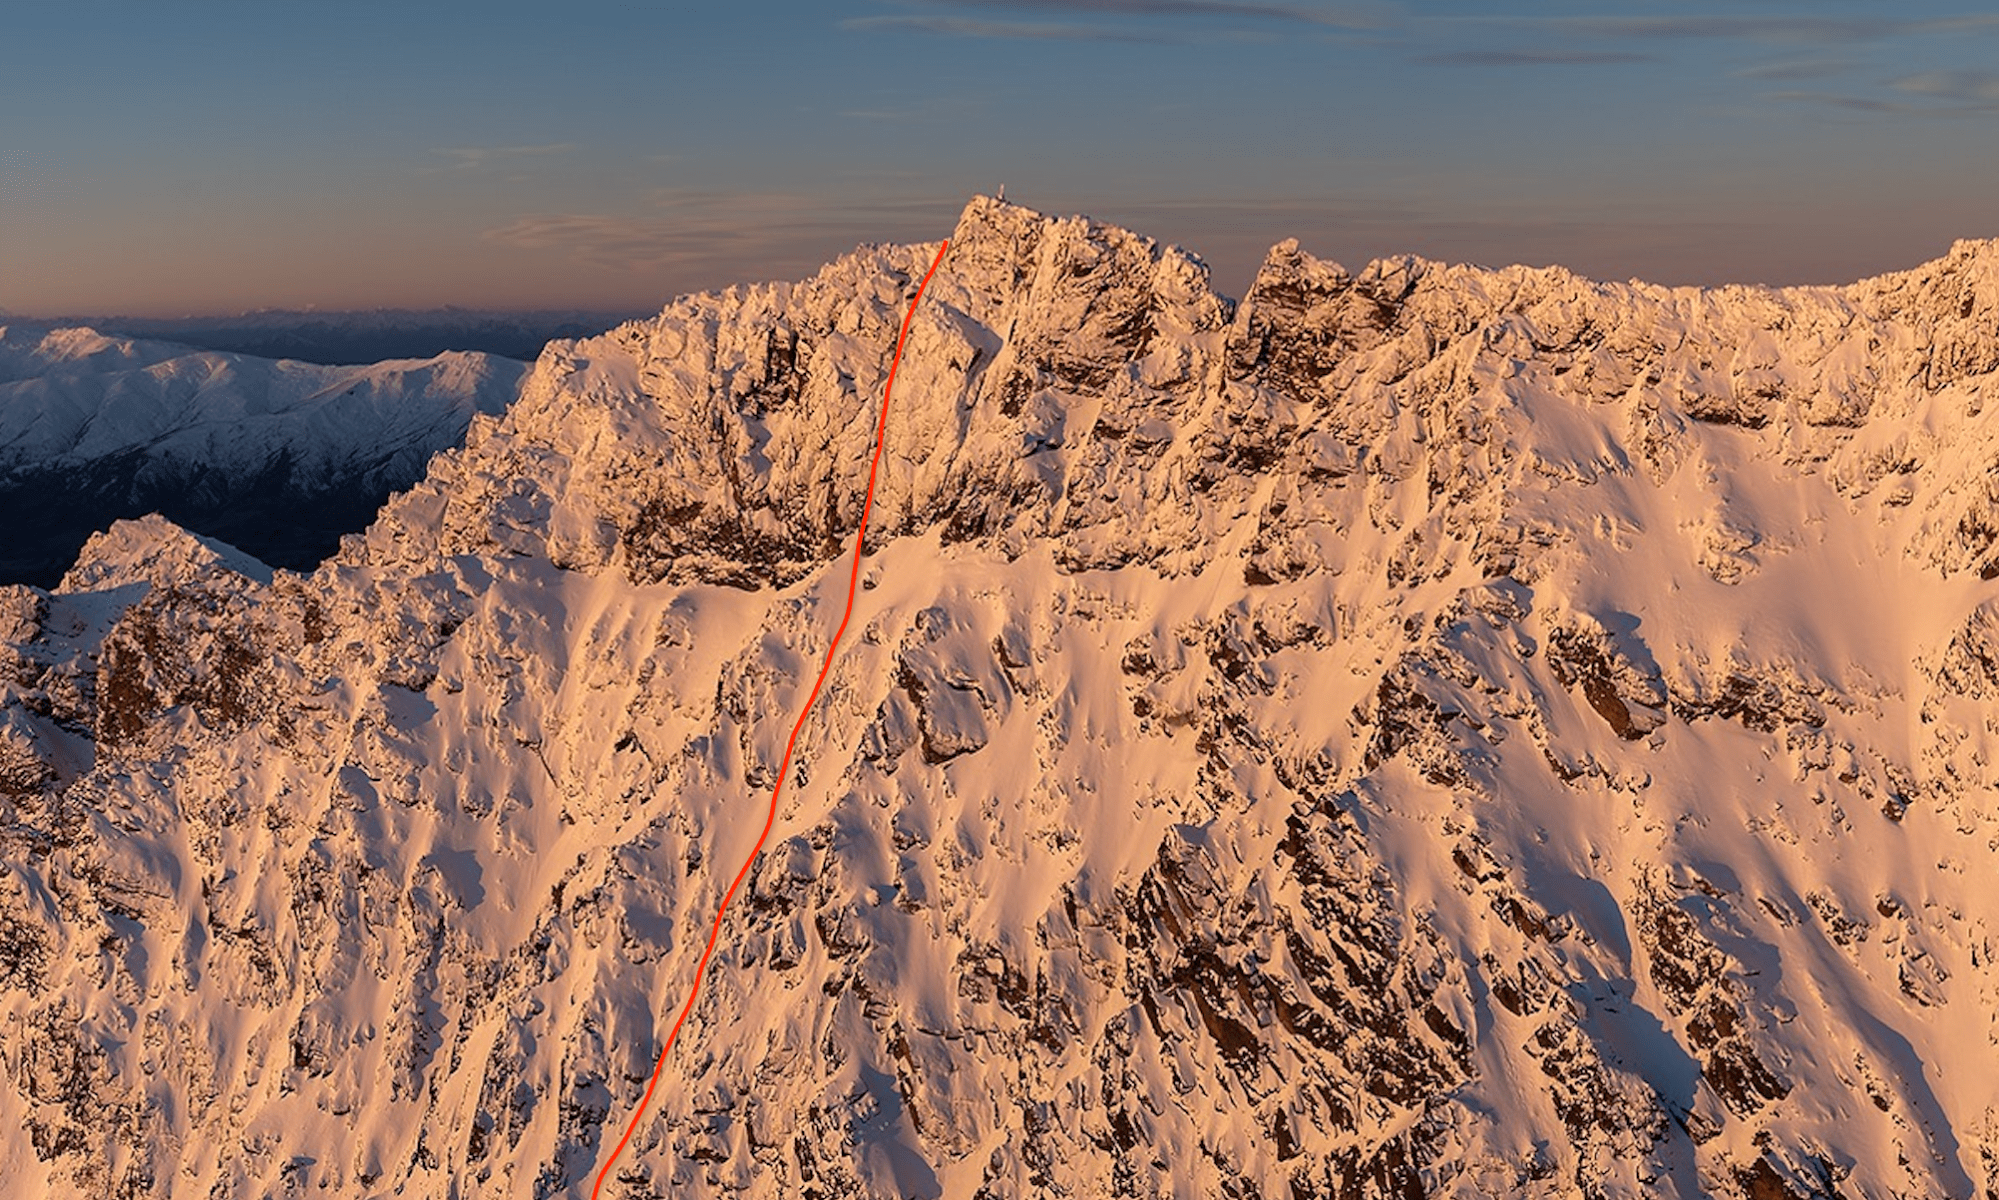
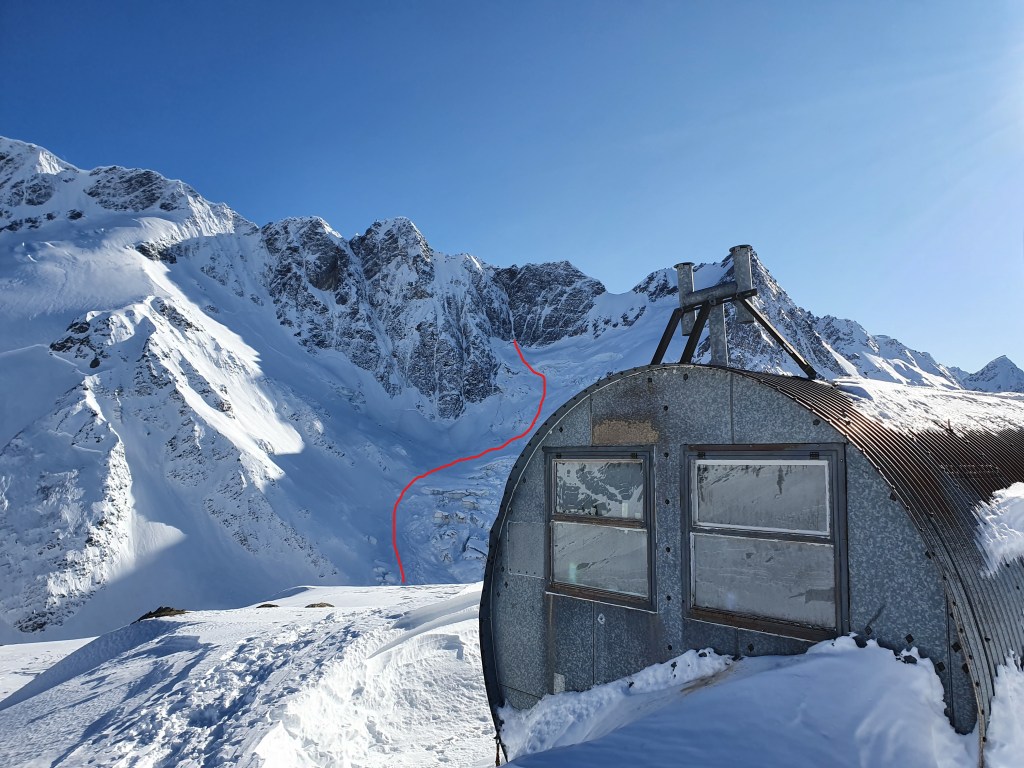
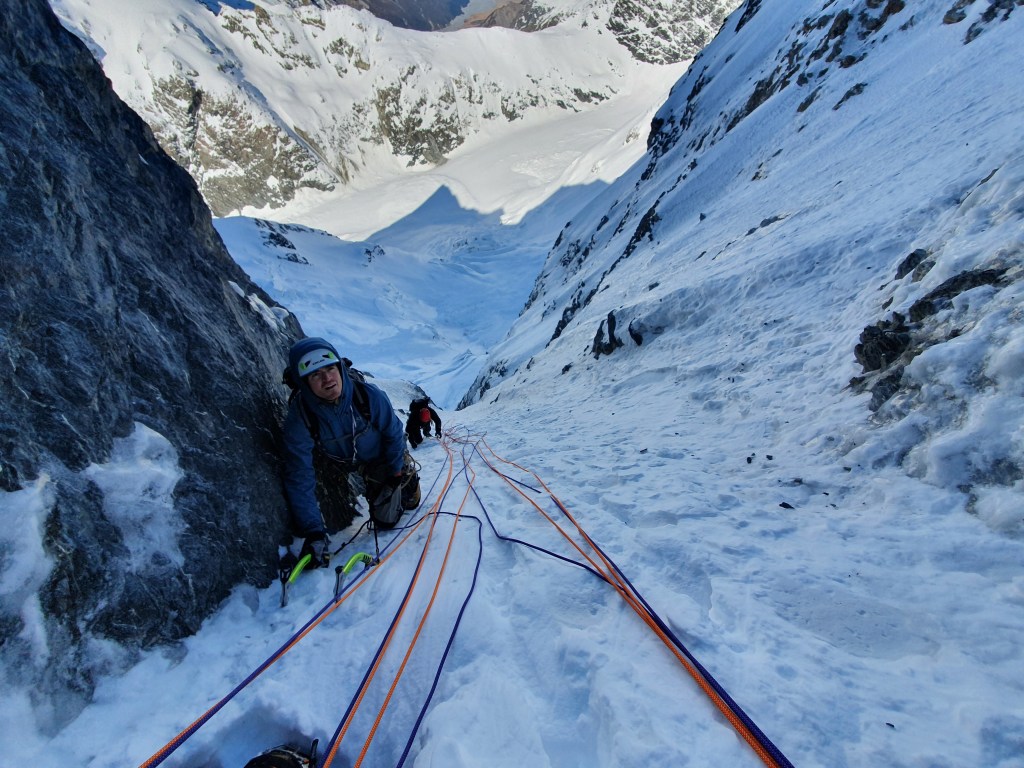
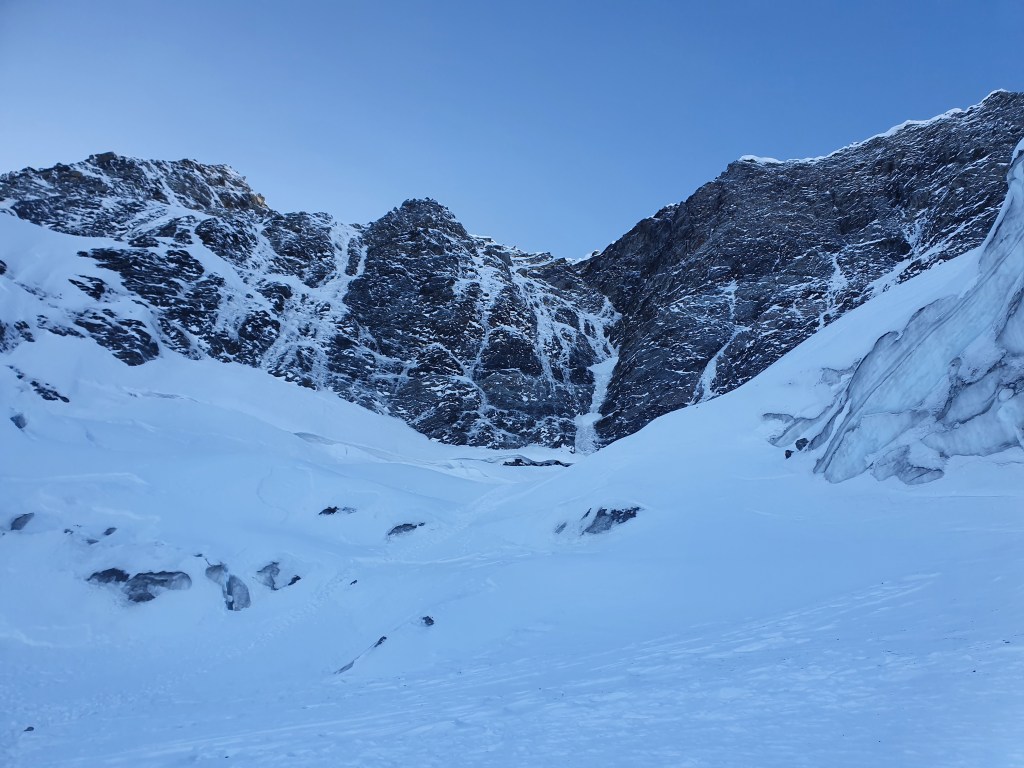
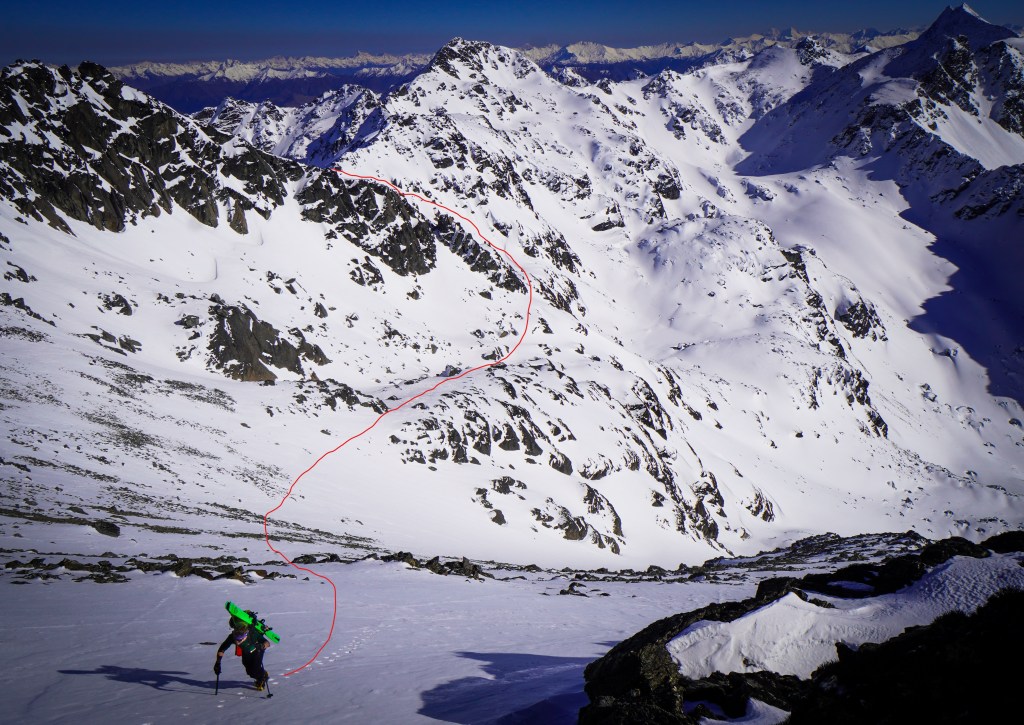
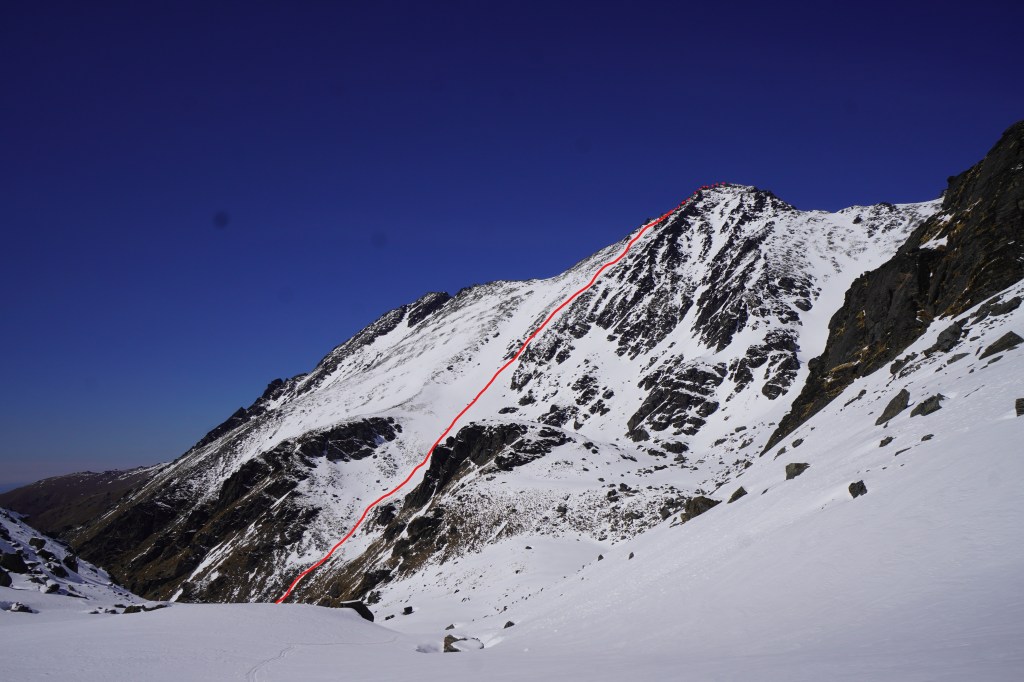
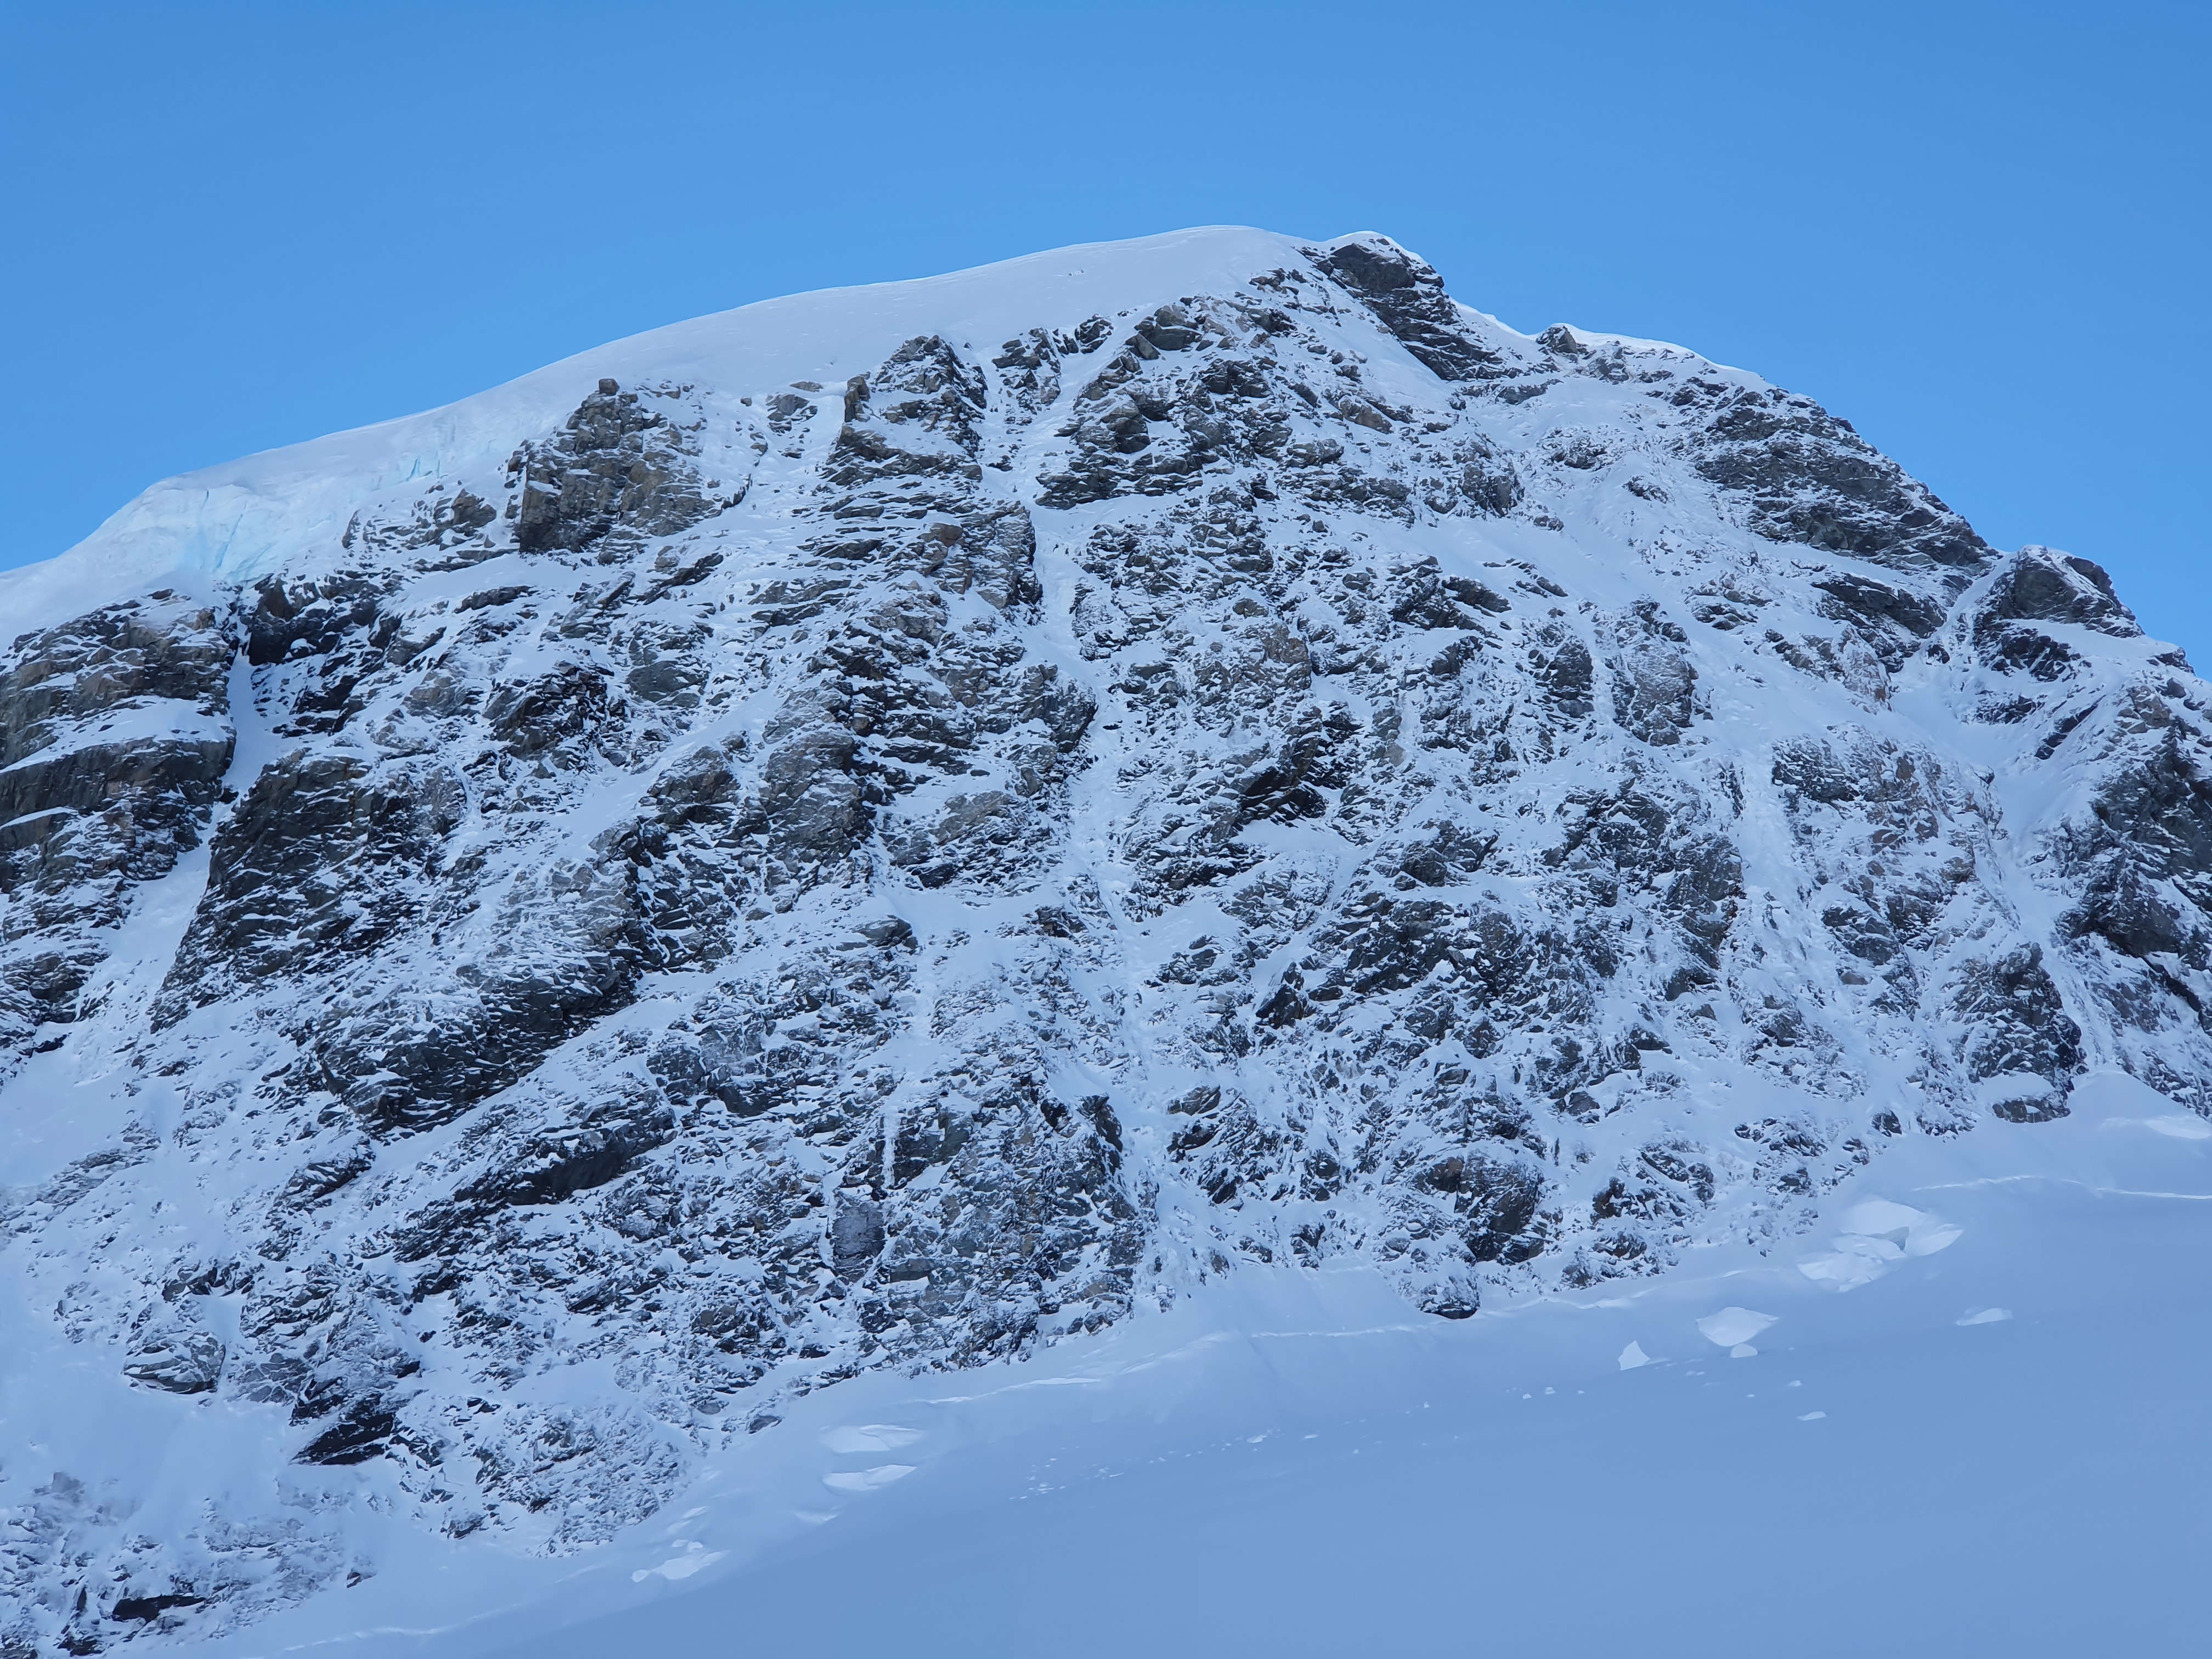
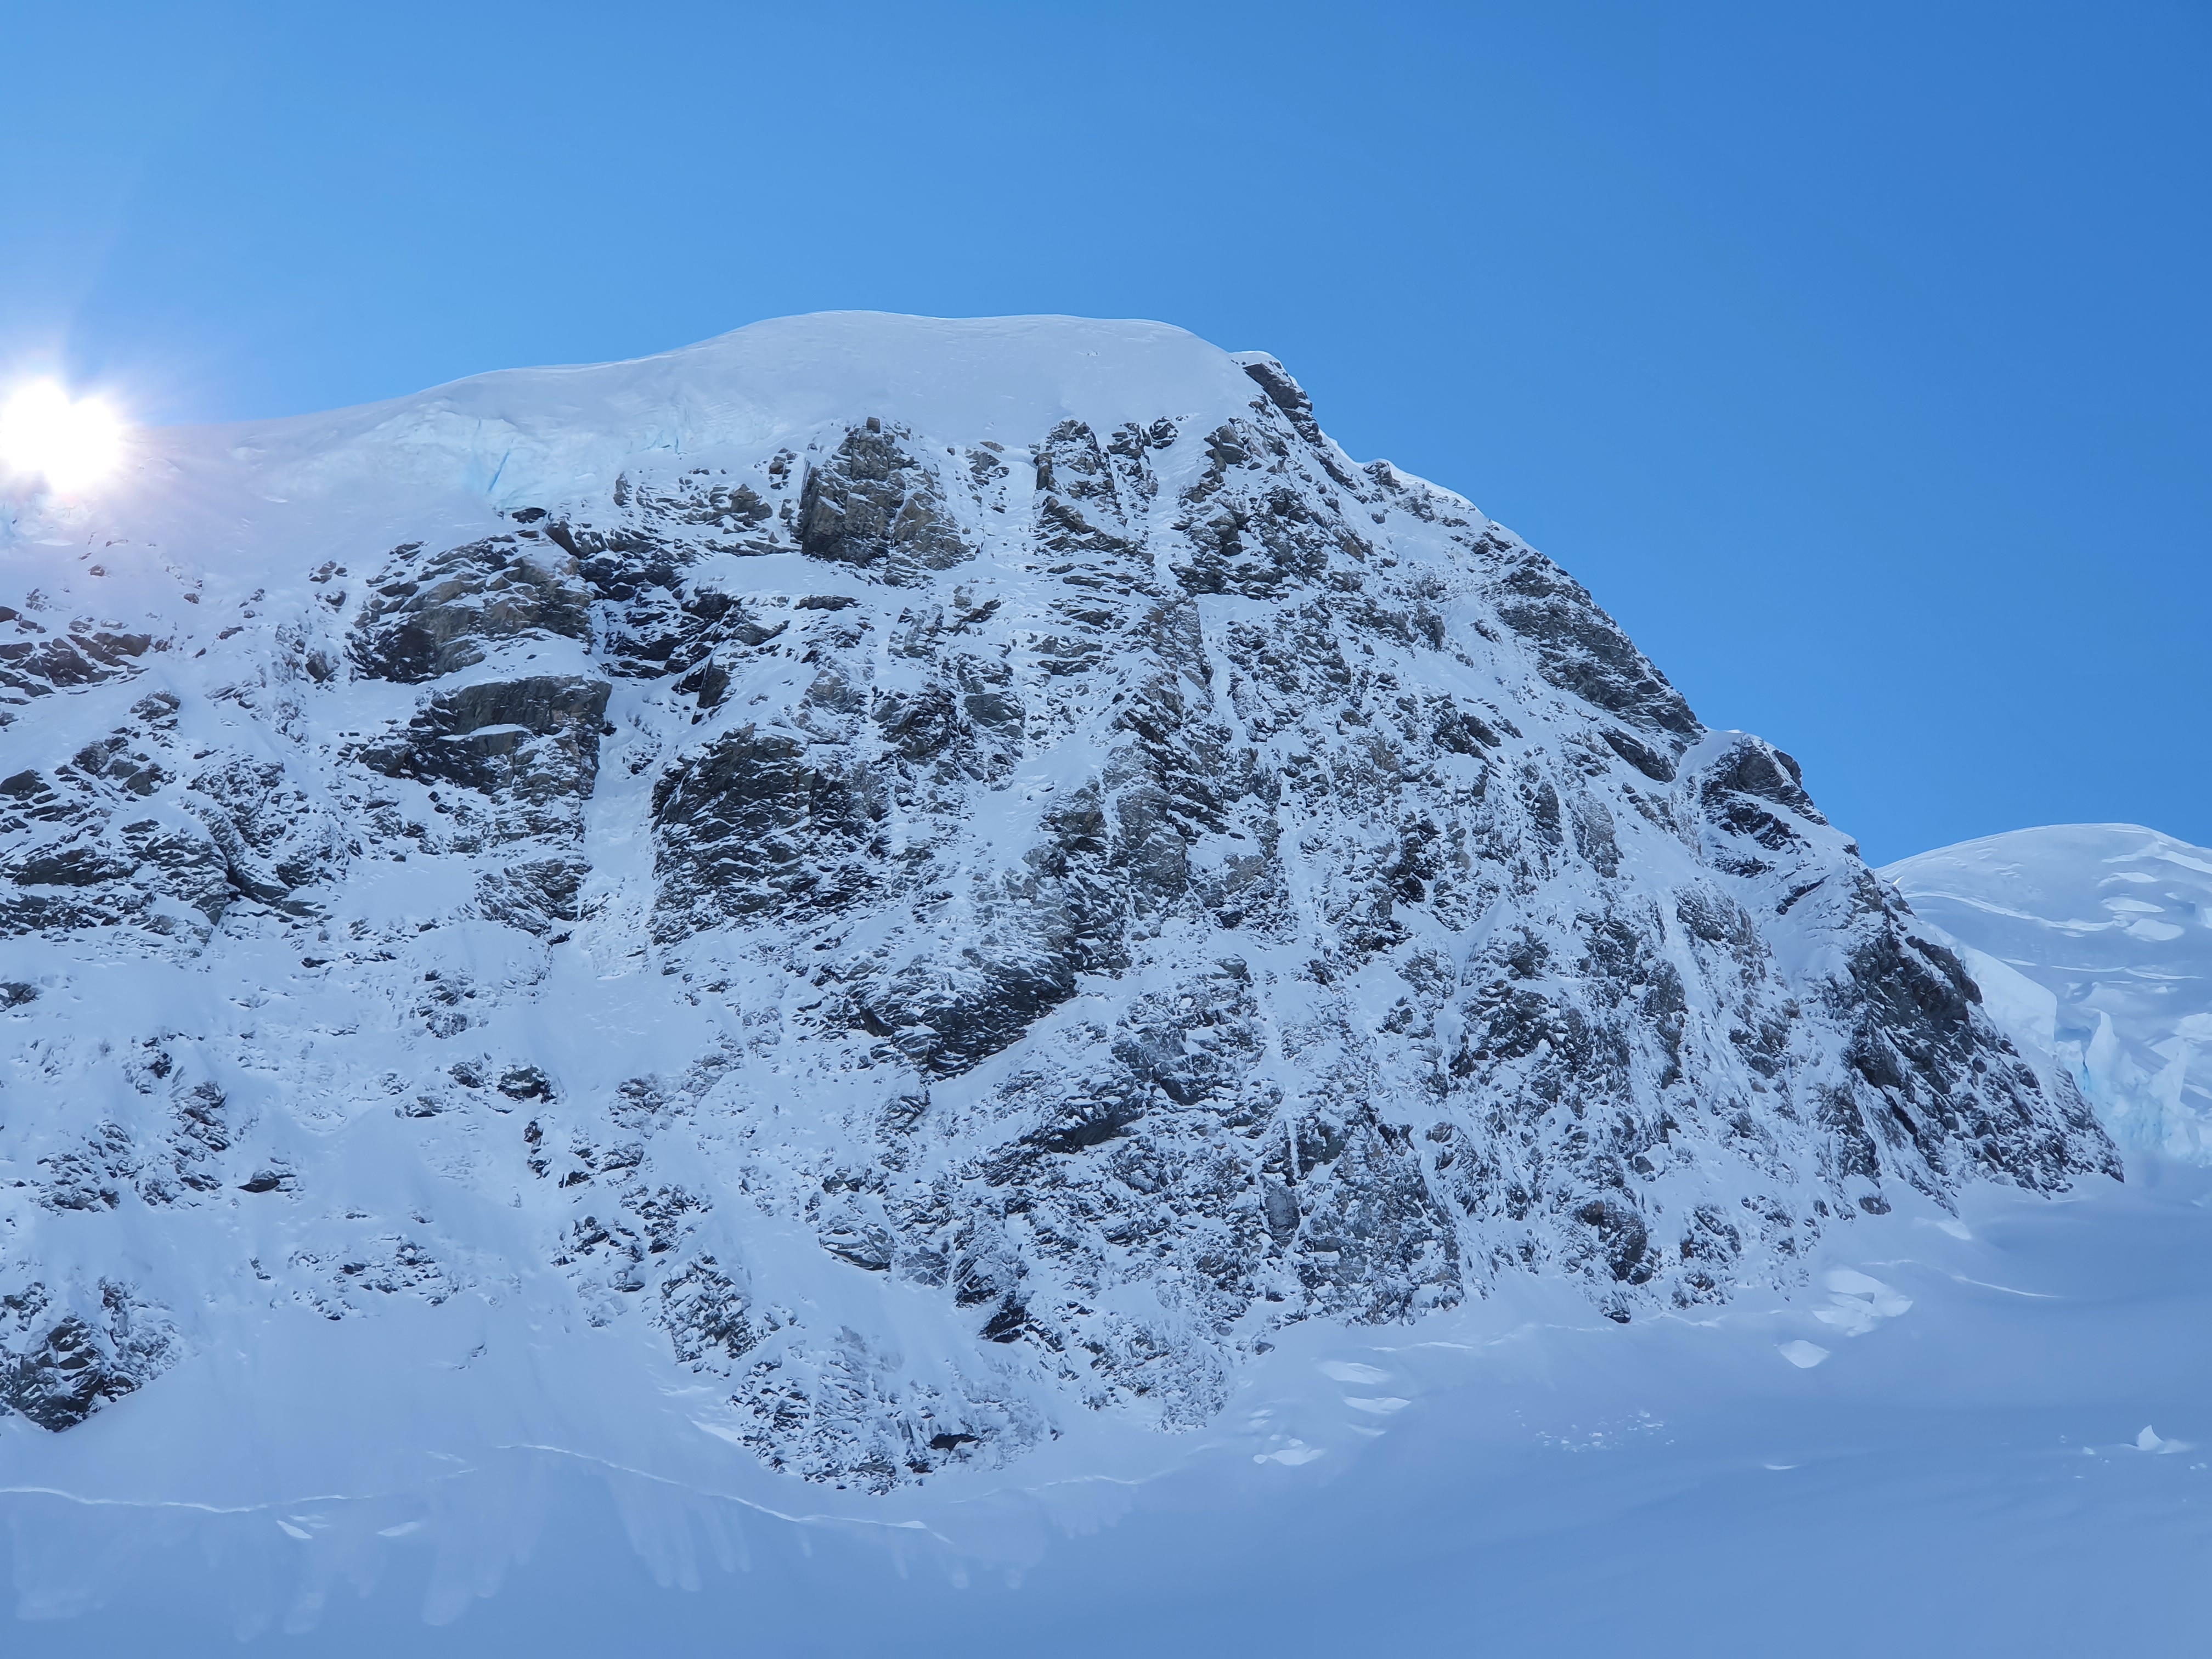
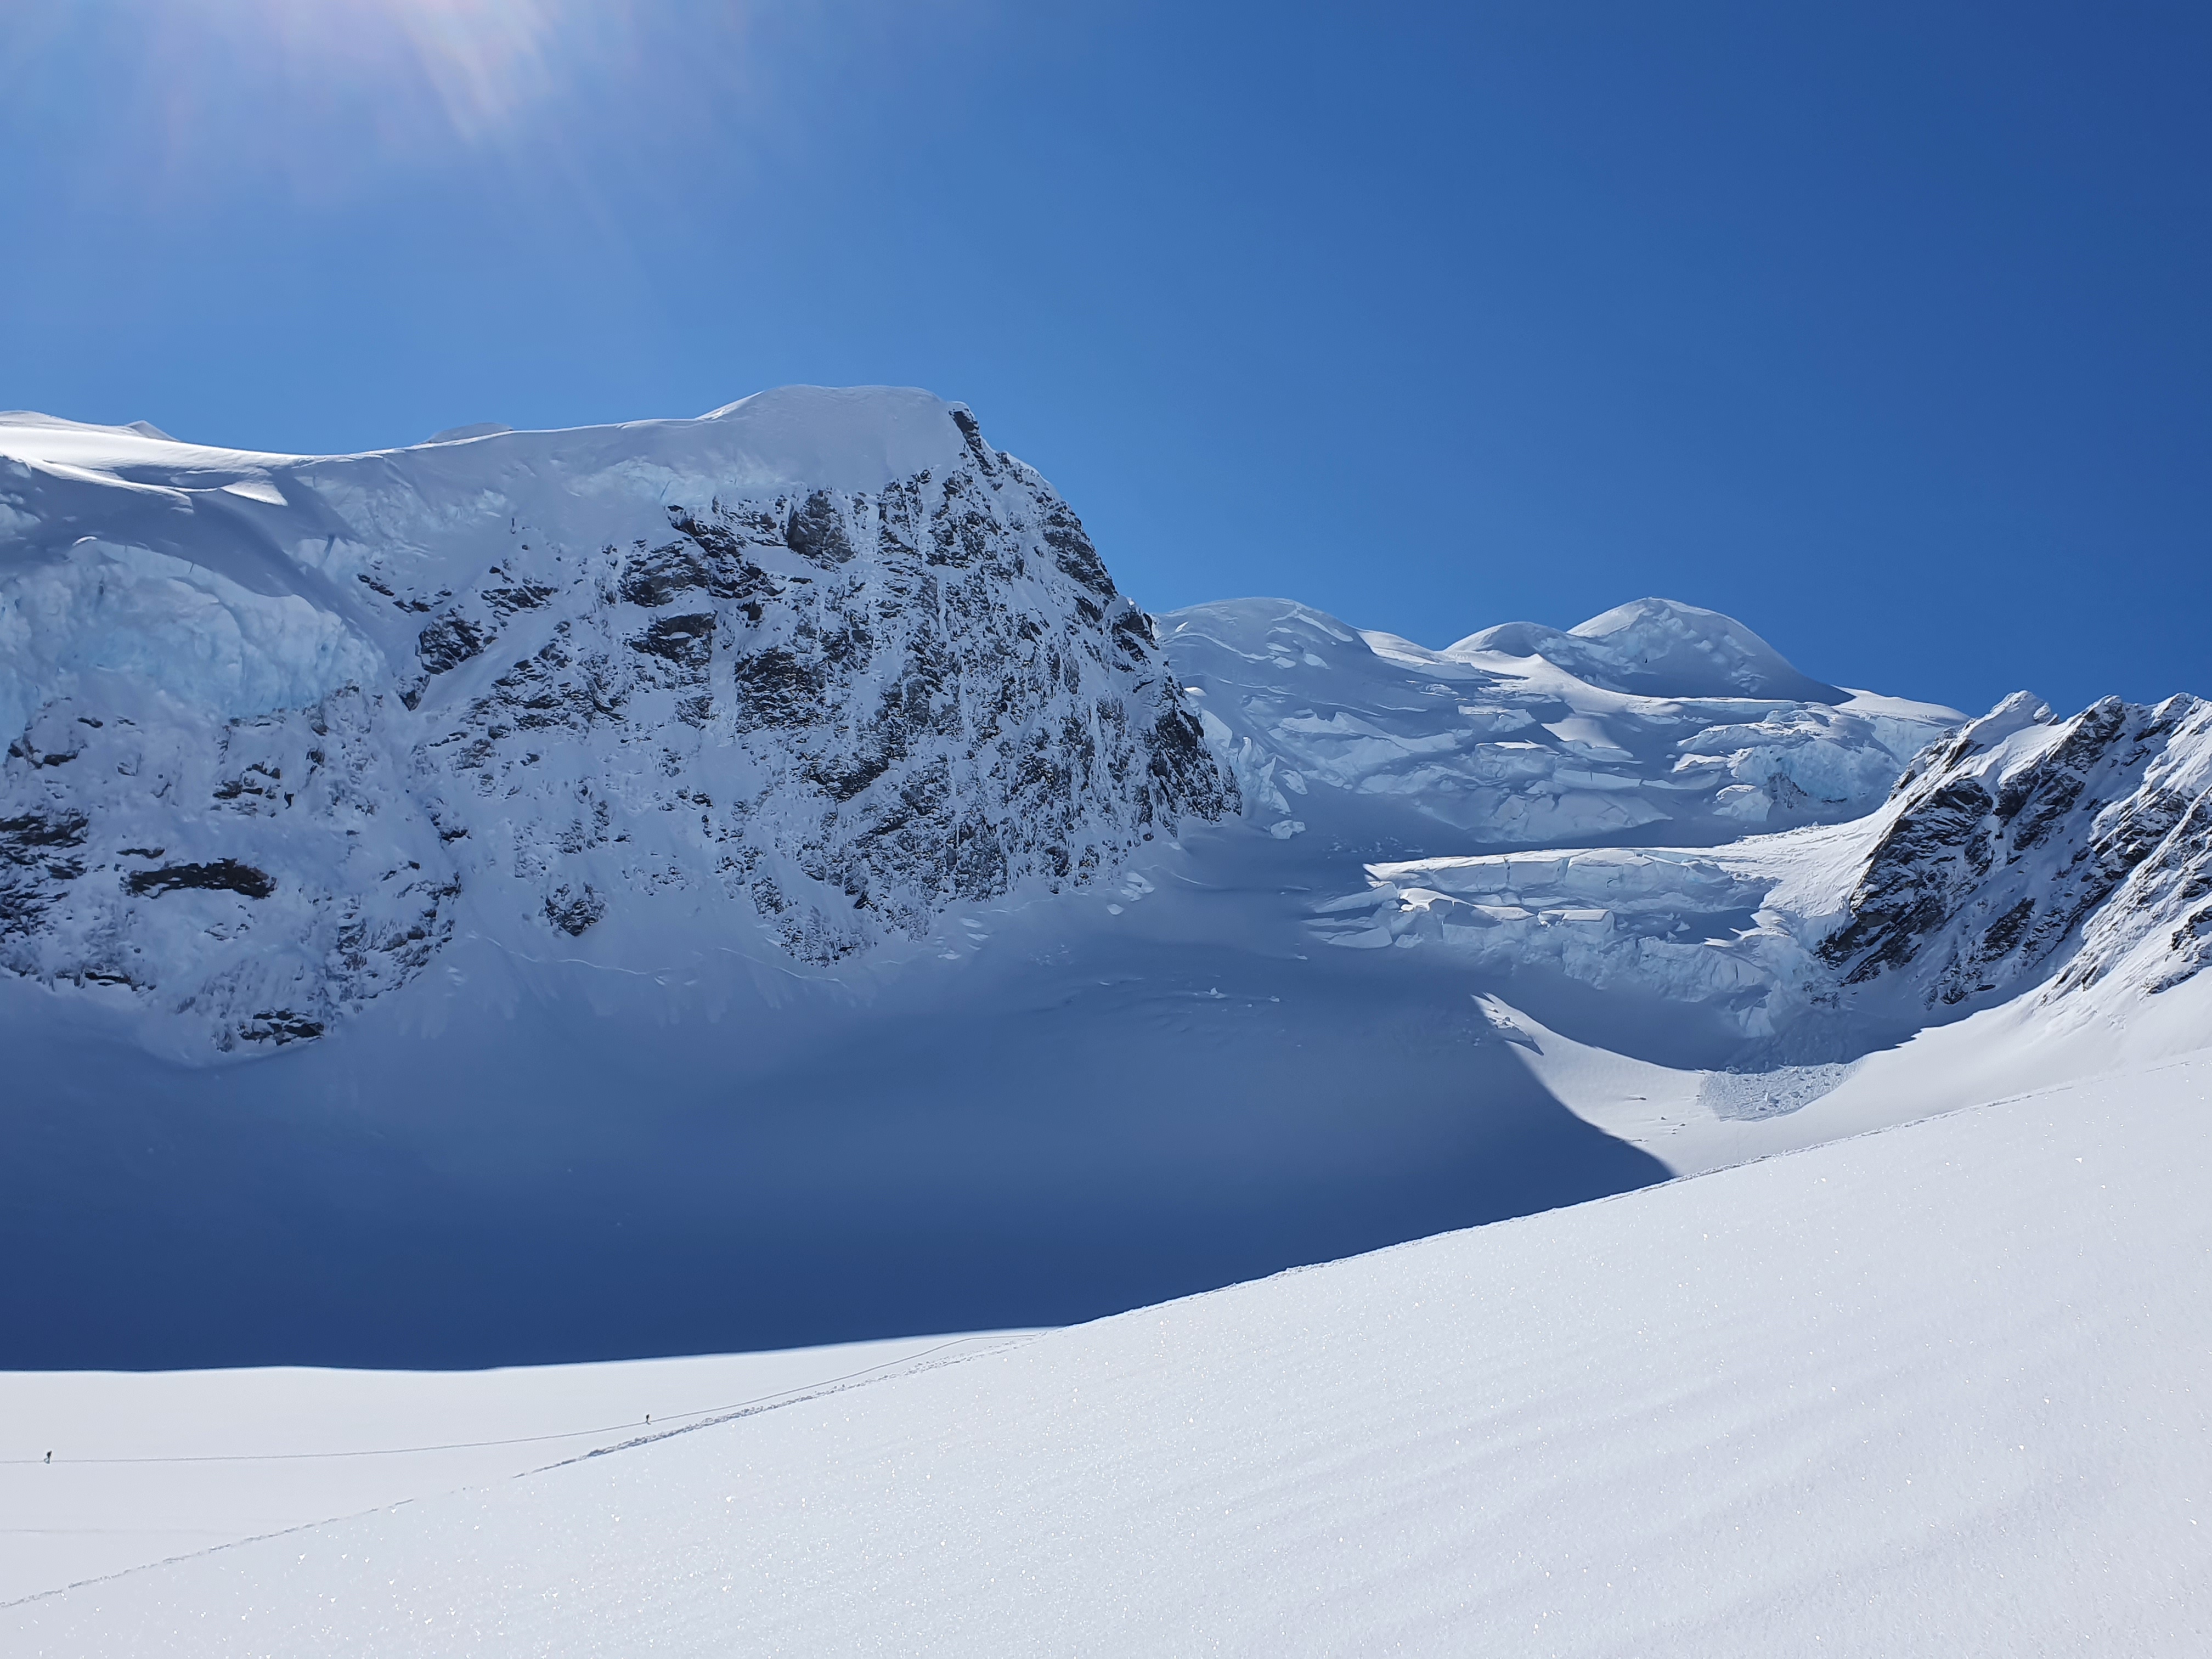
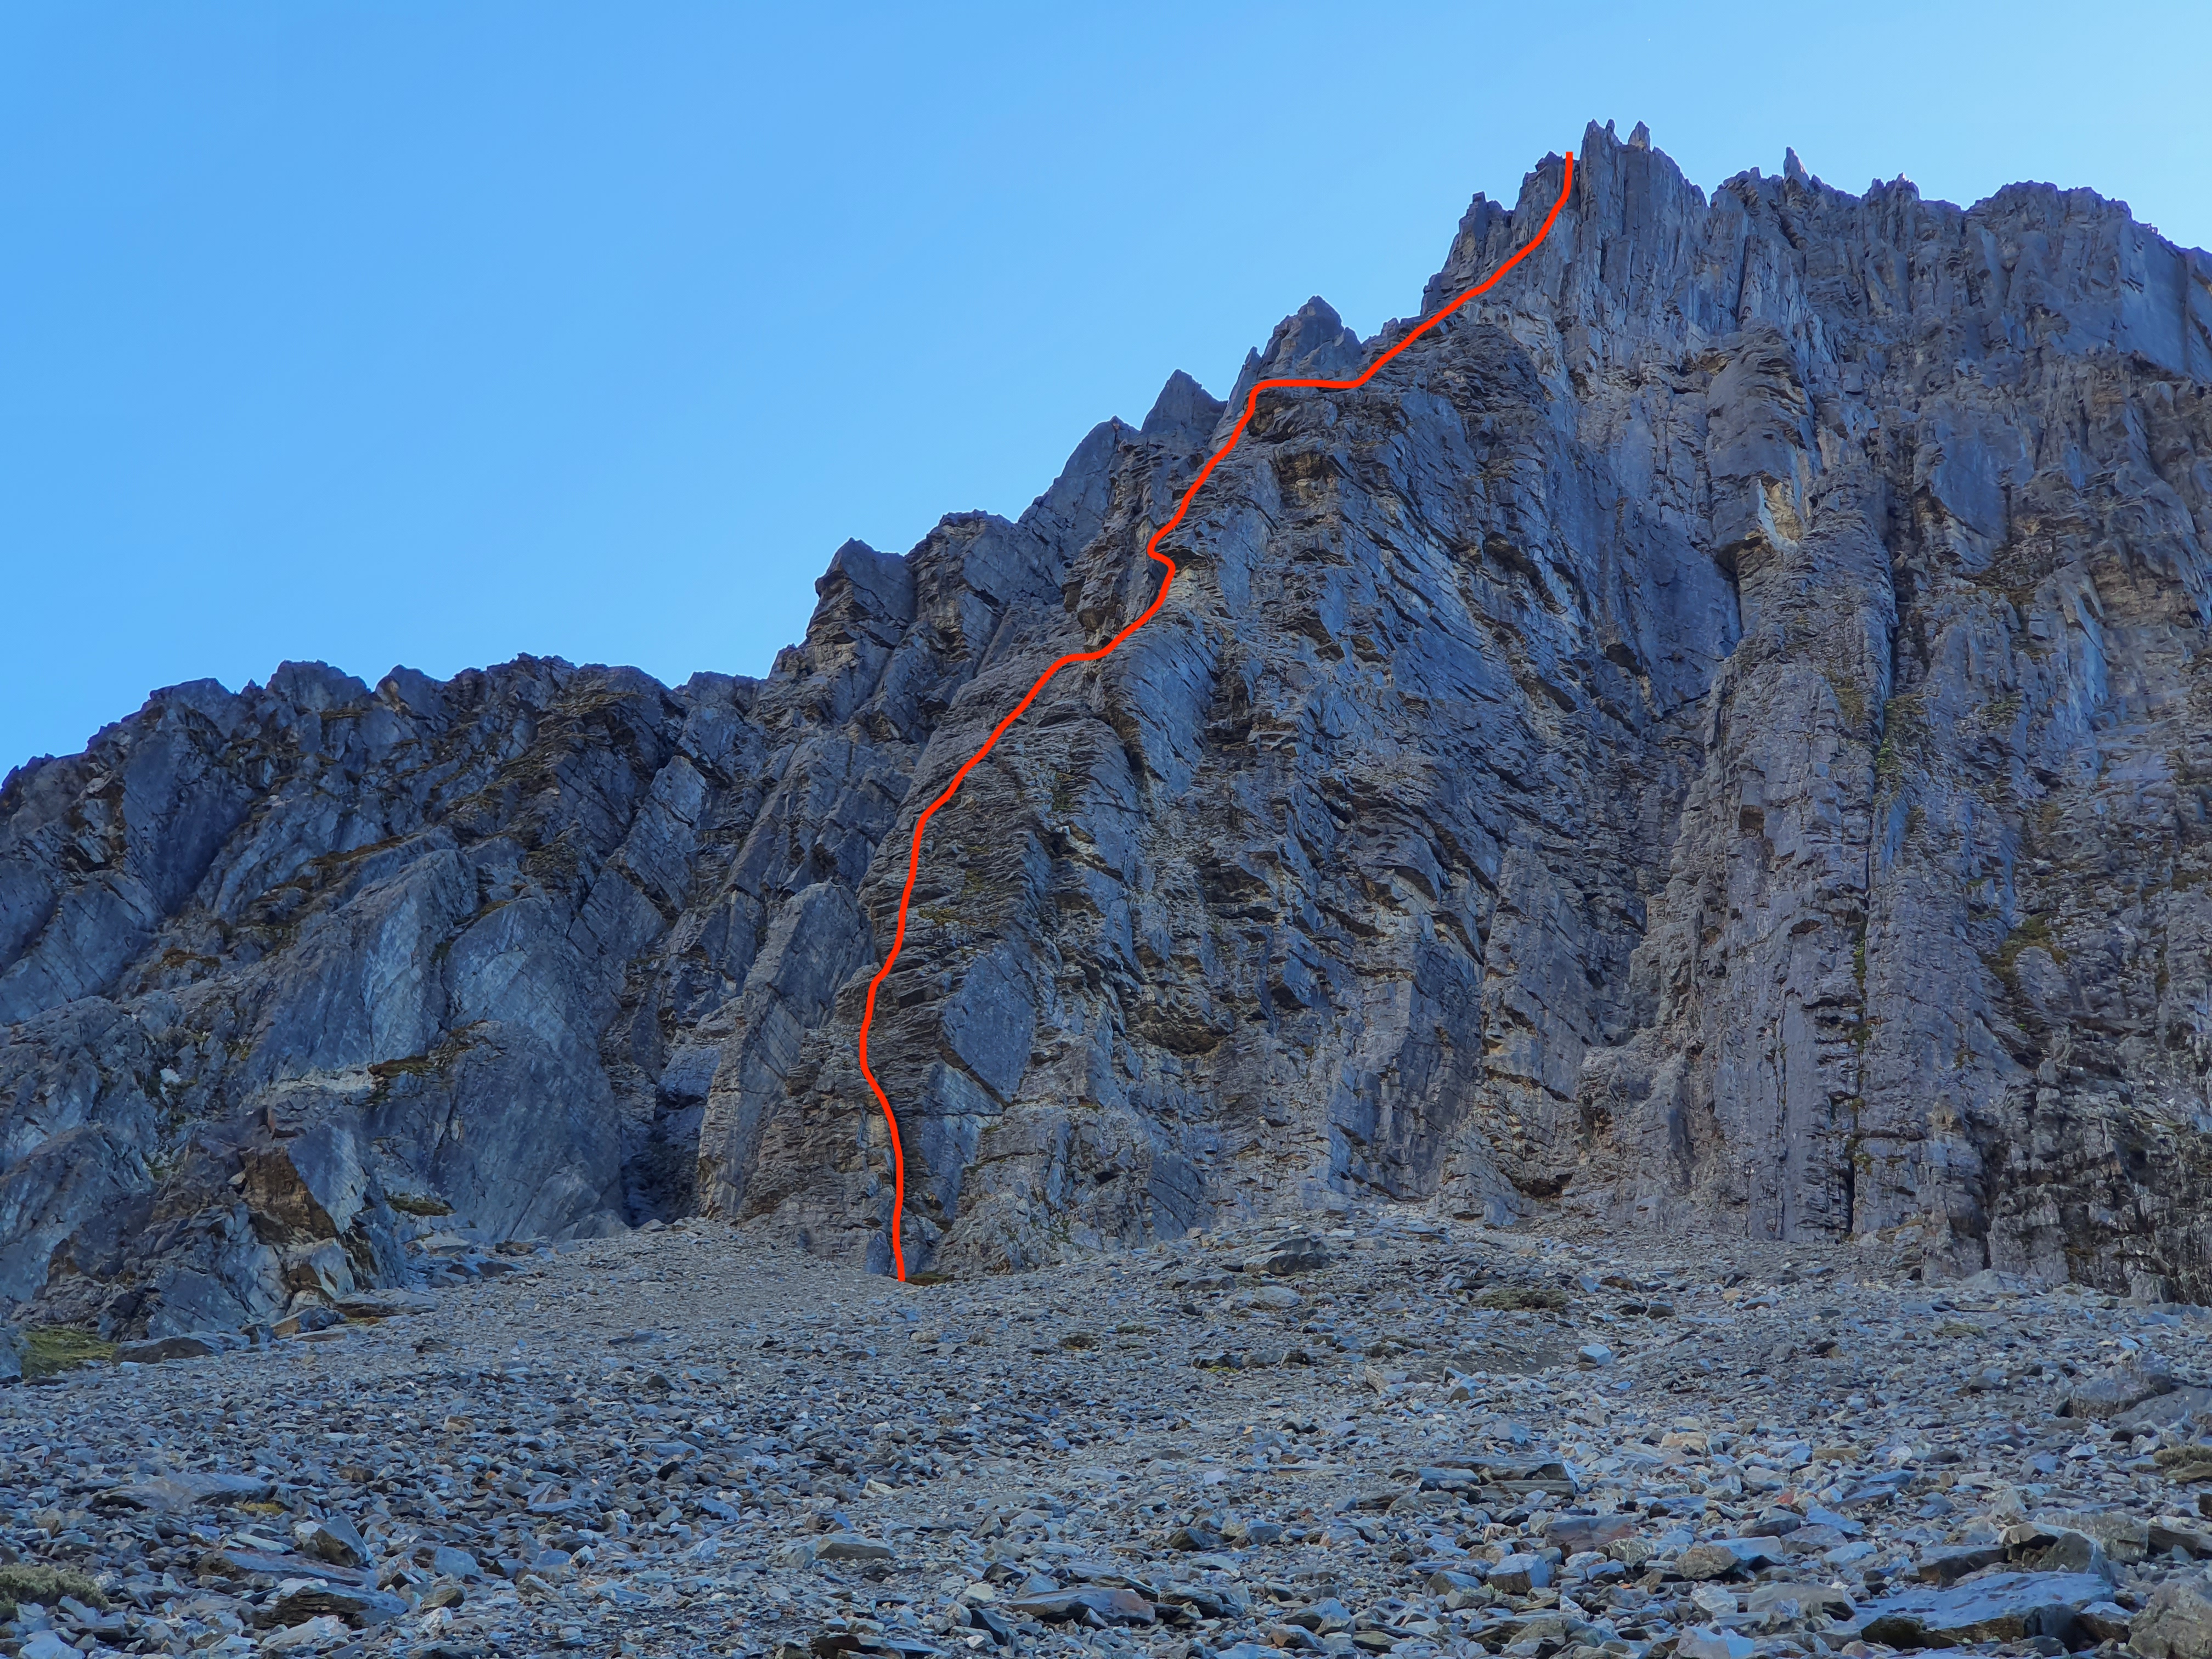
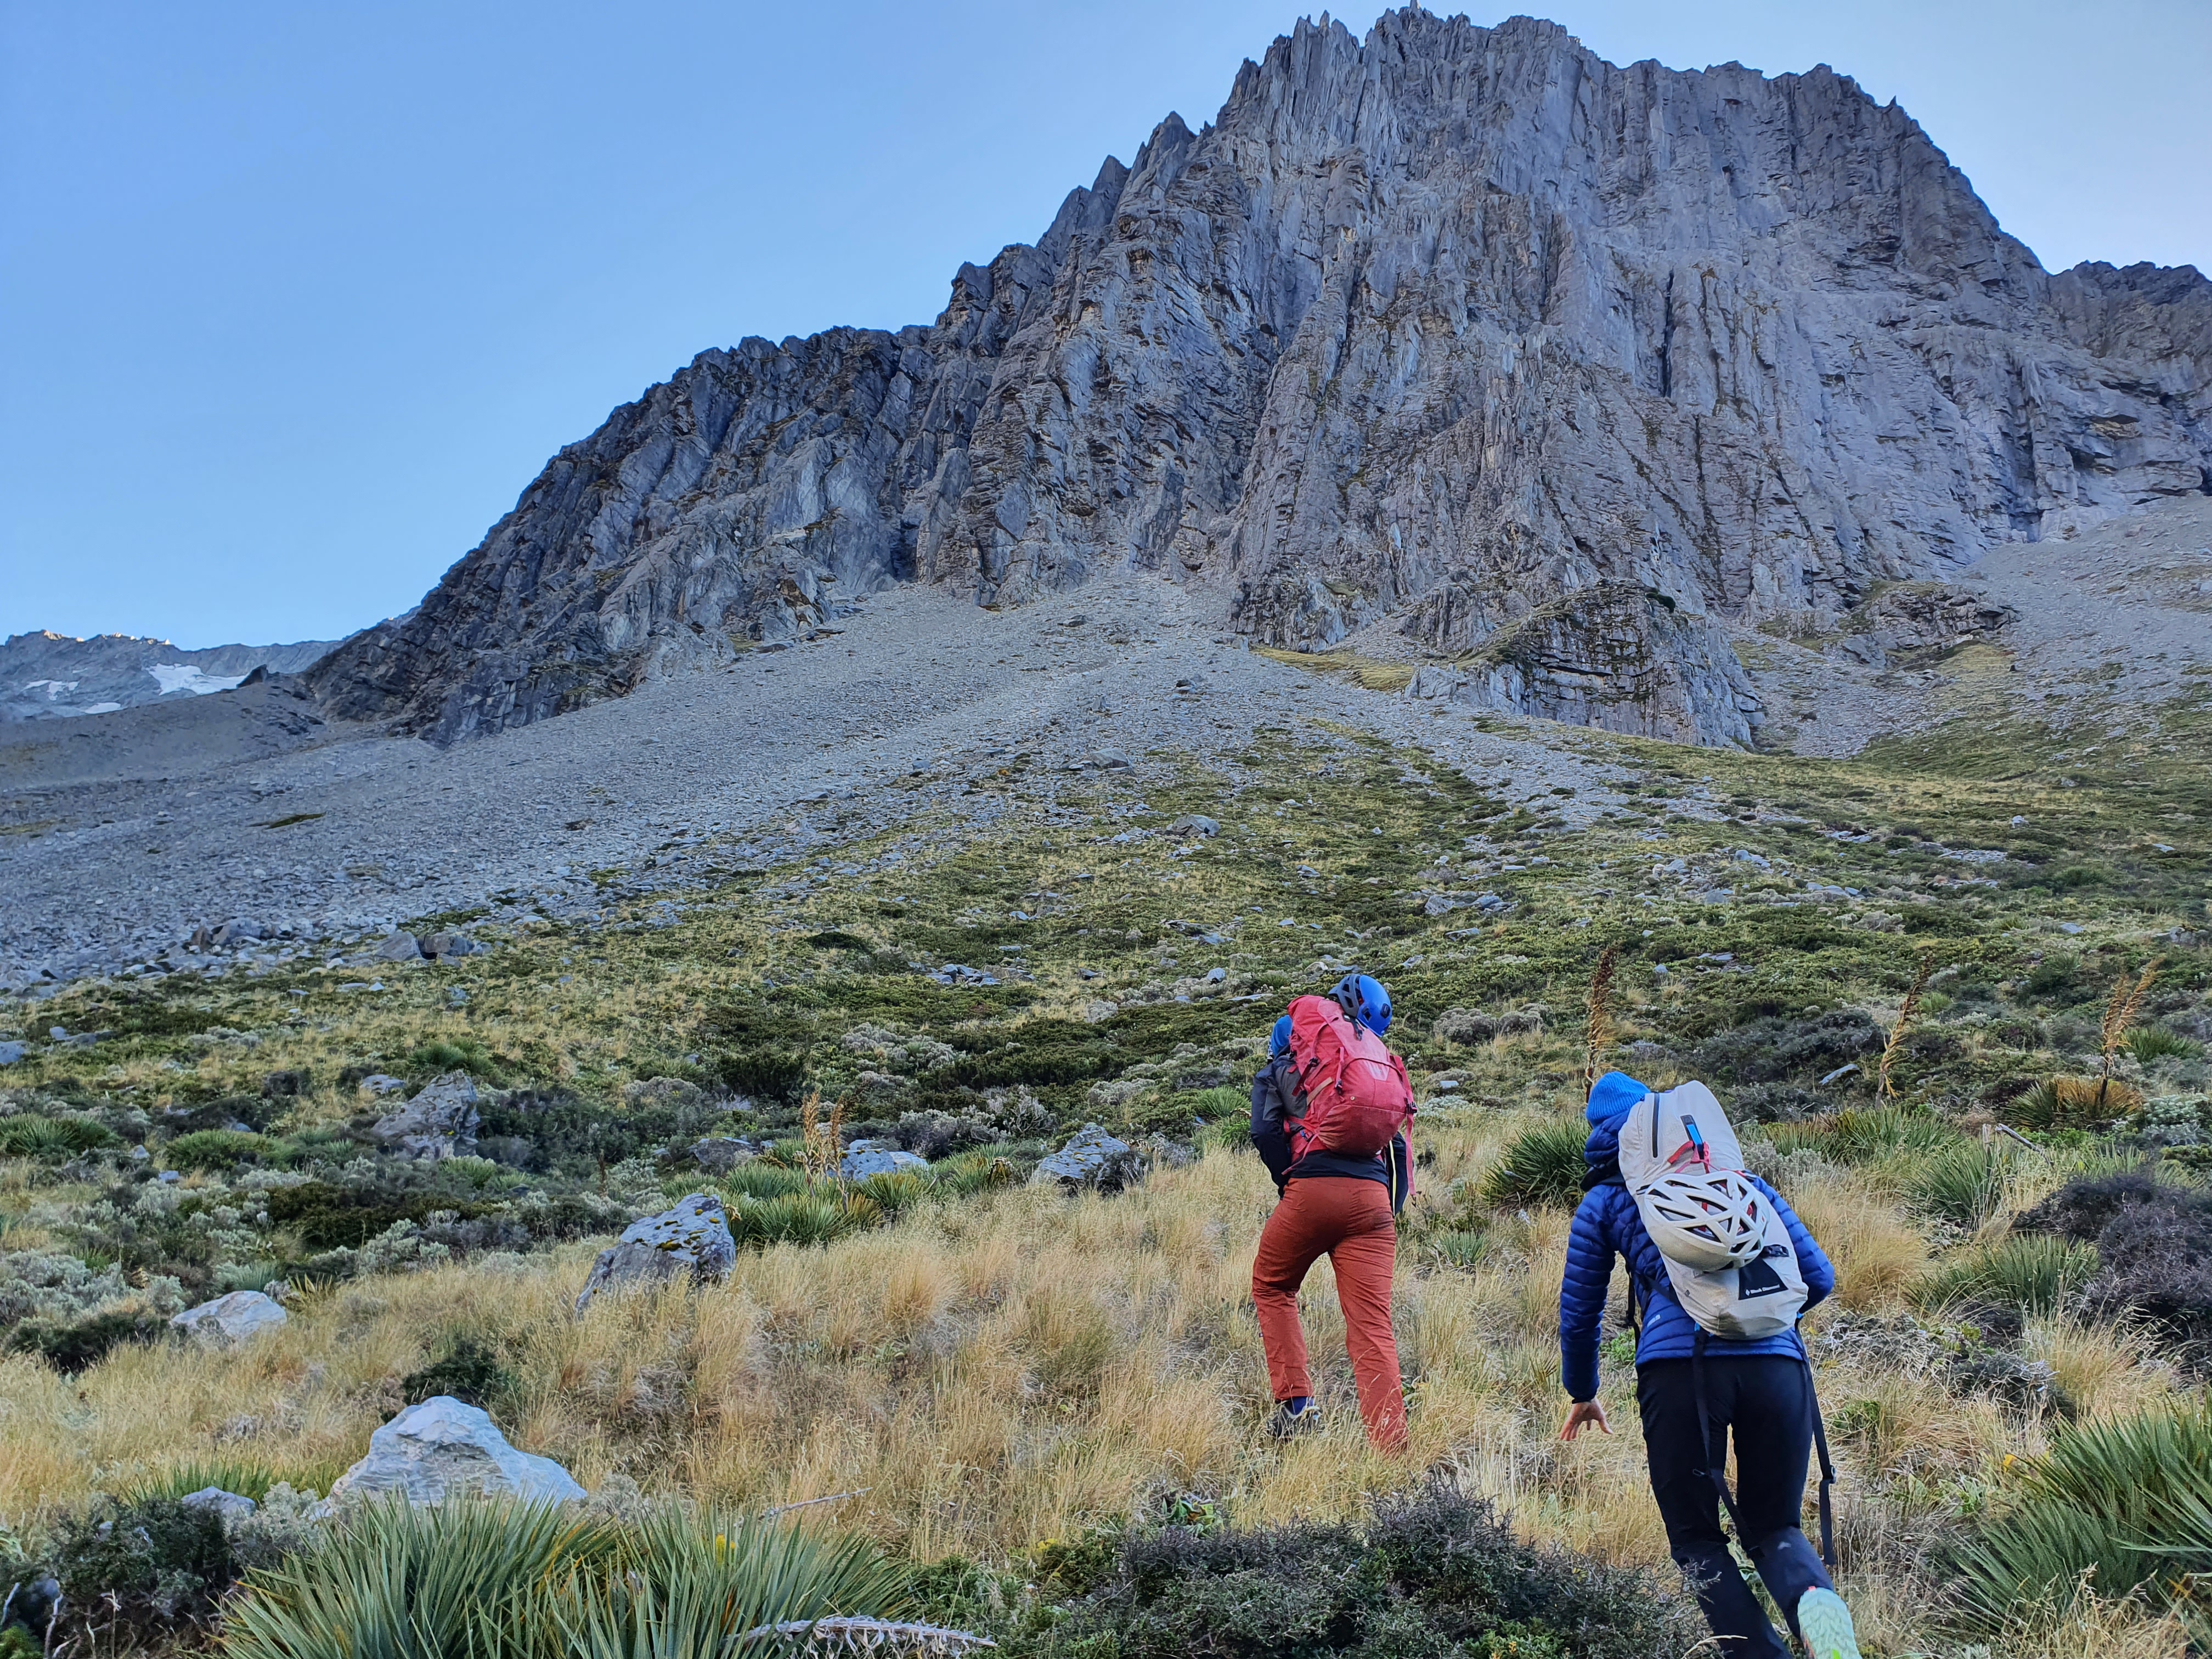
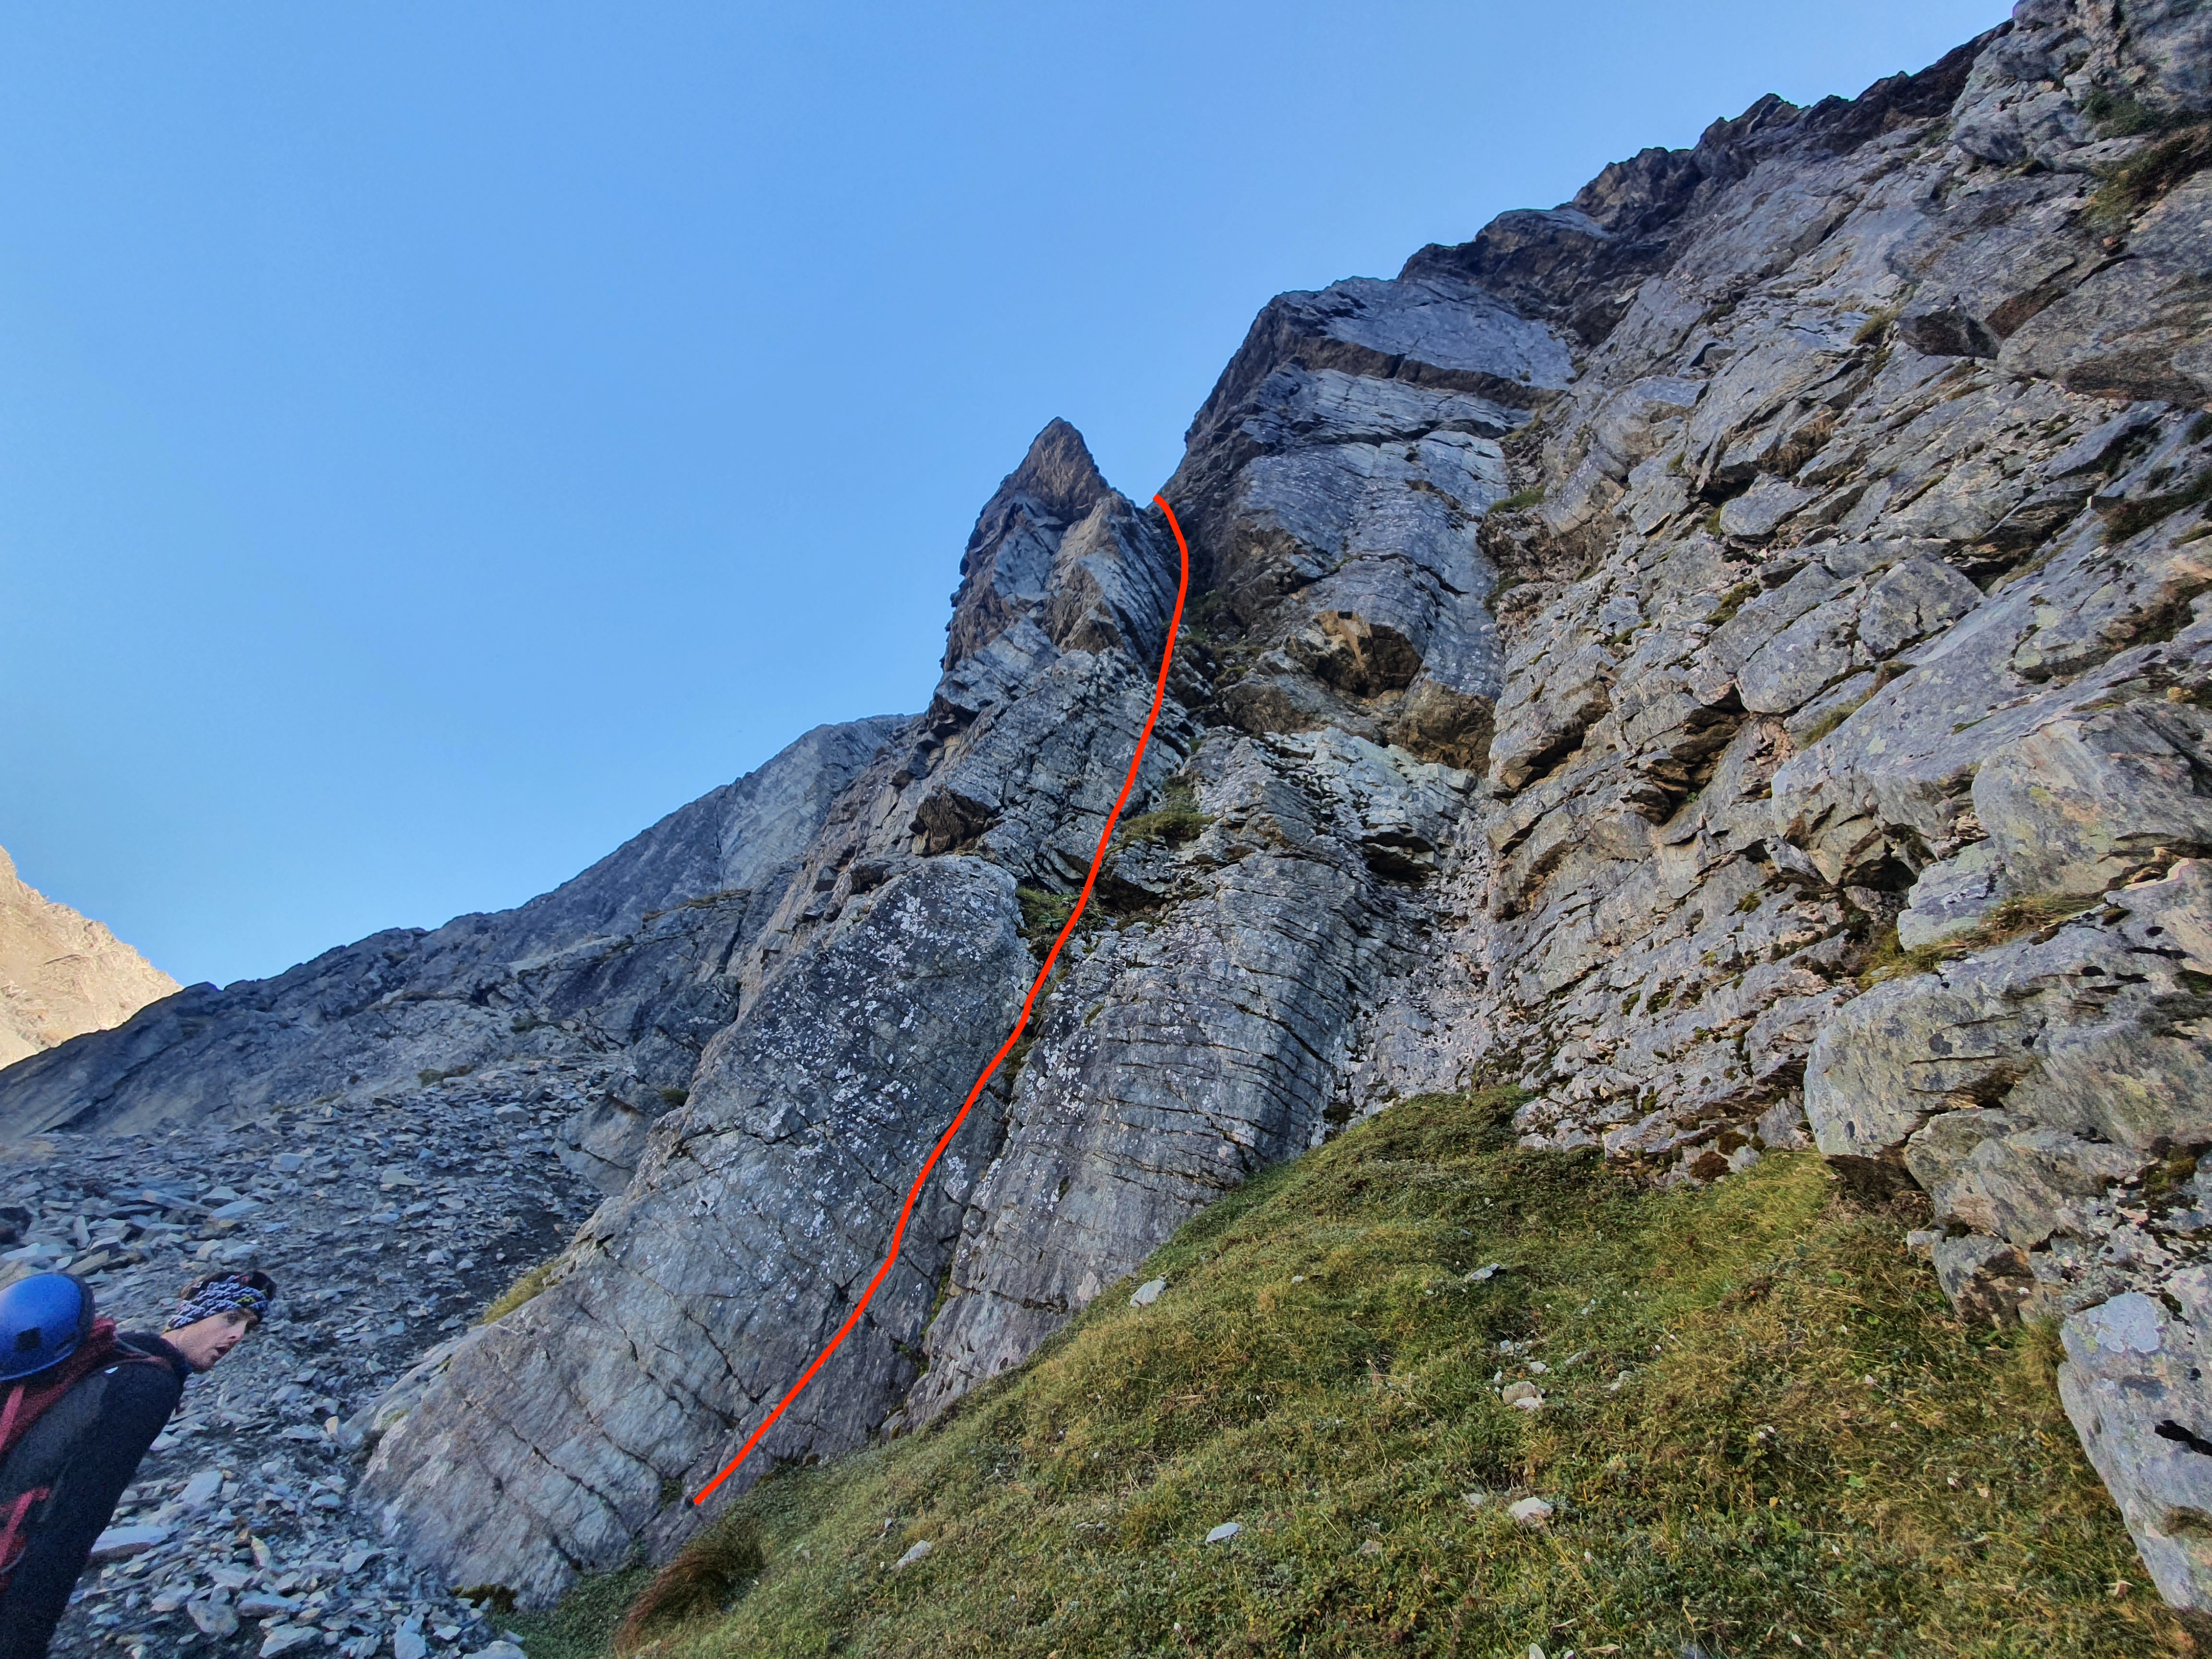
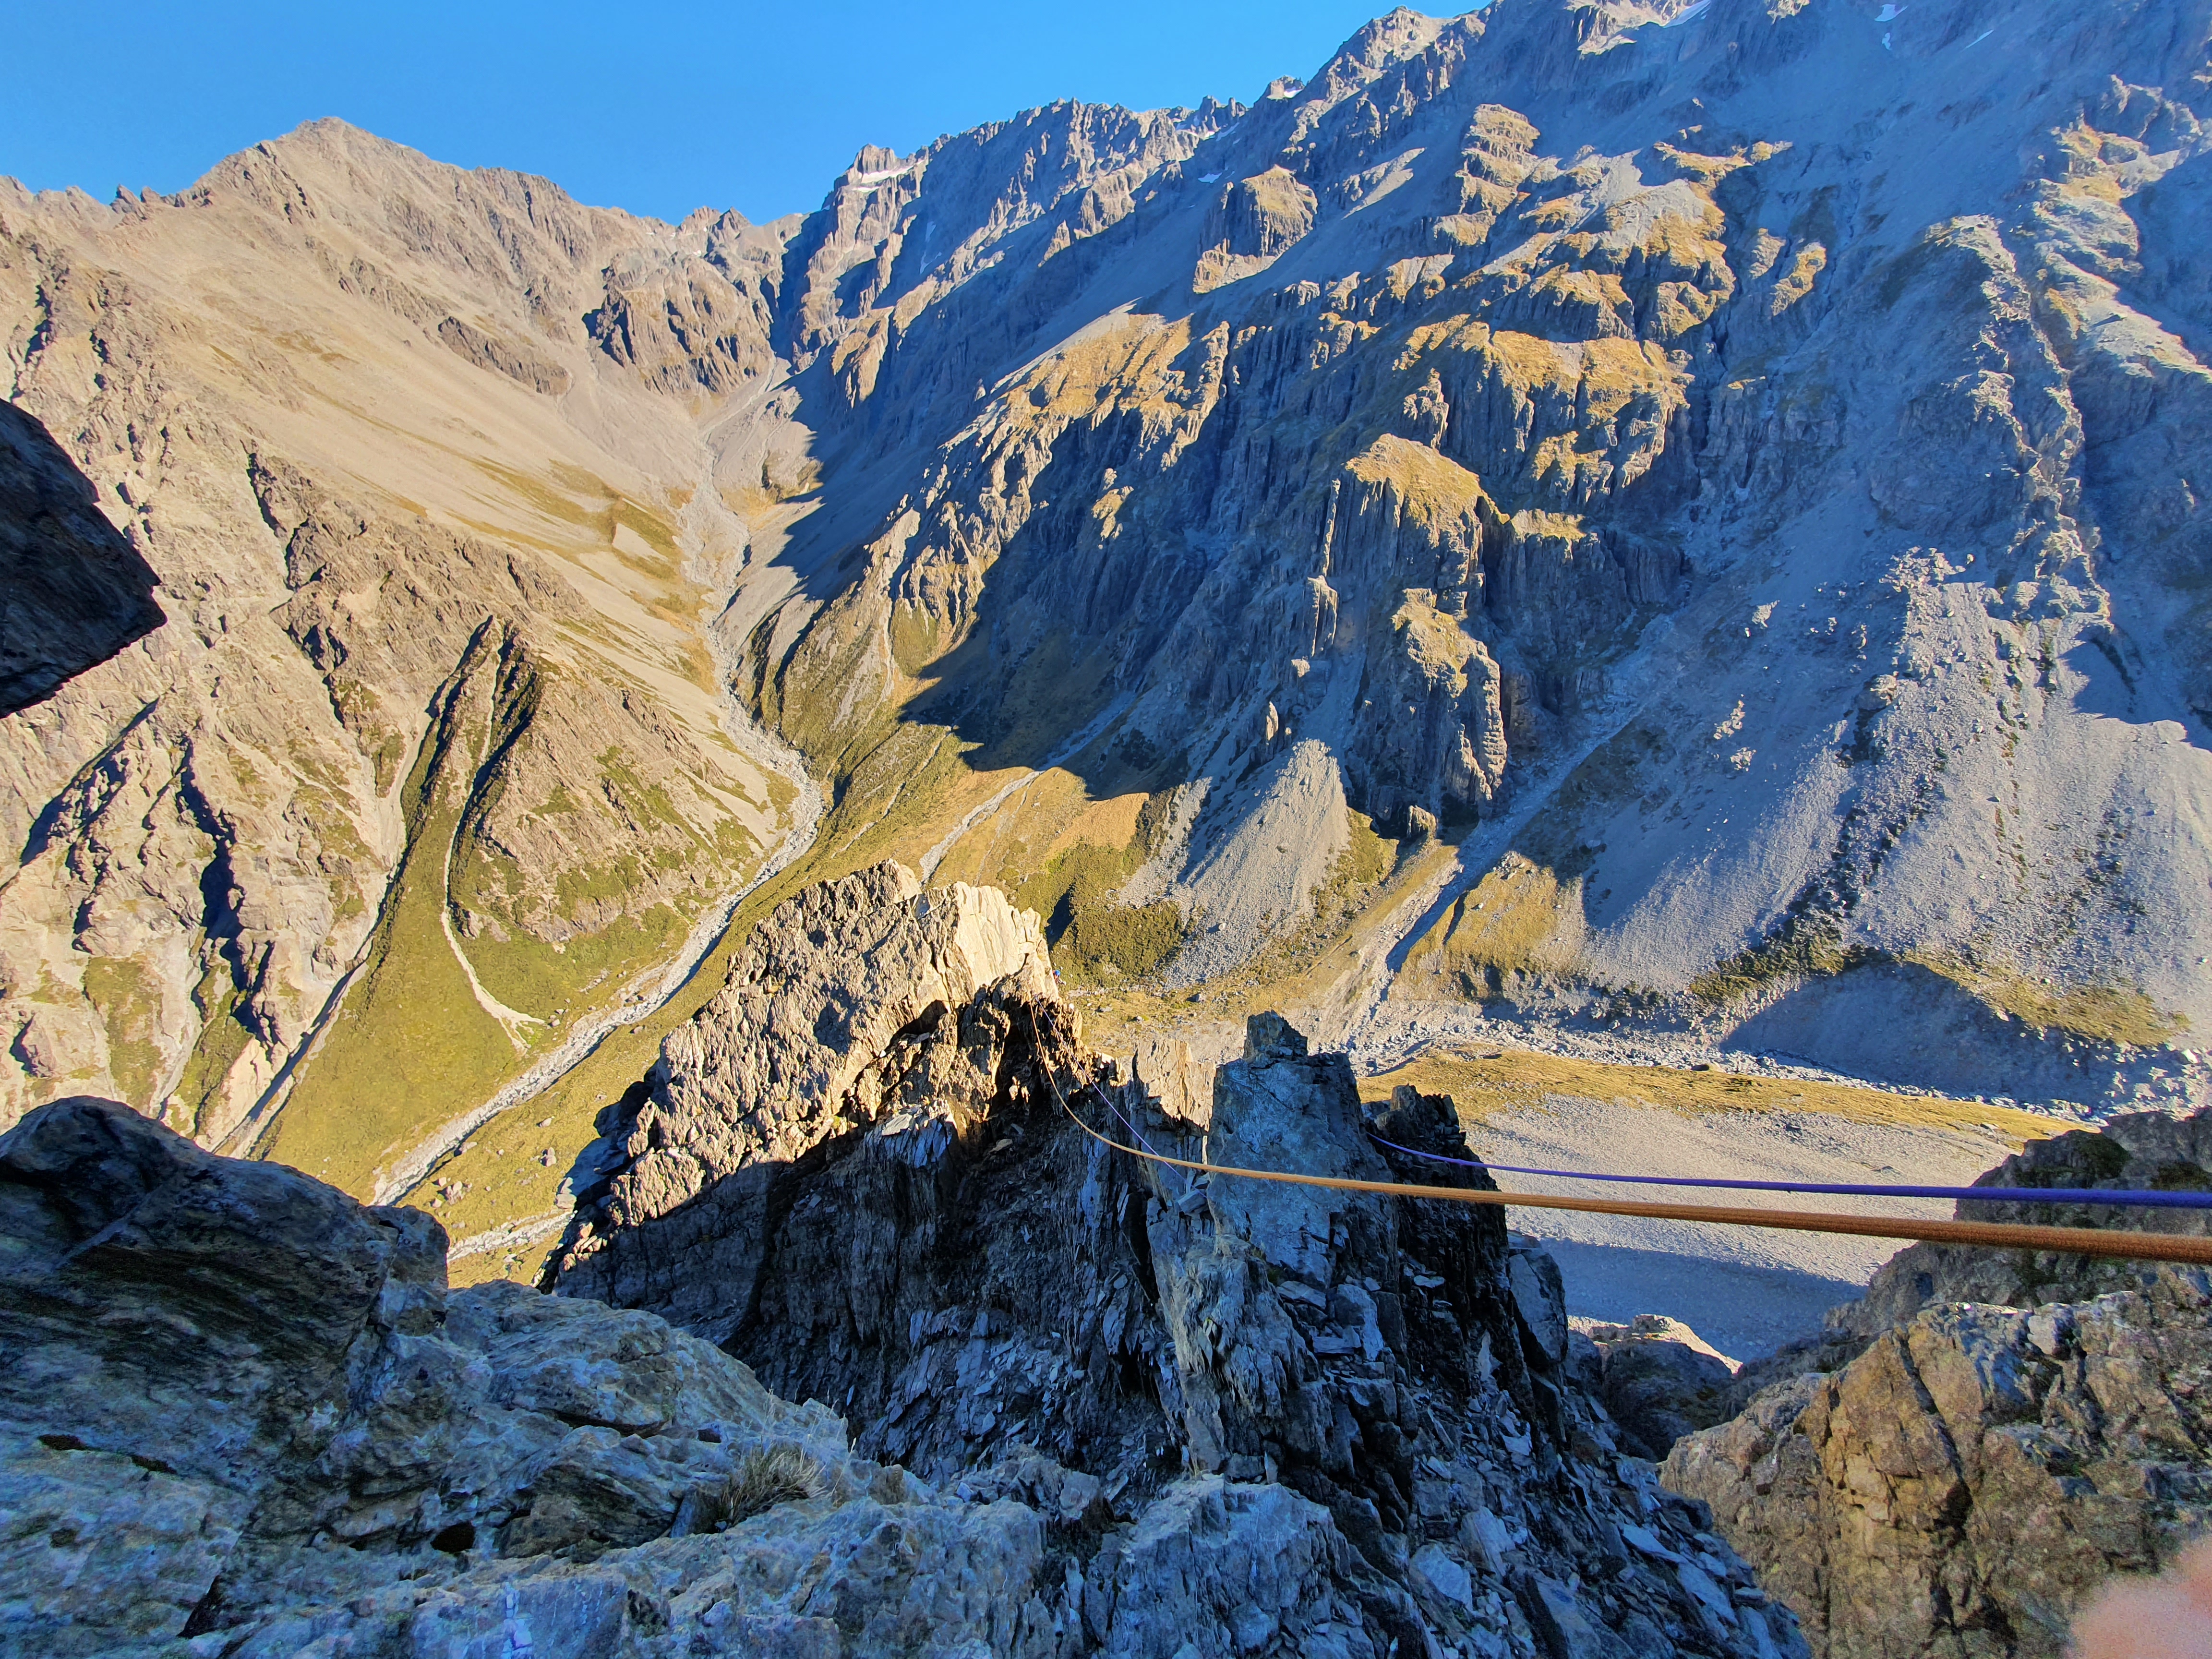
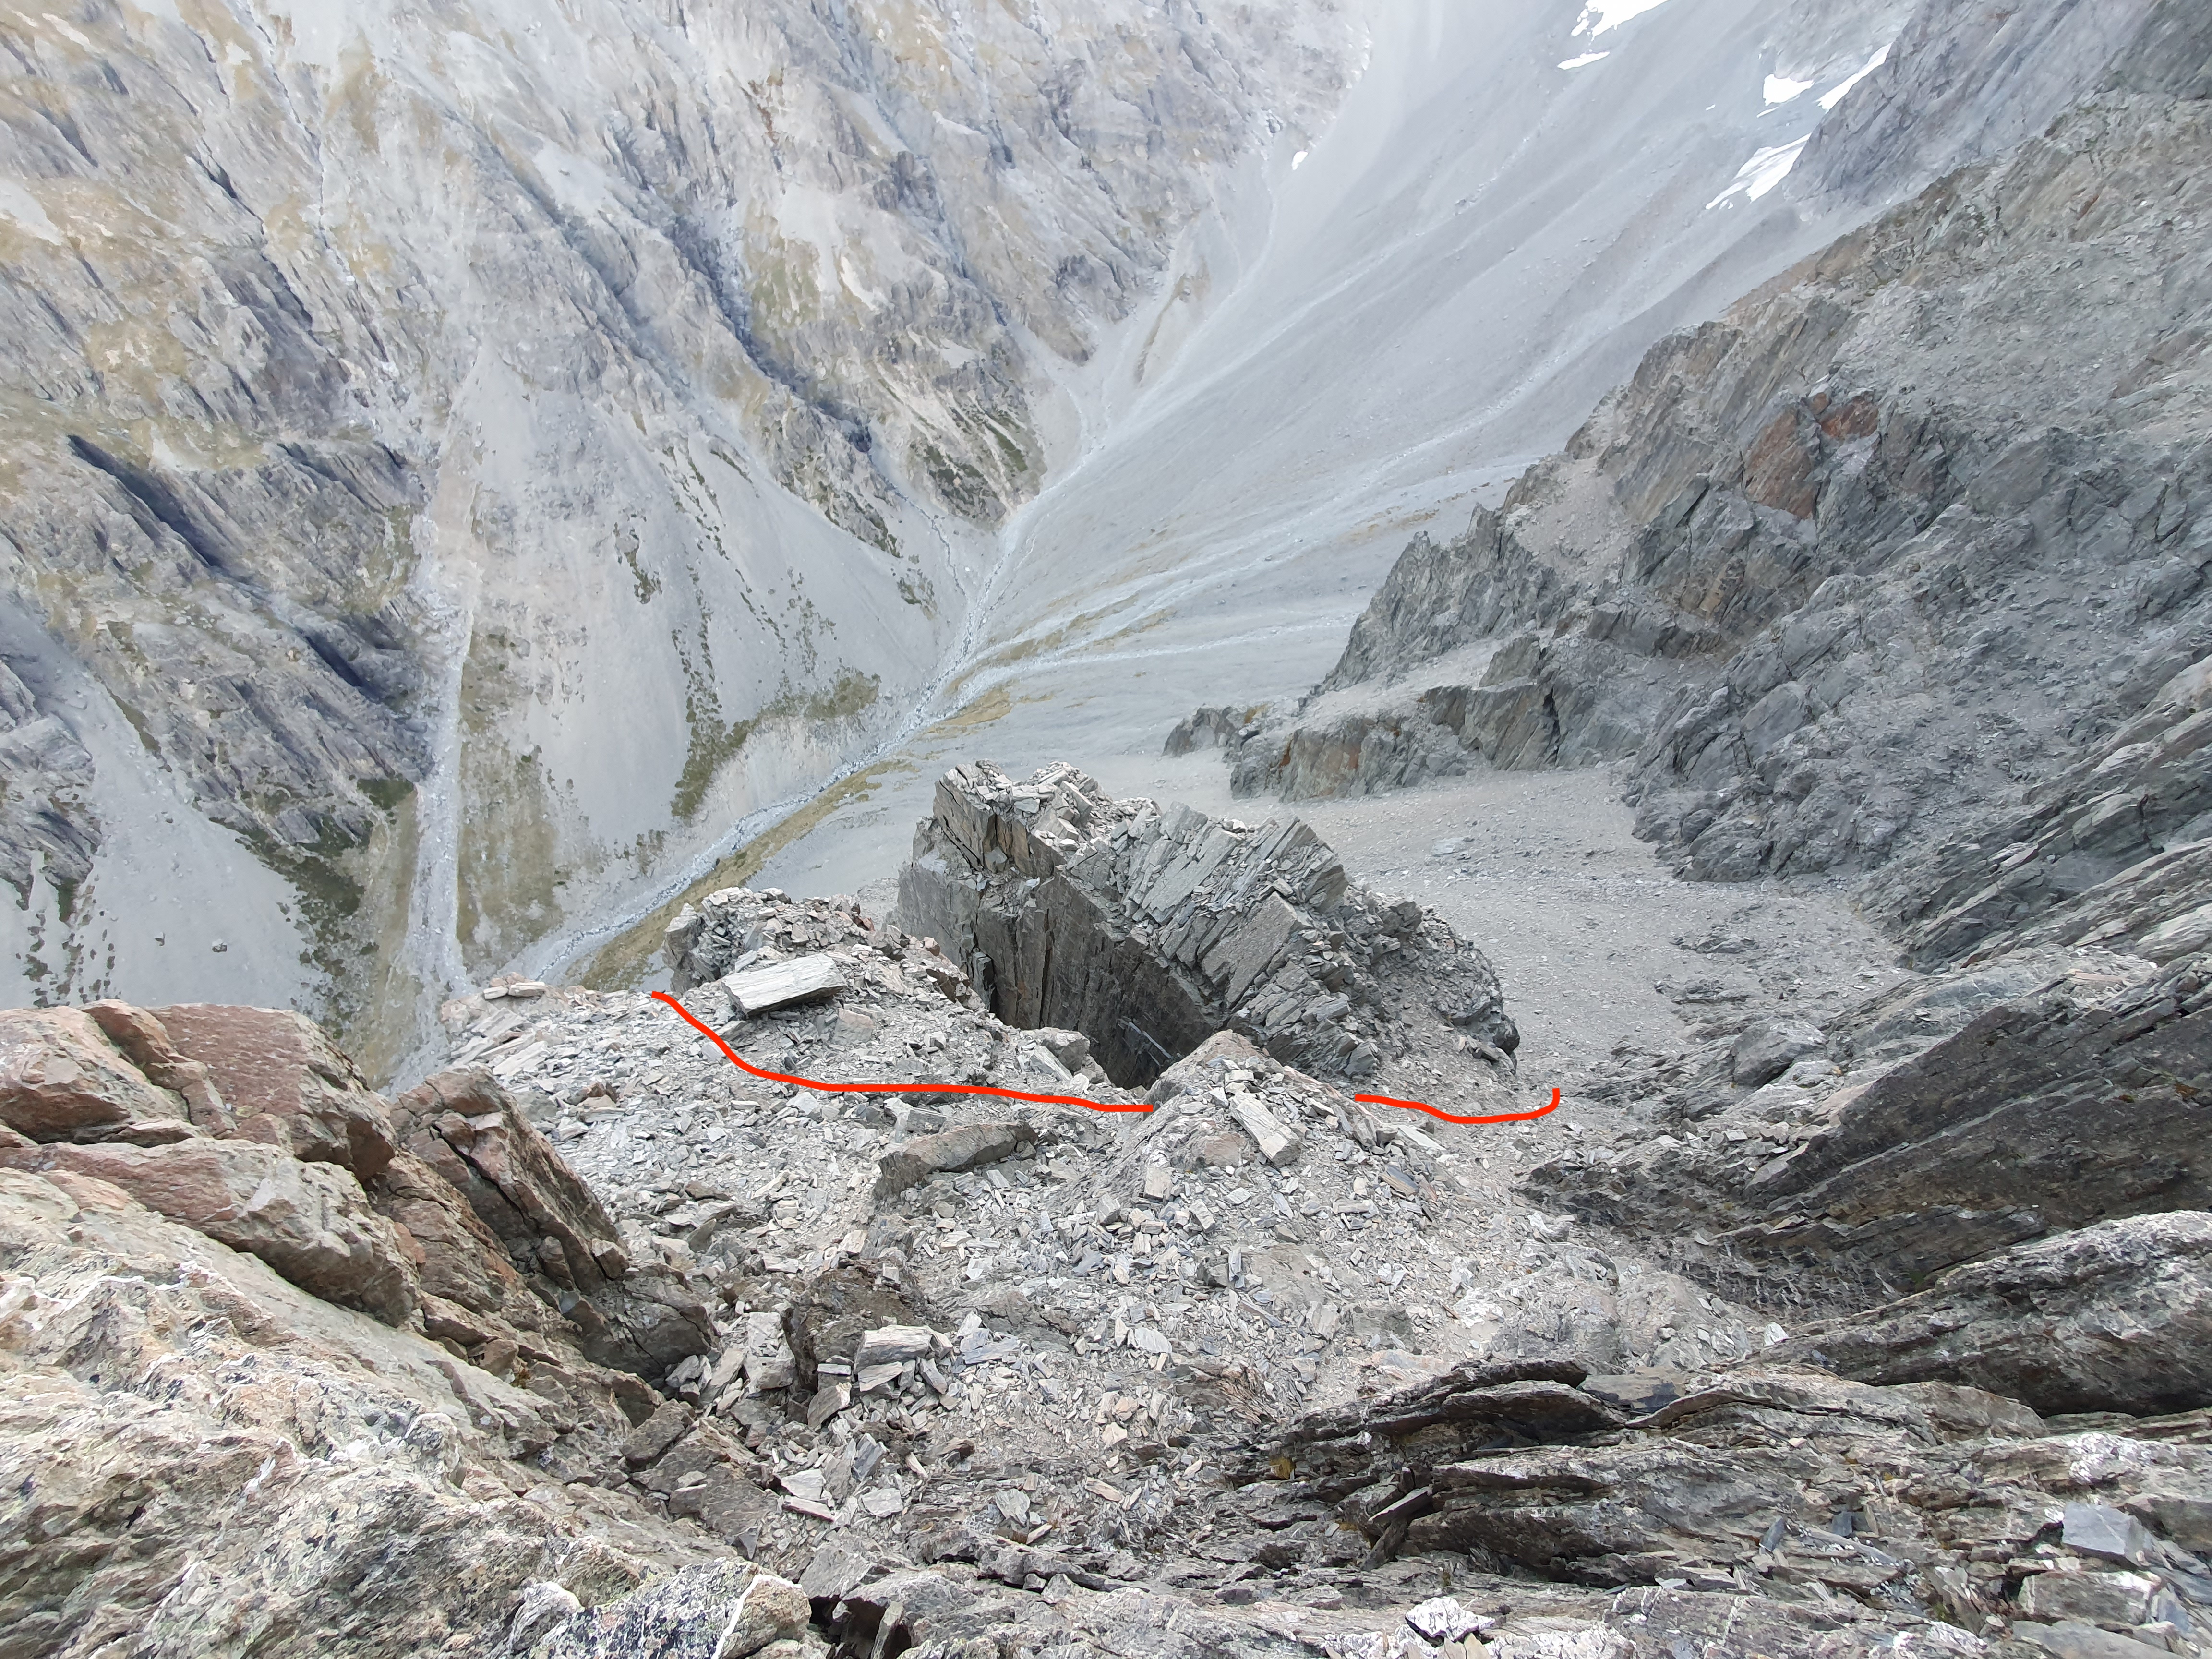
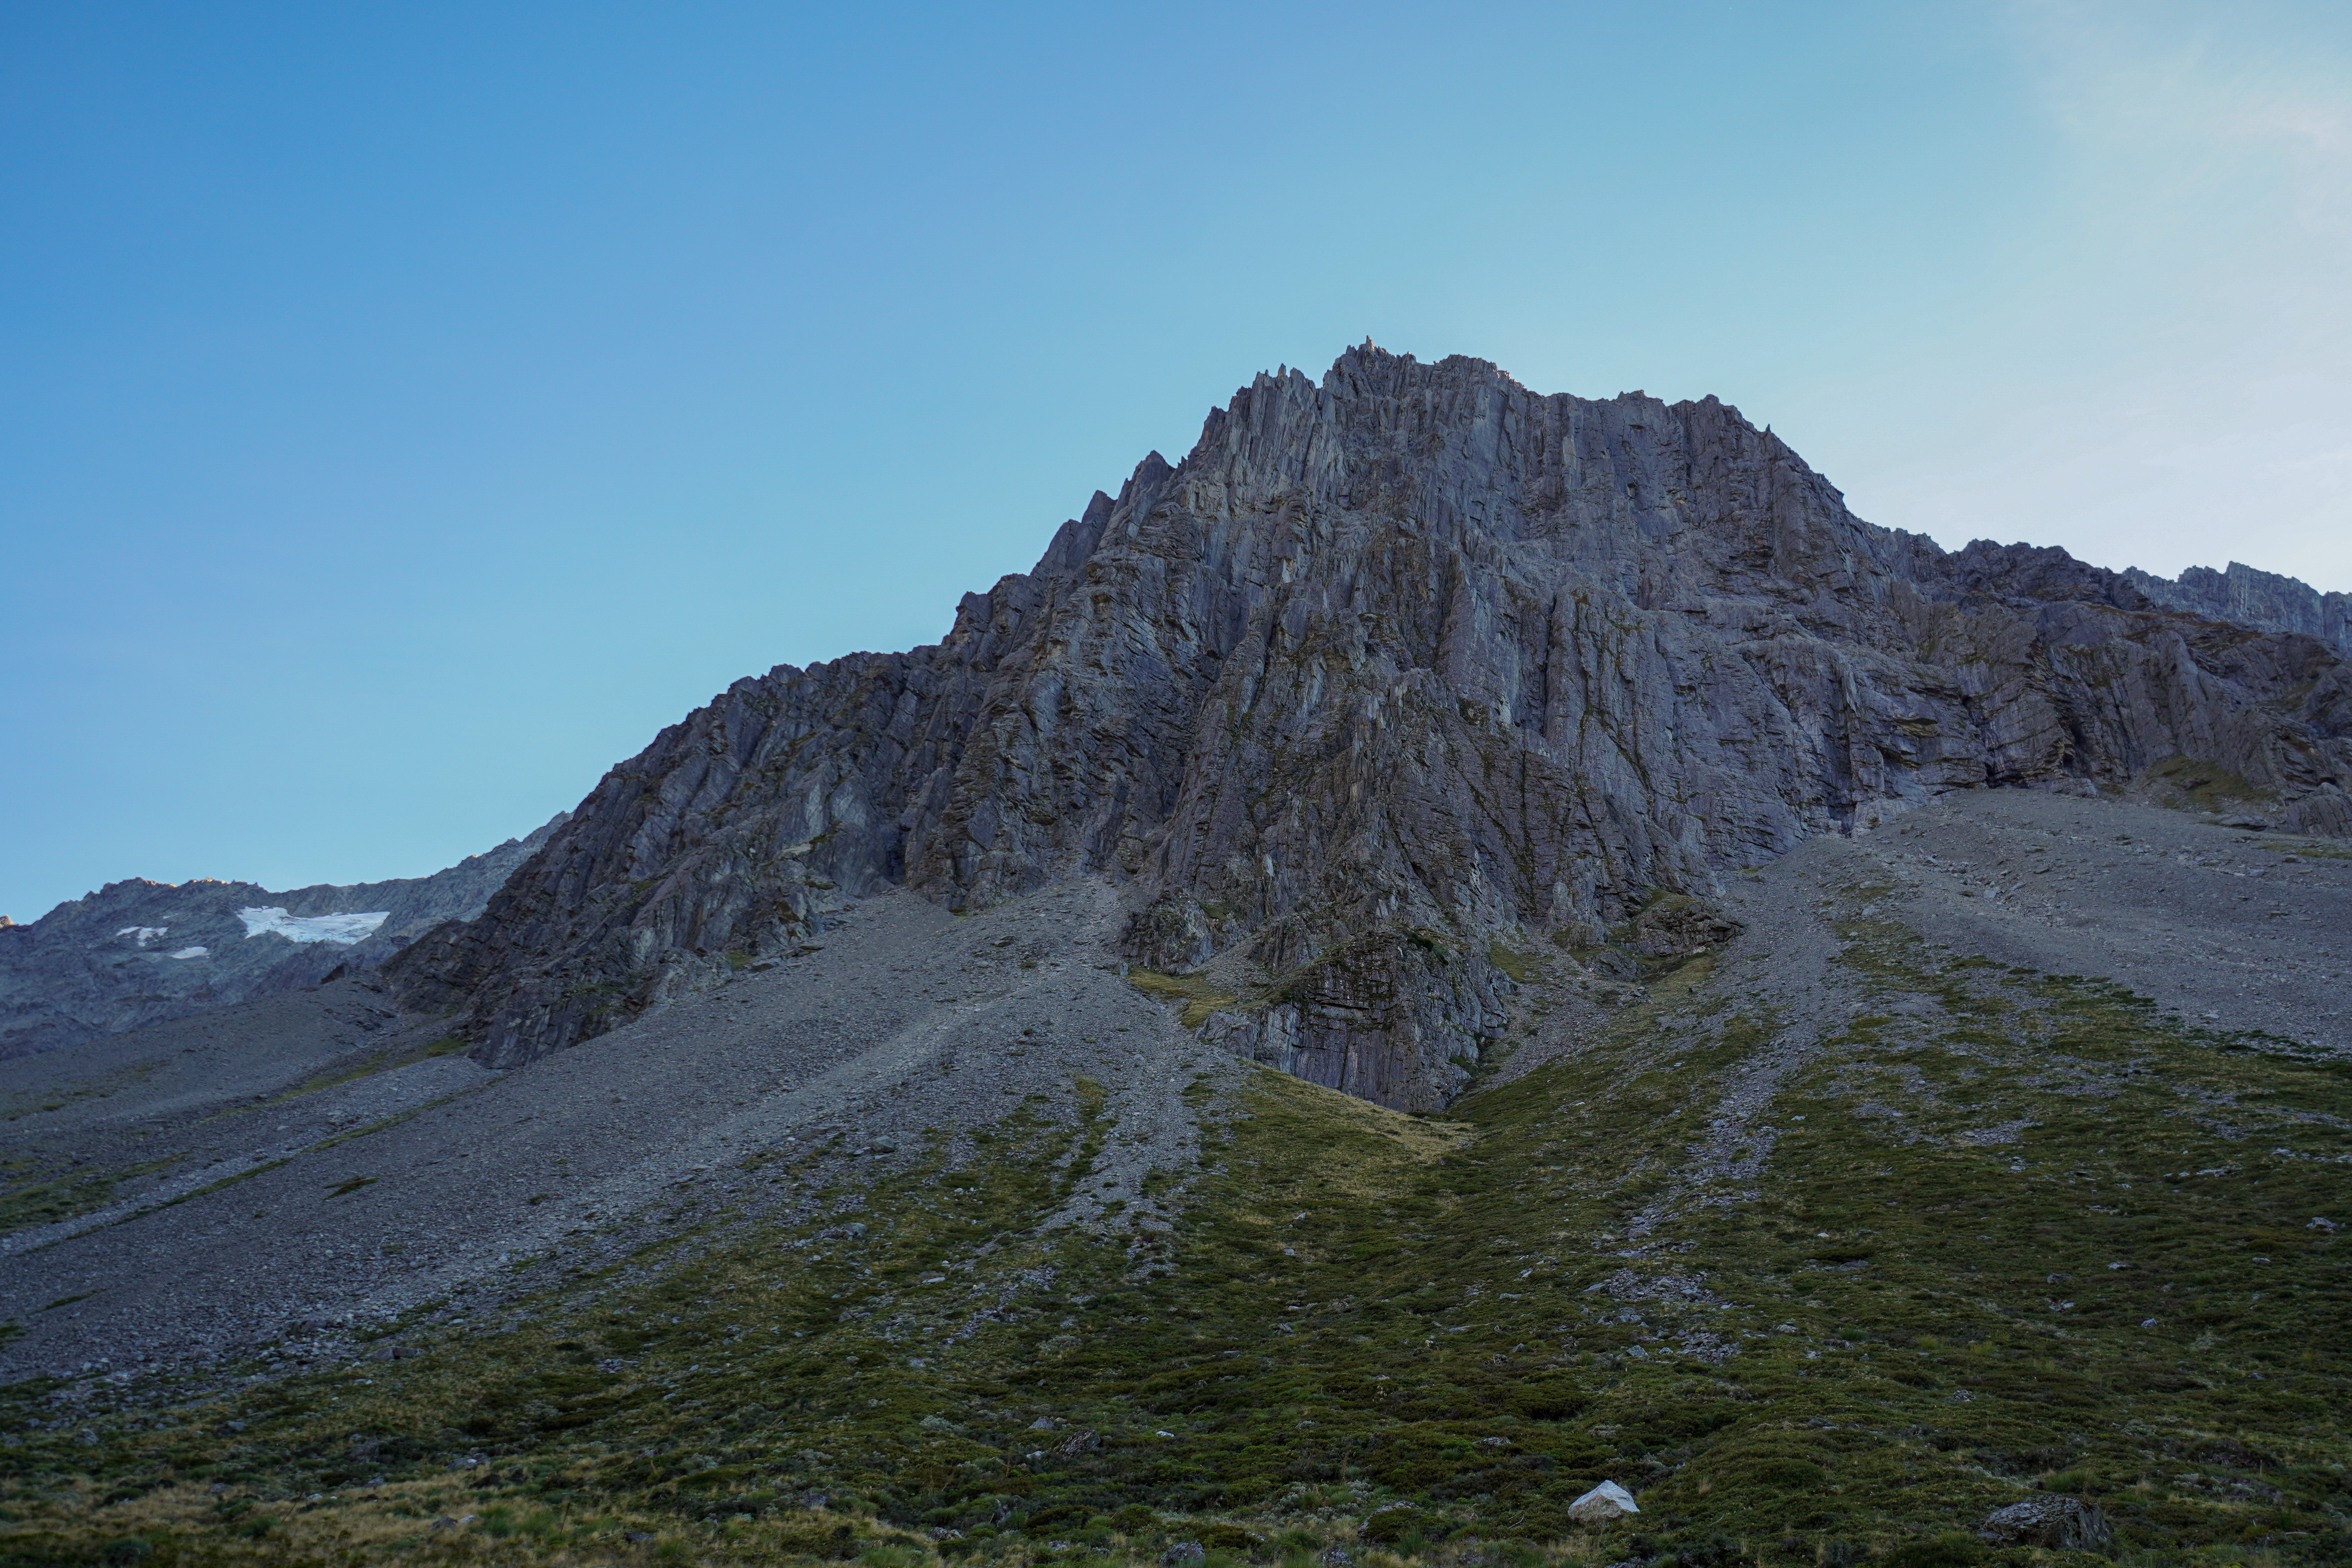
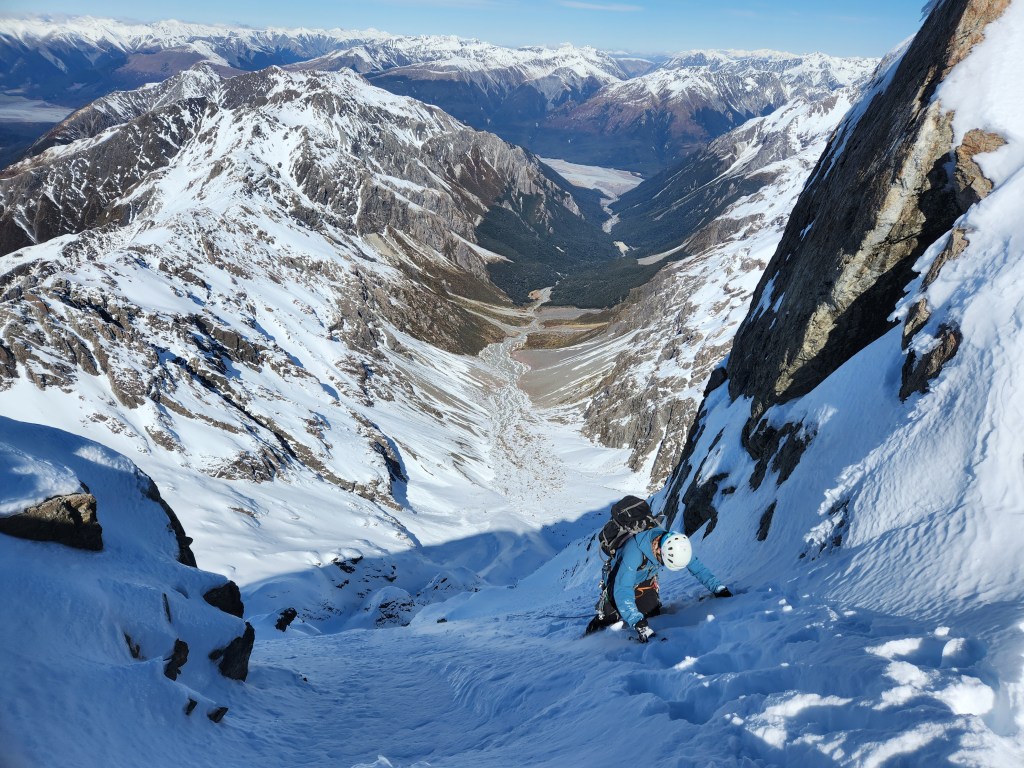
We went up Coral track to Rome Ridge, along Rome Ridge to the Sharks tooth / the gap – the end of the flat section of ridge just before the final ascent to low peak. From here theres an obvious gully that drops you down directly under the Crow face, and continues down into the Crow valley.
Travel along rome ridge when the conditions are good is fast and straightforward, but if coverage is thin and you end up on rock it would become a lot slower.
From the car it took us around 1 hour to the treeline, and 3 hours to the sharks tooth, then another 20 minutes to the base of the route.
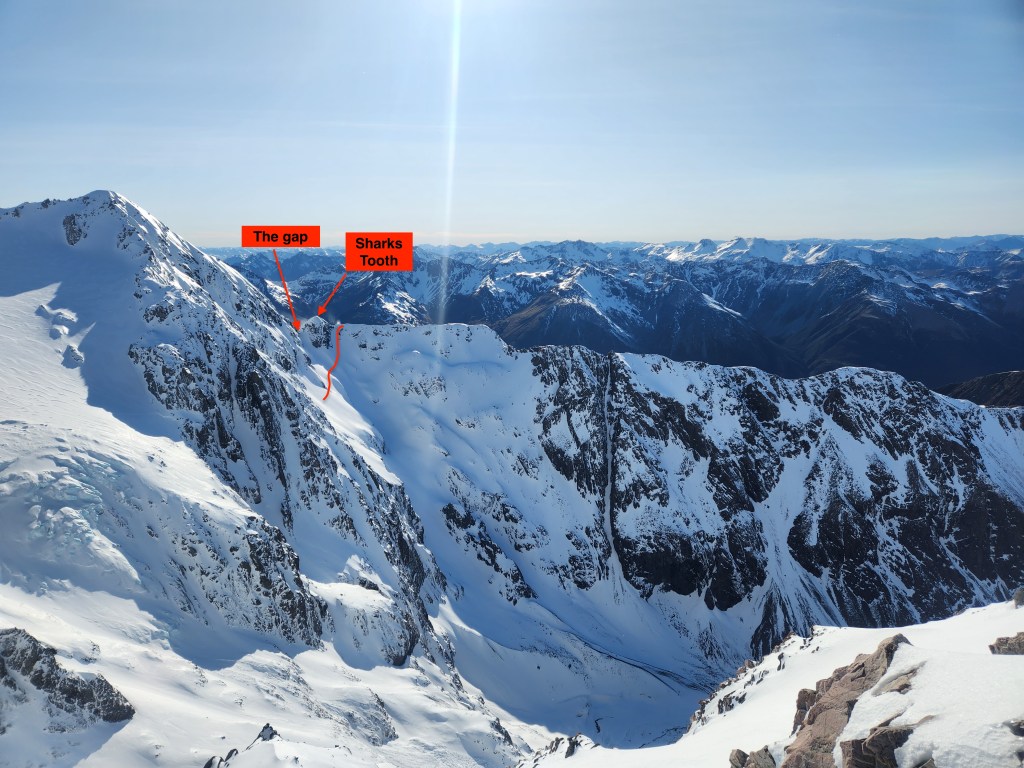
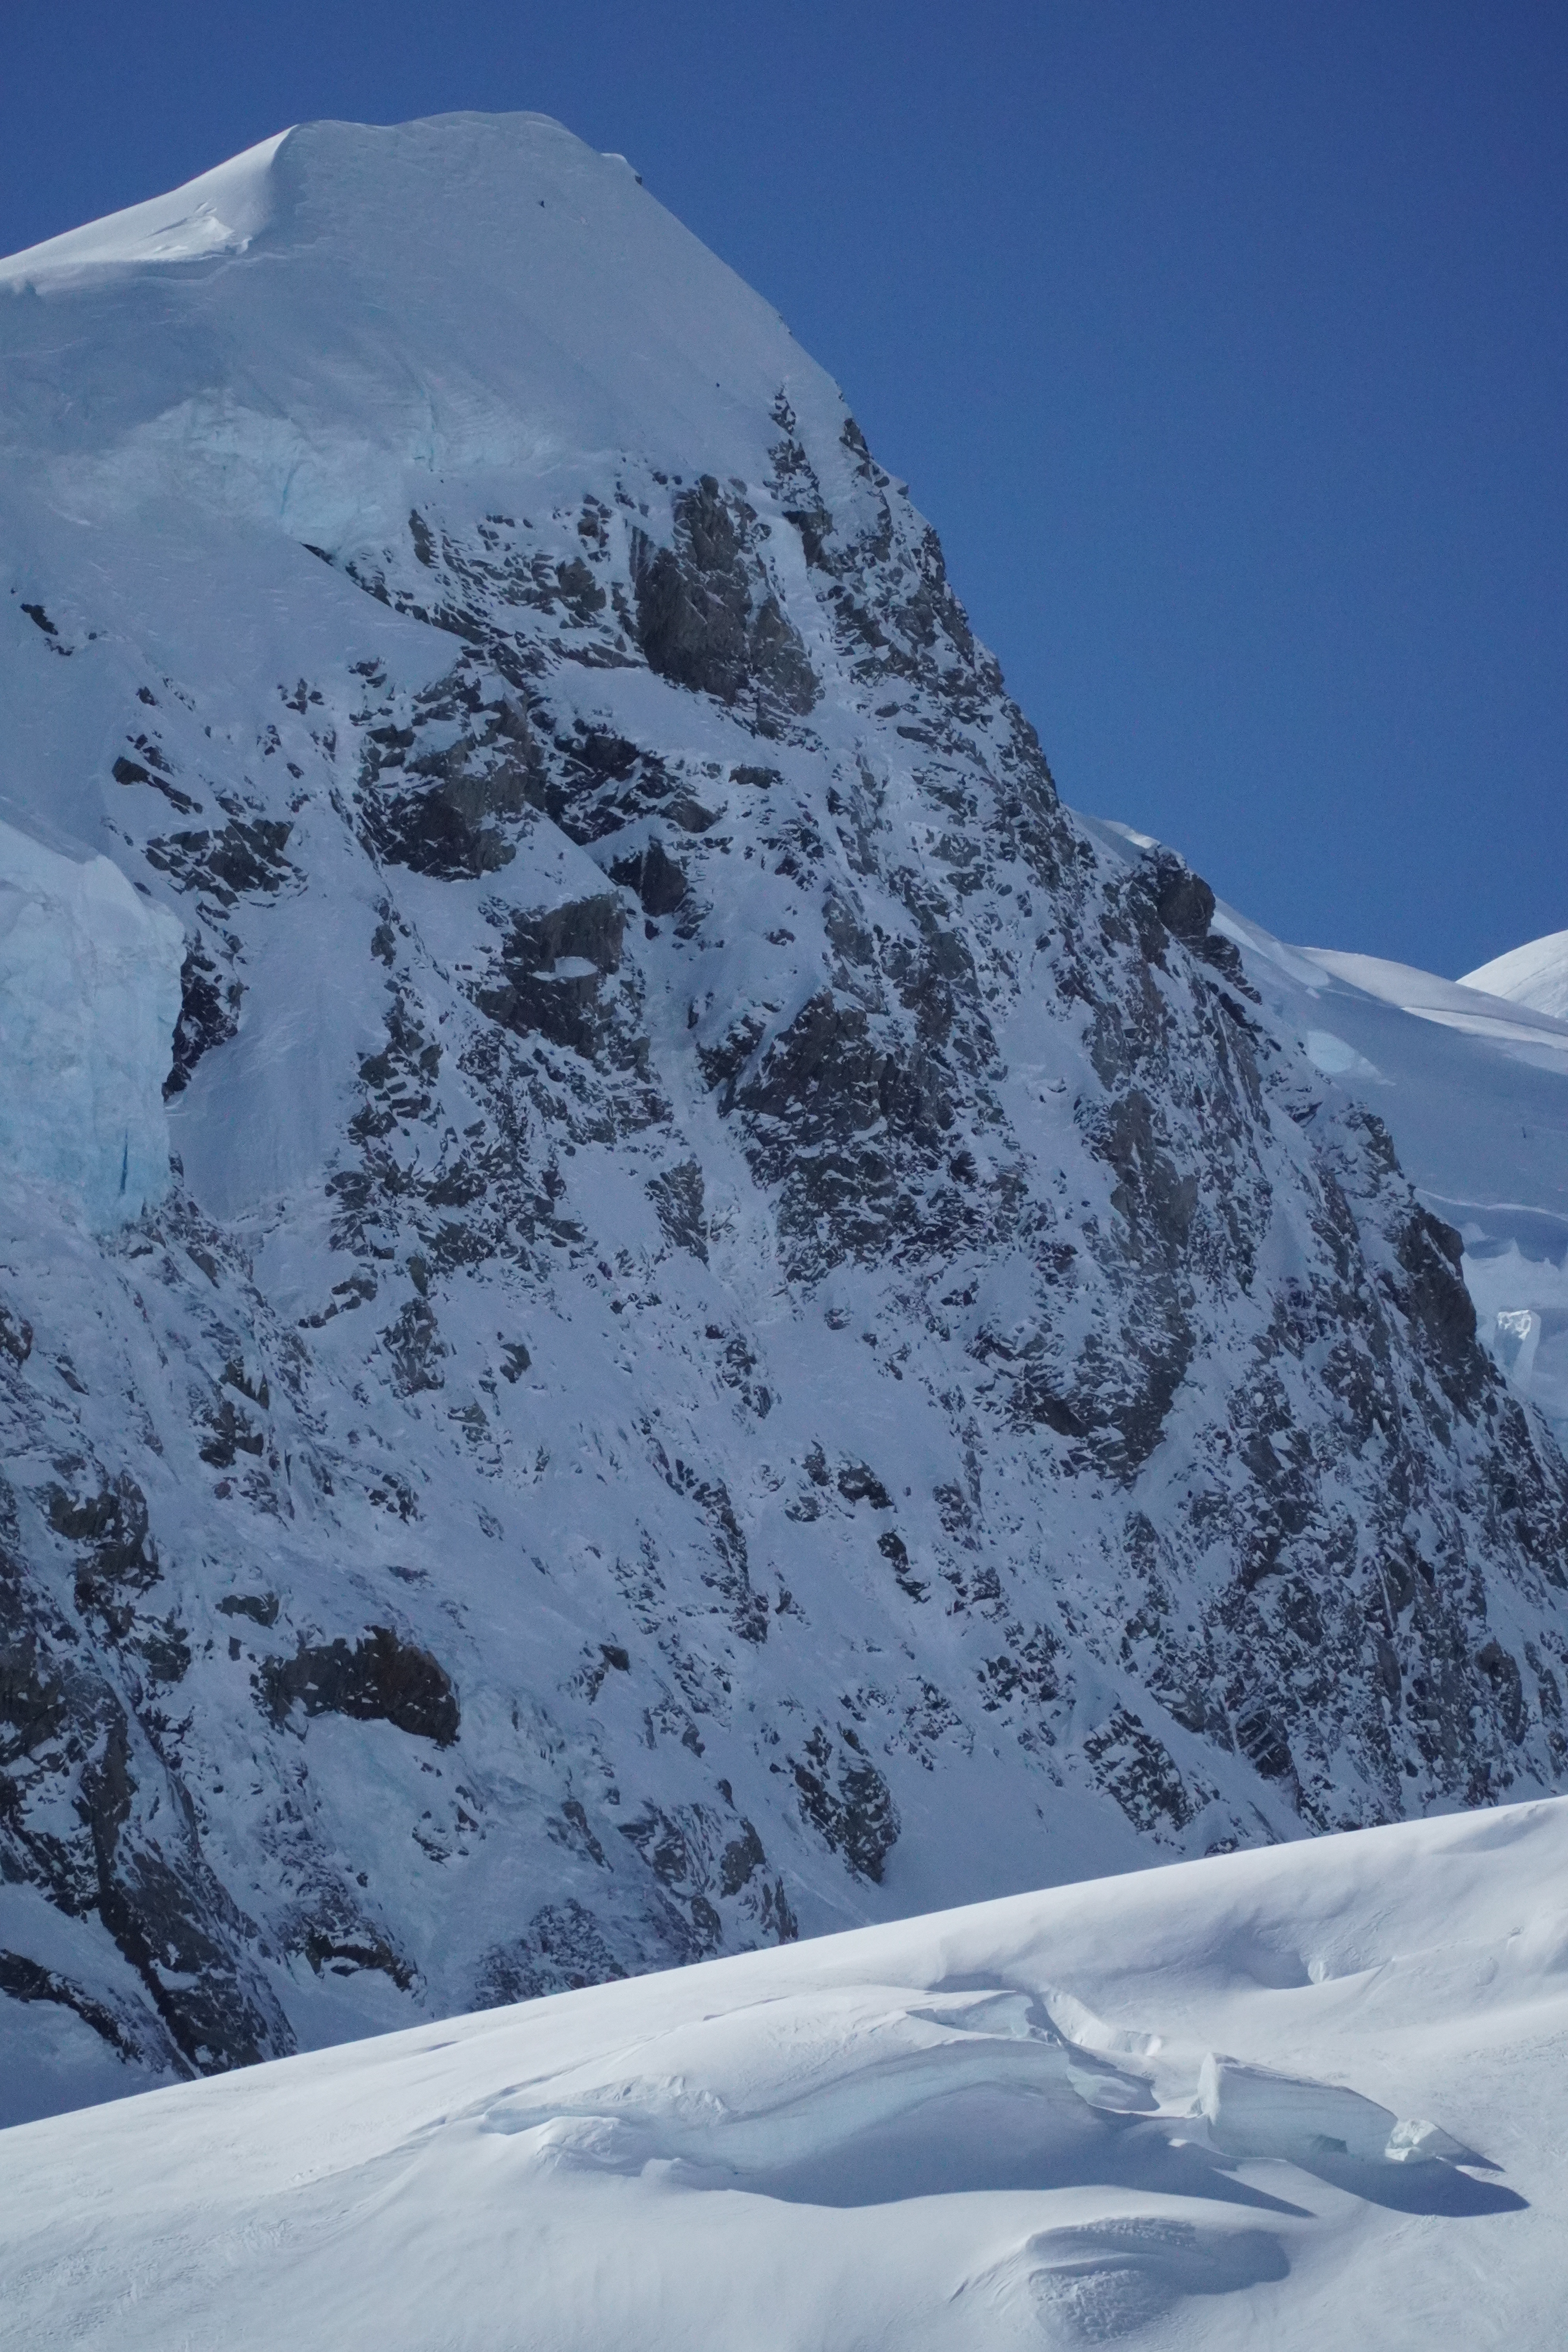
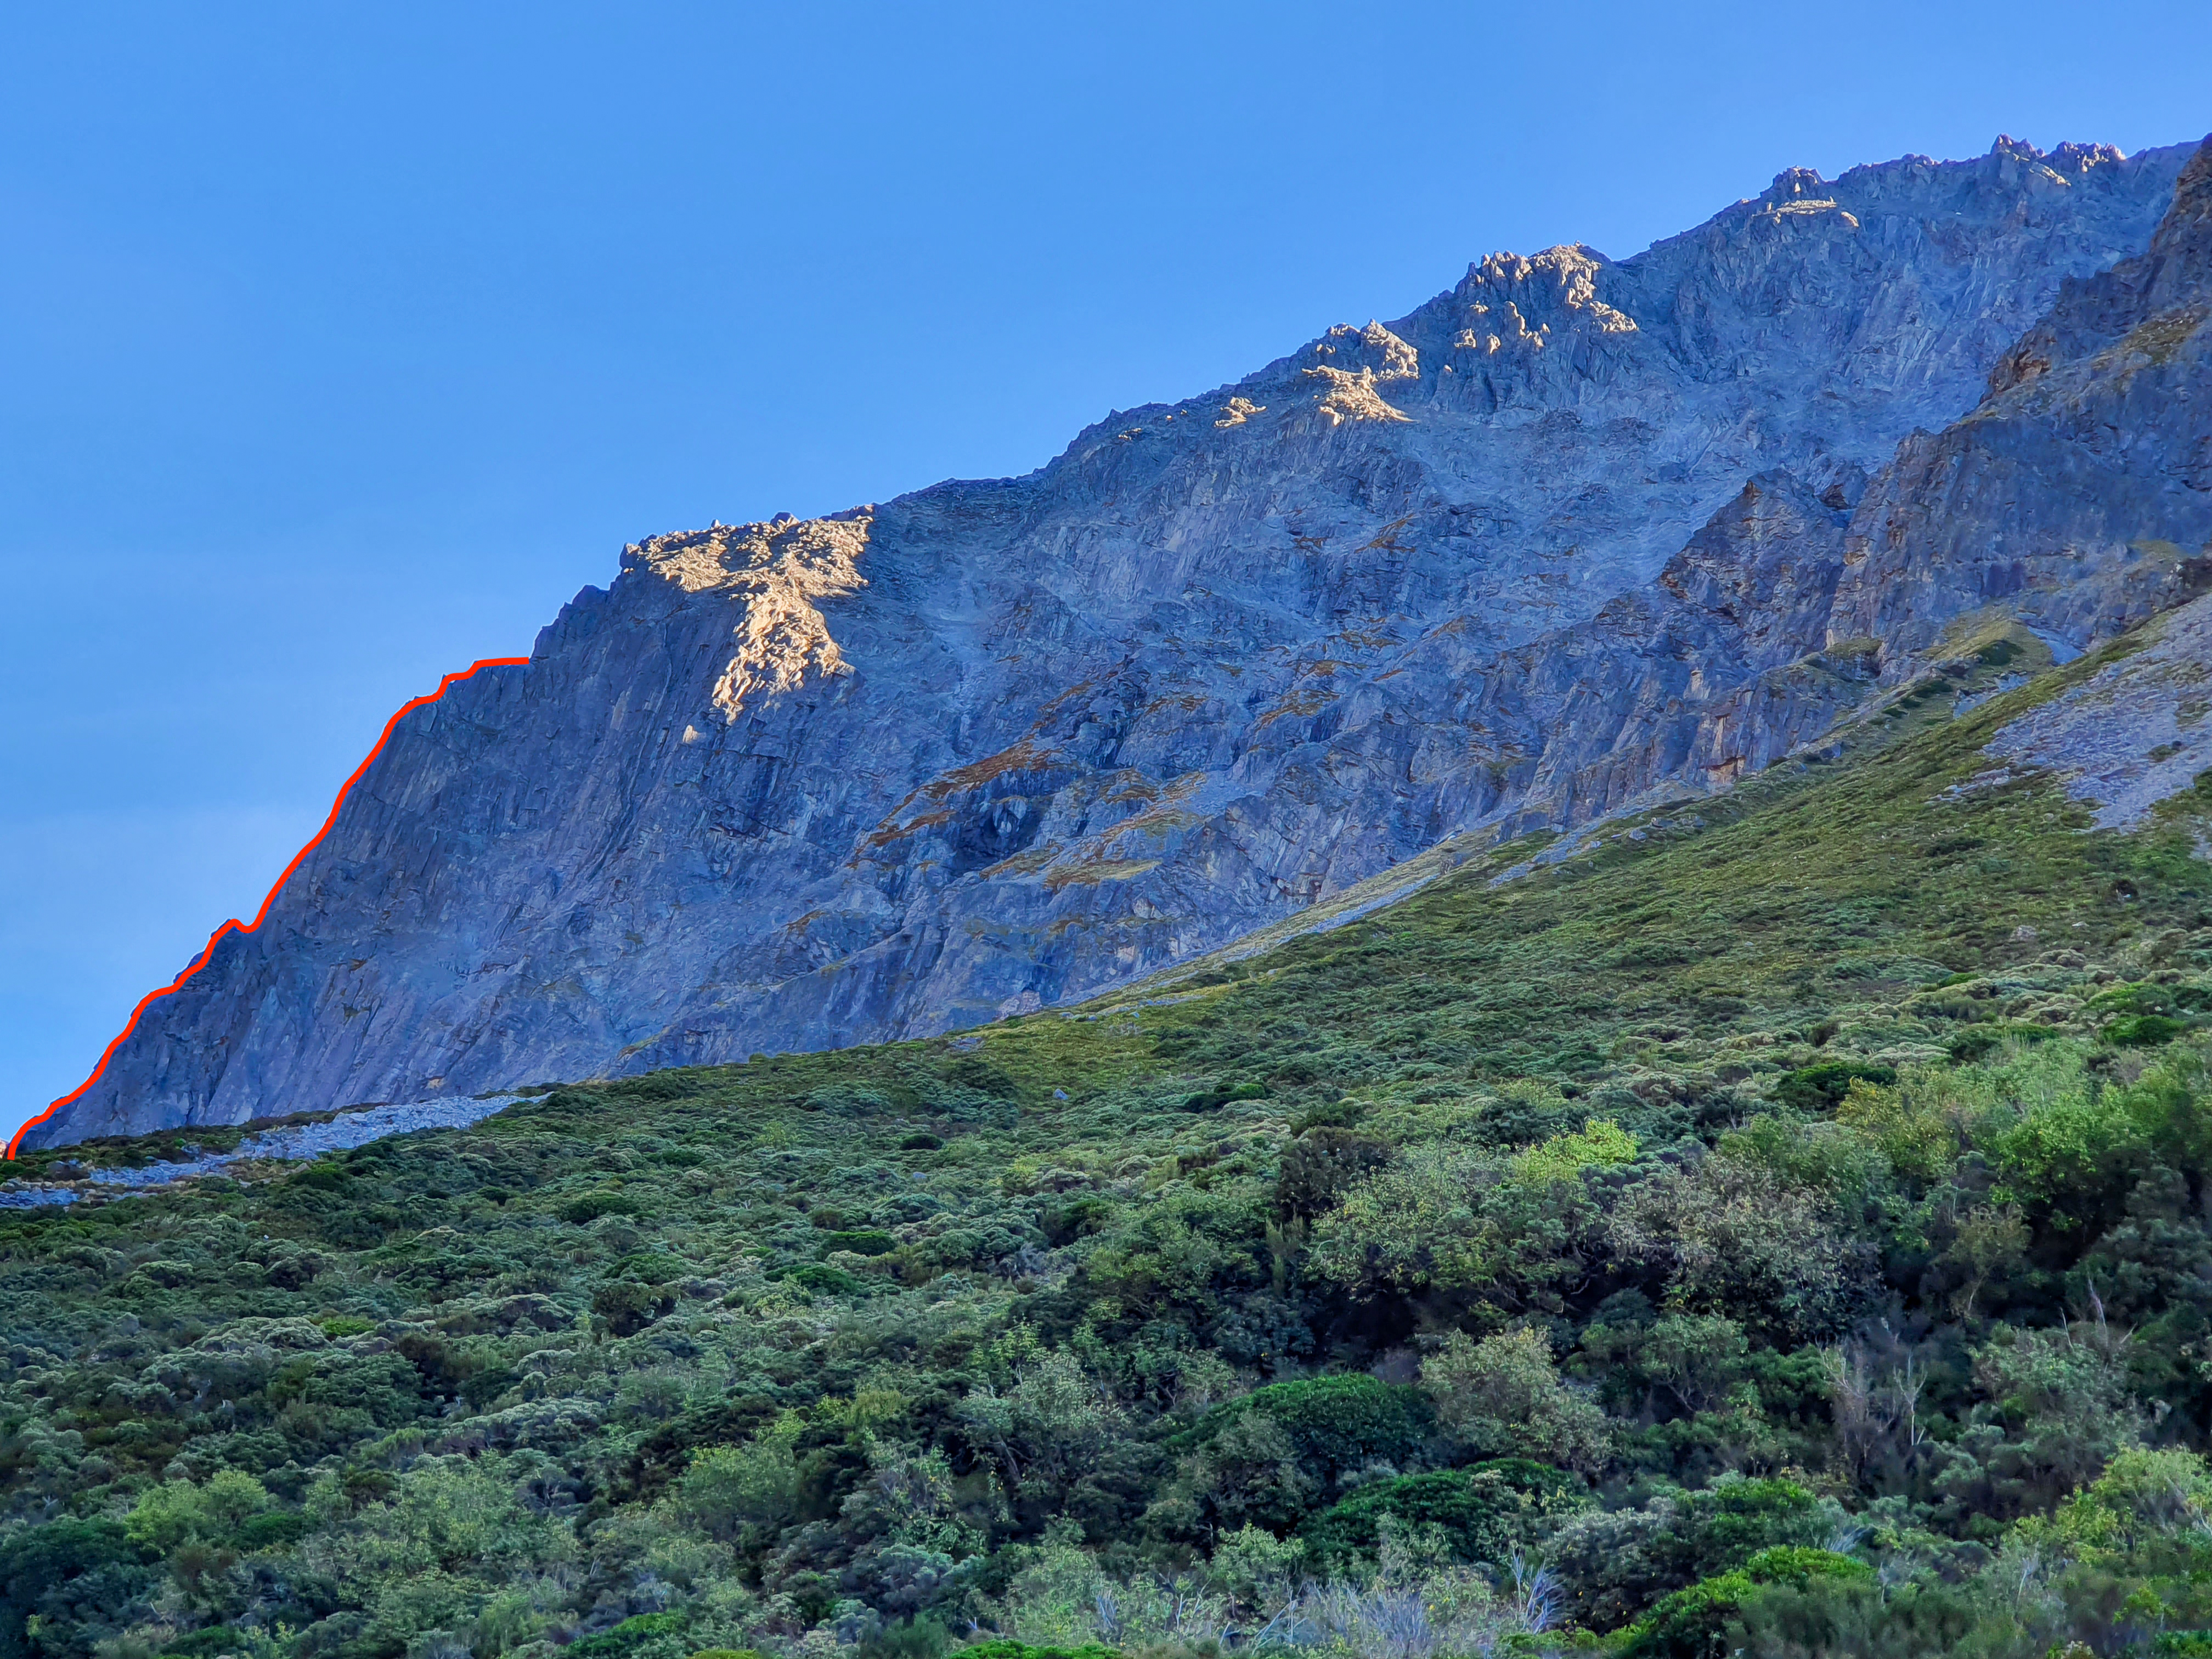
From Rome Ridge you get a reasonably good view of the face to pick a line – although its not possible to see the bottom section in its entirety to figure out the best way through the lower rock band.
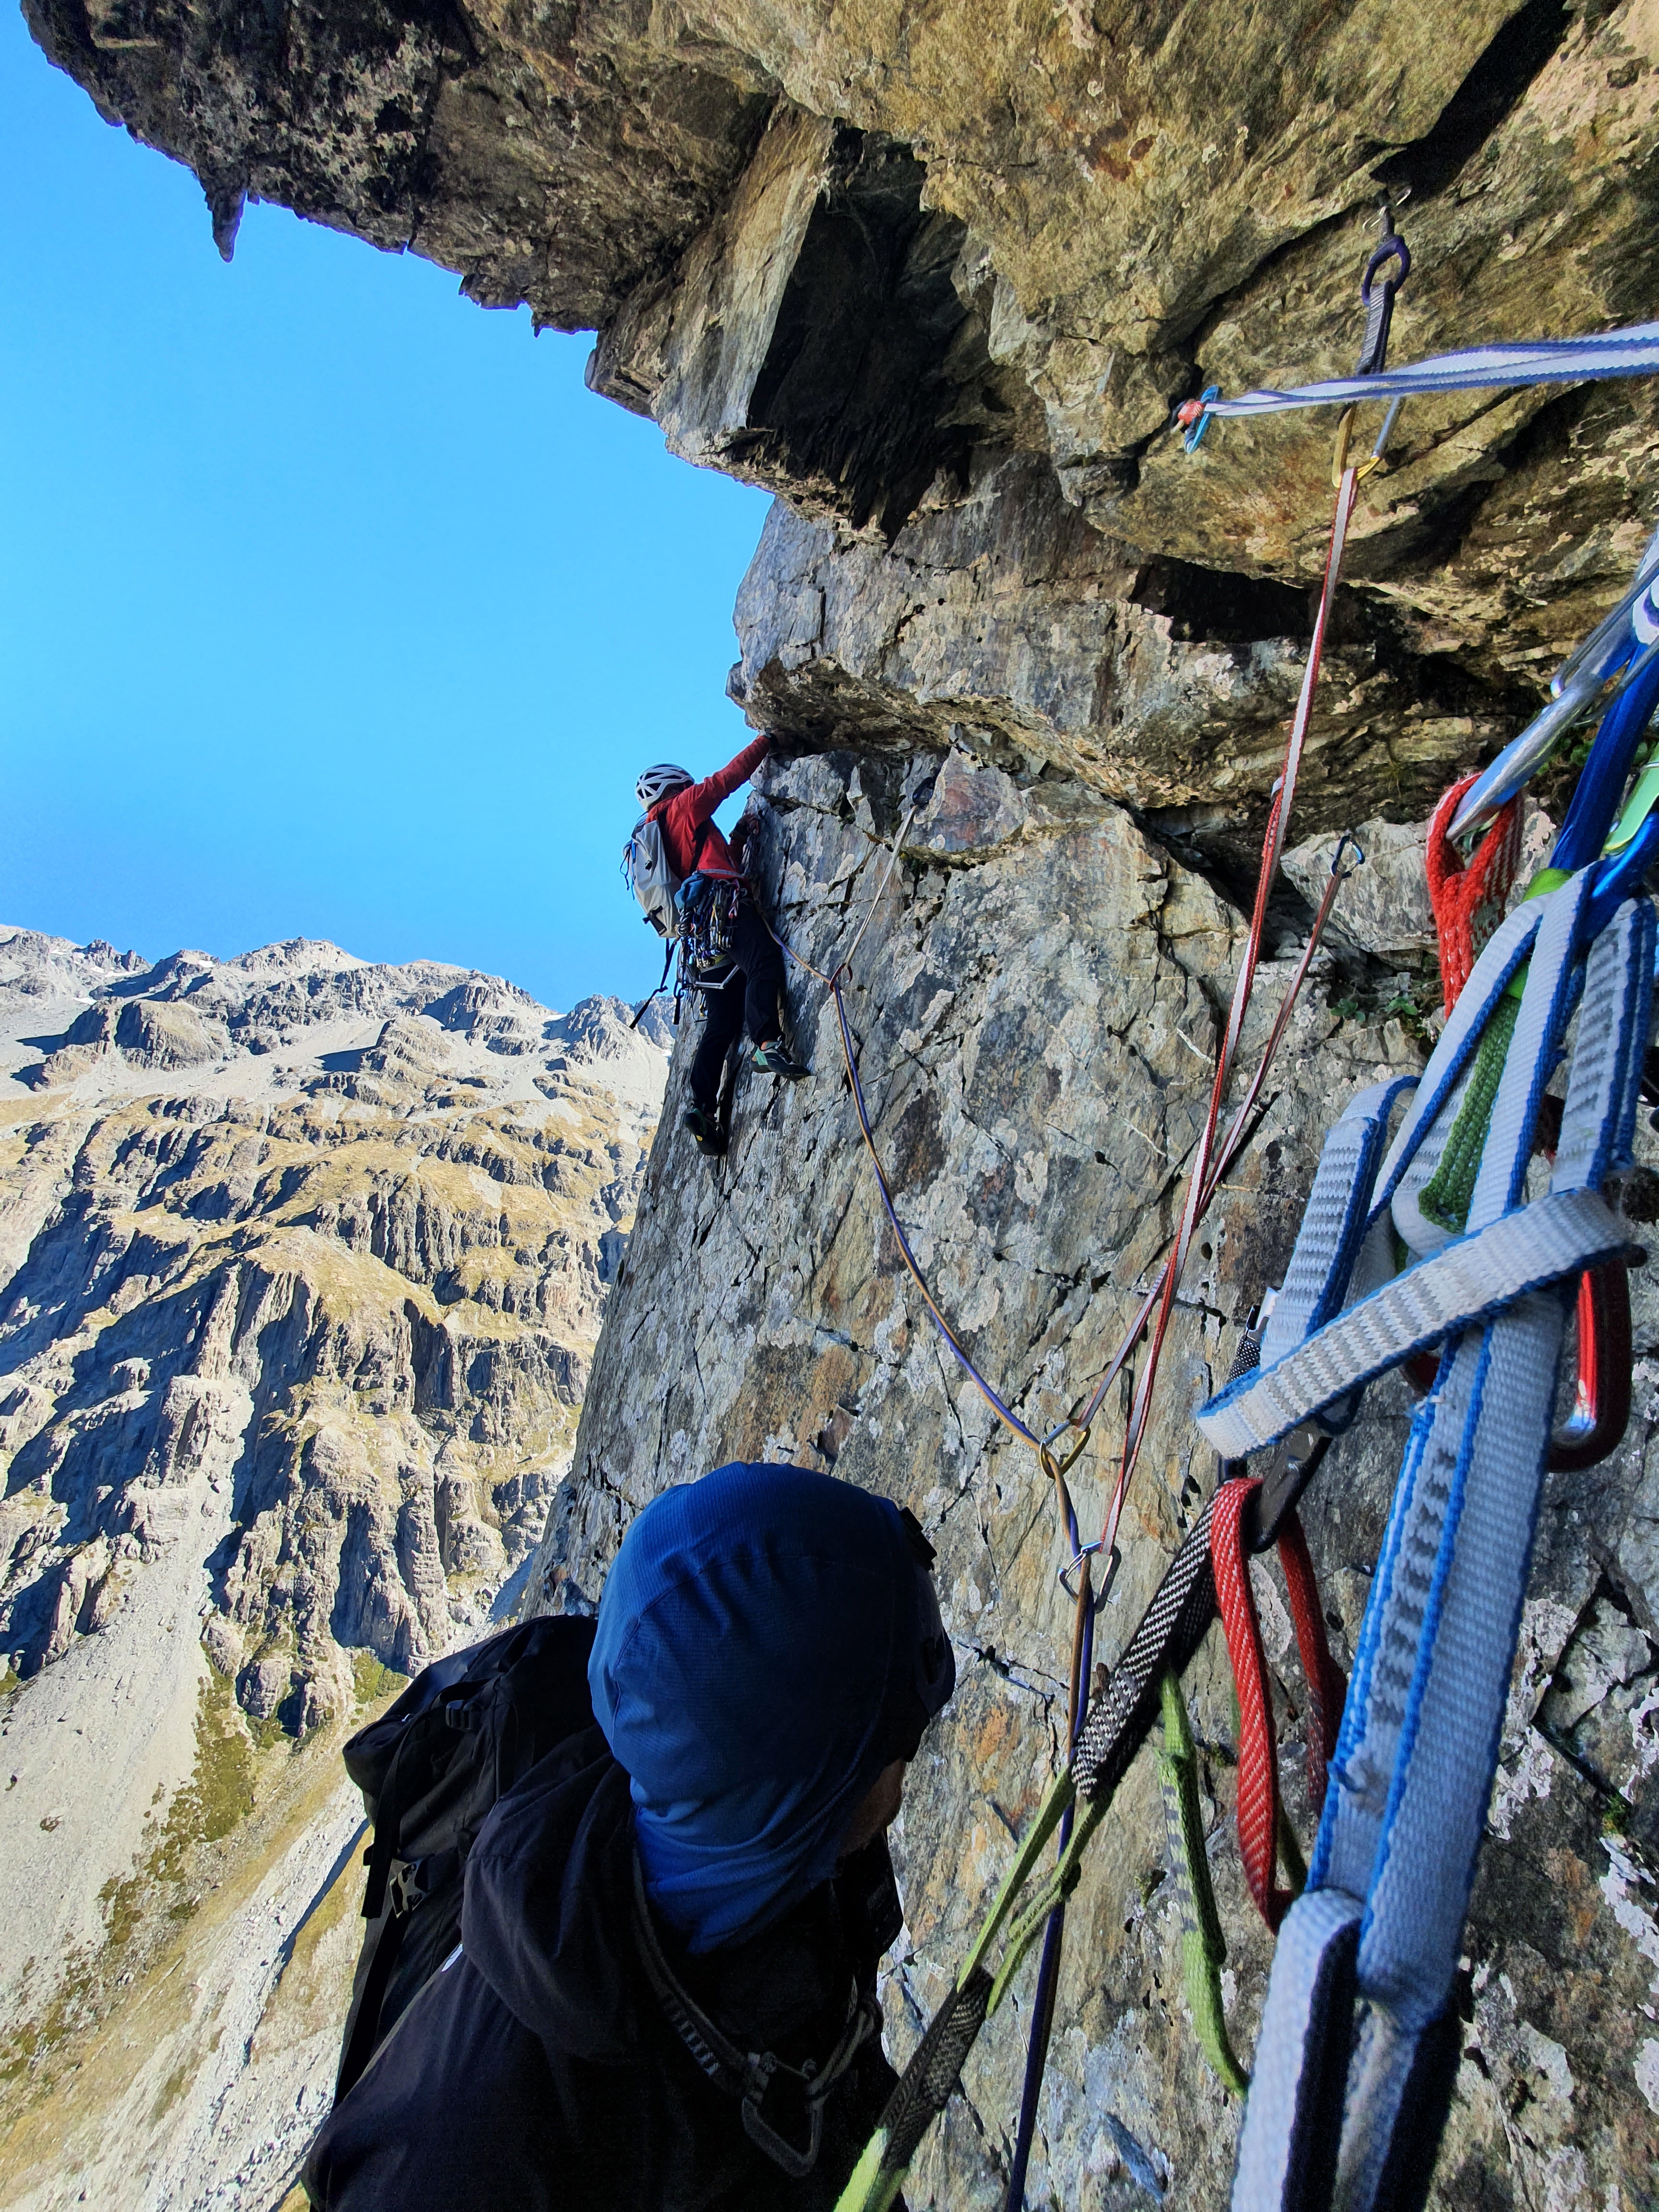
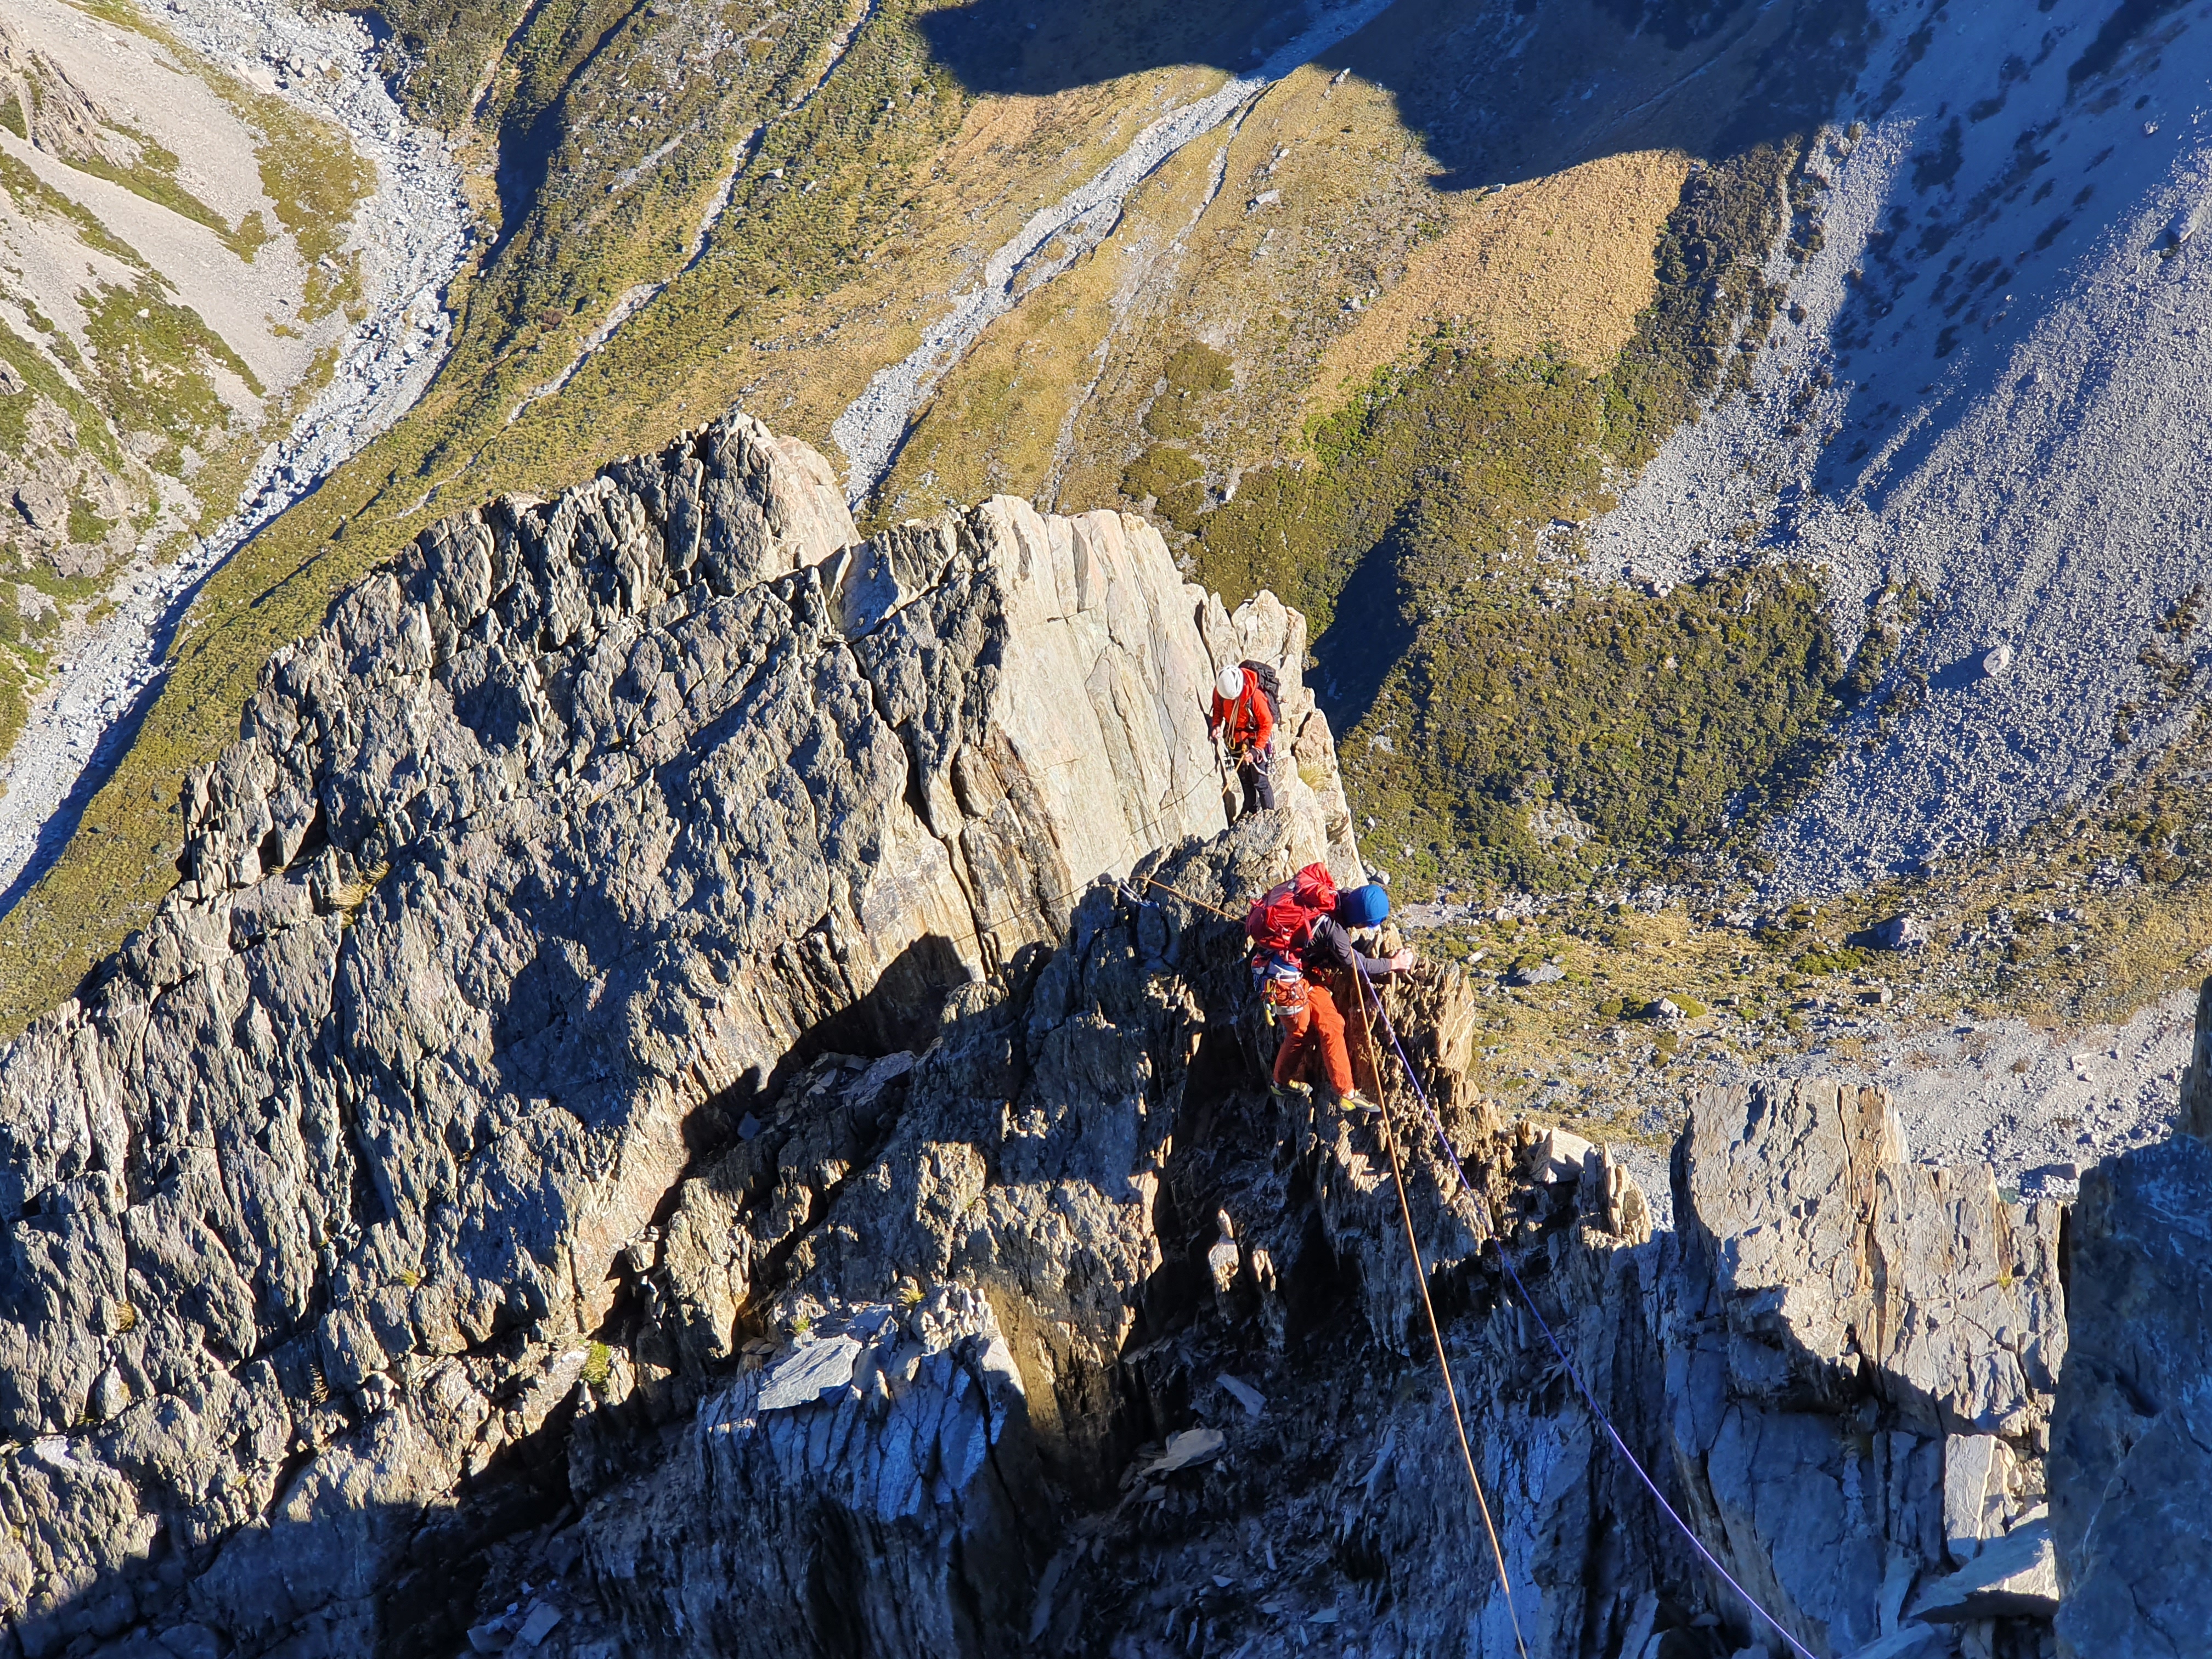
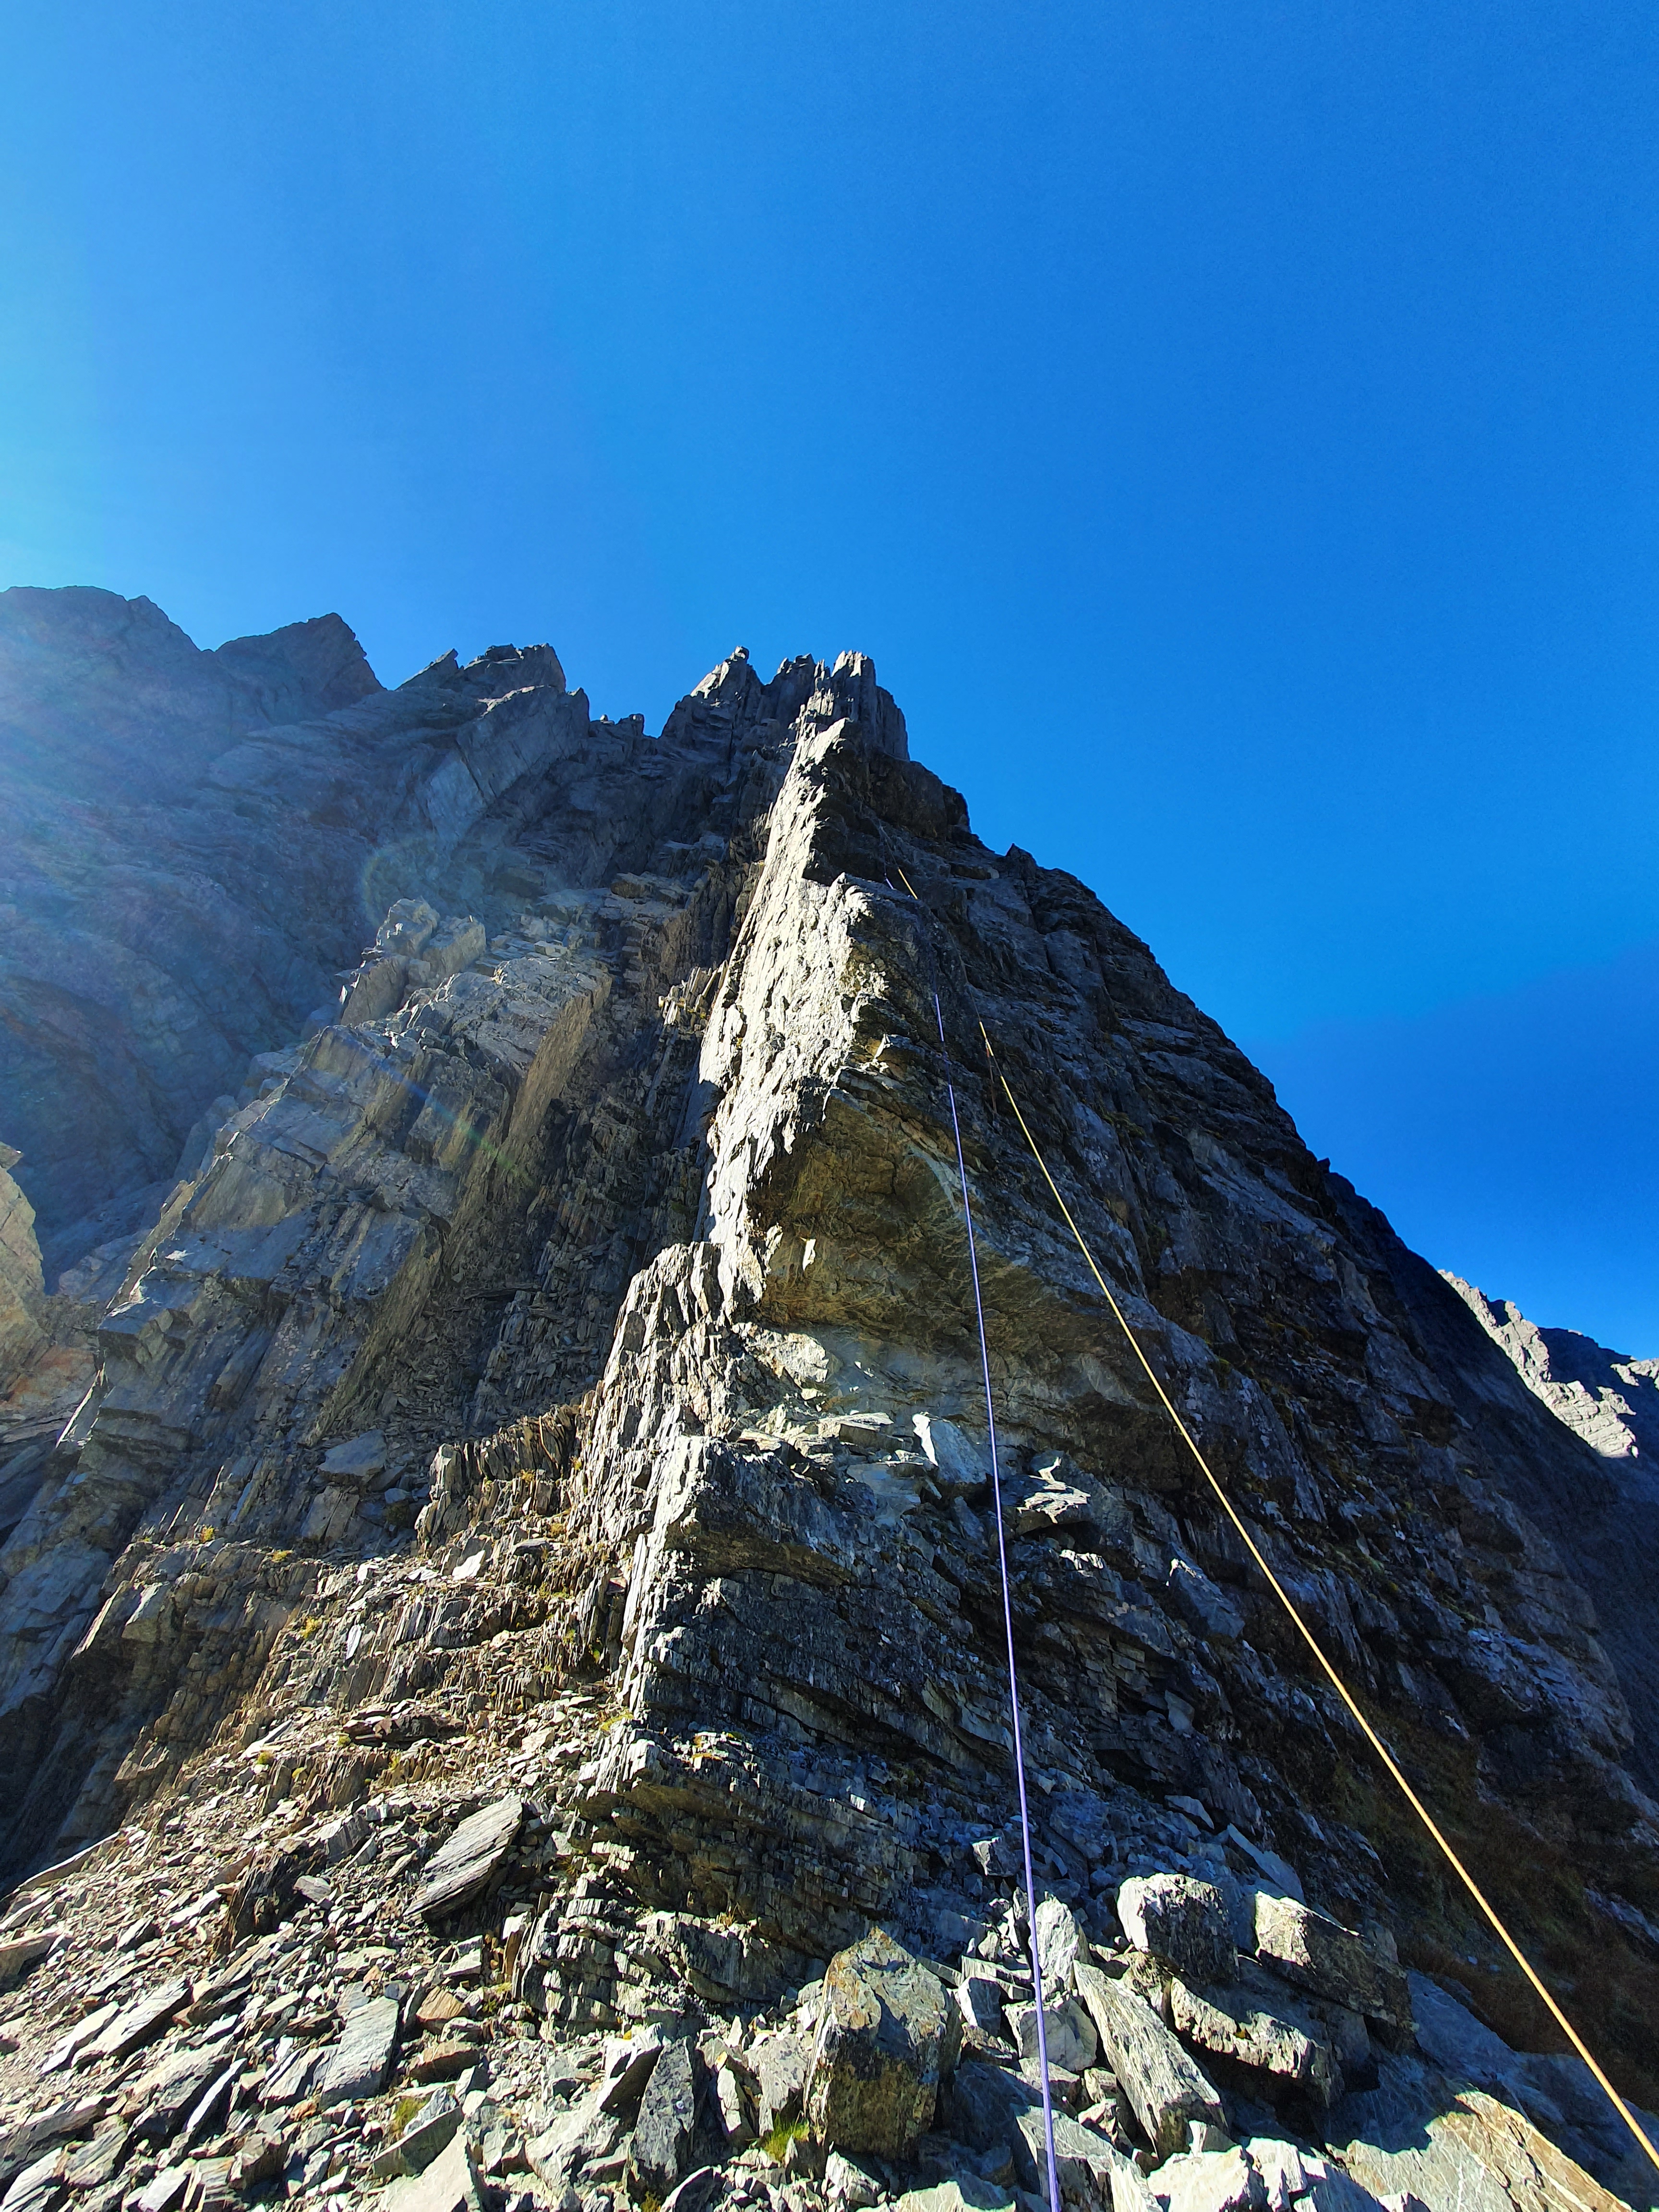
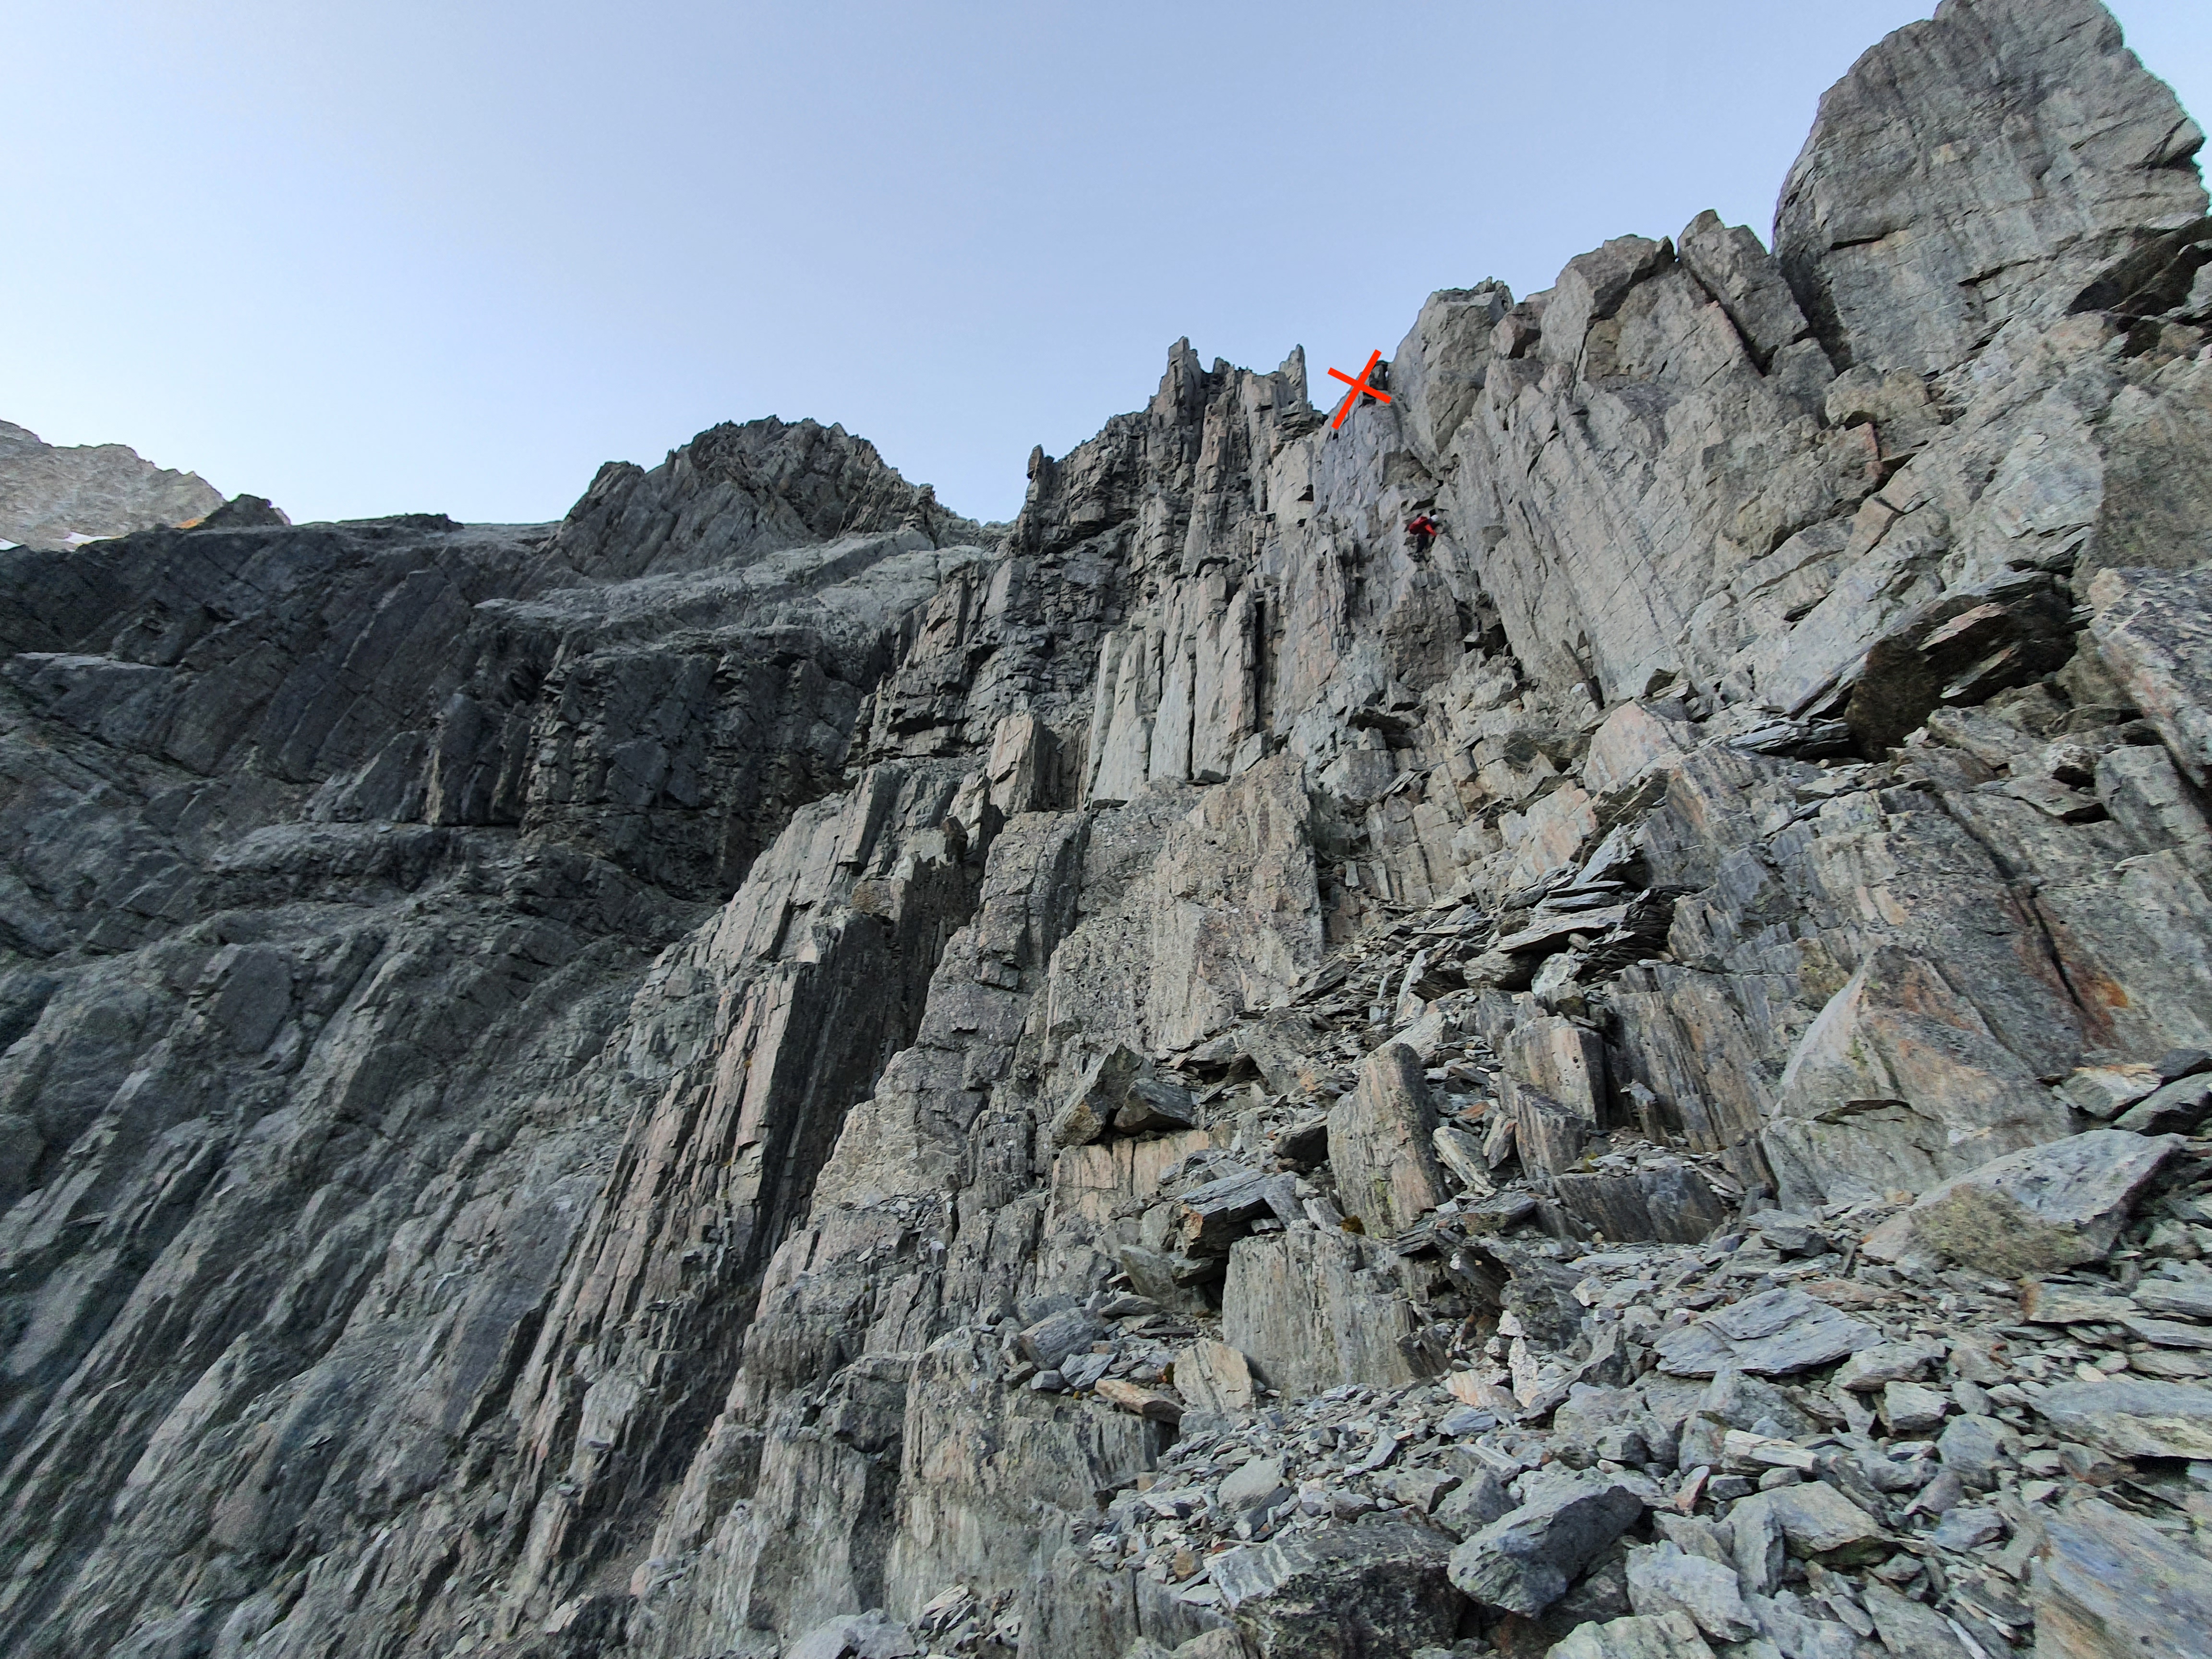
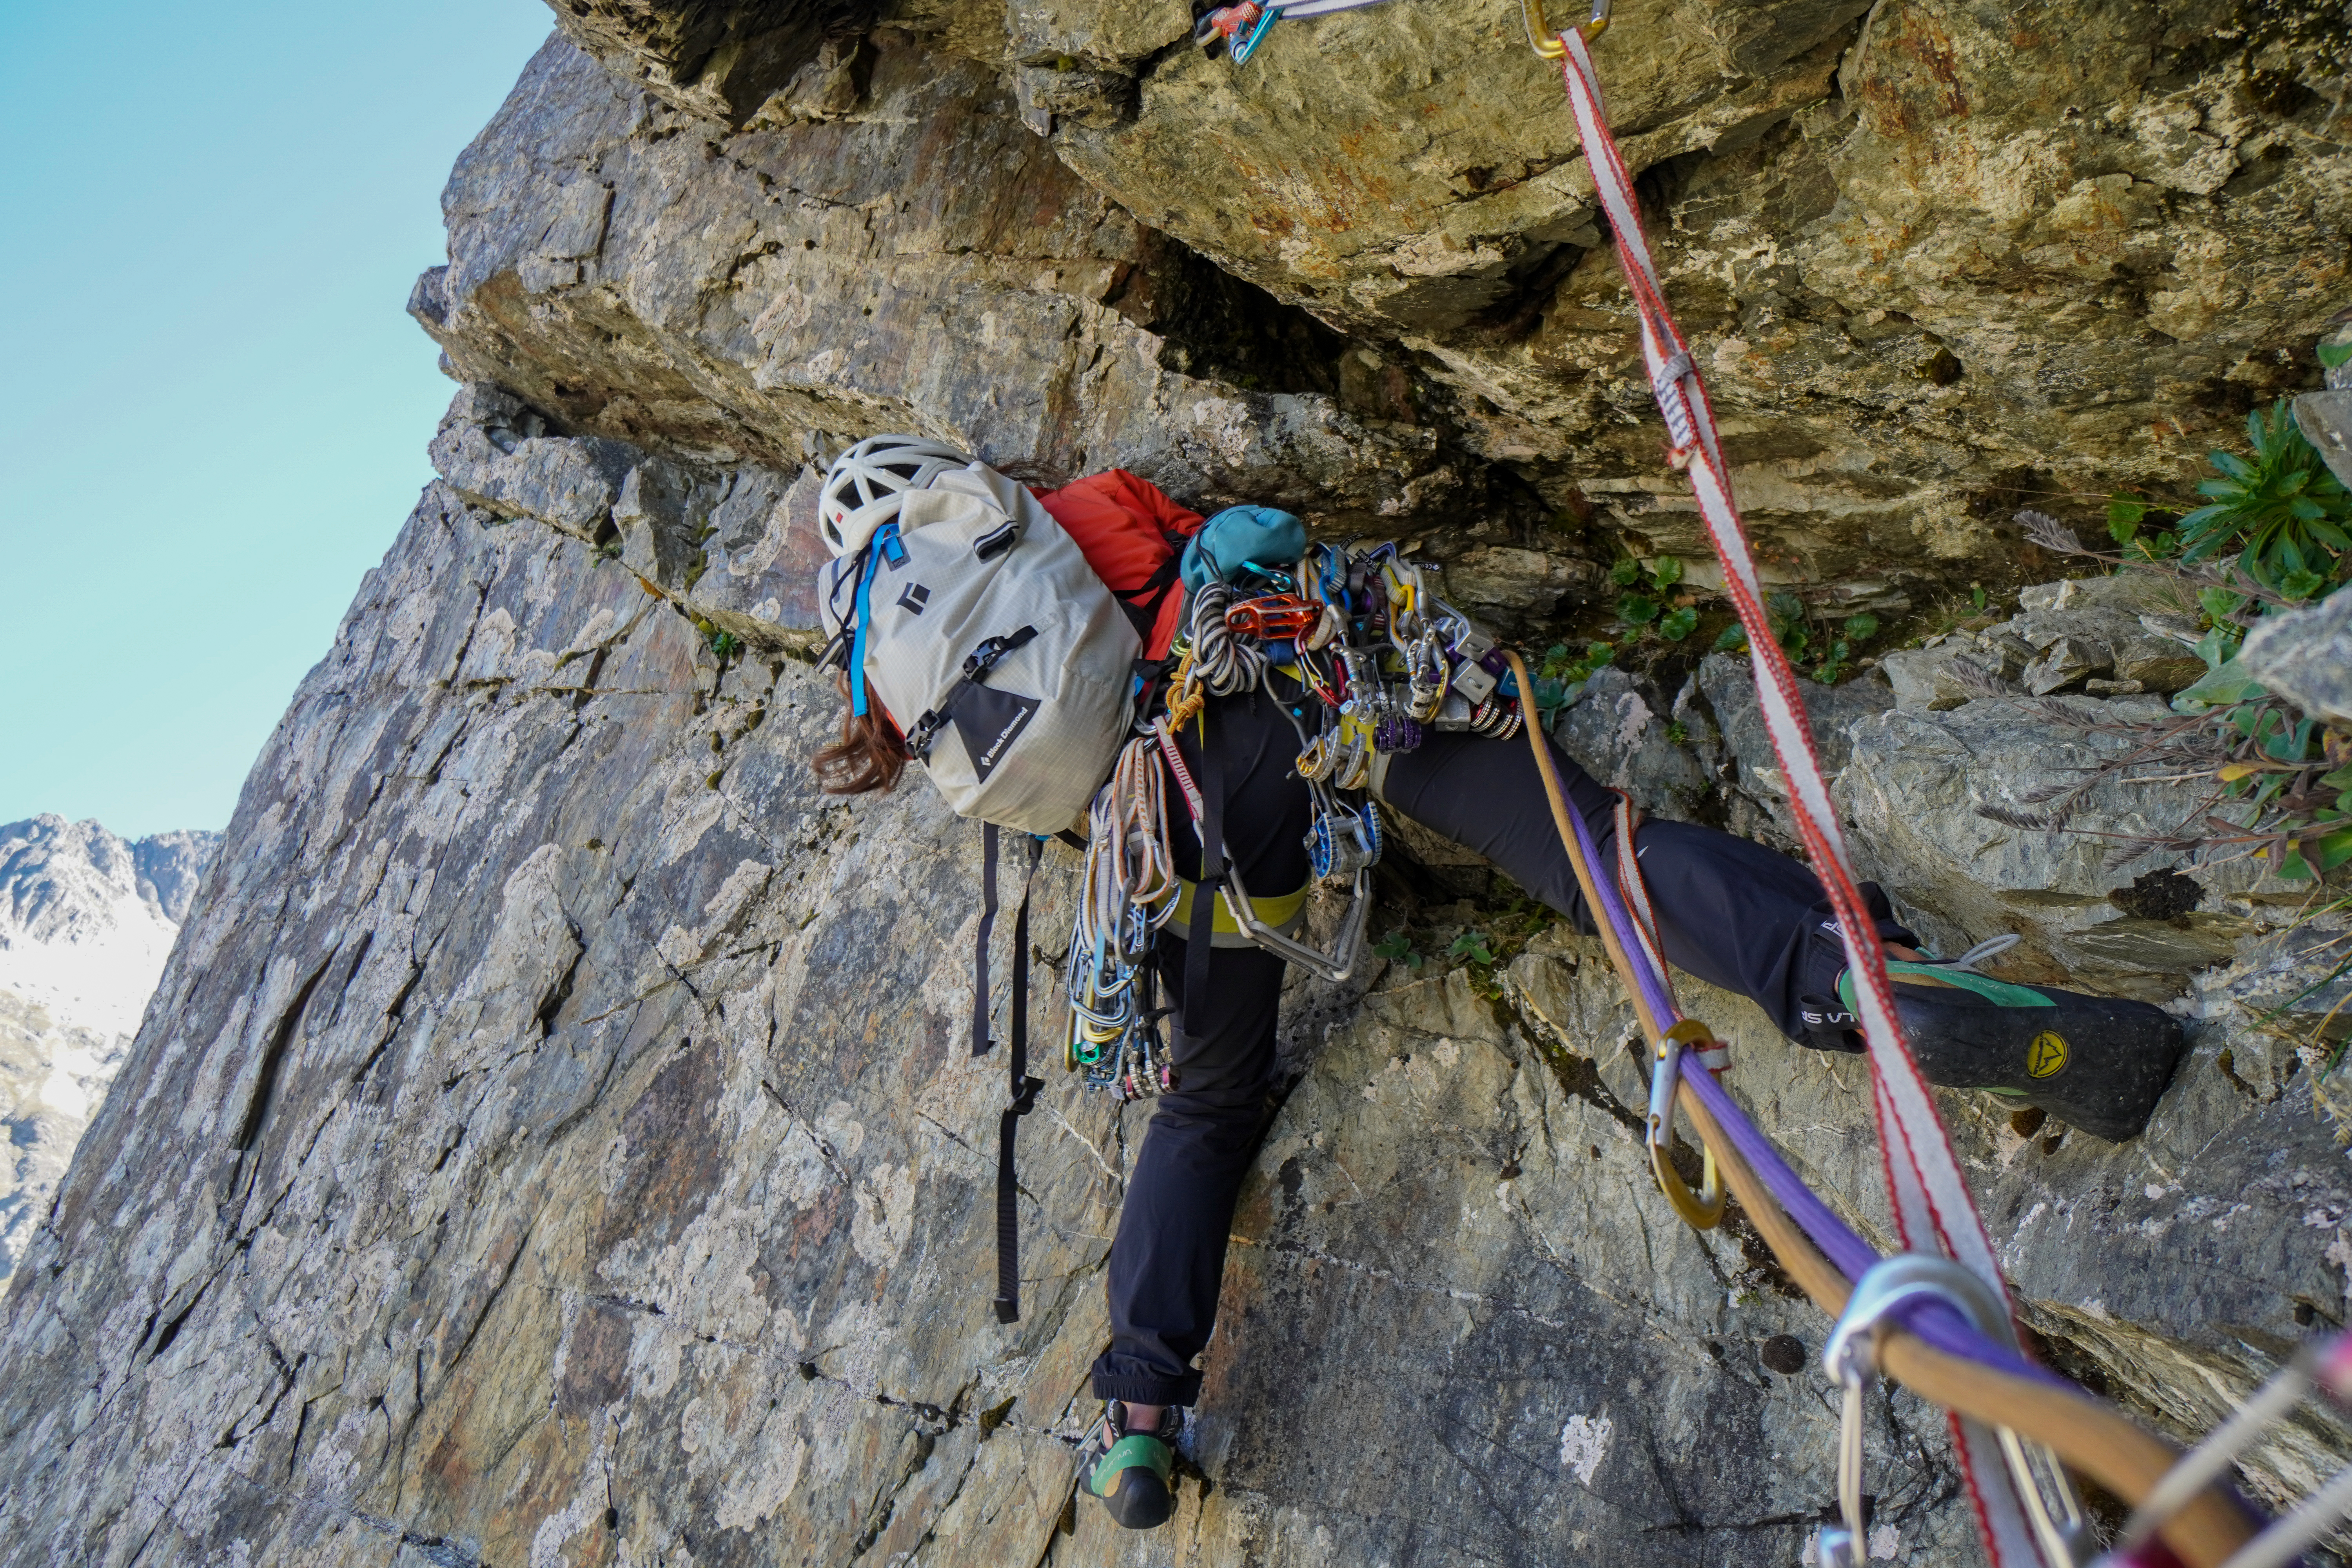
We chose a line starting on the left side of the face following the most obvious line of weakness to the summit ridge, but multiple variations exist. When we were there the other lines would have involved some scratchy mixed climbing to get establihed on the face
Climb
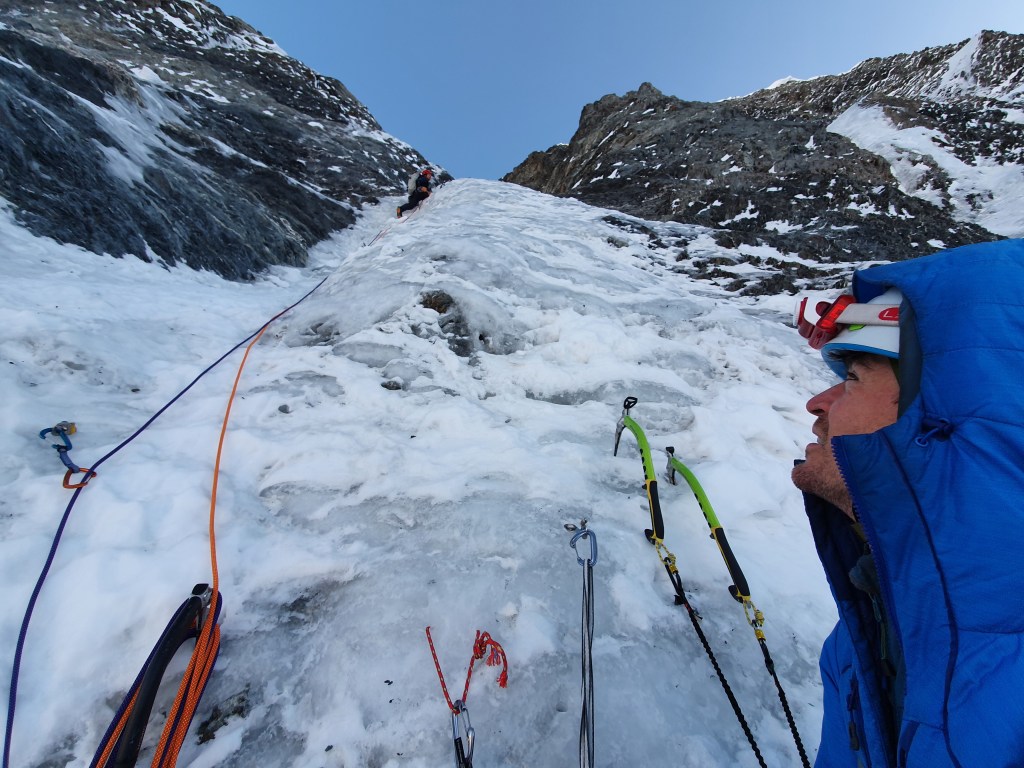
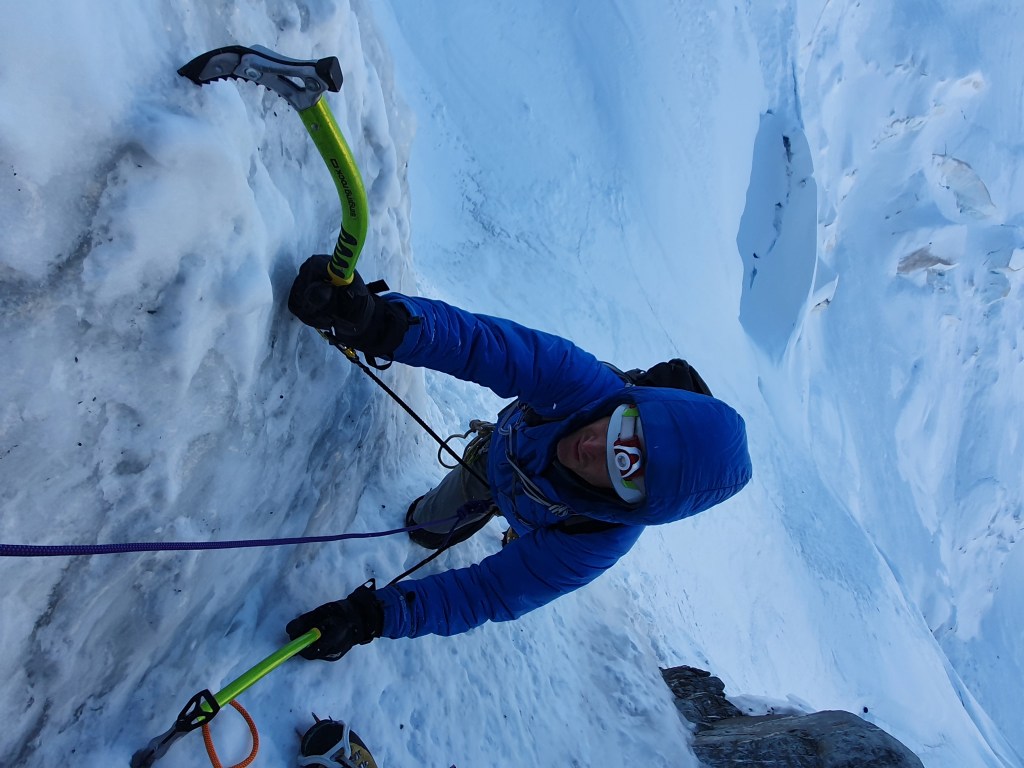
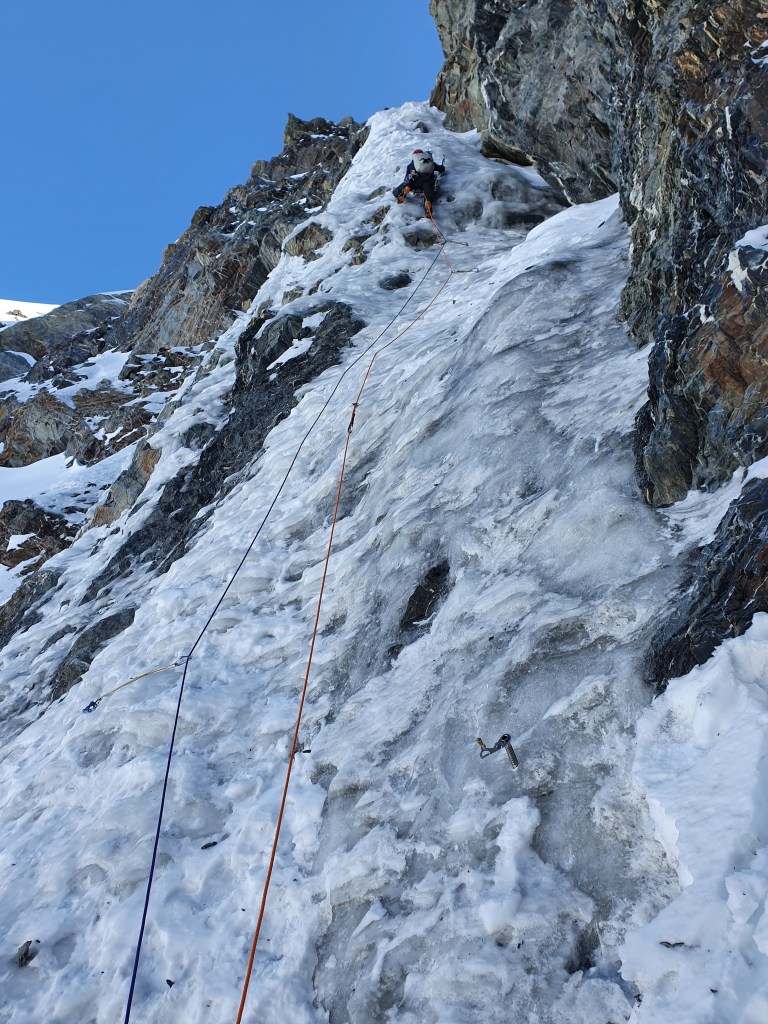
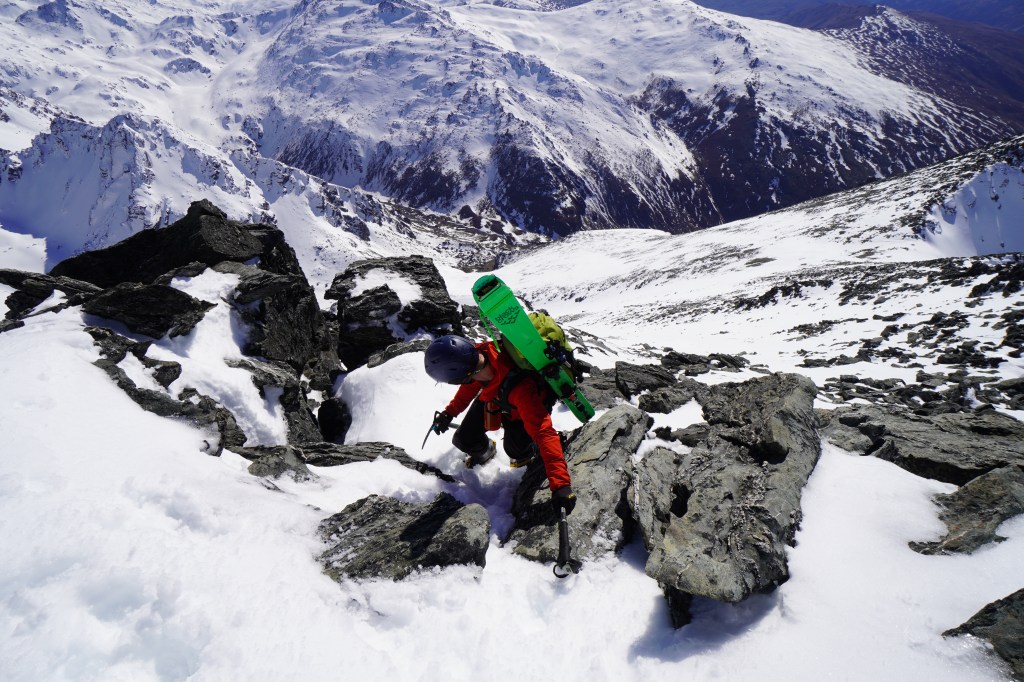
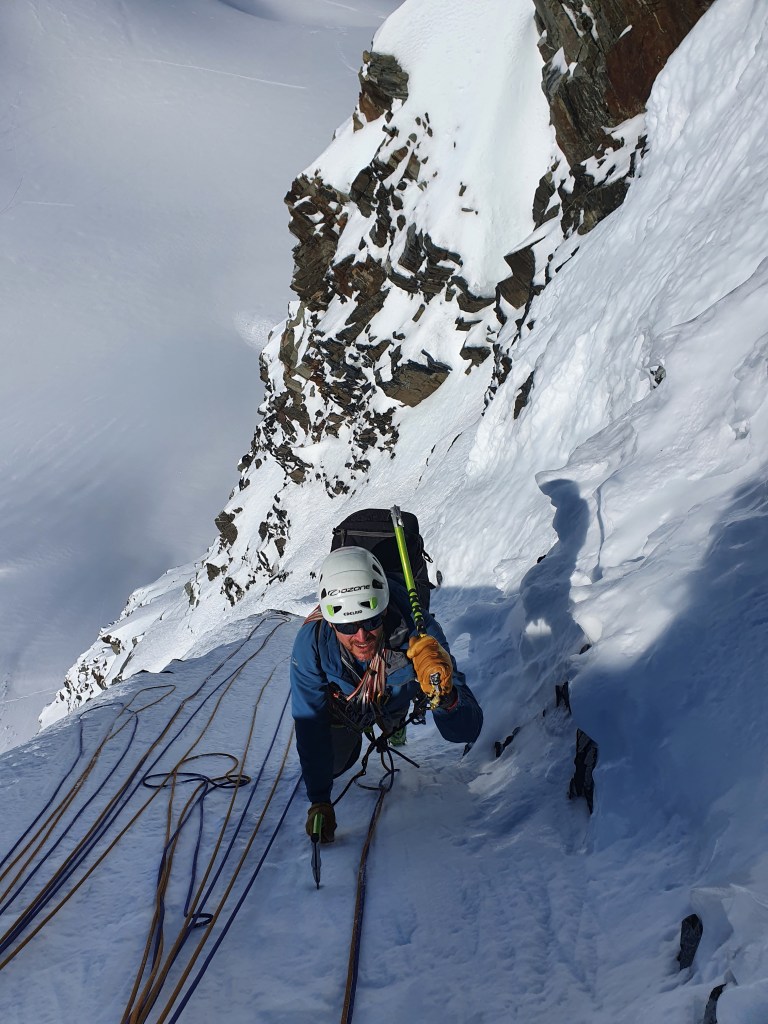
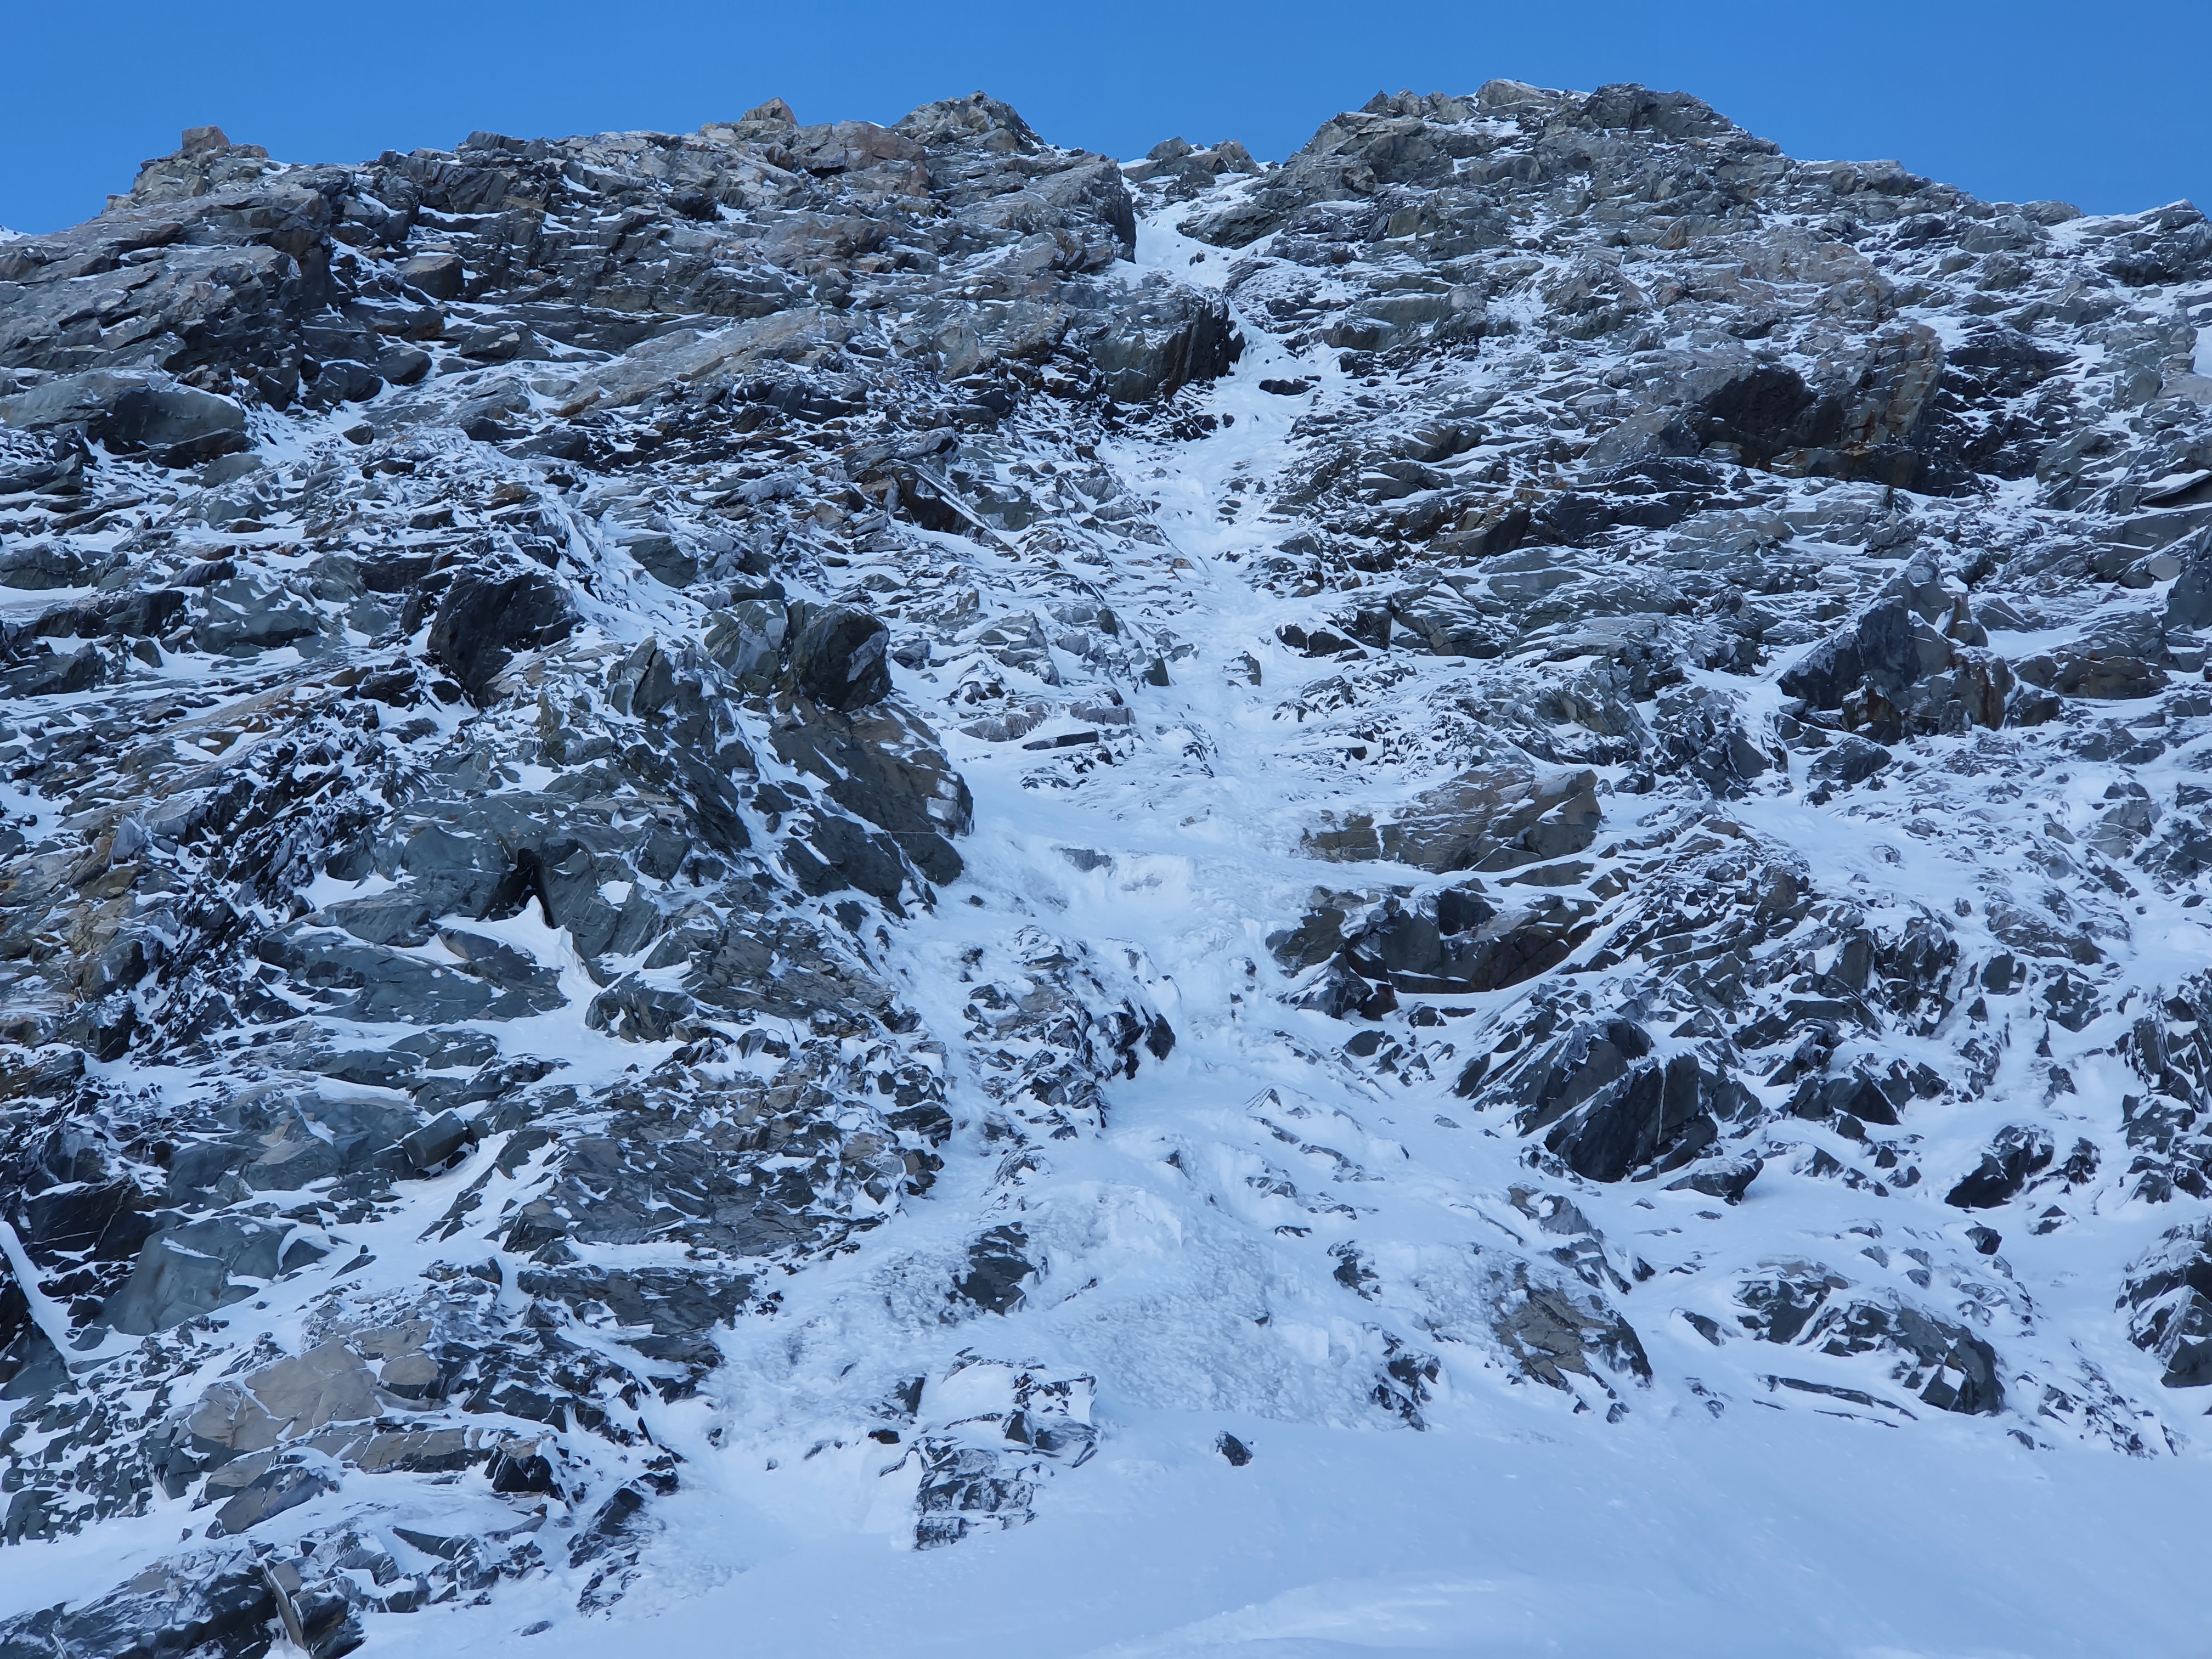
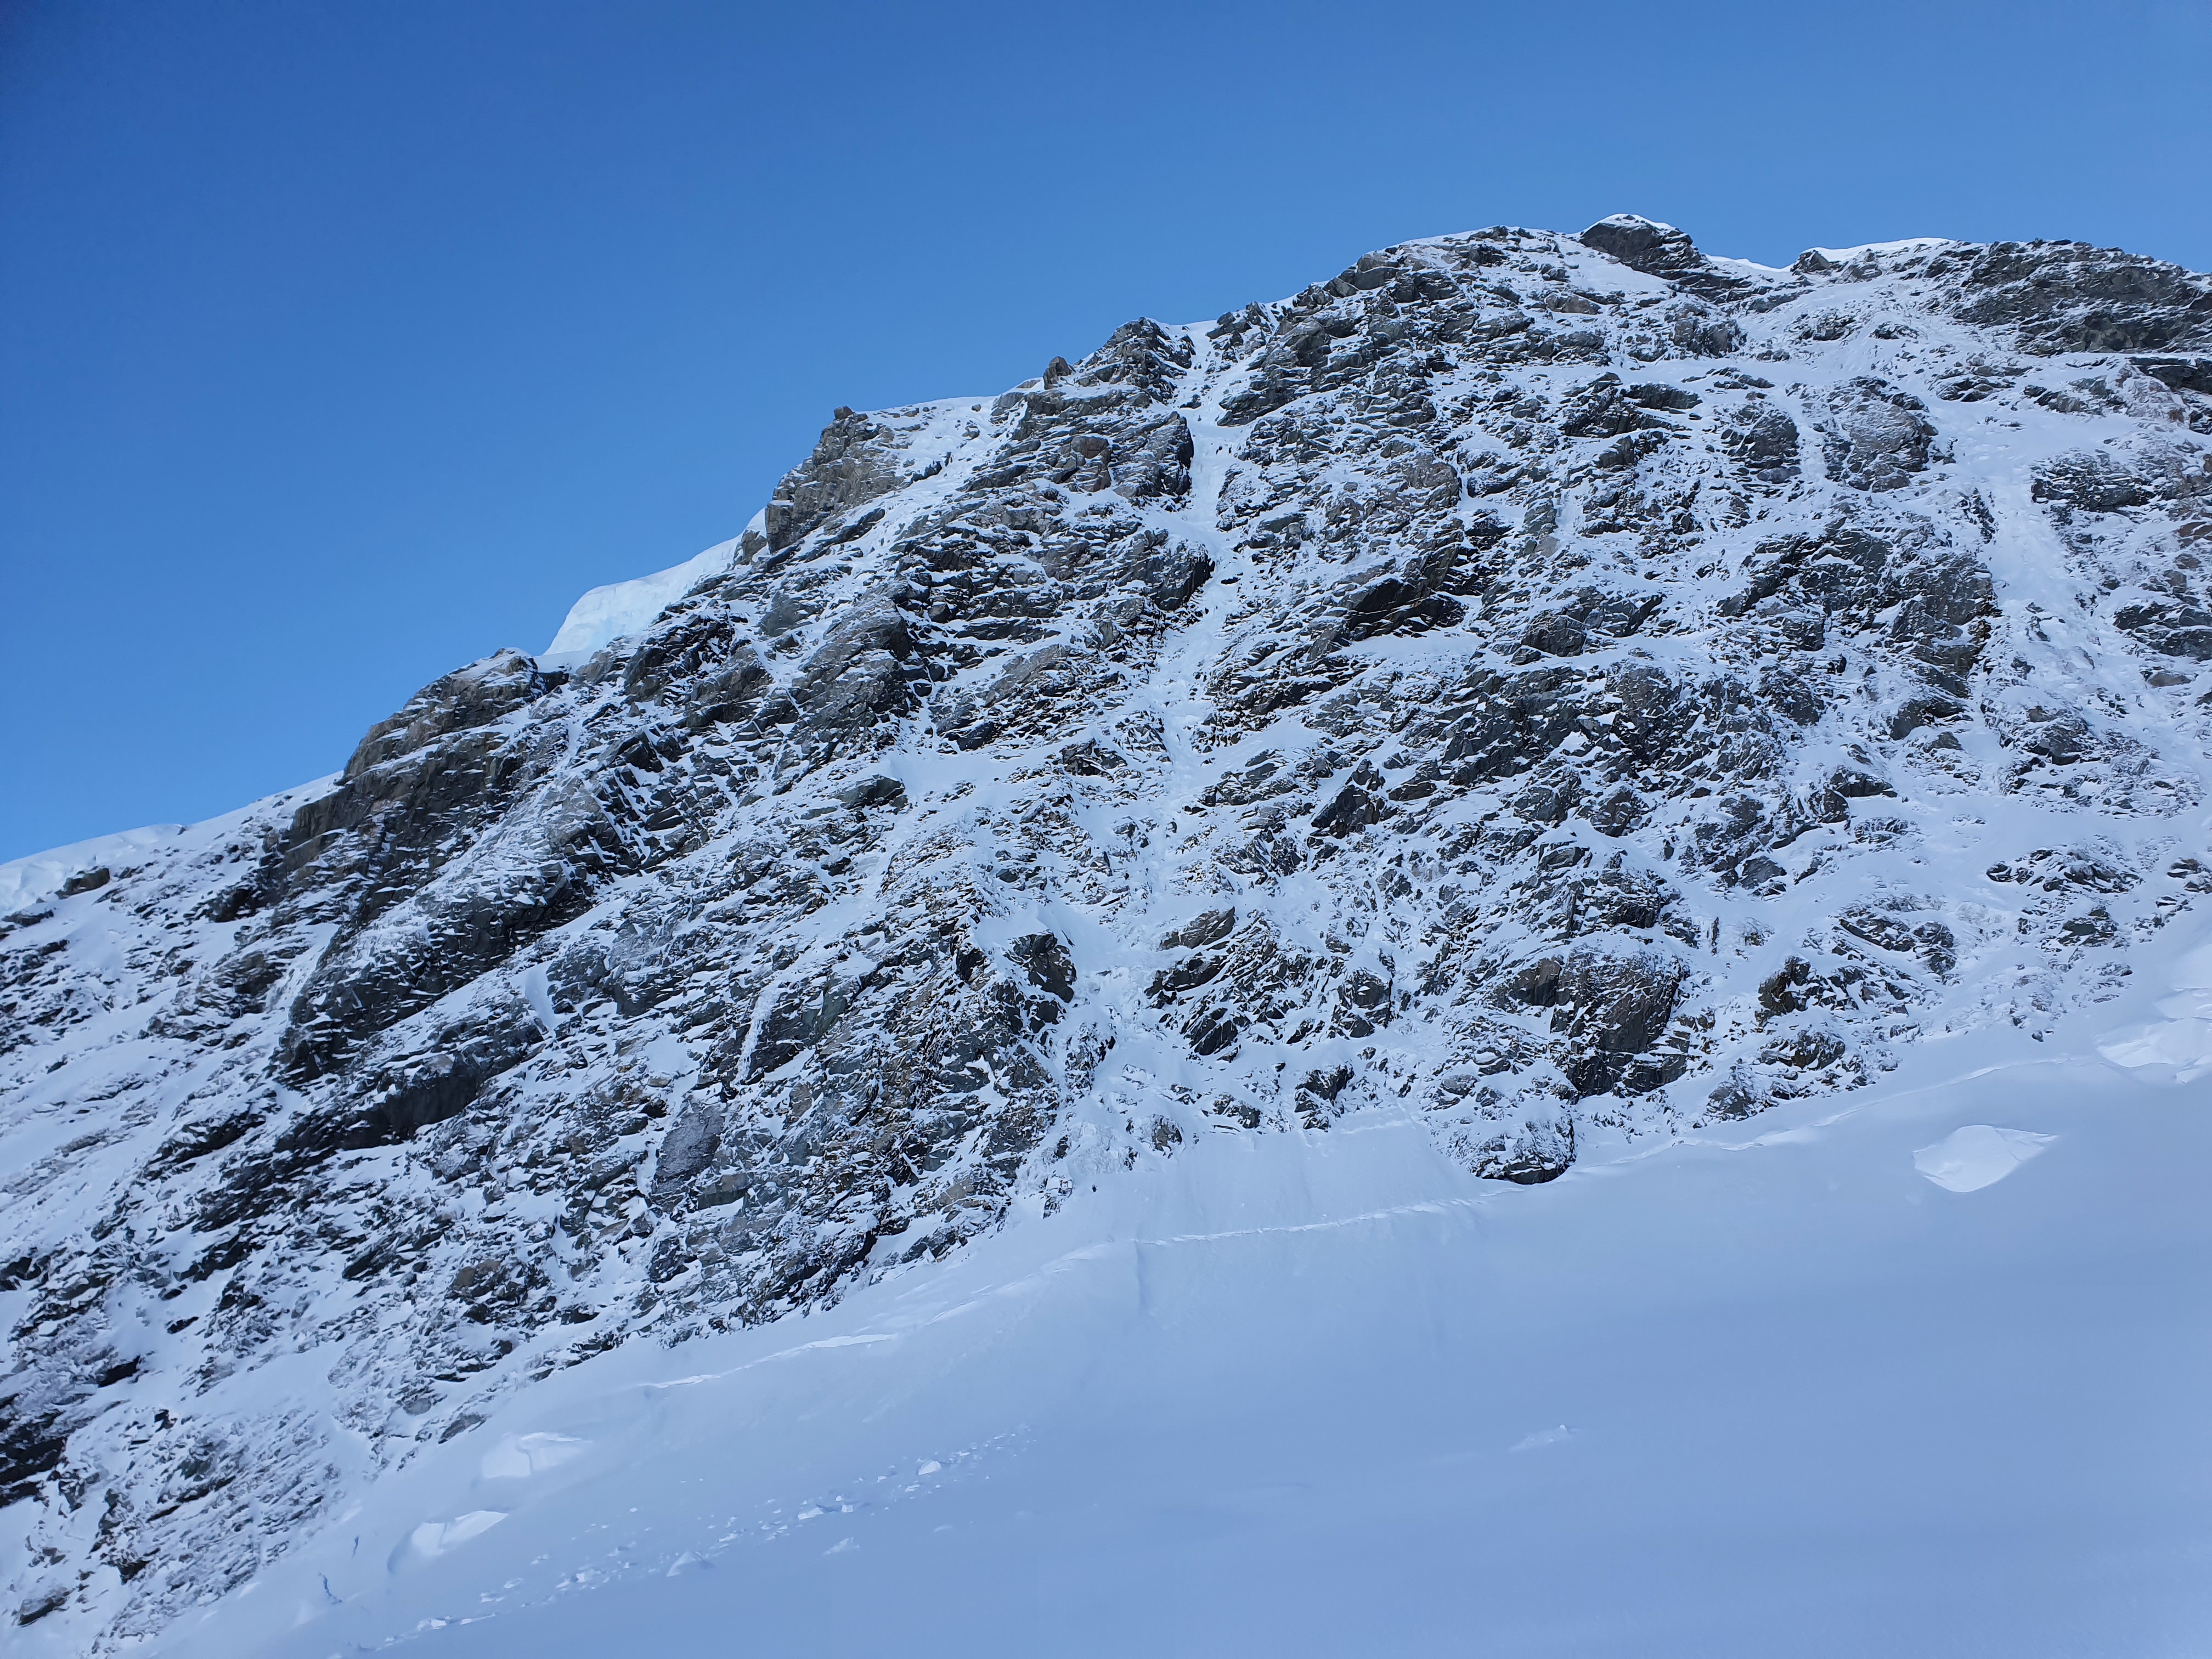
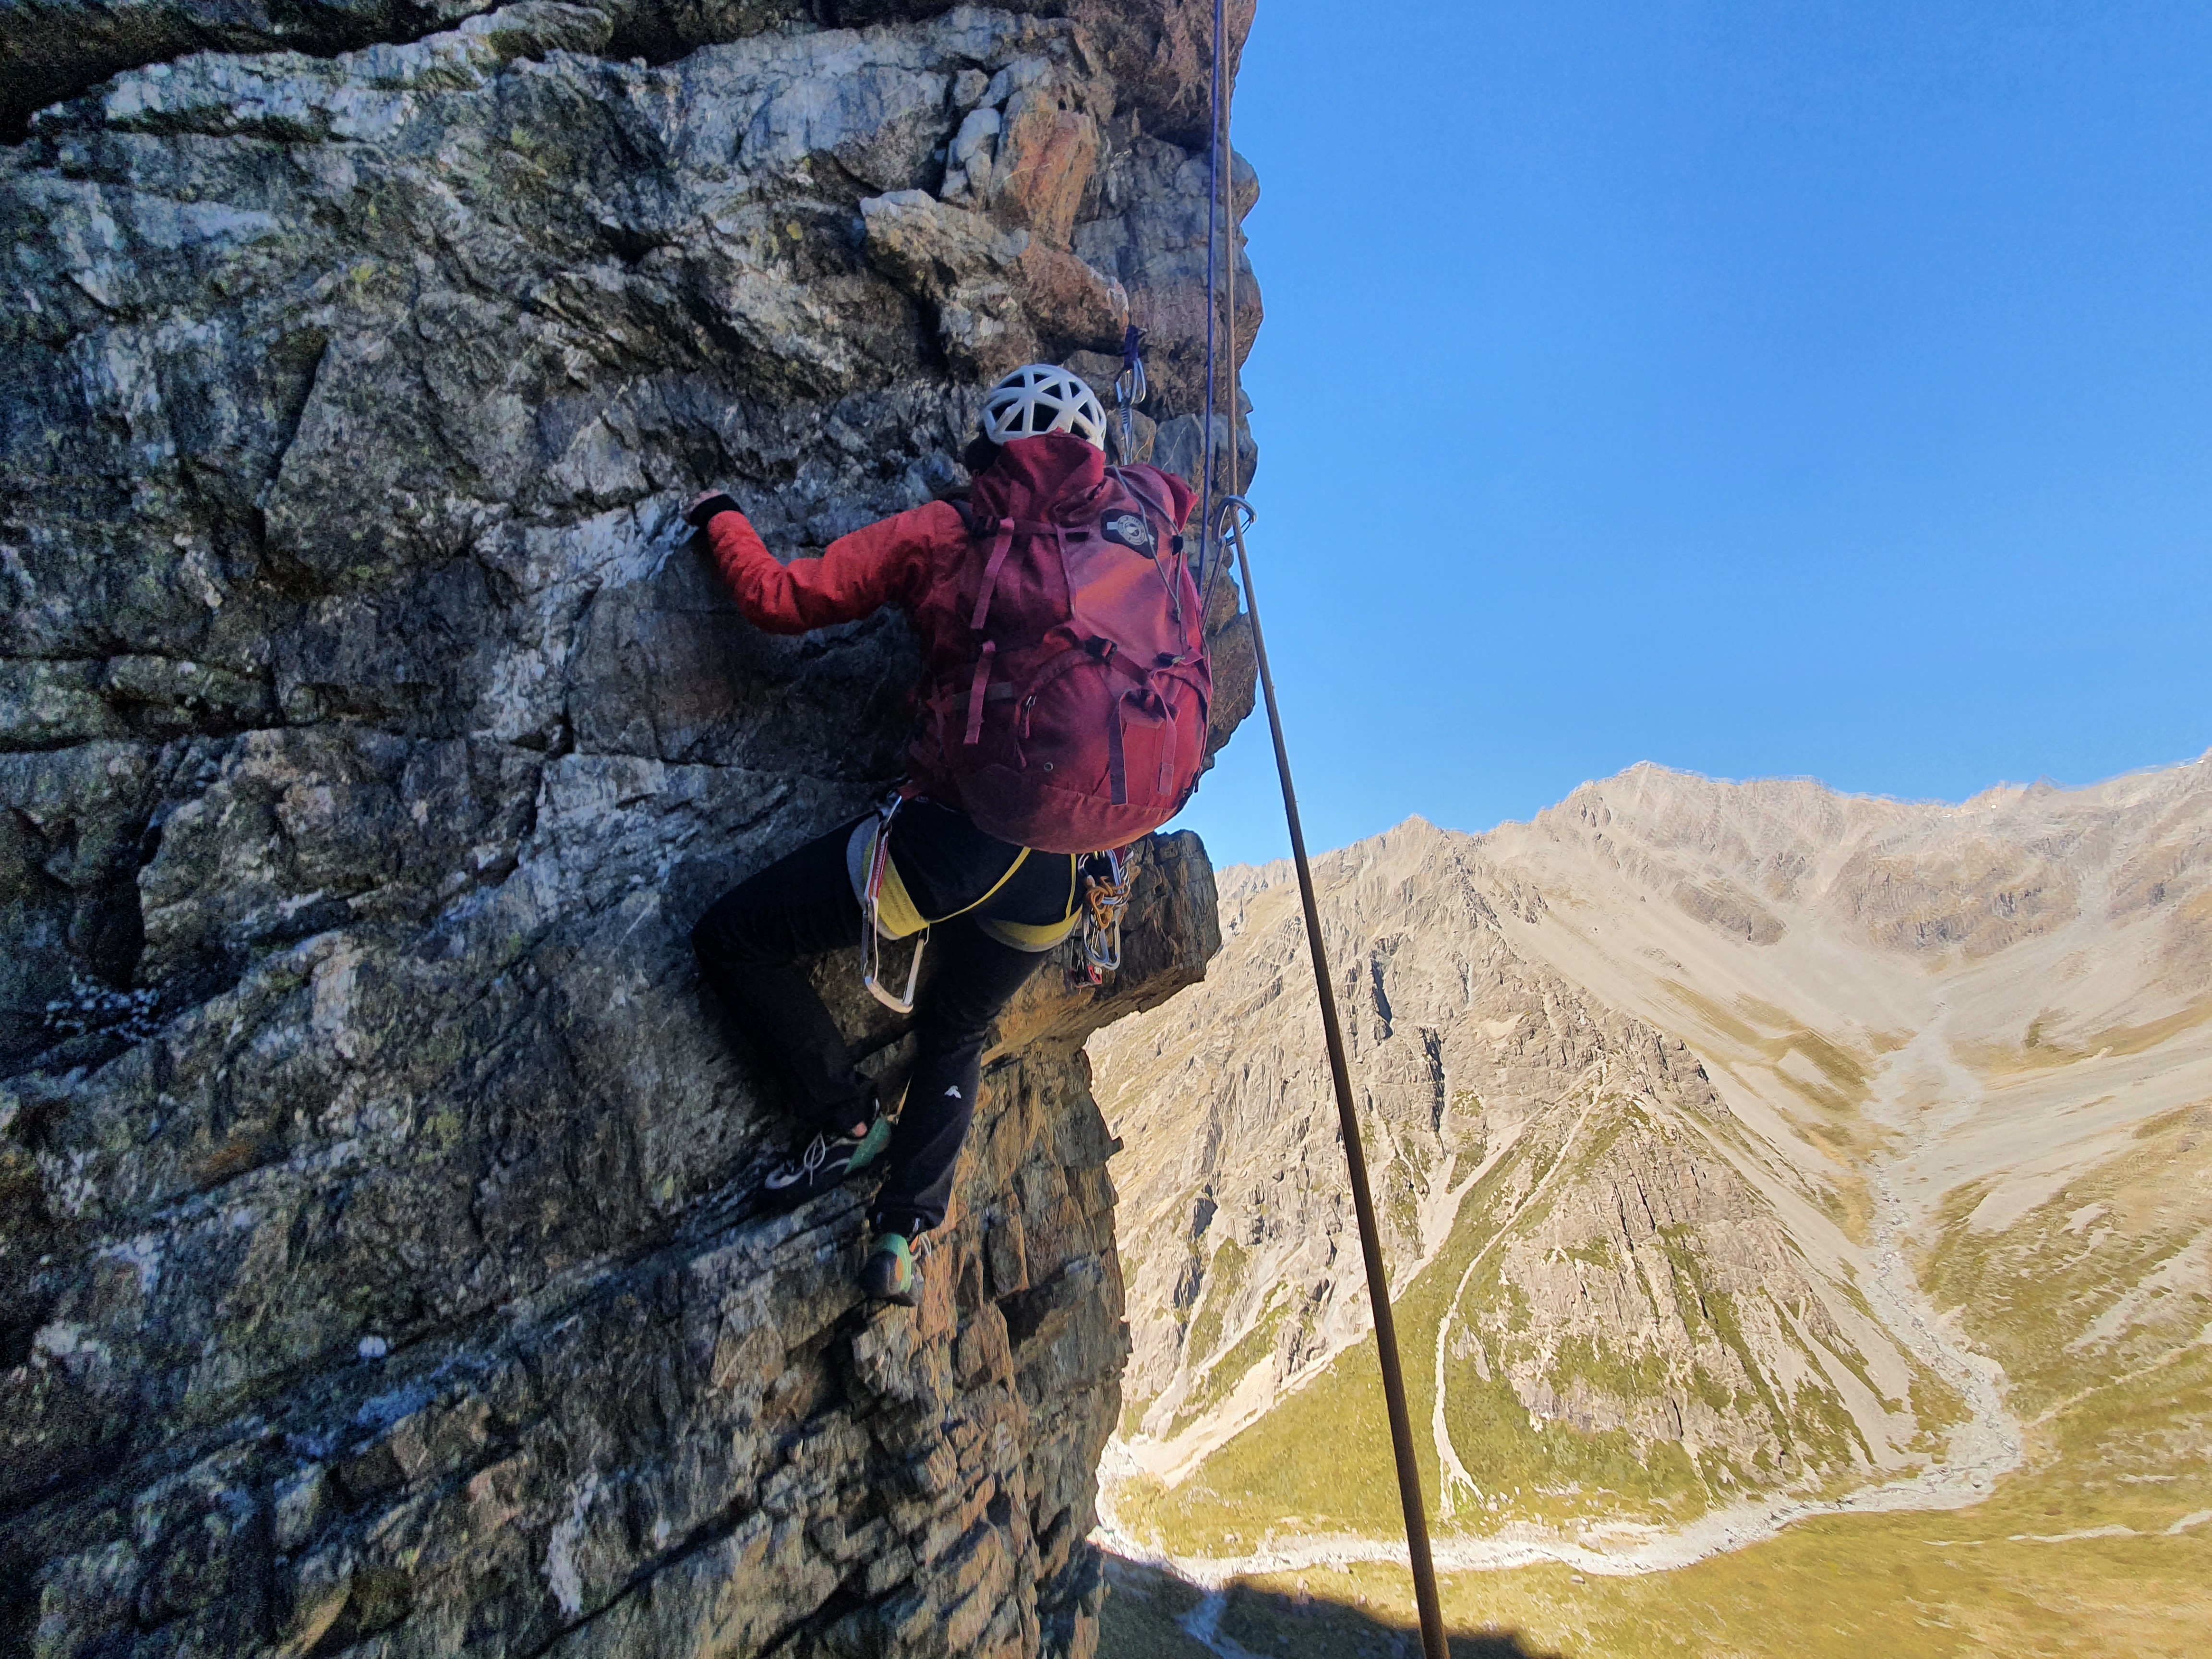
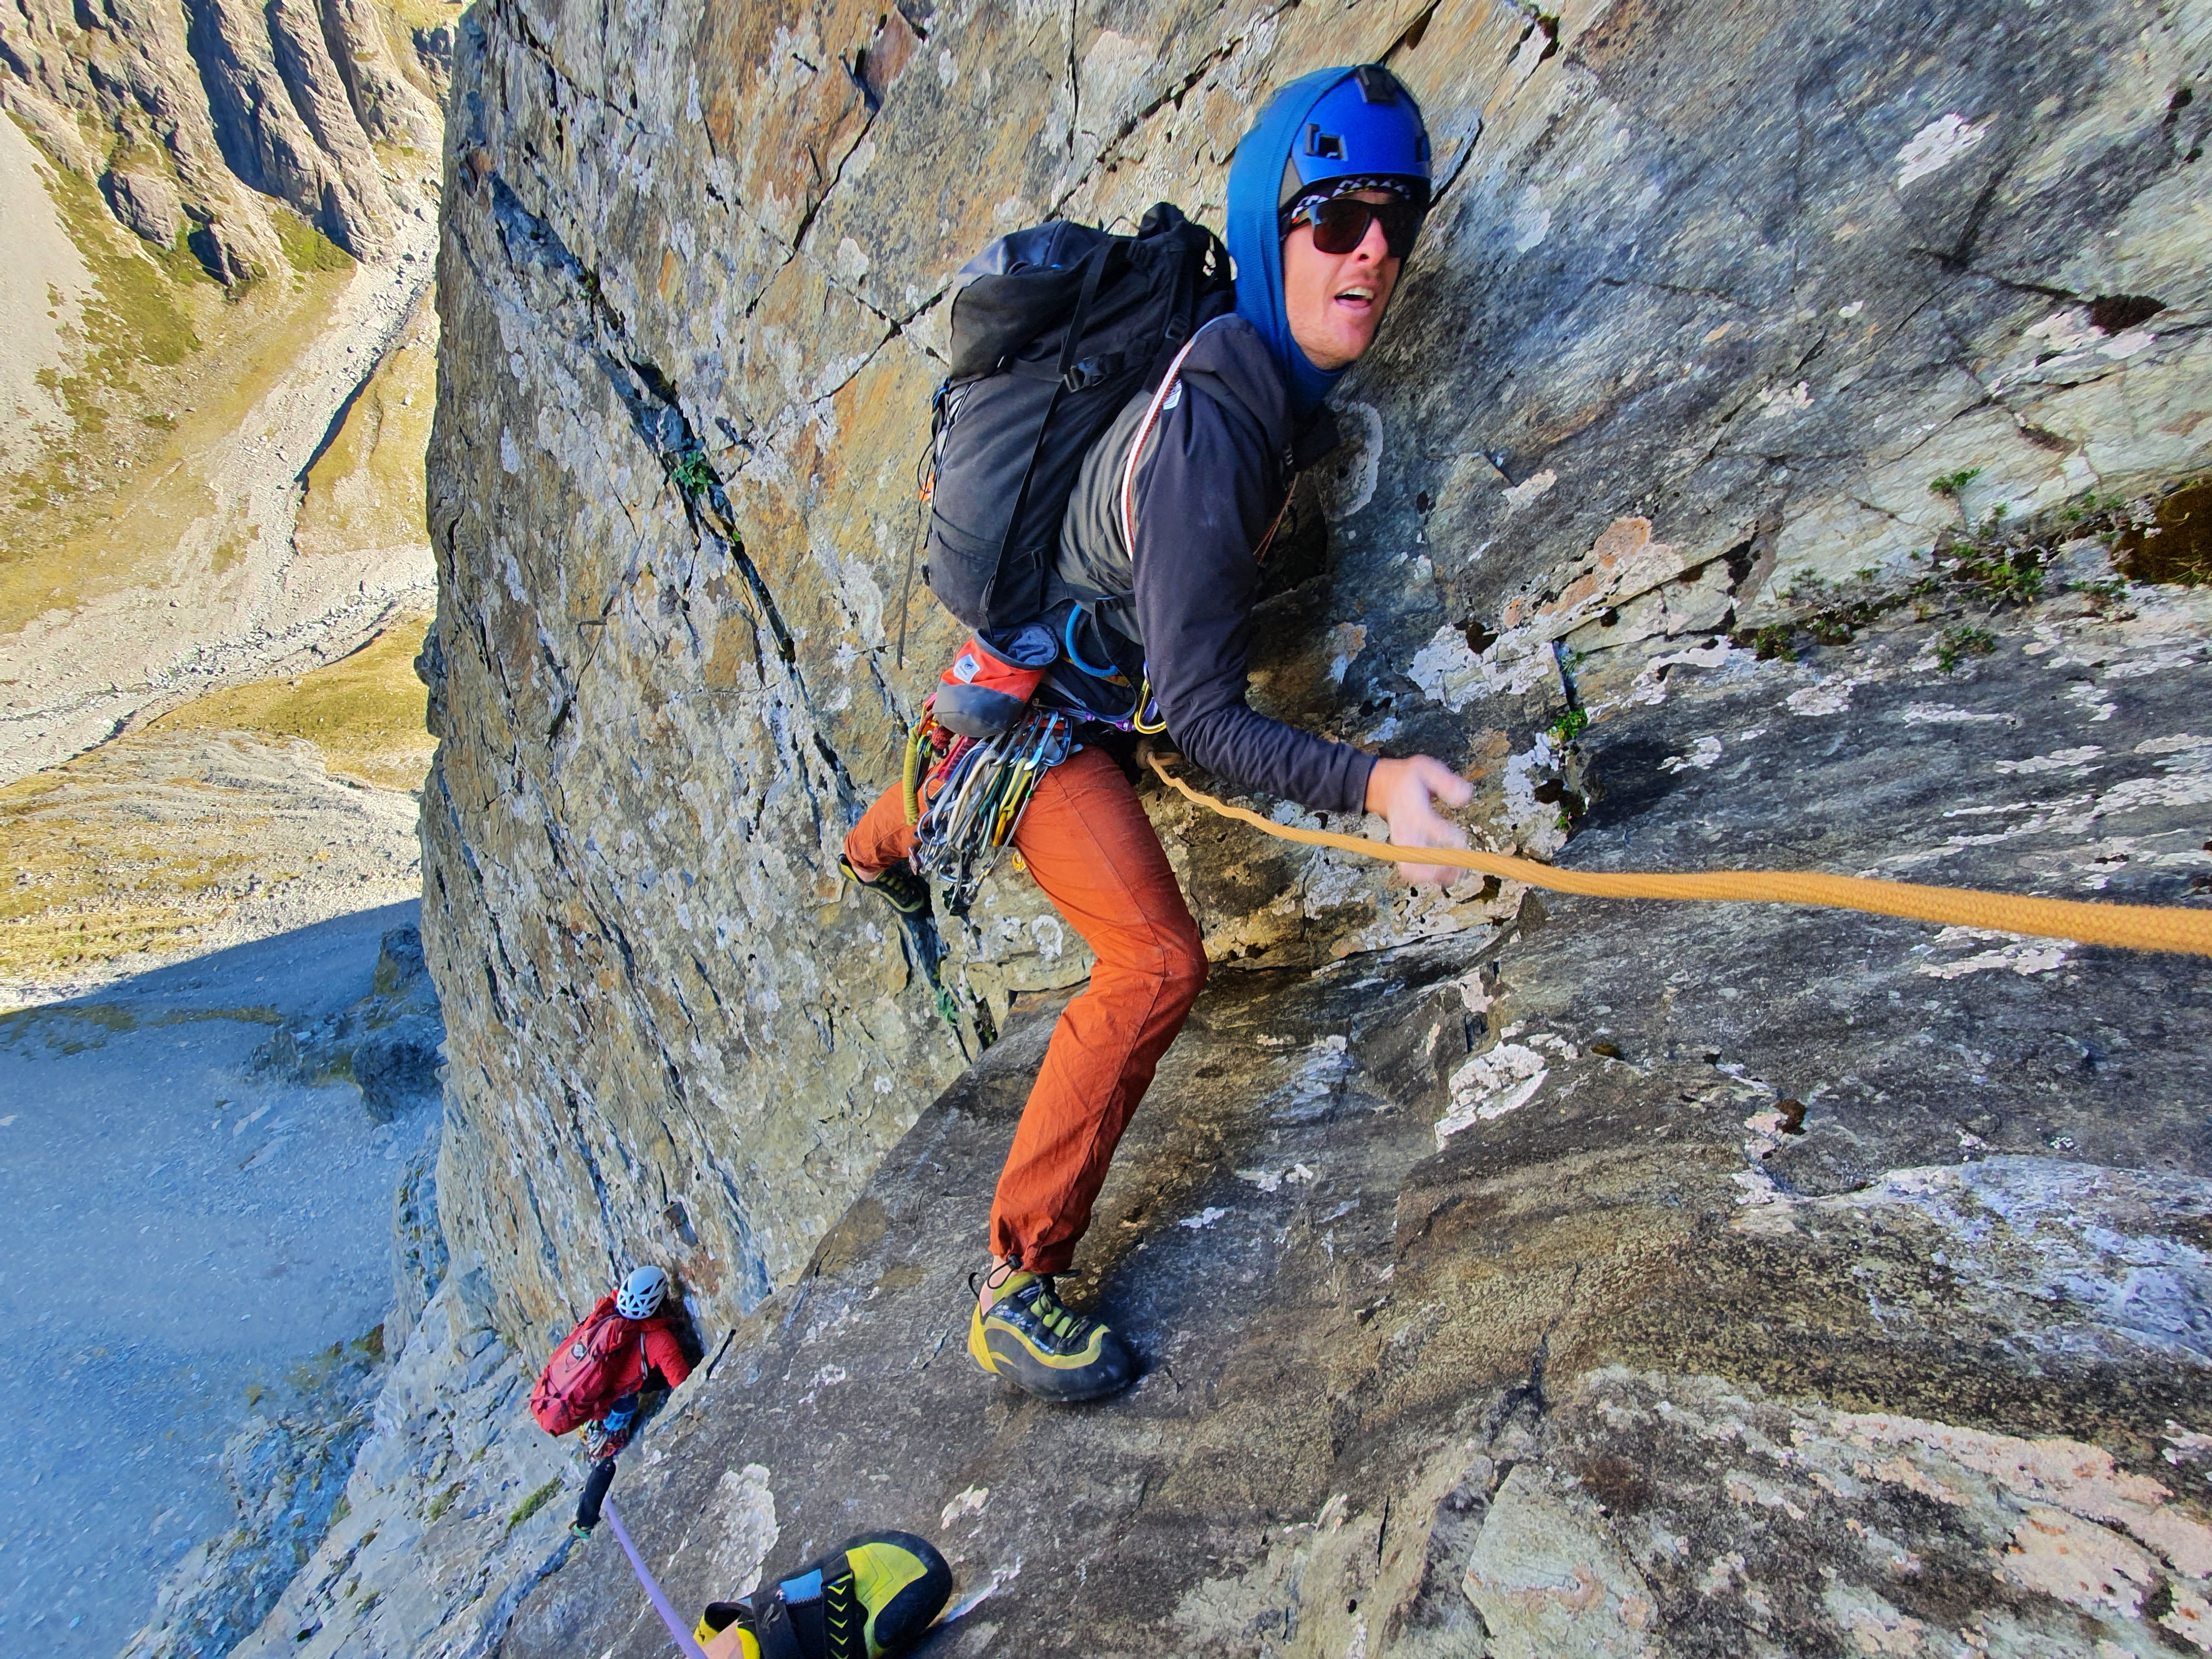
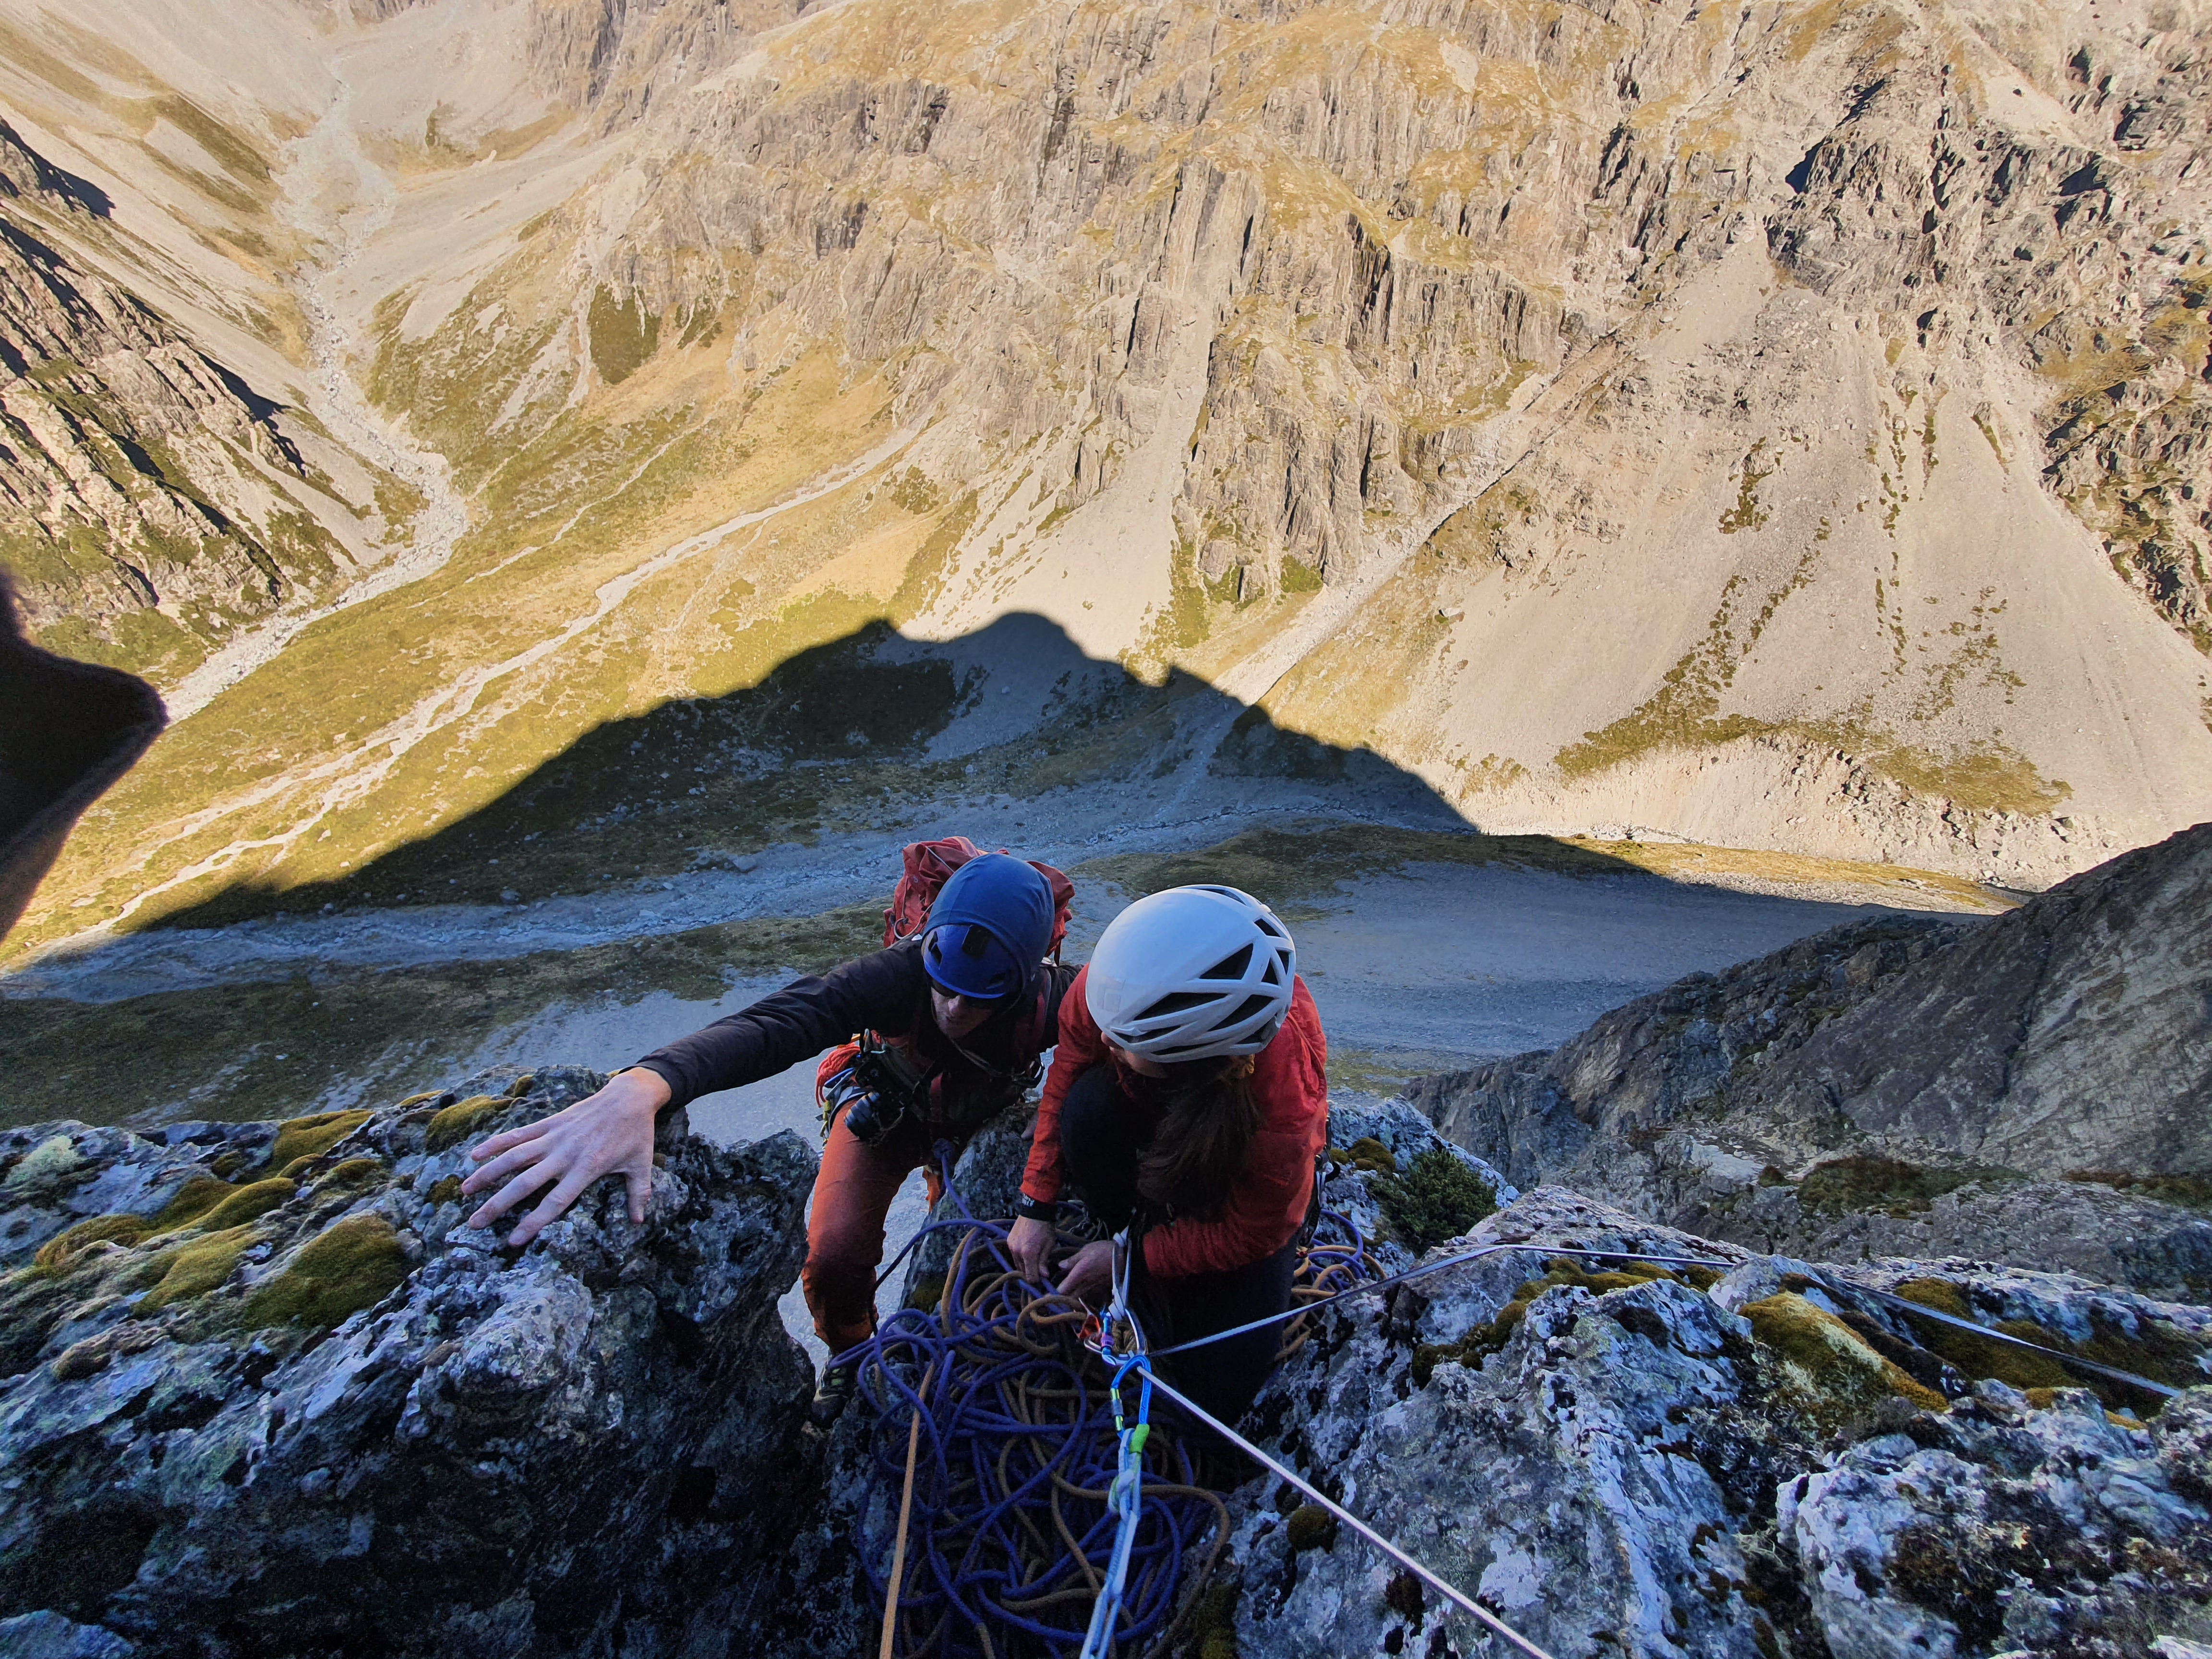
Will vary massivley year to year, but for us we found mostly pressed powder and breakable crust the whole way up the face which made for fast progress. There was a 30 section of WI2 at the very bottom of the route which we pitched, and took reasonable screws. There was another short rock step to negotiate near the summit, only a couple of metres long and no more than M2. There were plenty of oppurtunities for rock pro along the way if needed, and the pickets were solid.
Apart from those 2 sections we simulclimbed and it took us just under 3 hours to climb the route – expect longer if pitching the whole thing.
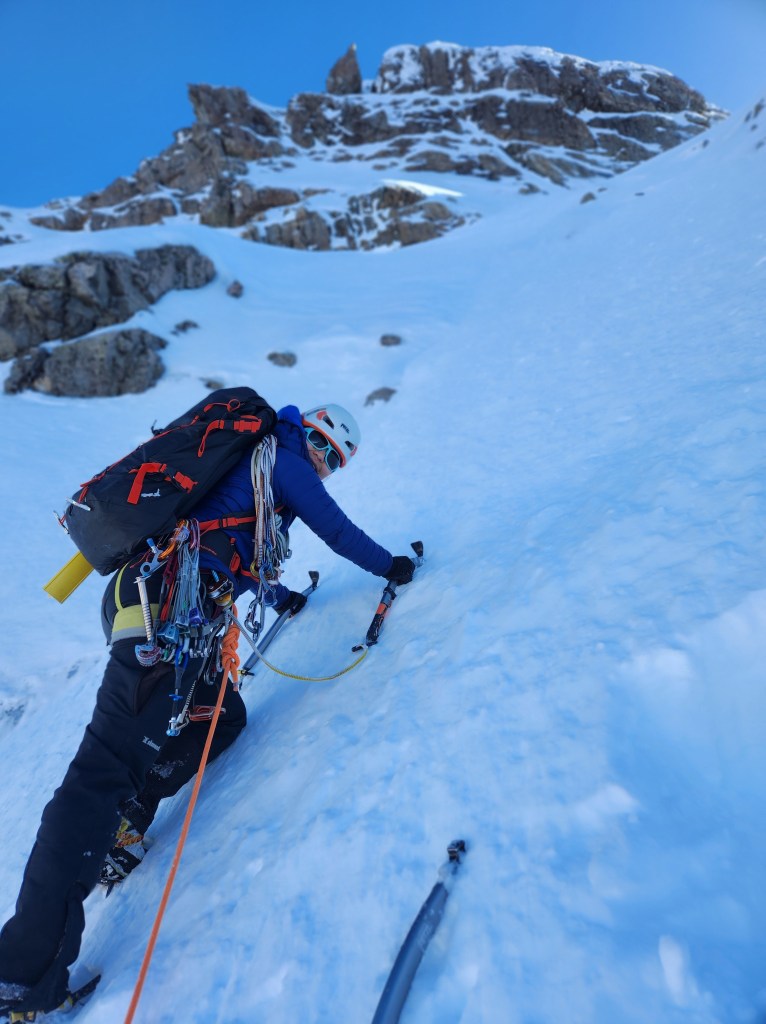
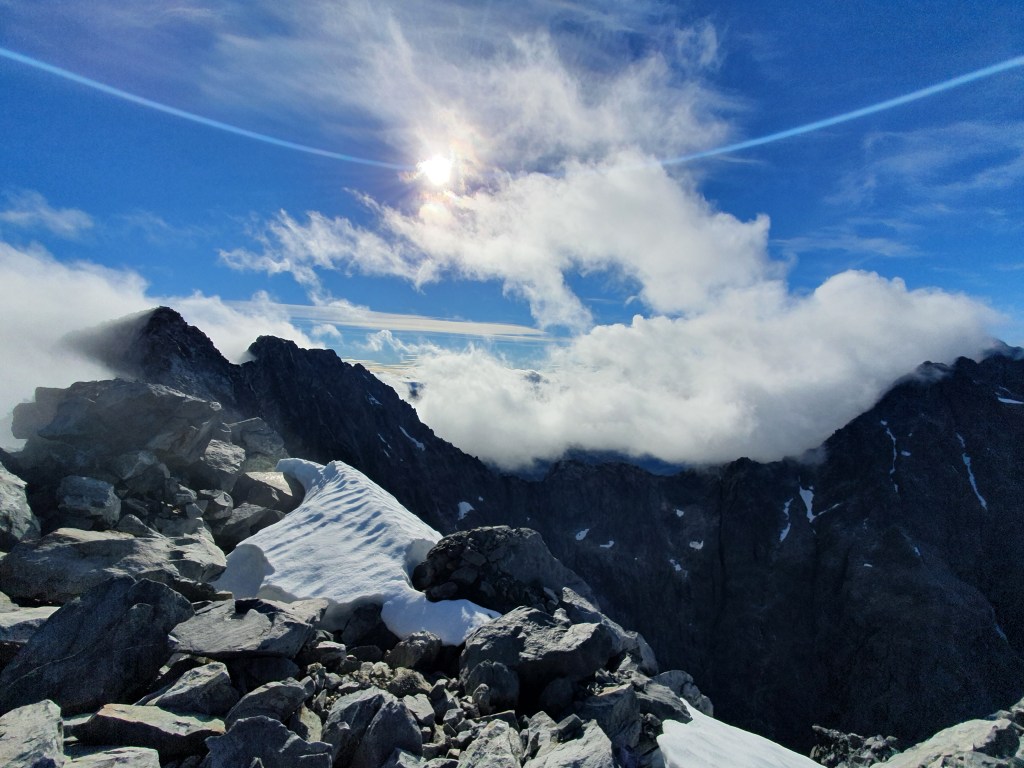
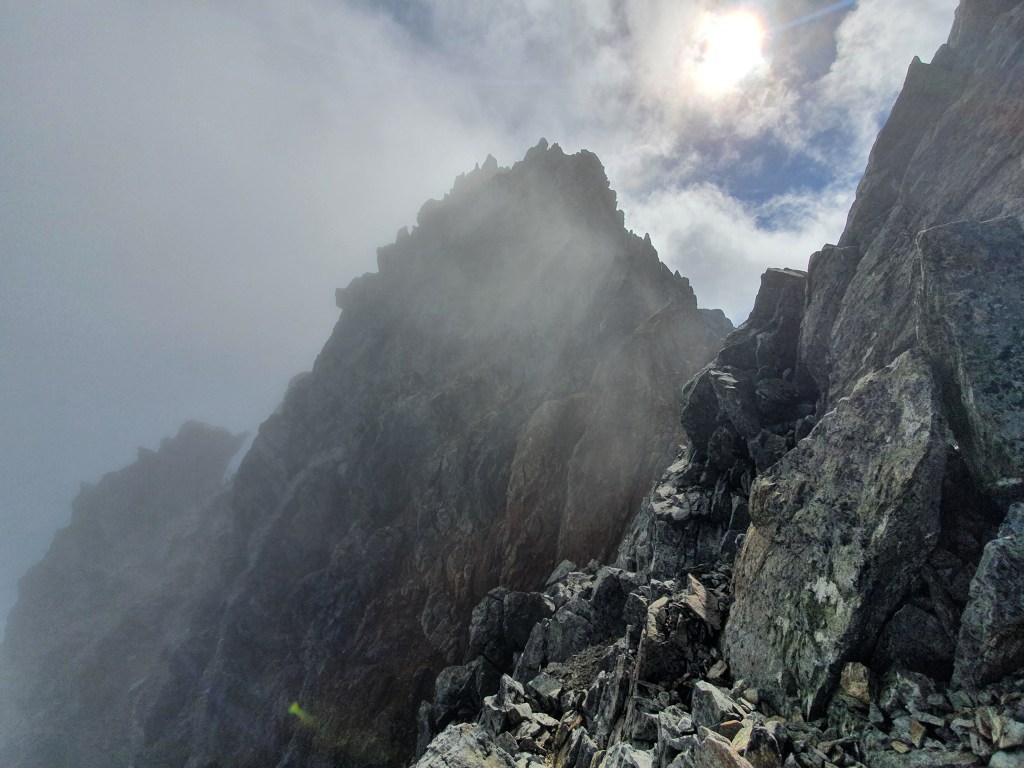
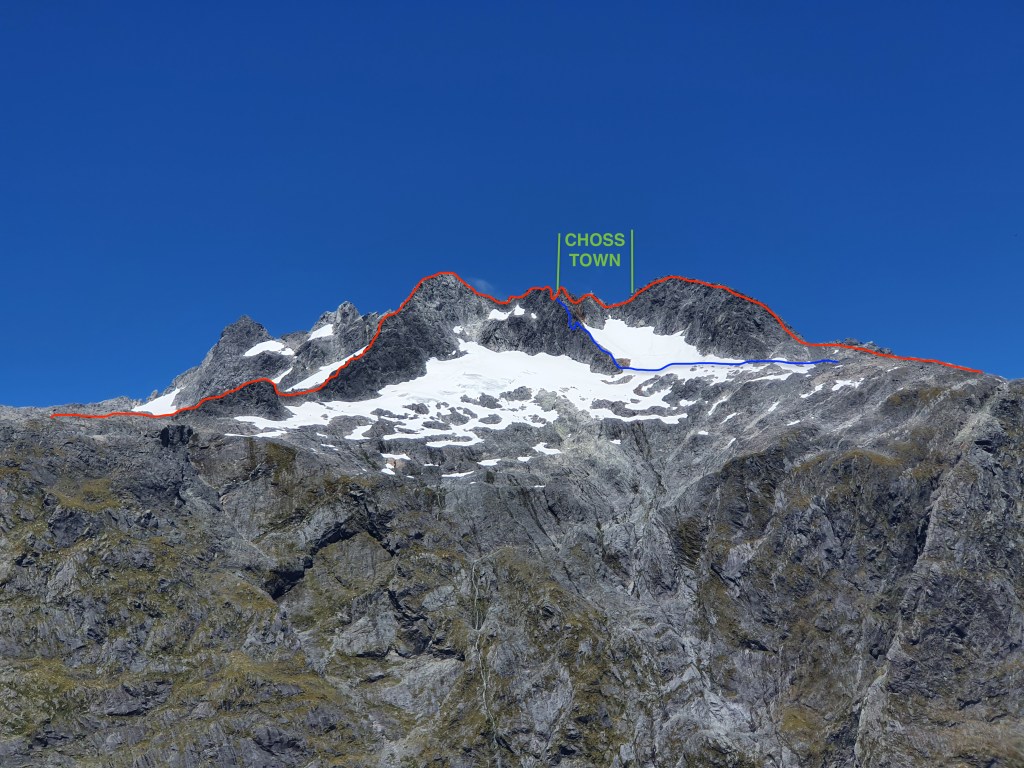
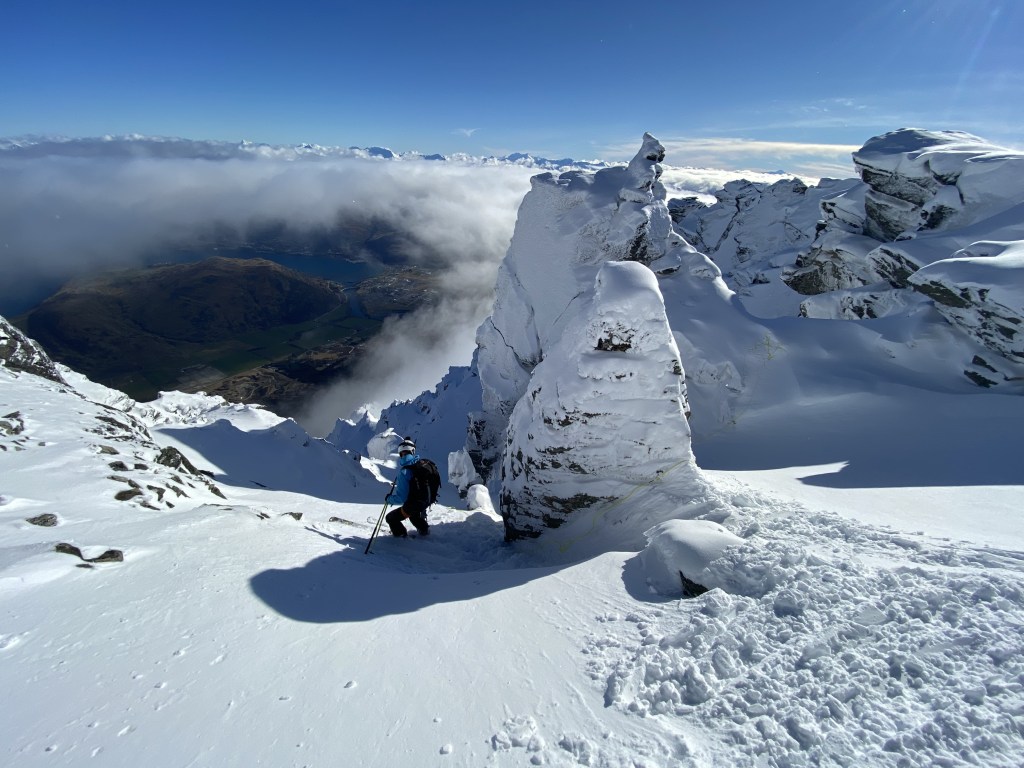
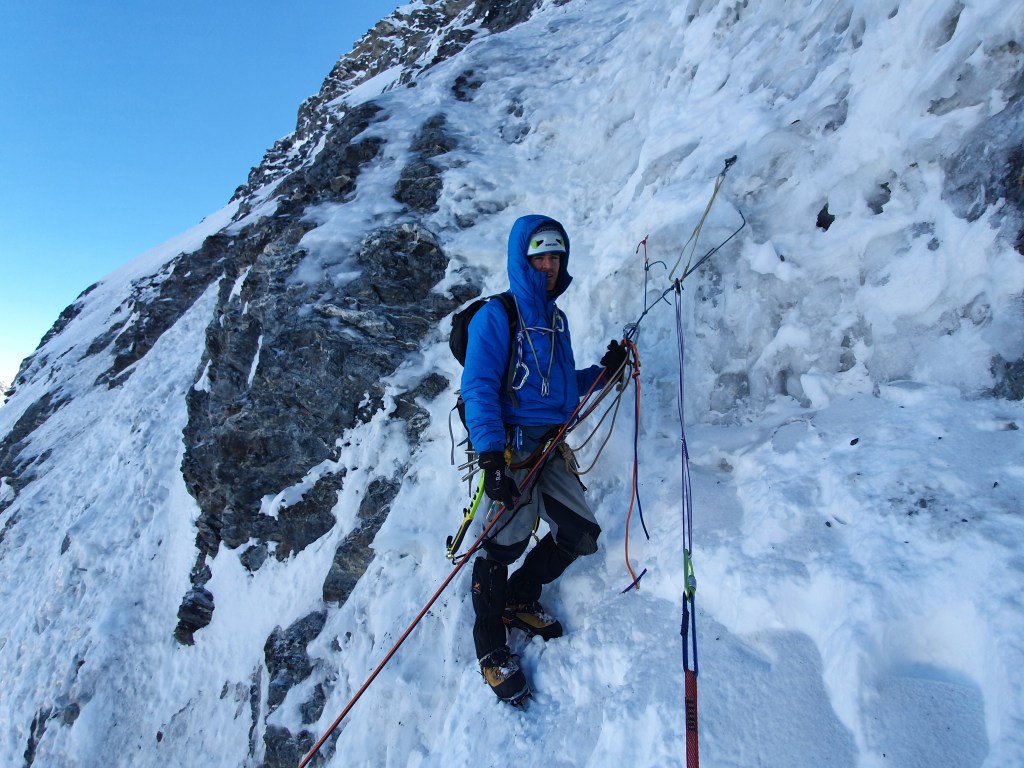
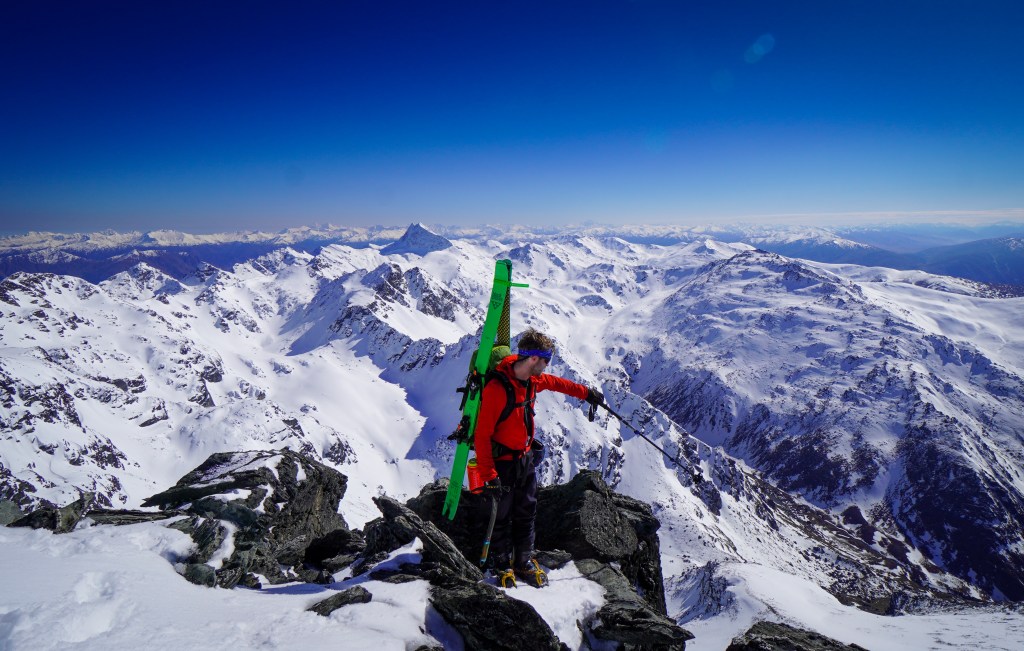
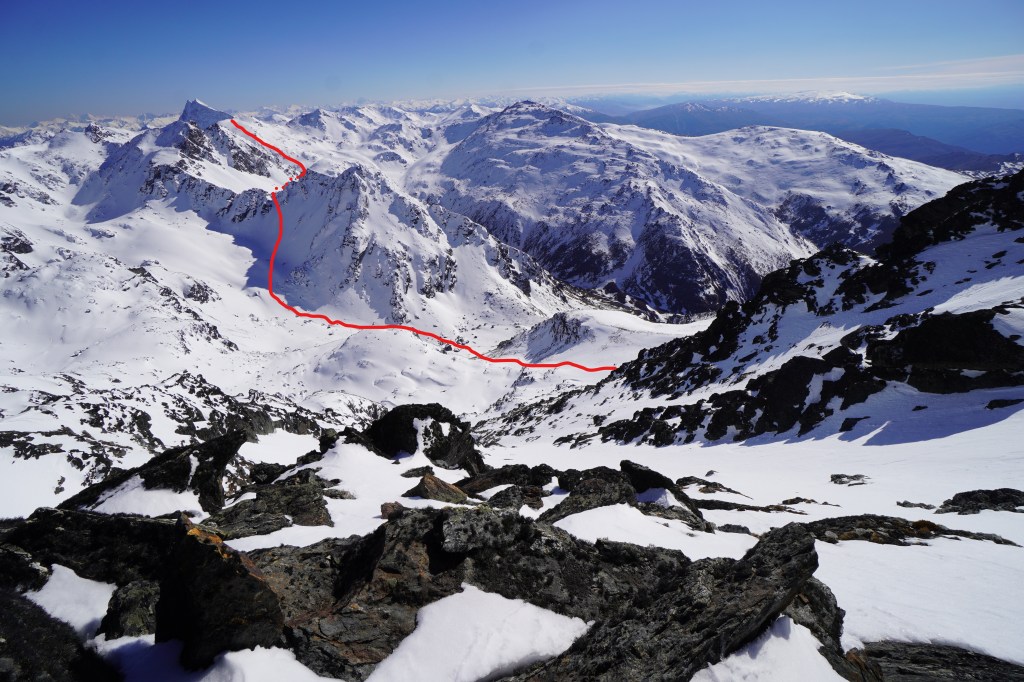
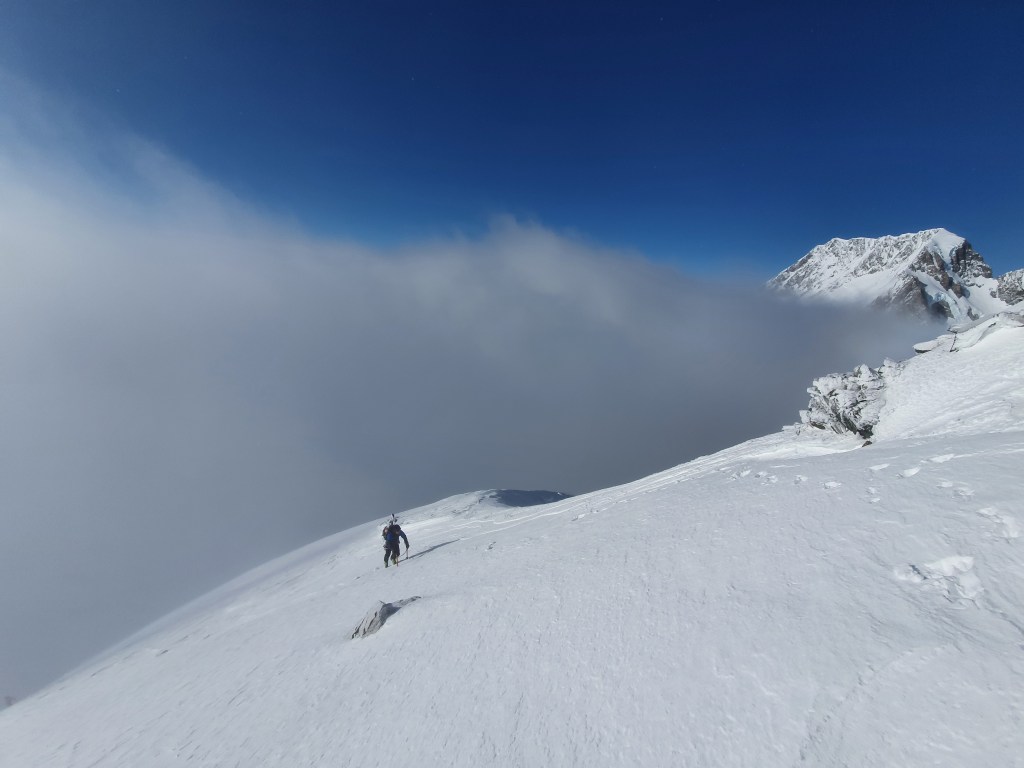
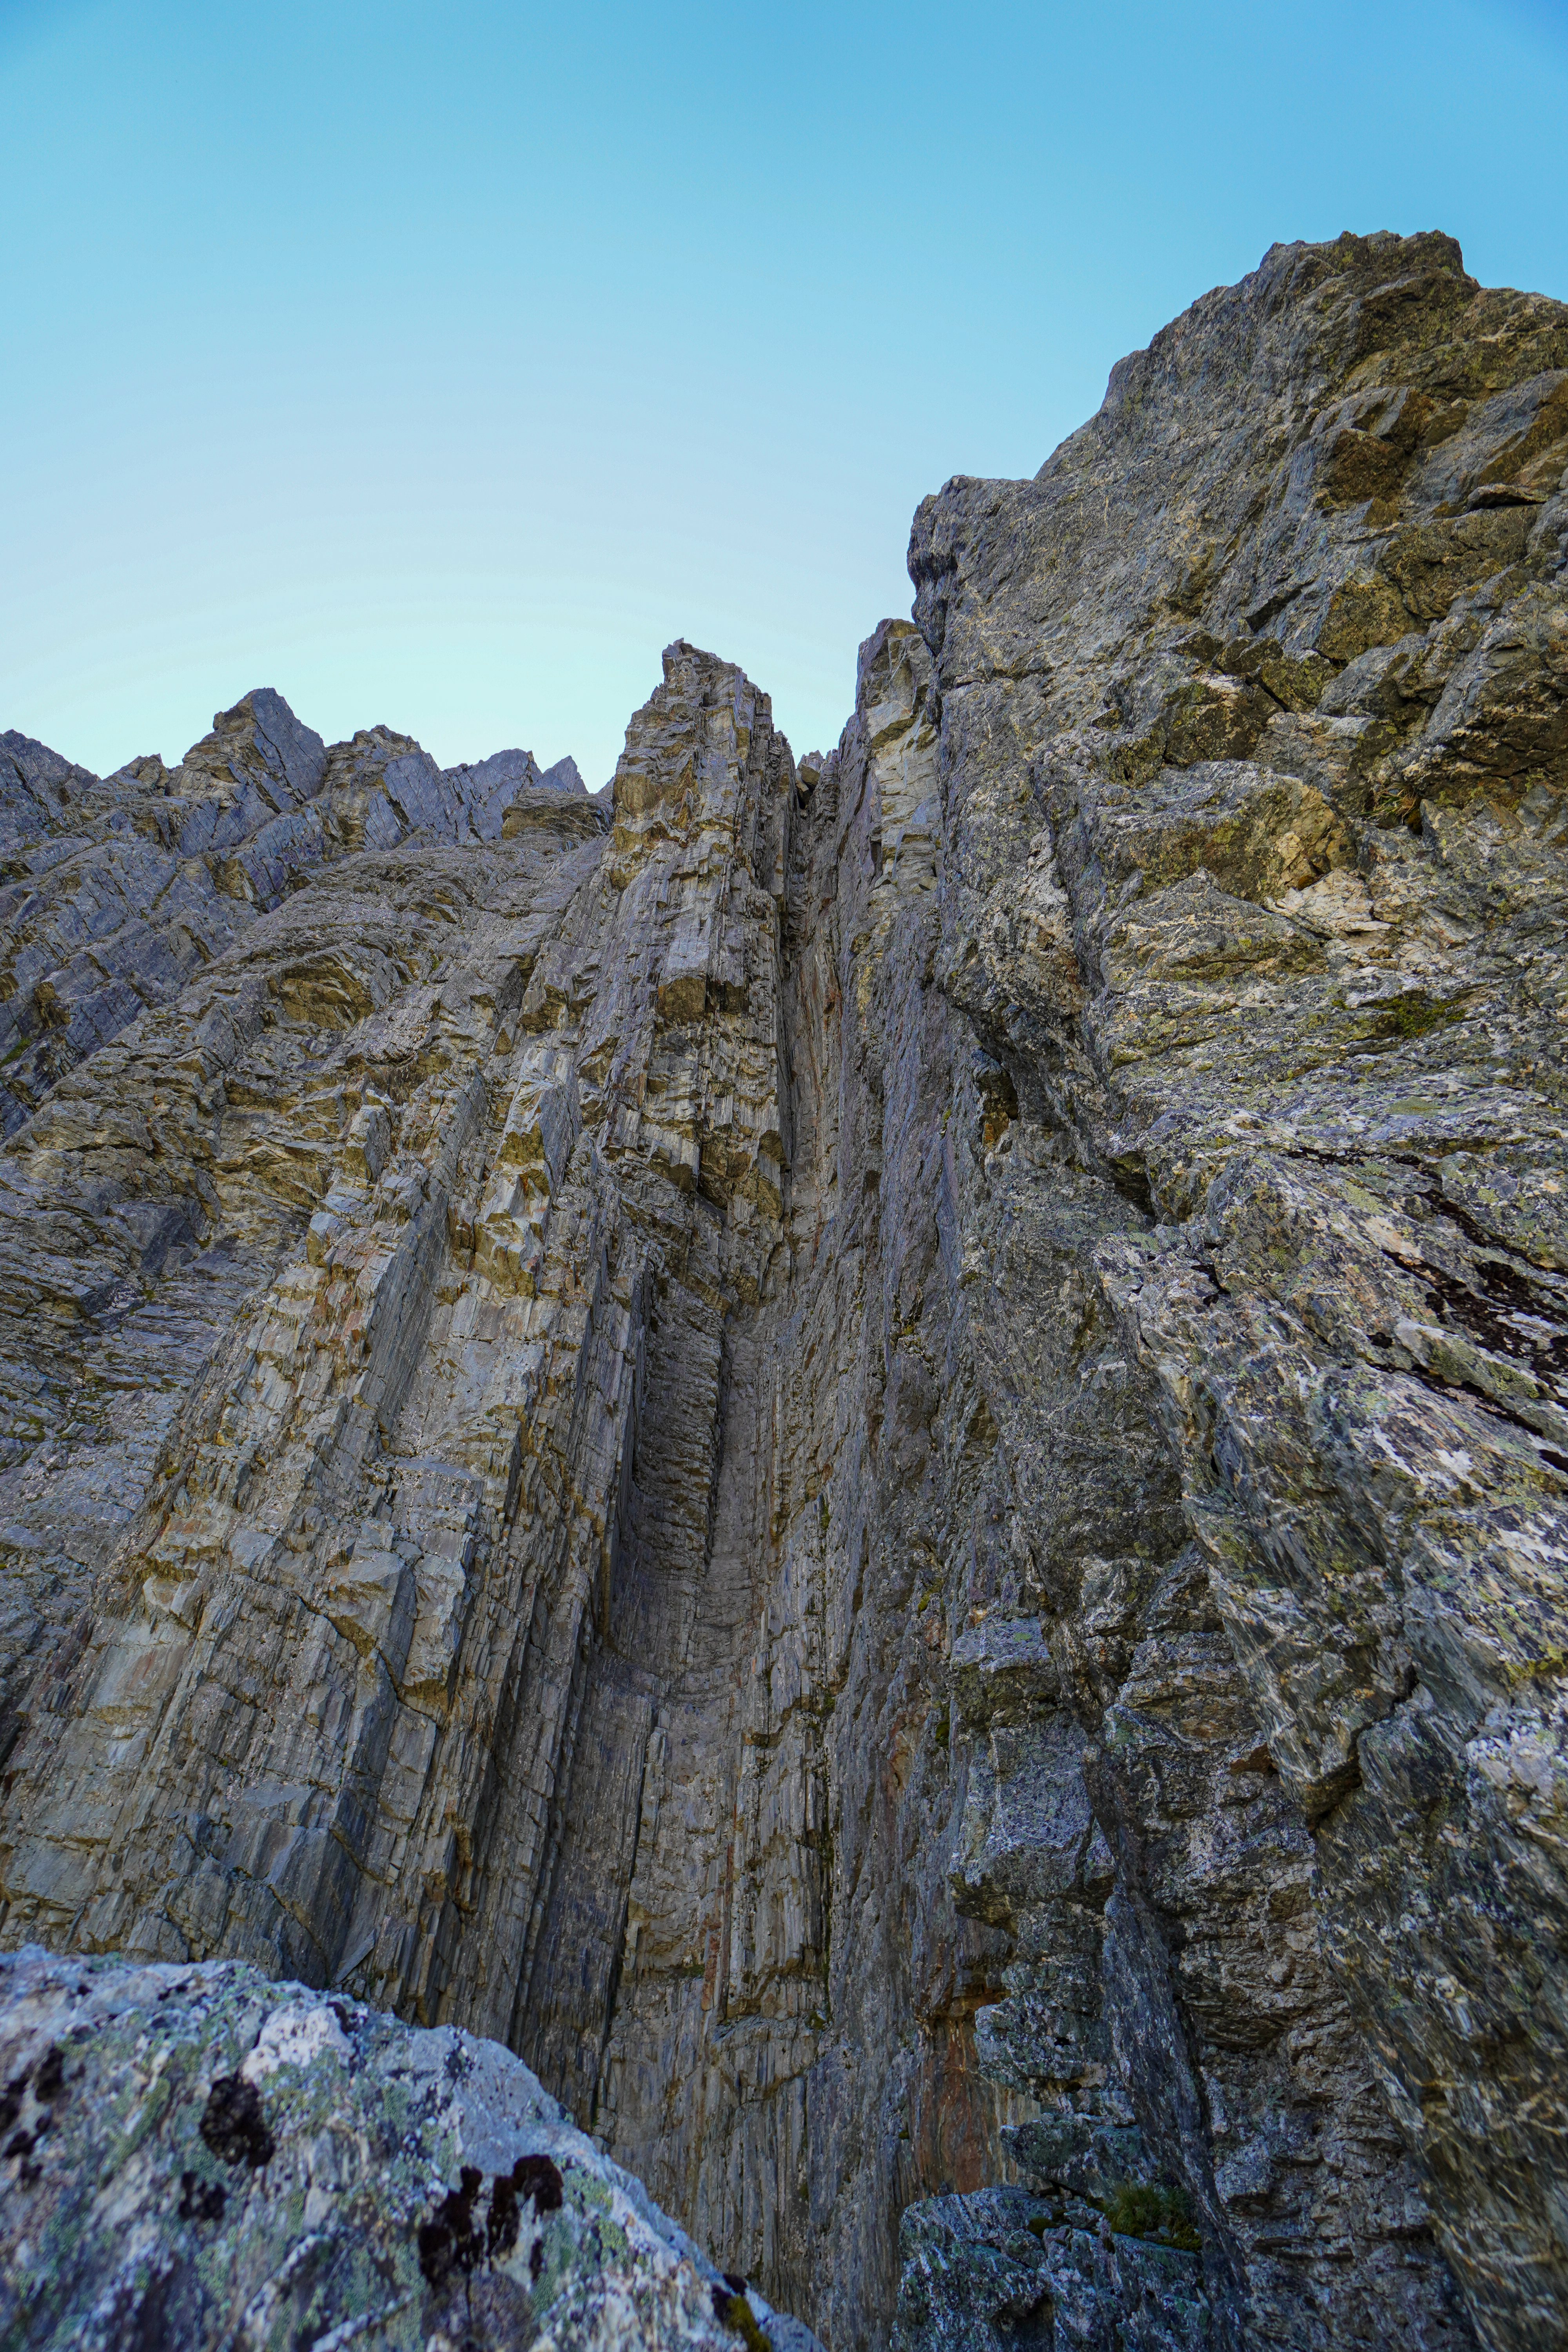
We followed the snow ramps to the summit ridge, just below low peak. The final section to the top was hard rime and rocky, but with the right conditions does look like it would go.
The climb is a really fun day out in itself, with a real sense of remoteness and scale despite only being a day trip from Christchurch, and well worth it even without the ski.
Ski
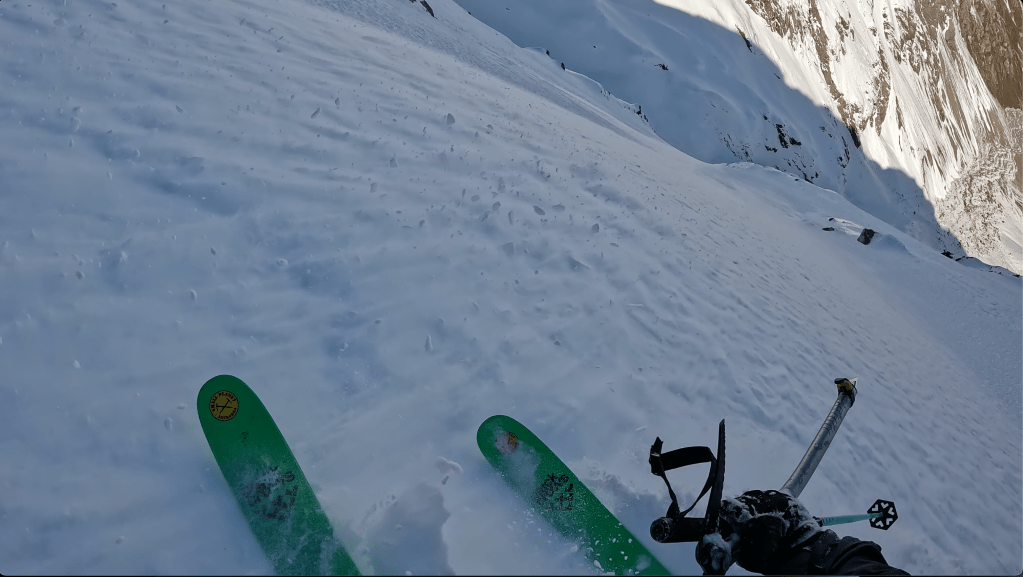
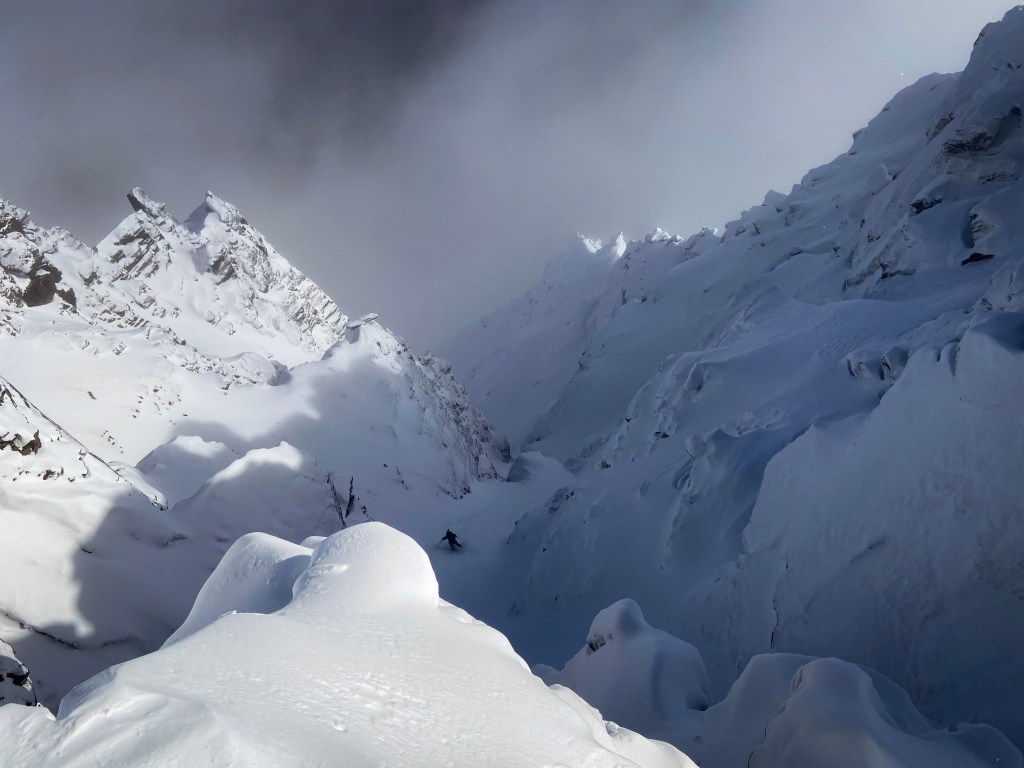
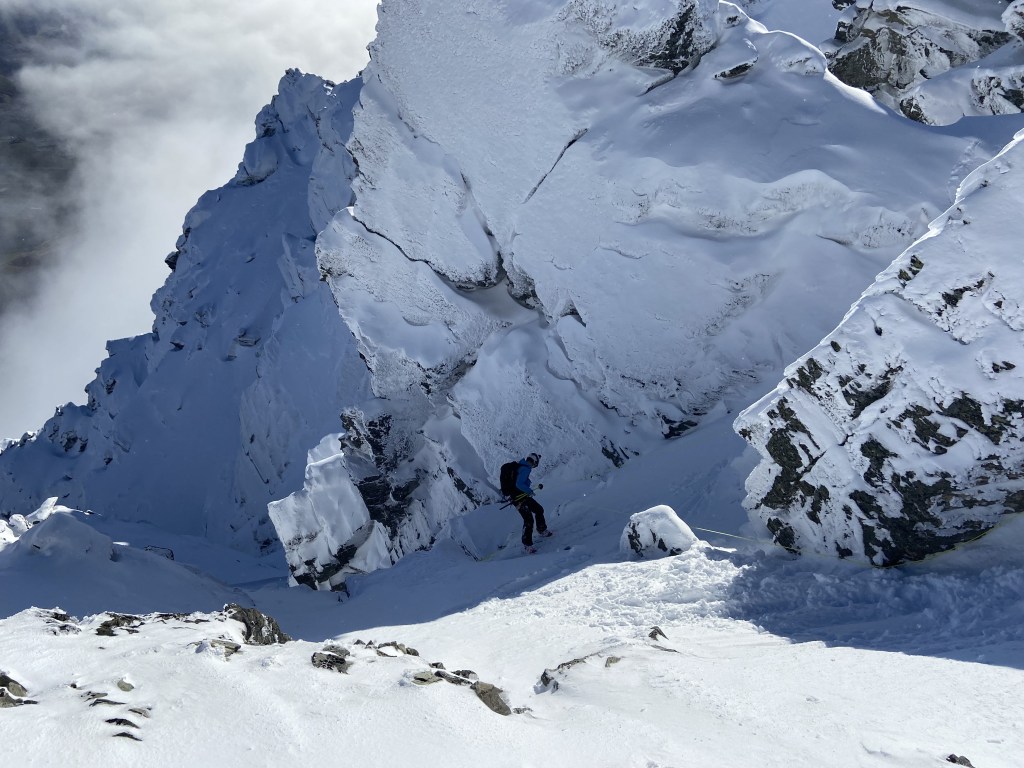
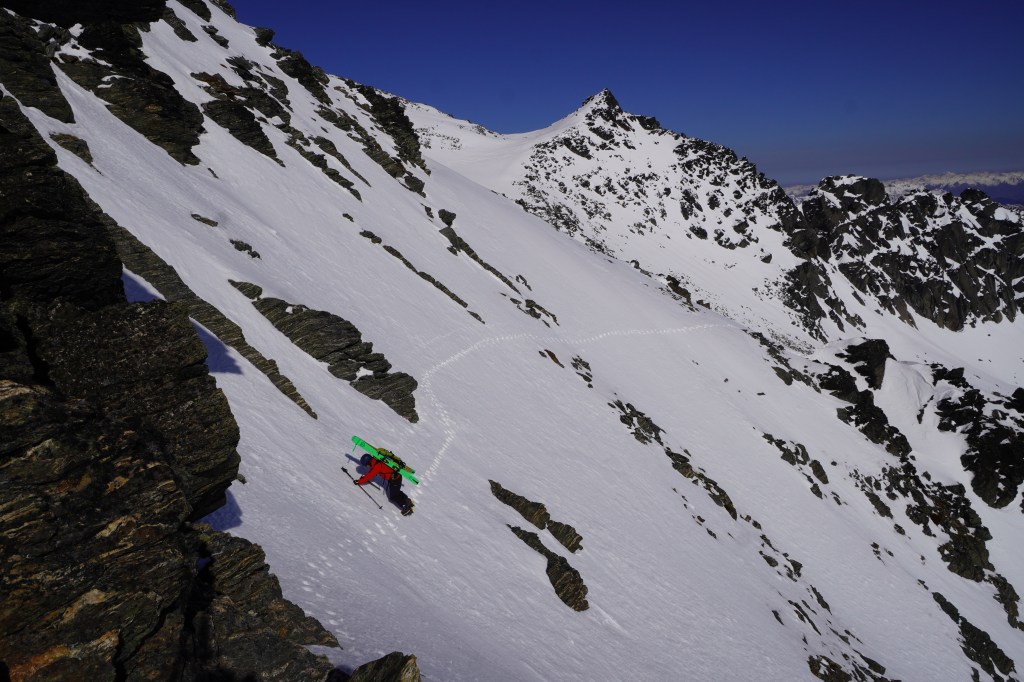
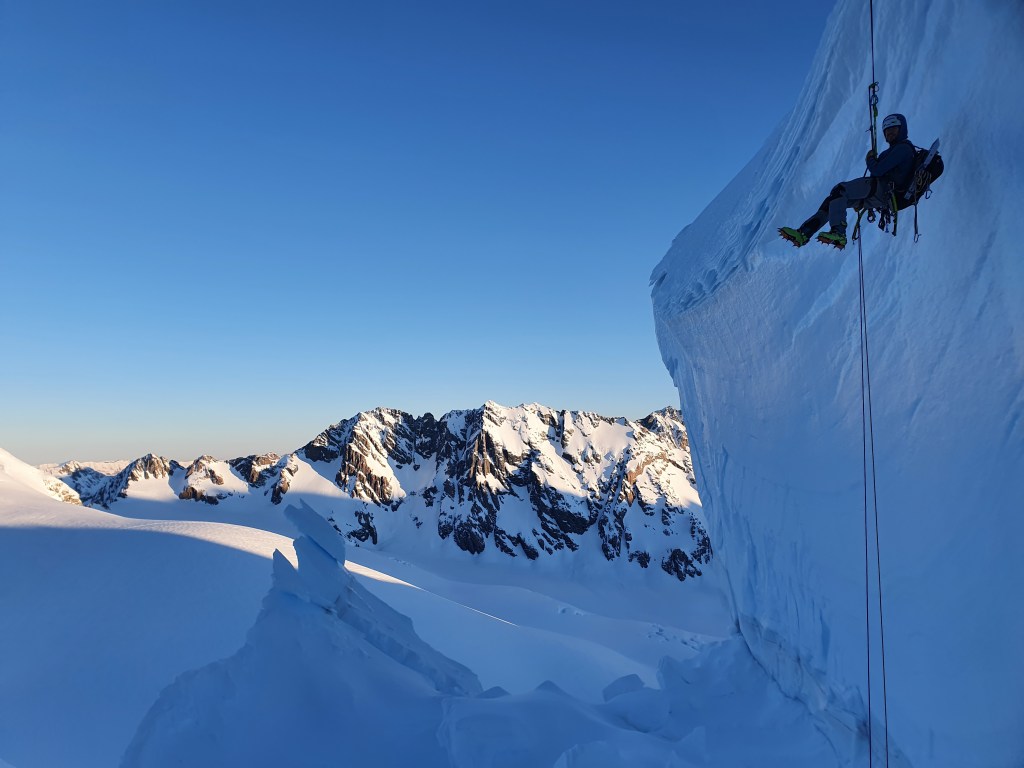
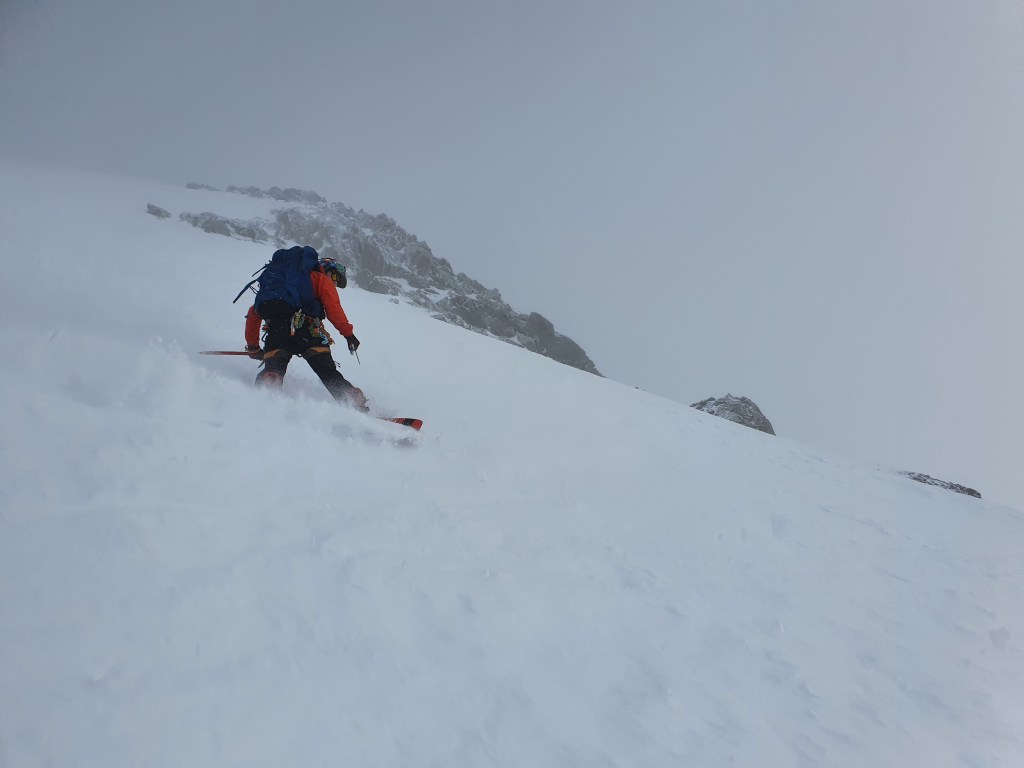
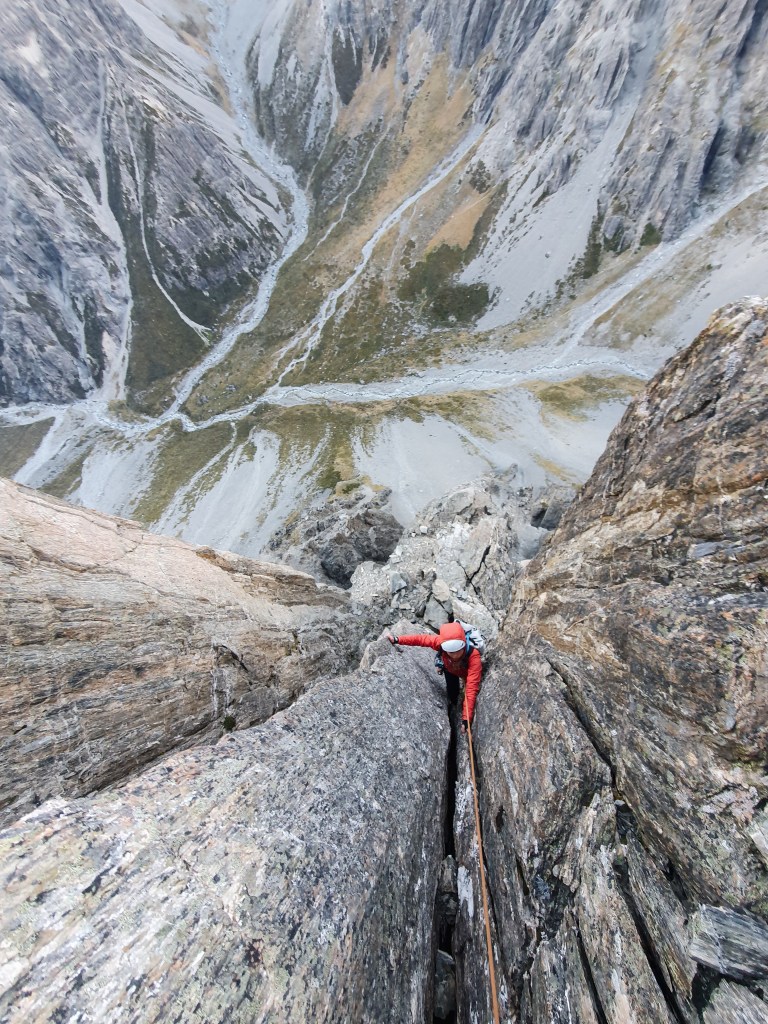
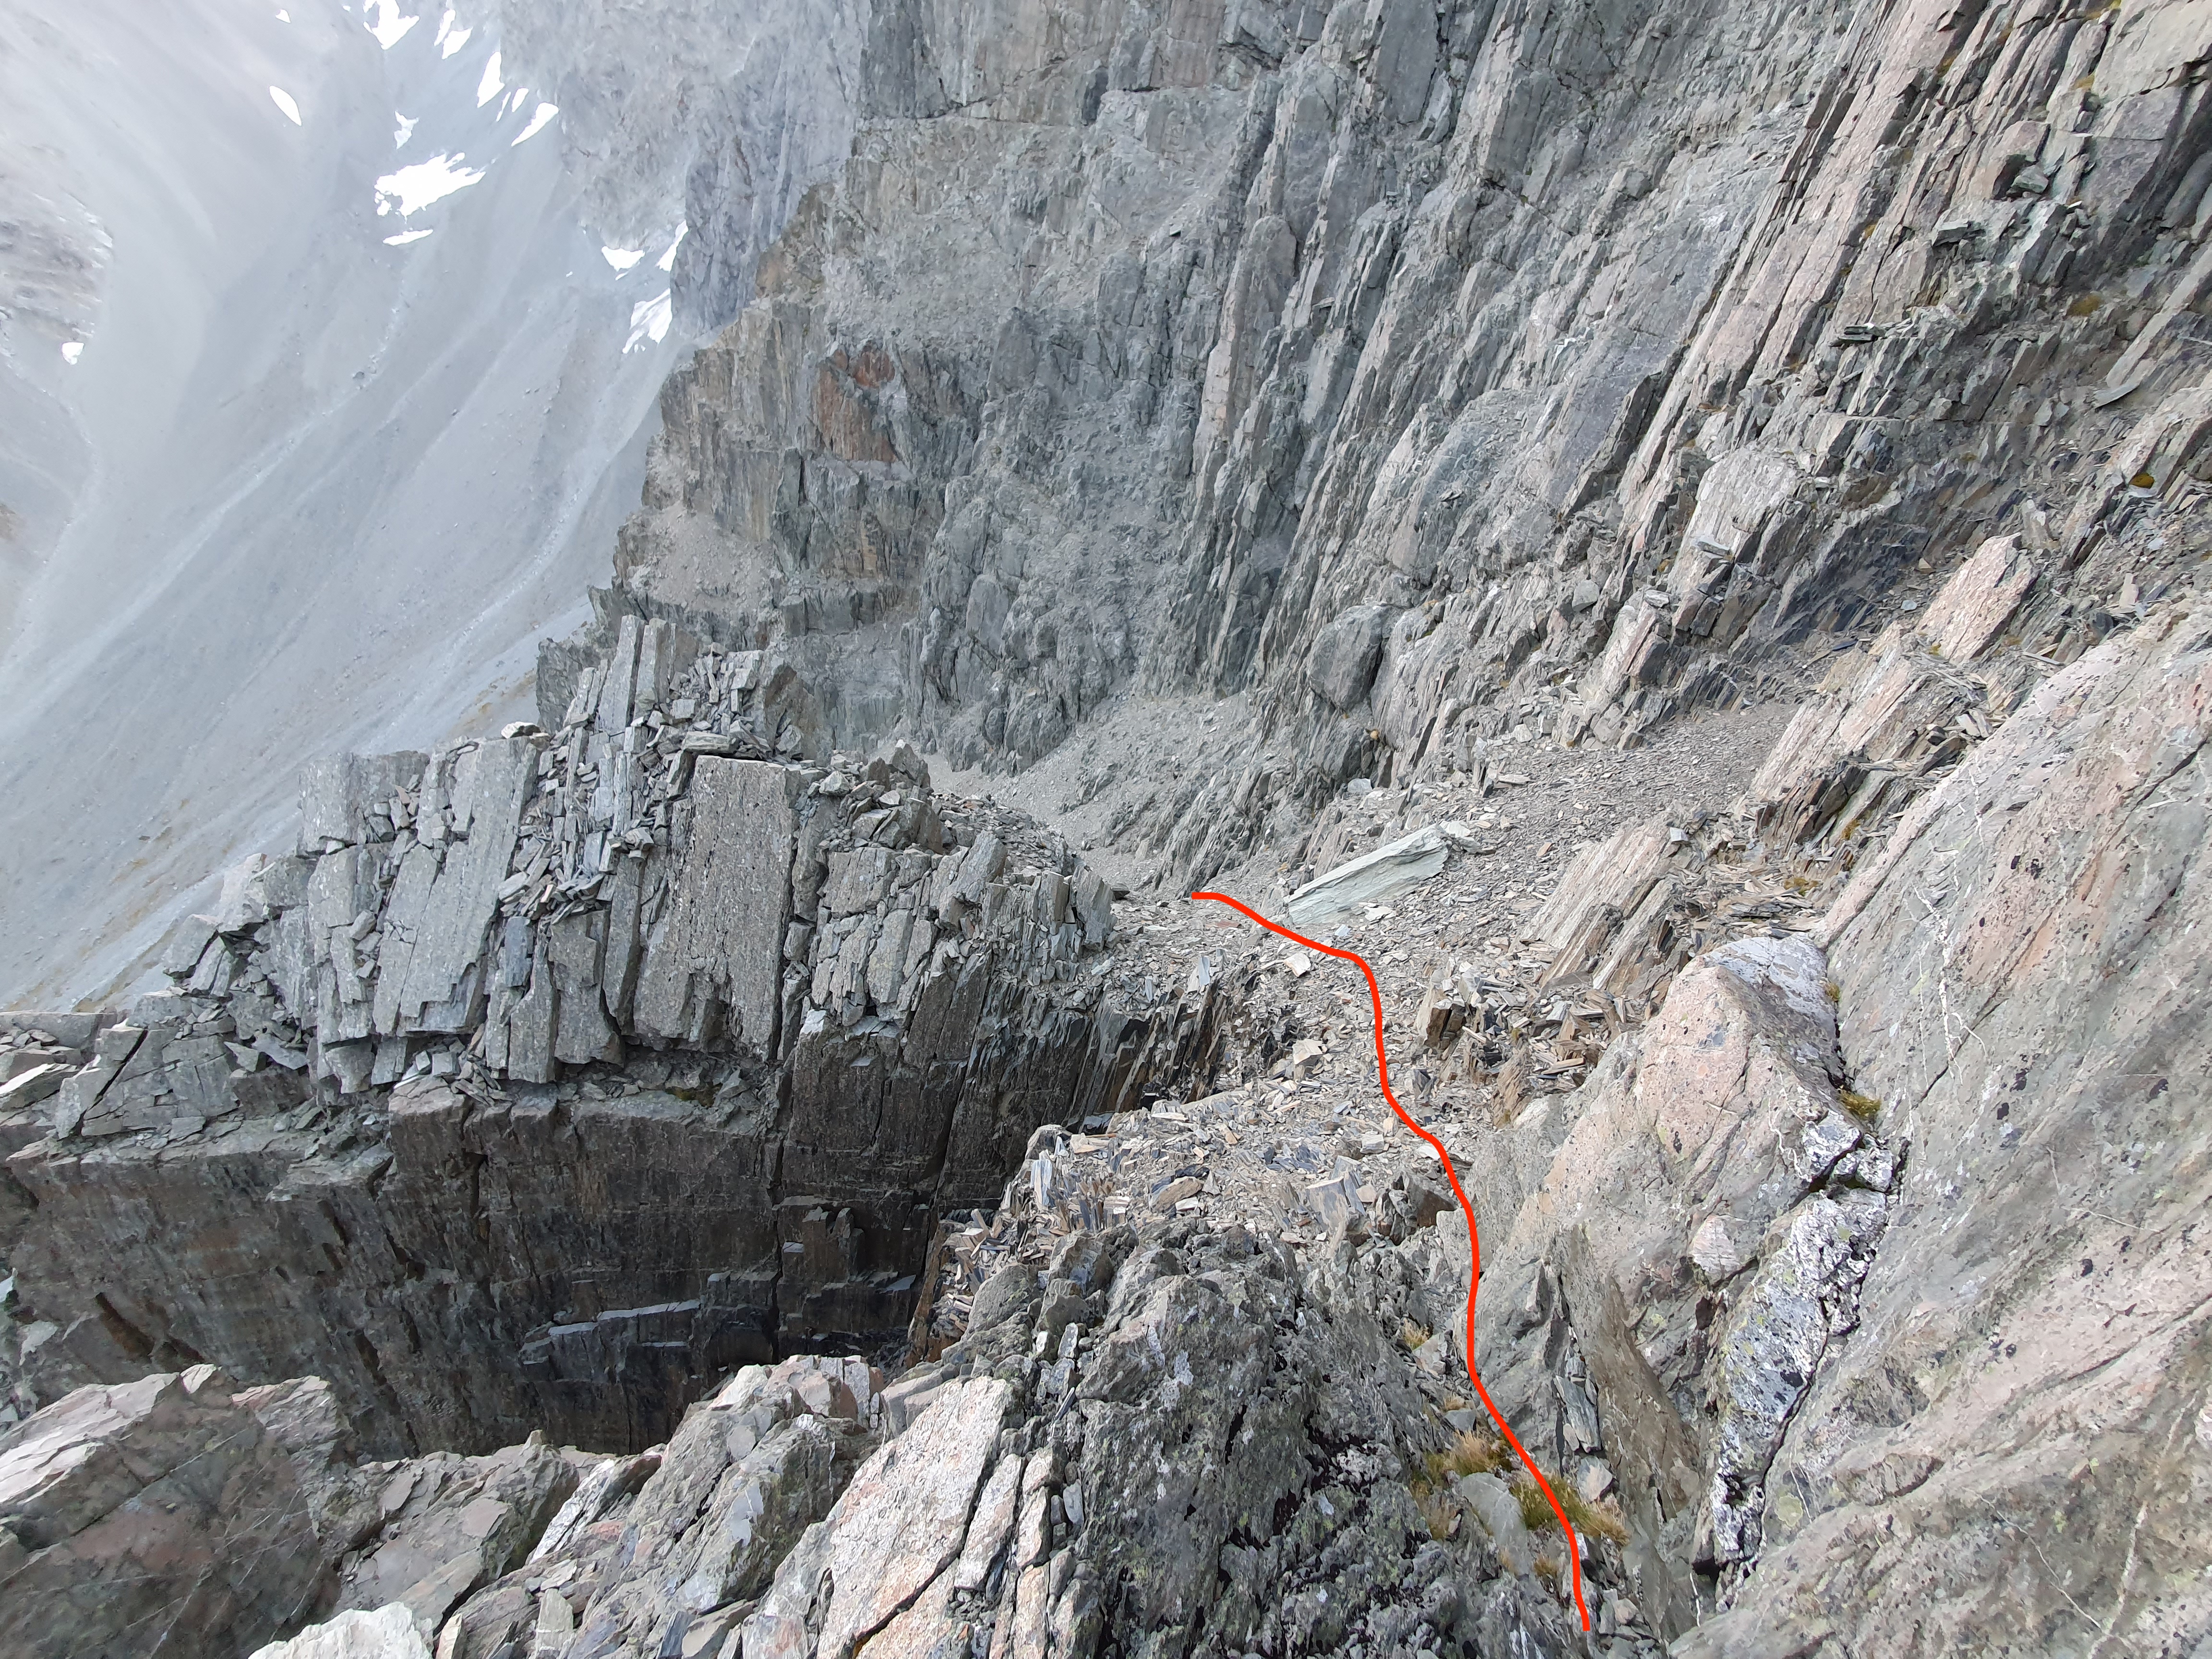
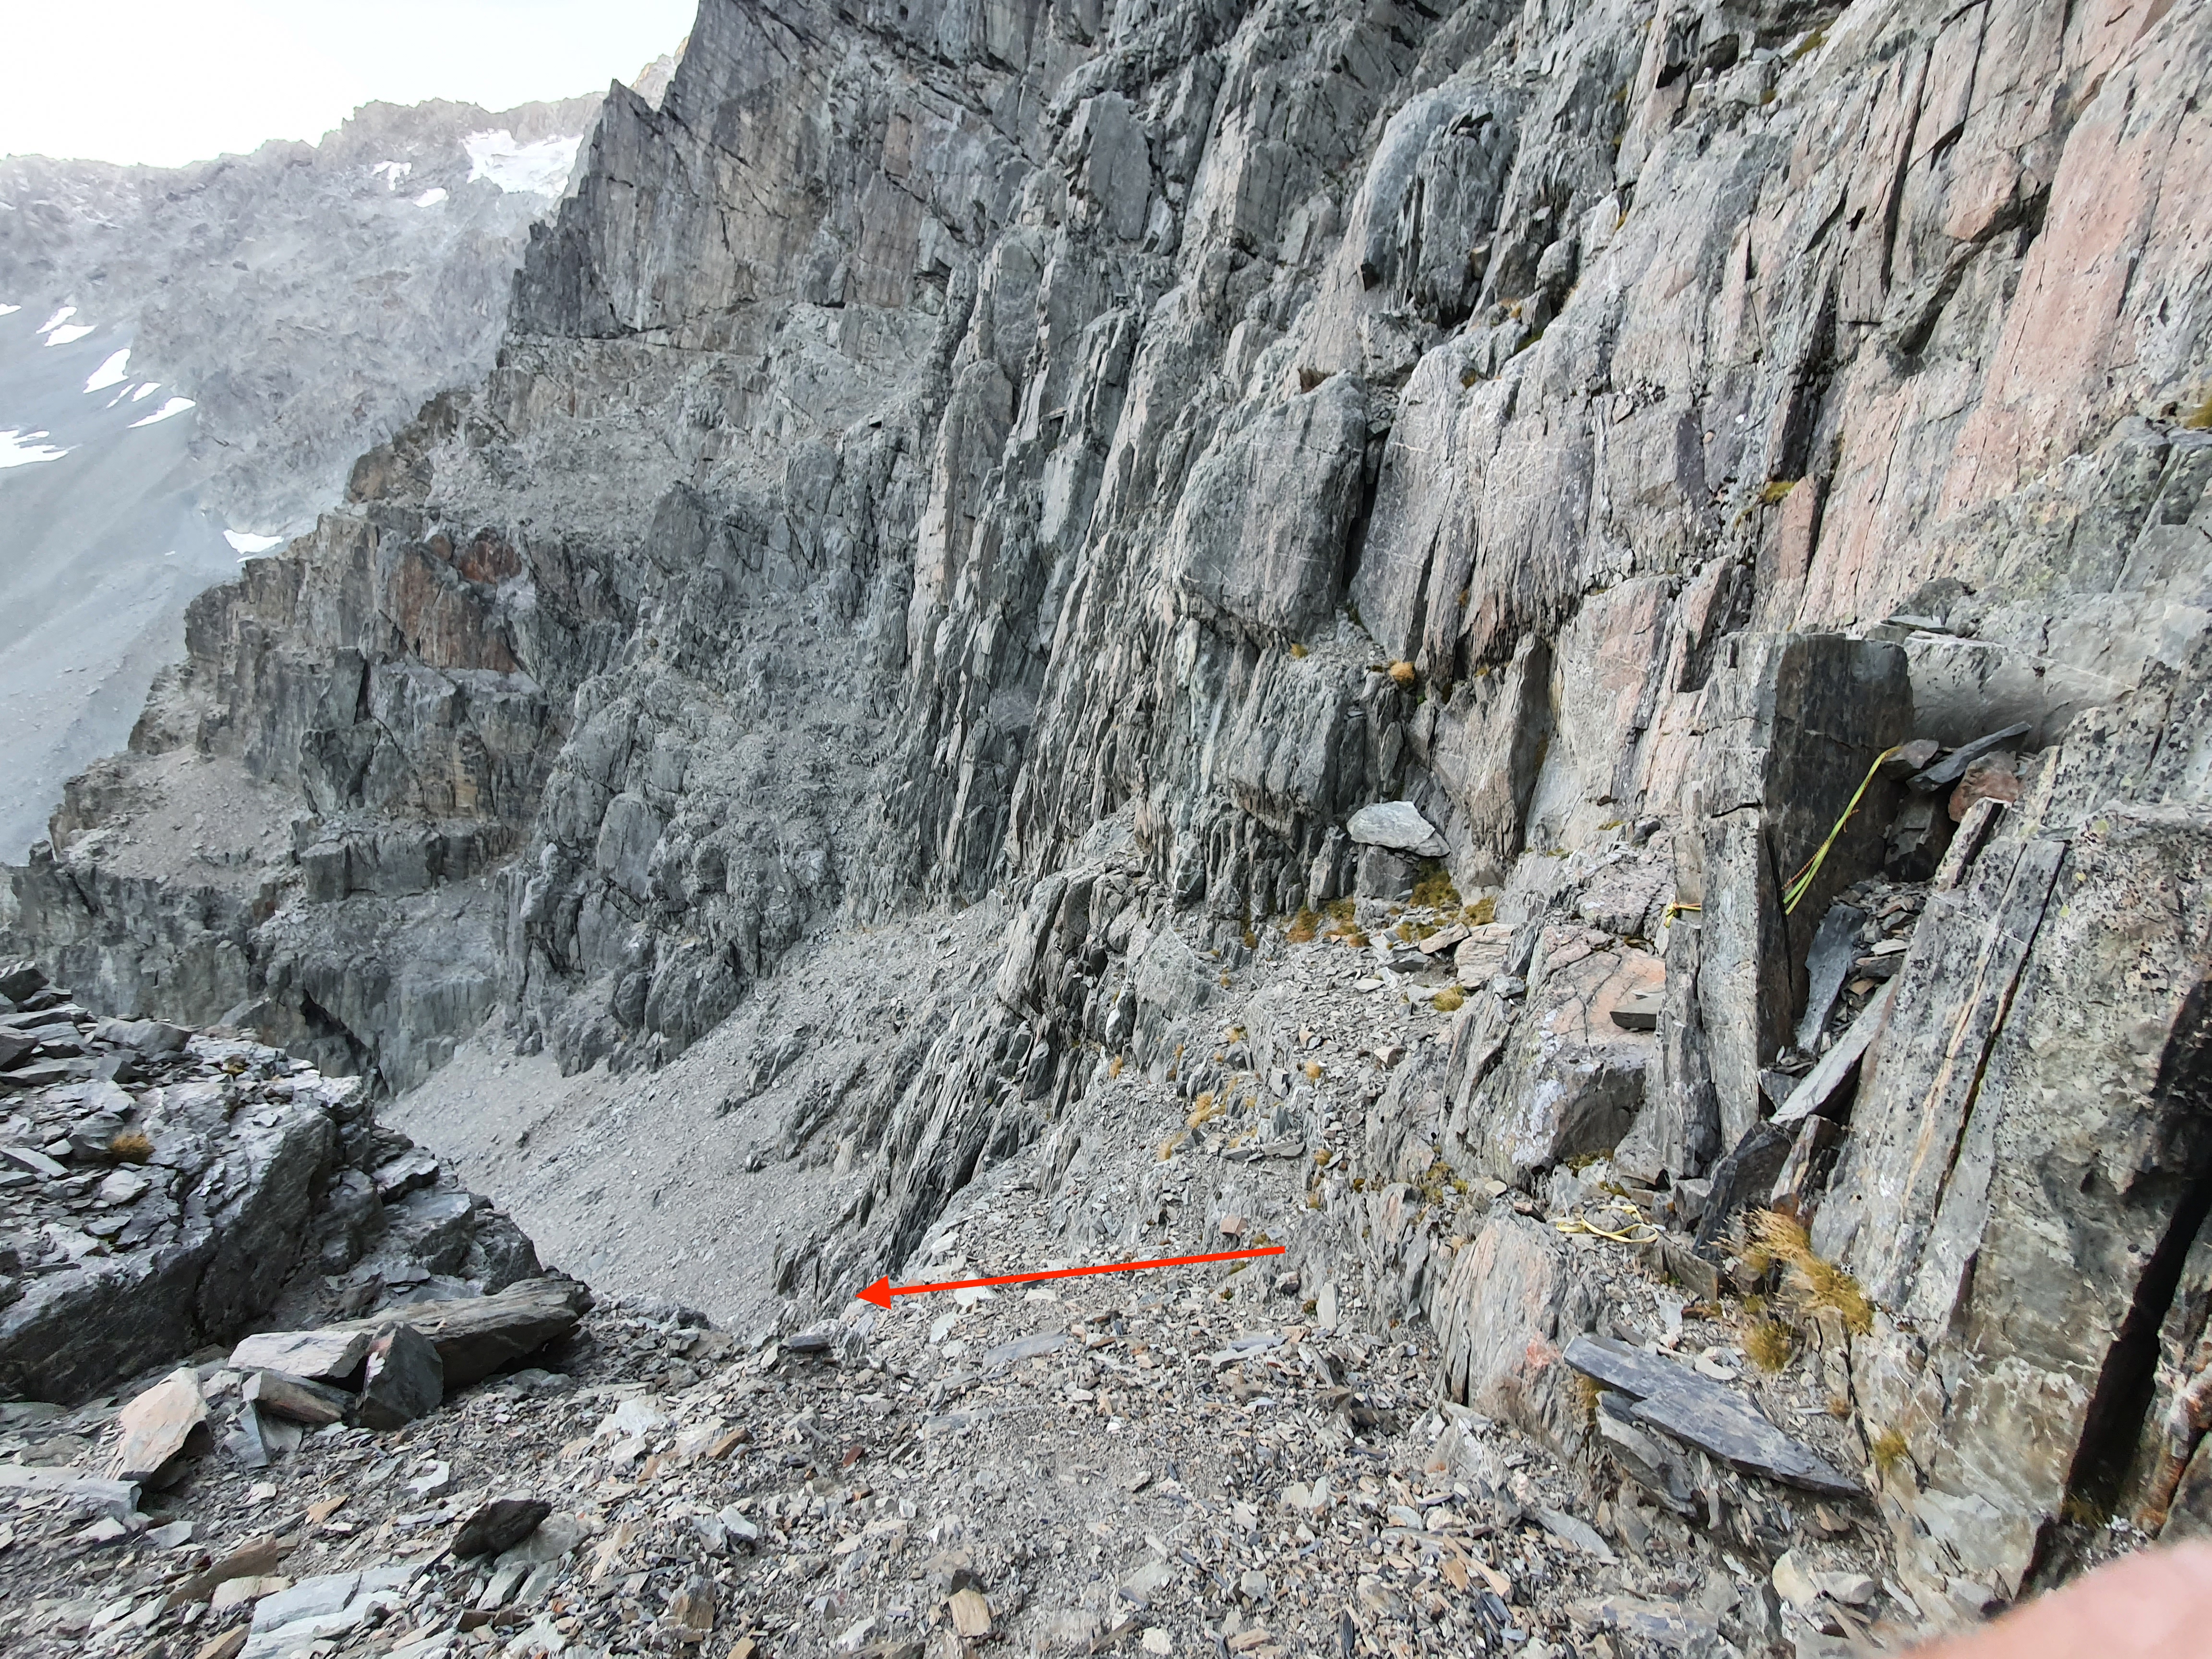
I followed the exact climbing line back down – especially on a face with such fickle conditions this gives a lot of confidence your not going to hit an unexpected chunk of ice and get thrown off the face. Starting at the obvious notch on the ridge, drop into the super steep and narrow right trending gully. This section is really steep and sustained, and the exposure is right in your face so its full focus time. This funnels you into the first rockband – I transitioned to crampons and downclimbed through this to save on loosing a picket. Once through this rockband theres a rightward traverse on a narrow terrace that puts you into the large open snowfield.

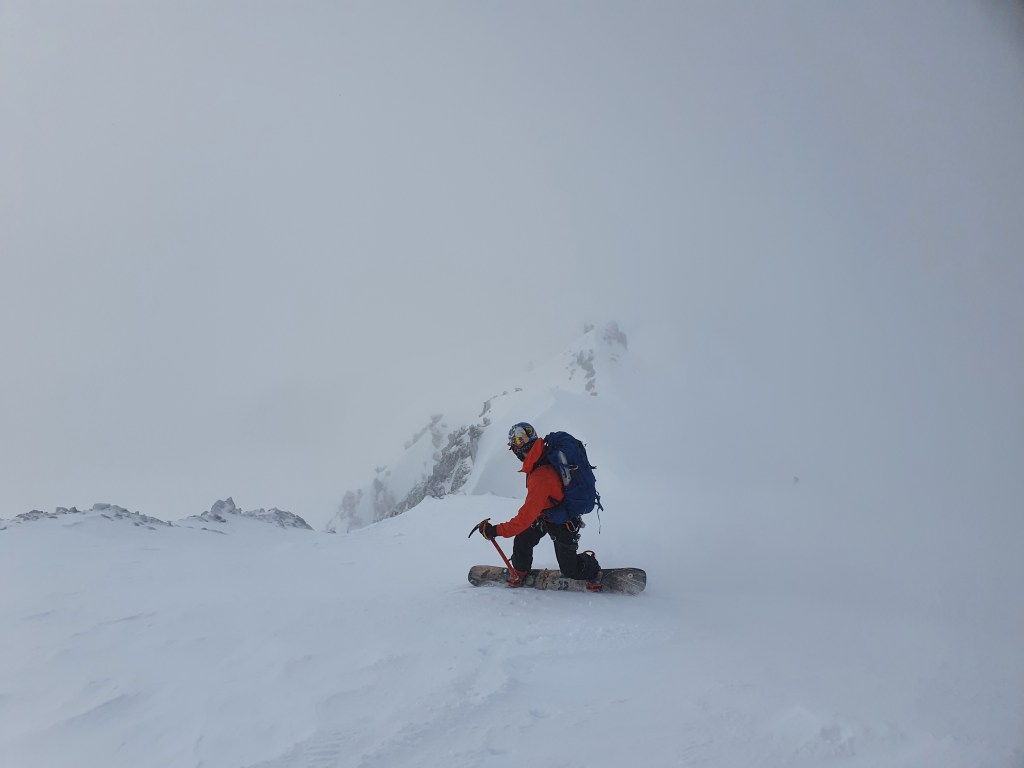
Once into this the exposure isnt quite as heinous and the angle eases off and you can open it up a bit more. I then tucked back left for the final section, which funneled me back into another steep and narrow gully ending in the WI2 section. I left a picket here and rapped 30m back to the snow.
From here its all go : mellow angle and no exposure = hoon time! You can go all the way to the snow line in the Crow Valley – an option is to then walk out via the Crow Valley to Klondyke corner (about 3 hours and a bunch of river crossings, but a good way to avoid the late in the day soft snow on Rome Ridge). I was meeting the others back at the village so instead retraced my steps exactly back up to Rome Ridge and the back down Coral Track to Arthurs.