

A very high quality rock route – fantastic varied climbing on solid rock basking in the afternoon sun overlooking the Fox glacier. Highly recommended.
- Difficulty: Grade : II, 4+, Rock 17
- Equipment: 2x 60m ropes. Double rack up to BD size 4
- Approach time: on skis from Pioneer Hut around 1h to base of climb.
- Climb time: 5h
- Season: Late spring/summer. We climbed in November – still some snow around but route was clear.
- Team: Joe Collinson, Maria Koo 12/11/2024
Climb
Length : 300m (as stated on thecrag.com; we make it out to be just shy of this probably because of the snow line being high when we climbed it)
There are 3 prominent peaks on Haast – Sun Circle is on the 3rd one on looker’s right. We climbed early season so could walk up the centre of the gully to the main face – topo shows some traversing required to do this late season.
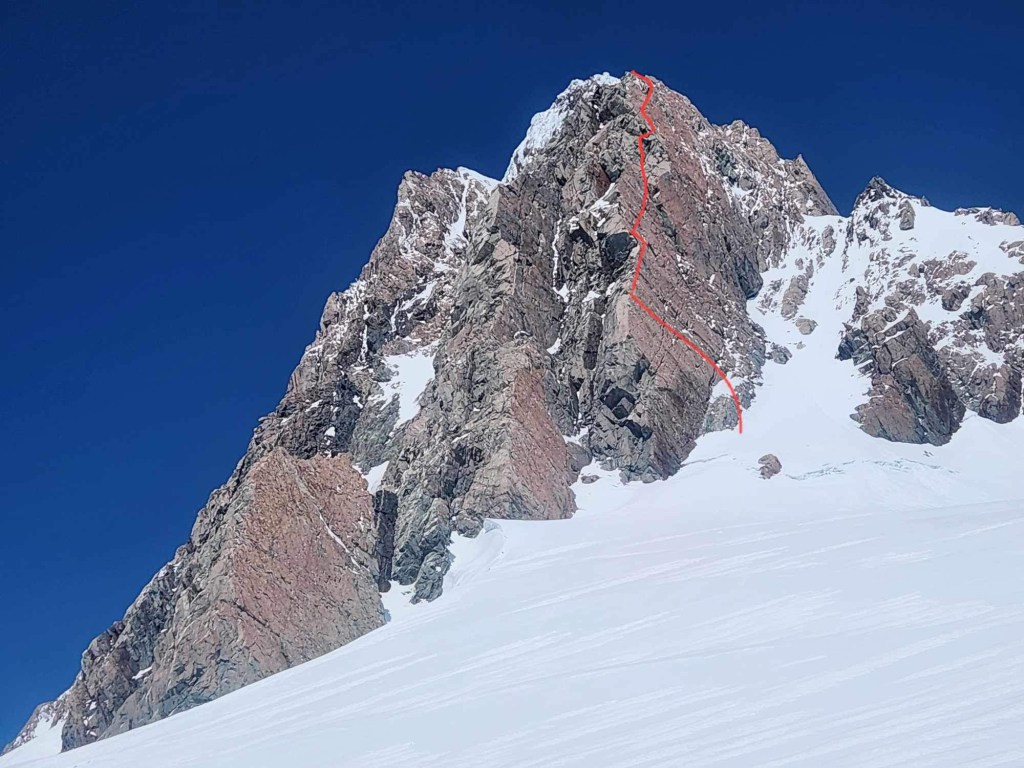
Pitch 1 Access to the main face – was easier for us as it was so early season the snow leads right up to the small rock the meets the main face where the obvious schrund is. Some scrambling up the small block to the rap tat marking the proper start of the route. From the topo this is more involved later in season and involves some traversing from out right. 15m, grade 11.
Pitch 2 On the main face there are a number of obvious crack systems that trend up and left all the way to the ridge, just left of a large obvious grey block on the top of the ridge. Some rap tat is on the rock at the bottom marking the start of the route proper. We followed the obvious line of weakness trending up and left which tops out at the ridge about 20m left of the big grey block. V good gear and solid rock. Small gear required to make anchor on the ridge (we used 3x microcams, no obvious block to sling. Around 40m, grade 15.
Pitch 3 Traversed along the ridge, some balancey moves with great exposure staying on the face to get past the block. Once you’re round the block, the going gets easier – keep going until you reach a large ledge which runs diagonally across the buttress. Large flake / spike belay here. 50m, Grade 17
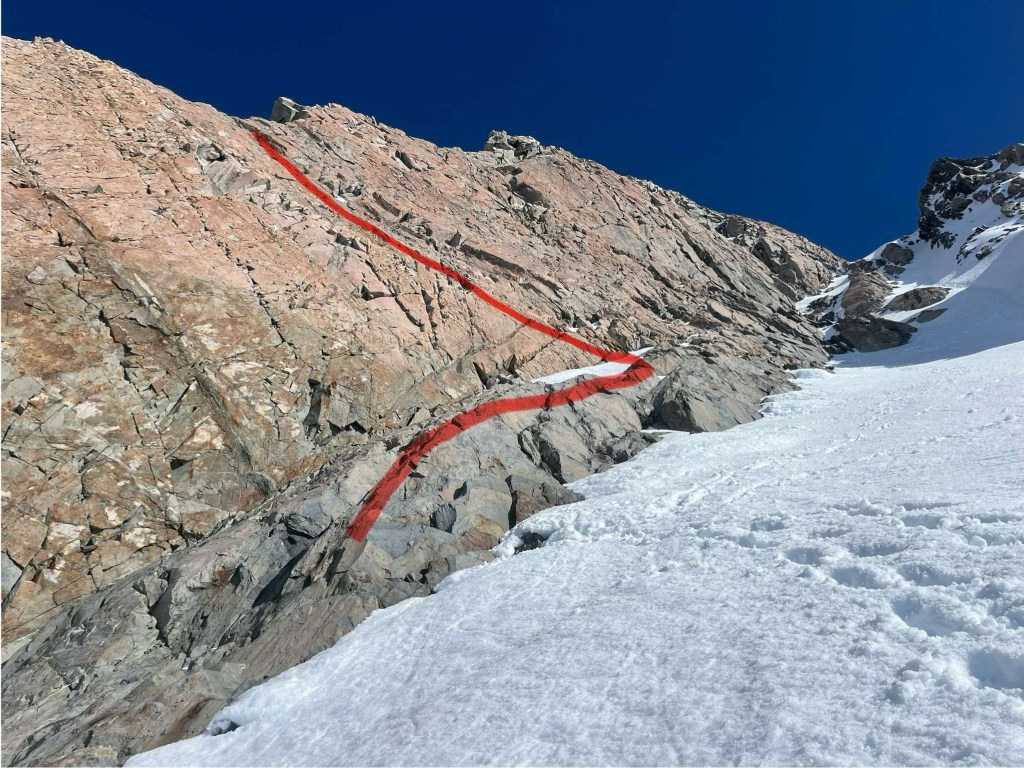
Pitch 4 Stay low/step right from the flake and follow the crack / ledge up and right. Looking above you you can see the amazing parallel cracks that lead towards a roof with lots of large grey blocks. We aimed for the right hand side of this. Some cool moves traversing some flakes / cracks. We built an anchor just where the rock turns grey and the parallel splitters start as was running out of gear. For full value link this and the first half of the next pitch finishing at the rap tat. 50m, Grade 16
Pitch 5 Phenomenal climbing up finger cracks, stepping round a square block and then trending right around the corner just to the left of the large orange block at the corner. This puts you on a ledge with a bunch of rap tat for the descent. But its a bit too soon to build an anchor here – turn left and head up the face until the drag gets too much. 50m, Grade 17
Pitch 6 Trend up and right to the summit. Another amazing fist crack that trends right up to a roof feature of a few overhanging blocks. Easiest to get through on the right, onto flatter ground with a load of large loose blocks. Spike belay from which we rapped. 60m, Grade 15
descent
Real risk of getting ropes stuck – lots of blocks and cracks and not vertical ground so be very careful. Rap back down to the tat you passed on pitch 4. We got our rope stuck pulling on this first rap but thankfully only 10m above the anchor so had enough rope to lead back up to it and free it. From here there’s a steep gully down to the left which is pretty clean (and was full of snow when we were there) which we rapped down and put us back to the snow about 80m above the start of the route. Some good spikes here to rap down the snow gully back to the start of the route / your gear.

